NMRA Achievement Program – Cars
55
NMRA Achievement Program – Cars It is a Journey – With a Destination My Personal Experience By Jim Osborn, MMR™ Fox Valley Division May 2021 Note: this entire clinic is available in downloadable PDF form on the Clinics webpage of the Fox Valley Division website at: http://www.foxvalleydivision.org/fvd2016/imagesfvd2016/clinicdata/apcars.v4.pdf
Transcript of NMRA Achievement Program – Cars

NMRA Achievement Program – Cars
It is a Journey – With a Destination
My Personal Experience
By Jim Osborn, MMR™Fox Valley Division
May 2021
Note: this entire clinic is available in downloadable PDF form on the Clinics webpage of the Fox Valley Division website at:
http://www.foxvalleydivision.org/fvd2016/imagesfvd2016/clinicdata/apcars.v4.pdf

Objectives:
• Acquaint each of you with scratch building
• Provide some inspiration to give it a try
• You will become a better modeler
• Share my scratch building experiences over the past year

Objectives:
Take a trip on how to get from Styrene, wood and wire to…… Here

Clinic Topics:
• Briefly review the Achievement Program• Categories• Discuss the Merit Award scoring & tips• Cover the Cars Category requirements
• Strategy thoughts for a successful outcome• Essential project activities• Suggestions and hints for a satisfying and winning result• Tools and Adhesives• Successful examples• References

AP Categories – all this info is available on the NMRA website:
• 11 AP categories• For the MMR award you need 7 Certificates – and at least 1 from
these 4 areas:
1) Railroad equipmenta. Motive Powerb. Cars
2) Railroad settingsa. Structuresb. Sceneryc. Prototype Models

AP Categories – all this info is available on the NMRA website:
• 11 AP categories• For the MMR award you need 7 Certificates – and at least 1 from
these 4 areas:
3) Railroad Construction & Operationa. Civilb. Electricalc. Chief Dispatcher
4) Service to the Hobby & NMRA Membera. Association Officialb. Association Volunteerc. Model Railroad Author (Cheap plug: write an article for the Semaphore!)

Car Category requirements:
• Four different types of cars represented in a total of eight models. • One of the cars must be a passenger car.• Each of the eight must be super detailed with either commercial parts
or scratch-built parts.• At least four of the eight models must be scratch-built*.
(*Read & understand the requirements for scratch built!)
• You must earn a judged score of at least 87-1/2 points out of 125 on four of the eight models.
• The other cars do not need to be judged – but described in your qualifications for the category
(If not scratch-built, they still can be judged)

Before you begin:
• Learn the rules on how to play the game
• Be familiar with the scoring grid – it’s your path to 87.5 points on each scratch-built project & It will help you make a better model
• 5 judged categories: • Construction 40 points 32%• Detail 20 points 16%• Conformity 25 points 20%• Finishing 25 points 20%• Scratch Built 15 points 12%
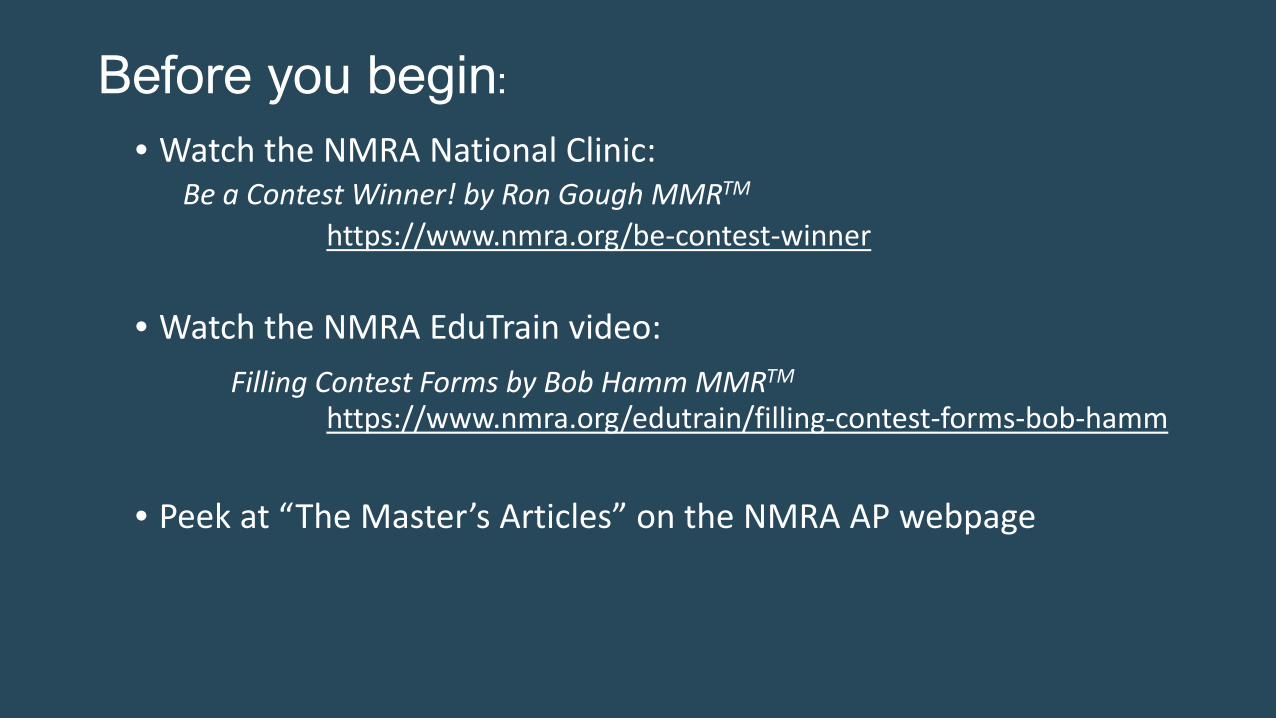
Before you begin:
• Watch the NMRA National Clinic: Be a Contest Winner! by Ron Gough MMRTM
https://www.nmra.org/be-contest-winner
• Watch the NMRA EduTrain video: Filling Contest Forms by Bob Hamm MMRTM
https://www.nmra.org/edutrain/filling-contest-forms-bob-hamm
• Peek at “The Master’s Articles” on the NMRA AP webpage

Scoring grid example :

Boiler Plate

My journey experiences:
• Avoid “Ready, Fire, Aim” -- Not here! Planning will help you.
• Write a multi-car strategy down – a starting point.• You will accumulate info for different cars as you progress
• Do not be afraid to change your strategy as you gain experience.
• Start with the least complicated car (don’t to what I did!)
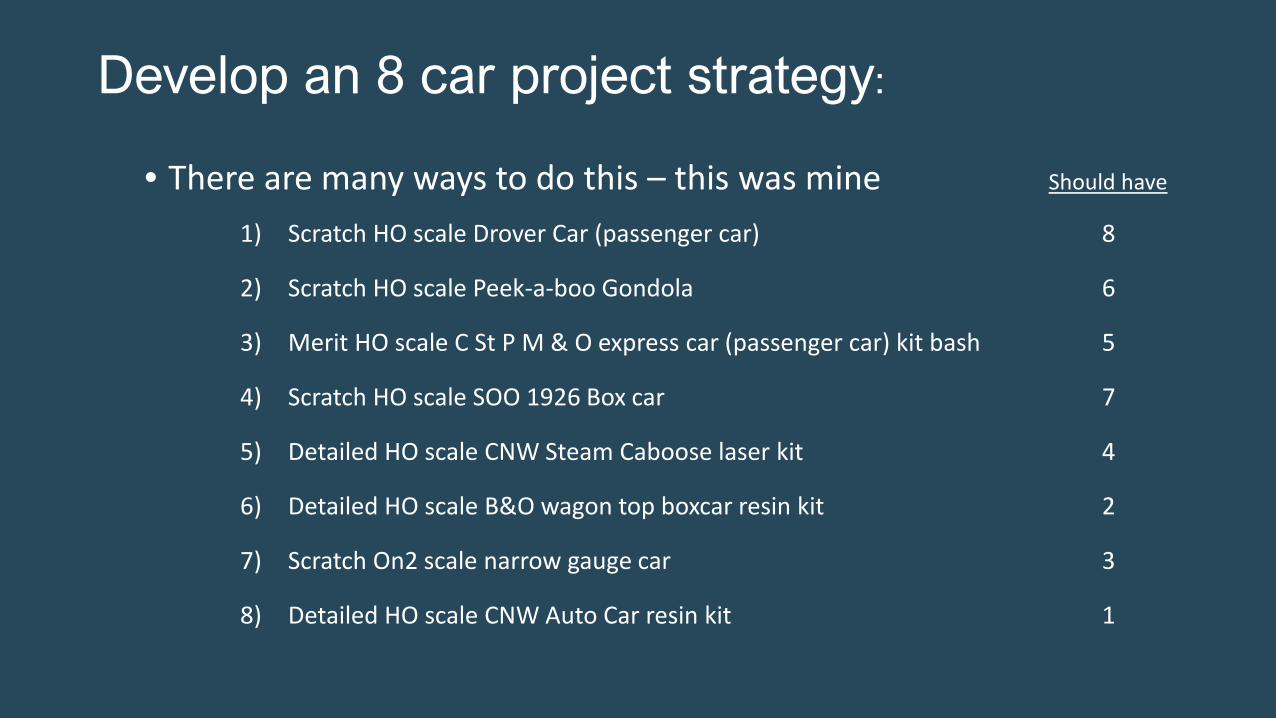
Develop an 8 car project strategy:
• There are many ways to do this – this was mine Should have
1) Scratch HO scale Drover Car (passenger car) 8
2) Scratch HO scale Peek-a-boo Gondola 6
3) Merit HO scale C St P M & O express car (passenger car) kit bash 5
4) Scratch HO scale SOO 1926 Box car 7
5) Detailed HO scale CNW Steam Caboose laser kit 4
6) Detailed HO scale B&O wagon top boxcar resin kit 2
7) Scratch On2 scale narrow gauge car 3
8) Detailed HO scale CNW Auto Car resin kit 1
Pick interesting cars:
• You are going to invest time and money - make it worthwhile• Leverage off prior accomplishments
• Narrow gauge truss frame• Brakes• Available parts
• Cars that match your current skill level.• Pick cars you want to learn about.• Pick something that is interesting to you.• Something new to you or unique – not available as a kit – Kitbash?

Consider larger scales:
• HO is okay but S, On30 or O might be better choices
• Avoid Z or N – You cannot get the necessary detail or complexity
• Easier detailing opportunities with larger scales
• You can see what you are doing!
• Large does not break so easily - Details are delicate
• These cars will most likely sit in a display case in the end

On each car project:
• Read about the car – learn as much as you can• Accumulate pictures and facts• All angles of the car• Focus on details• Ask others for info• Use the web• Historical societies
• Knowledge is Power!
• All for a Better Result


On each car project:
• Draw or use plans from what you have learned• Plans are essential for construction points.• They help you get the car built correctly!• Pencil drawings are okay – don’t worry about CAD unless you are
proficient at it.• Published plans are better yet!


On each car project:
• Document, document, document as you progress!• Count and log parts, vendors, etc.• Scratch vs. commercial parts• Take photos along the way – it’s easy with our cell phones – just takes 10
seconds.• Essential for interior details• Necessary for the paperwork at the end of the project• You have to tell your story to the judges – that’s your responsibility

Drover cabooseInterior details:Seats, stoves,Toilet, sink,People,overhead bunksFloor & wall boards
Soo outside bracedBoxcar showingIndividual boardConstruction on sidesand ends

Take it slow – Step by step:
• Think of each challenge as a mini project• Passenger seats• Rivet embossing• Side ribs• Cutting windows• Window frames• Ladders

Embossed Rivet >
Embossed Rivet >
Embossed Rivet >
Gondola side ribs

Details added at this stage:Riveted ribs - Interior & Exterior Rivet decalsGrabs - Brake chainEtched Brake platformPolling socketsBrake system
Details to be added later:Coupler liftsCouple lift chainsGlad handsInterior load buffersStirrups

Take it slow – Step by step:
• Think of each challenge as a mini project• Passenger seats• Rivet embossing• Side ribs• Cutting windows• Window frames
• Talk to others for ideas• Tar paper roofs – David Leider, MMRTM
• Grain embossing – The late Don Cook, MMRTM
• Cutting windows – Steve Miazga• Adhesives & history – David Crement, MMRTM

Embossing grain in styrene52 T.P.I razor saw blade >
Tar paper roof:Tissue paperFormula 560 Canopy glue

Windows: I did not have the skill to cut them square!Steve Miazga suggested hand carving with a small X-Acto knife.

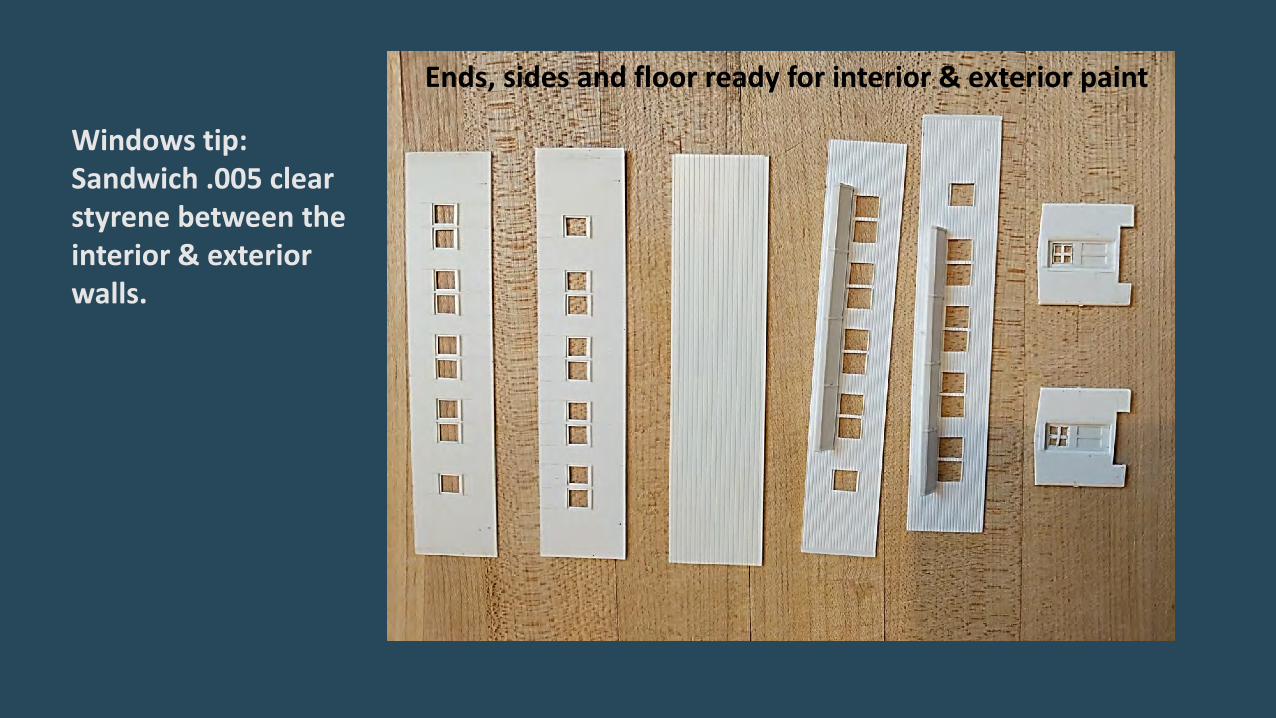
Ends, sides and floor ready for interior & exterior paint
Windows tip: Sandwich .005 clear styrene between the interior & exterior walls.

David Crement:• Drill a dimple in a chunk of machine steel for CA• Clean with acetone

Take it slow – Step by step:
• Think of each challenge as a mini project• Rivet embossing• side ribs• Cutting windows• Window frames
• Talk to others for ideas• tar paper roofs – David Leider• grain embossing – The late Don Cook• Cutting windows – Steve Miazga• Adhesives & history – David Crement
• Think outside the box

O scale 2 foot gauge 20” wheels made from HO scale 36” wheels


Take it slow – Step by step:
• Contemplate possible solutions - No ideas? – Sleep on it!
• Construction jigs make the difference – especially repetitive pieces.
• Make drilling patterns – grab irons, etc.
• Save the fragile stuff for last – Stirrups, brake wheels, Stove Pipes, etc……
• Measure 3 times, cut once & then sand to fit. Cut on a glass plate.


Take it slow – Step by step: Finishing• Prime your model before painting – It makes it easier to spot defects.
• Allow the primer to dry a week – avoid bleed through.
• Carefully patch and fill cracks, joints etc. with Dap Vinyl patch.• Use the tube style package – it lasts longer than the tubs.
• Allow your finish coat to dry for a week
• Prepare a smooth surface for decals• Pledge vinyl floor coat - Ammonia for cleaning your airbrush • Glosscote, Clear gloss, etc.


Take it slow – Step by step: Finishing
• Weather your model for realism• Use your research photos• Road spray – ends and underframe – side sills• Faded paint – blistered paint• Roof dirt
• Pan pastels, airbrush, thin paints• Small amounts – layered – don’t over do it• Air brush a top protective coat with dull cote – 50-50 diluted
• Mask the windows!
• Photograph your masterpiece!

Proper tool – Proper job!• Optivisor & a good bench light• Touch and Flow applicator• Wine corks & needles• Dental picks – ask your dentist!• X-Acto knives – small, large, custom• #2, 11, 17 & 17a blades – fine tip & chisel lots of ‘em• Single edge razor blades• Tweezers, fine and small tipped – also reverse
tweezer clamps• 6” metal scale with 0.01” markings• NMRA scale ruler• Digital caliper• Hole punch – holes, clearing material, washers, disks,
plates, etc.• Smooth jaw needle nose plyers – bending wire• The Chopper• Xuron rail nipper
• Three - ½ inch sq. tool steel blanks & clamps – mini bending brake for styrene, brass, aluminum, etc.
• Glass plate – for a cutting surface – general flat surface
• Sanding wands, sticks and pads• Sanding Fixture – right angle ends• Various numbered drill sets, 80-60, 60-40 (extra
small number drills)• Pin vise sets (make sure the smallest pin vise
tightens on a #80 drill)• Drill and tap set - #2-56 minimum• Clamps, rubber bands, magnets• Airbrush system, paint booth with exhaust vent,
respirator mask – N95 with a vent• Steel weights• Downflow airbrush• Only to mention a few ……

Touch ‘n Flow
Don’t fill it too much – ½ inch
Don’t push it backwards

Proper tool – Proper job!• Optivisor• Touch and Flow• Wine corks & needles for CA• Dental pick tools – ask your dentist!• X-Acto knives – small, large, custom• #2, 11, 17 & 17a blades – fine tip & chisel lots of ‘em• Single edge razor blades• Tweezers, fine and small tipped – also reverse
tweezers• 6” metal scale with 0.01” markings• NMRA scale ruler• Digital caliper• Hole punch – holes, clearing material, washers, disks,
plates, etc.• Smooth jaw needle nose plyers – bending wire• The Chopper• Xuron rail nipper
• Three - ½ inch sq. tool steel blanks & clamps – mini bending brake for styrene, brass, aluminum, etc.
• Glass plate – for a cutting surface – general flat surface
• Sanding wands, sticks and pads• Sanding Fixture – right angle ends• Various numbered drill sets, 80-60, 60-40 (extra
small number drills)• Pin vise sets (make sure the smallest pin vise
tightens on a #80 drill)• Drill and tap set - #2-56 minimum• Clamps, rubber bands, magnets• Airbrush system, paint booth with exhaust vent,
respirator mask – N95 with a vent• Steel weights• Downflow airbrush• Only to mention a few ……

CA applicator
Various needles stuck in corks with the eyes ground or cut off
CA puddle
Drill a dimple in some tool steel to hold CA – clean with acetone.

Proper tool – Proper job!• Optivisor• Touch and Flow• Wine corks & needles• Dental picks – ask your dentist!• X-Acto knives – small, large, custom• #2, 11, 17 & 17a blades – fine tip & chisel lots of ‘em• Single edge razor blades• Tweezers, fine and small tipped – also reverse
tweezers• 6” metal scale with 0.01” markings• NMRA scale ruler• Digital caliper• Hole punch – holes, clearing material, washers, disks,
plates, etc.• Smooth jaw needle nose plyers – bending wire• The Chopper• Xuron rail nipper
• Three - ½ inch sq. tool steel blanks & clamps – mini bending brake for styrene, brass, aluminum, etc.
• Glass plate – for a cutting surface – general flat surface
• Sanding wands, sticks and pads• Sanding Fixture – right angle ends• Various numbered drill sets, 80-60, 60-40 (extra
small number drills)• Pin vise sets (make sure the smallest pin vise
tightens on a #80 drill)• Drill and tap set - #2-56 minimum• Clamps, rubber bands, magnets• Airbrush system, paint booth with exhaust vent,
respirator mask – N95 with a vent• Steel weights• Downflow airbrush• Only to mention a few ……

Bending Brake
Clamp .005 styrene, Brass or Aluminum between 2 tool steel blanks. Use the third to bend the material.

Proper tool – Proper job!• Optivisor• Touch and Flow• Wine corks & needles• Dental picks – ask your dentist!• X-Acto knives – small, large, custom• #2, 11, 17 & 17a blades – fine tip & chisel lots of ‘em• Single edge razor blades• Tweezers, fine and small tipped – also reverse
tweezers• 6” metal scale with 0.01” markings• NMRA scale ruler• Digital caliper• Hole punch – holes, clearing material, washers, disks,
plates, etc.• Smooth jaw needle nose plyers – bending wire• The Chopper• Xuron rail nipper
• Three - ½ inch sq. tool steel blanks & clamps – mini bending brake for styrene, brass, aluminum, etc.
• Glass plate – for a cutting surface – general flat surface
• Sanding wands, sticks and pads• Sanding Fixture – right angle ends• Various numbered drill sets, 80-60, 60-40 (extra
small number drills)• Pin vise sets (make sure the smallest pin vise
tightens on a #80 drill)• Drill and tap set - #2-56 minimum• Clamps, rubber bands, magnets• Airbrush system, paint booth with exhaust vent,
respirator mask – N95 with a vent• Steel weights• Downflow airbrush• Only to mention a few ……

Adhesives:• MEK – Plastics• 10x or equivalent – very aggressive – do not use on .005 styrene• CA – super glue – thin and thick – sand styrene before using• Formula 560 – canopy cement – dries crystal clear• Scotch transfer tape – attaching dissimilar materials – wood/plastic/metal etc• Arlene’s tacky glue - attaching dissimilar materials – wood/plastic/metal etc• Plastruct Plastic Weld – Acrylics & styrene – DO NOT USE WITH THE TOUCH ‘N FLOW• Woodland Scenics Accent Cement – attaching dissimilar materials – wood/plastic/nylon/metal etc• Plybond – Contact cement• Carpenter’s yellow glue – wood• Dap vinyl wall patch for filling and repair – get the tube style container

References: Modeler’s Annual – back issues available – timeless! https://www.finescalerr.com/

References: Slim Gauge Cars, 2nd Edition by Carstens Publications

References: Slim Gauge Cars, 2nd Edition by Carstens Publications

Useful References:• Modeler’s Annual – back issues available – timeless! https://www.finescalerr.com/• Slim Gauge Cars, 2nd Edition by Carstens Publications• Railroad Model Craftsman – Essential Freight Car series by Ted Culotta – over 30• http://www.steamerafreightcars.com/modeling/models/culotta/culottamain.html• http://www.steamerafreightcars.com/modeling/parts/partsmain.html• Tichy and https://sanjuandetails.com/ – Grantline details• Your favorite railroad Car Roster books• Historical societies• Various photo journals• The INTERNET• Other modelers….. Don’t be afraid to ask.

HO Scale Drover’s waycar HO Scale Peek-a-Boo Gondola
HO Scale Outside Braced Boxcar
On2 Scale Trussed Frame Flatcar

HO Scale Double door Boxcar HO Scale Express Boxcar
HO Scale Steam Era Caboose HO Scale Wagon Top Boxcar

We are artists – give it a try!You will get hooked!
Always remember…..
Model Railroading is FUN!

That’s my story,
the rest is up to you!