New Plants Unit Plan - Boulder Valley School District Plants/New Plants...First Grade Science GLE2....
159
Desired Results BVSD Standard(s)/Grade Level Expectations First Grade Science GLE2. Offspring (new plants) have characteristics that are similar to but not exactly like their parents’ characteristics. * GLE3. An organism is a living thing that has physical characteristics to help it survive* First Grade Language Arts GLE1. Multiple strategies develop and expand oral vocabulary GLE2. Verbal and nonverbal language is used to express and receive information GLE3. Exploring the writing process develops ideas for writing texts that carry meaning Unit Essential Questions 1. In what ways do offspring resemble their parents?* 2. How are new plants like the existing plants they came from?* 3. What does a plant need to live? 4. How do the needs of plants and animals differ?* 5. What helps a specific plant or animal survive?* Students will know… Diversity – or variation – exists within populations of living organisms, for example, different Brassica plants may be taller or shorter or have different numbers of flowers.* Plants and animals are alive Plants need water, air, nutrients and light to grow. Animals need water, air, food (nutrients) and shelter to grow and survive. Students will be able to… a) Use evidence to analyze similarities and differences between parents and offspring in a variety of organisms including both plants and animals (humans)* b) Analyze and interpret data regarding the similarities and differences between parents and offspring of plants* c) Question peers about evidence used in developing ideas about similarities and differences between parents and offspring of plants* d) Interpret information about plants and animals represented in pictures, illustrations, and simple charts* e) Analyze and interpret data about the needs of plants* f) Use direct observations and other evidence to support ideas concerning physical characteristics that help plants and animals survive* g) Predict the outcome for an organism if a need is removed. h) Conduct investigations safely in the classroom and garden i) Describe the basic needs of plants. j) Express questions, predictions, and data using simple sentences in a science notebook. k) Use pictures within informational text to predict and check to confirm or reject those predictions. l) Describe what a calendar is used for. * From First Grade Curriculum Essentials FOSS New Plants Unit Plan 1
Transcript of New Plants Unit Plan - Boulder Valley School District Plants/New Plants...First Grade Science GLE2....

Desired Results
BVSD Standard(s)/Grade Level Expectations First Grade Science GLE2. Offspring (new plants) have characteristics that are similar to but not exactly like their parents’ characteristics. * GLE3. An organism is a living thing that has physical characteristics to help it survive* First Grade Language Arts GLE1. Multiple strategies develop and expand oral vocabulary GLE2. Verbal and nonverbal language is used to express and receive information GLE3. Exploring the writing process develops ideas for writing texts that carry meaning
Unit Essential Questions 1. In what ways do offspring resemble their parents?* 2. How are new plants like the existing plants they came from?* 3. What does a plant need to live?
4. How do the needs of plants and animals differ?* 5. What helps a specific plant or animal survive?*
Students will know…
Diversity – or variation – exists within populations of living organisms, for example, different Brassica plants may be taller or shorter or have different numbers of flowers.*
Plants and animals are alive
Plants need water, air, nutrients and light to grow.
Animals need water, air, food (nutrients) and shelter to grow and survive.
Students will be able to… a) Use evidence to analyze similarities and differences
between parents and offspring in a variety of organisms including both plants and animals (humans)*
b) Analyze and interpret data regarding the similarities and differences between parents and offspring of plants*
c) Question peers about evidence used in developing ideas about similarities and differences between parents and offspring of plants*
d) Interpret information about plants and animals represented in pictures, illustrations, and simple charts*
e) Analyze and interpret data about the needs of plants* f) Use direct observations and other evidence to support
ideas concerning physical characteristics that help plants and animals survive*
g) Predict the outcome for an organism if a need is removed. h) Conduct investigations safely in the classroom and garden i) Describe the basic needs of plants. j) Express questions, predictions, and data using simple
sentences in a science notebook. k) Use pictures within informational text to predict and check
to confirm or reject those predictions. l) Describe what a calendar is used for.
* From First Grade Curriculum Essentials
FOSS New Plants Unit Plan
1

Language Objectives
Use comparative words such as “taller”, “shorter”, “more flowers”, “fewer flowers” when describing differences between plants.
Share a connection or prior experience that they have with plants.
Use the words “parent” and “offspring” to indicate the relationship between plants.
Use the words “plant”, “soil”, “seed”, “light”, “water” to describe the needs of plants.
Use words related to table of contents and keeping a science notebook (notebook, page, table of contents)
Create a list of words that describe a plant.
Point to plants, soil, leaves when prompted.
Label parts of a plant using a word bank and pictures.
Select a book, and use it to support their understanding of plants.
Connect the words for plants, etc while they are touching/experiencing them.
Use descriptive words to describe plants.
Use words related to the use of calendars in context ( calendar, date, day, month, year)
Use visual cues (picture of plant) to predict what the needs of plants are.
Draw a picture to represent the words “parent” and “offspring”
Follow oral directions for planting seeds.
Contribute to a class discussion about how the parts of a plant help it survive.
Express a question and a prediction about plants.
Complete a sentence frame expressing a prediction.
Complete a glossary entry
Complete a Venn diagram using words from the word wall
Read from a script with a partner
Complete sentence frames for claims and evidence
Academic vocabulary Investigation 1
Air Alive/Living Brassica
Calendar Claims Evidence
Fertilizer Flower Glossary
Label Leaves Notebook
Nutrient Observe Offspring
Parent Plant Pollen
Record Root Seed
Seed-Pod Seedling Soil
Stem Sunlight Table of Contents
Vial Water
2

Investigation 2
Alfalfa Blade Change
Container Different Lawn
Rye Grass Shelter Similarities
Assessment Evidence
Pre/post assessment Science notebook entries Informal observation and discussion
Materials and Resources
Materials
Science notebooks for students
Large, class model science notebook
FOSS New Plants kit
Additional picture books related to plants and to parents and offspring
3

FOSS New Plants: Investigation 1 Session Content Objectives Language Objectives 1 Pre-‐assessment
Visit school yard or garden • Point to plants outside when
prompted 2 Set-‐up
• Kit inventory • Introduce science notebooks • Create Table of Contents • Review safety • Practice vocabulary
• Students will be able to conduct investigations safely in the classroom and garden.
• Students will be introduced to and will practice academic vocabulary (calendar, pen, Brassica seeds, planter cup, basin, tray, lamp, lamp frame, plant fertilizer, plant, leaf, stem, soil, sunlight).
• Use words related to table of contents and keeping a science notebook (notebook, page, table of contents)
• Share a connection or prior experience that they have with plants
3 Introducing calendars • Discuss plants • Post large, class calendar and find
date • Paste calendars in science
notebooks • Add words to word wall
• Students will be able to describe what a calendar is used for.
• Use descriptive words to describe plants
• Use words related to the use of calendars in context (calendar, date, day, month, year)
4 Introducing Brassica and needs of plants • Show picture of Brassica • Discuss new plants, parents and
offspring • Read “What Do Plants Need?”
• Students will know that plants need water, air, nutrients and light to grow.
• Students will be able to use the words “parent” and “offspring” to describe the relationship between existing plants and new plants.
• Students will use pictures within informational text to predict and check to confirm or reject those predictions.
• Use the words “plant”, “soil”, “seed”, “light”, “water”
• Use visual cues (picture of plant) to predict what the needs of plants are.
• Draw a picture to represent the words “parent” and “offspring”
4
cris.palmer
Typewritten Text
1.a
5 Planting the Brassica • Plant seeds • Make calendar entry
• Students will review what plants need as they plant their seeds.
• Students will review what a calendar is for.
• Use the words “plant”, “soil”, “seed”, “light”, “water”
• Use words related to the use of calendars (calendar, date, day, month, year)
• Follow oral directions for planting seeds
6 Parts of plants • Create large labeled plant picture
as a class • Students individually complete
Student Sheet “Brassica A” • Students match parts of plants
with descriptions of how that part helps the plant survive
• Students will know the names for parts of a plant. (This is foundational to describing differences and similarities between plants.)
• Students will develop ideas concerning physical characteristics that help plants survive.
• Label parts of a plant using a word bank and pictures
• Contribute to a class discussion about how the parts of a plant help it survive
7 Focus Question and Prediction • Teacher models writing a focus
question and prediction • Students write focus questions
and predictions in their notebooks
• Express questions, predictions, and data using simple sentences in a science notebook.
• Express a question and a prediction about plants
• Complete a sentence frame expressing a prediction
8 Emergence of seedlings • Observe seedlings • Teacher models drawing and
labeling observations • Students record observations in
notebooks
• Students will record observations accurately using pictures and words
• Students will know that diversity – or variation – exists within populations of living organisms, for example, different Brassica plants may be taller or shorter or have different numbers of flowers. (this idea is introduced)
• Use comparative words such as “taller”, “shorter”, when describing differences between Brassica plants
• Create a list of words that describe a plant
5
cris.palmer
Typewritten Text
1.b

9 Leaf growth • Observe plants • Teacher models drawing and
labeling observations • Students record observations in
notebooks
• Students will record observations accurately using pictures and words.
• Students will know that diversity – or variation – exists within populations of living organisms, for example, different Brassica plants may be taller or shorter or have different numbers of flowers.
• Use evidence to analyze similarities and differences between parents and offspring.
• Use comparative words such as “taller”, “shorter”, “more leaves”, “fewer leaves” when describing differences between Brassica plants
10 Flower growth • Observe plants • Teacher models drawing and
labeling observations • Students record observations in
notebooks
• Students will record observations accurately using pictures and words.
• Students will know that diversity – or variation – exists within populations of living organisms, for example, different Brassica plants may be taller or shorter or have different numbers of flowers.
• Use evidence to analyze similarities and differences between parents and offspring.
• Use comparative words such as “taller”, “shorter”, “more flowers”, “fewer flowers” when describing differences between Brassica plants
11 Cross pollination • Pollinate flowers
• Students will learn about pollination. • Complete a glossary entry for “pollen”
12 Appearance of Seed Pods • Observe plants • Teacher models drawing and
labeling observations • Students record observations in
notebooks
• Students will record observations accurately using pictures and words.
• Students will know that diversity – or variation – exists within populations of living organisms.
• Students will use evidence to analyze similarities and differences between parents and offspring.
• Use comparative words such as “larger”, “smaller”, “more seed pods”, “fewer seed pods” when describing differences between Brassica plants
6
cris.palmer
Typewritten Text
1.c
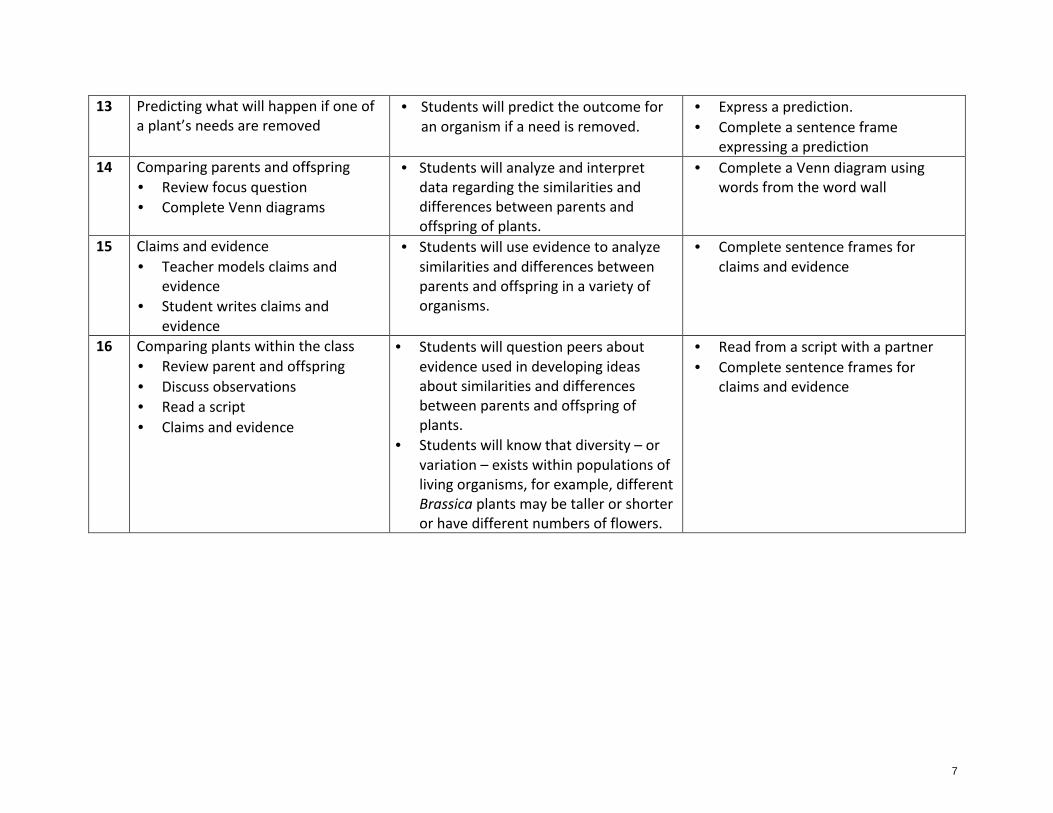
13 Predicting what will happen if one of a plant’s needs are removed
• Students will predict the outcome for an organism if a need is removed.
• Express a prediction. • Complete a sentence frame
expressing a prediction 14 Comparing parents and offspring
• Review focus question • Complete Venn diagrams
• Students will analyze and interpret data regarding the similarities and differences between parents and offspring of plants.
• Complete a Venn diagram using words from the word wall
15 Claims and evidence • Teacher models claims and
evidence • Student writes claims and
evidence
• Students will use evidence to analyze similarities and differences between parents and offspring in a variety of organisms.
• Complete sentence frames for claims and evidence
16 Comparing plants within the class • Review parent and offspring • Discuss observations • Read a script • Claims and evidence
• Students will question peers about evidence used in developing ideas about similarities and differences between parents and offspring of plants.
• Students will know that diversity – or variation – exists within populations of living organisms, for example, different Brassica plants may be taller or shorter or have different numbers of flowers.
• Read from a script with a partner • Complete sentence frames for
claims and evidence
7
cris.palmer
Typewritten Text
1.d

FOSS New Plants Investigation 1 Session 1.1: Set-‐up [30 minutes] Materials needed Papers to copy and cut Students will need Document camera/LCD projector New Plants Pre/Post
Assessment Pencil
1. Pre-‐assessment
While students are seated at their desks, tell them that will be beginning a new unit. Let them know that the exact same assessment will be given at the end of the unit in order to see how much they learned. Pass out the pre-‐assessment and make sure that student names are on the papers.
2. Teacher Instructions Make sure that you are all on the first page which has a plant drawn on it. Point to the first word on the list next to the plant: This word is flower. Trace the line with your finger from the word flower to the part of the plant that looks like a flower. [Demonstrate with your finger using the document camera] I’m going to read each word aloud to you and I want you to guess which part of the plant I am naming. When I say the names, take your pencil and draw a line from the word I read to the part of the plant you think it is-‐ just like with the flower. -‐Leaf (remember, draw a line from the 2nd word, LEAF, to where you see a leaf on the drawing) -‐Root -‐Seed pod -‐Stem And remember, it’s ok if you don’t know what some of the words mean or where they are on the plant. I just want to see what you know already about plants. When you have finished this part, please turn your paper over to the second page. It has 3 pictures on it. Now I am going to read you some names of parts of plants with special jobs [demonstrate by pointing to the pictures with your finger under the document camera while reading]. I want everyone to point at the same picture on their own page just like me and say the names aloud with me. Leaf-‐ point, say and look at the picture of the leaf. Root-‐ point, say and look at the picture of the root. Stem-‐ point, say and look at the picture of the root. Now I will read some of the special jobs and I want you to draw a line to the part of the plant you think does this. -‐ Gets the water from the soil (which of the pictures that we just pointed to
and said do you think gets the water from the soil-‐ draw a line from that part to where I am pointing).
8
cris.palmer
Typewritten Text
1.1
-‐ Carries water to leaves, and carries food to roots (which picture of the plant part do you think does this? Draw a line to that plant part)
-‐ Makes food from sunlight
3. Introduction to plants After students are finished with the pre-‐assessment, discuss plants. Explain that a plant is a type of living thing, and that a common example of a plant is tree. There are many different types of plants. Go outside, and challenge the students to find as many plants as they can. If they struggle, remind them that grass is a plant.
9
cris.palmer
Typewritten Text
1.1

New Plants Pre/Post Test Name: ___________________
Draw a line from the name of the part of the plant to the plant part on the picture.
Flower Leaf Root
Seed pod
Stem
What kind of plant do you think this is? __________________________________
10
cris.palmer
Typewritten Text
1.1.a
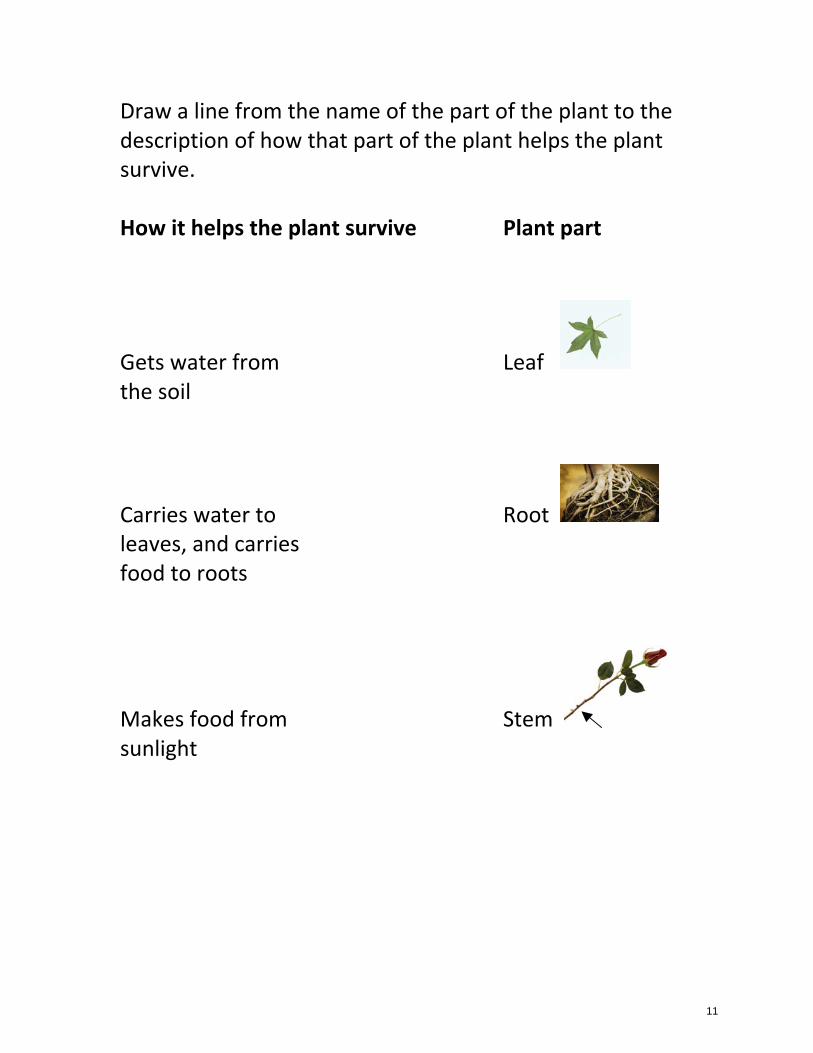
Draw a line from the name of the part of the plant to the description of how that part of the plant helps the plant survive.
How it helps the plant survive Plant part
Gets water from Leaf the soil
Carries water to Root leaves, and carries food to roots
Makes food from Stem sunlight
11
cris.palmer
Typewritten Text
1.1.b

Complete the following sentences with words from the word bank at the bottom of the page. Your teacher will read this out loud for you first. 1. If you take a ______________ from a parent plant and
(seed / flower) put it in soil with water, it will grow. 2. The new plant is called the __________________ of the (offspring/ flower) parent.
12
cris.palmer
Typewritten Text
1.1.c

Match the parent with its offspring by drawing a line between them.
13
cris.palmer
Typewritten Text
cris.palmer
Typewritten Text
1.1.d
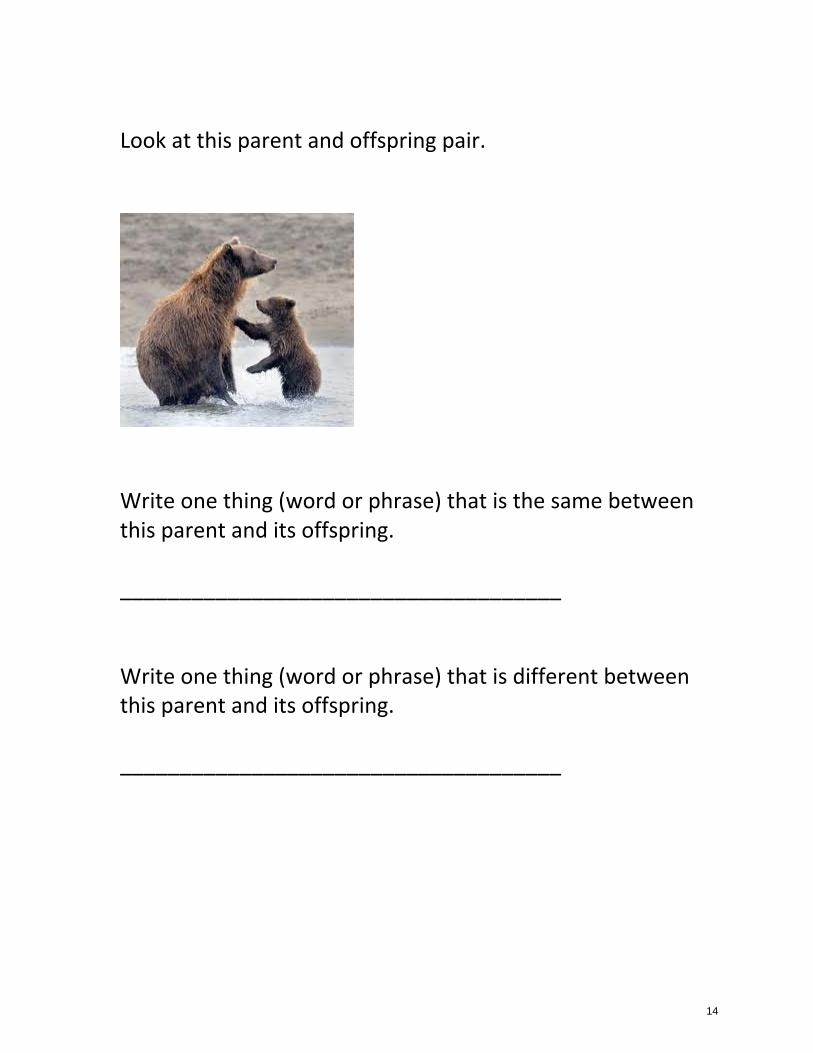
Look at this parent and offspring pair.
Write one thing (word or phrase) that is the same between this parent and its offspring. _____________________________________ Write one thing (word or phrase) that is different between this parent and its offspring. _____________________________________
14
cris.palmer
Typewritten Text
1.1.e

Session 1.2: Set-‐up [30-‐35 minutes] Materials needed Papers to copy and cut Students will need Calendar Pen/Marker Seeds Planter cups
Soil basin Tray Lamp Words
Lamp frame Plant Fertilizer
Table of Contents* Glossary*
Science notebooks Glue Pencil
* Scaffolded documents: these can be distributed to students in various ways. You can use the more scaffolded documents at the beginning of the year or use various ones throughout the year depending on students’ reading/writing levels.
1. Conduct “Kit Inventory” with students. Call students to the rug. One at a time, hold up each item for the kit inventory. Ask students:
• Where have you seen something like this before? • Does anyone know the word used for this item? • What do you think we are going to do with this item?
Put these words and pictures/items on the word wall. 2. Model and set up science notebooks
Tell students, All scientists record their thinking, observation and data in order to share with other people. Use an example notebook to model putting their names on the outside of the notebook. Number the pages at the bottom and explain the use of a “Table of Contents.” Glue the “Table of Contents” into the first or second page of the science notebook. Model for students how to make an entry in the Table of Contents with the corresponding page number. The first entry will be the “Glossary,” which will be pasted on the last page of the notebook. Turn your notebook upside down so that you can still read it form left to right. Write in page numbers starting from this back page towards the “front,” and after every page number, put the letter G for Glossary. This allows students to continue to add new vocabulary as the investigation proceeds, but does not interfere with their other work (and helps distinguish glossary pages from work pages). If the pages are all numbered, they would end up with numbers at the top going backwards (with G) and numbers at the bottom going forwards. Ask students why it would be important to have a glossary. Explain that we want to keep track of new words just like on the word wall in case we forget (this should be identical to the word wall) and make sure to put the correct page number in the Table of Contents.
3. Set up Science Notebooks Have students return to their desks. Give each student a notebook and either write their names on the notebooks or ask them to write their names in their notebooks and number the pages.
4. Science Notebook Entry: Table of Contents Have a student pass out “Table of Contents” sheet and have each student glue the “Table of Contents” student sheet into their notebooks.
5. Science Notebook Entry: Glossary
15
cris.palmer
Typewritten Text
1.2

Have a student hand out the “Glossary” and have students turn their notebooks upside down so that they are still reading it from left to right, and glue the “Glossary” student sheet into their notebook. Have students add page numbers and the letter G at the bottom of these pages, workings towards the middle. Have students add “Glossary” to the Table of Contents with the page number. Have students copy the words from the word wall into their glossary and draw a picture for each one. They should have: calendar, seeds, planters/planter cups, soil, tray, lamp, plant, fertilizer, water, light.
6. Review “Safety in the Classroom” (FOSS Teacher Guide Page 17)
7. Visit the garden or school yard Introduce and practice vocabulary about plants (“plant”, “leaf”, “stem”, “soil”, “sunlight”).
16
cris.palmer
Typewritten Text
1.2
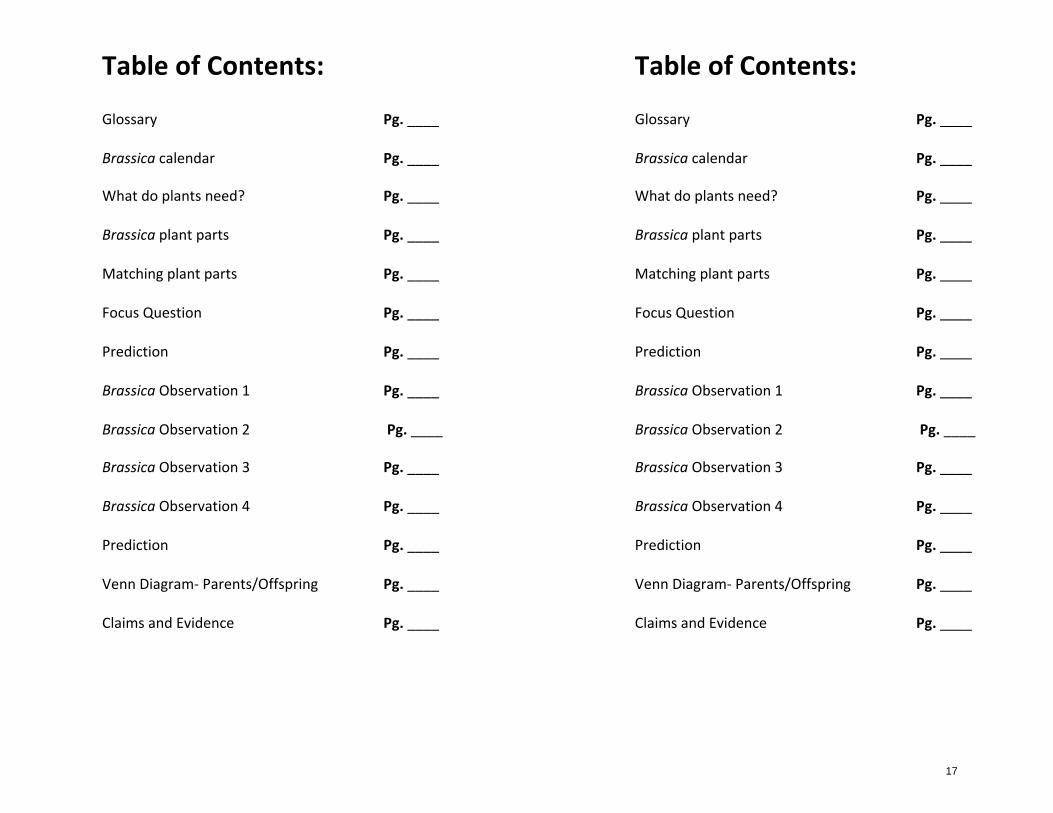
Table of Contents: Glossary Pg. ____
Brassica calendar Pg. ____ What do plants need? Pg. ____ Brassica plant parts Pg. ____ Matching plant parts Pg. ____ Focus Question Pg. ____ Prediction Pg. ____ Brassica Observation 1 Pg. ____ Brassica Observation 2 Pg. ____ Brassica Observation 3 Pg. ____ Brassica Observation 4 Pg. ____ Prediction Pg. ____ Venn Diagram-‐ Parents/Offspring Pg. ____ Claims and Evidence Pg. ____
17
cris.palmer
Typewritten Text
1.2.a

Table of Contents: Glossary Pg. ____ Brassica calendar Pg. ____ What do plants need? Pg. ____ _______________________________ Pg. ____ _______________________________ Pg. ____ _______________________________ Pg. ____ _______________________________ Pg. ____ Brassica observation 1 Pg. ____ _______________________________ Pg. ____ _______________________________ Pg. ____ _______________________________ Pg. ____ Prediction Pg. ____ ______________ Diagram Pg. ____ Claims and Evidence Pg. ____
Table of Contents: Glossary Pg. ____ Brassica calendar Pg. ____ What do plants need? Pg. ____ _______________________________ Pg. ____ _______________________________ Pg. ____ _______________________________ Pg. ____ _______________________________ Pg. ____ Brassica observation 1 Pg. ____ _______________________________ Pg. ____ _______________________________ Pg. ____ _______________________________ Pg. ____ Prediction Pg. ____ ______________ Diagram Pg. ____ Claims and Evidence Pg. ____
18
cris.palmer
Typewritten Text
1.2.b

Glossary calendar
Draw a picture:
Copy the word: Brassica
Draw a picture:
Copy the word: planter cup
Draw a picture:
Copy the word:
Glossary tray
Draw a picture:
Copy the word: lamp
Draw a picture:
Copy the word: plant
Draw a picture:
Copy the word:
19
cris.palmer
Typewritten Text
1.2.c

alive
Draw a picture:
Copy the word: bud
Draw a picture:
Copy the word: change
Draw a picture:
Copy the word:
parent
Draw a picture:
Copy the word: offspring
Draw a picture:
Copy the word: dead
Draw a picture:
Copy the word:
20
cris.palmer
Typewritten Text
1.2.d

water
Draw a picture:
Copy the word: fertilizer
Draw a picture:
Copy the word: flower
Draw a picture:
Copy the word:
germination
Draw a picture:
Copy the word: grow
Draw a picture:
Copy the word: leaf
Draw a picture:
Copy the word:
21
cris.palmer
Typewritten Text
1.2.e

light
Draw a picture:
Copy the word: nutrients
Draw a picture:
Copy the word: pollen
Draw a picture:
Copy the word:
root
Draw a picture:
Copy the word: seed
Draw a picture:
Copy the word: seedling
Draw a picture:
Copy the word:
22
cris.palmer
Typewritten Text
1.2.f
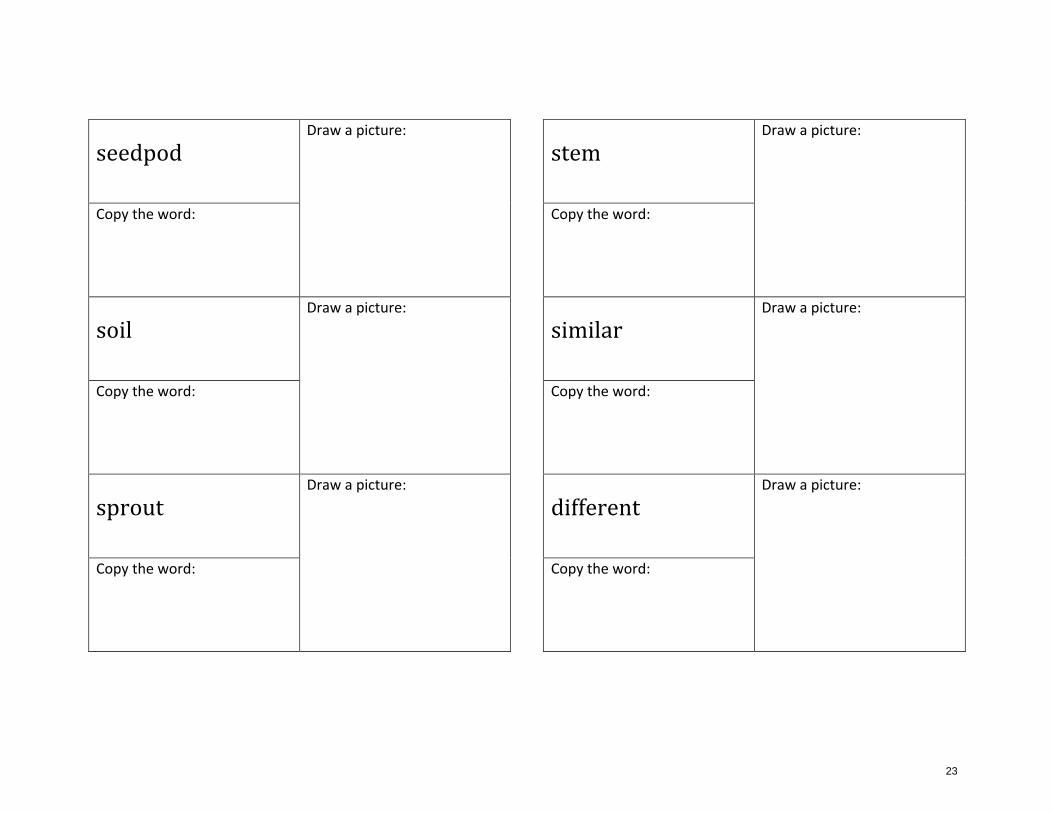
seedpod
Draw a picture:
Copy the word: soil
Draw a picture:
Copy the word: sprout
Draw a picture:
Copy the word:
stem
Draw a picture:
Copy the word: similar
Draw a picture:
Copy the word: different
Draw a picture:
Copy the word:
23
cris.palmer
Typewritten Text
1.2.g

Glossary Word Picture
Glossary Word Picture
24
cris.palmer
Typewritten Text
1.2.h
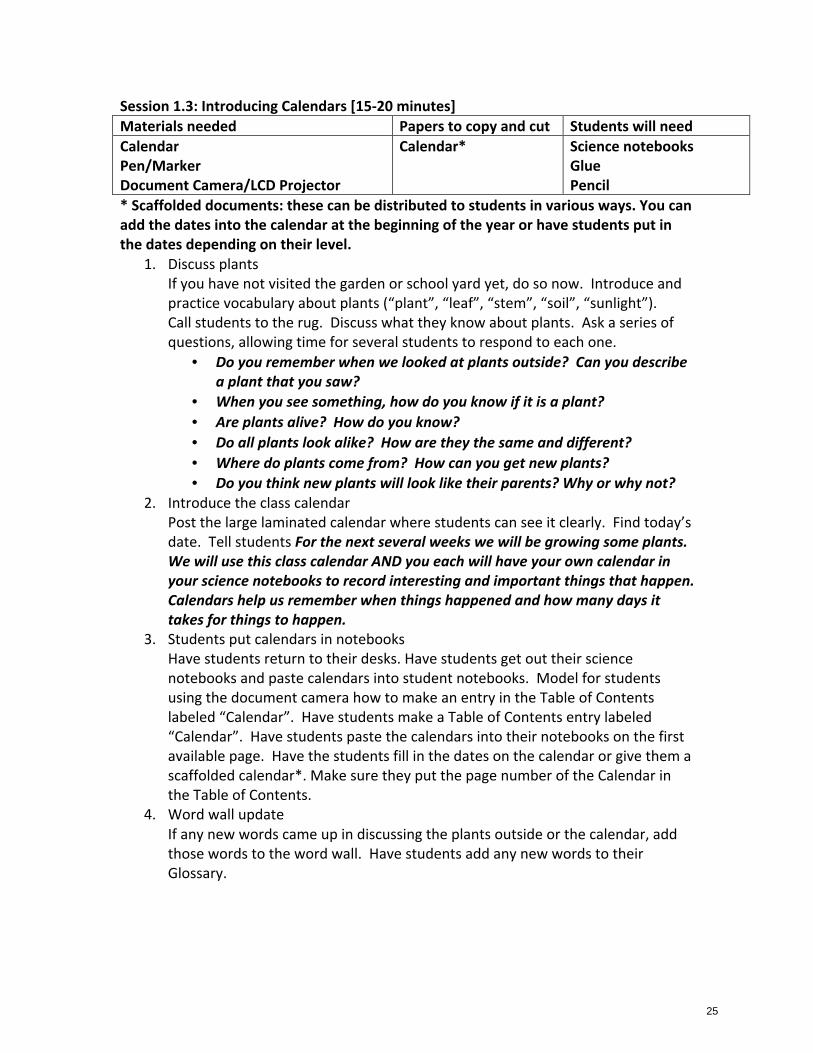
Session 1.3: Introducing Calendars [15-‐20 minutes] Materials needed Papers to copy and cut Students will need Calendar Pen/Marker Document Camera/LCD Projector
Calendar* Science notebooks Glue Pencil
* Scaffolded documents: these can be distributed to students in various ways. You can add the dates into the calendar at the beginning of the year or have students put in the dates depending on their level.
1. Discuss plants If you have not visited the garden or school yard yet, do so now. Introduce and practice vocabulary about plants (“plant”, “leaf”, “stem”, “soil”, “sunlight”). Call students to the rug. Discuss what they know about plants. Ask a series of questions, allowing time for several students to respond to each one.
• Do you remember when we looked at plants outside? Can you describe a plant that you saw?
• When you see something, how do you know if it is a plant? • Are plants alive? How do you know? • Do all plants look alike? How are they the same and different? • Where do plants come from? How can you get new plants? • Do you think new plants will look like their parents? Why or why not?
2. Introduce the class calendar Post the large laminated calendar where students can see it clearly. Find today’s date. Tell students For the next several weeks we will be growing some plants. We will use this class calendar AND you each will have your own calendar in your science notebooks to record interesting and important things that happen. Calendars help us remember when things happened and how many days it takes for things to happen.
3. Students put calendars in notebooks Have students return to their desks. Have students get out their science notebooks and paste calendars into student notebooks. Model for students using the document camera how to make an entry in the Table of Contents labeled “Calendar”. Have students make a Table of Contents entry labeled “Calendar”. Have students paste the calendars into their notebooks on the first available page. Have the students fill in the dates on the calendar or give them a scaffolded calendar*. Make sure they put the page number of the Calendar in the Table of Contents.
4. Word wall update If any new words came up in discussing the plants outside or the calendar, add those words to the word wall. Have students add any new words to their Glossary.
25
cris.palmer
Typewritten Text
1.3

Calendar of Brassica Growth Name: ______________________________ Monday Tuesday Wednesday Thursday Friday Saturday Sunday
26
cris.palmer
Typewritten Text
1.3.a
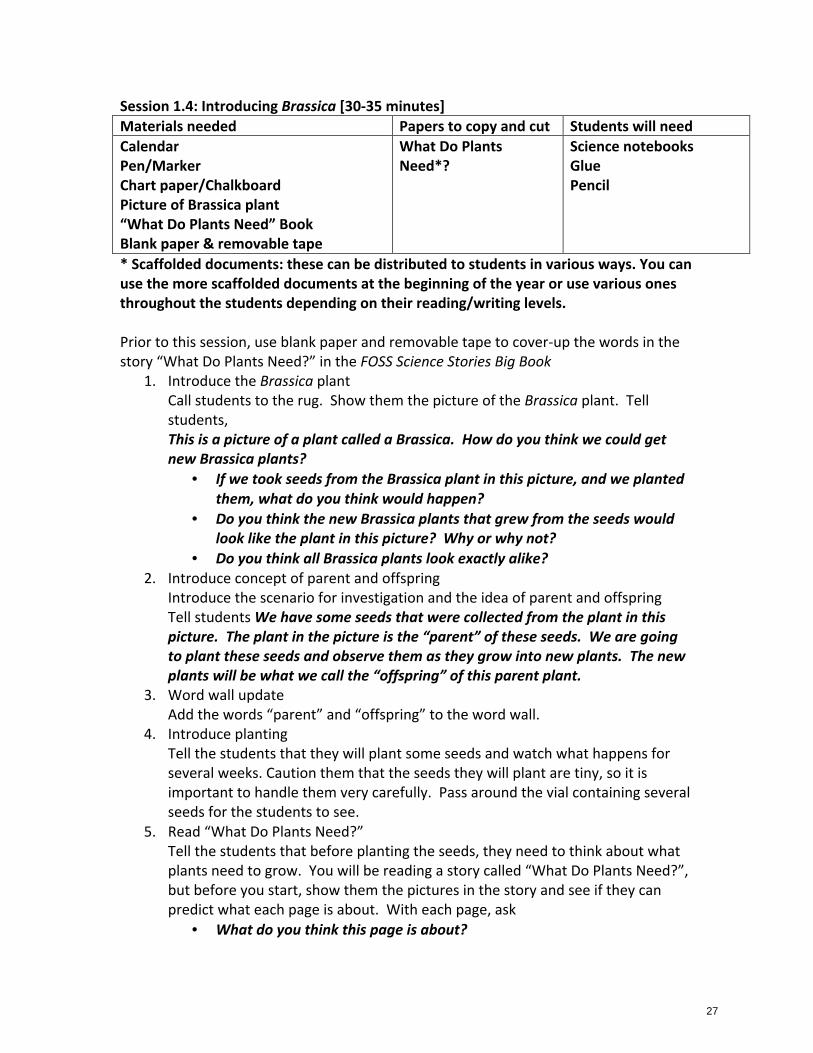
Session 1.4: Introducing Brassica [30-‐35 minutes] Materials needed Papers to copy and cut Students will need Calendar Pen/Marker Chart paper/Chalkboard Picture of Brassica plant “What Do Plants Need” Book Blank paper & removable tape
What Do Plants Need*?
Science notebooks Glue Pencil
* Scaffolded documents: these can be distributed to students in various ways. You can use the more scaffolded documents at the beginning of the year or use various ones throughout the students depending on their reading/writing levels. Prior to this session, use blank paper and removable tape to cover-‐up the words in the story “What Do Plants Need?” in the FOSS Science Stories Big Book
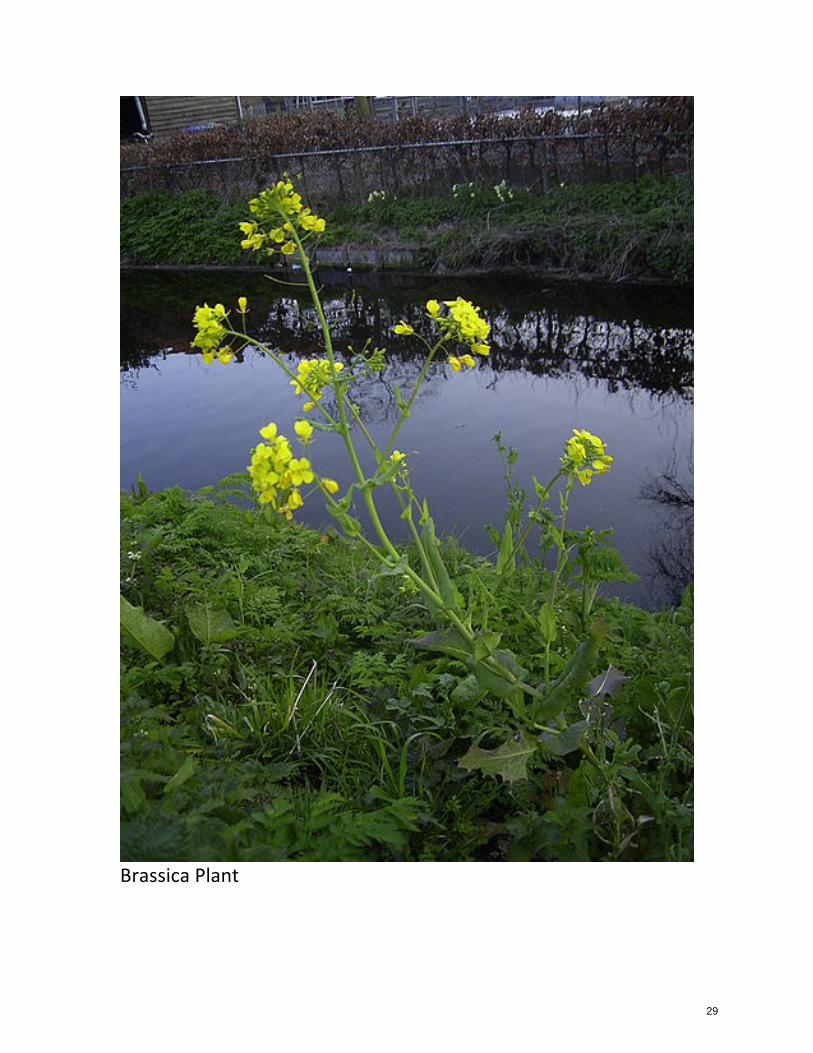
1. Introduce the Brassica plant Call students to the rug. Show them the picture of the Brassica plant. Tell students, This is a picture of a plant called a Brassica. How do you think we could get new Brassica plants?
• If we took seeds from the Brassica plant in this picture, and we planted them, what do you think would happen?
• Do you think the new Brassica plants that grew from the seeds would look like the plant in this picture? Why or why not?
• Do you think all Brassica plants look exactly alike? 2. Introduce concept of parent and offspring
Introduce the scenario for investigation and the idea of parent and offspring Tell students We have some seeds that were collected from the plant in this picture. The plant in the picture is the “parent” of these seeds. We are going to plant these seeds and observe them as they grow into new plants. The new plants will be what we call the “offspring” of this parent plant.
3. Word wall update Add the words “parent” and “offspring” to the word wall.
4. Introduce planting Tell the students that they will plant some seeds and watch what happens for several weeks. Caution them that the seeds they will plant are tiny, so it is important to handle them very carefully. Pass around the vial containing several seeds for the students to see.
5. Read “What Do Plants Need?” Tell the students that before planting the seeds, they need to think about what plants need to grow. You will be reading a story called “What Do Plants Need?”, but before you start, show them the pictures in the story and see if they can predict what each page is about. With each page, ask
• What do you think this page is about?
27
cris.palmer
Typewritten Text
1.4
• From this picture, what do you think is something that plants need? Read the story and chart what plants need on the white board or chart paper.
6. Students list needs of plants in science notebooks Have students return to their desks. Have students get out their science notebooks. Model for students how to make an entry in the Table of Contents labeled “What Do Plants Need” and have students add this entry to their Table of Contents. Have students make a notebook entry labeled “What Do Plants Need”* on the next available page. Have students list what plants need on this page using your example as a model and if your students need extra support, use the scaffolded document.
7. Word wall update Have students write the words “parent” and “offspring” into their Glossary with pictures.
28
cris.palmer
Typewritten Text
1.4
Brassica Plant
29
cris.palmer
Typewritten Text
1.4.a

What Do Plants Need? Plants need…. _______________________________________________ ______________________________________________ ______________________________________________ _____________________________________________
…to grow.
What Do Plants Need? Plants need…. _____________________________________________ ____________________________________________ _____________________________________________ _____________________________________________
…to grow.
30
cris.palmer
Typewritten Text
1.4.b
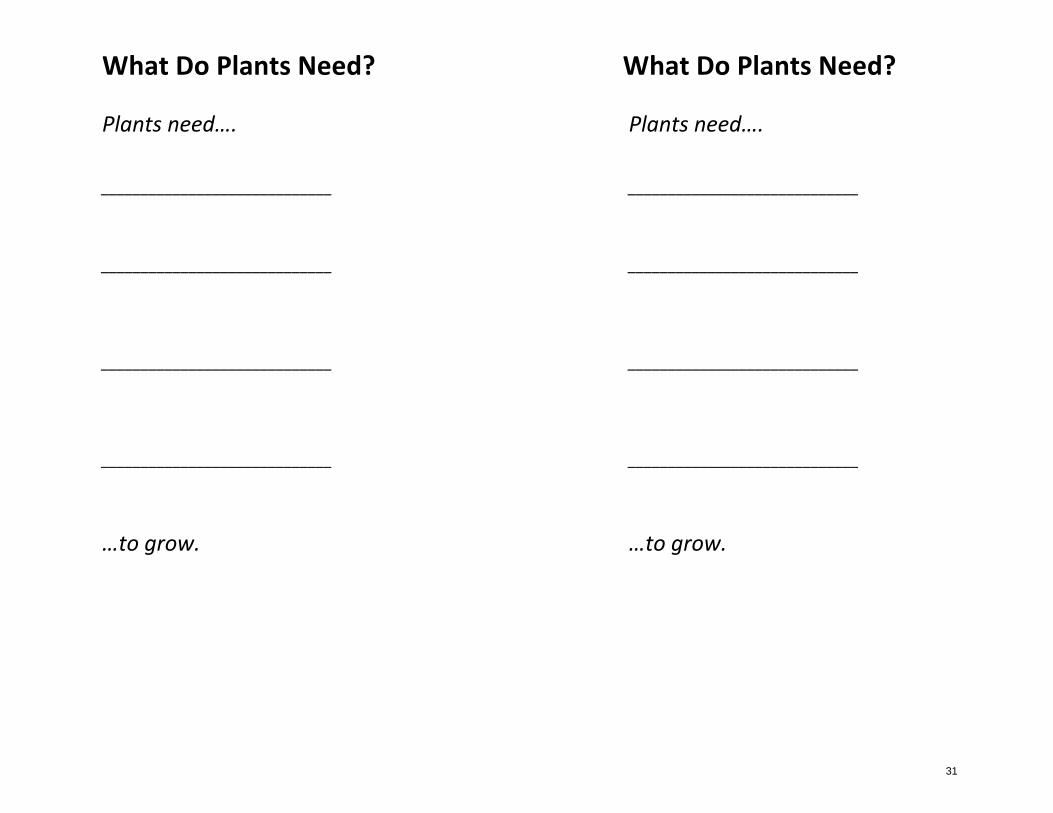
What Do Plants Need? Plants need…. _____________________________ _____________________________ _____________________________ _____________________________
…to grow.
What Do Plants Need? Plants need…. _____________________________ _____________________________ _____________________________ _____________________________
…to grow.
31
cris.palmer
Typewritten Text
1.4.c
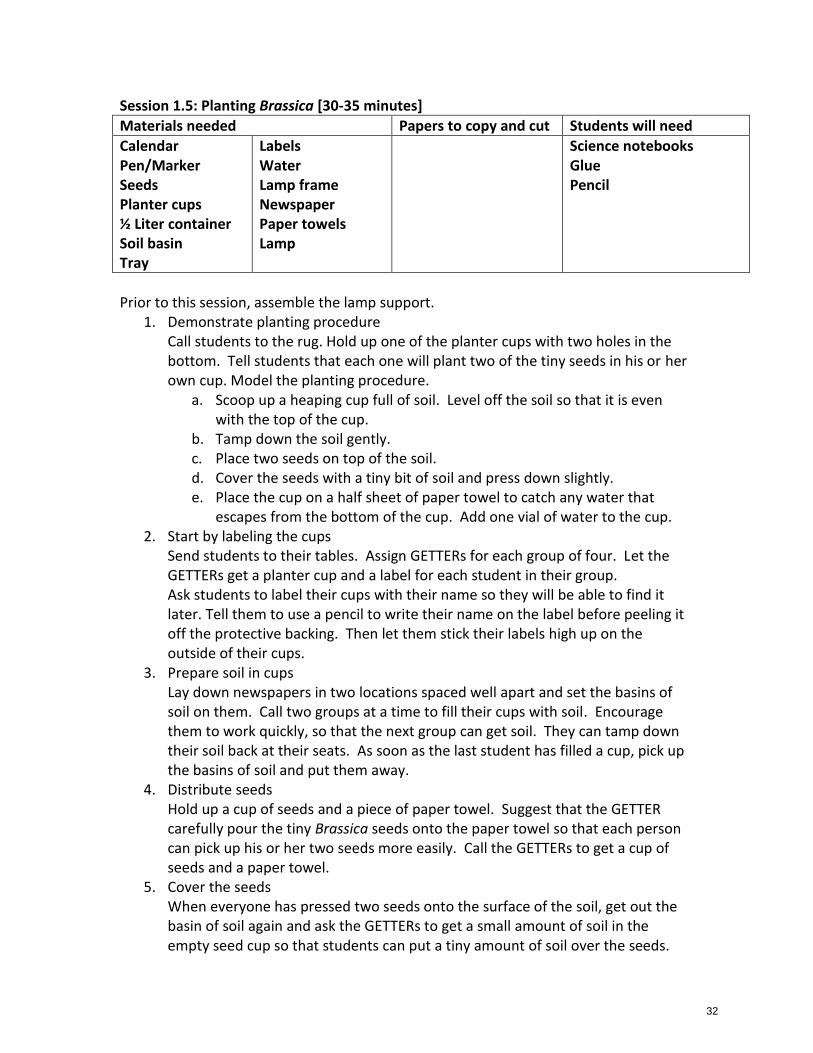
Session 1.5: Planting Brassica [30-35 minutes]
Materials needed Papers to copy and cut Students will need
Calendar Pen/Marker Seeds Planter cups ½ Liter container Soil basin Tray
Labels Water Lamp frame Newspaper Paper towels Lamp
Science notebooks Glue Pencil
Prior to this session, assemble the lamp support.
1. Demonstrate planting procedure Call students to the rug. Hold up one of the planter cups with two holes in the bottom. Tell students that each one will plant two of the tiny seeds in his or her own cup. Model the planting procedure.
a. Scoop up a heaping cup full of soil. Level off the soil so that it is even with the top of the cup.
b. Tamp down the soil gently. c. Place two seeds on top of the soil. d. Cover the seeds with a tiny bit of soil and press down slightly. e. Place the cup on a half sheet of paper towel to catch any water that
escapes from the bottom of the cup. Add one vial of water to the cup. 2. Start by labeling the cups
Send students to their tables. Assign GETTERs for each group of four. Let the GETTERs get a planter cup and a label for each student in their group. Ask students to label their cups with their name so they will be able to find it later. Tell them to use a pencil to write their name on the label before peeling it off the protective backing. Then let them stick their labels high up on the outside of their cups.
3. Prepare soil in cups Lay down newspapers in two locations spaced well apart and set the basins of soil on them. Call two groups at a time to fill their cups with soil. Encourage them to work quickly, so that the next group can get soil. They can tamp down their soil back at their seats. As soon as the last student has filled a cup, pick up the basins of soil and put them away.
4. Distribute seeds Hold up a cup of seeds and a piece of paper towel. Suggest that the GETTER carefully pour the tiny Brassica seeds onto the paper towel so that each person can pick up his or her two seeds more easily. Call the GETTERs to get a cup of seeds and a paper towel.
5. Cover the seeds When everyone has pressed two seeds onto the surface of the soil, get out the basin of soil again and ask the GETTERs to get a small amount of soil in the empty seed cup so that students can put a tiny amount of soil over the seeds.
32
cris.palmer
Typewritten Text
1.5
6. Water the seeds Remind students that in the story “What Do Plants Need” they learned that plants need water. Have the GETTERs get a ½ liter container of water and a vial for the group, and half a paper towel for each student. Remind students to put their planter cup on a piece of paper towel before adding one vial of water. Ask GETTERs to return the water as soon as all the planters have been watered.
7. Put cups in the tray. Call students, group by group, to put their planter cups in the class tray. As students bring their planters to the tray, check to see that there are no seeds on top of the soil. If you see uncovered seeds, gently move them to the center of the cup and push them into the soil.
8. Discuss light requirements Call students to the light source. Remind students that in the story “What Do Plants Need” they learned that plants need light. Tell them that to make sure that the Brassica plants get light, they will be put under a lamp assembly. Position the light source on a table or counter near an electric outlet. Turn on the lights and slide the tray into place under the light. Show students how the distance from the planters to the light can be adjusted, using chains and hooks.
9. Describe the future watering procedure Tell students that watering will be accomplished by pouring water into the tray rather than into the individual cups. Water will be added when there is no standing water in the tray. (You may want to wait to discuss the next part of the procedure when your plants first need water.) At that time, a ½ liter of water, enriched with four drops of liquid plant fertilizer, should be added. The fertilizer provides nutrients that the plants need to grow. Explain that plants usually get nutrients from the soil, but the potting soil may not have enough nutrients so the fertilizer will provide the necessary nutrients. It is not necessary to add fertilized water to the tray at the time of planting. This will be done in a day or two. Discuss a plan to ensure that the water around the plants is monitored every day. The responsibility for watering the plants should rotate from group to group.
10. Make a calendar entry Have students mark their calendars in their science notebooks to indicate the day that they planted their Brassica seeds. Mark the Brassica planting date on your class calendar as well. Have students get out their science notebooks and mark the date of planting in their calendars. They may want to draw planting the seeds on this date in their calendar.
11. Prepare some reserves After class, set up a planter cup for any absent students and three or four reserves. Put these into the tray with the rest. If a student’s planter fails to produce a sprout, simply transfer the student’s label from the failed planter onto one of the reserves.
12. Potential Extension
33
cris.palmer
Typewritten Text
1.5

If you have extra time and supplies, you could demonstrate what plants need by planting extra plants and taking away one variable from each extra plant. For example, to show that plants need carbon dioxide (air) you could cover one plant with a plastic bag or wrap to eliminate gas exchange. You also could leave one plant out of the water bin to show that plants need water to live. Additionally you could not use fertilizer for one plant to demonstrate that plants need nutrients. And lastly, you could put a plant in a closet, without light, to demonstrate that plants need light to grown. This is also very tricky because seeds will germinate without light, and they may even grow faster in the dark in search of light, but they will be very spindly and eventually die from lack of light.
34
cris.palmer
Typewritten Text
1.5
cris.palmer
Typewritten Text
1.5.a

cris.palmer
Typewritten Text
1.5.b
cris.palmer
Typewritten Text

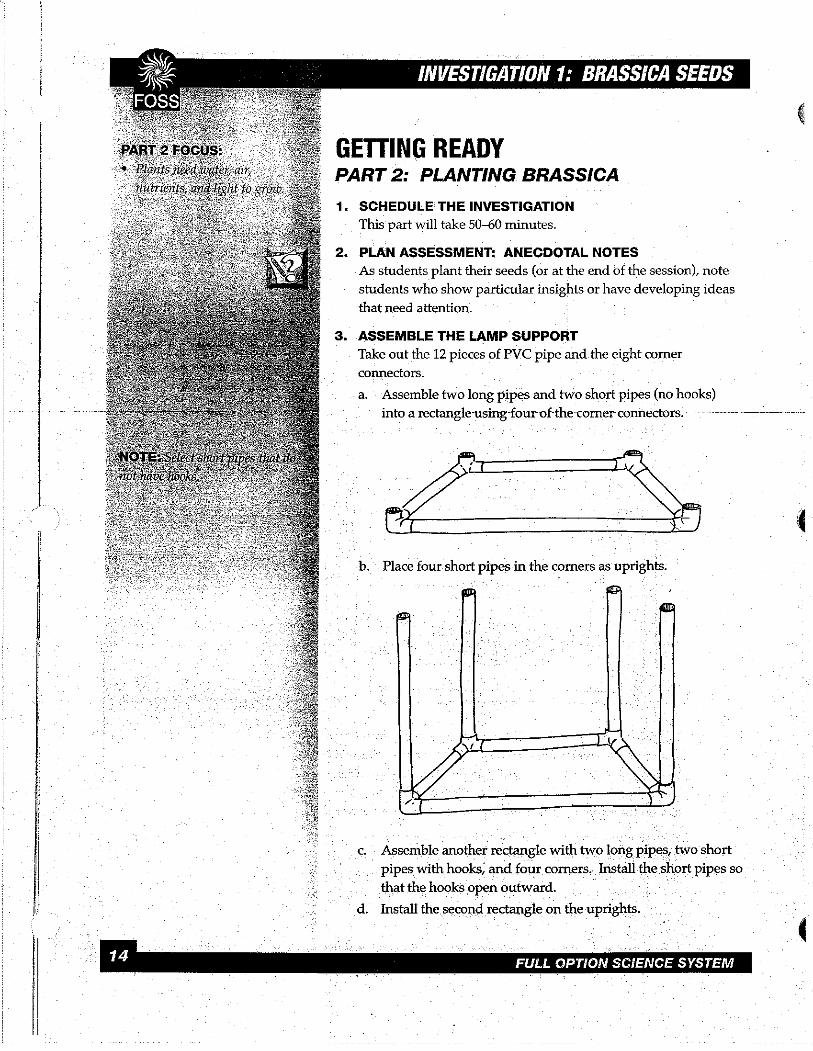
Session 1.6: Learning about the Parts of Plants [30-‐45 minutes-‐ can be split into 2 sessions] Materials needed Papers to copy and cut Students will need Index cards labeled with plant parts with arrows Enlarged Brassica photo Tape or magnets
Brassica Plant Parts Plant part and function cards – 1 complete set per student Matching plant parts with what they do – 4 half-‐sheet copies per student
Science notebooks Glue Pencil
1. Discuss plant parts
Call students to the rug. Attach the picture of the Brassica plant to the white board or easel. Give out the index cards labeled with plant parts to a few students. Read aloud with the students the plant parts on the index cards and discuss. As you discuss them, ask the students to stick the appropriate label and arrow onto the picture. If you have a live plant in the classroom, have students identify the parts of the plant.
2. Update the word wall Add the words “roots,” “stems” and “leaves” to the word wall.
3. Students label plant parts in notebooks Ask students to move to their seats and get out their science notebooks. Have students paste “Brassica Plant Parts” into their science notebooks. Model for students how to make an entry in the Table of Contents labeled “Brassica Plant Parts” and have students add this entry to their Table of Contents, remember to add the corresponding page number. Ask them to draw lines or arrows from the words to the parts of the plant. Circulate around to the tables to ensure students are labeling their plants accurately.
4. Discuss how the parts of a plant help it survive Call students back to the rug. Refer to the picture of the Brassica plant on the white board or easel as you discuss each part of the plant and what it does.
• Let’s look at the roots of the plant. What do you think the roots do to help the plant survive?
• Roots help the plant by anchoring it in the soil. Roots also help the plant by getting water from the soil.
• Do you think that all plants would have the same kind of roots? • What kind of roots do you think a plant would have in a desert, where
the water is buried deep underground? • Let’s look at the stem of the plant. What do you think the stem does to
help the plant survive? • The stem helps the plant by holding it up. The stem also helps the plant
by carrying things from the roots to the leaves and from the leaves to the roots.
35
cris.palmer
Typewritten Text
1.6

• What do you think the stem carries from the roots to the leaves? Why do you think that?
• The stem carries water from the roots to the leaves. The stem also carries food from the leaves to the roots.
• Let’s look at the leaves of the plant. What do you think the leaves do to help the plant survive?
• Leaves use sunlight and air to make food. Plants make their own food, but they need to have sunlight and air and water in order to make it.
• Let’s look at the flowers of the plant. What do you think the flowers do to help the plant survive?
• Flowers have a special job, which is to make seeds. Why are seeds important to a plant?
• Seeds will grow into the plant’s offspring. 5. Model matching plant parts
Tape or glue enlarged matching sheets to the white board or chart. Model for the students how to glue in the pictures of plant parts while saying the names aloud. Ask for volunteers and give each one the descriptions with pictures of the plant functions. Have each student discuss what the function is of the plant part and glue it in the box below the plant part.
6. Students match plant parts with functions Have students return to their desks. Give each student a set of “Plant Part and Function” cards that have been pre-‐cut and a “Matching Plant Parts With What They Do” sheet. Before gluing, have students update their Table of Contents by writing in “Matching Plant Parts With What They Do “ and the corresponding page number. Now ask students to glue 4 copies of the “Matching Plant Parts With What They Do” sheet into their notebooks and then glue the cards with the plant parts in the top boxes of each sheet. Have students match the description of what the plant part does and glue those in the bottom box. You may want to have students place them without gluing them first so you can check their work before they glue them down.
7. Students update their glossary Have students add the words “root”, “stems” and “leaves” to their glossary.
36
cris.palmer
Typewritten Text
1.6

Brassica Plant Parts
Flower
Leaf
Root
Seed pod
Stem
Brassica Plant Parts
Flower
Leaf
Root
Seed pod
Stem
37
cris.palmer
Typewritten Text
1.6.a
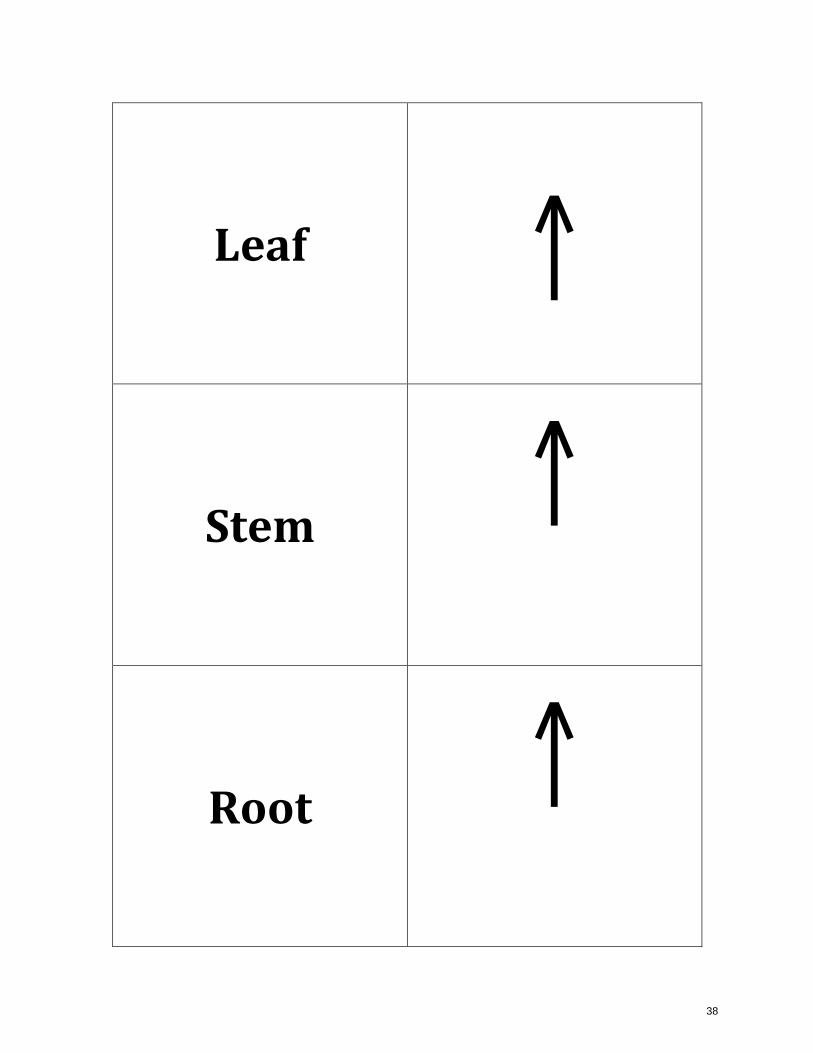
Leaf
↑
Stem
↑
Root
↑
38
cris.palmer
Typewritten Text
1.6.b

Flower
↑
Seed Pod
↑
39
cris.palmer
Typewritten Text
1.6.c

Leaf
Makes food from sunlight
Stem
Carries water to leaves Carries food to roots
Root
Gets water from soil Anchors plant in soil
Flower
Makes seeds
Plant Parts and Function Cards
40
cris.palmer
Typewritten Text
1.6.d
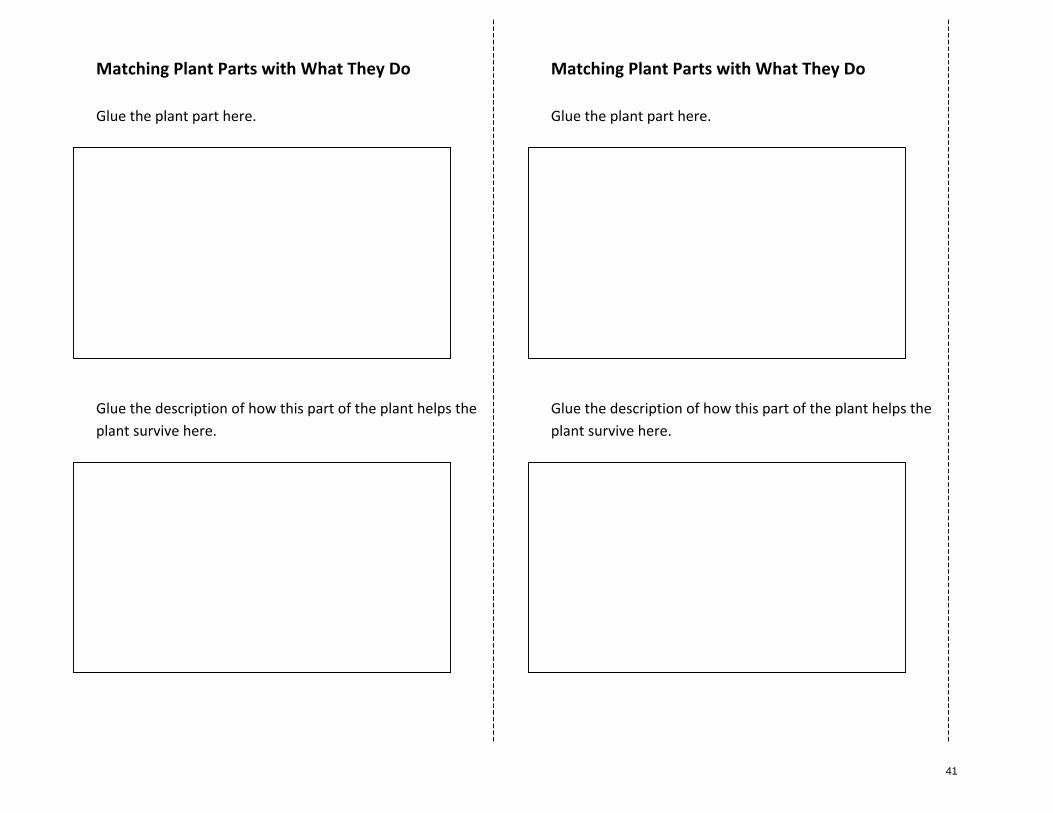
Matching Plant Parts with What They Do Glue the plant part here.
Glue the description of how this part of the plant helps the plant survive here.
Matching Plant Parts with What They Do Glue the plant part here.
Glue the description of how this part of the plant helps the plant survive here.
41
cris.palmer
Typewritten Text
1.6.e

Session 1.7: Focus Question and Prediction [20 minutes] Materials needed Papers to copy and cut Students will need Chart paper Pen/Marker Document Camera/LCD Projector
Focus Question* Prediction*
Science notebooks Glue Pencil
* Scaffolded documents: these can be distributed to students in various ways. You can use the more scaffolded documents at the beginning of the year or use various ones throughout the year depending on students’ reading/writing levels.
1. Discuss “Focus Questions” Have students stay at their desks with their science notebooks out. On chart paper, model writing the focus question for the investigation. Start by writing the words “Focus question” on the chart paper at the top. If students have been introduced to the process of science, you may want to review that with them. Tell the students, When scientists investigate things, they typically have a question in mind. A good scientific focus question should be something we can investigate with the materials we have. It should also be a question that can’t be answered just “yes” or “no”. The focus question we are going to investigate is “How are new plants (offspring) both the same and different from their parents?” Write the focus question on the chart paper. Model for students how to make an entry in the Table of Contents labeled “Focus Question” and put the corresponding page number [use the Document Camera if you have one].
2. Students write focus question in notebooks Have students make a new entry in the science notebooks labeled “Focus Question” on the next available page. Depending on the students writing skills, you may want them to either paste this question from scaffolded* slips of paper or copy the question into their notebooks.
3. Discuss “Predictions” Call students to the rug. On chart paper, model writing the prediction for the investigation. Start by writing the word “Prediction” on the chart paper at the top. Discuss with the students, What is a prediction? When scientists make predictions, they say what they think is going to happen in an investigation. But they don’t just guess. They also state the reason why they think something is going to happen. What predictions do you have about how the new Brassica plants will look both the same and different from their parent?
• How do you think they will look the same? Why? • How do you think they will look different? Why? • Do you think they will have all the same kinds of parts? • Will they be the same color? • Will they be the same size?
Write two predictions on the chart paper that includes both the “I think” and the “because” parts. One should be a prediction of a similarity, and the other should
42
cris.palmer
Typewritten Text
1.7
a prediction about a difference. Example: “I think both the parent plant and the offspring plant will look green, because all plants are green.” “I think the offspring will be smaller than the parent because human children are smaller than their parents.”
4. Students generate predictions orally Ask students what their predictions are. Prompt them to add a “because” statement if they leave that out.
5. Students write focus question in notebooks Have students return to their seats and make a new entry in the science notebooks labeled “Prediction.” Depending on the students writing skills, you may want them to copy one of your predictions, complete a scaffolded* sentence frame with “I think….because”, or draw what they predict and label drawings. Have students add “Prediction” to their Table of Contents and write the corresponding page number.
43
cris.palmer
Typewritten Text
1.7

Focus Question
“How are offspring both the same and different from their parents?”
Focus Question
“How are offspring both the same and different from their parents?”
Focus Question
“How are offspring both the same and different from their parents?”
Focus Question
“How are offspring both the same and different from their parents?”
Focus Question
“How are offspring both the same and different from their parents?”
Focus Question
“How are offspring both the same and different from their parents?”
Focus Question
“How are offspring both the same and different from their parents?”
Focus Question
“How are offspring both the same and different from their parents?”
44
cris.palmer
Typewritten Text
1.7.a

Focus Question
“How are ________________________________
both the same and different from their
_______________________________________?”
Focus Question
“How are ________________________________
both the same and different from their
_______________________________________?”
Focus Question
“How are ________________________________
both the same and different from their
_______________________________________?”
Focus Question
“How are ________________________________
both the same and different from their
_______________________________________?”
45
cris.palmer
Typewritten Text
1.7.b

Focus Question
“How are ________________________________
both the _________________________________
and ____________________________________
from their_________________________________?”
Focus Question
“How are ________________________________
both the _________________________________
and ____________________________________
from their_________________________________?”
46
cris.palmer
Typewritten Text
1.7.c

Prediction
I think the offspring will have a different
_______________________________________
than the parent because__________________
_______________________________________
_______________________________________.
Prediction
I think the offspring will have a different
_______________________________________
than the parent because__________________
_______________________________________
_______________________________________.
47
cris.palmer
Typewritten Text
1.7.d
cris.palmer
Typewritten Text

Prediction
I think both the parent and the offspring
will _________________________________
because_________________________________
_______________________________________.
Prediction
I think both the parent and the offspring
will _________________________________
because_________________________________
_______________________________________.
48
cris.palmer
Typewritten Text
1.7.e
cris.palmer
Typewritten Text

Prediction
I think ________________________________
______________________________________
because_________________________________
_______________________________________.
Prediction
I think ________________________________
______________________________________
because_________________________________
_______________________________________.
49
cris.palmer
Typewritten Text
1.7.f
cris.palmer
Typewritten Text
~It may take 2-‐3 days for seedlings to sprout. During these days, you can begin Investigation 2 Session 1.8: Emergence of Seedlings [20 minutes] Materials needed Papers to copy and cut Students will need Student planter Chart paper Pen/Marker Copy of enlarged “Brassica Observation” Calendar
Brassica Observation Science notebooks Glue Pencil
1. Discuss observations of seedlings
On the day that plants have emerged in all of the cups, have students observe their planters. Gather students at the rug to discuss what they have noticed. Ask,
• What did you observe in your Brassica planters? • What colors do you see on your Brassica plants? • What do we call new plants that come from a parent plant? (offspring) • What words are used to describe the new plants? (sprouts, seedlings) • Are all of the Brassica plants the same size? Why do you think that this is the case? • How are the seedlings the same and different from their parent?
2. Update the word wall While students are telling you what they have noticed, add the words “offspring,” “seedling” and “sprout” to the wordwall.
3. Model “Brassica Observation” Explain that scientists keep drawings and descriptions about the plants they study. Draw a copy of the student sheet called “Brassica Observation” on chart paper. Label it “Brassica Observation 1” at the top of the page. Model drawing and labeling what you observe. Ask students to help you observe as you draw:
• How many sprouts are in the cup? • What color are the sprouts? • How big should I draw the sprouts? • How many days has it been since we planted the seeds? • Is there anything else I should add to my drawing?
Captions are an important part of the recording process. Model this process using students’ suggestions. Be sure to include in your observation the number of days that have elapsed since planting. Before sending students to their desks, ask them what steps you have forgotten to do (update class calendar and table of contents).
4. Update class calendar and table of contents
50
cris.palmer
Typewritten Text
1.8

Make an entry in the class calendar that seedlings sprouted. Also, model in your teacher notebook by gluing the Brassica Observation 1 and updating the Table of Contents and putting the corresponding page number. Remove or erase your model drawing before students make their own recording so they will look at the actual plant.
5. Students draw their own Brassica Observations Have students return to their desks. Give each student a blank “Brassica Observation” student sheet and have them glue it in their science notebooks. Have students add “Brassica Observation 1” to their Table of Contents and the corresponding page number. Have the students retrieve their planter and make an entry in their Brassica Observation 1. The entry should include a drawing, the number of days that have elapsed since planting, and a caption or comment related to the observation.
6. Students update their glossary and calendar Students should add the words “offspring,” “seedling,” “leaves,” “stem” and “sprout” from the word wall into their Glossary. They also should make an entry in their calendar that seedling sprouted and possibly draw a picture.
51
cris.palmer
Typewritten Text
1.8
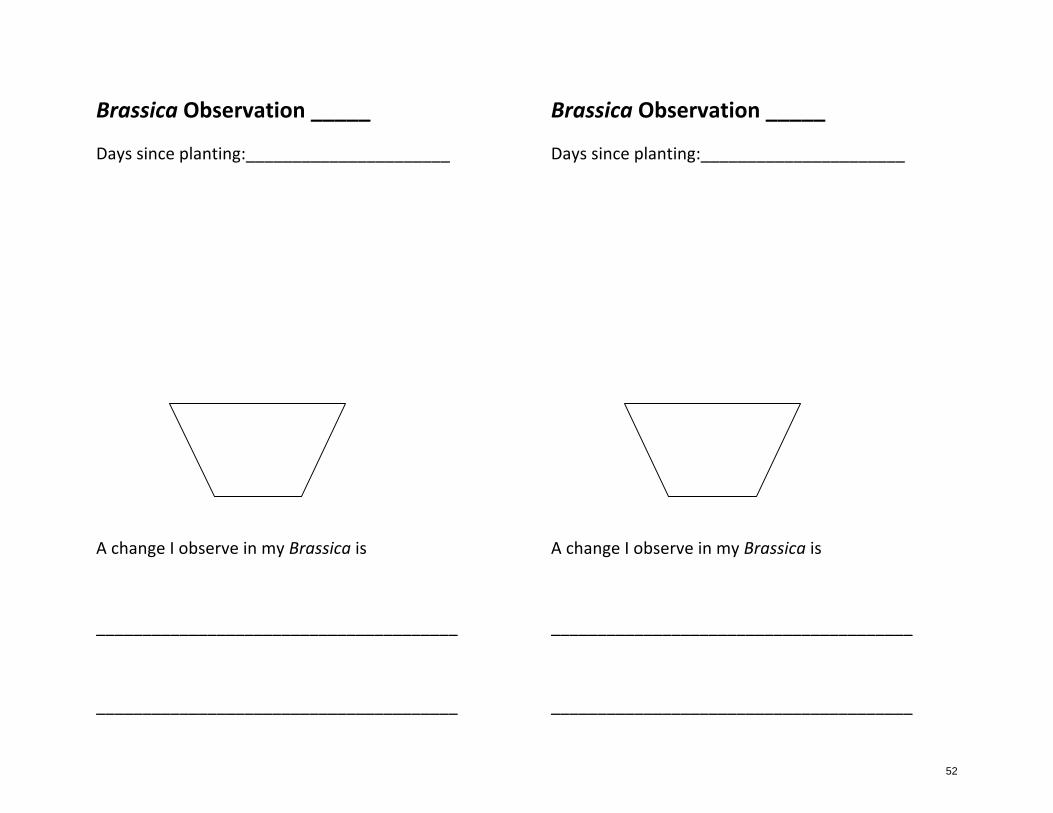
Brassica Observation _____
Days since planting:______________________
A change I observe in my Brassica is
_______________________________________
_______________________________________
Brassica Observation _____
Days since planting:______________________
A change I observe in my Brassica is
_______________________________________
_______________________________________
52
cris.palmer
Typewritten Text
1.8.a

~It may take up to a week for leaves to grow. During these days you can work on Investigation 2 or other activities. Session 1.9: Leaf Growth [20 minutes] Materials needed Papers to copy and cut Students will need Student planter Chart paper Pen/Marker Copy of enlarged “Brassica Observation” Calendar
Brassica Observation Science notebooks Glue Pencil
1. Discuss observations of seedlings
When all the planters have new leaf growth, gather students at the rug for a group discussion of what they have noticed. You may want to ask questions from the list below.
• What has changed since the last time you observed your planter? • What colors do you see on your Brassica plants? • Where do the leaves grow? Are they all the same? • What do you suppose leaves do for the plant? (They capture light and use it to make food) • Do all of the Brassica plants have the same numbers of leaves? Why do
you think that this is the case? • How are the offspring plants the same and different from their parent?
2. Update word wall Add any new words that are not already on the word wall that may have come up in this new observation.
3. Model drawing and labeling what you observe. Draw a copy of the student sheet called “Brassica Observation” on chart paper. Label it “Brassica Observation 2” at the top of the page. Model drawing and labeling what you observe. Ask students to help you observe as you draw. Write down an example caption or comments. Before sending students to their desks, ask them what you have forgotten to do (update the class calendar).
4. Update class calendar Make an entry in the class calendar that leaves have grown on your plant. Remember to model in your teacher notebook by gluing in the Brassica Observation 2. Also update the Table of Contents and put in the corresponding page number.
5. Students draw their own Brassica Observations Have students return to their desks. Give each student a blank “Brassica Observation” student sheet and have them glue it in their science notebooks. Have students add “Brassica Observation 2” to their Table of Contents and the corresponding page number. Have the students retrieve their planter and make
53
cris.palmer
Typewritten Text
1.9
an entry in their journals. The entry should include a drawing, the number of days that have elapsed since planting, and a caption or comment related to the observation.
6. Students update their glossary and calendar. If any new words came up during the observations as a group and were added to the word wall, remind students to enter those words into their glossary as well. Also, have students update their calendar with the appropriate date for leaf growth and possibly draw a picture.
54
cris.palmer
Typewritten Text
1.9

Brassica Observation _____
Days since planting:______________________
A change I observe in my Brassica is
_______________________________________
_______________________________________
Brassica Observation _____
Days since planting:______________________
A change I observe in my Brassica is
_______________________________________
_______________________________________
55
cris.palmer
Typewritten Text
1.9.a

~It may take up to 5-‐7 days from leaf growth for flowers to fully appear. During these days you can work on Investigation 2 or other activities. Session 1.10: Flower Growth [20 minutes] Materials needed Papers to copy and cut Students will need Student planter Chart paper Pen/Marker Copy of enlarged “Brassica Observation” Calendar
Brassica Observation Science notebooks Glue Pencil
1. When all the planters have at least one flower or a majority of the planters have
a flower, gather students at the rug for a group discussion of what they have noticed. You may want to ask questions from the list below.
• What has changed since the last time you observed your planter? • From where do the flowers grow? Are they all the same? • How many flowers are on the plant? • What color are the flowers? • How many petals does a flower have? • What do you suppose flowers do for the plant? • What questions do you have about your Brassica plants? • How are the offspring plants the same and different from their parent in terms of their flowers?
2. Update word wall Add the word “flower” to the word wall if it is not already there.
3. Model drawing and labeling what you observe. Draw a copy of the student sheet called “Brassica Observation” on chart paper. Label it “Brassica Observation 3” at the top of the page. Model drawing and labeling what you observe. Ask students to help you observe as you draw. The entry should include a drawing, the number of days that have elapsed since planting, and a caption or comment related to the observation. Write down a caption or comment, using the possible prompt, “A new thing that happened to my Brassica was …”.
4. Update class calendar Make an entry in the class calendar that flowers have grown on your plant. Also, model in your teacher notebook by gluing the Brassica Observation 3 and updating your Table of Contents and putting the corresponding page number.
5. Students draw their own Brassica Observations Have students return to their desks. Give each student a blank “Brassica Observation” student sheet and have them glue it in their science notebooks. Have students add “Brassica Observation 3” to their Table of Contents and the corresponding page number. Have the students retrieve their planter and make
56
cris.palmer
Typewritten Text
1.10

an entry in their journals. For students that do not have any flowers on their plants, they can draw the plant of someone else in their group. The entry should include a drawing, the number of days that have elapsed since planting, and a caption or comment related to the observation. You might consider using a prompt for their caption such as, “A new thing that happened to my Brassica was …”
6. Students update their glossary and calendar. If any new words came up during the observations as a group, maybe “flower,” and were added to the word wall, remind students to enter those words into their glossary as well. Also, have students update their calendar with the appropriate date for flower appearance and possibly draw a picture.
57
cris.palmer
Typewritten Text
1.10

Brassica Observation _____
Days since planting:______________________
A change I observe in my Brassica is
_______________________________________
_______________________________________
Brassica Observation _____
Days since planting:______________________
A change I observe in my Brassica is
_______________________________________
_______________________________________
58
cris.palmer
Typewritten Text
1.10.a
cris.palmer
Typewritten Text
Session 1.11: Cross Pollinating [10-‐15 minutes] Materials needed Papers to copy and cut Students will need Pen/Marker Picture of bee with pollen Calendar Student planters
Science notebooks Glue Pencil
1. When to pollinate
Brassica plants will form viable seeds only if pollen is transferred from the flowers on one plant to the flowers on another plant. You can do this by gently pushing and bumping the mature flowering heads together. Or take a cotton swab and visit each flower one after another to emulate the action of a bee. There are a number of activities that can used here: students can act out the part of a bee and a flower, students can make pollinator wands and use those to act as the bee, one person can be bee for a day and transfer the pollen, etc. Follow one of these procedures every day or two during the week of the most intense flowering.
2. Update word wall Introduce the word “pollen” for the powder that is produced by the flower. As you transfer pollen from one flower to the other, explain what you are doing. Tell students that, in nature, bees and other insects transfer pollen as they move from one flower to another. Don’t worry about students understanding pollination at this point; just provide the awareness. Add “pollen” to the word wall and have students update their Glossary.
3. Update class calendar and notebook calendars Make an entry in the class calendar that flowers were pollinated and have the students make an entry in their calendars as well.
59
cris.palmer
Typewritten Text
1.11

Brassica Observation _____
Days since planting:______________________
A change I observe in my Brassica is
_______________________________________
_______________________________________
Brassica Observation _____
Days since planting:______________________
A change I observe in my Brassica is
_______________________________________
_______________________________________
60
cris.palmer
Typewritten Text
1.11.a

~It may take up to 4-‐5 days from flower growth to seed pod formation. During these days you can work on Investigation 2 or other activities. Session 1.12: Appearance of Seedpods [20 minutes] Materials needed Papers to copy and cut Students will need Student planter Chart paper Pen/Marker Copy of enlarged “Brassica Observation” Calendar
Brassica Observation Science notebooks Glue Pencil
Brassica plants will form pods after about 18-‐20 days. Not all of the plants will produce the seed pods. The seed pods will look like tiny string beans. If you want to collect seeds for planting another cycle, stop watering the plants as soon as the seed pods fill out (See Session 13). When the pods are tan and crispy (about 2 weeks after you stop watering), you can pick the pods.
1. Observing seed pods When the majority of the planters have seed pods, gather students at the rug for a group discussion of what they have noticed. You may want to ask questions from the list below.
• What has changed since the last time you observed your planter? • What color is the Brassica plant now? • How have the Brassica plants changed since they first started? • What would happen if we took the seeds out of the pod and planted them? • How would the new Brassica plants that grow from these seeds look like their parents?
3. Update word wall Add the word “seed pod” to the word wall.
4. Model drawing and labeling what you observe. Draw a copy of the student sheet called “Brassica Observation” on chart paper. Label it “Brassica Observation 4” at the top of the page. Model drawing and labeling what you observe. Ask students to help you observe as you draw. The entry should include a drawing, the number of days that have elapsed since planting, and a caption or comment related to the observation. Write down an example caption or comments.
5. Update class calendar Make an entry in the class calendar that seed pods have grown on your plant. Also, model in your teacher notebook by gluing in the Brassica Observation 4 and update your Table of Contents and put the corresponding page number.
6. Students draw their own Brassica Observations
61
cris.palmer
Typewritten Text
1.12

Have students return to their desks. Give each student a blank “Brassica Observation” student sheet and have them glue it in their science notebooks. Have students add “Brassica Observation 4” to their Table of Contents and the corresponding page number. Have the students retrieve their planter and make an entry in their journals. For students that do not have seed pods, they can draw their neighbor’s plant. The entry should include a drawing, the number of days that have elapsed since planting, and a caption or comment related to the observation.
1. Students update their glossary and calendar. Have students add “seed pods” to their glossary and have them update their calendar with the appropriate date for seed pod appearance and possibly draw a picture.
62
cris.palmer
Typewritten Text
1.12.a

Session 1.13: Predicting what will happen if we stop watering [15 minutes] Materials needed Papers to copy and cut Students will need Chart paper Pen/Marker
Prediction Science notebooks Glue Pencil
1. Discuss stopping the watering of the plants
Call the students to the rug. Tell them that because your Brassica plants have grown enough that they have seed pods, you are going to stop watering them.
• Let’s review the basic needs of plants. • What are four things that plants need in order to grow? • What do you think will happen if we stop watering our Brassica plants? • Why do you think that will happen?
Chart student answers on the board or on chart paper. 2. Students generate predictions orally
Tell students that now we are going to make predictions about what will happen when we stop watering the Brassica plants. Remind them that when we make a prediction, we tell what we think will happen and why. Ask students what their predictions are. Prompt them to add a “because” statement if they leave that out.
3. Students write prediction in notebooks Have students return to their desks. Have students make a new entry in the science notebooks labeled “Prediction.” Because students have already done one prediction previously, have students create their own prediction with the sentence frame, “I think….because…”, or draw what they predict and label drawings. Have students add “Prediction” to their Table of Contents and write the corresponding page number.
63
cris.palmer
Typewritten Text
1.13

Prediction
I think the plants will
_____________________________________
when we stop watering them, because
______________________________________
______________________________________.
Prediction
I think the plants will
___________________________________________
when we stop watering them, because
___________________________________________
___________________________________________.
64
cris.palmer
Typewritten Text
1.13.a
Session 1.14: Comparing Parents and Offspring [20 minutes] Materials needed Papers to copy and cut Students will need Chart paper Pen/Marker Enlarged Venn Diagram
Venn Diagram Science notebooks Glue Pencil
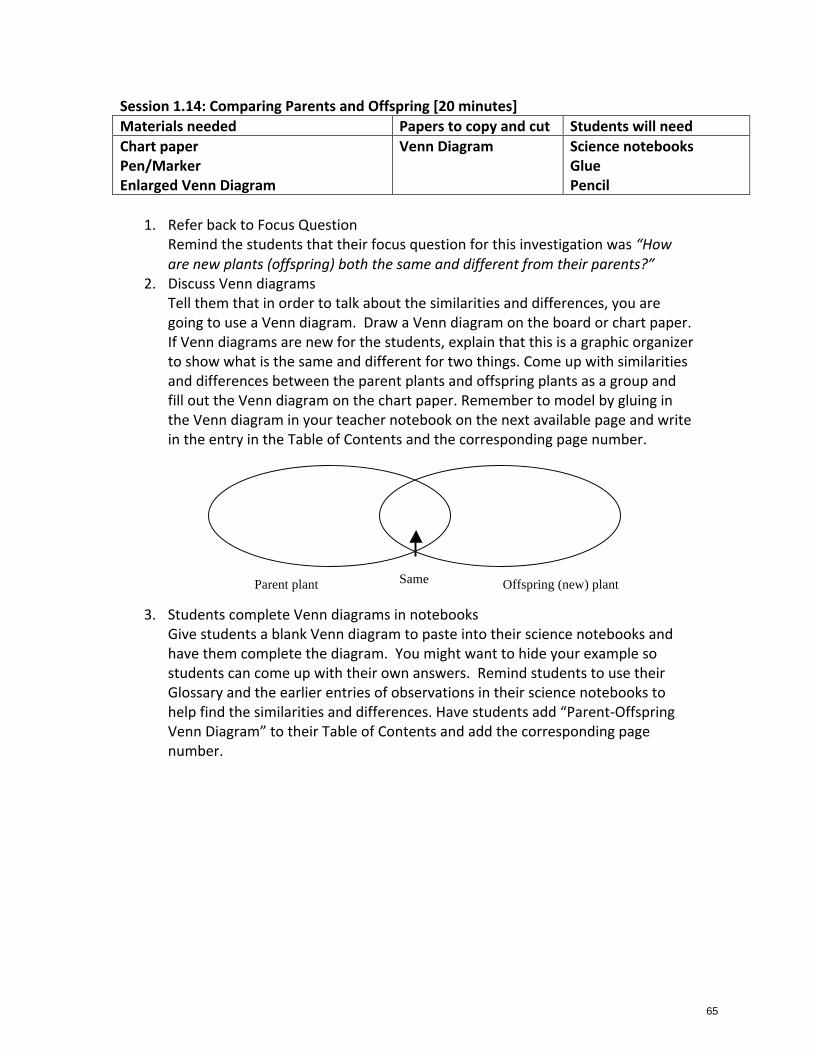
1. Refer back to Focus Question
Remind the students that their focus question for this investigation was “How are new plants (offspring) both the same and different from their parents?”
2. Discuss Venn diagrams Tell them that in order to talk about the similarities and differences, you are going to use a Venn diagram. Draw a Venn diagram on the board or chart paper. If Venn diagrams are new for the students, explain that this is a graphic organizer to show what is the same and different for two things. Come up with similarities and differences between the parent plants and offspring plants as a group and fill out the Venn diagram on the chart paper. Remember to model by gluing in the Venn diagram in your teacher notebook on the next available page and write in the entry in the Table of Contents and the corresponding page number.
3. Students complete Venn diagrams in notebooks Give students a blank Venn diagram to paste into their science notebooks and have them complete the diagram. You might want to hide your example so students can come up with their own answers. Remind students to use their Glossary and the earlier entries of observations in their science notebooks to help find the similarities and differences. Have students add “Parent-‐Offspring Venn Diagram” to their Table of Contents and add the corresponding page number.
Offspring (new) plant Parent plant Same
65
cris.palmer
Typewritten Text
1.14

Brassica Venn Diagram
Brassica Venn Diagram
Parent plant Offspring (new) plant Same
Parent plant Offspring (new) plant
Same
66
cris.palmer
Typewritten Text
1.14.b
Session 1.15: Claims and evidence [20 minutes] Materials needed Papers to copy and cut Students will need Chart paper Pen/Marker
Claims and Evidence Science notebooks Glue Pencil
1. Claims and Evidence
Have students gather at the rug. Review the data in the Venn Diagram from the previous session.
• Looking at our Venn Diagram, what can we say is the same between parents and offspring?
• What can we say about how offspring and parent plants are different? • What other kind of organisms have parents and offspring? • What about dogs and its puppies? Which is the parent and which is the offspring? • How are a parent dog’s puppies the same and different from the parent?
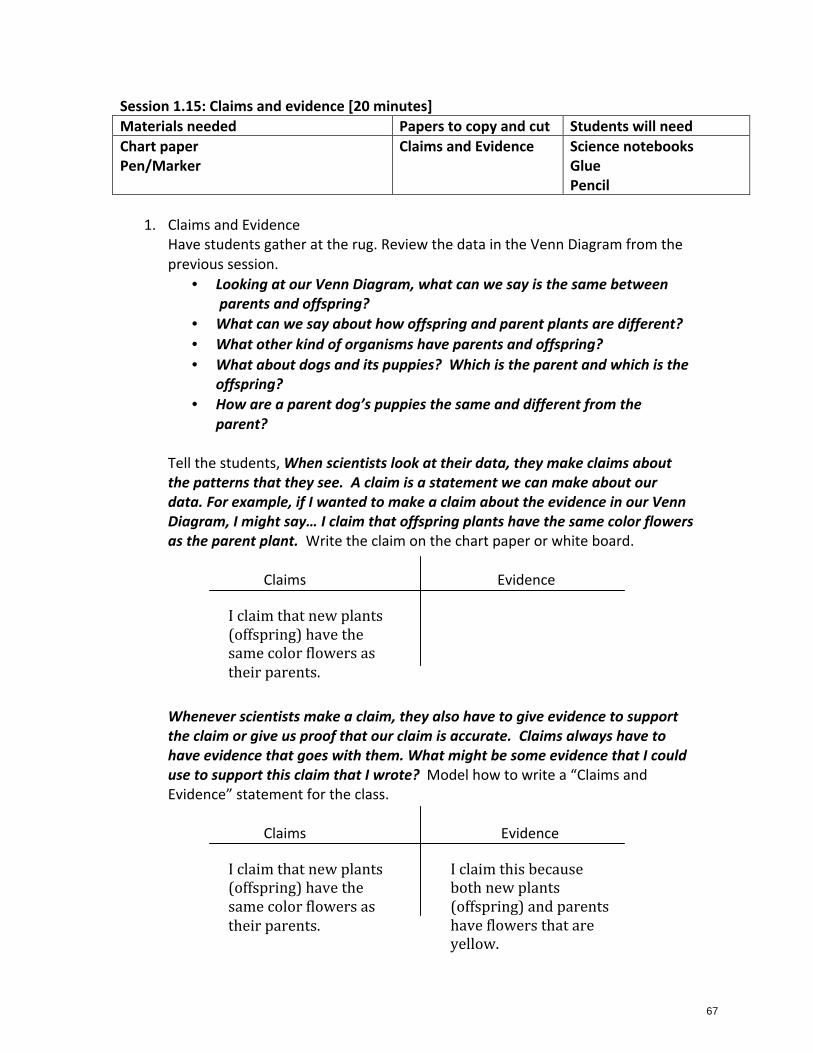
Tell the students, When scientists look at their data, they make claims about the patterns that they see. A claim is a statement we can make about our data. For example, if I wanted to make a claim about the evidence in our Venn Diagram, I might say… I claim that offspring plants have the same color flowers as the parent plant. Write the claim on the chart paper or white board.
Claims Evidence
Whenever scientists make a claim, they also have to give evidence to support the claim or give us proof that our claim is accurate. Claims always have to have evidence that goes with them. What might be some evidence that I could use to support this claim that I wrote? Model how to write a “Claims and Evidence” statement for the class.
Claims Evidence
I claim that new plants (offspring) have the same color flowers as their parents.
I claim that new plants (offspring) have the same color flowers as their parents.
I claim this because both new plants (offspring) and parents have flowers that are yellow.
67
cris.palmer
Typewritten Text
1.15

Claims Evidence
2. Model updating table of contents
Before sending students to their desks, remember to model gluing in the Claims and Evidence sheet into the teacher notebook and writing it in the Table of Contents with the corresponding page number.
3. Students enter “Claims and Evidence” in their notebooks Have students go back to their seats for them to copy or paste (depending on how developed their writing skills are) the Claims and Evidence chart into their notebook and add “Claims and Evidence” to their Table of Contents and the corresponding page number. Have the students come up with more claims and evidence. Students may come up with different claims depending on their evidence-‐ some students may have plants identical to parent plants shown, and others may not. Remember, the “Desired Results” are for students to learn that offspring have characteristics that are similar to but not exactly like their parents characteristics.
I claim that new plants (offspring) and their parents have different numbers of flowers as their parents.
I claim this because the new plant (offspring) had 10 flowers, and the parent plant had 12 flowers.
68
cris.palmer
Typewritten Text
1.15

Claims and Evidence
Claims Evidence
Claims and Evidence
Claims Evidence
I claim that …. I claim this because… I claim that …. I claim this because…
69
cris.palmer
Typewritten Text
1.15.a
Session 1.16: Scientists Question Each Other About Evidence [30 minutes] Materials needed Papers to copy and cut Students will need Chart paper Pen/Marker Enlarged photo of Flax Plant Enlarged photo of Flax Plant Offspring Props to accompany script
Questioning Evidence Script Claims and Evidence
Science notebooks Glue Pencil
1. Introduce new scenario
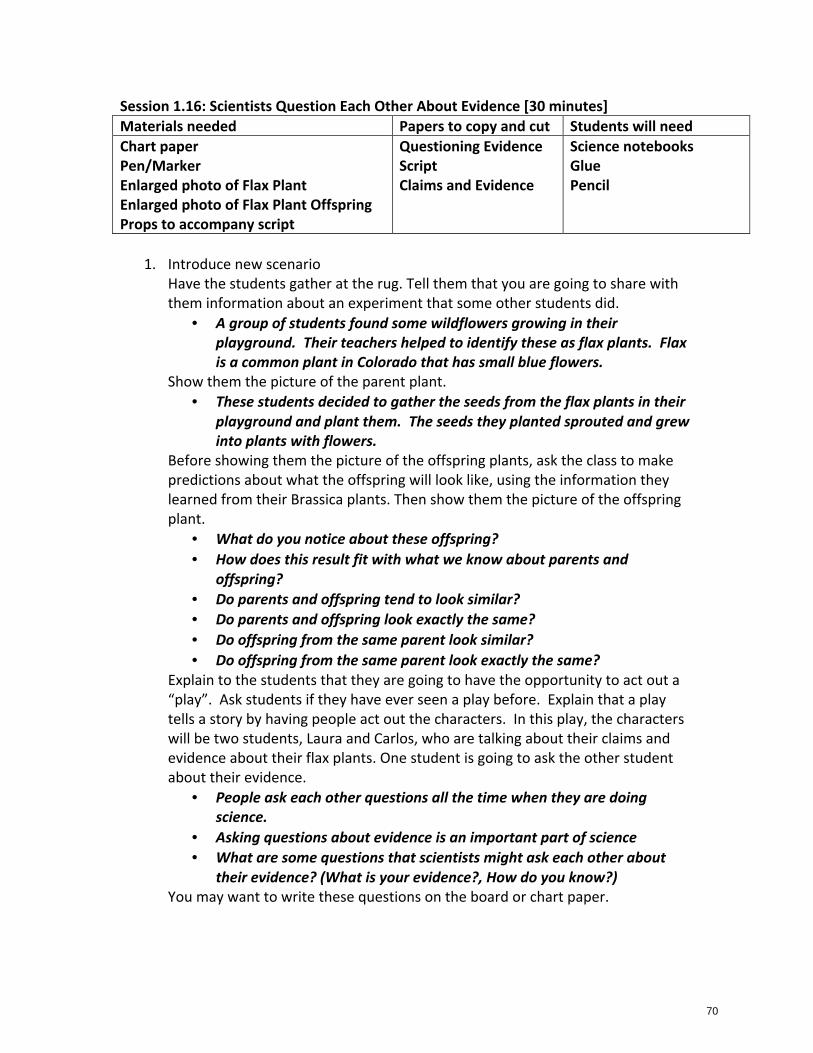
Have the students gather at the rug. Tell them that you are going to share with them information about an experiment that some other students did.
• A group of students found some wildflowers growing in their playground. Their teachers helped to identify these as flax plants. Flax is a common plant in Colorado that has small blue flowers.
Show them the picture of the parent plant. • These students decided to gather the seeds from the flax plants in their
playground and plant them. The seeds they planted sprouted and grew into plants with flowers.
Before showing them the picture of the offspring plants, ask the class to make predictions about what the offspring will look like, using the information they learned from their Brassica plants. Then show them the picture of the offspring plant.
• What do you notice about these offspring? • How does this result fit with what we know about parents and
offspring? • Do parents and offspring tend to look similar? • Do parents and offspring look exactly the same? • Do offspring from the same parent look similar? • Do offspring from the same parent look exactly the same?
Explain to the students that they are going to have the opportunity to act out a “play”. Ask students if they have ever seen a play before. Explain that a play tells a story by having people act out the characters. In this play, the characters will be two students, Laura and Carlos, who are talking about their claims and evidence about their flax plants. One student is going to ask the other student about their evidence.
• People ask each other questions all the time when they are doing science.
• Asking questions about evidence is an important part of science • What are some questions that scientists might ask each other about
their evidence? (What is your evidence?, How do you know?) You may want to write these questions on the board or chart paper.
70
cris.palmer
Typewritten Text
1.16
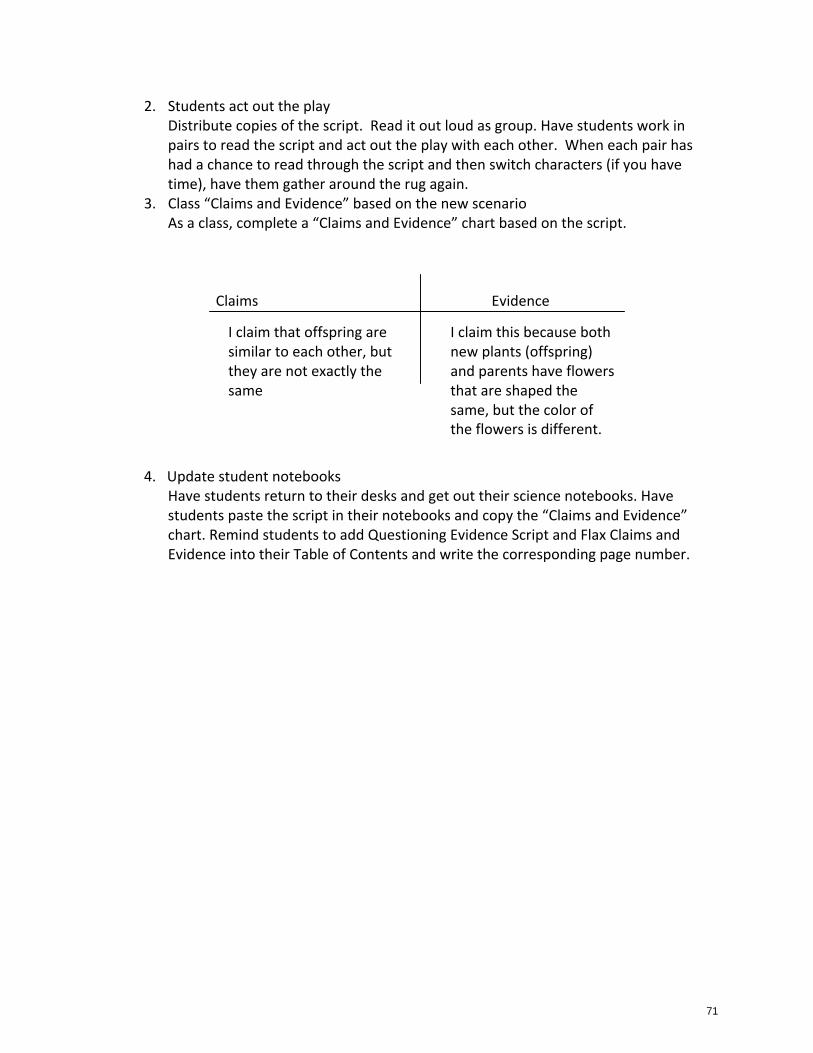
2. Students act out the play Distribute copies of the script. Read it out loud as group. Have students work in pairs to read the script and act out the play with each other. When each pair has had a chance to read through the script and then switch characters (if you have time), have them gather around the rug again.
3. Class “Claims and Evidence” based on the new scenario As a class, complete a “Claims and Evidence” chart based on the script.
Claims Evidence
4. Update student notebooks Have students return to their desks and get out their science notebooks. Have students paste the script in their notebooks and copy the “Claims and Evidence” chart. Remind students to add Questioning Evidence Script and Flax Claims and Evidence into their Table of Contents and write the corresponding page number.
I claim that offspring are similar to each other, but they are not exactly the same
I claim this because both new plants (offspring) and parents have flowers that are shaped the same, but the color of the flowers is different.
71
cris.palmer
Typewritten Text
1.16

Parents
72
cris.palmer
Typewritten Text
1.16.a
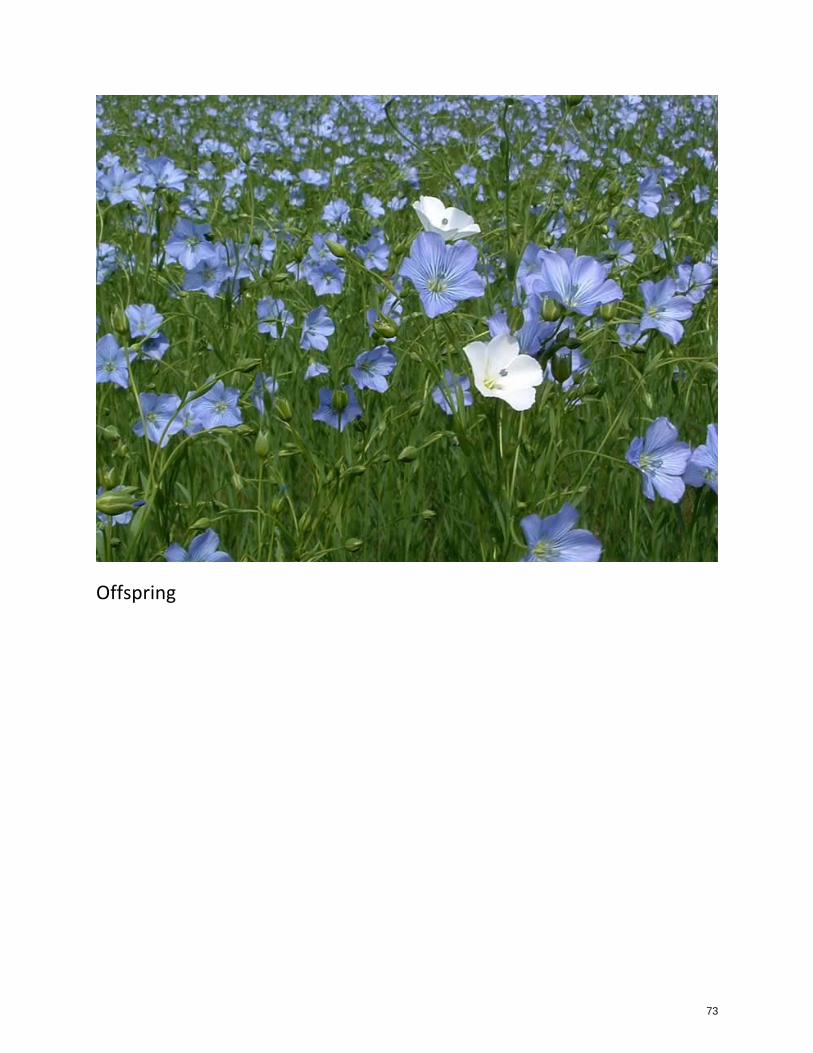
Offspring
73
cris.palmer
Typewritten Text
1.16.b
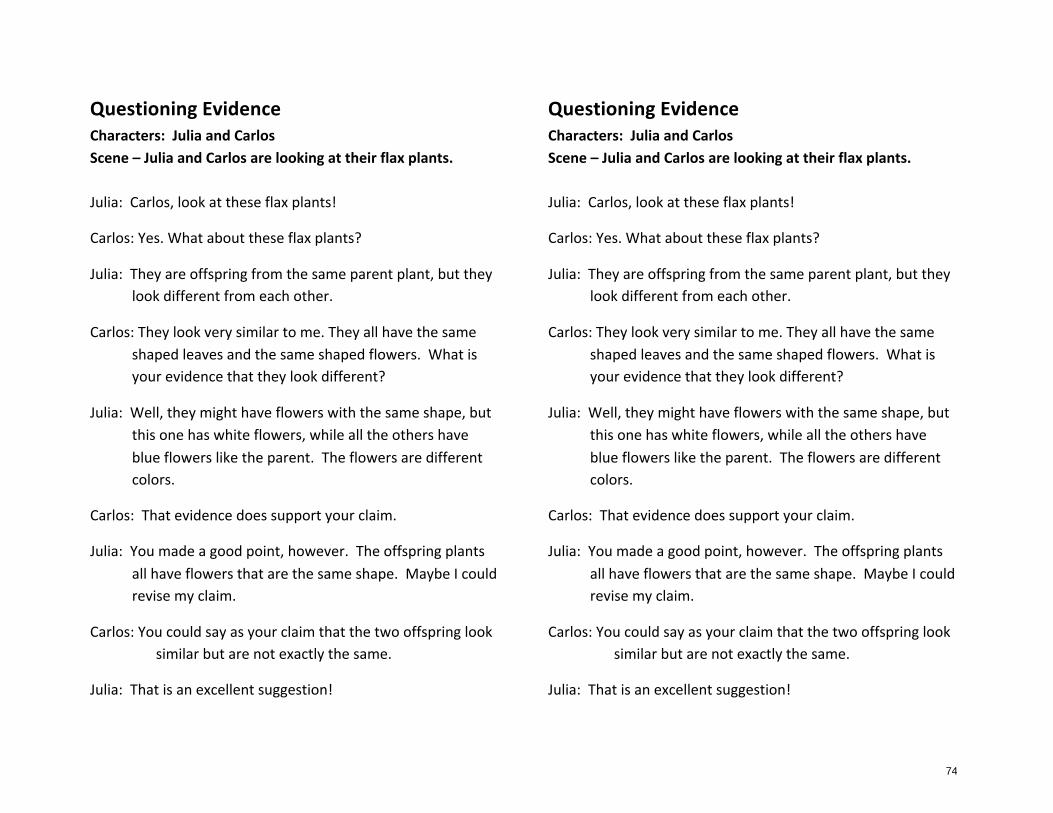
Questioning Evidence Characters: Julia and Carlos Scene – Julia and Carlos are looking at their flax plants. Julia: Carlos, look at these flax plants!
Carlos: Yes. What about these flax plants?
Julia: They are offspring from the same parent plant, but they look different from each other.
Carlos: They look very similar to me. They all have the same shaped leaves and the same shaped flowers. What is your evidence that they look different?
Julia: Well, they might have flowers with the same shape, but this one has white flowers, while all the others have blue flowers like the parent. The flowers are different colors.
Carlos: That evidence does support your claim.
Julia: You made a good point, however. The offspring plants all have flowers that are the same shape. Maybe I could revise my claim.
Carlos: You could say as your claim that the two offspring look similar but are not exactly the same.
Julia: That is an excellent suggestion!
74
cris.palmer
Typewritten Text
1.16.c

Claims and Evidence
Claims Evidence
Claims and Evidence
Claims Evidence
I claim that …. I claim this because… I claim that …. I claim this because…
75
cris.palmer
Typewritten Text
1.16.d

FOSS New Plants: Investigation 2 Session Content Objectives Language Objectives 1 Review and introduction of lawns
• Discuss rye grass and alfalfa • Start Investigation 2 Glossary • Outside visit to a lawn
• Students will be introduced to and will practice academic vocabulary (rye grass, alfalfa).
• Create glossary entries for “rye grass” and “alfalfa"
2 Review needs of plants and parent and offspring • Introduce planting • Re-‐read “What Do Plants Need?” • Review parents and offspring
• Students will know that plants need water, air, nutrients and light to grow.
• Students will be able to use the words “parent” and “offspring” to describe the relationship between existing plants and new plants.
• Contribute to a class discussion reviewing the needs of plants and parent and offspring
3 Calendar and planting of seeds • Introduce calendar 2 • Paste calendars in science
notebooks • Plant rye grass and alfalfa
• Students will be able to describe what a calendar is used for.
• Follow directions for planting rye grass and alfalfa
• Use words related to the use of calendars in context (calendar, date, day, month, year)
4 Focus Question and Prediction • Teacher models writing a focus
question and prediction • Students write focus questions
and predictions in their notebooks
• Express questions, predictions, and data using simple sentences in a science notebook.
• Express a question and a prediction about plants
• Complete a sentence frame expressing a prediction
5 Emergence of seedlings • Observe seedlings • Teacher models drawing and
labeling observations • Students record observations in
notebooks
• Students will record observations accurately using pictures and words.
• Label drawings accurately using words from a word bank
76
cris.palmer
Typewritten Text
2.a
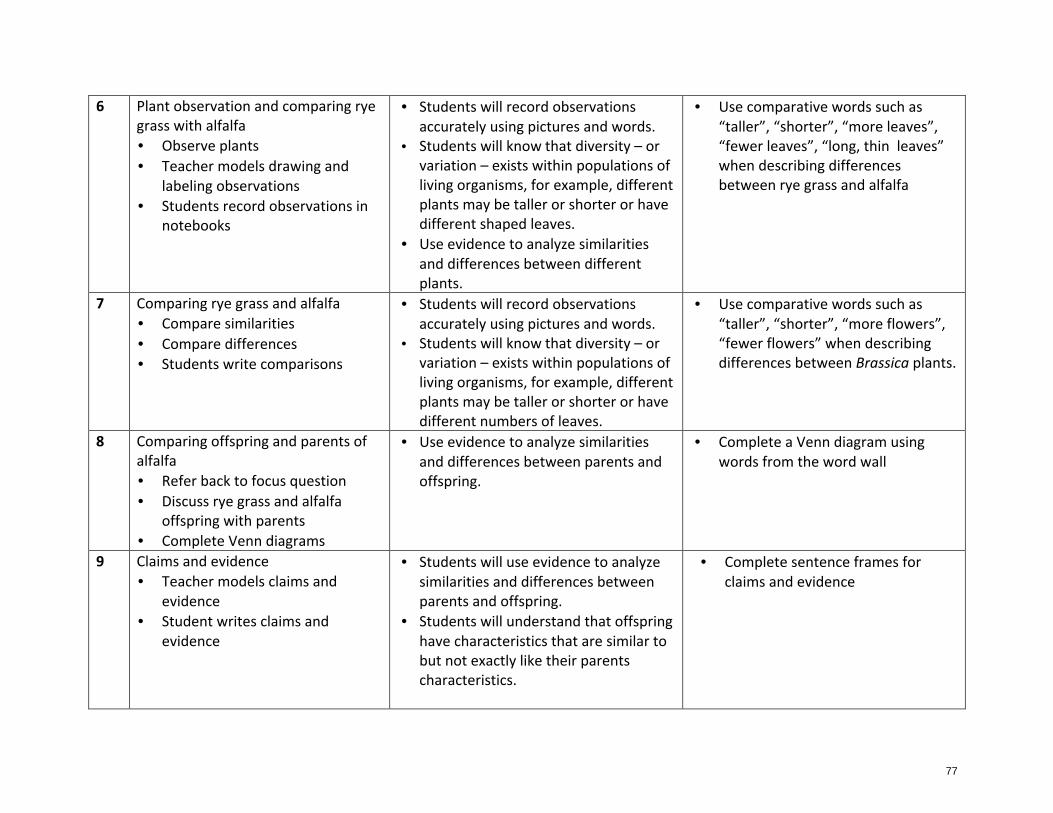
6 Plant observation and comparing rye grass with alfalfa • Observe plants • Teacher models drawing and
labeling observations • Students record observations in
notebooks
• Students will record observations accurately using pictures and words.
• Students will know that diversity – or variation – exists within populations of living organisms, for example, different plants may be taller or shorter or have different shaped leaves.
• Use evidence to analyze similarities and differences between different plants.
• Use comparative words such as “taller”, “shorter”, “more leaves”, “fewer leaves”, “long, thin leaves” when describing differences between rye grass and alfalfa
7 Comparing rye grass and alfalfa • Compare similarities • Compare differences • Students write comparisons
• Students will record observations accurately using pictures and words.
• Students will know that diversity – or variation – exists within populations of living organisms, for example, different plants may be taller or shorter or have different numbers of leaves.
• Use comparative words such as “taller”, “shorter”, “more flowers”, “fewer flowers” when describing differences between Brassica plants.
8 Comparing offspring and parents of alfalfa • Refer back to focus question • Discuss rye grass and alfalfa
offspring with parents • Complete Venn diagrams
• Use evidence to analyze similarities and differences between parents and offspring.
• Complete a Venn diagram using words from the word wall
9 Claims and evidence • Teacher models claims and
evidence • Student writes claims and
evidence
• Students will use evidence to analyze similarities and differences between parents and offspring.
• Students will understand that offspring have characteristics that are similar to but not exactly like their parents characteristics.
• Complete sentence frames for claims and evidence
77
cris.palmer
Typewritten Text
2.b

10 Writing about our investigation • Introduction to writing • Sequencing events • Students draw what they did • Students write what they did
• Students will write about sequential events.
• Write phrases that match pictures indicating steps in a process
78
cris.palmer
Typewritten Text
2.c

FOSS New Plants Investigation 2 Session 2.1: Review and introduction of lawns [20-‐25 minutes] Materials needed Papers to copy and cut Students will need Chart paper Pen/Marker Pictures of Rye grass and Alfalfa Words and Pictures of plants
Glossary Investigation 2*
Science notebooks Glue Pencil
* Scaffolded documents: these can be distributed to students in various ways. You can use the more scaffolded documents at the beginning of the year or use various ones throughout the year with different students depending on their reading/writing skills.
1. Introduce lawns Call students to the rug. Let your students know that they are now moving on to Investigation 2 where they will be growing more plants. Ask students Does anyone know what a lawn is? Can you describe it?
• Where have you seen a lawn? • What types of plants are in lawns? • What has to be done to care for a lawn? • If we wanted to grow new lawns, how would we do that? • Would the offspring lawn look like a parent lawn? • How would we know?
2. Introduce rye grass and alfalfa Call students to the rug and show them pictures of rye grass and alfalfa. Tell students -‐-‐ These are pictures of rye grass and alfalfa. If we took seeds from these two types of plants in these pictures, and we planted them, what do you think would happen?
• Do you think the new plants that grow from the seeds will look like the plant in this picture? Why or why not?
• Do you think all rye grass plants and alfalfa plants look exactly alike? 3. Introduce rye grass seeds and alfalfa seeds
Tell the students you have some rye grass seeds and some alfalfa seeds. Rye grass is used for lawns, and sometimes there are other plants that grow in lawns, and alfalfa is one of them. Pass around the bags of each type of seeds.
4. New Glossary Entry Add the words “lawn”, “rye grass” and “alfalfa” and pictures to the word wall. Have a student hand out the “Glossary Investigation 2” and have students turn their notebooks upside down so that they are still reading it from left to right, and glue the “Glossary Investigation 2” student sheet into their notebook. This allows students to continue to add new vocabulary as the investigation proceeds, but does not interfere with their other work. Have students add the Glossary Investigation 2 to the Table of Contents with the page number. Have
79
cris.palmer
Typewritten Text
2.1

students copy “lawn”, “rye grass” and “alfalfa” from the word wall into their glossary and draw a picture.
5. Go outside to observe a lawn. Observe whether it looks like there is only one kind of plant in the lawn or several. Look for any small animals like worms, pill bugs, ants, etc in the lawn.
80
cris.palmer
Typewritten Text
2.1

Alfalfa
81
cris.palmer
Typewritten Text
2.1.a
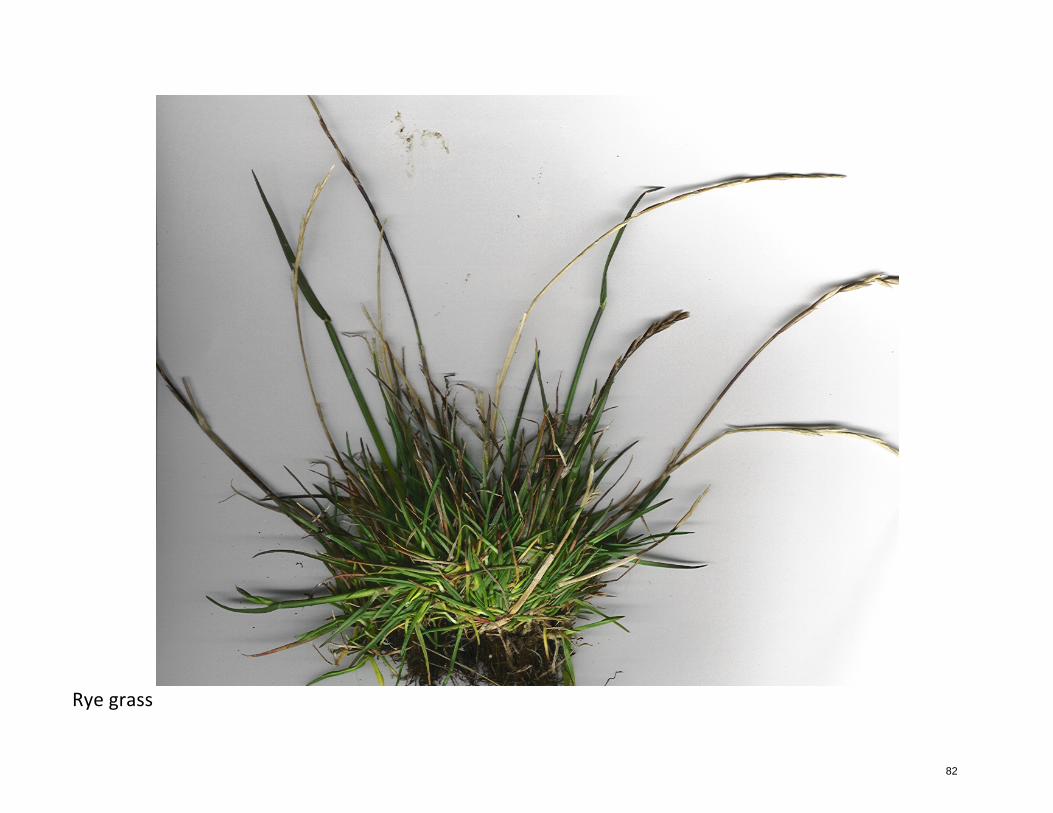
Rye grass
82
cris.palmer
Typewritten Text
2.1.b

lawn
Draw a picture:
Copy the word:
mow
Draw a picture:
Copy the word:
alfalfa
Draw a picture:
Copy the word:
rye grass
Draw a picture:
Copy the word:
blade
Draw a picture:
Copy the word:
Draw a picture:
Copy the word:
83
cris.palmer
Typewritten Text
2.1.c
Glossary Word Picture
Glossary Word Picture
84
cris.palmer
Typewritten Text
2.1.d

Session 2.2: Review What Plants Need and Parent and Offspring [25-‐30 minutes] Materials needed Papers to copy and cut Students will need Chart paper Pen/Marker “What Do Plants Need?” book Pictures of Rye grass and Alfalfa
What Do Plants Need*?
Science notebooks Glue Pencil
* Scaffolded documents: these can be distributed to students in various ways. You can use the more scaffolded documents at the beginning of the year or use various ones throughout the year with different students depending on their reading/writing skills.
1. Introduce planting Call the students to the rug and tell them, Before we begin planting more seeds, we need to review a few things about plants. Remember when we read and predicted what plants need from the book “What Do Plants Need?”
• Can anyone remind me of the 4 things plants need to grow? • We are going to grow more plants from seeds and we need to make
sure that they have all the things plants need in order to grow. Read the book “What Do Plants Need” without the words covered.
2. Review parent and offspring Ask the students if they remember what parent and offspring mean. If Brassica plants have just been planted and students have not observed them yet, ask a few students to give their predictions about what their offspring Brassica plant will look like/looks like in comparison to the parent plant. This will be dependent on where the planters are in their growing stage. If planters have already grown and students have done their observations and possibly claims and evidence, have the students tell you what their claims and evidence are for their plant. Then ask for a general prediction of the offspring for when they plant the rye grass and alfalfa seeds. Write a few predictions on the chart paper for the students to see. Model your writing process for the students by rereading as you craft a prediction. Talk out loud about how you use capitalization, punctuation and word choice.
3. Students list needs of plants in science notebooks Have students return to their desks and get out their science notebooks. Model for students how to make an entry in the Table of Contents labeled “What Do Plants Need” and have students add this entry to their Table of Contents and the corresponding page number. Have students glue “What Do Plants Need*” on the next available page and fill in the blanks. Have students list what plants need on this page using your example as a model.
85
cris.palmer
Typewritten Text
2.2

What Do Plants Need? Plants need…. _____________________________ _____________________________ _____________________________ _____________________________
…to grow.
What Do Plants Need? Plants need…. _____________________________ _____________________________ _____________________________ _____________________________
…to grow.
86
cris.palmer
Typewritten Text
2.2.a

Session 2.3: Calendar and Planting of Seeds [35-‐40 min] Materials needed Papers to copy and cut Students will need Calendar Pen/Marker Seeds Planter cups Newspaper Paper towels Lamp
½ Liter container Soil basin Tray Labels Water Lamp frame Plastic spoon
Calendar 2* Science notebooks Glue Pencil
* Scaffolded documents: these can be distributed to students in various ways. You can add the dates into the calendar at the beginning of the year or have students put in the dates depending on their level. If the lamp is being used by the Brassica plants, place the tray in or near a window.
1. Introduce the class calendar Post the large laminated calendar where students can see it clearly. Find today’s date and tell students, For the next several weeks we will be growing rye grass and alfalfa plants. We will use this calendar to record interesting and important things that happen just like the calendar we used for our Brassica plants.
2. Students put calendars in notebooks Have students get out their science notebooks and ask a student to pass out the student sheet “Calendar 2.” Have students paste calendars into notebooks. Model for students how to make an entry in the Table of Contents labeled “Calendar 2”. Have students make a Table of Contents entry labeled “Calendar 2” and remember to write in the corresponding page number. Have students paste the calendars into their notebooks on the first available page and fill in the dates on the calendar.
3. Demonstrate planting procedure Call students to the rug. Hold up one of the planter cups with two holes in the bottom. Tell students that some students will be growing rye grass and some students will be growing alfalfa in his or her own cup. Model the planting procedure.
a. Scoop up a heaping cup full of soil. Level off the soil so that it is even with the top of the cup. Repeat for the second cup.
b. Tamp down the soil gently. Repeat for the second cup c. Use a small plastic spoon to measure one level spoon of rye grass seed
onto the surface of the soil. d. Cover the seeds with a tiny bit of soil and press down slightly. e. Place the cup on a half sheet of paper towel to catch any water that
escapes from the bottom of the cup. Add one vial of water to the cup. f. For the second cup, put one pinch of the alfalfa seeds on the surface of
the soil. Use your finger to carefully spread the seeds evenly over the soil. g. Cover the seeds with a tiny bit of soil and press down slightly.
87
cris.palmer
Typewritten Text
2.3

h. Place the cup on a half sheet of paper towel to catch any water that escapes from the bottom of the cup. Add one vial of water to the cup.
4. Start by labeling the cups Send students to their tables. Assign GETTERs for each group of four. Let the GETTERs get a planter cup and a label for each student in their group. Ask students to label their cups with their name so they will be able to find it later. Tell them to use a pencil to write their name on the label before peeling it off the protective backing. Then let them stick their labels high up on the outside of their cups.
5. Prepare soil in cups Lay down newspapers in two locations spaced well apart and set the basins of soil on them. Call two groups at a time to fill their cups with soil. Encourage them to work quickly, so that the next group can get soil. They can tamp down their soil back at their seats. As soon as the last student has filled a cup, pick up the basins of soil and put them away.
6. Distribute rye grass seeds Call the Getters for half of the class to get a cup of rye grass seeds and a spoon. Let students measure seeds and press them down on the surface of the soil. Have the Getters return the spoons and the extra cup.
7. Distribute alfalfa seeds Call the Getters for the other half of the class to get a cup of alfalfa seeds. Remind students to add only a pinch of alfalfa seeds and press them down on the surface of the soil.
8. Cover the seeds When everyone has pressed two seeds onto the surface of the soil, get out the basin of soil again and ask the GETTERs to get a small amount of soil in the empty seed cup so that students can put a tiny amount of soil over the seeds.
9. Water the seeds Remind students that in the story “What Do Plants Need” they learned that plants need water. Have the GETTERs get a ½ liter container of water and a vial for the group, and half a paper towel for each student. Remind students to put their planter cup on a piece of paper towel before adding one vial of water. Ask GETTERs to return the water as soon as all the planters have been watered.
10. Put cups in the tray. Call students, group by group, to put their planter cups in the class tray. As students bring their planters to the tray, check to see that there are no seeds on top of the soil. If you see uncovered seeds, gently push them into the soil.
11. Discuss light requirements Call students to the light source. Remind students that in the story “What Do Plants Need” they learned that plants need light. Tell them that to make sure that the rye grass and alfalfa plants get light, they will be put under a lamp assembly. Position the light source on a table or counter near an electric outlet. Turn on the lights and slide the tray into place under the light. Show students
88
cris.palmer
Typewritten Text
2.3

how the distance from the planters to the light can be adjusted, using chains and hooks.
12. Describe the future watering procedure Tell students that watering will be accomplished by pouring water into the tray rather than into the individual cups. Water will be added when there is no standing water in the tray. (You may want to wait to discuss the next part of the procedure when your plants first need water.) At that time, a ½ liter of water, enriched with four drops of liquid plant fertilizer, should be added. The fertilizer provides nutrients that the plants need to grow. Explain that plants usually get nutrients from the soil, but the potting soil may not have enough nutrients so the fertilizer will provide the necessary nutrients. It is not necessary to add fertilized water to the tray at the time of planting. This will be done in a day or two. Discuss a plan to ensure that the water around the plants is monitored every day. The responsibility for watering the plants should rotate from group to group.
13. Make a calendar entry Have students mark their calendars in their science notebooks to indicate the day that they planted their rye grass or alfalfa seeds. Mark the planting date on your class calendar as well. Students may want to draw planting the seeds on this date in their calendar.
14. Prepare some reserves After class, set up a planter cup for any absent students and three or four reserves. Put these into the tray with the rest. If a student’s planter fails to produce a sprout, simply transfer the student’s label from the failed planter onto one of the reserves.
15. Potential Extension If you have extra time and supplies, you could demonstrate what plants need by planting extra plants and taking away one variable from each extra plant. For example, to show that plants need air you could cover one plant with a plastic bag or wrap to eliminate gas exchange. You also could leave one plant out of the water bin to show that plants need water to live. Additionally you could not use fertilizer for one plant to demonstrate that plants need nutrients. And lastly, you could put a plant in a closet, without light, to demonstrate that plants need light to grown. This is also very tricky because seeds will germinate without light, and they may even grow faster in the dark in search of light, but they will be very spindly and eventually die from lack of light.
89
cris.palmer
Typewritten Text
2.3

Calendar of Alfalfa Growth Name: ______________________________ Monday Tuesday Wednesday Thursday Friday Saturday Sunday
90
cris.palmer
Typewritten Text
2.3.a
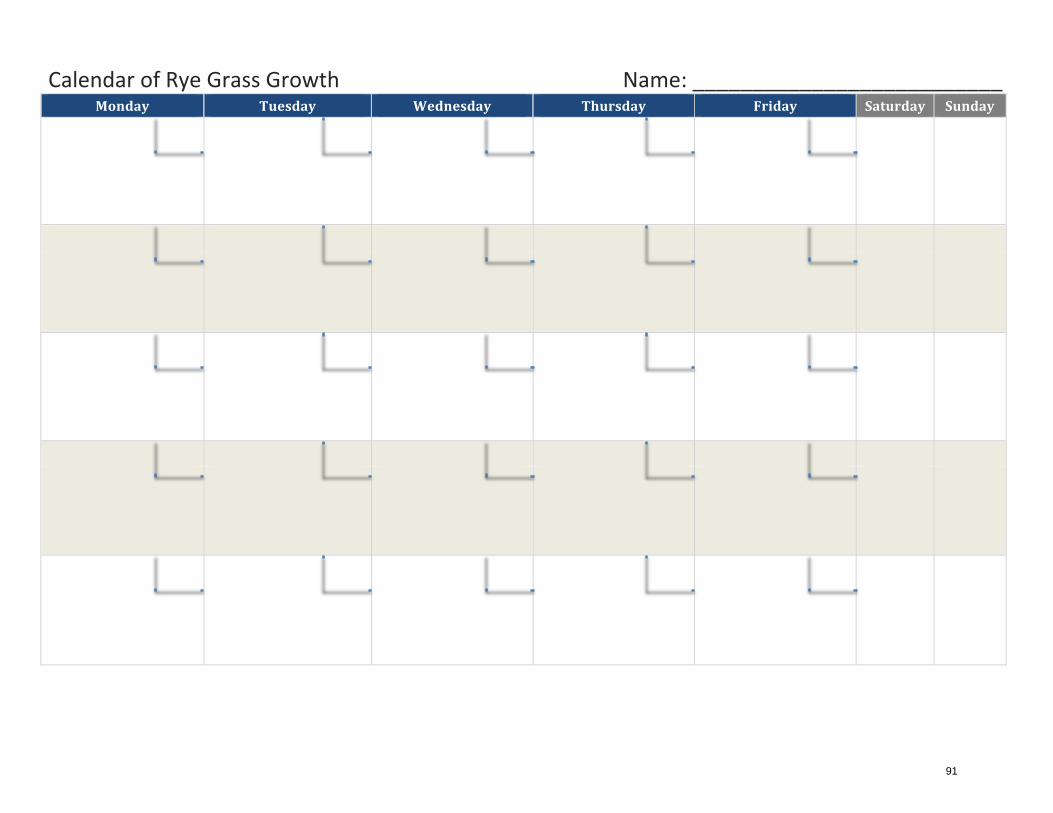
Calendar of Rye Grass Growth Name: __________________________ Monday Tuesday Wednesday Thursday Friday Saturday Sunday
91
cris.palmer
Typewritten Text
2.3.b

Session 2.4: Focus Question and Prediction [20-‐25 min] Materials needed Papers to copy and cut Students will need Chart paper Pen/Marker
Focus Question* Prediction*
Science notebooks Glue Pencil
* Scaffolded documents: these can be distributed to students in various ways. You can use the more scaffolded documents at the beginning of the year or use various ones throughout the year depending on students’ reading/writing levels.
1. Discuss “Focus Questions” Have students stay at their desks with their science notebooks out. On chart paper, model writing the focus question for the investigation. Start by writing the words “Focus question” on the chart paper at the top. Review with students the stages of the scientific process. Tell the students, Does anyone remember our focus question from the last investigation? -‐-‐ How are new plants (offspring) both the same and different from their parents? (If you have observations from Brassica already, ask) “What did we find out about Brassica offspring and their parents?” What about rye grass and alfalfa offspring? Do you think they look their parents? Let’s find out. Let’s have two new Focus Questions –
• How are offspring rye grass both the same and different from their parents? and
• How are offspring alfalfa both the same and different from their parents?
Write the focus questions on the chart paper. Model for students how to make an entry in the Table of Contents labeled “Focus Question” and put the corresponding page number.
2. Students write focus question in notebooks Have students make a new entry in the science notebooks labeled “Focus Question” on the next available page. Tell them that half the class will investigate the focus question about rye grass, and the other half will investigate the focus question about alfalfa. Depending on students writing skills, you may want them to either paste this question from scaffolded* slips of paper or copy the question into their notebooks.
3. Discuss “Predictions” Once students have finished writing their focus questions, call them to the rug. On chart paper, model writing the prediction for the investigation. Ask the students if they can tell you the next step in the scientific process (Prediction). Write the word “Prediction” on the chart paper at the top. Let’s make some predictions about our new offspring plants. Depending on how much the Brassica plants have grown, you can use this information to help make your predictions.
• How do you think the rye grass plants will look the same as their parents? Why do you think that?
92
cris.palmer
Typewritten Text
2.4

• How do you think the rye grass plants will look different from their parents? Why do you think that?
• How do you think the alfalfa plants will look the same as their parents? Why do you think that?
• How do you think the alfalfa plants will look different from their parents? Why do you think that?
• Do you think they will have all the same kinds of parts? • Will they be the same color? • Will they be the same size?
Write two predictions on the chart paper that includes both the “I think” and the “because” parts. One should be a prediction of a similarity, and the other should a prediction about a difference. Example: “I think both the parent alfalfa plant and the offspring alfalfa plant will have purple flowers, because the Brassica offspring and Brassica parent had the same color flowers.” “I think the offspring rye grass will be smaller that the rye grass parent at first because the Brassica offspring were smaller than their parents.”
4. Students generate predictions orally Ask students what their predictions are. Prompt them to add a “because” statement if they leave that out.
5. Students write prediction in notebooks Have students make a new entry in the science notebooks labeled “Prediction.” Depending on students writing skills, you may want them to copy one of your predictions, complete a scaffolded* sentence frame with “I think….because”, or draw what they predict and label drawings. Have students add “Prediction” to their Table of Contents and write the corresponding page number.
93
cris.palmer
Typewritten Text
2.4

Focus Question
“How are the offspring of rye grass both the same and different from their parents?”
Focus Question
“How are the offspring of rye grass both the same and different from their parents?”
Focus Question
“How are the offspring of rye grass both the same and different from their parents?”
Focus Question
“How are the offspring of rye grass both the same and different from their parents?”
Focus Question
“How are the offspring of rye grass both the same and different from their parents?”
Focus Question
“How are the offspring of rye grass both the same and different from their parents?”
Focus Question
“How are the offspring of rye grass both the same and different from their parents?”
Focus Question
“How are the offspring of rye grass both the same and different from their parents?”
94
cris.palmer
Typewritten Text
2.4.a
Focus Question
“How are the offspring of alfalfa both the same and different from their parents?”
Focus Question
“How are the offspring of alfalfa both the same and different from their parents?”
Focus Question
“How are the offspring of alfalfa both the same and different from their parents?”
Focus Question
“How are the offspring of alfalfa both the same and different from their parents?”
Focus Question
“How are the offspring of alfalfa both the same and different from their parents?”
Focus Question
“How are the offspring of alfalfa both the same and different from their parents?”
Focus Question
“How are the offspring of alfalfa both the same and different from their parents?”
Focus Question
“How are the offspring of alfalfa both the same and different from their parents?”
95
cris.palmer
Typewritten Text
2.4.b

Focus Question
“How are ________________________________
both the same and different from their
_______________________________________?”
Focus Question
“How are ________________________________
both the same and different from their
_______________________________________?”
Focus Question
“How are ________________________________
both the same and different from their
_______________________________________?”
Focus Question
“How are ________________________________
both the same and different from their
_______________________________________?”
96
cris.palmer
Typewritten Text
2.4.c
Focus Question
“How are ________________________________
both the _________________________________
and ____________________________________
from their_________________________________?”
Focus Question
“How are ________________________________
both the _________________________________
and ____________________________________
from their_________________________________?”
97
cris.palmer
Typewritten Text
2.4.d

Prediction
I think both the parent and the offspring
will _________________________________
because_________________________________
_______________________________________.
Prediction
I think both the parent and the offspring
will _________________________________
because_________________________________
_______________________________________.
98
cris.palmer
Typewritten Text
2.4.e

Prediction
I think the offspring will have a different
_______________________________________
than the parent because__________________
_______________________________________
_______________________________________.
Prediction
I think the offspring will have a different
_______________________________________
than the parent because__________________
_______________________________________
_______________________________________.
99
cris.palmer
Typewritten Text
2.4.f

Prediction
I think ________________________________
______________________________________
because_________________________________
_______________________________________.
Prediction
I think ________________________________
______________________________________
because_________________________________
_______________________________________.
100
cris.palmer
Typewritten Text
2.4.g

~The lawns will start to sprout in 2-‐4 days Session 2.5: Emergence of Seedlings [20 minutes] Materials needed Papers to copy and cut Students will need Student planter Chart paper Pen/Marker Copy of enlarged “Plant Observation” Calendar
Rye grass Observation Alfalfa Observation
Science notebooks Glue Pencil
1. Discuss observations of seedlings On the day that plants have emerged in all of the cups, have students observe
their planters. Gather students at the rug to discuss what they have noticed. Ask,
• What did you observe in your rye grass and alfalfa planters? • What colors do you see on your rye grass and alfalfa plants? • What do we call new plants that come from a parent plant? (offspring) • What words are used to describe the new plants? (sprouts, seedlings) • Are all of the rye grass and alfalfa plants the same size? Why do you think that this is the case? • How are the seedlings the same and different from their parent?
2. Model “Rye Grass Observation” Ask students to remind you of the next step in the scientific process
(observations) and why it’s important. Draw a copy of the student sheet called “Rye Grass Observation” on chart paper. Label it “Rye Grass Observation 1” at the top of the page. Model drawing and labeling what you observe of the rye grass. Ask students to help you observe as you draw:
• How many sprouts are in each cup? • What color are the sprouts in each cup? • How big should I draw the sprouts? • How many days has it been since we planted the seeds? • Is there anything else I should add to my drawing?
Captions are an important part of the recording process. Model this process, using students’ suggestions. Be sure to include in your observation the number of days that have elapsed since planting. Before sending students to their desks, ask them what steps you have forgotten to do (update class calendar and table of contents).
3. Update class calendar and table of contents Make an entry in the class calendar that seedling sprouted. Also, model in your
teacher notebook by gluing Rye Grass Observation 1 in your teacher notebook and updating the Table of Contents and putting the corresponding page number. Remove or erase your model drawing before students make their own recording so they will look at the actual plant.
101
cris.palmer
Typewritten Text
2.5

4. Model “Alfalfa Observation” Draw a copy of the student sheet called “Alfalfa Observation” on chart paper.
Label it “Alfalfa Observation 1” at the top of the page. Model drawing and labeling what you observe for the alfalfa. Ask students to help you observe as you draw:
• How many sprouts are in each cup? • What color are the sprouts in each cup? • How big should I draw the sprouts? • How many days has it been since we planted the seeds? • Is there anything else I should add to my drawing?
Captions are an important part of the recording process. Model this process, using students’ suggestions. Be sure to include in your observation the number of days that have elapsed since planting. Remove or erase your model drawing before students make their own recording, so they will look at the actual plant.
5. Students draw their own Plant Observations Have students return to their desks. Give each student with a rye grass plant a
blank “Rye Grass Observation” student sheet and have them glue it in their science notebooks. Give each student with an alfalfa plant a blank “Alfalfa Observation” student sheet and have them glue it in their science notebooks. Regardless of the plants each student has, make sure that they update their Table of Contents by writing in the appropriate plant observation sheet and corresponding page number [Rye Grass Observation 1 or Alfalfa Observation 1]. Have the students retrieve their planter and make an entry in their journals. The entry should include a drawing, the number of days that have elapsed since planting, and a caption or comment related to the observation.
6. Students update their calendar Students should make an entry in their calendar that seedling sprouted and
possibly draw a picture.
102
cris.palmer
Typewritten Text
2.5

Rye grass Observation _____
Day since planting: ______________________
A change I observe in my rye grass is
_______________________________________
_______________________________________
Rye grass Observation _____
Day since planting: ______________________
A change I observe in my rye grass is
_______________________________________
_______________________________________
103
cris.palmer
Typewritten Text
2.5.a

Alfalfa Observation _____
Day since planting:______________________
A change I observe in my alfalfa is
_______________________________________
_______________________________________
Alfalfa Observation _____
Day since planting:______________________
A change I observe in my alfalfa is
_______________________________________
_______________________________________
104
cris.palmer
Typewritten Text
2.5.b
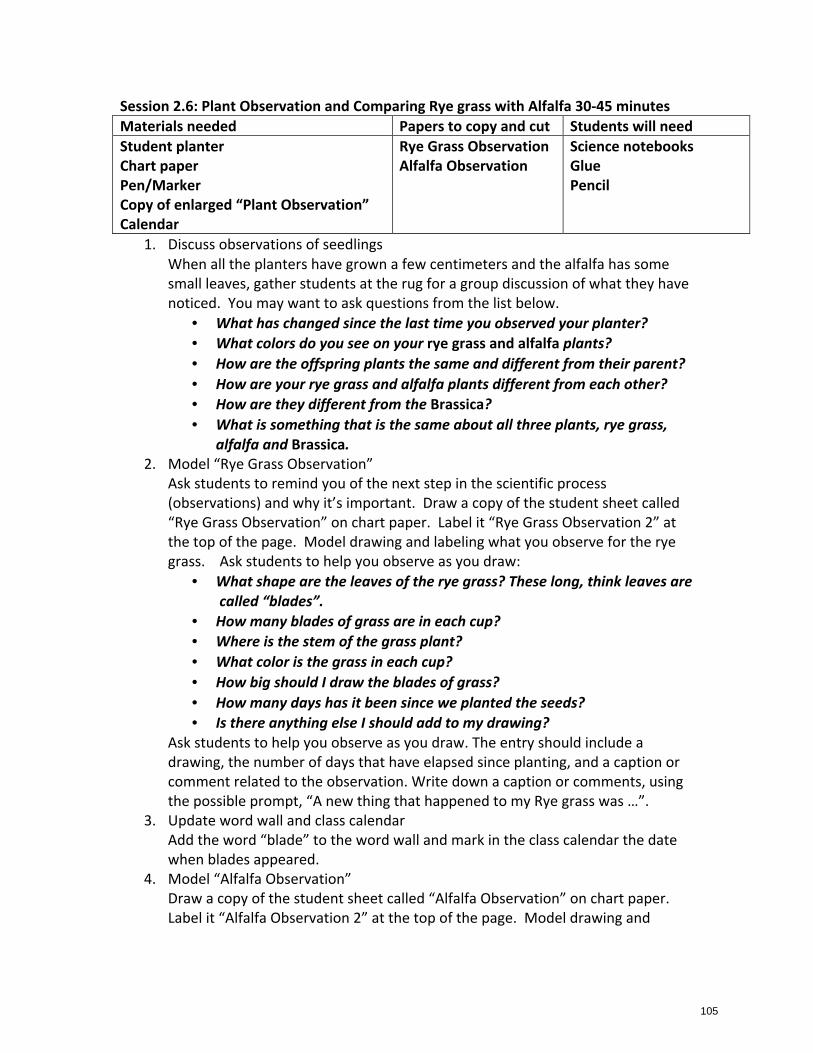
Session 2.6: Plant Observation and Comparing Rye grass with Alfalfa 30-‐45 minutes Materials needed Papers to copy and cut Students will need Student planter Chart paper Pen/Marker Copy of enlarged “Plant Observation” Calendar
Rye Grass Observation Alfalfa Observation
Science notebooks Glue Pencil
1. Discuss observations of seedlings When all the planters have grown a few centimeters and the alfalfa has some small leaves, gather students at the rug for a group discussion of what they have noticed. You may want to ask questions from the list below.
• What has changed since the last time you observed your planter? • What colors do you see on your rye grass and alfalfa plants? • How are the offspring plants the same and different from their parent? • How are your rye grass and alfalfa plants different from each other? • How are they different from the Brassica? • What is something that is the same about all three plants, rye grass, alfalfa and Brassica.
2. Model “Rye Grass Observation” Ask students to remind you of the next step in the scientific process (observations) and why it’s important. Draw a copy of the student sheet called “Rye Grass Observation” on chart paper. Label it “Rye Grass Observation 2” at the top of the page. Model drawing and labeling what you observe for the rye grass. Ask students to help you observe as you draw:
• What shape are the leaves of the rye grass? These long, think leaves are called “blades”.
• How many blades of grass are in each cup? • Where is the stem of the grass plant? • What color is the grass in each cup? • How big should I draw the blades of grass? • How many days has it been since we planted the seeds? • Is there anything else I should add to my drawing?
Ask students to help you observe as you draw. The entry should include a drawing, the number of days that have elapsed since planting, and a caption or comment related to the observation. Write down a caption or comments, using the possible prompt, “A new thing that happened to my Rye grass was …”.
3. Update word wall and class calendar Add the word “blade” to the word wall and mark in the class calendar the date when blades appeared.
4. Model “Alfalfa Observation” Draw a copy of the student sheet called “Alfalfa Observation” on chart paper. Label it “Alfalfa Observation 2” at the top of the page. Model drawing and
105
cris.palmer
Typewritten Text
2.6

labeling what you observe for the alfalfa. Ask students to help you observe as you draw:
• What shape are the leaves of the alfalfa? • Where is the stem of the alfalfa plant? • What color is the alfalfa? • How big should I draw the alfalfa plants? • How many days has it been since we planted the seeds? • Is there anything else I should add to my drawing?
Ask students to help you observe as you draw. The entry should include a drawing, the number of days that have elapsed since planting, and a caption or comment related to the observation. Write down a caption or comment, using the possible prompt “A new thing that happened to my Alfalfa offspring was …”. Remove or erase your model drawing before students make their own recording, so they will look at the actual plant.
5. Students draw their own plant observations Have students return to their desks. Give each student with a rye grass plant a blank “Rye Grass Observation” student sheet and have them glue it in their science notebooks. Give each student with an alfalfa plant a blank “Alfalfa Observation” student sheet and have them glue it in their science notebooks. Regardless of the plants each student has, make sure that they update their Table of Contents by writing in the appropriate plant observation sheet and corresponding page number [Rye Grass Observation 2 or Alfalfa Observation 2]. Have the students retrieve their planter and make an entry in their journals. The entry should include a drawing, the number of days that have elapsed since planting, and a caption or comment related to the observation, possibly including the statement, “A new thing that happened to my Rye grass/Alfalfa plant was…”
6. Students update their glossary and calendar. Students should add the word “blade” into their glossary. Also, have students update their calendar with the appropriate date for blade appearance and possibly draw a picture.
106
cris.palmer
Typewritten Text
2.6

Rye grass Observation _____
Day since planting: ______________________
A change I observe in my rye grass is
_______________________________________
_______________________________________
Rye grass Observation _____
Day since planting: ______________________
A change I observe in my rye grass is
_______________________________________
_______________________________________
107
cris.palmer
Typewritten Text
2.6.a

Alfalfa Observation _____
Day since planting:______________________
A change I observe in my alfalfa is
_______________________________________
_______________________________________
Alfalfa Observation _____
Day since planting:______________________
A change I observe in my alfalfa is
_______________________________________
_______________________________________
108
cris.palmer
Typewritten Text
2.6.b

Session 2.7: Comparing Rye grass with Alfalfa 15-‐20 minutes Materials needed Papers to copy and cut Students will need Student planter Chart paper Pen/Marker Calendar
Comparing Rye Grass and Alfalfa
Science notebooks Glue Pencil
1. Compare rye grass and alfalfa-‐ similarities
Gather students at the rug. Write “Comparing Rye Grass and Alfalfa” on the board or chart paper. Ask the students to tell you about the things they observed of their rye grass plants. Write these on one side of your chart paper. Then ask the students to tell you about the things they observed of their alfalfa plants. Write these on the other side of the board. Ask the students, “What are some things we could list here that are the same between rye grass and alfalfa?” Draw lines that connect the similar characteristics between the two plant types.
2. Compare rye grass and alfalfa-‐ differences Now ask the students “What are some things that we have listed between these plants that are different or not similar?” Circle or put a star next to these differences. Tell the students they are going to complete their own comparisons in their notebooks. Before sending them to their desks, model gluing in the “Comparing Rye Grass and Alfalfa” sheet into your teacher notebook and entering the title into the Table of Contents and the corresponding page number.
3. Students write their comparisons Have students go back to their desks while a PASSER student hands out “Comparing Rye Grass and Alfalfa.” Remind the students to glue the sheet in as well as up update their Table of Contents with the corresponding page number. Students may work individually or alone to complete their comparison sheet.
109
cris.palmer
Typewritten Text
2.7

Comparing Rye Grass and Alfalfa
List the things that are the same about rye grass and alfalfa:
___________________________________________
___________________________________________
___________________________________________
List the things that are different between rye grass and alfalfa:
___________________________________________
___________________________________________
___________________________________________
110
cris.palmer
Typewritten Text
2.7.a

Session 2.8: Comparing Parents and Offspring of Rye Grass and Alfalfa [15-‐20 minutes] Materials needed Papers to copy and cut Students will need Chart paper Pen/Marker Enlarged Venn Diagram
Rye Grass Venn Diagram Alfalfa Venn Diagram
Science notebooks Glue Pencil
1. Refer back to Focus Questions
Remind the students that their focus questions for this investigation were “How are rye grass offspring both the same and different from their parents?” and “How are alfalfa offspring both the same and different from their parents?”
2. Comparing rye grass and alfalfa offspring to their parents Ask students “What kind of diagram could we use that would help us organize the similarities and differences between the rye grass or alfalfa offspring and their parents?” Draw a Venn diagram on the board or chart paper. Come up with similarities and differences between parent and offspring of rye grass and alfalfa as a group and fill out the Venn diagram on the chart paper. Remember to model by gluing in the Venn diagram in your teacher notebook on the next available page and write in the entry in the Table of Contents and the corresponding page number.
3. Students complete Venn diagrams in notebooks Give students a blank Venn diagram to paste into their science notebooks and have them complete the diagram. You might want to hide your example so students can come up with their own answers. Remind students to use their Glossary and the earlier entries of observations in their science notebooks to help them come up with similarities and differences. Have students add
Rye grass parent Same Rye grass offspring
Alfalfa offspring Alfalfa parent Same
111
cris.palmer
Typewritten Text
2.8

“Comparing Rye Grass Offspring and Parents Venn Diagram” or “Comparing Alfalfa Offspring and Parents Venn Diagram” to their Table of Contents and add the corresponding page number.
112
cris.palmer
Typewritten Text
2.8

Rye Grass Venn Diagram
Rye Grass Venn Diagram
Rye Grass Parent plant
Rye Grass Offspring (new) plant Same
Rye Grass Parent plant
Rye Grass Offspring (new) plant
Same
cris.palmer
Typewritten Text
113
cris.palmer
Typewritten Text
2.8.a
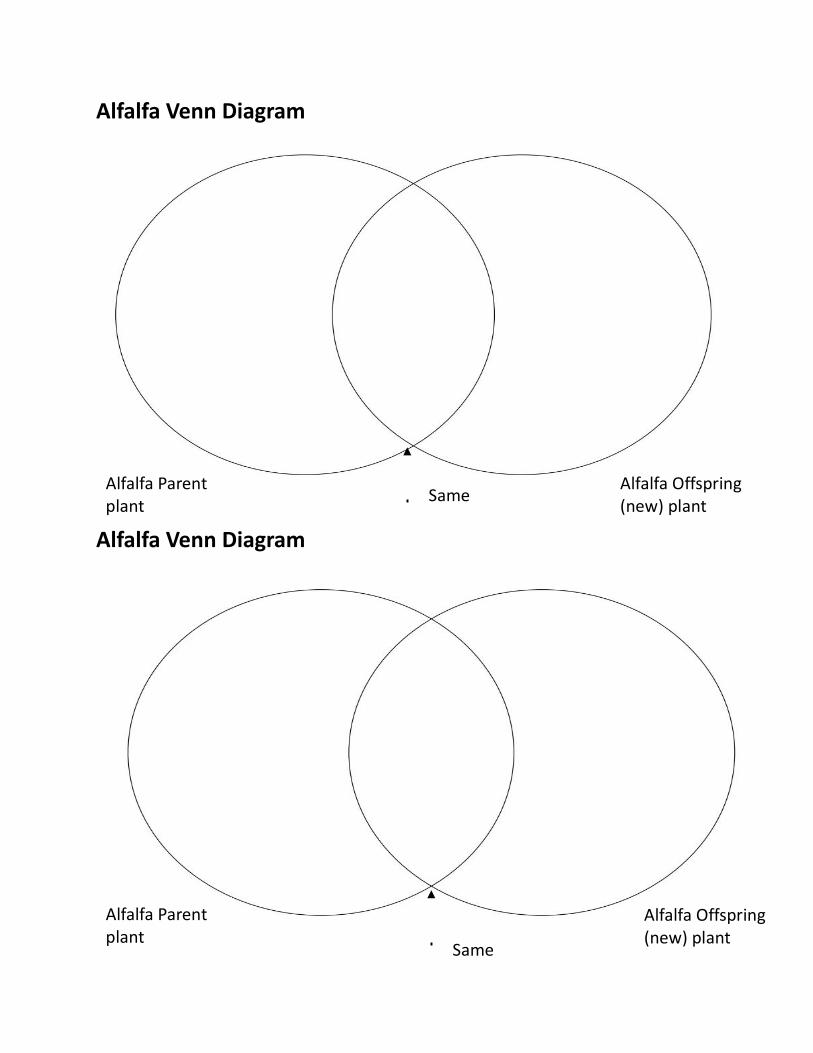
Alfalfa Venn Diagram
Alfalfa Venn Diagram
Alfalfa Parent plant
Alfalfa Offspring (new) plant
Same
Alfalfa Parent plant
Alfalfa Offspring (new) plant Same
cris.palmer
Typewritten Text
2.8.b
cris.palmer
Typewritten Text
114
cris.palmer
Typewritten Text

Session 2.9: Claims and evidence [15-‐20 minutes] Materials needed Papers to copy and cut Students will need Chart paper Pen/Marker
Claims and Evidence Science notebooks Glue Pencil
1. Claims and Evidence
Have students gather at the rug. Review the data in the Venn diagram from the previous session.
• Looking at our Venn diagram, what can we say is the same between parents and offspring of rye grass? • What can we say about how rye grass offspring and parent plants are different? • What about the alfalfa? • What can we say about the alfalfa offspring and parents? • How are they the same? How are the different? • What other kind of organisms have parents and offspring? • Is this a similar pattern to what we found with the Brassica?
Tell the students When scientists look at their data, they make claims about the patterns that they see. For example, if I wanted to make a claim about the evidence in our Venn diagram, I might say…”I claim that offspring plants have the same leaf shape as the parent plant.” Write the claim on the chart paper or board.
Claims Evidence
Whenever scientists make a claim, they also have to give evidence to support the claim. Claims always have to have evidence that goes with them. What might some evidence that I could use to support this claim that I wrote?
2. Model how to write a “Claims and Evidence” statement for the class.
Claims Evidence
I claim that new plants (offspring) have the same leaf shape as their parents.
I claim that new plants (offspring) have the same leaf shape as their parents.
I claim this because both new plants (offspring) and parents of rye grass have leaves that are long and thin.
115
cris.palmer
Typewritten Text
2.9

Claims Evidence
Remember to update the teacher notebook by gluing in Claims and Evidence and filling in the Table of Contents with the corresponding page number.
3. Students write Claims and Evidence Have students go back to their seats for them to copy or paste (depending on how developed their writing skills are) the Claims and Evidence chart into their notebook and add “Claims and Evidence” to their Table of Contents with the corresponding page number. Let the students see if they can come up with any more claims and evidence. Students may come up with different claims depending on their evidence-‐ some students may have plants identical to parent plants shown, and others may not. Remember, the “Desired Results” are for students to learn that offspring have characteristics that are similar to but not exactly like their parents characteristics.
I claim that new rye grass plants (offspring) and their parents have different sized leaves
I claim this because the offspring rye grass had smaller leaves than the parent plant.
116
cris.palmer
Typewritten Text
2.9
Claims and Evidence
Claims Evidence
Claims and Evidence
Claims Evidence
I claim that …. I claim this because… I claim that …. I claim this because…
117
cris.palmer
Typewritten Text
2.9.a

Session 2.10: Writing about Our Investigation [10-‐15 minutes] Materials needed Papers to copy Students will need Chart paper Pen/Marker
Drawing What We Did in Our Investigation Writing What We Did in Our Investigation
Science notebooks Glue Pencil
As a time-‐saver, you may want to write the steps of the investigation on sentence strips that could be reordered.
1. Introduction to writing Tell students Scientists often write what they did in an investigation so they remember all of the things that they did and in what order. Why do you think it is important for scientists to do this? They do this in case they want to go back and try the investigation again. Sometimes they share what they did with another scientist, who will try it and see if they get the same results. Let’s remember some of the things we did in this investigation about the rye grass and the alfalfa. Who can tell me something that we did? List students’ responses on the board or on chart paper in both writing and in drawings/pictures.
2. Put events in sequential order Ask the students, “Now who remembers which of these things we did first? Second?....” Tell the students that you are going to write this list again in the correct order. Share your thinking out loud as you do this So as I write what we did first, I’m going to start my sentence with the word “First”.
• How could I start my sentence about what we did second? • How could I start my sentence about what we did last?
Tell the students they are going to be doing this activity on their own, but on two separate sheets of paper. One paper they will draw in the steps of the investigation and the other they will write the steps. Remember to glue in the sheets “Drawing What We Did in Our Investigation” and “Writing What We Did in Our Investigation” in the teacher notebook and add them to the Table of Contents with the corresponding page numbers.
3. Students draw what they did Have students go back to their seats. Give each student a blank handout titled “Drawing What We Did in Our Investigation”. Have them glue it in their notebooks across two pages with a fold in the middle. Before they begin working, please remind them to update their Table of Contents with the title of the sheet and the corresponding page number. Have them complete their drawings.
4. Students write what they did Give each student a blank handout titled “Writing What We Did in Our Investigation”. Have them glue it in their notebooks across two pages with a fold in the middle. Before they begin working, please remind them to update their
118
cris.palmer
Typewritten Text
2.10

Table of Contents with the title of the sheet and the corresponding page number. Have them complete their written descriptions. Tell them they can look at your examples if they need help. Remind them to use the Word Wall and their glossaries.
5. Share out Have students to come to the rug with their notebooks. Ask if anyone would like to share by reading their writing aloud. Have students practice reading their work aloud in front of their peers.
119
cris.palmer
Typewritten Text
2.10

Drawing What We Did Draw the first thing we did.
Draw the second thing we did.
Draw the third thing we did.
Draw the last thing we did.
Fold
120
cris.palmer
Typewritten Text
2.10.a

Writing About What We Did Write what we did first.
First, ______________________________________ __________________________________________ __________________________________________
Write what we did second.
Second, ______________________________________ __________________________________________ __________________________________________
Write what we did third.
Next, ______________________________________ __________________________________________ __________________________________________
Write what we did last.
Finally, ______________________________________ __________________________________________ __________________________________________
Fold
121
cris.palmer
Typewritten Text
2.10.b

FOSS New Plants: Investigation 3 Session Content Objectives Language Objectives 1 What Do Animals Need?
• Discuss needs of animals • Discuss photos of animals in their
habitats • Draw animal and habitat with
needs • Share drawings
• Students will know that animals need water, air, food (nutrients) and shelter to grow and survive.
• Students will interpret information about animals represented in pictures.
• Share a drawing and point out where the needs of an animal are represented in the drawing
• Use the word “shelter” to describe one of the needs of animals
2 What helps animals survive • Analyze photos of animals • Update animal and habitat
drawings
• Students will use direct observations and other evidence to support ideas concerning physical characteristics that help animals survive.
• Write a list of characteristics that an animal has that help it survive
3 Comparing the needs of plants and animals • Review needs of plants • Complete T-‐chart
• Students will compare the needs of plants and animals.
• Students will complete a T-‐chart comparing the needs of plants and animals
4 Comparing parents and offspring of animals • Review focus question used with
plants • Watch and discuss video • Venn diagrams using pictures of
animal parents and offspring • Students present
• Students will use evidence to analyze similarities and differences between parents and offspring in a variety of organisms including both plants and animals.
• Discuss similarities and differences between parents and offspring of animals in a small group.
• Complete a Venn diagram using words
5 Claims and Evidence • Review Venn diagrams • Model claims and evidence • Students complete claims and
evidence
• Students will understand that offspring have characteristics that are similar to, but not exactly like their parents.
• Complete sentence frames expressing claims and evidence
122
cris.palmer
Typewritten Text
3.a

FOSS New Plants Investigation 3 Session 3.1: What Do Animals Need? [30 minutes] Materials needed Papers to copy and cut Students will need Chart Paper Marker Animals in their Habitat Photos
Pencil Science Notebook Colored pencils/crayons/Markers
1. Introduction Have students gather at the rug. Tell the students We’ve been talking a lot about plants -‐-‐ what they need to grow and live, how we get new plants, and similarities and differences between parent and offspring plants. Now I’d like for us to think about these same things for animals. When we first started learning about plants, we learned what they needed to grow and live. So, can anyone tell me what animals need to grow and live?
• Water • Air • Shelter • Food
Write each of the students’ ideas on chart paper and maybe draw a small picture next to the words.
2. Model drawing an animal and its habitat Show the students the pictures of animals in their habitat. Go through with them and identify or predict where each of the 4 needs are found on the photo. For some of the photos, the students will need to access prior knowledge and guess. On another piece of chart paper or the whiteboard, choose an animal that the students are familiar with and draw the animal in its habitat, showing access to water, food, air and its shelter. If one or more needs are not in the photo, ask the students to guess. Label each of the 4 needs on your drawing with an arrow. Explain to the students that they will now be drawing their own animal and the animal’s needs to survive. Write down the student names and animals they have chosen to ensure there are a variety of animals chosen.
3. Update table of contents Model for the students in your teacher science notebook by writing in the Table of Contents for “Animal Drawing in its Habitat” and the corresponding page number.
4. Students draw an animal and its habitat Have students go back to their desks and get out their science notebooks. Have the students update the Table of Contents with the entry of “Animal Drawing and its Habitat” and the corresponding page number. Have each of the students draw their chosen animal in its habitat, and label the 4 things that it needs to survive with an arrow or line.
123
cris.palmer
Typewritten Text
cris.palmer
Typewritten Text
cris.palmer
Typewritten Text
3.1

5. Share in front of the class Gather students at the rug again and have students present their drawings and explain the 4 things each of their animals need. Every so often, ask the presenting student what would happen if the animal wasn’t able to get or have the specific need.
124
cris.palmer
Typewritten Text
3.1
Elephants, Kenya
Polar Bear, Svalbard
125
cris.palmer
Typewritten Text
3.1.a

White Lions, South Africa
126
cris.palmer
Typewritten Text
3.1.b

Red Foxes, Connecticut USA
127
cris.palmer
Typewritten Text
3.1.c

Hares, Italy
128
cris.palmer
Typewritten Text
3.1.d

Emperor Penguins, Antarctica
129
cris.palmer
Typewritten Text
3.1.e

Sandgrouse, Namibia
130
cris.palmer
Typewritten Text
3.1.f
Brown Bear, USA
131
cris.palmer
Typewritten Text
3.1.g

Cows, Holland
132
cris.palmer
Typewritten Text
3.1.h

Black Sheep, USA
133
cris.palmer
Typewritten Text
3.1.i

Session 3.2: What helps animals survive? [25-‐30 min] Materials needed Papers to copy and cut Students will need Chart paper Marker Animals in their Habitats Photos Document Camera/LCD Projector
Science notebooks Pencil Colored pencils/crayons/Markers
1. Analyze photos
Have students gather at the rug. Ask students to tell you again the 4 things that animals need in order to survive (air, water, shelter and food). Explain to the students that you now want to look in more detail at the animals to see what physical characteristics they have that help them survive. Put the penguin photo under the document camera for all the students to see. Ask what type of environment the penguin lives in (Antarctica-‐ extreme cold). Tell the students In order for the Penguin to not freeze in Antarctica, it has some physical characteristics that allow it to live in such cold temperatures (-‐58° Celcius). Ask the students to tell you the characteristics they see or have heard of and write them on the board or chart paper (dense feathers, curved beak to eat small fish, narrow wings for swimming instead of flying, broad bellies to slide on ice, thick layer of fat to keep them warm). Do the same for any of the other animal photos.
2. Apply survival traits to drawings In your teacher science notebook, find your drawing from the past lesson where you had a chosen animal in its habitat. Model for the students on the following page the list of physical traits that help keep the animal alive. If any of the traits are easily seen in the photo, label them as well.
3. Students update drawings Send your students to their desks to get out their science notebooks. Have them open up their drawings of their animals in their habitat. Have students write a list of the characteristics that their specific animal has. They may work with other students at their table to come up with the list. They also should label the physical characteristics on their drawing.
134
cris.palmer
Typewritten Text
3.2
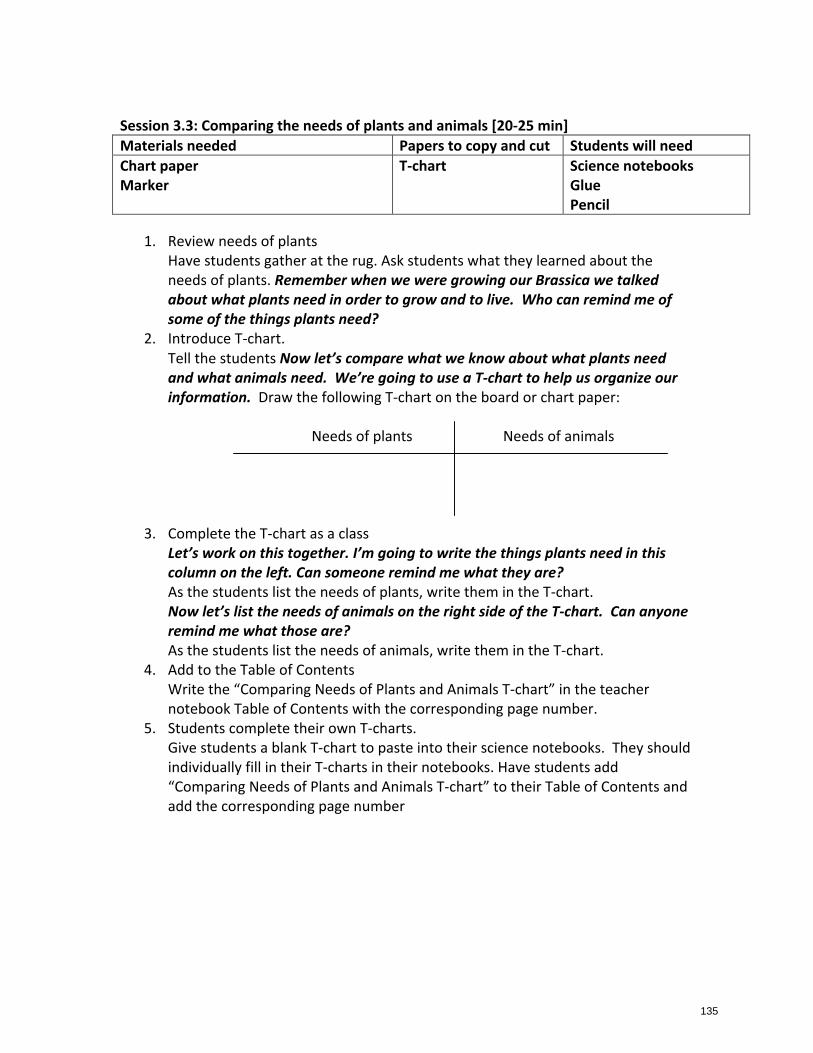
Session 3.3: Comparing the needs of plants and animals [20-‐25 min] Materials needed Papers to copy and cut Students will need Chart paper Marker
T-‐chart Science notebooks Glue Pencil
1. Review needs of plants
Have students gather at the rug. Ask students what they learned about the needs of plants. Remember when we were growing our Brassica we talked about what plants need in order to grow and to live. Who can remind me of some of the things plants need?
2. Introduce T-‐chart. Tell the students Now let’s compare what we know about what plants need and what animals need. We’re going to use a T-‐chart to help us organize our information. Draw the following T-‐chart on the board or chart paper:
Needs of plants Needs of animals
3. Complete the T-‐chart as a class Let’s work on this together. I’m going to write the things plants need in this column on the left. Can someone remind me what they are? As the students list the needs of plants, write them in the T-‐chart. Now let’s list the needs of animals on the right side of the T-‐chart. Can anyone remind me what those are? As the students list the needs of animals, write them in the T-‐chart.
4. Add to the Table of Contents Write the “Comparing Needs of Plants and Animals T-‐chart” in the teacher notebook Table of Contents with the corresponding page number.
5. Students complete their own T-‐charts. Give students a blank T-‐chart to paste into their science notebooks. They should individually fill in their T-‐charts in their notebooks. Have students add “Comparing Needs of Plants and Animals T-‐chart” to their Table of Contents and add the corresponding page number
135
cris.palmer
Typewritten Text
3.3
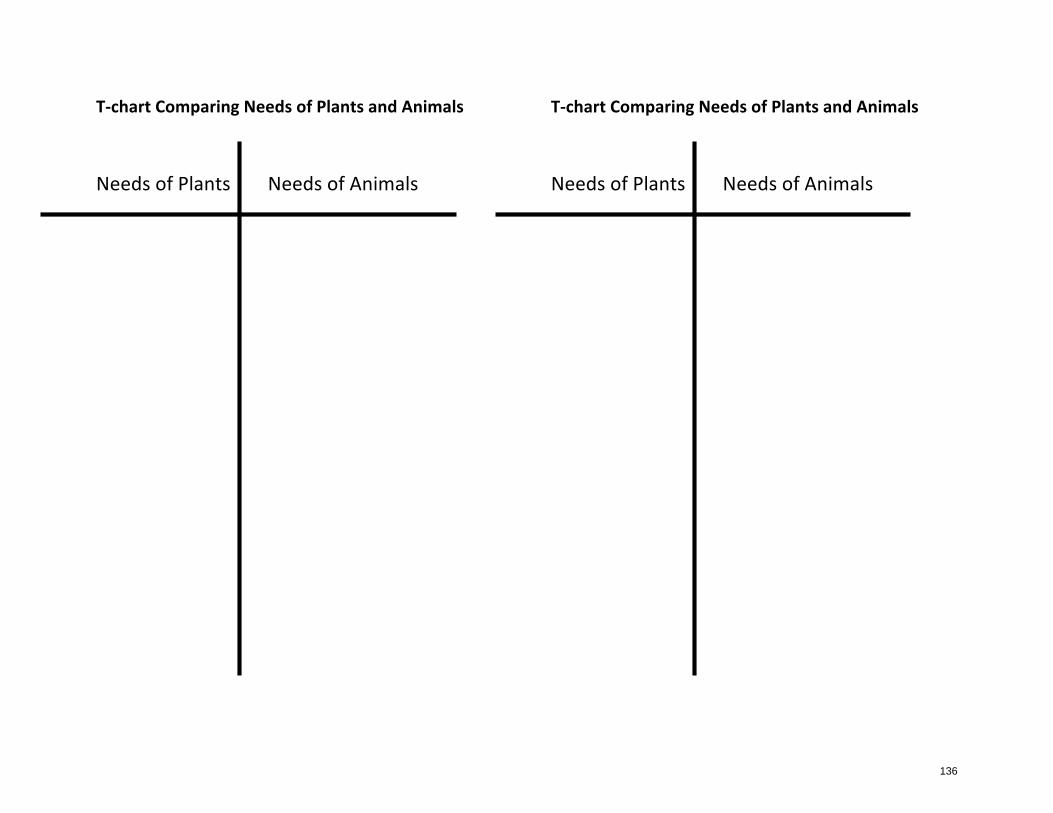
T-‐chart Comparing Needs of Plants and Animals
Needs of Plants Needs of Animals
T-‐chart Comparing Needs of Plants and Animals
Needs of Plants Needs of Animals
136
cris.palmer
Typewritten Text
3.3.a
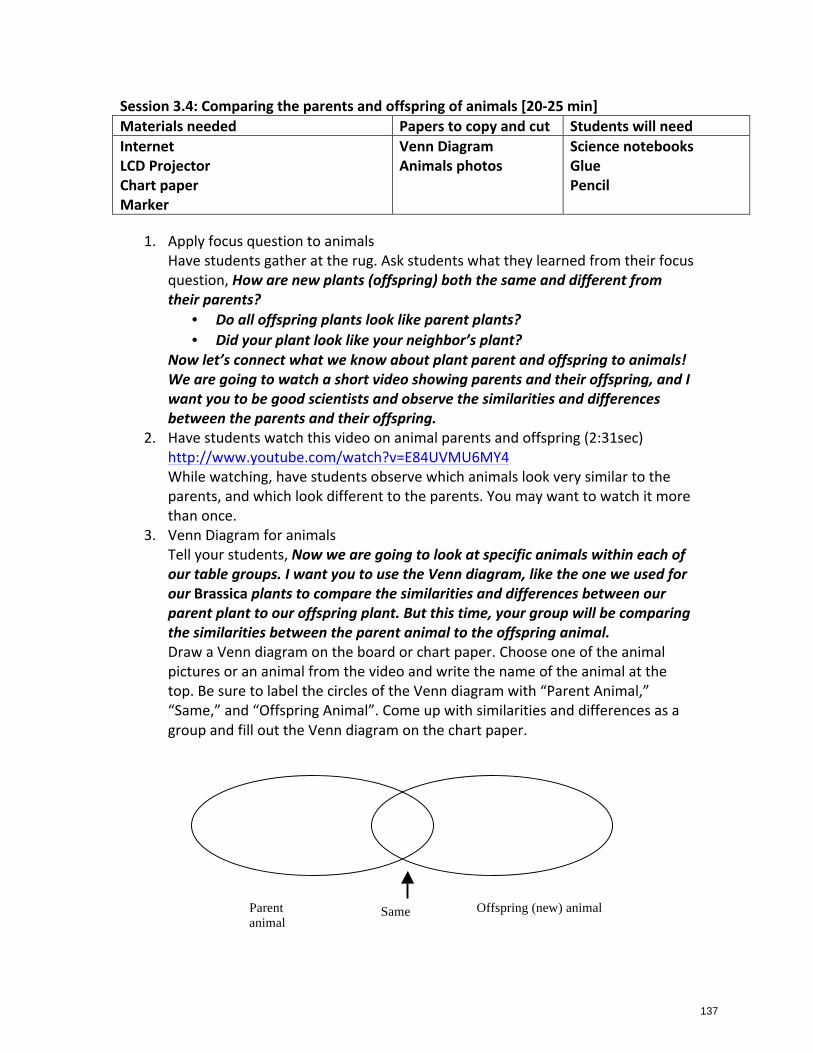
Session 3.4: Comparing the parents and offspring of animals [20-‐25 min] Materials needed Papers to copy and cut Students will need Internet LCD Projector Chart paper Marker
Venn Diagram Animals photos
Science notebooks Glue Pencil
1. Apply focus question to animals
Have students gather at the rug. Ask students what they learned from their focus question, How are new plants (offspring) both the same and different from their parents?
• Do all offspring plants look like parent plants? • Did your plant look like your neighbor’s plant?
Now let’s connect what we know about plant parent and offspring to animals! We are going to watch a short video showing parents and their offspring, and I want you to be good scientists and observe the similarities and differences between the parents and their offspring.
2. Have students watch this video on animal parents and offspring (2:31sec) http://www.youtube.com/watch?v=E84UVMU6MY4 While watching, have students observe which animals look very similar to the parents, and which look different to the parents. You may want to watch it more than once.
3. Venn Diagram for animals Tell your students, Now we are going to look at specific animals within each of our table groups. I want you to use the Venn diagram, like the one we used for our Brassica plants to compare the similarities and differences between our parent plant to our offspring plant. But this time, your group will be comparing the similarities between the parent animal to the offspring animal. Draw a Venn diagram on the board or chart paper. Choose one of the animal pictures or an animal from the video and write the name of the animal at the top. Be sure to label the circles of the Venn diagram with “Parent Animal,” “Same,” and “Offspring Animal”. Come up with similarities and differences as a group and fill out the Venn diagram on the chart paper.
Offspring (new) animal Parent animal
Same
137
cris.palmer
Typewritten Text
3.4

4. Students complete Venn diagrams in Notebook Give students a blank Venn diagram and copies of the Animal photos to paste into their science notebooks and have them complete the diagram. Each team or table of students should have the same animal photo to work with. While students are working together and sharing ideas, they should individually be filling in their Venn diagram in their notebooks. Have students add “Venn diagram” and “Animal photos” to their Table of Contents and add the corresponding page number
5. Student presentations Have students present their Venn diagrams to the class, and make sure they share both the similarities and differences.
138
cris.palmer
Typewritten Text
3.4
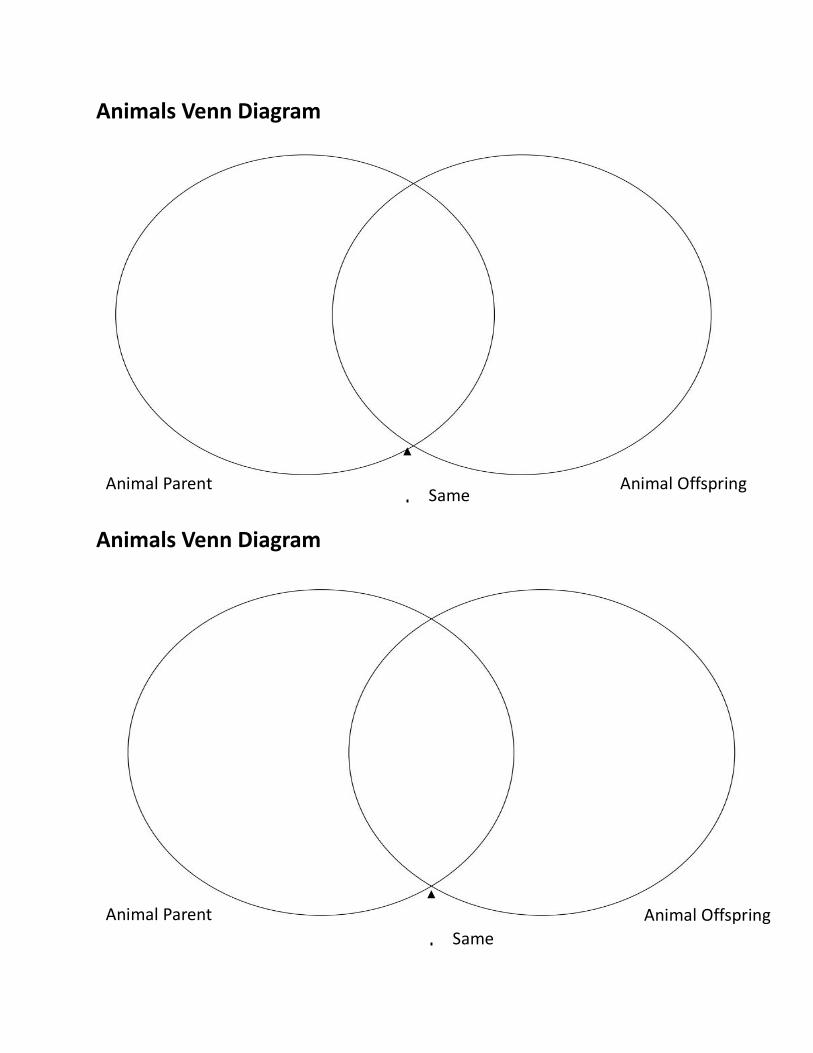
Animals Venn Diagram
Animals Venn Diagram
Animal Parent Animal Offspring Same
Animal Parent Animal Offspring Same
cris.palmer
Typewritten Text
3.4.a
cris.palmer
Typewritten Text
139
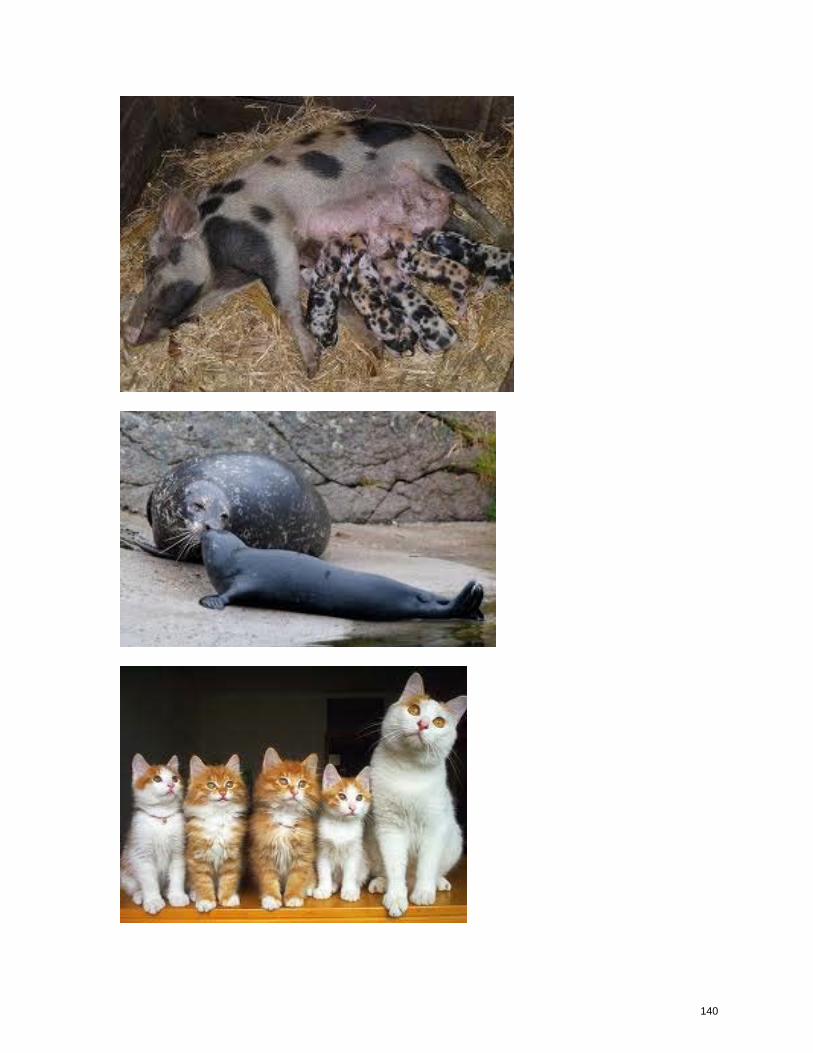
140
cris.palmer
Typewritten Text
3.4.b
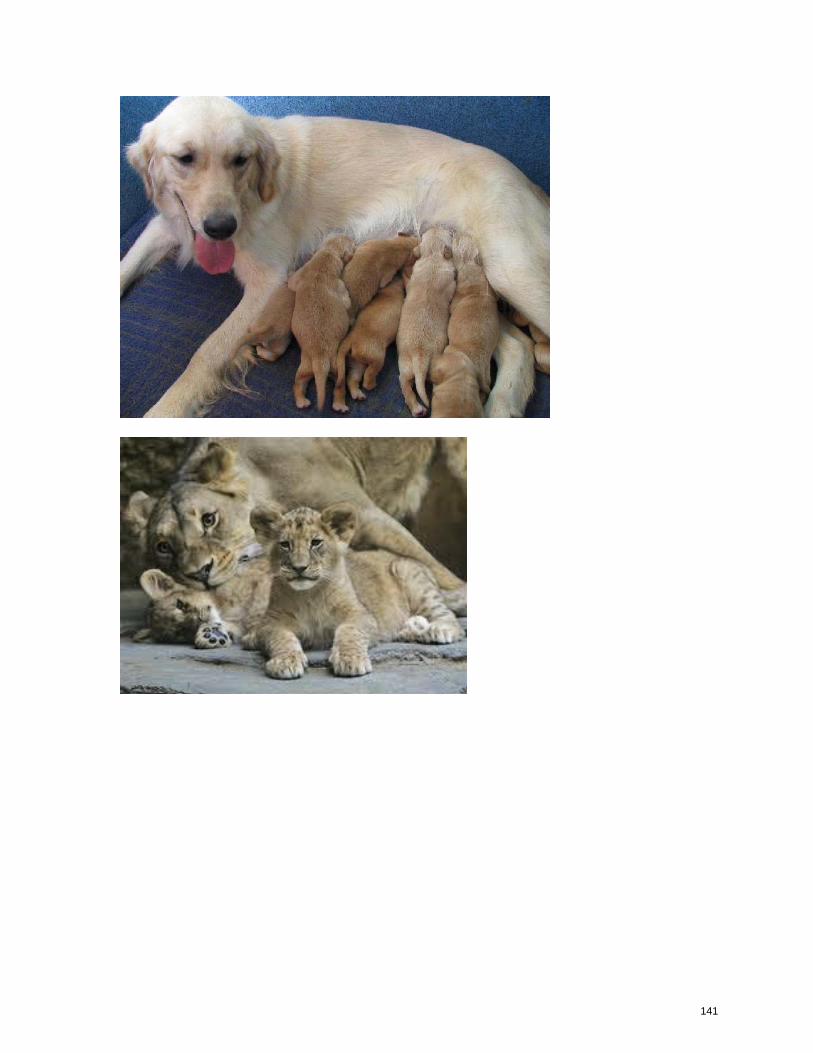
141
cris.palmer
Typewritten Text
3.4.c

142
cris.palmer
Typewritten Text
3.4.d
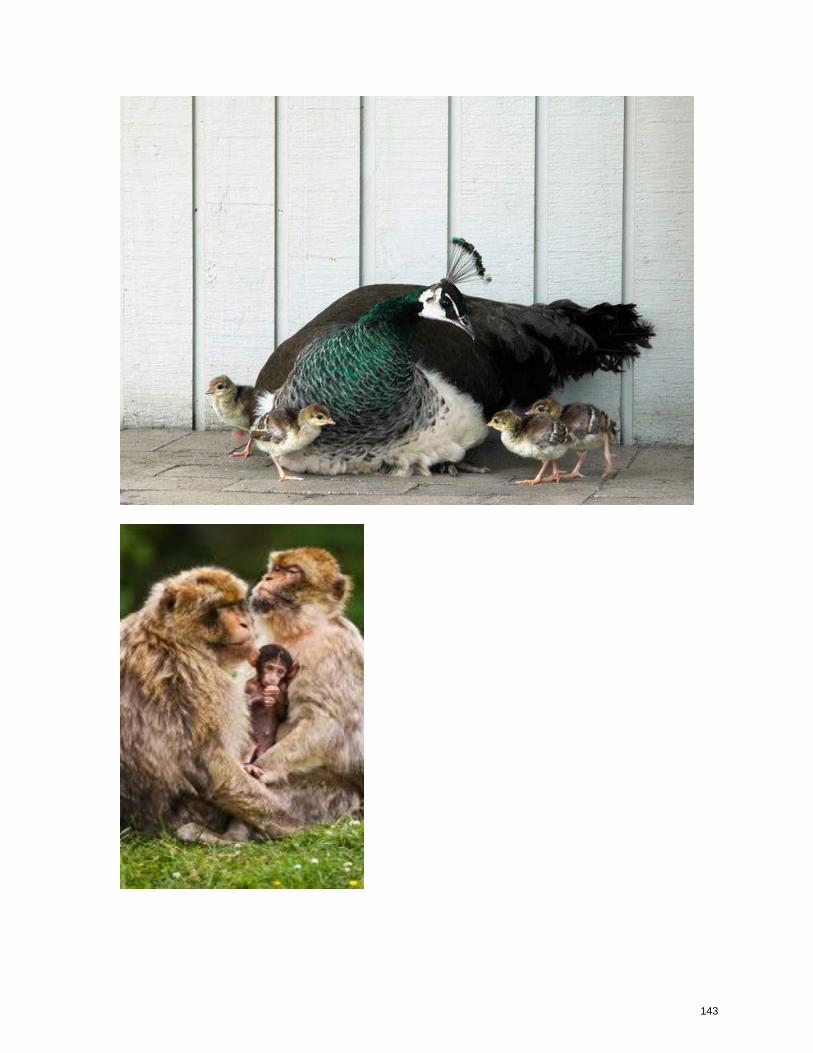
143
cris.palmer
Typewritten Text
3.4.e
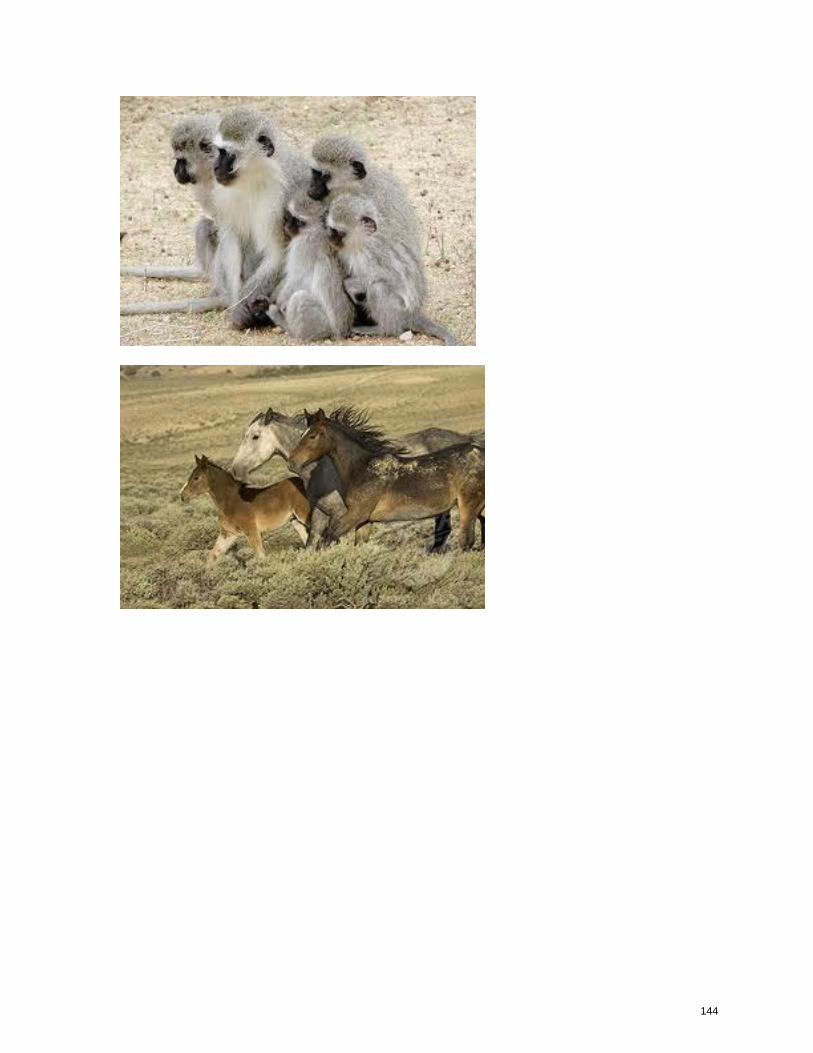
144
cris.palmer
Typewritten Text
3.4.f

Session 3.5: Claims and evidence [10-‐15 minutes] Materials needed Papers to copy and cut Students will need Chart paper Pen/Marker
Claims and Evidence Science notebooks Glue Pencil
1. Claims and Evidence
Have students gather at the rug. Review the data in the Venn Diagram from the previous session.
• Looking at our Venn Diagram, what can we say is the same between parents and offspring of animals? • What can we say about how offspring and parent animals are different? • Let’s look at one example – the cat and its kittens. How are the parent cat’s kittens the same and different from the parent?
Tell the students, Remember that when scientists look at their data, they make claims about the patterns that they see. We did this earlier with plants. Now we are going to do claims and evidence about animals. For example, if I wanted to make a claim about the evidence in our Venn Diagram about the cat and it’s kittens, I might say… I claim that offspring cats have the same shaped ears as their parents. Write the claim on the chart paper or board.
Claims Evidence
Whenever scientists make a claim, they also have to give evidence to support the claim. Claims always have to have evidence that goes with them. What might some evidence that I could use to support this claim that I wrote?
Model how to write a “Claims and Evidence” statement for the class.
Claims Evidence
I claim that offspring cats have the same shaped ears as their parents.
I claim that offspring cats have the same shaped ears as their parents.
I claim this because both the cat and its kittens have pointed ears.
145
cris.palmer
Typewritten Text
3.5
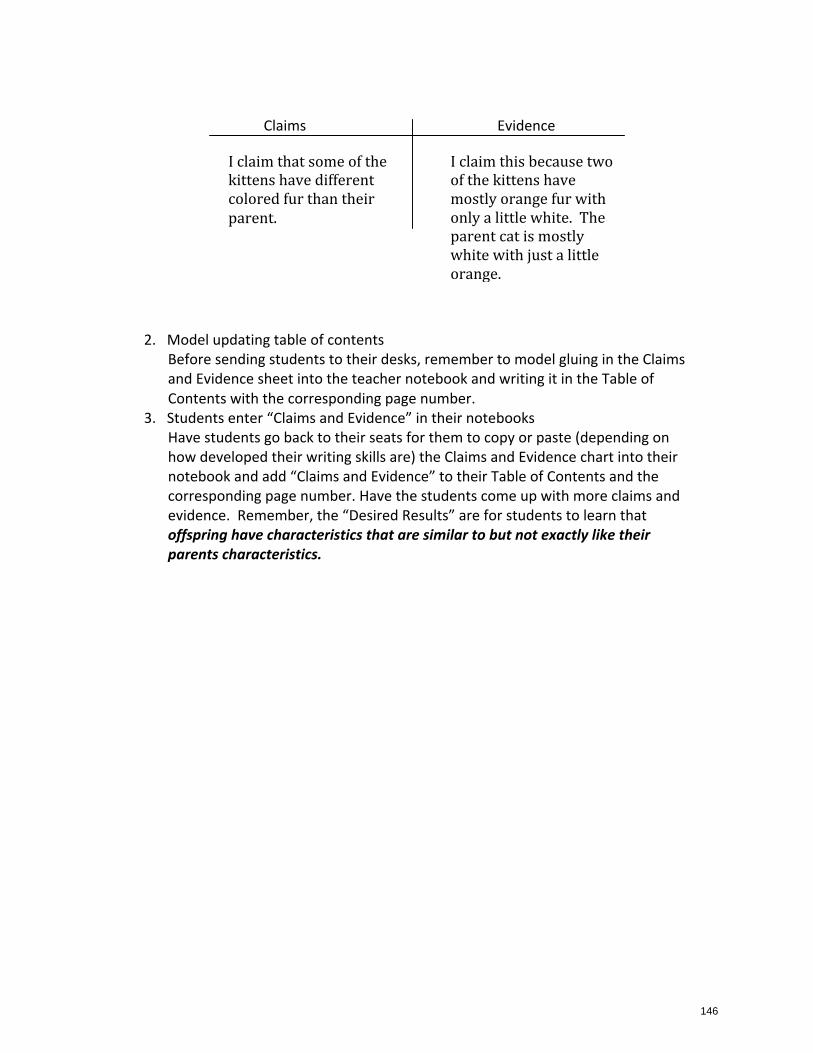
Claims Evidence
2. Model updating table of contents Before sending students to their desks, remember to model gluing in the Claims and Evidence sheet into the teacher notebook and writing it in the Table of Contents with the corresponding page number.
3. Students enter “Claims and Evidence” in their notebooks Have students go back to their seats for them to copy or paste (depending on how developed their writing skills are) the Claims and Evidence chart into their notebook and add “Claims and Evidence” to their Table of Contents and the corresponding page number. Have the students come up with more claims and evidence. Remember, the “Desired Results” are for students to learn that offspring have characteristics that are similar to but not exactly like their parents characteristics.
I claim that some of the kittens have different colored fur than their parent.
I claim this because two of the kittens have mostly orange fur with only a little white. The parent cat is mostly white with just a little orange.
146
cris.palmer
Typewritten Text
3.5

Claims and Evidence
Claims Evidence
Claims and Evidence
Claims Evidence
I claim that …. I claim this because… I claim that …. I claim this because…
147
cris.palmer
Typewritten Text
3.5.a

Session 6: Clothing for the Seasons – Optional Activity [45 minutes] Materials needed Papers to copy and
cut Students will need
Electric kettle or access to hot water Plastic bottles with screw on caps to hold water, ~250mL. Thermometer for each group One set of three different fabric samples** for each group, each of the same size, ~12” x 12” labeled A, B, C Rubber bands to hold fabric around the bottle Chart paper/document camera
Insulation Investigation*
Pencil Science Notebook Glue
* Scaffolded documents: these can be distributed to students in various ways. You can use the more scaffolded documents at the beginning of the year or use various ones throughout the year depending on students’ reading/writing levels. **Fabric should include thin cotton, thick quilted or fleece, and one other fabric that will be intermediate in its insulation properties. Before Class: Arrange to have the bottles filled with water that is warm, but not too hot, when students are ready to begin the investigation.
1. Introduce weather appropriate clothing • What did we learn from our historical data about Colorado
temperatures in winter in January? • What did we learn from our historical data about Colorado weather in
winter in January? • On sunny days in January would it be smart to wear a t-‐shirt and shorts?
(No.) • What would you need to consider before dressing? (The temperature.)
Sometimes it’s hard to know what to wear, especially in Colorado, because the weather conditions can be tricky! It is sunny in Colorado most of the year, but that doesn’t mean that we wear shorts and tank tops all year round! We are going to do an experiment with fabrics to help us figure out what would be appropriate clothing for winter days. What do you normally wear in winter? Why? Lead students’ thoughts towards staying warm. It’s important to wear clothes that keep us warm, or insulated. Write the word insulation on the word wall. Who has heard of this word before? Where have you heard it? Insulation helps prevent the transfer or heat. We use insulation in our homes to help keep the warm air in the house in the winter and the cool air in the house when it’s hot outside. We are going to look at different kinds of fabric and see how well it will keep you warm on a cold day. Distribute the student sheets Insulation Investigation and have students glue them into their science notebooks on the next available page. Remind students to update their table of contents with the corresponding page number.
148
cris.palmer
Typewritten Text
3.6

Having discussed the appropriate kind of clothing for cold days, students should be ready to develop an investigation comparing different fabrics and their effectiveness as insulation. Ask students, What might be a good focus question? Allow students to brainstorm ideas as you scribe them on the board or chart paper. Select one focus question to investigate as a group. Example: How well does each fabric insulate? Once you have determined a class focus question, have students try to write their own predictions. Before writing them down on their paper, have students share their ideas with their shoulder partner and have a few students share out with the class to be written on the chart paper. Tell students, Here are our materials for our experiment: thermometers, fabric samples, plastic bottles with lids, water, rubber bands and a water heater. Who has an idea of how we can measure how well the fabric will insulate the water or keep the water warm? This experiment can be done as a demonstration with the help of students or in student groups. If you are doing this with student groups, make sure to designate group roles: GETTERs 1 & 2, REPORTER and a TIMER. Students may have varying ways of measuring, but make sure that each group is measuring the initial temperature of the water and again after the set amount of time. Also make sure that each group plans what they will change (the fabric) and what they will keep the same (the bottle, initial water temperature, measurement of temperature at the same time interval). Use the following chart on chart paper while students fill in the plan in their science notebooks. If you want everyone to use the same procedure, have students copy your chart.
How are we going to observe or measure? Example: We will measure the temperature of the water before and after a ____ minute period of time. What is going to be different in our investigation? Example: The fabric insulating the warm water from the air around it. What are we going to keep the same? Example: Use the same type of bottle, the same volume of water at the same initial temperature, measure the temperature over the same time interval…
2. Set up experiment
Before the GETTER 1s gather materials, create a data catcher on chart paper and talk out loud to describe your thinking about how you set it up.
149
cris.palmer
Typewritten Text
3.6

Different Types of Fabrics and the Temperature Change Over a _____ Minute Period of Time
Type of Fabric Initial Temperature Temperature After
Have students copy the data catcher into their notebooks. If students have already glued in all the pages of the Insulation Investigation, their data catcher will end up after their claims and evidence. Before students begin, have them wrap the bottles with each piece of cloth. Make sure that the cloths are secure and that they are relatively consistent in how they are wrapped on each bottle within a group. Have students leave the top uncovered so that you can pour the warm water into each bottle, and remind students to close the lids immediately after they have recorded the initial temperature of the water. The REPORTER should take the first temperature recording, and the TIMER should keep track of the initial time and monitor the clock. Have students conduct the experiment and collect data. Record data on the chart paper data catcher and have students copy the data into their notebooks as you go.
3. Making meaning Have a class discussion about the data using the following prompts to guide the discussion:
• What did we find out about the temperature change of the water in all of the bottles after ____ minutes (The temperature went down.)
• Which fabric was the best insulator? • Which fabric was the worst insulator? • Which fabric would keep you warmest on a cold day?
4. Claims and Evidence
Model how to write a “Claims and Evidence” statement for the class. Begin by writing only the claim in the box below. Remind the students, When scientists look at their data, they make claims about the patterns that they see. A claim is a statement we can make about our data.
Claims Evidence
I claim that the quilted fabric is the best insulator and would make the warmest clothing on a cold day.
150
cris.palmer
Typewritten Text
3.6

Whenever scientists make a claim, they also have to give evidence to support the claim or support that our claim is accurate. Claims always have to have evidence that goes with them. What might be some evidence that I could use to support this claim that I wrote? Help students develop the evidence for the claim, then record on the chart.
Claims Evidence
I claim that the quilted fabric is the best insulator and would make the warmest clothing on a cold day.
I claim this because the temperature change for the quilted fabric was the smallest of all the fabrics tested. The temperature of the water was ____ degrees at the beginning and was ____ degrees after ___ minutes.
Let the students see if they can come up with any more claims and evidence. Have the students copy the claims and evidence into their notebook.
5. Update the word wall and student glossaries Add the words “fabric” and “insulation” to the word wall and have students do the same in the glossary in their science notebooks.
151
cris.palmer
Typewritten Text
3.6
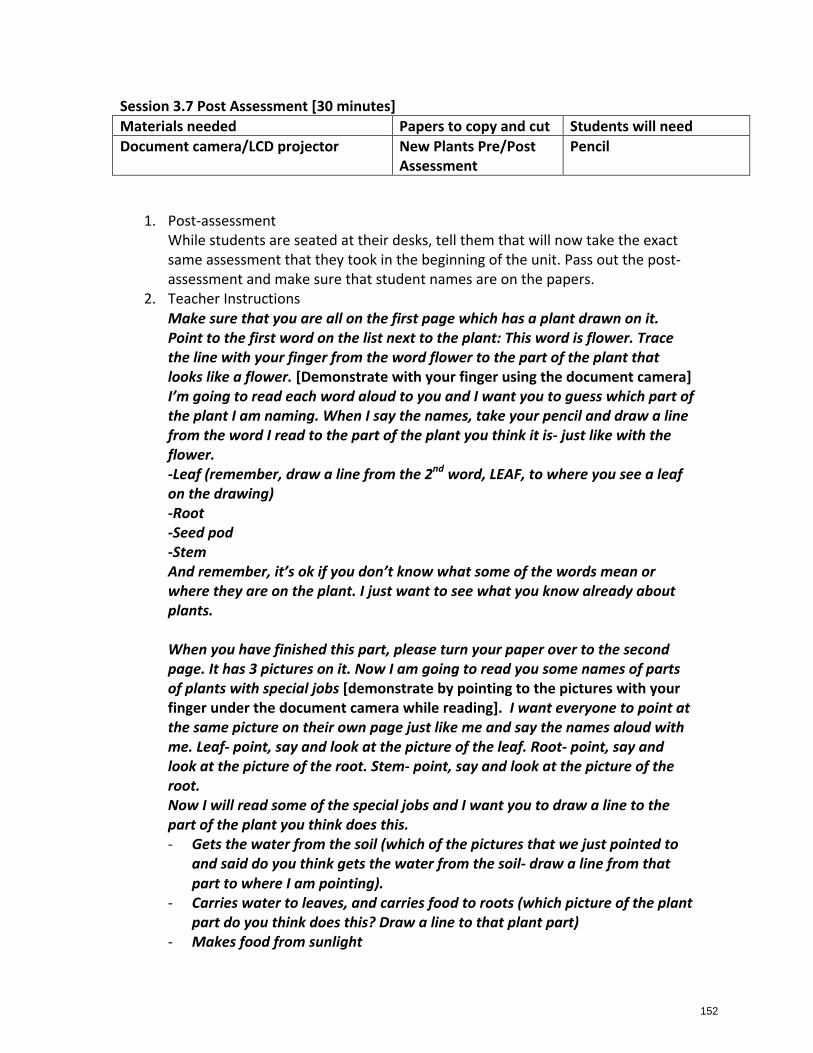
Session 3.7 Post Assessment [30 minutes] Materials needed Papers to copy and cut Students will need Document camera/LCD projector New Plants Pre/Post
Assessment Pencil
1. Post-‐assessment While students are seated at their desks, tell them that will now take the exact same assessment that they took in the beginning of the unit. Pass out the post-‐assessment and make sure that student names are on the papers.
2. Teacher Instructions Make sure that you are all on the first page which has a plant drawn on it. Point to the first word on the list next to the plant: This word is flower. Trace the line with your finger from the word flower to the part of the plant that looks like a flower. [Demonstrate with your finger using the document camera] I’m going to read each word aloud to you and I want you to guess which part of the plant I am naming. When I say the names, take your pencil and draw a line from the word I read to the part of the plant you think it is-‐ just like with the flower. -‐Leaf (remember, draw a line from the 2nd word, LEAF, to where you see a leaf on the drawing) -‐Root -‐Seed pod -‐Stem And remember, it’s ok if you don’t know what some of the words mean or where they are on the plant. I just want to see what you know already about plants. When you have finished this part, please turn your paper over to the second page. It has 3 pictures on it. Now I am going to read you some names of parts of plants with special jobs [demonstrate by pointing to the pictures with your finger under the document camera while reading]. I want everyone to point at the same picture on their own page just like me and say the names aloud with me. Leaf-‐ point, say and look at the picture of the leaf. Root-‐ point, say and look at the picture of the root. Stem-‐ point, say and look at the picture of the root. Now I will read some of the special jobs and I want you to draw a line to the part of the plant you think does this. -‐ Gets the water from the soil (which of the pictures that we just pointed to
and said do you think gets the water from the soil-‐ draw a line from that part to where I am pointing).
-‐ Carries water to leaves, and carries food to roots (which picture of the plant part do you think does this? Draw a line to that plant part)
-‐ Makes food from sunlight
152
cris.palmer
Typewritten Text
3.7
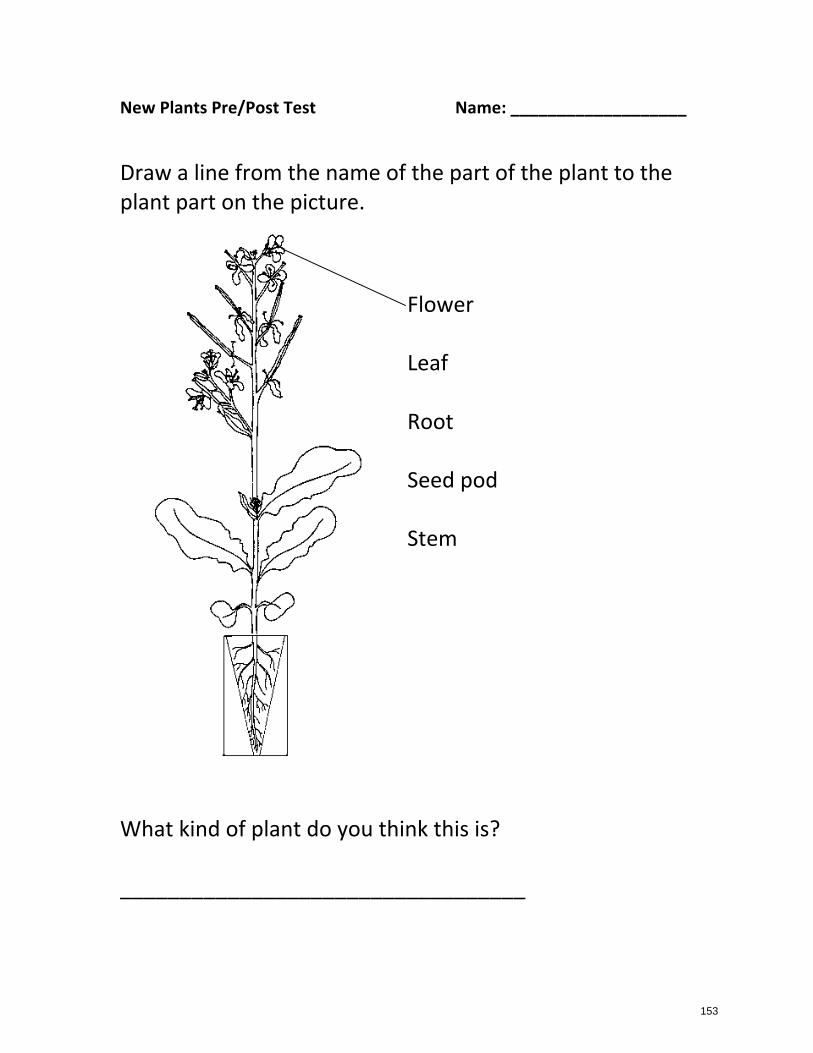
New Plants Pre/Post Test Name: ___________________
Draw a line from the name of the part of the plant to the plant part on the picture.
Flower Leaf Root
Seed pod
Stem
What kind of plant do you think this is? __________________________________
153
cris.palmer
Typewritten Text
3.7.a
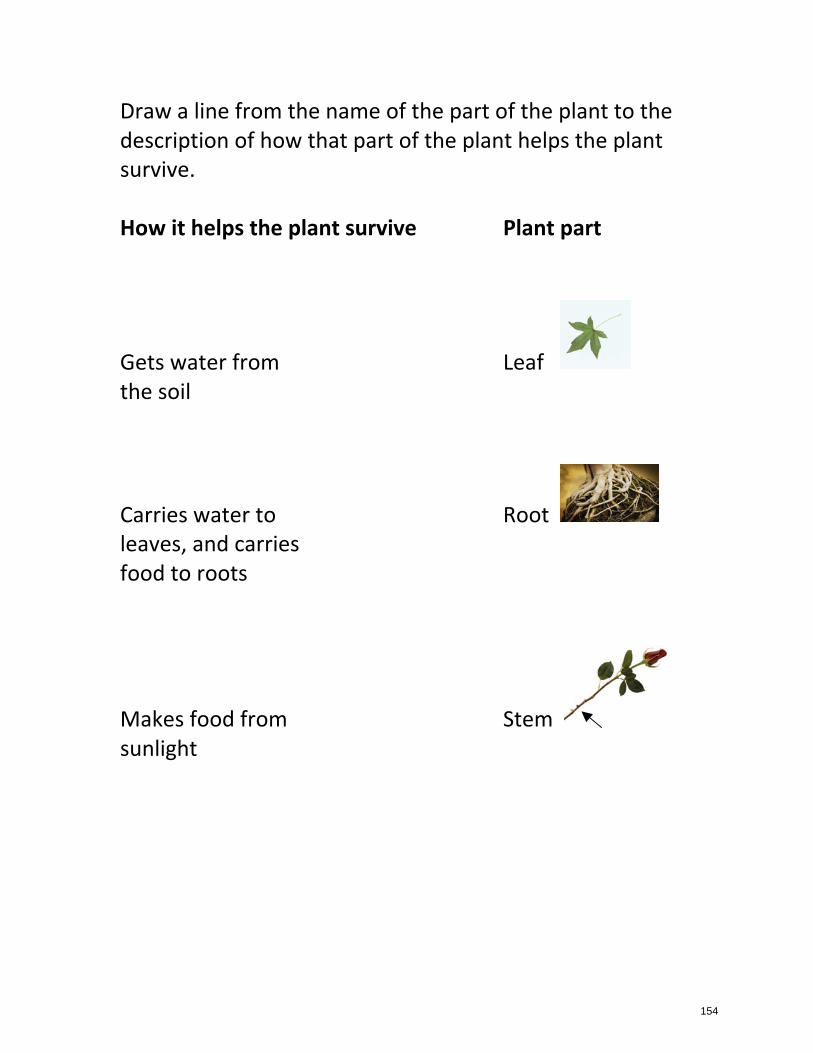
Draw a line from the name of the part of the plant to the description of how that part of the plant helps the plant survive.
How it helps the plant survive Plant part
Gets water from Leaf the soil
Carries water to Root leaves, and carries food to roots
Makes food from Stem sunlight
154
cris.palmer
Typewritten Text
3.7.b

Complete the following sentences with words from the word bank at the bottom of the page. Your teacher will read this out loud for you first. 1. If you take a ______________ from a parent plant and
(seed / flower) put it in soil with water, it will grow. 2. The new plant is called the __________________ of the (offspring/ flower) parent.
155
cris.palmer
Typewritten Text
3.7.c

Match the parent with its offspring by drawing a line between them.
156
cris.palmer
Typewritten Text
3.7.d

Look at this parent and offspring pair.
Write one thing (word or phrase) that is the same between this parent and its offspring. _____________________________________ Write one thing (word or phrase) that is different between this parent and its offspring. _____________________________________
157
cris.palmer
Typewritten Text
3.7.e
cris.palmer
Typewritten Text