National Model Railroad Association Inc - Australasian Region 2007.pdf · MainLine National Model...
28
MainLine National Model Railroad Association Inc - Australasian Region Autumn 2007 Volume 24 No. 1 Inside this issue • Converting an Atlas HO S2 to DCC • Fanta Se Story • MasterSwitch revisited • Region Roundup • Division 9 & 3/4 Handy Hints and Tips Registered at Australia Post Publication # PP241613/00080
Transcript of National Model Railroad Association Inc - Australasian Region 2007.pdf · MainLine National Model...

MainLine
National Model Railroad Association Inc - Australasian Region
Autumn 2007
Volume 24 No. 1
Inside this issue
• Converting an Atlas HO S2 to DCC
• Fanta Se Story
• MasterSwitch revisited
• Region Roundup
• Division 9 & 3/4 Handy Hints and Tips
Registered at Australia Post Publication # PP241613/00080

Page 2
Autumn 2007MainLine
Australasian Region Directory www.nmra.org.au NMRA Inc. PO Box 382, Forestville NSW 2087
Board
President Sowerby Smith (02) 9411 5726 [email protected]
Vice President David North (02) 9975 2569 [email protected]
Secretary David Jupp 0416 280 517 [email protected]
Treasurer Erik Bennett (02) 9997 7971 [email protected]
Pacific District Director Peter Jensen (02) 4990 9855 [email protected]
Members Gerry Hopkins MMR (02) 4329 0242 [email protected]
Marcus Ammann (02) 9402 8929 [email protected]
David Howarth (02) 9498-4995 [email protected]
Superintendents
Div 1 Qld Glenn Stevens (07) 3207 2442 [email protected]
Div 2 ACT Jess Brisbane (02) 6260 6427 [email protected]
Div 3 Vic/Tas Grant McAdam (03) 9578 8685 [email protected]
Div 4 WA Frank Godde (08) 9293 0667 [email protected]
Div 5 New Zealand Kelvin Sherson (04) 234 8577 [email protected]
Div 6 SA Ron Solly (08) 8522 2536 [email protected]
Div 7 NSW John Montgomery (02) 9628 9921 [email protected]
Div 8 Nth Rivers Ian Phemister (02) 6658 9871 [email protected]
Div 9 Mid North Coast Mike Bartlett (02) 6553 6227 [email protected]
Other Officers
A.P. Chairman Gerry Hopkins MMR (02) 4329 0242 [email protected]
A.P. Vice Chairman, VIC Laurie Green MMR (03) 9744 5188 [email protected]
A.P. Vice Chairman, SA Ray Brownbill (08) 8389 1045 [email protected]
A.P. Vice Chairman, QLD Graeme Davis (07) 5463 1475 [email protected]
A.P. Vice Chairman, WA Phil Knife MMR (08) 9459 4506 [email protected]
Librarian David Howarth (02) 9498 4995 [email protected]
Member Aid Steve Chapman (02) 9626 9979 [email protected]
Contest Chair Gerry Hopkins MMR (02) 4329 0242 [email protected]
Public Officer Rob Peterson (02) 9871 4157 [email protected]
Editor MainLine Kelly Loyd (02) 4956 5793 [email protected]
Web Master Wayne Eagle (02) 9627 9892 [email protected]
Membership Denise Bennett (02) 9997 7971 [email protected]
33 Kanook Avenue Bayview, NSW 2104
Stop Press
MainLine goes Internet
At the February Committee meeting it was decided to publish MainLine not only as a Hard Copy
magazine but also as an electronic version accessed via our web site. This is a trial for one year so we can
assess how popular this option is and also to get an accurate idea of the costs associated with this form of
delivery of MainLine. Contrary to popular opinion, transmission of large amounts of data is not free.
Anyone who has gone over their Telstra broadband limit can attest to this. For the duration of this trial there
will be no cost to members for this service.
You may be aware that in the past few months we have had several limited trials of Mainline on the Web.
All members will be able to log into a secure area of the our web site www.nmra.org.au and, using your
NMRA membership number as the password, download a full colour version of Mainline. It is intended to
be available in two versions. A viewing only version in low resolution approximately 2 meg in size and
there will be a higher resolution version, approximately 6-8 meg, for those who wish to print a copy. We
hope to have the electronic version available as you read this. This will be the full version of the magazine.
The Committee also decided to have an older Mainline available to all visitors to the NMRA Australian
Region Website . This will only be in low resolution and some personal details will be removed. Accurate
details of the number of downloads will be kept. The printed version of MainLine will continue to be
available, the electronic version is an additional members service. Hope you like it.
Notice of Annual General Meeting
The AGM will be held at John Saxons May 12th, starting at 3:00pm. Office bearers will deliver their
annual reports for acceptance There are no officer elections this year.

Page 3
Autumn 2007MainLine
Feature Articles
Converting an Atlas HO S2 to DCC................. 7
MasterSwitch revisited...................................... 24
Story of the Fanta Se..........................................22
EMD Early Road Switchers Book review........21
Regular Articles
Presidents Report............................................... 5
Pacific Directors Report.................................... 6
Off the Wire (Editorial)..................................... 6
Region Roundup.................................................11
Division 9 & 3/4 Handy Hints........................... 26
Photo Credits
Front cover
George Paxons On30 Layout - Engine Shed.
Photo by Josh Loyd
Centre photo
John Hughes US Layout
Photo by Gerry Hopkins
Back Cover
First Place Digital Photo from Convention 2006
Photo by Josh Loyd
Zig-Zag Railway Top Points Staff handoff
Photo by Maika Ly
Official Publication of the
National Model Railroad Association
Australasian Region
Registered at Australia Post Publication #
PP241613/00080
Editor: Kelly Loyd
Proof Reader: Greg Harper
Photographers: Sowerby Smith, Josh
Loyd
Assistants: All NMRA AR Members
Article Submissions: The editor
welcomes any train related articles,
photos, drawings, cartoons, letters to the
editor and other material.
Any submissions can be either emailed or
“snail mailed”. It is preferable that any
submissions be made using a computer,
(PC or Mac) Publication of articles
submitted are at the discretion of the editor.
Cut-off date for urgent material to be
printed is 30 days prior to publication
The Editor
Mainline
27 Whitehaven Drive
Lakelands NSW 2282
Email: [email protected]
Advertising: is limited to the back inside
cover of the MainLine. This
change has been made to allow easy
access as a retailer Directory for NMRA
Members, and reduce costs to retailers,
following the lead of our parent
organization’s magazine (ScaleRails).
Retailers who wish to be listed in Mainline
will be charged a nominal annual fee
covering four issues of Mainline with their
advertisement. For more information
contact the editor.
NMRA Inc.
Advancing the global model railroading
community through advocacy, standards,
education and social interaction

Page 4
Autumn 2007MainLine

Page 5
Autumn 2007MainLine
Christmas parties in Sydney, and the next day in
Taree, were a good start to the holiday season.
Members and their partners attended the Sydney
meeting organised by Divisional Superintendent
John Montgomery, ably assisted on the day by his partner, Natalie. Gerry Hopkins had organised a People's
Choice model display and all the attendees were invited to cast their vote. Somehow Gerry’s industrial
complex won! Just goes to prove how good a modeller he is. Well done Gerry and to all the other
participants. Also, wonderful to see John and Tony Saxon at the meeting as John had only just got out of
hospital a few days before following a major operation. With great food and wonderful company, it was a
day to remember.
Immediately after the meeting ended, Jenny and I set off north and an overnight stay in Cessnock with
our friends, Peter and Barbara Jenson Pete also moonlights as our Pacific Director and is on the local
Committee. The next morning the four of us were off to Taree and the lovely home of Mike and Carmel
Bartlett. Mike, as you probably know, is our newest Divisional Superintendent of our newest division, Mid
North Coast Division 9. The local NMRA members started arriving soon after and to start the day we
enjoyed an operating session on Mike’s new layout. Sixty car trains and a really long run. Mixed UP and
NSW prototypes were running on the day and I spent a great time running a 60 car train around the layout.
Also running was a very long train of wagons behind 2 of the new AD60 Garret models. A magic day.
Later we enjoyed a BBQ lunch whilst sitting around their lovely new swimming pool. There was a few
mercifully short speeches and I welcomed all the members to the association. The four of us stayed
overnight with Mike and Carmel and left mid morning on the Monday to make our way home. One of our
biggest strengths as a group is the way we extend hospitality to out of town members. I would like to thank
Mike and Carmel for the fantastic hospitality they extended to the four of us during our visit. So don’t
forget, if you are going to a new city and have a little time up your sleave contact the local Divisional
Superintendent and get more out of your membership of the NMRA. I just wish I could have attended all of
the Divisional Christmas meetings.
We have not yet collated all the responses to our members' survey and the final results will be published
in the next issue of Mainline. I just received my copy of Scale Rails from the US and if you are not
currently a subscriber I would strongly recommend the magazine to you all as it has improved out of sight
in the last few months with a new Editor and editorial team. If you have not yet seen a copy, ask to see one
at the next meeting you attend. I think you will be impressed.
I mentioned in my last report the passing of one of our members, Ian Hokins, from a heart attack.
I have been helping with the railway side of Ian’s estate and it his executor Peter Bone’s wish that we
dispose of Ian’s extensive collection of books (450 and still cataloguing), large collection of trains, kits,
parts and a switching layout. These are to be offered exclusively to the members of the NMRA and all
proceeds of the sale are to go to the Australasian Region of the NMRA. A very generous donation. I will
be conducting a sale on the 15th of April at John Baker's Kellyville home with the help of Divisional
Superintendent, John Montgomery. I would like to thank John Baker for his generous help in bringing this
event to the maximum number of members by offering his large shed as the venue. The money raised will
benefit all the members of the association and in due course I will report to you the Committee's decision on
what we will do with the funds that are raised.
Time marches on for us all and I would like to extend our sympathies to both Alan Garbutt and Geoff
Nott and their families for the loss of their mothers in the last few weeks. Our condolences also go to David
Swinfield whose wife Joan passed away on the 6th of February after a long illness. Division 6 members will
remember the excellent meeting held at David and Joan’s home a year or so ago and also his layout hosting
after last year's convention on the central coast.
Sowerby Smith
President ARC
From The Business Car
Page 6
Autumn 2007MainLine
Off The Wire - Editorial
The days are getting shorter and the humid February weather
will soon be forgotten in the windy month of March. In North
America, the onset of Autumn means moving indoors and doing
more work on the model pike. We are fortunate in Australia that we
don't have the really harsh winter of our North American friends.
Perhaps you have a craftsman kit that you haven't started yet. Or
there is that steam locomotive that could do with some super-detailing. Autumn and winter are great
seasons for doing these kind of activities. Try relaxing and enjoying some of the other great things in this
hobby.
I received an email from a member who had just read the latest MainLine and his comments were that he
really enjoyed reading the story behind Ken House's layout. In his words, "The pictures on the web site are
great to look at, but it is really good to read the story behind the photos." Why not write a few words about
your layout, so we can tell the story to the region and beyond? You may inspire another modeler to make a
start - or give them ideas for their own layout. This is the kind of thing that I joined the NMRA for - to
learn from other modelers and share ideas.
If you have not yet booked to attend the Australian Narrow Gauge convention, why not consider it? You
may not model narrow gauge, but there will be plenty of workshops and clinics on scenery, scratch-
building and weathering. I'm certainly looking forward to attending and improving my modelling. You can
still register until the end of March.
Congratulations to our Proofreader, Greg Harper and his wife Karen on the arrival of their new son,
Anderson.
Next Issue - We will be starting a series from Ted Edwards, a bit of history on the Module Sig from
Warren Wormald and more book reviews from Gavin Hince. Look for all the news from the Narrow Gauge
Convention.
Pacific Directors Report
by Peter Jensen
If I look at the duties of a Director of the NMRA (paraphrased) from the regulations of the NMRA,
Directors are responsible for:
1. Developing policies for the benefit of all NMRA members,
2. Maintaining liaison between the Regions and the NMRA via the Regional Advisory Council (RAC),
3. Keeping the NMRA informed of Region issues and desires,
4. Transmitting to the NMRA such recommendations as are made by Region members, and
5. Performing the required duties under US law.
In essence, my main responsibilities are (1) Communications (from, and to, the BOD and Executive of
the organisation) and (2) As part of the national Board of Directors, setting policy and direction of the
organisation. None of this can be achieved in isolation. To be relevant, a Director must listen to members
everywhere. It is then our duty to take this information to the BOD for discussion, and possible action.
To be more effective, I would appreciate your communication, comments and thoughts on any matter that
would help make the organisation more effective for all members.
Perhaps the BOD’s greatest concern is to grow the organisation. Total membership has remained
relatively constant (around 20K) for some time now, despite significant growth in the ABC group
(Australia, Britain and Canada). The BOD is introducing programs and services to spark interest to again
make the organisation relevant to the modeler. A good example has been the revitalisation of Scale Rails.
It is important that we all talk up the benefits of membership and encourage our modeling mates to
become active members of the organisation.
If you have any questions about the national organisation, please contact me.

Page 7
Autumn 2007MainLine
Converting an Atlas
HO S2 to DCC
By John Parker
Barren Creek & Santa Fe Railroad
When I purchased my Atlas Alco S2 switcher,
my objective was to install a DCC decoder
[without sound] and detail the cab interior.
Let’s start by removing the body shells. Gently
lift all the railings out of their holes in the cab.
Then using a very sharp small Exacto chisel blade
insert between the cab and walkway floor, gently
lift the cab sides out and upwards.
Once you remove the cab housing then the long
hood can be gently lifted up and away with your
fingers. You should now be looking at the motor,
flywheels, drive shafts and truck mounted gear
boxes as shown in figure 1.
Installation of your “silent” decoder
The clearance between the hood and the printed
circuit board [PCB] is so close you need to decide
where your DCC “silent” decoder is to be mounted.
If you choose to install the decoder inside the
cab, then build the cab floor as discussed later on
in this article, and omit the crew and control
cabinet. Just make sure that the decoder you select
along with its wires will fit inside the cab’s interior.
The PCB and its light bulb are of no use to you.
I chose to include a crew and fudge something
that looks like the control cabinet. This means the
decoder has to be mounted inside the hood towards
the front. This article is therefore written with this
specifically in mind.
In doing this, I had to dispense with both the
extra weight and the PCB in order to accommodate
the decoder, the extra wiring and a replacement
12v headlight bulb.
Looking at figure 2, the PCB and extra weight
are held in place by a single screw on top of the
motor frame. In removing this extra weight I don’t
believe you are going to lose too much in pulling
power. My S2 Yard Switcher has easily pulled 15
empty hoppers up a 2% grade, so this should not be
an issue for normal switching duties.
Looking at figure 3 you should have removed
just the weight and the PCB. However, keep the
screw as you will need it!
Looking at the two pairs of pickup wires they
are black on both sides! So which pair are the “red”
wires? For our purpose, the long hood end is the
front of the loco and the engineer sits on the right
hand side looking forward. Thus the right hand rail
is under him and it’s these pair of “black” wires
that should be considered to be the “red” pickup
wires going directly to your decoder.
You could replace these pickup wires with
longer wires using the correct colours, but I chose
to keep them. However, to eliminate any confusion
when I unsoldered this pair of wires from the PCB
I slipped a short piece of red shrink tubing over
them. The other pair of black wires should also be
disconnected from the PCB.
The other important consideration with this loco
is that the lower motor brush is in direct contact
with the “live” motor frame and chassis. The
opposite polarity gets to the upper motor brush’s
contact via the PCB.
Hence we need to insulate the lower motor brush
by inserting a piece of plastic insulating tape
between it and the frame. Also we need to solder a
piece of orange wire to the edge of this brass motor
brush nut. Make sure the exposed part of this wire
Figure 1
Figure 2
Figure 3

Page 8
Autumn 2007MainLine
does NOT touch any part the frame. Similarly, the
grey wire is soldered to the edge of the upper brass
brush nut as shown in figure 4.
I chose to install a Lenz LE1000W Value Line
decoder simply because I had it as a spare. Being a
“cheapie” it only comes with one function which I
used to control the front headlight. There is no
option to automatically kill the headlight when the
loco runs in the reverse direction.
However, you can use any brand decoder so long
as its width does not exceed the internal
dimensions of the hood. If your choice supports
two or more functions then you could install a
reversing headlight up in the ceiling of the cab. Just
make sure you create a light baffle so it doesn’t
light up the cab interior like a lighthouse!
Looking at figure 5 you will see two pieces of
scrap styrene glued on each side of the chassis. As
shown in figure 6, take a piece of double-sided tape
and stick it on the underside of the decoder and
then press it down onto these two pieces of styrene.
This allows the double-sided tape to straddle and
clear the drive shaft. Also, make sure the brass
flywheel doesn’t touch either the tape or the
decoder.
Looking at figure 7 your decoder should now
look something like mine.
Each pair of pickup wires were not long enough
to be joined together and then to the decoder.
Therefore, I had to solder an intermediary wire to
each pair of pickup wires and then solder the other
end of it directly to its appropriate place on the
decoder.
To stop all these wires from falling everywhere I
thread the wires through a short piece of soft shrink
tubing prior to soldering them to the decoder as
shown in figure 7.
Before you start connecting your decoder to
these wires, check the correct wire colours with
your decoder’s documentation. Once you are
familiar with them, then we can proceed.
Looking at figure 7 the red/black wires are the
pickup wires. The orange/grey wires take the
power from the decoder to the motor brush nuts.
Finally, the two yellow light bulb wires are
soldered in lieu of the blue and white function
wires. I soldered my wires direct to the decoder,
thereby eliminating a need for a DCC plug and
socket.
Looking at figure 7, you will notice how I
oriented the wires when I soldered them. This is to
allow the wires to lay back towards the trucks and
motor brushes.
With the wires all now neatly bundled together,
we need a platform that will keep them up and out
of the way of the drive mechanism.
As shown in figure 8, take a piece of scrap
styrene that will fit inside the hood. This platform
will need a screw hole drilled at one end. As shown
in figure 9, screw it onto the motor frame using the
Figure 4
Figure 5
Figure 6
Figure 7

Page 9
Autumn 2007MainLine
retained screw. The wires are then kept in place by
means of a small piece of “blue-tack” as shown in
figure 10.
We need to replace the original headlight bulb
with another 12v light bulb. I bought this 12v
“grain of wheat” bulb [with yellow leads] from
Dick Smith Electronics. Cut the leads down to
allow the bulb to be located underneath the hood
with enough slack so you can separate the hood for
maintenance without disturbing the light bulb.
As these light bulbs can generate heat I prefer to
use a piece of plastic tubing as shown in figure 11
to hold the light bulb with a snug fit. Then using
another generous piece of “blue-tack” pushed up
underneath the hood to keep the light bulb well
away from the plastic surfaces.
You will also notice in figure 11 that I painted
the clear plastic “headlight” rod with some orange
glass paint. This creates a realistic yellowish
headlight glow whilst the number boards remain
white.
This completes the installation of the decoder
and you should probably take the loco away to
your programming track to check for any problems
and/or assign its address.
The Crew
At this point we now shift our attention to the
cab end of the loco. From your work so far you
will have seen that the top of the truck gearbox
housing sits slightly higher than the top of chassis.
Consequently, we need to glue two more scrap
styrene spacers onto each side of the chassis so
when the cab floor is in place, the trucks will have
adequate clearance.
Looking closely at figure 12 you will notice
beneath the grey floor are the spacers. Make sure
the truck and its pickup wires do not snag on these
spacers. The spacers are glued just inside the
outside edges of the cab and NOT flush with them.
At this point remove the clear plastic “box” that
fits up inside the cab’s roof to provide the window
glazing.
Figure 8
Figure 9
Figure 10
Figure 11
Figure 12
Page 10
Autumn 2007MainLine
This will allow you to measure the internal sizes
so that the new cab floor will sit inside it. Also you
can use the bottom curve of the clear plastic box to
draw a template for the top of the firewall that will
separate the cab from the hood.
Once you have made the cab flooring from scrap
styrene, check again to make sure it will easily fit
inside the clear plastic “box”. Next centre the floor
of the cab and glue it onto the spacers. Put aside to
dry.
Looking at figure 13, you can see the firewall
glued to the back of the hood. The width should be
the same as the rear of the hood. The height of the
firewall is determined by the distance between the
floor and the top of the hood. Remember the cab’s
shell and glazing has to also fit over the firewall.
Once you have the deduced the firewall’s size and
outline make a firewall from scrap styrene and glue
it in place. Put aside to dry.
I found two likely crew members in my scrap
box. You could also use a couple of the Preiser
figures from their “seated” collection. As the
modified floor sits higher than the prototype, the
crew will need to be “lowered” in their seated
position. I chopped their legs off at the knees and
painted them. Then I glued the back of their seats
to their backs.
The “control cabinet etc.” was made by gluing
together some more styrene pieces out of my scrap
box as shown in figure 13. I painted the floor,
control panel and firewall a neutral shade of grey,
although you could also use a “duck egg green”
paint colour.
Before I reinstalled the clear plastic “box” up
inside the cab’s roof I very carefully painted the
inside of the cab shell grey. Make sure you don’t
get any excess paint bleeding on to the window
edges. Put aside to dry.
Now reinsert the clear plastic “box” into the cab
shell. Glue the crew and the control cabinet in
place. Put aside to dry.
Once everything is dry, slip the hood body shell
in place. Then push the cab shell down over the
floor until it snaps into position. Carefully relocate
the railings into their holes.
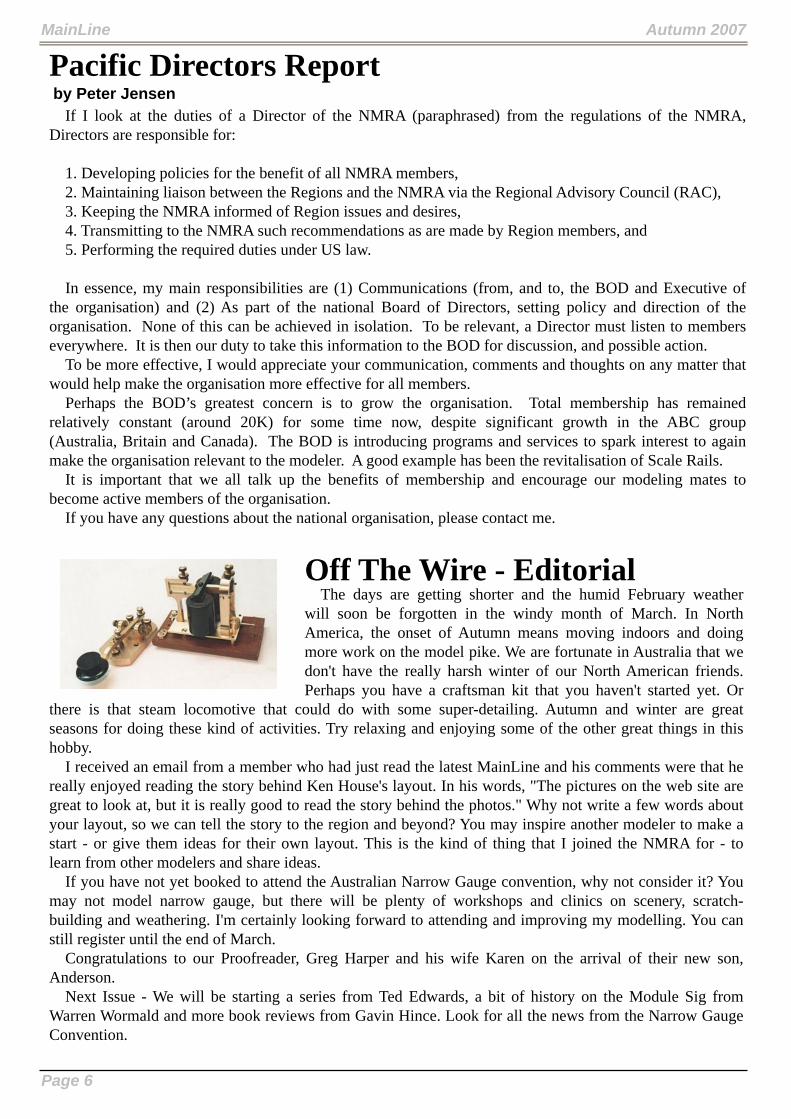
Finally, I took the opportunity to replace the
X2F couplers with a pair of Kadee #58 scale
knuckle couplers.
Figure 14 shows the completed project with its
crew manning the S2 diesel instead of a “black
hole” being inside the cab.
Figure 13
Figure 14
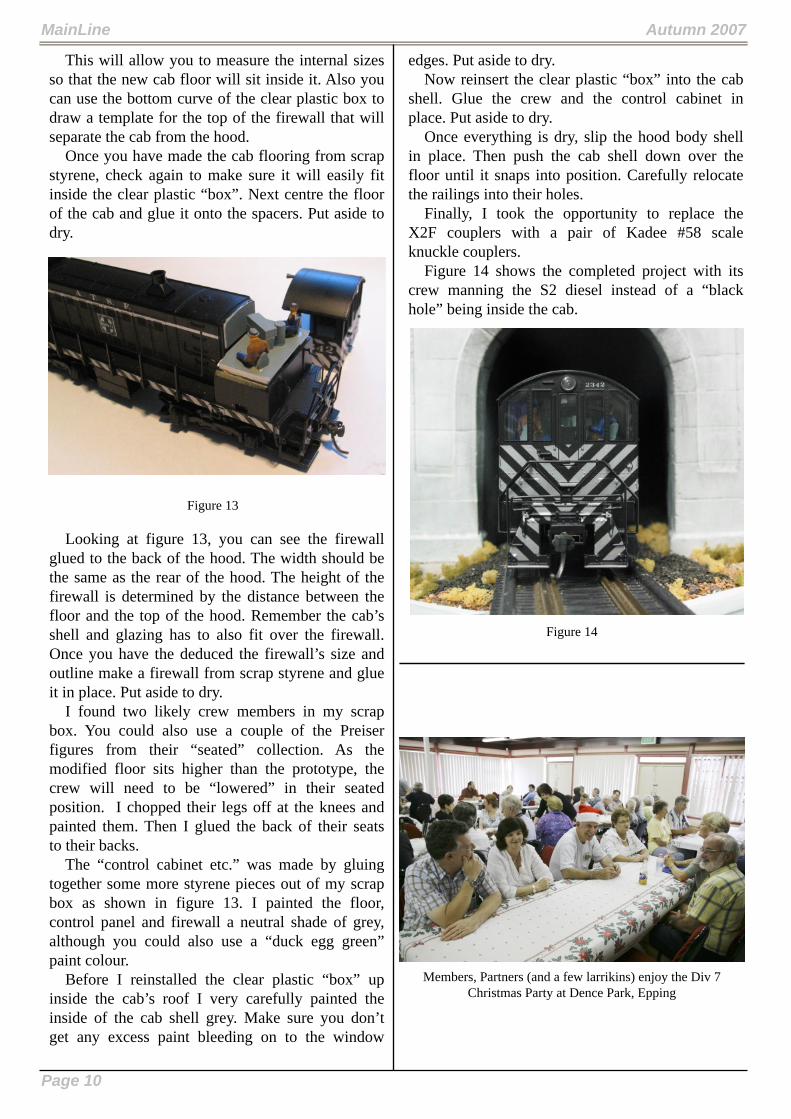
Members, Partners (and a few larrikins) enjoy the Div 7
Christmas Party at Dence Park, Epping
Page 11
Autumn 2007MainLine
Division 1
Queensland
By Ian Venables
JANUARY 2007
Next Meeting
See below for a quick glance at what the
program is for 2007. Keep an eye open for news of
our Post Christmas Family Picnic and the day at
the Warner Live Steam complex.
(All meetings start at 1.30pm unless advised)
Visit to Darling Downs Model Railroad Club
(DDMRC)
Visiting the DDMRC is always a treat because
this large group “invent” good ways of achieving
results and always treat us with much camaraderie.
Our visit to their club rooms on 4-11-06 gave us a
chance to see the progress on their layouts, Eight
are completed and a couple more are on the way.
And what layouts! Most are large and their N scale
layout must have one of the longest mainline runs
in the country. One scale layout takes about 20
minutes to cover with the potential of it being a lot
longer if they join another layout next to it.
A Division 1 meeting was held and Glenn
Stevens told the group that we are planning to hold
the convention on the 2nd weekend of September
2008. He mentioned that at this moment the initial
planning was being done by him as superintendent,
Sandra Stevens and Ian Venables. Since then
Graham Emery has been asked to contribute by
looking into the clinics programme. More people
would be required to make up the committee as we
progress into next year. Another appointment is
that of Graham Emery as our new librarian. Those
clubs with 100% NMRA memberships will be
allocated library material depending on their
membership size.
The 2007 calendar is not yet completed nor fully
confirmed but here is a preview:
Jan – Post-Xmas Family Picnic
Jan – Warner Live Steam
Feb 10 – Alan Harland, Oxenford
Apr – John Lebsanft Bundaberg
Jun 16/17 – Toowoomba Train Show
Aug 11 – Macleay Island layouts
Oct 13 – Ian Wellings, Sunshine Coast
Dec 8 – Toowoomba Oma Belt & DDMRC
Show and Tell:
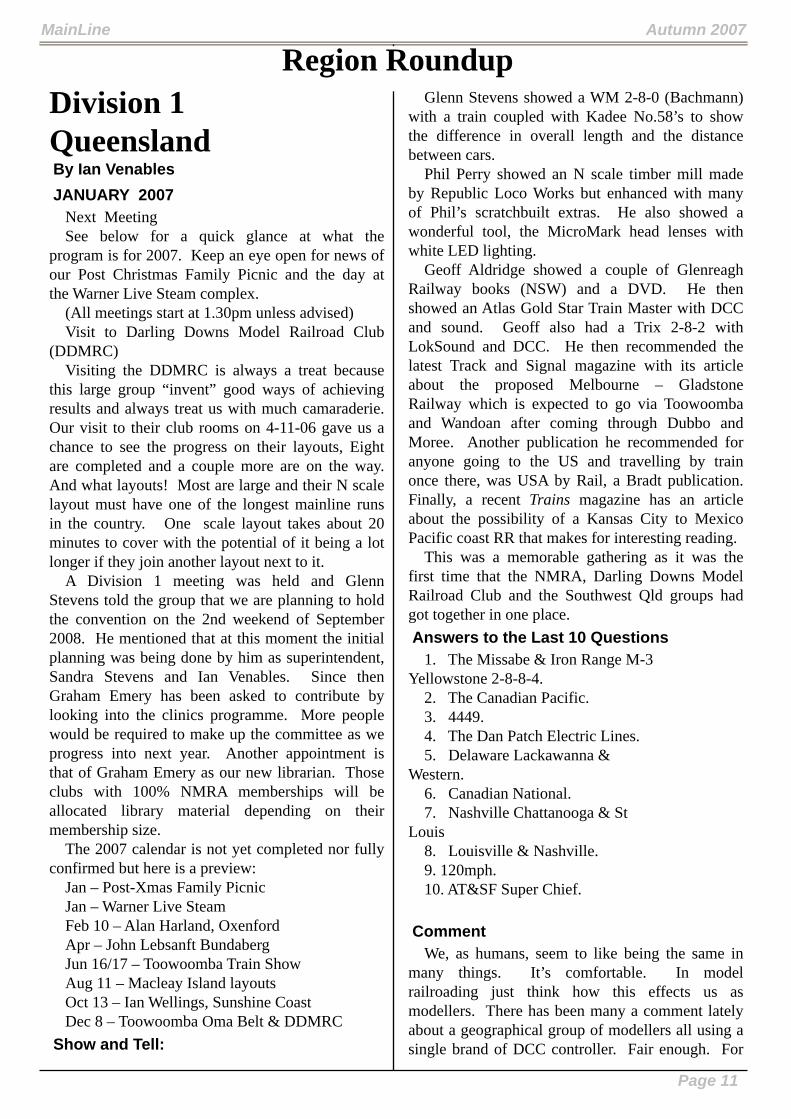
Glenn Stevens showed a WM 2-8-0 (Bachmann)
with a train coupled with Kadee No.58’s to show
the difference in overall length and the distance
between cars.
Phil Perry showed an N scale timber mill made
by Republic Loco Works but enhanced with many
of Phil’s scratchbuilt extras. He also showed a
wonderful tool, the MicroMark head lenses with
white LED lighting.
Geoff Aldridge showed a couple of Glenreagh
Railway books (NSW) and a DVD. He then
showed an Atlas Gold Star Train Master with DCC
and sound. Geoff also had a Trix 2-8-2 with
LokSound and DCC. He then recommended the
latest Track and Signal magazine with its article
about the proposed Melbourne – Gladstone
Railway which is expected to go via Toowoomba
and Wandoan after coming through Dubbo and
Moree. Another publication he recommended for
anyone going to the US and travelling by train
once there, was USA by Rail, a Bradt publication.
Finally, a recent Trains magazine has an article
about the possibility of a Kansas City to Mexico
Pacific coast RR that makes for interesting reading.
This was a memorable gathering as it was the
first time that the NMRA, Darling Downs Model
Railroad Club and the Southwest Qld groups had
got together in one place.
Answers to the Last 10 Questions
1. The Missabe & Iron Range M-3
Yellowstone 2-8-8-4.
2. The Canadian Pacific.
3. 4449.
4. The Dan Patch Electric Lines.
5. Delaware Lackawanna &
Western.
6. Canadian National.
7. Nashville Chattanooga & St
Louis
8. Louisville & Nashville.
9. 120mph.
10. AT&SF Super Chief.
Comment
We, as humans, seem to like being the same in
many things. It’s comfortable. In model
railroading just think how this effects us as
modellers. There has been many a comment lately
about a geographical group of modellers all using a
single brand of DCC controller. Fair enough. For
Region Roundup

Page 12
Autumn 2007MainLine
most, it is a complicated affair and the more of us
using a single brand in one locality, the more likely
we are to find answers from our friends living in
the neighbourhood. Is this what drives most
Australians modelling US railroads to model
western roads? Or is it because the West Coast of
the US is the closest part to Australia and thus if
we get to railfan in the US we start as soon as we
land? Is it the Santa Fe’s eye catching warbonnet
scheme or any other western road paint scheme
that attracts us? That’s like asking what comes
first, a shop full of western road locos or the
demand for western road locos causing traders to
stock them? Perhaps it's the Big Boys,
Challengers, Cab Forwards, etc? Some of us are
driven the other way. That is, because there are so
many western roads, we like to do something
different. That certainly influenced my choice and
why I’m interested in the L&N, SR and other roads
connecting to them. But these other lines also have
beautiful diesel colour schemes and they had some
classy steamers too. They went through nice
scenery including, in some places, great mountain
scenery. They generally interchanged with more
roads than western roads did. Some of these
Eastern roads would make really great models.
Think of the tiny Interstate with only 88 miles of
trackage (1960). It had freight and passenger
operations, traversed lovely scenery, had many
interesting structures and industries, had a
reasonable variety of steam locos, including
mallets, diesels and RS-3’s with one of the most
startling colour schemes in the US. Then there is
the Clinchfield with similar features but still quite
different in some things. The CRR had lots of coal
tipples models of which would easily fit in a very
small corner with most of them being a scratch
builders paradise. I’ve never heard of a model of
the Charleston & Western Carolina nor the Atlantic
and East Carolina (a Branchline boxcar is
available) nor Sumpter & Choctaw nor the
Columbus & Greenville (the original Delta Line).
But each of these railroads had features that are
most appealing and call out to be modelled. There
is information about them if you look hard enough.
Models can be bought, the lettering removed, the
odd detail added or perhaps removed, cars and
locos re-decalled and you begin to have something
almost unique. What you can’t fill in from
reference sources you can surmise and who can
criticise you? But you don’t have to hunt down the
really small RR’s. The Monon, the Alton,
Tennessee Central, Chicago & Eastern Illinois,
Chicago and Illinois Midland and the Nashville
Chattanooga & St. Louis are roads that are very
attractive in many ways. Then there are many
others in New England and along the eastern
seaboard. If I go on much further the retailers will
be wanting my blood! What I’m really saying is,
“Don’t be afraid to go out on a limb and do
something different”. Having to delve into your
chosen RR a bit deeper because there is less
information about it may give you a greater sense
of achievement and fulfilment. You might also be
surprised at the attention you’ll get.
Some History
On 2nd July, 1913 General Electric completes
construction of the first commercially successful
locomotive powered by an internal combustion
engine. The loco goes into service on the
Minneapolis St.Paul Rochester & Dubuque – The
Dan Patch Lines as #100.
On 12th December, 1922, the long Island RR
#401, a 100 ton, 60 hp diesel locomotive, makes
the first move of a road freight train with diesel
power in North America. The train of 379 tons
travelled 537 miles.
On 25th June, 1925, Baldwin Locomotive Works
places locomotive #58501 in service, the first to be
powered by a diesel engine.
Confused? Yes so am I, but that’s history!
Who’s Doing What?
Division 1 Superintendent:
Glenn Stevens.
Achievements Program Chairman:
Grahame Davis.
Achievements Program Committee:
Ken Leitch.
Display Layout Co-ordinator:
Paul Skehan.
Newsletter Editor:
Ian Venables.
Company Store (Shirts & Name Badges):
Glenn Stevens.
Treasurer (Hon): Sandra Stevens.
Webmaster: Lynn Zelmer.
2008 Convention Committee:
Glenn Stevens (chairman)
Sandra Stevens
Graham Emery
Ian Venables.
Get Well Soon
We all wish our friend from Gosford, John

Page 13
Autumn 2007MainLine
Saxon, a speedy recovery after a recent operation
and may he recuperate fully at the controls of the
Cedar Valley Lines.
MARCH 2007
Next Meetings
31st March at Alan Harland, 75 Ruth Terrace,
Oxenford.
12th May at Bob Brown, 63 Viscount St, Bray
Park.
Then:
Jun 16/17 Toowoomba Train Show
Aug 11 Macleay Island layouts
(All meetings start at 1.30pm unless advised)
Farewell
On behalf of the Display Layout SIG, we said
farewell to popular Canadian member, Roy
Berryman on Sunday 7th January. Roy brought
with him much enthusiasm and knowledge that we
all appreciated.
Roy, flanked by Division 1 Superintendent
Glenn Stevens and Display Layout Co-ordinator
Paul Skehanholding, and our farewell presentation
to him, a Kato BN business car.
We wish him, Jessica and their children our best
wishes on their return to Canada and hope that we
haven't seen the last of them. Roy stated that he
wished to remain in contact with us in the future
and I'm sure everyone here is pleased to know we
have a faraway friend we appreciate.
Display Layout
We recommenced working on the display layout
again on 14th January. Lessons learnt in the past
are being put into action and we believe that when
finished all of these improvements should make the
thing a joy to erect and run. We progress slowly but
that's pleasant because I've never known modellers
to be short of conversation on their favourite topic.
There is a lot of chat in amongst all of that
hammering, drilling, soldering, gluing, etc. I hear
people say, when doing some job on the layout,
"That's given me a good idea of how to do that job
on my own layout".
All of the frogs are wired to the slide switches
that operate the turnouts. The tubing and
connecting pins for the joins at the module ends are
in progress and being done a lot more accurately
than previously. Some scenery work has been
started and we've decided to make the trestle a
ballasted one as that eases the maintenance of the
track bed in that section. This is because the
roadbed doesn't need changing to a thinner piece at
the bridge. This should be more durable for a
layout that is moved often. Some jobs are repeats
but are being done much more carefully and not so
rushed. Others are new directions and hopefully
doing things in a way that will stand a lot of
movement but achieve the results that we hope for.
Comment
You're a model railroader. That means you have
a reasonable collection of tools especially fine
ones. It also means that you probably can use them
with proficiency. You also have a workshop or
workshop area that contains timber, all sorts of
wire in many thicknesses, putties, glues, electric
tools maybe a lathe and round half-hard brass
lengths. You probably have many colours and types
of paint and what's more you can mix them very
accurately to match a chip of some obscure colour.
You aren't too bad with electrical circuitry either.
Got the picture? You also have family, friends and
neighbours with almost none of these advantages
nor the skills to use them, but can sniff out your
workshop and your abilities like a pig finding
truffles in the French forests. These people are out
to spoil your modelling time by asking you to fix
Aunt Dolly's clock radio, daughter Maisie's
connecting cord from the PC to the printer. How
about a daub of paint on the car where a stone
chipped the bonnet? And you haven't told them
anywhere near about all of your talents yet. Thank
God! We are likely to see all of these chores as a
pain but we do them anyway; and of course we
never charge them a cent. You can get some
mileage out of all of this. I'm fond of announcing
that my Unimat lathe has saved this household a
fortune over the years. Things such as the washing
machine bearings have been fixed promptly
without having to empty the machine and it cost
almost nothing; except for the original pile of cash
the lathe cost! But each job it does, lowers the cost
of each individual piece. That must bring the next
job cost down to about 0.001 cents. Well how

Page 14
Autumn 2007MainLine

Page 15
Autumn 2007MainLine
C
C
e
e
n
n
t
t
r
r
e
e
P
P
h
h
o
o
t
t
o
o
J
J
o
o
h
h
n
n
H
H
u
u
g
g
h
h
e
e
s
s
n
n
e
e
w
w
W
W
e
e
s
s
t
t
e
e
r
r
n
n
R
R
o
o
a
a
d
d
L
L
a
a
y
y
o
o
u
u
t
t
P
P
h
h
o
o
t
t
o
o
b
b
y
y
G
G
e
e
r
r
r
r
y
y
H
H
o
o
p
p
k
k
i
i
n
n
s
s
Page 16
Autumn 2007MainLine
about getting your due in full. Show them where all
of this gear and your talents are directed to.
Explain how model railroading has taught you so
many skills that are great fun and useful around the
household (that will get spouses in!). Show them
the interesting and the finer points of your hobby.
You could force them to accept you as a very well
adjusted hobbyist rather than a nutter who plays
with trains. You may, with considerable skill, get a
convert to our great hobby, and, as I have said
before, "that's got to be good for all of us". Lots of
people are looking for hobby time these days. And
don't think of it as a male thing; you'd be surprised
by the number of women I know that are fascinated
by the scenic aspects and one or two by the
possibility of making structures. If none of these
things come to pass, you may bore them to tears
and suddenly find that you have more hobby time
and fewer interruptions.
Some Reading Matter
I have just received from Chattanooga the new
NMRA publication "The Postwar Freight Car
Fleet" by Larry Kline and Ted Culotta. What a
wealth of information there is in this hard cover
book. The Introduction explains the make-up and
the reason the book is written. In particular the
authors validate their freight car coverage by
ensuring that their treatment reflects the percentage
of each type of freight car in the American fleet in
1947. The book is really a photographic record of
the diversity of freight car with captions that give
some account of the logic behind each particular
car. There are a lot of surprises to be found
throughout this book. I noted that that flash
Readingherald with the red background was extant
in 1947 and is not a later indulgence as it seemed. I
recently bought a gondola with that logo in a sale
and was about to backdate it to my era by using
something a lot simpler. Don't have to now! It is
interesting to note the variations in lettering for
cars of the same road in photos taken in 1947. The
maxim seems to be, "Don't be too dogmatic about
how a car was lettered at any particular date".
Another surprise is the number of boxcars that
seemed to use Murphy corrugated ends and the
variety of corrugations in those ends. Yet there
aren't a lot of models with these Murphy ends. As
most of the photographs are dated, we now know
that obsolete equipment, for example vertical
brakes staffs, carried on long after its stated official
discard date and it was used in interchange.If you
are at all interested in the accuracy of your freight
car fleet this book is a must. It can be cross
referenced with information obtained from Official
Railroad Equipment Register reprints from the
NMRA, plans and articles in the various magazines
and information from the internet very well. As
modellers of the American prototype, this is
another great tool to get your freight cars right.
I also ordered the 2006 Clinic Book
(Philadelphia) at the same time. Like clinic books
of the past, it is full of information on a variety of
aspects of our hobby. In my own case, I even got
some answers to long standing questions about the
Borden butterdish milk tank cars. There are
sections on Animation and Electricity, Cars and
Trains, General Modelling, Industries and
Prototype Research and Modelling. It all makes
one thankful to be in the NMRA.
Outing with Live Steam
On Sunday 11th February, we paid a visit to the
live steam group at Warner, the Queensland
Society of Model and Experimental Engineers.
There was a good roll-up of members, wives and
friends As it turned out, we didn't even have time
for a formal meeting. There were so many
locomotives in action during our visit, mostly
steam, that it was impossible to round up
members.Although a hot day, we found good
shelter at a few picnic tables under shady trees and
were so taken with the trackside action that I doubt
very many would even remember what they ate for
lunch! Prominent runners were a couple of
beautiful BB181/4 QGR steamers, more QGR in a
PB15 and a C16, NSWGR 3807, a 'Rocket' type
and a vertical boilered logging loco that ran all day.
Yes there were a few non-steam types but they are
difficult to remember for an old steam freak like
me. This is one of those places where you go
expecting a 2 hour outing and stay for 5 hours. So
be warned.
Easter Events Interstate
A couple of Easter events have been brought to
my notice. Firstly the Exhibition of Australian
Model Railways 2007 run by the Hobsons Bay
Model Railway Club. For details check:
www.hbmrc.net [1].
Secondly, there is the 8th Narrow Gauge
Convention in Melbourne. For details check:
http;//users.bigpond.com/nawlins/ngconvoz.htm
or contact Laurie Green at:
[email protected] [2].
Attendance is by pre-registration only and closes
26thMarch.
Page 17
Autumn 2007MainLine
UP Club Buy and Sell
This year's dates for the popular UP Club buy
and sells are:
Tuesday 20th March
Tuesday 17th July, and
Tuesday 20th November.
These are an opportunity to get rid of your
unwanted items and perhaps buy up on items you
need. But they are also great social occasions. So
be there as you are sure to get something out of it.
The AMRA Train Show this year will be on the
long weekend in May, Saturday 5th May to
Monday 7th May. Besides the social event you get
a chance to see what others are doing and perhaps
make a purchase or two of items not normally seen
in the shops.
Check out NMRA Scale Rails (The old Bulletin)
as it is much improved and may be a help to your
modelling.
Finally, this is a plea for you to please keep us
informed of your e-mail changes. Your Newsletter
editor has little enough hair already without
needing an excuse to pull out more!
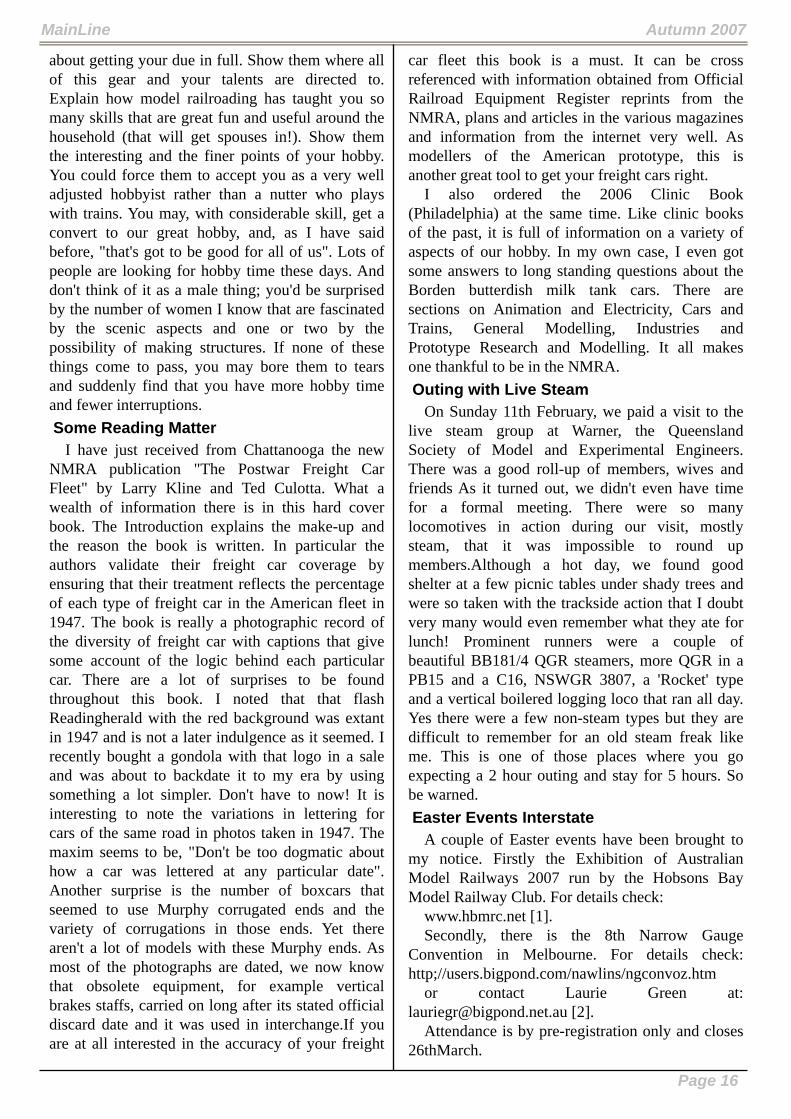
George Paxon's On30 Layout - Photo by Josh Loyd
Taree Christmas Party
Members inspect Garratt locomotives
Page 18
Autumn 2007MainLine
Division 3
Victoria
by Rod Hutchinson
February
The February meeting was held on Sunday 18 at
it's regular venue, the home of Paul & Kath
Ritchie, located in Ballarat on the road to Adelaide.
10 modellers and 2 partners arrived on a very hot
day, complimented by attendees from as far away
as Mooroolbark, east of Melbourne, Stawell to the
west and Geelong to the South.
Models on display
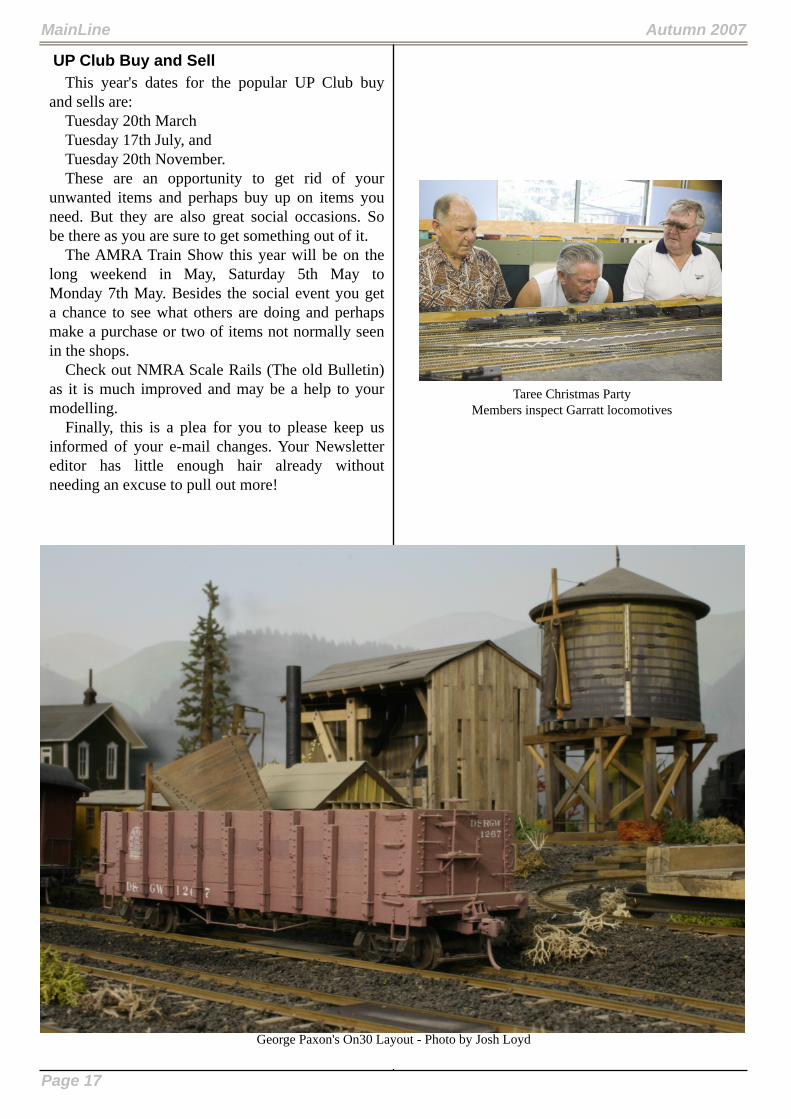
Laurie Green has been working on his
submission to the 2007 Australian Narrow Gauge
Convention; a station halt in O scale called
"Tullie", and showed off his new Precision Models
On30 Galloping Goose No.4.
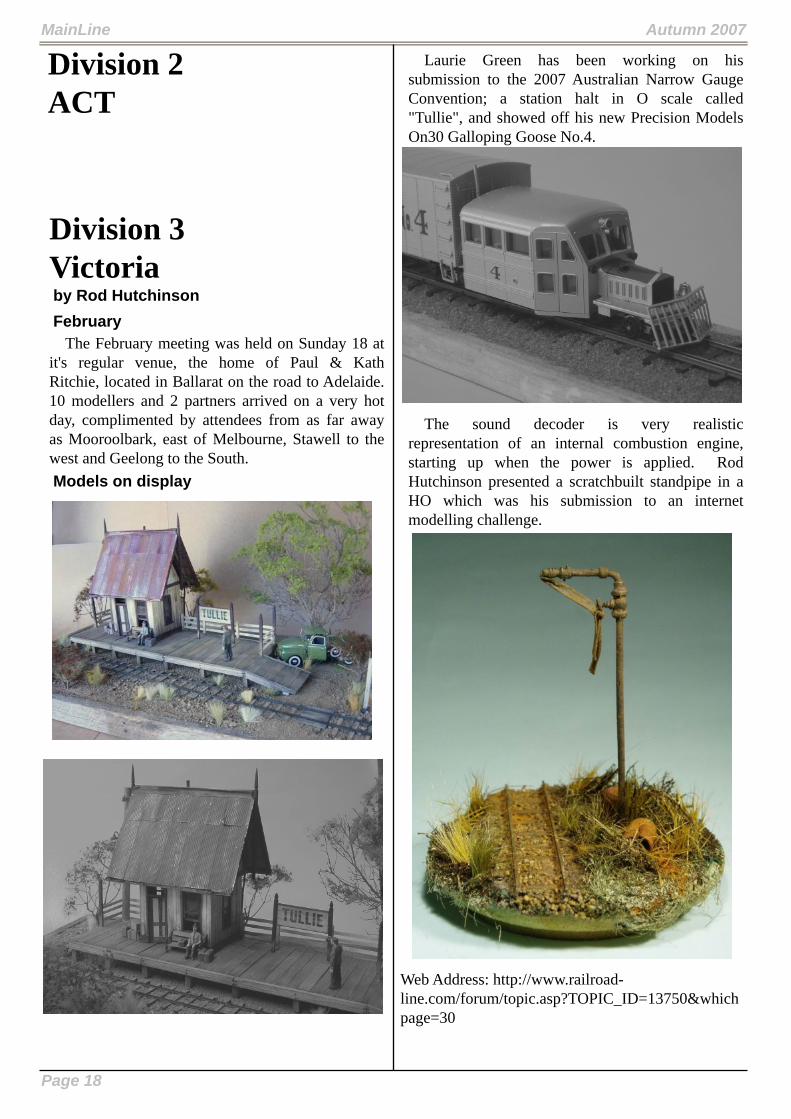
The sound decoder is very realistic
representation of an internal combustion engine,
starting up when the power is applied. Rod
Hutchinson presented a scratchbuilt standpipe in a
HO which was his submission to an internet
modelling challenge.
Web Address: http://www.railroad-
line.com/forum/topic.asp?TOPIC_ID=13750&which
page=30
Division 2
ACT

Page 19
Autumn 2007MainLine
Paul Ritchie showed his progress with his On30,
Forney and Sandy River locomotives.
Reading matter
Grant McAdam; Narrow Gauge and Industrial
Railway Modelling Review, Narrow Gauge News
and the Puggy Line by Patrick Harat. Rod
Hutchinson; Newsrail February 2007, Light
Railways No 93 featuring the narrow gauge
railways of PNG.
Grant provided an update of the Narrow Gauge
Convention to be held at Noble Park, Melbourne
during Easter 2007.
Web Address:
http://www.users.bigpond.com/nawlins/convention_h
ome.htm .
Following a very hot day catching up with
modellers from far flung parts of the state, Grant
thanked Paul & Kath for opening up their home,
and presented them with their thankyou plaque
Next Div. 3 meeting venue will be at the home
of Bill Black, 18 March 2007
Division 6
South Australia
by Ron Solly
The first 2007 meeting was held on February 3
at the home of Ron Solly and it was a hot day.
Water coolers & fans going ninety to the dozen
as we were outside. The Train Room was not bad
and inside the home was better but less room. 21
names appear on the Attendees listing.
Ron mentioned a few aspects such as surplus
magazines; the Mainline possibly going on-line;
our Divisional finances and the raffle. The raffle
will be held open for 3 meetings with 2 prizes of
gift vouchers from a couple of local hobby shops;
Wats-on-Track and Graham’s Corner and to these,
we say “thanks”.
It was pleasing to see Ron Davey return after
2006 being a bad year for him and his family.
The modelling part of the afternoon was a mixed
bag of “Show and Tell” covering a Kadee coupling
test track; detailing an Athearn GP38-2 loco;
vehicle construction in G scale, cardboard
buildings using software for brick and stone papers
and old soapboxes and oddments found throughout
the household for detailing.
The layout of the host gave some members a few
ideas coupled with discussions of how UK models
have improved over the last few years. The layout
was even used to test out one member's USA
model loco.
As usual, lots of general chitchat floated around
the group, some of it modelling and others of any
other topic.
Refreshments of hot and cold varieties were
available all afternoon and the goodies provided by
the partner of one member disappeared in a flash.
It was unfortunate that the weather was not kind
and, if memory is still OK, it would be the second
time that weather has been not the ideal
Page 20
Autumn 2007MainLine
considering we have held 21 meetings since we got
started back in November 2003.
The next meeting on April 14 will be at the
home of Mike Warburton at Elizabeth. Let Mike
know by Wednesday April 11 if attending on 8255
1676.
Division 7
New South Wales
by John Montgomery
January
On a beautiful sunny Saturday our members
heeded the call to go west into the Blue Mountains
to visit George and Celeste Paxon at Wentworth
Falls. Forty nine members signed the attendance
book and many of those members attended with
their wives. It was very nice to see the ladies
accompanying their husbands.
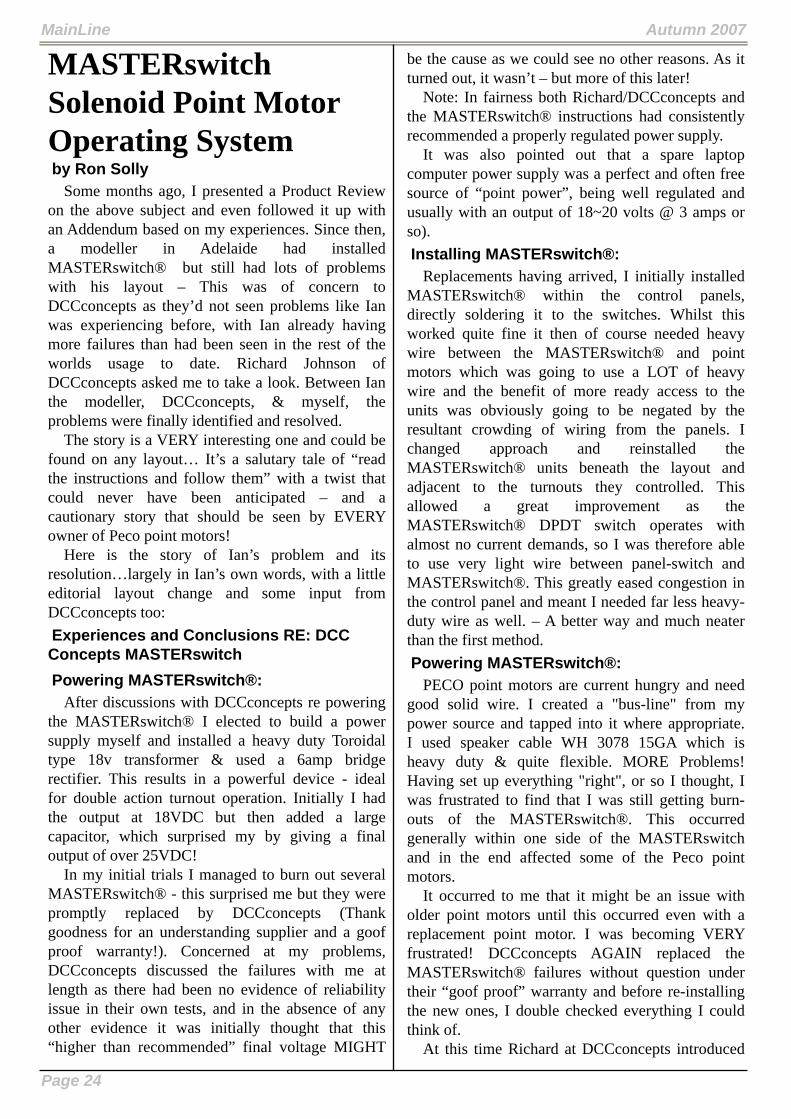
George has done considerable work on his
layout since last we visited him. His O Gauge
layout which runs on DCC ran superbly and the
buildings and scenery were immaculate. It was a
pleasure to see such a high quality layout on
display for the members. George was ably assisted
running the layout by Ray Walter and some of the
other members.
After a very short business part of the meeting
Celeste served us a wonderful afternoon tea.
All members who attended the meeting appeared
to enjoy the afternoon and the company provided
by both George and Celeste.
February
The February meeting was held on a very warm
Saturday afternoon at the home of John and
Lorraine Hughes. Fifty members and some partners
attended the meeting.
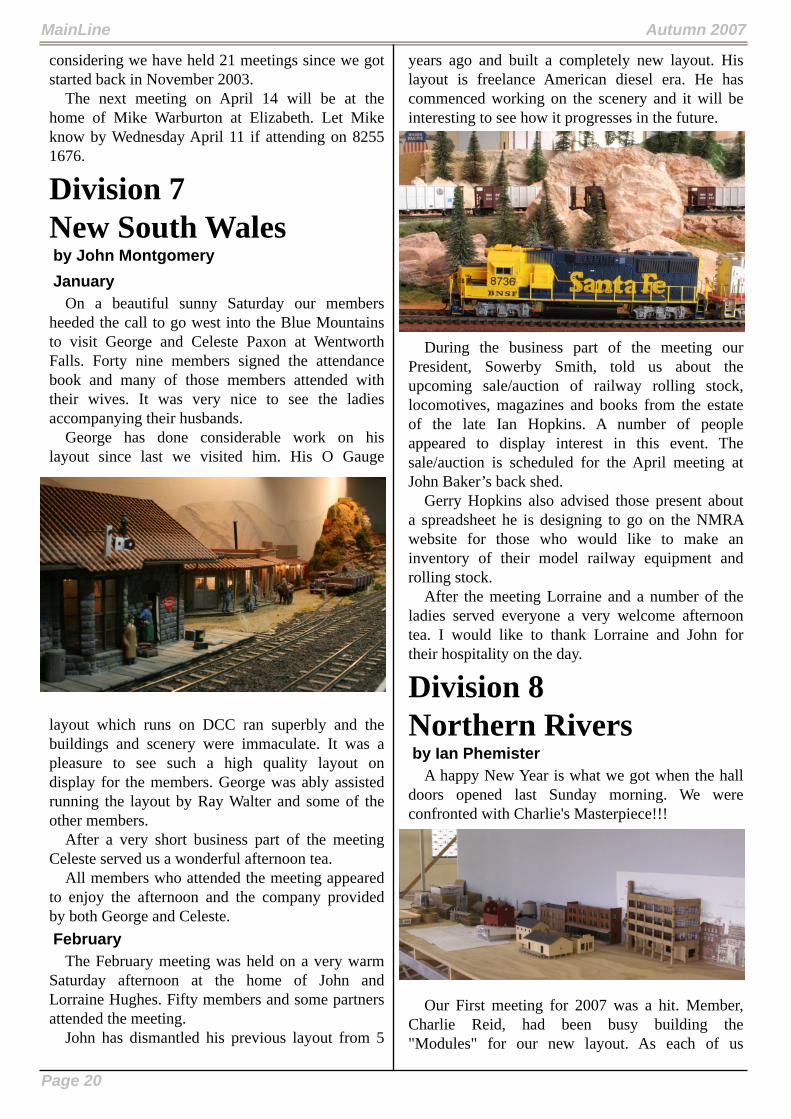
John has dismantled his previous layout from 5
years ago and built a completely new layout. His
layout is freelance American diesel era. He has
commenced working on the scenery and it will be
interesting to see how it progresses in the future.
During the business part of the meeting our
President, Sowerby Smith, told us about the
upcoming sale/auction of railway rolling stock,
locomotives, magazines and books from the estate
of the late Ian Hopkins. A number of people
appeared to display interest in this event. The
sale/auction is scheduled for the April meeting at
John Baker’s back shed.
Gerry Hopkins also advised those present about
a spreadsheet he is designing to go on the NMRA
website for those who would like to make an
inventory of their model railway equipment and
rolling stock.
After the meeting Lorraine and a number of the
ladies served everyone a very welcome afternoon
tea. I would like to thank Lorraine and John for
their hospitality on the day.
Division 8
Northern Rivers
by Ian Phemister
A happy New Year is what we got when the hall
doors opened last Sunday morning. We were
confronted with Charlie's Masterpiece!!!
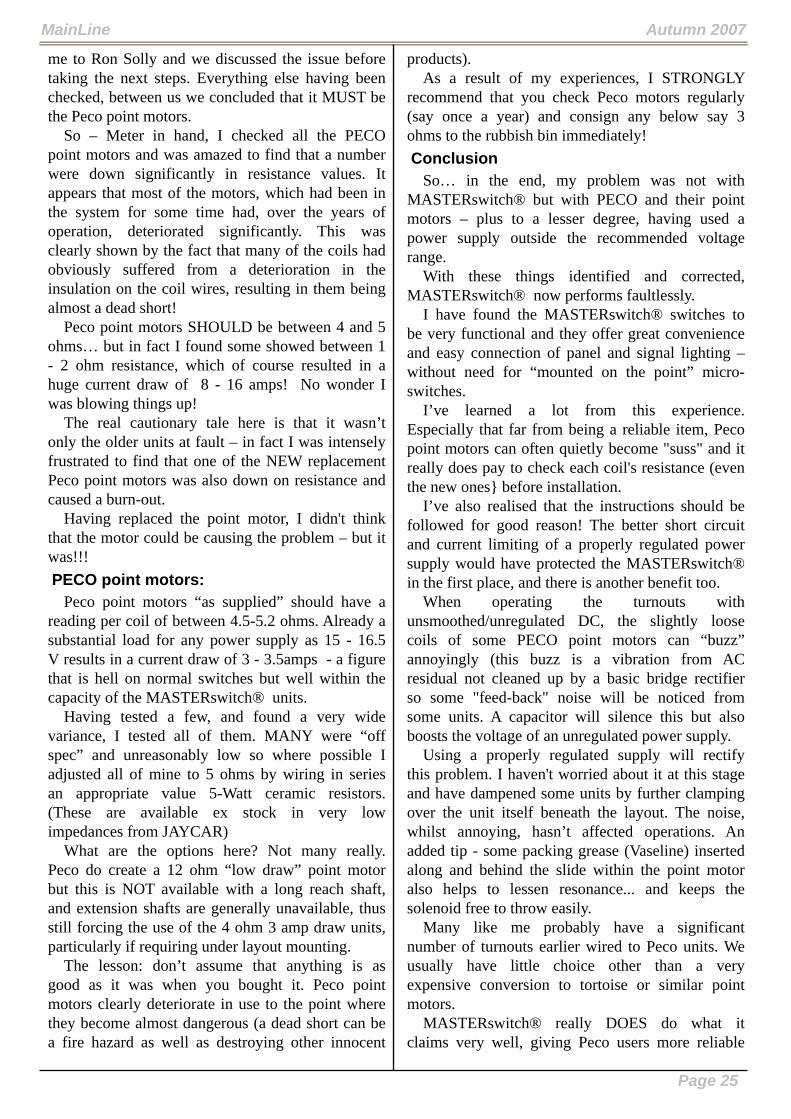
Our First meeting for 2007 was a hit. Member,
Charlie Reid, had been busy building the
"Modules" for our new layout. As each of us

Page 21
Autumn 2007MainLine
entered the hall, chins simply dropped to the floor
and Holy _ _ _ _! was the only thing heard. There
was not a whisper of criticism to be heard upon
inspection, and why would there be when it was
built within a 1/2 millimeter. That Charlie......Spot
on!
Due to a lag in the building trade, Charlie and
son Dave had spend most of the holidays
constructing all 14 of the new modules for the new
layout. Over five thousand dollars worth of
alluminium has been cut and welded to bring it all
together. At present they are still just frames.
Backdrops and roadbed is still to be fitted.
Throughout the day several of us continued with
construction of the numerous building kits we had
purchased. John Skinner showed us how he makes
his Gum trees for his home layout and after a
general discussion it was time to head home. What
a great, Positive day and great start to the new year.
I have only added a couple of pics, To see more
you will have to come up and see it for yourself.
Book Review
By Gavin Hince
The emergence of diesel
power arguably represents the
major technology influence on
railroads of the past century.
Among this evolution, EMD
road switchers (general-
purpose hood diesels from
GP7's through to GP20) were a massive influence
on the design and refinement of the modern hood-
style diesel-electric.
Beginning with the GP7 in 1949, thousands of
these units were built for use in the US and dozens
of other countries. The hood construction allowed
easy maintenance access and good visibility for
switching. The mid-powered road switcher
provided "building block" power suited for yard
work, branchlines, or combined in lash-ups for
heavier haulage. Sharing many components with
other EMD models, the success of these designs
made EMD a dominant locomotive builder. This
signalled not only the "end of steam" - as ageing
steamers were displaced from lighter duties and
branchlines - but also the decline of traditional rival
builders such as Alco and Baldwin.
Over 112 pages and more than 200 photographs,
this soft-cover book from Specialty Press traces the
evolution of the EMD road switcher. Early chapters
deal with preceding models and the early Alco
locos that developed the "road switcher" concept.
Chapters then deal with each of the major model
evolutions; and finally address "re-builds" by a
number of railroads to prolong the service life of
their diesels.
Modellers will appreciate the numerous close-up
colour photographs and extended captions
highlighting the variations amongst different users.
Generally, photos of a particular railroad's
engines are grouped together, providing easy
reference for modelling purposes. Many
specifications are also provided, particularly for the
EMD 567-series diesel engine that powered many
of the road switcher models. The book also
explores how design improvements provided
performance advantages for EMD's products - such
as traction motor cooling performance. As well as
being interesting reading, this material provides
modellers with a better understanding of practices
to operate and maintain the real thing - such as
"cycling" the traction motors after prolonged heavy
usage.
This book forms a companion to previous
volumes that explored "F" cab units and other
contemporary diesels. The crisp presentation and
highly-readable text make it an enjoyable read for
anyone interested in diesel-era US railroads; and
the photographs provide great modelling references
to customise your road switchers to individual
prototypes.

Page 22
Autumn 2007MainLine
The Story of the Fanta
Se Railroad.
By David Latham
A new railroad room with two floors of solar and
thermal insulation was purchased in July 2003. This
occurrence necessitated a new and, hopefully, better
model railroad.
Surveying and planning of the available space
(an oversize double garage which houses two cars)
began very soon after. I was determined to use new
techniques to model the right-of-way and a trip to
Seattle for the NMRA convention in 2004 helped
me organise some ideals.
Presently, the HO scale layout is a 600mm shelf
along one wall with return loops located in the
adjacent sub-floor area. There is a hinged drop leaf
at the garage door end where a loop of track directs
traffic to one of these return loops. The next stage
of construction includes continuing the shelf around
the back of the garage and onto the other side wall
to hold a stub-end branch.
Work has been steady since July 2004. The
benchwork is at such a height that the doors of my
car can open under it. Shelf storage was built to
support the railroad. 15mm plywood
was used in both. The mainline
roadbed is made from 4mm thick
25mm wide draft-excluding tape.
This material is soft-ish and has peel
& stick simplicity. I used this for its
sound deadening properties but this
meant that all other glues needed to
be flexible. Clear silicone holds the
track and points (Peco code 75) and
Chuck’s ballast glue, the ballast. Yard
areas are glued and ballasted with
white glue direct to the plywood to
give a more prototypical look for the
elevated mainline.
The area sceniced so far portrays a
division point on the Fanta Se

Page 23
Autumn 2007MainLine
network. There are the necessary loco service
equipment, turntable, roundhouse, etc and some
sizeable industries to keep the ‘operators’ happy.
By the time of the NMRA meeting at the FSRR
next year, I should have all this side of the garage
‘completed’ and some indication of my intentions
for the branch. I hope you can all (within reason!)
attend.
David Latham (CEO FSRR)
Page 24
Autumn 2007MainLine
MASTERswitch
Solenoid Point Motor
Operating System
by Ron Solly
Some months ago, I presented a Product Review
on the above subject and even followed it up with
an Addendum based on my experiences. Since then,
a modeller in Adelaide had installed
MASTERswitch® but still had lots of problems
with his layout – This was of concern to
DCCconcepts as they’d not seen problems like Ian
was experiencing before, with Ian already having
more failures than had been seen in the rest of the
worlds usage to date. Richard Johnson of
DCCconcepts asked me to take a look. Between Ian
the modeller, DCCconcepts, & myself, the
problems were finally identified and resolved.
The story is a VERY interesting one and could be
found on any layout… It’s a salutary tale of “read
the instructions and follow them” with a twist that
could never have been anticipated – and a
cautionary story that should be seen by EVERY
owner of Peco point motors!
Here is the story of Ian’s problem and its
resolution…largely in Ian’s own words, with a little
editorial layout change and some input from
DCCconcepts too:
Experiences and Conclusions RE: DCC
Concepts MASTERswitch
Powering MASTERswitch®:
After discussions with DCCconcepts re powering
the MASTERswitch® I elected to build a power
supply myself and installed a heavy duty Toroidal
type 18v transformer & used a 6amp bridge
rectifier. This results in a powerful device - ideal
for double action turnout operation. Initially I had
the output at 18VDC but then added a large
capacitor, which surprised my by giving a final
output of over 25VDC!
In my initial trials I managed to burn out several
MASTERswitch® - this surprised me but they were
promptly replaced by DCCconcepts (Thank
goodness for an understanding supplier and a goof
proof warranty!). Concerned at my problems,
DCCconcepts discussed the failures with me at
length as there had been no evidence of reliability
issue in their own tests, and in the absence of any
other evidence it was initially thought that this
“higher than recommended” final voltage MIGHT
be the cause as we could see no other reasons. As it
turned out, it wasn’t – but more of this later!
Note: In fairness both Richard/DCCconcepts and
the MASTERswitch® instructions had consistently
recommended a properly regulated power supply.
It was also pointed out that a spare laptop
computer power supply was a perfect and often free
source of “point power”, being well regulated and
usually with an output of 18~20 volts @ 3 amps or
so).
Installing MASTERswitch®:
Replacements having arrived, I initially installed
MASTERswitch® within the control panels,
directly soldering it to the switches. Whilst this
worked quite fine it then of course needed heavy
wire between the MASTERswitch® and point
motors which was going to use a LOT of heavy
wire and the benefit of more ready access to the
units was obviously going to be negated by the
resultant crowding of wiring from the panels. I
changed approach and reinstalled the
MASTERswitch® units beneath the layout and
adjacent to the turnouts they controlled. This
allowed a great improvement as the
MASTERswitch® DPDT switch operates with
almost no current demands, so I was therefore able
to use very light wire between panel-switch and
MASTERswitch®. This greatly eased congestion in
the control panel and meant I needed far less heavy-
duty wire as well. – A better way and much neater
than the first method.
Powering MASTERswitch®:
PECO point motors are current hungry and need
good solid wire. I created a "bus-line" from my
power source and tapped into it where appropriate.
I used speaker cable WH 3078 15GA which is
heavy duty & quite flexible. MORE Problems!
Having set up everything "right", or so I thought, I
was frustrated to find that I was still getting burn-
outs of the MASTERswitch®. This occurred
generally within one side of the MASTERswitch
and in the end affected some of the Peco point
motors.
It occurred to me that it might be an issue with
older point motors until this occurred even with a
replacement point motor. I was becoming VERY
frustrated! DCCconcepts AGAIN replaced the
MASTERswitch® failures without question under
their “goof proof” warranty and before re-installing
the new ones, I double checked everything I could
think of.
At this time Richard at DCCconcepts introduced
Page 25
Autumn 2007MainLine
me to Ron Solly and we discussed the issue before
taking the next steps. Everything else having been
checked, between us we concluded that it MUST be
the Peco point motors.
So – Meter in hand, I checked all the PECO
point motors and was amazed to find that a number
were down significantly in resistance values. It
appears that most of the motors, which had been in
the system for some time had, over the years of
operation, deteriorated significantly. This was
clearly shown by the fact that many of the coils had
obviously suffered from a deterioration in the
insulation on the coil wires, resulting in them being
almost a dead short!
Peco point motors SHOULD be between 4 and 5
ohms… but in fact I found some showed between 1
- 2 ohm resistance, which of course resulted in a
huge current draw of 8 - 16 amps! No wonder I
was blowing things up!
The real cautionary tale here is that it wasn’t
only the older units at fault – in fact I was intensely
frustrated to find that one of the NEW replacement
Peco point motors was also down on resistance and
caused a burn-out.
Having replaced the point motor, I didn't think
that the motor could be causing the problem – but it
was!!!
PECO point motors:
Peco point motors “as supplied” should have a
reading per coil of between 4.5-5.2 ohms. Already a
substantial load for any power supply as 15 - 16.5
V results in a current draw of 3 - 3.5amps - a figure
that is hell on normal switches but well within the
capacity of the MASTERswitch® units.
Having tested a few, and found a very wide
variance, I tested all of them. MANY were “off
spec” and unreasonably low so where possible I
adjusted all of mine to 5 ohms by wiring in series
an appropriate value 5-Watt ceramic resistors.
(These are available ex stock in very low
impedances from JAYCAR)
What are the options here? Not many really.
Peco do create a 12 ohm “low draw” point motor
but this is NOT available with a long reach shaft,
and extension shafts are generally unavailable, thus
still forcing the use of the 4 ohm 3 amp draw units,
particularly if requiring under layout mounting.
The lesson: don’t assume that anything is as
good as it was when you bought it. Peco point
motors clearly deteriorate in use to the point where
they become almost dangerous (a dead short can be
a fire hazard as well as destroying other innocent
products).
As a result of my experiences, I STRONGLY
recommend that you check Peco motors regularly
(say once a year) and consign any below say 3
ohms to the rubbish bin immediately!
Conclusion
So… in the end, my problem was not with
MASTERswitch® but with PECO and their point
motors – plus to a lesser degree, having used a
power supply outside the recommended voltage
range.
With these things identified and corrected,
MASTERswitch® now performs faultlessly.
I have found the MASTERswitch® switches to
be very functional and they offer great convenience
and easy connection of panel and signal lighting –
without need for “mounted on the point” micro-
switches.
I’ve learned a lot from this experience.
Especially that far from being a reliable item, Peco
point motors can often quietly become "suss" and it
really does pay to check each coil's resistance (even
the new ones} before installation.
I’ve also realised that the instructions should be
followed for good reason! The better short circuit
and current limiting of a properly regulated power
supply would have protected the MASTERswitch®
in the first place, and there is another benefit too.
When operating the turnouts with
unsmoothed/unregulated DC, the slightly loose
coils of some PECO point motors can “buzz”
annoyingly (this buzz is a vibration from AC
residual not cleaned up by a basic bridge rectifier
so some "feed-back" noise will be noticed from
some units. A capacitor will silence this but also
boosts the voltage of an unregulated power supply.
Using a properly regulated supply will rectify
this problem. I haven't worried about it at this stage
and have dampened some units by further clamping
over the unit itself beneath the layout. The noise,
whilst annoying, hasn’t affected operations. An
added tip - some packing grease (Vaseline) inserted
along and behind the slide within the point motor
also helps to lessen resonance... and keeps the
solenoid free to throw easily.
Many like me probably have a significant
number of turnouts earlier wired to Peco units. We
usually have little choice other than a very
expensive conversion to tortoise or similar point
motors.
MASTERswitch® really DOES do what it
claims very well, giving Peco users more reliable
Page 26
Autumn 2007MainLine
Division 9 & 3/4
Handy Tips
By Gerry Hopkins MMR
Well, my hairy upper lip may not be hairy
enough for this, but, here we go with a little “myth
busting”.
Myth No. 1
We are told that we must ‘isolate the motor’
when fitting a decoder. The word isolate is the one
that causes ALL the problems. People have brought
locos to me with the words “I put a decoder in but
it does not work”.
One loco had a motor that was sheathed in a thin
latex sleeve to ‘isolate’ from the frame – a condom.
Another one arrived with the motor encased in the
finger section of a latex glove. One arrived with the
motor in a ‘heat shrink’ sleeve.
Isolating the motor only means isolating the two
small connections to the motor brushes – the rest of
the motor should be left alone.
The photo below will give you the idea.
Myth No. 2
If you have more than X locos on the layout you
need a bigger booster. NO, if you have a large
number of locos you get an extra booster and split
the layout into two power districts.
The power delivered by a DCC booster is very
different to the power delivered by a DC system.
The current measured on a DCC system for a given
loco can be much less than that measured on a DC
SYSTEM for the same loco.
I only have a few locos on my layout (compared
to the yanks) and I have never been close to
tripping a 4.5 amp booster.
I use two boosters to drive the layout with a total
of 52 locos (36 with sound). At an operating
session there can be 10 throttles driving a total of
over 18 locos at any one time.
Another part of this myth is that you need to
raise the voltage of the power supply when you get
more locos – wrong. As long as the amp rating of
the supply exceeds the amp rating of the booster
the booster will be happy. Remember, one supply
for each booster.
Myth No. 3
The choice of decoder. Terms like N scale or HO
decoder only refers to a Plug and Pray decoder
made specifically for a particular loco. Example,
an N scale decoder is a long thin decoder that
replaces the light board in an N scale loco.
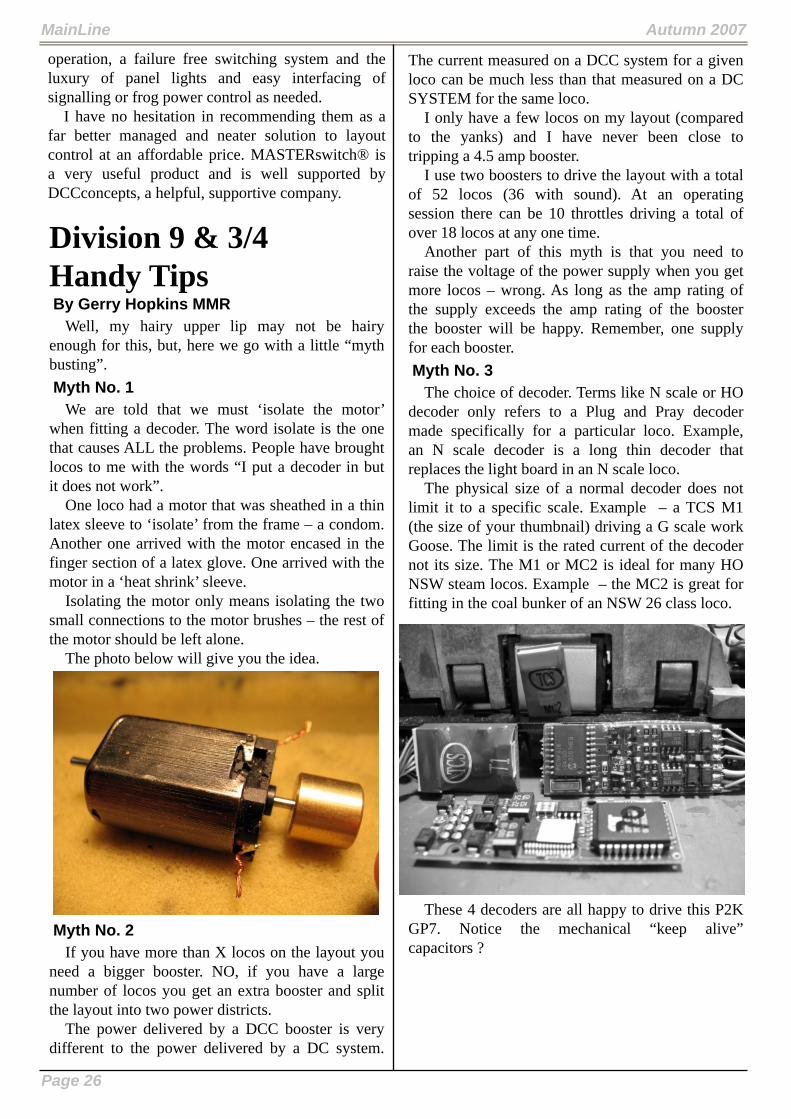
The physical size of a normal decoder does not
limit it to a specific scale. Example – a TCS M1
(the size of your thumbnail) driving a G scale work
Goose. The limit is the rated current of the decoder
not its size. The M1 or MC2 is ideal for many HO
NSW steam locos. Example – the MC2 is great for
fitting in the coal bunker of an NSW 26 class loco.
These 4 decoders are all happy to drive this P2K
GP7. Notice the mechanical “keep alive”
capacitors ?
operation, a failure free switching system and the
luxury of panel lights and easy interfacing of
signalling or frog power control as needed.
I have no hesitation in recommending them as a
far better managed and neater solution to layout
control at an affordable price. MASTERswitch® is
a very useful product and is well supported by
DCCconcepts, a helpful, supportive company.

Page 27
Autumn 2007MainLine
4952 ARHS NSW Bookshop
67 Renwick St, Redfern NSW 2016
Ph: (02) 9699 4595
Fx: (02) 9699 1714
www.arhsnsw.com.au
Mon-Fri 11am-5pm
Sat 9:30am-3:30pm
Retail Directory
Casula Hobbies
62 Moore St Liverpool NSW 2170
Ph: (02) 9602 8640 Fx: (02) 96028874
Authorised Walthers Partner On-Line Dealer
Email [email protected]
www.casulahobbies.com.au
Mon-Fri 9am-5:30pm Thu 9am-8pm Sat 9am-3pm
Anton’s Trains Order Service
PO Box 236 Castle Hill NSW 1765
Fx: (02) 9899 4484
Email: [email protected]
Woodpecker Model Railways
8 Joyce Street Pendle Hill NSW 2145
Ph: (02) 9636 3855
Fx: (02) 9631 4204
Email: [email protected]
Mon-Fri 10am-5:30pm Sat 9am-2pm
Gwydir Valley Models
PO Box 740 Glen Innes NSW 2370
Ph: (02) 6732 5711
Fx: (02) 6732 1731
Email: [email protected]
www.gwydirvalleymodels.com
Berg’s Hobbies
181 Church Street Parramatta NSW 2150
Ph: (02) 9635 8618
Fx: (02) 9689 1840
Email [email protected]
www.bergshobbies.com
Open 7 days
Vic Barnes Cycle & Model Train Centre
213 Lambton Road
New Lambton NSW 2305
Ph: (02) 4952 1886
Austral Modelcraft
Shop 15 Fairfield St Mt. Gravatt QLD 4122
Ph: (07) 3849 2655
Fx: (07) 3849 8664
Walthers Dealer
Tue 9:30am-1pm Thu-Fri 4pm-8pm
Sat 9am-4pm
Model Railroad Craftsman
Shop 2/21 Campbell St Blacktown NSW 2148
Ph: (02) 9831 8217
Fx: (02) 9831 4132
Email [email protected]
http://www.mrrc.com.au
Tue-Wed 10am-5pm Thu 10am-8pm Sat 9:30am-3:30pm
The Signal Box Model Railways
8/15a Gt Western Hwy Blaxland NSW 2774
Ph: (02) 4739 1799
Mail & Phone Orders Welcome
Open Tuesday-Saturday
Mountain Blue Miniatures
PO Box 287 Blaxland NSW 2774
Email: [email protected]
www.mountainblueminiatures.com.au
Full range available at:
The Railcar (NSW), Buffer Stop (VIC)
Trains & Track (QLD)
The N Scaler - N Scale By Mail
PO Box 254 Rydalmere NSW 1701
Ph/Fx: (02) 9832 8913
Mo: 0407 217927
Email [email protected]
www.ozemail.com.au/~kerr43/nscaler.html
The Railcar
17 The Breakwater, Corlette NSW 2315
Ph: (02) 4981 0668
Fx: (02) 4981 0668
Email: [email protected]
www.railcar.com.au
Contact: Herna or Paul Ward
Junction Models
Shop 5/449 Main North Rd Enfield SA 5085
Ph: (08) 8349 7464
Fx: (08) 8349 7463
www.junctionmodels.com.au
Open everyday except public holidays
Asquith Model Railways
Unit 4/113 Hunter Street Hornsby NSW 2077
Ph/Fx: (02) 9482 3242
(PO Box 106 Asquith NSW 2077)
Tom’s Hobbies
1001 Victoria Rd West Ryde NSW 2114
Ph: (02) 9809 0530
Fx: (02) 9809 0650
Email: [email protected]
Www.hom.pacific.net.au/~tomshobbys
Mon-Fri 8:30am-5pm Sat 830am-3:30pm

Photographic Contest entry 2006 Convention
Photo by Josh Loyd
The MainLine Editor handing over the Top Points - Bottom Points section staff.
Top Points Signal Box, Zig-Zag Railway Steam-up 2005
Photo by Maika Ly