
MPICH2 Windows Development Guide Version 1.0.6...
36
MPICH2 Windows Development Guide * Version 1.0.6 Mathematics and Computer Science Division Argonne National Laboratory David Ashton Jayesh Krishna September 14, 2007 * This work was supported by the Mathematical, Information, and Computational Sci- ences Division subprogram of the Office of Advanced Scientific Computing Research, Sci- DAC Program, Office of Science, U.S. Department of Energy, under Contract DE-AC02- 06CH11357. 1
Transcript of MPICH2 Windows Development Guide Version 1.0.6...
MPICH2 Windows Development Guide∗
Version 1.0.6
Mathematics and Computer Science Division
Argonne National Laboratory
David AshtonJayesh Krishna
September 14, 2007
∗This work was supported by the Mathematical, Information, and Computational Sci-ences Division subprogram of the Office of Advanced Scientific Computing Research, Sci-DAC Program, Office of Science, U.S. Department of Energy, under Contract DE-AC02-06CH11357.
1
Contents
1 Introduction 1
2 Build machine 1
3 Test machine 1
4 Software 1
4.1 Packages . . . . . . . . . . . . . . . . . . . . . . . . . . . . . . 1
5 Building MPICH2 3
5.1 Developer Studio automated 32bit build . . . . . . . . . . . . 3
5.1.1 Automated build from the source distribution . . . . . 4
5.1.2 Building without Fortran . . . . . . . . . . . . . . . . 5
5.2 Platform SDK builds . . . . . . . . . . . . . . . . . . . . . . . 5
6 Distributing MPICH2 builds 7
7 Testing MPICH2 7
7.1 Testing from scratch . . . . . . . . . . . . . . . . . . . . . . . 7
7.2 Testing a built mpich2 directory . . . . . . . . . . . . . . . . 7
7.3 Testing an existing installation . . . . . . . . . . . . . . . . . 8
8 Development issues 8
9 Runtime environment 9
9.1 User credentials . . . . . . . . . . . . . . . . . . . . . . . . . . 9
9.2 MPICH2 channel selection . . . . . . . . . . . . . . . . . . . . 10
9.3 MPI apps with GUI . . . . . . . . . . . . . . . . . . . . . . . 10
i
9.4 Security . . . . . . . . . . . . . . . . . . . . . . . . . . . . . . 11
9.5 Firewalls . . . . . . . . . . . . . . . . . . . . . . . . . . . . . . 13
9.6 MPIEXEC options . . . . . . . . . . . . . . . . . . . . . . . . 14
9.7 SMPD process manager options . . . . . . . . . . . . . . . . . 19
9.8 Debugging jobs by starting them manually . . . . . . . . . . . 22
9.9 Environment variables . . . . . . . . . . . . . . . . . . . . . . 23
9.10 Compiling . . . . . . . . . . . . . . . . . . . . . . . . . . . . . 28
9.10.1 Visual Studio 6.0 . . . . . . . . . . . . . . . . . . . . . 28
9.10.2 Developer Studio .NET 2003 . . . . . . . . . . . . . . 29
9.11 Performance Analysis . . . . . . . . . . . . . . . . . . . . . . 30
9.11.1 Tracing MPI calls using the MPIEXEC Wrapper . . . 31
9.11.2 Tracing MPI calls from the command line . . . . . . . 32
9.11.3 Customizing logfiles . . . . . . . . . . . . . . . . . . . 32
ii
1 INTRODUCTION 1
1 Introduction
This manual describes how to set up a Windows machine to build and testMPICH2 on.
2 Build machine
Build a Windows XP or Windows Server 2003 machine. Place this machinein the MPICH domain and create a user in the domain with the same nameas your MCS user name. Use your MCS password for this new account.This isn’t a requirement; you can create any username you want with anypassword you want and it doesn’t have to be part of the MPICH domain.But it makes life a lot easier if you do.
3 Test machine
Build a Windows XP or Windows Server 2003 machine on a 32bit CPU. Alsobuild a Windows Server 2003 X64 machine to test the Win64 distribution.
4 Software
This section describes the software necessary to build MPICH2.
4.1 Packages
To build MPICH2 you will need:
1. Microsoft Developer Studio .NET 2003
2. Microsoft Platform SDK
3. cygwin - full installation
4. Intel Fortran compiler IA32
5. Intel Fortran compiler EMT64
4 SOFTWARE 2
6. Java SDK
Microsoft Developer Studio can be found on the CDs from an MSDNsubscription. The 2003 version is needed to get a compiler that is up todate on standards compliance. This is needed to compile the C++ interfaceand handle types like “long long”.
The Platform SDK can also be found on the MSDN CDs or downloadedfrom Microsoft.com. The latest version as of the writing of this documentwas Platform SDK - Windows Server 2003 SP1. This package needs to beinstalled to get the Win64 compilers.
The Intel Fortran compilers need to be installed after Developer Studioand the PSDK because they integrate themselves into those two products.The regular IA32 compiler needs to be installed and the EMT64 compilerneeds to be installed. They are two separate packages and they require alicense file to use. The license file is for a single user on a single machine.
cygwin needs to be installed to get cvs, perl and ssh. MPICH2 can alsobe built completely under cygwin just like a Unix build so I install all ofcygwin. The latest cygwin packages are needed to build MPICH2 undercygwin and the MCS mirror site for cygwin does not contain the latestversions. So I would select a download site other than the mcs mirror siteduring the cygwin install. I also select to use the DOS file format duringthe install process for cygwin.
After installing cygwin, bring up a cygwin bash shell and generate somessh keys. I believe the command is: ssh-keygen -t dsa. Then copy thepublic key generated to your mcs /home/you/.ssh/authorized keys file.This will allow you to ssh from this machine to harley.mcs.anl.gov withouttyping a password. This is important in order for the automated scripts torun without user intervention.
Assuming you installed cygwin to the default c:\cygwin directory, addc:\cygwin\bin to your path environment variable. This is required so theautomated scripts can run tools like ssh and perl without specifying the fullpath.
The Java SDK needs to be installed so the logging library can be com-piled. After installing the SDK set the JAVA HOME environment variableto point to the installation directory.
5 BUILDING MPICH2 3
Run the following command from a command prompt to change theWindows script engine from GUI mode to console mode:
cscript //H:cscript
5 Building MPICH2
This section describes how to make various packages once you have a workingbuild machine.
5.1 Developer Studio automated 32bit build
The easist way to build an MPICH2 distribution is to use the DeveloperStudio environment and the makewindist.bat script from the top level ofthe mpich2 source tree. You can check out mpich2 from CVS or you cansimply copy this batch file from the distribution. The batch file knows howto check out mpich2 so it the only file required to make a distribution.
The product GUIDs need to be changed when a new release is created.To do this run “perl update windows version <new version>”. Runthis script with mpich2/maint as the current directory so the project filescan be found. Example:
perl update_windows_version 1.0.3
Or you can modify the project files by hand. Edit mpich2/maint/mpich2i.vdproj.The ProductCode and PackageCode entries need to be changed to use newGUIDs. Under Unix or Windows, uuidgen can be used to generate a newGUID. The ProductVersion entry needs to be changed to match the versionof MPICH2.
Once the version and GUIDs have been updated, commit the changes tompich2i.vdproj to CVS.
Then you can build a distribution.
Bring up a build command prompt by selecting Start→Progams→MicrosoftVisual Studio .NET 2003→Visual Studio .NET Tools→Visual Studio .NET2003 Command Prompt.
5 BUILDING MPICH2 4
Change directories to wherever you want to create the distribution.mpich2 will be checked out under the current directory. Run the makewindistbatch file:
makewindist.bat --with-checkout
Since there are no bugs in MPICH2 everything will work automatically.The batch file does the following steps:
1. check out mpich2allWithMPE and change into the mpich2 directory
2. ssh to harley.mcs.anl.gov and checkout mpich2. Then run maint/updatefileson harley, collect all the generated .h.in files and copy them back tothe Windows machine.
3. run “winconfigure.wsf --cleancode” to configure mpich2 for Win-dows and output all the generated files like mpi.h and the fortraninterface files, etc.
4. run the Developer Studio command line tool to build all the pieces ofMPICH2. This includes each of the channels - sock, ssm, shm, sshm,and the multi-threaded sock channel. Two versions of each channel arebuilt, the regular release build and the rlog profiled version. The mpiwrapper channel selector dll is built and three Fortran interfaces arebuilt, one for each set of common symbol types and calling conventions.mpiexec and smpd are built along with the Windows GUI tools andthe cygwin libraries. (These are the cygwin link libraries to use theWindows native build of MPICH2, not a Unix-style build of MPICH2under cygwin.)
5. package up everthing into maint\ReleaseMSI\mpich2.msi.
When the batch file is finished you will be left with a mpich2.msi filethat can be used to install MPICH2 on any Win32 machine. This file canbe re-named to match our release naming conventions.
5.1.1 Automated build from the source distribution
If you don’t have access to the CVS repository but you have the MPICH2source distribution you can still use the makewindist batch file. Follow thesesteps:
5 BUILDING MPICH2 5
1. unzip/untar the source distribution
2. bring up a Visual Studio Command Prompt
3. cd into the mpich2xxx directory
4. execute “winconfigure.wsf --cleancode”
5. execute “makewindist.bat --with-curdir”
5.1.2 Building without Fortran
If you don’t have a Fortran compiler you can use winconfigure.wsf to re-move the Fortran projects. Execute winconfigure.wsf --remove-fortran--cleancode Then you can build the projects without Fortran support. Ifyou want to use the makewindist.bat script you will need to remove theFortran lines from it before executing it.
5.2 Platform SDK builds
The makefile in the mpich2\winbuild directory builds a distribution basedon what compilers are specified in the environment so it can be used tocompile any version of MPICH2. The following targets can all be built withthis mechanism:
• Win64 X64
• Win64 IA64
• Win32 x86
But first you need to have mpich2 checked out and configured beforebuilding.
1. bring up a command prompt and check out mpich2:
cvs -d :ext:[email protected]:/home/MPI/cvsMaster compich2allWithMPE. Replace ashton with your own username.
2. cd into mpich2
3. run getdotin.bat
5 BUILDING MPICH2 6
4. run winconfigure.wsf --cleancode
To build the Win64 X64 distribution do the following:
1. Bring up a build command prompt from the PSDK. It can be foundhere: Start→Programs→Microsoft Platform SDK for Windows Server2003 SP1→Open Build Environment Window→ Windows Server 200364-bit Build Environment→Set Win Svr 2003 x64 Build Env (Retail)
2. Run \Program Files\Intel\Fortran\compiler80\Ia32e\Bin\ifortvars.bat3. cd into mpich2\winbuild4. run build.bat 2>&1 | tee build.x64.out
To build the Win64 IA64 distribution do the following:
1. Bring up a build command prompt from the PSDK. It can be foundhere: Start→Programs→Microsoft Platform SDK for Windows Server2003 SP1→Open Build Environment Window→ Windows Server 200364-bit Build Environment→Set Win Svr 2003 IA64 Build Env (Retail)
2. Run \Program Files\Intel\Fortran\compiler80\Itanium\Bin\ifortvars.bat3. cd into mpich2\winbuild4. run build.bat 2>&1 | tee build.ia64.out
To build the Win32 x86 distribution do the following:
1. Bring up a build command prompt from the PSDK. It can be foundhere: Start→Programs→Microsoft Platform SDK for Windows Server2003 SP1→Open Build Environment Window→ Windows 2000 BuildEnvironment→Set Windows 2000 Build Environment (Retail)
2. Run \Program Files\Intel\Fortran\compiler80\Ia32\Bin\ifortvars.bat3. cd into mpich2\winbuild4. run build.bat 2>&1 | tee build.x86.out
6 DISTRIBUTING MPICH2 BUILDS 7
6 Distributing MPICH2 builds
If you built an .msi file using the Developer Studio build process 5.1 thenall you have to do is rename the mpich2.msi file to something appropriatelike mpich2-1.0.3-1-win32-ia32.msi
If you built using the Platform SDK build process 5.2 then the outputfiles are left in their build locations and need to be collected and put in azip file for distributing. This process should be automated with a script.
7 Testing MPICH2
Run the testmpich2.wsf script to checkout mpich2, build it, install it,checkout the test suites, build them, run the test suites, and collect theresults in a web page.
7.1 Testing from scratch
Explain the use of testmpich2.wsf.
Run “testmpich2.wsf” without any parameters and it will create atestmpich2 subdirectory and check out into that directory mpich2 and thetest suites - c++, mpich, intel and mpich2. It will then build mpich2 andall the tests from the test suites. Then it will run the tests and place asummary in testmpich2\summary\index.html.
7.2 Testing a built mpich2 directory
Explain how to run testmpich2.wsf if you have the mpich2 source tree ona machine and you have already built all of mpich2.
Here is a sample batch file to test mpich2 that has already been built inc:\mpich2:
testmpich2.wsf /mpich2:c:\mpich2 /make- /configure- /buildbatchpushd testmpich2\buildMPICHcall mpich_cmds.batpopd
8 DEVELOPMENT ISSUES 8
pushd testmpich2\buildCPPcall cpp_cmds.batpopdpushd testmpich2\buildINTELcall intel_cmds.batpopdpushd testmpich2\buildMPICH2call mpich2_cmds.batpopdtestmpich2.wsf /mpich2:c:\mpich2 /make- /configure- /summarize
7.3 Testing an existing installation
Explain the use of testmpich2.wsf to test an existing installation, one thatwas installed with the .msi distribution.
8 Development issues
This section describes development issues that are particular to the Windowsbuild.
Whenever a .h.in file is created on the Unix side, winconfigure.wsf needsto be updated to create the .h file from the .h.in file. Copy and paste anexisting section in winconfigure.wsf that already does this and rename thefile names.
When new definitions are added to the .h.in files these definitions, usuallyin the form HAVE FOO or USE FOO, need to be added to the AddDefi-nitions function in winconfigure.wsf. Simply add new cases to the big casestatement as needed. winconfigure.wsf warns you of definitions that are notin the case statement.
Whenever a @FOO@ substitution is added on the Unix side, winconfig-ure.wsf needs to be updated to handle the substitution. Find the ReplaceAtsfunction in winconfigure.wsf and add the substitution to the big case state-ment. winconfigure.wsf warns you of new substitutions that have not beenadded to the case statement.
9 RUNTIME ENVIRONMENT 9
9 Runtime environment
This section describes the MPICH2 environment that is particular to Win-dows.
9.1 User credentials
mpiexec must have the user name and password to launch MPI applicationsin the context of that user. This information can be stored in a secureencrypted manner for each user on a machine. Run mpiexec -register tosave your username and password. Then mpiexec will not prompt you forthis information.
This is also true for a nightly build script. The user context under whichthe script is run must have saved credentials so mpiexec doesn’t prompt forthem. So scripts won’t hang, mpiexec provides a flag, -noprompt, that willcause mpiexec to print out errors in cases when it normally would prompt foruser input. This can also be specified in the environment with the variableMPIEXEC NOPROMPT.
You can also save more than one set of user credentials. Add the option-user n to the -register, -remove, -validate, and mpiexec commandsto specify a saved user credential other than the default. The parameter nis a non-zero positive number. For example this will save credentials in slot1:
mpiexec -register -user 1
And this command will use the user 3 to launch a job:
mpiexec -user 3 -n 4 cpi.exe
User credentials can also be specified in a file using the -pwdfile filenameoption to mpiexec. Put the username on the first line of the file and thepassword on the second line. If you choose this option you should make surethe file is only readable by the current user.
9 RUNTIME ENVIRONMENT 10
9.2 MPICH2 channel selection
MPICH2 for Windows comes with multiple complete implementations ofMPI. These are called channels and each build represents a different trans-port mechanism used to move MPI messages. The default channel usessockets for communication. There are two channels that use only sharedmemory. There is a channel that uses both sockets and shared memory.There is a channel that uses Infiniband. And there is a thread-safe versionof the sockets channel.
The short names for the channels are: sock, shm, sshm, ssm, mt.
These channels can be selected at runtime with an environment variable:MPICH2 CHANNEL. The following is an example that uses the Infinibandchannel instead of the default sockets channel:
mpiexec -env MPICH2_CHANNEL ib -n 4 myapp.exeormpiexec -channel ib -n 4 myapp.exe
If you specify auto for the channel then mpiexec will automaticallychoose a channel for you.
mpiexec -channel auto -n 4 myapp.exe
The rules are:
1. If numprocs is less than 8 on one machine, use the shm channel
2. If numprocs is greater than 7 on one machine, use the sshm channel
3. If running on multiple machines, use the ssm channel. This channelcan be changed using winconfigure.
9.3 MPI apps with GUI
Many users on Windows machines want to build GUI apps that are also MPIapplications. This is completely acceptable as long as the application followsthe rules of MPI. MPI Init must be called before any other MPI function
9 RUNTIME ENVIRONMENT 11
and it needs to be called soon after each process starts. The processes mustbe started with mpiexec but they are not required to be console applications.
The one catch is that MPI applications are hidden from view so anyWindows that a user application brings up will not be able to be seen.mpiexec has an option to allow the MPI processes on the local machineto be able to bring up GUIs. Add -localroot to the mpiexec command toenable this capability. But even with this option, all GUIs from processeson remote machines will be hidden.
So the only GUI application that MPICH2 cannot handle by defaultwould be a video-wall type application. But this can be done by runningsmpd.exe by hand on each machine instead of installing it as a service. Logon to each machine and run “smpd.exe -stop” to stop the service and thenrun “smpd.exe -d 0” to start up the smpd again. As long as this process isrunning you will be able to run applications where every process is allowedto bring up GUIs.
9.4 Security
MPICH2 can use Microsoft’s SSPI interface to launch processes withoutusing any user passwords. This is the most secure way to launch MPI jobsbut it requires the machines to be configured in a certain way.
• All machines must be part of a Windows domain.
• Each machine must have delegation enabled.
• Each user that will run jobs must be allowed to use delegation.
If the machines are set up this way then an administrator can set upMPICH2 for passwordless authentication. On each node, a domain admin-istrator needs to execute the following: “smpd -register spn”.
Then a user can add the -delegate flag to their mpiexec commands andthe job startup will be done without any passwords. Example:
mpiexec -delegate -n 3 cpi.exe
With SSPI enabled you can also control access to nodes with job objects.
9 RUNTIME ENVIRONMENT 12
First the nodes need to be set up so that only SSPI authentication isallowed. An administrator can run the following on each node:
1. smpd.exe -set sspi protect yes
2. smpd.exe -set jobs only yes
3. smpd.exe -restart
These settings mean that authentication must be done through SSPI andmpiexec commands will only be accepted for registered jobs.
To register jobs an administrator or a scheduler running with adminis-trator privileges can execute the following command:
mpiexec.exe -add_job <name> <domain\username> [-host <hostname>]
This adds a job called “name” for the specified user on either the local orspecified host. Any name can be used but it must not collide with anotherjob with the same name on the same host. The command must be executedfor each host that is to be allocated to the user.
Then when the job has finished or the allotted time has expired for theuser to use the nodes the following command can be executed:
mpiexec.exe -remove_job <name> [-host <hostname>]
This command removes the job from the local or specified host. Any pro-cesses running on the host under the specified job name will be terminatedby this command.
So -add job and -remove job can be used by a scheduler to create awindow when a user is allowed to start jobs on a set of nodes.
When the window is open the user can run jobs using the job name.First the user must run:
mpiexec.exe -associate_job <name> [-host <hostname>]
This will associate the user’s token with the job object on the local or speci-fied host. This must be done for all of the hosts allocated to the user. Then
9 RUNTIME ENVIRONMENT 13
the user can issue mpiexec commands. The mpiexec commands are of theusual format except they must contain one extra option - “-job <name>”.This job name must match the job allocated by the -add job command. Soa typical command would look like this:
mpiexec.exe -job foo -machinefile hosts.txt -n 4 myapp.exe
Multiple mpiexec commands can be issued until the -remove job commandis issued. This allows the users to issue multiple mpiexec commands andmultiple MPI Comm spawn commands all using the same job name untilthe job is removed from the nodes.
The rationale for the design where an adminstrator can create and de-stroy jobs but the user must first associate the job with his own token beforerunning jobs is so that the administrator does not need to know the user’spassword. In order for an administrator to do both the job allocation and as-sociation he would have to call LogonUser with the user name and passwordfor each user that submits a job request.
9.5 Firewalls
Windows comes with a default firewall that is usually turned on by default.Firewalls block all TCP ports by default which renders MPICH2 applicationsinoperable because the default communication mechanism used by MPICH2are sockets on arbitrary ports assigned by the operating system. This canbe solved in several ways:
• Turn off the firewall completely.
• MPICH2 applications can be limited to a range of TCP ports using theMPICH PORT RANGE environment variable. If you set your firewallto allow the same port range then MPICH2 applications will run.
• Leave the Windows firewall on and allow exceptions for your MPICH2applications. This can be done through the Security Center moduleof the Windows Control Panel. Click the Windows Firewall option inthe Security Center to bring up the properties page and select the Ex-ceptions tab. Here you can add each MPICH2 application to exempt.Note that this exception includes the path to the executable so if youmove the executable you will have to exempt the new location. This

9 RUNTIME ENVIRONMENT 14
solution obviously only will work for a small number of applicationssince managing a large list would be difficult. Make sure you addmpiexec.exe and the smpd.exe process manager to this exception list.
9.6 MPIEXEC options
This section describes all the options to mpiexec.exe
• -n x or -np x Specify the number of processes to launch.
• -localonly x or -localonly Specify that the processes should onlybe launched on the local host. This option can replace the -n x optionor be used in conjunction with it when it is only a flag.
• -machinefile filename Use the specified file to get host names tolaunch processes on. Hosts are selected from this file in a round robinfashion. One host is specified per line. Extra options can be speci-fied. The number of desired processes to launch on a specific host canbe specified with a colon followed by a number after the host name:hostname:n. This is usefull for multi-CPU hosts. If you want to spec-ify the interface that should be used for MPI communication to thehost you can add the -ifhn flag. Here is an example: hostname:4-ifhn 192.168.1.100
• -configfile filename Use the specified job configuration file to launchthe job. Each line in the file represents a set of options just like youwould enter them on the mpiexec command line. The one differenceis that there are no colons in the file. The colons are replaced bynew-lines.
• -file filename Use the specified implementation specific job con-figuration file. For Windows this option is used to specify the oldMPICH 1.2.5 configuration file format. This is useful for users whohave existing configuration files and want to upgrade to MPICH2.
• -host hostname Specify that the processes should be launched on aspecific host.
• -hosts n host1 host2 host3 ... Specify that the processes shouldbe launched on a list of hosts. This option replaces the -n x option.
9 RUNTIME ENVIRONMENT 15
• -hosts n host1 m1 host2 m2 host3 m3 ... Specify that the pro-cesses should be launched on a list of hosts and how many processesshould be launched on each host. The total number of processeslaunched is m1 + m2 + m3 + ... mn.
• -map drive:\\host\share Specify a network mapped drive to createon the hosts before launching the processes. The mapping will beremoved when the processes exit. This option can be specified multipletimes.
• -mapall Specify that all network mapped drives created by the userexecuting mpiexec command will be created on hosts before launchingthe processes. The mappings will be removed when the processes exit.
• -dir drive:\my\working\directory Specify the working directoryfor the processes.
• -wdir drive:\my\working\directory -wdir and -dir are synonyms.
• -env variable value Specify an environment variable and its valueto set in the processes’ environments. This option can be specifiedmultiple times.
• -genvlist a,b,c,d... Specify a list of environment variables totaken from the environment local to mpiexec and propagated to thelaunched processes.
• -logon Prompt for user credentials to launch the job under.
• -pwdfile filename Specify a file to read the user name and passwordfrom. The user name should be on the first line and the password onthe second line.
• -exitcodes Specify that the exit code of each process should beprinted to stdout as each processes exits.
• -noprompt Prevent mpiexec for prompting for information. If usercredentials are needed to launch the processes mpiexec usually promptsfor this information but this flag causes an error to be printed outinstead.
• -priority class[:level] Specify the priority class and optionallythe thread priority of the processes to be launched. The class can be0,1,2,3, or 4 corresponding to idle, below, normal, above, and high.
9 RUNTIME ENVIRONMENT 16
The level can be 0,1,2,3,4, or 5 corresponding to idle, lowest, below,normal, above, highest. The default is 2:3.
• -localroot Specify that the root process should be launched on thelocal machine directly from mpiexec bypassing the smpd process man-ager. This is useful for applications that want to create windows fromthe root process that are visible to the interactive user. The smpdprocess manager creates processes in a hidden service desktop whereyou cannot interact with any GUI.
• -channel channel name This option is only available under Windowsand allows the user to select which channel implementation of MPICH2to select at runtime. The current channels supported are sock, mt, ssm,shm, and sshm. These represent the sockets, multi-threaded sockets,sockets plus shared memory, shared memory, and scalable shared mem-ory channels. The shared memory channels only work on one node.The sockets, multi-threaded sockets, and sockets plus shared memorychannels work on multiple nodes. There are also profiled versions ofthe channels that produce RLOG files for each process when selected.They are named p, mtp, ssmp, shmp, and sshmp. See the section onchannel selection for additional information.
• -log This option is a short cut to selecting the MPE wrapper libraryto log the MPI application. When the job finishes there will be a .clog2file created that can be viewed in Jumpshot.
• -l This flag causes mpiexec to prefix output to stdout and stderr withthe rank of the process that produced the output. (This option is thelower-case L not the number one)
• -port port Specify the port where the smpd process manager is lis-tening.
• -p port Short version of the -port option.
• -smpdfile filename Specify the location of the smpd configurationfile. The default is ~/.smpd. This is a Unix only option. Under Win-dows the settings are stored in the Windows Registry.
• -phrase passphrase Specify the passphrase used to authenticate withthe smpd process managers.
9 RUNTIME ENVIRONMENT 17
• -path search path Specify the search path used to locate executa-bles. Separate multiple paths with semicolons. The path can be mixedwhen using both Windows and Linux machines. For example: -pathc:\temp;/home/user is a valid search path.
• -register [-user n] Encrypt a user name and password into theWindows registry so that it can be automatically retrieved by mpiexecto launch processes with. If you specify a user index then you can savemore than one set of credentials. The index should be a positive non-zero number and does not need to be consecutive.
• -remove [-user n] Remove the encrypted credential data from theRegistry. If multiple entries are saved then use the -user option tospecify which entry to remove. -user all can be specified to deleteall entries.
• -validate [-user n] [-host hostname] Validate that the saved cre-dentials can be used to launch a process on the local or specified host.If more that one credentials has been saved then the -user option canbe used to select which user credentials to use.
• -user n Specify which encrypted credentials to retrieve from the Reg-istry. The corresponding entry must have been previously saved usingthe -register -user n option.
• -timeout seconds Specify the maximum number of seconds the jobis allowed to run. At the end of the timeout period, if the job has notalready exited then all processes will be killed.
• -plaintext Specify that user credentials should go over the wire un-encrypted. This is required if both Linux and Windows machines areused in the same job because the Linux machines cannot encrypt anddecrypt the data created by the Windows machines.
• -delegate Specify that you want to use passwordless SSPI delegationto launch processes. The machines must be configured to use SSPI asdescribed in the section on security.
• -impersonate Specify that you want to use passwordless SSPI imper-sonation to launch processes. This will create processes on the remotemachines with limited access tokens. They wil not be able to openfiles on remote machines or access mapped network drives.
9 RUNTIME ENVIRONMENT 18
• -add job job name domain\user [-host hostname] Create a job ob-ject on the local or specified host for the specified user. Administratorprivileges are required to execute this command.
• -remove job job name [-host hostname] Remove a job object onthe local or specified host. Any processes running under this job willbe terminated. Administrator privileges are required to execute thiscommand.
• -associate job job name [-host hostname] Associate the currentuser token with the specified job on the local or specified host. Thecurrent user must match the user specifed by the -add job job nameusername command.
• -job job name Specify that the processes should be launched underthe specifed job object. This can only be used after successful calls to-add job and -associate job.
• -whoami Print out the current user name in the format that mpiexecand smpd expect it to be. This is useful for users who use a screenname that is different from their user name.
• -hide console Detach from the console so that no command promptwindow will appear and consequently not output will be seen.
• -quiet abort Use this flag to prevent extensive abort messages toappear. Instead the job will simply exit with minimal error output.
• -rsh or -ssh Use the remote shell command to execute the processesin the job instead of using the smpd process manager. The defaultcommand is “ssh -x” no matter whether -rsh or -ssh is used. Ifthis is the only flag specified then an smpd process manager must berunning on the local host where mpiexec is executed. mpiexec contactsthe local smpd process to start a PMI service required by the MPI joband then starts the processes using the remote shell command. Onthe target machines the application “env” must be available since itis used to set the appropriate environment variables and then startthe application. The remote shell command can be changed usingthe environment variable MPIEXEC RSH. Any command can be usedthat takes a host name and then everything after that as the usercommand to be launched.
9 RUNTIME ENVIRONMENT 19
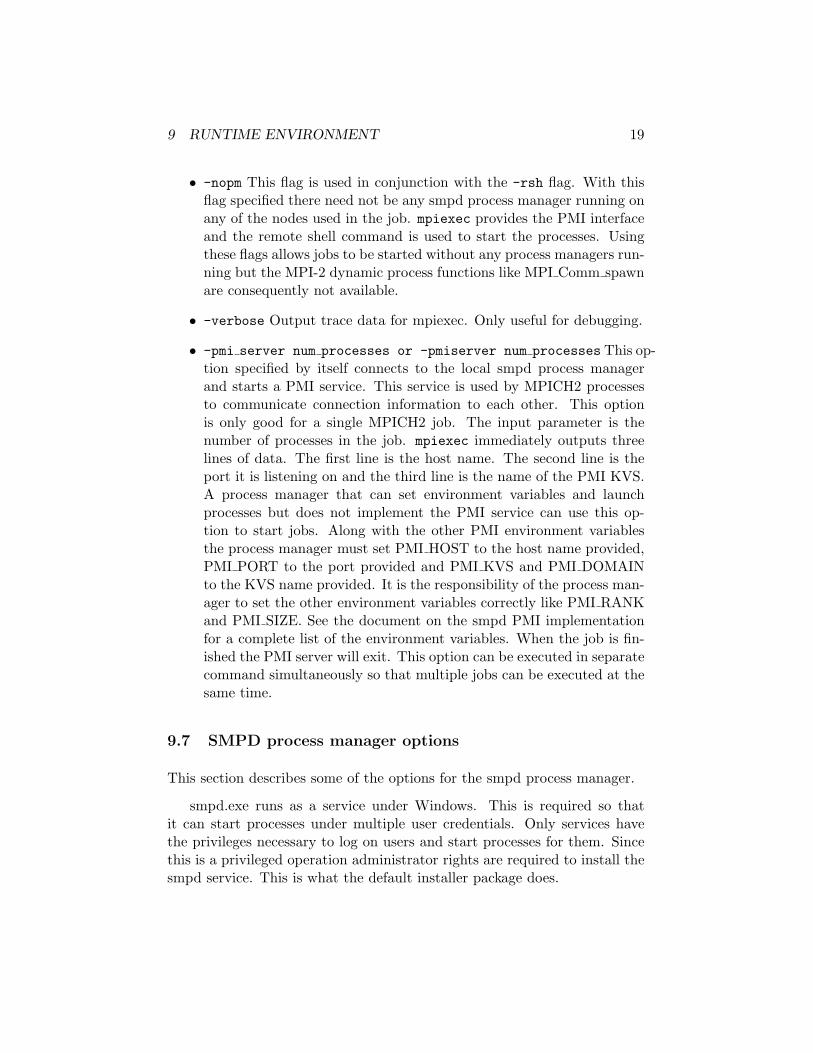
• -nopm This flag is used in conjunction with the -rsh flag. With thisflag specified there need not be any smpd process manager running onany of the nodes used in the job. mpiexec provides the PMI interfaceand the remote shell command is used to start the processes. Usingthese flags allows jobs to be started without any process managers run-ning but the MPI-2 dynamic process functions like MPI Comm spawnare consequently not available.
• -verbose Output trace data for mpiexec. Only useful for debugging.
• -pmi server num processes or -pmiserver num processes This op-tion specified by itself connects to the local smpd process managerand starts a PMI service. This service is used by MPICH2 processesto communicate connection information to each other. This optionis only good for a single MPICH2 job. The input parameter is thenumber of processes in the job. mpiexec immediately outputs threelines of data. The first line is the host name. The second line is theport it is listening on and the third line is the name of the PMI KVS.A process manager that can set environment variables and launchprocesses but does not implement the PMI service can use this op-tion to start jobs. Along with the other PMI environment variablesthe process manager must set PMI HOST to the host name provided,PMI PORT to the port provided and PMI KVS and PMI DOMAINto the KVS name provided. It is the responsibility of the process man-ager to set the other environment variables correctly like PMI RANKand PMI SIZE. See the document on the smpd PMI implementationfor a complete list of the environment variables. When the job is fin-ished the PMI server will exit. This option can be executed in separatecommand simultaneously so that multiple jobs can be executed at thesame time.
9.7 SMPD process manager options
This section describes some of the options for the smpd process manager.
smpd.exe runs as a service under Windows. This is required so thatit can start processes under multiple user credentials. Only services havethe privileges necessary to log on users and start processes for them. Sincethis is a privileged operation administrator rights are required to install thesmpd service. This is what the default installer package does.
9 RUNTIME ENVIRONMENT 20
But smpd can be run in other ways for debugging or single user use.
If you have smpd.exe installed first execute smpd.exe -stop to stop theservice.
Then you can run it by hand for single user mode or for debugging. Theflag for debugging single user mode is -d debug output level.
If you run it like this you will get full trace output:
smpd.exe -d
If you run it like this you will get no output except for errors:
smpd.exe -d 0
Here are all the options to smpd.exe:
• -install or -regserver Install the smpd service. Requires admin-istrator privileges.
• -remove or -uninstall or -unregserver Uninstall the smpd ser-vice. Requires administrator privileges.
• -start Start the smpd service. Requires administrator privileges.
• -stop Stop the smpd service. Requires administrator privileges.
• -restart Stop and restart the smpd service. Requires administratorprivileges.
• -register spn Register the Service Prinicipal Name for the smpd ser-vice of the local machine on the domain controller. Requires DOMAINadministrator privileges. This is used in conjunction with passwordlessSSPI authentication described in the section on security.
• -remove spn Remove the Service Prinicipal Name from the domaincontroller for the smpd service of the local machine. Requires DO-MAIN administrator privileges.
• -traceon filename [hostA hostB ...] Turn on the trace loggingof the smpd service on the local or specified hosts and set the outputto the specified file. The file location must be available on the localdrive of each of the hosts. It cannot be located on a remote machine.
9 RUNTIME ENVIRONMENT 21
• -traceoff [hostA hostB ...] Turn off the trace logging of thesmpd service on the local or specified hosts.
• -port n Listen on the specified port number. If this option is notspecified then smpd listens on the default port (8676).
• -anyport Listen on any port assigned by the OS. smpd immediatelyprints out the port that it has been assigned.
• -phrase passphrase Use the specified passphrase to authenticateconnections to the smpd either by mpiexec or another smpd process.
• -getphrase Prompt the user to input the passphrase. This is usefulif you don’t want to specify the phrase on the command line.
• -noprompt Don’t prompt the user for input. If there is missing infor-mation, print an error and exit.
• -set option value Set the smpd option to the specified value. Forexample, smpd -set logfile c:\temp\smpd.log will set the log fileto the specified file name. smpd -set log yes will turn trace loggingon and smpd -set log no will turn it off.
• -get option Print out the value of the specified smpd option.
• -hosts Print the hosts that mpiexec and this smpd will use to launchprocesses on. If the list is empty then processes will be launched onthe local host only.
• -sethosts hostA hostB ... Set the hosts option to a list of hoststhat mpiexec and smpd will use to launch processes on.
• -d [level] or -debug [level] Start the smpd in debug or singleuser mode with the optionally specified amount of output. For exam-ple, smpd -d will start the smpd will lots of trace output and smpd -d0 will start the smpd with no output except for errors.
• -s Only available on Unix systems. This option starts the smpd insingle user daemon mode for the current user.
• -smpdfile filename On Unix systems the smpd options are storedin a file that is readable only by the current user (chmod 600). Thisfile stores the same information that would be stored in the Windowsregistry like the port and passphrase. The default file is named ~/.smpdif this option is not specified.
9 RUNTIME ENVIRONMENT 22
• -shutdown Shutdown a running smpd that was started by smpd -s orsmpd -d.
• -printprocs On a Windows machine you can run smpd -printprocsand it will print out the processes started and stopped by smpd on thecurrent host. The format of the output is +/-pid cmd. Plus meansa process was started and minus means the process has exited. Theprocess id is specified next and then the rest of the line is the commandthat was launched.
• -enum or -enumerate Print the smpd options set on the local host.
• -version Print the smpd version and exit.
• -status [-host hostname] Print the status of the smpd on the localor specified host.
• -help Print a brief summary of the options to smpd.
9.8 Debugging jobs by starting them manually
This section describes how to start a job by hand without the use of a processmanager so the job can be stepped through with a debugger.
You can launch an MPICH2 job by hand if you set the minimum requiredenvironment variables for each process and then start the processes yourself(or in a debugger).
Here is a script that sets the environment variables so that a job can bestarted on the local machine: The file is called setmpi2.bat
if ‘‘%1’’ == ‘‘’’ goto HELPif ‘‘%2’’ == ‘‘’’ goto HELPset PMI_ROOT_HOST=%COMPUTERNAME%set PMI_ROOT_PORT=9222set PMI_ROOT_LOCAL=1set PMI_RANK=%1set PMI_SIZE=%2set PMI_KVS=mpich2goto DONE:HELPREM usage: setmpi2 rank size
9 RUNTIME ENVIRONMENT 23
:DONE
For example, to debug a two process job bring up two separate commandprompts. In the first prompt execute setmpi2.bat 0 2 and in the secondprompt execute setmpi2.bat 1 2. Then run your application always start-ing the root process first. The root process must call MPI Init before anyof the other processes because it is the process that listens on the portspecifed by the environment variable PMI ROOT PORT. Simply executemyapp.exe from each command prompt to run your job. Or better yet runeach process in a debugger. If you have the Microsoft developer studio in-stalled you can run the following from each command prompt: devenv.exemyapp.exe. This will bring up a debugger for each process. Then you canstep through each process and debug it. Remember that the first processmust call MPI Init before any of the rest of the processes do. You can restartthe processes at any time as long as you restart all of them.
The script can be modified to launch on multiple hosts by changing theline:
set PMI_ROOT_HOST=%COMPUTERNAME%
to set the variable to the hostname where the root process will be startedinstead of the local host name.
The limitation of this method of starting processes is that MPI-2 spawn-ing operations are not supported. If your application calls MPI Comm spawnit will produce an error.
9.9 Environment variables
This section describes the environment variables used by MPICH2 andsmpd.
• MPICH ABORT ON ERROR Call abort() when an error happens instead ofreturning an error and calling MPID Abort. useful for unix wherecalling abort() creates a core file.
• MPICH PRINT ERROR STACK Print the entire error stack when an erroroccurs (currently this is the default)
9 RUNTIME ENVIRONMENT 24
• MPICH CHOP ERROR STACK Split the error stack output at the characterposition specified. A value of 79 would cause carriage returns to beinserted after the 79th character.
• MPICH WARNINGS Print runtime warnings (unmatched messages at MPI Finalize,unreleased resources, etc)
• MPICH SOCKET BUFFER SIZE socket buffer size
• MPICH SOCKET RBUFFER SIZE socket receive buffer size
• MPICH SOCKET SBUFFER SIZE socket send buffer size
• MPICH SOCKET NUM PREPOSTED ACCEPTS number of accepts posted forMPIDU Sock listen
• MPICH PORT RANGE Range of ports to use for sockets: min..max ormin,max
• MPICH INTERFACE HOSTNAME hostname to use to connect sockets
• MPICH NETMASK bitmask to select an ip subnet: ip/numbits, ie 192.0.0.0/8
• MPIEXEC TIMEOUT job timeout in seconds
• MPIEXEC LOCALONLY launch job processes on the local machine only
• MPIEXEC NOPROMPT Don’t prompt for user input for missing informa-tion, print an error instead.
• MPIEXEC SMPD PORT Connect to smpd on the specified port.
The following two only affect mpiexec for smpd if -rsh is on the com-mand line:
• MPIEXEC RSH rsh command to use, default is “ssh -x”
• MPIEXEC RSH NO ESCAPE create an rsh command compatible with cyg-win’s ssh
• MPICH SPN Service Principal Name used for passwordless authentica-tion
• SMPD DBG OUTPUT Print debugging output
• SMPD DBG LOG FILENAME name of logfile to send output to
9 RUNTIME ENVIRONMENT 25
• SMPD MAX LOG FILE SIZE maximum number of bytes the logfile cangrow to before it is truncated
• MPICH DBG OUTPUT stdout, memlog or file. determines where debug-ging output goes
• MPI DLL NAME name of the dll that contains the MPI and PMPI inter-faces
• MPICH2 CHANNEL short name of the channel used to create the fullname of the MPI dll (ie. ib becomes mpich2ib.dll)
• MPI WRAP DLL NAME name of the dll that contains only the MPI inter-face, not the PMPI interface
• MPICH TRMEM INITZERO used by the memory tracing package
• MPICH TRMEM VALIDATE used by the memory tracing package
• MPITEST DEBUG used by the test suite
• MPITEST VERBOSE used by the test suite
• PATH used by smpd to search for executables under Unix.
SMPD options specified on the command line can also be specified inthe environment by prefixing SMPD OPTION to the option name and savingit as an environment variable.
• SMPD OPTION app path
• SMPD OPTION logfile
• SMPD OPTION nocache
• SMPD OPTION phrase
• SMPD OPTION sspi protect
• SMPD OPTION max logfile size
• SMPD OPTION plaintext
• SMPD OPTION port
9 RUNTIME ENVIRONMENT 26
• SMPD OPTION timeout
• SMPD OPTION exitcodes
• SMPD OPTION priority
• SMPD OPTION localonly
• SMPD OPTION noprompt
• SMPD OPTION channel
• SMPD OPTION hosts
• SMPD OPTION delegate
• SMPD OPTION internode channel
• SMPD OPTION log
• SMPD OPTION no dynamic hosts
Variables to control debugging output when enabled:
• MPICH DBG
• MPICH DBG CLASS
• MPICH DBG FILENAME
• MPICH DBG LEVEL
• MPICH DBG OUTPUT
• MPICH DBG RANK
• MPICH DEBUG ITEM
The following variables affect the MPE logging library:
• MPE LOGFILE PREFIX name of the clog file to create without the ex-tension
• MPE DELETE LOCALFILE true,false - delete or not the local clog file
9 RUNTIME ENVIRONMENT 27
• MPE LOG OVERHEAD I think this one adds an event to the clog filesrepresenting the time it takes to write a clog buffer to disk
• CLOG BLOCK SIZE number of bytes in a clog block
• CLOG BUFFERED BLOCKS number of blocks
• MPE CLOCKS SYNC yes/no - synchronize clocks
directories to store temporary files:
• MPE TMPDIR
• TMPDIR
• TMP
• TEMP
PMI environment variables created by smpd are described in the smpddocumentation:
• PMI DLL NAME name of the PMI dll to load (replaces the default smpdfunctions)
• PMI NAMEPUB KVS name of the key-val-space where MPI service namesare stored for MPI Lookup name()
• PMI ROOT HOST
• PMI ROOT PORT
• PMI ROOT LOCAL
• PMI SPAWN
• PMI KVS
• PMI DOMAIN
• PMI RANK
• PMI SIZE
• PMI CLIQUE
• PMI APPNUM
9 RUNTIME ENVIRONMENT 28
• PMI SMPD ID
• PMI SMPD KEY
• PMI SMPD FD
• PMI HOST
• PMI PORT
• PMI APPNUM
Used by the process managers other than smpd:
• MPIEXEC DEBUG
• MPIEXEC MACHINES PATH
• MPIEXEC PORTRANGE
• MPIEXEC PREFIX STDERR
• MPIEXEC PREFIX STDOUT
• MPIEXEC REMSHELL
• MPIEXEC USE PORT
9.10 Compiling
This section describes how to set up a project to compile an MPICH2 ap-plication using MS Visual Studio 6.0 or MS Developer Studio .NET 2003.
9.10.1 Visual Studio 6.0
Visual C++ 6.0 cannot handle multiple functions with the same type signa-ture that only differ in their return type. So you must define HAVE NO VARIABLE RETURN TYPE SUPPORTin your project.
1. Create a project and add your source files.
9 RUNTIME ENVIRONMENT 29
2. Bring up the settings for the project by hitting Alt F7. Select the Pre-processor Category from the C/C++ tab. Enter HAVE NO VARIABLE RETURN TYPE SUPPORTinto the Preprocessor box. Enter C:\Program Files\MPICH2\includeinto the “Additional include directories” box.
3. Select the Input Category from the Link tab. Add cxx.lib andmpi.lib to the Object/library modules box. Add C:\Program Files\MPICH2\libto the “Additional library path” box.
4. Compile your application.
9.10.2 Developer Studio .NET 2003
For Developer Studio .NET 2003 or newer you can use the example projectsprovided with the release as a guide to creating your own projects.
1. Create a project and add your source files.
2. Bring up the properties dialog for your project by right clicking theproject name and selecting Properties.
3. Navigate to Configuration Properties::C/C++::General
4. Add C:\Program Files\MPICH2\include to the “Additional IncludeDirectories” box.
5. Navigate to Configuration Properties::Linker::General
6. Add C:\Program Files\MPICH2\lib to the “Aditional Library Direc-tories” box.
7. Navigate to Configuration Properties::Linker::Input
8. Add cxx.lib and mpi.lib and fmpich2.lib to the “Additional De-pendencies” box. If your application is a C application then it onlyneeds mpi.lib. If it is a C++ application then it needs both cxx.liband mpi.lib. If it is a Fortran application then it only needs one of thefmpich2[s,g].lib libraries. The fortran library comes in three flavorsfmpich2.lib, fmpich2s.lib and fmpich2s.lib. fmpich2.lib con-tains all uppercase symbols and uses the C calling convention like this:MPI INIT. fmpich2s.lib contains all uppercase symbols and uses the
9 RUNTIME ENVIRONMENT 30
stdcall calling convention like this: MPI INIT@4. fmpich2g.lib con-tains all lowercase symbols with double underscores and the C callingconvention like this: mpi init . Add the library that matches yourFortran compiler.
9. Compile your application.
9.11 Performance Analysis
MPICH2 includes the Multi-Processing Environment (MPE), which is asuite of performance analysis tools comprising profiling libraries, utility pro-grams, a set of graphical tools, and a collective checking library.
The first set of tools to be used with user MPI programs is profilinglibraries which provide a collection of routines that create log files. Theselog files can be created manually by inserting MPE calls in the MPI pro-gram, or automatically by linking with the appropriate MPE libraries, orby combining the above two methods. Currently, MPE offers the followingfour profiling libraries.
1. Tracing Library: Traces all MPI calls. Each MPI call is preceded by aline that contains the rank in MPI COMM WORLD of the calling process,and followed by another line indicating that the call has completed.Most send and receive routines also indicate the values of count, tag,and partner (destination for sends, source for receives). Output is tostandard output.
2. Animation Libraries: A simple form of real-time program animationthat requires X window routines (Currently not available on windows).
3. Logging Libraries: The most useful and widely used profiling librariesin MPE. These libraries form the basis for generating log files fromuser MPI programs. Several different log file formats are available inMPE. The default log file format is CLOG2. It is a low overheadlogging format, a simple collection of single timestamp events. Theold format ALOG, which is not being developed for years, is not dis-tributed here. The powerful visualization format is SLOG-2, standsfor Scalable LOGfile format version II, which is a total redesign of theoriginal SLOG format. SLOG-2 allows for much improved scalabilityfor visualization purpose. A CLOG2 file can be easily converted toSLOG-2 file through the new SLOG-2 viewer, Jumpshot-4.
9 RUNTIME ENVIRONMENT 31
4. Collective and datatype checking library: An argument consistencychecking library for MPI collective calls. It checks for datatype, root,and various argument consistency in MPI collective calls (Currentlynot available on Windows).
The set of utility programs in MPE includes log format converter (e.g.clogTOslog2) and logfile viewer and convertor (e.g. Jumpshot). These newtools, clog2TOslog2 and Jumpshot (Jumpshot-4) replace old tools, clog2slog,slog print and logviewer (i.e. Jumpshot-2 and Jumpshot-3).
9.11.1 Tracing MPI calls using the MPIEXEC Wrapper
A developer can trace MPI calls by using the tracing functionality of thempiexec wrapper (wmpiexec.exe). A step by step process is given below.
1. Launch the mpiexec wrapper application (wmpiexec.exe).
2. After launching the mpiexec wrapper, select the application that youwould like to run and select the number of processes. Now click on the“more options” checkbox to show the extended options for mpiexec.
3. Check the “produce clog2 file” checkbox so that the clog2 file is gen-erated when the application is run.
4. Check “run in an separate window” checkbox to enable your programto run in a separate window (for user interaction).
5. Run your application by clicking on the “Execute” button.
6. Once the application exits, click on the “Jumpshot” button to launchJumpshot (the logfile viewer).
7. Open your logfile (the default name of the logfile is <APPLICATIONNAME>.clog2) using Jumpshot. Jumpshot will ask for converting thelogfile to slog2 format. Click “Convert” button in Jumpshot to convertyour logfile to slog2 format.
8. Now click on “OK” button in Jumpshot to view the logfile.
9 RUNTIME ENVIRONMENT 32
9.11.2 Tracing MPI calls from the command line
1. Run your application using the “-log” option to the mpiexec command.
2. Launch Jumpshot using the java command. (eg: java -jar "c:\ProgramFiles\MPICH2\bin\jumpshot.jar")
3. Follow the steps mentioned in the previous section to convert the logfileto slog2 format and view the log.
9.11.3 Customizing logfiles
In addition to using the predefined MPE logging libraries to log all MPIcalls, MPE logging calls can be inserted into the user’s MPI program todefine and log states. These states are called user-defined states. Statesmay be nested, allowing one to define a state describing a user routine thatcontains several MPI calls, and display both the user-defined state and theMPI operations contained within it.
The simplest way to insert user-defined states is as follows:
1. Get handles from MPE logging library. MPE Log get state eventIDsmust be used to get unique event IDs (MPE logging handles). Thisis important if you are writing a library that uses the MPE loggingroutines from the MPE system. Hardwiring the eventIDs is considereda bad idea since it may cause eventID confict and so the practice isn’tsupported. The older MPE library provides MPE Log get event number,which is still being supported but has been deprecated; users arestrongly urged to use MPE Log get state eventIDs instead.
2. Set the logged state’s characteristics. MPE Describe state sets thename and color of the states.
3. Log the events of the logged states. MPE Log event is called twice tolog the user-defined states.
Below is a simple example that uses the three steps outlined above.
int eventID_begin, eventID_end;...
9 RUNTIME ENVIRONMENT 33
MPE_Log_get_state_eventIDs( &eventID_begin, &eventID_end );...MPE_Describe_state( eventID_begin, eventID_end, "Multiplication", "red" );...MyAmult( Matrix m, Vector v ){
/* Log the start event along with the size of the matrix */MPE_Log_event( eventID_begin, 0, NULL );... Amult code, including MPI calls ...MPE_Log_event( eventID_end, 0, NULL );
}
The logfile generated by this code will have the MPI routines nestedwithin the routine MyAmult.
Besides user-defined state, MPE2 also provides support for user-definedevents, which can be defined through use of MPE Log get solo eventID andMPE Describe event. For more details, see cpilog.c.
For undefined user-defined state (where the corresponding MPE Describe statehas not been issued), the new Jumpshot (Jumpshot-4) may display the leg-end name as “UnknownType-INDEX” where INDEX is the internal MPEcategory index.
An example program, cpilog.c, is provided in the “examples” directoryof your MPICH2 installation. This program can be used as a reference forcustomizing logfiles.