Move Your Website Files to AT&T Website Solutions · Step Step 1:11::1: PlanningPlanningPlanning...
12
We have created 9 steps to ensure a smooth transition from your current hosting provider to AT&T Website Solutions. © 2012 AT&T Intellectual Property. All rights reserved. AT&T products and services are provided or offered by subsidiaries and affiliates of AT&T Inc. under the AT&T brand and not by AT&T Inc. AT&T, AT&T logo and all other AT&T marks contained herein are trademarks of AT&T Intellectual Property and/or AT&T affiliated companies. All other trademarks are the property of their owners. This document is not an offer, commitment, representation or warranty by AT&T and is subject to change. Your Web Hosting service is subject to the Terms and Conditions (T&Cs), which may be found at http://webhosting.att.com/Terms-Conditions.aspx . Service terms and Fees are subject to change without notice. Please read the T&Cs for additional information. How to Change your current Hosting Provider to AT&T Website Solutions in Nine Steps September 2012 Move Your Website Files to AT&T Website Solutions
Transcript of Move Your Website Files to AT&T Website Solutions · Step Step 1:11::1: PlanningPlanningPlanning...

We have created 9 steps to ensure a smooth transition from your current hosting provider to AT&T Website Solutions.
© 2012 AT&T Intellectual Property. All rights reserved. AT&T products and services are provided or offered by
subsidiaries and affiliates of AT&T Inc. under the AT&T brand and not by AT&T Inc. AT&T, AT&T logo and all other
AT&T marks contained herein are trademarks of AT&T Intellectual Property and/or AT&T affiliated companies. All
other trademarks are the property of their owners. This document is not an offer, commitment, representation or
warranty by AT&T and is subject to change. Your Web Hosting service is subject to the Terms and Conditions
(T&Cs), which may be found at http://webhosting.att.com/Terms-Conditions.aspx. Service terms and Fees are
subject to change without notice. Please read the T&Cs for additional information.
How to Change your current Hosting Provider to AT&T Website Solutions in Nine Steps
September 2012
Move Your Website Files to AT&T Website Solutions

Contents Step 1. Planning .................................................................................................................................................. 3
Step 2. Back up your website! ............................................................................................................................ 3
Using FileZilla ................................................................................................................................................ 4
Step 3. Sign up for your new AT&T Website Solutions hosting account. ......................................................... 5
Step 4. Uploading your website content ............................................................................................................. 6
Publishing your website with Microsoft FrontPage™ ............................................................................... 9
Step 5. Testing and previewing your website ..................................................................................................... 9
Step 6. Create your Email accounts .................................................................................................................... 9
Step 7. Change your Nameservers .................................................................................................................... 10
Step 8. Test your live website ........................................................................................................................... 11
Step 9. Configure your Email client. ................................................................................................................ 11
Where to find Help/Instructions ....................................................................................................................... 12
How to Contact Support ............................................................................................................................... 12
Submit a ticket by email: [email protected] ........................................................................... 12
Contact us by phone: .................................................................................................................................... 12
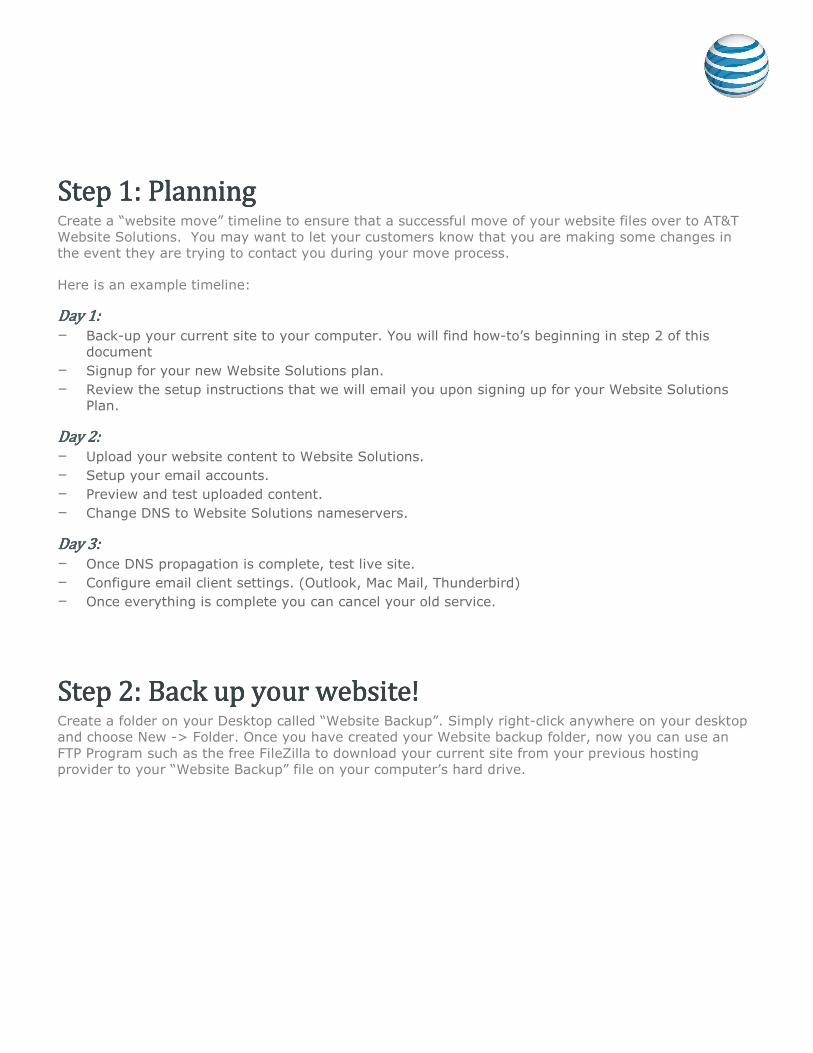
Step Step Step Step 1:1:1:1: PlanningPlanningPlanningPlanning Create a “website move” timeline to ensure that a successful move of your website files over to AT&T
Website Solutions. You may want to let your customers know that you are making some changes in
the event they are trying to contact you during your move process.
Here is an example timeline:
Day 1:Day 1:Day 1:Day 1:
– Back-up your current site to your computer. You will find how-to’s beginning in step 2 of this
document
– Signup for your new Website Solutions plan.
– Review the setup instructions that we will email you upon signing up for your Website Solutions
Plan.
Day 2:Day 2:Day 2:Day 2:
– Upload your website content to Website Solutions.
– Setup your email accounts.
– Preview and test uploaded content.
– Change DNS to Website Solutions nameservers.
Day 3:Day 3:Day 3:Day 3:
– Once DNS propagation is complete, test live site.
– Configure email client settings. (Outlook, Mac Mail, Thunderbird)
– Once everything is complete you can cancel your old service.
Step 2:Step 2:Step 2:Step 2: Back up your website!Back up your website!Back up your website!Back up your website! Create a folder on your Desktop called “Website Backup”. Simply right-click anywhere on your desktop
and choose New -> Folder. Once you have created your Website backup folder, now you can use an
FTP Program such as the free FileZilla to download your current site from your previous hosting
provider to your “Website Backup” file on your computer’s hard drive.
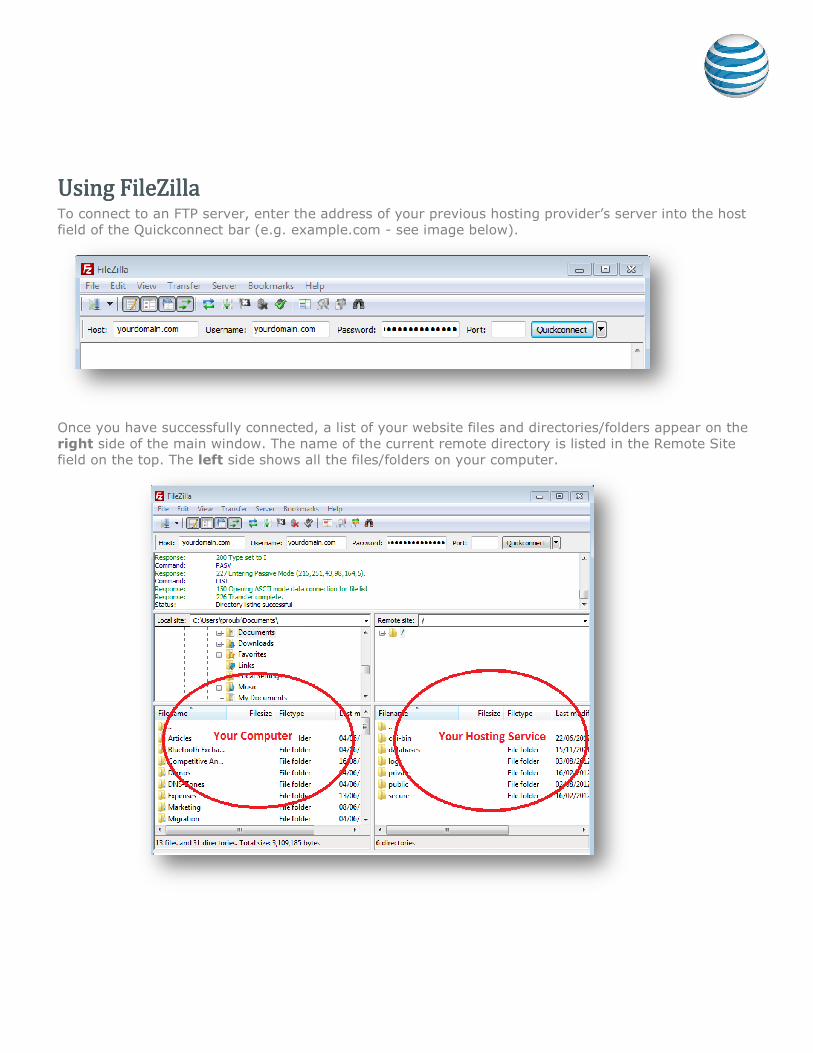
Using FileZillaUsing FileZillaUsing FileZillaUsing FileZilla To connect to an FTP server, enter the address of your previous hosting provider’s server into the host
field of the Quickconnect bar (e.g. example.com
Once you have successfully connected, a list of your website files and directories/folders appear on the
right side of the main window. The name of the current remote directory is listed in the Remote Site
field on the top. The left side shows all the file
To connect to an FTP server, enter the address of your previous hosting provider’s server into the host
field of the Quickconnect bar (e.g. example.com - see image below).
Once you have successfully connected, a list of your website files and directories/folders appear on the
side of the main window. The name of the current remote directory is listed in the Remote Site
side shows all the files/folders on your computer.
To connect to an FTP server, enter the address of your previous hosting provider’s server into the host
Once you have successfully connected, a list of your website files and directories/folders appear on the
side of the main window. The name of the current remote directory is listed in the Remote Site

Transferring filesTransferring filesTransferring filesTransferring files To download your site to your “Website Backup” file on your computer, simply select all the files and
folders on the right side inside your public or public_html directory and drag them to the left side to
your Website Backup folder on your Desktop as displayed in the image below.
Step 3:Step 3:Step 3:Step 3: Sign up for your AT&T Website Solutions hosting Sign up for your AT&T Website Solutions hosting Sign up for your AT&T Website Solutions hosting Sign up for your AT&T Website Solutions hosting
accountaccountaccountaccount If you have not already done so, purchase your new hosting account with Website Solutions.
cancel your hosting account at your current host until you have tested and made sure that everything
is moved to your AT&T Website Solutions account.
If you have your new hosting account with Website Solutions,
your current host until you have tested and made sure that everything is moved to your AT&T Website
Solutions account.
To download your site to your “Website Backup” file on your computer, simply select all the files and
folders on the right side inside your public or public_html directory and drag them to the left side to
your Website Backup folder on your Desktop as displayed in the image below.
Sign up for your AT&T Website Solutions hosting Sign up for your AT&T Website Solutions hosting Sign up for your AT&T Website Solutions hosting Sign up for your AT&T Website Solutions hosting
If you have not already done so, purchase your new hosting account with Website Solutions.
ting account at your current host until you have tested and made sure that everything
is moved to your AT&T Website Solutions account.
If you have your new hosting account with Website Solutions, DO NOT cancel your hosting account at
ntil you have tested and made sure that everything is moved to your AT&T Website
To download your site to your “Website Backup” file on your computer, simply select all the files and
folders on the right side inside your public or public_html directory and drag them to the left side to
Sign up for your AT&T Website Solutions hosting Sign up for your AT&T Website Solutions hosting Sign up for your AT&T Website Solutions hosting Sign up for your AT&T Website Solutions hosting
If you have not already done so, purchase your new hosting account with Website Solutions. DO NOT
ting account at your current host until you have tested and made sure that everything
cancel your hosting account at
ntil you have tested and made sure that everything is moved to your AT&T Website

In both cases, you will have two hosting accounts working concurrently for a short time and this
ensures the least amount of downtime.
Once you have created your new hosting account, make sure to get all of the relevant information you
need to setup your website. Upon signing up, you will receive detailed setup instructions via email with
all the pertinent information.
The following are the most important pieces of information you need:
– Logins for FTP and control panel. You receive this information in your Welcome Email that we send
to you after your order is complete. It says “Welcome” in the Subject line. If you do not have this
information or receive your email, then contact our customer support team at 1.888.932.4678 or
by emailing [email protected] and we can have the information resent.
– Instructions on how to create/setup email accounts. Please click here for help in setting up your email or
refer to the Managing Email guide.
– The name of your homepage. Additional information is below on how to name your homepage.
– Nameserver/DNS information. Keep this information on-hand. AT&T Website Solutions
nameservers are as follows:
o 1st nameserver: ns1.att-websites.com
o 2nd nameserver: ns2.att-websites.com
Step Step Step Step 4444:::: Uploading your website contentUploading your website contentUploading your website contentUploading your website content Once your new hosting account is created and you have the necessary uploading instructions, you can
now upload your website content to your AT&T Website Solutions account and make sure that all
relevant files are uploaded into the Public directory and that home page is named “index”.
We suggest using FTP to upload your files. To configure your FTP client, please use the following
information:
Host Name / Address: yourdomain.com
User Name: yourdomain.com
Password: your password
Using 216.55.149.9 as the Host Name will ensure that you can upload your website before your domain
name’s DNS propagates to our name servers. This allows you to preview your website’s content before
changing your nameservers.
***Please note that once DNS propagation is completed, your domain name will have to be used as the
Host Name.

You can upload your website by using the File Manager Pro application found in
With File Manager Pro you can select each file to upload them. Simply click on Upload then Browse.
You’ll then be able to select the files from your computer to upload.
You can also repeat step 2 of transferring your files in reverse order with an FTP client such as FileZilla,
once you have connected to AT&T Website Solutions servers, simply select all your website files in the
left window and drag them to the public directory in the right window.
You can upload your website by using the File Manager Pro application found in your
Manager Pro you can select each file to upload them. Simply click on Upload then Browse.
You’ll then be able to select the files from your computer to upload.
You can also repeat step 2 of transferring your files in reverse order with an FTP client such as FileZilla,
T Website Solutions servers, simply select all your website files in the
left window and drag them to the public directory in the right window.
your control panel.
Manager Pro you can select each file to upload them. Simply click on Upload then Browse.
You can also repeat step 2 of transferring your files in reverse order with an FTP client such as FileZilla,
T Website Solutions servers, simply select all your website files in the
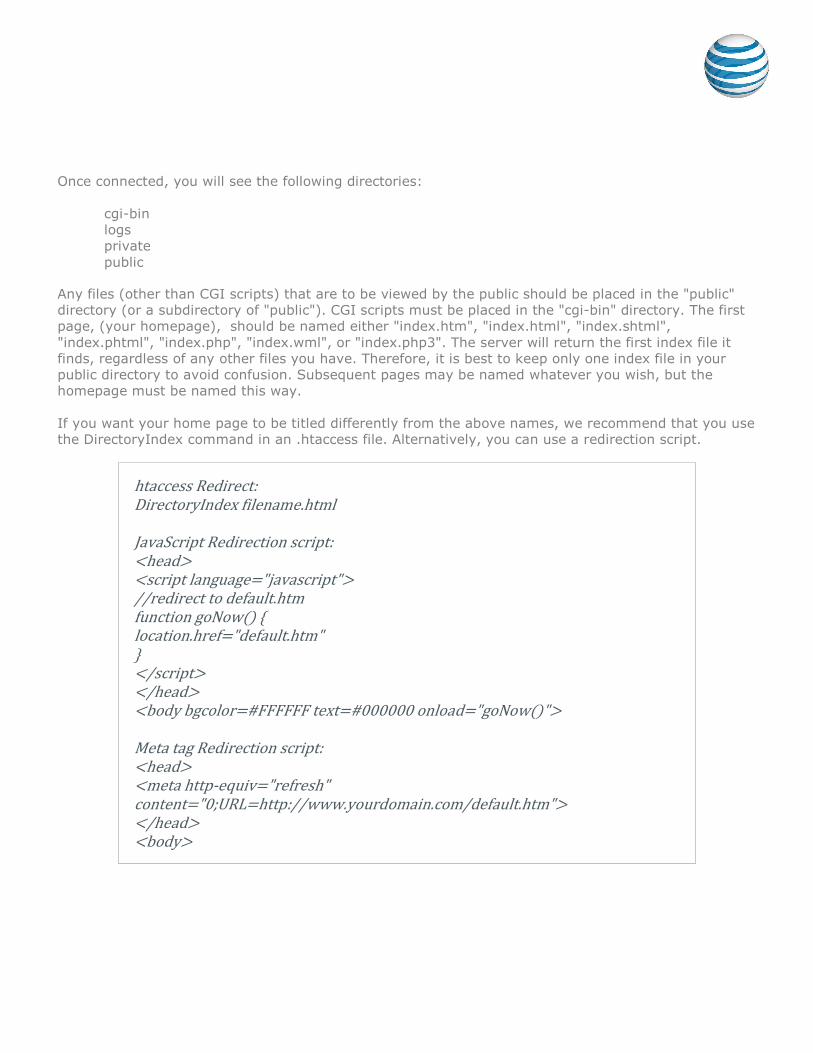
Once connected, you will see the following directories:
cgi-bin
logs
private
public
Any files (other than CGI scripts) that are to be viewed by the public should be placed in the "public"
directory (or a subdirectory of "public"). CGI scripts must be placed in the "cgi-bin" directory. The first
page, (your homepage), should be named either "index.htm", "index.html", "index.shtml",
"index.phtml", "index.php", "index.wml", or "index.php3". The server will return the first index file it
finds, regardless of any other files you have. Therefore, it is best to keep only one index file in your
public directory to avoid confusion. Subsequent pages may be named whatever you wish, but the
homepage must be named this way.
If you want your home page to be titled differently from the above names, we recommend that you use
the DirectoryIndex command in an .htaccess file. Alternatively, you can use a redirection script.
htaccess Redirect: DirectoryIndex filename.html JavaScript Redirection script: <head> <script language="javascript"> //redirect to default.htm function goNow() { location.href="default.htm" } </script> </head> <body bgcolor=#FFFFFF text=#000000 onload="goNow()"> Meta tag Redirection script: <head> <meta http-equiv="refresh" content="0;URL=http://www.yourdomain.com/default.htm"> </head> <body>
Publishing your website Publishing your website Publishing your website Publishing your website with Microsoft FrontPage™with Microsoft FrontPage™with Microsoft FrontPage™with Microsoft FrontPage™ If you are using Microsoft FrontPage™ for your website, make sure that you have activated the
FrontPage extensions before publishing your site. This can be done by logging into the control panel
and accessing the “FrontPage Manager” application.
In FrontPage, from the "File" menu choose the "Publish Web" option. You will be prompted to provide a
URL to publish your website files to. After specifying the address to publish to (in the form of
"yourdomain.com"), you have the choice of publishing the entire website, or just the pages that have
been changed. If you are publishing for the first time, choose "Publish all pages."
Important notes:Important notes:Important notes:Important notes:
– Publish your site using FrontPage's "Publish Web" function. Your publishing address is your domain
name (in the form of "yourdomain.com").
– FrontPage extensions disable regular FTP access along with the following applications: Ad Manager,
Business Card, Plug-in Scripts, File Manager, Database Manager and Website Security.
– Once your website is published, use a browser and check to make sure all your changes occurred.
If they haven't, try refreshing your browser and clearing the Temporary Internet Files (cache)
before making further changes to your site. In Internet Explorer, this is done by going to "Tools,"
"Internet Options." On the General tab under "Temporary Internet Files" click "Delete Files."
Step 5:Step 5:Step 5:Step 5: Testing and previewing your websiteTesting and previewing your websiteTesting and previewing your websiteTesting and previewing your website After moving your files, your website is ready to test and preview using the preview URL to make sure
that everything works seamlessly. This way you can identify and troubleshoot any configuration
differences between hosts. To preview your site before changing nameservers simply go to the
following URL: http://yourdomain.com. previewc45.carrierzone.com
Step 6:Step 6:Step 6:Step 6: Create your Email accountsCreate your Email accountsCreate your Email accountsCreate your Email accounts Log into your Website Solutions control panel and create all the same email accounts that you currently
use. Once you have logged into the control panel, click “EasyMail Setup” and click on “Create a new
account” and follow the steps to configure your email accounts. We recommend keeping the passwords
the same to minimize any email client settings changes if your company uses programs such as
Outlook to send and receive email. From the EasyMail Setup application you can also setup Auto
responders, Spam Filtering, Aliases and Forwarding options.

Step 7:Step 7:Step 7:Step 7: Change your NameserversChange your NameserversChange your NameserversChange your NameserversOnce you have tested your website and are
log into their domain management system to change the nameservers from your old host to AT&T
Website Solutions. In their domain management system, look for the “DNS” or “Nameservers” option
and replace the current nameservers with the following:
1st nameserver: ns1.att-websites.com
2nd nameserver: ns2.att-websites.com
Most registrars will then ask you to confirm the changes via an email sent to the administrative contact
for the domain. It is very important that this email address is always kept up
potential disruptions in service.
Any modifications to domain names generally take between 24
called DNS propagation, which is the amount of time it takes nameservers around the world to update
their DNS tables to see your new domain’s settings.
To view the status of your domain name, simply do a simple “whois” lookup. This can be done by going
to the following URL: http://www.easywhois.com/
ns2 services read as they do in circled area within the image below:
Change your NameserversChange your NameserversChange your NameserversChange your Nameservers Once you have tested your website and are pleased with the results, contact your domain registrar or
log into their domain management system to change the nameservers from your old host to AT&T
Website Solutions. In their domain management system, look for the “DNS” or “Nameservers” option
e current nameservers with the following:
websites.com
websites.com
Most registrars will then ask you to confirm the changes via an email sent to the administrative contact
for the domain. It is very important that this email address is always kept up-to-date to avoid any
ns to domain names generally take between 24 – 72 hours to process. This process is
called DNS propagation, which is the amount of time it takes nameservers around the world to update
their DNS tables to see your new domain’s settings.
of your domain name, simply do a simple “whois” lookup. This can be done by going
http://www.easywhois.com/. Your DNS propagation is completed when the ns1 and
ircled area within the image below:
with the results, contact your domain registrar or
log into their domain management system to change the nameservers from your old host to AT&T
Website Solutions. In their domain management system, look for the “DNS” or “Nameservers” option
Most registrars will then ask you to confirm the changes via an email sent to the administrative contact
date to avoid any
72 hours to process. This process is
called DNS propagation, which is the amount of time it takes nameservers around the world to update
of your domain name, simply do a simple “whois” lookup. This can be done by going
. Your DNS propagation is completed when the ns1 and

Step 8:Step 8:Step 8:Step 8: Test your live websiteTest your live websiteTest your live websiteTest your live website Once you have confirmed that DNS propagation is complete through a whois lookup, we recommend
that you test your website again to ensure that your website is up and running appropriately. If you
have any concerns do not hesitate to contact our technical support team. They are available to you 24
hours a day, 7 days a week. You can contact them toll free at 1.888.932.4678 or by emailing
Step 9:Step 9:Step 9:Step 9: Configure youConfigure youConfigure youConfigure your Email clientr Email clientr Email clientr Email client The last step in changing hosts is to change your email client settings to reflect your new email settings
(please refer to Managing Email guide). Below is an example for Microsoft Outlook. Use these settings
to configure Microsoft Outlook to check your email. Remember to replace "username" with your actual
username, and replace "yourdomain.com" with your actual domain name.
Mail Account (can be any label): [email protected]
Email Address: [email protected]
Reply Address: [email protected]
Outgoing Mail (SMTP) Server: mail.yourdomain.com
Incoming Mail (POP/IMAP) Server: mail.yourdomain.com
Logon using Account Name: username.yourdomain.com
These 9 steps will assist you in moving from your current hosting provider to AT&T Website Solutions.
Once all 9 steps have been successfully completed and your website and email are working properly,
then and only then would you cancel your old hosting service.
Remember, it is critical that you keep both your old and new hosting accounts running concurrently
during your website account move to AT&T Website Solutions as you will need to check your email from
both hosts. Some ISP’s and hosting providers will direct email to your old host, while others will begin
sending email to your new host earlier as a result of propagation times. Canceling before the steps are
followed can result in unwanted downtime for both your website and emails.

Where to find Help/InstructionsWhere to find Help/InstructionsWhere to find Help/InstructionsWhere to find Help/Instructions AT&T Website Solutions includes a number of applications and tools that you can use on your website.
Help/Instructions on how to use each of these features are located in the top right of your control
panel. For specific help for each application together with instructions, select the
application you want in the control panel and click the help button in the top right corner.
How to Contact SupportHow to Contact SupportHow to Contact SupportHow to Contact Support
Submit a ticket by email: : : : [email protected]
For support issues, please also include a step-by-step on how to replicate your problem including your
operating system, browser type and version, and any links and login information that may be needed to
duplicate and correct the reported issue.
Contact us by phone:::: You may also reach us by dialing 1.888.WEB.HOST (1.888.932.4678).
Our Technical Support staff is available 24 hours a day, 7 days a week; choose the tech support option.
Our billing group is available Monday - Friday 8 a.m. – 8 p.m. (Eastern); select the billing option. All
questions concerning billing, renewal or cancellation should be directed here.
Our sales staff is available Monday – Friday 8 a.m. – 8 p.m. (Eastern); select the sales option.
International customers may reach us by calling 972-234-4847