Online Mother’s Day Gifts - History of Mother’s Day Unveiled
Mother’s Day Craft eBook: Blogger Edition
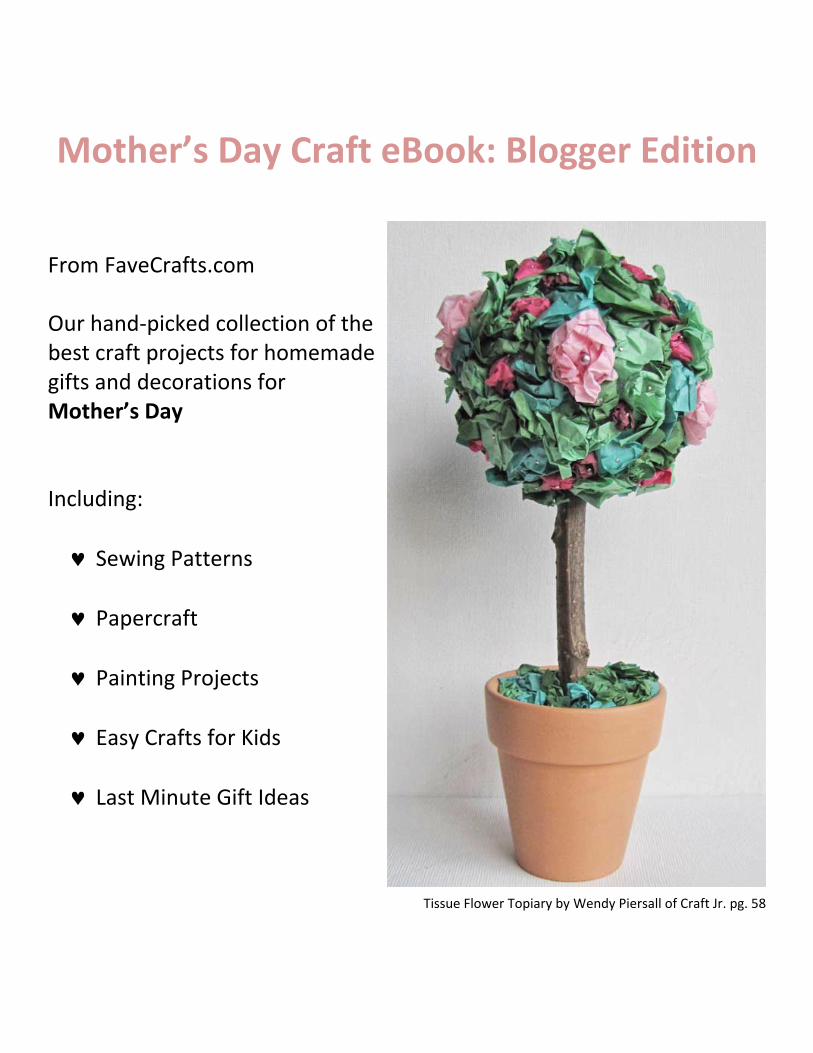
From FaveCrafts.com Our hand‐picked collection of the best craft projects for homemade gifts and decorations for Mother’s Day Including: ♥ Sewing Patterns
♥ Papercraft
♥ Painting Projects
♥ Easy Crafts for Kids
♥ Last Minute Gift Ideas
Tissue Flower Topiary by Wendy Piersall of Craft Jr. pg. 58
Mother’s Day Craft eBook: Blogger Edition
Find thousands of free craft projects, decorating ideas, handmade gift options and more at www.FaveCrafts.com. 2
The contents of this eBook, including all craft projects, are the property of FaveCrafts.com and cannot be distributed or published without permission from FaveCrafts. Any syndication requests may be
directed to FaveCrafts.
© 2009, Prime Publishing LLC, All Rights Reserved.
Mother’s Day Craft eBook: Blogger Edition
Find thousands of free craft projects, decorating ideas, handmade gift options and more at www.FaveCrafts.com. 3
Letter from the Editors
Dear Reader,
As you might imagine, the editors here at FaveCrafts love craft blogs! We continue to read an ever‐growing list of blogs and discover new sources for creativity each week. Publishing guest features in the form of projects, tutorials, tips, and blog posts gives the FaveCrafts team a wonderful opportunity to share our favorite bloggers with our readers. Our goal has always been to create and nurture a vibrant and varied community of crafters, from designers and manufacturers to those just learning how to knit.
In that spirit, this Mother’s Day Craft eBook is dedicated entirely to bloggers. These craft bloggers have some of the best ideas for how to decorate for Mother’s Day celebrations and what to make Mom. Best of all, these projects won’t break the bank! We hope you enjoy reading as much as we enjoyed putting this together.
You can find more holiday craft projects, great activities for kids and extensive decorating ideas at www.FaveCrafts.com. Our eBooks, like all our craft projects, are absolutely FREE to members of our crafting community. Please feel free to share with family and friends and ask them to sign up at our website for our free e‐mail newsletter.
We hope you enjoy reading and creating!
Sincerely,
The Editors of FaveCrafts
www.FaveCrafts.com
www.FaveCraftsBlog.com
Mother’s Day Craft eBook: Blogger Edition
Find thousands of free craft projects, decorating ideas, handmade gift options and more at www.FaveCrafts.com. 4
Acknowledgements
We would like to thank these bloggers for contributing to the eBook:
Marie LeBaron of Makes and Takes
Jo Ebisujima of A Bit of This and A Bit of That
Suzanne of Crazy for Collars
Ashley of Domestic Fashionista
Ashley Johnston of Make It and Love It
Tania Ennor of MyrtleandEunice
Kate of Centsational Girl
Avital Gertner‐Samet of Creativity Prompt
Meg of The Closet Seamstress
Molly Kozera of Bit O’ Shine
Corinne of So September
Chasity of Belle and Burger
Wendy Piersall of Craft Jr.
Michelle Sybert of Her Cup Overfloweth
Vanessa of MaxxSilly
Thank you for sharing your ideas and continuing to inspire us in
crafting.
Mother’s Day Craft eBook: Blogger Edition
Find thousands of free craft projects, decorating ideas, handmade gift options and more at www.FaveCrafts.com. 5
Table of ontentsC
other's Day Photo Bookmark by Marie LeBaron of Make and Takes ......................................... 6
Canning Jar Pin Cushion or Treasure Jar by Suzanne of Crazy for Collars .................................... 13
Embellish a Pillow for Mom by Ashley of Domestic Fashionista .................................................. 18
Oatmeal Container Yarn Holder by Molly Kozera of Bit O Shine .................................................. 40
M
Origami Tulip Card by Jo Ebisujima of A Bit of This and A Bit of That ............................................ 8
Embellish a Tea Towel by Ashley Johnston of Make It and Love It .............................................. 21
Heart Vouchers and Wrap for Mom by Tania Ennor of MyrtleAndEunice ................................... 23
Monogram Plate for Mom by Kate of Centsational Girl ............................................................... 26
Mother's Day Mini‐Book by Avital Gertner‐Samet of Creativity Prompt ..................................... 30
Mother's Day Sleep Mask by Meg of The Closet Seamstress ....................................................... 34
Photo Fabric Button Magnets by Corinne of So September ........................................................ 47
Scrap Fabric and Button Brooch by Chasity of Belle and Burger .................................................. 51
Tissue Flower Topiary by Wendy Piersall of Craft Jr. .................................................................... 56
Recycled Yogurt Cup Bud Vase by Michelle Sybert of Her Cup Overfloweth ............................... 60
Place Mat Purse by Vanessa of MaxxSilly ..................................................................................... 62
Mother’s Day Craft eBook: Blogger Edition
Mother's Day Photo Bookmark by Marie LeBaron of Make and Takes
This great guest Mother's Day project comes to us from Marie at Make and Takes.
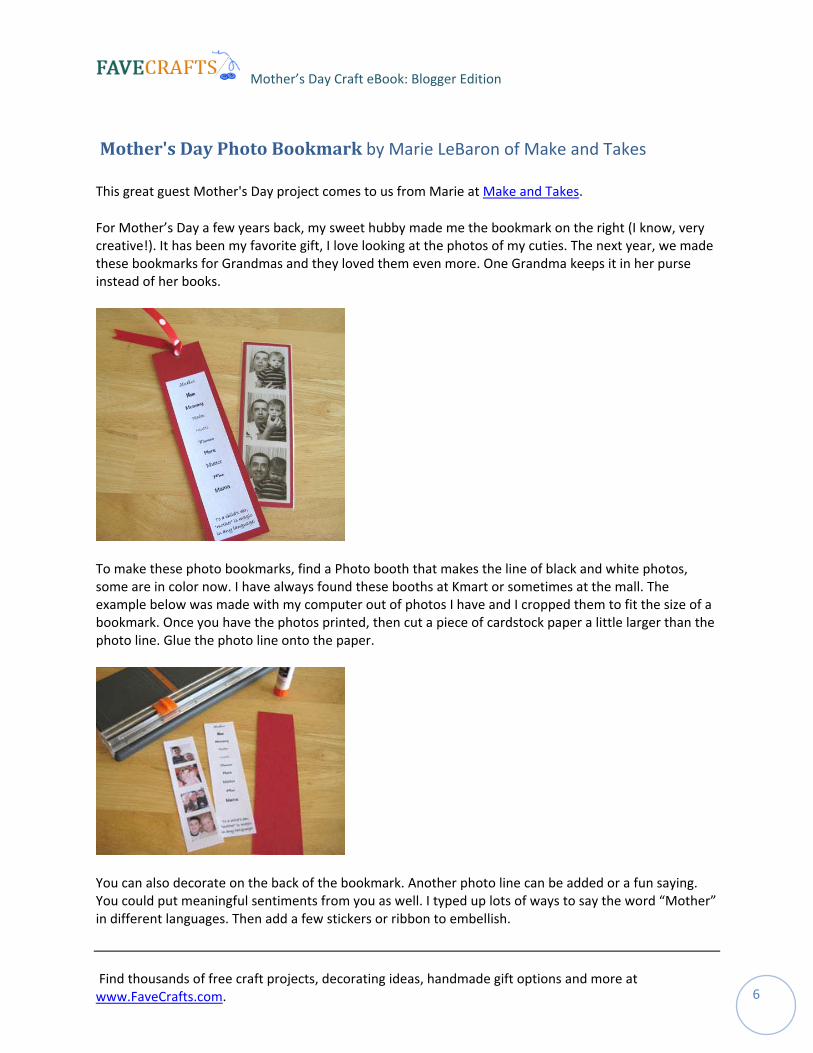
For Mother’s Day a few years back, my sweet hubby made me the bookmark on the right (I know, very creative!). It has been my favorite gift, I love looking at the photos of my cuties. The next year, we made these bookmarks for Grandmas and they loved them even more. One Grandma keeps it in her purse instead of her books.
To make these photo bookmarks, find a Photo booth that makes the line of black and white photos, some are in color now. I have always found these booths at Kmart or sometimes at the mall. The example below was made with my computer out of photos I have and I cropped them to fit the size of a bookmark. Once you have the photos printed, then cut a piece of cardstock paper a little larger than the photo line. Glue the photo line onto the paper.
You can also decorate on the back of the bookmark. Another photo line can be added or a fun saying. You could put meaningful sentiments from you as well. I typed up lots of ways to say the word “Mother” in different languages. Then add a few stickers or ribbon to embellish.
Find thousands of free craft projects, decorating ideas, handmade gift options and more at www.FaveCrafts.com 6 .

Mother’s Day Craft eBook: Blogger Edition
Now you will need to seal this so it will last forever. You can go to a copy store and have it laminated. Or you can buy contact paper to laminate it yourself.
It’s now ready for a Mother and a good book. Here is one of my favorite books for Mother’s Day. It is called, What Moms Can’t Do by Douglas Wood. It talks about how Mom’s can’t “make the bed without help” or “Mom’s can’t hear themselves think!” It’s cute, a perfect story for any Mom.
Find thousands of free craft projects, decorating ideas, handmade gift options and more at www.FaveCrafts.com 7 .
Mother’s Day Craft eBook: Blogger Edition
Origami Tulip Card by Jo Ebisujima of A Bit of This and A Bit of That
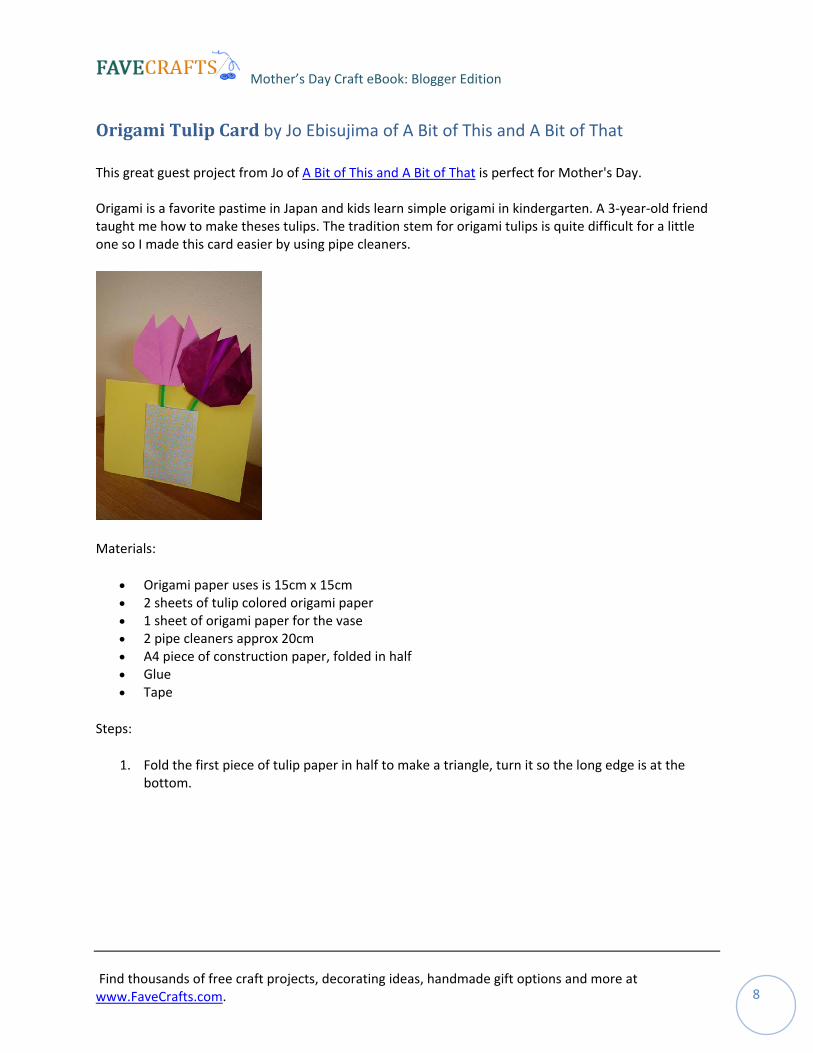
This great guest project from Jo of A Bit of This and A Bit of That is perfect for Mother's Day. Origami is a favorite pastime in Japan and kids learn simple origami in kindergarten. A 3‐year‐old friend taught me how to make theses tulips. The tradition stem for origami tulips is quite difficult for a little one so I made this card easier by using pipe cleaners.
Materials:
• Origami paper uses is 15cm x 15cm • 2 sheets of tulip colored origami paper • 1 sheet of origami paper for the vase • 2 pipe cleaners approx 20cm • A4 piece of construction paper, folded in half • Glue • Tape
Steps:
1. Fold the first piece of tulip paper in half to make a triangle, turn it so the long edge is at the bottom.
Find thousands of free craft projects, decorating ideas, handmade gift options and more at www.FaveCrafts.com 8 .
Mother’s Day Craft eBook: Blogger Edition
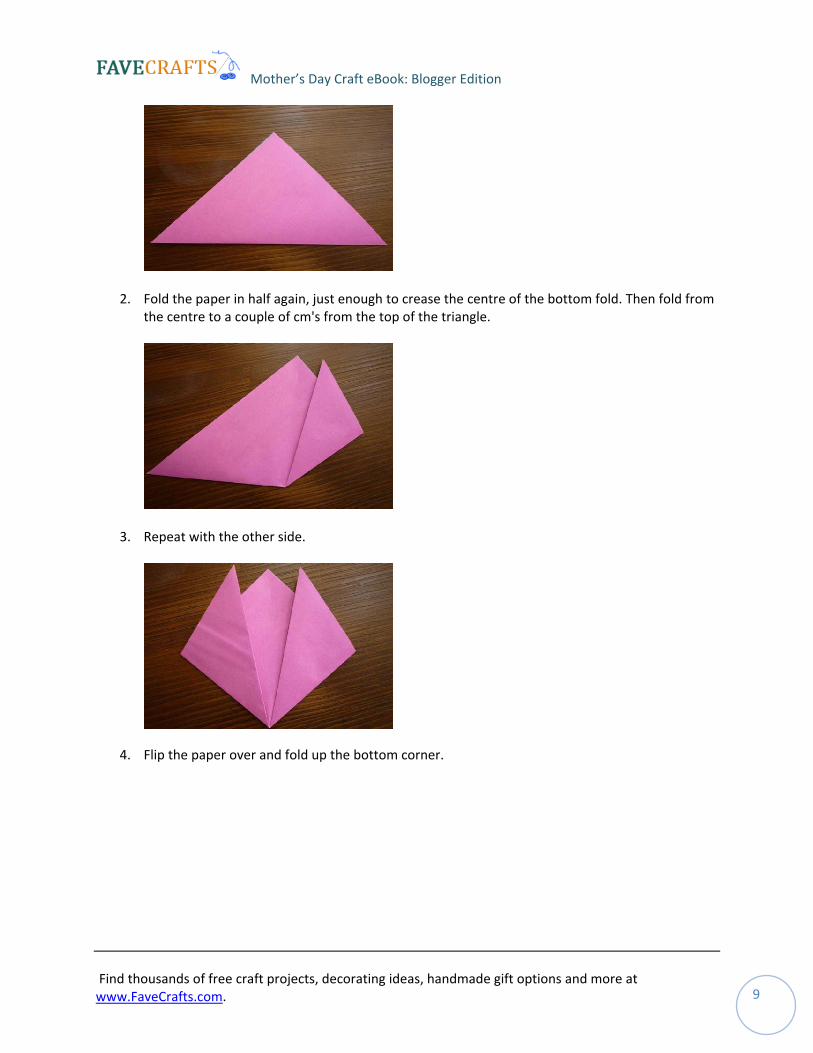
2. Fold the paper in half again, just enough to crease the centre of the bottom fold. Then fold from the centre to a couple of cm's from the top of the triangle.
3. Repeat with the other side.
4. Flip the paper over and fold up the bottom corner.
Find thousands of free craft projects, decorating ideas, handmade gift options and more at www.FaveCrafts.com 9 .
Mother’s Day Craft eBook: Blogger Edition
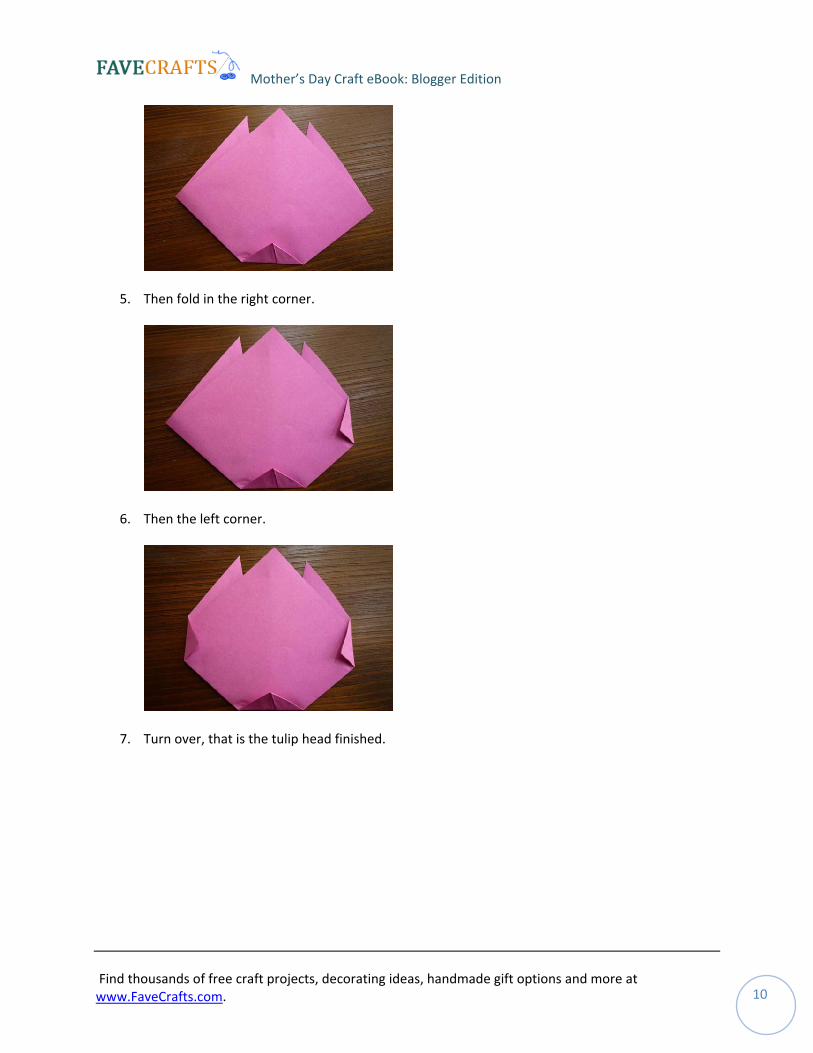
5. Then fold in the right corner.
6. Then the left corner.
7. Turn over, that is the tulip head finished.
Find thousands of free craft projects, decorating ideas, handmade gift options and more at www.FaveCrafts.com 10 .
Mother’s Day Craft eBook: Blogger Edition
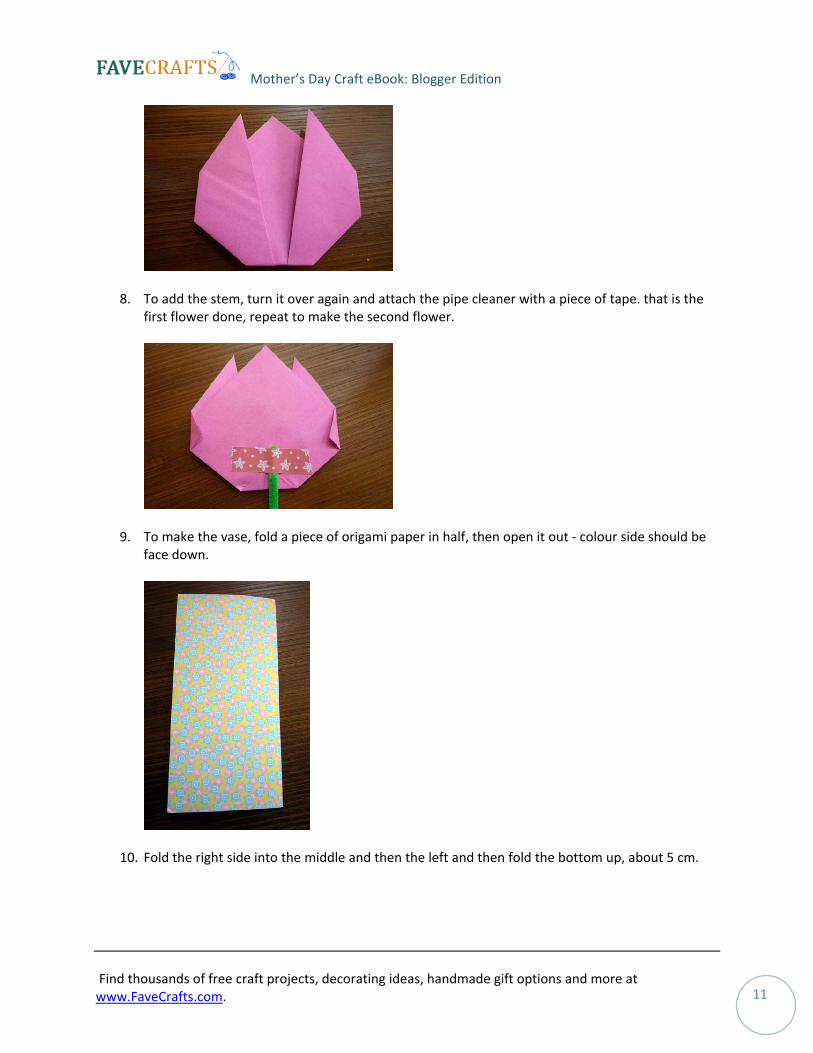
8. To add the stem, turn it over again and attach the pipe cleaner with a piece of tape. that is the first flower done, repeat to make the second flower.
9. To make the vase, fold a piece of origami paper in half, then open it out ‐ colour side should be face down.
10. Fold the right side into the middle and then the left and then fold the bottom up, about 5 cm.
Find thousands of free craft projects, decorating ideas, handmade gift options and more at www.FaveCrafts.com 11 .
Mother’s Day Craft eBook: Blogger Edition
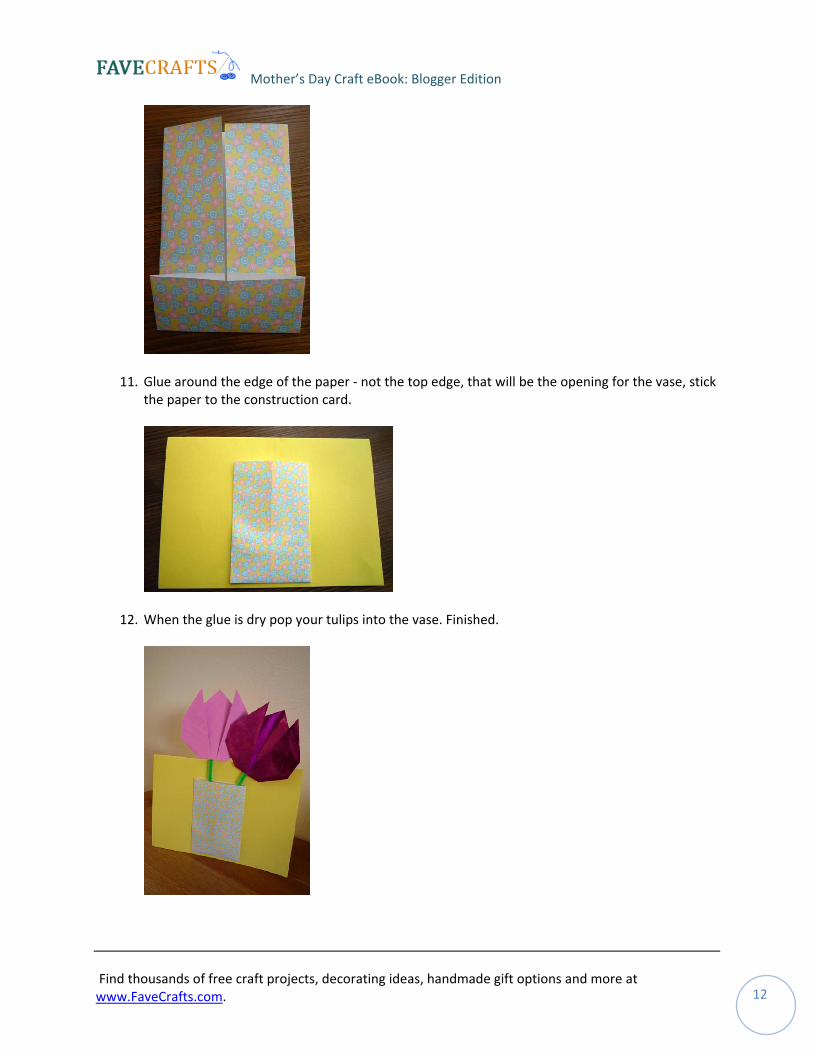
11. Glue around the edge of the paper ‐ not the top edge, that will be the opening for the vase, stick the paper to the construction card.
12. When the glue is dry pop your tulips into the vase. Finished.
Find thousands of free craft projects, decorating ideas, handmade gift options and more at www.FaveCrafts.com 12 .

Mother’s Day Craft eBook: Blogger Edition
Canning Jar Pin Cushion or Treasure Jar by Suzanne of Crazy for Collars
This project comes to us compliments of Suzanne of Crazy for Collars, who specializes in hand‐sewn pet items. Suzanne also operates Joyful Finds shop and Suzanne's Perfect Treasures.
Ball recently released the Wide Mouth Contemporary Styled Glass Preserving Jars.
Using the new little Half Pint size, make a super sweet and easy pincushion or “treasure jar” for Mom.
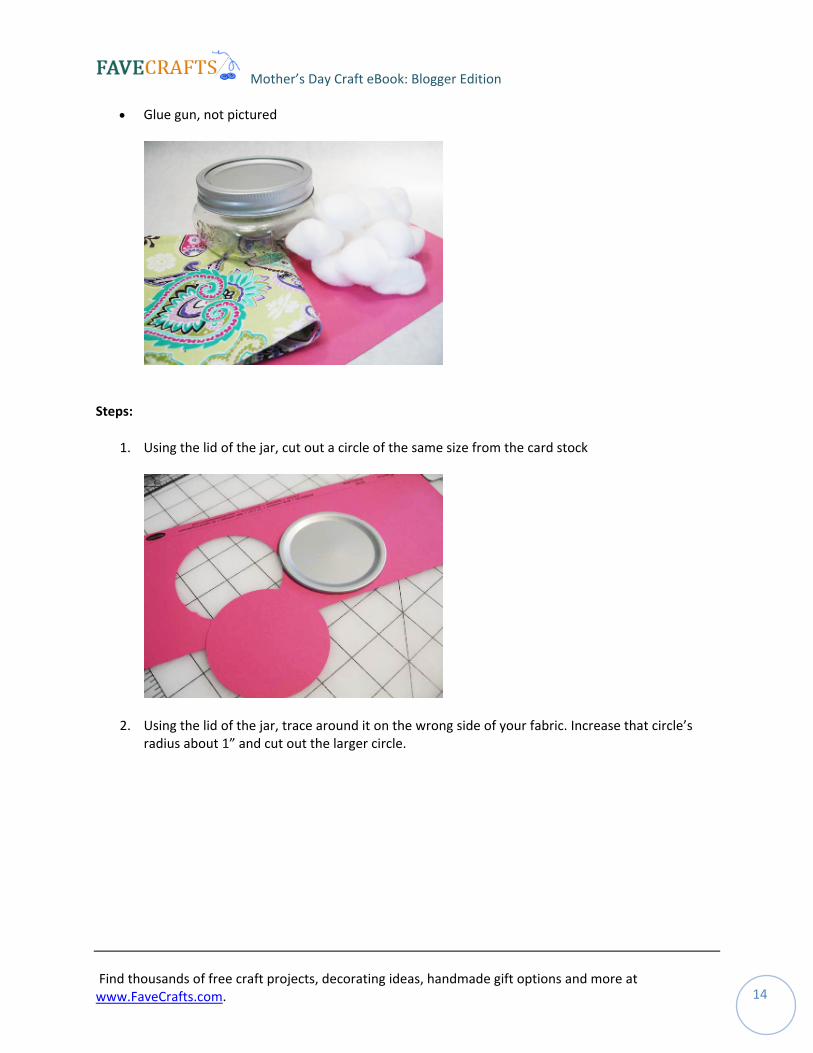
Materials:
• Fabric Scrap of your choice • Jar with lid and band • Cotton balls or fiberfill • Card Stock
Find thousands of free craft projects, decorating ideas, handmade gift options and more at www.FaveCrafts.com 13 .
Mother’s Day Craft eBook: Blogger Edition
• Glue gun, not pictured
Steps:
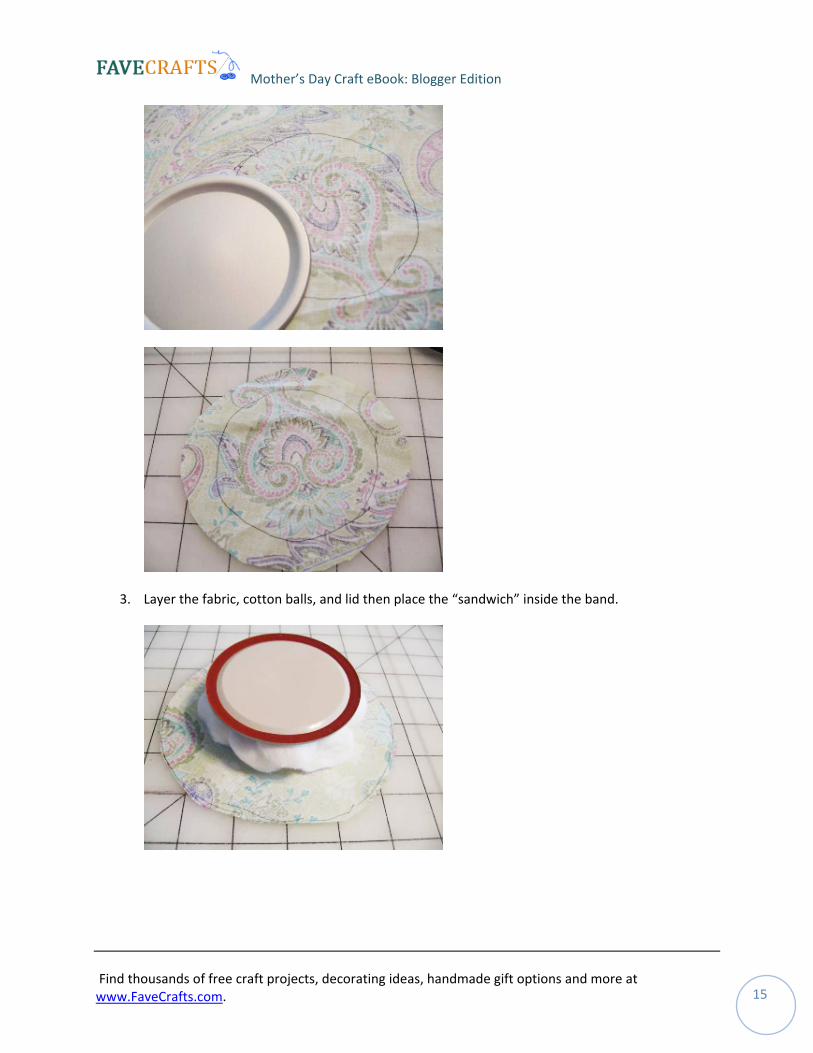
1. Using the lid of the jar, cut out a circle of the same size from the card stock
2. Using the lid of the jar, trace around it on the wrong side of your fabric. Increase that circle’s radius about 1” and cut out the larger circle.
Find thousands of free craft projects, decorating ideas, handmade gift options and more at www.FaveCrafts.com 14 .
Mother’s Day Craft eBook: Blogger Edition
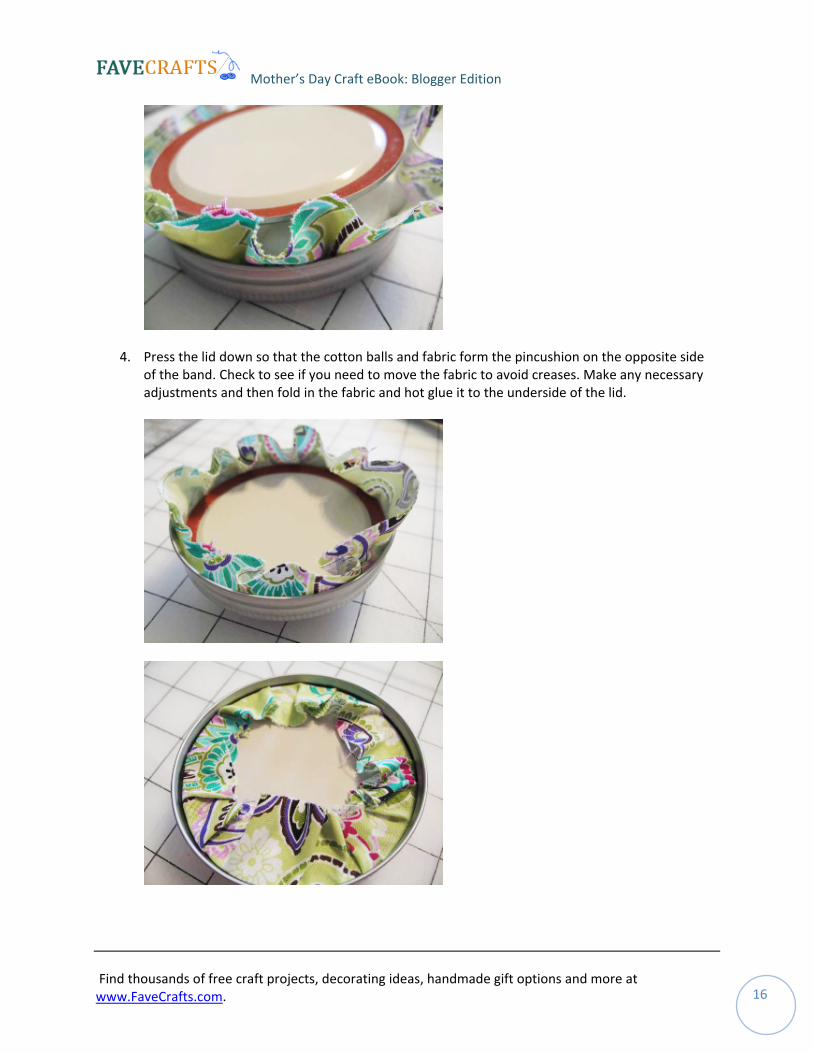
3. Layer the fabric, cotton balls, and lid then place the “sandwich” inside the band.
Find thousands of free craft projects, decorating ideas, handmade gift options and more at www.FaveCrafts.com 15 .
Mother’s Day Craft eBook: Blogger Edition
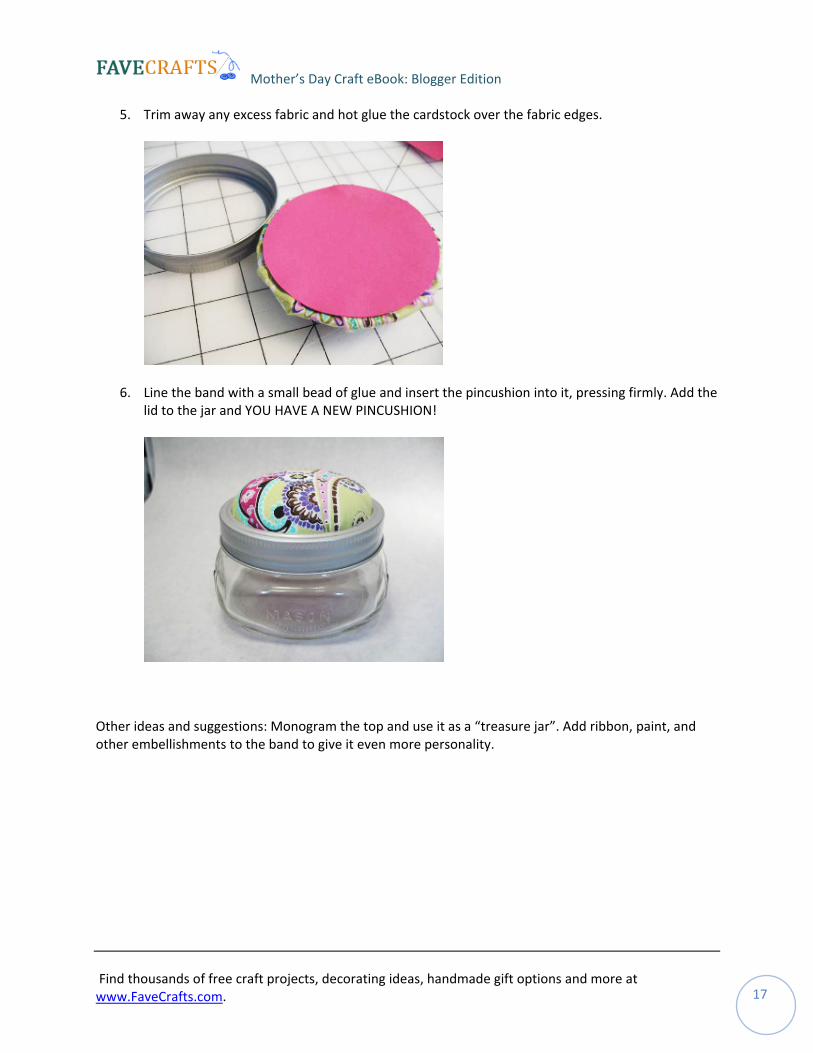
4. Press the lid down so that the cotton balls and fabric form the pincushion on the opposite side of the band. Check to see if you need to move the fabric to avoid creases. Make any necessary adjustments and then fold in the fabric and hot glue it to the underside of the lid.
Find thousands of free craft projects, decorating ideas, handmade gift options and more at www.FaveCrafts.com 16 .
Mother’s Day Craft eBook: Blogger Edition
5. Trim away any excess fabric and hot glue the cardstock over the fabric edges.
6. Line the band with a small bead of glue and insert the pincushion into it, pressing firmly. Add the lid to the jar and YOU HAVE A NEW PINCUSHION!
Other ideas and suggestions: Monogram the top and use it as a “treasure jar”. Add ribbon, paint, and other embellishments to the band to give it even more personality.
Find thousands of free craft projects, decorating ideas, handmade gift options and more at www.FaveCrafts.com 17 .
Mother’s Day Craft eBook: Blogger Edition
Embellish a Pillow for Mom by Ashley of Domestic Fashionista
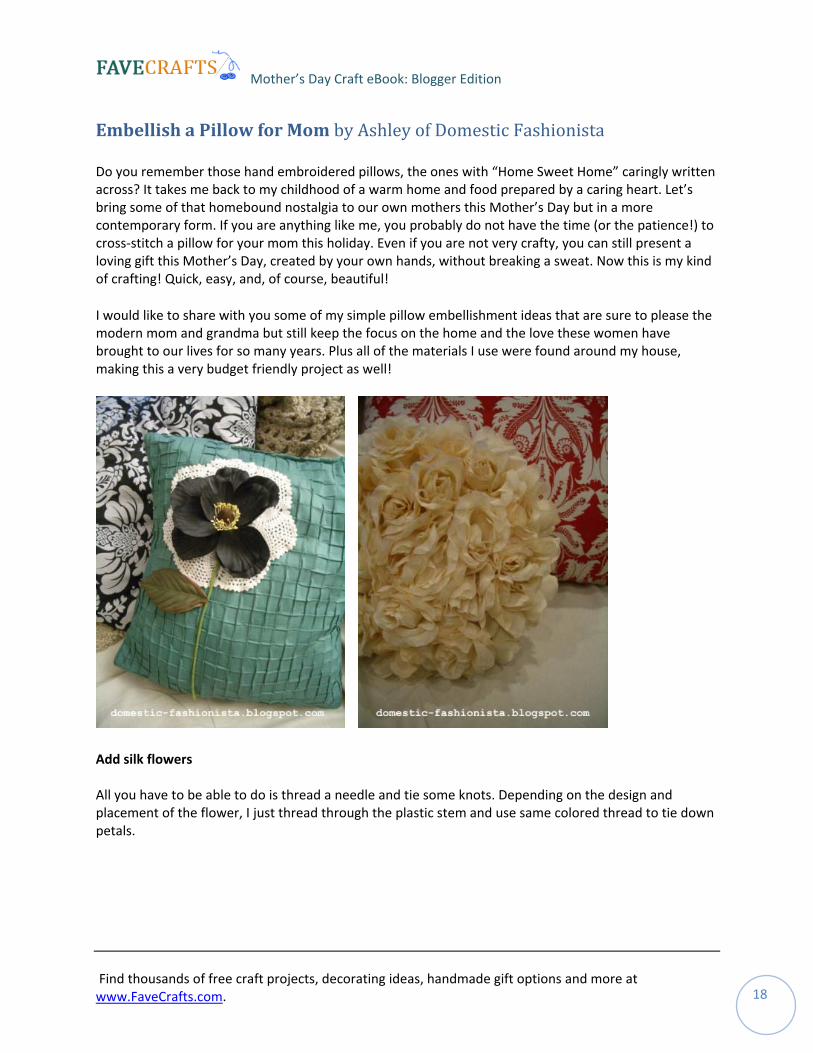
Do you remember those hand embroidered pillows, the ones with “Home Sweet Home” caringly written across? It takes me back to my childhood of a warm home and food prepared by a caring heart. Let’s bring some of that homebound nostalgia to our own mothers this Mother’s Day but in a more contemporary form. If you are anything like me, you probably do not have the time (or the patience!) to cross‐stitch a pillow for your mom this holiday. Even if you are not very crafty, you can still present a loving gift this Mother’s Day, created by your own hands, without breaking a sweat. Now this is my kind of crafting! Quick, easy, and, of course, beautiful!
I would like to share with you some of my simple pillow embellishment ideas that are sure to please the modern mom and grandma but still keep the focus on the home and the love these women have brought to our lives for so many years. Plus all of the materials I use were found around my house, making this a very budget friendly project as well!
Add silk flowers All you have to be able to do is thread a needle and tie some knots. Depending on the design and placement of the flower, I just thread through the plastic stem and use same colored thread to tie down petals.
Find thousands of free craft projects, decorating ideas, handmade gift options and more at www.FaveCrafts.com 18 .

Mother’s Day Craft eBook: Blogger Edition
Add fabric Another simple sewing strategy is to make your own fabric designs to add to the pillows. Here I cut out flower shapes using pinking shears to keep the fabric from raveling. You can also do this with felt, doilies, ribbon, lace…play around with whatever fabric you have around the house to create new fun looks!
Use placemats and table cloths Think outside of the fabric box and use other materials you have hidden away that never get used. I found this darling place mat on clearance and decided to use it to make a pillow. I sewed a piece of fabric to the back for a cute and easy project! You can also use table cloths, window treatments, old quilts, and bed sheets. I love browsing the thrift stores for fun vintage fabrics to make into new creations.
Find thousands of free craft projects, decorating ideas, handmade gift options and more at www.FaveCrafts.com 19 .
Mother’s Day Craft eBook: Blogger Edition
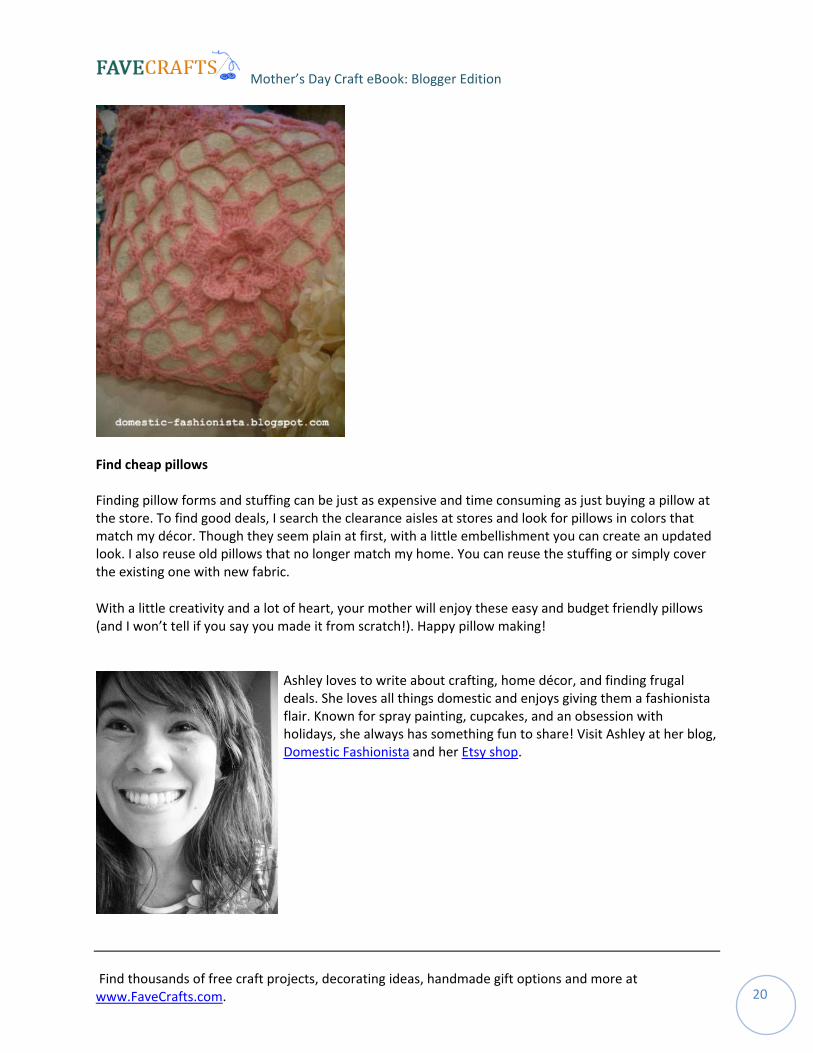
Find cheap pillows Finding pillow forms and stuffing can be just as expensive and time consuming as just buying a pillow at the store. To find good deals, I search the clearance aisles at stores and look for pillows in colors that match my décor. Though they seem plain at first, with a little embellishment you can create an updated look. I also reuse old pillows that no longer match my home. You can reuse the stuffing or simply cover the existing one with new fabric.
With a little creativity and a lot of heart, your mother will enjoy these easy and budget friendly pillows (and I won’t tell if you say you made it from scratch!). Happy pillow making!
Ashley loves to write about crafting, home décor, and finding frugal deals. She loves all things domestic and enjoys giving them a fashionista flair. Known for spray painting, cupcakes, and an obsession with holidays, she always has something fun to share! Visit Ashley at her blog, Domestic Fashionista and her Etsy shop.
Find thousands of free craft projects, decorating ideas, handmade gift options and more at www.FaveCrafts.com 20 .
Mother’s Day Craft eBook: Blogger Edition
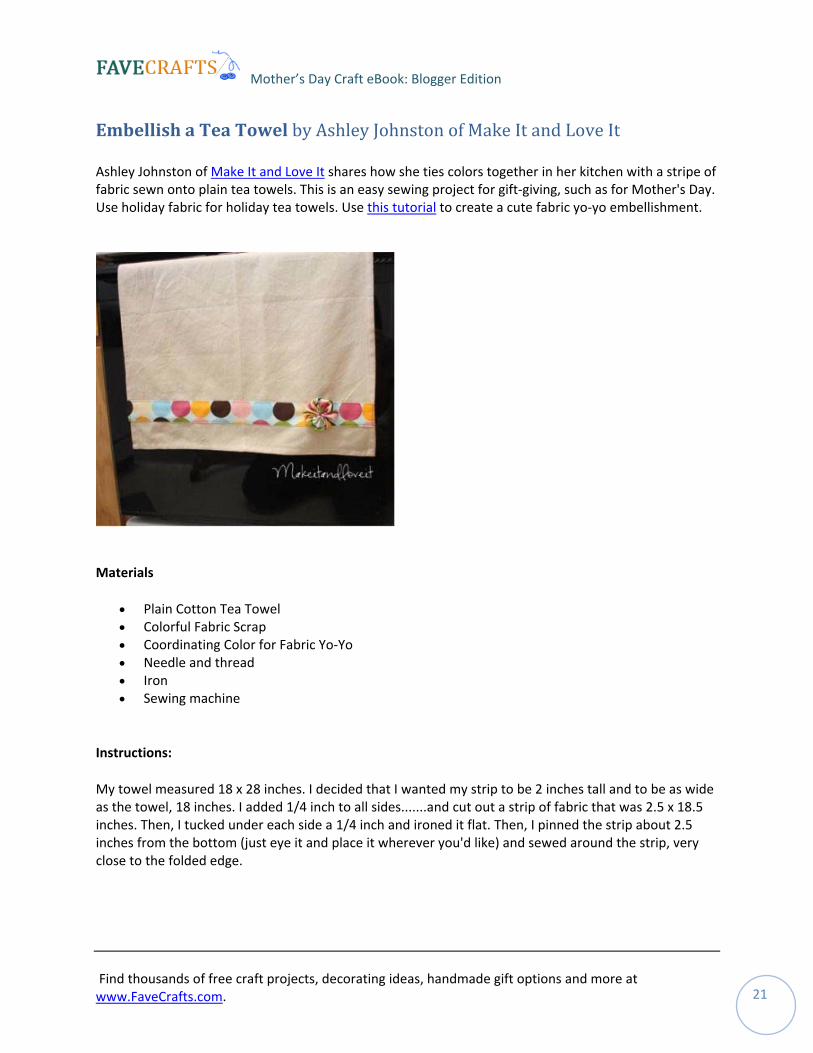
Embellish a Tea Towel by Ashley Johnston of Make It and Love It
Ashley Johnston of Make It and Love It shares how she ties colors together in her kitchen with a stripe of fabric sewn onto plain tea towels. This is an easy sewing project for gift‐giving, such as for Mother's Day. Use holiday fabric for holiday tea towels. Use this tutorial to create a cute fabric yo‐yo embellishment.
Materials
• Plain Cotton Tea Towel • Colorful Fabric Scrap • Coordinating Color for Fabric Yo‐Yo • Needle and thread • Iron • Sewing machine
Instructions:
My towel measured 18 x 28 inches. I decided that I wanted my strip to be 2 inches tall and to be as wide as the towel, 18 inches. I added 1/4 inch to all sides.......and cut out a strip of fabric that was 2.5 x 18.5 inches. Then, I tucked under each side a 1/4 inch and ironed it flat. Then, I pinned the strip about 2.5 inches from the bottom (just eye it and place it wherever you'd like) and sewed around the strip, very close to the folded edge.
Find thousands of free craft projects, decorating ideas, handmade gift options and more at www.FaveCrafts.com 21 .
Mother’s Day Craft eBook: Blogger Edition
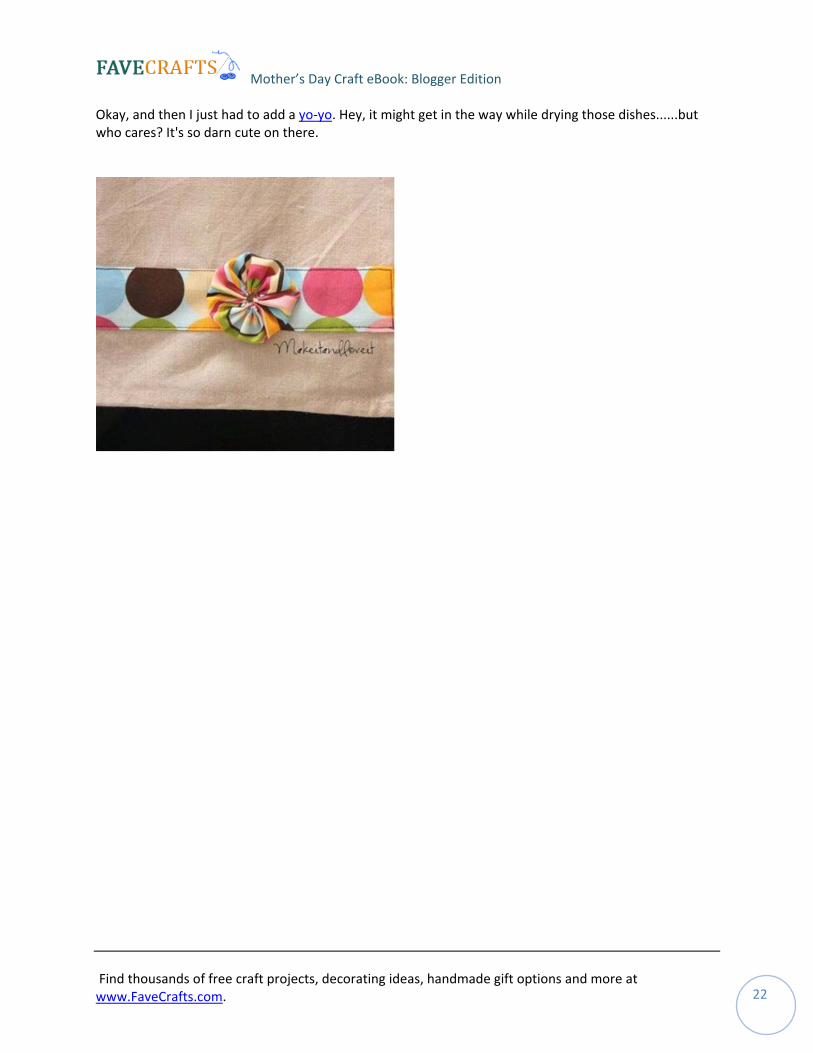
Okay, and then I just had to add a yo‐yo. Hey, it might get in the way while drying those dishes......but who cares? It's so darn cute on there.
Find thousands of free craft projects, decorating ideas, handmade gift options and more at www.FaveCrafts.com 22 .
Mother’s Day Craft eBook: Blogger Edition
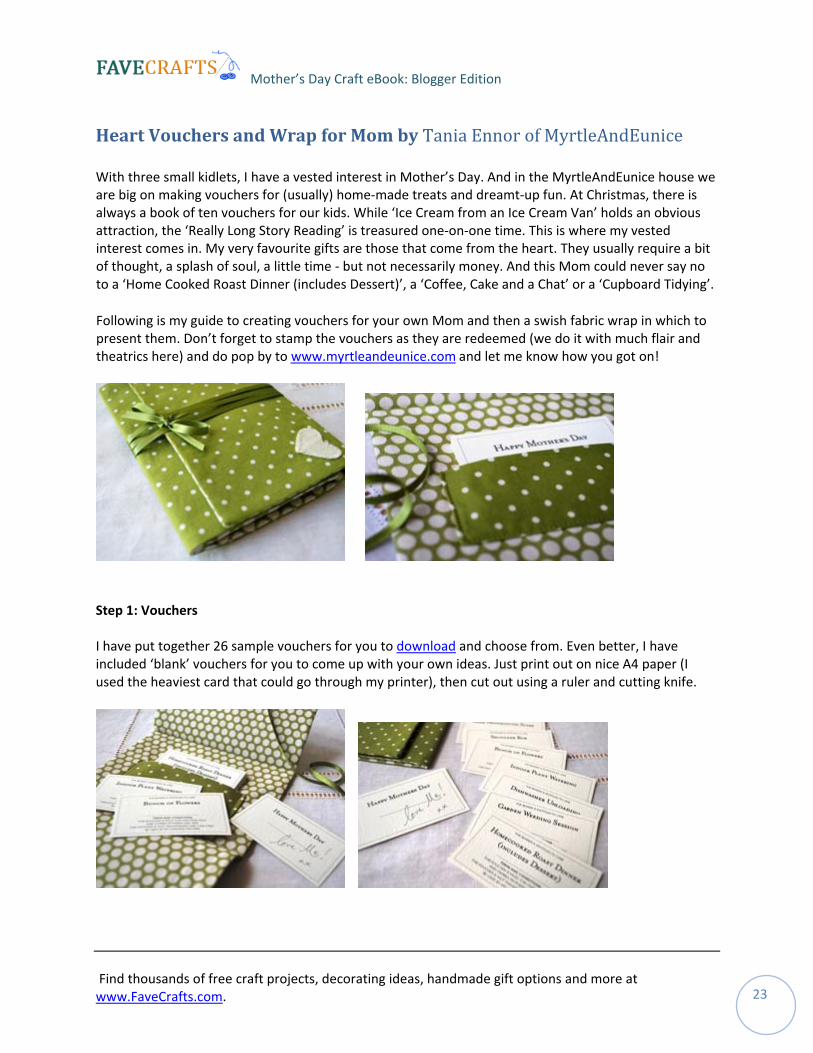
Heart Vouchers and Wrap for Mom by Tania Ennor of MyrtleAndEunice
With three small kidlets, I have a vested interest in Mother’s Day. And in the MyrtleAndEunice house we are big on making vouchers for (usually) home‐made treats and dreamt‐up fun. At Christmas, there is always a book of ten vouchers for our kids. While ‘Ice Cream from an Ice Cream Van’ holds an obvious attraction, the ‘Really Long Story Reading’ is treasured one‐on‐one time. This is where my vested interest comes in. My very favourite gifts are those that come from the heart. They usually require a bit of thought, a splash of soul, a little time ‐ but not necessarily money. And this Mom could never say no to a ‘Home Cooked Roast Dinner (includes Dessert)’, a ‘Coffee, Cake and a Chat’ or a ‘Cupboard Tidying’.
Following is my guide to creating vouchers for your own Mom and then a swish fabric wrap in which to present them. Don’t forget to stamp the vouchers as they are redeemed (we do it with much flair and theatrics here) and do pop by to www.myrtleandeunice.com and let me know how you got on!
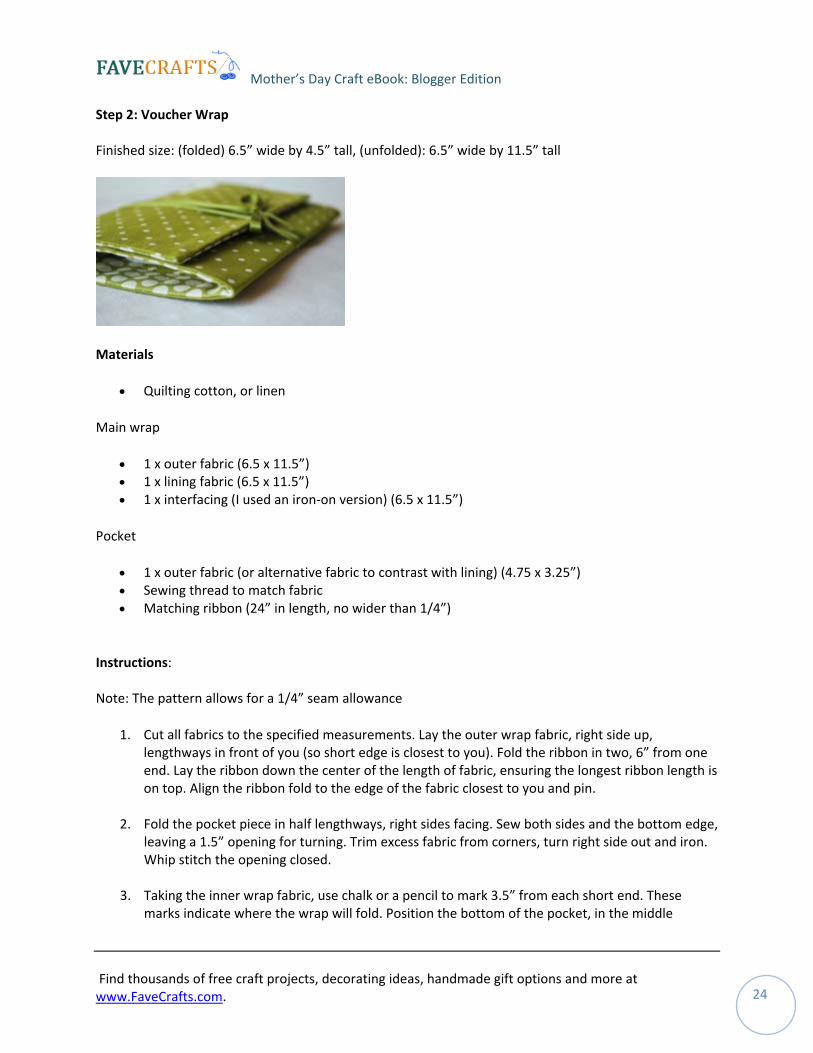
Step 1: Vouchers I have put together 26 sample vouchers for you to download and choose from. Even better, I have included ‘blank’ vouchers for you to come up with your own ideas. Just print out on nice A4 paper (I used the heaviest card that could go through my printer), then cut out using a ruler and cutting knife.
Find thousands of free craft projects, decorating ideas, handmade gift options and more at www.FaveCrafts.com 23 .
Mother’s Day Craft eBook: Blogger Edition
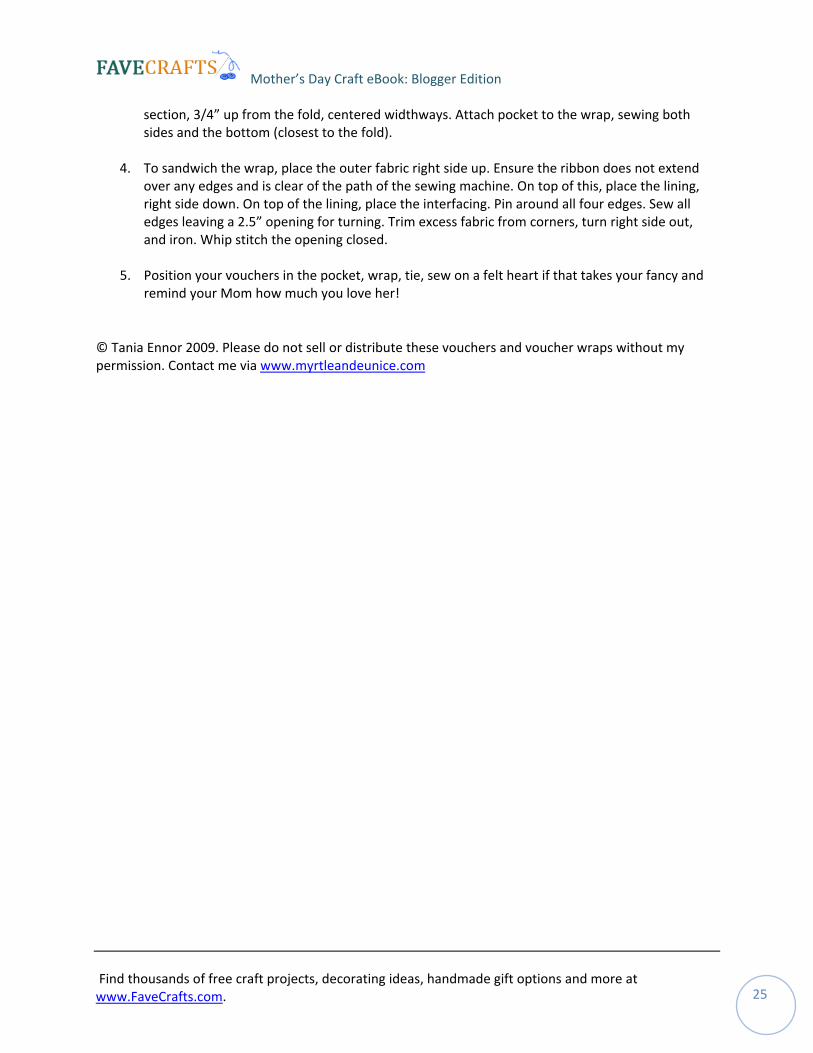
Step 2: Voucher Wrap Finished size: (folded) 6.5” wide by 4.5” tall, (unfolded): 6.5” wide by 11.5” tall
Materials
• Quilting cotton, or linen
Main wrap
• 1 x outer fabric (6.5 x 11.5”) • 1 x lining fabric (6.5 x 11.5”) • 1 x interfacing (I used an iron‐on version) (6.5 x 11.5”)
• 1 x outer fabric (or alternative fabric to contrast with lining) (4.75 x 3.25”) • Sewing thread to match fabric • Matching ribbon (24” in length, no wider than 1/4”)
Instructions: Note: The pattern allows for a 1/4” seam allowance
1. Cut all fabrics to the specified measurements. Lay the outer wrap fabric, right side up, lengthways in front of you (so short edge is closest to you). Fold the ribbon in two, 6” from one end. Lay the ribbon down the center of the length of fabric, ensuring the longest ribbon length is on top. Align the ribbon fold to the edge of the fabric closest to you and pin.
2. Fold the pocket piece in half lengthways, right sides facing. Sew both sides and the bottom edge, leaving a 1.5” opening for turning. Trim excess fabric from corners, turn right side out and iron. Whip stitch the opening closed.
3. Taking the inner wrap fabric, use chalk or a pencil to mark 3.5” from each short end. These marks indicate where the wrap will fold. Position the bottom of the pocket, in the middle
Find thousands of free craft projects, decorating ideas, handmade gift options and more at www.FaveCrafts.com 24 .
Mother’s Day Craft eBook: Blogger Edition
Find thousands of free craft projects, decorating ideas, handmade gift options and more at www.FaveCrafts.com. 25
section, 3/4” up from the fold, centered widthways. Attach pocket to the wrap, sewing both sides and the bottom (closest to the fold).
4. To sandwich the wrap, place the outer fabric right side up. Ensure the ribbon does not extend over any edges and is clear of the path of the sewing machine. On top of this, place the lining, right side down. On top of the lining, place the interfacing. Pin around all four edges. Sew all edges leaving a 2.5” opening for turning. Trim excess fabric from corners, turn right side out, and iron. Whip stitch the opening closed.
5. Position your vouchers in the pocket, wrap, tie, sew on a felt heart if that takes your fancy and remind your Mom how much you love her!
© Tania Ennor 2009. Please do not sell or distribute these vouchers and voucher wraps without my permission. Contact me via www.myrtleandeunice.com
Mother’s Day Craft eBook: Blogger Edition
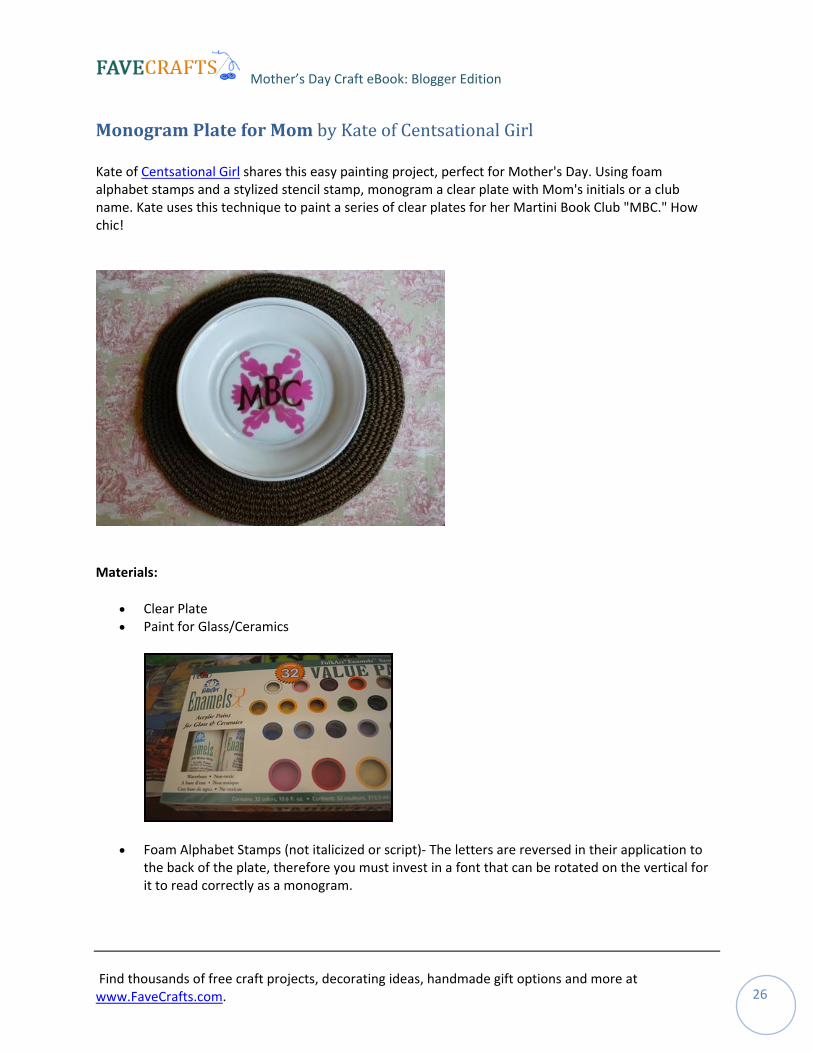
Monogram Plate for Mom by Kate of Centsational Girl
Kate of Centsational Girl shares this easy painting project, perfect for Mother's Day. Using foam alphabet stamps and a stylized stencil stamp, monogram a clear plate with Mom's initials or a club name. Kate uses this technique to paint a series of clear plates for her Martini Book Club "MBC." How chic!
Materials:
• Clear Plate • Paint for Glass/Ceramics
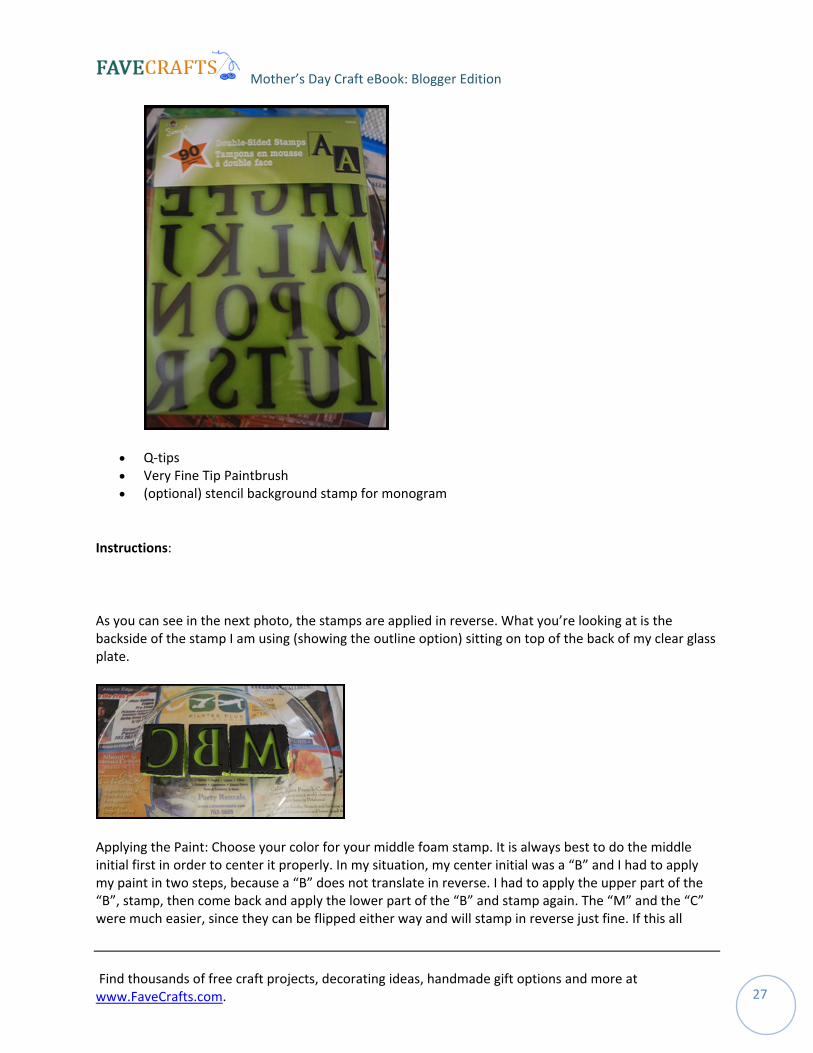
• Foam Alphabet Stamps (not italicized or script)‐ The letters are reversed in their application to the back of the plate, therefore you must invest in a font that can be rotated on the vertical for it to read correctly as a monogram.
Find thousands of free craft projects, decorating ideas, handmade gift options and more at www.FaveCrafts.com 26 .
Mother’s Day Craft eBook: Blogger Edition
• Q‐tips • Very Fine Tip Paintbrush • (optional) stencil background stamp for monogram
Instructions:
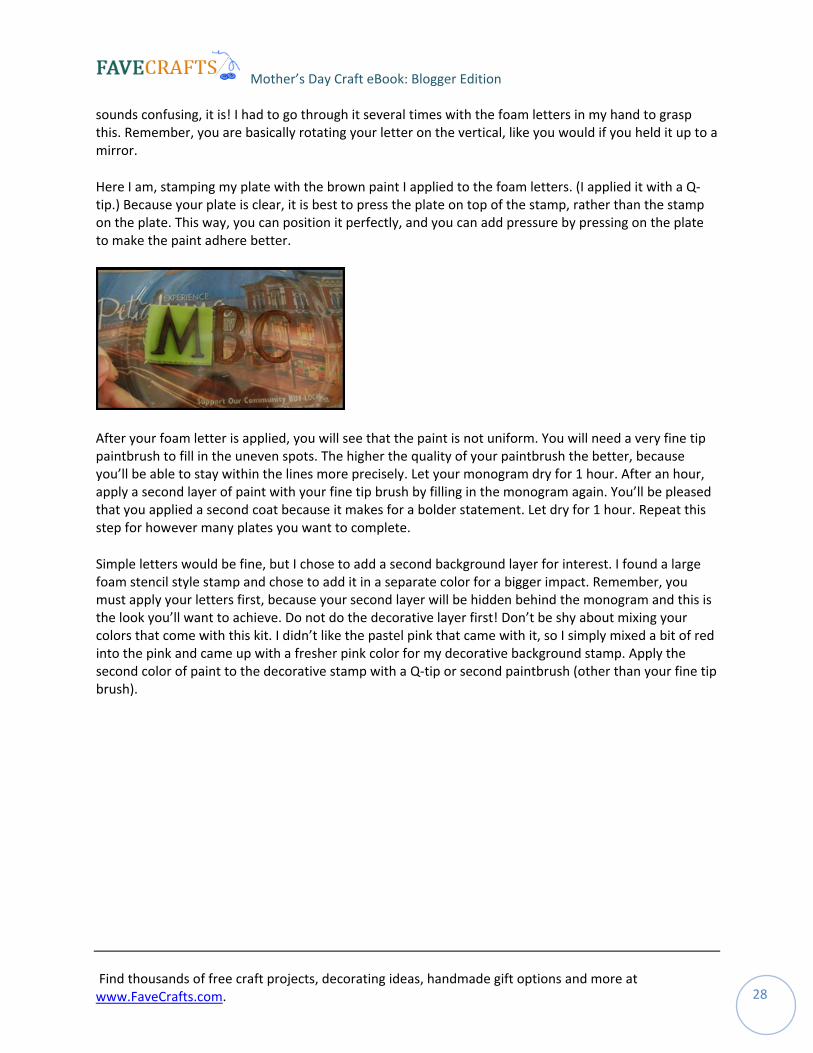
As you can see in the next photo, the stamps are applied in reverse. What you’re looking at is the backside of the stamp I am using (showing the outline option) sitting on top of the back of my clear glass plate.
Applying the Paint: Choose your color for your middle foam stamp. It is always best to do the middle initial first in order to center it properly. In my situation, my center initial was a “B” and I had to apply my paint in two steps, because a “B” does not translate in reverse. I had to apply the upper part of the “B”, stamp, then come back and apply the lower part of the “B” and stamp again. The “M” and the “C” were much easier, since they can be flipped either way and will stamp in reverse just fine. If this all
Find thousands of free craft projects, decorating ideas, handmade gift options and more at www.FaveCrafts.com 27 .
Mother’s Day Craft eBook: Blogger Edition
sounds confusing, it is! I had to go through it several times with the foam letters in my hand to grasp this. Remember, you are basically rotating your letter on the vertical, like you would if you held it up to a mirror.
Here I am, stamping my plate with the brown paint I applied to the foam letters. (I applied it with a Q‐tip.) Because your plate is clear, it is best to press the plate on top of the stamp, rather than the stamp on the plate. This way, you can position it perfectly, and you can add pressure by pressing on the plate to make the paint adhere better.
After your foam letter is applied, you will see that the paint is not uniform. You will need a very fine tip paintbrush to fill in the uneven spots. The higher the quality of your paintbrush the better, because you’ll be able to stay within the lines more precisely. Let your monogram dry for 1 hour. After an hour, apply a second layer of paint with your fine tip brush by filling in the monogram again. You’ll be pleased that you applied a second coat because it makes for a bolder statement. Let dry for 1 hour. Repeat this step for however many plates you want to complete.
Simple letters would be fine, but I chose to add a second background layer for interest. I found a large foam stencil style stamp and chose to add it in a separate color for a bigger impact. Remember, you must apply your letters first, because your second layer will be hidden behind the monogram and this is the look you’ll want to achieve. Do not do the decorative layer first! Don’t be shy about mixing your colors that come with this kit. I didn’t like the pastel pink that came with it, so I simply mixed a bit of red into the pink and came up with a fresher pink color for my decorative background stamp. Apply the second color of paint to the decorative stamp with a Q‐tip or second paintbrush (other than your fine tip brush).
Find thousands of free craft projects, decorating ideas, handmade gift options and more at www.FaveCrafts.com 28 .

Mother’s Day Craft eBook: Blogger Edition
Again, lay the stamp paint side up on your newspaper, and press the plate directly on to the stamp.
Again, you’ll see that the paint does not apply evenly, but it does give you the shape you desire. Fill in the design with your fine tip paintbrush.
Let first layer of paint dry 30 minutes. Come back and fill in a second layer with your paint color and brush. Now you’re done ! Let all plates dry overnight.
Find thousands of free craft projects, decorating ideas, handmade gift options and more at www.FaveCrafts.com 29 .
Mother’s Day Craft eBook: Blogger Edition
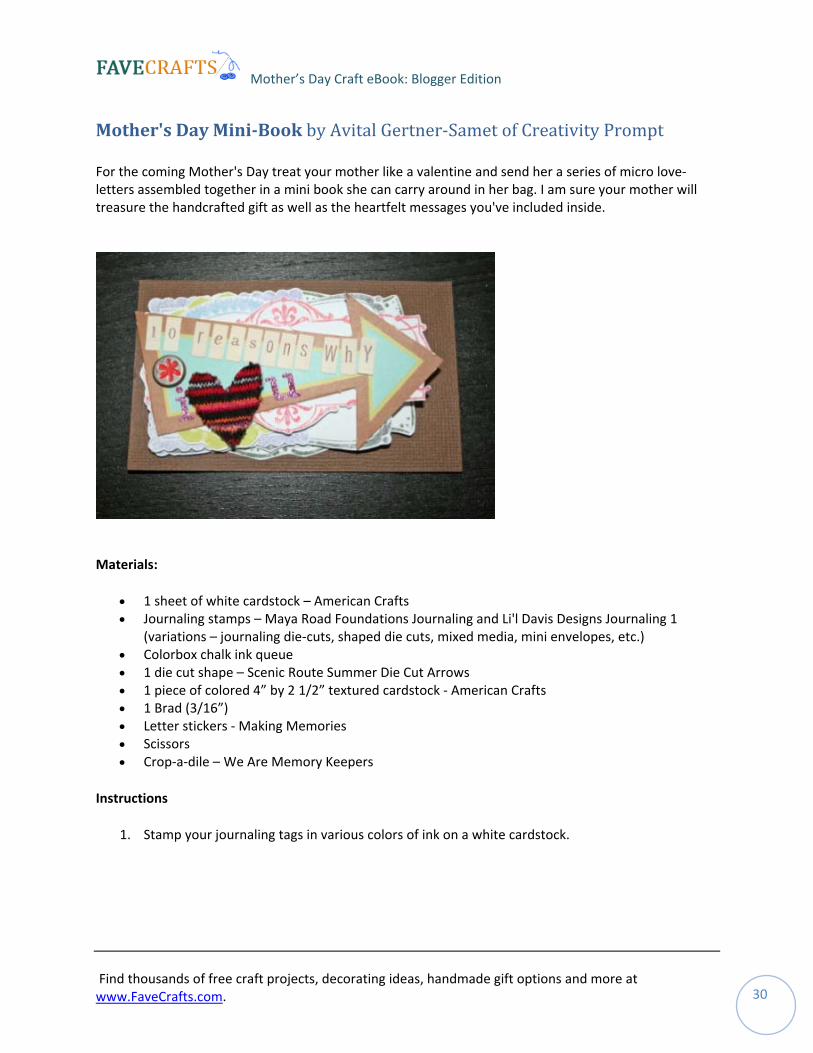
Mother's Day MiniBook by Avital Gertner‐Samet of Creativity Prompt
For the coming Mother's Day treat your mother like a valentine and send her a series of micro love‐letters assembled together in a mini book she can carry around in her bag. I am sure your mother will treasure the handcrafted gift as well as the heartfelt messages you've included inside.
Materials:
• 1 sheet of white cardstock – American Crafts • Journaling stamps – Maya Road Foundations Journaling and Li'l Davis Designs Journaling 1
(variations – journaling die‐cuts, shaped die cuts, mixed media, mini envelopes, etc.) • Colorbox chalk ink queue • 1 die cut shape – Scenic Route Summer Die Cut Arrows • 1 piece of colored 4” by 2 1/2” textured cardstock ‐ American Crafts • 1 Brad (3/16”) • Letter stickers ‐ Making Memories • Scissors • Crop‐a‐dile – We Are Memory Keepers
Instructions
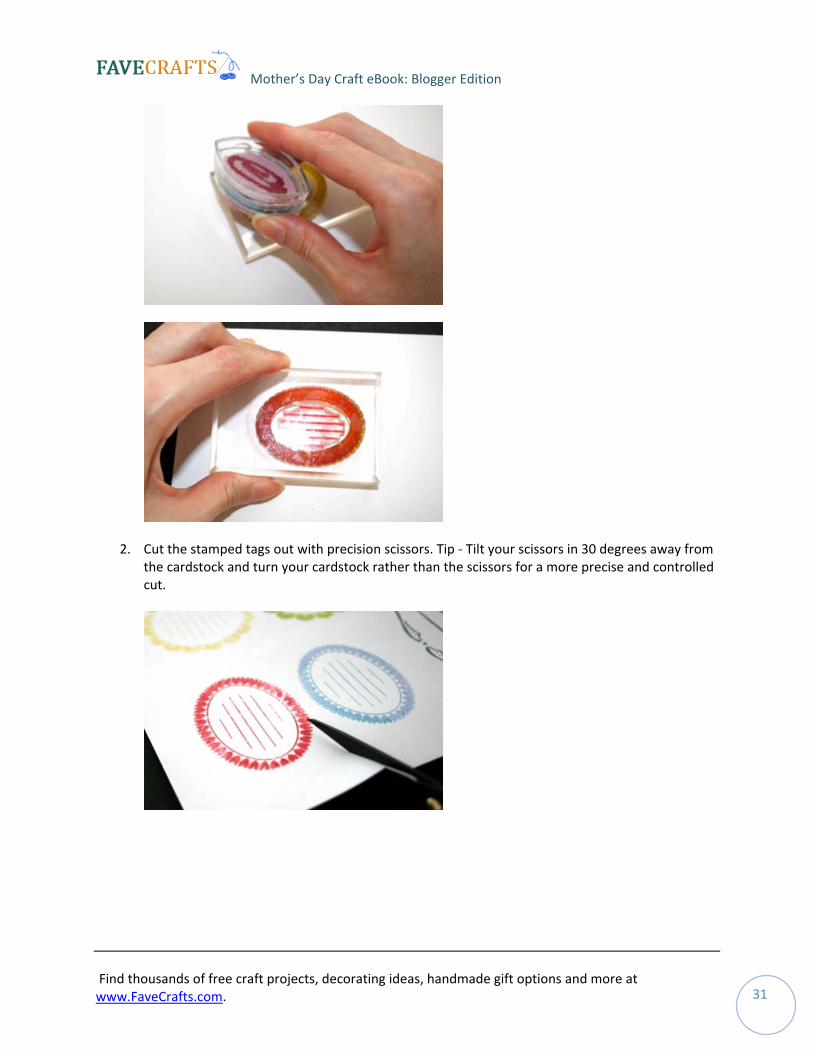
1. Stamp your journaling tags in various colors of ink on a white cardstock.
Find thousands of free craft projects, decorating ideas, handmade gift options and more at www.FaveCrafts.com 30 .
Mother’s Day Craft eBook: Blogger Edition
2. Cut the stamped tags out with precision scissors. Tip ‐ Tilt your scissors in 30 degrees away from the cardstock and turn your cardstock rather than the scissors for a more precise and controlled cut.
Find thousands of free craft projects, decorating ideas, handmade gift options and more at www.FaveCrafts.com 31 .
Mother’s Day Craft eBook: Blogger Edition
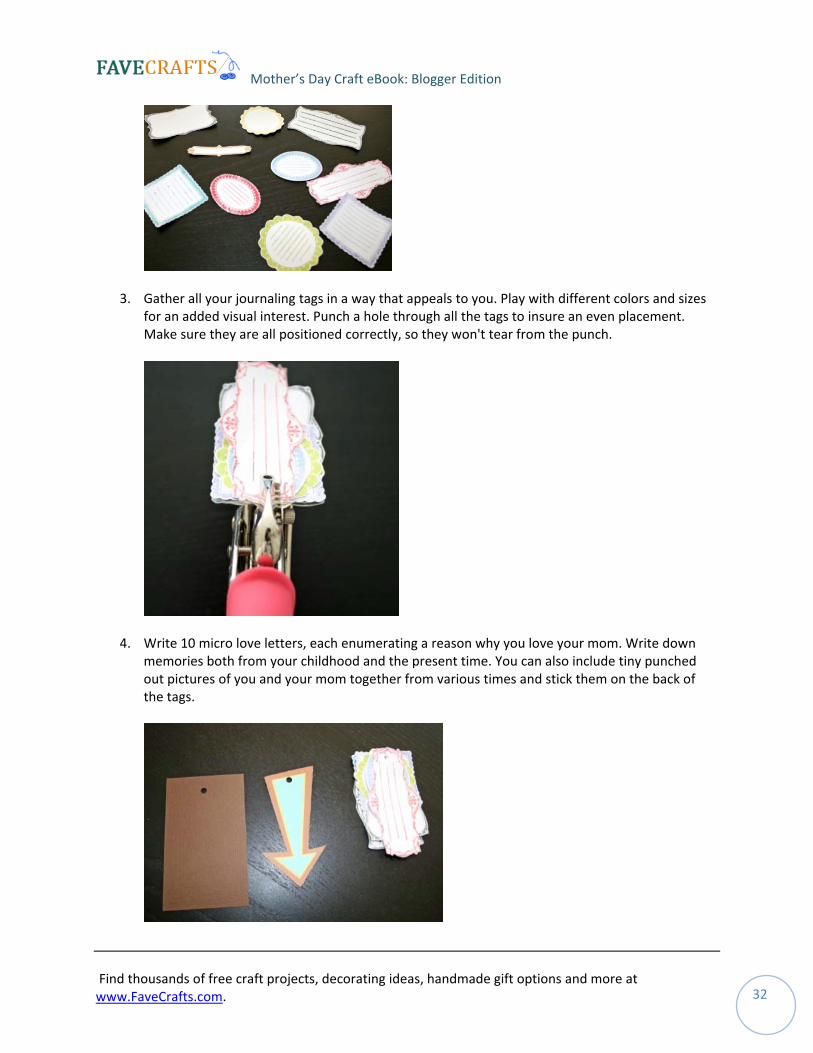
3. Gather all your journaling tags in a way that appeals to you. Play with different colors and sizes for an added visual interest. Punch a hole through all the tags to insure an even placement. Make sure they are all positioned correctly, so they won't tear from the punch.
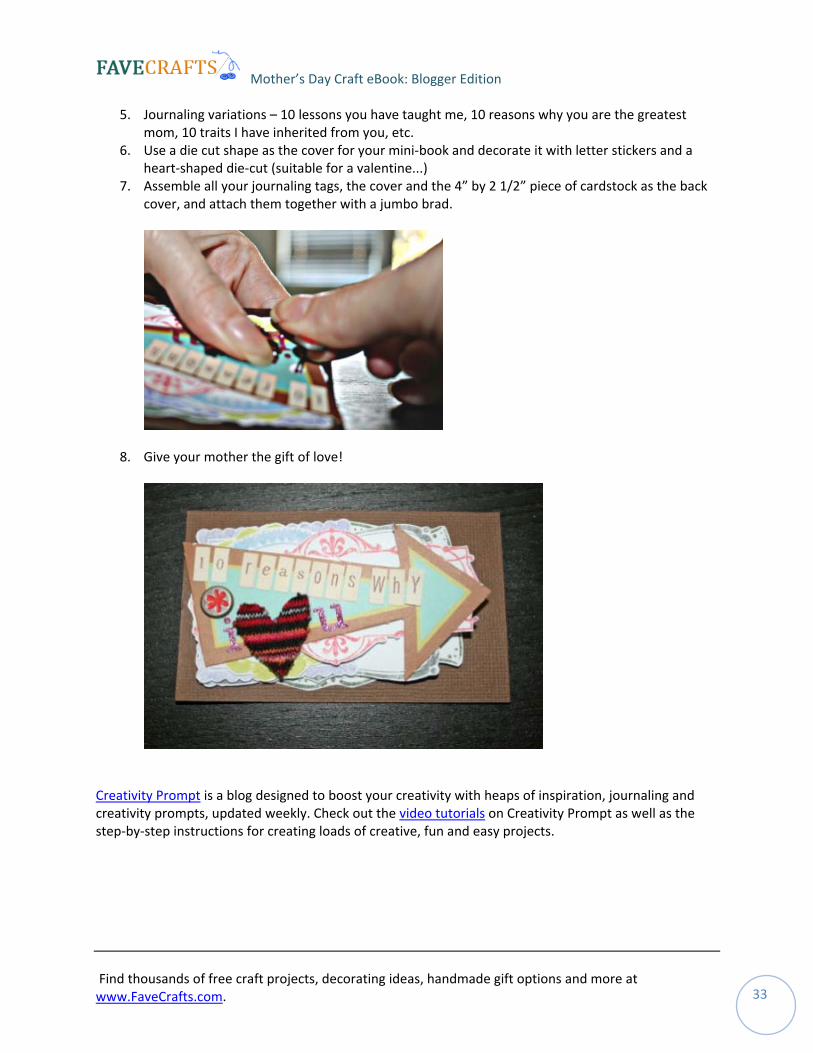
4. Write 10 micro love letters, each enumerating a reason why you love your mom. Write down memories both from your childhood and the present time. You can also include tiny punched out pictures of you and your mom together from various times and stick them on the back of the tags.
Find thousands of free craft projects, decorating ideas, handmade gift options and more at www.FaveCrafts.com 32 .
Mother’s Day Craft eBook: Blogger Edition
5. Journaling variations – 10 lessons you have taught me, 10 reasons why you are the greatest mom, 10 traits I have inherited from you, etc.
6. Use a die cut shape as the cover for your mini‐book and decorate it with letter stickers and a heart‐shaped die‐cut (suitable for a valentine...)
7. Assemble all your journaling tags, the cover and the 4” by 2 1/2” piece of cardstock as the back cover, and attach them together with a jumbo brad.
8. Give your mother the gift of love!
Creativity Prompt is a blog designed to boost your creativity with heaps of inspiration, journaling and creativity prompts, updated weekly. Check out the video tutorials on Creativity Prompt as well as the step‐by‐step instructions for creating loads of creative, fun and easy projects.
Find thousands of free craft projects, decorating ideas, handmade gift options and more at www.FaveCrafts.com 33 .
Mother’s Day Craft eBook: Blogger Edition
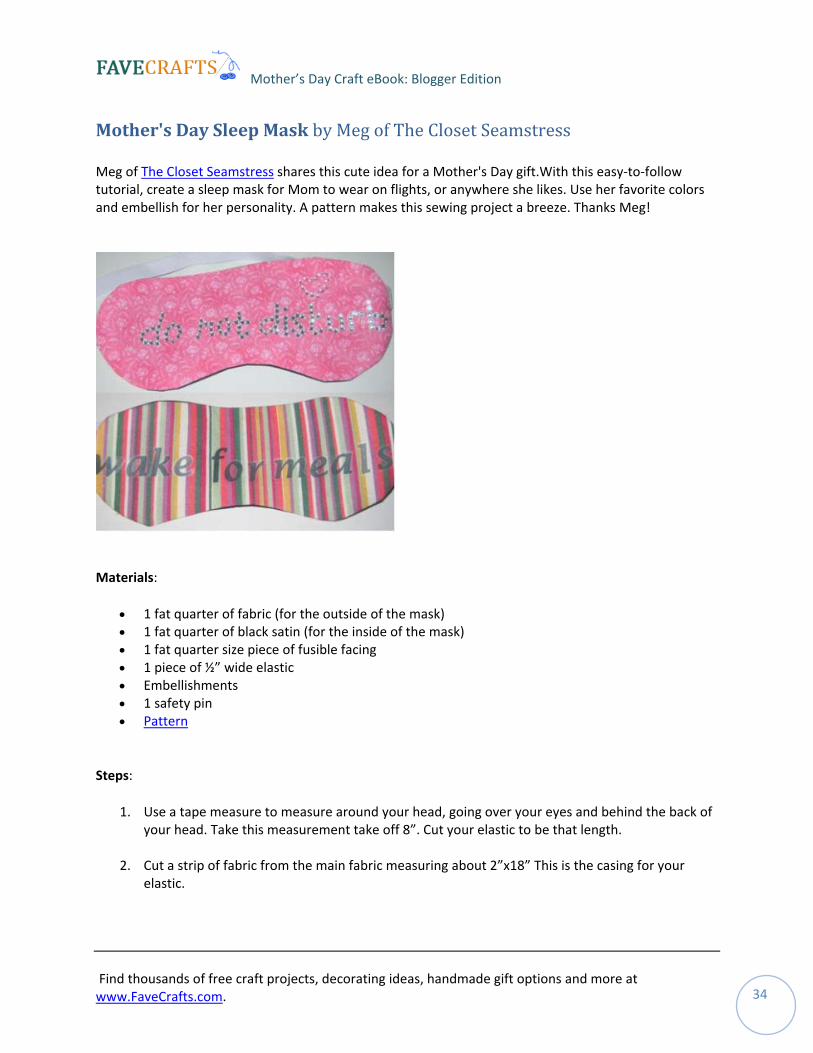
Mother's Day Sleep Mask by Meg of The Closet Seamstress
Meg of The Closet Seamstress shares this cute idea for a Mother's Day gift.With this easy‐to‐follow tutorial, create a sleep mask for Mom to wear on flights, or anywhere she likes. Use her favorite colors and embellish for her personality. A pattern makes this sewing project a breeze. Thanks Meg!
Materials:
• 1 fat quarter of fabric (for the outside of the mask) • 1 fat quarter of black satin (for the inside of the mask) • 1 fat quarter size piece of fusible facing • 1 piece of ½” wide elastic • Embellishments • 1 safety pin • Pattern
Steps:
1. Use a tape measure to measure around your head, going over your eyes and behind the back of your head. Take this measurement take off 8”. Cut your elastic to be that length.
2. Cut a strip of fabric from the main fabric measuring about 2”x18” This is the casing for your elastic.
Find thousands of free craft projects, decorating ideas, handmade gift options and more at www.FaveCrafts.com 34 .
Mother’s Day Craft eBook: Blogger Edition
3. Cut out the sleep mask pattern at the end of this tutorial & add on ½“ seam allowance.
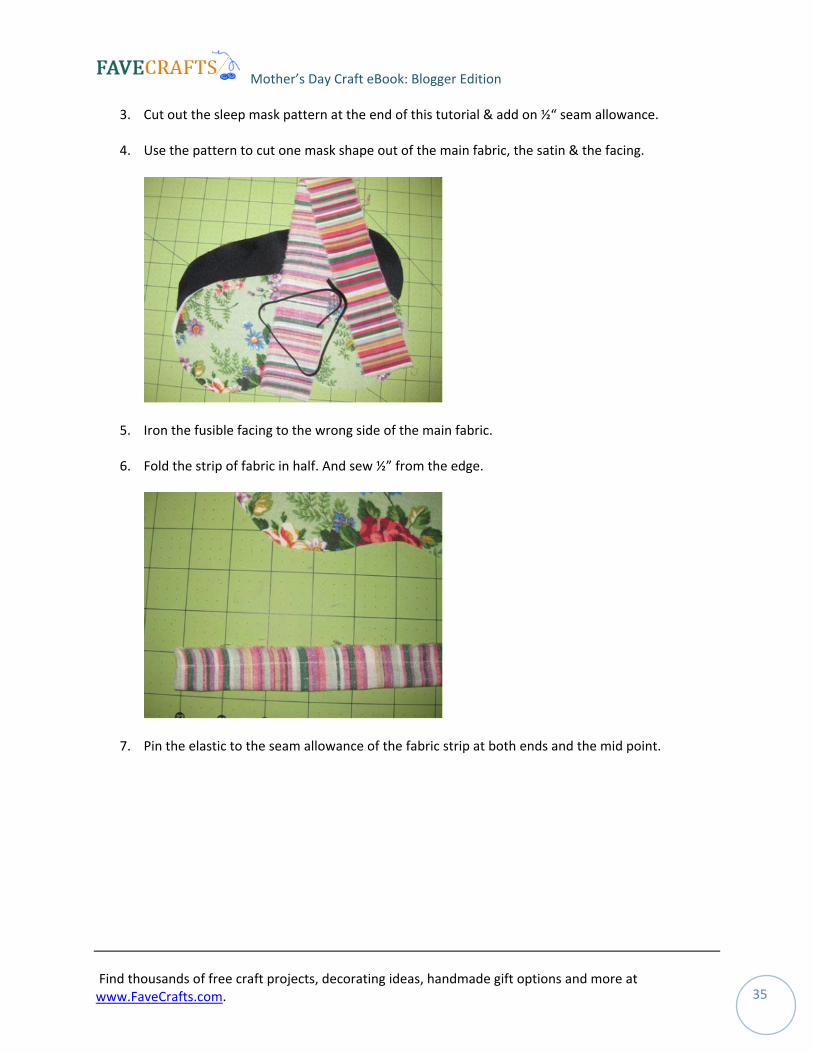
4. Use the pattern to cut one mask shape out of the main fabric, the satin & the facing.
5. Iron the fusible facing to the wrong side of the main fabric.
6. Fold the strip of fabric in half. And sew ½” from the edge.
7. Pin the elastic to the seam allowance of the fabric strip at both ends and the mid point.
Find thousands of free craft projects, decorating ideas, handmade gift options and more at www.FaveCrafts.com 35 .
Mother’s Day Craft eBook: Blogger Edition
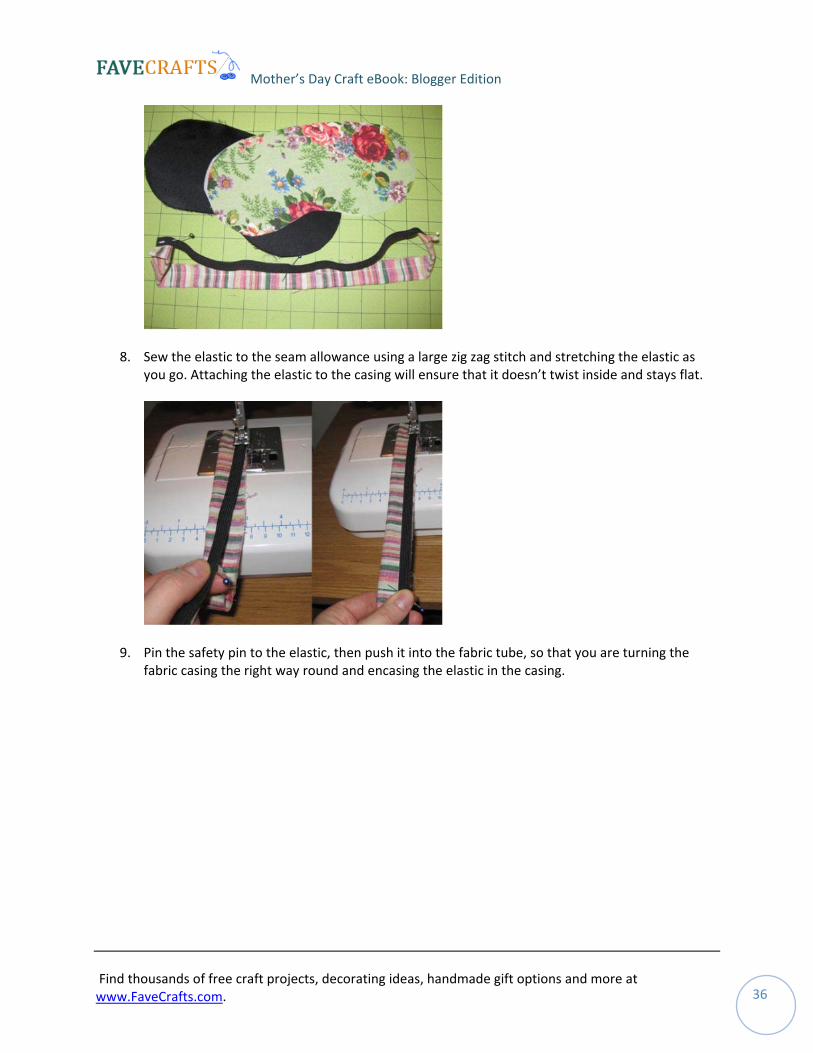
8. Sew the elastic to the seam allowance using a large zig zag stitch and stretching the elastic as you go. Attaching the elastic to the casing will ensure that it doesn’t twist inside and stays flat.
9. Pin the safety pin to the elastic, then push it into the fabric tube, so that you are turning the fabric casing the right way round and encasing the elastic in the casing.
Find thousands of free craft projects, decorating ideas, handmade gift options and more at www.FaveCrafts.com 36 .
Mother’s Day Craft eBook: Blogger Edition
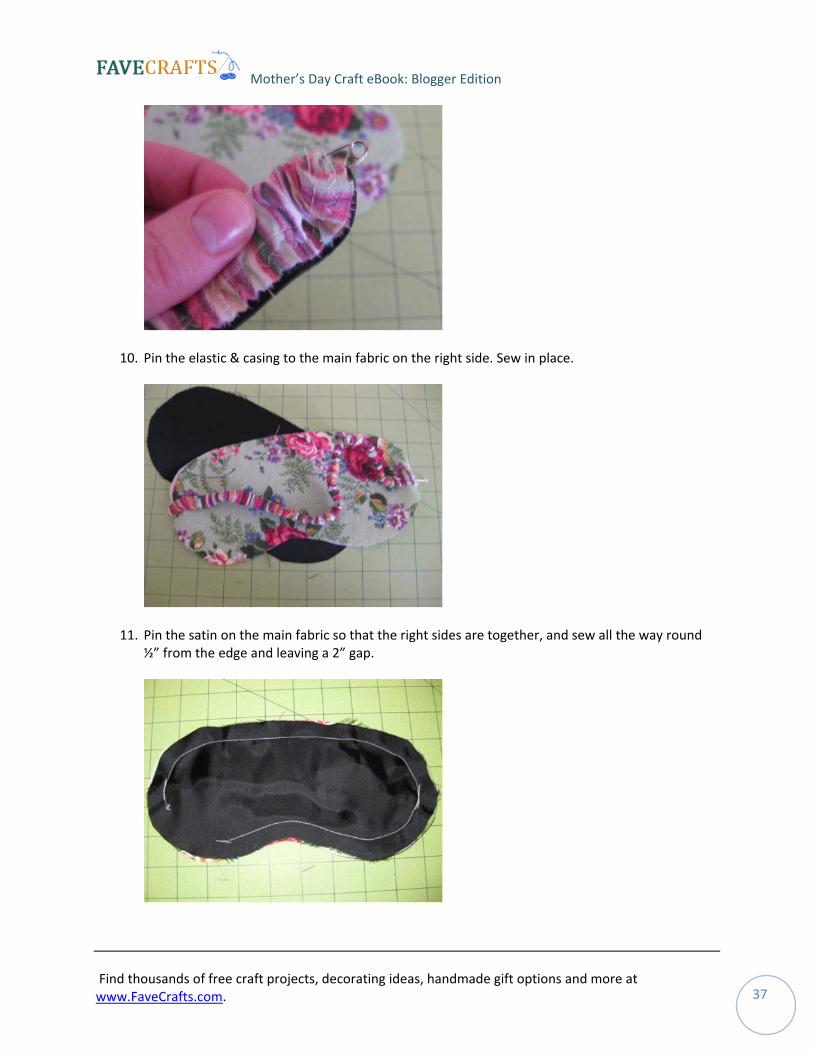
10. Pin the elastic & casing to the main fabric on the right side. Sew in place.
11. Pin the satin on the main fabric so that the right sides are together, and sew all the way round ½” from the edge and leaving a 2” gap.
Find thousands of free craft projects, decorating ideas, handmade gift options and more at www.FaveCrafts.com 37 .
Mother’s Day Craft eBook: Blogger Edition
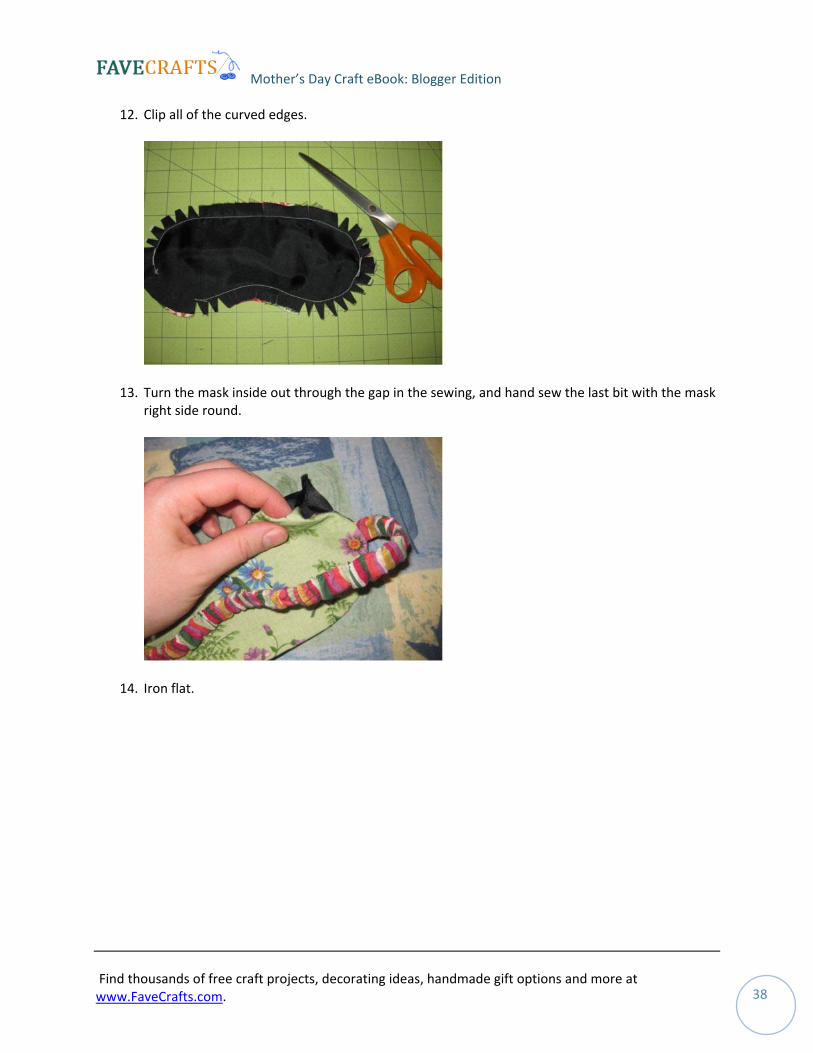
12. Clip all of the curved edges.
13. Turn the mask inside out through the gap in the sewing, and hand sew the last bit with the mask right side round.
14. Iron flat.
Find thousands of free craft projects, decorating ideas, handmade gift options and more at www.FaveCrafts.com 38 .
Mother’s Day Craft eBook: Blogger Edition
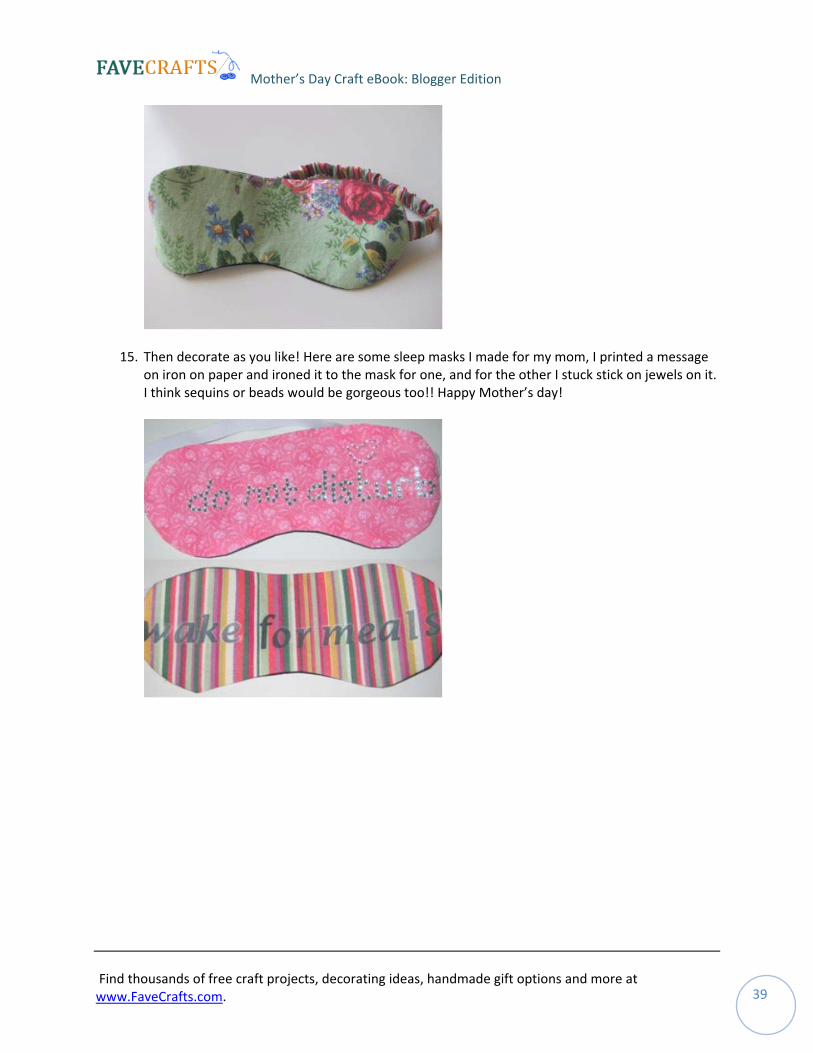
15. Then decorate as you like! Here are some sleep masks I made for my mom, I printed a message on iron on paper and ironed it to the mask for one, and for the other I stuck stick on jewels on it. I think sequins or beads would be gorgeous too!! Happy Mother’s day!
Find thousands of free craft projects, decorating ideas, handmade gift options and more at www.FaveCrafts.com 39 .
Mother’s Day Craft eBook: Blogger Edition
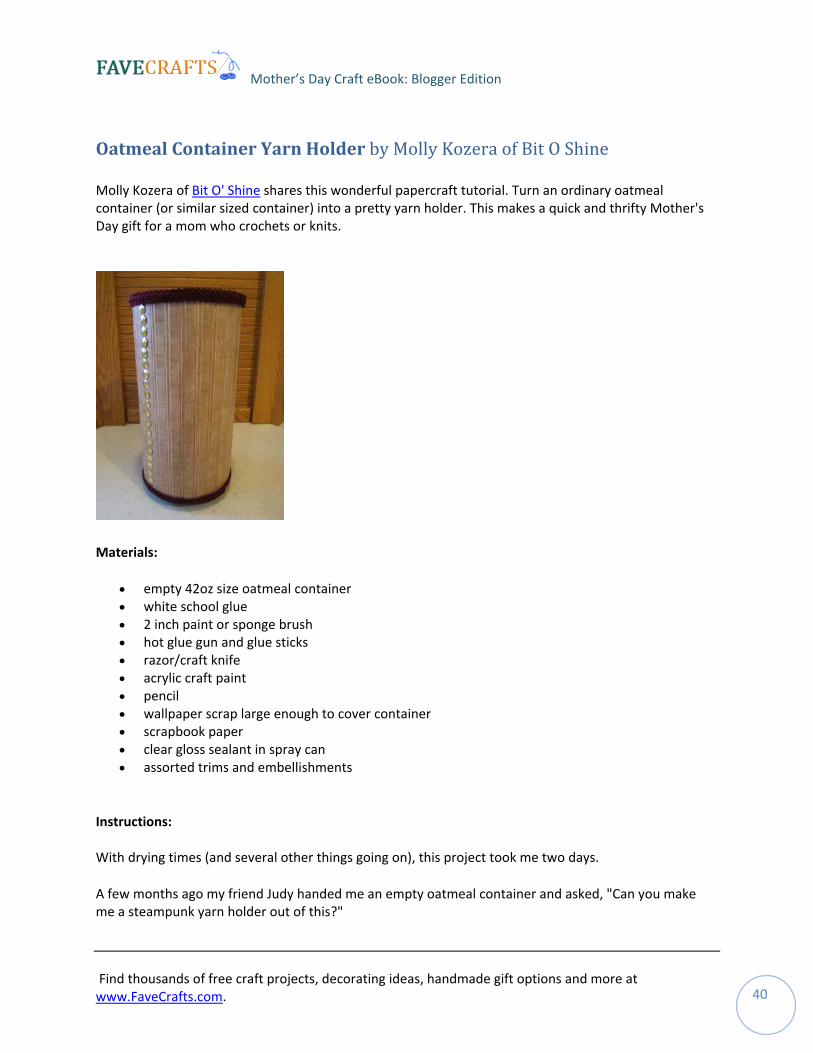
Oatmeal Container Yarn Holder by Molly Kozera of Bit O Shine
Molly Kozera of Bit O' Shine shares this wonderful papercraft tutorial. Turn an ordinary oatmeal container (or similar sized container) into a pretty yarn holder. This makes a quick and thrifty Mother's Day gift for a mom who crochets or knits.
Materials:
• empty 42oz size oatmeal container • white school glue • 2 inch paint or sponge brush • hot glue gun and glue sticks • razor/craft knife • acrylic craft paint • pencil • wallpaper scrap large enough to cover container • scrapbook paper • clear gloss sealant in spray can • assorted trims and embellishments
Instructions: With drying times (and several other things going on), this project took me two days.
A few months ago my friend Judy handed me an empty oatmeal container and asked, "Can you make me a steampunk yarn holder out of this?"
Find thousands of free craft projects, decorating ideas, handmade gift options and more at www.FaveCrafts.com 40 .
Mother’s Day Craft eBook: Blogger Edition
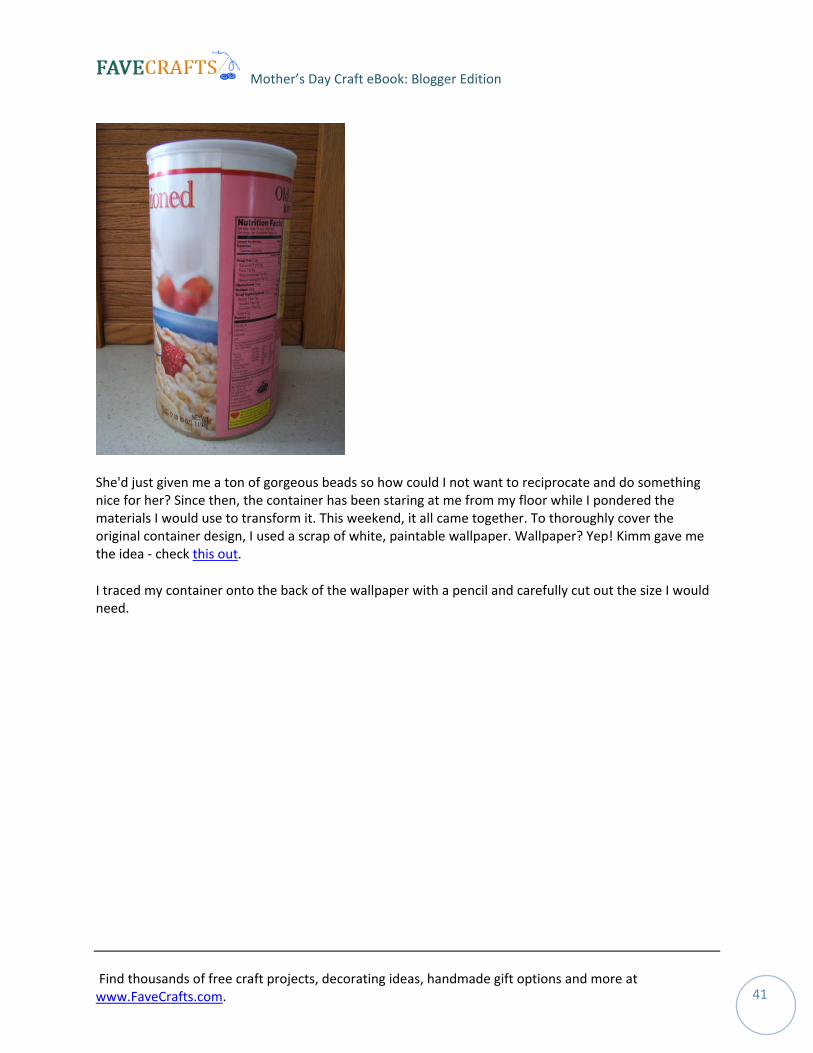
She'd just given me a ton of gorgeous beads so how could I not want to reciprocate and do something nice for her? Since then, the container has been staring at me from my floor while I pondered the materials I would use to transform it. This weekend, it all came together. To thoroughly cover the original container design, I used a scrap of white, paintable wallpaper. Wallpaper? Yep! Kimm gave me the idea ‐ check this out.
I traced my container onto the back of the wallpaper with a pencil and carefully cut out the size I would need.
Find thousands of free craft projects, decorating ideas, handmade gift options and more at www.FaveCrafts.com 41 .
Mother’s Day Craft eBook: Blogger Edition
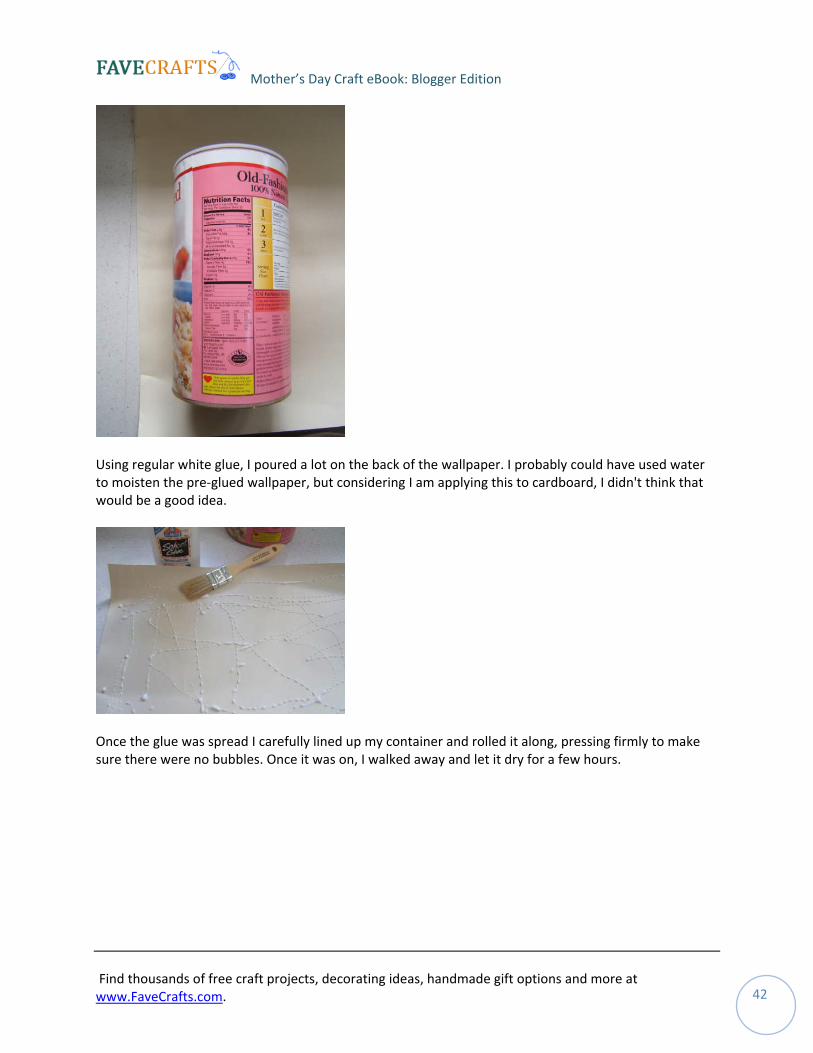
Using regular white glue, I poured a lot on the back of the wallpaper. I probably could have used water to moisten the pre‐glued wallpaper, but considering I am applying this to cardboard, I didn't think that would be a good idea.
Once the glue was spread I carefully lined up my container and rolled it along, pressing firmly to make sure there were no bubbles. Once it was on, I walked away and let it dry for a few hours.
Find thousands of free craft projects, decorating ideas, handmade gift options and more at www.FaveCrafts.com 42 .
Mother’s Day Craft eBook: Blogger Edition
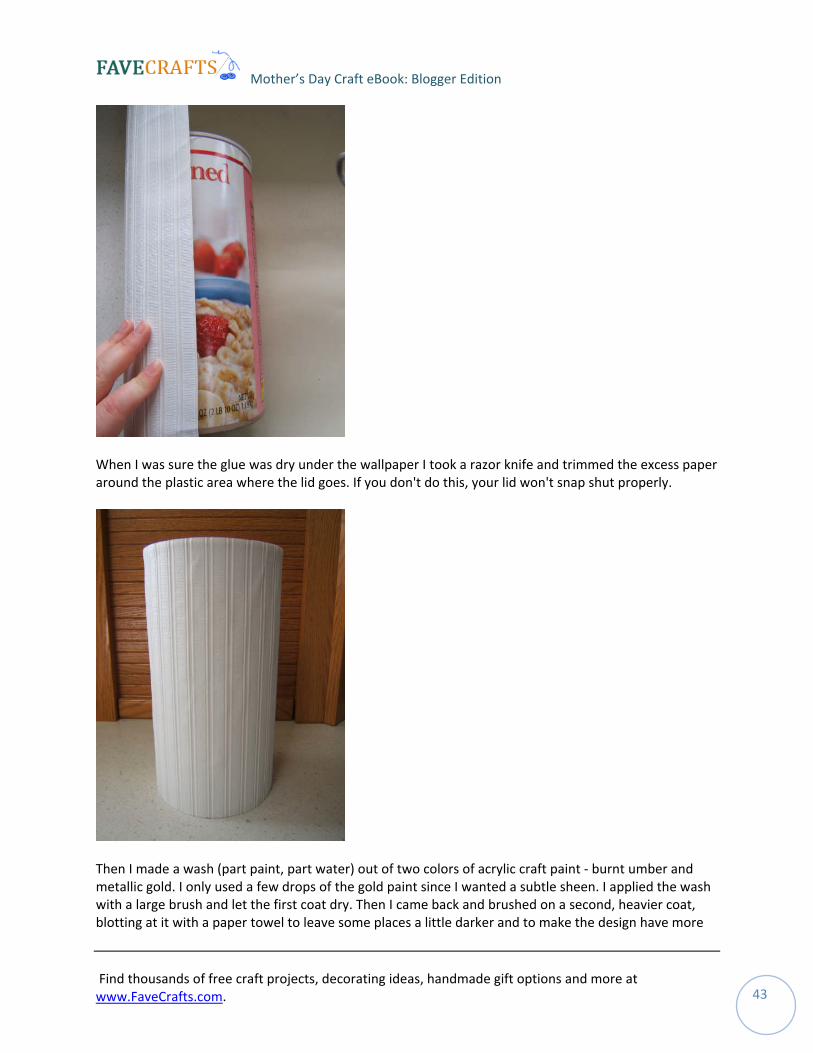
When I was sure the glue was dry under the wallpaper I took a razor knife and trimmed the excess paper around the plastic area where the lid goes. If you don't do this, your lid won't snap shut properly.
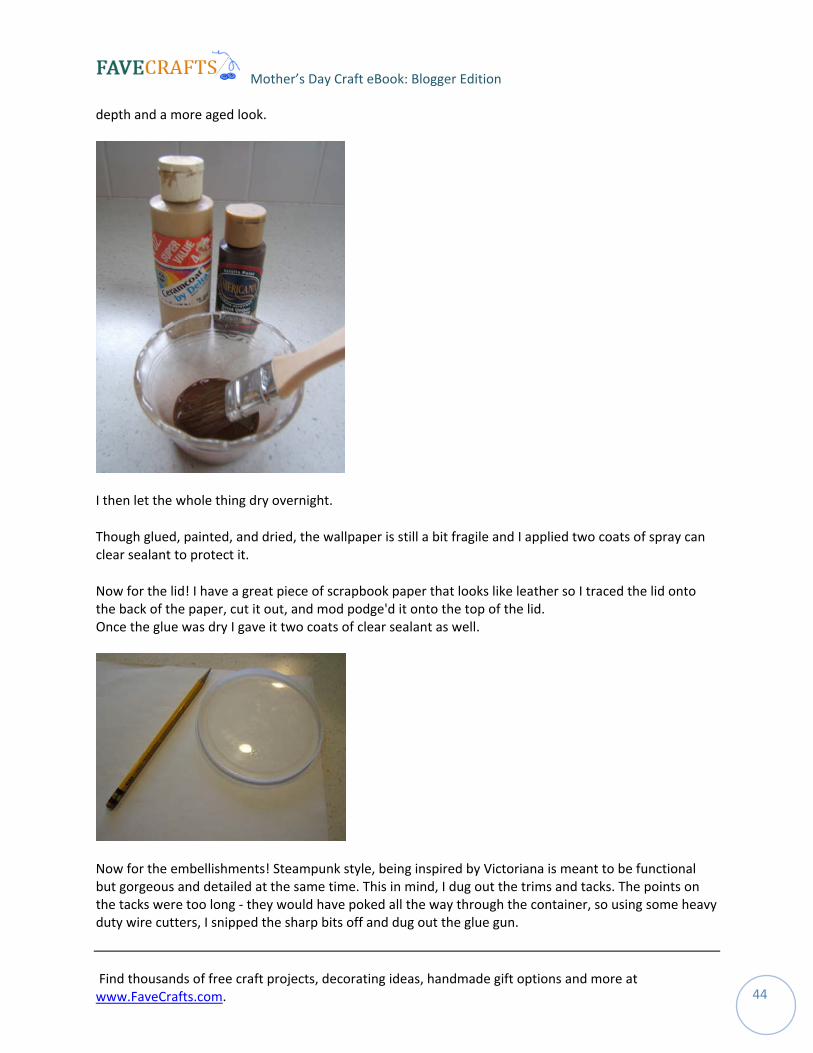
Then I made a wash (part paint, part water) out of two colors of acrylic craft paint ‐ burnt umber and metallic gold. I only used a few drops of the gold paint since I wanted a subtle sheen. I applied the wash with a large brush and let the first coat dry. Then I came back and brushed on a second, heavier coat, blotting at it with a paper towel to leave some places a little darker and to make the design have more
Find thousands of free craft projects, decorating ideas, handmade gift options and more at www.FaveCrafts.com 43 .
Mother’s Day Craft eBook: Blogger Edition
depth and a more aged look.
I then let the whole thing dry overnight.
Though glued, painted, and dried, the wallpaper is still a bit fragile and I applied two coats of spray can clear sealant to protect it.
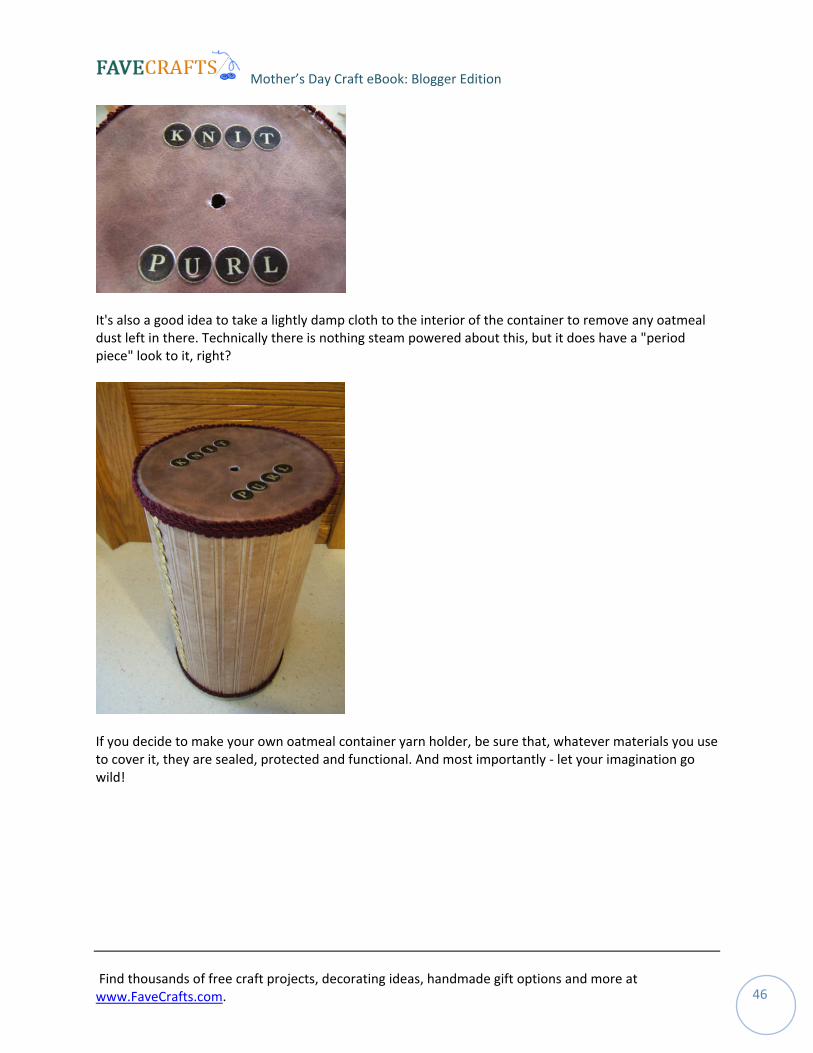
Now for the lid! I have a great piece of scrapbook paper that looks like leather so I traced the lid onto the back of the paper, cut it out, and mod podge'd it onto the top of the lid. Once the glue was dry I gave it two coats of clear sealant as well.
Now for the embellishments! Steampunk style, being inspired by Victoriana is meant to be functional but gorgeous and detailed at the same time. This in mind, I dug out the trims and tacks. The points on the tacks were too long ‐ they would have poked all the way through the container, so using some heavy duty wire cutters, I snipped the sharp bits off and dug out the glue gun.
Find thousands of free craft projects, decorating ideas, handmade gift options and more at www.FaveCrafts.com 44 .

Mother’s Day Craft eBook: Blogger Edition
I applied my embellishments to places where they could be functional as well ‐ such as added reinforcement to hold down the seams. All the embellishments were hot glued.
Then I cut a hole through the lid using a razor knife so that the yarn can come through and the container doesn't have to be open. I would have liked to put a gromet there, but I didn't have any. sad face And just for fun I added "knit" and "purl" with stickers that look like old tyepwriter keys.
Find thousands of free craft projects, decorating ideas, handmade gift options and more at www.FaveCrafts.com 45 .
Mother’s Day Craft eBook: Blogger Edition
It's also a good idea to take a lightly damp cloth to the interior of the container to remove any oatmeal dust left in there. Technically there is nothing steam powered about this, but it does have a "period piece" look to it, right?
If you decide to make your own oatmeal container yarn holder, be sure that, whatever materials you use to cover it, they are sealed, protected and functional. And most importantly ‐ let your imagination go wild!
Find thousands of free craft projects, decorating ideas, handmade gift options and more at www.FaveCrafts.com 46 .
Mother’s Day Craft eBook: Blogger Edition
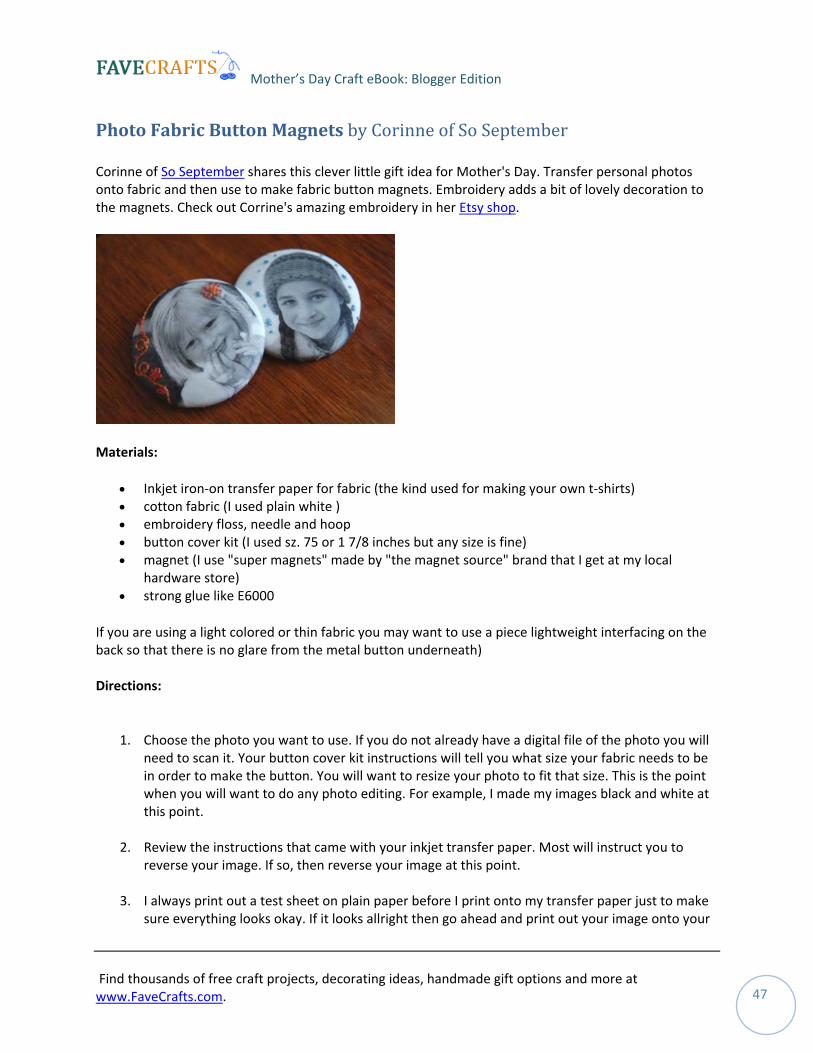
Photo Fabric Button Magnets by Corinne of So September
Corinne of So September shares this clever little gift idea for Mother's Day. Transfer personal photos onto fabric and then use to make fabric button magnets. Embroidery adds a bit of lovely decoration to the magnets. Check out Corrine's amazing embroidery in her Etsy shop.
Materials:
• Inkjet iron‐on transfer paper for fabric (the kind used for making your own t‐shirts) • cotton fabric (I used plain white ) • embroidery floss, needle and hoop • button cover kit (I used sz. 75 or 1 7/8 inches but any size is fine) • magnet (I use "super magnets" made by "the magnet source" brand that I get at my local
hardware store) • strong glue like E6000
If you are using a light colored or thin fabric you may want to use a piece lightweight interfacing on the back so that there is no glare from the metal button underneath) Directions:
1. Choose the photo you want to use. If you do not already have a digital file of the photo you will need to scan it. Your button cover kit instructions will tell you what size your fabric needs to be in order to make the button. You will want to resize your photo to fit that size. This is the point when you will want to do any photo editing. For example, I made my images black and white at this point.
2. Review the instructions that came with your inkjet transfer paper. Most will instruct you to reverse your image. If so, then reverse your image at this point.
3. I always print out a test sheet on plain paper before I print onto my transfer paper just to make sure everything looks okay. If it looks allright then go ahead and print out your image onto your
Find thousands of free craft projects, decorating ideas, handmade gift options and more at www.FaveCrafts.com 47 .
Mother’s Day Craft eBook: Blogger Edition
transfer paper.
4. Trim the image to the correct size (the circle size indicated on your button kit).
5. Iron your image onto your fabric according to the instructions that came with your transfer paper. Allow the fabric to cool.
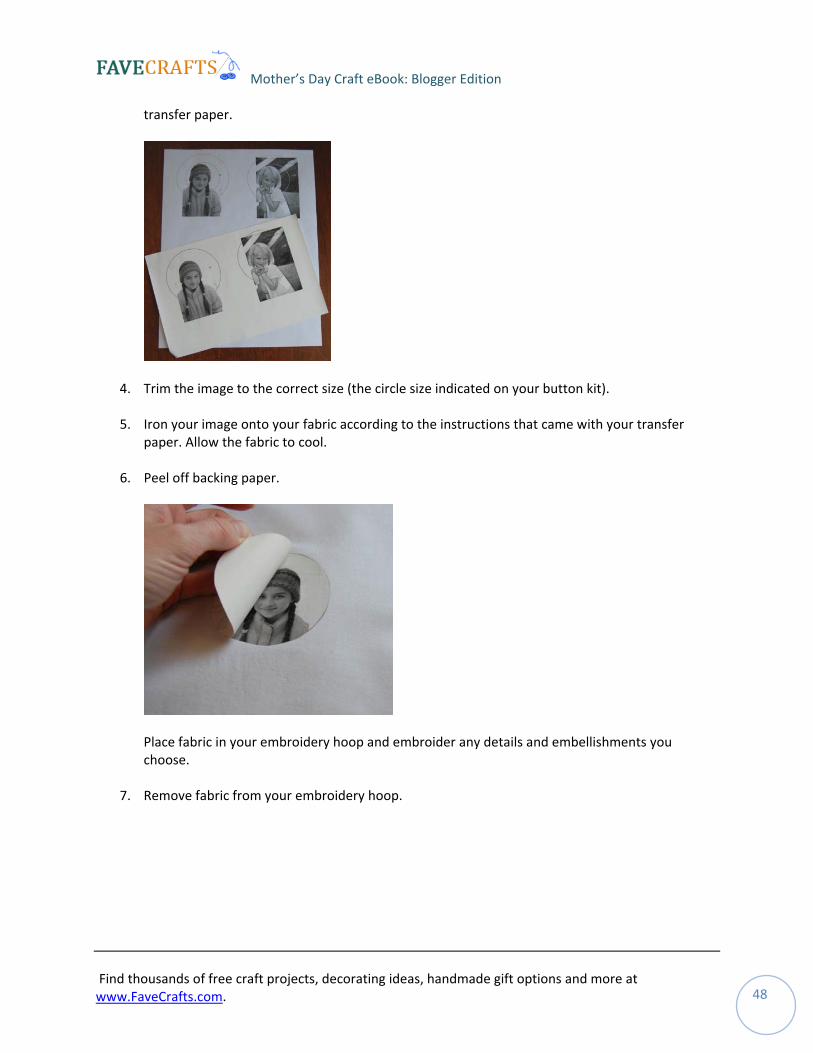
6. Peel off backing paper.
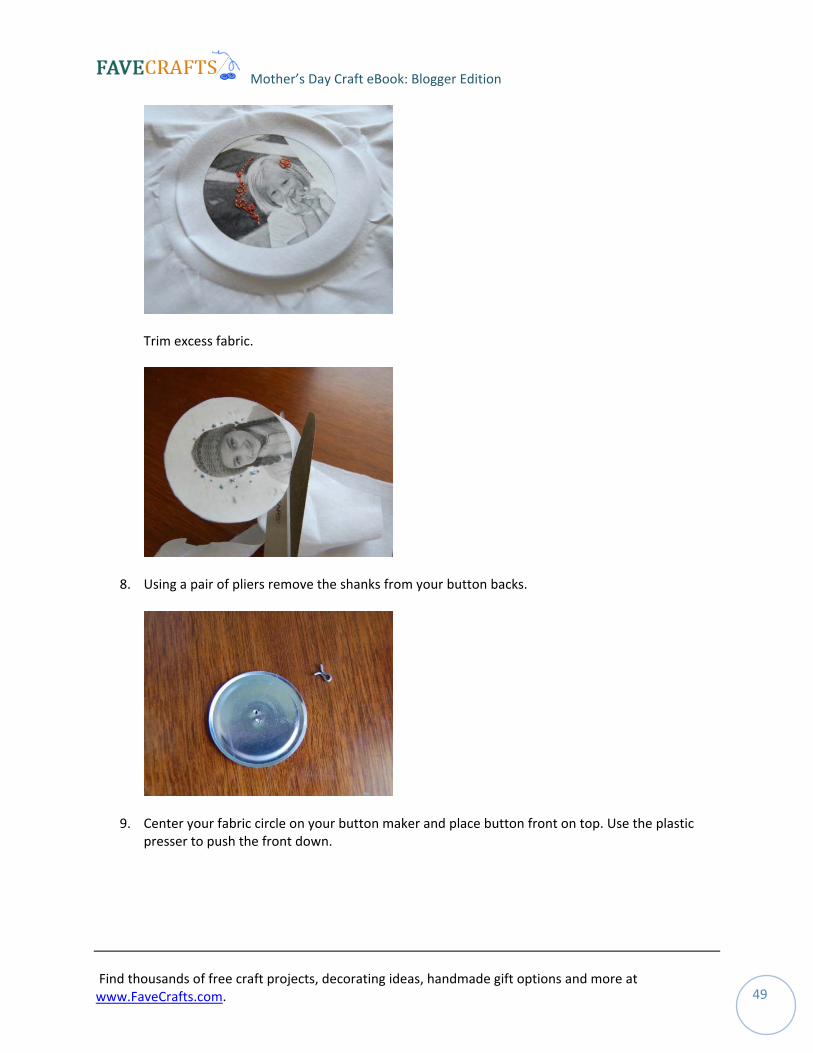
Place fabric in your embroidery hoop and embroider any details and embellishments you choose.
7. Remove fabric from your embroidery hoop.
Find thousands of free craft projects, decorating ideas, handmade gift options and more at www.FaveCrafts.com 48 .
Mother’s Day Craft eBook: Blogger Edition
Trim excess fabric.
8. Using a pair of pliers remove the shanks from your button backs.
9. Center your fabric circle on your button maker and place button front on top. Use the plastic presser to push the front down.
Find thousands of free craft projects, decorating ideas, handmade gift options and more at www.FaveCrafts.com 49 .
Mother’s Day Craft eBook: Blogger Edition
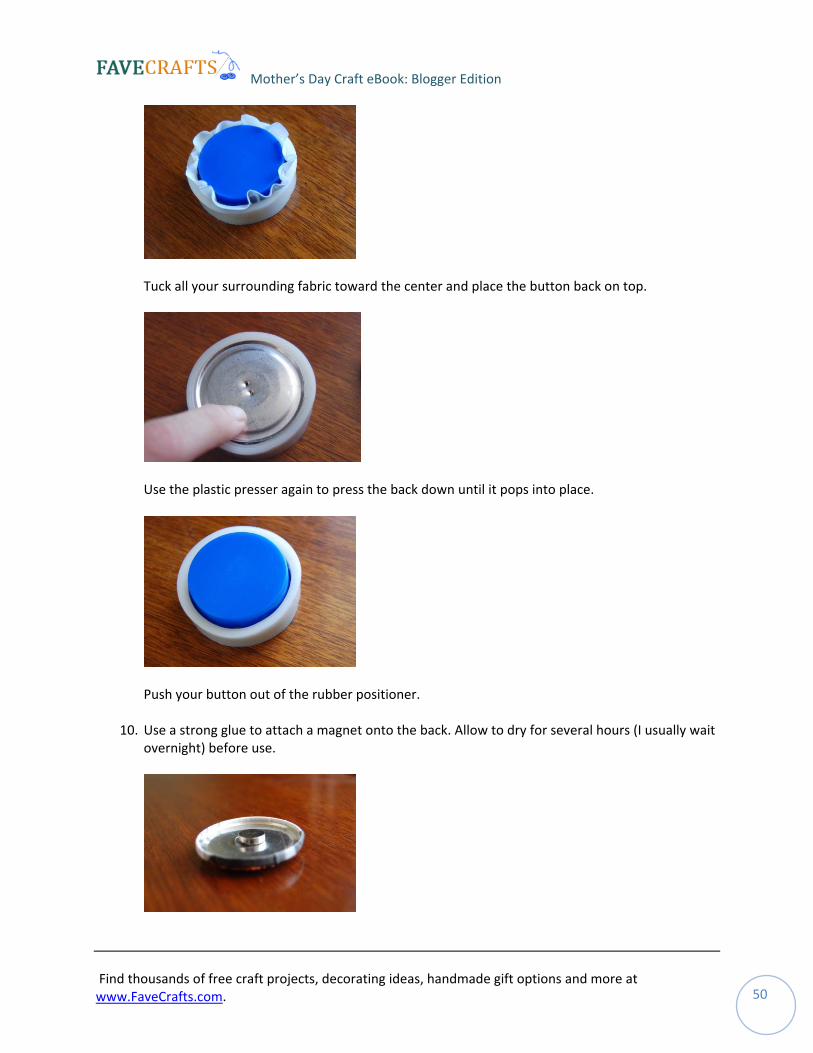
Tuck all your surrounding fabric toward the center and place the button back on top.
Use the plastic presser again to press the back down until it pops into place.
Push your button out of the rubber positioner.
10. Use a strong glue to attach a magnet onto the back. Allow to dry for several hours (I usually wait overnight) before use.
Find thousands of free craft projects, decorating ideas, handmade gift options and more at www.FaveCrafts.com 50 .
Mother’s Day Craft eBook: Blogger Edition
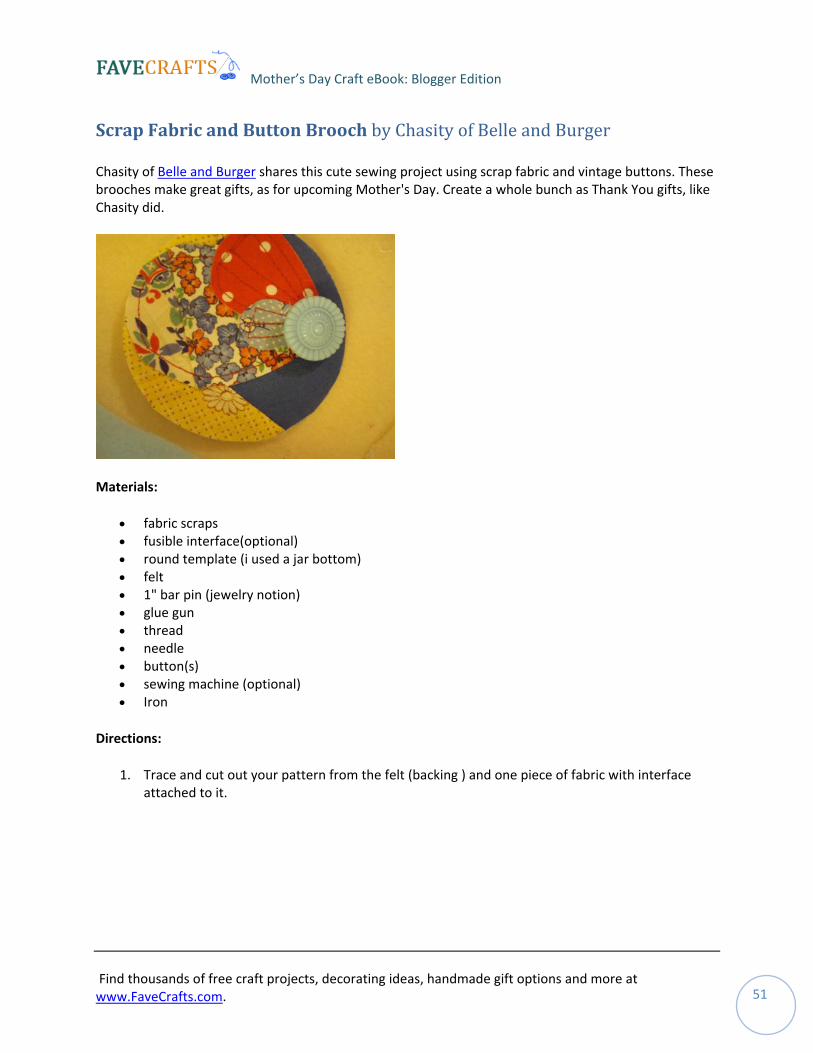
Scrap Fabric and Button Brooch by Chasity of Belle and Burger
Chasity of Belle and Burger shares this cute sewing project using scrap fabric and vintage buttons. These brooches make great gifts, as for upcoming Mother's Day. Create a whole bunch as Thank You gifts, like Chasity did.
Materials:
• fabric scraps • fusible interface(optional) • round template (i used a jar bottom) • felt • 1" bar pin (jewelry notion) • glue gun • thread • needle • button(s) • sewing machine (optional) • Iron
Directions:
1. Trace and cut out your pattern from the felt (backing ) and one piece of fabric with interface attached to it.
Find thousands of free craft projects, decorating ideas, handmade gift options and more at www.FaveCrafts.com 51 .
Mother’s Day Craft eBook: Blogger Edition
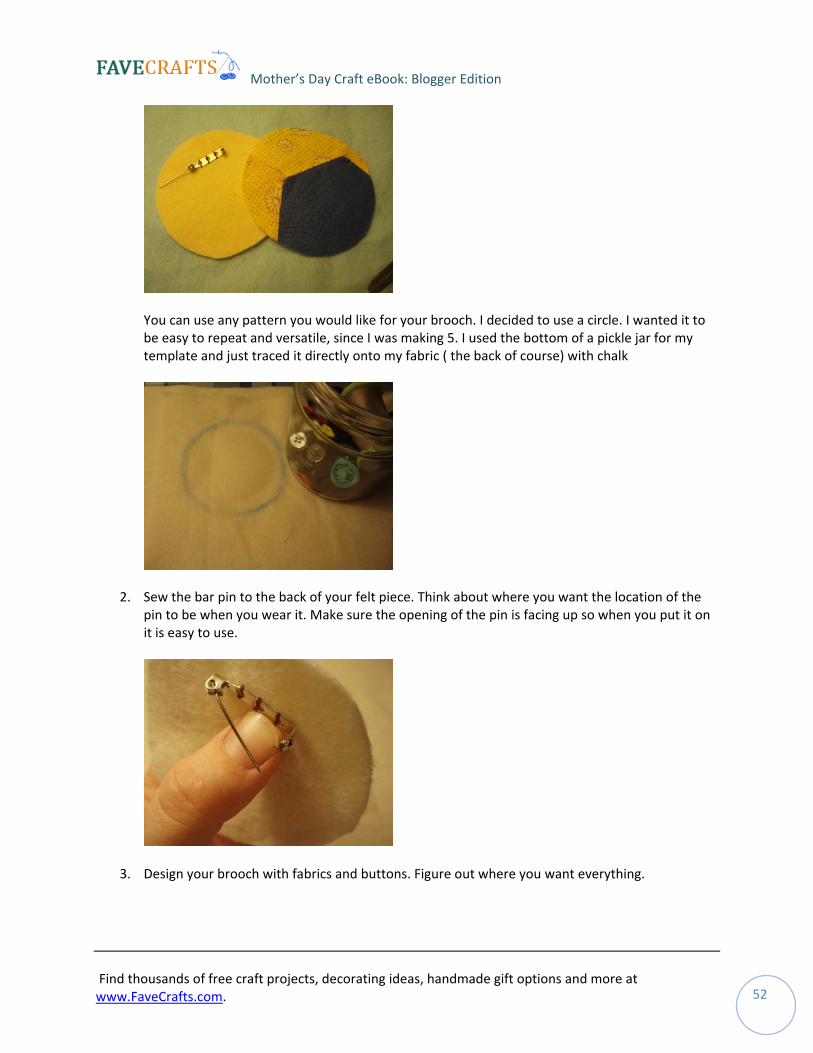
You can use any pattern you would like for your brooch. I decided to use a circle. I wanted it to be easy to repeat and versatile, since I was making 5. I used the bottom of a pickle jar for my template and just traced it directly onto my fabric ( the back of course) with chalk
2. Sew the bar pin to the back of your felt piece. Think about where you want the location of the pin to be when you wear it. Make sure the opening of the pin is facing up so when you put it on it is easy to use.
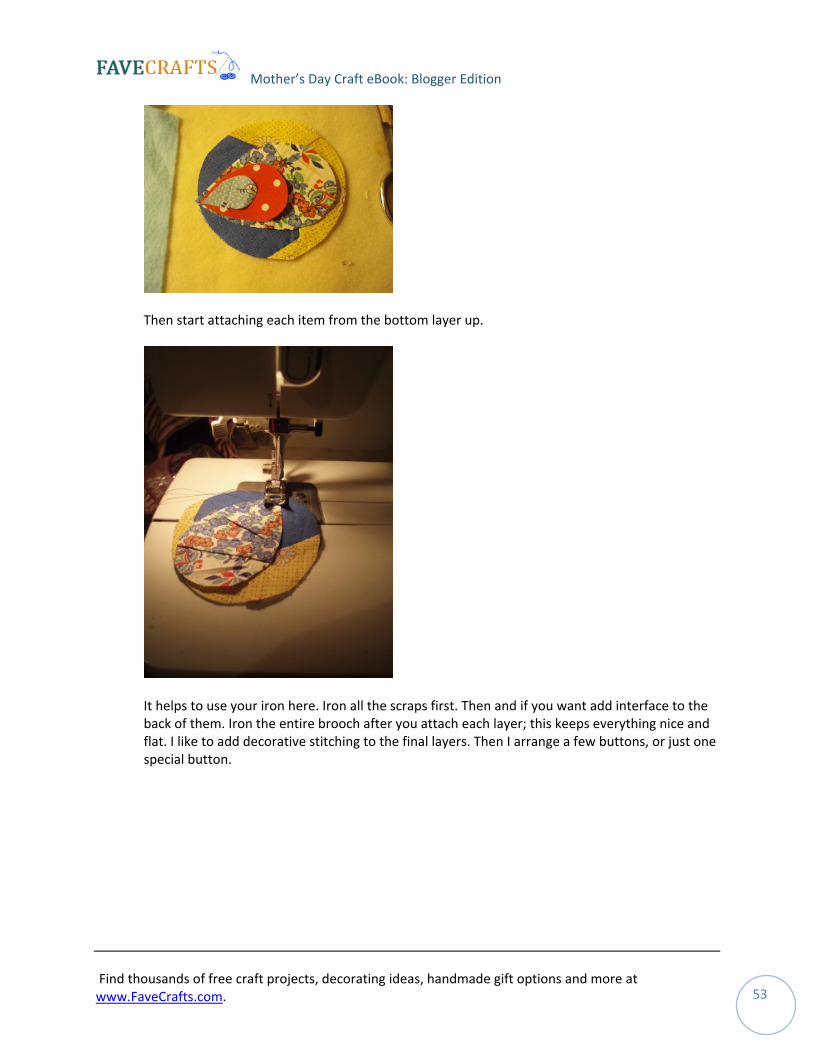
3. Design your brooch with fabrics and buttons. Figure out where you want everything.
Find thousands of free craft projects, decorating ideas, handmade gift options and more at www.FaveCrafts.com 52 .
Mother’s Day Craft eBook: Blogger Edition
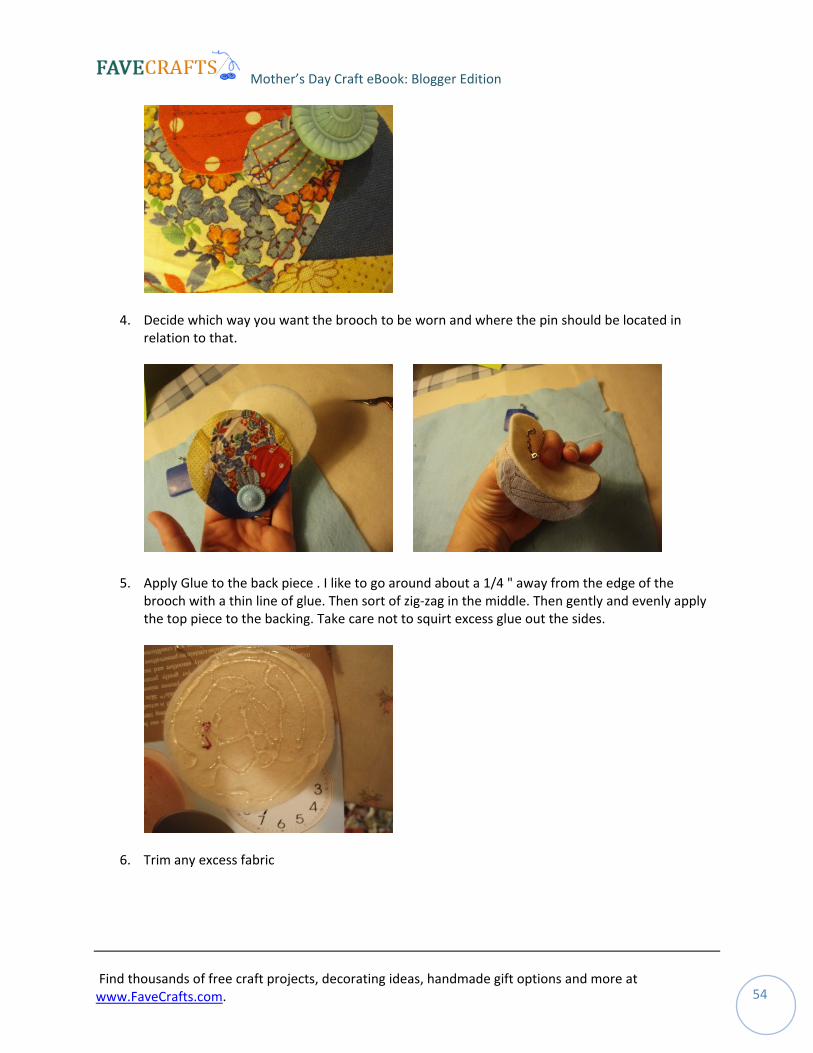
Then start attaching each item from the bottom layer up.
It helps to use your iron here. Iron all the scraps first. Then and if you want add interface to the back of them. Iron the entire brooch after you attach each layer; this keeps everything nice and flat. I like to add decorative stitching to the final layers. Then I arrange a few buttons, or just one special button.
Find thousands of free craft projects, decorating ideas, handmade gift options and more at www.FaveCrafts.com 53 .
Mother’s Day Craft eBook: Blogger Edition
4. Decide which way you want the brooch to be worn and where the pin should be located in relation to that.
5. Apply Glue to the back piece . I like to go around about a 1/4 " away from the edge of the brooch with a thin line of glue. Then sort of zig‐zag in the middle. Then gently and evenly apply the top piece to the backing. Take care not to squirt excess glue out the sides.
6. Trim any excess fabric
Find thousands of free craft projects, decorating ideas, handmade gift options and more at www.FaveCrafts.com 54 .

Mother’s Day Craft eBook: Blogger Edition
7. ......Tada!
Find thousands of free craft projects, decorating ideas, handmade gift options and more at www.FaveCrafts.com 55 .
Mother’s Day Craft eBook: Blogger Edition
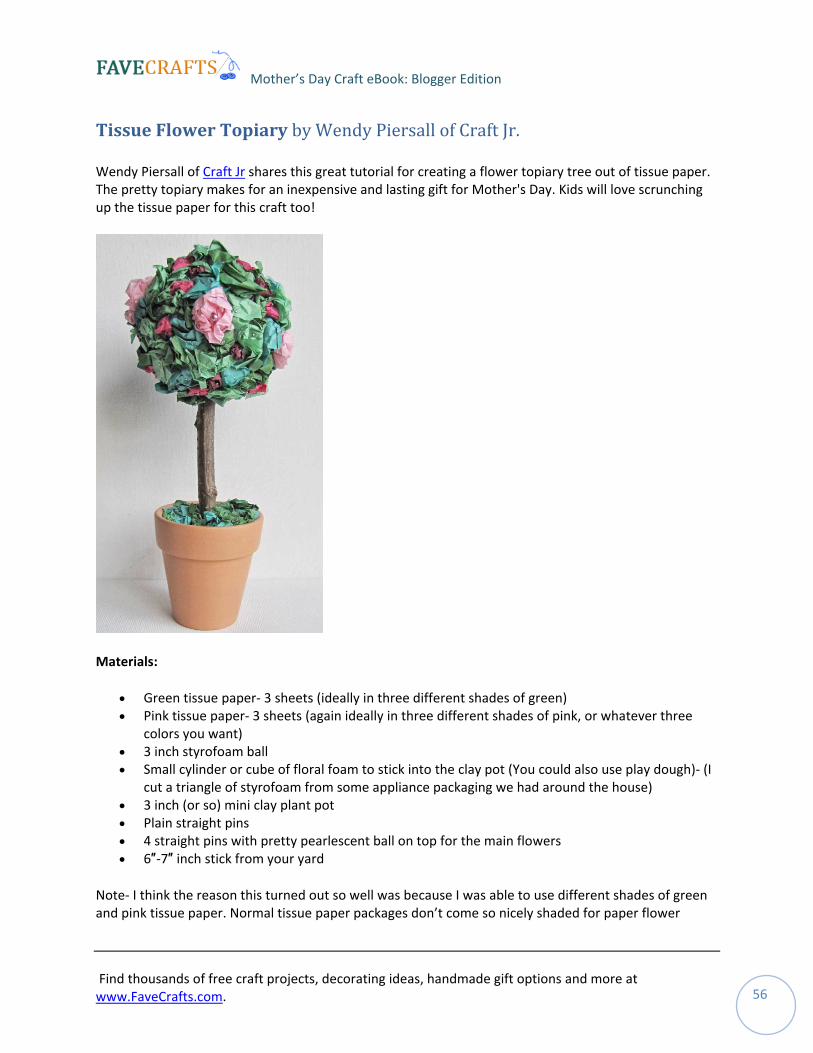
Tissue Flower Topiary by Wendy Piersall of Craft Jr.
Wendy Piersall of Craft Jr shares this great tutorial for creating a flower topiary tree out of tissue paper. The pretty topiary makes for an inexpensive and lasting gift for Mother's Day. Kids will love scrunching up the tissue paper for this craft too!
Materials:
• Green tissue paper‐ 3 sheets (ideally in three different shades of green) • Pink tissue paper‐ 3 sheets (again ideally in three different shades of pink, or whatever three
colors you want) • 3 inch styrofoam ball • Small cylinder or cube of floral foam to stick into the clay pot (You could also use play dough)‐ (I
cut a triangle of styrofoam from some appliance packaging we had around the house) • 3 inch (or so) mini clay plant pot • Plain straight pins • 4 straight pins with pretty pearlescent ball on top for the main flowers • 6″‐7″ inch stick from your yard
Note‐ I think the reason this turned out so well was because I was able to use different shades of green and pink tissue paper. Normal tissue paper packages don’t come so nicely shaded for paper flower
Find thousands of free craft projects, decorating ideas, handmade gift options and more at www.FaveCrafts.com 56 .

Mother’s Day Craft eBook: Blogger Edition
crafts, but I swear by a huge package of tissue paper I am able to get at Hobby Lobby for $5 (inconveniently they don’t sell online, but CreateforLess has shades of green at $.89 a package).
Instructions:
1. First cut up the green tissue paper into approximately 2 inch squares. They are going to get crumpled up, so don’t worry about being precise or anything.
2. Start scrunching up the squares into loose little balls. I found it worked best if I rolled them between my hands as if it were clay I was trying to roll into a ball. Even on a tiny ball you will need a surprisingly large number of these, because you want them to be relatively close together.
3. Next just start pinning them to the styrofoam ball. Don’t put them too close together, because you will want to have room to put in the flowers. You can see in the second photo how close I put them together.
Find thousands of free craft projects, decorating ideas, handmade gift options and more at www.FaveCrafts.com 57 .
Mother’s Day Craft eBook: Blogger Edition
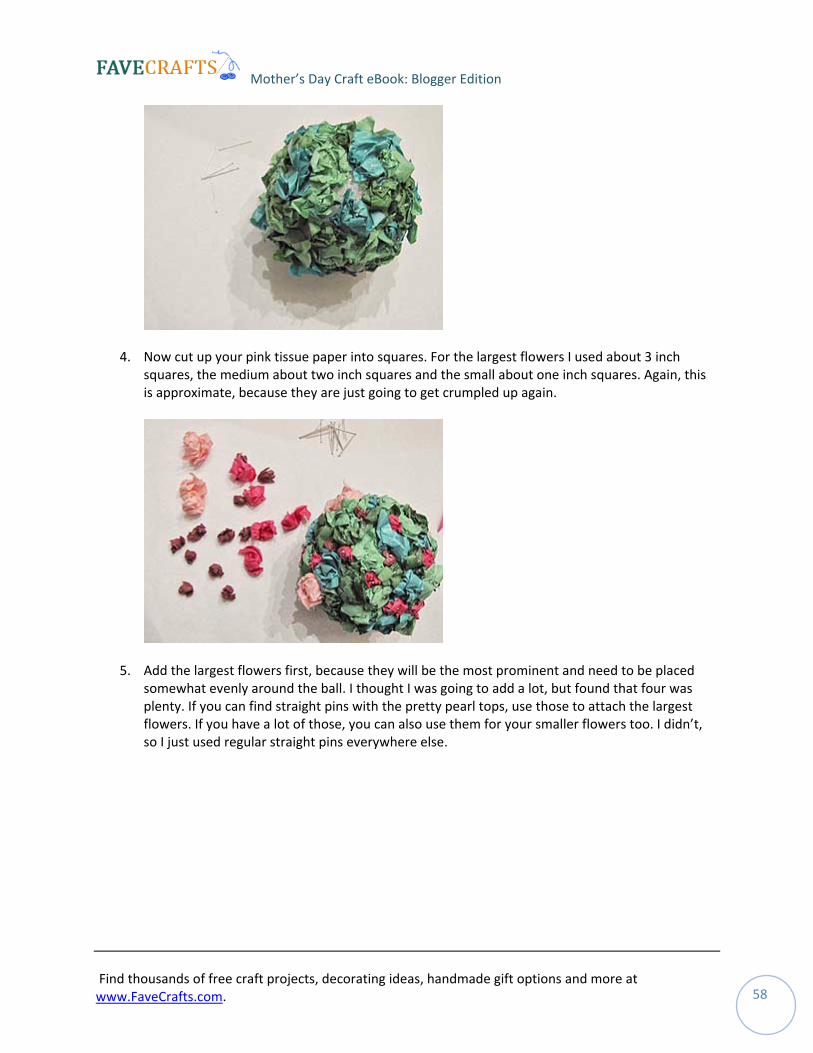
4. Now cut up your pink tissue paper into squares. For the largest flowers I used about 3 inch squares, the medium about two inch squares and the small about one inch squares. Again, this is approximate, because they are just going to get crumpled up again.
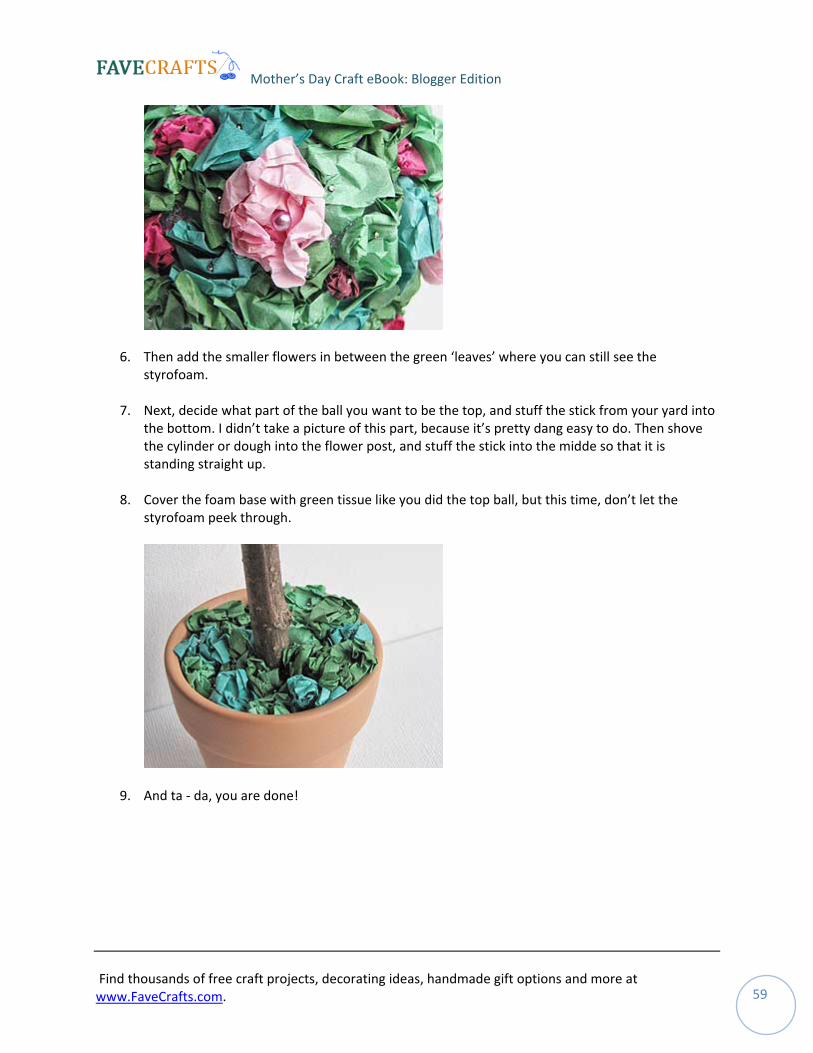
5. Add the largest flowers first, because they will be the most prominent and need to be placed somewhat evenly around the ball. I thought I was going to add a lot, but found that four was plenty. If you can find straight pins with the pretty pearl tops, use those to attach the largest flowers. If you have a lot of those, you can also use them for your smaller flowers too. I didn’t, so I just used regular straight pins everywhere else.
Find thousands of free craft projects, decorating ideas, handmade gift options and more at www.FaveCrafts.com 58 .
Mother’s Day Craft eBook: Blogger Edition
6. Then add the smaller flowers in between the green ‘leaves’ where you can still see the styrofoam.
7. Next, decide what part of the ball you want to be the top, and stuff the stick from your yard into the bottom. I didn’t take a picture of this part, because it’s pretty dang easy to do. Then shove the cylinder or dough into the flower post, and stuff the stick into the midde so that it is standing straight up.
8. Cover the foam base with green tissue like you did the top ball, but this time, don’t let the styrofoam peek through.
9. And ta ‐ da, you are done!
Find thousands of free craft projects, decorating ideas, handmade gift options and more at www.FaveCrafts.com 59 .
Mother’s Day Craft eBook: Blogger Edition
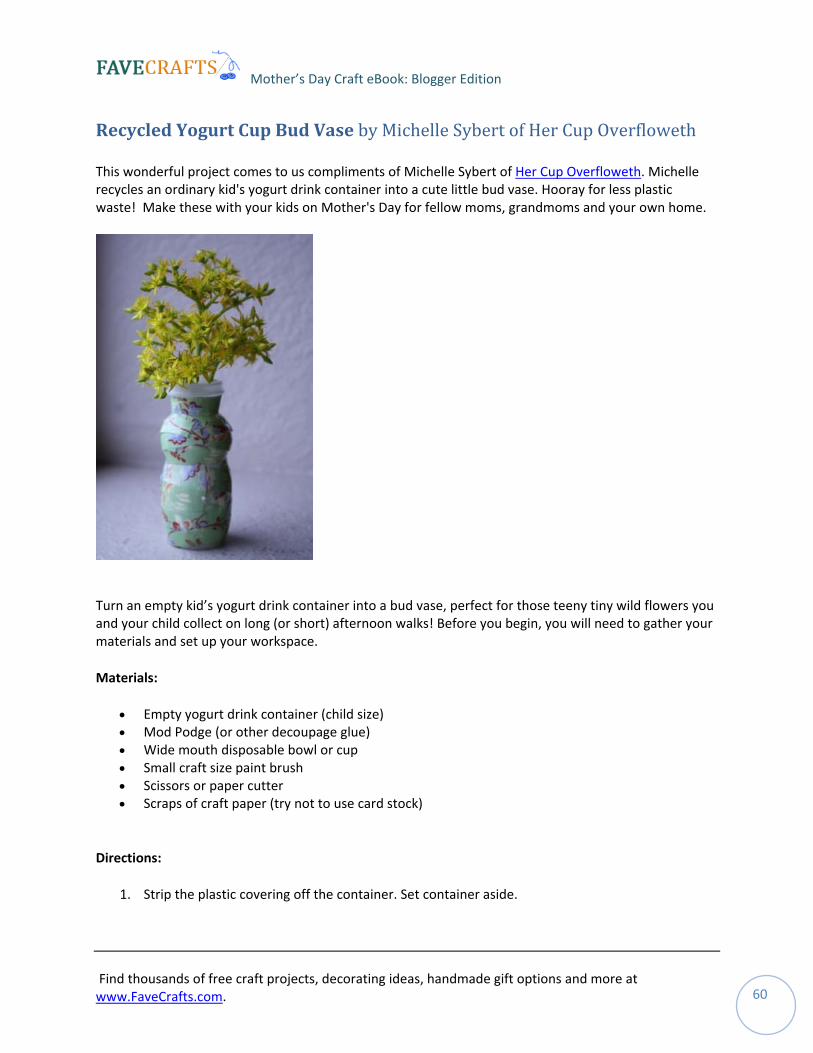
Recycled Yogurt Cup Bud Vase by Michelle Sybert of Her Cup Overfloweth
This wonderful project comes to us compliments of Michelle Sybert of Her Cup Overfloweth. Michelle recycles an ordinary kid's yogurt drink container into a cute little bud vase. Hooray for less plastic waste! Make these with your kids on Mother's Day for fellow moms, grandmoms and your own home.
Turn an empty kid’s yogurt drink container into a bud vase, perfect for those teeny tiny wild flowers you and your child collect on long (or short) afternoon walks! Before you begin, you will need to gather your materials and set up your workspace.
Materials:
• Empty yogurt drink container (child size) • Mod Podge (or other decoupage glue) • Wide mouth disposable bowl or cup • Small craft size paint brush • Scissors or paper cutter • Scraps of craft paper (try not to use card stock)
Directions:
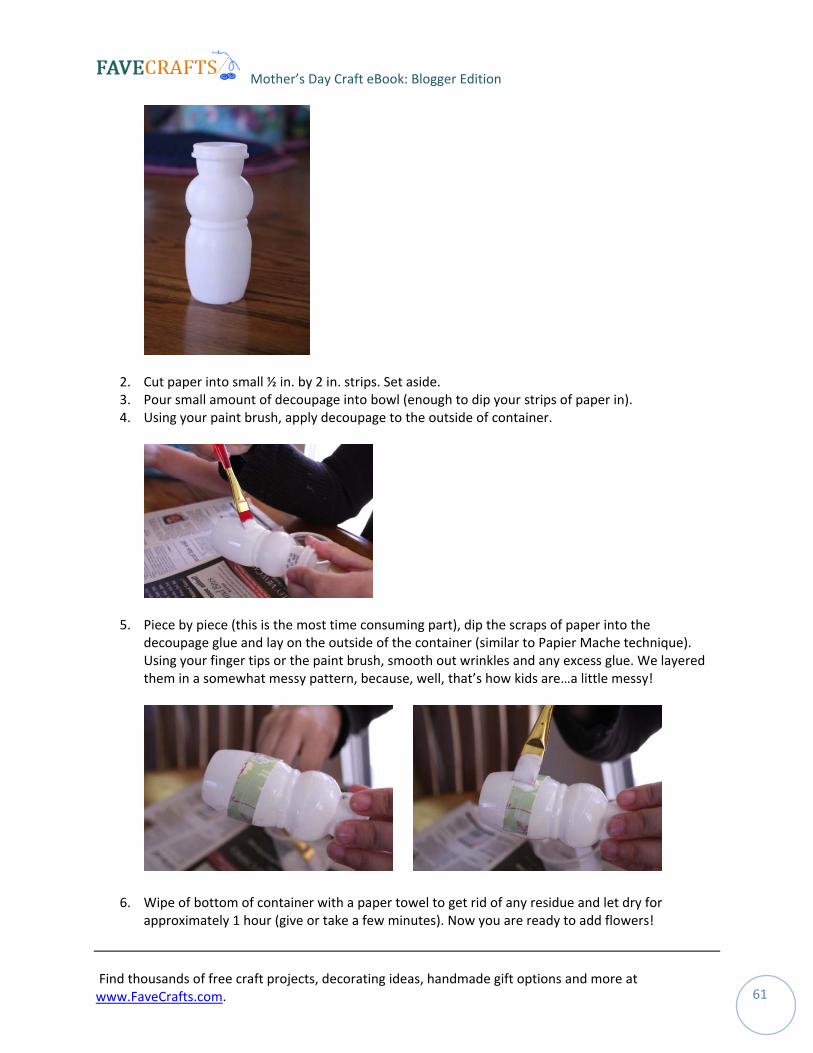
1. Strip the plastic covering off the container. Set container aside.
Find thousands of free craft projects, decorating ideas, handmade gift options and more at www.FaveCrafts.com 60 .
Mother’s Day Craft eBook: Blogger Edition
2. Cut paper into small ½ in. by 2 in. strips. Set aside. 3. Pour small amount of decoupage into bowl (enough to dip your strips of paper in). 4. Using your paint brush, apply decoupage to the outside of container.
5. Piece by piece (this is the most time consuming part), dip the scraps of paper into the decoupage glue and lay on the outside of the container (similar to Papier Mache technique). Using your finger tips or the paint brush, smooth out wrinkles and any excess glue. We layered them in a somewhat messy pattern, because, well, that’s how kids are…a little messy!
6. Wipe of bottom of container with a paper towel to get rid of any residue and let dry for approximately 1 hour (give or take a few minutes). Now you are ready to add flowers!
Find thousands of free craft projects, decorating ideas, handmade gift options and more at www.FaveCrafts.com 61 .
Mother’s Day Craft eBook: Blogger Edition
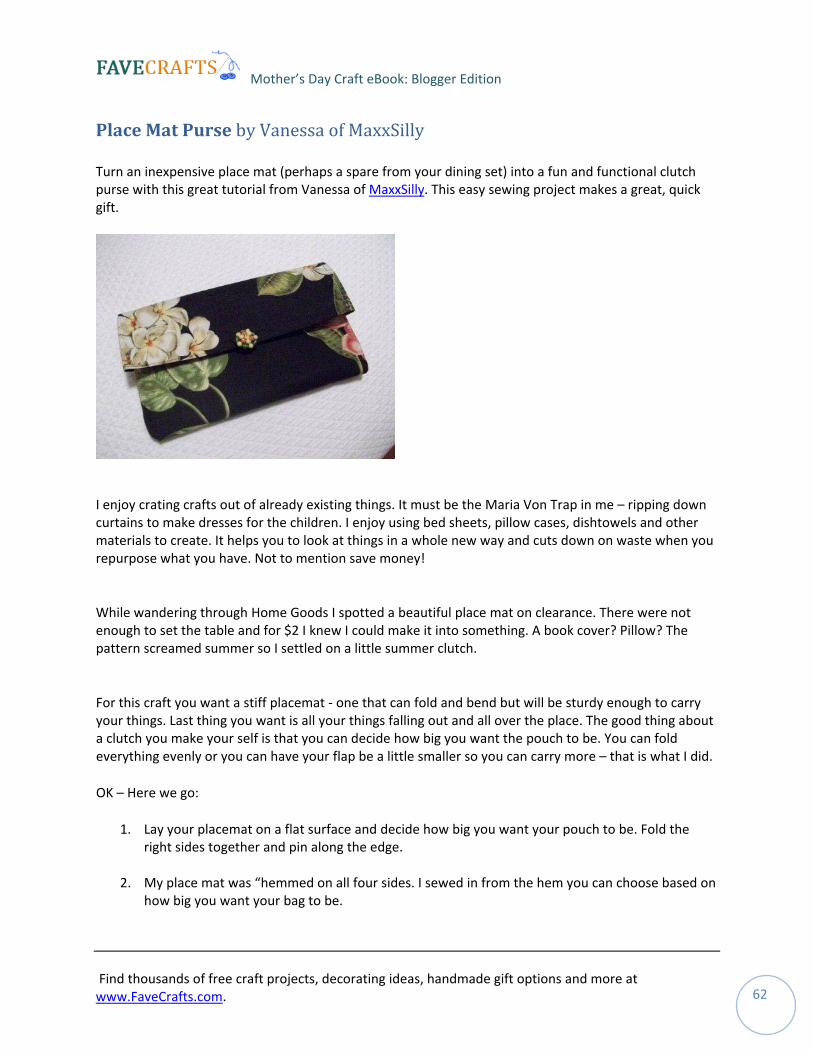
Place Mat Purse by Vanessa of MaxxSilly
Turn an inexpensive place mat (perhaps a spare from your dining set) into a fun and functional clutch purse with this great tutorial from Vanessa of MaxxSilly. This easy sewing project makes a great, quick gift.
I enjoy crating crafts out of already existing things. It must be the Maria Von Trap in me – ripping down curtains to make dresses for the children. I enjoy using bed sheets, pillow cases, dishtowels and other materials to create. It helps you to look at things in a whole new way and cuts down on waste when you repurpose what you have. Not to mention save money!
While wandering through Home Goods I spotted a beautiful place mat on clearance. There were not enough to set the table and for $2 I knew I could make it into something. A book cover? Pillow? The pattern screamed summer so I settled on a little summer clutch.
For this craft you want a stiff placemat ‐ one that can fold and bend but will be sturdy enough to carry your things. Last thing you want is all your things falling out and all over the place. The good thing about a clutch you make your self is that you can decide how big you want the pouch to be. You can fold everything evenly or you can have your flap be a little smaller so you can carry more – that is what I did.
OK – Here we go:
1. Lay your placemat on a flat surface and decide how big you want your pouch to be. Fold the right sides together and pin along the edge.
2. My place mat was “hemmed on all four sides. I sewed in from the hem you can choose based on how big you want your bag to be.
Find thousands of free craft projects, decorating ideas, handmade gift options and more at www.FaveCrafts.com 62 .
Mother’s Day Craft eBook: Blogger Edition
Find thousands of free craft projects, decorating ideas, handmade gift options and more at www.FaveCrafts.com. 63
3. Turn the bag inside out. Be sure to push out your corners.
4. On the flap – fold in and again sew in from the hem or so it is lined up with the pouch.
5. I used a clip on earring that I took apart and sewed on for a little decoration on the front. You can add a snap, ribbons or whatever you want – be sure to make it your own!
6. Fill it with what you need for a night on the town and enjoy!
Mother’s Day Craft eBook: Blogger Edition
Find thousands of free craft projects, decorating ideas, handmade gift options and more at www.FaveCrafts.com. 64
Mother’s Day Craft eBook: Blogger Edition eBook from www.FaveCrafts.com Craft Bloggers Included in this eBook:
• Marie LeBaron of Makes and Takes • Jo Ebisujima of A Bit of This and A Bit of That • Suzanne of Crazy for Collars • Ashley of Domestic Fashionista • Ashley Johnston of Make It and Love It • Tania Ennor of MyrtleandEunice • Kate of Centsational Girl • Avital Gertner‐Samet of Creativity Prompt • Meg of The Closet Seamstress • Molly Kozera of Bit O’ Shine • Corinne of So September • Chasity of Belle and Burger • Wendy Piersall of Craft Jr. • Michelle Sybert of Her Cup Overfloweth • Vanessa of MaxxSilly
Sign up for our free crafting newsletter and receive more holiday fun, craft projects, quick tips, home décor ideas and more right in your inbox every week.