Module 3 Fabricaton
25
Evelyne Setiono Student No: 579870 Semester 2/2012 Group 3 Module 3- Fabrication
-
Upload
evelyne-setiono -
Category
Documents
-
view
214 -
download
0
description
fabrcation process of the lantern
Transcript of Module 3 Fabricaton

Evelyne SetionoStudent No: 579870
Semester 2/2012Group 3
Module 3- Fabrication

EvaluationBased on the evaluation I made from the final model I've created on Rhino in module 2, I decided to refine the model to suit its function. Some evaluations that I made are:1. Less opening/ holes
This can be done by changing the body part into solid panelling. This way there will be sufficient light for the lantern.2. Choose suitable materials used for the lantern
I decided to use black card as the material.3. Try different prototypes4. Size and scale
I have to think about how the lantern is worn/ held, for example measuring the width of my neck or shoulder.5. Improve presentation method
I can do this by having a chronological explanation, explaining some interesting observations and analysing more in the process.

Refinements
For the first refinement, I began in the first process again which is creating the point grids and splitting the model into three parts. The above pictures are the result of the splitting.

RefinementsAfter that, I refined the head and tail parts' pattern so that the folding lines are not too thin. In order to solve this problem, for the head part, I moved the triangular holes closer together by 30mm. Then, I extrude the surface by 10mm. The finished pattern then place on the head part on the model as 3D custom panel.

RefinementsI did the same thing for the tail part, however this time, I offset the triangles by 15 mm and move them closer by 50 mm each. I wanted to make the triangles smaller so that there is significant difference with the head part.

UnrollingAfter I did all the refinements needed, I found out that the body part was a little bit tricky. When I wanted to panel it using 2D custom panelling, the result showed no surface on the panel. However, when I tried to panel it using basic panelling, such as box and triangles, the result showed different result. It showed the surface and the panelling is successful. Therefore, I decided to concentrate on unrolling the head and tail part first because these are the main point of the lantern.
Tail Head

UnrollingThe tabs are 10mm away from the unrolled section. This is the same distance as the thickness of the 3D pattern of the model.The unrolled sections are shown below:
Tail Head

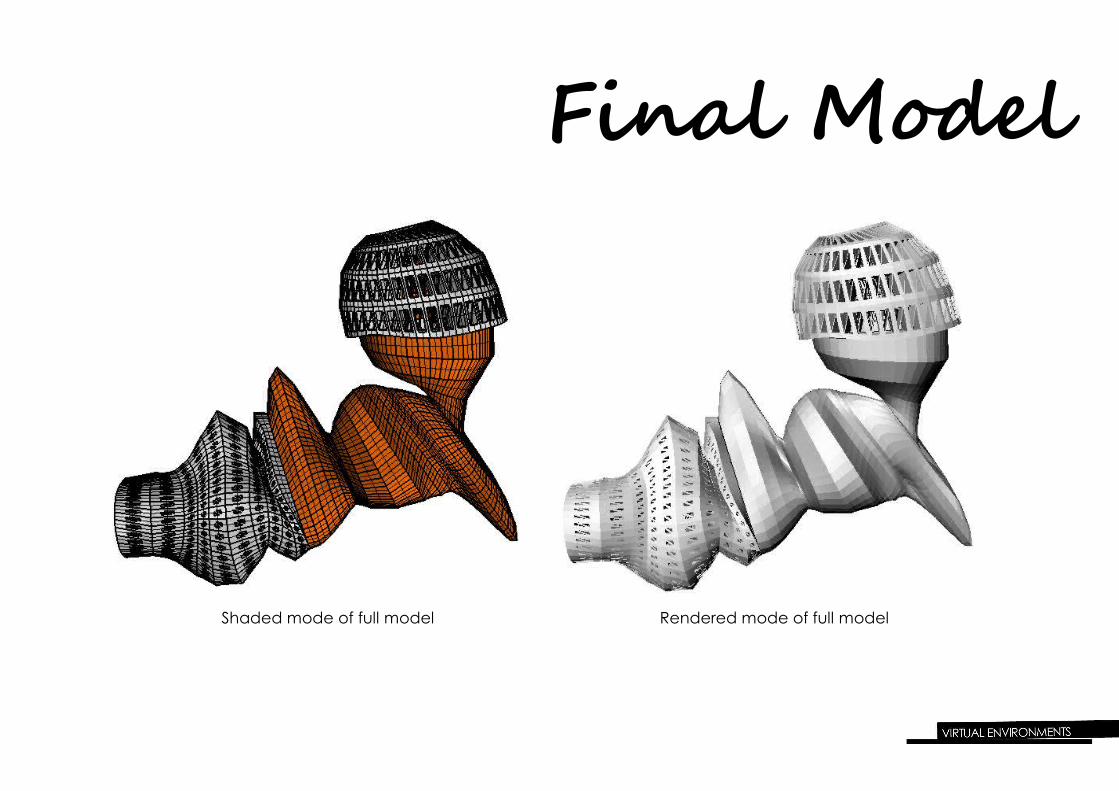
Final ModelAfter a few attempts in designing the final model in Rhino, I decided to change the body part into solid surfaces; with no holes on them. This prevents the light to pass through the body part. I used the basic 2D panel for this part which is the box pattern.

Final Model
Rendered mode(with lines)
Rendered mode(with no lines)

Final ModelOne problem of this model is that the body part is not made up of surfaces, but meshes. Therefore, it couldn't be unrolled using ptUnrollFaces command. To solve this problem, I had to convert these meshes into surfaces by using MeshToNURB command. This attempt was succesful as I could convert it into surfaces which could be unrolled.
Rendered mode of the body part
Meshes
Surfaces
Final Model
Rendered mode of full modelShaded mode of full model

PrototypesTail Head
These are the unrolled sections of the tail and head part. I made 2 strips for each part.

PrototypesFor this prototype, I decided to use laser cuter for the cutting. It was more effective and less time-consuming, and I also wanted to know the benefit and the end-product of using laser cutter rather than hand-cut. I prepared the fablab file as shown below.
The red lines indicate scoring (the laser cutter will cut it lightly)
The black lines indicate cutting (these lines will be completely cut)
The magenta lines indicate pages (the outline of the paper chosen which has a dimension of 900x600 mm)
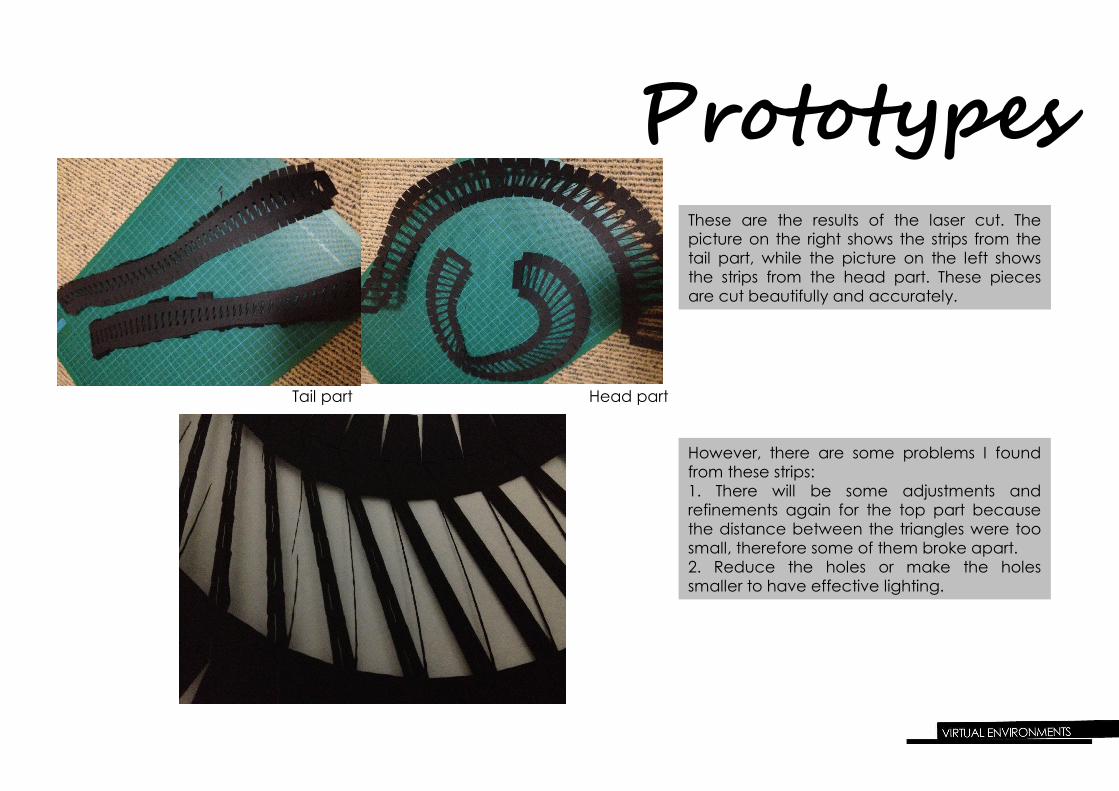
PrototypesThese are the results of the laser cut. The picture on the right shows the strips from the tail part, while the picture on the left shows the strips from the head part. These pieces are cut beautifully and accurately.
However, there are some problems I found from these strips:1. There will be some adjustments and refinements again for the top part because the distance between the triangles were too small, therefore some of them broke apart.2. Reduce the holes or make the holes smaller to have effective lighting.
Tail part Head part

PrototypesThe pictures on the left are the constructed model of the tail section. I constructed using PVA glue and it turned out quite messy as I put too much glue at some parts. Also, I didn't know the position and direction of where the strips should be attached together, therefore it might not be very similar to the digital model. The panels from the first strip are quite difficult to parallel with the second strip as they have different sizes.
I have also the same difficulty with the top part which is the gluing process. This time I attached the second strip panel by panel to the second strip, and it looked neater than the tail part. However, some improvements can still be done in constructing the model.

Final UnrollingHead
Final UnrollingTail

Final Unrolling
The red lines indicate scoring (the laser cutter will cut it lightly)
The black lines indicate cutting (these lines will be completely cut)
The magenta lines indicate pages (the outline of the paper chosen which has a dimension of 900x600 mm)
Fab Lab File

Final Unrolling
To resolve the breaking of the card because very small distances between the triangles, I tried to set them into scoring so that the laser cut will only cut it lightly rather than cutting it completely. Some triangles, usually in corners or the distances are the smallest, are outlined completely in red so that it could be cut manually later on.

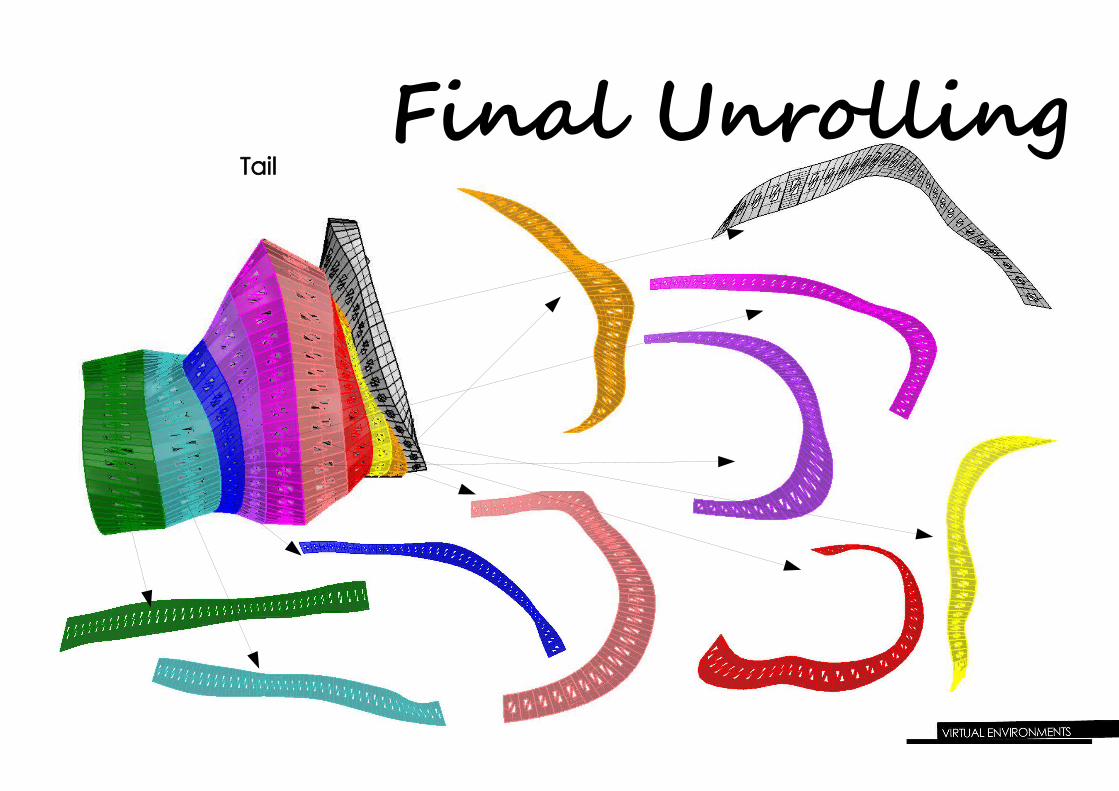
Body UnrollingI did the same process as unrolling the head and tail part to the body part. I color coded the body strips by strips and I ended up to 26 strips. It took quite a long time to unroll and make tabs for each strips. For the body part, I made use of grasshopper rather than doing it manually. However, sue to some overlapping of the strips and tabs, I had to delete it one by one by exploding it and delete the unnecessary parts.
Overlapping tabs

Body UnrollingThese are the result of the color coding and unrolling:

Body UnrollingHere are the resut of the fablab file of the body part:

Fabrication ProcessThe fabrication process is as followed:1. First I cut some of the scoring of the cards thaat have been cut by laser cutter2. Then I label them again so it will no be confusing when putting them all together using sticky note3. I used PVA glue for the assembly of the model
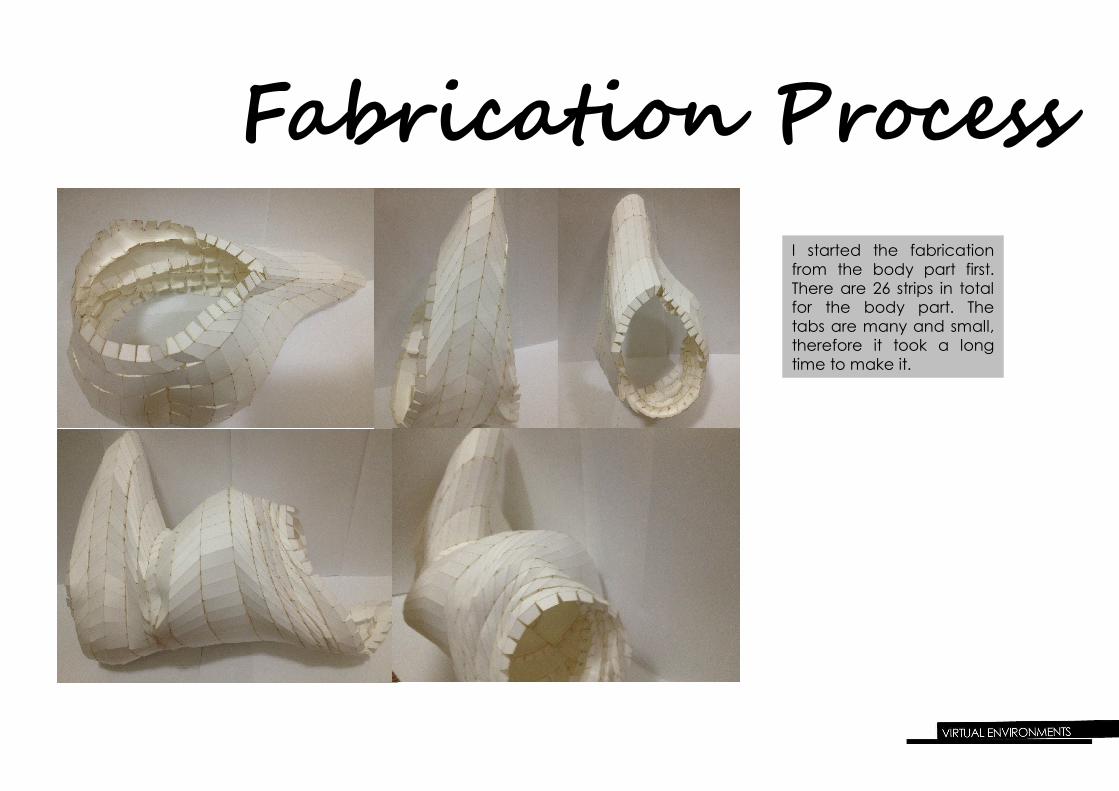
Fabrication ProcessI started the fabrication from the body part first. There are 26 strips in total for the body part. The tabs are many and small, therefore it took a long time to make it.

ReflectionModule 3 is a lot of hard work, however this module teaches me about responsibility and perseverance. From the digitalisation process, I entered the fabrication process which I think is a whole new process again. From the lecture, I learned about the power of technology and computation in architecture; how it affects the world of designing and constructing tremendously. The development of networking enable people to communicate easily with one another and so there is a concept of programmed or to be programmed. The concept of “form follows software” and “form follows limitation of one's knowledge” are also introduced which make me think about how technology has taken control our life, especially in designing.
In addition, my work is also influenced by some of my readings. MacFarlane introduces the concept of “event as generator” in his book “Making Ideas”. He used one of his projects, Maison T project, to discuss about the meaning of this concept. From this project, he explained tha form is dictated by two things: inside by the event and outside by the skin of the existing roof. He also discuss about the importance of materials and light which is very related to this module as we have to consider these elements in making the lantern. It is important to know how materials absorb and reflect light and we need to have balance in making openings so that light can be received maximally.
Module 3 is the finale of the whole module. From all of the modules I have been working, I learned things from multiple perspectives from thinking about something abstract into tangible things. I learned by doing in cumulative and reflective way.