Module 2 and 3- A Primer of Young Worker Safety and · PDF filea primer of young worker safety...
82
A PRIMER OF YOUNG WORKER SAFETY AND HEALTH TRAINING FOR EMPLOYEES MODULE 2/3‐ A PRIMER OF YOUNG WORKER SAFETY AND HEALTH: LESSON PLANS UPDATED SEPTEMBER 2011 Contact: www.youngworker.gatech.edu or email: [email protected] Information Provided under OSHA Susan Harwood Capacity Building Grant: #SH ‐ 20848SHO
Transcript of Module 2 and 3- A Primer of Young Worker Safety and · PDF filea primer of young worker safety...

A PRIMER OF YOUNG WORKER SAFETY AND HEALTH TRAINING FOR EMPLOYEES
MODULE 2/3‐ A PRIMER OF YOUNG WORKER SAFETY AND
HEALTH: LESSON PLANS
UPDATED SEPTEMBER 2011
Contact: www.youngworker.gatech.edu
or email: [email protected]
Information Provided under OSHA Susan Harwood Capacity Bui lding Grant: #SH ‐20848SHO

Young Worker Safety and Health Training for Employees
Page 1
A Primer of Young Worker Safety and Health Training for Employees
MODU L E 3 : O V E R V I EW
This training was developed to provide instruction for young workers (defined as those ages 15‐24). This
course is designed to be presented as four distinct lessons during a 6‐8 hour workshop class.
This interactive, hands‐on training will cover the following topics:
Introduction to Young Worker Injuries and Illnesses
• Identification of Workplace hazards (e.g. chemical, biological, safety, and other health hazards.
• Personal Protective Equipment
• Finding a Voice—Speaking up and against workplace hazards
• Taking Action
• Young Worker Rights and Responsibilities
• An Overview of Young Worker Labor Laws
Included in this booklet are the lesson plans for training, copies of the slides to be used for instruction,
and indicators on how to tie all the lessons together with activities, class participation, or other forms of
media.
Each topic has a separate lesson plan developed to assist teachers with instruction. These lesson plans
include a detailed objective for the training, focused ideas that promote enduring understanding and
answer essential questions, the total duration for the lesson, the materials and equipment necessary to
conduct the lesson, and any additional notes for the instructor.
Acknowledgements
The authors wish to acknowledge valuable source material taken from the Youth @ Work: Talking
Safety curriculum, documents from the OSHA website, resources provided by the Centers for Disease
Control and Prevention and the National Institute of Occupational Safety and Health, and the Work
Safe, Work Smart: Health and Safety Awareness for Working Teens curriculum, the OSHA’s 11
Curriculum, and the WorkSafe BC Lost Youth video. Additional materials were gathered from various
sources that are cited throughout the presentation.
MODULE 3 CURRICULUM
A PRIMER OF YOUNG WORKER SAFETY AND HEALTH TRAINING FOR
EMPLOYEES
Table of Contents
INTRODUCTION OF THE COURSE .................................................................................................................... 1
Introductory Slides ........................................................................................................................................ 2
LESSON 1: YOUNG WORKER INJURIES AND ILLNESSES ................................................................................ 4
Lesson 1 Slides ............................................................................................................................................... 8
LESSON 2: IDENTIFICATION OF JOB HAZARDS..............................................................................................18
Lesson 2 Slides ............................................................................................................................................ 36
LESSON 3: FINDING SOLUTIONS: CONTROLLING AND PREVENTING HAZARDS ON THE JOB .................46
Lesson 3 Slides............................................................................................................................................. 55
LESSON 4: FINDING A VOICE: YOUNG WORKER RIGHTS AND RESPONSIBILITIES ................................... 64
Lesson 4 Slides............................................................................................................................................. 71

Young Worker Safety and Health Training for Employees
Page 1
INTRODUCTION OF THE COURSE
Introduction
This course was developed for delivery to young workers, ranging in age from 14 to 24 years old. The
course contains four distinct lessons covering the following topics:
• Introduction to Young Worker Injuries and Illnesses
• Identification of Workplace hazards (e.g. chemical, biological, safety, and other health hazards.
• Personal Protective Equipment
• Finding a Voice—Speaking up and against workplace hazards
• Taking Action
• Young Worker Rights and Responsibilities
• An Overview of Young Worker Labor Laws
For each lesson in this booklet, you will find a lesson plan, any additional materials, and the
accompanying slides in that section. There is a supplemental handout packet that corresponds to the
lesson plans and slides for this course.
Prior to beginning the lessons, go over the first four slides with the class. These slides include a title
slide, an acknowledgement of sources, a course agenda outlining the four topics, and the “Tying it all
Together” section.
Tying it all Together
The “Tying it all Together” slide is intended to focus the instructor’s and students’ attention to potions
of the lessons where there should be class participation. Types of recommended participation include:
a Puzzle piece which represents an activity that the students can do individually or as a group,
a Movie reel which represents ways to integrate media into training, and
a Microphone which represents ways to involve students to participate.
All the images are shown on slide 4.

Young Worker Safety and Health Training for Employees
Page 2

Young Worker Safety and Health Training for Employees
Page 3
Young Worker Safety and Health Training for Employees
Page 4
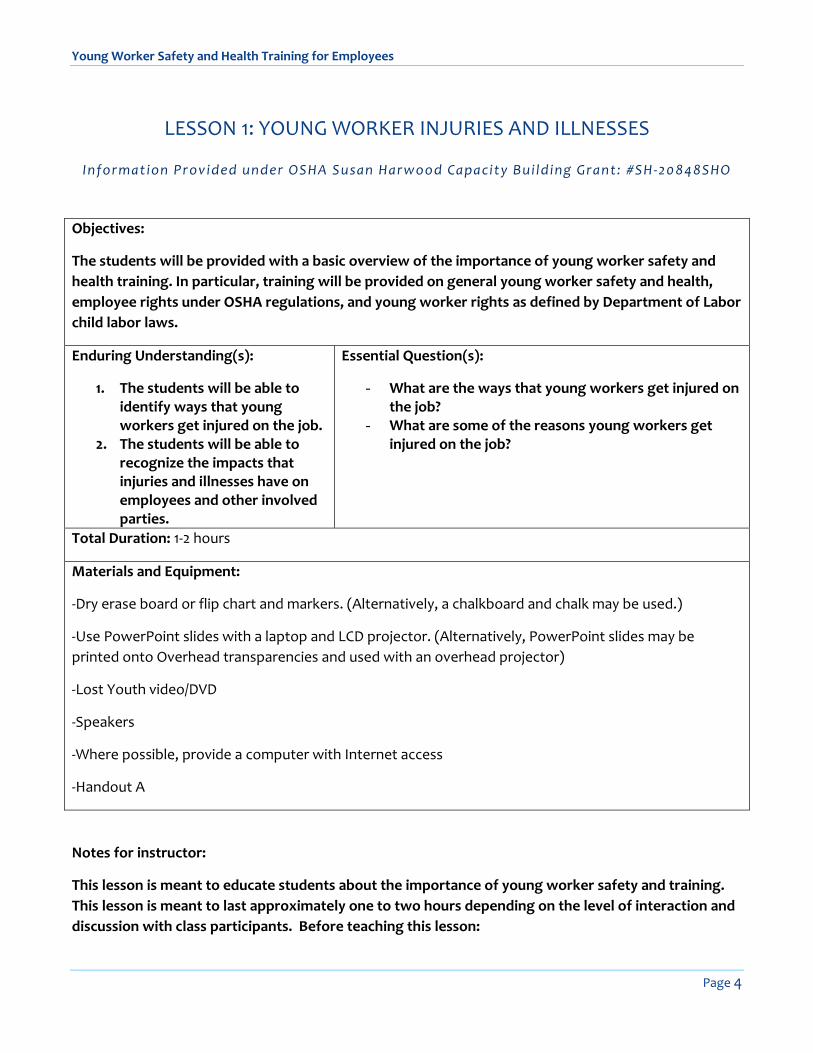
LESSON 1: YOUNG WORKER INJURIES AND ILLNESSES
Information Provided under OSHA Susan Harwood Capacity Bui lding Grant: #SH ‐20848SHO
Objectives:
The students will be provided with a basic overview of the importance of young worker safety and
health training. In particular, training will be provided on general young worker safety and health,
employee rights under OSHA regulations, and young worker rights as defined by Department of Labor
child labor laws.
Enduring Understanding(s):
1. The students will be able to identify ways that young workers get injured on the job.
2. The students will be able to recognize the impacts that injuries and illnesses have on employees and other involved parties.
Essential Question(s):
- What are the ways that young workers get injured on the job?
- What are some of the reasons young workers get injured on the job?
Total Duration: 1‐2 hours
Materials and Equipment:
‐Dry erase board or flip chart and markers. (Alternatively, a chalkboard and chalk may be used.)
‐Use PowerPoint slides with a laptop and LCD projector. (Alternatively, PowerPoint slides may be
printed onto Overhead transparencies and used with an overhead projector)
‐Lost Youth video/DVD
‐Speakers
‐Where possible, provide a computer with Internet access
‐Handout A
Notes for instructor:
This lesson is meant to educate students about the importance of young worker safety and training.
This lesson is meant to last approximately one to two hours depending on the level of interaction and
discussion with class participants. Before teaching this lesson:

Young Worker Safety and Health Training for Employees
Page 5
1. Determine the technology capabilities at the location of training. Where possible, use a laptop, LCD projector, and screen.
2. Obtain markers and either a flipchart, cling sheets, or a dry erase board to be used for activities.
3. Download the WorkSafe BC video: Lost Youth and provide speakers for the viewing of the video.
4. Determine Internet access capabilities for the training location. 5. Define the audience: employers, educators, young workers, parents to emphasize each group’s
focus to reduce young worker injuries and illnesses during the training.
Lesson One: Young Worker Injury and Illnesses
Activity Time Materials Description
A. Young Worker
Injuries and
Illnesses ‐ Statistics
5
minutes
Slides 5‐10 Discuss the statistics associated with young workers in
the workplace.
Explain the risk factors associated with young workers:
Hazards on the job
Inexperienced
Developmental factors
Some working in violation of child labor laws
Lack of training & supervision
Less likely to speak up or question authority
Potential Underreporting
B. Young Worker
Injuries and
Illnesses – Impact
of Injuries
10
minutes
Slide 11 Engage the students in a warm‐up discussion related to
their own personal work‐related experiences. Ask the
students:
1. Have you ever been hurt at work, or do you
know someone who was?
2. Have you ever been uncomfortable with a task
you’ve been asked to do at work?
Provide time for the class to discuss their answers.

Young Worker Safety and Health Training for Employees
Page 6
C. Young Worker
Injuries and
Illnesses – Impact
of Injuries
20
minutes
Slide 12
Lost Youth video/DVD. Video can be viewed at:
http://www.worksafebc.com/publications/default.asp ,
purchased from the Worksafe BC website, or accessed
on www.youtube.com (in search box enter: lost youth
worksafe bc)
Warning: two versions of this video exist: an edited
version and an unedited version. The unedited version
does contain some profanity. Video also contains
graphic images of young worker injuries. Viewer
discretion is advised.
As an alternative, show the NIOSH‐ Talking Safety Teen
Worker Video: Teen Workers: Real Jobs, Real Risks,
which can be found at:
http://www.cdc.gov/niosh/talkingsafety/video.html.
Provide time at the end of the presentation of the video
for any reflections the students may have made during
the viewing of it.
Alternative Activity: Provide a copy of Handout A to
students to use to write down reflections of the video
and injuries to be discussed in Activity D. This handout
can be used either in class or as a take‐home exercise.
D. Young Worker
Injuries and
Illnesses – Impact
of Injuries
20
minutes
Slides 13‐21 Share:
Slides 13‐21: examples of real‐life young worker injuries
(Alternatively, share current newspaper articles
documenting young worker involved in a workplace
accident/exposure)
Ask the students:
Imagine this happened to you: How would it change
your life? Would you still be able to keep your same
hobbies/interests?
What role does the employer play in keeping workers
safe?
What role does the worker play in keeping him/herself
safe at work?

Young Worker Safety and Health Training for Employees
Page 7
E. Young Worker
Injuries and
Illnesses –
Reporting
5
minutes
Slides 22‐23 Explain that in the event that an employee is injured
while performing their job, the employer is required to
keep a record of the injury.
Tell students that all workplace injuries (no matter how
big or small) should be reported to the
supervisor/employer.
Examples might be a cut from a knife, something
getting into your eye, falling and bruising your leg,
tripping and straining your wrist when grabbing
something for balance.
Explain how the employer might ask questions to help
them determine how the injury occurred so they can
prevent it from happening again, and to help them
determine whether it must be recorded on a special
form called the OSHA 300 log.
References
NIOSH and CDC. (2010), Youth@Work Talking Safety: Teaching Young Workers about Job Safety and
Health. Department of Health and Human Services, Public Health Service, Centers for Disease Control,
National Institute for Occupational Safety and Health. NIOSH Publication No.2007‐136.
OSHA. (2010), Introduction to OSHA Presentation. United States Department of Labor, Occupational
Safety and Health Administration.
WorkSafe BC (2003) Lost Youth ‐ Four stories of injured young workers. WorkSafe British Columbia.
* This material was produced under grant number #SH‐20848SHO from the Occupational Safety and Health
Administration, U.S. Department of Labor. It does not necessarily reflect the views or policies of the U.S. Department
of Labor, nor does mention of trade names, commercial products, or organizations imply endorsement by the U.S.
Government.

Young Worker Safety and Health Training for Employees
Page 8

Young Worker Safety and Health Training for Employees
Page 9

Young Worker Safety and Health Training for Employees
Page 10

Young Worker Safety and Health Training for Employees
Page 11

Young Worker Safety and Health Training for Employees
Page 12

Young Worker Safety and Health Training for Employees
Page 13

Young Worker Safety and Health Training for Employees
Page 14

Young Worker Safety and Health Training for Employees
Page 15

Young Worker Safety and Health Training for Employees
Page 16

Young Worker Safety and Health Training for Employees
Page 17

Young Worker Safety and Health Training for Employees
Page 18
LESSON 2: IDENTIFICATION OF JOB HAZARDS
Information Provided under OSHA Susan Harwood Capacity Bui lding Grant: #SH ‐20848SHO
Objectives:
The students will be provided with a basic overview of the importance of young worker safety and
health training. In particular, this lesson is designed to outline the types of job hazards that exist in
different work environments.
Enduring Understanding(s):
1. The students will be able to identify ways that young workers get injured on the job.
2. The student will begin to be able to categorize the different types of job hazards.
3. The students will learn the basic principles for identifying hazards.
4. The students will learn how to read and interpret Material Safety Data Sheets.
5. The students will learn about the hazards associated with exposure to noise.
Essential Question(s):
- What are different types of job hazards? - How might injuries occur on a job site and what
impact might that have on their lives? - How do you recognize hazards in a workplace? - How can a Material Safety Data Sheet be used to
identify hazards? - How can exposure to noise lead to hearing loss and
tinnitus (ringing in the ears)? - What are the basic principles to identifying hazards?
Total Duration: 1.5 ‐ 3 hours
Materials and Equipment:
‐ Dry erase board or flip chart and markers. (Alternatively, a chalkboard and chalk may be used.)
‐Use PowerPoint slides with a laptop and LCD projector. (Alternatively, PowerPoint slides may be
printed onto Overhead transparencies and used with an overhead projector)
‐Where possible, provide a computer with Internet access and speakers
‐Copies of Handouts B and C and example Material Safety Data Sheets
‐Marker and large sheets of papers for students
‐‐GERTI‐ Jolene Inspired Dangerous Decibels mannequin with a sound level meter in her ear for testing
the volume of personal music devices

Young Worker Safety and Health Training for Employees
Page 19
Notes for instructor:
This lesson is meant to educate young workers about the importance of young worker safety and
training. This lesson is meant to last approximately 1.5 to 3 hours depending on the level of interaction
and discussion with class participants. Before teaching this lesson:
1. Rectangles with titles in each of the activity columns represent a separate flip chart sheet that should be used for each individual activity.
2. Determine the technology capabilities at the location of training. Where possible, use a laptop, LCD projector, speakers, and screen.
3. Obtain markers and either a flipchart, cling sheets, or a dry erase board to be used for activities.
4. Make copies of Handouts B and C and an example of a MSDS. 5. Make sure that GeRTI is properly connected and has fresh batteries. 6. Determine Internet access capabilities for the training location. 7. Define the audience: employers, educators, young workers, parents to emphasize each group’s
focus to reduce young worker injuries and illnesses during the training.

Young Worker Safety and Health Training for Employees
Page 20
Lesson 2: Identification of Job Hazards
Activity Time Materials Description
A.
Introduction:
What is a Job
Hazard and
how might it
harm you?
10
minutes
Flipchart
Markers
Slides: 24‐27
1. Discuss with the students the basic definition of a job hazard. Explain that a wide range of possible job hazards exist. Review the differences between “temporary” and “permanent” injuries and illnesses. Review the differences between “immediate” and “delayed” health effects.
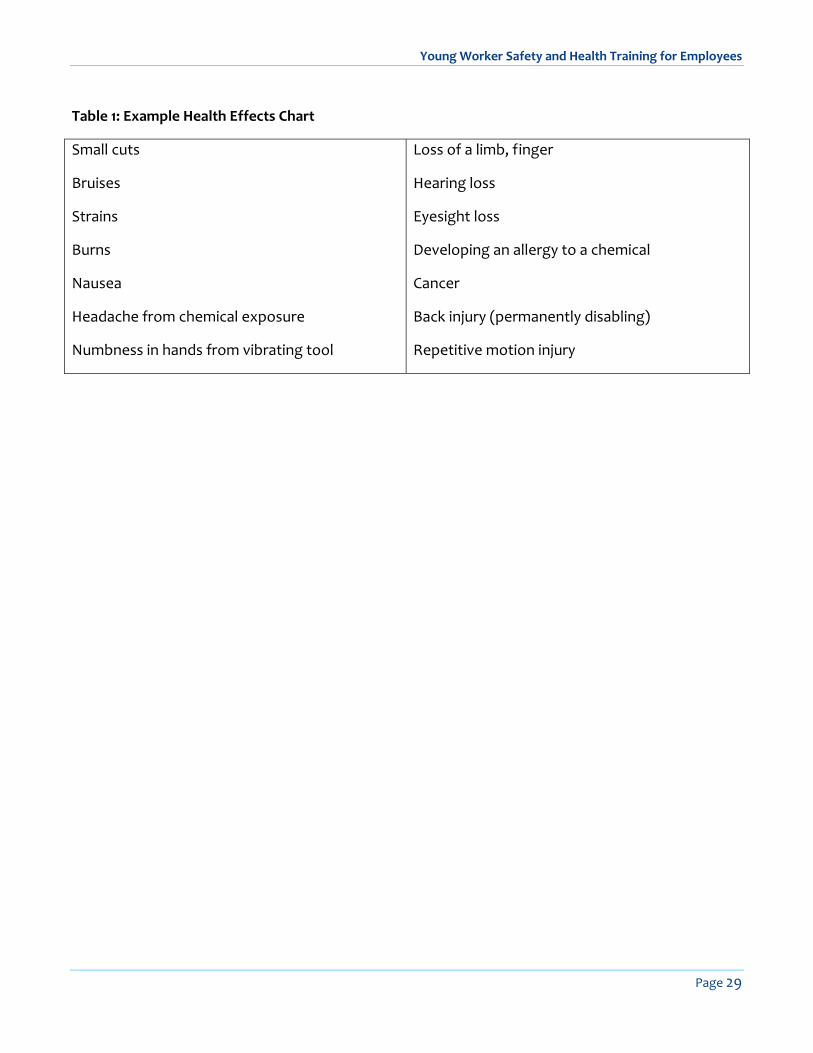
2. Flip Chart Activity: Brainstorm Injury/Illness Effects examples using the Effects categories onto the Effects Chart. Use Table 1: Example Health Effects Chart included below if needed. Discuss whether the brainstormed injuries/illnesses are “temporary/permanent” and/or “immediate/delayed”.
B. Defining the
Hazard Types
10
minutes
Handout B
Flipchart
Markers
Slides: 28‐30
1. Provide Students with copies of Handout B 2. Tell the class that hazards can be divided into five
categories: - Safety hazards can cause immediate accidents
and injuries. (Examples: knives, hot grease, etc.) - Chemical hazards are gases, vapors, liquids, or
dusts that can harm your body. (Examples: cleaning products or pesticides.) Discuss how chemicals can get into the body.
- Biological hazards are living things that can cause sickness or disease. (Examples: bacteria, viruses, or insects.)
- Other health hazards are harmful things, not in other categories, that can injure you or make you sick. They are sometimes less obvious because they may not cause health problems right away. (Examples: noise, radiation, repetitive movements, heat, cold)
- “Pressure Cooker or Unspoken” hazards (unsafe equipment or procedures; emergency situations: fires, explosions, severe injury, violence; stressful conditions; inadequate training; inadequate supervision; deadlines, production requirements, etc.)
Health Effects
Hazard
Categories

Young Worker Safety and Health Training for Employees
Page 21
3. Activity: Brainstorm examples within the categories using memories or personal experiences onto the Hazard Chart. As students call out possible hazards, decide as a group whether they are a safety, chemical, biological, other health, or pressure cooker hazard and write them into the appropriate category. Encourage students to think about all kinds of workplaces. If necessary, suggest from the list provided in Table 3: Example Work Places.
*Note, ensure students are brainstorming hazards or
causes of injuries and illnesses, not effects. For
example, a student may call out “cuts” (effect) as a
safety hazard instead of knives (cause). Refer to Table 2:
Example Hazard Chart included below if necessary.
C. Identifying
Hazards: How
to Start
5
minutes
Handout B
Slide 31
Discuss with students the methods that they may begin to identify hazards when they are working. These options may include:
1. Ask your supervisor for help 2. Get Training on the chemicals or equipment you will use 3. Check the label of the products you will use 4. Read the Material Safety Data Sheet (MSDS) for the chemicals or products being used 5. Look online for safety and health information‐Handout H‐ provides a listing of resources 6. Call a resource agency like OSHA for more help
Ask the students what other options they have for the identification of hazards.
D.
Understanding
Chemical
Exposure
(Optional
Lesson)
10‐20
minutes
As an
introduction to
Slides 32‐33
Understanding Chemical Exposures Many workplaces require handling chemicals – whether as part of the job task, or to clean up after a spill or just as part of general housekeeping. Some chemicals could be the same products you use in your own home, others could be very different.
Brainstorm as a class what type of chemicals might be encountered on a job site. [Use the Example Hazard Chart: Chemical column if necessary. ] Encourage students to think beyond chemicals that come in containers, and to include chemicals that are generated as a result of performing a work activity (such as carbon

Young Worker Safety and Health Training for Employees
Page 22
monoxide when running a car). Consider the following Questions for discussion:
‐Question: How do chemicals get into the body? How can chemicals harm the body? ‐Answer: Chemicals can get into the body by breathing them in, swallowing them, or getting them on your skin. [Review with students how chemicals can unintentionally be swallowed when they are transferred from unwashed hands to food, drinks, makeup, cigarettes, etc.] Chemical exposures can cause many different health effects or symptoms. Exposure to some chemicals may cause dizziness and breathing problems right away (an immediate effect). Other chemicals, if they get on your skin, can immediately cause a severe burn or destroy your skin tissue. For some chemicals, over time, continued exposure to a chemical could result in cancer, or injury to a specific organ in your body, such as your liver (delayed effect).
‐Question: How can we find out about chemicals and how to protect ourselves? ‐Answer: Your employer is required to provide you with information about the types of chemicals you might work with at your job. They must train you on how to use the chemicals safely, or what to do if there is a chemical spill or emergency. Chemicals used in a workplace should also have information on their container labels, and chemicals have an informational document called a “material safety data sheet” or MSDS that should be stored in an accessible location at your place of work. MSDSs are information sheets that manufacturers must send to companies along with their chemical products. They tell you what is in the product, how it can harm you, and how to protect yourself.
E. Material
Safety Data
Sheets
10 ‐60
minutes
Handout C
Slides 32‐33
Discuss the following information with the students: 1. Material Safety Data Sheets (MSDSs) are used to
provide safety and health properties of workplace chemical products.
2. Review with the students the information required to be provided on a MSDS: a. The identity used on the label. b. Chemical and common names ‐ may be the same

Young Worker Safety and Health Training for Employees
Page 23
as #1. c. Physical and chemical characteristics of the
hazardous ingredients (e.g., flash point, appearance and odor).
d. Physical hazards (e.g., combustible, unstable). e. Health hazards (e.g., corrosive) plus signs and
symptoms of exposure and medical conditions aggravated by exposure.
f. Primary route(s) of entry (e.g., inhalation). g. Air exposure limits (e.g., PEL, TLV). h. Carcinogenicity. i. Precautions for safe handling and use (e.g.,
storage, waste disposal). j. Control measures (e.g., personal protection). k. Emergency and first aid procedures. l. Date of preparation of MSDS. m. Name/address/phone number of responsible
party. 3. Go over the benefits and limitations using MSDSs:
a. Benefits of MSDSs include: i. They contain detailed health information ii. They tell employees how to protect
themselves and what employers should be doing to protect employees
iii. They provide information on what to do in an emergency
iv. They provide information on safe storage, exposure limits, and incompatibility
b. Limitation of MSDSs include: i. MSDSs may be missing information ii. May be difficult to read iii. May contain inaccurate information iv. Different suppliers of the same chemical may
contain different hazard information 4. Using Handout C, provide students with either a
MSDS related to a chemical they will be working with or one of the two provided chemical MSDSs. Ask them to answer the questions on the MSDS worksheet using the MSDS as a guide.
Activity using slide 33 and Handout C (alternatively, this could be given as homework)
1. Divide the students into groups. Hand‐out an MSDS for ammonia. Give the students a few minutes to look over the MSDS. Post the following list of questions via

Young Worker Safety and Health Training for Employees
Page 24
Powerpoint/overhead and instruct the students to use the MSDS to find the answers. Instruct them to write down their answers and whichever team correctly finds all answers the fastest wins.
2. Questions: 3. What is the percentage of ammonia in this
product? What is the other ingredient in this product? [27‐31%; water]
4. Is ammonia a corrosive? What is a corrosive? [yes; a corrosive causes irreversible damage to the body]
5. What happens if you get ammonia in your eye? [burns that could result in temporary or permanent blindness]
6. What should you do if you accidentally swallow ammonia? [do not cause vomiting]
7. What would happen to your body if you accidentally ingested ammonia? [swallowing could cause severe burns of the mouth, throat, stomach, leading to death. Ingestion could also cause sore throat, vomiting, and diarrhea]
8. What kind of protection should you wear on your body to protect yourself? [goggles and faceshield; lab coat and apron; proper gloves]
F. Identification
of Job Hazards
(example)
10
minutes
Flipchart
Markers
Slides: 22
Referring back to the hazard chart and building off what was just discussed regarding ways to identify hazards, remind students that all workplace injuries or illnesses are caused by hazards. Depending on class, this hazard list could be used for mapping within a specific industry (for example, by asking shop students “which hazards from this list might be found in a cabinetry shop?” Asking cosmetology students “which hazards from this list might be found in a salon?” 1. Ask the students to think about places they have
worked, or workplaces with which they are familiar and call them out.
2. Write the suggested workplaces onto a flip chart list.
3. Using one of the workplaces suggested by the students, draw a floor plan of the suggested workplace on another flip chart sheet, including walls, doors, windows, equipment, work areas. You may also ask for a student volunteer to draw the map. Ask the students to call out possible job
Workplaces
Example of
Hazard
Mapping

Young Worker Safety and Health Training for Employees
Page 25
hazards and to classify the job hazard as a safety, chemical, biological, or other hazard as they call out the example. Use colored markers to code the job hazards on the floor plan as follows: - Red to show safety hazards - Green to show chemical hazards - Orange to show biological hazards - Blue to show other health hazards - Brown to show “Pressure Cooker” hazards
G. Identification
of Job Hazards
(Activity)
20+
minutes
Flipchart
Markers
Divide the class into groups. Have each group select a
workplace from the brainstormed list. Provide flip chart
paper and markers, and have each team complete their
own hazard mapping activity, following the example
just completed. Have each group share their maps with
the class.
H. Noise and
Hearing Loss
Prevention
10‐20
minutes
Slides 35‐38
Audio:
“Demonstration
of Noise
Induced
Hearing Loss”
NIOSH Sound
Level Meter
GeRTI
Begin the activity by asking the students how loud they
think noise has to be before it causes hearing loss.
Ask the question: How Loud is too loud?
Exposure to noise at 85dbA for 8 hours a
day will cause permanent hearing loss
The amount of time of exposure to
sounds determines the potential for
hearing loss.
Discuss with the students that work‐related hearing
loss is a critical issue and that noise‐induced hearing loss
is 100% preventable. However, once noise‐induced
hearing loss is acquired, it is a permanent and
irreversible condition.
Discuss that noise is an exposure that is found not only
in the workplace, but at home as well.
Noise‐induced hearing loss is hearing loss due to
exposure to a sudden, loud sound, or exposure to loud
Sheet for
each group

Young Worker Safety and Health Training for Employees
Page 26
sounds over a period of time.
Approximately 36 million Americans are affected by
hearing loss. And 10 million of those cases can be
directly attributed to exposure to dangerous sounds.
Tinnitus is a hissing, ringing, buzzing, or combination of
other sounds in the ear that are caused by damage to
the ear or brain.
Approximately 50 million Americans have tinnitus.
Using the NIOSH Sound Level Meter (which can either
be downloaded from:
http://www.cdc.gov/niosh/topics/noise/noisemeter.html
onto the computer or played directly from the internet,
where internet access is available), show the difference
between various sounds.
Play the demonstration of Noise Induced Hearing Loss,
which can be downloaded from
http://www.hse.gov.uk/noise/demonstration.htm )
Ask the students what their thoughts are about the
potential to experience noise induced hearing loss.
Ask the students what they believe their daily
exposures to noise is, and what they could do to reduce
their exposure to noise. Introduce GeRTI, the
mannequin with a sound level meter inside her ear. Ask
the students to bring up their personal music listening
devices to determine what their exposure to noise is
when listening to music. Ask the students how long
they typically listen to music each day. Using slide 38,
determine how long the student could listen to music at
that level before starting to experience hearing loss.
Take home message is:
1. Turn down the volume
2. Walk away (put as much distance as possible
between your ears and the sound source)
3. Wear hearing protection

Young Worker Safety and Health Training for Employees
Page 27
E. Conclusions
and Summary
5
minutes
Slide: 39 Go over the objectives of this lecture, as outlined in the
beginning of this lesson plan.
Answer student questions.
F. Hazards in
the Workplace:
Advanced
Workshop
Session
60
minutes
Slides: 40‐43 Please refer to pages 32‐35 of this document for
instructions on conducting this workshop session.

Young Worker Safety and Health Training for Employees
Page 28
References
NIOSH and CDC. (2010), Youth@Work Talking Safety: Teaching Young Workers about Job Safety and
Health. Department of Health and Human Services, Public Health Service, Centers for Disease Control,
National Institute for Occupational Safety and Health. NIOSH Publication No.2007‐136.
OSHA. (2010), Introduction to OSHA Presentation. United States Department of Labor, Occupational
Safety and Health Administration.
Work Safe, Work Smart: Health and Safety Awareness for Working Teens curriculum. University of
Washington: Dept. of Environmental and Occupational Health Sciences. Washington State Dept. of
Labor and Industries.
Young Worker Safety Resource Center, OSHA’11: An OSHA 10‐hour curriculum for Young Workers.
University of Washington‐ Pacific Northwest OSHA Education Center, U.C. Berkeley Labor Occupational
Health Program, Education Development Center, Inc.
Dangerous Decibels, Educator Resource Guide, Version 2.0. Oregon Health and Science University,
Portland, Oregon.
* This material was produced under grant number #SH‐20848SHO from the Occupational Safety and Health
Administration, U.S. Department of Labor. It does not necessarily reflect the views or policies of the U.S. Department
of Labor, nor does mention of trade names, commercial products, or organizations imply endorsement by the U.S.
Government.
Young Worker Safety and Health Training for Employees
Page 29
Table 1: Example Health Effects Chart
Small cuts
Bruises
Strains
Burns
Nausea
Headache from chemical exposure
Numbness in hands from vibrating tool
Loss of a limb, finger
Hearing loss
Eyesight loss
Developing an allergy to a chemical
Cancer
Back injury (permanently disabling)
Repetitive motion injury

Young Worker Safety and Health Training for Employees
Page 30
Table 2: Example Hazard Chart
Safety Hazards Chemical
Hazards
Biological Hazards Other Health
Hazards
“Pressure
Cooker” Hazards
Hot surfaces
Walk‐in freezers
Slippery floors
Unsafe ladders
Unsafe stairways
Machines without guards
Sharp knives
Moving equipment with sharp parts or pinch points
Hot grease
Unsafe electric circuits
Unintentional power‐up of equipment
Lack of fire exits
Motor vehicles (cars, forklifts, tractors, etc.)
Cluttered work areas
Falling objects
Cleaning products
Pesticides
Fertilizers
Solvents
Paints
Acids
Lead
Wood dust
Silica dust
Poor air quality
Carbon monoxide
Gasoline
Toxic gases
Viruses
Bacteria
Molds
Animals
Birds
Insects
Poison ivy
Poison oak
Used needles
Human blood
Contaminated laundry
Noise
Vibration
Radiation
Heat or cold
Repetitive movements
Awkward posture
Standing for long periods
Sitting for long periods
Heavy lifting
Too little/too much light
Fast work pace
Harassment
Stressful conditions
Lack of training
Lack of supervision
Hostile work environment
Violence

Young Worker Safety and Health Training for Employees
Page 31
Table 3: Example Workplaces Chart
Farm (barn, machine shop, feedlot, cropland)
Restaurant
Fast food restaurant
Nursing home
Movie theater
Office
Construction site
Convenience store
Grocery store
Retail store
Home (babysitting, landscaping)
Landscaping
Pool (lifeguarding)
Camp counselor
Delivery person (e.g takeout food)
Lab worker

Young Worker Safety and Health Training for Employees
Page 32
HAZARDS IN THE WORKPLACE: ADVANCED WORKSHOP SESSION ADDITIONAL ACTIVITIES (IF TIME PERMITS):
Understanding Emergency Preparation
o Explain: Some hazards are easy to spot because they are potentially encountered very day or are a routine part of the work process; excessive noise or hot grease could be an example. However, unexpected hazards are sometimes encountered, such as fires, workplace violence, or chemical spills/releases. These singular, hazardous events are considered workplace emergencies because they are unexpected and may threaten employees, customers, or the public in some way.
o Brainstorm as a class onto a flip chart sheet types of emergencies that might occur at a job: Examples might include:
Severe illness or injury
Hurricanes/tornadoes/floods/earthquakes
Power outages
Fires
Chemical release
Violence
Explosion
Mob in a retail store
Drowning (at a public pool)
Robbery at a store o Ask the class to think about if they were at work and one of these events happened,
would they know what to do? How do you prepare for an unexpected event? Explain: An employer should explain what kinds of emergencies might happen in
that workplace, and what the plans and procedures are that you should follow to ensure your safety.
o Brainstorm as a class onto a flip chart sheet what they might want to know ahead of time to prepare for an unexpected emergency: Examples might include:
Where shelters and meeting places are located
Evacuation routes
Emergency equipment locations and how to use it (fire extinguishers, AED’s, etc.)
Alert system (alarm? What does it look/sound like? Where should I go and what should I do?)
Who is in charge during emergencies and how to reach them
Procedures to follow if someone is injured or becomes ill
What are MY individual responsibilities
How will I know the emergency is over?

Young Worker Safety and Health Training for Employees
Page 33
o Activity (alternatively, this could be given as homework for an individual or group) Divide the students into groups (Alternatively, the story/stories can be read aloud
by the instructor, and then the class can answer the questions together). They will work in their small groups to evaluate news stories about workplace emergencies, and determine what went well during the response, and what didn’t. Alternatively, they could use examples from their own workplaces/experiences, or from news stories they have seen/heard.
Story A: Grease Fire in Restaurant Burns Employee A fire destroyed part of Hooper’s Restaurant late Thursday night, and critically
injured two employees. The fire was caused when a frying pan, filled with oil
heating up on the stove, was left unattended while fry cook went to get
something out of the walk‐in freezer. The fire rapidly spread to dishcloths
hanging on a towel rack over the stove. Another employee discovered the
fire and attempted to put out the fire by pouring water on the stove. This
caused the burning grease to splatter his face, arms, and chest. Another co‐
worker, hearing cries for help, called 911 and then ran out into the dining
room and yelled for everyone to leave the restaurant immediately.
Emergency services arrived and went to work extinguishing the blaze and
treating the burned employee.
Ask: What went right in this emergency situation? o Calling 911 o Evacuating the restaurant immediately
Ask: What went wrong in this emergency situation? o Leaving the stove unattended
Why did he leave the stove? o Dish clothes were hanging in a dangerous location o Employee tried to put out the fire with the wrong material
Was he trained correctly? o No smoke detector or fire alarm or sprinkler system went off
Ask: What better steps could be taken now to make sure employees are better protected and prepared next time?
o Install a smoke detector with an alarm and correct sprinkler system (or ensure that the existing one is working correctly)
o Training employees: hazards of leaving the stove unattended, what type of fire extinguisher to use and how to use it
o Put up a new dishcloth rack farther away from the stove o Practice evacuation drills and set up a meeting place to ensure that
all employees got out of the building safely
Story B: Robber Threatens Young Employee With Gun A 16‐year old employee of a local convenience store was held up at gunpoint late
Tuesday night by a robber wearing a hoodie and dark sunglasses. The employee
was working alone at the front counter and was in the process of closing the

Young Worker Safety and Health Training for Employees
Page 34
store for the evening. The robber reportedly demanded the employee empty the
cash register into a duffel bag, then get down on the floor behind the counter
and remain on the floor for 15 minutes. The robber then exited the store.
Although the young employee was not physically injured, she was very shaken up
by the incident.
Ask: What went right in this emergency situation? o The employee cooperated with the robber, probably helping to
prevent physical injury
Ask: What went wrong in this emergency situation? o The store was actually able to be robbed because security
measures weren’t in place.
Ask: What better steps could be taken now to make sure employees are better protected and prepared next time?
o Employees shouldn’t be working alone at night o Better security measures (a security guard or silent alarm) o Good lighting inside and outside the store o Security camera o Train the employees how to respond to a robbery or other threat
Story C: Young Construction Worker Falls From Ladder An 18‐year old house painter, who was painting the second story of a
house, fell off his ladder yesterday, breaking both legs. He also suffered
severe cuts when he caught his arm on a metal fence during the fall. Co‐
workers rushed to assist him and called for an ambulance. While waiting for
the ambulance, the co‐workers carried the employee to the front lawn and
then applied pressure to his open wound to stop the bleeding.
Ask: What went right in this emergency situation? o Co‐workers called 911 o The co‐workers knew to apply pressure to the bleeding wound
Ask: What went wrong in this emergency situation? o Co‐workers moved the injured worker (they should have let the
EMT’s assess his injuries first) o It’s hard to know, but the co‐workers may not have used gloves to
protect themselves from blood when applying pressure to the wound.
Ask: What better steps could be taken now to make sure employees are better protected and prepared next time?
o Employees should be trained to call 911 first, and not move injured co‐workers unless there is another imminent danger. Moving someone after they have fallen or had another injury could make the situation worse.

Young Worker Safety and Health Training for Employees
Page 35
o There should be a first aid kit quickly available at each job site, and employees should be trained to use gloves if they need to respond to an injured co‐worker
o The ladder should be checked to make sure it wasn’t broken or defective, or that it was the wrong size for the job
o The employee should be trained about using the ladder correctly, and using other tools (if needed) to get the job done safely
Review: Remind students that all workplaces should have Emergency Action Plans, and that employers
must provide this information to workers. Plans should detail who is in charge during an emergency,
where shelters are, how to evacuate the facility, and what to do if someone is injured.

Young Worker Safety and Health Training for Employees
Page 36

Young Worker Safety and Health Training for Employees
Page 37

Young Worker Safety and Health Training for Employees
Page 38

Young Worker Safety and Health Training for Employees
Page 39

Young Worker Safety and Health Training for Employees
Page 40

Young Worker Safety and Health Training for Employees
Page 41

Young Worker Safety and Health Training for Employees
Page 42

Young Worker Safety and Health Training for Employees
Page 43

Young Worker Safety and Health Training for Employees
Page 44

Young Worker Safety and Health Training for Employees
Page 45

Young Worker Safety and Health Training for Employees
Page 46
LESSON 3: FINDING SOLUTIONS: CONTROLLING AND PREVENTING HAZARDS ON THE JOB
Information Provided under OSHA Susan Harwood Capacity Bui lding Grant: #SH ‐20848SHO
Objectives:
The students will be provided with a basic overview of the importance of young worker safety and
health training. In particular, training will be provided on general young worker safety and health,
employee rights under OSHA regulations, and young worker rights as defined by Department of Labor
child labor laws.
Enduring Understanding(s):
1. The student will be able to discuss possible solutions to control job hazards.
2. The student will be able to distinguish between prevention strategies that remove the hazard, improve the conditions when working around the hazard, and personal protective equipment worn by the employee.
Essential Question(s):
- What are the three main ways to reduce or eliminate hazards at work?
- What are appropriate ways to approach solving problems at work?
- What are the barriers to making safe choices? - What is the purpose of wearing personal protective
equipment? - How would you conduct a personal protective
equipment hazard assessment?
Total Duration: 1.5‐3 hour
Materials and Equipment:
‐Dry erase board or flip chart and markers. (Alternatively, a chalkboard and chalk may be used.)
‐Use PowerPoint slides with a laptop and LCD projector. (Alternatively, PowerPoint slides may be
printed onto Overhead transparencies and used with an overhead projector)
‐Where possible, provide a computer with Internet access
‐A container with an assortment of personal protective equipment. This may include an assortment of
gloves, hearing protection, protective clothing, protective shoes, head protection, eye protection, and
respiratory protection.
‐Copies of Handouts D and E

Young Worker Safety and Health Training for Employees
Page 47
Notes for instructor:
This lesson is meant to educate students, teachers, employers, and parents about the importance of
young worker safety and training. This lesson is meant to last approximately one to two hours
depending on the level of interaction and discussion with class participants. Before teaching this
lesson:
1. Determine the technology capabilities at the location of training. Where possible, use a laptop, LCD projector, and screen.
2. Obtain markers and either a flipchart, cling sheets, or a dry erase board to be used for activities.
3. Make copies of Handout D and E 4. Determine Internet access capabilities for the training location. 5. Define the audience: employers, educators, young workers, parents to emphasize each group’s
focus to reduce young worker injuries and illnesses during the training.
Lesson 3: Finding Solutions: Controlling and Preventing Hazards on the Job
Activity Time Materials Description
A. Introduction: Controlling Job Hazards
15‐20
minutes
Slides: 44‐
49
Flipchart
Markers
Remind students that now that they know how to
identify hazards, they can now take steps to prevent an
injury or illness from occurring. These steps are called
“preventative actions.” Explain how some
preventative actions are the responsibility of the
employer, while others can be undertaken by
employees.
Explain to the class that there are often several ways to
control a hazard, but that some methods are better
than others. [Slide: 46] Go over with the class the three
main control methods:
Remove the hazards,
Improve work policies and procedures,
Use protective clothing and equipment.
Poll the class as to which method seems the best, next
best, and least best. Explain to the class how removing
the hazard prevents all the responsibility for safety
from falling on an individual worker. Then discuss how
in the absence of the ability to remove the hazard,
workplace policies and procedures can help to reduce

Young Worker Safety and Health Training for Employees
Page 48
employee exposure to hazards. Finally, personal
protective equipment is the least effective way to
control hazards.
[Slides: 47‐49] As you go through these slides, ask
students to provide examples for each of the control
methods. Ask for examples of solutions they may have
seen at their own workplaces. Refer to Table 1: Example
Control Key for suggestions.
B. Finding Solutions (Example)
5‐7
minutes
Flipchart
Markers
Post‐Its™
Hazard
Chart from
Task B of
“Identifying
Hazards”
lesson
[Optional:
Slide 50]
Draw a pyramid on a flipchart (or overhead) sheet, and
add the 3 control tiers (remove/barrier, policies,
protective equipment). Using the example Hazard
Chart created during Task B of the “Identifying
Hazards” lesson, select an example hazard and write it
above the pyramid. [Alternatively, use Slide 35].
Discuss as a class possible solutions; as students call
out solutions, write them on Post‐It™ notes and
arrange those on the side of the flipchart (or
overhead). Once brainstorming is complete, take each
Post‐It™ individually and ask the class under which
control strategy the solution belongs. Stick the Post‐
It™ onto the pyramid chart in the appropriate control
tier.
C. Finding Solutions (Activity)
30
minutes
Flipchart
Markers
Post‐Its™
Ask students to retrieve the Hazard Maps they created
in Task C of the “Identifying Hazards” lesson, and get
into their groups. Have each group brainstorm
solutions for their identified hazards, and write each
solution onto individual Post‐It notes. Provide each
group with a flipchart sheet. Instruct each group to
draw a pyramid and control tiers onto their sheet, and
the name of their workplace at the top. Instruct each
group to place their Post‐Its™ onto the appropriate
control category. Have each team present their control
strategy pyramid to the class.
[If time is an issue, have each group select as many
hazards as appropriate]

Young Worker Safety and Health Training for Employees
Page 49
D. Barriers to Safe Choices and Solutions (facilitated,
subjective
discussion)
As time
allows
Slide: 51 Review the reason for Removal of the Hazard/Building
Barriers being the best control choice. If the hazard
isn’t there in the first place, then people don’t have to
be relied upon to make safe choices EVERY time.
Ask the class what might prevent a worker from performing a jobtask safely EVERY time.
Reasons might include: personal protective clothing or equipment might be hot, uncomfortable, makes it hard to communicate or perform the work; in a hurry – doing it safely may take extra time; doing it safely might be inconvenient; others are observed performing the work unsafely don’t get in trouble; habit; not knowing how to fix the hazard; concern about what the boss or other workers might think if you make a big deal about doing the job safely; attitudes of other workers/supervisors.
Sometimes, a bad attitude towards safety – whether it
is an employee or the employer or supervisor – can be
just as hazardous or dangerous as other more obvious
hazards such as sharp knives and hot grease.
Remember, when you enter the work world, you
become responsible for yourself and your co‐workers.
Preventing injuries or illnesses on the job requires that
the hazard be recognized AND that something is done
to eliminate or reduce the hazard – and that is
EVERYONE’s responsibility.
E. Introduction to Personal Protective Equipment
5 minutes Slides 52‐54 Begin by polling the students to ask them who has
worn various types of personal protective equipment.
Ask the students:
‐Why use PPE?
‐Why should PPE be used as a last resort?
‐What are some common types of PPE?
‐Have you ever used PPE at home or for recreational
activities?

Young Worker Safety and Health Training for Employees
Page 50
Explain to the students that PPE can be an effective
tool to protect workers only if it is selected properly,
the user is effectively trained, and the user wears the
PPE properly.
Discuss the uses of PPE to protect not only the worker,
but to also prevent take home contamination.
Discuss the common uses of PPE in sports and
recreation such as: helmets, gloves, knee pads, and
SCUBA respirators.
Discuss how PPE has limitations that include:
‐Comfort being limited, especially in extreme
temperatures.
‐Frequent breaks or changes in tasks may require the
employee to repeatedly put on and take off their PPE.
‐PPE may not fit individuals properly, especially if the
employer purchases only one type for an entire
workplace.
‐PPE breaks down over time and may not fully protect
the employee
F. Routes of Exposure
5 minutes Slide 55 Explain to the students that when selecting PPE, the
employer must determine how employees may be
exposed to the individual chemicals or hazards.
Explain that the human body has three main protective
barriers against exposure to hazards. These include:
- The skin, which protects the body from
contaminants outside the body;
- The gastrointestinal (GI) tract, which protects
the inner body from contaminants that have
been ingested,
- The membranes within the lungs and
respiratory tract, which protect the inner body
from contaminants that have been inhaled.
Because sharp objects may be present in a
workplace, it is possible for a fourth route of

Young Worker Safety and Health Training for Employees
Page 51
exposure: injection. Injection can occur when there
is an accidental needlestick.
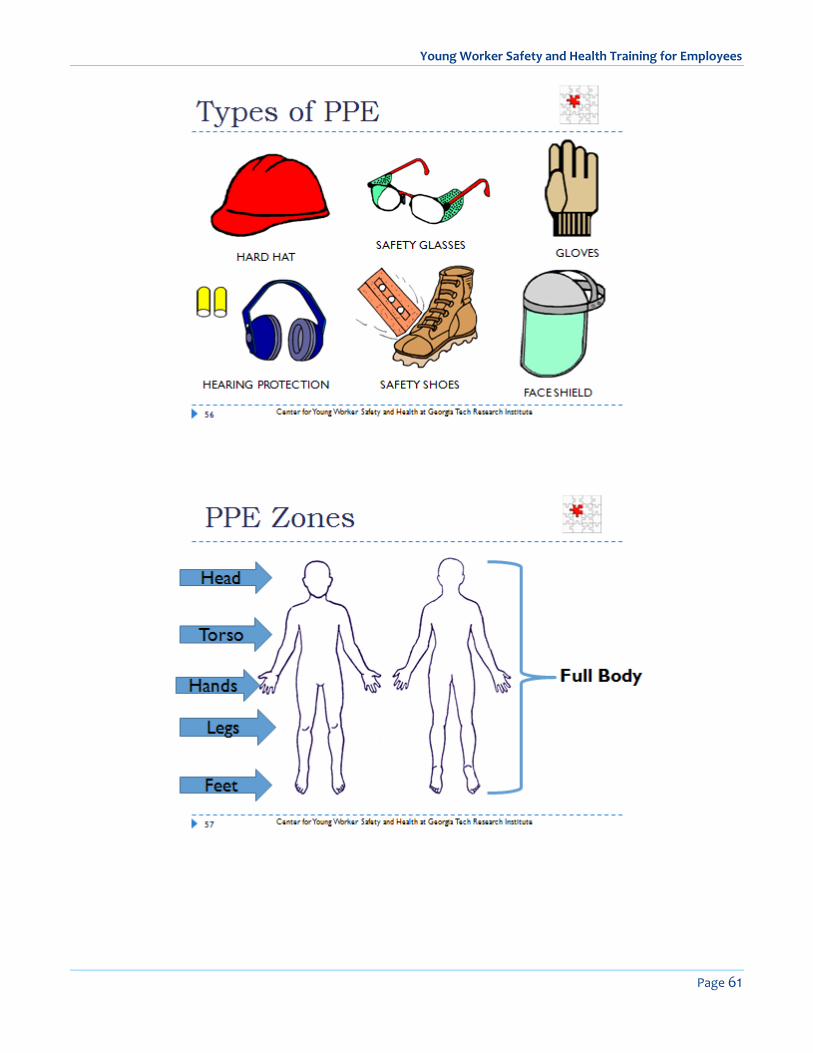
G. PPE Grab Bag 15
minutes
Slide 56
Handout E
Container
of PPE
Provide Students with copies of Handout E. This
handout includes and OSHA Factsheet about PPE.
Using this Fact Sheet and the container full of PPE, go
over with students the various types of personal
protective equipment. These may include:
Protection from Head Injuries: Hard hats can protect
your workers from head impact, penetration injuries,
and electrical injuries such as those caused by falling or
flying objects, fixed objects, or contact with electrical
conductors.
Protection from Foot and Leg Injuries: In addition to
foot guards and safety shoes, leggings (e.g., leather,
aluminized rayon, or other appropriate material) can
help prevent injuries by protecting workers from
hazards such as falling or rolling objects, sharp objects,
wet and slippery surfaces, molten metals, hot surfaces,
and electrical hazards.
Protection from Eye and Face Injuries: Besides
spectacles and goggles, personal protective equipment
such as special helmets or shields, spectacles with side
shields, and faceshields can protect workers from the
hazards of flying fragments, large chips, hot sparks,
optical radiation, splashes from molten metals, as well
as objects, particles, sand, dirt, mists, dusts, and glare.
Protection from Hearing Loss: Wearing earplugs or
earmuffs can help prevent damage to hearing.
Exposure to high noise levels can cause irreversible
hearing loss or impairment as well as physical and
psychological stress.
Protection from Hand Injuries: Workers exposed to
harmful substances through skin absorption, severe
cuts or lacerations, severe abrasions, chemical burns,
thermal burns, and harmful temperature extremes will
benefit from hand protection.

Young Worker Safety and Health Training for Employees
Page 52
Protection from Body Injury: In some cases workers
must shield most or all of their bodies against hazards
in the workplace, such as exposure to heat and
radiation as well as hot metals, scalding liquids, body
fluids, hazardous materials or waste, and other
hazards.
When to Wear Respiratory Protection: When
engineering controls are not feasible, workers must
use appropriate respirators to protect against adverse
health effects caused by breathing air contaminated
with harmful dusts, fogs, fumes, mists, gases, smokes,
sprays, or vapors.
H. PPE Hazard Assessment
10‐20
Minutes
Slides 57‐58
Handout E
Hazard
Maps
Ask the students to refer back to the hazard maps that
were created during Lesson 2 of this course.
Alternatively, if hazard mapping was not conducted,
one of the injury reports, found on slides 13‐21 may be
used for this exercise.
Ask students to choose one job task that might be
conducted either at the job site that they drew during
the hazard mapping activity or using one of the job
tasks from the injury reports. Have the students discuss
what the different zones of the body may be subjected
to hazards. Using handout E, have the students mark
the body, determining where the employee may
possibly experience injury or illness.
After the students have completed this first task, have
the students use the PPE Hazard Assessment form that
is found in Handout E to write down what the potential
hazards would be for each of those zones of the body.
Then, using the OSHA PPE Factsheet as a guide, have
the students determine what type of PPE would be
appropriate to protect each PPE zone for the body.
I. PPE Shopping 5‐10
minutes
Slide 59
Container
of PPE
Place the samples of PPE on a table . Explain to the
students that they are to use their PPE hazard
assessments that they completed during exercise H of
this lesson to use a shopping guide to “purchase” the
appropriate PPE for an employee to perform the
selected job task.

Young Worker Safety and Health Training for Employees
Page 53
Ask the students to present their selections and
explain why they choose each individual type of PPE.
E. Conclusions and
Summary
5 minutes Slide 60 Go over the objectives of this lecture, as outlined in the
beginning of this lesson plan.
Answer student questions.
References
NIOSH and CDC. (2010), Youth@Work Talking Safety: Teaching Young Workers about Job Safety and
Health. Department of Health and Human Services, Public Health Service, Centers for Disease Control,
National Institute for Occupational Safety and Health. NIOSH Publication No.2007‐136.
OSHA. (2010), Introduction to OSHA Presentation. United States Department of Labor, Occupational
Safety and Health Administration.
Work Safe, Work Smart: Health and Safety Awareness for Working Teens curriculum. University of
Washington: Dept. of Environmental and Occupational Health Sciences. Washington State Dept. of
Labor and Industries.
Young Worker Safety Resource Center, OSHA’11: An OSHA 10‐hour curriculum for Young Workers.
University of Washington‐ Pacific Northwest OSHA Education Center, U.C. Berkeley Labor Occupational
Health Program, Education Development Center, Inc.
OSHA, (2006) OSHA Factsheet: Personal Protective Equipment. United States Department of Labor,
Occupational Safety and Health Administration.
* This material was produced under grant number #SH‐20848SHO from the Occupational Safety and Health
Administration, U.S. Department of Labor. It does not necessarily reflect the views or policies of the U.S. Department
of Labor, nor does mention of trade names, commercial products, or organizations imply endorsement by the U.S.
Government.

Young Worker Safety and Health Training for Employees
Page 54
Table 1: Example Control Key
Remove the Hazard/Build a Barrier Use less toxic cleaners
Install ventilation to remove hazardous air contaminants
Putting shields or guards in front of dangerous equipment or moving parts
Using machines that require both hands to start so the employees hands are out of the way of the moving part when the machine is operational
Seatbelts in moving vehicles
Storing chemicals in safety cabinet
Installing non‐slip flooring
Improve Work Policies & Procedures Establish a rule requiring workers to wear personal protective equipment or clothing during certain hazardous jobs
Require people to rotate jobs, so a worker is only exposed to a hazard for a short period of time
Enforcing rules (including disciplining workers for not following safety rules)
Creating workplace policies on how a job will be performed
Allow no food in a work area
Train workers how to apply chemicals safely
Teach workers about the hazards of their job
Train workers how to dispose of hazardous trash appropriately
Post safety reminders or hold safety meetings
Require inspection of equipment prior to using it
Use Protective Clothing or Equipment Use protective equipment such as: hard hats, steel‐toed boots, rubber boots, hearing protection, gloves, eye protection, respiratory protection, goggles, face shields, lab coats

Young Worker Safety and Health Training for Employees
Page 55

Young Worker Safety and Health Training for Employees
Page 56

Young Worker Safety and Health Training for Employees
Page 57

Young Worker Safety and Health Training for Employees
Page 58

Young Worker Safety and Health Training for Employees
Page 59

Young Worker Safety and Health Training for Employees
Page 60
Young Worker Safety and Health Training for Employees
Page 61

Young Worker Safety and Health Training for Employees
Page 62

Young Worker Safety and Health Training for Employees
Page 63

Young Worker Safety and Health Training for Employees
Page 64
LESSON 4: FINDING A VOICE: YOUNG WORKER RIGHTS AND RESPONSIBILITIES
Information Provided under OSHA Susan Harwood Capacity Bui lding Grant: #SH ‐20848SHO
Objectives:
The students will be provided with a basic overview of the importance of young worker safety and
health training. In particular, training will be provided on general young worker safety and health,
employee rights under OSHA regulations, and young worker rights as defined by Department of Labor
child labor laws.
Enduring Understanding(s):
1. The student will develop an understanding of what rights employees’ have under OSHA.
2. The student will determine what jobs young workers “Can Do” as defined by US Department of Labor child labor laws.
3. The student will develop communication tools and strategies for addressing safety and health hazards they identify in the workplace with their supervisor and co‐workers.
Essential Question(s):
- What legal rights do all workers have to make sure their jobs are safe?
- What extra protections do young workers have under child labor laws?
- What are the governmental agencies that enforce labor and job safety laws?
- What are appropriate ways to approach solving problems at work?
- What should a young worker do if they see something at work that could hurt them or make them sick?
Total Duration: 2 hours
Materials and Equipment:
‐Dry erase board or flip chart and markers. (Alternatively, a chalkboard and chalk may be used.)
‐Use PowerPoint slides with a laptop and LCD projector. (Alternatively, PowerPoint slides may be
printed onto Overhead transparencies and used with an overhead projector)
‐Props for role‐playing scenarios
‐Where possible, provide a computer with Internet access
‐Handouts F, G, and H

Young Worker Safety and Health Training for Employees
Page 65
Notes for instructor:
This lesson is meant to educate students, teachers, employers, and parents about the importance of
young worker safety and training. This lesson is meant to last approximately two hours depending on
the level of interaction and discussion with class participants. Before teaching this lesson:
1. Determine the technology capabilities at the location of training. Where possible, use a laptop, LCD projector, and screen.
2. Obtain markers and either a flipchart, cling sheets, or a dry erase board to be used for activities.
3. Determine Internet access capabilities for the training location. 4. Define the audience: employers, educators, young workers, parents to emphasize each group’s
focus to reduce young worker injuries and illnesses during the training.
Lesson 4: Finding Your Voice: Young Worker Rights and Responsibilities
Activity Time Materials Description
A. Understanding
Your Rights:
OSHA Rights
10
minutes
Slides 61‐63
Handout F
Internet
Access
1. Discuss the importance of OSHA in the protection of
all workers’ rights. Go over slides 55‐57, discussing
with the students that Section 5(a)(1) of the OSH Act
states: “Each employer shall furnish to each of his
employees employment and a place of employment
which are free from recognized hazards that are
causing or are likely to cause death or serious physical
harm to his employees." Discuss what it means to have
a workplace that is safe and healthful.
2. Provide Students with copies of Handout F
Go over the additional rights that all employees have,
including:
‐A safe and healthful workplace
‐ Knowledge about hazardous chemicals
‐Information about injuries and illnesses in your
workplace
‐Complain or request hazard correction from
employer
‐Training (in a language you understand)

Young Worker Safety and Health Training for Employees
Page 66
‐Access to hazard exposure and medical records
‐File a complaint with OSHA
‐Participate in an OSHA inspection
‐Be free from retaliation for exercising safety and
health rights (describe Whistleblower Protection
Program)
If Internet access is available, show students the OSHA
Web site. http://www.osha.gov/workers.html
B. Understanding
Your Rights: Child
Labor Laws
10
minutes
Slide 64 Discuss the history of child labor. Can include
discussion about:
Child labor expanded with industrial revolution b/c operating machinery did not require adult strength
Children could do some tasks that adults could not (esp. those requiring small bodies or small hands)
Children were cheaper, easily replaceable, and less likely to strike
Children had no time to play or go to school
Working conditions were bad (hot in the summer, cold in the winter, chemical exposures, unguarded machinery, etc.) causing many children to get sick, maimed, or killed
Ask students to work in groups to come up with a few
laws that could effectively protect children. Have each
group share their ideas. (Knowledge of the history of
child labor laws is not required but recommended for
this exercise; however you may wish to compare the
groups’ ideas to current labor laws.)
C. Understanding
Your Rights: Labor
Laws
10
minutes
Slides 65‐67
Handout F
Discuss with the class that OSHA is found within the
US Department of Labor. Explain that also found
within the Department of Labor is the Wage and Hour
Division. This Division is responsible for designating
child labor laws. Explain that some states may have
more stringent child labor laws. If internet access is
available, show the students the websites that can be
used to determine specifics related to child labor laws

Young Worker Safety and Health Training for Employees
Page 67
at both a federal and state level.
Explain that the child labor laws were updated on July
19, 2010, and caution students to verify any fact sheets
or references that are being used for child labor law
information be updated to reflect the current laws.
Distribute handout and discuss the labor laws for
minors.
Refer to Handout F for additional information on child
labor laws.
D. Understanding
Your Rights:
Communication
Strategies
10
minutes
Slide 68
Handout F
Explain that while there are rules and regulations employers must follow to provide a safe and healthy workplace for all employees, sometimes rules are broken or not followed – either accidentally or on purpose – by both employers and employees. Although a complaint may be filed by an employee with OSHA if hazards exist, employees are encouraged to address safety concerns with their supervisors or co‐workers first. Ask the class if anyone has ever had any kind of
problem at work, or a problem that someone you
know has had, that the student would be willing to
share with the class. (Alternatively, refer back to one of
the Injury Report Scenarios from Lesson 1 (Slides 13‐21)
Ask the student what steps they took to solve the
problem. Then ask the whole class to comment on any
other steps that could be taken to solve the problem.
Discuss with the class possible steps for solving
workplace problems:
• Define the problem or problems. Being able to
describe the problem clearly is the first step
toward solving it.
Get advice from a parent, teacher, or co‐
worker. See if they have ideas about how to
handle the problem, and see if they’ll help.
If there is a union at your workplace, you may
also want to ask the union to help you.

Young Worker Safety and Health Training for Employees
Page 68
• Choose your goals. Think about what you want
to happen to fix the problem. You may want to
write down your possible solutions.
• Know your rights. Be familiar with what hours
you may work, and what tasks you are not allowed
to do as a teen. Be familiar with your safety rights
too.
• Decide the best way to talk to the supervisor.
Figure out what to say and whether to take
someone with you when you talk to the supervisor.
• If necessary, contact an outside agency for
help. If you continue to have trouble after you talk
to your supervisor, get help from someone you
trust. If all else fails, you may need to call the
appropriate government agency.
These strategies are summarized on Handout F.
E. Understanding
Your Rights:
Finding Your Voice
60
minutes
Slide 69
Handout G
Provide students with either a complete version of Handout G or provide them with an individual scenario. Depending on time available, either assign teams/groups of students a role‐play scenario to develop, or allow them to choose their topic. Hand out the appropriate scenario documents to each group. Allow them 15‐20 minutes to develop their scripts and rehearse. Remaining time will be spent presenting their scenario to the group.
Understanding
Your Rights:
Finding Your Voice
10
minutes
Slide 70‐71 Facilitate discussion around the questions on the
slides. Achieving agreement or consensus is not the
goal – exploring the concept of “acceptable risk” is
the purpose of this slide. Refer to Table 1: Attitudes for
additional information.
Understanding
Your Rights:
Finding Your Voice
5
minutes
Slide 72‐73 Read the example on the slide to the class. This
“safety measure solution” to preventing an injury
during close up at a retail store comes with costs and
benefits. Ask class to brainstorm out loud possible
costs and benefits to this safety measure solution.
Show Slide 67 to assist dialogue, and see if students
can add additional ideas. If time, continue with other

Young Worker Safety and Health Training for Employees
Page 69
“safety measure solutions,” such as: installing a guard
on a piece of moving equipment or wearing gloves
when handling chemicals.
Understanding
Your Rights:
Finding Your Voice
5
minutes
Slide 74 Use this slide as a summary for the day. Remind
students that they have reviewed how to identify
hazards, ways to control hazards, and how to
communicate about hazards to others.
F. Conclusions and
Summary
5
minutes
Slides 75‐79 Share various resources outlined on slides 75‐78.
Share contact information for Youth Center on slide
79.
Go over the objectives of this lecture, as outlined in
the beginning of this lesson plan.
Answer student questions.
References
NIOSH and CDC. (2010), Youth@Work Talking Safety: Teaching Young Workers about Job Safety and
Health. Department of Health and Human Services, Public Health Service, Centers for Disease Control,
National Institute for Occupational Safety and Health. NIOSH Publication No.2007‐136.
OSHA. (2010), Introduction to OSHA Presentation. United States Department of Labor, Occupational
Safety and Health Administration.
Young Worker Safety Resource Center, OSHA’11: An OSHA 10‐hour curriculum for Young Workers.
University of Washington‐ Pacific Northwest OSHA Education Center, U.C. Berkeley Labor Occupational
Health Program, Education Development Center, Inc.
* This material was produced under grant number #SH‐20848SHO from the Occupational Safety and Health
Administration, U.S. Department of Labor. It does not necessarily reflect the views or policies of the U.S. Department
of Labor, nor does mention of trade names, commercial products, or organizations imply endorsement by the U.S.
Government.

Young Worker Safety and Health Training for Employees
Page 70
Table 1: Attitudes (Possible Answers)
Even if an employer does everything they can
to prevent work injuries and illnesses, people
still become injured while working. Why do
you think that is?
A worker might not recognize that something is a hazard
Even if the hazard is recognized, they might continue working without prevention strategies (like safety glasses)
Why might a person work around hazards
without setting up prevention measures?
Prevention is uncomfortable
Busyness/rushing; stress about getting the job done on time
Concern about what the boss or other co‐workers might think
Underestimating the danger
Not knowing how to fix the hazard
Habit
People sometimes take risks with things they
know are hazards. Can you name some things
you or other people do, even though they may
be risky?
Drive fast
Smoke
Drink and drive
Ride motorcycle or bike without helmet
Can you name some things you or other people
would not do, because they are too risky?
Racing train across railroad tracks
Use drugs
Jump off a 1‐story building
How do you decide how much of a risk you are
willing to take? How do you know where to
draw the line?
Input from others?
Concern for yourself? Others?
Advice?
Rules?

Young Worker Safety and Health Training for Employees
Page 71

Young Worker Safety and Health Training for Employees
Page 72

Young Worker Safety and Health Training for Employees
Page 73

Young Worker Safety and Health Training for Employees
Page 74

Young Worker Safety and Health Training for Employees
Page 75

Young Worker Safety and Health Training for Employees
Page 76

Young Worker Safety and Health Training for Employees
Page 77

Young Worker Safety and Health Training for Employees
Page 78

Young Worker Safety and Health Training for Employees
Page 79