
MOLAR MASS What is molar mass? How do you calculate molar mass?
Copyright © Texas Education Agency 2012. All rights reserved.
MODULE 1
Objective 1.6 Lesson C Making Molar Solutions and Dilutions
Calculate, Experiment and Analyze
Course Advanced Biotechnology
Unit Math Skills
Essential Question How do scientists collect and analyze data when making solutions and dilutions?
TEKS 130.364 1 A-K, 2F-J
TAKS Science 1A, 2A-D
Prior Student Learning Math Skills for the Science Lab
Estimated Time 120 minutes
Rationale A common task for any biotechnician is solution preparation. What is a solution? It is defined as a solute (smaller amount) dissolved in a solvent (larger amount). The concentration of a solution frequently must be known to a high degree of accuracy. An incorrectly prepared solution can destroy months of hard work or cost companies thousands of dollars.
Therefore, companies usually have an SOP (Standard Operating Procedure) for the preparation of each solution to minimize mistakes. All calculations are recorded in the lab notebook, even if a calculator is used. Important calculations are double-checked by another person (and sometimes triple- checked). The exact mass and volume of reagents used is recorded in the notebook. This information, along with the date and the preparer’s name or initials, is recorded on a preparation form and on a label on the bottle itself.
Objectives Students will:
Correctly prepare a solution of a given molarity leaving a clean lab area.
Prepare parallel and serial dilutions and distinguish between the two.
Determine whether to use a parallel or serial dilution in a given situation.
Use a microcentrifuge to pellet a precipitate.
Use Excel to examine trend lines and check for accuracy of dilution preparation.
Key Points
Refer to Power Point Module 1 Objective 6: Math Skills
View Podcast 1.X Solutions and Dilutions
Activity
1. Students view and complete Podcast 1.X Solutions and Dilutions
2. Students complete “Making Molar Solutions and Dilutions Lab”.
3. Have students set up for the lab the previous day for a lab grade based on the materials they will need.
4. Teacher initials are needed before students can proceed to the next step. Record these as a lab participation grade for the day.
5. Excel exercise can be found in a Lesson 1.6 B.
6. Have students peer grade labs using “Making Molar Solutions and Dilutions Grade Sheet”.

Copyright © Texas Education Agency 2012. All rights reserved.
Assessment
Teacher Initials for correct calculations
“Making Molar Solutions and Dilutions Grade Sheet”
Materials
“Making Molar Solutions and Dilutions Lab”. See lab for supplies needed.
Accommodations for Learning Differences
Visit the Special Populations section of the CTE Career and Technology Education Website: http://cte.unt.edu/special-pops.
National and State Education Standards Texas College Readiness Standards II. Foundation Skills: Scientific Applications of Mathematics A1, A2, A3, A4, A5, A6, A7, B1, B2, E1, F1, F2, F3 III. Foundation Skills: Scientific Applications of Communication A1, B1, B2, B3, C1

Copyright © Texas Education Agency 2012. All rights reserved.
Making Molar Solutions and Dilutions Objectives
Your performance will be satisfactory when you are able to:
• Correctly prepare a solution of a given molarity leaving a clean lab area.
• Do parallel and serial dilutions and distinguish between the two.
• Determine whether to use a parallel or serial dilution in a given situation.
• Use a microcentrifuge to pellet a precipitate.
Introduction
A common task for any biotechnician is solution preparation. What is a solution? It is defined as a solute (smaller amount) dissolved in a solvent (larger amount). The concentration of a solution frequently must be known to a high degree of accuracy. An incorrectly prepared solution can destroy months of hard work or cost companies thousands of dollars. Therefore, companies usually have an SOP (Standard Operating Procedure) for the preparation of each solution to minimize mistakes. All calculations are recorded in the lab notebook, even if a calculator is used. Important calculations are double-checked by another person (and sometimes triple-checked). The exact mass and volume of reagents used is recorded in the notebook. This information, along with the date and the preparer’s name or initials, is recorded on a preparation form and on a label on the bottle itself.
Units of Concentration
Molarity is the most common unit of concentration in the biotechnology lab. The molarity of a solution is defined as the number of moles of solute per liter of solution. The symbol for molarity is M, but it can also
be written as moles/Liter, or mol/L. A mole of any element always contains 6.02 X 10²³
(Avogadro’s number) atoms. Because some atoms are heavier than others, a mole of one element weighs a different amount than a mole of another element. The weight of a mole of a given element is equal to its atomic weight in grams. Consult a periodic table of elements to find the atomic weight of an element. For
example, one mole of the element carbon weighs 12.0 g.
Example: Using a periodic table, calculate the molar mass of chromium oxide (CrO2). The atomic weight of chromium is 52.00, and that of oxygen is 16.00. You must count the oxygen twice because there are two per formula unit of chromium oxide.
52.00 + 2(16.00) = 84.00 g/mol
Practice:
Using a periodic table, calculate the molar mass of potassium sulfate (K2SO4):___________
Using a periodic table, calculate the molar mass of MgCl*7H2O: ______________________
*Don’t forget to add the 7 hydrates to the total molar mass

Copyright © Texas Education Agency 2012. All rights reserved.
Part A: Making Molar Solutions
We can’t directly measure moles, but we can measure mass. To calculate the mass of a chemical needed to prepare a given volume of a solution of desired molarity, you must convert number of moles to mass, using the chemical’s molar mass as a conversion factor.
Mass = molarity x volume x molar mass
? g = moles/liter x L x g/mole
Don’t forget to convert mL to L, if necessary.
Example: To prepare 100 mL of 1 M NaOH (FW 40.0), g = 40 g/mol x 1.0 mol/L x 0.1 L g = 4 (dissolve 4 g of NaOH in 100 mL water)
Practice: How many grams of NaCl would you need to prepare 0.5 L of a 0.10 M solution? The molar mass of sodium chloride is 58.44 g/mol.
In this exercise, you will prepare two solutions of given molarity.
Materials
Each Group: Class Shares:
150-mL beaker 10 mL graduated cylinder 100-mL graduated cylinder or volumetric flask glass stirring rod masking tape or labeling tape permanent marker goggles
Calcium chloride – CaCl2 • 2H20
Magnesium sulfate – MgSO4 • 7H2O balances with SOPs spatulas weigh boats parafilm scissors stir plate or stirring hot plate stir bars gloves periodic table

Copyright © Texas Education Agency 2012. All rights reserved.
Procedure
*Denotes a step that must be checked by instructor before continuing.
1. *Calculate the number of grams needed to make 100 mL of a 2.00 M solution of calcium chloride.
Use the formula in the introduction. See instructions for labeling your solutions below.
Show your calculations below: Teacher Initials:
Labeling is very important in any lab. It is critical that you label every tube, bottle, flask, cuvette or other container you use in the lab, whatever its contents. This is especially important for any hazardous chemicals or pathogens, but be just as thorough with something as harmless as salt water.
You must label all containers with:
♦ the identity of the contents and its concentration
♦ your initials
♦ the date (and time, if applicable)
♦ your class (for example, BITC1311)
♦ OR, a number or letter corresponding to a detailed description containing the above information in your lab notebook
2. Calibrate and use a balance to measure this amount of calcium chloride in a weigh boat or on weighing paper; leave the balance clean. Unless each group has its own stock of chemical, leave the container at the balance for other groups to use. If you are the last to use the chemical, close the container and return it to the cart.
3. Measure 50.0 mL of dH20 (deionized water) with a 100-mL graduated cylinder and add it to a 150-mL
beaker. Label the beaker “CaCl2” with labeling tape and a Sharpie. Add the calcium chloride you weighed out in step 2. You will dissolve the solute (calcium chloride) in less than the final amount of solvent (water) because the solute may displace some water. If you had started with 20 g of water, after dissolving the calcium chloride you would probably have had slightly more than 20 g of solution, making your molar concentration slightly lower than 2.00 M.
4. Stir the solution with a glass-stirring rod or add a stir bar and place the solution on a stir plate until the
entire solid has dissolved. If the solution you are making is nearly saturated, you may not be able to dissolve all of the solute in half the final volume of water as instructed. If this happens, you may want to add more water. Try not to add more than 80% of the final volume (i.e. if your final volume is 100 mL, try not to use more than 80 mL to dissolve the solute) before the solute dissolves.

Copyright © Texas Education Agency 2012. All rights reserved.
5. Bring the solution to its final volume by returning the solution to a 100-mL graduated cylinder or 100
mL volumetric flask (labeled with the name of the chemical and the concentration, and your initials and the date). When the volume approaches 100 mL, slowly and carefully add more water with a wash bottle, watching the meniscus (the rounded top surface of the water). The lowest part of the meniscus should line up with the 100-mL mark. This step is often abbreviated BTV (bring to volume). The beaker used to dissolve the solution does not measure accurately enough to be used for bringing the solution to volume.
6. *Transfer the solution to a labeled, 150-mL Erlenmeyer flask. You can transfer the label from the
graduated cylinder or volumetric flask if you wish. Never put a solution into an unlabeled container, and always label legibly. Cover the Erlenmeyer flask with parafilm. Cut a square of parafilm with scissors, center it over the mouth of the flask, and stretch and wrap the film around the mouth. Make sure there are no holes in the film.
Teacher Initials:
7. *Repeat steps 1 – 6 to make 100 mL of a 2.00 M solution of magnesium sulfate.
Show calculations for 2.00 M Magnesium Sulfate below: Teacher Initials:
Part B: Parallel Dilutions
Dilution consists of adding additional solvent (usually water) to a solution to reduce its concentration. There are many ways of expressing dilution factors.
a) Combining one part food coloring with 9 parts water dilutes the food coloring to 1/10. This means that
there is one part food coloring in 10 parts total volume. The denominator an expression such as 1/10 is the total volume of the solution.
b) The food coloring dilution in part (a) can also be referred to as 1:9 food coloring to water. The colon (:) means “to.” A 1:10 food coloring to water dilution would be 1/11, not 1/10, because the total number of parts is 11.
c) Frequently, stock solutions in biotechnology labs are concentrated and must be diluted before using. A buffer that is ten-fold more concentrated than the usable concentration is referred to as a 10X solution. One must dilute a 10X solution by a factor of 10 (by adding 1 part of the 10X stock to 9 parts of solvent) before using.
d) In dilutions, parts can be of any unit. If you combine 1 mL food coloring with 1mL water, you are using the same dilution factor (1:1, or ½) as the person who combines 1 ounce of food coloring with 1 ounce of water. If you combine one ounce of food coloring with one liter of water, the dilution factor is not 1:1, because the units are not the same.
Copyright © Texas Education Agency 2012. All rights reserved.
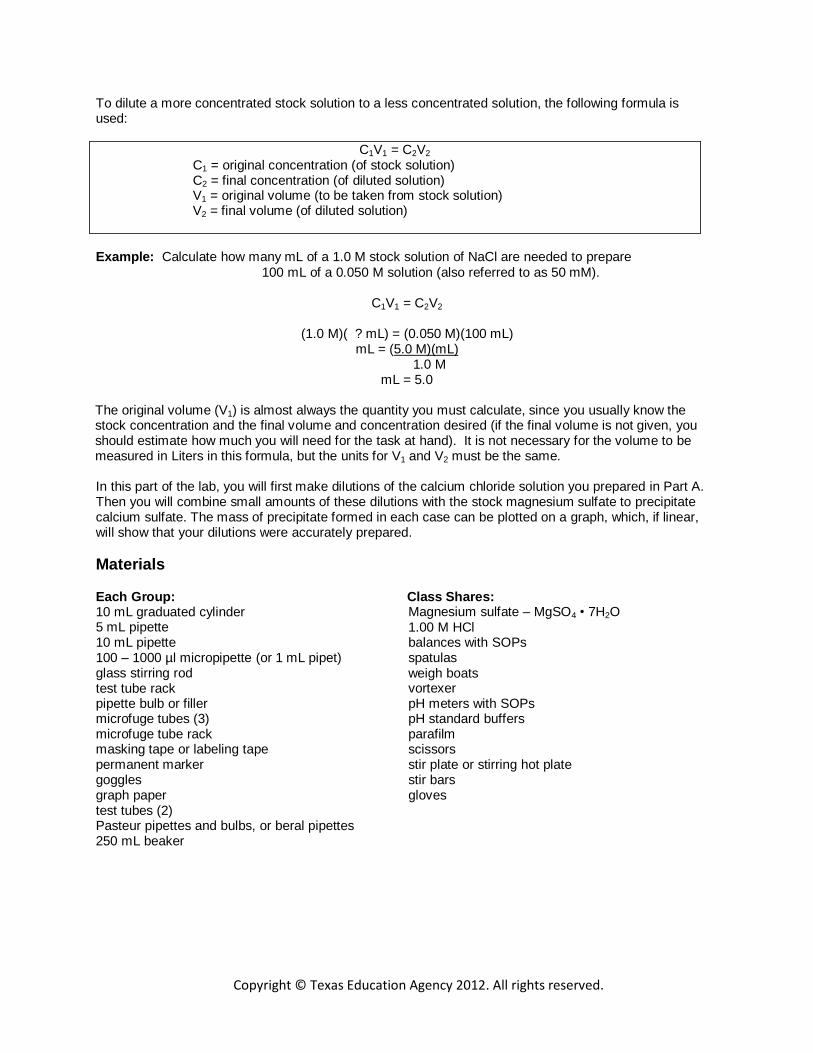
To dilute a more concentrated stock solution to a less concentrated solution, the following formula is used:
C1V1 = C2V2
C1 = original concentration (of stock solution) C2 = final concentration (of diluted solution) V1 = original volume (to be taken from stock solution) V2 = final volume (of diluted solution)
Example: Calculate how many mL of a 1.0 M stock solution of NaCl are needed to prepare
100 mL of a 0.050 M solution (also referred to as 50 mM).
C1V1 = C2V2
(1.0 M)( ? mL) = (0.050 M)(100 mL)
mL = (5.0 M)(mL) 1.0 M
mL = 5.0 The original volume (V1) is almost always the quantity you must calculate, since you usually know the stock concentration and the final volume and concentration desired (if the final volume is not given, you should estimate how much you will need for the task at hand). It is not necessary for the volume to be measured in Liters in this formula, but the units for V1 and V2 must be the same.
In this part of the lab, you will first make dilutions of the calcium chloride solution you prepared in Part A. Then you will combine small amounts of these dilutions with the stock magnesium sulfate to precipitate calcium sulfate. The mass of precipitate formed in each case can be plotted on a graph, which, if linear, will show that your dilutions were accurately prepared.
Materials Each Group: Class Shares:
10 mL graduated cylinder 5 mL pipette 10 mL pipette 100 – 1000 µl micropipette (or 1 mL pipet) glass stirring rod test tube rack pipette bulb or filler microfuge tubes (3) microfuge tube rack masking tape or labeling tape permanent marker goggles graph paper test tubes (2) Pasteur pipettes and bulbs, or beral pipettes 250 mL beaker
Magnesium sulfate – MgSO4 • 7H2O 1.00 M HCl balances with SOPs spatulas weigh boats vortexer pH meters with SOPs pH standard buffers parafilm scissors stir plate or stirring hot plate stir bars gloves
Copyright © Texas Education Agency 2012. All rights reserved.
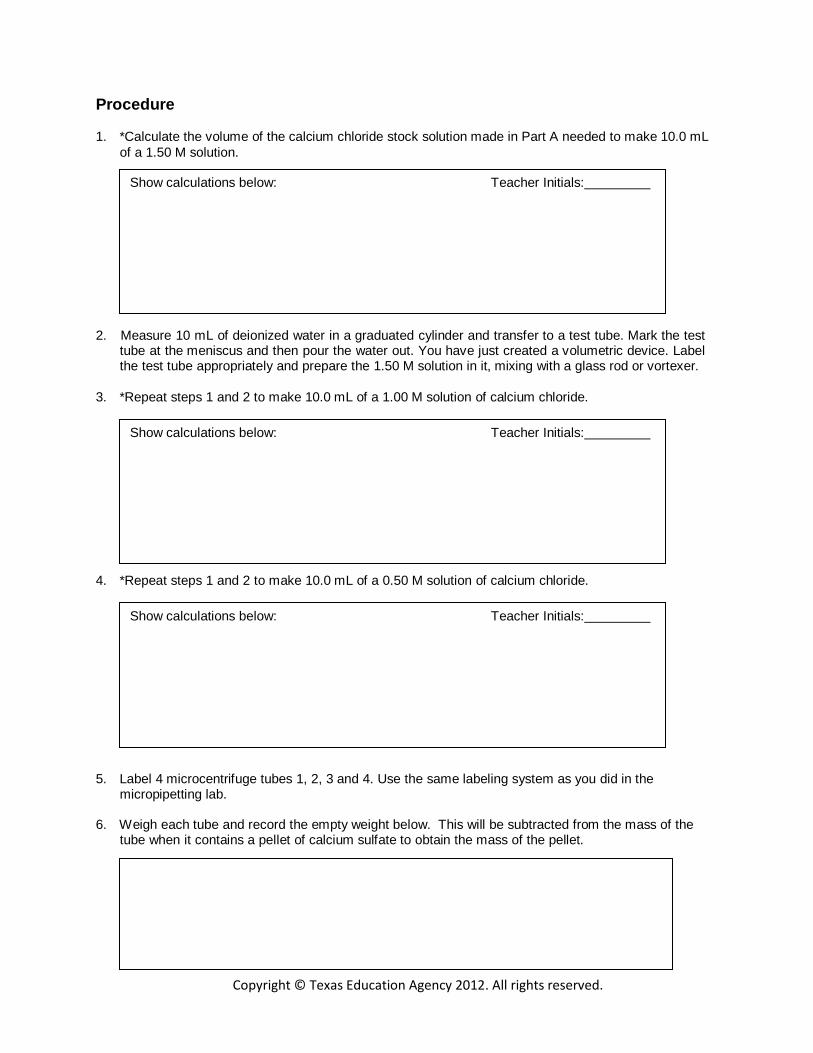
Procedure
1. *Calculate the volume of the calcium chloride stock solution made in Part A needed to make 10.0 mL
of a 1.50 M solution.
Show calculations below: Teacher Initials:
2. Measure 10 mL of deionized water in a graduated cylinder and transfer to a test tube. Mark the test tube at the meniscus and then pour the water out. You have just created a volumetric device. Label the test tube appropriately and prepare the 1.50 M solution in it, mixing with a glass rod or vortexer.
3. *Repeat steps 1 and 2 to make 10.0 mL of a 1.00 M solution of calcium chloride.
Show calculations below: Teacher Initials:
4. *Repeat steps 1 and 2 to make 10.0 mL of a 0.50 M solution of calcium chloride.
Show calculations below: Teacher Initials:
5. Label 4 microcentrifuge tubes 1, 2, 3 and 4. Use the same labeling system as you did in the micropipetting lab.
6. Weigh each tube and record the empty weight below. This will be subtracted from the mass of the
tube when it contains a pellet of calcium sulfate to obtain the mass of the pellet.

Copyright © Texas Education Agency 2012. All rights reserved.
7. Pipette 500 µl of 2 M magnesium sulfate stock solution into each tube.
8. Add the following to the indicated tubes: Tube 1—500 µl of 2 M CaCl2
Tube 2—500 µl of 1.5 M CaCl2
Tube 3—500 µl of 1.0 M CaCl2
Tube 4—500 µl of 0.5 M CaCl2
9. Spin the tubes in a microcentrifuge for 5 minutes or until a solid pellet is formed which does not
dislodge when the tube is turned upside down. Don’t forget to balance the tubes by placing them across from each other and filling a tube with an equal amount of water to balance uneven numbers of tubes. If you are spinning your tubes with those of another group, be sure to mark them so you can distinguish your tubes from theirs. A simple dot or line will suffice, but your initials are better.
10. Discard the water by turning the tube upside down over the sink and then lightly tapping the tube
against the edge of the sink to remove more water. If the pellet is well compacted, this should not dislodge it.
11. Weigh the tubes with pellets and subtract the weight of the empty tube to obtain the mass of
precipitate formed. Record this information below. The measure is not entirely accurate because there will be some water clinging to the pellet and tube even after most of it is poured off. Leaving the tubes upside down to dry overnight, or drying them in an oven, would produce more accurate results. This mass should be proportional to the concentration of calcium chloride. In the most dilute solution, there are fewest calcium ions to react with the sulfate ions in the other solution. Therefore, the smallest mass of insoluble calcium sulfate should be formed from this dilution.
12. Discard the stock solutions down the sink with plenty of water unless your instructor asks you to save
them.
Part C: Serial Dilutions
Serial dilutions are dilutions made from dilutions. They are made for one of the following reasons: 1) a number of dilutions of the same dilution factor are desired
Example: You want to make a series of solutions with a repeating dilution factor of 2; in
other words, the concentration of each diluted solution should be half that of the dilution before it (such as 2 M, 1 M, 0.5 M, 0.25 M).
2) the final concentration desired is so small that the original volume (C1) cannot be accurately
measured
Example: You want to prepare 1 mL of a 5 mM solution from a 10 M stock solution.

Copyright © Texas Education Agency 2012. All rights reserved.
To find C1, you would first convert millimolar to molar so that the concentration is the same on both sides of the equal sign. 5 mM = 0.005 M Then you would use C1V1 = C2V2.
(10 M)( ? mL) = (0.005 M)(1 mL) ? mL = (0.005 M)(mL)
10 M mL = 0.0005 mL (or 0.5 µl)
There are micropipetters that will measure 0.5 µl, but they are not available in every lab. Moreover, this small a volume is hard to measure accurately, since it is far smaller than a single drop of liquid. It is far more accurate to make a series of 1/100 or even 1/10 dilutions from a highly concentrated stock.
For serial dilutions: Dilution factor = (V1 + V2 ) / V1
Where V1 is the volume of the solution being diluted
V2 is the volume of solvent used to dilute the solution
(Note: V2 is also the ending volume of the diluted solution)
Example: You want to do a series of 5-fold dilutions, each with an end volume of 40 mL.
Dilution factor = (V1 + V2 ) / V1
5 = (V1 + 40 mL) / V1
5 V1 = (V1 + 40 mL )
4 V1 = 40 mL
V1 = 10 mL V2 is both the volume of solvent used in each dilution and the final volume of that dilution. Why? Once you have made a dilution by adding V1 mL of solution to V2 mL of water, you remove V1 mL of that dilution to make the next one. Thus, you always end up with V2 mL in each dilution but the very last one.
In this part of the lab, you will serially dilute a hydrochloric acid solution and check the accuracy of your preparations with pH measurements.
Materials
Each Group: Class Shares: Four 100-mL beakers 10- and 50-mL graduated cylinders 5- and 10-mL pipettes 100 – 1000 µl micropipetter pipette bulb or filler glass stirring rod labeling tape permanent marker goggles
1.00 M HCl pH meters with SOPs pH standard buffers and three 50-mL beakers 250-mL waste beaker gloves

Copyright © Texas Education Agency 2012. All rights reserved.
Procedure
1. Pour 20 mL of a 1 M solution of hydrochloric acid (HCl) into a labeled 50-mL beaker. Always wear goggles and gloves when working with acids. You may reuse beakers from Part A, but be sure to clean them thoroughly with soap solution rather than just rinsing.
2. *Calculate the volumes of acid and water needed to prepare 50 mL each of a 0.1 M solution, a 0.01
M, 0.001 M and 0.000aM solution through serial dilution.
Show calculations below: Teacher Initials:
3. Label 4 small beakers with the concentrations from step 2 and add the correct amount of water to each one, using the appropriate measuring device. Remember the AAA rule (always add acid) when working with acids. Never add water to acid, always add acid to water.
4. Add the correct amount of acid to each beaker and stir with a stirring rod.
5. Measure the pH of each solution using the pH meter. Before you use the pH meter, calibrate it using
the buffers and SOP provided.
6. Pour your acid solutions into a properly labeled waste container. Clean up your work area and the area around the pH meters.

Copyright © Texas Education Agency 2012. All rights reserved.
Making Molar Solutions and Dilutions Analysis Name _
1. In part C, the last dilution made was the 0.0001 M solution. How many mM is this?
If you had made this solution from the 1 M stock instead of the 0.01 M, how much stock would you have had to use?
2. Describe how to make 100 mL each of 0.4 M, 0.2 M and 0.1 M solution from a stock of 0.8 M. Would you use parallel or serial dilution for this?
3. Describe how to make 20 mL each of 1.0 M, 400 mM and 100 mM from a 2 M stock solution.
Would you use parallel or serial dilution for this?
4. A student wishes to prepare 300 mL of 0.25 M sucrose. He puts 25.7 g of sucrose in a beaker and then adds 300 mL of dH2O. The total volume of the solution after the sucrose has been dissolved is 330 mL. a) What did he do wrong when preparing his solution?
b) What is the actual concentration of the sucrose solution he prepared?
c) What is the percentage error in the concentration of sucrose from the desired 0.25 M?
Copyright © Texas Education Agency 2012. All rights reserved.
Graphing Data
(Attach graphs to the back of this sheet.)
5. Create an EXCEL graph and TABLE to compare molar concentration of CaCl2 to amount of
precipitate produced (ppt) as shown by the weight of your pellet. a. Use the EXCEL tutorial to create your graph.
b. Graph must include a best-fit line, slope and R2
c. Do the data points from this dilution series seem to fit a straight line? Explain.
6. Create a double-log graph and TABLE to compare molar concentration of HCl to pH. The log
grid is on the Y-axis (pH) and the linear grid is on the X –axis (1/10 dilutions). a. Graph must include the best fit trend line. b. Do the data points from this dilution series seem to fit a straight line? Explain.
At this point, it is assumed that you know it is extremely important to keep all equipment clean, report when it is not working, and to clean up after yourself. A laboratory technician that does not take care of equipment will not last long on the job, or that matter, in this program. “Cleaning up after yourself” will not be listed as an objective in future labs.

Copyright © Texas Education Agency 2012. All rights reserved.
Solutions and Dilutions Grade sheet
(10)Teacher Initials
(10)Analysis Questions
_____ 1 _____2 _____3 _____4
(30)EXCEL GRAPHS
(15)CaCl2
Excel generated
Title
y Axis
x Axis
Trend line
All information required is included
Do the data points from this dilution series seem to fit a straight line? EXPLAIN
(15)pH
Excel generated
Title
y Axis
x Axis
Trend line
All information required is included
Do the data points from this dilution series seem to fit a straight line? EXPLAIN
Peer grade (grade in black ink): _______________ Teacher grade: _____________


