Modern lettering, artistic and practical; a thorough and ...
160
'l^f
Transcript of Modern lettering, artistic and practical; a thorough and ...

'l^f

mCollege of ArafeitActmre libiafy
Cornell U^irersity
CORNELLUNIVERSITYLIBRARY
BOUGHT WITH THE INCOME
OF THE SAGE ENDOWMENTFUND GIVEN IN 1 89 1 BY
HENRY WILLIAMS SAGE

.„, „ Cornell University LibraryNK 3600.H61 1913
Modern lettering, artistic and practical
3 1924 020 596 528

The original of this book is in
the Cornell University Library.
There are no known copyright restrictions in
the United States on the use of the text.
http://www.archive.org/details/cu31924020596528


C'S,3O
oo
t^
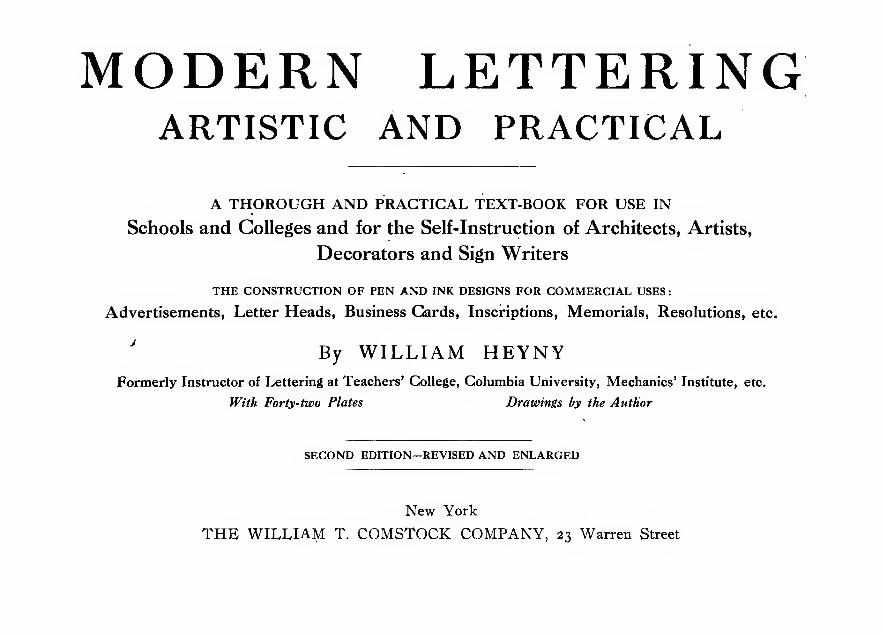
MODERN LETTERINGARTISTIC AND PRACTICAL
A THOROUGH AND PRACTICAL TEXT-BOOK FOR USE IN
Schools and Colleges and for the Self-Instruction of Architects, Artists,
Decorators and Sign Writers
THE CONSTRUCTION OF PEN AND INK DESIGNS FOR COMMERCIAL USES:
Advertisements, Letter Heads, Business Cards, Inscriptions, Memorials, Resolutions, etc.
'By WILLIAM HEYNY
Formerly Instructor of Lettering at Teachers' College, Columbia University, Mechanics' Institute, etc.
With Forty-two Plates Drawings by the Author
SECOND EDITION—REVISED AND ENLARGED
New York
THE WILLIAM T. COMSTOCK COMPANY, 23 Warren Street

Copyright, 1909, 1913
By WIIXIAM HEYNY

PREFACEA number of books have been written on LET-
TERING. Several new works of this kind, contain-
ing some very good features, were published re-
cently. That most of these books, from a practical
standpoint, are worse than useless, is a well-knownand deplorable fact. In constructing the letters of
the alphabets, the designer has too often departed far
from the original outlines, thus misleading youngstudents of lettering. Letters and numerals designedfor the use of architects, on plans and specifications,
are likewise inadequate for the purpose, being either
stiff and ill-spaced, lacking in beauty, or too highlyembellished. Too many scrolls and flourishes makeit difficult to decipher a letter easily, which is a gravefault, as legibility ought to be the artist's first con-
sideration. Only plain letters, that can be quickly
made and easily read, should be used by architects.
Engineers and builders with them have no trouble
'
in making out their meaning, and are not nearly so
liable to make mistakes.
One branch of the art of lettering, in particular,
has received but scant attention: the designing of
attractive advertisements is virtually a class in itself.
It constitutes a special field, and a most interesting
and remunerative one.
In the following pages the author has endeavored
to supply such information on the subject as hasbeen gained by many years of experience in this
line. Practical suggestions are given, simple meth-ods employed. The difference between correct andfaulty styles of letters, good and poor spacing, har-monious and bad grouping of words and phrases is
shown by artistic examples. The result aimed at is
the construction of plain and neat designs, of novel,
individual ideas in advertisements, lettering ofquality, instead of the stiff, monotonous types andfaulty spacing as generally employed, or exagger-ated styles* that cannot be read.
The printer is limited to the use of existing types;the designer of letters is bound only by the limits ofhis own imagination. If his creative or inventivepowers be boundless, he should be wise enough notto let his fancy lead him to extremes. Aim forbeauty rather than striking or crying effects.
In no department of the graphic arts is good taste
being sinned against so frequently and persistently
as in the art of lettering. At almost every step weare offended by coarse violations of the art; and this
is true not only of commercial lettering, but also ofarchitectural inscriptions and those of memorialtablets, claimed to represent masterpieces, and in-
tended to impress future generations.

Doubtless one of the causes of this lamentable lackof judgment is the fact that certain authors of bookson mechanical drawing do not realize the impor-tance of good lettering, and treat the subject as a side
issue only; The results are mathematically correct
but, consequently, stiff, awkward letters, drawn withpainstaking care, but devoid of harmony and beauty.
The other extreme is as bad, if not worse. We are
drifting into a craze for " fancy," " snappy " letter-
ing called by representatives of this school " mod-ern." While sometimes executed with no little skill,
this style of lettering is of no practical value, be-
cause the average person cannot read it without dif-
ficulty. More artistic ability is required to con-
struct a plain letter correctly than to create a mostphantastic "modern" hieroglyphic, but it demandsstudy and practice to cultivate the taste necessary to
produce the former.
This book does not merely present a collection of
alphabets and designs, but may be considered a guide
into the realms of letterdom. The construction of
letters is taught by a system of easy lessons, and rules
are laid down for the proportions and spacing of
the different characters, in their relations to each
other. At every stage of the development practical
,
examples are given. From step to step the text is ac-
companied by illustrations, explaining important
good points and also mistakes to be avoided.
Good letterers are exceedingly scarce, and there is
a growing demand for competent exponents of the
art. Keen competition of tradespeople has brought
about in recent years a marvelous display of posters,
signs and labels, and an extraordinary mass of ad-
vertising matter in the newspapers and magazines.
It is necessary now to make your " ad " stand out
prominently among a hundred others. Thus the art
of designing novel and conspicuous advertisements
is becoming more important every day. It appeals
to the creative talent of the artist. Correct, well
spaced lettering is wanted. In addition to this the
principal words of the subject matter must be dis-
tinctly brought out, so that the reader can see at a
glance what the advertisement may offer. The pro-
ducer is eager to sell his goods, and the advertise-
ment must tell the story. Advertising is as essential
as the merchant's display of goods. But the an-
nouncement should not flare out brutally, aggres-
sively. The advertiser, when he lifts his voice, mustnot shout offensively, but should temper his languageby artistic effects.
The young student of art or architecture also,
who takes up the study of lettering seriously, will
find in this method everything necessary to acquireproficiency, if he be but willing to do his part, byworking out the problems and following the sugges-
tions here offered.
4

CONTENTS
Introduction
PAGE
7
PART I
The Drawing Materials
The Drawing Board 9
The T-Square . 9
The Triangle 10
The Set of Drawing Instruments . . 10
(a) The Compasses 11
(h) The Ruling Pen 12
(c) The Bow Spacers .... 13
(d) The Dividers 13
Lead Pencils 14
Pencil Pointer IS
Writing Pens iS
Thumb Tacks iS
India Ink 16
Flat Rule 17
Drawing Paper 16
Cross-Section paper 17
Transfer Paper 18
Tracing Paper or Cloth 18
Irregular Curves 18
Brushes 18
Rubber IS
Ink Eraser 19
Water Color, White ig
Sheet Gelatine . 19
PART II
Practice Work
19
19
22
22
23
31
Position in Drawing, as to Light
Practice WorkThe Guide Lines (with illustration)
Copying the Letters
Method of Procedure
Ellipses 30
Mechanical Construction of Letters and
Numerals (with 3 construction plates)
General Rules for the Construction of
Letters ....Modern Roman
, Antique RomanFrench RomanOrnamental RomanBlock ....Square Block
Ornamental Block
Plain or Condensed, Round
Plain, Square
Plain, Spurred ....Roman Italics
SO
SO
SI
54
S4
S4
S4
54
55
SS
55
55
page
Modern Gothic 62
German Gothic 66
Modern Uncials 67
The Lower Case Letters:
Modern Roman, Lower Case . 74
French Roman, Lower Case . 75
Antique Roman, Lower Case . 75
Ornamental Roman, Lower Case . 75
Plain, Round, Lower Case . . 75
Plain, Square, Lower Case . 75
Plain, Spurred, Lower Case . . 75
Block, Lower Case 75
Ornamental Block, Lower Case 75
Roman Italics, Lower Case 75
Modern Gothic, Lower Case . 81
German Gothic, Lower Case . . 81
Modern Script 84
Freedom of Treatment 84
PART III
The Alphabets, Practical and Artistic
Their History, Description and
Proper Use
The Roman Alphabets . ... 85
The Classic Roman Capitals (with plate) 85

PAGE
Modern Roman (with 3 plates) ... 89
French Roman (with 2 plates) ... 89
Antique Roman (with plate) ... 92
Ornamental Roman (with plate) . . 92
Roman Italics (with plate) . . . . 93
Plain or Condensed, Round and Square
(with plates) 93
Plain, Spurred (with plate) .... 96
Block (with plate) 96
Ornamental Block (with plate) . . 97
The Lower Case Letters (with five
plates) 97
The Gothic Alphabets
Modern Gothic, or Old English (with
plate) 97
PAGE
German Gothic (with plate) . . . 100
Modern Uncials or Church Text (with
plate) loi
The Numerals (illustrated) .... 112
The Architects' Single Stroke Alphabets,
comprising 3 alphabets, upper and
lower case (with plate) 112
PART IV
The Proper and Artistic Employment of
Lettering
Arrangement of Letters, Composition,
Spacing, Balance, Harmony (with
plates) 116
PAGE
Grouping of Words and Sentences (with
plate) 117
The "Ad" (with plate) 120
The Border 121
Adapting Ideas (with plate) . . . 124
Letter Heads and Business Cards, Title
Pages, Book Cover Designs, Newspa-
per Headings 125
Designing Memorials, Resolutions, etc.
(with plate) 128
Conclusion 134
Alphabetical Index 135, 136
Example of Grouping . . . Frontispiece
I The Guide Lines ....II Mechanical Construction of
Letters and Numerals (i) .
III Mechanical Construction of
Letters and Numerals (2) .
IV Mechanical Construction of
Letters and Numerals (3) .
V Modern Roman (i)
VI Modern Roman (2)
VII Modern Roman (3)
VIII Classic Roman .
IX French Roman (l)
X French Roman (2)
LIST OF PLATESPAGE
Antique Roman 53
Ornamental Roman ... 57
Century Roman .... 61
Roman Italics 65
Plain, Round 69
Plain, Square '.
. . . 71
Plain, Spurred 73
Block -77Ornamental Block .... 79
Architects' Single Stroke Al-
phabets 83
Modern Script 87
German Gothic 91
Modern Gothic (Old English) 95
6
^GE

INTRODUCTION" Lettering, the art of designing the letters of the
alphabet, for various commercial, mechanical andartistic purposes, largely used in architectural work,
sign painting, advertisement designing, engraving,
printing and book-plate and book-cover making. It
may be said that practically all the lettering nowused in architectural offices in this country is de-
rived, however remotely it may seem in some cases,
from the old Roman capitals, as developed and de-
fined during the period of the Italian Renaissance.
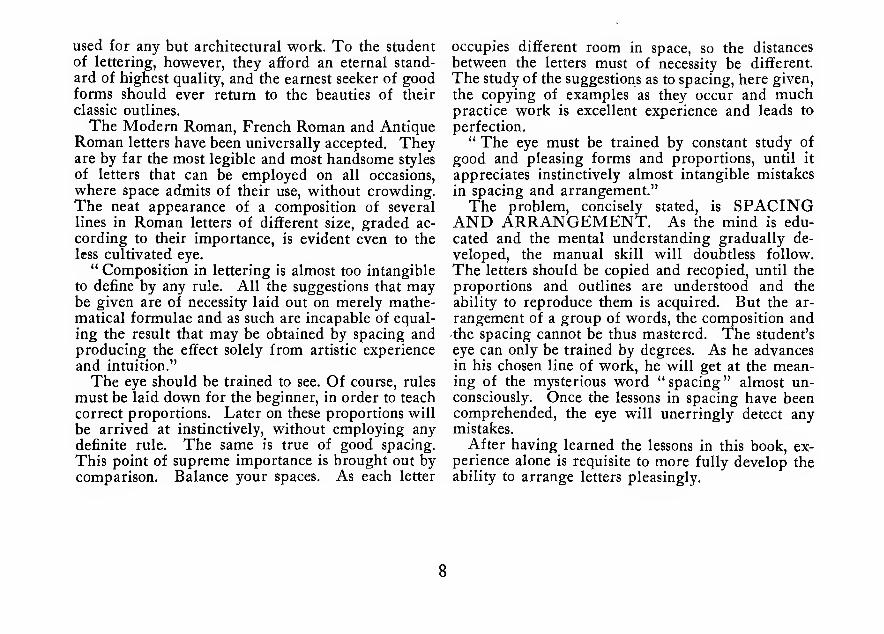
Composition in lettering is almost too intangible to
define by any rule. All the suggestions that may be
given are of necessity laid out on merely mathemat-ical formulae, and as such, are incapable of equaling
the result that may be obtained by spacing and pro-
ducing the effect solely from artistic experience andintuition. The final result should always be judged
by its effect upon the eye, which must be trained,
until it is susceptible to the slightest deviation fromthe perfect whole. It is more difficult to define what
good composition is in lettering than in painting or
any other of the more generally accepted arts, and it
resolves itself back to the same problem. The eye
must be trained by constant study of good and pleas-
ing forms and proportions, until it appreciates in-
stinctively almost intangible mistakes in spacing and
arrangement. This point of "composition" is so
important that a legend of most beautiful individual
letter forms, badly placed, will not produce as
pleasing an effect as an arrangement of more awk-ward letters, when their composition is good."
—
Americana."Lettering, the art of designing the letters of the
alphabet."
The shaping and spacing of well proportioned,harmonious letters is an art. The pleasing effect ofgood lettering on the eye trained to beauty is notsecond to that of a fine painting, or the lines of class-
ical architecture. The student of the art of lettering
should aim at the highest standards only, to cultivate
a taste for the beautiful." The letters used in our time are derived from the
old Roman capitals."
Therefore, in beginning the study of the forms ofletters, we should go back to this source.
"As developed and defined during the period ofthe Italian Renaissance," the letters of the Romanalphabet have since been somewhat modified. Butin many instances letterers have departed so far
from the originals, as to lose sight of the most beauti-
ful features.
The unchangejd original characters are seldom
used for any but architectural work. To the studentof lettering, however, they aflford an eternal stand-
ard of highest quality, and the earnest seeker of goodforms should ever return to the beauties of their
classic outlines.
The Modern Roman, French Roman and AntiqueRoman letters have been universally accepted. Theyare by far the most legible and most handsome styles
of letters that can be employed on all occasions,
where space admits of their use, without crowding.The neat appearance of a composition of several
lines in Roman letters of different size, graded ac-
cording to their importance, is evident even to the
less cultivated eye." Composition in lettering is almost too intangible
to define by any rule. All the suggestions that maybe given are of necessity laid out on merely mathe-matical formulae and as such are incapable of equal-
ing the result that may be obtained by spacing andproducing the effect solely from artistic experience
and intuition."
The eye should be trained to see. Of course, rules
must be laid down for the beginner, in order to teach
correct proportions. Later on these proportions will
be arrived at instinctively, without employing anydefinite rule. The same is true of good spacing.
This point of supreme importance is brought out bycomparison. Balance your spaces. As each letter
occupies different room in space, so the distances
between the letters must of necessity be different.
The study of the suggestions as to spacing, here given,
the copying of examples as they occur and muchpractice work is excellent experience and leads to
perfection." The eye must be trained by constant study of
good and pleasing forms and proportions, until it
appreciates instinctively almost intangible mistakes
in spacing and arrangement."The problem, concisely stated, is SPACING
AND ARRANGEMENT. As the mind is edu-
cated and the mental understanding gradually de-
veloped, the manual skill will doubtless follow.
The letters should be copied and recopied, until the
proportions and outlines are understood and the
ability to reproduce them is acquired. But the ar-
rangement of a group of words, the composition andthe spacing cannot be thus mastered. The student's
eye can only be trained by degrees. As he advancesin his chosen line of work, he will get at the mean-ing of the mysterious word "spacing" almost un-consciously. Once the lessons in spacing have beencomprehended, the eye will unerringly detect anymistakes.
After having learned the lessons in this book, ex-perience alone is requisite to more fully develop theability to arrange letters pleasingly.

PART I—THE DRAWING MATERIALSThe Instruments and How to Use Them
The instruments and materials necessary for this
course are as follows:
—
Drawing board, T-square, Triangle, Set of draw-ing instruments, Lead pencils. Erasing and cleaning
rubber, Thumb tacks. Writing pens and holder, Pen-
cil pointer, India ink. Ink eraser, White water color,
Set of brushes. Set of irregular curves. Flat rule.
Sketching and drawing paper, Cross-section paper,
Tracing paper or cloth, Transfer paper.
The Drawing Board should be of clear pine, with
a cross-piece at each end, to prevent warping. Donot use one smaller than 1 8 by 24 inches, 20 by 26
would be better. The cost is about one dollar. Makesure the edges are perfect and sharp. Run your
fingers along them and reject any board that feels
rough or shows the least dent or projection. An ac-
curate drawing cannot result unless the edge of the
drawing board be perfectly true and even. TheT-square is guided along the edges of the board, and
should work freely and smoothly. In selecting a
suitable drawing board, try a T-square on it to in-
sure perfectly square corners. At least the bottom
and left edges should be exactly square. Lay the T-
square on the top of the working surface of the
board, with the T-square head pressed against the
edge and move along, up and down, until the bladeof the T-square is even with the corresponding edgeof the board. This may also be considered a test for
the accuracy of the T-square. In use, the left andbottom edges of the drawing board are the " work-ing," or "sliding" edges. The board is laid flat
upon the table, or it may be raised slightly at the top.
As you face your drawing board, the lines runningfrom left to right are called horizontal, those fromthe top to bottom edge of the board, vertical lines.
When, after long use, the drawing board becomesfull of holes and uneven, it may the restored to use-
fulness by first cleaning and smoothening with sand-paper, and then glueing on a sheet of thin card-board.
The T-square is laid across the drawing board,with its head resting against the edge. The blademust be long enough to reach over the whole of theboard. Use a T-square with a fixed head and blackrubber blade. It can be bought for about $1.50.The edge of the T-square must be absolutely straight
and smooth, or else a correct drawing cannot bemade. When drawing long vertical lines, rest the

head of the T-square against the lower edge of thedrawing board, keeping it firmly p'ressed in positionwith the left hand. For horizontal lines it is heldagainst the left edge of the board, as above described.Along this edge the head of the T-square is slid upor down, as the case may be, and all horizontal lines
drawn from left to right, guided by the upper edgeof the blade. For the short vertical lines, as theyoccur in lettering, the triangle is used. Never use
the right hand to move the T-square. Do not guidea knife along the edge of the T-square or triangle
when cutting. When not in use the T-square shouldhang safely against the wall. A hole is provided for
this purpose at the end of the blade. Never stand it
up or lean it against the wall or furniture, lest the
blade become permanently bent, or warp out of
shape. By resting it on the floor it is also liable to
be stepped upon and injured or broken.The Triangle or Set Square is used for lettering
principally to draw the short vertical lines. It is laid
on the drawing paper, above the T-square blade,
resting on and pushed along its upper edge, as
needed. Amber or Xylonite (transparent) triangles
should be used in preference to the black rubberones. You may observe- your pencil lines and marksthrough them while working, and it is easier to keep
them clean. Note, also, that you get them with
bevels on the inner edges. These can be readily lifted
with the finger nail, thus saving annoyance or acci-
dent. A 30° by 60° triangle, 6 inches long, can be
bought for 40 cents. Do not use any so-called " let-
tering " triangles. In drawing vertical lines, the tri-
angle is manipulated as follows : with the fingers of
the left hand hold the head of the T-square in posi-
tion, pressed against the left edge of the drawing
board. With your right hand place the triangle
above and resting against the upper edge of the T-square blade, so that the right angle of the triangle is
to the left. Now move the fingers of your left hand
along the T-square blade, pressing slightly to the
right, while sliding towards the triangle. As youreach it, hold it with first and middle fingers, firmly
pressing it down to the edge of the T-square blade,
at the same time keeping hold of the T-square blade
with thumb, fourth and fifth fingers, while drawingline with right hand. This seemingly difficult andawkward manipulation will become easier with con-
stant practice. Run your eye along the edge of the
T-square or triangle when drawing lines. Keepyour pen or pencil inclined at the same angle frombeginning to end of line. This is very important.
See that your arm and elbow are free to move andthat there are no obstructions or tools, which mighthinder your movements, lying about your drawingboard, before starting to draw the line. Lines are
nearly always drawn to the left of the triangle, that
being the lighted side. While working thus withthe triangle try to encourage a habit of occasionally
running your left hand to the head of the T-square,pressing it against the edge of the drawing board, to
assure correct position. Use your hands only, andnever resort to thumb tacks or weights to hold T-square or triangle in place.
The Drawing Instruments. In purchasing a set
of drawing instruments the beginner should bear in
mind that good materials are necessary to make a
10

good drawing. Most people labor under the mis-taken idea that a cheap outfit will do to start with,and think it time enough to get better tools, whenthey shall have learned how to use them. A set of
fine instruments is a good investment and can beused for all time. Learn to use them at the start,
then you can acquire the ability to work with ac-
curacy, which is of prime importance. If you can-
not afford a full set of first class tools, it is a better
plan to buy a few only at the start, say the com-passes and ruling pen, and add bow spacers, dividers,
etc., later on. See that your instruments are always
clean and bright, and occasionally polish them upwith chamois.
The Compasses are used for spacing, measuringand drawing circles and arcs. With the lengthening
bar added, the largest curves can be made. Exceptfor borders, this extension bar is rarely used for let-
tering. Circles up to 12 inches in diameter can be
drawn without it. In purchasing compasses, see
that you get one with movable or pivot knee joints
and adjustable legs, also with interchangeable needle-
point, pen- and pencil-points. One leg has a steel
needle clamped to it. For drawing circles with penor pencil the shouldered point of this needle should
be used. When spacing or measuring, the other endof the needle is more appropriate. On the other leg
of the compasses the steel point can be removed byloosening the clamping screw, and the pencil- or
pen-point inserted. In doing this, note that the
straight or inner side of pen is opposite the other
leg, and the curved side faces outward. The pencil-
point also has an outer and inner surface, and the
thumb screw should always be on the outside. Becareful to push in pen- or pencil-point as far as it
will go, and secure it with the clamping screw be-
fore using. It is important to always have the needle-
point even with the pen- or pencil-point, so, after
inserting pen- or pencil-attachment, close the instru-
ment, and, loosening the clamping screw, set the
needle-point to the length of the pen- or pencil-point,
and clamp well. After each sharpening of pencil-
lead always see that it is brought to correspond to
the length of the shoulder of the needle-point. Todraw a circle or curve, insert needle-point in ex-
act center mark, to shoulder of needle, and push it
straight down into the drawing board. Removecompasses and open them, setting the legs to the re-
quired radius, and bending the knee-joints. Insert
needle-point in hole again and try the distance. Theneedle-point must be held in an upright position,
while doing this, so the hole in the paper may not
be unnecessarily enlarged. Never incline your com-passes while holding the needle-point inserted. In-
stead, bend at the knee-joint, until the radius wantedis reached. Also bend the pivot-joint of pen- orpencil-point correspondingly. When drawing cir-
cles or arcs with the pen, especial notice must betaken to have the pen-point vertical with the knee-
joint, as otherwise both nibs of the pen will not touchthe paper simultaneously, and a perfect line cannotresult. After filling the pen, as directed under" Ruling Pen," take the compasses by the little han-dle on top of instrument, and turn, beginning the
line at the lowest point, and drawing upward and to
the right (never reverse) until the circle is com-II

plete. Try this on a small piece of paper, beforebeginning on your drawing, to make sure that yourpen works well. If a break in the line should occur,redraw line, as before, from left to right. The com-passes are held slightly inclined forward, insuring a
better flow of ink and making an even, clean line.
For lead pencil work always have your lead nicelysharpened before beginning the drawing. The com-pass-lead should be flattened on one side to a chisel
edge, and placed in the pencil holder with this fiat,
sharp edge toward the outside of the leg. For smallcircles use the bow-pen or bow-pencil. After read-ing over these instructions, it would be well to take
up your compasses, handle the instrument carefullyand study its mechanism, while going over this lesson
again.
The Ruling- or Drawing-Pen, also called RightLine Pen, is made of one piece of steel, with a handleof ebony or ivory. It has two tongues, called nibs,
connected by a thumb screw. By turning the screwthe nibs are brought together or separated, for a fine
or a heavy line. As set by this screw, a line drawnby the ruling pen is always uniform in width and in
this respect differs from a line drawn by the writing
pen, where the thickness varies according to the pres-
sure employed. Ruling pens are also made withspring- and jointed nibs, with three and more blades.
The ruling pen is never used without a guide, such
as the T-square, triangle or rule. It is held firmly,
yet lightly, between the fingers. Handle it as youwould your pencil. Proceed to fill the pen with ink.
One way to do this is to use a quill, which comesattached to the cork of some brands of fluid ink. An-
12
other method is to dip the pen into the ink, as with
writing pens. Care must be taken, however, to al-
ways wipe the outside of the pen before using, as
otherwise a blot is almost certain to result. Little
ink should be fed into the ruling pen at a time. In
working with pen and ink, your first aim should be
to make sharp, clear lines, and to connect themsmoothly and evenly with arcs as well as makingsharp corners. Some letterers work in the curves
and circles first when employed on a drawing, andthe straight lines last. They claim it is easier to run
the straight lines to meet the curves flush. But, as
many draughtsmen work the opposite way. Runthe pen along the T-square blade, from left to right
only. For vertical lines draw the pen strokes up-ward, when working on left edge of the T-square or
triangle. On the right hand side you will find it
more convenient to run the lines downward. Butwhen working on the right hand side, change the
position of the drawing board, to get a good light.
Hold the pen upright, so that both nibs rest on the
paper evenly, and with screw head pointing out-
ward. Do not incline your pen to the left whendrawing vertical, nor toward the top when runninghorizontal lines. The point is liable to get too close
to the T-square or triangle edge and the ink wouldspread along it. The rounded shape of the pen-point prevents this, when the pen is held in theproper way. Incline your pen slightly forwardwhen drawing lines, thus assisting in the flow of ink.
Rest the little finger on the triangle or T-squareblade. Draw the pen along the guide with an even,gentle pressure. Before beginning work on your

drawing, try the pen on a bit of paper. A lot of
practice is necessary to acquire proficiency with the
ruling pen-. Practice ruling lines, long lines, short
lines, try to make them uniform in thickness, clean,
and at even distances from each other. Practice
running lines side by side, to the left, to the right,
horizontal as well as vertical, until all lines are clear
and even. When done with your pen, always clean
it vidth a piece of chamois, or part of old glove, or
even a piece of clean, white cotton fabric, and rub
to a fine polish. Insert a corner of your cleaning
cloth or leather between the nibs of the pen andcarefully draw it through towards the point. Re-
peat with clean edge of cloth, also wiping exterior
parts of the pen. Finally polish inside and out. It is
of greatest importance that this operation be gonethrough every day when using the pen and before
putting it away. Do not detach the screw. Alwayshave your cleaning cloth handy. The best way is to
attach it with a thumb tack to the right edge of
drawing board. The pen needs cleaning frequently,
while working. In summer especially the ink dries
rapidly and thickens in the pen. The nibs should
not be opened when cleaning while at work. Thecloth can be inserted and drawn through before re-
filling with ink, without touching the screw. A good
ruling pen can be obtained for 75 cents.
The Bow Spacers are an instrument for measur-
ing small distances. With the two needle-points the
most accurate work can be performed. Next to the
compasses and ruling pen, the bow spacers are the
most useful tool employed in the drawing of letters.
It has a fine spring which tends to keep the legs of
the instrument separated to the distance set by the
adjusting screw, and for this reason is more reliable
than the compasses.
Open the instrument by turning the adjusting screwon the side of the leg, until the desired width is indi-
cated by the points, then mark on your drawing bypushing the sharp points into the paper. See that the
punctures are clearly marked. For spacing equaldistances walk bow spacers along the line, lifting
the right and left leg of the instrument alternately
and pricking the paper with the needle-points. It
is good practice to press the legs of the bow spacerstogether with the fingers, when opening or closingthe instrument, thereby saving the fine thread of theadjusting screw. For larger spacing use the divid-ers.
By inserting the Bow-Pen- or Bow-Penctl-SLttach-ments you are enabled to draw the smallest arcs andcircles. Take care, however, to insert the appliancescorrectly into the shank, to push them in as far as
they go, and to clamp them well with the clampingscrew, before employing them. See that the straight
or inner side of the pen-point is facing toward the
other leg or that the screw of the pencil-point is onthe outside of the instrument. Also adjust the
needle-point, until its shoulder is even with the pen-or pencil-point. Distinguish between spacer-pointand the shouldered point of the needle. As to hand-ling the bow-pen and -pencil for drawing circles, see
the directions for "The Compasses." When verysmall circles or arcs are to be made, the needle-pointmust be pushed back until both nibs of the pen rest
upon the paper evenly. For large circles use the
13

compasses. Clean you bow pen carefully while us-
ing and afterwards. See the directions for the useof the ruling pen. Separate bow spacers, bow pen-cils and bow pens can be bought, and the busy artist
will save valuable time by using them, and avoidingthe changing of the needle-point-, pencil-point- orpen-point-attachments.
The Dividers are an instrument like the compassesin appearance, having fixed needle-points only, butwith a hair spring and adjusting screw attachment,similar to that of the bow spacers. It is used for ex-
act work in spacing and measurements, where thebow spacers are found too small to reach. Get onewithout the clamp at the top, for this is unnecessaryand bothersome. By handling this instrument care-
fully and adjusting it to the required distance by the
small thumb screw at its side, you should be able to
trace the exact dimensions of letters without a slip.
Like the bow spacers it has two needle-points, de-
signed to prick spacing marks into the drawing pa-
per. The legs are opened a little more than the
required width, then with the screw, set the points
to the correct size wanted. When it is desired to
copy a letter to twice .its size, take dimensions of
original, and with the points of dividers mark yourdrawing paper, then, keeping one leg in position,
raise the other leg and swing it around to a point
opposite, piercing the paper and marking the doubledistance. The adjusting screw should never be
removed, and the instrument should be closed before
putting it back into the case. You may substitute
your compasses for use as dividers by employing the
pricking point of needle, and inserting the steel- or
14
plain-point in the pencil-leg, but the dividers are
more reliable on account of the hair spring and ad-
justing screw. For small spacing use the bowspacers.
Lead Pencils. It is essential to have all your tools
in perfect working order. Your pencils are of no
less importance than any other instrument. Alwayshave several of them on hand, nicely sharpened.
To sharpen the pencil a very sharp penknife is
required. Hold the pencil in the left hand, with its
point toward you, and, resting it against the thumbof your right hand, carefully slice ofif the woodsmoothly and evenly, bringing it to a long taper, andexposing the lead for about half an inch at the end.
It will take some practice to perform this feat with-
out breaking the lead, but soon you will be able to
do it without accident. Now rub the lead lightly
on a sandpaper sharpener, holding the pencil nearly
horizontal, rolling it from side to side and around,
until the lead takes on a nicely tapering, sharp point.
Smooth off the roughness of lead, finally, on a piece
of drawing paper, and you have a fine pencil-point
to work with. Resharpen the point every little
while. Do not cut the lettered end of pencils, as the
marks are necessary to note the grade. The com-pass leads should be sharpened to a flat edge. Seethe directions given under "The Compasses."When starting to study the proportions and shape
of letters, the beginner should make the drawing ona large scale. Enlarge the letter two or four timesthe size of the original. Take plain paper first, andcopy the outline of the letters freehand. Yourpencil work should be as accurate as possible. No
amount of skill in pen work can ever make good the
defects of faulty pencil work. Draw all lines fromthe top down and from left to right, when sketchingletters. Practice sketching the letters freehandin long, light and even strokes first, then use the in-
struments. When using a rule, T-square or triangle,
always start the line from the bottom upwards, ex-
cept when working to the right of the guide. Holdyour pencil at exactly the same angle from begin-
ning to end of line. All practice work is done in
pencil first. Use a hard pencil, 6 H., in laying out
contours of letters. Work with long, even strokes,
making a very light line only. This can easily beremoved with the rubber, if necessary. After youhave finally succeeded in getting a correct outline,
it will be. time enough to go over the outline with a
softer "Ipencil, say 3 H. The lines should be thin andsharp. Try to finish the drawing without use of the
rubber, making the letter stand out clear and dis-
tinct. When a drawing is to be finished in ink, donot use a soft pencil. Also do not press on the pencil
while drawing lines, as this would leave a grooveon the paper, which might seriously interfere withthe inking-in process. Draw your pencil lines clear
through centers, let them sweep over top and belowbottom lines. Do not start or stop at the corners,
where they terminate. You will find it easier to makesharp corners with your pen, if the pencil lines run
through. Before starting to work in ink, all pencil
lines not wanted, should be removed, so that the re-
maining lines show clear and sharp. After all ink
lines have been completed, the pencil marks are re-
moved by the wedge-shaped pencil eraser. Be care-
ful to skirt the ink lines as much as possible. Rub-bing is apt to dull the appearance of the black ink
lines. The drawing is finally cleaned with spongerubber. This cleaning up is to be done very care-
fully. Too much rubbing will injure fine, sharpink lines. Go over the soiled spots of the drawingpaper gently, and rub no more than necessary. Aftercleaning and carefully dusting off, the drawing is
ready for the final pointing up and filling in withink.
Rubber. To remove pencil lines a wedge-shapedsoft white pencil eraser is used. This rubber doesnot roughen or injure the drawing paper, while it
effectually cleans away all lead pencil marks. Blacksponge rubber is generally employed for cleaning
drawing paper. A generous piece of it can be boughtfor 30 cents.
A Pencil Pointer is made by glueing strips of sand-
paper to a small slat of wood. You may cut it froma cigar box. Let it be two inches wide by nine long,
—the length of an ordinary cigar box—allowingthree inches for the handle. Now cut strips of No,I sandpaper, to cover one side of the wood, with the
exception of the handle, and glue them on. Pencilpointers are sold for from 20 to 30 cents.
Writing Pens. For freehand lettering, pointing
up and filling in, Gillott's pens, No. 303, are gener-
ally used by letterers, but No. 404 will be found ex-
cellent for all-around work. A gross box costs 65cents. Writing pens are employed for all but straight
lines on small lettering and ornaments.
Thumb Tacks. Select those with flat heads, so
the T-square may slide over them easily while you15

are at work. When inserting in the paper, slantthem slightly, thus assisting in the stretching of thedrawing paper. Press them down with the thumbas far as they will go. Use a lifter when removingthem. "Government" or "Silver Steel" thumbtacks are made on a new principle, the points willnot push through the heads, nor pull out. They cost
from 35 cents per loo upwards, with lifter. Forstretching paper see the directions under " DrawingPaper."India or Chinese Ink only is used for all drawings.
Writing inks of any kind are barred. The best Indiaink comes in sticks or cakes, and should be groundin water fresh whenever used. But inasmuch as this
means the loss of much time, to be done properly,
the fluid inks are generally employed. Buy a smallbottle at a time. Keep bottle well corked, to excludedust and dirt, and, also, to prevent disaster. Thecost is about 25 cents. A bottle-holder is sold at 30cents.
Drawing Paper. The beginner requires sketch-
ing paper of the plainest kind only, for his pencil
work. Get the smooth sort. It can be bought by the
yard. Later in the course, when the lettering is to
be finished in ink, the drawing paper should be of
good quality. There are numerous brands of paperin the market, and they are almost all of excellent
quality. Smooth paper only should be used for let-
tering. The drawing paper may be cut somewhatsmaller than the drawing board. The cross piece on
each end of the board, being of tougher wood, the
thumb tacks cannot easily be employed on them.
The paper is tacked upon the drawing board, square
16
with left and lower edges. Use the T-square to in-
sure accuracy. Get the right or finished side of pa-
per uppermost. To find the right side hold paper
up to the light and look for the watermark. Theside from which the lettering or manufacturer's trade
mark is readable, represents the right, or workingside. If no watermarks can be found, lay the paperupon the drawing board, and with your fingers
gently rub over the surface, first of one, then the
other side. Select the smoothest side to work on.
To stretch the paper upon the drawing board, put a
tack into the center of the top edge of the paper,
pressing it well down with thumb, then gently, butfirmly rub down with the fingers of the left hand to
the middle of bottom edge, and place another tack
there. Now run your hand over the paper,, starting
from the center, towards the right edge, putting
down a tack at about the middle point, and then,
sliding hand to left over the paper, fasten the edgethere likewise. Starting again from center of the
sheet, rub your hand towards each corner in succes-
sion, and, holding the paper firmly, insert tacks also.
Make sure of pressing the tacks down hard with yourthumb. If more tacks are necessary, put them in be-
tween the others, always pressing the paper downfirst, from the center outward.When the student of lettering has passed the experi-
mental stage and enters into the competition for hon-ors and material remuneration, he will become morepainstaking in the execution of his art as well as in
the selection of materials. The first thing, then, is to
substitute fine paper, and heavier, say three- or four-ply, or bristol board, for the cheaper grades used for

practising. The paper may then be mounted on the
drawing board. This method insures more comfort-able work, as there are no thumb tacks used, and the
T-square and triangle may be moved over the work-ing surface of the paper more easily and withoutobstruction. When the finished drawing is to be re-
moved from the board, it is simply cut along the
outer edge and lifted out. The remaining pastededges may then be soaked with warm water, andafter a while the strips can be pulled off, and small
particles still adhering, cleaned away with the pen-knife. Care should be taken not to use too muchwater, nor to get any moisture upon the drawingboard, as this would tend to raise the grain of the
wood, and might even warp it out of shape.
To mount the paper, first find the right side.
Make sure your board is smooth, if not, remove all
particles of paper or glue, and sandpaper any rough-ness. With the paper right side up, cut off about aninch of the corners diagonally. Turn up the edgesof paper and lay the sheet over on the other side.
Soak paper well and evenly with clean water andsponge, except the edges. Now lay the paper over onthe drawing board with right side up. Let the edges
of paper be parallel with the edges of drawing board.
Paste the top edge and turn it down, pressing it uponthe board from center of the sheet outward, to both
ends. (Photo paste is good to use.) When fastened
down sufficiently, paste opposite edge of paper. Turndown and rub from center outward, as before, but
with a downward motion, designed to stretch the pa-
per. Finally repeat pasting process, first on one,
then on the other of remaining edges, stretching well
outward, while rubbing with the palms of the hands.
Stand your drawing board on edge, until the paperis dry, when it will be found stretched tightly.
The first thing to do, on starting the drawing, is
to square off the paper, put in the center line, anddraw three lines around the working space. Thefirst, or outer line represents the cutting line, andalong this pencil line the penknife is used, to cut
and remove the finished drawing from the board.(Do not use the T-square or triangle as a guide whencutting with knife.) The second, or middle line is
for the border. The third, or inner line is drawn to
keep the reading matter exactly within its limits.
A Flat Rule, graduated to eighths and sixteenths
of inches, is handy for ruling lines and rough meas-urements for sketching and pencil work. For pur-
poses of taking dimensions of letters as well as for
spacing, &c., compasses, dividers or bow spacers are
used. A strip of cross-section paper, divided ten
squares to the inch, is a valuable adjunct to the let-
tered Keep a strip, two inches wide, by six or eight
inches long, pushed under the right edge of yourdrawing paper. With a pencil mark the spaces, di-
mensions, width of letters, thickness of lines, &c., onthe strip, and compare proportions as you proceed.While not as accurate as the measurements markedby the bow spacers and other instruments, this paperscale will be found very handy and useful.
Cross-section Paper is drawing paper, ruled in
small squares. It is a very convenient article for the
student when copying letters on an enlarged scale.
The ruling is also done on transparent or tracingpaper.
17

Transfer Paper. The black carbon paper, sold at
art material stores, is not suitable for transferring de-signs, as the carbon generally contains oil and themarks are difScult to remove. Instead you can easily
construct a piece of transfer paper by blackening a
sheet of thin, white paper on one side with a lead
pencil, and this may be used for a long while. Takea sheet of note paper, unruled, thin, white; unglazedbond paper would serve best. When pointing yourlead pencils, you may save the lead powder and use
it to rub into the sheet with a small rag. Be careful
to keep the other side clean. The paper should beblackened evenly and well up to the edges. Whendone, any excess of the powder is carefully shakenoff, and the sheet further cleaned and the lead sur-
face smoothed and tempered by rubbing it with a
piece of soft paper with a circular motion, until
the sheet shows an even and unbroken dark graycolor.
Tracing Paper or -Cloth. When you have drawna design on sketching paper and desire to carry it
over to the drawing paper to be finished in ink, a
piece of tracing paper or tracing cloth Ts spread over
the design and fastened at the edges with thumbtacks. With a sharp pointed pencil the lines are
then traced very carefully on the tracing paper.
When finished, both the sketch and tracing are re-
moved from the board. The drawing paper or card
board is now mounted on the drawing board, as di-
rected under " Drawing Paper," and the tracing
securely fastened over it, taking good care, however,
to first square it by the use of the T-square, before
putting the thumb tacks in place. Between the
drawing paper and the tracing a sheet of trans-
fer paper is inserted with the white or clean side up.
This may be shifted when necessary, by removinga tack or two and fastening down securely again
when placed. The lines of the design are now re-
drawn with painstaking care. A very hard and well
pointed pencil is used. It is necessary to keep the
paper smooth, and in shifting, to avoid even a frac-
tional movement of the design or tracing.
Irregular Curves are sometimes necessary or help-
ful in the construction of borders for inscriptions
or advertisements, also in drawing ellipses and the
curved arrangement of a line of lettering. Theyare never employed in the shaping of letters. Usetransparent curves in preference to black rubber or
wooden ones. Select two that show the longest andmost graceful lines. When using part of an irregu-
lar curve to draw a border, and, having drawn withpencil the line wanted, mark at beginning and endof the line, on the paper as well as on the implement,so that the particular part of curve can be foundagain when inking in. It may also be necessary to
reverse the curve to continue the design, or to carry
over the contours on the opposite side of the border,
but it is a better plan to use tracing paper for this
purpose. As used for ellipses see the directions un-der " Ellipses," page 30, and also " The Border,"page 121.
Brushes. Black or red sable brushes are employedin the course of lettering for the final filling out withink of the spaces betwen the outlines of large letters.
To correct mistakes of overdrawn ink lines and spots
by painting out with white color, a very fine brush8

is used. Brushes, mounted in metal ferrules, withhandles are preferable. Nos. five or six may beselected for the ink work, No. one for the whitecolor.
Clean out the brushes in water, as soon as donewith them. Take special care not to let the inkharden in your brush. Lay them into a case or box,
flat, so as to keep the hair straight and smooth.Ink Eraser. To remove an ink spot or fraction
of inked line a sharp steel eraser is used. To makea perfect erasure, so that it cannot be noticed, is a
very delicate operation, because the smooth paperwill be roughened. The spot may finally be flat-
tened and polished by rubbing with the bone handleof the eraser. Ink rubber should not be used.
The correction of faulty ink lines and spots ondrawings intended for photographic reproduction is
a simple operation. If an error is made, finish yourdrawing first, and after all pencil marks and mussedspots have been cleaned off, correct the faulty line
by painting over with white color, as directed under" Water Color, White," in the article below. Adver-tisement designs are made for reproduction only, and
in themselves represent merely a means to that
end.
Water Color, White. A cake or pan of white color
is used to paint out errors on finished pen work in-
tended for mechanical reproduction. Take a verysmall brush, dip into water and rub on cake or pan.
The moist color will ^aeld quicker. When rubbedthick and creamy, apply to the spot to be obliterated,
taking care to confine the operation to the inkedportion only, and not to daub the paper. The whiteline at the edge should be cut sharply. A second ap-
plication of white color may be necessary after the
first coating has dried thoroughly.
Sheet Gelatine is used by some letterers for trans-
ferring designs, measuring, &c., and also as a supportfor the compass- or bow pen-points, when drawingcircles or arcs, to avoid tearing large holes in the
drawing paper.
Its use is not recommended, as the practice is
liable to soil the paper. When the compasses are
employed properly, the drawing paper should not
become torn, and the use of tracing paper fills all the
other requirements.
PART II—PRACTICE WORKPosition as to light. Always do your work in the
best light obtainable. Get nearest the window.
North light is the best, light from the east the next
best. See that the light falls on your drawing board
from the left upper corner. You will notice, when
drawing lines with the T-square and triangle, that
by having the correct position, no shadows fall onthe working side of your paper, and your eyes will
be saved. The drawing board may be laid flat uponthe table, or slightly inclined at the top.
19

Plate I
The Guide Lines


When lines are to be drawn on the right, or shadeside, swing your drawing board around, so the bot-
tom edge will be at the top, but do not change yourposition, nor that of the T-square. The horizontal
top lines of letters are drawn in the same manner.Practice work. Your daily practice work should
be done in the following order. Select the proper"place to work, with reference to light, as above.
Dust and carefully wipe drawing board, T-square,
triangle, &c., .with dry cloth. Sharpen and point
pencils and compass lead. See that your hands are
clean. Stretch drawing paper upon the board. (See
under "Drawing Paper.") Square off the paperand put in the guide lines.
Guide Lines. (Plate I). You may start in to
copy the first three letters of the Roman alphabet
from Plate 2, " Mechanical construction." The let-
ters are, say, i inch high, so you should make yourcopy 2 inches. Divide your sheet. of drawing paperinto two inch squares. Be very accurate to have all
squares exactly alike. Draw even, thin, sharp lines.
Beginning from the top line, the first space of squares
is to be filled with letters, the next one below left
blank, the following one is for letters again and so
on. Now, with bow spacers measure width of hair
lines of letters, and mark from top and bottom line
of first space on drawing paper the double distance,
then draw lines from the marks, parallel with the
others. Do the same with the other letter spaces.
You are now ready to begin the sketching in of the
letters into the squares. This is done freehand,, in
long, light, sweeping strokes of the pencil. By meas-
uring the width of letter and comparing it with its
22
height you will arrive at the proportions relative to
its position in the square. The Roman A is muchwider than it is high. It should be started from the
center and top line of the first square, and the serifs,
or spurs, extended outside of the square. See first
example on plate i.
The letter B is then sketched into the third square,
leaving the second square to intervene. Place the
lines for the heavy, or down stroke, just within the
square.
C, like O and G, &c., is a round letter, and can be
placed almost wholly within the square.
All letters are sketched in freehand and no rule
or instrument whatever is used for guide or measure-ment. The proportions must be studied out andcopied with care. Fill in the remaining squares onyour drawing paper with the letters A, B and C as
above, always trying to improve on the letter pre-
viously made. After finishing a letter, examine it
from one side first, then from the other, and also
looking at it from the top, or upside down.. Youwill thus find deficiencies in the roundness of the
curves and the shape generally. These shortcomingsshould be corrected, however, from the original
position as you sit before your drawing board. Eachexample must be carefully studied and practised un-ceasingly, until the student has brought out everyline and curve as correctly as possible.
When you think that you have copied the letters
as well as you can, clean them off with sponge rub-ber, until only faint lines remain. Over these youmay now proceed with your instruments, guided bythe rules on the " Mechanical construction " plate.

Lay T-square across drawing board, with its headagainst the left edge. Place triangle in position
against top edge of T-square blade, so as to reachslightly above top lines of drawing. Now with sharppencil draw all vertical lines along left edge of tri-
angle, starting at the extreme left and working to-
wards the right, until all lines are drawn. Theexact width of hair- and body-lines is determined bymeasurement with the bow spacers, dividers, or a
piece of cross-section paper. Next slide T-squaredown the board, until the triangle again reaches just
above the height of lines to be drawn. Proceed as
before, beginning at the left, and so on, until all
vertical lines have been drawn. Removing the T-square, all diagonal lines are drawn next, by the use
of the triangle. Attention must be given at all times
to get uniform widths of hair lines and body lines.
Now discard the triangle and draw horizontal lines
along the T-square edge, beginning at the top andworking along from left to right, to the end of blade.
Then lower the T-square and, as the lines come into
view repeat the operation all the way down the sheet.
Do not have any instruments on the drawing boardand in your way. When all straight lines have been
gone over, remove T-square and take up your com-passes. With the pencil point draw all circles andarcs, as told under "The Compasses." Begin fromthe top line and work downward, doing the large
circles first. Let your arcs run flush with the straight
lines. The bottom and top lines of the letters are
finished by the T-square last of all. To do the top
lines conveniently, the drawing board is turned
around, until the bottom edge is at the top. With
the T-square head pressed against the same edge as
before, (now on the right) draw the top lines of let-
ters (now at the bottom). (See also "The T-square," " The Triangle," " The Lead pencils " and"The Compasses.")
After you have succeeded in making good copiesof the first three letters of the alphabet, preserve thebest sheet, destroying those containing the inferior
studies. On a fresh sheet continue with the nextthree letters, D, E and F, and so on, down to Z, andthe numerals.
The sheets of drawing paper containing the best
copies of letters are finally scrutinized, and if no im-provement can be made on any of them, they may beworked out in ink. (See under " The Ruling pen,""The Compasses," &c.) A better way, which in-
sures cleaner work, is to trace the drawings upon.
a
fresh sheet. (Consult the article " Tracing-Paper or-Cloth.") When all your letters are done, comparethem with the originals in the book and make a newdrawing for any found deficient.
Take good care of your drawing instruments, wipethem after each handling.
Always remember that the light should fall uponyour work from the upper left corner of drawing"*
board.
Take your time to work out lettering. Go slow.
Good work cannot be done in a hurry. Letteringrequires patience.
When working on a drawing, keep your paper as
clean as possible. A lot of mussing can be avoidedby covering up all portions of the drawing belowthe working line. Use tracing paper, or even clean
23

Plate II
Modern Roman
Mechanical Construction 1


• Plate III
Modern Roman
Mechanical Construction 2

J ^
^^T" S?^

Plate IVModern Roman
Mechanical Construction 3

, \r Y )

wrapping paper, and thumb tacks. After the topline of lettering has been inked in, shift your cover-ing to below the next line and so on.
After proficiency in the use of the instruments hasbeen attained, lettering is always finished by their
use. At this stage the freehand work is allowable'only in the sketching of letters.
Freehand work should again be encouraged onall but straight lines, when the student has masteredthe art so far as to be able to draw all the letters to
perfection.
Ellipses. The construction of an ellipse, while a
difficult and laborious proposition for the student ofmechanical drawing, can be narrowed down to a
simple manipulation for the purposes of the practi-
cal letterer. In this respect elliptical lines are rarely
used for anything but borders or frames of adver-tisements, and inscriptions on plans, memorials, &c.An oval or elliptical border is a most handsome
thing, although it eats up a lot of costly space whenused for an advertisement.
One method of drawing an ellipse, and the easiest
of all, is to employ a section of the outer edge of anirregular curve. You can make ovals in any shape,
full pointed or flat. Use the curve for a quarter sec-
tion only. Divide the space on the drawing paperby a horizontal and a vertical center line. Drawelliptical line by guide of the irregular curve, butdo one-half or one-quarter section only, and use
tracing paper to construct the rest. (See " Irregular
Curves," page i8; also "Tracing Paper," page i8.)
Another method, and one that can be employedalso on larger work, is to put in the center lines, as
above, and then to use the compasses as in construct-ing the inner line of the letter O. (See " Mechani-cal construction of letters and numerals," page 31.)-' As given in books on geometry, one of different
methods of drawing an ellipse is as follows
:
First determine the major and minor axe.s. Thendraw straight lines R H and H Q, making anyconvenient angle at H. With center H and radiiequal to the semi-minor and semi-major axes re-
spectively, describe arcs L M and N O. Join L O30

and draw M K and N P parallel to L O. Lay off
hi-^ of LN. Join Oi and draw M2 and N3 paral-
lel to Oi. Take H3 for the longest radius (^T),H2 for the shortest radius (~E), and one-half the
sum of the semi-axes for the third radius (~S) anduse these radii to describe the ellipse as follows : LetAB and CD be the major and minor axes. Lay off
A4=E and A5=S. Then lay off CG=T and C6==S.
With G as center and G6 as radius draw the arc 6, g.
With center 4 and radius 4 5, draw arc 5 g, intersect-
ing 6, g at g. Draw the line Gg and produce it mak-ing G8~T. Draw g 4 and extend it to 7 making g7=S.With center G and radius GC (~T) draw the arc
C8, with center g and radius g 8 (~S) draw the arc
8 7. With center 4 and radius 4 7 (~E) draw arc 7A. The remaining quadrants can be drawn in the
same way.
MECHANICAL CONSTRUCTION OF LET-TERS AND NUMERALS
To lay down strict rules for the construction of
the ideal lines of Roman letters seerns a cruel under-
taking, but as there should be a system by which the
beginner may be taught, the author has endeavoi-ed
~to supply one according to his experience.
These rules will gradually be superseded by sim-
pler methods as the student acquires proficiency.
Even the accomplished artist draws his guide lines
to be eliminated after he has no further use for them.
The drawing paper is first laid out in guide lines,
as described under " Practice Work," page 19.
A The letter A is sketched into the first square
freehand and in light, clean lines. Whenyou have succeeded in copying the letter from plate
2, " Mechanical construction of letters," as well as
you can, remove the pencil marks with sponge rub-
ber, until only faint lines remain. With the triangle
as a guide and a sharp pointed pencil draw the outer
lines from the lower corners of square upward to the
center of top line of square. The widths of hair-
and body-lines are measured by the bow spacers or
dividers and then marked on the drawing paper.
The inner straight lines are now drawn accordingly
and parallel with the outer lines. The length of the
serifs or spurs on the bottom must then be determinedand marked on the drawing. The arcs are run in
with the compasses and pencil-point. (The centers
for compass-point are indicated on the " Mechanicalconstruction" plates by small stars.) Note the
smaller and larger curves, as used for the slanting
lines. The top and bottom lines are finally drawnalong T-square edge. Observe that the pointed top
of A extends above upper guide line. Rememberthat all the letters are first sketched in lightly, free-
hand. (See " Practice Work," page 19.)
Bin constructing B the first line of the downstroke or body line is drawn by the triangle
edge, along the left side of the square. The width of
body line is taken and marked on drawing, and the
second line of the down stroke made parallel to the
first. After the lengths of the two serifs have beenmarked and drawn the triangle is discarded and the
middle hair line located slightly above center,
marked and drawn. Next the outer semi-circles to
31

Plate VModern Roman 1

EFGD
KL

Plate VI
Modern Roman 2

MNOPRST
UVWX

Plate VII
Modern Roman 3

12345YZO?• 9 •

the right are made. Then the inner curves, after
the widths of the body lines have been carefullymeasured. Note that the thickness is slightly fuller
towards the middle part than that of the straight
body lines. Observe also that the lower round bodyline is a little heavier than the upper one, andthat the bottom portion of the letter is more ex-
panded than the top. All letters look better when"weighted" towards the lower portion. The arcs
for the serifs, and the top and bottom hair lines are
drawn last.
Find the exact point of center for your compassesso that the curves are run perfectly tangent with the
straight lines. The construction lines are drawnheavier than the guide lines, and a softer pencil is
used.
CFrom a point in the exact center of square
the outer curve of C is drawn with the com-passes. This line must slightly overreach the top
and bottom guide lines. The straight line of serif at
the right is next run down by the use of triangle
edge. The centers for compass-point must now befound to extend the top and bottom outer curves
toward the right. It is of the greatest importance to
have the lines run flush with the semi-circle, so that
they appear as one line and no break is noticeable
where the two arcs join. The end of lower hair line
is carried a little farther out than the upper, in
order to better balance the shape of the letter. Theinner curve to the left comes next, after the width of
body line has been marked, then the inner lines ontop and bottom, connecting it, are drawn. Notethat the end of lower hair line is thickened. The
38
width of all hair lines must be uniform. The small
arc on top of serif, the two short straight lines on
serif and the one on end of lower hair line complete
the letter.
DAs in B, the two vertical lines for the downstroke of D are first drawn. The outer
semi-circle to the right comes next, then the inner
curve. Always obtain your measurements first. Thesmall arches connecting inner curve and horizontal
hair lines must be placed very accurately, so as to
run flush with both, without showing a joint. Theserifs are then drawn, as before.
EThe vertical lines for the body line of Eare drawn first, the same as for the letters B
and D. The vertical lines of the brackets and center
serif are made next, after their dimensions have beenascertained. Note that the lower bracket extendsslightly beyond the line of the upper one, also that
it is a little heavier. Measurements are now takenof the widths of brackets, and the diagonal lines
drawn. The middle hair line is placed slightly abovecenter of square. The serifs on top, bottom and onmiddle hair line are made, then the short end strokes
and finally the top and bottom lines.
FWith the exception of lower bracket, the con-struction of letter F is identical with that
of E.
GThe letter G is constructed like C and the
lower body line is added by the use of the tri-
angle. The serifs are drawn last. See that lowerbody line balances well with top serif.
TT Place letter H in the center of the square.^ The two body lines are drawn first, after their

width has been marked. The middle hair line is
next put in. Note that it is located just above the
center. The serifs are now drawn and the letter
finished by the top and bottom lines. The serifs mustall be of uniform length.
1 Letter I is but a repetition of a part of formerletters and its construction requires no special
description. Place the I in the center of the square.
JThe body line of J is placed against the right
side of the square. The arch at the bottomis then drawn toward the left and the ball added.
Joining the lines of the ball so that they appear as
one continuous curve requires accurate placing of
compass point. The curve must reach just below the
guide line. The serif and top line are drawn last.
KA difficult letter is K. After drawing the
lines of the vertical body line, the exact loca-
tion of the diagonal hair line is of importance. Whenthis has been put in, the next difficulty is the correct
placing of the short diagonal body line. This mustbe sufficiently slanted so as to extend far enough be-
yond the upper hair line to balance the position of
the letter well. The serifs are now drawn. Special
attention must be given to the bringing out of the
proper values of the smaller and larger curves neces-
sary to meet the slant of the lines. The top and bot-
tom horizontals finish the letter.
LThe construction of letter L is done undera partial repetition of the rules for making
the E.
MThe vertical lines of M are run exactly
within the square. Draw the hair line to the
left first, then the body line at the right. Nextfind the center between the two and mark on the bot-
39
tom guide line. From this point draw the diagonal
hair line upward. (An easy way to get the correct
slant is to run in the top left serif arch first and then
let the lower line of diagonal body line run up to
meet it.) The serifs are all put in simultaneously,
and then the diagonals drawn. The short end strokes
and the top and bottom lines are finally done. Notethat the point of center body line extends belowguide line.
N Similar to M the N is made. The two hairlines are drawn first, then the serifs, and the
diagonal body line next. The short ends and topand bottom lines last. Remember that the point of
body line must reach below guide line.
OThe outer line of O is a simple circle, just
overlapping the top and bottom guide lines.
A horizontal and vertical guide line, drawn across
the center point, will assist in finding the correctposition of the compass centers, for drawing the in-
ner long curves and also to connect them by theshorter curves of top and bottom inner lines. Notethat the body lines are a little heavier in the middleportion than the straight body lines. See also that
the hair lines, at their narrowest part, are of equalwidth with the straight hair lines. The small curvesmust run flush with the larger ones.
PThe letter P is constructed on part of theprinciples of B except that the middle hair
line is placed slightly below the center of square andthat the outer semicircle extends outward as far as
the lower curve of B.
OFor Q draw an O as per directions above.The dash or tail at the bottom must be made
gracefully and somewhat lighter than the body lines.

Plate VIII
Classic Roman

ABCDEMGH I KtN FOPQRSV

Observe the compass centers to get the dash into theright position.
"O Another letter hard to make is R, and theAv obstacle to be overcome is the curious shape
and position of its curled tail. The other parts ofthe letter are constructed as in B. The hooklike endof the tail or dash should stand out beyond the line
of the upper semicircle, and also run fairly overand below the guide line. The curvature of the
dash must be well studied, for upon its correct
shape depends the expression of this letter. Thelarge curves are always drawn first, the smaller ones
last. Give ample width to the dash.
SThe most difficult to draw of all letters is
the S. Of advantage to the student, how-ever, is the fact that it will about fill the space withina square. The top and bottom hair lines are drawnfirat. Remember that the outer curves must extend
just above and below the guide lines. One vertical
center guide line, and two horizontal guide Imes,
equal to the width of the straight body lines, are
drawn. The center between these guide lines should
be a little above the center of the square. The outer
semicircles are drawn to connect the upper hair line
with the lower center guide line at the left, and the
lower hair line with the upper center guide line at
the right. Next the inner curves are made to con-
nect the inner line of the top hair line with the
upper center guide line, and the inner line of the
bottom hair line with the lower center guide line.
The width of the body line should be greater at the
right and left curves than at the center part. Thevertical lines of the serifs are now put in, the lower
42
one on a line with the upper semicircle and the up-
per straight line receding from the line of the lower
outer curve on the right. This is done to balance
the upper and lower portions of the letter. Theshort curves on both ends of the serifs are then
drawn. All small curves must run flush into the
larger ones. The short horizontal lines for the cen-
ter bo'dy line are now made, tangent to the curves.
Finally the short end lines are drawn. The letter S
requires a great deal of study and practice to bring
out the beauty of its shape.
TA simple letter is T. As long as you get the
measurements correct you cannot fail to makeyour copy an exact duplicate of the original. Place
it right within the square. The body line is drawnfirst. Then the two brackets, which must be of uni-
form length and thickness. Be careful not to get
them too heavy. The serifs and top and bottomlines are done last.
UThe proportions of U should be carefully
studied. The body line is drawn first, then
the vertical part of the hair line. Next the curves
connecting the hair- and body-lines are run in. Youmust try with your compasses until you find the ex-
act center point and have the curves meet the straight
lines perfectly flush. The serifs and top lines com-plete the letter.
VThe V is like,A reversed, without the cross
hair line, but much narrower than that letter.
Draw the outer diagonals from the center of thelower line of the square, the inner lines parallel to
the former. The serifs are measured and drawn as in
A and the larger and smaller curves, as applied for

the slant, well studied. The short finishing line onthe bottom end and the top lines are done last. Thepoint must extend below the guide line.
WThe widest letter of the alphabet, W, re-
quires special study as to proportion. Lightfreehand sketching will determine the position of
the two starting points from the lower guide line.
The first body line and the last hair line are drawnat the start. Then the middle hair- and body-lines
are run parallel with the first. The two open spaces
between the upper portions of the letter must be
exactly alike in size and shape. The serifs are then
drawn with caution. Make use of the experience
gained with letters K and V. The short end lines
and the straight top lines finish the letter. Do not
forget that the two points should reach below the
bottom guide line.
XA rather peculiar letter is X. The result to
be aimed at, in the construction of this let-
ter, is an even balance to right and left and also a
smaller upper than lower portion. The waist line
must consequently be raised above the center of
square. Start the outer diagonal lines from the top
corners of the square and let the hair line extend
beyond the lower left corner. The second line of
the body line must run outside of the square at the
lower right corner likewise. The second outline of
hair line is then put in and the effect studied. If
they are balanced correctly, the serifs are drawn with
the same attention to the right placing of the smaller
and larger curves as in V and W. Then the short
end strokes of the serifs and the top and bottom hori-
zontals are drawn.
YThe upper portion of the letter Y, resembling
V, it is made on somewhat similar principles.
The vertical body line is drawn in the center of the
square. The outer diagonal lines are then put in,
bringing the waist line on the right to about the
center and the inner diagonal body line to connect
at the same point. Thus the waist line on the left
side will come considerably below the center. Theouter diagonal lines are run outside the upper cor-
ners of the square. The serif curves are now drawn,observing the correct placing of the larger andsmaller curves, as for previous diagonals. The short
end strokes and the top and bottom lines are then
made.
ZThe last letter of the alphabet, Z, fits into a
square at the top, the bottom portion extend-
ing outside of both corners. The diagonal body line
is put in first, then the short vertical lines of the
brackets. The diagonals of the brackets are next
drawn. The lower bracket may be a trifle heavier
than the upper one. The short ends are then fin-
ished and the top and bottom hair lines drawn.
THE NUMERALS
IWith the exception of part of the top serif the
figure I is identical with the letter I and is
constructed accordingly.
2 The 2 about occupies a square. Much study is
required to balance the figure properly. Tobring out its grace of outline untiring practice is
necessary. The top hair line is done first. Run the
upper curve slightly above guide line. Next the hair
43

Plate IX
French Roman 1

ABCDEFGHIJKLMNO

Plate XFrench Roman 2

PQRST& Z ,!?
UVWXY

line is drawn from the left lower corner of thesquare up, toward the center. The inner line of theupper body line is then run in, connecting the in-
ner line of the top hair line with the lower hairline. The second line of the lower hair line is nowrun from below and upward, observing that the
width of the hair line must at its narrowest pointcorrespond to the width of the straight hair lines.
The curved outer line to the right is drawn by twosuccessive center points. The lower body line or
tail is done next. The peculiar swing must be care-
fully copied. The long curves are drawn first, the
lower one reaching a trifle below the guide line,
the smaller ones last. Note that the body lines are
a little fuller than the straight body lines. The ball
at the top comes next and great accuracy is neces-
sary to run in the small curves as one continuous
line. The figure is finished by the short strokes at
the bottom.
3 The proper shaping of figure 3 demands even
more study and practice than that of 2. This
numeral also is just about as wide as a square. Notehow much smaller is the upper portion than the
lower. The top and bottom hair lines, just reach-
ing above and below the guide lines, are drawnfirst, then the round body lines, somewhat like those
of the letter B, the lower one a little heavier than
the upper. The balls are then added to top and
bottom ends, and again the lower one must be a
trifle fuller. Examine the work critically to see
whether the figure is properly balanced. If not,
try again. The short straight line to finish the cen-
ter end is done last.
48
4 The 4 is of comparatively easy construction, butits width is perplexing. Place the figure in the
square so that the vertical line of the serif on the
right end of the hair line rests on the right side of
the square. The body line is drawn first. Then the
horizontal hair line. The correct location of this
cross line is important. Next comes the diagonalhair line, which must run out to the left sufficiently
far to balance the serif end on the right. This serif
is smaller than usual. The point on top must ex-
tend above the guide line. The serifs are nowdrawn and the short ends finished.
5 To construct the 5 is easier than it seems. Thepoint to be observed here is the proper balanc-
ing of the lower portion of the figure with the up-per. Start by running in the bottom hair line, anddo the center hair line next. The round body line
is then connected with both. Then comes the ver-tical hair line, followed by the upper curved bodyline or tail. This is nearly like the tail of figure 2.
The ball end of the bottom hair line is then drawn.It should extend far enough beyond the line of theupper vertical hair line to balance the figure well.Finish by putting in the short end strokes. Do notforget that the round body lines need fullness.
6 For the 6 draw a circular guide line first, extend-ing just above and below the guide lines. Next
run a vertical guide line through center. The innercurve for the upper part of the body line is thenmade. From a point of the center guide line drawthe inner curve of the top hair line. From the sameguide line draw the inner curves of the bottomand center hair lines, then connect these small

curves by larger ones. The outer curve of the cen-
ter hair line is next made and connected by a smallcurve w^ith the outer circle. Add the ball to the tophair line. Finally draw in that part of the circularguide line v^^hich constitutes the outer constructionline of the figure.
7 The upper body line of 7 is almost identical
with the tails of 2 and 5, except that it is moreextended. After this has been drawn within the
boundaries of a square, parallel diagonal guidelines, corresponding to the width of hair lines, are
run from the right end of upper body line to a pointwithin a short distance of the lower left corner of
the square. The left curve of the lower body line
is now drawn from the second lower guide line up-ward, meeting the first diagonal guide line flush.
Next the right curve of the lower body line is made-from the lower guide line upward, joining the sec-
ond diagonal guide line just above the center of the
square. The small curves connecting the upperends of the diagonal guide lines with the upperbody line are put in, and then those parts of the
diagonals, which lie between the curves, redrawn.The vertical serif at the left upper corner, the bot-
tom line, and the short ends, finish the figure. At-tention is called to the extra width of the lower bodyline and also to its peculiar position, which must ap-
pear well poised to balance the upper portion of
the figure. The extremes of the curves and points
must project above the guide line.
8 In the 8 we have the most difficult of the num-erals. Its construction is similar to that of the
letter S. A vertical center line and two parallel
49
horizontal guide lines are drawn in the square asfor S. The upper and lower outer curves are drawnfirst, extending just above and below the guide lines.
The left outer curve on body line is next made toconnect the upper line with the lower center guideline. The lower outer line is likewise connectedon the right by a curve with the upper center line.
This curve may touch the right side of the square,while the upper curve must recede from the leftside of the square, to insure a smaller top than bot-tom portion of the figure. The inner curves of thetop and bottom hair lines are next drawn. Thenthe inner curves of the body line, running fromthe center guide lines, and connecting with the innerline of the hair lines. The same radius is used forthe opposite curve on inner line of the hair lines.
The lower outer curve of the hair line is now ex-tended by shifting the point of compass center tothe left. From the extended bottom curve a smallercurve is drawn at the lower left, connecting with thecurved body line, near its junction with the lowercenter guide line. A small curve is likewise drawnconnecting the top outer curve with a point at theintersection of the upper center guide line and thecurved body line on the right. The result shouldshow a substantial thickening of the lower hair line
at the extreme left, and also of the upper one to theright, although the latter should be of lesser width,
9 The construction of 9 is a repetition of that of
6, as it represents that figure upside down,but with two distinct exceptions. First: theupper portion of 9 is shorter than the lower one of6 and the inner line can be done in one plain circle.

Second: the lower end of 9 is more extended thanthe top of 6, because of the rule as applied in con-
structing 3, 5 and 8, i. e., to always make the lowerportions fuller than the upper. Therefore the ball
end is extended and the ball itself enlarged.
OThe o is identical with the letter O and drawnaccording to the same principles.
&The construction of the abbreviation mark for" and," &, is explained here, since we have now
learned about the figure 8. The & is practically an8 with its lower portion shifted slightly to the left
and a small c attached to its lower right. Run in
the lines as for figure 8, taking care to keep the
lower portion i^ell to the left. The bottom hookis then drawn and finally the ball end. See that this
character is well balanced. The ball end shouldappear as the continuation of the lower hair line,
and the bottom hook as that of the body line.
P The interrogation mark is made, with a slight
• deviation, according to the rules laid down for
constructing the upper part of figure 2. The ball or
period must be of a thickness equal to the width of
the body lines. The latter principle also applies
to the construction of the comma (,) and exclama-
tion mark ( !).
Ink work should not be attempted on letters andnumerals until proficiency in the copying of their
outlines, by pencil, has been acquired. Ink workin the mechanical construction of letters and num-erals is done on the following order: the small
circles and curves are done first, the larger ones
next, then the vertical and diagonal lines are run
in, and the horizontals last.
In no case is it permissible to copy a letter or fig-
ure from the book, by the use of tracing paper.
Nothing is gained by such practice. Your eye
must be trained as well as your hand. Freehandsketching is the best means to that end. The con-
struction of the letters and numerals on mechanicalprinciples is done to show how near you can cometo the true lines, and also to gain experience.
GENERAL RULES FOR THE CONSTRUC-TION OF LETTERS
The letters of the alphabet should appear as
much as possible each to occupy the same amountof space. They should be made to appear so, to
produce harmony. There are certain limitations to
this, however. The letter M or the W, for in-
stance, would not look well when squeezed into a
space equal to that occupied by an I or a J, nor vice
versa. It is the volume of the letter, in its relation
to the white space between the letters, that counts.
As a matter of fact hardly two letters of the
whole alphabet can be made to fill exactly the sameamount of space and look right. Study the charac-
ters on plates 2, 3 and 4, "Mechanical construc-
tion of letters and numerals" and note how theyappear in their finished state, plates 5, 6 and 7,
"Modern Roman." To make the proportions of
black letters and white spaces as nearly alike as pos-
sible is the idea underlying the principles for the
construction of letters designed for legibility. Tostrive to even up space without addition to, orchanging the individual lines of the characters, is
50

to help to make these letters easy to read when theyare assembled in words and phrases.
Next to W, A and M, the letters K and X oc-
cupy the largest space. Still A appears no larger
than B, which letter is, in fact, much smaller. They I and J fill the smallest spaces.
The proportions of the Roman letters are basedon the square or the circle. All round or circular
letters, like O, S, C, &c., should be made to extend
a little above and below the line, otherwise they
would look too small. A striking example of this
illusion is found in the letter R. If the hooked end
of its curved tail is made on a line with the lower
serif, it will appear too short. This is a mistake
often seen.
For the same reason the sharp points of the let-
ters, A, V, N, &c., should be extended above or be-
low the line.
The utmost care is necessary to have all hair- and
all body- or heavy lines of the letters of equal width.
Accuracy of construction is the chief requirement
for drawings of letters, and exactness can best be
acquired when enforced at the beginning. Whencopying letters and numerals from the book take
your dimensions deliberately and with care.
The drawing tools and materials should be prop-
erly employed, see Part I—" The Drawing Mater-
ials," page 9.
Hair lines are the light up-strokes, body lines or
down-strokes are heavy lines, as in writing. Theround body lines of letters like O, G, B, &c., should
always be a little heavier in the middle portion than
the straight body lines, lest they appear too thin.
The width of the curved hair lines, at their narrow-est part, is equal to that of the straight hair lines.
\jr^Sjr"\y' such awkward mistakes as an in-
Y .^\. X verted Y or V or X are frequently
met with. They are sometimes committed byeminent artists, proving that these masters do not
give due consideration to so important a matter as
lettering.
Like the lines of a well constructed building, the
letter should be lighter in its upper, and heavier in
its lower portion, wherever it can be so constructed.
Thus the middle hair lines of B, E and H are placedslightly above the center, and the lower brackets of
E, L, and Z made somewhat fuller than the upperones. B, C, E, G, K, R, S, X and Z are all widerat the bottom than on top, for the same reason.
The above rules together with the principles of
mechanical construction on page 31 are given to
teach not only the construction of the ModernRoman letters, but all other styles of Roman letters
as well. By applying these principles, with a fewexceptions as to details, the Antique Roman, FrenchRoman, Ornamental Roman, Block and Plain let-
ters can be correctly made. The rules will also aid
materially in the construction of the Roman Italic
alphabet, or slanted Roman.All these styles are described under separate head-
ings, and this article deals only with the method of
construction of the letters.
Antique Roman. In this alphabet (plate 11), the'
serifs vary from those of the Modern Roman letters
in that the curves are extended by straight lines, mak-
51

Plate XIAntique Roman

ABCDEFGHIJKLMNOPQRSTUVWXYZ &

ing them flat and thinner. The hair lines are also
lighter, and the brackets and serifs of C, E, F, G,L, S, T and Z are slightly curved and slanted. Thebody lines of A, K, M, N, R, V and W show thepeculiar pointed extension at the ends, characteris-
tic of this style. There are several other minor devi-
ations, which require no special description as to
construction. The student who has acquired the
faculty of correctly copying the Modern Romanletters, will have no trouble in reproducing the An-tique Roman letters from Plate ii. See "AntiqueRoman," page 92.
French Roman. In constructing the FrenchRoman letters (plates 9 and 10), the complicationsare considerably lessened after you have acquiredthe mastery of the letters of the two former alpha-
bets. The manipulation is very similar to that of
shaping the Antique Roman. In fact, the pointed
serifs and ends of the French Roman letters require
a good deal less work. Being extremely graceful,
these letters demand delicate handling. To repro-
duce them correctly is a matter of great accuracy,
as the slightest deviation from the clean, sharp line
or perfect curve would, of course, prove fatal.
See " French Roman," page 89.
Ornamental Roman. To construct the curvedserifs of the Ornamental Roman letters (plate 12),
is a simple matter and requires less accuracy of exe-.
cution than the straight end strokes of the ModernRoman, in that slight deviations are not at once ap-
parent. Even when fairly well done, the effect is
highly ornamental. This goes to prove that a fewornaments can hide a number of defects, and that a
plain letter is generally the hardest to make. In all
other essentials the Ornamental Roman letters are
made exactly like the Modern Roman. The ap-pearance of the letters can be varied by adding balls
to the ends of the serifs.
See "Ornamental Roman," page 92.
The Block letters (plate 18) are practically Mod-ern Roman with all the lines of equal thickness, andtherefore much easier to make than the latter style.
The principal thing to observe, in its construction,is to get all parts of the letter of even width. Squareguide lines are drawn for the construction of Block,as for Modern Roman letters, but the upper andlower inter-guide lines are placed as far from theouter ones as the width of the body lines. Wheiidrawing the Block letter run all inner lines parallelwith the outer ones, as in the drawing of the bodylines for Modern Roman. On account o'f the heavyserifs, the cross bar of A is placed somewhat higherthan in Modern Roman. The serifs of K, X and Yare perplexing, because of the great slant of the diag-onals. This difl!iculty may be avoided or lessenedby decreasing the widths of the lines of all letters.
The block serifs should be nicely squared and caretaken not to have them too long.
The principles of construction laid down for theModern Roman letters, may be applied in a slightlymodified manner. See "Block" letters, page 96.Square Block. A style of Block letter, con-
structed entirely of straight lines, except the roundcorners, is made similar to the Square Plain letters,
plate 16.
54

Ornamental Block, (plate 19) is a Block letter
with curved serifs, as in Ornamental Roman. Forprinciples of construction see " Block," above.
The drawing of the serifs needs no special direc-
tions.
See "Ornamental Block" page 97.The Plain or Condensed, Round. These letters,
(plate 15) are designed to meet the requirements of
convenience and economy.They can be made, according to squareness or cir-
cularity, on the principles of the Modern Roman.That means that letters like B, D, H, &c., may bemade approximately as wide as a square, and roundletters like C, O, S, &c., to just fill a circle. A, K,
M, V, W, X and Y should then be made wider, of
course, as in the Modern Roman, but the letters E,
F, L and U are exceptions, and should be nar-
rower. See "Architects Single Stroke Alphabets,"
plate 20, Alphabet i.
As the Plain letters are intended for a smaller
space, however, they are generally narrowed downto four-fifths of their height, and can be made still
narrower. A glance at plates 15 and 16 will showthat the widths of letters B, C, D, H, J, N, P, R, S,
T and Z are normal, as above, E, F, L and U nar-
rower, and A, G, K, M, O, Q, V, W, X and Y wider
than four-fifths of their height. Draw guide lines
as for Block letters.
Do not make the Plain letters too heavy.
Plain, Square. A variation of the Plain letter is
made square, with straight lines and round corners.
(Plate 16). All round letters are done in straight
lines also, making their construction very simple.
Another variation has no curves at all, the cor-
ners being slanted oft with straight lines. This style
is much used in wagon lettering. See also article
on " Plain" letters, page 93.Plain, Spurred. (Plate 17). Although but a
Plain letter with pointed serifs or spurs added, this
style can be made to appear decidedly different
from the former.
The letters are constructed on the principles of
the Plain or Condensed letters, as above, with the
exception of A, M, N, V and W, whose body lines
are brought together to a sharp point, as in the
French Roman. Another deviation are the slanted
serifs of letters C, E, F, G, J, L, S, T and Z, neces-
sitating contraction of the curved parallel lines at
the ends, in order to make the connection for the
point.
The spurs should be made sharp and short, andall be of equal proportion.
Roman Italics, (plate 14). After the construc-
tion of the Modern Roman letters has been mas-tered the Roman Italics offer no difficulties to the
student. Instead of dividing' the drawing paperinto squares composed of horizontal and vertical
guide lines, as for Modern Roman, the guide lines
are run in diagonally, giving them the slant re-
quired by the Roman Italics. They should beplaced at an angle of about thirty degrees, so as to
form diagonal parallelograms of a width of three
quarters their height.
The curves of the letters of this alphabet may bedrawn freehand, using the writing pen, and only
55

Plate XII
Ornamental Roman

ABCDEFGHIJKLMNOPQRSTUVWXYZ St

the straight lines made with the ruling pen, guidedby the T-square and triangle edge.
Mechanical construction of the curves can be re-
sorted to in extreme cases, if the letters are verylarge, but this style of lettering never looks well ex-
cept when done with a light and graceful swing,and by using the instruments for their construction
they are liable to become stiff and awkward in ap-
pearance. For these reasons it is not advisable for
the student to attempt the reproduction of the
Roman Italics until a certain manual skill and con-
fidence has been acquired, which cannot fail to re-
sult after all the previous alphabets are mastered.
The Romaa Italics should be studied and prac-
tised in lead pencil first. The method of construc-
tion is as follows:
After sketching in the letters with pencil, the
straight down strokes or body lines are drawn along
the T-square and triangle edge. Then, with a pen-
cil or the writing pen the curves are drawn, observ-
ing that all hair lines and all body lines are of even
widths.
A The lines for the body line of A are drawnas above, then the hair line from the top
down, with a gentle, easy swing, ending with the
small ball. This flourish may be extended according
to fancy. The cross bar and bottom line of the serif
are drawn with the T-square guide and the curves
of the serif finished freehand.
BThe diagonal body line of B is made with the
triangle and the upper hair line started from
the top, with a swing to the left and a slight thick-
ening near the end. Begin again at the same point
58
of the top hair line, turning to the right and con-
tinuing with the curved outer body line to the Center
and thence again outward and down to the lower
guide line. Then the inner curves are made. Thelower horizontal hair line is drawn along T-squareedge and the curves of the serifs done as above.
CC is begun at the top, and the outer curve
made with one clean sweep of the pen or pen-
cil. The lower end is slightly accentuated by a backstroke. Beginning again at the upper hair line andgoing towards the right, the curve is finished withthe serif. The inner curve is finally drawn from the
top down.
DT? The manipulation for D is similar to
-t-' that of B. E and F are drawn with
F/^ triangle and the T-square except that^-J the serifs can be done freehand. G is
made like C first and then the lower bracket or bodyline is drawn with the triangle and T-square, and the
serifs drawn as before.
Remember the rule concerning the thickness ofround body lines, as given in " Mechanical construc-
tion of letters and numerals," page 31.HT H and I are done with the help of the tri-
-* angle and T-square, as above.
JThe diagonals for J are made with the tri-
angle and the lower curve put in, from left
to right, and finished with the ball. Then the topserif is done.
KThe first body line for K is drawn as beforeand then the hair line, beginning^at the top.
The ball end is next finished and the lower body line
done along the triangle edge. Then make the serifs.

LThe L is drawn by the use of the triangle
and T-square, except the bracket and serifs,
which may be done freehand. '
M\/T The hair lines of M and N are done•*-^ freehand and the ball is finished simi-
lar to the first line of A. The ends may also be ex-
tended. The other parts of the letters are drawnwith the triangle and T-square guide, and then the
curves of the serifs made.
OThe O is done by starting at the top andsweeping toward the left and down and
around to the right, then starting at the top again
and moving toward the right and down, uniting withthe first stroke. The inner curves are then run in,
from the top downward.When working with ink, the C, O, Q and S, also
all numerals except the i and 4, can be made entirely
with the writing pen.
P /^ P and Q are made similar to B and O.
R is a repetition of P, and then the
R lower body line or tail is drawn by starting
the outer curve at the center and running
it down below the line. The inner curve is then
made from the center down, in one stroke to the
end. A fine, graceful swing of this curve must be
produced, and the extent of the flourish is optional.
SS requires thoughtful study and prolonged
practice, as in Modern Roman. Start it with
the upper curve, from left to right. Then draw the
lower curve, from left to right and upward. Start
again at the point of beginning of the upper curve,
running downward and then to the right and downagain in one sweep to the lower curve, thus describ-
ing the lower line of the body line. Begin once morefrom the top, for the upper line of the body line, andunite with the lower curve. The curves of the bodyline must not appear too flat. The letter is finished
by putting in the serifs.
TThe body line of T is made and the bracketsand serifs done as with previous letters. The
brackets must be as nearly alike as possible, andthe one on the right must not appear too heavy.
UU is made with an upward swing of its hairline, similar to the first hair line of A, but
running in an opposite direction. Make the bodyline first, from the top down, and then the hair line,
also beginning at the top and uniting with body line
below.
VW/" V and W are done similar to other» V letters as described above. The cor-
rect slant of these two letters is of importance.
XV^ X and Y are also difficult as' to getting1 the slant to appear in line with the
other letters.
The hair lines of all these letters are capped witha ball, as before.
ZThe diagonal body line of Z having an extra
slant, great care is necessary to balance the
letter well, as against the slant of the other letters.
For the numerals a free interpretation of the con-struction of the Modern Roman numerals, by meth-ods as above, will be found sufficient direction.
Sign painters and decorators can make use of this
method of lettering by substituting the brush stroke
for the pen stroke.
59

Plate XIII
Century Roman
Modern Type(American Type Founders Co.)

ABCDEFGHIJKLMNOPQRSTUVWXYZ$&abcdefghijklmnopqrstu
vwxyz!?., 123456

See also article on " Roman Italics," page 93, and"Architects' Single Stroke Alphabets," page 112.
For lower case Italics see " The Lower Case Let-ters," page 74.
Modern Gothic, (Old English) plate 23, showsthe Modern Gothic types, and also the correct let-
ter shapes, drawn for comparison.Although built upon a foundation, entirely for-
eign, and representing another school, the lines of the
Roman characters can unmistakably be traced in theModern Gothic letters. For this reason the previousstudy of the Roman alphabets has a beneficial in-
fluence upon the student, seeking to master these ap-parently complicated characters.
Many and varied are the exterior decorativeflourished ends and scrolls, devised for ModernGothic, and the styles used are often badly mixed.The Gothic alphabet shown in instruction bookspresents many letter forms of different characteristic
treatment.
All letters are composed of straight or curvedparts. These parts or features recur in most letters
of a family, and they should always be made uni-
form in appearance. To present these features cor-
rectly and without variation, is to make the letters
plain to read and easy of construction.
In studying the individual letter forms of ModernGothic, it will be noticed that many parts are merelyadded as ornamental. A, for instance, would still
be plain A, without the second hooked flourish or
dash attached to the upper part of the hair line, andeven without the first. Likewise the top dash of B,
62
F, H, K, L, P, R, W and Y is unnecessary, but adds
to the ornamental expression of the letters. Thesecond of the double first body strokes in B, F, H, I,
K, L, R and S might also be dispensed with, aJid
the remaining component parts would still consti-
tute a letter. But inasmuch as the Modern Gothic
letters, as also the Uncial capitals, are designed andused chiefly for ornamental lettering, all parts serv-
ing as an adornment are indispensable.
First of all we will apply the principle of square-
ness and circularity. C, E, G, O, Q, S and T are
round letters, the others may be classified as about
filling a square.
Divide the drawing paper into equal squares, as
for Modern Roman, and add a horizontal center line,
but no further guide lines are required. The out-
lines of the letters are drawn in pencil and practised
until all letter forms have been mastered. All hair
lines are very fine and sharp, and the body lines all
of uniform thickness.
The structural lines of A are sketched into a
square, care being taken not to spread the letter too
much, and allowing space for the lower flourished
hair line. The diagonals are drawn similar to those
of the Modern Roman letter, then the lower curvedtail is added, and the two upper dashes. The center
cross line is finally put in.
The outlines of B are sketched by first copyingthe second vertical body line, then connecting it withthe upper curved and lower vertical body lines, fol-
lowed by the lower tail or dash, similar to that of A,but elongated, thus forming the frame of B. Thefirst vertical or sub-body line with its short dash and

the upper scroll are then drawn. Note that the twofirst vertical body lines run parallel to each other.
The ornamental central hair lines are drawn last.
The upper dash or scroll recurs in many other let-
ters, and should invariably be shaped alike. Alsothe vertical twin body line, wherever it occurs, is al-
ways the same. The lower flourish or tail, present
in most letters, should be of the same radius in every
instance, though varying in length.
The first body line of C is semi-circular. This
line is repeated in E and T, and in a modified way,
in G, O and Q also. The vertical body line, akin
to the second one of B, is entirely straight. The size
of the short upper dash must be restricted, to balance
the lower extremity of the semi-circular body line.
This small dash is again shown in many of the fol-
lowing letters. A lower semi-circular hair line is
added below the line to balance the flourish of the
other letters.
The top dash is continued in D, and combinedwith its second vertical body line.
E is a C with a short center dash added, which
must be placed slightly above the center line.
F also presents a repetition of the features of
former letters. The exterior ornamental hair line
may be run below the line. The short central cross
line is placed opposite the dash of the first vertical
body line, giving it the appearance of a continuance
of the same.
G is made similar to C, but its upper dash is con-
nected by a diagonal hair line, and the first curved
body line narrows down to a hair line in its lower
portion, and connects with another semi-circular
63
body line. The end of this line is connected withthe diagonal hair line above the center line.
H is a repetition of parts of former letters, exceptthe third vertical body line, which is started at aboutthe center and carried, in a curve, below the lowerline.
I shows the features of former letters, but its lowerdash is placed farther toward the left.
The letter form for J being absent in the Gothicalphabet, the I is generally used in its stead.
K is like H, but a new feature is introduced in
place of the third vertical body line. This short,
curved body line is started from a diagonal hair line,
placed slightly above the point of that of H, and is
connected near its lower end with another, but nearlyrigid body line, similar to the lower part of the
diagonal body line of A. The letter R shows a simi-
lar feature.
L shows parts of former letters, but the lowerscroll, to give expression, is somewhat elongated andshifted toward the right.
M, for reasons of harmony, has only a single first
body line. The second and third vertical body lines
are new features. The former is nearly straight, andthe latter, started with a slight curve at the end of
the familiar upper dash, is carried down, with an-
other short turn, to the lower line. Nearly all these
features are present in W. N presents parts of M.Features of G are employed for O, and the third
body line is started with a heavy, curved stroke, fromthe top down, uniting with the first.
The new feature shown in P is the extended first
body stroke, which is brought down to the extreme

Plate XIVRoman Italics

JKL44JV0PQ11
sri/rwxrz&/?
f • •

line of the lower scroll. The second vertical bodyline is connected with the lower dash, as in D.Q is O with an additional lower dash. This is
connected with the middle vertical body line and theornamental lower curved hair line is omitted.R is'a repetition of parts of the principles of B,
but the fourth straight body line is run downward,similar to the one of K, and not connected at thelower end.
S requires special study. The twin curved centerbody lines, resembling the curvature of the body line
of the Roman S, must run parallel with each other.
A good plan is to draw the two lines as one heavyone, and then separate them by drawing lines throughthe center. Note particularly, that the upper por-tion of the letter is smaller than the lower. Theposition of the diagonal hair line and its connectionwith the lower scroll must be carefully studied andpersistently practised.
T is C with its upper dash extended toward the
left and curved downward.U shows no new features other than the position
of the parts, and the squaring of the second vertical
body line, resembling the middle body line of M.V and W both present features from D and M.X shows singular treatment. The diagonal body
line should be gracefully curved, to prevent a too
rigid and stiff appearance. The position of the
diagonal hair line, and the points of connection withthe upper and lower dashes, must be carefully ob-
served.
Y represents parts of V. The first vertical bodystroke, however, is brought down to the line, with
66
a short turn to the right, similar to that of the
middle body line of M, but without corners. Thesecond vertica:l body line is curved toward the left,
near the lower line, and continued in a hair
line, connecting with the first body line, and carried
toward the left and downward, thickening into a
heavy, curved stroke, turning again to the right, and
downward again, finally narrowing into a hair line.
Z is a combination of parts of B and D.
See also "Modern Gothic," page 97.
German Gothic. (Plate 22.) The letters may be
considered somewhat wider than a square, but the
guide lines for their construction should be laid out
in squares. The inter-guide lines are placed as far
from the outer ones as the width of body lines.
The letters are sketched within the squares, the
vertical body line of-A, I, J, N and U leaning against
the right side of the square. The second or double
curved body lines of B and R, and the right ex-
tremes of body lines of S, X and Z may also beplaced against the inner right line of square. Thefirst vertical body line of H, K, L, P, V, W and Yare drawn against the left side of the square. Thecentral vertical body line of C, D, E, F, G, M, O,
Q, T and W should occupy a position in the center
of a square.
The first scrolled body' line of A is similar to that
of B, R, N, U, W and M, although more condensedin the last named letters, and, more elongated, the
same feature is present in D. The lower or basic bodyline of A recurs, in various lengths, in nearly all the
other letters. The vertical body line of A is repre-
sented again in U. The central vertical line of C *

is shown also in D, E, F, G, H, I, J, K, L, O, P, Qand T. C, E and T are similar in construction, andG, O and Q nearly so, as with the Modern Gothic.
The scrolled bar on the upper left of F, or the plain
one of P may be added to the letters H, K and Lalso. The feature of the top bar, connected withthe right curved body line of G, recurs in Z. Thepositions of the upper and lower curved body lines
of K and R are similar, as are the parts that consti-
tute the letters M and N, and those of V, W and Y.
All diagonal hair lines should, as nearly as pos-
sible, run parallel. The scrolled hair line ornaments
must be carefully sketched out.
See also " German Gothic," page lOO.
Modern Uncials (plate 24). The construction of
the Modern Uncials is a very complicated matter.
Of the rules governing the proportions of the Romanletters, only the principle of squareness or circular-
ity can be applied.
There are, however, certain pronounced features,
which recur in most of the letters. The place of the
vertical rigid body lines of the Roman letters is
taken by gracefully curved lines, tapering to a slen-
der stem in the middle portion. The semi-circular
body lines show the characteristic Gothic pointed
arch.
Draw guide lines as for Modern Roman letters.
Those of the letter forms, presenting the lines of
the Roman capitals most unmistakably, as B, D, F,
G, I, L, O, P, Q, R, S and Z, may be constructed on
principles similar to the Modern Roman letters; but
the absence of vertical lines makes their application
difficult. The tapered uprights, shown in most let
67
ters, are all of the same proportions. Of like di-
mensions are also all semi-circular body lines, as in
C, D, E, G, M, O, Q, T, U and W. The compara-tive thickness of hair lines and body lines is the sameas in the Modern Roman. The construction of the
peculiar ornamental appendages of characters like
A, C, E, H, etc., should be studied from the plate.
Their proportions are arrived at by comparison.The brackets, crowning A, H and K, may be con-
structed alike. The one of A extends from right to
left, those of the others from left to right. Thebrackets of L and F are of similar curvature, butthose of Z present rigid lines. The treatment of the
hair lines and serifs of C and E is almost identical.
The position of the second, or semi-circular bodyline of H must be carefully determined. It may becompared with the second body line of the bracketof G. The middle hair line of K is started like that
of H, but makes a short turn to allow for the secondstraight body line. M is made under a repetition
of previous principles. This letter form, turned up-side down, represents W. N and U resemble lowercase letters. The second bo'dy line of N, as that of Vand Y, are of peculiar treatment. The dash or tail of
R, like the first stroke of A, shows special embel-lishment, but it may be made plain, and the down-ward flourish of A can be restricted to the lower line
by constructing it similar to the last body line of N,reversed. S is in pronounced Roman lines, but the Tshows the Gothic character. Compare the secondbody line or bracket with those of G and H. Theupper straight bar is of odd appearance but simpleconstruction. V and Y are of kindred shape, and X

Plate XVPlain, Round

\.
ABCDEFGHIJKLMNOPQRSTUVWXYZa

Plate XVIPlain, Square

ABCDEFDHIJKLMNDPQRSTUVWXYZa

Plate XVII
Plain, Spurred

ABCDEFGHIJKLMNOPQRSTUVWXYZ a

and Z differ but slightly from their Roman cousins.
The ball serifs are similar in all letters. See also
"The Modern Uncials," page loi.
The Lower Case Letters. (See also article on"The Lower Case Letters," page 97.) All lowercase letters are constructed according to the rules
laid down for that of the corresponding capitals.
Modern Roman Lower Case. (Plate 25.) Likethose of the capitals, the dimensions of the smallModern Roman letters are based upon the square or
circle. The thickness of body- and hair-lines is
made a trifle less than that of the capitals. Serifs
and other details are proportioned likewise, and it
is necessary to study the construction of the capital
letters of a certain alphabet first, before attempting
to draw the lower case letters, because the rules for
constructing the former may be generally applied to
the construction of the latter.
In laying out lower case lettering, special space
allowance must be made between lines, to give roomfor the letters, g, j, p, q and y, extending below the
line.
The guide lines for all Roman lower case letters
are drawn as for the capitals, but additional middle-
and sub-guide lines are required for the lower case
letters and the squares are proportionately smaller.
(See "Guide Lines," plate i.)
Letter a is sketched within a square, under rules
similar to those given for the capitals. (See "Me-chanical construction of letters and numerals," page
31.) All letters are drawn freehand, and finished
with the aid of the instruments. The vertical lines
are drawn first, then the curves, and the horizontal
lines last.
The a is finished with the top ball and the lowerserif, extending outside of square.
Fill all squares of the first row with copies of the
letter a, leaving an intervening space between the
sub-guide line and the top guide line of the next
row, into the squares of which the letter b is repro-
duced, and so on to z.
Always look for information as to construction
rules under the heading " Mechanical construction
of letters and numerals," page 31.
The b is started with the vertical lines, and the
curves are added. The serifs are put in last, extend-
ing outside the square.
The c is drawn wholly within a square and fin-
ished with the top ball. Note that the end of the
lower hair line is slightly thickened.
The d is manipulated like b.
The e may be constructed like c, but it is widerthan the former.
With f care must be taken not to make the curvedtop as wide as the other letters.
The g is a very difHcult letter. The top oval is
drawn first, then a larger oval below, and the double-curved lower body line constructed similar to the
body line of S. (See under " Mechanical construc-
tion of letters and numerals," page 31.)
The construction of the other Modern Romanlower case letters requires no special directions
other than those given for previous letters. Theproportions of m and n, however, should be studied
well. Do not leave the spaces between the three
74

body lines of m as wide as that between the two bodylines of n. The proportions of v and w should like-
wise be observed.
French Roman Lower Case Letters. (Plate 26.)
This style of lettering looks especially well, whenthe end-stroke of letters h, k, m, n, &c., is drawn outwith a graceful swing, extending below the line,
when it occurs at the end of a word. Experience,however, is necessary to accomplish this successfully.
When used in composition for inscriptions the let-
ters must not appear cramped. Sharp serifs andgraceful lines are the prominent features of this
style.
The French Roman lower case letters are con-
structed on similar principles to the Modern Romansmall letters. Hair- and body-lines must always be
of uniform widths. It will be noticed that this is
the only Roman alphabet whose lower case letters
have serifs instead of balls, as in a, c, f, j, &c.
Antique Roman Lower Case Letters. (Plate 26.)
The length of the upper stems of b, d, f, &c., should
be greater than that of similar letters of the other
alphabets, because the slanted serifs cause them to
appear shorter than they are. In other respects these
letters may be constructed under rules similar to
those given for the Modern Roman lower case let-
ters. See also "Antique Roman " capitals, page 51.
Ornamental Roman Lower Case. (Plate 29.)
The principles laid down for the construction of the
Modern Roman lower case letters can be applied
to that of these letters also. The curved serifs are
added, as with the capitals. (See "Ornamental Ro-
man," page 54,) No other directions are required.
Plain, Round, Lower Case. (Plate 27.) The con-
struction of these small letters is subject to the samerestrictions as given for that of, the capitals. Caremust be taken not to make the letters too heavy.
They appear more graceful when thin. The guidelines for all Plain and Block lower case letters are
drawn similar to those used for the Roman lowercase letters, but the upper and lower inter-guide
lines, as well as those of the upper and lower sub-
guide lines are placed as far from the outer ones
as the width of the body lines.
Plain, Square, Lower Case. (Plate 27.) Similar
rules obtain for their construction, the proportionsbeing the same. Like their capitals, these small let-
ters can be made entirely by the use of the instru-
ments.
Plain, Spurred, Lower Case. (Plate 27.) Thetendency to make the spurs too long and flat shouldbe guarded against. In all other essentials theSpurred small letters are made like the Plain, Round,lower case. See also the capitals under "Plain,Spurred," of this part.
Block and Ornamental Block, Lower Case. ( Plate
28.) The construction of both require no special
description, since it would be but a repetition of themethods employed in the reproduction of the capi-
tals and other lower case letters above described.
Roman Italics, Lower Case. (Plate 25.) Theconstruction of single stroke lower case italics is
a matter of confidence derived from experience andsupplemented by ability in penmanship. The letters
should be executed in an even running hand andthey look best when small and set closely. When so
75

Plate XVIII
Block

ABCDEFGHIJKLMNOPQRSTUVWXYZ a

Plate XIXOrnamental Block

ABCDEFGHIJKLMNOPQRSTUVWXYZ a

made, this style of lettering is plainer and reads moreeasily than the plainest writing.
When large lettering is desired, the lower case
Italics may be executed by drawing double bodylines, similar to those of the capitals, as given under" Roman Italics," page 55. The method describedhereafter is for smaller letters.
For larger lettering the lower case letters shouldbe sketched in, aided by diagonal guide lines, as
described for the construction of the capitals, ex-
cept that a middle- and sub-guide line is added.The small Roman Italics are well adapted for the
use of architects, and may be employed in conjunc-
tion with the special Architects' Single Stroke al-
phabets described in another part.
The single stroke lower case Italics are not prac-
tised with the pencil, as they represent a style of penstroke letters. All lettering is sketched in with the
pencil first, to insure correct spacing. The result to
be aimed at, and which can only be acquired by ex-
perience, is an even slant and thickness of all letters.
The a is started by the down stroke from the top
toward the left and down, and continued upwardagain, as in writing. Begin at the starting point on
top again and run a hair line toward the right anddown, meeting the first hair line, as in ; then begin
again at the top, for the straight, heavy body line,
running it down and continuing it up again with the
short end hair line, which may be slightly empha-sized by a light back stroke at the end.
All hair lines may thus be thickened at the ends,
both at the top and bottom.
Start the end of the hair line of b at the top, run-
80
ning it downward. Then, again starting at the samepoint, run in the straight body line, continuing it
around to the right and up. Beginning again at the
right of the lower part of the body line, move up-ward and curve to the right and down again, meetingthe former hair line.
Start c with the top hair line, running towardsthe left and continuing downward and up again, andwith a slight back stroke at the end, then put in the
top ball with a short down stroke.
The d is constructed like a and b, and e as c, fol-
lowed by a slightly thickened center hair line^ fromthe top downward and to the left.
Starting from the top, run f down with a grace-
ful sweep and end with a ball or period, then finish
with the top ball and the short cross hair line.
Make g like a, continuing the straight body stroke
down and around towards the left, and upwardagain, finishing with the ball.
Start h like b, and finish as with d, also i and j as
with previous letters.
Make first stroke of k as for h, then, starting a
diagonal hair line at the top and running downwardtowards the left, unite with the body line. Start a
short body line from the center of the hair line, run-ning it down and finishing as for h. Finally put in
the ball at the upper right.
Construct 1, m and n as in former letters.
Begin as for the first stroke of a. Then, begin-ning again at starting point, run toward the right
and downward, uniting with the lower hair line.
Draw p, q and r as previous letters.
Start s with the top hair line, as for c, then curve

toward the right and downward. Starting again
with the lower ball, run down and toward the right,
uniting with the curved body line, and finishing withthe top ball.
Make t and u as in former letters.
The first stroke of v is as in u, the upper hair line
running upward and to the right, with a generous
thickening, thence downward and uniting with the
first stroke. The w is the same as before.
Start X as for i, but run the body line down nearly
vertical. Then start hair line with the top ball, run-
ing it down through the body line, toward the left,
and finishing with the lower ball; make y as in
former letters, and z starting with the top curved
body line from left to right, follow with the diagonal
hair line running downward, then the lower tail, andfinishing with the short center dash.
Modern Gothic Lower Case. (Plate 29.) This
may be used together with either the Modern Gothic
capitals or Uncial Initials. The proportions of these
letters may be compared with those of the Plain,
Spurred, lower case letters. The small ModernGothic letters are composed almost entirely of
straight lines.
Draw guide lines as for the Plain lower case let-
ters.
Great accuracy is essential for the correct render-
ing of these letters. The body lines must all be of
even thickness, and the hair lines sharp and fine. All
pointed corners should be made very sharp, and the
slanting lines, where they recur in similar letters, be
parallel to each other.
8]
Do not make the body lines too heavy. Narrowlines give these letters a more refined appearance.The short upper dashes of c, f and s, and the long
lower ones of g and p as well as the lower scroll of
y, must all be made to correspond with those of the
Modern Gothic capitals.
The lower case Gothic letters show two formsof the letter s. The long s is used within a wordonly, and never at the end, while the small or rounds can be employed in either place.
The peculiar construction of the hair lines of a
must be carefully studied and practised. The scrolls
on the ends of the stems of b, h, j, k, 1, p, q and t
are for ornamental expression. They may be omitted
and the letters finished by a slanted line.
Modern Gothic lower case letters look well whenset closely.
German Gothic Lower Case. (Plate 29.) Theseletters, designed especially to be used with the Ger-man Gothic capitals (plate 22) will also give a har-
monious effect when combined with the ModernUncials or Church Text. (Plate 24.)
Being composed almost wholly of straight lines,
their construction is very simple, and, after the prin-
ciples of the Modern Gothic lower case letters havebeen studied, these letters can be produced forth-
with.
Guide lines are drawn as for the small ModernGothic letters.
Great accuracy of proportion and execution is re-
quired to correctly reproduce these letters. All di-
agonal lines run perfectly parallel throughout the
alphabet. The hair lines are heavier than those of

Plate XXArchitects' Single Stroke Alphabets

ABCDEFG v_y
\
abcdefehi klmnooarstu •z
^SCOEFGH/JKl/F345
'OPQRSTUS7SS
.RSTUVWXYZabcdefehiiklmnopqrs
aA. A.

the Modern Gothic lower case letters. Observe thatthe long s is never used at the end of a word.
In arranging letters of this style, they shouldbe placed close to each other. See example onplate 35.
Modern Script. (Plate 21.) Script, when usedfor purposes of lettering, is handled in a differentmanner than in writing. Good penmanship does notat all insure the ability to construct good Script le.t-
tering, and again: a studentwith a poor handwritingmay soon acquire a marvelous proficiency for letter-
ing Script.
Begin by practising large Script letters on brownpaper. Lay out one letter at a time, with long, firmstrokes and whole-arm movement. Use only youreyes and hand as guides. Improve on the lines
drawn, and correct the less graceful ones. Alwaystry for perfect ovals.
Being generally constructed on an enlarged scale,
the lines should invariably be started at the top andrun downward with a determined sweep. All up-
strokes are likewise made from the top down. Care-
ful sketching in lead pencil makes the final execu-
tion of this difficult work one of pleasure. Thepencil lines must be examined critically, and all
ovals, especially, made as smooth as possible, before
inking in. Large Script lettering may be executed
in ink with a fine, long-haired brush.
The sign painter should practice Script lettering
on a board, with a stick of chalk or charcoal. Theletters are drawn out large, with a free-arm motion,
and in rapid, clean, long swings. Standing off a few
84
paces, the efifect may then be studied. Confidencewill thus be assured, eventually, by persistent prac-
tise. The lower case letters are practised in a simi-
lar manner.The main difficulty in lettering a line of Script,
is to give an even slant to all the letters. Experience,gathered from conscientious practice, will eventually
overcome this also.
Clean, fine and even lines are essential to bringout the beauty of Script lettering.
When Script is to be introduced among lines of
other types of letters, much space is required to giveit a good appearance. Leave a generous marginabove and below your line of Script.
Freedom of treatment. Lettering should neverappear harsh and stiff. Correctly constructed, it
may still lack a certain dash and finish. This pointof perfection is reached only after the techniquehas been acquired. Then an artistic abandon-ment of the stringent rules of mathematical draw-ing, a gradual breaking away from the strict meth-ods of the school, occurs of itself.
It is at this stage of the development of his ability,
that the artist is most liable to run to extremes. Herethe student should be cautioned to keep before his
mind's eye the classic originals of the letters, and,while developing a freedom of treatment, to pre-serve that quality, in the shape of his letters, whichwill ever appeal to the refined taste of competentjudges.
Letters have varying expressions, somewhat as
human faces have. You must try to make them pre-

sent a pleasing countenance. Crooked letters are de-
fective in expression; they sometimes appear ludi-
crous.
Occasionally letters also appear to dance, stand-
ing, seemingly, on one leg and raising the other.
This happens when they were not correctly drawn.When properly constructed, they stand still, andlook as you intended that they should.
Letters have speech. See that they speak a digni-
fied language; do not permit them to shout.
PART III—THE ALPHABETSPractical and Artistic—Their History, Description and Proper Use
The Roman Alphabets
No little confusion is created by various books on
lettering offering so many different names for let-
ters of practically identical alphabets, merely slightly
modified or changed. These are labeled for en-
lightenment: "IX century," or "From a tomb in
the church." Moreover, nearly every " author-
ity " has his own style of lettering nowadays, andnew names are applied to old styles. Take the Plain
or Condensed letter for instance. (Plate 15.) This
style is called in some books of alphabets " Egyp-
tian " ; by other instructors " Gothic." The same let-
ter parades under several other aliases. Now the
name " Egyptian " would suggest the ancient hiero-
glyphs, but there is nothing in the construction of
this letter which in any way relates to the symbolic
characters of that sacred figure script. " Gothic " is
a style of letter, showing the characteristic, sharp-
cornered forms of the Pointed and many-gabled
Gothic architecture. (Plate 23.)
Our " Plain " letter is nothing but a condensed
85
form of the Roman alphabet. All the letters used in
the civilized world to-day have emanated from the
Roman capitals, even the Gothic characters beingtraceable, however remotely some of them may re-
semble their original shapes, to the same source.
This fact the student of lettering should not lose
sight of. The many queer and corrupted styles^ ofan intervening period, when wars devastated thecountries of Europe, and arts and sciences were lost
or neglected, have no value as examples for learners,
bent on cultivating an acquaintance with good letter
forms. On the contrary, these faulty letter shapesare most harmful to study from, and should not beplaced in books of instruction.
Out of the chaos of some hundred conflicting styles
of Roman alphabets—so-called, the Classic Romancapitals stand out prominently and beautifully
(plate 8), among the many positively ugly styles of
a later, degenerate period.
The Classic Roman Capitals have been preserved

Plate XXIModern Script

^/^^x^/^A^^JyJ^^'y/rn^y-y^^y/iy^/^J^-^^^'^''^^^^^'

to us upon the ruins of ancient buildings, such as the has taught him to see and enabled him to judge; the
columns and arches in the Forum Romanum mRome, and on numerous tomb inscriptions. Capitalletters only were used by the Romans, the smallor lower case letters being devised at a much later
period. The marvelously beautiful and gracefullines of Greek and Roman architecture are con-stantly studied and copied by our modern architects
and builders, and it is but natural that the ancientletter forms also have been revived and are univer-sally employed to-day for architectural inscriptions,
memorial tablets, &c.Like many beautiful things, however, the Roman
letters of the Classical period present deficiencies,
the principal one being the absence of several letters
contained in our modern alphabets. Althoughideal in form and outline, the primitive Roman capi-
tals, however appropriate in their day, are lacking in
harmony of proportion, and at our advanced age wemust aim at greater perfection. With the world's
art specimens before us to study from, we should re-
fuse to accept the crude methods of an ancient time.
Since the days of the Italian Renaissance therefore,
Classic letters have been greatly modified and are
still being improved, for ours is an age of constant
progress and improvement.We cannot claim originality in the production of
letter shapes. The letterer of to-day copies fromforms which have been in existence for centuries; he
but continues to enlarge their artistic possibilities.
He takes the letters as handed down, and works out
the shapes according to the progressive ideas of an
advanced era. It is cultivation and education that
88
museums and galleries have furnished him with the
art treasures of all ages and nations, in order to study
and compare the different styles, and thus enlarge
his horizon. He has before him endless variety of
alphabets and letter shapes, and the product of his
studies and skill is the refined and finished letter of
the present time. The old masters could not boast
of such privileges, and their work, therefore, being
original and the product of their own inventive
genius, should be held in so much the higher
esteem.
The letter forms J, U and W were unknown in an-
cient Rome, V standing for both U and V, and the
W having been later devised by making a double V,as the name implies. This letter form V being em-ployed also to express U is one of the objectionable
features of this alphabet (REVVE). By reason of
its incompleteness the Classic Roman alphabet shouldnot be employed in advertisements, nor on street
signs, name plates, etc., which demand a more legible
style of letter. It is a pitiful spectacle to see stran-
(COLVMBVS AVENVE) gers standing at the
street corners of the city, vainly trying to spell outthe names.
A modernized form of the Classic Roman is muchin vogue with our artists, for book-plates, newspa-per-headings, &c. (See plate 31.) These are veryhandsome letters, but, unfortunately, all the short-
comings of their originals have been retained andeven emphasized. Among these is the unwise prac-tice of constructing each letter of different width,the B so much narrower than C and D, the N

unreasonably drawn out, and the S condensed to less
than half of the square.
Of the exaggerated modern styles of Roman let-
ters perhaps the less said, the better. A few exam-ples of the letter U, freakishly distorted, are also
represented on plate 31.
Modern Roman is a type of letter evolved fromthe Roman capitals, modified and perfected, retain-
ing the beauties of its classical originals in all es-
sentials, with their inconsistencies and deficiencies
corrected. It is at once the most legible and mostgenerally used form of letter known.Modem Roman (plates 5, 6 and 7) is the alpha-
bet we all are familiar with, being universally
adopted, under various names, in book- and news-
paper-printing. These are the letters we have beentaught to read from the time of our " First Reader "
at school, nay, even from our first ABC lesson. Assurvival of the fittest, this alphabet has endured since
the Mediaeval Age, and to-day, improved, idealized,
it has victoriously conquered all other styles of let-
ters. By virtue of its greater legibility the ModernRoman letter is gaining favor even with so conserv-
ative a people as the Germans. The German Text,
a modified Gothic letter, has held sway through cen-
turies, but German technical books and scientific
magazines and newspapers are now printed entirely
in Roman types.
This style of lettering can be fittingly employedon all occasions where space permits of its use with-
out crowding, for advertisements, inscriptions, signs,
in short. Modern Roman is never out of place.
Its use in wider fields should be encouraged
89
and cannot fail to win new friends wherever em-ployed.
Almost all the modern alphabets are embodied in
the structure of the Modern Roman. The Antique,French, Plain, Block and nearly all other styles of
letters are essentially Roman. The student who has
learned to design good Modern Roman letters, haspractically also mastered the construction of those
other alphabets, barring a few details.
See " Mechanical construction of letters and num-erals," page 31, and also "Practice work," page 19.
The French Roman (plates 9 and 10) may beclassified as a happy combination of the Classic, An-tique and Modern Roman alphabets. This style of
letter, used in the Latin countries since the MiddleAges, has been much improved, until it presents to-
day a refined type, with the classical lines of beautyenhanced. Its legibility is but second to that of the
Modern Roman. This text is not frequently seen in
our country, and its elegance of form still holds a
strange note.
You will find in many books styles of alphabetstermed " French Roman," that show but little re-
semblance to it. No letters of any alphabet, old ornew, can compare with this beautiful type. Its
ideal, graceful lines proclaim the French Roman the
aristocrat of letters.
The use of this style of lettering for architectural
inscriptions, memorials, street signs and other pub-lic purposes, in place of the Classic Roman, shouldbe encouraged.
Crowding spoils the effect of the French Romanletter. Painstaking accuracy is necessary to bring

.^ Plate XXII \
German Gothic


out the sharp pointed serifs, the clean-cut lines andgraceful curves of this letter.
Wherever employed, the French Roman letters
will not look their best when other styles are intro-
duced within their sacred precincts.
For rules of construction see under " General rules
for the construction of letters," page 50.Antique Roman, (plate 1
1 ), as the name implies, is
an older type of letter than our Modern Roman,and, in a modified form, has come into vogue againof late years. It may be said that the AntiqueRoman letters were derived from the Classic Romancapitals, since the time of the invention of the art ofprinting. The old style of Roman, from which ourModern Roman has evolved, is a later product.
If the French Roman be better known to the
Latin races. Antique Roman is certainly more famil-
iar to us. This alphabet has been much employedduring the past centuries, in book- and newspaperprinting by the English-speaking nations. Its let-
ters differ but slightly from the Modern Roman of
our day, many traces of its classical origin still ad-
hering.
The hair lines of the Antique Roman letters are
finer than those of the Modern Roman, lending a
note of refinement to this type. The serifs also are
decidedly flatter and sometimes slanting, as are the
brackets, and in these characteristics they resemble
the French Roman. The body lines of A, K, M, N,R, V, W and Y are extended, and the cross Ifnes of
A and H may be broken. These peculiarities add a
quaint charm to the letters of this alphabet, whichdoes not impair their legibility.
Engravers and lithographers employ this style for
inscriptions on tablets, in art- and commercial work.
Some of the finest lettering in Antique Roman maybe seen on our bank notes, stock certificates, insur-
ance policies, &c. In the business districts of our
great cities this handsome letter is used by sign
writers of renown, and many are the admirablespecimens of their art, lettered in gold, on public
and private buildings, and proclaiming to the worldthe superiority of the American letterer. For per-
fection of style, beauty of form and excellence of
spacing these business signs would be fitting objects
of study.
The letters of the Antique Roman alphabet are
also well adapted for newspaper- and magazineheadings, book titles and -cover designs, as well as
for letter heads and business cards, and whereverthe Modern Roman is appropriate.
With the exception of a few details, the construc-
tion of the Antique Roman letters is based on the
same principles as that of the Modern Roman, as de-
scribed under " Mechanical construction of letters
and numerals," page 31.
See alsQ "Antique Roman," page 51.
Ornamental Roman, (plate 12) sometimes called"Tuscan Roman," also "Etruscan," is a Roman let-
ter with curved serifs. It is a showy letter and canbe used for effect. One line of lettering in this style
among smaller letters in Plain or Italics will have avery expressive appearance. In advertisements it is
appropriate for the confectionery, millinery andsimilar lines of business.
For engrossed documents the Ornamental Roman92

letters are well adapted and can be used in conjunc-tion with the Modern Roman or Plain letters.
On title pages, book covers and newspaper head-ings these dressy letters are employed to good ad-
vantage.
Sign writers occasionally use the " OrnamentalRoman" letter, wagon letterers employ it when-ever a " fancy " letter is wanted.
Engravers and lithographers also select this style
to emphasize a certain line of an inscription.
For construction rules see " Ornamental Roman,"page 54-
Roman Italics (plate 14) are the well-knownslanting style of Roman letters used in printed books,
newspapers, &c., to emphasize a word or in quota-
tion of a sentence. It seems that these letters havebeen developed from an early Italian style of script.
Lettering, composed of the expressive types of this
alphabet, is extremely easy to read, as it is the near-
est approach of printed or drawn letters to our writ-
ten characters, which is evidenced by the similarity
of the up- and down-strokes and the slanting position
of the letters, but with the legibility enhanced by a
more uniform appearance.
The Roman Italics are used on all occasions wherea larger group of lettering is to be introduced into
another mass, as in the reproduction of a part of a
speech, a verse of poetry or any quotation. But the
letters can also be employed for artistic display on
title pages of books, for newspaper headings, etc.
For such a purpose the letters are treated with morefreedom, and the ends of hair lines of A, B, D, &c.,
and the tails of Q, R, &c,, extended with a genial
93
swing, and sometimes connected in graceful curveswith other letters, producing unique and most pleas-
ing effects.
For speed and economy of space the capitals in
connection with the lower case Italics are employedby sign painters for all-round lettering and by en-
gravers for inscriptions on metal. The architect also
uses this style with the single pen stroke,, as in writ-ing, to mark his plans and specifications.
Contrary to the appearance of other styles ofRoman letters, the lower case Italics (plate 25) lookbest when set closely and executed rapidly in a free,
running hand, for, the graceful flowing curves andthe even slant are made possible only by determinedand skilful handling.
Rules for construction will be found under " Gen-eral rules for the construction of letters," page 50.
The Plain or Condensed, Round and Square,(plates 15 and 16) also called " Egyptian," " Gothic,"" Sans serif," etc., have been designed for conveni-ence and economy. These letters can be condensedto fit into the narrowest spaces, are at once plain to
read and quickly and easily made, and do not at all
look commonplace when correctly constructed.
There are no serifs, no ornaments; the letters standunadorned, in their nudity exposing any possible de-
fects of construction. Thus it may be said that theseapparently easy letters are more difficult to makethan the other ornamental styles. To get a correct
idea of their proportions, the Plain letters must becarefully studied and a great deal of practice is
necessary to bring out their proper shapes. For, al-

Plate XXIIIModern Gothic (Old English), Type
(American Type Founders Co.)
Modern Gothic (Old English), Drawing

^^ ^3(^Z$&alichrfgI|tjliImmip
qrgtutoxg2!?./<;
AiCBffijr
fmi"

though they can be produced easily enough, whenspeed is the only object, these letters can also be madeto looTs very handsome, if constructed accuratelyand with care. The conscientious student, whodevotes time and effort in developing the quiet beautyand unpretentious charm of the Plain letters, will
find himself eventually highly rewarded. There is
much elegance hidden in these simple letter forms,awaiting the earnest endeavor of him who will exer-
cise patience and skill to bring it out.
One thing above all should be borne in mind. Thecorrect rendering of the Modern Roman letters onone hand, and of the Plain letters on the other, oncefully undestood and mastered, all other styles of let-
ters of the entire Roman family have been con-
quered. The construction of all but the Gothic andUncial letters is embodied in the rules for the " Me-chanical construction of letters and numerals,"
(page 31) and the Plain letters are Roman in a con-
densed form.
The Plain letters are generally used by engravers
and lithographers. For advertisements they are suit-
able wherever there is not room enough for the other
Roman styles. Sign writers employ these letters
constantly, and for lettering on wagons the roundand square Plain letters are most generally adapted.
For architects' use the Plain letters are embodiedin the Single Stroke alphabets, plate 20. (See also,
page 112.)
For construction see " Plain " letters, page 55.
Plain, Spurred. (Plate 17.) The Spurred let-
ters are adapted especially for carving on wood and
stone. They will look equally well if employed for
96
other purposes, being very handsome and legible, and
not requiring as much space as the French-, Mod-ern- or Antique Roman letters.
They are much used in sign painting and by lithog-
raphers and engravers. In architectural inscrip-
tions also the Spurred letters are most appropriate
and do not look out of place with either the Greek,
Roman or the modern styles of architecture.
Work of great beauty can be accomplished by the
use of this letter, which is a near relative of the
French Roman. All that has been said of the Plain
letters, except as to space, may be applied to the
Spurred style, as it represents in fact nothing but the
Plain letters with spur serifs.
For construction principles see " Spurred " let-
ters, page 55.
Block, (plate 18) called also Full Block, repre-
sents the heaviest type of all modern Roman letters.
They may be classified as Plain letters with blockserifs, or rather as Roman letters without hair lines.
The Block letters are employed mainly by sign
painters, for large work, and this style of lettering
can be read at the greatest distance.
For business cards, letter heads, and in business
announcements the Block letters are also appro-priate, if but one line of this style be selected withother types of letters. For instance, in the first line,
firm name, in Script; second line, business or trade,
in Block; third line, address, in smaller Plain or
Italics.
The square type of Block letters is principally
used in wagon lettering.
For construction see "Block" letters, page 54.

Ornamental Block, (plate 19) also called "Tus-can Block," are Block letters with curved serifs, as
in Ornamental Roman. They are employed like the
Block letters, and a line of Ornamental Block helps
to break the monotony of an inscription of plainer
letters. These heavy Ornamental types are very
showy, and their construction does not require the
skill necessary for a Plain letter, because the orna-
mental serifs tend to hide slight defects in the
structure of the letter.
The Architects' Single Stroke type of OrnamentalBlock, (plate 20) is a dressy letter, to be used for
display of any single line of an inscription on plans
&c., easily made and plain to read.
Principles of construction are given under" Block "
letters, page 54.
The Lower Case Letters. (Plate& 25 to 29). Oursmall. or lower case letters were derived from the
Minuscule- (as distinguished from Majuscule- or
capital-) letters, originated in the VII century.
Words in lower case letters are more easily read than
those set in capitals only. This is due to our familiar-
ity with this style of letter, it being employed uni-
versally in printed books, journals and newspapers.
A large mass of reading matter should always be
designed in lower case letters, to make it appeal to
the public.
The lines of the small letters, like those of the
capitals', should not be judged by the cramped and
stiff appearance of printed types. In the hand of
an artist the lower case letter assumes a most beau-
tiful shape and form, when constructed with free-
dom of treatment and harmony of spacing.
Roman capitals only should be used with the
lower case Roman letters. Block capitals withlower case Block, and so on. It is not permissible
to combine two different styles of letters within the
same word.There is but one exception to this rule: the lower
case Gothic letters may be used with both the
Uncial and the Gothic capitals. In the lower case
German Gothic (plate 29) the author has designeda new type for combination with both, the GermanGothic capitals and the Modern Uncial Initials. Apractical application of combining these two styles
of letters is shown in the example of a resolution,
plate 35.
No lower case letters are devised for the ClassicRoman; these letters are therefore used as capitals
only.
For construction of lower case letters see page 74.
THE GOTHIC ALPHABETS
Modern Gothic, also called Old English. (Plate
23). Gothic is a term applied to Mediaeval art in
Europe, especially to the different Pointed types of
architecture, prevalent from the XII to the XVIcentury; a style developed from the Romanesque,and having probably no relation to the Goths.The Old Gothic letters were derived from the
Greek Uncials of the III century, but several of
the letter forms originated in the Gothic Runes. TheGothic Runic system of letters was lost with the
Gothic language.
The Old Gothic characters have descended to us
97

Plate XXIVModern Uncials (Church Text)


from ancient manuscripts, and, as perfected andmodernized, have been developed out of the Gothicor Old English, also called Blackletter, and usedby the English printers of the XVI century.The letters represent a family by themselves, but
since the revival of the Roman letters, the Gothicletter forms have been greatly changed, and the in-
fluence of the Roman lines upon them is clearlyseen.
Gothic letters now are not generally used in Latincountries. They have flourished, however, for the
last centuries in Germany, where the Gothic and the
German Text, a modified form of the Gothic, are
almost exclusively used. But the Roman letter is,
of late, making inroads into eastern lands, and the
Gothic is being revived in the west. As the tide of
Gothic conquest in the III and IV centuries
flowed from east to west, so the stately and elegant
Gothic letter forms have recently found their waywestward, into the United States, and are now usedfor special announcements, on stationery, etc., whilethe Roman letters, in turn, are slowly winning favor
in literary circles of Germany, and are there
employed in the printing of scientific and art
journals.
The use of the Modern Gothic letters for an-
nouncements of social functions, inscriptions on
panels in churches and halls has become very popu-lar. Its promiscuous employment in newspaper ad-
vertisements, however, is a mistake, as the majority
of readers are not sufficiently familiar with this type
at present. The prevailing custom of using the
Modern Gothic letters for names on private- and
business cards is also to be censured. Names and
addresses should always be set in the plainest, most
legible letters and figures.
The great field for the undisputed reign of the
Modern Gothic letter lies in the artistic engrossing
of testimonials and other commemorative docu-
ments. The unlimited possibilities for decorative
effect, offered by these embellished letter forms, as
well as their adaptability to lend themselves to elab-
orate ornamentation and illumination, make themespecially suitable for this purpose.
The Modern Gothic capitals are used for initials
only. A name or word, composed of Gothic capi-
tals, would be difficult to read, even for a letterer.
As with the Roman letters, a corruption of taste
has brought forth extremes of ugliness in extrava-
gant curlicues and grotesque shapes, and examplesof this kind have found their way into books of in-
struction in lettering. The other extreme is also
represented by clumsy, ungraceful imitations of
these beautiful letters.
In selecting a book of instruction or of alphabets,
for the purpose of study, the aid of a competentteacher or judge should be sought.
For construction of Modern Gothic letters see
page 62.
For lower case Gothic letters see page 81.
German Gothic. Of the many different modernstyles of German Gothic letters, the initials shownon plate 22 represent one of the prettiest designs.
It is a highly ornamental letter, and in this respect
ranks with the Modern Uncials.
The manner of execution, in fine outline, and100

body lines filled in solid, enhances its decorative ap-pearance. This method may be employed with anyof the other style letters, when occasion demands it.
The Modern Gothic (plate 23) is especiallyadapted to this treatment.
Sign painters and decorators should not use theGerman Gothic letters, except for such special workas church windows and inscriptions in public build-ings, etc. This style is also suitable for title pages,book cover designs, &c.For use on engrossed documents the German
Gothic initials may be set within a square of ara-
besque- or scrollwork.
See " German Gothic " Initials, page 66.
German Gothic Lower Case letters will be foundon plate 29.
The Modern Uncials, or Church Text. (Plate
24). In the midst of an era of general upheaval, at
a time, when the images of the old gods of mythol-ogy tumbled before the victorious onslaught of
Christianity, when armies rallied under the bannerof the new religion, and devastated fair landscapes,
when wild hordes of barbarous tribes scoured the
countries of Europe, and armored knights swoopeddown upon the walled towns, when little was held
sacred and few were safe—in these days of ruin andunrest there sat in the quiet sanctuary of their cells,
in the safe and secluded nooks of quaint cloisters,
hidden in the valleys or inaccessible mountain fast-
nesses, far from the roar and carnage of battle andplundering, the goodly friars, protected by mighty
lords and kings, their allies, and secure from at-
tack, in the knowledge of the power of the Gospelof Christ, which they endeavored to spread andtranslate into the heathen tongues.
Here, in peace and solitude, the learned monkscultivated the sciences and arts, the knowledge ofM^hich they had brought from Italy, the center ofcivilization. In these monasteries, the abodes oflearning, were executed beautiful specimens of theart of chirography, copied from the Holy Scrip-tures, in psalm books, litanys and missals.
Before Gutenberg invented the art of printing,books were written by hand. Some of these oldmanuscripts in marvelously handsome and finishedscript, emblazoned with gilded and beautifully col-
ored lettering^ now crumbled and age-stained, areshown in our museums and collections, still bearingwitness to the skill of their patient writers.
The first letter on a page or at the beginning of a
sentence or chapter—the initial—was generallydrawn large, and elaborately embellished, or orna-mented with scrollwork and painted and illumin-ated in colors. The original capitals, found in the
early missals, were later copied in type and used for
printing, in a manner similar to the written books.Like the Modern Gothic characters the Modern
Uncials are the product of gradual development.There are countless styles of these Mediaeval letters',
and most of them show such strange features, as to
greatly impair their usefulness for modern pur-poses. The letters presented on plate 24 are ex-
amples, modified and designed for greater legibility.
The Uncials are seldom used for any but decora-tive purposes, and in this respect they stand high
lOI

Plate XXVLower Case Letters 1
Modern Roman
Roman Italics

abcdefghijkl
mnopqrstuyuvw VWXZ -xz
abcdefyhi/'Mmnop^rsii/

Flate XXVILower Case Letters 2
French Roman
Antique Roman

abcdefghijklmnopqrstuvwxyz1234^56789abcdefghijklmnopqrstuvwxyz123456789

Plate XXVIILower Case Letters 3
Spurred
Plain, Square
Plain, Round

abcdefghijklmnopqrsty
uw 123456789 vxz
abcdefghij klmnopqrsty
uw I2345B789 vxz
abcdefghijklmnopqrsty
uw 123456789 vxz

Plate XXVIII
Lower Case Letters 4
Block
Ornamental Block

abcdefghijklmnopqrstuvwxyz123456789abcdefghijklmnopqrstuvwxyz123456V89
Plate XXIXLower Case Letters 5
Ornamental Roman
German Gothic
Modern Gothic (Old English)

123456789abcdefghijklmnop^n/n /n
pt/r
\y
qrstuvwxyzmn§fqf \y[y
ahchcf^^ ijkfmncjjqrfsfugntn 1EM56T89 xz

above any of our other letter forms. They admit ofa scope of embellishment even larger than that ofthe Gothic initials.
As with the latter, names or words should not becomposed entirely of these capitals. A special typeof lower case letters, designed for use in conjunctionwith either the Modern Uncials or the GermanGothic capitals, will be found on plate 29.
On engrossed documents, as memorials, resolu-
tions, etc., the Modern Uncials may be employedwith most gratifying results. See plate 35.For church work, stained glass windows, inscrip-
tions for private and public places, where an orna-mental letter is desired, no style of lettering, better
qualified for this purpose, can be found.
For construction principles see "Modern Un-cials," page 67.
The Numerals. The seven letters, I, V, X, L, C,D and M constitute the Roman numerals. Thenumerals used at present by all civilized peoples are
of Hindoo origin, and were developed by the Ara-bians in the IX century.
The employment of Roman numerals for archi-
tectural inscriptions and on book titles has of late
been revived. Watch and clock dials, in turn, are
now frequently marked with the Arabian characters,
and they are generally used for all purposes through-
out the world.
For reasons of harmony, the employment of the
proper style of numerals, as designed in combina-
tion with a certain alphabet, is obligatory. So the
Arabic numerals, executed in Modern Roman style
(plate 7) should be used in conjunction with the
Modern Roman letters, and those in the Gothic
style (plate 29) be selected when Gothic letters are
used.
The other examples of numerals are found onplates 20, 26, 27, 28 and 29.
The construction of the different types of numer-als requires no special description. They are made in
a manner similar to the letters of their category.
The rules laid down for the construction of numer-als under " Mechanical construction of letters andnumerals," page 31, pertain also to the construction
of the other styles.
The Architects' Single Stroke Alphabets. (Plate
20). It is absolutely necessary for the student of
these alphabets to go through the course of" Mechanical construction of letters and numerals,"(page 31) and also to study the article on "Arrange-ment and spacing of letters," (page 116) before at-
tempting to copy any of these letters. Having ac-
quired a certain amount of skill in drawing all the
previous styles of letters, described in this chapter,
rendei-s the reproduction of the Single Stroke letters
a comparatively easy matter.
The principles laid down for the construction of
the Modern Roman letters and numerals governequally all styles of the Architects' Single Strokealphabets, and the correct spacing and arrangementof letters are of even greater importance than their
more or less perfect shaping.
For the lettering of titles and details on plans andspecifications, where a very plain letter is wanted,that can be executed with speed, and is easily made,the Architects' Single Stroke alphabets have been
112

designed. The first two alphabets represent simpli-
fied forms of the Plain or Condensed letters, (plate
15) the third a modification of the OrnamentalBlock, (plate 19). The construction of these types
of letters requires even less time than that of the
Roman Italics, as described for execution by the
pen stroke on page 55. Like these the Single Stroke
letters can be made slanting, but they admit of a
greater variety of representation. If set vertically
and executed by aid of the drawing instruments they
will have an accurate and finished appearance.
(Alphabet i.) Otherwise these letters are simply
dashed off freehand, with a writing pen.
In practising the slanted style of letter, (alpha-
bet 2), the beginner must give attention to bringingthe up- and down strokes exactly to the line. Thispoint, and the uniform slant of all the letters are of
the greatest importance.
Capitals and lower case letters of the Single
Stroke styles, vertical and slanting, used in conjunc-
tion with the ornamental alphabet 3, offer a wide
field of variations of letter forms, to be employedon titles of plans, &c. With the ornamental serifs
added, the Architects' Single Stroke alphabet 3, rep-
resents a decidedly decorative letter, requiring buta minimum of labor.
In designing these letter forms, the extremes of
superfluous scrolls, ends and dashes have been care-
fully avoided, legibility being the main object.
When constructing the Single Stroke letters,
draw top- and bottom guide lines first, and, if lowercase letters be used, draw middle- and sub-guide
lines also. Sketch in the letters lightly, spacing themwell, before beginning with ink. Use a writing pen.
Take little ink at a time. Run in your letters after
the method of constructing the Roman Italics, for
which see page 55. Produce clean and even lines.
Remove pencil marks, when finished.
Another alphabet for architects' use is the RomanItalic, (plate 14) and its construction is described
under this heading on page 55. The rules for the
lower case Italics, (plate 25) are found on page 75.
113

Plate XXXExample of Composition

i
THEDISTINCTIVE INDIVIDUALITYOF TONE AND CHARACTEI^
OF THE BEAUTIFUI^
FURNITURESHOWN AT OUR^WAKpi^OMS
SIMPLY B^pAXHES ACHAI^ OF I^EFINEMENT
/h
y>.)^^>c:^f^s^ i: vPtTe-s^g^jg-s^^Y,^ ^<^^^U-sr.-t5;^^ ^ ^^^.-^^-^JJr^<ey.^7
LrxG'^^^^:^:r^^ ^^'2^s^2^s^:>^r:ry,^^^ ^^^':ii'^S^^-^(:K'J^i^J^t}iJ^^-^^. ^-c-'^:-^^g5:;^'-.:3gP3g^^

PART IV—THE PROPER AND ARTISTIC EMPLOYMENTOF LETTERING
Arrangement of Letters—Composition—Spacing—Balance—HarmonyThe arrangement of the letters in the composition
of an advertisement or inscription is the most im-portant point in successfully solving the problem of
good lettering. Spacing and arrangement are so
far synonymous, that each expresses a meaning whichcannot be separated from the other without griev-
ously crippling it. The theme of spacing in letter-
ing is an old one, and the systems invented and prac-
tised, from ancient times to our own, are manifoldand numerous, as are also the errors and deviations
from a sane and logical course. Inconsistencies in
spacing are perhaps not encountered more fre-
quently in the lettering of today than in the archi-
tectural inscriptions of a classical past. Nor is it at
all beyond dispute, which is the better solution of
the problem; the spacing of the old Romans, with
all its discrepancies, such as the close setting of INDand VA, and the illogical distancing of characters
in the word CATVLVS, or the questionable meth-
ods of some masters of modern art, who strive to
balance spaces by freely changing the size of certain
letters, inventing constantly new and varying forms
and shapes, to fit into and fill out spaces, as they are
met, entirely losing sight of the main requirement in
lettering, legibility. (Plate 32.)
16
There can be but one way of settling the question
of spacing, after all the examples of ancient andmodern schools have been studied, and that is, to
space our lettering with a view to obtaining aneffect most pleasing to the eye. This principJe of
sane use is not new by any means. It has been em-bodied in the designing of our modern printers' dis-
play types, as far as practicable, with the best pos-
sible results. We must get away from the crudemethods of a gray past. But we should not allowourselves to be carried away by the hyper-modernidea.
When arranging a mass of letters, after sketchingin the words of the text, you must study out the
problem of spacing from the way the letters happento be placed or grouped. Such difficult combina-tions as TT, or LA, or AJ may form the basis of
the proportion of spacing for the rest of the letter-
ing. Balance as nearly as possible the whitespaces between the letters. That is to say the spacebetween the letters in each word should be made to
appear alike. This does not mean the space betweenextreme ends of letters, but the space as a whole.
It is no easy task to produce good spacing, but thereward is great and the effect highly pleasing, when

a line of perfectly spaced lettering appears before
your eyes. And when it appears in print this well
spaced lettering is easily distinguished from other
reading matter. The reason is not known to mostobservers, but any one can tell that the lettering is
much plainer and easier to read, regardless of its
reduction in size.
The word " LETTERING " is perhaps as goodan example of spacing as any. See plate 32.
The one difficulty here to be overcome is the large
space between the stem strokes of the two Ts. If
these letters be placed close to each other at the
top, then the volume of space near the lower line
will suggest the comparative space to be maintainedbetween the other letters. The proportion of space
between each pair of letters should be very carefully
studied. The more or less perfect harmony of let-
ters and spaces depends on the successful solution of
this problem of correctly spacing the letters. Theword LAW on plate 32 serves as an illustration
of poor spacing. The space between A and Wshould be left sufficiently wide to balance that be-
tween L and A.The method of spacing shown in the letters LAT,
on the same plate, filling in the space with a dash,
is also to be condemned.Note the wide space between the letters A and T
in the word " Hats," illustrated on plate 32, and be-
tween LL and LI in " Spelling," or between P andA in the word " Company," as compared with the
crowded appearance of the other letters. Theseexamples of bad spacing are the result of the
printers' block type and discrepancies of this sort
cannot be avoided in printing, because the spaces
between types are figured from the extremes of the
letters.
The superiority of the letterer's art is thus shown.He is not restricted by stock rules, and can draw his
letters and arrange them to suit the circumstances.
The printer, less fortunate, has no alternative, butmust employ his type as it comes.The space between two words should be about
as wide as one square. Spaces between sentences
should be greater; but these spaces between wordsare optional and may be increased or diminished to
suit the contingencies of each case. See "Example of
Composition," plate 30. Also Modern "Ad,"plate 33.
Grouping of words and sentences. The tasteful
grouping of a body of words, which may also becalled the setting, is a quality entirely absent, or at
least often wanting with many an artist of repute. Is
it to be wondered at, then, that so many of the less
successful ones follow the bad example? Look at
our modern publications, book cover designs, news-paper headings. Many of them are spoiled in the
laying out of their lettering, in the wilful breakingup of a word into syllables, or the tearing apart of
a sentence. It is mutilation to carry the remnantof a word or sentence over to the next line. See ex-
ample on plate 31.
Not all sign writers are artists in their line, butsome of them could give points to artists and archi-
tects of the present day, on the arrangement andgrouping of letters.
The reading matter for an advertisement or in-
117

Plate XXXIMutilation
Modern Freak Letters
Classic Roman, Modernized

A 5 T U D Y IN
CONTEMFOK,'A PoY A R.T ^

scription looks best when grouped towards an im-aginary center line, so that the body of the text ap-pears isolated from the border, or the lines, sepa-
rating the column from other reading matter of the
publication. The lettering of titles or inscriptions,
for architects' plans and all other purposes, is ar-
ranged on the same principles, always grouping the
most important words toward the center.
Arrange a sentence within a line, or two, or morelines. To be expressive, it must stand out independ-ent from the rest of the reading matter, and the next
sentence must begin a new line. Any word or a
group of words may be accentuated by placing it in
a line by itself, or in the center of a line.
A word must not be broken into syllables. Theprevailing usage of displaying the principal wordsof a group of lettering by larger spacing or distanc-
ing of letters, should not be copied by the designer
of high-class lettering. Letters and spaces should
always be in proportion to each other, and if anyword or a group of words is to be emphasized, let
it appear in larger letters than the rest. See ex-
ample of good grouping. Frontispiece. Also
plate 30.
The "Ad." High-class advertisements, bookplates, title pages of books, magazines and sheet
music, newspaper headings, &c., are generally
printed from plates, instead of type. The design,
drawn in ink on paper or cardboard, is reproduced
on a metal plate, by the photo-engraving process.
The plate, mounted on a wooden block, is used for
printing. If a large number of copies be desired,
or should be wanted for different publications,
duplicates are made of the plate, by electrotyping.
The drawings are executed on a somewhat larger
scale than appears in print. For very small adver-
tisements, such as single column newspaper or maga-zine-;-about two inches wide—the drawings should
be made eight inches wide, or more. The measure-
ment is figured from the extreme outer edge of
the lettering or border. For larger ads like half
or full page magazine, or newspaper headings, etc.,
the drawings may be made only one-half or one-
third larger than the actual space for which they
are intended. Lettering can be designed with morecomfort and ease when worked out on a large scale.
A correct drawing of lettering will always look
well, no matter how great the reduction in size.
When laying out the reading matter for an adver-
tisement, one should aim to produce, not a striking
effect, but a decent, pleasing appearance. The effec-
tiveness of a good advertisement lies in its sim-
plicity. Any embellishment is of secondary im-portance, not only for reasons of beauty, but becauseotherwise the eye is drawn from the principal, the
text.
The impression of the advertisement as a wholemust conform to the sense expressed. It should serve
as an illustration of the wording of the legend told.
Roman letters should be selected for the purpose of
advertising municipal, banking and insurance busi-
ness notices, as well as matters relating to the arts
and sciences. An announcement of spring millinerymay be set in ornamental type and in graceful curvesand broken lines, while the more severe forms ofGothic letters and Uncial capitals should be em-
120

ployed to herald such dignified affairs as churchfunctions and the like.
The advertisement, by its characteristic outwardappearance, should convey, even before the wordscontained therein be read, a message akin to the sen-
tence quoted.
In making a drawing for an advertisement, the
paper is first squared off, the center line put in, andthree lines drawn around the working space. Thefirst or outer line represents the cutting line. Thesecond or middle line serves as a guide for the
border. The third or inner line is drawn to keep the
reading matter within its boundaries. The lettering
is sketched in first, the border last. By the aid of
the Center line the words and letters of the advertise-
ment are broken up or divided into equal, or nearly
equal parts, and lightly sketched in. The numberof lines needed for the reading matter is calculated
on another sheet of paper. Never break a word into
syllables,—this practice is absolutely inexcusable.
Crowding. It looks well to leave an ample mar-gin at the top and bottom, between the text andouter line, or border. An even space is left on each
end of a line of lettering, and the reading matter
kept well balanced toward the center. Plenty of
space between the body of the lettering and the bor-
der or frame always looks better and also makes
the advertisement appear more conspicuous than
larger' and crowded lettering. It is a bad mistake
generally committed by advertisers, to direct the
artist to make the letters of a given size for a given
space. Instead, they ought to leave the size of letters
to the better judgment of the letterer, after pointing
out what Is to appear most prominently. To insure
mutual satisfaction, let the draughtsman submit a
rough pencil sketch, which may be changed or cor-
rected.
In spite of the many good examples to be ob-served daily, some advertisers never learn to useshort, pithy sentences. They will crowd into a three
of four inch single column advertisement, mattercomposed of four- or five hundred letters. Whenphotographed down to the print block the lettering
will, of course, appear very small, and, printed onthe coarse stock of some newspapers, must come outpartly indiscernible. One cannot reasonably ex-
pect readers of the advertising columns to peruseall the small text of such an announcement. Thesense of the subject matter should be presented in as
few words as possible and in letters of sufficient
size, so that it can be read at a glance.
After the sketchwork has been finally approvedand all the lettering and by work carefully penciled
in, the whole may be traced and transferred to a
fresh sheet for inking in.
The reproduction of a good drawing is sometimesspoiled in the process of photo-engraving, by in-
competent or careless workmen. The artist canhave a proof of the plate submitted to him for ex-
amination, and he should be asked to judge as to the
merits of the work. See plate 33.
The Border or Frame. Conventional adaptationof flower and foliage motives, as well as the lines of
the different styles of architecture can be fittingly
employed in borders for advertisements or inscrip-
tions, where an ornamental expression is desired.
121

Flate XXXIISpacing

LAW LETTER L'AT
LETTERINGSPELLINGHATS, UrLLLIIlU company, company

Endless are the possibilities for the combinationsof graceful lines for attractive borders. The em-blems of the trades and sciences, the attributes ofthe arts, intertwined with scrollwork or combinedwith designs of columns and friezes present ideal
opportunities to demonstrate artistic ability. Theaddition to the advertisement of a suitable borderhas a wide and important bearing upon its appear-ance. Apart from the beauty of the effect as a har-
monious whole, the border invariably adds a charm,a distinctiveness, which, when the notice appearsamong a number of others in the columns of a news-paper, at once attracts the eye.
A border designed for an advertisement should in
some manner be related to the matter advertised.
For a tobacco " ad " the border may be composed of
leaves and flowers of the tobacco plant, or graceful
waving and curling lines of tobacco smoke. Forreal estate, the building-, furniture- and allied
trades and similar lines of advertising the wholescale of architectural lines and forms is available.
But do not be led astray by the folly of some artist
who embellished a candy advertisement with a bor-
der composed of fowls and feathers. Do not con-
struct borders composed of a number of meaningless" curlicues " or " gingerbread work." Study yourdesign well, and work it out with the consciousness
of art. Flowers and foliage are never out of place,
and may be employed for borders in all cases, as
also a frame composed of straight or gracefully
curved lines.
When designing a border the first consideration
must be to give the text or reading matter due124
prominence. A border of elaborate design should
be drawn in light lines only.
For other matter concerning Borders see under" Irregular Curves," page 18, and the following
paragraph.For examples of borders see plates 30 and 33.
Adapting ideas. It has been stated in a previous
chapter that genius is not essential to become a goodartist in lettering. Novel ideas are not alone pro-
duced in the imagination of an artistic temperament.It is the man with an eye for practical things who
gets up the schemes for advertisements that com-mand the admiration of connoisseurs, for a time at
least. But he does not present any new ideas, nordoes he imagine anything; he is too much of a prac-
tical, matter-of-fact man for that. He simplyadapts a well-known idea for his purpose.To put simple, every day themes to practical use
for advertisements is not at all as difficult as it seems.All you have to do is to look around you with youreyes open. You can get inspiration close at hand.No need to go far or travel abroad.
For the purpose of illustration we will assumethat you desire to design a border for a notice, and as
it is to be used as an advertisement for a new fish-
ing rod, the border should suggest something aquatic.Very well. In your bathroom the decorations on
the tiles show a design of pond lilies. That willdo—or, rather, you will make it do. Just take apiece of tracing paper and copy the outlines of onebunch of the flowers, a few buds and some of thewaving stems and floating leaves. You can use this
composition without much changing, in fact, you

select which of the flowers, buds, leaves and stems
you can best utilize for your scheme, and leave out
what is not wanted. (See example on plate 34.)
The center lily is too large—lay it aside, as also a
bud and leaf below and substitute a smaller one.
The stems are rearranged and a bud placed to fill
the corner, and there you are, one-half of the lowerborder is complete; the other half is added by re-
versing the pattern. For the sides you only have to
extend the trailing stems, or shorten them, accord-
ing to the shape of the advertising space. Theflowers and leaves must be placed in a horizontal
position. Outside of these minor changes it is sim-
ply a matter of tracing. For the top take the samedetail of design used for the bottom, with the excep-
tion of a leaf here and a bud there, to make it ap-
pear lighter and to balance better the effect of the
frame as a whole.
In a similar manner the designs of wall papers,
borders, patterns of rugs and carpets, embroidery,
&c., may be utilized.
For other examples of borders see plates 30 and
33-
Letter Heads, Business Cards. Designs for these
branches of the art of lettering are also drawn on
paper and reproduced upon metal. The lettering
for business cards and letter heads is generally laid
out with a view to utilizing the same design and
plate for both. Attention must therefore be paid
to arranging the lettering suitably for the space at
the head of the letter sheet.' This is accomplished
by distributing the reading matter in as few straight
or slightly curved lines as possible, rather narrowas to height, and long drawn out horizontally.
Occasionally an emblem of trade, decorations offlowers, a vase or portrait is placed to the left of the
design, appropriate for milliners, florists, decorators,
etc. Borders should not be used.
All styles of Roman letters are suitable for this
purpose. The first line, the name of the firm, mightbe set in Script; the next line, relating to the busi-
ness, in Modern Roman or Block, and the last line,
giving the address, in Italics or smaller Roman orPlain letters. A pleasing effect results when onestyle of letter only, graded to different sizes, accord-ing to their importance, is used.
The lettering on a business card or letter headshould be sharp and well defined. The narrow strip
of lettering appears to advantage on the formerwhen placed near the lower edge, leaving the upperhalf blank.
The possibilities of varying designs and combina-tions of lettering for Book Covers are unlimited.
Here the fertile imagination of the progressive ar-
tist has free play.
Scroll designs of intertwined Italics, artistic, butvery simple in appearance, and most difficult ofcomposition, or any of the ornamental styles of let-
ters may be used, without a border. Originalschemes of lettering and borders of odd appearance,bold letters upon a background of curiously
twisted, ornamental line work, curved lines of letter-
ing, mingling with branches or flowers, or just a
line of gracefully flourished French Roman letters,
freely treated, will all look well on a book cover.
125

Plate XXXIII
Design for Modern "Ad"

The Standard of tke World
t S^
LEWatermanGa 173 Broadwaj^ MX

Sometimes a title name, in any of the Roman style
letters, capitals and lower case, enclosed in an ovalor plain oblong line border, is called for, and makesan elegant design.
The Uncial, Gothic and Script letters should beused for titles of books on history, architecture,
art, &c.The construction of a design of lettering for a
Title Page requires the employment of novel andunique ideas, and skilful w^ork of the highest qual-
ity. Lettering on title pages is often framed in a
suitable border, or flanked by architectural columns.Letters of any conventional style may be selected
and treated in a free and unrestricted manner, buttheir lines should always proclaim the artist.
Figure work and elaborate ornamentation of great
beauty often accompanies the lettering of title
pages, yet, in many instances, the poor quality of the
letter forms and their faulty spacing furnish an oddcontrast to the excellent by-work.
For title pages, as for all purposes, the lettering
should always be considered of first importance.The careful grouping and arrangement of letters,
and their accurate execution is most essential.
Large and conspicuous letters of artistic design andfinish are desirable for the titles of newspapers andperiodicals. The lettering may be elaborately
drawn in open line work, or shaded, but the letters
should be carefully spaced, and be of a plain style.
There is a tendency to crowd in too much orna-
mentation, or add heavy borders to the narrow space
allotted to the Headings of newspapers. If a border
be used, let it appear in light line worh-aiid do not
let it be too clumsy. Bulkiness should also be
guarded against in designing the lettering. Whenmore than one line of it is required, arrange the
most important matter in one line, composed of
heavier letters, and set the remainder in smaller,
lighter characters.
Artistic work in newspaper titles is sometimes
seen. The lettering appears on a design of an archi-
tectural frieze, flanked by potted plants, or havingurns at the ends. A narrow garland of flowers, in
light outline, separating the headline from the other
printed matter, produces a charming effect.
Designing Memorials, Resolutions, &c. Thework of designing lettering for memorials, resolu-
tions, testimonials, diplomas and other commem-orative documents, also called engrossing, is in
many instances the nianifestation of great art. Whathas been said under the heading " The ad " also ap-
plies, and with even greater force, to the laying out
of lettering for this purpose. Avoid loud, striking
effects. Aim for beauty and elegance.
Unlike the advertisement, which is used and readby thousands, but, once read, is scarcely ever lookedat again by the same individual, a document like amemorial is framed and hung upon the wall, and is
reverenced, the pride of generations. And as " a
thing of beauty is a joy forever," you should strive,
then, to make your design a real work of art. Letthe construction of your letters, their arrangement,the border, accuracy of each line and curve, the ap-pearance as a whole convey to those who see thework, the import of the message, even before theyread the words.
28

Put your whole heart and soul into your work.Do not force yourself into the harness if " in no
mood" or "out of sorts." Such unpleasant moodswill pass.
Gothic letters are always most appropriate for
work of this kind. A large capital as a beginningfor the words " Whereas " or " At a meeting " maybe executed in Uncial, as also the capitals of the
name of the person to be honored. But do not let
the name or any word of the text appear in Gothicor Uncial capitals entirely. It is illegible. Capitals
only may be used when Roman letters are employed.In that case use none but the Roman letters through-
out the work. Enough variety can be given by us-
ing different sizes, lower case and capital letters.
The letters composing the name and all capitals
may be embellished with ornaments in color andgold. The employment of ornamental characters
and also of elaborate adornment is very appropriate
for this class of pen- and brush work, but the ar-
rangement should be very carefully studied out be-
fore the ink work is attempted.
A pleasing effect is attained by leaving a widemargin to the left of the body of lettering and partly
filling this space with ornamental filigree- or scroll-
work, flowing out from the first letter or the capi-tals of the name.
Attention should here be called to a gross mistakefrequently encountered in designs for resolutions
on such solemn subjects as the death of a respectedcitizen. The arrangement of lettering on documentsof this character should be dignified and quiet.
Frivolous looking letters with many flourishes that
seem to be hopping and dancing all over the sheetmust be avoided.
An elaborate border is sometimes added to me-morials, resolutions and testimonials, but when the
work is intended for framing, a plain line would, in
most cases, be more suitable.
Designs for these documents should always first
be carefully sketched in lead pencil, then the effect
studied, and errors corrected. After this it shouldbe traced and carried over to the parchment or draw-ing paper for inking in.
Much more than ordinary care must be exercisedwhen working out memorials, &c., with ink, to avoidmistakes from overdrawn lines, and accidents suchas ink spots and rubbing. These cannot easily beentirely eliminated; erasures are apt to be noticed.
See example on plate 35.
129

Plate XXXIVAdapting Ideas
Tile Design Reconstructed
for Border


Plate XXXVExample of Engrossed
Resolution

Jf
a^m^7aMW^
lyiy

CONCLUSIONThe conviction of having an inexhaustible wealth
of ideas, the certainty that forms and compositionsare slumbering in his mind, is the artist's pride.
This feeling is not one of self-esteem merely, it is
a kind of art consciousness.
The architect studies out and draws his plans for
a handsome villa, or a great public building, and,
with his mind's eye sees the structure rise before
him—the landscape gardener enhances the beauties
of nature by the application of his art, and a knowl-edge gathered from experience.
The letterer, if he be an artist, having ability ofcomposition and arrangement, and a knowledge of
decorative effects, brings to the fullest force of ex-
pression the many beautiful letter forms and grace-
ful lines, and gathers them into a harmonious whole.Under the inspiration of the moment and with the
enthusiasm that is inseparable from him who loves
his fascinating work for beauty's sake, the true ar-
tist in this line likewise creates a thing of beauty,
which is an expression of his inner life.
But, unlike the architect or gardener, the artist of
lettering needs no expensive apparatus to execute his
ideas; he has all the necessary implements for his
work right at his fingers' ends.
If others do not appreciate the merits of yourwork, be not discouraged. There may be days whenyour ideals seem to be vanishing, owing to lack of
understanding and appreciation on the part of those
in a position to dictate.
The sketch conceived in a happy moment andexecuted with enthusiasm will ever be your best
work. Cherish your ideals and the love for yourwork in your inmost heart. The laws of beautymust eventually prevail, and sooner or later the highquality of your work will meet with due recognition.
134

Freehand Designs ot
Initials, Monograms and Cyphers
of various styles and ornamentation
Also Borders and Book Cover
Designs

/


INDEX
Adapting Ideas
Advertisement, TheAlphabets, The RomanAlphabets, The Gothic
Antique Roman Letters
Architects' Single Stroke Alphabets, The 112
Arrangement of Letters 116
PAGE
124
120
8S
97
51,92
Balance (of spaces) . 116
Blackletter (Old English) 100
Block Letters . 54, 96
Block Letters, Ornamental . . 54, 97
Board, The Drawing . . . .9Border, The . . . 121
Book Cover Designs . . . 125
Bow Spacers . . ... 13
Bristol Board . . . . 16
Brushes 18
Business Cards, Designs for ... 125
Centering . . . . 120
Center Line ... . . . 117, 121
Classic Roman. Capitals, The . 85
Classic Roman, Modernized 88
Cleaning the Drawing . . . IS. 22
Cloth, Tracing .' . . . ... 18
Commemorative Documents, Designs for 128
Compasses
Compass-lead ....Composition (of Lettering)
Conclusion
Construction of Letters, General Rules
for the . . . . . . .
Construction of Letters and Numerals,
Mechanical ...Contents, Table of
Cross-Section Paper
Crowding
Curves, Irregular . . . . . .
PACE
II
II
116
134
SO
31
5
17
121
18
Designing Advertisements . . 120
Designing Memorials, etc 128
Designing Borders . 121, 124
Display (of Lettering) 116, 117
Dividers, The .... ... 14
Documents, Commemorative, Designs for 128
Drawing Board, The . . ... 9
Drawing Instruments, How to Use the 9
Drawing Instruments, Set of ... 10
Drawing Paper .... . . 16
Ellipses ... . . . 30
Eraser, Ink -19Erasing and Cleaning Rubber ... 15
PAGE
French Roman Letters .... 54, 89
Freak Letters, Modern ... 89
Freedom of Treatment . 84
Gelatine, Sheet . . . .19General Rules for the Construction of
Letters ... . . 50
Gothic, Modern 62, 97
Gothic, German . . 66, 100
Grouping of Words and Sentences . . 117
Guide Lines, The . . 22
Harmony . . 116
How to Use the Instruments . g
Ideas, Adapting . ... 124
India Ink . ... 16
Introduction . . . . . 7.
Instruments, How to Use the . .9Instruments, Drawing, The Set of 10
Irregular Curves . . . .18Italics, Roman . • SS, 93
Lead, Compass .... 11
Lead Pencils . 14
Letter Heads, Designing 125
Letters, Arrangement of 116

PAGE
Letters, General Rules for the Construc-
tion of ... so
Letters and Numerals, Mechanical Con-
struction of . . . . .31List of Plates ... .6Lower Case Letters, The . . 74, 97
Margin 121, 129
Mechanical Construction of Letters and
Numerals 31
Memorials, etc.. Designing . 128
Modern Gothic Letters . . 62, 97
Modern Roman Letters . 31, 50, 89
Modem Script . . . . -84Modern Uncials, or Church Text . 67, loi
Modernized Classic Letters .... 88
Modern Type . . . .116Mounting Paper ... .16Mutilation .117
Newspaper Headings . . . 128
Numerals, The 112
Numerals, Mechanical Construction of
Letters and .... ... 31
Old English (Gothic) Letters . 62,97
Ornamental Block Letters . . 54, 96
Ornamental Roman Letters . 54, 92
Paper, Cross-Section
Paper, Drawing
Paper Sketching
Paper, Tracing .
Paper, Transfer .
Pen, Ruling . . . .
Pens, Writing
Pencil Pointer
Pencils, Lead
Plain or Condensed Letters
Plates, List of
Practice WorkPosition as to Light
PAGE•
17
16, 17
16
18
18
12
IS
15
14
55,93
5
19
19
Resolutions, etc.. Designing . 128
Ro^an Alphabets, The ... .85Rtfftian Letters, Antique . 51, 92
Roman Letters, Classic . . -85Roman Letters, French . 54, 89
Roman Letters, Modern . .31, SO, 89
Roman Letters, Ornamental . . 54, 92
Roman Italics • 5S> 93
Rubber, Erasing and Cleaning ... 15
Rules, General, for the Construction of
Letters 5°
Ruling Pen, The . . . . 12
PAGE
Script, Modern 84
Set of Brushes 18
Set of Drawing Instruments, The . . 10
Set of Irregular Curves ..... 18
Sheet Gelatine 19
Sketching Paper 16
Space Margin . ...... 121, 129
Spacers, Bow 13
Spacing 116
Spurred Letters, Plain .... 55, 96
Stretching the Paper 16
Testimonials, etc., Designing
Thumb Tacks ....Title Pages .
Tracing Paper
Transfer Paper
Treatment, Freedom of
Triangle, The ....T-Square, The .
Type, Modern
128
IS
128
18
18
9
116
Uncials, Modern 67, lOI
Water Color, White 19
Words, Grouping of 117
136

GILLOTT'S PENSThe Standard Pens of the WorldFOR DRAUGHTING; Nos. 170, 290, 291, 303, 659, 850, 1000
FOR FINE WRITING: Nos. 303, 404, 601 E. F. 603 E. F., 604 E. F.
FOR BROAD WRITING OR LETTERING: Nos. 849, 1009, 1071, 1087
Sold by Stationers Everywhere
JOSEPH GILLOTT & SONSALFRED FIELD & CO., Sole Agents
93 Chambers St. New York
BOOKS F ARCHITECTS. STUDENTSOR AND DRAFTSMEN
Building Construction and Su-perintendence, Kidder.
Part I, Mason Work $6.00
Part II, Carpentry 4.00
Part III, Roof Trusses 3.00
Details Building Construction,
Martin. 2nd Edition 2.00
Architectural Drawing,TUTHILI. - - 2.50
Architectural Perspective,
Wrioht - 3.00
Detailed Working Drawings,5 Orders of Architecture,Ball. Folio 4.00
Building Details, Snyder.6 Parts. Price per Part 2.50
Send for descriptive Catalogue,
sample of the Architect's andBuilders' Magazine, also cir-
cular of the Students' andDraftsmen 's Library Club.
WILLIAM T. COMSTOCK, Publisher23 Warren Street NEW YORK
F. W. DEVOE ANDC. T. RAYNOLDS CO.
MANUFACTURERS AND IMPORTERS OF
ARTISTS MATERIALS, DRAUGHTMANSSUPPLIES, FINE BRUSHES, ETC.
SIGN WRITERS SUPPLIES
The Automatic Shading Pen Outfit. A Lettering Out-fit of Pens and Devoe Shading Inks with In-
structions for Using Them. A Valu-able Aid to Show Window
Decoration.
THE AIR PENCIL, FOR MAKINGRAISED LETTERS AND RELIEF
WORKCARD WRITERS' BRISTOL BOARDS,COLORED METALLICS, FROSTINGS,
ETC.
BRUSHESWe are the Largest Manufacturers and Importers of all
Kinds of Brushes. Sign Painters' Brushes and Letter-
ing Pencils a Specialty.
SEND FOR PRICED LIST OF SUPPLIES
F. W- DEVOE ANDC. T. RAYNOLDS CO.
101 Fulton Street
NEW YORK176 Randolph St.
CHICAGO


:%
//