MODEL H8066 MANDOLIN KIT WITHOUT HOLEScdn2.grizzly.com/manuals/h8066_m.pdf · -4- H8066 Mandolin...
36
MODEL H8066 MANDOLIN KIT WITHOUT HOLES OWNER'S MANUAL COPYRIGHT © NOVEMBER, 2006 BY GRIZZLY INDUSTRIAL, INC. WARNING: NO PORTION OF THIS MANUAL MAY BE REPRODUCED IN ANY SHAPE OR FORM WITHOUT THE WRITTEN APPROVAL OF GRIZZLY INDUSTRIAL, INC. #BL8553 PRINTED IN JAPAN
Transcript of MODEL H8066 MANDOLIN KIT WITHOUT HOLEScdn2.grizzly.com/manuals/h8066_m.pdf · -4- H8066 Mandolin...

MODEL H8066 MANDOLIN KIT
WITHOUT HOLESOWNER'S MANUAL
COPYRIGHT © NOVEMBER, 2006 BY GRIZZLY INDUSTRIAL, INC.WARNING: NO PORTION OF THIS MANUAL MAY BE REPRODUCED IN ANY SHAPE
OR FORM WITHOUT THE WRITTEN APPROVAL OF GRIZZLY INDUSTRIAL, INC. #BL8553 PRINTED IN JAPAN

������������������������������������������������������������������������������������������������������������������������������������������������������������������������������������������������������������������������������������������������������
�� ������������������������������ �������������������������������������������������������������������� ����������������������������������������������������
�������������������������������������������������������������������������������������������������������������������������������������������������������������������������������������������������������������������������������������������������������������������������������������������������������

SECTION 1: SAFETY ....................................................................................................................... 2
SECTION 2: INTRODUCTION ......................................................................................................... 3Foreword .................................................................................................................................... 3Contact Info ................................................................................................................................ 3
SECTION 3: PARTS INVENTORY ................................................................................................... 4Inventory ..................................................................................................................................... 4Supplies/Tools ............................................................................................................................ 4Identification ............................................................................................................................... 5
SECTION 4: ASSEMBLY ................................................................................................................. 6Shaping Body ............................................................................................................................. 6Assembling Body ....................................................................................................................... 7Attaching Binding ....................................................................................................................... 9Sanding Body ........................................................................................................................... 10Sanding Neck ........................................................................................................................... 10Fretboard .................................................................................................................................. 10Neck to Body ............................................................................................................................ 11Fretboard .................................................................................................................................. 14Shaping Neck ........................................................................................................................... 15Shaping Fretboard ................................................................................................................... 16Final Sanding ........................................................................................................................... 17Finishing ................................................................................................................................... 17Nut ............................................................................................................................................ 18Tailpiece ................................................................................................................................... 19Tuning Machines ...................................................................................................................... 19Fitting Bridge ............................................................................................................................ 20Installing Strings ....................................................................................................................... 20String Height ............................................................................................................................ 22Tuning ...................................................................................................................................... 23Adjusting F-Holes ..................................................................................................................... 23
SECTION 5: REFERENCE INFO ................................................................................................... 26Accessories .............................................................................................................................. 26
WARRANTY AND RETURNS ........................................................................................................ 29
Table of Contents

-2- H8066 Mandolin Kit Without Holes
SECTION 1: SAFETY
These instructions assume that you are intimately familiar with the safe operation and use of wood-working machinery and woodworking tools, and understand the techniques used to reproduce this project. If you do not qualify for both of these criteria, STOP building this project for your own safety. Read and understand the owners manual for the machinery you intend to use, take a wood-working class or visit your local library for more information. Woodworking machinery and tools are inherently dangerous because they use sharp edges that can and will cause serious personal injury including amputation and death. Do not underestimate the ability of these tools and machin-ery to cause injury. Never operate any tool without all guards in place and always wear approved safety glasses. For your own safety, please heed this warning.
Always wear safety glasses or goggles when operating equipment. Everyday glasses or read-ing glasses are not safety glasses. Be certain the safety glasses you wear meet the appropri-ate standards of the American National Standards Institute (ANSI).
Because there are various ways to cut and join wood, you can make substitutions for the methods stated in this plan. We try to suggest the easiest methods possible. However, only you know your skills with each piece of machinery. Never compromise your safety by using a cutting method with which you are not comfortable. Instead, find an alternative approach that will yield the same result.

H8066 Mandolin Kit Without Holes -3-
SECTION 2: INTRODUCTION
If you have any comments regarding this manual, please write to us at the address below:
Grizzly Industrial, Inc.C/O Technical Documentation Manager
P.O. Box 2069Bellingham, WA 98227-2069Email: [email protected]
We stand behind our products. If you have any service questions or parts requests, please call or write us at the location listed below.
Grizzly Industrial, Inc.1203 Lycoming Mall Circle
Muncy, PA 17756Phone: (570) 546-9663
Fax: (800) 438-5901E-Mail: [email protected] Site: http://www.grizzly.com
Contact InfoForeword
We are proud to offer the Model H8066 Mandolin Kit Without Holes. This kit is a part of a growing Grizzly family of fine woodworking projects. When assembled according to the guidelines set forth in this manual, you can expect years of enjoyment from your mandolin.
We are pleased to provide this manual for the Model H8066. It was written to guide you through assembly, review safety considerations, and cover general information. It represents our effort to pro-duce the best documentation possible.
-4- H8066 Mandolin Kit Without Holes
The majority of the wood components in this kit come fully machined and ready for assembly. A small amount of sanding and finish work is need-ed to complete the mandolin.
Recommended Tools & Supplies:• Wood Glue—Titebond Original Wood Glue• #80 to #320 Sanding Paper• Flexible Sanding Block• “000” Grade Steel Wool• Clamps (carriage bolts, wing nuts, flat wash-
ers, wood blocks)• Rubber Strips (cut up inner tubes)• Electric/Cordless Drill• Drill Bit (1/16")• Small Brad Nails• Wire Cutters• Razor Blade• Chisel • Phillips Screwdriver• Masking Tape• Lightweight Hammer• Rubber Dead Blow Hammer• Steel Straight Edge • Sharp Pencil• File Assortment• Finishing Materials• Electronic Tuner• Coat Hanger• NIOSH Approved Respirator• ANSI-Approved Safety Glasses
SECTION 3: PARTS INVENTORY
Figure 1. Boxed components.
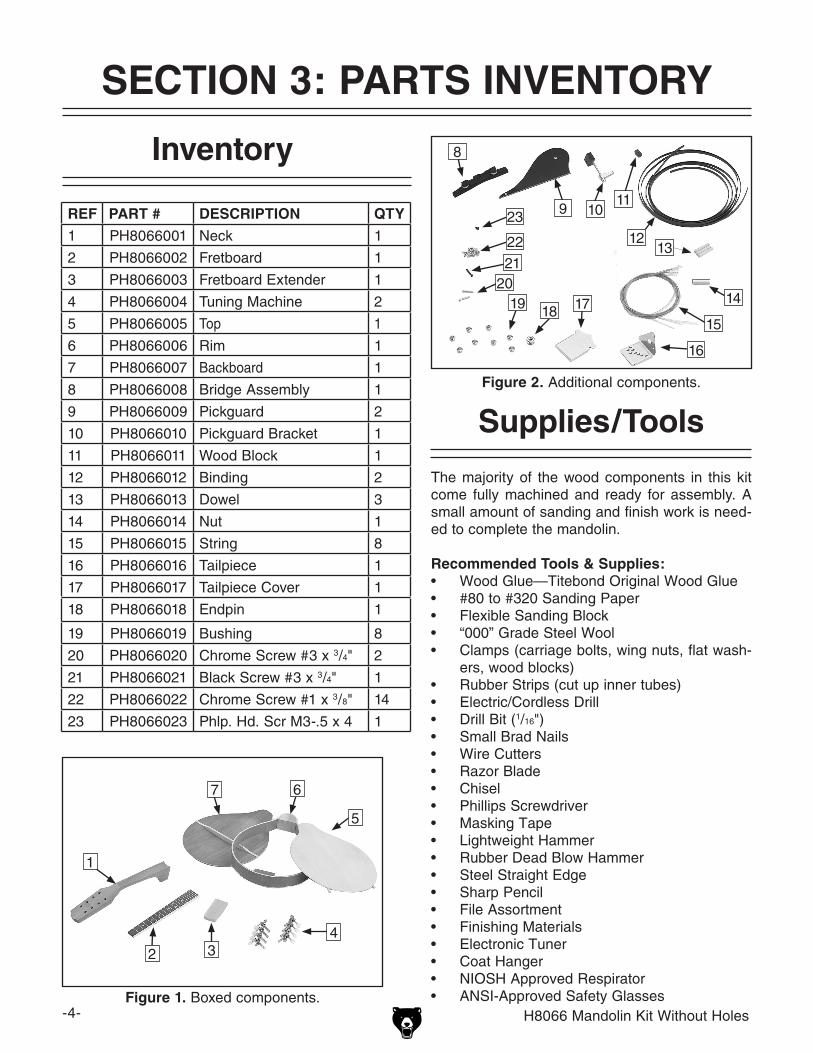
Figure 2. Additional components.
Supplies/Tools
REF PART # DESCRIPTION QTY
1 PH8066001 Neck 1
2 PH8066002 Fretboard 1
3 PH8066003 Fretboard Extender 1
4 PH8066004 Tuning Machine 2
5 PH8066005 Top 1
6 PH8066006 Rim 1
7 PH8066007 Backboard 1
8 PH8066008 Bridge Assembly 1
9 PH8066009 Pickguard 2
10 PH8066010 Pickguard Bracket 1
11 PH8066011 Wood Block 1
12 PH8066012 Binding 2
13 PH8066013 Dowel 3
14 PH8066014 Nut 1
15 PH8066015 String 8
16 PH8066016 Tailpiece 1
17 PH8066017 Tailpiece Cover 1
18 PH8066018 Endpin 1
19 PH8066019 Bushing 8
20 PH8066020 Chrome Screw #3 x 3/4" 2
21 PH8066021 Black Screw #3 x 3/4" 1
22 PH8066022 Chrome Screw #1 x 3/8" 14
23 PH8066023 Phlp. Hd. Scr M3-.5 x 4 1
1
2 34
5
67
11
12
18
Inventory
14
15
16
171920
23 10
22 1321
9
8

H8066 Mandolin Kit Without Holes -5-
Identification
Tuner or Tuning Machine
Headstock or Peghead
Neck
Tailpiece
Fret
Tuning Peg
Figure 3. Model H8066 main features.
Figure 4. Model H8066 headstock features.
Endpin
Barrel Nut
Bridge

-6- H8066 Mandolin Kit Without Holes
SECTION 4: ASSEMBLY
Shaping Body
The f-holes are cut into the top to aid air flow through the mandolin.
Components and Hardware Needed: QtyTop ................................................................... 1Backboard ......................................................... 1Rim ................................................................... 1
To make the f-holes:
1. Place the top face down, then place the rim onto the top so the notches in the rim fit over the tone bars.
Note: The ends of the tone bars will stick
out. The head block should be about 1⁄8" back from the edge of the top.
2. Using a pencil, mark the outside edge of the rim onto the top. This line will identify where the two pieces meet as shown in Figure 5.
Figure 5. Marking outline of rim onto top.
4. Use a bandsaw or jig saw to cut the top to a rough shape. Be careful to cut only to the edge of your pencil mark.
5. Choose an f-hole pattern. Refer to Page 25 for sample f-hole shapes.
6. Draw two f-holes onto the inside of the top as shown in Figure 6.
Typically the bass f-hole is closer to the tone
bar than the treble f-hole is to the treble tone bar. Make sure the f-holes do not extend into the tone bars or past the top edge (drawn in Step 1).
Tip: Use carbon paper to transfer the f-hole outline onto the top. Place low adhesion painting tape over the inside of the top to reduce tear out when you cut the holes.
Figure 6. Using carbon paper to trace f-holes onto inside of top.
3. Remove the rim.
Tone Bars
Headblock
Bass Tone Bar
Treble Tone Bar
Rim
Top
F-hole patterns

H8066 Mandolin Kit Without Holes -7-
Figure 7. Cutting the f-holes.
7. Drill a hole into the f-hole ends, then cut them out carefully with a scroll saw or jig saw, mak-ing sure you stay inside the lines, as shown in Figure 7.
Tip: Drilling additional holes near the tight corners of the f-holes can help you cut them out more easily.
Components and Hardware Needed: QtyTop ................................................................... 1Backboard ......................................................... 1Rim ................................................................... 1
To assemble the top, rim, and backboard:
1. Place the backboard face down, then place the rim over the backboard so the notches in the rim fit over the ends of the tone bar.
2. Mark the outside edge of the rim onto the backboard. Make sure the waste cut area is even around the edge of the backboard.
3. Remove the rim.
Assembling Body
Figure 8. Cutting backboard to rim outline.
4. Use a bandsaw or jig saw to cut the edge of the backboard close to the rim outline as shown in Figure 8.
Note: Be careful to cut up to but not past the outline.
Figure 9. Drilling positioning holes.
5. Drill positioning holes 1/2" deep into the center of the headblock and tailblock on both sides for positioning brad nails (Figure 9).
Note: The brads will help keep the top and backboard from moving after they are glued. Make the hole diameters slightly smaller than the brads.
Tailblock
8. Use a fine metal file or rolled up piece of fine grit sandpaper to smooth the inside edge of the f-holes. Do not remove too much mate-rial, because you will smooth the f-hole aper-tures after the body is assembled. (See Page 23 for f-hole adjustments.)
Outline
Headblock

-8- H8066 Mandolin Kit Without Holes
6. Nail the brads into the positioning holes and use wire cutters to cut the heads off no more than 1⁄16" above the surface of the neck as shown in Figure 10.
Figure 10. Brads nailed into the headblock and tailblock.
7. Place the rim over the top, making sure the rim does not protrude beyond the top edge.
8. Lightly tap the rim with a rubber dead blow hammer to leave brad marks on the inside of the top.
9. Repeat Steps 6–8 with the backboard.
10. Spread a thick layer of wood glue such as Model H5332 on the top and bottom of the rim, and the outside edges of the top and backboard.
11. Position the top and backboard onto the rim using the brad nails as guides.
Figure 11. Top, rim, and backboard clamped together.
12. Place screw clamps around the rim and a C-clamp over the headblock, then tighten them to hold the top and backboard in place until the glue dries, as shown in Figure 11.
Fit as many screw clamps onto the mando-lin body as possible to ensure even contact between the wood surfaces.
Note: You can make screw clamps from car-riage bolts, wing nuts, flat washers, and wood blocks or discs. Keep the blocks away from the fragile edges of the f-holes so you don't break or crack them.
13. Scrape away excess glue, then allow the glue to dry according to the glue manufacturer's curing instructions.
14. Remove the clamps and fill in any gaps in the glue seam with a paste filler, then sand down when dry.
Brads
Screw Clamp

H8066 Mandolin Kit Without Holes -9-
Attaching Binding
Figure 12. Routing the binding slot using a binding router tool with tape shim.
Note: Shim the attachment with masking tape to adjust the cutting depth. A sharp knife or a hand routing tool can also be used.
4. Spread a thin layer of cyanoacrylate adhe-sive (see Page 28, Accessories) into the slot on the top of the mandolin and attach the binding as shown in Figure 13.
Note: It may be easier to start attaching the binding near the f-holes—instead of at the headblock—then work your way around the body.
5. Wipe off extra adhesive with a cloth and cut off the unused end of the binding with a knife or razor blade.
6. Repeat Steps 4–5 on the backboard side of the mandolin.
The mandolin body should now look like the one in Figure 14.
Figure 13. Attaching the binding.
Figure 14. Binding secured.
The binding is installed into slots cut in the man-dolin body.
Components and Hardware Needed: QtyMandolin Body ................................................... 1Binding Rolls ..................................................... 2
To install the binding on the mandolin:
1. Sand the top and backboard edges so they are flush with the rim.
2. Place pieces of cardboard around the man-dolin and secure it in a vise, putting most of the pressure at the headblock or tailblock.
3. Cut a slot all the way around the top and bot-tom of the mandolin (see Figure 12) slightly less than the binding height and width. The binding included with the kit measures 15⁄64" high by 1⁄16" wide.
Note: We recommend using a Dremel® tool or handheld die grinder fitted with a binding attachment (see Page 28, Accessories) to route out the slot.
Cardboard Padding
Tape Shim
Cutter Bit
Binding Attachment

-10- H8066 Mandolin Kit Without Holes
7. After the glue sets, scrape off extra glue residue on the rim with a sharp chisel held perpendicular to the surface.
8. Remove extra glue on the binding with a chisel or with #220 sandpaper.
Note: If you use a slower drying glue—such
as acrylic glue—allow at least eight hours for the glue to dry, and use masking tape to hold the binding to the body.
The mandolin body was rough sanded at the factory. To get a good finish, the body must be sanded further with a series of sandpaper grits.
To sand the mandolin body:
1. Wear a NIOSH-approved respirator and ANSI-approved safety glasses when sand-ing wood!
Note: When hand sanding, always sand in the same direction as the wood grain.
2. Use a sanding block with #150 grit aluminum-oxide sanding paper to sand the mandolin body, including the binding, until there is a consistent scratch pattern on the entire sur-face. Sand as little as possible in the neck area at this time.
3. Resand the entire mandolin body with #220
grit sanding paper and lightly round over the f-holes and edges of the body.
4. Wipe the mandolin body with a damp cloth to “raise” the wood grain.
5. Wait until the wood is dry and resand the entire body with #220 grit sandpaper.
6. Repeat Steps 4–5.
Sanding Body The mandolin neck has been rough sanded at the factory. Personalize the fretboard and neck headstock with additional cutting, inlay, or design work before final sanding.
Note: Take your time and consider testing your designs in scrap wood before performing the work on the actual fretboard and headstock.
Wait until the fretboard is installed before sanding the neck.
Sanding Neck
Do not sand the fretboard. Sanding the fretboard will affect the playability of the mandolin and could lead to permanent damage.
Fretboard
7. Fill the wood pores in the back and sides with a paste filler according to the manufacturer's instructions. DO NOT fill the grain in the mandolin top.
8. When the paste filler is dry, use #320 grit sandpaper to remove the residue, and use a tack cloth to pick up remaining grit.

H8066 Mandolin Kit Without Holes -11-
A precise fit is important for the neck-to-body joint. This joint affects the placement of the strings and bridge, and these determine the sound qual-ity of the mandolin. Dry fit and check all the parts before gluing.
Components and Hardware Needed: QtyNeck .................................................................. 1Body .................................................................. 1Dowels ............................................................... 2Tailpiece ............................................................ 1Nut ................................................................... 1
To install the neck:
1. Test fit the neck by pushing the dowels into the body of the mandolin and sliding the neck onto the dowels as shown in Figure 15. DO NOT glue the joint at this time.
2. Check for gaps between the body and the neck.
— If the neck fits tightly, go on to Step 3.
—If there are gaps, remove the neck and dowels, and hold sandpaper on the surface of the mandolin body with the grit facing out (see Figure 16). Rub the neck up and down on the sandpaper until the neck con-forms to the body shape.
3. Dry fit the neck, and mark the center of both ends of the body and the neck.
4. Place a straightedge across your center marks as shown in Figure 17.
Figure 15. Test fitting the neck.
Figure 16. Adjusting the fit of the neck.
Neck to Body
Figure 17. Checking neck and body alignment along center line.
Center Line Marks
—If center marks are aligned, go to Step 6.
—If the center marks are not aligned, go to Step 5.
—If the binding protrudes at the neck mount-ing area, use a fine metal file to make it even.

-12- H8066 Mandolin Kit Without Holes
5. Align the neck by using the sanding tech-nique described in Step 2. Apply extra pres-sure toward the part of the neck that needs to be shifted.
Note: Check alignment frequently. A little bit of sanding can cause large adjustments.
6. Place the tailpiece on the edge of the top and align it to the center mark drawn in Step 4.
7. Use a screw or drill a hole with a 1⁄16" bit to mark the centers of the screw holes (Figure 18) and then set the tailpiece to the side.
Note: The tailpiece will not be installed until after the finish is applied to the mandolin (see Page 19), but aligning the tailpiece is easier before final sanding.
8. Place the fretboard nut straight across the end of the neck, as shown in Figure 19, and draw a line along the bottom edge of the nut. Do not place the nut on the pegboard (the piece that slopes downward from the neck).
Figure 18. Marking the tailpiece mounting holes.
9. Place the fretboard on the neck and align it with the nut.
—If the fretboard is not flush with the nut, use a fine metal file to make the end of the fretboard even with the nut.
10. Remove the nut.
11. Mark the edge of the fretboard binding on both sides of the neck, drawing a line 2" from the body toward the headstock as shown in Figure 20.
Figure 19. Marking the nut position.
Fretboard Nut
Figure 20. Example of marking fretboard binding on neck.
12. Remove the neck from the body.

H8066 Mandolin Kit Without Holes -13-
Figure 21. Shaping end of neck.
Figure 22. Example of gluing the neck.
18. Scrape away excess glue with a sharp knife when it sets, then allow the glue to dry for 24 hours before the next step.
14. Place a thin coat of wood glue into the dowel holes in the mandolin body, insert the dowels, and wipe away excess glue.
15. Spread a thin layer of wood glue on the heel of the neck, the dowels, and the body where it will connect to the neck.
16. Press the neck firmly onto the dowels.
17. Use rubber strips or clamps to hold the neck in place until the glue dries (Figure 22).
Note: If using clamps, use wooden blocks and pads to protect the instrument.
13. Use a 4-in-1 shoe rasp to carefully file the end of the neck down to the line you drew in Step 11, as shown in Figure 21. Shape both sides of the neck, then sand smooth with #220 grit sandpaper.
Figure 23. Example of fitting the fretboard extender.
Components and Hardware Needed: QtyMandolin Neck and Body (Assembled) ............. 1Fretboard Extender ........................................... 1
To install the fretboard extender:
1. Place the fretboard extender at the base of the neck (see Figure 23).
2. Check for gaps between the fretboard extend-er and the body.
—If there are no gaps, go on to Step 3.
— If there are gaps, place #220 grit sandpa-per face up on the top at the base of the neck. Rub the fretboard extender on the sandpaper until the extender conforms to the body shape as shown in Figure 23.
Fretboard Extender
3. Check for gaps between the fretboard extend-er and the neck.
—If there are no gaps, go on to Step 4.
— If there are gaps, trace the neck radius onto a piece of paper and transfer this curve onto the extender using carbon paper. Carefully sand or cut the curve down to the line.
SandpaperFretboard Extender

-14- H8066 Mandolin Kit Without Holes
4. Center the fretboard over the neck and extender, aligning the top of the fretboard with the nut line.
—If the fretboard extender protrudes beyond the edge of the fretboard, mark the excess edge, as shown in Figure 24, and sand it off.
5. Spread a thin layer of wood glue on the bot-tom of the fretboard extender and place the extender on the top.
6. Push the fretboard extender against the neck and align by holding a straightedge on the side of the neck and sliding the fretboard extender against the straightedge.
7. Hold the fretboard extender in place with rub-ber strips or clamps until the glue dries.
Note: When using clamps, use wooden blocks and pads to protect the instrument.
8. Scrape away the excess glue when it becomes firm, then allow the glue to dry for 24 hours.
Figure 24. Marking the extender.
Components and Hardware Needed: QtyMandolin Body ................................................... 1Fretboard ........................................................... 1Nut ................................................................... 1
To attach the fretboard to the neck:
1. Check to see if the neck and extender are flat by laying the neck down on a flat surface.
— If neck and fretboard extender are flat, move on to Step 2.
— If there are gaps between the surface and the neck and extender, place sandpaper, grit side up, on the flat surface and rub the neck and extender on the sandpaper (as shown in Figure 25) until the neck and extender are flat.
Fretboard
Figure 25. Example of flattening the neck.
2. Drill positioning holes near the ends of the surface of the neck using a drill bit that is slightly smaller than the brad nails used for positioning.

H8066 Mandolin Kit Without Holes -15-
Figure 26. Trimming brad nails.
4. Center the fretboard on the neck, aligning the top with the nut line.
Note: The neck is wider than the fretboard and will be shaped to match later. If you removed the nut line during sanding, just redraw it.
5. Place a wooden block on the fretboard and tap the block lightly with a hammer to leave marks in the back of the fretboard.
6. Drill 1⁄8" deep holes slightly smaller than the brads in the marks made in the fretboard.
Note: To ensure that you do not drill through the fretboard, use a depth stop or tape guide wrapped around the bit 1⁄8" from the tip.
7. Spread a light layer of glue on the flat surface of the neck and the back of the fretboard, then position the fretboard on the neck using the brad nails as guides.
8. Use rubber strips or clamps to hold the fretboard in place until the glue dries.
Note: Use wooden blocks and pads between the clamps and the neck to protect the instru-ment.
9. Scrape away the excess glue when it becomes firm, then allow the glue to dry for 24 hours.
Brad Nails
Shaping Neck
The rest of the neck must be shaped to match the width of the fretboard and then sanded smooth.
Components and Hardware Needed: QtyMandolin Neck and Body (Assembled) ............. 1
To shape and sand the neck:
1. Wear a NIOSH-approved respirator and ANSI-approved safety glasses during the next step to protect against dust!
2. Use a 4-in-1 shoe rasp to shape the neck until it matches the width of the fretboard (Figure 27).
Figure 27. Shaping the neck.
3. Use a flexible sanding block with #150 grit aluminum-oxide sanding paper to sand the neck until there is a consistent scratch pat-tern on the entire surface.
Note: When hand sanding, always sand in the same direction as the wood grain.
4. Resand the neck with #220 grit sanding paper.
5. Wipe the neck with a damp cloth to raise the wood grain.
6. Wait until the wood is dry and resand the neck with #220 grit sandpaper. Dampen again and resand.
3. Nail the brads into the positioning holes and use wire cutters to cut the heads off no more than an 1⁄8" above the surface of the neck as shown in Figure 26.

-16- H8066 Mandolin Kit Without Holes
7. Fill the wood pores in the neck with a paste filler according to the manufacturer's instruc-tions.
8. When the paste filler is dry, use #320 grit sandpaper to remove the residue, and use a tack cloth to pick up extra grit.
2. Use a file to angle the metal fret ends, as shown in Figures 29.
Figure 29. Filing fret ends.
Shaping Fretboard
The fretboard binding and fret ends must be filed down so they are even with the fretboard.
Components and Hardware Needed: QtyMandolin Neck and Body (Assembled) ............. 1
To clean up the fretboard binding and fret ends:
1. Use a fine machinist's file to make the binding even with the fretboard surface as shown in Figure 28. File up to the edge of the frets.
Note: File the binding at an angle so you do not damage the fretboard surface.
Figure 28. Filing fretboard binding.
Note: File enough of the fret ends so they are not sharp, as shown in Figure 30.
Figure 30. Example of correctly angled fret ends.

H8066 Mandolin Kit Without Holes -17-
Final Sanding
Components and Hardware Needed: QtyMandolin Neck and Body (Assembled) ............. 1
To prepare the mandolin for finishing:
1. Inspect the entire mandolin under bright lights and take note of any glue residue, dents, scratches, and areas needing further sanding.
2. Carefully scrape away any glue residue with a sharp chisel held perpendicular to the sur-face as shown in Figure 31.
Figure 31. Example of removing glue residue.
3. Wear a NIOSH-approved respirator and ANSI-approved safety glasses during the next step to protect against dust!
4. Use #220 grit sandpaper to smooth any flaws found when inspecting the mandolin, except the fretboard.
5. Final sand the entire mandolin, except the fretboard, with #320 grit sandpaper.
6. Wipe the entire mandolin with a tack cloth, then wipe a clean rag with paint thinner over the mandolin, except the fretboard, to remove oil stains.
Finishing supplies are not included with this mandolin kit. Finishing options include stains, lacquers, varnishes, and oil finishes. All can be applied by spray or brush. Finish materials and books on finishing instruments can be ordered through Grizzly Industrial or numerous luthier sup-ply catalogs.
Components and Hardware Needed: QtyMandolin Neck and Body (Assembled) ............. 1
To finish the mandolin:
1. Mask off the surface of the fretboard. Carefully press all the masking tape edges securely to the fretboard. The finish coat should not be allowed to seep under edges, or flood-corners and places where the frets meet the fretboard.
2. Form a piece of wire into a U-shaped hanger with hooks on both ends.
3. Thread the hooks through the upper pegholes and hang the instrument in the finish room.
Finishing
Figure 32. Instrument ready to be finished.

-18- H8066 Mandolin Kit Without Holes
4. Apply several thin coats of the finish follow-ing the manufacturer's instructions. Multiple thin coats usually produce a better quality finish than one heavy coat.
5. When finishing is complete, remove the masking tape from the fretboard.
6. Carefully scrape any excess finish off the fretboard with a razor blade.
Painting/Finishing TipsDust particles suspended in the air will settle on wet finishes, causing dust specks, bumps, or fish-eyes. To avoid this problem: • Leave the finishing room undisturbed for 24
hours prior to applying the finish.
• Avoid making unnecessary movements when in the finish room.
• Apply the finish to the desired mandolin parts and immediately leave the finish room.
• DO NOT return to the room until the speci-fied drying time has elapsed.
Most finishes are hazard-ous to your health. Wear a NIOSH/OSHA approved res-pirator with particulate and gas/vapor filters, safety glasses, rubber gloves, and work in a well ventilated area when finishing.
Nut
The nut holds the peghead end of the strings the correct distance above the frets. It is not neces-sary to cut the string notches in the nut.
Components and Hardware Needed: QtyMandolin Neck and Body (Assembled) ............. 1Nut ................................................................... 1
To install the nut:
1. Use a chisel to carefully scrape all of the fin-ish out of the nut slot (See Figure 33). DO NOT remove any wood from the nut slot.
Figure 33. Example of cleaning out the nut slot.
2. Spread a thin layer of glue in the nut slot and on the end of the fretboard.
3. Place the nut in the nut slot and hold it in place with rubber strips or clamps until the glue dries.
Note: Use wood blocks and pads between the clamps and the neck to protect the instru-ment.
4. Wipe away excess glue before it becomes firm, then allow the glue to dry for 24 hours.
Nut Slot

H8066 Mandolin Kit Without Holes -19-
3. Insert a #3 x 3/4" chrome screw through the endpin (strap button).
4. Screw the endpin into the center hole of the tailpiece.
Figure 34. Tailpiece components.
The tailpiece holds and separates the ends of the strings.
Components and Hardware Needed: QtyMandolin Neck and Body (Assembled) ............. 1Tailpiece ............................................................ 1Tailpiece Cover .................................................. 1Chrome Screws #1 x 3/8" .................................. 3Chrome Screw #3 x 3/4" .................................... 1 Endpin ............................................................... 1
To install the tailpiece:
1. Place the tailpiece on the edge of the top and align the screw holes with the marks made earlier.
2. Secure the tailpiece to the mandolin with three #1 x 3/8" chrome screws as shown in Figure 34.
Tailpiece Tuning Machines
Components and Hardware Needed: QtyMandolin Neck and Body (Assembled) ............. 1Tuning Machines ............................................... 2Bushings ............................................................ 8Chrome Screws #1 x 3/8" ................................ 10
To install the tuning machines:
1. Place the eight bushings in the pegholes as shown in Figure 35.
Figure 35. Peghead bushings.
Bushing
Figure 36. Tuning machines installedin the peghead.
2. Use a rubber dead blow hammer or a wood block to seat the bushings so the bushing flanges are flush with the peghead surface.
3. Turn the mandolin over and insert the tuning machines into the back of the pegholes.
4. Attach both tuning machines to the peghead with the #1 x 3/8" chrome screws (see Figure 36).
Tailpiece
Tuning Machine
Screws

-20- H8066 Mandolin Kit Without Holes
Installing Strings
Components and Hardware Needed: QtyMandolin Neck and Body (Assembled) ............. 1Bridge ................................................................ 1Strings ............................................................... 8
To install the strings:
1. Use a narrow file to make slots in the bridge. Angle the slots toward the tailpiece. See Figure 38 for string spacing on the bridge.
Note: Make the bridge slots the same depth as the nut slots. If you make the slots too deep, it will be harder to make adjustments.
������
������
������
������
�
�
�
�
Figure 38. String slot example.
2. Lay the bridge flat on the mandolin.
3. Place the strings over the hooks on the tail-piece as shown in Figure 39. Work from the thinnest string (E string-treble) to the thickest (G string-bass).
Fitting Bridge
Components and Hardware Needed: QtyMandolin Neck and Body (Assembled) ............. 1Bridge ................................................................ 1
This mandolin has a scale of 13.8", which means that the bridge will be placed 13.8" from the nut. Mandolin bridges are not glued into place, but are held in place with the string pressure, so final placement of the bridge occurs when the strings are tuned.
To fit the bridge to the top:
1. Place the bridge on a piece of sandpaper, grit side up, 13.8" from the nut as shown in Figure 37.
2. Hold the sandpaper firmly (to avoid marring the finish), and move the bridge back and forth between the f-holes and the tailpiece.
3. Remove the sandpaper and place the bridge on the top. Look for gaps between the bridge and the top. Repeat Step 2 until there are no gaps.
Figure 37. Fitting the bridge to the top.
Direction of Sanding
G D A E
Tailpiece
Figure 39. String placement.

H8066 Mandolin Kit Without Holes -21-
Figure 40. Example of bridge placement.
8. Set the position of the bridge by lightly touch-ing the 1st string directly above the twelfth fret and pluck the string to play a harmonic note.
9. Now pluck the string while holding it against the twelfth fret.
— If this note is sharper than the note played in Step 8, move the bridge toward the tail-piece.
—If this note is flat in comparison, move the bridge toward the neck.
Note: This can also be done with an elec-
tronic tuner by tuning the harmonic note to be exactly in tune and then adjusting the bridge until the note played in Step 9 is also in tune.
4. Route the strings over the bridge and into the tuning posts.
Note: Allow enough string slack for 2-3 com-plete winds around the tuning peg.
5. Turn the knob to tighten the strings.
Note: Strings should not touch surrounding strings or tuning posts. If they do, reverse the string winding direction so the strings face the inside of the peghead.
6. Slide the strings into their slots and tune.
7. Make sure that the bridge is located 13.8" from the nut and 6.89" from the 12th fret. (See Figure 40).

-22- H8066 Mandolin Kit Without Holes
String Height
Measurements must be taken at the following locations along the first and eight strings.
• 1st fret
• 12th fret
To check the string height at the 1st fret:
1. Measure the string height at the 1st fret. The first string measurement should be 1/64", the 8th string should be 1/64"-1/32".
— If the string heights at the 1st fret are correct (Figure 42), measure the string heights at the 12th fret.
— If the string heights are incorrect at the 1st fret, this indicates that the string nut grooves are either too deep or too shallow and must be adjusted.
Figure 41. String height measurement.
Fret
Fretboard
String Height
Correct string height is crucial to prevent fret buzz and to maximize playability. The string height is measured from the top face of the fret to the bot-tom of the string (Figure 41).
String
Figure 42. Correct 1st fret string heights.
1st Fret1st String: 1⁄64"
Mandolin Body
Figure 43. Correct 12th fret string heights.
12th Fret
Mandolin Body
To check the string height at the 12th fret:
1. Measure the string height at the 12th fret (Figure 43). The first string measurement should be 3/32-7/64"; the 8th string should be 7/64"-9/64".
— If the string height is correct, then continue to the next sub-section.
— If the string height is incorrect at the 12th fret, adjust the barrel nuts on the bridge until the string height is correct.
Note: You may need to loosen the strings to adjust the bridge.
8th String: 1⁄64"–1⁄32"
String Nut
1st String: 3⁄32"-7⁄64"
8th String: 7⁄64"–9⁄64"

H8066 Mandolin Kit Without Holes -23-
Tuning
Correct tuning is essential. If the mandolin is not in tune with itself, or with other instruments in an ensemble, the resulting music will not be harmo-nious. The standard mandolin tuning notes are shown in Figure 44.
GD
AE
43
21
Figure 44. Standard tuning notes.
Some tips on tuning mandolins:
• Get into the habit of tuning the mandolin every time you play it.
• Always tune the strings “up.” The final tuned tension of each string should be reached by tightening the string, not by loosening it. If the string is tensioned too far, release the tension and tune “up” again.
• The easiest way to tune a mandolin is using an electronic tuner such as the Grizzly H3097 Chromatic Tuner shown on Page 26.
Adjusting F-Holes
To adjust the air chamber tuning:
1. Tune the mandolin strings.
2. Tap the top near the bridge.
— If the tuner registers a D or D#, the air cham-ber is in tune and no adjustments need to be made. Proceed to the Pickguard instal-lation instructions on Page 24.
— If the tuner registers a C or C# it may indi-cate that the f-holes are too small. Go to Step 3.
— If the tuner registers E or E#, go to Step 4.
—If the tuner registers higher than E# or lower than C, you will not be able to correct the air chamber pitch.
3. To raise the air chamber pitch to D or D#, carefully enlarge both f-holes using rolled up sandpaper (Figure 45) or a fine-tooth metal file. Duplicate the pitch corrections on both f-holes while aiming for a symmetrical, aes-thetically pleasing shape.
Figure 45. Sanding f-holes to raise air chamber pitch.
You can alter the tuning of the mandolin by adjust-ing the size or shape of the f-holes.
Tip: Use a digital tuner such as the Grizzly H3097 Chromatic Tuner for this procedure.
4. Repeat Steps 2 & 3 until the air chamber registers a D or D#.
5. To lower the air chamber pitch to D or D#, try adding thin strips of wood or plastic, such as binding, to the inside edge of the f-holes.

-24- H8066 Mandolin Kit Without Holes
Pickguard
Components and Hardware Needed: QtyMandolin Body ................................................... 1Pick Guard ......................................................... 1Pick Guard Bracket ........................................... 1Wood Block ....................................................... 1Phlp. Hd. Scr M3-.5 x 4 ..................................... 1Black Screw #3 x 3/4" ......................................... 1Chrome Screw #3 x 3/4" ..................................... 1Chrome Screw #1 x 3/8" ..................................... 1
To install the pickguard:
1. Attach the bracket to the pickguard with the #3 x 3/4" black screw as shown in Figure 46.
2. Thread the end of the black screw into the small wood block.
5. Tighten the small wood block against the bot-tom of the mandolin using a hex wrench and screwdriver, as shown in Figure 47.
3. Adjust the wood block height and slide it into the f-hole.
4. Place the pickguard against the neck exten-sion so the tip of the pickguard lines up with the inside edge of the binding (Figure 48).
Figure 46. Metal bracket attached to pick guard.
Bracket
Wood Block
Figure 48. Pickguard placement.
6. Screw the #1 x 3⁄8" screw into the hole at the head of the pickguard (see Figure 48).
7. Adjust the bracket so it is tight against the side of the mandolin body.
8. Attach the bracket to the body with a #3 x 3⁄4" chrome screw as shown in Figure 48.
Figure 47. Tightening wood block.
Screw
Screws
Pick Guard

H8066 Mandolin Kit Without Holes -25-
F-Hole Shapes
The following shapes can be used for f-holes on your mandolin. The top two shapes are full scale.

-26- H8066 Mandolin Kit Without Holes
Accessories
SECTION 5: REFERENCE INFO
Figure 49. Our most popular safety glasses.
G7984—Face ShieldH1298—Dust Sealed Safety GlassesH1300—UV Blocking, Clear Safety GlassesH2347—Uvex® Spitfire Safety GlassesH0736—Shop Fox® Safety GlassesSafety Glasses are essential to every shop. If you already have a pair, buy extras for visitors or employees. You can't be too careful when it comes to shop safety!
G7984
H1298H1300
H2347 H0736
Figure 50. Model H3097 Chromatic Tuner.
H3097—Chromatic TunerAn absolute must for any guitar player, this tuner allows you to tune your acoustic or electric guitar dead on. Includes 9V battery.
H5097—Constructing a Bluegrass MandolinThis beautifully detailed manual gives clear, step by step directions from raw materials to a magnifi-cently finished mandolin through the use of simply stated texts, photos and templates. Spiral bound and includes 19 full-sized blueprints covering each phase of construction. 56 pages.
H5332—Titebond Original Wood Glue, 16 Oz. The industry standard for woodworking.
Figure 51. Model H5332 Titebond Wood Glue.
Figure 52. Model H0917 Maxi-cure.
H0917—Maxi-cure, 1 Oz. Extra-thick cyanoacrylate has 10-25 seconds of maximum working time which allows greater control over part alignment. Maxi-Cure™ is ideal for soft and hard woods, glass, metal, fiberglass, ceramics, hard plastics, laminating and reinforc-ing and is a very good all-purpose cyanoacrylate adhesive.
H8066 Mandolin Kit Without Holes -27-
Figure 53. Model H5750-59 McFadden's Lacquers and Fillers.
H5750—Vinyl Washcoat/Sealer, 1QtH5751—Nitrocellulose Lacquer, Gloss, 1 QtH5752—Nitrocellulose Lacquer, Gloss, 1 GalH5753—Nitrocellulose Lacquer, Satin, 1 QtH5754—Nitrocellulose Lacquer, Satin, 1 GalH5755—Retarder for Lacquer, 1 QtH5756—Natural Filler, 1 PintH5757—Mahogany Filler, 1 PintH5759—Filler Reducer, 1QtMcFadden's nitrocellulose lacquer is the leading lacquer used by custom guitar builders. It sprays and buffs really well and is capable of giving you a finish that looks "wet."
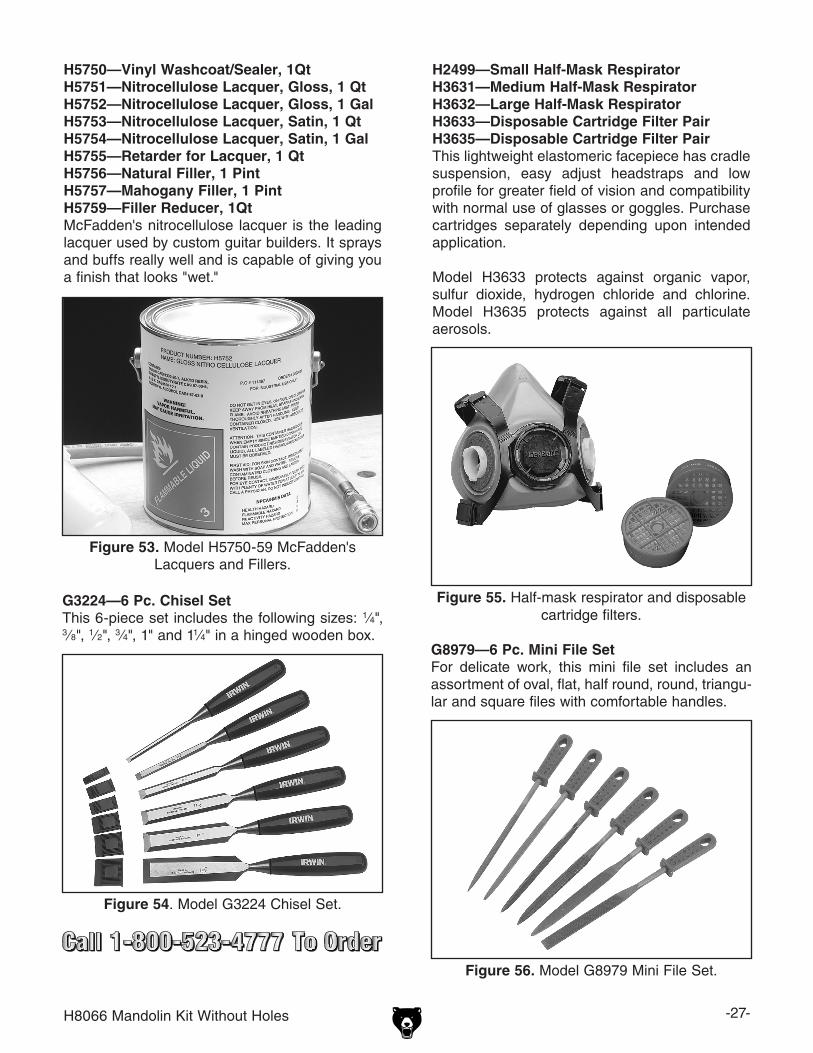
Figure 55. Half-mask respirator and disposable cartridge filters.
H2499—Small Half-Mask RespiratorH3631—Medium Half-Mask RespiratorH3632—Large Half-Mask RespiratorH3633—Disposable Cartridge Filter Pair H3635—Disposable Cartridge Filter PairThis lightweight elastomeric facepiece has cradle suspension, easy adjust headstraps and low profile for greater field of vision and compatibility with normal use of glasses or goggles. Purchase cartridges separately depending upon intended application.
Model H3633 protects against organic vapor, sulfur dioxide, hydrogen chloride and chlorine. Model H3635 protects against all particulate aerosols.
G8979—6 Pc. Mini File SetFor delicate work, this mini file set includes an assortment of oval, flat, half round, round, triangu-lar and square files with comfortable handles.
Figure 56. Model G8979 Mini File Set.
Figure 54. Model G3224 Chisel Set.
G3224—6 Pc. Chisel SetThis 6-piece set includes the following sizes: 1⁄4", 3⁄8", 1⁄2", 3⁄4", 1" and 11⁄4" in a hinged wooden box.

-28- H8066 Mandolin Kit Without Holes
H9890—SIminoff Router AttachmentThis binding attachment for Dremel® tools helps cut the binding slot around the curved edge of mandolin bodies and banjo resonators. Designed by Roger Siminoff in 1972, it features a small table that controls the cutting height and an extension bar that controls cutting depth. Threads onto new Dremel® moto-tools. Use with Model H9891 High Speed Cutter Bit.
Figure 57. Model H9890 Router Attachment.
H9891—Dremel® High Speed Cutter BitA high-quality, versatile cutter made from high-grade steel 1/8" shank. Ideal for shaping, hol-lowing, grooving, slotting, inlaying and making tapered holes in soft metals, plastics and woods, especially on flat and slotted surfaces.
Figure 58. Model H9891 Cutter Bit.
G7802— Files 4-PC SetThis 4-pc. file set includes all the files most people need for general purpose filing in one neat pack-age. Contents include: 8" 4-in-1 shoe rasp, 6" slim taper, 6" round and 8" mill bastard.
Light Paper Backed A/0 SandpaperModel G6194—80 Grit, 10 PackModel G6195—100 Grit, 10 PackModel G6196—120 Grit, 10 PackModel G6197—150 Grit, 10 PackModel G6198—180 Grit, 10 PackModel G6199—220 Grit, 10 PackWe offer a variety of 9" x 11" sanding sheets in convenient 10 packs in 80 - 220 grits for just about any requirement.
Figure 59. Assorted sandpaper.

H8066 Mandolin Kit Without Holes -29-
Grizzly Industrial, Inc. warrants every product it sells for a period of 1 year to the original purchaser from the date of purchase. This warranty does not apply to defects due directly or indirectly to misuse, abuse, negligence, accidents, repairs or alterations or lack of maintenance. This is Grizzly’s sole written warranty and any and all warranties that may be implied by law, including any merchantability or fitness, for any par-ticular purpose, are hereby limited to the duration of this written warranty. We do not warrant or represent that the merchandise complies with the provisions of any law or acts unless the manufacturer so warrants. In no event shall Grizzly’s liability under this warranty exceed the purchase price paid for the product and any legal actions brought against Grizzly shall be tried in the State of Washington, County of Whatcom.
We shall in no event be liable for death, injuries to persons or property or for incidental, contingent, special, or consequential damages arising from the use of our products.
To take advantage of this warranty, contact us by mail or phone and give us all the details. We will then issue you a “Return Number,’’ which must be clearly posted on the outside as well as the inside of the carton. We will not accept any item back without this number. Proof of purchase must accompany the merchandise.
The manufacturers reserve the right to change specifications at any time because they constantly strive to achieve better quality equipment. We make every effort to ensure that our products meet high quality and durability standards and we hope you never need to use this warranty.
Please feel free to write or call us if you have any questions about the machine or the manual.
Thank you again for your business and continued support. We hope to serve you again soon.
WARRANTY AND RETURNS


�������
��������������
���������������������������������������������������������������������������������� �
������������������������������������������������������������������������������������
����� ����������������������� ������������������������������� ���� ���������������������
���������������������������� ������ ������������������������ ���������������������������
���������������������������� ������������������������������� ���������������������������
�������������
�����������������������������������������������������������������������������������������������������������������������������������������������������������������������������������������������������
��� ���������������������������� ����� �������������� � ���� ������� ����� �������� ����� ���������� � ������������ ����� ������
��� �����������������������������������������������������
��� �������������������������������������� ����� ���������������� � ���� ���������������� ����� ���������������� ����� ���������������� � ���� ���������������� ����� ��������
��� ������������������������ ����� ������ � ���� ������ ����� ������ ����� ������ � ���� ������ ����� ���
��� ������������������������������������������������� ����� ���������� ����� ���������� ����� ������������ � �������������
��� ������������������������������������������������ ����� ���� ����� ���� ����� ���� � �������
��� ��������������������������������������������������� ���������� ��������
��� ���������������������������������������������������� ���������� ��������
��� ��������������������������������������������������������������������������������������� �������������������������������������������� ���������� ��������
���� �������������������������������������������������������������������������������
� ����������������������������������������������������������������������������������
� ����������������������������������������������������������������������������������
� ����������������������������������������������������������������������������������
���� ����������������� ������������������� ��������������� ��������� ����������������������� �������������������������� �������������� ����������������������� ������������ �����������������
���� ��������������������� ������������������� ����������������������� ����������������������� ��������������������� ��������������������� �������������� �������� �������������� ������������
���� ��������������������� �������� ��������������� ����������������� ������������� ������������ ������������������� ������������������������ ������

��������������������������������������
����������������������
����������������������
���������������������������������������������������������������
��������������
�����������������������������������
�������������������������������������
��������������������������������������
�����������������������������������


�����������������������������������������������������������������������
����
�����������������
��������������������������������
���������������������������������
�������������������������������������������������������������������������
���������������������������������������