Mobile Inventory Manual - Proxis Software · 2012-10-04 · 1.6 Symbol Hardware Features The most...
47
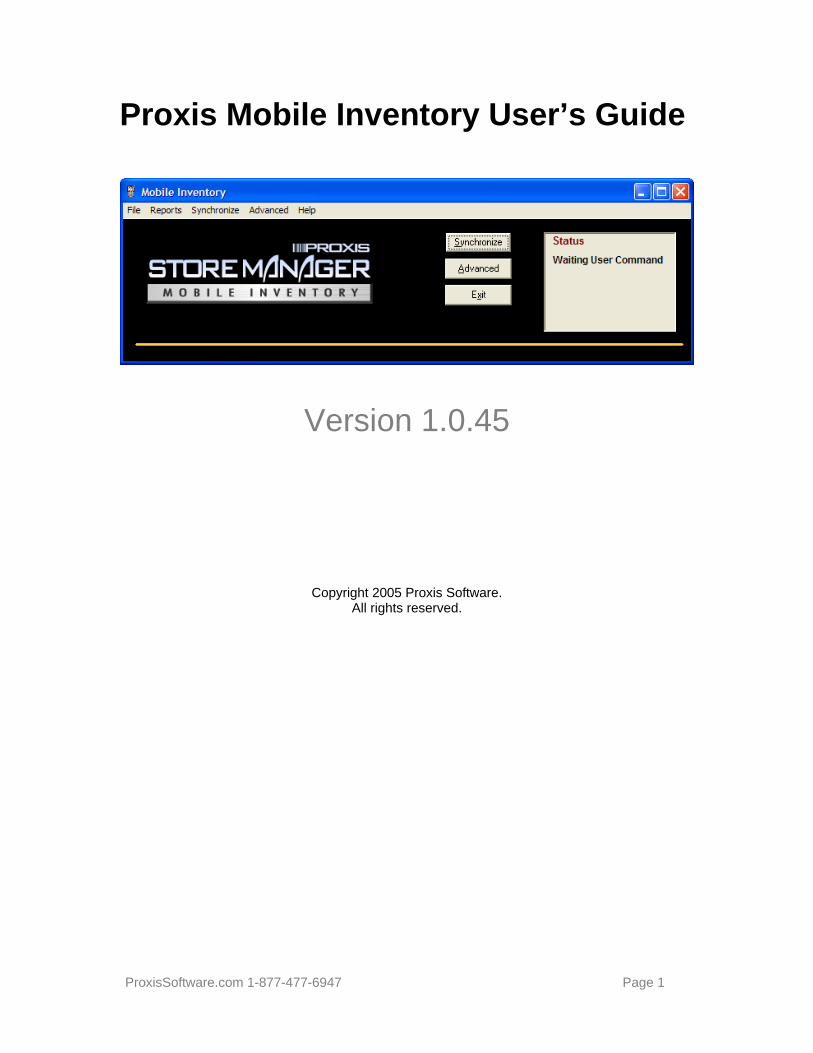
ProxisSoftware.com 1-877-477-6947 Page 1 Proxis Mobile Inventory User’s Guide Version 1.0.45 Copyright 2005 Proxis Software. All rights reserved.
Transcript of Mobile Inventory Manual - Proxis Software · 2012-10-04 · 1.6 Symbol Hardware Features The most...
ProxisSoftware.com 1-877-477-6947 Page 1
Proxis Mobile Inventory User’s Guide
Version 1.0.45
Copyright 2005 Proxis Software.
All rights reserved.
ProxisSoftware.com 1-877-477-6947 Page 2
Proxis Mobile Inventory User’s Guide
Mobile Inventory Version 1.0.45 Proxis Software Telephone: 1-877-477-6947 Fax: 1-360-738-3495 http://www.proxissoftware.com [email protected] This document and the software described by this document are sold and distributed by Proxis Software All rights reserved. Use of the software described herein may only be done in accordance with the License Agreement provided with the software. Information in this document is subject to change without notice. Windows is the registered trademark of Microsoft Corporation. All other trademarks are the property of their respective owners PROXIS SOFTWARE WILL NOT BE LIABLE FOR (A) ANY BUG, ERROR, OMISSION, DEFECT, DEFICIENCY, OR NONCONFORMITY IN MOBILE INVENTORY OR THIS DOCUMENTATION; (B) IMPLIED MERCHANTIBILITY OF FITNESS FOR A PARTICULAR PURPOSE; (C) IMPLIED WARRANTY RELATING TO COURSE OF DEALING, OR USAGE OF TRADE OR ANY OTHER IMPLIED WARRANTY WHATSOEVER; (D) CLAIM OF INFRINGEMENT; (E) CLAIM IN TORT, WHETHER OR NOT ARISING IN WHOLE OR PART FROM PROXIS SOFTWARE’S FAULT, NEGLIGENCE, STRICT LIABILITY, OR PRODUCT LIABILITY, OR (F) CLAIM FOR ANY DIRECT, INDIRECT, INCIDENTAL, SPECIAL, OR CONSEQUENTIAL DAMAGES, OR LOSS OF DATA, REVENUE, LICENSEES GOODWILL, OR USE. IN NO CASE SHALL Proxis INC. LIABILITY EXCEED THE PRICE THAT LICENSEE PAID FOR MOBILE INVENTORY.
ProxisSoftware.com 1-877-477-6947 Page 3
Proxis Mobile Inventory User’s Guide
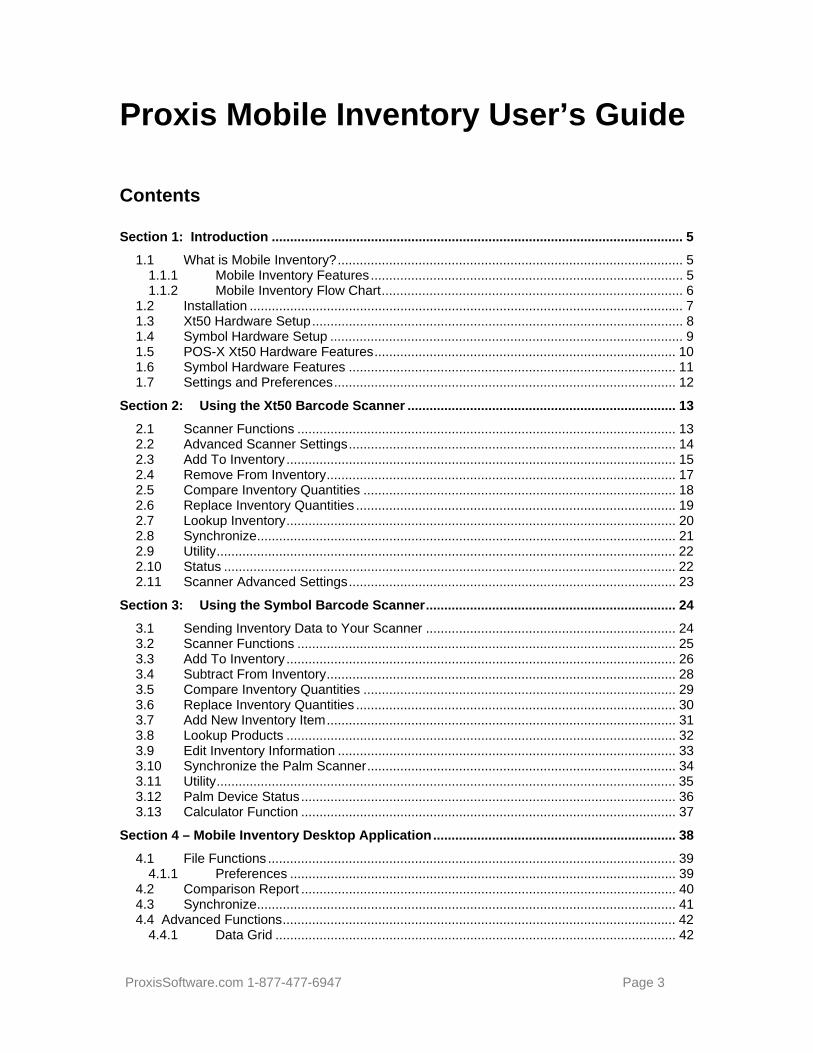
Contents
Section 1: Introduction ................................................................................................................ 5 1.1 What is Mobile Inventory?.............................................................................................. 5
1.1.1 Mobile Inventory Features..................................................................................... 5 1.1.2 Mobile Inventory Flow Chart.................................................................................. 6
1.2 Installation ...................................................................................................................... 7 1.3 Xt50 Hardware Setup..................................................................................................... 8 1.4 Symbol Hardware Setup ................................................................................................ 9 1.5 POS-X Xt50 Hardware Features.................................................................................. 10 1.6 Symbol Hardware Features ......................................................................................... 11 1.7 Settings and Preferences............................................................................................. 12
Section 2: Using the Xt50 Barcode Scanner ......................................................................... 13 2.1 Scanner Functions ....................................................................................................... 13 2.2 Advanced Scanner Settings......................................................................................... 14 2.3 Add To Inventory .......................................................................................................... 15 2.4 Remove From Inventory............................................................................................... 17 2.5 Compare Inventory Quantities ..................................................................................... 18 2.6 Replace Inventory Quantities ....................................................................................... 19 2.7 Lookup Inventory.......................................................................................................... 20 2.8 Synchronize.................................................................................................................. 21 2.9 Utility............................................................................................................................. 22 2.10 Status ........................................................................................................................... 22 2.11 Scanner Advanced Settings......................................................................................... 23
Section 3: Using the Symbol Barcode Scanner.................................................................... 24 3.1 Sending Inventory Data to Your Scanner .................................................................... 24 3.2 Scanner Functions ....................................................................................................... 25 3.3 Add To Inventory .......................................................................................................... 26 3.4 Subtract From Inventory............................................................................................... 28 3.5 Compare Inventory Quantities ..................................................................................... 29 3.6 Replace Inventory Quantities ....................................................................................... 30 3.7 Add New Inventory Item............................................................................................... 31 3.8 Lookup Products .......................................................................................................... 32 3.9 Edit Inventory Information ............................................................................................ 33 3.10 Synchronize the Palm Scanner.................................................................................... 34 3.11 Utility............................................................................................................................. 35 3.12 Palm Device Status...................................................................................................... 36 3.13 Calculator Function ...................................................................................................... 37
Section 4 – Mobile Inventory Desktop Application.................................................................. 38 4.1 File Functions ............................................................................................................... 39
4.1.1 Preferences ......................................................................................................... 39 4.2 Comparison Report ...................................................................................................... 40 4.3 Synchronize.................................................................................................................. 41 4.4 Advanced Functions........................................................................................................... 42
4.4.1 Data Grid ............................................................................................................. 42
ProxisSoftware.com 1-877-477-6947 Page 4
4.4.2 Read Scanner...................................................................................................... 42 4.4.3 Process/Post ....................................................................................................... 43 4.4.4 Update Inventory to Scanner............................................................................... 43 4.4.5 Process Options .................................................................................................. 43 4.4.6 Filter List .............................................................................................................. 43
Appendix A: The Xt50 Alpha Keyboard.................................................................................... 44
Appendix B: Device Registration.............................................................................................. 45
Appendix C: Installing Palm Files............................................................................................. 46
Mobile Inventory User’s Guide
ProxisSoftware.com 1-877-477-6947 Page 5
Section 1: Introduction
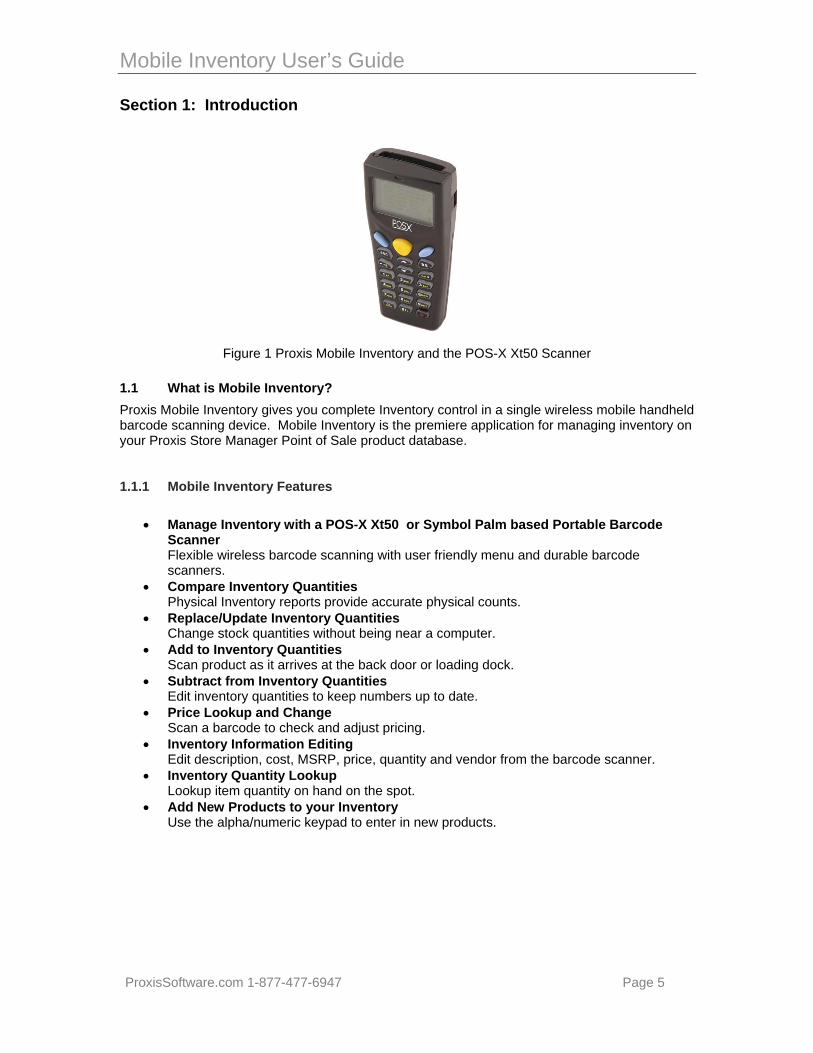
Figure 1 Proxis Mobile Inventory and the POS-X Xt50 Scanner
1.1 What is Mobile Inventory? Proxis Mobile Inventory gives you complete Inventory control in a single wireless mobile handheld barcode scanning device. Mobile Inventory is the premiere application for managing inventory on your Proxis Store Manager Point of Sale product database. 1.1.1 Mobile Inventory Features
• Manage Inventory with a POS-X Xt50 or Symbol Palm based Portable Barcode Scanner Flexible wireless barcode scanning with user friendly menu and durable barcode scanners.
• Compare Inventory Quantities Physical Inventory reports provide accurate physical counts.
• Replace/Update Inventory Quantities Change stock quantities without being near a computer.
• Add to Inventory Quantities Scan product as it arrives at the back door or loading dock.
• Subtract from Inventory Quantities Edit inventory quantities to keep numbers up to date.
• Price Lookup and Change Scan a barcode to check and adjust pricing.
• Inventory Information Editing Edit description, cost, MSRP, price, quantity and vendor from the barcode scanner.
• Inventory Quantity Lookup Lookup item quantity on hand on the spot.
• Add New Products to your Inventory Use the alpha/numeric keypad to enter in new products.
Mobile Inventory User’s Guide
ProxisSoftware.com 1-877-477-6947 Page 6
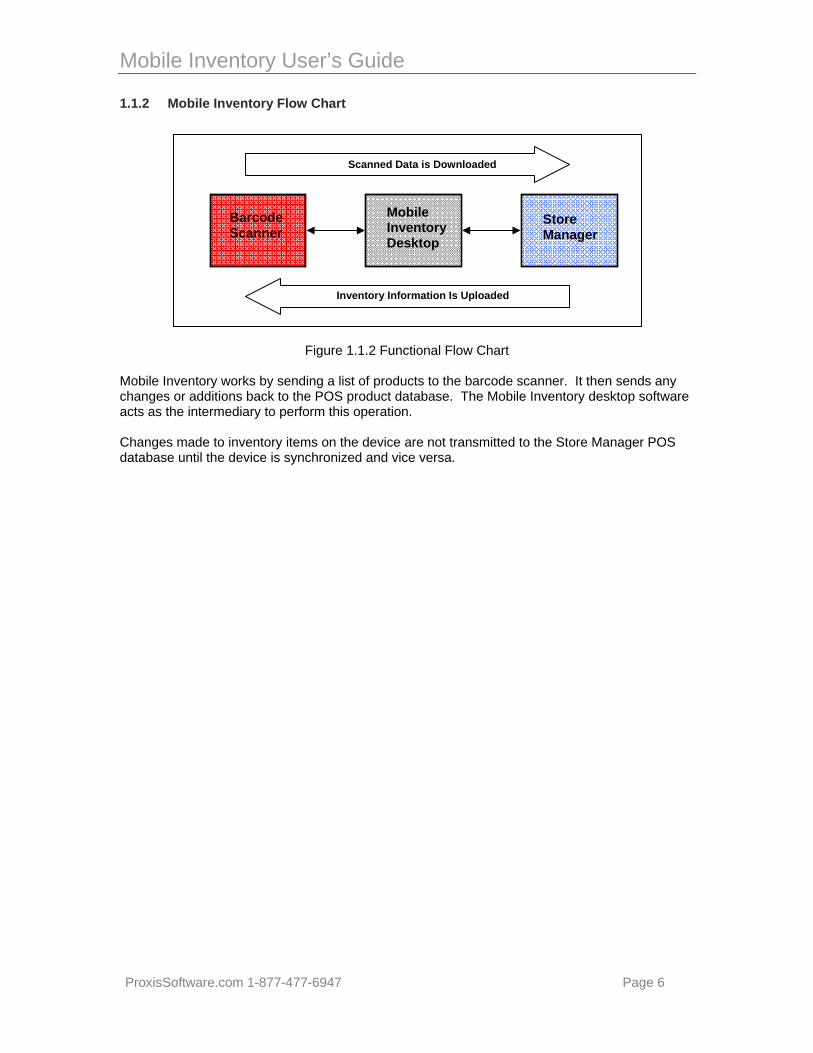
1.1.2 Mobile Inventory Flow Chart
Figure 1.1.2 Functional Flow Chart
Mobile Inventory works by sending a list of products to the barcode scanner. It then sends any changes or additions back to the POS product database. The Mobile Inventory desktop software acts as the intermediary to perform this operation. Changes made to inventory items on the device are not transmitted to the Store Manager POS database until the device is synchronized and vice versa.
Scanned Data is Downloaded
Inventory Information Is Uploaded
Mobile Inventory Desktop
Store Manager
Barcode Scanner

Mobile Inventory User’s Guide
ProxisSoftware.com 1-877-477-6947 Page 7
1.2 Installation Mobile Inventory must be installed on the server computer. The server must be the computer that hosts the Store Manager product data. Please follow the onscreen prompts when installing the Mobile Inventory application.
Figure 1.2 Mobile Inventory Installation The Mobile Inventory Installer will install the application to the following directory: Install Directory: c:\WinPOS40\mobileinventory.exe Mobile Inventory connects to the Proxis Store Manager product database usually located here: Database Location: c:\WinPOS40\posdata\products.mdb Launch the Mobile Inventory application from the system’s Start menu: Start>Programs>Mobile Inventory>Mobile Inventory The POS-X Xt50 barcode scanner will come preloaded with the Mobile Inventory program. No software installation on the device is required. Xt50 application files and loader utility can be found in the c:\WinPOS40\Xt50 Support Files\ directory. Palm barcode scanner (Symbol SPT 1550, SPT 1800, and SPT 1846) support files are located in the c:\WinPOS40\Palm Support Files\ directory. Please call the Proxis Help Desk for additional assistance: 1-877-477-6947 (email: [email protected]).
Mobile Inventory User’s Guide
ProxisSoftware.com 1-877-477-6947 Page 8
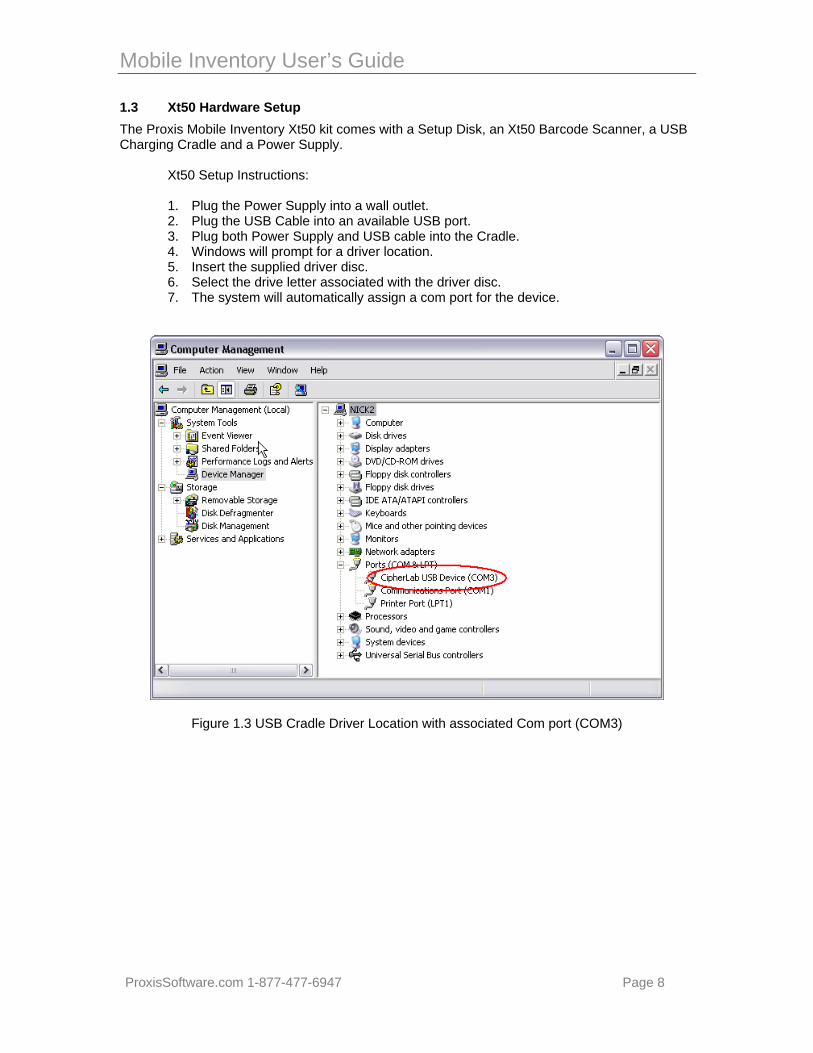
1.3 Xt50 Hardware Setup The Proxis Mobile Inventory Xt50 kit comes with a Setup Disk, an Xt50 Barcode Scanner, a USB Charging Cradle and a Power Supply. Xt50 Setup Instructions:
1. Plug the Power Supply into a wall outlet. 2. Plug the USB Cable into an available USB port. 3. Plug both Power Supply and USB cable into the Cradle. 4. Windows will prompt for a driver location. 5. Insert the supplied driver disc. 6. Select the drive letter associated with the driver disc. 7. The system will automatically assign a com port for the device.
Figure 1.3 USB Cradle Driver Location with associated Com port (COM3)
Mobile Inventory User’s Guide
ProxisSoftware.com 1-877-477-6947 Page 9
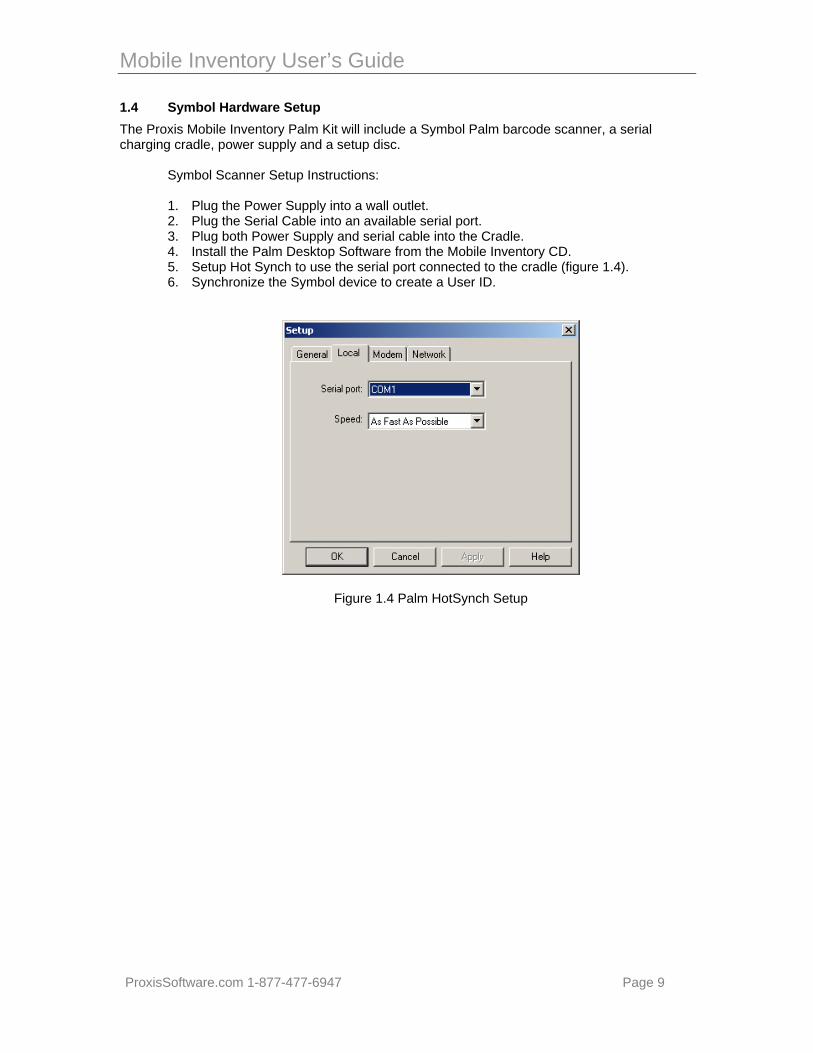
1.4 Symbol Hardware Setup The Proxis Mobile Inventory Palm Kit will include a Symbol Palm barcode scanner, a serial charging cradle, power supply and a setup disc.
Symbol Scanner Setup Instructions: 1. Plug the Power Supply into a wall outlet. 2. Plug the Serial Cable into an available serial port. 3. Plug both Power Supply and serial cable into the Cradle. 4. Install the Palm Desktop Software from the Mobile Inventory CD. 5. Setup Hot Synch to use the serial port connected to the cradle (figure 1.4). 6. Synchronize the Symbol device to create a User ID.
Figure 1.4 Palm HotSynch Setup
Mobile Inventory User’s Guide
ProxisSoftware.com 1-877-477-6947 Page 10
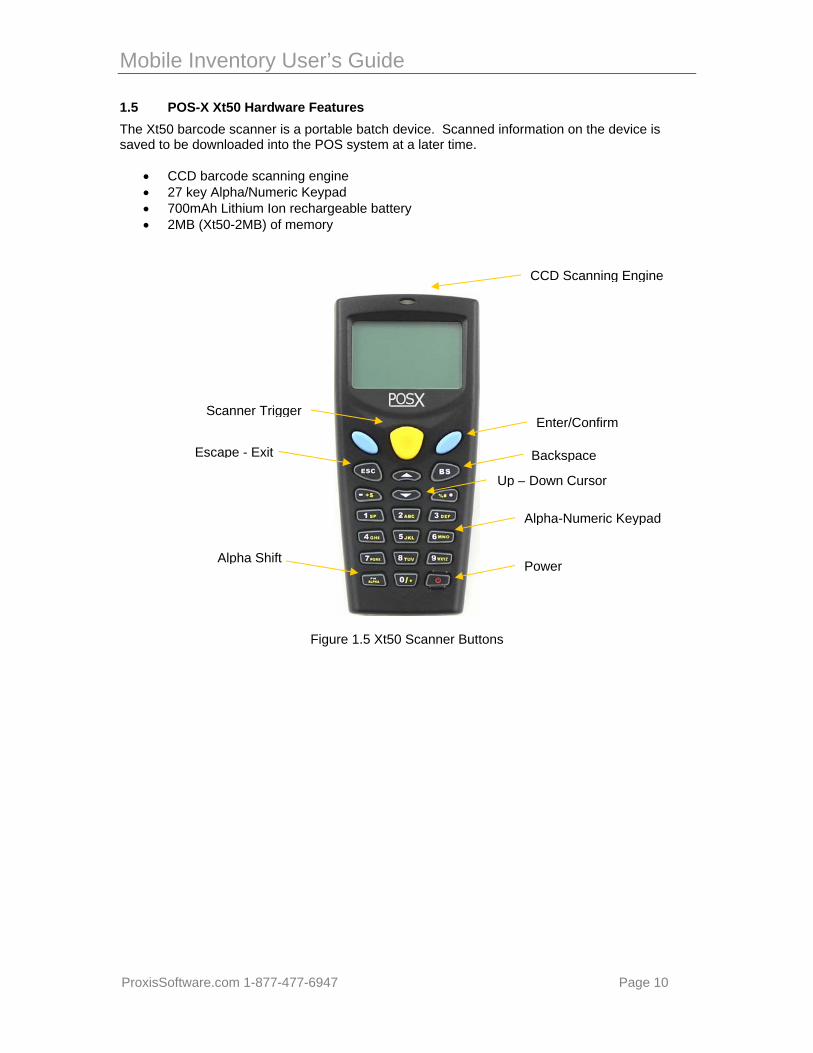
1.5 POS-X Xt50 Hardware Features The Xt50 barcode scanner is a portable batch device. Scanned information on the device is saved to be downloaded into the POS system at a later time.
• CCD barcode scanning engine • 27 key Alpha/Numeric Keypad • 700mAh Lithium Ion rechargeable battery • 2MB (Xt50-2MB) of memory
Figure 1.5 Xt50 Scanner Buttons
Alpha-Numeric Keypad
Up – Down Cursor
Backspace
Enter/Confirm
PowerAlpha Shift
Escape - Exit
Scanner Trigger
CCD Scanning Engine
Mobile Inventory User’s Guide
ProxisSoftware.com 1-877-477-6947 Page 11
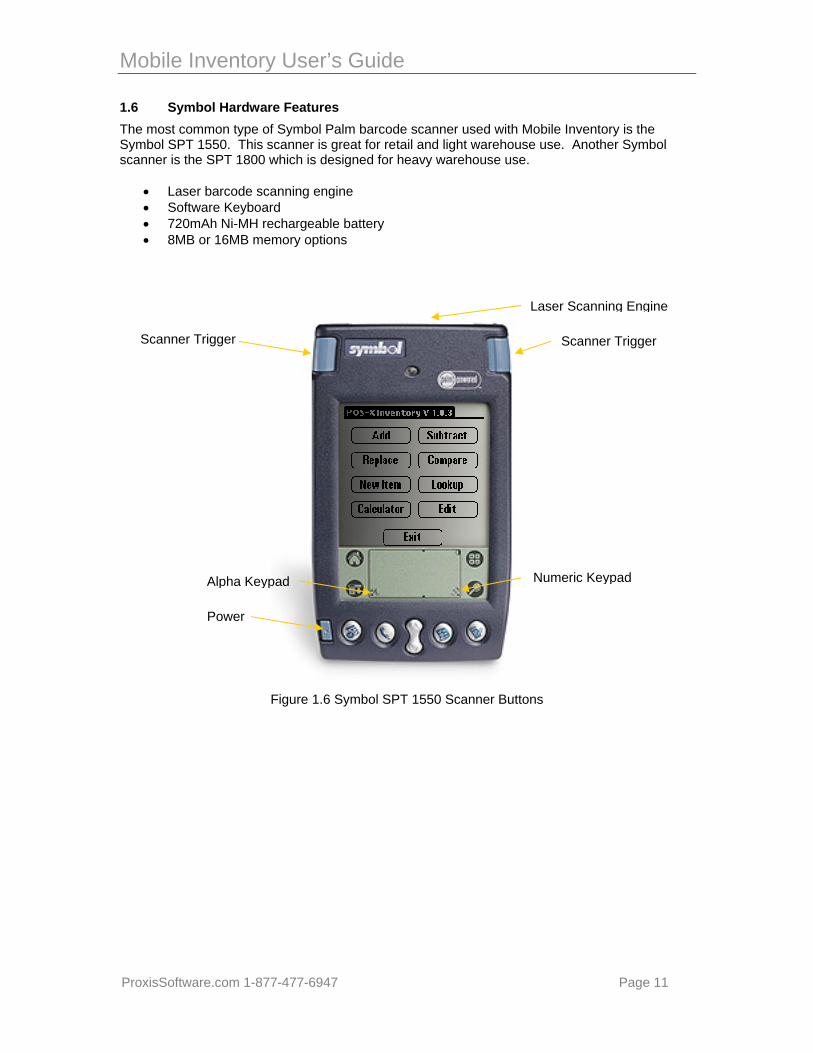
1.6 Symbol Hardware Features The most common type of Symbol Palm barcode scanner used with Mobile Inventory is the Symbol SPT 1550. This scanner is great for retail and light warehouse use. Another Symbol scanner is the SPT 1800 which is designed for heavy warehouse use.
• Laser barcode scanning engine • Software Keyboard • 720mAh Ni-MH rechargeable battery • 8MB or 16MB memory options
Figure 1.6 Symbol SPT 1550 Scanner Buttons
Numeric Keypad
Power
Alpha Keypad
Scanner Trigger
Laser Scanning Engine
Scanner Trigger
Mobile Inventory User’s Guide
ProxisSoftware.com 1-877-477-6947 Page 12
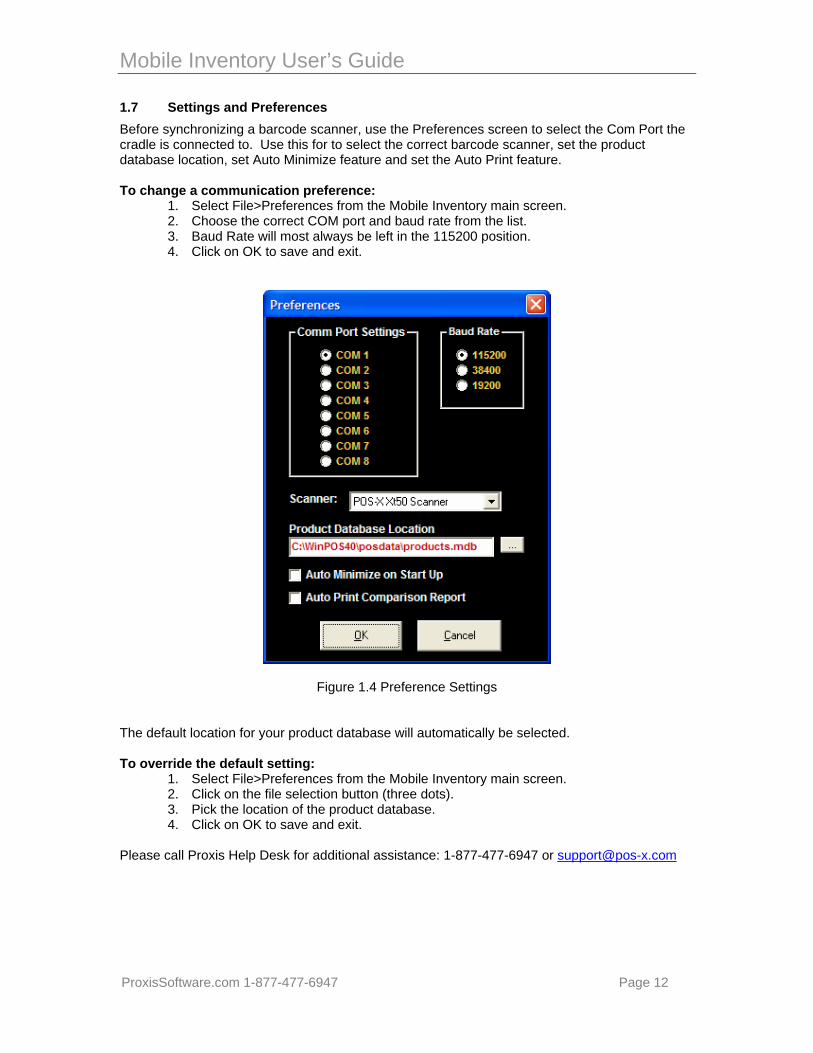
1.7 Settings and Preferences Before synchronizing a barcode scanner, use the Preferences screen to select the Com Port the cradle is connected to. Use this for to select the correct barcode scanner, set the product database location, set Auto Minimize feature and set the Auto Print feature. To change a communication preference:
1. Select File>Preferences from the Mobile Inventory main screen. 2. Choose the correct COM port and baud rate from the list. 3. Baud Rate will most always be left in the 115200 position. 4. Click on OK to save and exit.
Figure 1.4 Preference Settings
The default location for your product database will automatically be selected. To override the default setting:
1. Select File>Preferences from the Mobile Inventory main screen. 2. Click on the file selection button (three dots). 3. Pick the location of the product database. 4. Click on OK to save and exit.
Please call Proxis Help Desk for additional assistance: 1-877-477-6947 or [email protected]
Mobile Inventory User’s Guide
ProxisSoftware.com 1-877-477-6947 Page 13
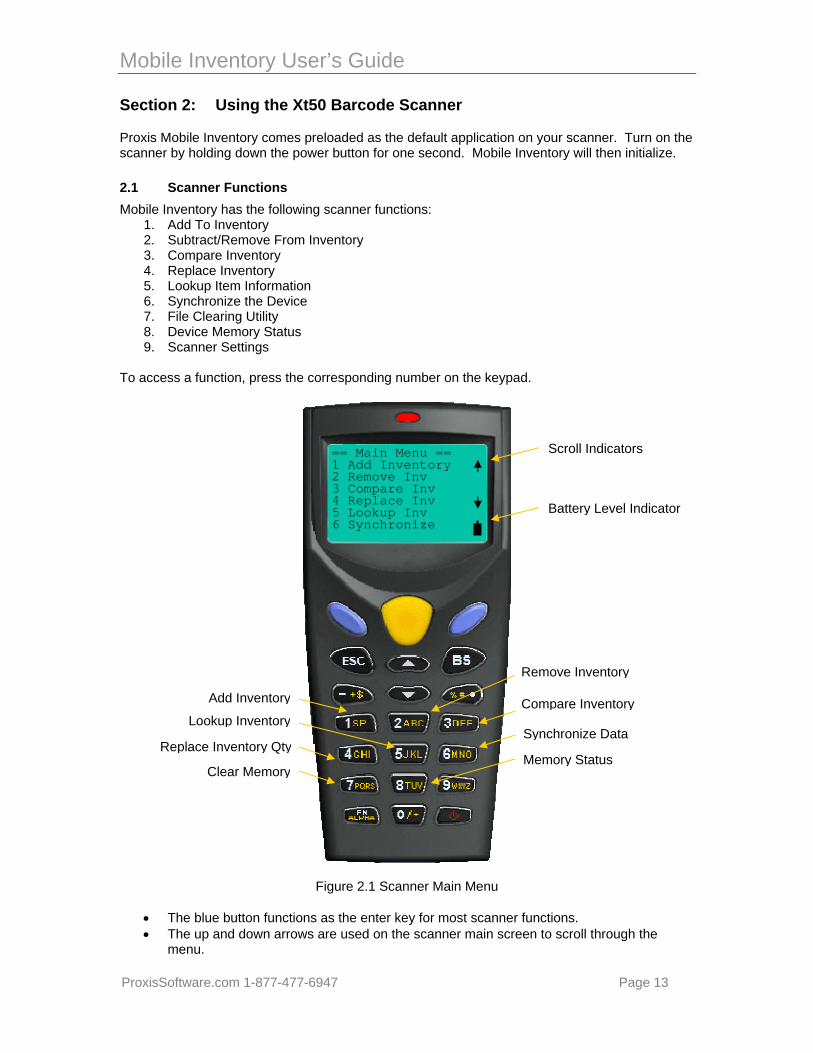
Section 2: Using the Xt50 Barcode Scanner
Proxis Mobile Inventory comes preloaded as the default application on your scanner. Turn on the scanner by holding down the power button for one second. Mobile Inventory will then initialize. 2.1 Scanner Functions Mobile Inventory has the following scanner functions:
1. Add To Inventory 2. Subtract/Remove From Inventory 3. Compare Inventory 4. Replace Inventory 5. Lookup Item Information 6. Synchronize the Device 7. File Clearing Utility 8. Device Memory Status 9. Scanner Settings
To access a function, press the corresponding number on the keypad.
Figure 2.1 Scanner Main Menu
• The blue button functions as the enter key for most scanner functions. • The up and down arrows are used on the scanner main screen to scroll through the
menu.
== Main Menu ==1 Add Inventory2 Remove Inv3 Compare Inv4 Replace Inv5 Lookup Inv6 Synchronize
Remove Inventory
Compare Inventory
Synchronize Data
Memory Status
Add Inventory
Lookup Inventory
Replace Inventory Qty
Clear Memory
Battery Level Indicator
Scroll Indicators
Mobile Inventory User’s Guide
ProxisSoftware.com 1-877-477-6947 Page 14
• The up and down arrows are used in scanning screens to scroll through the records of scanned data.
There is a battery icon in the lower right hand side of the screen. This icon shows the current charge of the battery. 2.2 Advanced Scanner Settings The Xt50 Barcod Scanner has an Advanced settings screen that controls functions like
• Loading New Versions of the scanner application. • Changing the scanner “beep” settings. • Inintializing the scanner memory. • Running diagnostic tests.
To Enter the Advanced Setting mode:
1. Ensure the scanner is powered off. 2. Hold the 7 and 9 buttons down while powering the scanner on. 3. The 7 and 9 buttons must be pressed and held while the power button is activated to
enter the advanced screen. For more information on the Xt50 Advanced settings please contact the Proxis help desk.
Mobile Inventory User’s Guide
ProxisSoftware.com 1-877-477-6947 Page 15
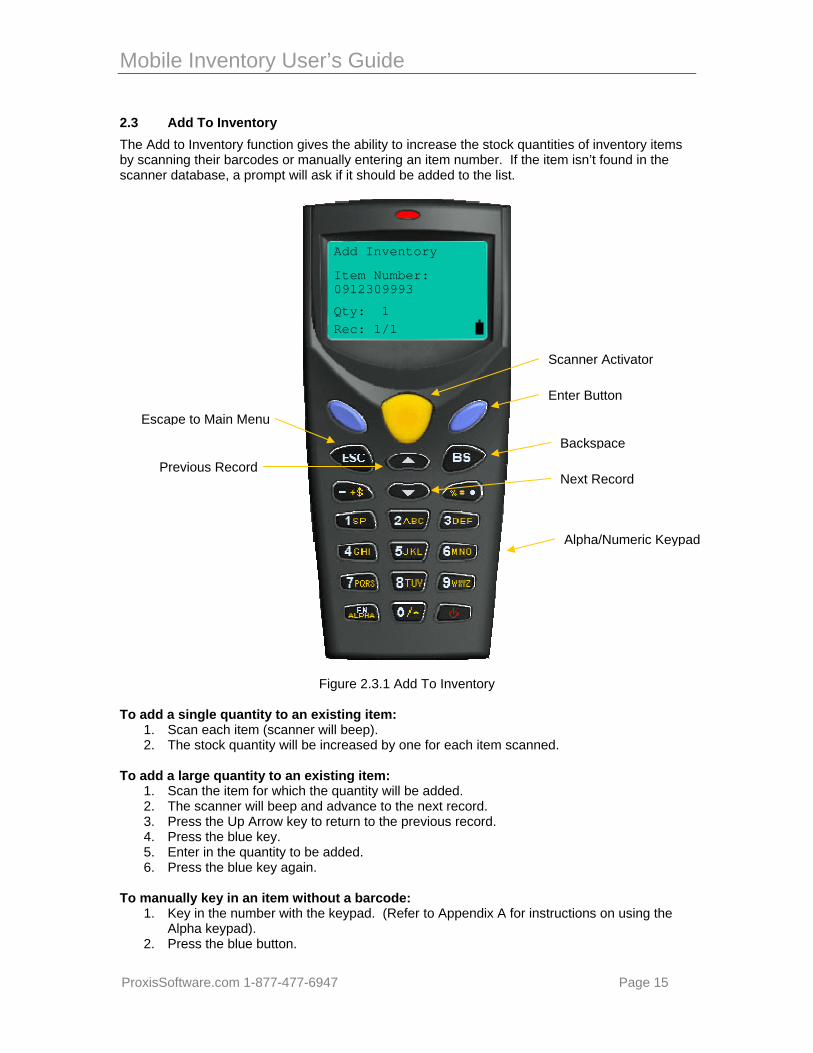
2.3 Add To Inventory The Add to Inventory function gives the ability to increase the stock quantities of inventory items by scanning their barcodes or manually entering an item number. If the item isn’t found in the scanner database, a prompt will ask if it should be added to the list.
Figure 2.3.1 Add To Inventory To add a single quantity to an existing item:
1. Scan each item (scanner will beep). 2. The stock quantity will be increased by one for each item scanned.
To add a large quantity to an existing item:
1. Scan the item for which the quantity will be added. 2. The scanner will beep and advance to the next record. 3. Press the Up Arrow key to return to the previous record. 4. Press the blue key. 5. Enter in the quantity to be added. 6. Press the blue key again.
To manually key in an item without a barcode:
1. Key in the number with the keypad. (Refer to Appendix A for instructions on using the Alpha keypad).
2. Press the blue button.
Add Inventory
Item Number:0912309993
Qty: 1Rec: 1/1
Enter Button
Scanner Activator
Backspace
Next Record
Alpha/Numeric Keypad
Escape to Main Menu
Previous Record
Mobile Inventory User’s Guide
ProxisSoftware.com 1-877-477-6947 Page 16
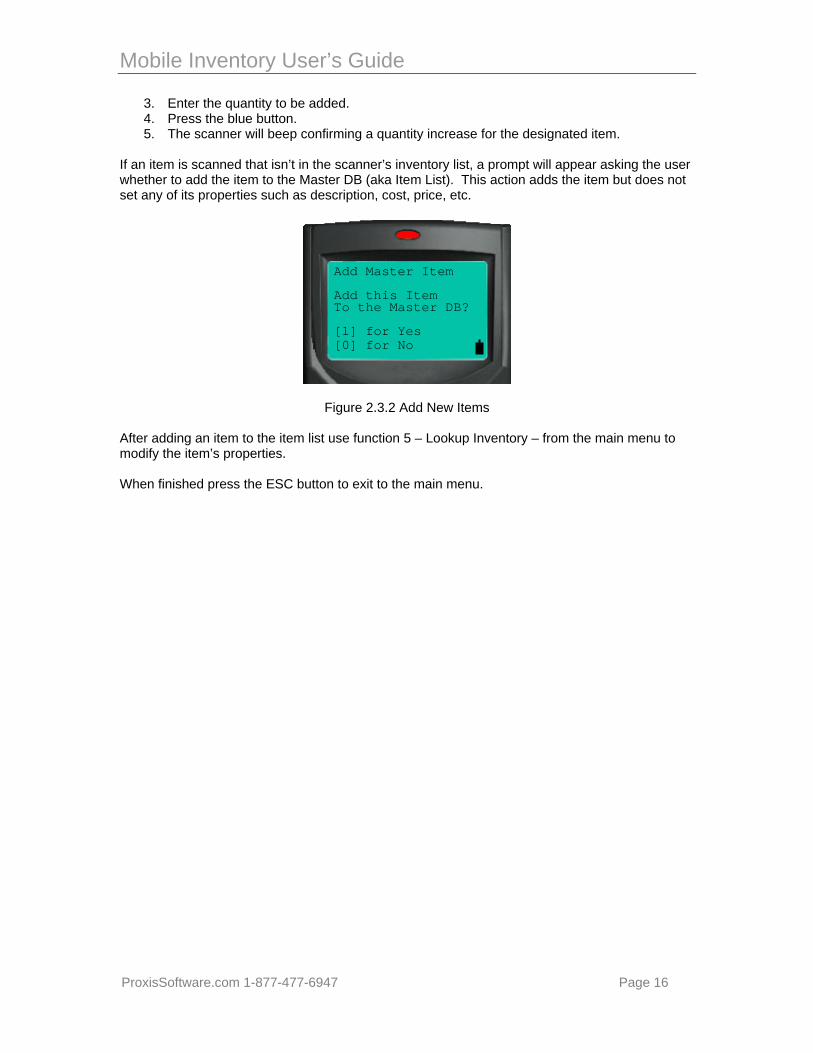
3. Enter the quantity to be added. 4. Press the blue button. 5. The scanner will beep confirming a quantity increase for the designated item.
If an item is scanned that isn’t in the scanner’s inventory list, a prompt will appear asking the user whether to add the item to the Master DB (aka Item List). This action adds the item but does not set any of its properties such as description, cost, price, etc.
Figure 2.3.2 Add New Items After adding an item to the item list use function 5 – Lookup Inventory – from the main menu to modify the item’s properties. When finished press the ESC button to exit to the main menu.
Add Master Item
Add this ItemTo the Master DB?
[1] for Yes[0] for No
Mobile Inventory User’s Guide
ProxisSoftware.com 1-877-477-6947 Page 17
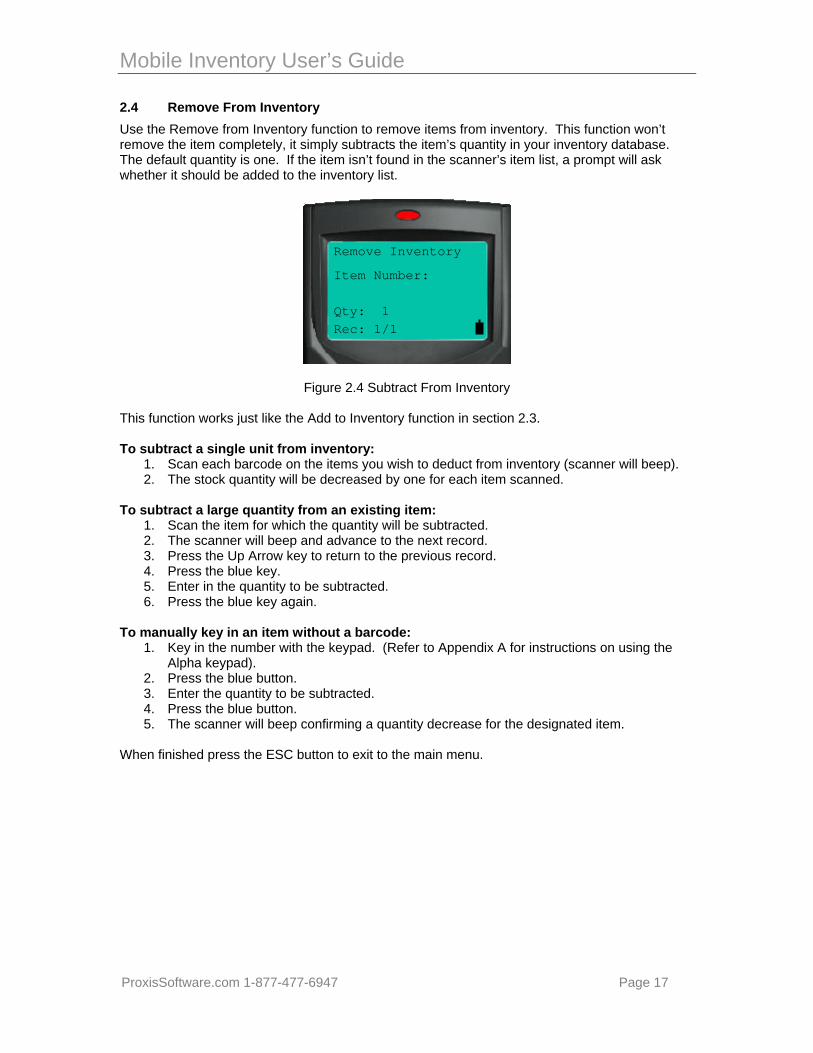
2.4 Remove From Inventory Use the Remove from Inventory function to remove items from inventory. This function won’t remove the item completely, it simply subtracts the item’s quantity in your inventory database. The default quantity is one. If the item isn’t found in the scanner’s item list, a prompt will ask whether it should be added to the inventory list.
Figure 2.4 Subtract From Inventory This function works just like the Add to Inventory function in section 2.3. To subtract a single unit from inventory:
1. Scan each barcode on the items you wish to deduct from inventory (scanner will beep). 2. The stock quantity will be decreased by one for each item scanned.
To subtract a large quantity from an existing item:
1. Scan the item for which the quantity will be subtracted. 2. The scanner will beep and advance to the next record. 3. Press the Up Arrow key to return to the previous record. 4. Press the blue key. 5. Enter in the quantity to be subtracted. 6. Press the blue key again.
To manually key in an item without a barcode:
1. Key in the number with the keypad. (Refer to Appendix A for instructions on using the Alpha keypad).
2. Press the blue button. 3. Enter the quantity to be subtracted. 4. Press the blue button. 5. The scanner will beep confirming a quantity decrease for the designated item.
When finished press the ESC button to exit to the main menu.
Remove Inventory
Item Number:
Qty: 1Rec: 1/1
Mobile Inventory User’s Guide
ProxisSoftware.com 1-877-477-6947 Page 18
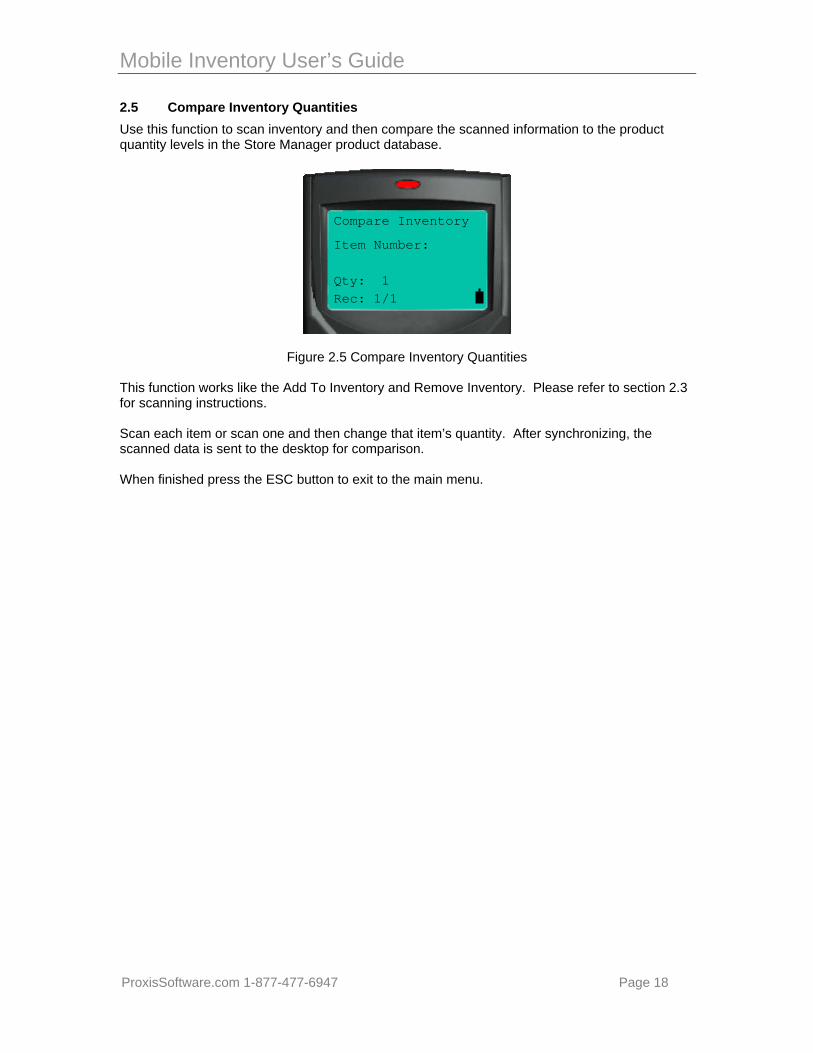
2.5 Compare Inventory Quantities Use this function to scan inventory and then compare the scanned information to the product quantity levels in the Store Manager product database.
Figure 2.5 Compare Inventory Quantities
This function works like the Add To Inventory and Remove Inventory. Please refer to section 2.3 for scanning instructions. Scan each item or scan one and then change that item’s quantity. After synchronizing, the scanned data is sent to the desktop for comparison. When finished press the ESC button to exit to the main menu.
Compare Inventory
Item Number:
Qty: 1Rec: 1/1
Mobile Inventory User’s Guide
ProxisSoftware.com 1-877-477-6947 Page 19
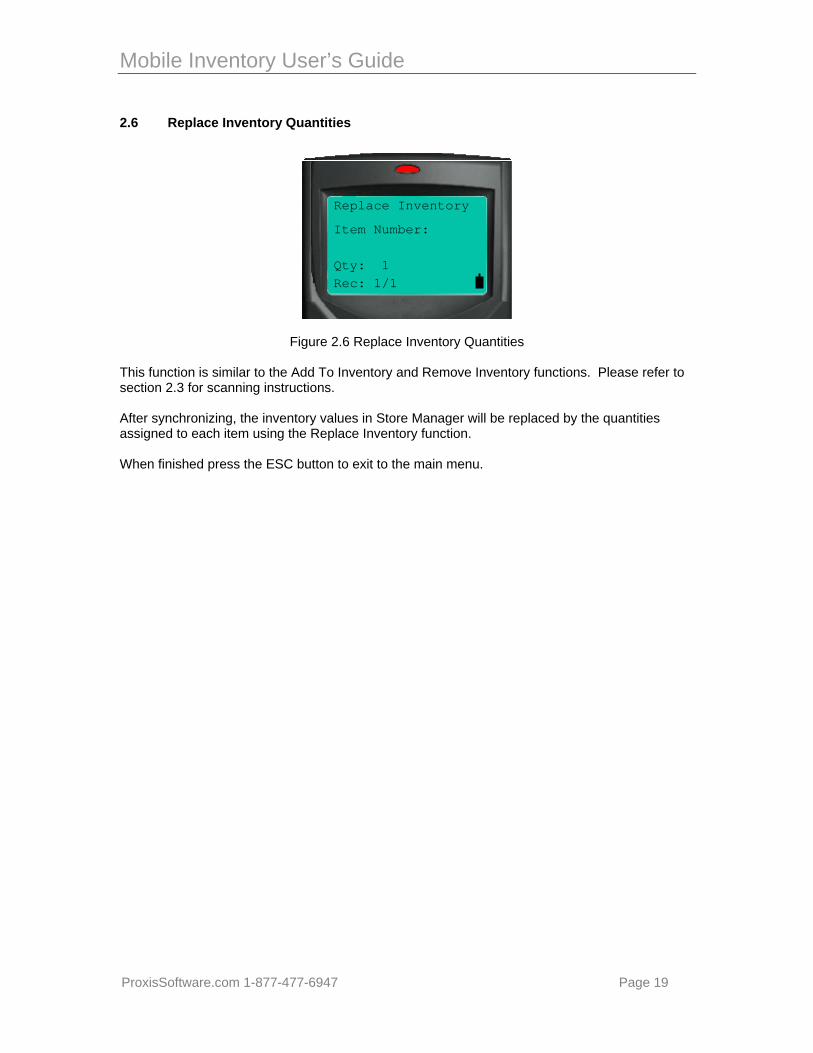
2.6 Replace Inventory Quantities
Figure 2.6 Replace Inventory Quantities
This function is similar to the Add To Inventory and Remove Inventory functions. Please refer to section 2.3 for scanning instructions. After synchronizing, the inventory values in Store Manager will be replaced by the quantities assigned to each item using the Replace Inventory function. When finished press the ESC button to exit to the main menu.
Replace Inventory
Item Number:
Qty: 1Rec: 1/1
Mobile Inventory User’s Guide
ProxisSoftware.com 1-877-477-6947 Page 20
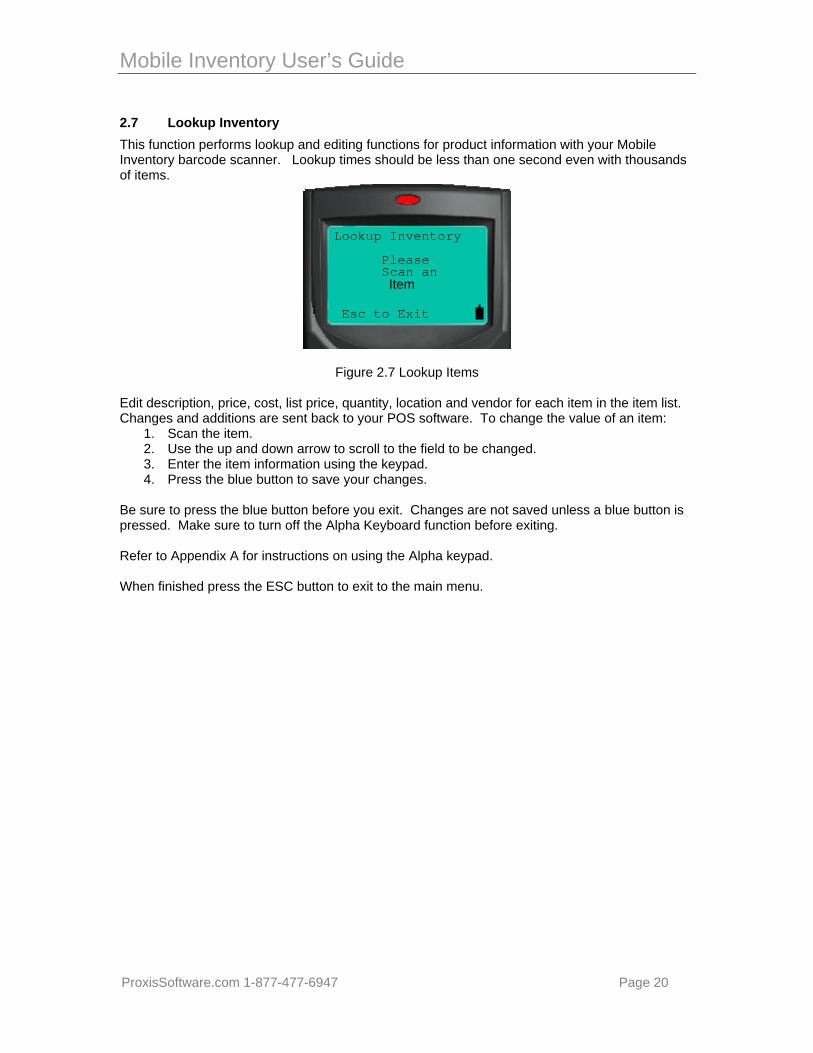
2.7 Lookup Inventory This function performs lookup and editing functions for product information with your Mobile Inventory barcode scanner. Lookup times should be less than one second even with thousands of items.
Figure 2.7 Lookup Items Edit description, price, cost, list price, quantity, location and vendor for each item in the item list. Changes and additions are sent back to your POS software. To change the value of an item:
1. Scan the item. 2. Use the up and down arrow to scroll to the field to be changed. 3. Enter the item information using the keypad. 4. Press the blue button to save your changes.
Be sure to press the blue button before you exit. Changes are not saved unless a blue button is pressed. Make sure to turn off the Alpha Keyboard function before exiting. Refer to Appendix A for instructions on using the Alpha keypad. When finished press the ESC button to exit to the main menu.
Lookup Inventory
PleaseScan an Item
Esc to Exit
Mobile Inventory User’s Guide
ProxisSoftware.com 1-877-477-6947 Page 21
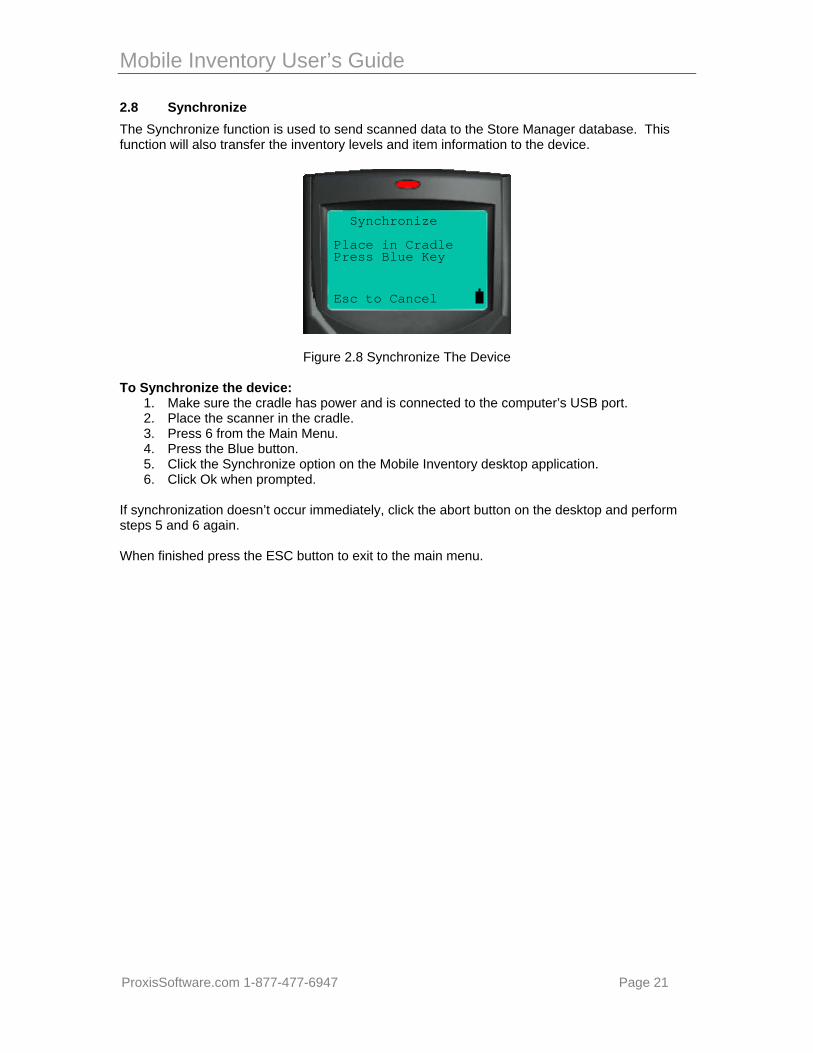
2.8 Synchronize The Synchronize function is used to send scanned data to the Store Manager database. This function will also transfer the inventory levels and item information to the device.
Figure 2.8 Synchronize The Device To Synchronize the device:
1. Make sure the cradle has power and is connected to the computer’s USB port. 2. Place the scanner in the cradle. 3. Press 6 from the Main Menu. 4. Press the Blue button. 5. Click the Synchronize option on the Mobile Inventory desktop application. 6. Click Ok when prompted.
If synchronization doesn’t occur immediately, click the abort button on the desktop and perform steps 5 and 6 again. When finished press the ESC button to exit to the main menu.
Synchronize
Place in CradlePress Blue Key
Esc to Cancel
Mobile Inventory User’s Guide
ProxisSoftware.com 1-877-477-6947 Page 22
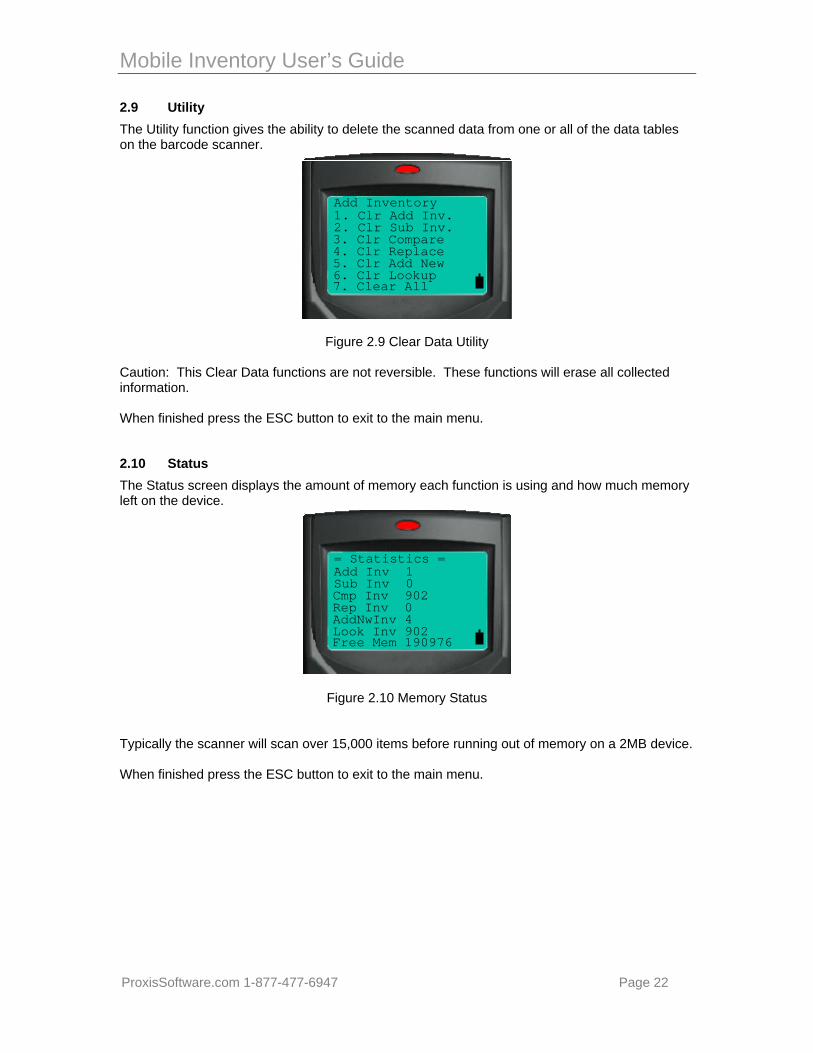
2.9 Utility The Utility function gives the ability to delete the scanned data from one or all of the data tables on the barcode scanner.
Figure 2.9 Clear Data Utility Caution: This Clear Data functions are not reversible. These functions will erase all collected information. When finished press the ESC button to exit to the main menu.
2.10 Status The Status screen displays the amount of memory each function is using and how much memory left on the device.
Figure 2.10 Memory Status Typically the scanner will scan over 15,000 items before running out of memory on a 2MB device. When finished press the ESC button to exit to the main menu.
Add Inventory1. Clr Add Inv.2. Clr Sub Inv.3. Clr Compare4. Clr Replace5. Clr Add New
7. Clear All6. Clr Lookup
= Statistics =Add Inv 1Sub Inv 0Cmp Inv 902Rep Inv 0AddNwInv 4
Free Mem 190976Look Inv 902

Mobile Inventory User’s Guide
ProxisSoftware.com 1-877-477-6947 Page 23
2.11 Scanner Advanced Settings The Scanner Table configures the Xt50 barcode scanner for specific scanner settings. Support for ISBN barcodes can be turned on or off. Lead digits can be enabled or disabled. The scanner can even be restricted to only scan a certain barcode type.
Figure 2.11 Scanner Table Please call your vendor or the Proxis tech support department for assistance with configuring the scanner setting. When finished press the ESC button to exit to the main menu and save any changes.
Scanner Table
1: 9B C9 00 3F 802: 21 54 80 00 9C3: BF 10 C0 01 C04: 01 C0 01 C0 01
Press Esc - Exit5: 66 03 03
Mobile Inventory User’s Guide
ProxisSoftware.com 1-877-477-6947 Page 24
Section 3: Using the Symbol Barcode Scanner
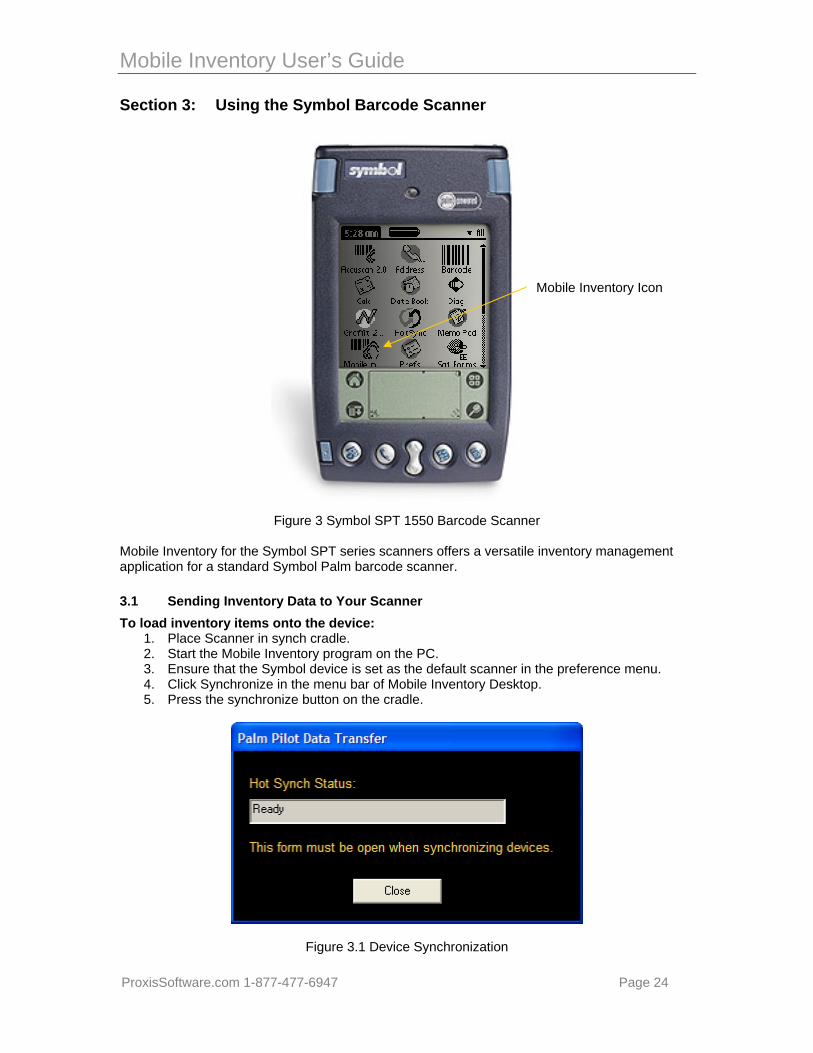
Figure 3 Symbol SPT 1550 Barcode Scanner
Mobile Inventory for the Symbol SPT series scanners offers a versatile inventory management application for a standard Symbol Palm barcode scanner. 3.1 Sending Inventory Data to Your Scanner To load inventory items onto the device:
1. Place Scanner in synch cradle. 2. Start the Mobile Inventory program on the PC. 3. Ensure that the Symbol device is set as the default scanner in the preference menu. 4. Click Synchronize in the menu bar of Mobile Inventory Desktop. 5. Press the synchronize button on the cradle.
Figure 3.1 Device Synchronization
Mobile Inventory Icon
Mobile Inventory User’s Guide
ProxisSoftware.com 1-877-477-6947 Page 25
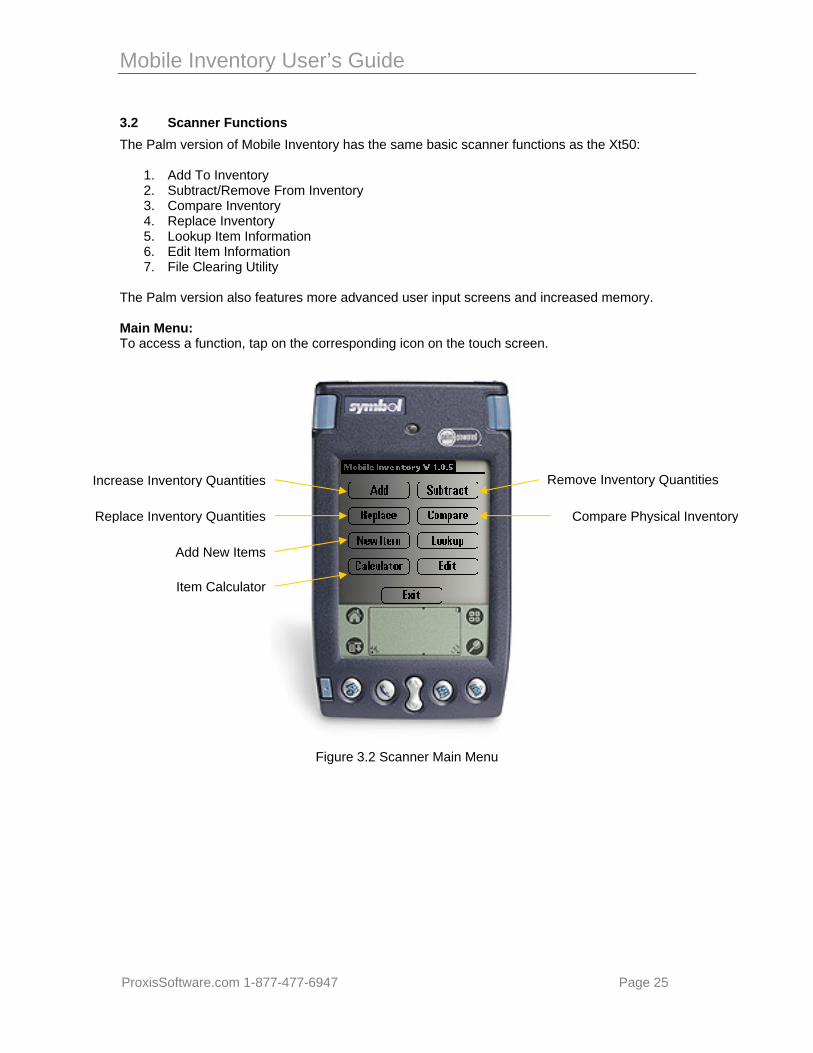
3.2 Scanner Functions The Palm version of Mobile Inventory has the same basic scanner functions as the Xt50:
1. Add To Inventory 2. Subtract/Remove From Inventory 3. Compare Inventory 4. Replace Inventory 5. Lookup Item Information 6. Edit Item Information 7. File Clearing Utility
The Palm version also features more advanced user input screens and increased memory. Main Menu: To access a function, tap on the corresponding icon on the touch screen.
Figure 3.2 Scanner Main Menu
Remove Inventory QuantitiesIncrease Inventory Quantities
Replace Inventory Quantities
Add New Items
Compare Physical Inventory
Item Calculator
Mobile Inventory User’s Guide
ProxisSoftware.com 1-877-477-6947 Page 26
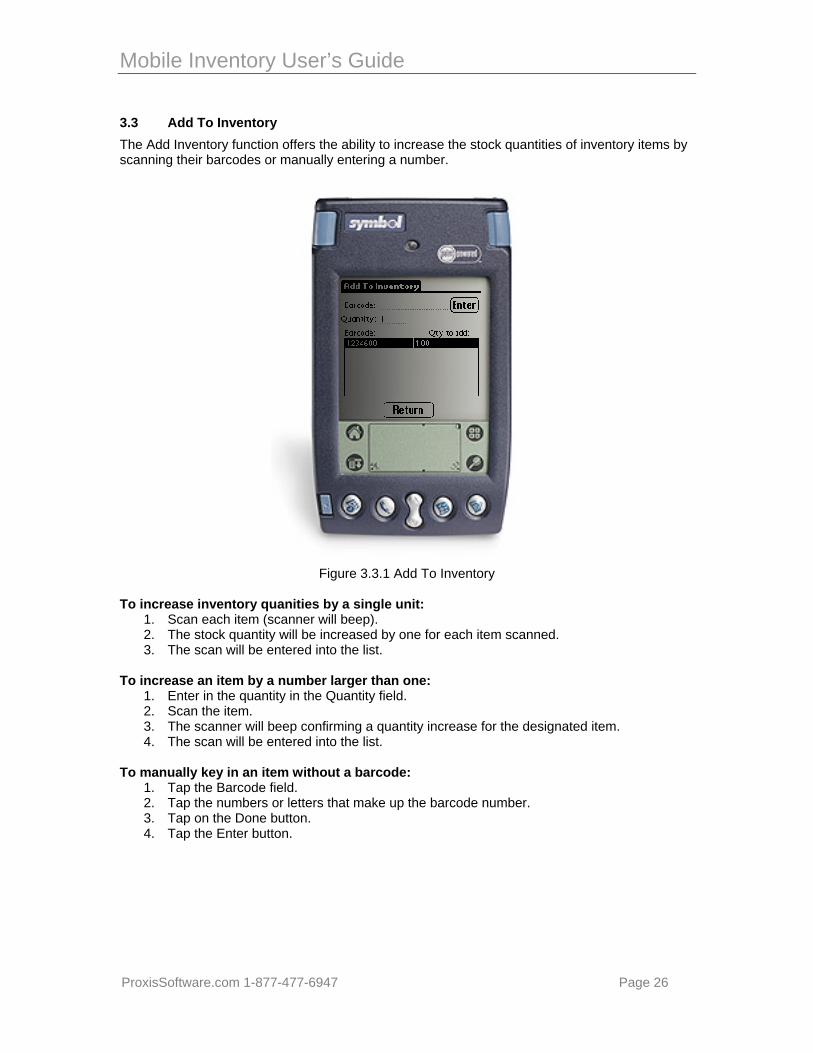
3.3 Add To Inventory The Add Inventory function offers the ability to increase the stock quantities of inventory items by scanning their barcodes or manually entering a number.
Figure 3.3.1 Add To Inventory
To increase inventory quanities by a single unit:
1. Scan each item (scanner will beep). 2. The stock quantity will be increased by one for each item scanned. 3. The scan will be entered into the list.
To increase an item by a number larger than one:
1. Enter in the quantity in the Quantity field. 2. Scan the item. 3. The scanner will beep confirming a quantity increase for the designated item. 4. The scan will be entered into the list.
To manually key in an item without a barcode:
1. Tap the Barcode field. 2. Tap the numbers or letters that make up the barcode number. 3. Tap on the Done button. 4. Tap the Enter button.
Mobile Inventory User’s Guide
ProxisSoftware.com 1-877-477-6947 Page 27
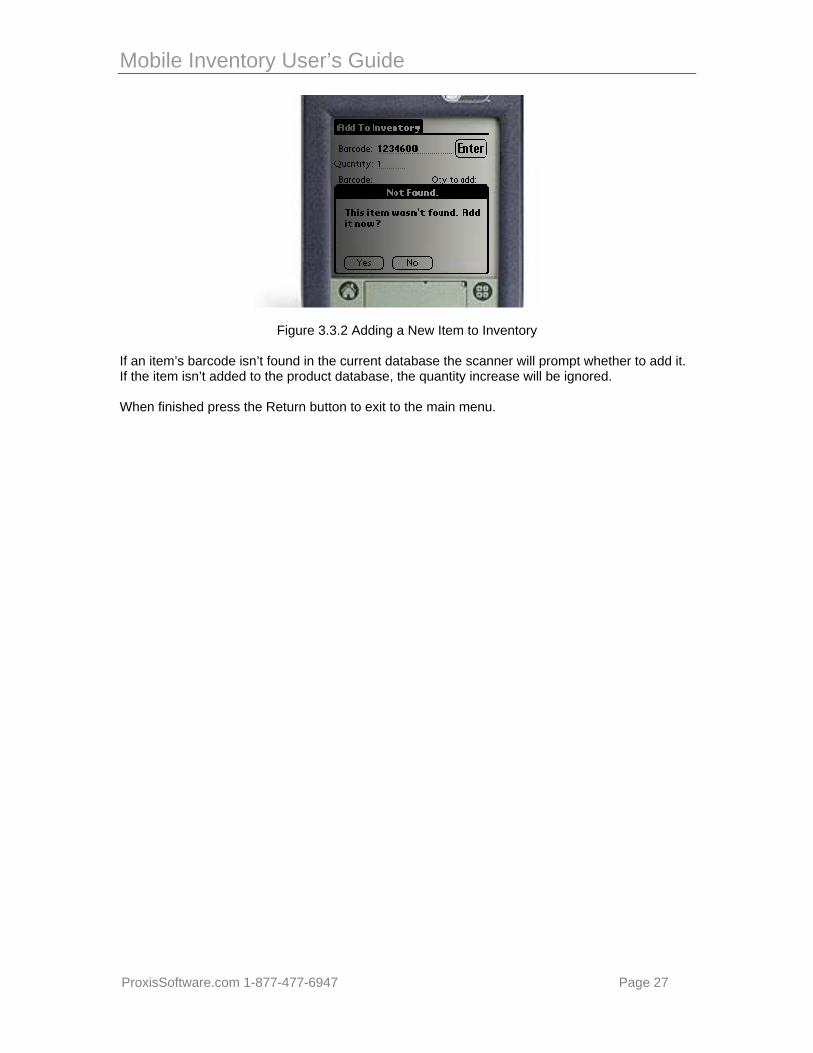
Figure 3.3.2 Adding a New Item to Inventory If an item’s barcode isn’t found in the current database the scanner will prompt whether to add it. If the item isn’t added to the product database, the quantity increase will be ignored. When finished press the Return button to exit to the main menu.
Mobile Inventory User’s Guide
ProxisSoftware.com 1-877-477-6947 Page 28
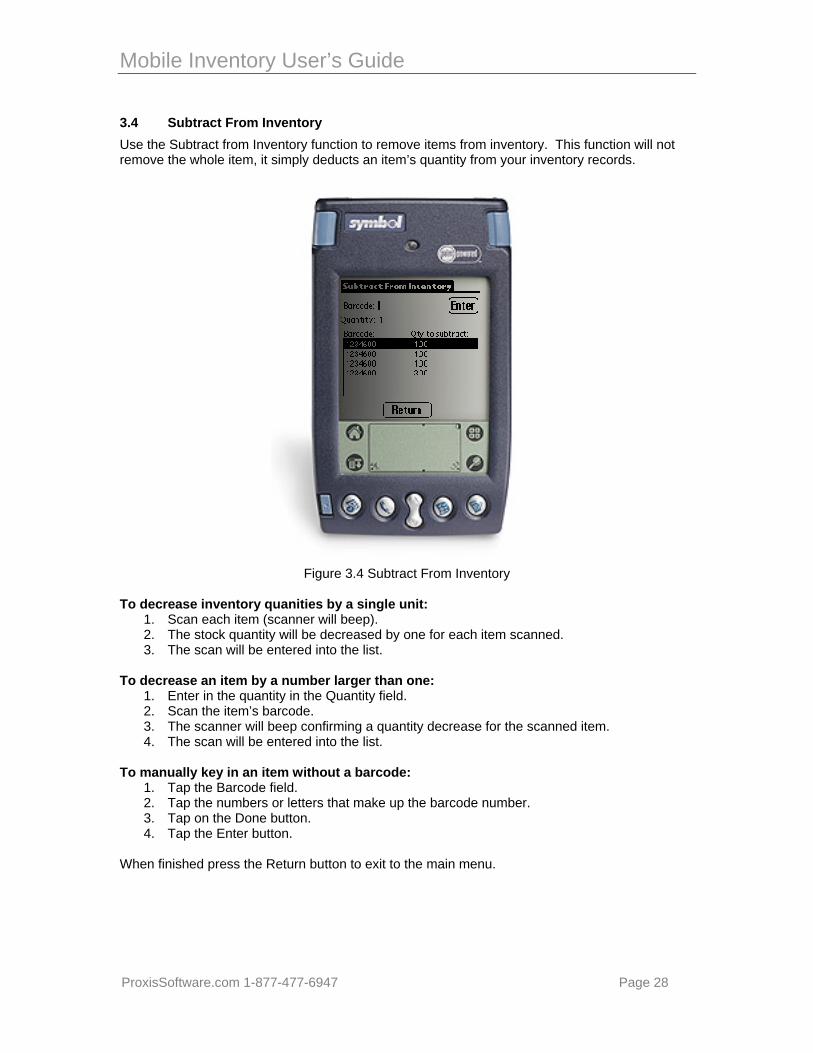
3.4 Subtract From Inventory Use the Subtract from Inventory function to remove items from inventory. This function will not remove the whole item, it simply deducts an item’s quantity from your inventory records.
Figure 3.4 Subtract From Inventory
To decrease inventory quanities by a single unit:
1. Scan each item (scanner will beep). 2. The stock quantity will be decreased by one for each item scanned. 3. The scan will be entered into the list.
To decrease an item by a number larger than one:
1. Enter in the quantity in the Quantity field. 2. Scan the item’s barcode. 3. The scanner will beep confirming a quantity decrease for the scanned item. 4. The scan will be entered into the list.
To manually key in an item without a barcode:
1. Tap the Barcode field. 2. Tap the numbers or letters that make up the barcode number. 3. Tap on the Done button. 4. Tap the Enter button.
When finished press the Return button to exit to the main menu.
Mobile Inventory User’s Guide
ProxisSoftware.com 1-877-477-6947 Page 29
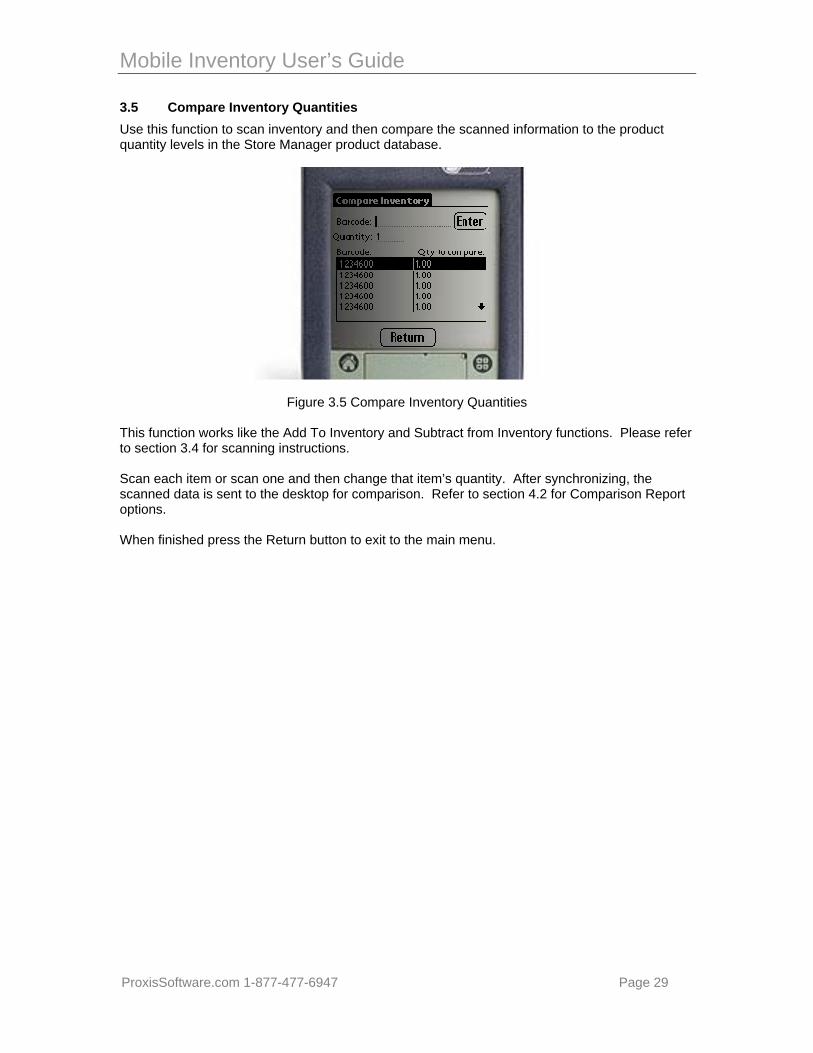
3.5 Compare Inventory Quantities Use this function to scan inventory and then compare the scanned information to the product quantity levels in the Store Manager product database.
Figure 3.5 Compare Inventory Quantities
This function works like the Add To Inventory and Subtract from Inventory functions. Please refer to section 3.4 for scanning instructions. Scan each item or scan one and then change that item’s quantity. After synchronizing, the scanned data is sent to the desktop for comparison. Refer to section 4.2 for Comparison Report options. When finished press the Return button to exit to the main menu.
Mobile Inventory User’s Guide
ProxisSoftware.com 1-877-477-6947 Page 30
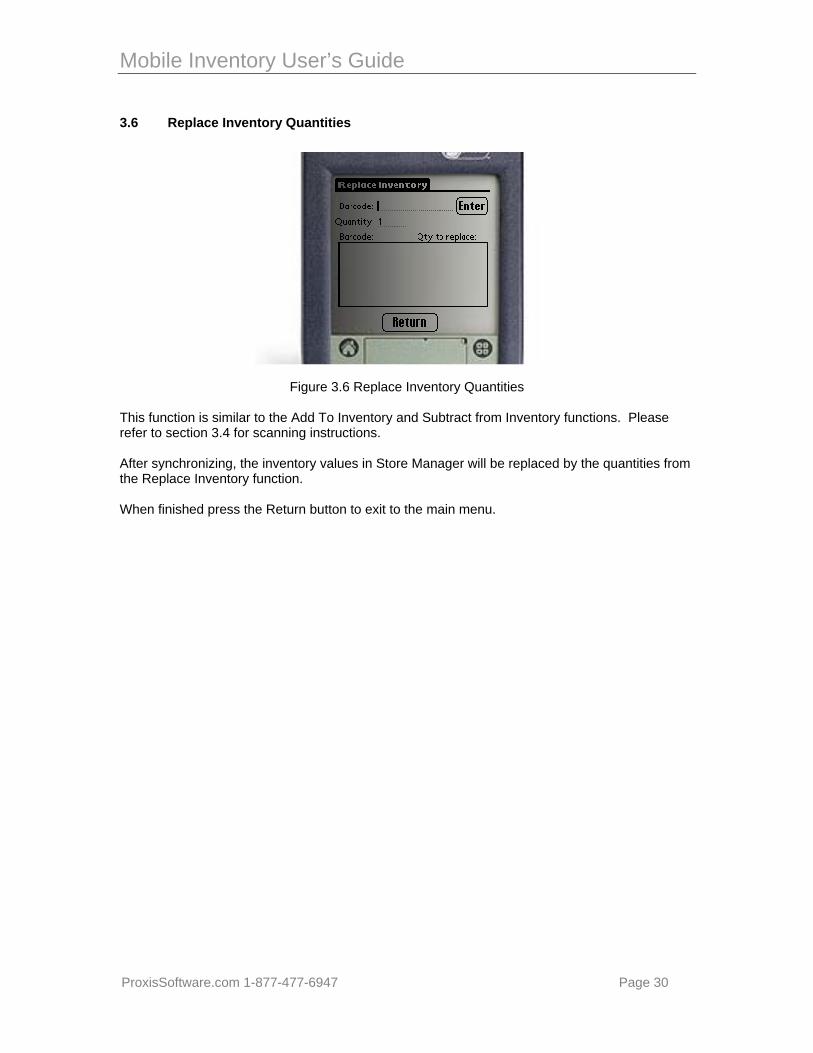
3.6 Replace Inventory Quantities
Figure 3.6 Replace Inventory Quantities
This function is similar to the Add To Inventory and Subtract from Inventory functions. Please refer to section 3.4 for scanning instructions. After synchronizing, the inventory values in Store Manager will be replaced by the quantities from the Replace Inventory function. When finished press the Return button to exit to the main menu.
Mobile Inventory User’s Guide
ProxisSoftware.com 1-877-477-6947 Page 31
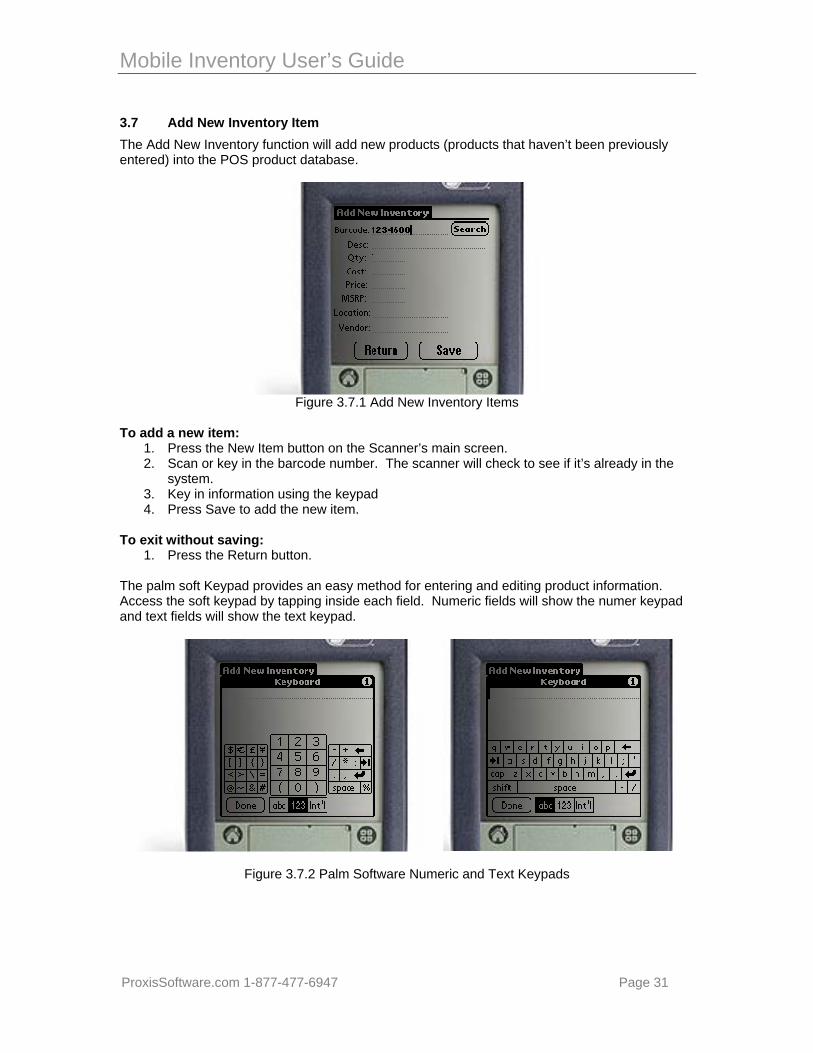
3.7 Add New Inventory Item The Add New Inventory function will add new products (products that haven’t been previously entered) into the POS product database.
Figure 3.7.1 Add New Inventory Items
To add a new item:
1. Press the New Item button on the Scanner’s main screen. 2. Scan or key in the barcode number. The scanner will check to see if it’s already in the
system. 3. Key in information using the keypad 4. Press Save to add the new item.
To exit without saving:
1. Press the Return button. The palm soft Keypad provides an easy method for entering and editing product information. Access the soft keypad by tapping inside each field. Numeric fields will show the numer keypad and text fields will show the text keypad.
Figure 3.7.2 Palm Software Numeric and Text Keypads
Mobile Inventory User’s Guide
ProxisSoftware.com 1-877-477-6947 Page 32
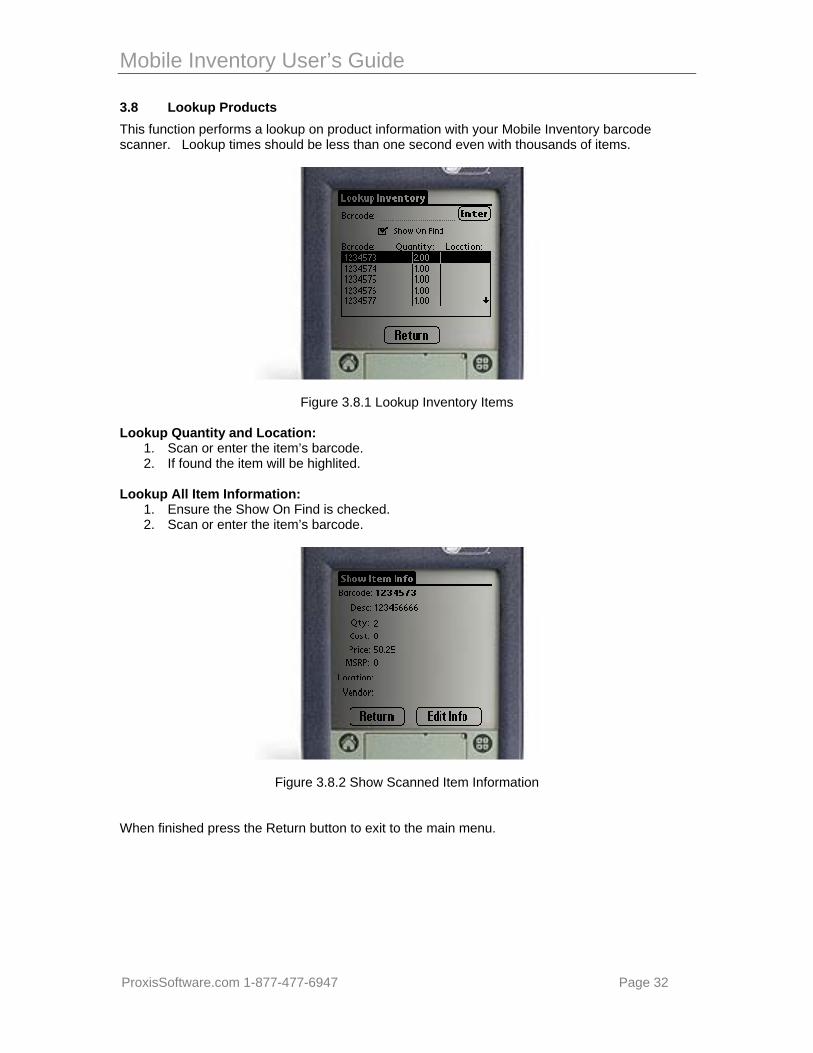
3.8 Lookup Products This function performs a lookup on product information with your Mobile Inventory barcode scanner. Lookup times should be less than one second even with thousands of items.
Figure 3.8.1 Lookup Inventory Items Lookup Quantity and Location:
1. Scan or enter the item’s barcode. 2. If found the item will be highlited.
Lookup All Item Information:
1. Ensure the Show On Find is checked. 2. Scan or enter the item’s barcode.
Figure 3.8.2 Show Scanned Item Information When finished press the Return button to exit to the main menu.
Mobile Inventory User’s Guide
ProxisSoftware.com 1-877-477-6947 Page 33
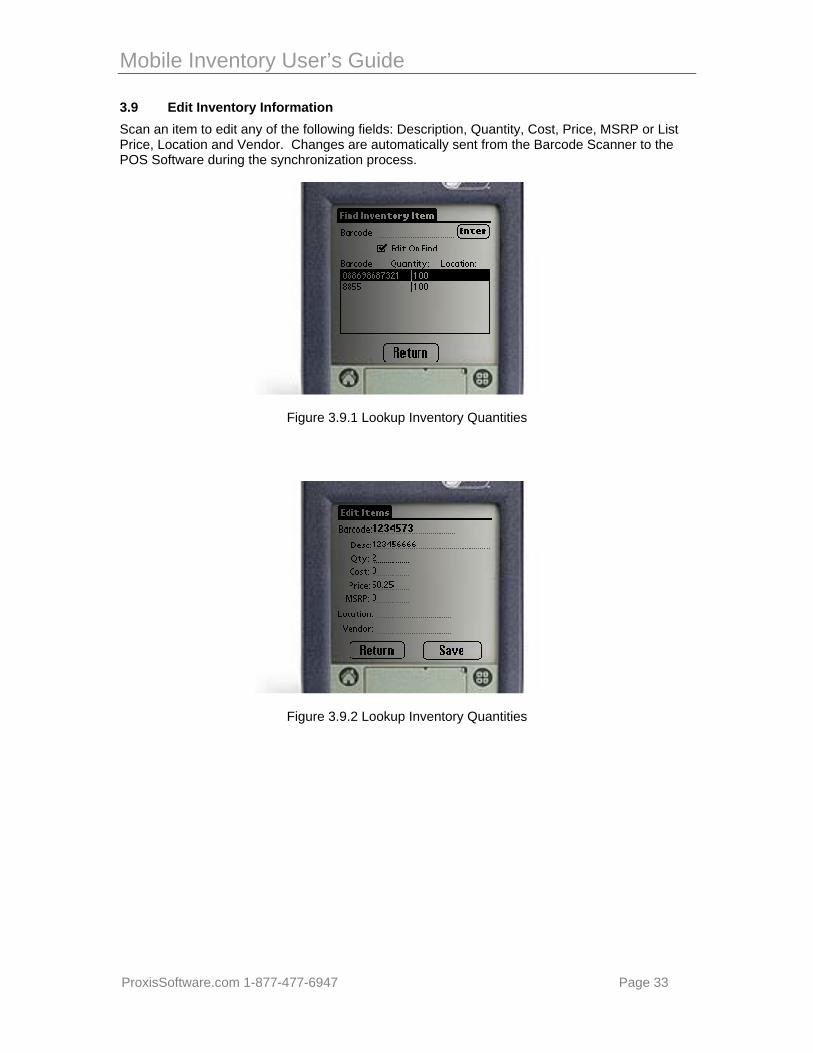
3.9 Edit Inventory Information Scan an item to edit any of the following fields: Description, Quantity, Cost, Price, MSRP or List Price, Location and Vendor. Changes are automatically sent from the Barcode Scanner to the POS Software during the synchronization process.
Figure 3.9.1 Lookup Inventory Quantities
Figure 3.9.2 Lookup Inventory Quantities
Mobile Inventory User’s Guide
ProxisSoftware.com 1-877-477-6947 Page 34
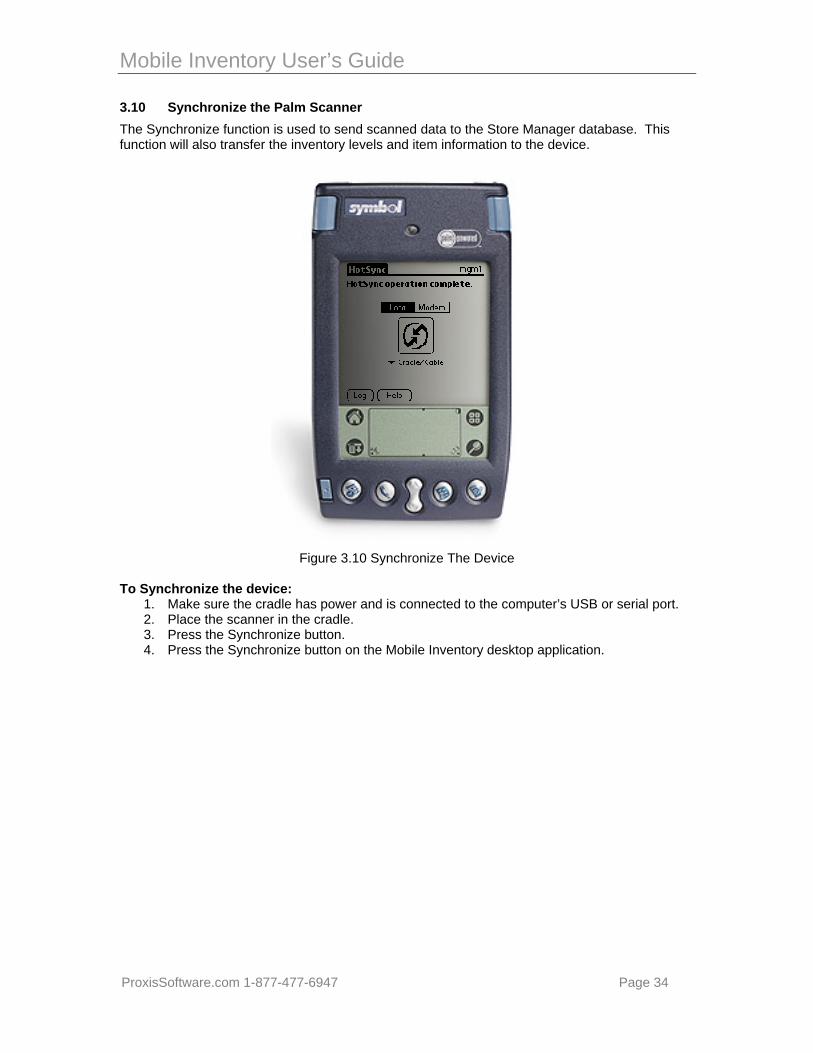
3.10 Synchronize the Palm Scanner The Synchronize function is used to send scanned data to the Store Manager database. This function will also transfer the inventory levels and item information to the device.
Figure 3.10 Synchronize The Device
To Synchronize the device:
1. Make sure the cradle has power and is connected to the computer’s USB or serial port. 2. Place the scanner in the cradle. 3. Press the Synchronize button. 4. Press the Synchronize button on the Mobile Inventory desktop application.
Mobile Inventory User’s Guide
ProxisSoftware.com 1-877-477-6947 Page 35
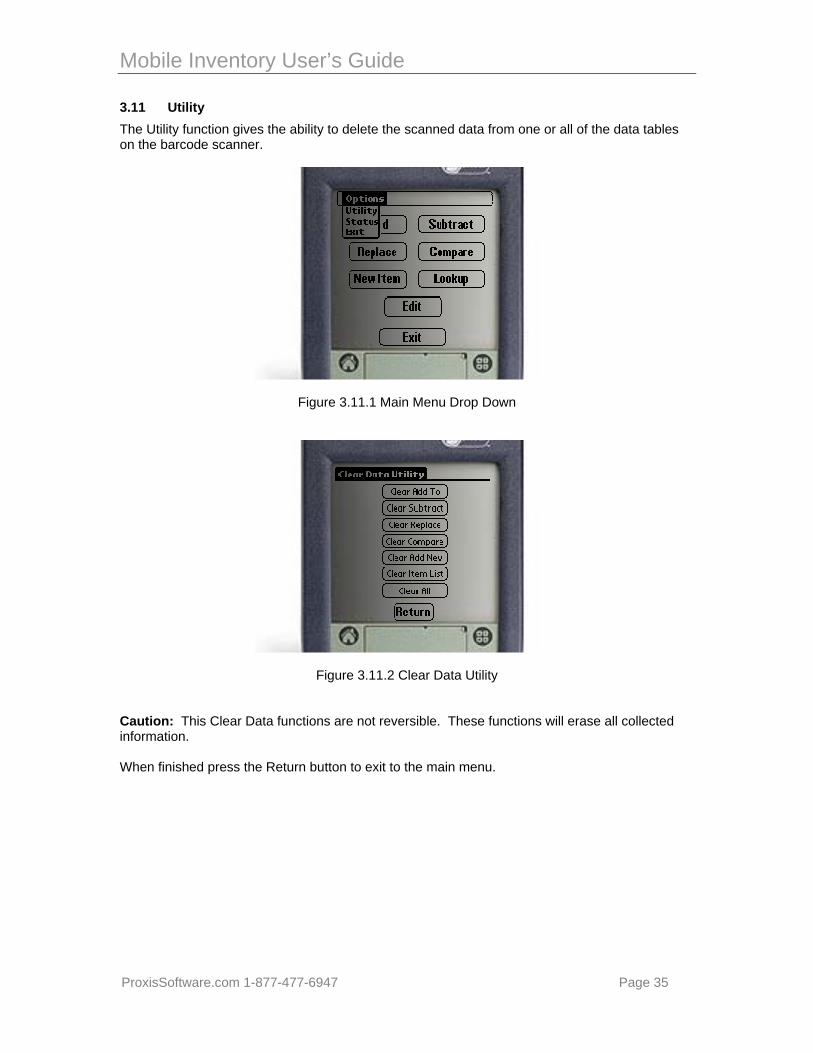
3.11 Utility The Utility function gives the ability to delete the scanned data from one or all of the data tables on the barcode scanner.
Figure 3.11.1 Main Menu Drop Down
Figure 3.11.2 Clear Data Utility
Caution: This Clear Data functions are not reversible. These functions will erase all collected information. When finished press the Return button to exit to the main menu.
Mobile Inventory User’s Guide
ProxisSoftware.com 1-877-477-6947 Page 36
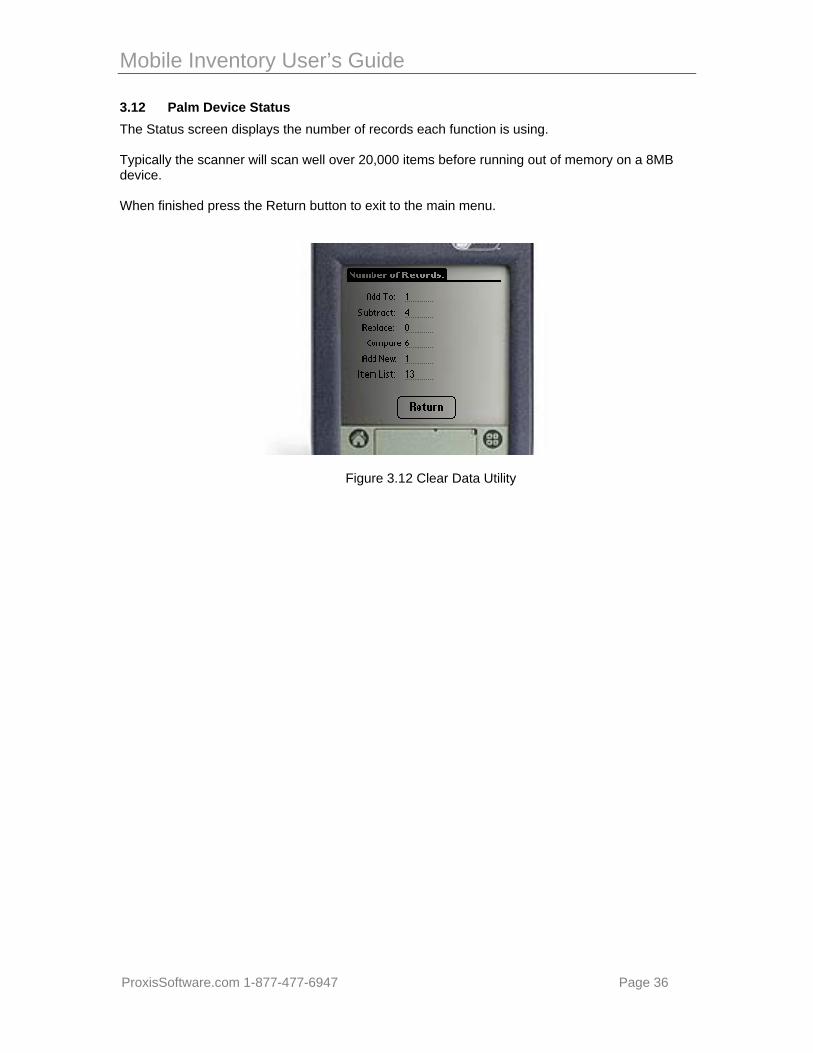
3.12 Palm Device Status The Status screen displays the number of records each function is using. Typically the scanner will scan well over 20,000 items before running out of memory on a 8MB device. When finished press the Return button to exit to the main menu.
Figure 3.12 Clear Data Utility
Mobile Inventory User’s Guide
ProxisSoftware.com 1-877-477-6947 Page 37
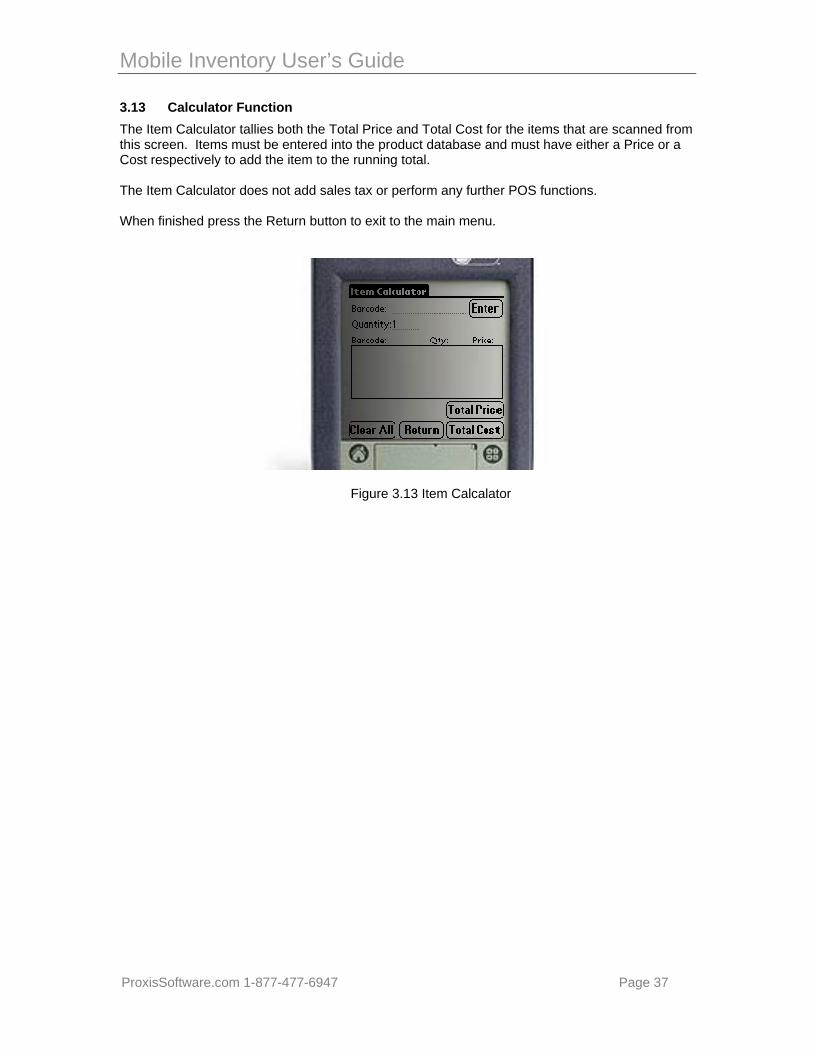
3.13 Calculator Function The Item Calculator tallies both the Total Price and Total Cost for the items that are scanned from this screen. Items must be entered into the product database and must have either a Price or a Cost respectively to add the item to the running total. The Item Calculator does not add sales tax or perform any further POS functions. When finished press the Return button to exit to the main menu.
Figure 3.13 Item Calcalator
Mobile Inventory User’s Guide
ProxisSoftware.com 1-877-477-6947 Page 38
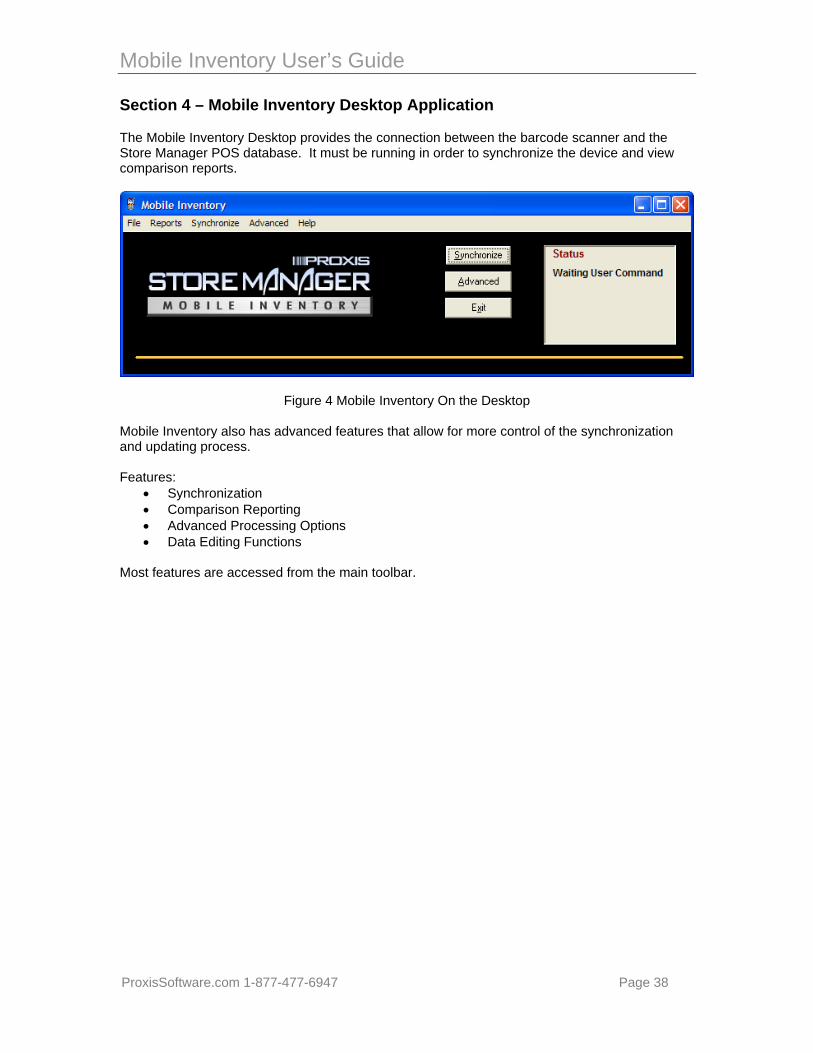
Section 4 – Mobile Inventory Desktop Application
The Mobile Inventory Desktop provides the connection between the barcode scanner and the Store Manager POS database. It must be running in order to synchronize the device and view comparison reports.
Figure 4 Mobile Inventory On the Desktop Mobile Inventory also has advanced features that allow for more control of the synchronization and updating process. Features:
• Synchronization • Comparison Reporting • Advanced Processing Options • Data Editing Functions
Most features are accessed from the main toolbar.
Mobile Inventory User’s Guide
ProxisSoftware.com 1-877-477-6947 Page 39
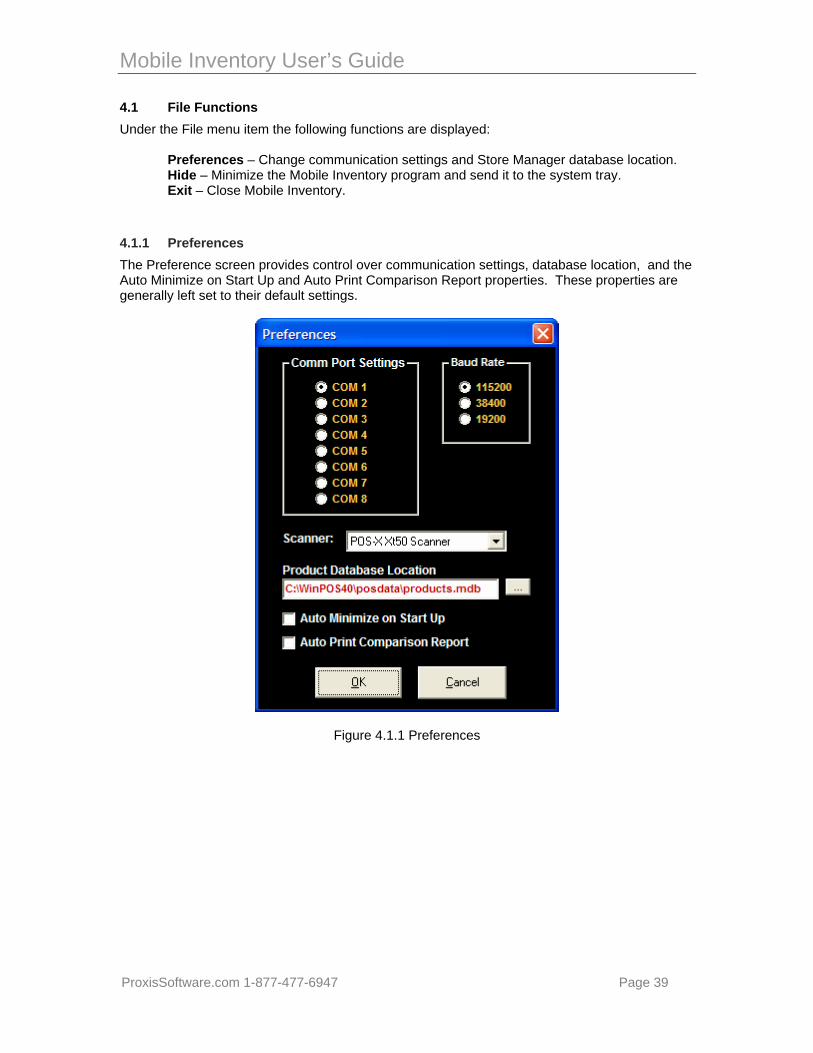
4.1 File Functions Under the File menu item the following functions are displayed:
Preferences – Change communication settings and Store Manager database location. Hide – Minimize the Mobile Inventory program and send it to the system tray. Exit – Close Mobile Inventory.
4.1.1 Preferences The Preference screen provides control over communication settings, database location, and the Auto Minimize on Start Up and Auto Print Comparison Report properties. These properties are generally left set to their default settings.
Figure 4.1.1 Preferences
Mobile Inventory User’s Guide
ProxisSoftware.com 1-877-477-6947 Page 40
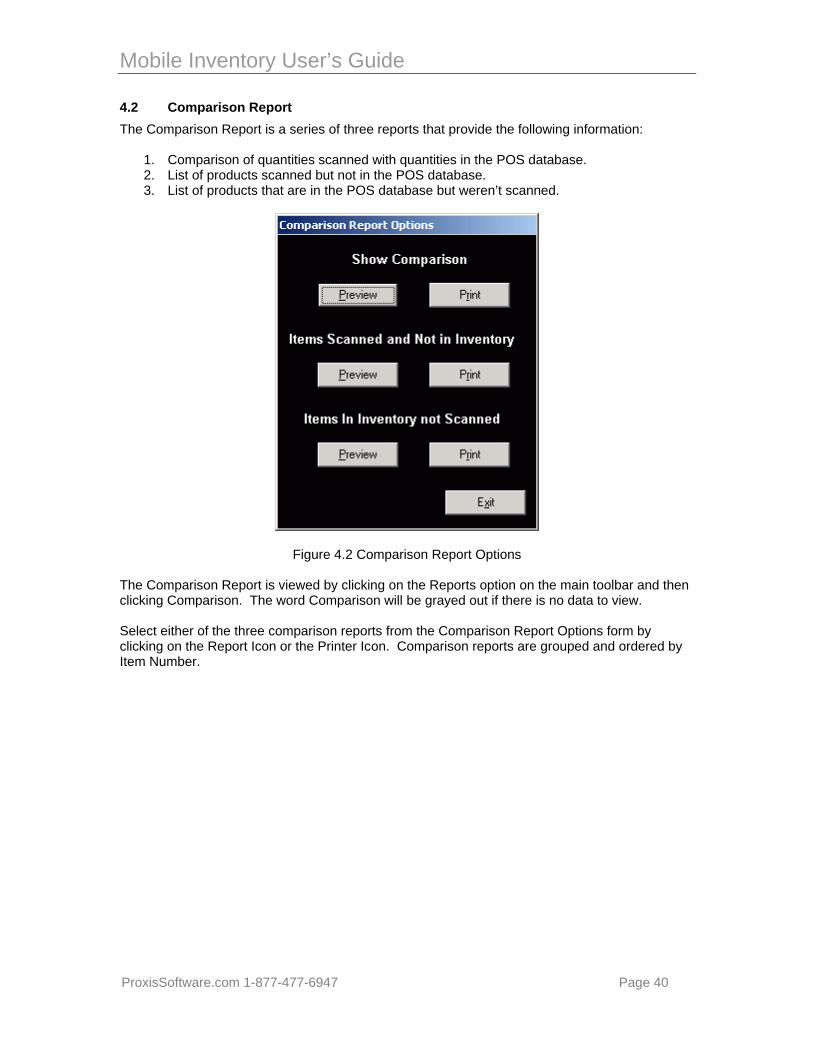
4.2 Comparison Report The Comparison Report is a series of three reports that provide the following information:
1. Comparison of quantities scanned with quantities in the POS database. 2. List of products scanned but not in the POS database. 3. List of products that are in the POS database but weren’t scanned.
Figure 4.2 Comparison Report Options The Comparison Report is viewed by clicking on the Reports option on the main toolbar and then clicking Comparison. The word Comparison will be grayed out if there is no data to view. Select either of the three comparison reports from the Comparison Report Options form by clicking on the Report Icon or the Printer Icon. Comparison reports are grouped and ordered by Item Number.

Mobile Inventory User’s Guide
ProxisSoftware.com 1-877-477-6947 Page 41
4.3 Synchronize The Synchronize option on the main toolbar will initiate the synchronization process. This process will download all scanned data, including price updates, and then update the Store Manager database with this data. The second part of the synchronization process will upload your product information to the barcode scanner.
Figure 4.3 Synchronize Confirmation Information sent to the scanner during synchronization:
• Item Number/Barcode • Price • Cost • MSRP • Quantity on hand • Description • Vendor
Advanced Synchronization features will be covered in section 4.4.
Mobile Inventory User’s Guide
ProxisSoftware.com 1-877-477-6947 Page 42
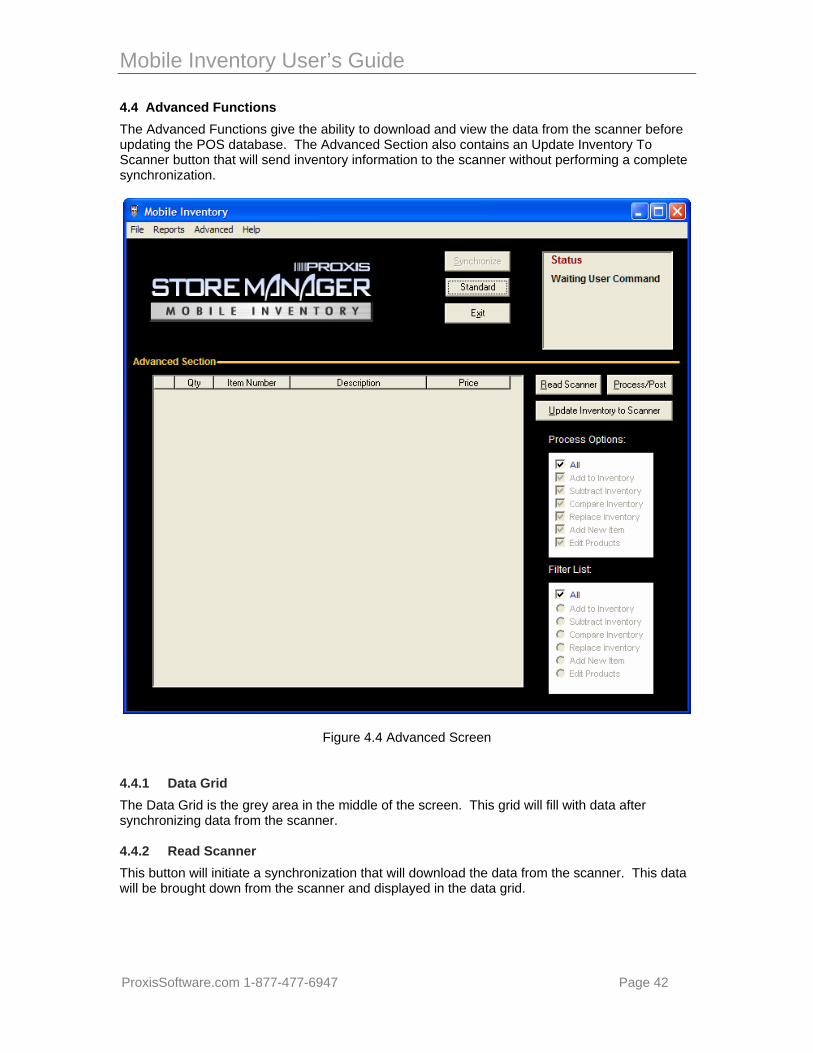
4.4 Advanced Functions The Advanced Functions give the ability to download and view the data from the scanner before updating the POS database. The Advanced Section also contains an Update Inventory To Scanner button that will send inventory information to the scanner without performing a complete synchronization.
Figure 4.4 Advanced Screen
4.4.1 Data Grid The Data Grid is the grey area in the middle of the screen. This grid will fill with data after synchronizing data from the scanner.
4.4.2 Read Scanner This button will initiate a synchronization that will download the data from the scanner. This data will be brought down from the scanner and displayed in the data grid.
Mobile Inventory User’s Guide
ProxisSoftware.com 1-877-477-6947 Page 43
4.4.3 Process/Post This button will send the data in the data grid to the Store Manager product database. Any changes made to items in the data grid will also be sent to the POS database. 4.4.4 Update Inventory to Scanner Sends inventory information (barcode, price, cost, quantity, description and vendor) to the scanner. 4.4.5 Process Options Provides a filter for choosing which data sets are processed and sent to update or append to the Store Manager product database. 4.4.6 Filter List Provides a filter list for the data grid. By checking a specific filter the data grid will be limited to just the data that has been scanned for that particular function. Checking All will show a complete list of scanned data.

Mobile Inventory User’s Guide
ProxisSoftware.com 1-877-477-6947 Page 44
Appendix A: The Xt50 Alpha Keyboard
The Alpha Keyboard feature on the Xt50 barcode scanner allows for keying in letters using the numeric keypad. The Alpha Keyboard functions just like most standard cell phone texting functions. To enter a letter using the keypad:
1. Press the “ALPHA” key. a. An “A” will appear above the battery indicator.
2. Press the key that has the desired letter. a. Example1: for the letter “A” press the 2 key once. b. Example2: for the letter “B” press the 2 key twice.
To enter a lower case letter:
1. Press the “ALPHA” key twice a. A small “a” will appear above the battery indicator.
2. Press the key that has the desired letter. a. Example1: for the letter “a” press the 2 key once. b. Example2: for the letter “b” press the 2 key twice.
Pressing the “ALPHA” key three times will bring up the function characters. This mode is indicated by a “F” above the battery indicator. The function characters is an extended letter set that is rarely used. To return to numeric input, press the “ALPHA” key until the letter function indicator (“A”, “a” or “F”) disappears.
Mobile Inventory User’s Guide
ProxisSoftware.com 1-877-477-6947 Page 45
Appendix B: Device Registration
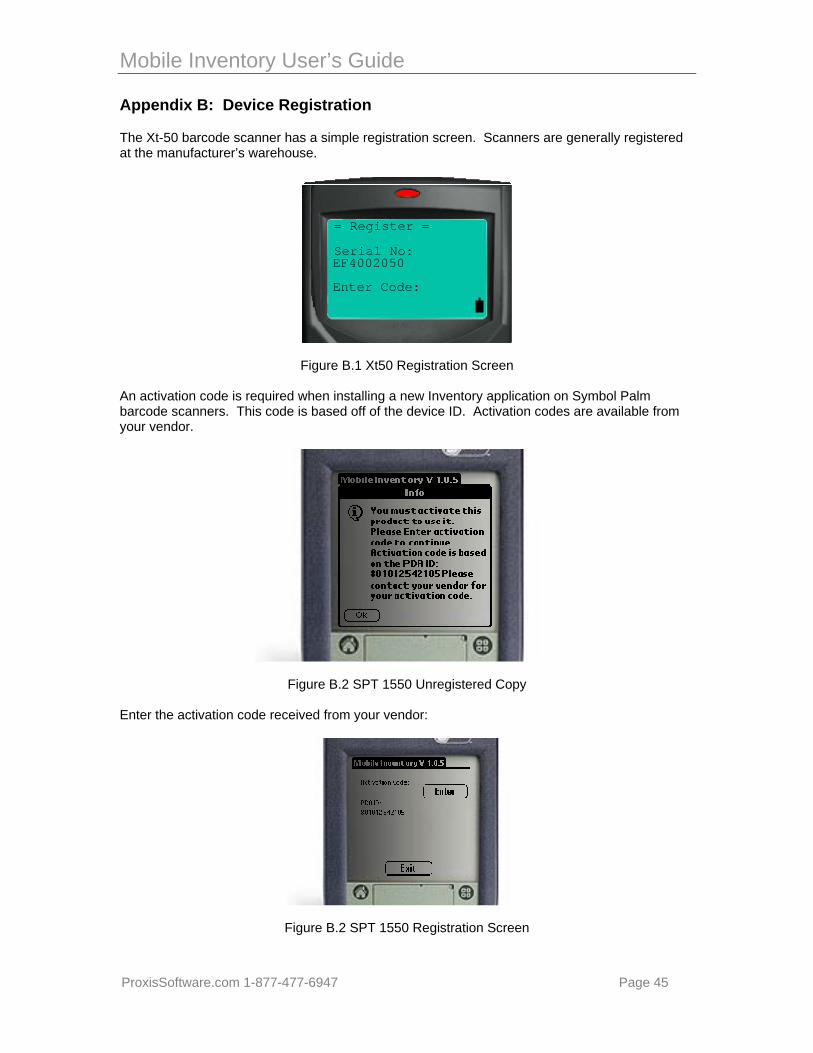
The Xt-50 barcode scanner has a simple registration screen. Scanners are generally registered at the manufacturer’s warehouse.
Figure B.1 Xt50 Registration Screen An activation code is required when installing a new Inventory application on Symbol Palm barcode scanners. This code is based off of the device ID. Activation codes are available from your vendor.
Figure B.2 SPT 1550 Unregistered Copy Enter the activation code received from your vendor:
Figure B.2 SPT 1550 Registration Screen
= Register =
Serial No:EF4002050
Enter Code:
Mobile Inventory User’s Guide
ProxisSoftware.com 1-877-477-6947 Page 46
Appendix C: Installing Palm Files
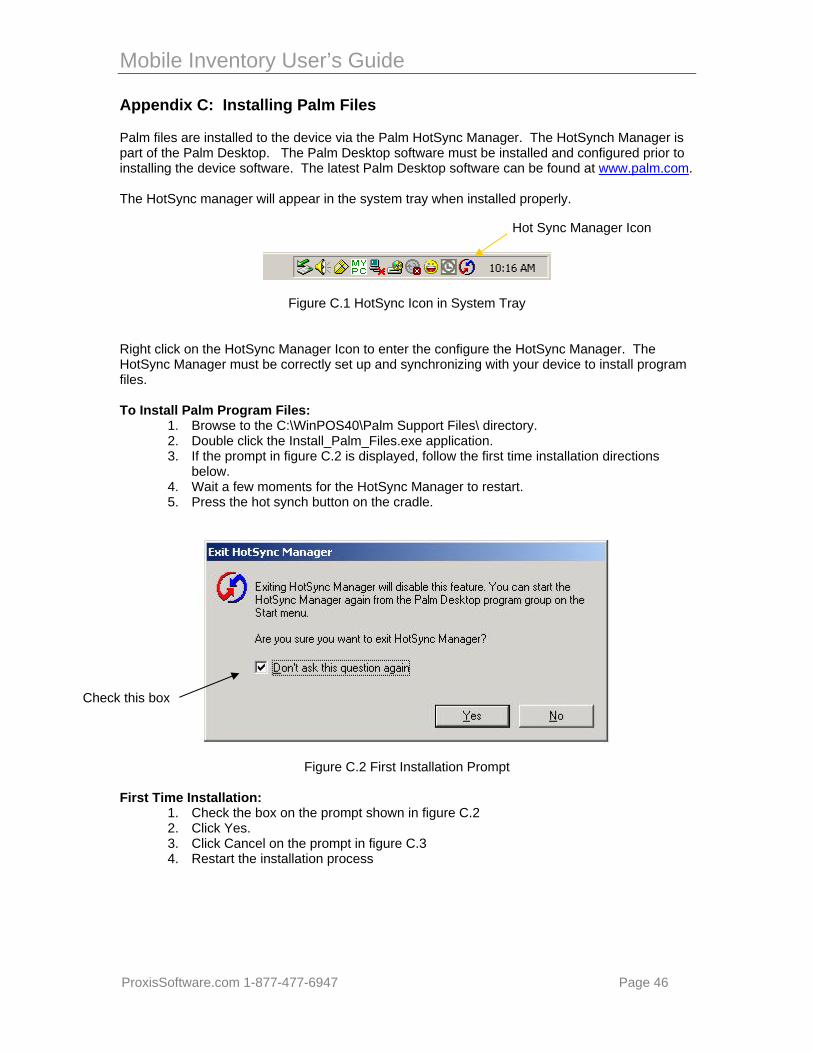
Palm files are installed to the device via the Palm HotSync Manager. The HotSynch Manager is part of the Palm Desktop. The Palm Desktop software must be installed and configured prior to installing the device software. The latest Palm Desktop software can be found at www.palm.com. The HotSync manager will appear in the system tray when installed properly.
Figure C.1 HotSync Icon in System Tray Right click on the HotSync Manager Icon to enter the configure the HotSync Manager. The HotSync Manager must be correctly set up and synchronizing with your device to install program files. To Install Palm Program Files:
1. Browse to the C:\WinPOS40\Palm Support Files\ directory. 2. Double click the Install_Palm_Files.exe application. 3. If the prompt in figure C.2 is displayed, follow the first time installation directions
below. 4. Wait a few moments for the HotSync Manager to restart. 5. Press the hot synch button on the cradle.
Figure C.2 First Installation Prompt First Time Installation:
1. Check the box on the prompt shown in figure C.2 2. Click Yes. 3. Click Cancel on the prompt in figure C.3 4. Restart the installation process
Hot Sync Manager Icon
Check this box
Mobile Inventory User’s Guide
ProxisSoftware.com 1-877-477-6947 Page 47
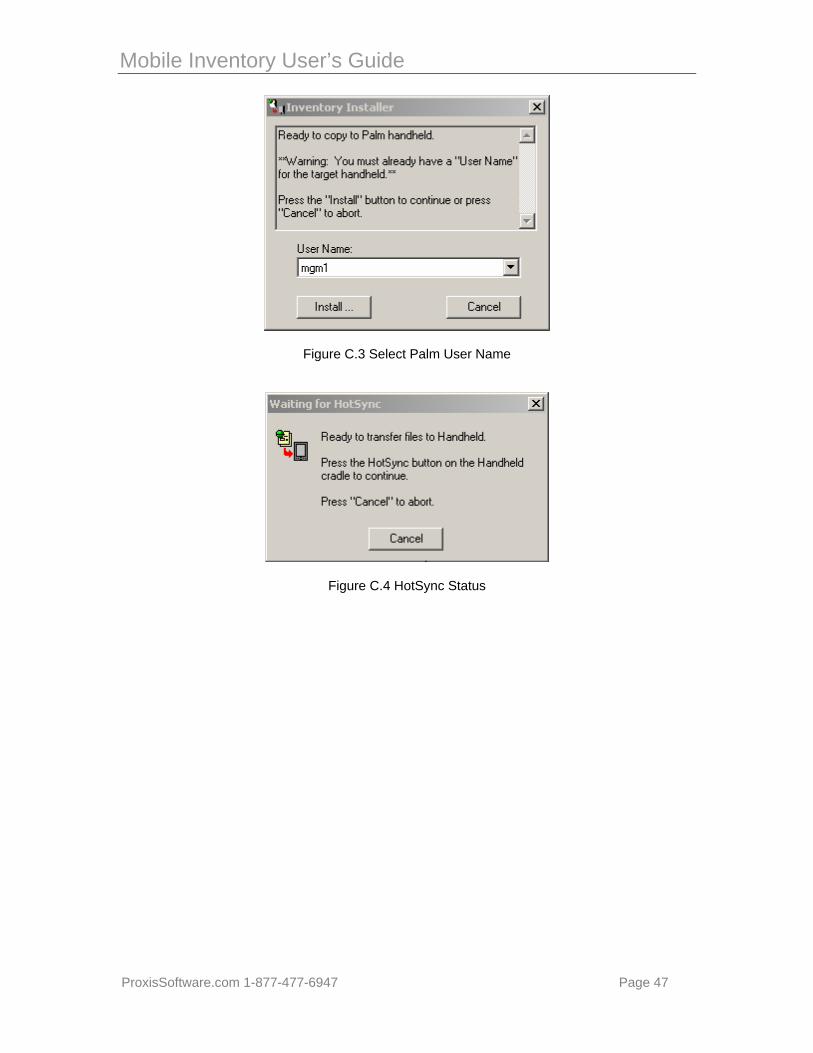
Figure C.3 Select Palm User Name
Figure C.4 HotSync Status