MITEL Unified Communicatordownload.unifiedcommunicatorexpress.com/ucx/3.3/UCExpress_3.3_IT... ·...
89
IT and Administrator Guide for UC Express Release 3.3 MITEL Unified Communicator Express
Transcript of MITEL Unified Communicatordownload.unifiedcommunicatorexpress.com/ucx/3.3/UCExpress_3.3_IT... ·...

IT and Administrator Guide for UC Express Release 3.3
MITEL
Unified Communicator Express
Mitel Unified Communicator Express- IT and Administrator Guide
NOTICE
The information contained in this document is believed to be accurate in all respects but is not warranted by Mitel Networks Corporation (MITEL®). The information is subject to change without notice and should not be construed in any way as a commitment by Mitel or any of its affiliates or subsidiaries. Mitel and its affiliates and subsidiaries assume no responsibility for any errors or omissions in this document. Revisions of this document or new editions of it may be issued to incorporate such changes.
No part of this document can be reproduced or transmitted in any form or by any means - electronic or mechanical - for any purpose without written permission from Mitel Networks Corporation.
TRADEMARKS Mitel and the Mitel Logo are trademarks of Mitel Networks Corporation.
Mitel Unified Communicator Express and UC Express are trademarks of Mitel Networks Corporation or its Licensors.
Windows, Outlook, Active Directory and Microsoft are trademarks of Microsoft Corporation.
Adobe Acrobat Reader is a registered trademark of Adobe Systems Incorporated.
Other product names mentioned in this document may be trademarks of their respective companies and are hereby acknowledged.
Mitel Unified Communicator Express IT and Administrator Guide Release # 3.2
May 2012
®, Trademark of Mitel Networks Corporation © Copyright 2009, Mitel Networks Corporation or its Licensors
All rights reserved

Table of Contents
1
NOTICE ....................................................................................................................... II
ABOUT MITEL UNIFIED COMMUNICATOR EXPRESS ........................................... 5
SUPPORTED ENVIRONMENTS ................................................................................ 6
MITEL 3300 ICP CONFIGURATION .......................................................................... 8 Enable MiTAI/TAPI Computer Integration ....................................................................................... 8 Class of Service Settings ................................................................................................................ 8 DN2IP Lookup Configuration (Optional) .......................................................................................... 8 Multicall Lines .................................................................................................................................. 9 Provisioning a Softphone ................................................................................................................ 9
Enabling MiTAI/TAPI Computer Integration ........................................................................ 9
ENABLING MITAI/TAPI COMPUTER INTEGRATION .............................................. 9
Class of Service Settings ................................................................................................... 10 Requirements ................................................................................................................................ 10 Step-by-Step Procedure ................................................................................................................ 10
Configuring DN2IP Support ............................................................................................... 12 Step-by-Step Procedure ................................................................................................................ 13
Multicall Lines .................................................................................................................... 17
Provisioning a Softphone ................................................................................................... 18 Verifying SIP User Licenses .......................................................................................................... 18 Supporting Transfer/Conference ................................................................................................... 20 Enable Device-based In-Call Features ......................................................................................... 22 STUN Servers ............................................................................................................................... 23
MITEL 5000 CP CONFIGURATION ......................................................................... 24 Enable System OAI Level 2 Socket Connections ......................................................................... 24 Specify Listening Port ................................................................................................................... 24 Program Station Password ........................................................................................................... 24
Enabling System OAI Level 2 Socket Connections ........................................................... 24 Enabling UCX Support .................................................................................................................. 26 CT Gateways ................................................................................................................................ 27
Specifying a Listening Port ................................................................................................ 28
TO LOOKUP THE LISTENING PORT ..................................................................... 28
Programming Station Passwords ...................................................................................... 29 Changing Station Password .......................................................................................................... 29

Mitel Unified Communicator Express- IT and Administrator Guide
2
MITEL BORDER GATEWAY SUPPORT ................................................................ 30 Configure the Mitel 3300 ICP ....................................................................................................... 30 Enable SIP Connector on the Mitel Border Gateway ................................................................... 30
Configuring the Mitel 3330 ICP .......................................................................................... 30
Enabling SIP Connector .................................................................................................... 31
PC CONNECTIVITY ................................................................................................. 32 MiNET Mode ................................................................................................................................. 32 SIP Mode ...................................................................................................................................... 33
CORPORATE DIRECTORY .................................................................................... 34
Overview of LDAP ............................................................................................................. 34 Supported LDAP Servers ............................................................................................................. 34
Contact Lookup ................................................................................................................. 35
Advanced Directory Settings ............................................................................................. 36
Lotus Notes Domino Server ......................................................................................................... 37 URL .............................................................................................................................................. 37 Search Filter ................................................................................................................................. 39 Authentication Types .................................................................................................................... 40 Phone Number Fields ................................................................................................................... 41 Custom Phone Number Fields ..................................................................................................... 45
EXAMPLE ................................................................................................................ 45
MASS DEPLOYMENT ............................................................................................. 46
Overview ............................................................................................................................ 46
Command Line Options ................................................................................................................ 46 Deployment Tools ......................................................................................................................... 46 Install-time Options ....................................................................................................................... 46
Command Line Options ..................................................................................................... 46
Software Deployment Tools .............................................................................................. 57 Deploying the default MSI package .............................................................................................. 57 Passing Install-time Options ......................................................................................................... 58 Configuring User-specific Settings During Deployment ................................................................ 59
Install-time Options ............................................................................................................ 59
Installation options ........................................................................................................................ 59 Configuration file ........................................................................................................................... 60 Starting installation ....................................................................................................................... 60 Installing with Batch Files ............................................................................................................. 61
3
CONFIGURING UC EXPRESS CLIENTS WITH DHCP ........................................... 62
Overview ............................................................................................................................ 62
DHCP Options ................................................................................................................... 62
Vendor Option String ..................................................................................................................... 63
Mapping Vendor Options to UC Express fields ................................................................. 65 Softphone Profile ........................................................................................................................... 65 Mitel 5000 CP Desktop Phone Profile ........................................................................................... 66 Mitel 5300 series IP desk phone Profile ........................................................................................ 66
Creating Vendor Option Strings ......................................................................................... 67
Example 1 - Softphone Profile ...................................................................................................... 67 Example 2 - Mitel 5300 series IP desk phone Profile .................................................................... 68 Example 3 - Mitel 5000 CP Desktop Phone Profile ....................................................................... 68 Example 4 - Multiple Profile Support ............................................................................................. 69 Mitel Vendor ID – id:ipphone.mitel.com ........................................................................................ 69 Option Priority ............................................................................................................................... 69
How DHCP Settings Work ................................................................................................. 71 The User Experience .................................................................................................................... 71 Changing DHCP Options .............................................................................................................. 71 Overriding DHCP Options ............................................................................................................. 72
Configuring the DHCP Server ........................................................................................... 73 Overview ....................................................................................................................................... 73
ADDING DHCP OPTION 43 FOR UC EXPRESS TO A MITEL 3300 ICP ............... 73
ADDING DHCP OPTION 125 FOR UC EXPRESS TO A MITEL 3300 ICP ............. 74 Other DHCP Servers ..................................................................................................................... 75
Mobile Users ...................................................................................................................... 75
UC EXPRESS ON A TERMINAL SERVER .............................................................. 76
Requirements .................................................................................................................... 76 Editions ......................................................................................................................................... 76 Terminal Services Notifications ..................................................................................................... 76 License – Max Sessions ............................................................................................................... 76
Special Considerations ...................................................................................................... 77 UC Express Softphone .................................................................................................................. 77 Telephony Location ....................................................................................................................... 77
Installing on a Terminal Server .......................................................................................... 77 Use Add or Remove Programs ..................................................................................................... 77

Mitel Unified Communicator Express- IT and Administrator Guide
4
YOU CAN NOW RUN UC EXPRESS TO PROVIDE THE LICENSE. ..................... 78 Enabling Terminal Services Notifications ..................................................................................... 78 Telephony Location Settings ........................................................................................................ 78
NETWORK REQUIREMENTS ................................................................................. 79 Phone Connectivity ....................................................................................................................... 79
EXAMPLE: ............................................................................................................... 79 LDAP Connectivity ........................................................................................................................ 79 Global Catalog Connectivity ......................................................................................................... 80 Mitel 3300 ICP Connectivity ......................................................................................................... 80 Mitel 5000 CP Connectivity .......................................................................................................... 80 Mitel Border Gateway ................................................................................................................... 81 Softphone RTP Traffic .................................................................................................................. 81
APPLICATION COMPONENTS .............................................................................. 82
UC Express Folders .......................................................................................................... 82
Important Files ................................................................................................................... 84
5
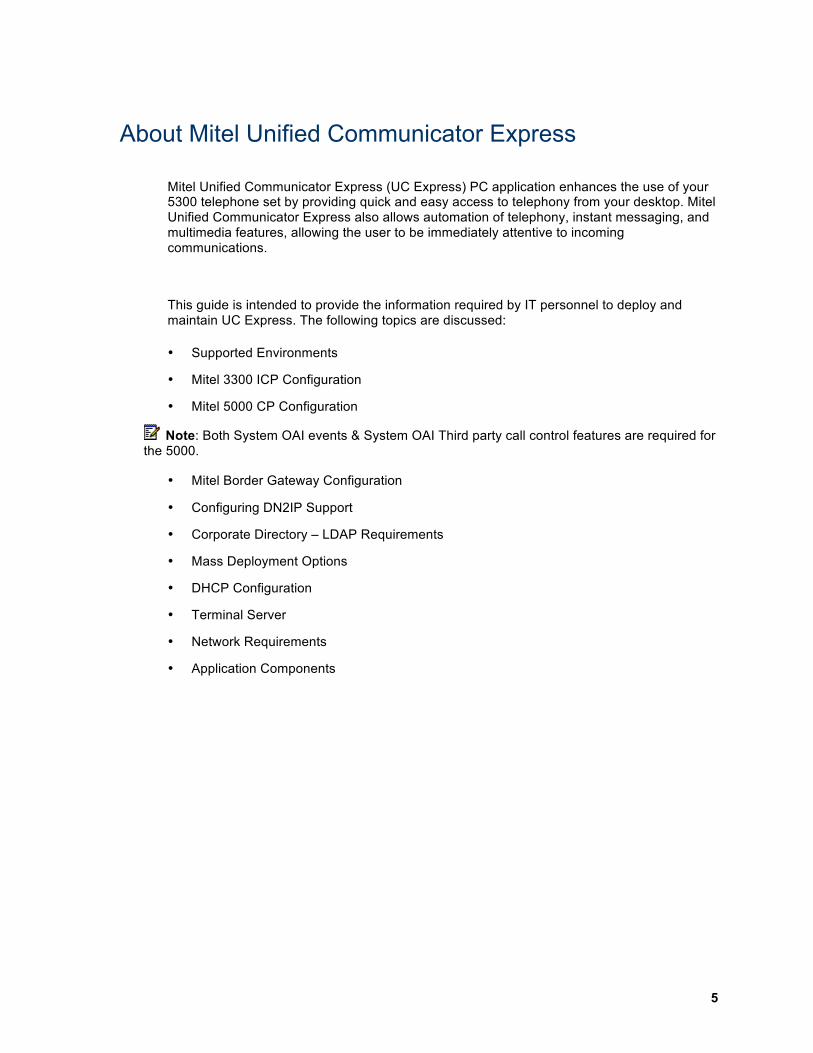
About Mitel Unified Communicator Express
Mitel Unified Communicator Express (UC Express) PC application enhances the use of your 5300 telephone set by providing quick and easy access to telephony from your desktop. Mitel Unified Communicator Express also allows automation of telephony, instant messaging, and multimedia features, allowing the user to be immediately attentive to incoming communications.
This guide is intended to provide the information required by IT personnel to deploy and maintain UC Express. The following topics are discussed:
• Supported Environments
• Mitel 3300 ICP Configuration
• Mitel 5000 CP Configuration
Note: Both System OAI events & System OAI Third party call control features are required for the 5000.
• Mitel Border Gateway Configuration
• Configuring DN2IP Support
• Corporate Directory – LDAP Requirements
• Mass Deployment Options
• DHCP Configuration
• Terminal Server
• Network Requirements
• Application Components

Mitel Unified Communicator Express- IT and Administrator Guide
6
Supported Environments
Mitel Unified Communicator Express provides desktop integration with Mitel’s telephony products and other systems in a network environment.
The support for each component that integrates with Unified Communicator Express is summarized below.
Component Description Supported Version
Platforms The operating systems on which you can install Unified Communicator Express. This includes Terminal Services support.
• Windows 7 • Windows 8
Microsoft Outlook The Outlook clients supported with Unified Communicator Express. You can locate Outlook contacts and dial their number directly from Unified Communicator Express.
• Outlook 2007 SP1 • Outlook 2010
Instant Messaging The IM clients supported with Unified Communicator Express. Integration with IM clients provides presence features, enabling you to dial your contacts according to their online status for instance.
• Windows Live Messenger 8.5
• Windows Live Messenger 9
Mitel Switches The Mitel phone switches which integrate with Unified Communicator Express.
• Mitel 3300 ICP 9.0 UR3 and greater
• Mitel Communications Director 10.0 UR1 and greater
• Mitel 5000 CP 4.0 or Greater
Mitel Phones The Mitel phones that are supported with Unified Communicator Express.
• Mitel 5312 (MiNET / SIP) • Mitel 5324 (MiNET / SIP) • Mitel 5320 (MiNET ) • Mitel 5330 (MiNET / SIP) • Mitel 5340 (MiNET / SIP) • Mitel 5360 (MiNET ) • Mitel 8528 Digital Phone • Mitel 8568 Digital Phone
Component Description Supported Version
LDAP Servers The LDAP servers which you can use for searching for contacts with Unified Communicator Express. You can locate corporate contacts and dial their number directly from Unified Communicator
• Standard LDAP

7
Express. Mitel Border Gateway
The Mitel Border Gateway or Teleworker systems supported with Unified Communicator Express. The Mitel Border Gateway enables external softphone users to connect to the internal Mitel 3300 ICP.
• Mitel Border Gateway 5.0 • MAS 1.2 Teleworker
DHCP Server The DHCP servers which you can use to deliver configuration settings to Unified Communicator Express.
• Mitel 3300 ICP 9.0 UR2 or greater DHCP Server
• Mitel Communications Director 10.0 UR1 DHCP Server
Configuration details required for each component is provided in the sections that follow.
Note: Manual installation and end-user configuration are covered in the Mitel Unified Communicator Express User Guide.
Mitel Unified Communicator Express- IT and Administrator Guide
8
Mitel 3300 ICP Configuration
To support Mitel Unified Communicator Express with a Mitel 3300 ICP, you must perform some configuration on the switch. The configuration requirements are summarized below.
Note: When you use UC Express with a phone on a Mitel 3300 ICP, the application controls the phone directly; therefore, the number of users you support has a limited affect on switch performance.
Enable MiTAI/TAPI Computer Integration
The Mitel 3300 ICP must have “MiTAI/TAPI Computer Integration” enabled in the licensing options. This enables "HCI/CTI Advanced Telephony Control" and "HCI/CTI Basic Telephony Control".
Class of Service Settings
Any phone that you wish to use with Mitel Unified Communicator Express must be part of a Class of Service group which has the following settings enabled:
• HCI/CTI/TAPI Call Control Allowed
• HCI/CTI/TAPI Monitor Allowed
Note: This configuration is mandatory to support Mitel Unified Communicator Express.
DN2IP Lookup Configuration (Optional)
In previous versions you associated with a phone by providing the phone’s IP address and PC Connectivity password. This presents a problem in environments where the IP address of the phone changes frequently, or users hot desk into different phones, each with a different IP address.
With this release of Mitel Unified Communicator Express you can associate with a phone by providing the phone’s DN instead of its IP address. This frees the user from having to determine the IP address, and allows Mitel Unified Communicator Express to connect when the IP address changes, or if the user hot desks into a different phone.
You must perform configuration on the Mitel 3300 ICP in order to support DN2IP lookups.
Note: This configuration is optional and is only required if you want to enable users to associate Mitel Unified Communicator Express to a phone by its DN.

9
Multicall Lines
There are special considerations relating to multicall lines that you should keep in mind when programming a phone on the Mitel 3300 ICP for use with Unified Communicator Express. The considerations are described later in this section.
Provisioning a Softphone
If you want to support the UC Express softphone on your Mitel 3300 ICP, you will need to provision a “Generic SIP Phone” for each user who needs to use the softphone.
Enabling MiTAI/TAPI Computer Integration
You cannot enable "HCI/CTI Advanced Telephony Control" and "HCI/CTI Basic Telephony Control" unless you have enabled “MiTAI/TAPI Computer Integration” in the licensing options.
Enabling MiTAI/TAPI Computer Integration
To enable MiTAI/TAPI Computer Integration:
1. Login to the System Administrator Tool on the Mitel 3300 ICP and navigate to the “License and Option Selection” form.
2. Verify that “MiTAI/TAPI Computer Integration” is enabled. If it is enabled it will have a “Yes” beside it as shown
3. If it is not enabled then you must change the option from “No” to “Yes”.
Note: Changing the “MiTAI/TAPI Computer Integration” option does not require you to synchronize with the Mitel AMC licensing server.

Mitel Unified Communicator Express- IT and Administrator Guide
10
Class of Service Settings
This section describes the Class of Service settings required to enable you to use Mitel Unified Communicator Express.
Note: You must first enable “MiTAI/TAPI Computer Integration” as shown above.
Requirements
All phones must be a member of a Class of Service that has the following two settings enabled:
• HCI/CTI/TAPI Call Control Allowed
• HCI/CTI/TAPI Monitor Allowed
Step-by-Step Procedure
This section provides the steps to program the required Class of Service settings on the Mitel 3300 ICP.
Overview
The basic steps you need to perform on the Mitel 3300 ICP in order to configure Class of Service settings required by Mitel Unified Communicator Express are described in the following list:
1. Edit the Class of Service and enable the two required settings.
2. Set the Class of Service for each phone to the one modified in the previous step.
Details are provided below.
Configuring the Class of Service
To configure the Class of Service follow these steps:
1. Login to the System Administrator Tool on the Mitel 3300 ICP and navigate to the “Class of Service Options Assignment” form.
2. Select the relevant Class of Service number and click “Change”

11
3. Scroll down and enable the following settings:
• HCI/CTI/TAPI Call Control Allowed
• HCI/CTI/TAPI Monitor Allowed
4. Click “Save”.
Setting the Class of Service for the Phones
To set the Class of Service for a phone, follow these steps:
1. Login to the System Administrator Tool on the Mitel 3300 ICP and navigate to the “Station Service Assignment” form.
2. Select the DN for the phone and click on “Change”
3. Set the three Class of Service numbers to the one used in the previous section.
4. Click “Save”.
Note: If you need to use more than one Class of Service for the phone then each one needs to be configured to support Mitel Unified Communicator Express.

Mitel Unified Communicator Express- IT and Administrator Guide
12
Configuring DN2IP Support
This section describes the requirements and steps for configuring a Mitel 3300 ICP to support DN2IP lookups with Mitel Unified Communicator Express.
The requirements are summarized below.
DN2IP User Account
For DN2IP lookups to work you must create a user account on the Mitel 3300 ICP that has read access to the “IP Telephones - All” form in Enterprise System Manager.
This form contains information about every IP telephone on the Mitel 3300 ICP, including the DN and current IP address of the phone.
Note: You do not need to perform any configuration on this page.
System Administrator Policies
The recommended way of providing access to the “IP Telephones – All” form is by creating a custom System Administrator Policy specifically for enabling DN2IP lookups to be performed, and then assigning this policy to the DN2IP account.
We recommend that you create an Administrator Policy named “DN2IP” with Default Access Type set to “No Access”. Then customize the DN2IP Administrator Policy to enable Read-only access to the “IP Telephones – All” form.

13
User Authorization Profiles
After you create the DN2IP System Administrator Policy you must create a user account and assign it to the DN2IP policy.
There are three basic approaches you can follow for providing DN2IP lookup for users:
• Create one “master” DN2IP account for all users.
• Create individual DN2IP accounts for each user, or possibly department.
In either case you need to assign the DN2IP Administrator Policy to the account or accounts.
Note: If you enter the login credentials improperly in Mitel Unified Communicator Express, it is possible to lock the account out so that all DN2IP lookups fail. This is especially important when you use one account for all users – one badly configured install can lock out all users from connecting to their phone. For this reason it is important to verify the credentials when you enter them in Mitel Unified Communicator Express by clicking on the “Test” button.
Step-by-Step Procedure
This section provides the steps required to configure DN2IP support.
Overview
The basic steps you need to perform on the Mitel 3300 ICP in order to provide DN2IP support with Mitel Unified Communicator Express are described in the following list:
1. Create a custom System Administrator Profile for DN2IP
2. Give the profile read access to the “IP Telephones - All” form and No Access to all other forms.
3. Create a DN2IP user and assign it the DN2IP System Administrator Profile.
Details are provided below.

Mitel Unified Communicator Express- IT and Administrator Guide
14
Creating the DN2IP Administrator Policy
The steps for creating the DN2IP Administrator Policy are described below.
1. Login to the System Administrator Tool on the Mitel 3300 ICP and navigate to the “System Administrator Policies” form.
2. Click on “Add” at the top.
3. Provide a Policy Name such as “DN2IP”, set Default Access Type to “No Access”, and click “Save”

15
4. Select the DN2IP policy in the System Administrator Policies section and then click on “Change All Members”.
5. Scroll to the bottom of the Multi-Record Editing dialog and change the setting for “IP Telephones – All” from “No Access” to “Read Only”. Save changes.
The DN2IP System Administrator policy is now created.

Mitel Unified Communicator Express- IT and Administrator Guide
16
Creating the DN2IP Account
The steps for creating the DN2IP account are described below.
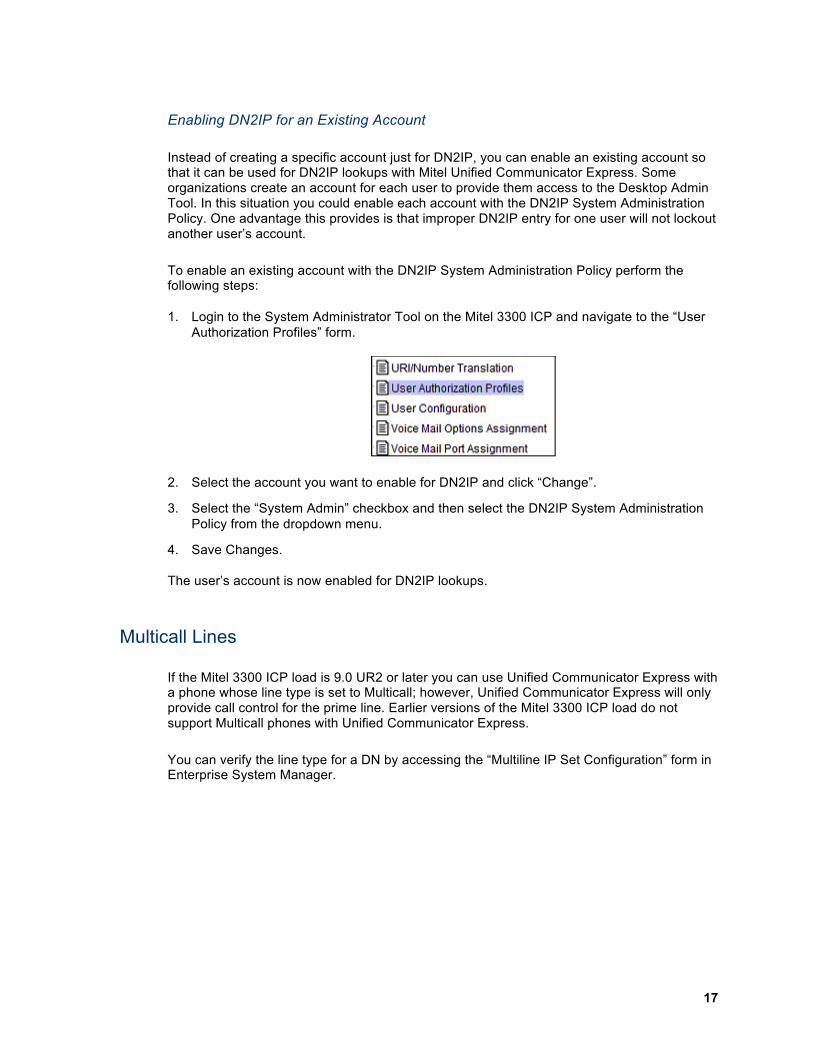
1. Login to the System Administrator Tool on the Mitel 3300 ICP and navigate to the “User Authorization Profiles” form.
2. Click on “Add”
3. Provide a username such as “DN2IP”, login ID, and password. Also be sure to select the DN2IP System Administrator policy as shown. Click the “Save” button.
The DN2IP account is now created.
17
Enabling DN2IP for an Existing Account
Instead of creating a specific account just for DN2IP, you can enable an existing account so that it can be used for DN2IP lookups with Mitel Unified Communicator Express. Some organizations create an account for each user to provide them access to the Desktop Admin Tool. In this situation you could enable each account with the DN2IP System Administration Policy. One advantage this provides is that improper DN2IP entry for one user will not lockout another user’s account.
To enable an existing account with the DN2IP System Administration Policy perform the following steps:
1. Login to the System Administrator Tool on the Mitel 3300 ICP and navigate to the “User Authorization Profiles” form.
2. Select the account you want to enable for DN2IP and click “Change”.
3. Select the “System Admin” checkbox and then select the DN2IP System Administration Policy from the dropdown menu.
4. Save Changes.
The user’s account is now enabled for DN2IP lookups.
Multicall Lines
If the Mitel 3300 ICP load is 9.0 UR2 or later you can use Unified Communicator Express with a phone whose line type is set to Multicall; however, Unified Communicator Express will only provide call control for the prime line. Earlier versions of the Mitel 3300 ICP load do not support Multicall phones with Unified Communicator Express.
You can verify the line type for a DN by accessing the “Multiline IP Set Configuration” form in Enterprise System Manager.

Mitel Unified Communicator Express- IT and Administrator Guide
18
Provisioning a Softphone
The UC Express softphone is a software-based SIP phone. To support softphone users you must add a “Generic SIP Phone” on the Mitel 3300 ICP for each softphone user. You also must ensure that you have enough SIP user licenses to support your user base.
Verifying SIP User Licenses
To verify that you have enough SIP user licenses, perform the following steps:
1. Login to the System Administrator Tool on the Mitel 3300 ICP and navigate to the “License and Option Selection” form.
2. View the “SIP User Licenses”. The number should be enough to support the total number of SIP users you need to support.
If you do not have enough licenses you will have to purchase more from your Mitel dealer. You should account for Mitel phones in SIP mode when you calculate your requirements.

19
Adding a Generic SIP Phone
The steps for adding a Generic SIP Phone are described below.
1. Login to the System Administrator Tool on the Mitel 3300 ICP and navigate to the “Multiline IP Set Configuration” form.
2. Click Add.
3. Set the Device Type to “Generic SIP Phone”
4. Provide the Number, User PIN, and Interconnect Number.
5. Click Save.

Mitel Unified Communicator Express- IT and Administrator Guide
20
The user will require the Number and the User PIN when they create a softphone profile. When creating the softphone profile, the Number is entered in the “User name or DN” field and the User PIN is entered in the “User password” field. They will also need the address of the Mitel 3300 ICP, which is provided in the “Server name or IP address” field.
A sample of the softphone profile fields is shown below.
Note: The client computers will require audio hardware to support audio output and a microphone input. Refer to the Users Guide for full details on configuring a softphone profile.
Supporting Transfer/Conference
To support transfer and conference features for the softphone you must add a second line for each SIP user.
To add a second line for a SIP user, perform the following steps:
1. Login to the System Administrator Tool on the Mitel 3300 ICP and navigate to the “Multiline Set Key Assignment” form.
2. Locate the user’s DN and highlight it.
3. Select a button number in the “Programmable Keys” section below and click on “Change Member”.
4. Complete the form as described below:
a. Provide a label of your choice.
b. Select ‘Multicall’ from the Line Type drop-down menu.
c. Leave URL blank.
d. Enter the SIP user’s DN in the Button Directory Number field.
e. Select ‘Ring’ from the Ring Type drop-down menu.
f. Leave MiXML Application set as Not Assigned.

21
The form should resemble the one shown below.
5. Click Save.
You should verify that the user can now use transfer and conference features with the UC Express softphone.

Mitel Unified Communicator Express- IT and Administrator Guide
22
Enable Device-based In-Call Features
Another requirement for Transfer/Conference feature support is to configure the SIP users to use device-based in-call features. This configuration option is controlled in the “SIP Device Capabilities Assignment” form. You may want to consider dedicating a SIP Device Capabilities Number to softphone users.
To enable device-based in-call features, perform the following steps:
1. Login to the System Administrator Tool on the Mitel 3300 ICP and navigate to the “SIP Device Capabilities Assignment” form.
2. Select a “SIP Device Capabilities Number” and click “Change”.
3. Select “Yes” beside “Replace System based with Device based In-Call Features”.
4. Click Save.
Then assign each softphone user to the same SIP Device Capabilities Number by performing the following steps:
1. Navigate to the “User Configuration” form.
2. Select the softphone user’s DN and click on “Change”.

23
3. Set the “SIP Device Capabilities” number to the one you modified above.
4. Click Save.
Note: When you create new softphone users remember to assign them to the proper SIP Capabilities number
STUN Servers
If your users are using the softphone behind a NAT firewall and they experience calls that appear to be successful, but no audio is heard on the call, or they experience one-way audio, they may need to specify a STUN server in the softphone advanced settings. The STUN server enables the softphone to pass its public IP address to the other party in the call instead of its private IP address. STUN servers are run by many organizations, and can be found by simply searching for STUN SERVER in Google. You may also choose to host your own STUN server.
The standard STUN server port is 3478.
Mitel Unified Communicator Express- IT and Administrator Guide
24
Mitel 5000 CP Configuration
To support Mitel Unified Communicator Express with a Mitel 5000 CP you must perform some configuration on the switch. The configuration requirements are summarized below.
Note: Both System OAI events & System OAI Third party call control features are required.
Enable System OAI Level 2 Socket Connections
The Mitel 5000 CP supports OAI which enables telephony applications such as UC Express to integrate with the switch’s call functions. To support OAI connections you must enable “System OAI Level 2” under System Sockets. You must also specify a password which you provide when creating a phone profile for a supported Mitel 5000 CP phone.
Specify Listening Port
The Mitel 5000 CP listens on a specific port for incoming socket requests (e.g., for voice mail, OAI, etc.). The default port is 4000 which should work in most cases but you may choose to change it to a different value. You must provide the listening port when creating a phone profile for a supported Mitel 5000 CP phone.
Program Station Password
UC Express relies on the Mitel 5000 CP Remote Programming feature. Each endpoint has a station password that enables remote programming. By default the password is the extension number of the endpoint. Users can change the password by using the “Program Station Password” feature code. You must provide the station password when creating a profile for a supported Mitel 5000 CP phone.
Enabling System OAI Level 2 Socket Connections
This section provides the steps to enable System OAI Level 2 socket connections.
To enable System OAI Level 2 Socket Connections, follow the steps below:
1. Login to the Mitel 5000 CP using the Session Manager Database programming utility.
2. Navigate to System Sockets
Verify that “System OAI Level 2” is enabled. If it is enabled it will have a “Yes” beside it as shown. If it is disabled, select the checkbox to change the setting from “No” to “Yes”.

25
3. Right-click and select “Edit password”. Provide a password and confirm it.
4. Click “OK” to save the new password.
Mitel Unified Communicator Express- IT and Administrator Guide
26
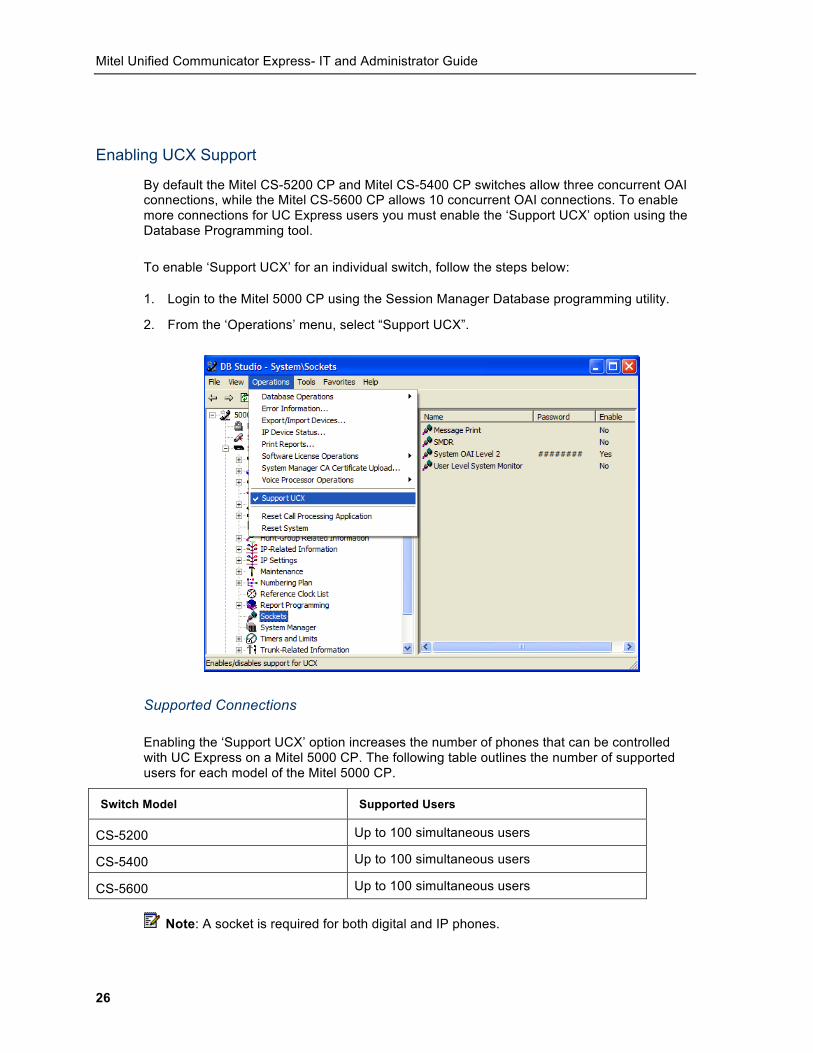
Enabling UCX Support
By default the Mitel CS-5200 CP and Mitel CS-5400 CP switches allow three concurrent OAI connections, while the Mitel CS-5600 CP allows 10 concurrent OAI connections. To enable more connections for UC Express users you must enable the ‘Support UCX’ option using the Database Programming tool.
To enable ‘Support UCX’ for an individual switch, follow the steps below:
1. Login to the Mitel 5000 CP using the Session Manager Database programming utility.
2. From the ‘Operations’ menu, select “Support UCX”.
Supported Connections
Enabling the ‘Support UCX’ option increases the number of phones that can be controlled with UC Express on a Mitel 5000 CP. The following table outlines the number of supported users for each model of the Mitel 5000 CP.
Switch Model Supported Users
CS-5200 Up to 100 simultaneous users
CS-5400 Up to 100 simultaneous users
CS-5600 Up to 100 simultaneous users
Note: A socket is required for both digital and IP phones.

27
CT Gateways
A CT Gateway acts as a proxy for OAI connections to a Mitel 5000 CP. If you have a CT Gateway in your environment users can use the address of the CT Gateway instead of the address of the Mitel 5000 CP when creating the phone profile.
If you have a large number of users you may prefer to use a CT Gateway, in which case you do not need to enable the ‘Support UCX’ option on the Mitel 5000 CP as described above.

Mitel Unified Communicator Express- IT and Administrator Guide
28
Specifying a Listening Port
This section provides the steps required to lookup or specify the Listening Port for OAI socket connections.
To lookup the Listening Port
1. Login to the Mitel 5000 CP using the Session Manager database programming utility.
2. Navigate to System IP Settings.
3. Select the “IP Settings” node and examine the Listening Port value on the right. The default value is 4000.
4. To change the port number click on the field and edit the value.
Note: Users will need to enter the Listening Port when creating a phone profile for a Mitel 5000 CP.

29
Programming Station Passwords
When you create a phone profile for a supported Mitel 5000 CP phone you must provide the phone password. This is known as the ‘station password’ on the Mitel 5000 CP. By default it is the extension of the phone; however, users are able to change the password using the “Program Station Password” feature code. By default the “Program Station Password” feature code is 392.
Changing Station Password
To change the station password for a phone perform the following steps:
1. From the phone you would like to change the station password, dial the “Program Station Password” feature code. E.g. 392
2. Enter the current password (e.g. the extension number) followed by #.
3. Enter the new password followed by #.
4. Verify the new password followed by #.
When creating the UC Express phone profile enter the password in the “Phone Password” field
Click the Test button to verify that the password is accepted.

Mitel Unified Communicator Express- IT and Administrator Guide
30
Mitel Border Gateway Support
The UC Express softphone can use a Mitel Border Gateway as its SIP server. The Border Gateway acts as a proxy to the Mitel 3300 ICP on the internal network. This allows mobile users to connect to the company phone system no matter where they are. This section covers the configuration you must perform on the Mitel Border Gateway to support UC Express softphone users.
Configure the Mitel 3300 ICP
You must first configure a Generic SIP phone on the Mitel 3300 CIP.
Enable SIP Connector on the Mitel Border Gateway
First you must be using a Mitel Border Gateway that supports SIP connections. If the Mitel Border Gateway supports SIP connections then you must enable the SIP Connector.
Configuring the Mitel 3330 ICP
The softphone users must have an existing account on the Mitel 3300 ICP. Refer to the steps for adding a Generic SIP phone in the “Provisioning a Softphone” section.

31
Enabling SIP Connector
This section provides the details required to enable the SIP connector on the Mitel Border Gateway.
To enable the SIP Connector:
1. Login to the Mitel Border Gateway web interface.
2. Select the “Connectors” tab.
3. Click on “SIP Configuration” to expand the SIP settings.
4. Enable the SIP Connector by selecting the “SIP connector enabled” checkbox.
5. If required, specify the default ICP according to your requirements.
6. Click “Save”.
Note: If the Mitel 3300 ICP is not listed you will need to add it by navigating to the ICP tab. Refer to Teleworker documentation for details.

Mitel Unified Communicator Express- IT and Administrator Guide
32
PC Connectivity
This section describes how to enable PC connectivity to a Mitel 5300 series IP phone. PC Connectivity must be enabled to allow UC Express to connect to the phone. Details are provided for phones in MiNET mode and SIP mode. Regardless of the mode used, once you’ve enabled PC Connectivity, configuring UC Express is the same.
Note: PC Connectivity must be enabled for phones that are on a Mitel 3300 ICP. It is not required for phones that are on a Mitel 5000 CP.
MiNET Mode
If you are using a Mitel 5300 series IP phone in MiNET mode and you want to enable UC Express to connect to the phone, the PC Connectivity and Password must be configured on the phone set. Also, if you wish to connect to the set via IP, you will have to obtain the set’s IP address.
a. On a 5320/30/40/60 set:
• Press Settings or , then select PC Connectivity. The phone's IP Address appears on the display: IP Address for PC: AAA.BBB.CCC.DDD
• Still in the PC Connectivity window, select Enable.
• Select Edit password and enter the password that will be used to set up the association with the PC application. You can also choose to use the default password. Record this password as you will need it to configure the PC application.
b. On a 5312/24 set:
c. Press and hold the Up and Down scroll arrows together. Release the Down and, while still holding the Up, press 2, 3, 4 On the menu that comes up, select Yes for Network Parameters. Select Yes for View Current Values. Scroll to Phone IP Address: AAA.BBB.CCC.DDD Scroll to Exit Menu and Select Yes.
d. Answer No to each entry until you get to Tools and Features, then select Yes. Scroll to Task Bar Setup and select Yes. Select Change to enable then 0 to confirm and # to accept.
e. Set the password. Save changes and reboot.

33
SIP Mode
If you are using a Mitel 5300 series IP phone in SIP mode configuration is performed by using a web browser. First you must obtain the IP address of the phone.
a. On any Mitel 5300 series IP phone in SIP mode:
• Press Settings or , then use the navigation buttons to select Admin Tools. Press OK.
• Navigate through the list of options until you reach Network Settings. Click OK.
• Enter the password and click Submit. By default the password is the phone model. e.g. 5340
• Click Next until you reach PHONE IP ADDRESS. Click Review to see the IP address of the phone.
b. Enter the IP address in a web browser:
• Login as user ‘admin’ and password. . By default the password is the phone model. e.g. 5340
• Under Admin Tools click on Network Config.
• Locate the CSTA setting and change it to On. This enables PC Connectivity. You can optionally specify the CSTA Password.
• Click Save and Reboot.

Mitel Unified Communicator Express- IT and Administrator Guide
34
Corporate Directory
This section describes the requirements to support searching for contacts in your company’s corporate directory.
Overview of LDAP
Mitel Unified Communicator Express enables users to search for contacts in your company’s Corporate Directory. This feature of Mitel Unified Communicator Express has the following requirements:
• LDAP URL – An LDAP URL includes the LDAP or Global Catalog server and the point in the directory to bind to. The LDAP server is the directory source that Mitel Unified Communicator Express searches for contacts.
• LDAP Bind User – You may require the login credentials for an LDAP user. Mitel Unified Communicator Express binds to the LDAP server using the credentials. This is not necessary if the LDAP server allows anonymous binding.
• LDAP Search Filter – Mitel Unified Communicator Express uses the LDAP search filter when it searches for contacts in the directory. The search filter controls what type of objects fields are checked for a match during a directory search.
• LDAP Contacts – The LDAP server should contain users with phone numbers entered in the appropriate directory fields.
Supported LDAP Servers
Mitel Unified Communicator Express has been tested with the following LDAP servers:
• Microsoft Windows 2003 Domain Controller – Active Directory domain controllers are an implementation of LDAP. Global Catalog servers are also supported which enables UC Express to locate users throughout an Active Directory forest.
• Sun Communications Server 6.0 – Sun Communications Server is a unified messaging platform that implements an LDAP directory system.
• OpenLDAP – OpenLDAP is an open source LDAP implementation. UC Express has been tested with OpenLDAP 2.3.27.
Other LDAP servers may work as a directory source but have not been tested.

35
Contact Lookup
To configure Mitel Unified Communicator Express for searching the Corporate Directory you must bring up “Settings” and click on “Contact Lookup”. To enable searching the Corporate Directory you must select the “Corporate Directory” checkbox as shown.

Mitel Unified Communicator Express- IT and Administrator Guide
36
Advanced Directory Settings
Mitel Unified Communicator Express has advanced settings that enable you to customize the connection to the LDAP directory source. To access the Advanced settings click on the “Advanced” button of the Contact Lookup settings page.
37
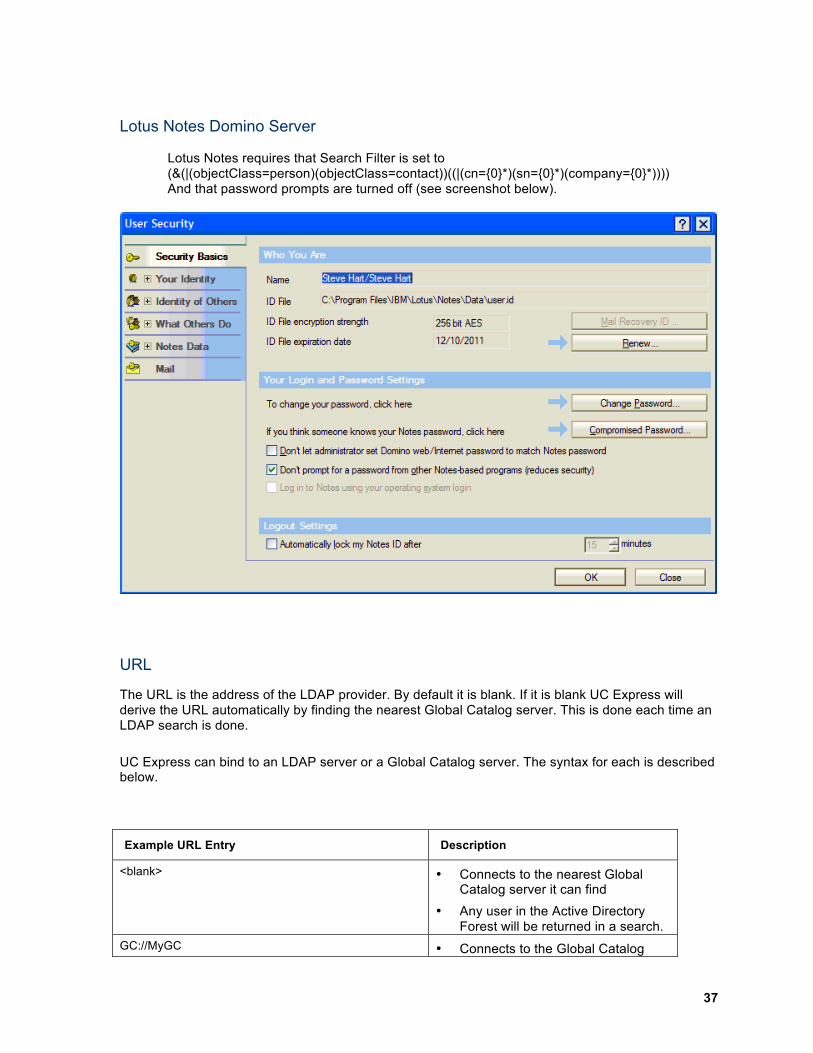
Lotus Notes Domino Server Lotus Notes requires that Search Filter is set to (&(|(objectClass=person)(objectClass=contact))((|(cn={0}*)(sn={0}*)(company={0}*)))) And that password prompts are turned off (see screenshot below).
URL
The URL is the address of the LDAP provider. By default it is blank. If it is blank UC Express will derive the URL automatically by finding the nearest Global Catalog server. This is done each time an LDAP search is done.
UC Express can bind to an LDAP server or a Global Catalog server. The syntax for each is described below.
Example URL Entry Description
<blank> • Connects to the nearest Global Catalog server it can find
• Any user in the Active Directory Forest will be returned in a search.
GC://MyGC • Connects to the Global Catalog

Mitel Unified Communicator Express- IT and Administrator Guide
38
server “MyGC”. • Any user in the Active Directory
Forest will be returned in a search. GC://MyForest.local • Connects to a Global Catalog
server in the root forest domain “MyForest.local”
• Does not bind to a specific server • Any user in the Active Directory
Forest will be returned in a search. LDAP://MyDC • Connects to the domain controller
“MyDC” • Any user from the MyDC’s domain
will be returned in a search LDAP://MyDomain.local • Connects to the root of the domain
“MyDomain.local” • Does not bind to a specific server • Any user in the domain will be
returned in a search. LDAP://MyDC/CN=Users,DC=MyDomain,DC=local • Connects to the domain controller
“MyDC” • Binds to the “Users” container of
the domain MyDomain.local • Only contacts in or below the Users
container will be returned in a search
LDAP://MyDC/OU=Contractors,DC=MyDomain,DC=local • Connects to the domain controller “MyDC”
• Binds to the “Contractors” organizational unit of the domain MyDomain.local
• Only contacts in or below the Contractors OU will be returned in a search

39
• User name – The LDAP bind user that Mitel Unified Communicator Express uses to bind to the LDAP server.
• Password – The password for the LDAP bind user.
To verify the configuration you should click on the “Test” button. You will see the following dialog if the configuration is correct:
Once you verify the configuration and save the changes, you can begin using Mitel Unified Communicator Express to search for users in the Corporate Directory.
Search Filter
Mitel Unified Communicator Express uses the LDAP search filter when you perform a directory search. It controls which types of directory objects are returned in a search. The default query string is specific to a Microsoft Active Directory domain and returns all users and contacts matching the first name, last name, or company name.
When you use an OpenLDAP or Sun Communications server as your directory source, you must change the search filter to work with your directory implementation.
Here is an example search filter that can be used with both OpenLDAP and Sun Communications Server:
(&(objectClass=inetOrgPerson) (|(cn={0}*)(sn={0}*)))
This search filter will return objects of type inetOrgPerson matching on their name.
You should consult your company’s LDAP administrator to ensure the search filter is suitable for your environment.
Note: Do not modify the search filter unless you are experienced with building LDAP query strings.

Mitel Unified Communicator Express- IT and Administrator Guide
40
Authentication Types
Below the Search Filter are the Authentication Types which control how the Mitel Unified Communicator Express authenticates to the LDAP server.
The Authentication Types are described:
• Anonymous Login – No authentication is performed.
• Secure Login – Requests secure authentication. (Kerberos or NTLM)
• Server Bind – Use when you bind to a server by name. Do not select this option when your LDAP URL contains only the domain name.
• Read Only Server – Indicates that a writeable server is not required for server-less binding.
• Secure Sockets – Enables SSL encryption. Requires a Certificate Server in the domain.
• Signing – Verifies data integrity to ensure that the data received is the same as the data sent. The Secure flag must also be set to use signing.
• Sealing – Encrypts data using Kerberos. The Secure flag must also be set to use sealing.
Note: By default none of authentication options are enabled.

41
Phone Number Fields
The lower section of the “Advanced” settings is where you configure the phone number fields. The phone number fields map directly to the attributes of the directory user object.
The default phone fields are specific to a Microsoft Active Directory domain and map to the attributes for a directory user that are commonly used to store phone numbers. Some or all of these fields must be populated with phone number data if you want to enable users to search the directory and call the users in the search results. If you are in an OpenLDAP or Sun Communications environment you will need to consult your LDAP administrator to find out what fields are used to store phone numbers and manually input them using the procedure outlined in the “Custom Phone Number Fields” section below.
With a default install of Mitel Unified Communicator Express the following phone fields are defined:
• Telephonenumber – This is the Active Directory attribute that maps to the “Telephone number:” field on the “General” tab of the user’s Active Directory Properties page.

Mitel Unified Communicator Express- IT and Administrator Guide
42
• Ipphone – This is the Active Directory attribute that maps to the “IP phone:” field on the “Telephones” tab of the user’s Active Directory Properties page.
• homePhone – This is the Active Directory attribute that maps to the “Home:” field on the “Telephones” tab of the user’s Active Directory Properties page.

43
• Mobile – This is the Active Directory attribute that maps to the “Mobile:” field on the “Telephones” tab of the user’s Active Directory Properties page.
• Pager – This is the Active Directory attribute that maps to the “Pager:” field on the “Telephones” tab of the user’s Active Directory Properties page.

Mitel Unified Communicator Express- IT and Administrator Guide
44
• otherTelephone – This is the Active Directory attribute that maps to “Other” for the “Telephone number” field on the “General” tab of the user’s Active Directory Properties page.
Other Phone Numbers

45
Custom Phone Number Fields
If the default phone fields don’t completely meet your needs you can add or remove fields as required. This may be useful if your organization stores phone numbers in custom directory attributes.
To add the Active Directory field you must know the full directory attribute name. You can use an LDAP browsing tool such as ADSI Edit to determine the attribute’s name. For instance, if you wanted the “Fax:” field on the “Telephones” tab of the user’s Active Directory Properties page to be returned in a search you would have to use the attribute name facsimile Telephone number.
Note: ADSI Edit is part of the Windows Server 2003 support tools, available on the product CD.
Example
Perform the following steps to add the facsimile Telephone number phone field:
1. On the Advanced Directory Settings page enter facsimile Telephone number in the “Field Name:” text field.
2. Select ‘Fax’ in the “Type” drop-down menu.
3. Click on “Add”
The facsimileTelephonenumber is now in the list of phone fields. You should verify that you can search for users with a value in this field.

Mitel Unified Communicator Express- IT and Administrator Guide
46
Mass Deployment
If you have a large number of client systems on which you to need to install UC Express, you may want to consider planning a mass deployment. This section provides the information required to plan a mass deployment of UC Express.
Overview
There are several approaches you can take to mass deploy UC Express. An overview of each is provided in this section. Each topic is covered more fully in subsequent sections.
Command Line Options
UC Express supports command-line options that you can pass to the application at run-time. The command-line options enable you to control the configuration and behavior of the application. You can leverage the command line options in a mass deployment.
Deployment Tools
UC Express is packaged as a Microsoft Installer package (MSI). Any deployment tool that supports deployment of MSI packages can be used to deploy UC Express to users in your environment.
Install-time Options
UC Express supports basic install-time options that enable you to control the installation behavior and resulting configuration.
Command Line Options
To configure UC Express using command line options perform the following steps:
1. Start a command prompt
2. Browse to “C:\Program Files\Mitel\Unified Communicator Express”
3. At the command prompt enter the UC Express executable name followed by the list of options:
UCExpress.exe /option1 /option2 …. /option
Note: You can combine as many options as makes sense to configure UC Express to suit your needs. The only limitation is imposed by the command prompt interpreter.

47
The command line options can be used as a ‘one-off’ to configure one system or you can create scripts to configure UC Express on many systems.
The table below describes the command-line options you can use with UC Express.
Parameter Description
/license:[license key] Enables registration from command line. You can either provide the license key or the path to a license file. Example 1 /license:xxxxxxxx-xxxxxxxx-xxxx-xxxxxxxxxxxx Example 2 /license:\\servername\sharename\license.xml When providing a license key the target computer must have an active Internet connection. When providing a license file it is not necessary that the target computer has an Internet connection.
/presence:[m | c | off] Controls the behavior of presence.
Example 1
/presence:m
This example enables presence features with Windows Live Messenger.
Example 2
/presence:c
This example enables presence features with Office Communicator.
Example 3
/presence:off
This example disables all presence features.
/associate:[ICP]:[DN2IP_USER]:
[DN2IP_PWD]:[DNorIP]:[PASSWORD]:[VoiceMailNu
mber]:[ProfileName]
Associates UC Express with a Mitel 5300 series IP phone from the command line. Allows association by the phone’s DN or IP address. All fields are optional.
[ICP] – The IP address or host name of the Mitel 3300 ICP switch. You can list two ICPs in this parameter, separated by a semicolon. Each ICP must have the same DN2IP account name and password. The format is [ICP1;ICP2]
[DN2IP_USER] – The DN2IP username on the Mitel 3300 ICP switch.
[DN2IP_PWD] – The password for the DN2IP user on the Mitel 3300 ICP

Mitel Unified Communicator Express- IT and Administrator Guide
48
Parameter Description
switch. Password values are assumed to be encrypted unless you prefix it with ‘p=’ or ‘P=’, in which case the password is interpreted as clear text.
[DNorIP] – The DN or IP address of the phone. UC Express uses pattern recognition to determine whether a DN or IP address is provided.
[PASSWORD] – The PC Connectivity password for the phone. Password values are assumed to be encrypted unless you prefix it with ‘p=’ or ‘P=’, in which case the password is interpreted as clear text.
[VoiceMailNumber] – The number to dial to check voice mail.
[ProfileName] – The name for the profile. If you provide an existing profile name it will update the settings. If you provide a non-existant profile name it will create a new profile and give it the name you specify. If you do not provide a profile name it will create a new profile named ‘Work’ using the settings you provide.
Separate each parameter with a colon. Each parameter is optional, but you still need to provide the colon to mark the position of the provided parameters.
Example 1
/associate:192.168.1.200:DN2IP:D53703788E0FF57CEB4061DF9DBD2999:5100:D1370478BD0FF57CE94058DF8BBD1999923C2C81FDF9674180C99933:6000:MitelPhone
This example provides all parameters and associates by DN to the phone at extension 5100. Passwords are provided in encrypted format. Voicemail number is 6000 and the profile is named ‘MitelPhone’.
Example 2
/associate::::192.168.1.100:D1370478BD0FF57CE94058DF8BBD1999923C2C81FDF9674180C99933:7500:IPPhone
This example associates with the phone with the IP address of 192.168.1.100. Note the padding of colons which indicate what parameters are left out. Passwords are provided in encrypted format. Voicemail number is 7500 and the profile is named ‘IPPhone’.
Example 3
/associate:ICP1;ICP2:DN2IP:p=mypassword:223495:::Example3
This example associates with the phone with the DN of 2234. Two ICPs are used – ICP1;ICP2. If one ICP is down the DN2IP lookup will still

49
Parameter Description
work. The DN2IP password is provided in clear text using the ‘p=’ prefix.
NOTE: The DN2IP password is NOT encrypted.
/s_assoc:[USER_DN]:[USER_PASSWORD]:[SIPSRV]:[SIPPORT]:[REALM]:[STNSRV]:[STNPORTt]:[OBPROXY]:[OBPROXYPORT]:[VoiceMailNumber]:[ProfileName]
Configures UC Express with a softphone profile.
[USER_DN] – The user name or DN of the SIP account. For use with a Mitel 3300 ICP it will be a DN.
[USER_PASSWORD] – The password for the SIP user or DN. This is set on the Mitel 3300 switch by the administrator. Password values are assumed to be encrypted unless you prefix it with ‘p=’ or ‘P=’, in which case the password is interpreted as clear text.
[SIPSRV] – The IP address or host name of the Mitel 3300 ICP.
[SIPPORT] – The port which the Mitel 3300 ICP uses for SIP communications. The port is specified in the “System IP Port Assignment” form (System UDP port and System TCP port) on the Mitel 3300 ICP. By default the port is 5060.
[REALM] – The SIP realm, also known as the user domain. You will not likely need to specify this value but it is provided for full SIP support.
[STNSRV] – The IP address or host name of the STUN server. A STUN server may be required for users who are behind a NAT firewall.
[STNPORT] – The port to connect to on the STUN server. The default port is 3478.
[OBPROXY] – The IP address or host name of SIP Outbound Proxy server. A proxy may be required in some network environments but is not normally needed for most users.
[OBPROXYPORT] – The port to connect to on the Outbound Proxy server. The default port is 5060.
[VoiceMailNumber] – The number to dial to check voice mail.
[ProfileName] – The name for the profile. When combined with the /install switch during initial deployment you do not need to provide a profile name – it will default to a profile named ‘Work’. Without the /install switch you must provide a profile name. If you provide an existing profile name it will update the settings. If you provide a non-existant profile name it will create a new profile and give it the name you specify.
Separate each parameter with a colon. Each parameter is optional, but

Mitel Unified Communicator Express- IT and Administrator Guide
50
Parameter Description
you still need to provide the colon to mark the position of the provided parameters.
Example 1
/s_assoc:2555:p=mypassword:switch01.company.com:5060::::::6000:MySoftphone
This example creates s softphone profile with a DN of 2555 on the switch ‘switch01.company.com’. The voice mail number is set to 6000 and the profile is named ‘MySoftphone’. All other fields are left blank. The USER_PASSWORD is passed in clear text by using the ‘p=’ prefix.
Example 2
/s_assoc:::switch01.company.com:5060::stun.company.com::::6000:MySoftphone
This example creates s softphone profile on the switch ‘switch01.company.com’. The voice mail number is set to 6000 and the profile is named ‘MySoftphone’. The STUN server is set to ‘stun.company.com. All other fields are left blank.
This might be used to create generic profiles for all users allowing them to input their own DN and password.
/it5k:[DN]:[StationPassword]:[ServerAddress]:[ServerPassword]:[ServerPortNumber]:[ProfileName]
Configures UC Express with a profile for a supported Mitel 5000 CP phone.
[DN] – The DN or extension of the endpoint.
[StationPassword] – The station password for the endpoint. By default this is the same as the DN, but it can be changed using the “Program Station Password” feature code. Password values are assumed to be encrypted unless you prefix it with ‘p=’ or ‘P=’, in which case the password is interpreted as clear text.
[ServerAddress] – The IP address or host name of the Mitel 5000 CP.
[ServerPassword] – The password required to connect to the Mitel 5000 CP. The password is set on the Mitel 5000 CP in System Sockets System OAI Level 2. Password values are assumed to be encrypted unless you prefix it with ‘p=’ or ‘P=’, in which case the password is interpreted as clear text.
[ServerPortNumber] – The port to use to connect to the Mitel 5000 CP. This is the Listening Port specified in System IP Settings Listening Port. The default port is 4000.

51
Parameter Description
[ProfileName] – The name for the profile. When the /install switch is used during initial deployment you do not need to provide a profile name – it will default to a profile named ‘Work’. Without the /install switch you must provide a profile name. If you provide an existing profile name it will update the settings. If you provide a non-existant profile name it will create a new profile and give it the name you specify.
Separate each parameter with a colon. Each parameter is optional, but you still need to provide the colon to mark the position of the provided parameters.
Example 1
/it5k:1004:p=1004:172.16.47.7:p=mypassword:4000:MyProfile
This example provides all parameters. It creates a profile for the phone at extension 1004 on the Mitel 5000 CP at 172.16.47.7, and names the profile “MyProfile”. Both the StationPassword and ServerPassword are passed in clear text using the ‘p=’ prefix.
Example 2
/it5k:::172.16.47.7:D53703788E0FF57CEB4061DF9DB:4000:MyProfile
This example creates a profile with the Mitel 5000 CP at 172.16.47.7 but leaves out the phone DN and station password. Note that while the values are left out, the colons are still in place as a delimiter. This might be used to create generic profiles for all users allowing them to input their own phone DN and station password. The ServerPassword value is provided in encrypted format.
/rules:[Yes | No] Enables or disables the user's ability to define dialing rules from UC Express.
Example 1
/rules:Yes
This example allows the user to create custom Dialing Rules.
Example 2
/rules:No
This example prevents the user from creating custom Dialing Rules in the UC Express interface.
/rules:<path to dialing rules file>
In this form the /rules: option imports dialing rules from the specified location. The parameter value must be either a local path or a UNC path to a shared folder. It must also be combined with the /install option.
Example 1

Mitel Unified Communicator Express- IT and Administrator Guide
52
Parameter Description
/install /rules:\\servername\sharename\DialingRules.xml
This example imports Dialing Rules stored on a central network share.
Example 2
/install /rules:C:\DialingRules.xmls
This example imports dialing rules stored on the local system.
/dialeareacode:Yes | No Configures the current location (if it exists) to dial or not the area code when dialing a local number
/language:[ietf language tag]
Sets the UI language for UC Express. Valid language tags are listed below:
(Default) (US English)
de-DE (German)
es (Spanish)
es-ES (Spanish - Spain)
fr-CA (French - Canada)
fr-FR (French-France)
it-IT (Italian - Italy)
nl-NL (Dutch - Netherlands)
pt-BR (Portuguese - Brazil)
pt-PT (Portuguese - Portugal)
sv-SE (Swedish - Sweden).
Example 1
/language:fr-CA
This example will set the UI language to Canadian French.
Example 2
/language: (Default)
This example will set the UI language to US English.
/install The /install switch should only be used during deployment. When you provide this switch all other options that you combine with it become the default application settings.
The /install switch also migrates old settings files to the current version. If you use the switch after UC Express is installed you may lose current settings.

53
Parameter Description
Example
/install /presence:off /language:fr-CA
This example will set the application defaults so that presence is disabled and the default language is Canadian French. Any user who runs the application for the first time will inherit these settings, which they can then change according to their own personal preference.
The default settings are stored in the following file:
C:\Program Files\Mitel\Unified Communicator Express\UCExpress.exe.config
/dialareacode:Yes | No Configures the “Dial area code for local calls” setting.
Example 1
/dialareacode:Yes
This example will configure UC Express to include the area code when dialing local numbers.
Example 2
/dialareacode:No
This example will configure UC Express to omit the area code when dialing local numbers.
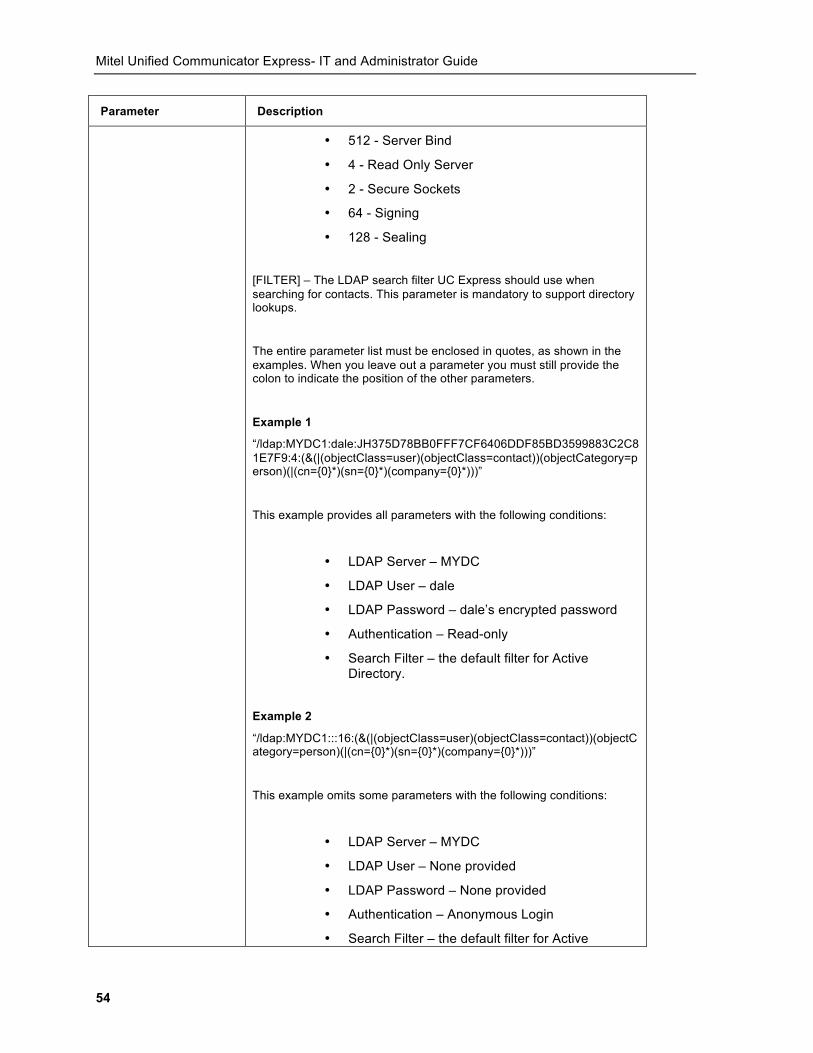
/ldap:[URL]:[USER]:[PWD]:[AUTH]:[FILTER]
Configures the LDAP settings that UC Express uses for searching for corporate contacts.
[URL] – The LDAP:// URL. This controls which LDAP server to bind to and is mandatory to support directory lookups.
[USER] – The LDAP username to bind with. This parameter is optional.
[PWD] – The encrypted password for the LDAP user. This parameter is optional.
[AUTH] – The authentication type (represented as a number) to use when connecting to the LDAP server. This parameter is mandatory. The accepted values are shown below:
• 16 - Anonymous Login
• 1 - Secure Login
Mitel Unified Communicator Express- IT and Administrator Guide
54
Parameter Description
• 512 - Server Bind
• 4 - Read Only Server
• 2 - Secure Sockets
• 64 - Signing
• 128 - Sealing
[FILTER] – The LDAP search filter UC Express should use when searching for contacts. This parameter is mandatory to support directory lookups.
The entire parameter list must be enclosed in quotes, as shown in the examples. When you leave out a parameter you must still provide the colon to indicate the position of the other parameters.
Example 1
“/ldap:MYDC1:dale:JH375D78BB0FFF7CF6406DDF85BD3599883C2C81E7F9:4:(&(|(objectClass=user)(objectClass=contact))(objectCategory=person)(|(cn={0}*)(sn={0}*)(company={0}*)))”
This example provides all parameters with the following conditions:
• LDAP Server – MYDC
• LDAP User – dale
• LDAP Password – dale’s encrypted password
• Authentication – Read-only
• Search Filter – the default filter for Active Directory.
Example 2
“/ldap:MYDC1:::16:(&(|(objectClass=user)(objectClass=contact))(objectCategory=person)(|(cn={0}*)(sn={0}*)(company={0}*)))”
This example omits some parameters with the following conditions:
• LDAP Server – MYDC
• LDAP User – None provided
• LDAP Password – None provided
• Authentication – Anonymous Login
• Search Filter – the default filter for Active
55
Parameter Description
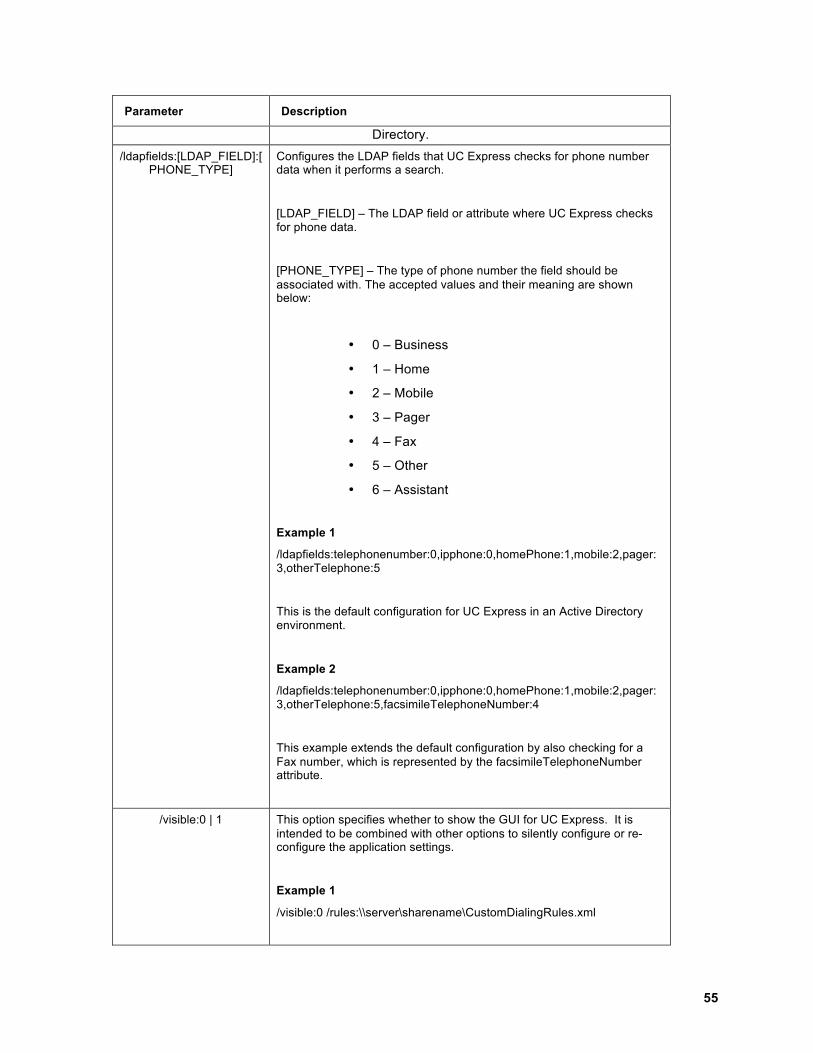
Directory. /ldapfields:[LDAP_FIELD]:[
PHONE_TYPE] Configures the LDAP fields that UC Express checks for phone number data when it performs a search.
[LDAP_FIELD] – The LDAP field or attribute where UC Express checks for phone data.
[PHONE_TYPE] – The type of phone number the field should be associated with. The accepted values and their meaning are shown below:
• 0 – Business
• 1 – Home
• 2 – Mobile
• 3 – Pager
• 4 – Fax
• 5 – Other
• 6 – Assistant
Example 1
/ldapfields:telephonenumber:0,ipphone:0,homePhone:1,mobile:2,pager:3,otherTelephone:5
This is the default configuration for UC Express in an Active Directory environment.
Example 2
/ldapfields:telephonenumber:0,ipphone:0,homePhone:1,mobile:2,pager:3,otherTelephone:5,facsimileTelephoneNumber:4
This example extends the default configuration by also checking for a Fax number, which is represented by the facsimileTelephoneNumber attribute.
/visible:0 | 1 This option specifies whether to show the GUI for UC Express. It is intended to be combined with other options to silently configure or re-configure the application settings.
Example 1
/visible:0 /rules:\\server\sharename\CustomDialingRules.xml

Mitel Unified Communicator Express- IT and Administrator Guide
56
Parameter Description
This example imports dialing rules from a share, and then shuts down after processing the command line. This can be used in login scripts to change user settings as required via login scripts. You should not use /visible:0 when using a deployment tool such as SMS.
Example 2
/visible:1
This example would show the GUI. It is the default behavior and is the same as running the application without any command line options.
/shortcuts:Yes | No Controls whether shortcuts for UC Express are created on the system. This option is typically used in a mass deployment.
Example 1
/shortcuts:Yes
This example places UC Express shortcuts on the desktop and the Program menu.
Example 2
/shortcuts:No
This example prevents UC Express from creating shortcuts on the desktop and the Program menu. If shortcuts already exist they will be removed.
/startup: Yes | No Controls whether or not UC Express starts automatically when a user logs into the computer. .
Example 1
/startup:Yes
This example configures UC Express to start automatically.
Example 2
/startup:No
This example configures UC Express to not start automatically.

57
Software Deployment Tools
If your company uses a software deployment tool for managing and deploying user applications you should be able to use it to deploy UC Express to your users. The deployment tool must support MSI installation files.
The following list shows some examples of software deployment tools:
• Microsoft System Management Server (SMS)
• Active Directory Group Policy
• LANDesk Management Suite
• Novell Zenworks
This is just a small sample – there are many other products to choose from.
Note: You should consult the vendor documentation to find details required to deploy an MSI application.
The following sections discuss strategies you can use to help choose a deployment strategy of UC Express using a software deployment tool.
Deploying the default MSI package
One option you have is to deploy the default MSI package using your software deployment tool of choice. When you deploy the default MSI package without providing any customization the installations of UC Express have the following characteristics:
• All default settings are used
• All users have the same configuration
After deploying the default MSI package you need to perform the following actions:
• License UC Express for each user
• Configure settings required for each user
Deploy the default MSI file when your deployment tool does not enable you to pass command line options to the MSI package and you are unable to create a customized MSI package.

Mitel Unified Communicator Express- IT and Administrator Guide
58
Passing Install-time Options
Some deployment tools support the ability to pass arguments to the MSI package. You can use that ability to pass configuration settings using the /CONFIG install-time option. You would typically store configuration settings in a text file stored in a central location.
When you pass install-time configuration options to the MSI package the installations of UC Express have the following characteristics:
• The software is automatically licensed
• Settings are configured according to your needs
• All users have the same configuration
After deploying the MSI package using install-time options you need to perform the following actions:
• Configure user-specific settings for each user (e.g. specify the DN or IP address of the phone to connect to)
Note: Refer to the Install-time Options section for more details.

59
Configuring User-specific Settings During Deployment
Some deployment tools may support the ability to customize deployment on a user-by-user basis. The basic approach is outlined in the following steps:
1. Deploy the MSI file with customized settings using one of the methods described in this section
2. For each user, silently configure user-specific settings (such as phone DN) using command line options as described in the Command Line Options section.
You could also perform user-specific configuration through login scripts. The /visible:0 command line switch is used with other options to update the configuration for the user.
In this scenario no further configuration is required by the user or IT staff.
Install-time Options
This section describes the Install-time options you can use with UC Express.
Installation options
The UC Express installation program accepts the following two options:
Option Description
LAUNCHAPP=” “ Controls whether or not UC Express launches after installation completes. You should disable this option when you perform a mass deployment.
CONFIG=”[path to configuration file]”
Enables you to pass a configuration file to the installer. The configuration file contains run-time options. Example CONFIG=”\\Servername\Sharename\config_file.txt” This example installs UC Express and uses the run-time command line options stored in the text file config_file.txt to configure the application.
Note: If the configuration file is hosted on a network share, the host computer and installation computer must be a member of the same domain.
Mitel Unified Communicator Express- IT and Administrator Guide
60
Configuration file
When you use the /CONFIG switch, the installer installs UC Express and then processes the configuration file as a final step by running UC Express with the command options in the configuration file. You must create the configuration file to include the command line options needed to configure UC Express the way you want.
Keep in mind the following considerations when creating the configuration file:
• All options must be run-time command line options
• All options must be on one line
• The order of the options does not matter
• If the configuration file is hosted on a network share, the host computer and installation computer must be a member of the same domain.
The following is an example of valid configuration file contents:
/install /visible:0 /license:xxxxxxxx-xxxx-xxxxxxxx-xxxxxxxxxxxx /language:(Default) /shortcuts:yes /startup:yes /dialareacode:yes
This example configuration file would configure UC Express with the following configuration:
• Automatically license UC Express
• Use the default language
• Install desktop and Program menu shortcuts
• Start UC Express at start-up
• Enable the “Dial area codes for local calls” option
Note: Refer to the Command Line Options section for full details on the options available.
Starting installation
Two main ways of starting the installation of UC Express as described below:
• UnifiedCommunicatorExpress.msi – This method is interactive and requires a user to input during the install. If .NET 4.0 is not installed the installation of UC Express will exit.
• Msiexec /quiet /package UnifiedCommunicatorExpress.msi - This method uses the msiexec.exe switches to enable a silent or non-interactive installation. If .NET 4.0 is not installed the installation of UC Express will exit.
Regardless of which method you use to start the installation, each one accepts the same install-time options.

61
Installing with Batch Files
Using the above installation methods you can create batch files to install UC Express in a consistent and controlled manner. The batch file can be run from a network share or as part of a login script.

Mitel Unified Communicator Express- IT and Administrator Guide
62
Configuring UC Express Clients with DHCP
UC Express 3.1 introduces the ability to deliver application configuration settings via a DHCP server. Using a DHCP server you can configure a subset of the application settings from a central location, which enables you to modify the settings for all users as need arise.
Overview
UC Express defines a number of DHCP configuration options that map to settings in the application. The settings would otherwise be specified through the application GUI, or by using mass deployment or command-line options.
The basic scenario is described below:
1. Configure the required options on the DHCP server.
2. Users create phone profiles which retrieve settings from the DHCP server at creation time.
3. Users can override DHCP settings if necessary.
DHCP Options
UC Express implements two DHCP standards in the form of options pairs designed for delivering vendor-specific options:
• Option 60/43
• Option 124/125
The general mechanism is that the UC Express client software sends out an option 60 request asking for the options defined on the DHCP server in option 43. It also sends an option 124 request which asks for the options defined on the DHCP server in option 125. In each case the DHCP server responds with a vendor option string, which is described below. The options returned in the string are used to configure the application as desired by the administrator.
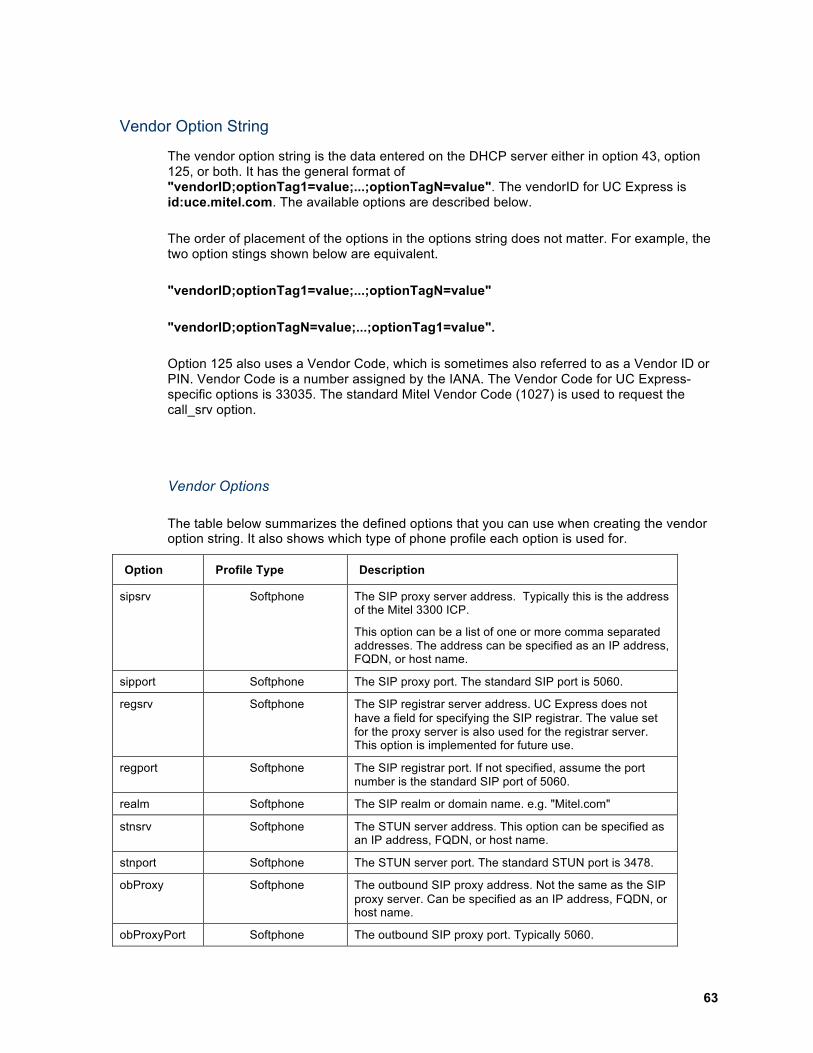
63
Vendor Option String
The vendor option string is the data entered on the DHCP server either in option 43, option 125, or both. It has the general format of "vendorID;optionTag1=value;...;optionTagN=value". The vendorID for UC Express is id:uce.mitel.com. The available options are described below.
The order of placement of the options in the options string does not matter. For example, the two option stings shown below are equivalent.
"vendorID;optionTag1=value;...;optionTagN=value"
"vendorID;optionTagN=value;...;optionTag1=value".
Option 125 also uses a Vendor Code, which is sometimes also referred to as a Vendor ID or PIN. Vendor Code is a number assigned by the IANA. The Vendor Code for UC Express-specific options is 33035. The standard Mitel Vendor Code (1027) is used to request the call_srv option.
Vendor Options
The table below summarizes the defined options that you can use when creating the vendor option string. It also shows which type of phone profile each option is used for.
Option Profile Type Description
sipsrv Softphone The SIP proxy server address. Typically this is the address of the Mitel 3300 ICP.
This option can be a list of one or more comma separated addresses. The address can be specified as an IP address, FQDN, or host name.
sipport Softphone The SIP proxy port. The standard SIP port is 5060.
regsrv Softphone The SIP registrar server address. UC Express does not have a field for specifying the SIP registrar. The value set for the proxy server is also used for the registrar server. This option is implemented for future use.
regport Softphone The SIP registrar port. If not specified, assume the port number is the standard SIP port of 5060.
realm Softphone The SIP realm or domain name. e.g. "Mitel.com"
stnsrv Softphone The STUN server address. This option can be specified as an IP address, FQDN, or host name.
stnport Softphone The STUN server port. The standard STUN port is 3478.
obProxy Softphone The outbound SIP proxy address. Not the same as the SIP proxy server. Can be specified as an IP address, FQDN, or host name.
obProxyPort Softphone The outbound SIP proxy port. Typically 5060.

Mitel Unified Communicator Express- IT and Administrator Guide
64
Option Profile Type Description
dnips Mitel 5300 Series IP desk phone
The DN to IP server. Typically this is the address of the Mitel 3300 ICP and is used to lookup a phone IP address via its DN.
This option can be a list of one or more comma separated addresses. The address can be specified as an IP address, FQDN, or host name.
You should combine this option with dnipu and dnipp.
dnipu Mitel 5300 Series IP desk phone
The account name to use for DN to IP lookup.
You should combine this option with dnips and dnipp.
dnipp Mitel 5300 Series IP desk phone
The password for the DN2IP account specified in the dnipu option.
You should combine this option with dnips and dnipu.
i5ksrv Mitel 5000 CP Desktop Phone
The Mitel 5000 CP network address. This option can be specified as an IP address, FQDN, or host name.
i5kpwd Mitel 5000 CP Desktop Phone
The Mitel 5000 CP OAI password.
i5kport Mitel 5000 CP Desktop Phone
The Mitel 5000 CP network port used for OAI connections.
vmn Softphone, Mitel 5300 Series IP desk phone
The voice mail number used to dial to retrieve user voice mail messages. This option works with softphone profiles and Mitel phones connected to a Mitel 3300 ICP.

65
Mapping Vendor Options to UC Express fields
This section illustrates in which fields the vendor options delivered by the DHCP server are stored within the application interface.
Softphone Profile
The image below shows the basic fields for a “Mitel UC Express Softphone” profile. The DHCP vendor option names are highlighted in red in the fields into which they map.
The image below shows the mappings for the advanced section of a softphone profile.

Mitel Unified Communicator Express- IT and Administrator Guide
66
Mitel 5000 CP Desktop Phone Profile
The image below shows the fields for a “Mitel 5000 CP Desktop Phone” profile. The DHCP vendor option names are highlighted in red in the fields into which they map.
Mitel 5300 series IP desk phone Profile
The image below shows the fields for a “Mitel 5300 series IP desk phone” profile. The DHCP vendor option names are highlighted in red in the fields into which they map.

67
Creating Vendor Option Strings
When you create a vendor option string you must first decide which options you want to control with the DHCP server options. This section uses examples to show how to create a valid vendor option string to configure the different UC Express phone profiles.
You have a lot of flexibility when building the options string. So long as the resulting configuration makes sense for your environment. One important requirement to be aware of however is that the vendor options string cannot exceed 255 characters. This limit is a set by the DHCP standard. You will have unexpected results if the string is beyond this limit.
Remember that the order of options does not matter.
Example 1 - Softphone Profile
The options in this example apply to a “Mitel UC Express Softphone” profile.
Option Value
sipsrv ICP1,ICP2
realm company.com
stnsrv stun1.company.com
vmn 6000
Combine these options with the vendor ID to create the following vendor options string:
id:uce.mitel.com;sipsrv=ICP1,ICP2;realm=company.com;stnsrv=stun1.company.com;vmn=6000
You would then use this vendor options string when you configure the DHCP server.

Mitel Unified Communicator Express- IT and Administrator Guide
68
Example 2 - Mitel 5300 series IP desk phone Profile
The options in this example apply to a “Mitel 5300 series IP desk phone” profile.
Option Value
dnips switch1.company.com
dnipu DN2IP
dnipp thepassword
vmn 6000
Combine these options with the vendor ID to create the following vendor options string:
id:uce.mitel.com;dnips=switch1.company.com;dnipu=DN2IP;dnipp=thepassword;vmn=6000
You would then use this vendor options string when you configure the DHCP server.
Example 3 - Mitel 5000 CP Desktop Phone Profile
The options in this example apply to a “Mitel 5000 CP Desktop Phone” profile.
Option Value
i5ksrv i5k.company.com
i5kpwd i5kpassword
i5kport 4001
Note: The default port is 4000. This example would change it to 4001.
Combine these options with the vendor ID to create the following vendor options string:
id:uce.mitel.com;i5ksrv=i5k.company.com;i5kpwd=i5kpassword;i5kport=4001
You would then use this vendor options string when you configure the DHCP server.
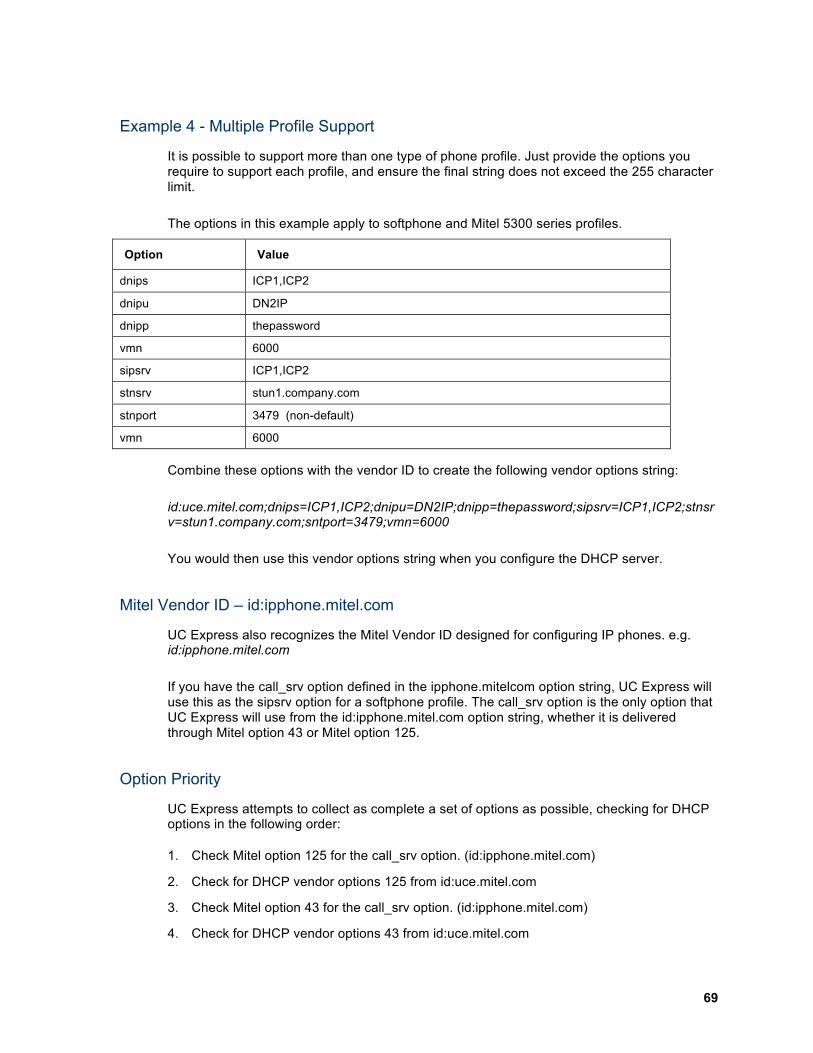
69
Example 4 - Multiple Profile Support
It is possible to support more than one type of phone profile. Just provide the options you require to support each profile, and ensure the final string does not exceed the 255 character limit.
The options in this example apply to softphone and Mitel 5300 series profiles.
Option Value
dnips ICP1,ICP2
dnipu DN2IP
dnipp thepassword
vmn 6000
sipsrv ICP1,ICP2
stnsrv stun1.company.com
stnport 3479 (non-default)
vmn 6000
Combine these options with the vendor ID to create the following vendor options string:
id:uce.mitel.com;dnips=ICP1,ICP2;dnipu=DN2IP;dnipp=thepassword;sipsrv=ICP1,ICP2;stnsrv=stun1.company.com;sntport=3479;vmn=6000
You would then use this vendor options string when you configure the DHCP server.
Mitel Vendor ID – id:ipphone.mitel.com
UC Express also recognizes the Mitel Vendor ID designed for configuring IP phones. e.g. id:ipphone.mitel.com
If you have the call_srv option defined in the ipphone.mitelcom option string, UC Express will use this as the sipsrv option for a softphone profile. The call_srv option is the only option that UC Express will use from the id:ipphone.mitel.com option string, whether it is delivered through Mitel option 43 or Mitel option 125.
Option Priority
UC Express attempts to collect as complete a set of options as possible, checking for DHCP options in the following order:
1. Check Mitel option 125 for the call_srv option. (id:ipphone.mitel.com)
2. Check for DHCP vendor options 125 from id:uce.mitel.com
3. Check Mitel option 43 for the call_srv option. (id:ipphone.mitel.com)
4. Check for DHCP vendor options 43 from id:uce.mitel.com
Mitel Unified Communicator Express- IT and Administrator Guide
70
Duplicate settings are handled using the following rules:
• Options specified in the id:uce.mitel.com option strings take precedence over options in id:ipphone.mitel.com option string.
• Options specified in the 125 option string take precedence over options found in the 43 option string.
• All non-conflicting options are used.
For example, if you have specified the following option strings on your DHCP Server:
• Option 125-id:ipphone.mitel.com;sw_tftp=172.16.47.3;call_srv=10.1.1.200;dscp=46v46s26
• Option 125 - id:uce.mitel.com;sipsrv=sip01.company.com;vmn=6000
• Option 43 - id:uce.mitel.com;sipsrv=sip02.company.com;stnsrv=stun01.company.com
UC Express would use the following options based on the priority described above:
sipsrv=sip01.company.com
vmn=6000
stnsrv=stun01.company.com
You might consider using option 125 for delivering settings for one type of profile, such as a softphone, and using option 43 for delivering settings for another type of profile, such as a Mitel IP phone. This enables you to maintain a logical distinction in the configuration and also reduces the likelihood of exceeding the 255 character limit.

71
How DHCP Settings Work
This section describes how the settings are handled by the UC Express client software.
The User Experience
Normally, when a user creates a new phone profile in UC Express, the profile is created with default settings. Some of the settings are blank and some have pre-defined values. When you configure a DHCP server to deliver options, they will override the default options.
Options that are delivered through DHCP are displayed in the application interface with ‘Dhcp:’ prefixed before the value, as shown in the softphone profile below.
In the example shown above, both the ‘User domain’ and ‘Stun server’ settings were obtained from the DHCP server. Notice that the text is also grayed-out.
UC Express checks for DHCP options during the following situations:
• When you create a phone profile
• When you click on the settings for an existing phone profile
• Each time you connect to a phone profile
Changing DHCP Options
You can change the options string on the DHCP server at any time. Any changes you make will take effect on existing phone profiles the next time the user connects to the phone profile or views the profile settings.
The changes will be seen immediately on any newly created profile.

Mitel Unified Communicator Express- IT and Administrator Guide
72
Overriding DHCP Options
DHCP options are designed to make it easier to pre-configure settings for users in your environment; however, it is still possible to override the DHCP options.
For instance, say you wanted to set the ‘Stun server’ to stun2.company.com for a specific installation instead of the pre-defined value of stun1.company.com delivered through the DHCP options. All that is necessary is to manually type the address in the ‘Stun server’ field as shown below.
If you want the profile to not use a STUN server, place a dash, ‘-‘, in the ‘Stun server’ field as shown below.
This effectively makes the field blank and prevents any DHCP options from being used.

73
Configuring the DHCP Server
This section describes how to configure DHCP options on a Mitel 3300 ICP to support the UC Express options.
Overview
The basic approach for configuring DHCP options on a Mitel 3300 ICP to support UC Express is summarized in the following steps:
• Review existing Mitel options 43 and 125 in the “DHCP Options” page on the Mitel 3300 ICP to see if the call_srv option is specified. If so you will need to consider if you need to override this setting for softphone clients. Refer to the section on “Option Priority”.
• Decide which other options you want to provide to UC Express clients. Consider which types of profiles you will be supporting.
• Design the vendor options string to meet your needs as described in “Creating Vendor Option Strings”.
• Add the options on the DHCP server, either as option 43, option 125, or both. Refer to the section on “Option Priority” for details on how options are combined when using both option 43 and option 125.
The first three steps are described in the “Creating Vendor Option Strings” section above. The last step is covered in the remainder of this section.
Adding DHCP Option 43 for UC Express to a Mitel 3300 ICP
To add DHCP option 43 for UC Express, follow these steps:
1. Login to the System Administrator Tool on the Mitel 3300 ICP and navigate to the “DHCP Options” form.
2. Click on “Add”
3. Select “Other” for Option Type.
4. Select “43 – Vendor Specific [System Default]” in the Standard Option dropdown menu.
5. Verify ID field is set to 43.
6. Select “ASCII String” in the Format dropdown menu.
7. Enter the vendor option string you designed in the Value text field.
8. Set the scope to meet the needs of your environment.
9. Enter “id:uce.mitel.com” in the Vendor ID field.
10. Your Entry should resemble the example shown below.

Mitel Unified Communicator Express- IT and Administrator Guide
74
11. Click “Save”.
Adding DHCP Option 125 for UC Express to a Mitel 3300 ICP
To add DHCP option 125 for UC Express, follow these steps:
1. Login to the System Administrator Tool on the Mitel 3300 ICP and navigate to the “DHCP Options” form.
2. Click on “Add”
3. Select “Other” for Option Type.
4. Select “125 – Vendor Specific [System Default]” in the Standard Option dropdown menu.
5. Verify ID field is set to 125.
6. Select “ASCII String” in the Format dropdown menu.
7. Enter the vendor option string you designed in the Value text field.
8. Set the Scope to meet the needs of your environment.
9. Enter 33035 in the Vendor ID field.
10. Your entry should resemble the example shown below.

75
11. Click “Save”.
Other DHCP Servers
If you use a different DHCP server in your environment you may be able to use it to deliver the DHCP options to UC Express clients. The DHCP server must fully support options 43 and 125. Some DHCP servers may allow you to specify the options string but not the Vendor ID, which is required for the DHCP request to complete.
Mobile Users
It’s important to understand that settings acquired through DHCP are dynamic – they are not stored in the user settings file but retrieved each time the user connects to the profile. This means that the settings will be lost if the user leaves the network. For this reason you should consider having separate profiles for mobile users. Mobile users could have one profile for use within the company network that retrieves settings from DHCP, and another profile with static settings for use outside of the company network.

Mitel Unified Communicator Express- IT and Administrator Guide
76
UC Express on a Terminal Server
UC Express now provides Terminal Server support with Microsoft Windows Server 2003 & 2008 which enables you to host the application centrally.
Requirements
The requirements for running UC Express in a Terminal Server environment are described below.
Editions
UC Express runs on 32-bit and 64-bit editions of Windows Server 2003 & 2008.
Terminal Services Notifications
When the Terminal Server is part of a Sun Ray solution you may want to enable UC Express to receive Terminal Services Notifications. With Terminal Services notifications enabled UC Express is able to detect when a user’s terminal session is locked or disconnected. When the user’s terminal session is locked or disconnected, UC Express will disconnect from the phone. When the user re-connects or unlocks the session, UC Express reconnects to the phone automatically.
Without Terminal Services notifications UC Express would stay connected to the phone when the user locks their screen or disconnects from their session.
License – Max Sessions
The license you use to activate UC Express determines how many users can run UC Express concurrently. Once the session limit is reached, nobody else will be able to launch the application until another user closes an instance of the software.
The license does not limit how many phone profiles each user can create. Each user can create as many profiles as they want.
When you order your license from your dealer you must specify the amount of concurrent sessions you want to support.

77
Special Considerations
There are a few special considerations for running UC Express in a Terminal Server environment. They are discussed below.
UC Express Softphone
Due to the need for audio hardware, the UC Express softphone is not supported when run through a Terminal Services session.
Telephony Location
The telephony location settings on a Windows Terminal Server are defined system-wide. This means that each user shares the same configuration. For this reason you should assign users to the Terminal Server who share the same telephony configuration requirements.
Note: You control telephony location settings from the “Phone and Modem Options” in the Control Panel.
Installing on a Terminal Server
Installation of UC Express on a Windows 2003 & 2008 Terminal Server is similar to Windows XP but with special considerations.
Use Add or Remove Programs
When you install any application on a Windows 2003 & 2008 Terminal Server you should install by going to “Add or Remove Programs” and clicking on “Install Application”. Windows will prompt you for the installer and then continue with the installation. During the install Windows changes the terminal session from execution mode to installation mode. When the installation is complete it returns it to execution mode.
You must perform the following procedure while logged in as an Administrator of the Terminal Services computer.
To install UC Express perform the following steps:
1. Launch “Add or Remove Programs” in the control panel.
2. Click on “Add New Programs”.
3. Click on “CD or Floppy”.
4. Click “Next” on the “Install Program From Floppy Disk or CD-ROM” dialog.
5. Browse to the UC Express installation program.
6. Click “Next” on the “Run Installation Program” dialog.

Mitel Unified Communicator Express- IT and Administrator Guide
78
7. Complete the UC Express installation wizard.
8. Do not run UC Express at the end of the installation wizard. Click Close.
9. Click “Next” on the “After Installation” dialog.
10. Click “Finish” on the “Finish Admin Install” dialog.
You can now run UC Express to provide the license.
Enabling Terminal Services Notifications
Terminal Services notifications are not enabled with a standard install of UC Express. If you decide that Terminal Services notifications makes sense in your environment then you should manually edit the UCExpress.exe.config file.
Note: You should backup the file before you modify it.
To enable Terminal Services notifications perform the following steps:
1. Open UCExpress.exe.config with a text editor
2. Locate the following section:
<setting name="TerminalServicesNotifications" serializeAs="String">
<value>False</value>
</setting>
3. Change the <value> attribute from False to True to enable Terminal Services notifications
4. Change the <value> attribute from True to False to disable Terminal Services notifications
Once enabled, UC Express will know when a user’s session becomes disconnected. When the session is disconnected UC Express will disconnect from the phone.
Telephony Location Settings
You need to configure telephony location settings that will apply too all users. If you run UC Express on a system that does not have telephony location settings defined, it will prompt you to configure them. You can also do it directly from “Phone and Modem Options” in the Control Panel. The telephony location settings control dialing rules used by UC Express and other telephony-aware applications.
79
Network Requirements
UC Express relies on network connectivity to the following systems:
• Mitel 5300 Series IP phone
• LDAP server
• Global Catalog Server
• Mitel 3300 ICP
• Mitel 5000 CP
• Mitel Border Gateway
Phone Connectivity
UC Express connects to the Mitel 5300 series IP phone over TCP port 5060. With this in mind, UC Express should connect to any phone that meets the following conditions:
• There is a network route between the PC and the phone
• All intervening firewalls, VPN clients, or routers allow traffic from the PC to TCP port 5060 on the phone to pass. If your environment segregates phones from PCs using a VLAN you will need to enable routing between the two VLANs.
A simple test to verify connectivity is to telnet to port 5060 on the phone.
Example:
1. Open a command prompt
2. At the command prompt type the following command:
telnet <IP of phone> 5060
If you connect successfully the command prompt should go blank. If you do not connect it should time-out. If you do connect successfully you can close the telnet session by pressing CTRL-] and then type ‘quit’.
LDAP Connectivity
UC Express connects to the LDAP server over TCP port 389. In a Windows Active Directory environment this should already be configured to allow normal domain operation.
To enable searching the LDAP directory you must ensure the following conditions are met:
• There is a network route between the PC and the LDAP server

Mitel Unified Communicator Express- IT and Administrator Guide
80
• All intervening firewalls, VPN clients, or routers allow traffic from the PC to TCP port 389 on the LDAP server to pass.
Global Catalog Connectivity
UC Express connects to the Global Catalog server over TCP port 3268. In a Windows Active Directory environment this should already be configured to allow normal domain operation.
To enable searching the Global Catalog server you must ensure the following conditions are met:
• There is a network route between the PC and the LDAP server
• All intervening firewalls, VPN clients, or routers allow traffic from the PC to TCP port 3268 on the Global Catalog server to pass.
Mitel 3300 ICP Connectivity
UC Express connects to the Mitel 3300 ICP over TCP port 80 during DN2IP lookup. The softphone also connects to the switch on TCP/UDP port 5060.
To support DN2IP lookups from the switch you must ensure the following conditions are met:
• There is a network route between the PC and the Mitel 3300 ICP.
• All intervening firewalls, VPN clients, or routers allow traffic from the PC to TCP port 80 on the Mitel 3300 ICP to pass in order to support DN2IP.
To support the softphone you must make sure the following conditions are met:
• All intervening firewalls, VPN clients, or routers allow traffic from the PC to TCP/UDP port 5060 on the Mitel 3300 ICP to pass in order to support softphone communications. The port is configurable so if you have changed it then make sure your network allows it to pass.
Mitel 5000 CP Connectivity
By default UC Express connects to the Mitel 5000 CP over TCP port 4000.
To support the use of Mitel 5000 phone profiles you must ensure the following conditions are met:
• There is a network route between the PC and the Mitel 5000 CP.
81
• All intervening firewalls, VPN clients, or routers allow traffic from the PC to TCP port 4000 on the Mitel 5000 CP to pass.
Mitel Border Gateway
The UC Express softphone connects to the Mitel Gateway on TCP/UDP port 5060.
To support the use of the UC Express softphone with a Mitel Border Gateway you must ensure the following conditions are met:
• There is a network route between the PC and the Mitel Border Gateway.
• All intervening firewalls, VPN clients, or routers allow traffic from the PC to TCP/UDP port 5060 on the Mitel Border Gateway to pass.
Softphone RTP Traffic
The UC Express softphone sends voice data using the RTP protocol over randomly generated ports.
To support the softphone audio traffic we recommend the following:
• RTP traffic is allowed through your firewall.
• Use a SIP-aware firewall.
• Use a STUN server when making calls from behind a NAT firewall if you find calls are experiencing one-way audio.
If your firewall is SIP-aware you may not need a STUN server.

Mitel Unified Communicator Express- IT and Administrator Guide
82
Application Components
This section describes the application components and files of interest to IT support personnel.
UC Express Folders
An installation of UC Express on Windows XP includes the folders listed in the following table.
Folder Description
C:\Program Files\Mitel\Unified Communicator Express The default installation folder for UC Express.
Files in this folder are removed when you uninstall the application.
C:\Documents and Settings\All Users\Application Data\InGenius\UCX Contains settings shared among all users.
Files in this folder are not removed when you uninstall the application. You must manually remove them if you do not want them left on the computer.
C:\documents and Settings\username\local Settings\Application Data\InGenius_Software_Inc\UCX
Contains user-specific dialing rules.
Files in this folder are not removed when you uninstall the application. You must manually remove them if you do not want them left on the computer.
C:\Documents and Settings\username\Local Settings\Application Data\InGenius_Software_Inc.\UCExpress.exe_Url_uniqueID\versionnumber
Contains application log files.
Files in this folder are not removed when you uninstall the application. You must manually remove them if you do not want them left on the computer.
C:\Documents and Settings\username\Local Settings\Application Data\Mitel53xxApp
Contains phone connection information for the user.
Files in this folder are not removed when you uninstall the

83
application. You must manually remove them if you do not want them left on the computer.
C:\Documents and Settings\username\Local Settings\Application Data\Mitel_Networks_Corporatio
Contains user-specific application settings.
Files in this folder are not removed when you uninstall the application. You must manually remove them if you do not want them left on the computer.

Mitel Unified Communicator Express- IT and Administrator Guide
84
Important Files
This section describes some of the important files that may be of interest to IT personnel.
Folder Description
C:\Documents and Settings\All Users\Application
Data\InGenius\UCX\licenses.xml
This file contains license information. It controls what features and phones the application is licensed to use. UC Express checks this file every time it starts to ensure that it is valid. Do not modify this file or the application will not run. If you delete this file you will have to re-enter your license key. Re-entering the license key does not consume another license if you are entering it on the same computer. You cannot move this file to another computer to license the other computer since it contains hardware identification information.
C:\Program Files\Mitel\Unified Communicator
Express\UCExpress.exe
This is the UC Express application. You can pass command line arguments to this application as described in the Command Line Options section.
C:\Program Files\Mitel\Unified Communicator
Express\53xxPCApp.exe
This is the Mitel 5300 PC Companion application. It is responsible for establishing connection to the phone. UC Express calls this application when it needs to connect to a phone.
C:\Program Files\Mitel\Unified Communicator
Express\UCExpress.exe.config
This file contains default application settings. When a user runs UC Express for the first time they inherit these settings. Any changes they make to their configuration are stored in a different location When you install UC Express the installation program creates this file to include either the default options defined in the installer or options you specify during a mass deployment. When you run UCexpress.exe with the /install command line option it updates this file and changes the defaults with the options included

85
Folder Description
with the /install switch. C:\Documents and Settings\All
Users\Application Data\InGenius\UCX\DialingRules.xm
l
If you include Dialing Rules as part of a mass deployment they are stored in the “All Users” folder. If a user edits the shared dialing rules, their changes are stored in a personalized copy, leaving this file untouched.
C:\documents and Settings\usernameFred Bulger\Local
Settings\Application Data\InGenius_Software_Inc\UCX\Di
alingRules.xml
This file stores user defined Dialing Rules.
C:\Documents and Settings\username\Local
Settings\Application Data\Mitel_Networks_Corporatio\Logs
\UCExpress\UCExpress.log
This file contains application logging.
C:\Documents and Settings\username\Local
Settings\Application Data\Runtime.log
This is the default log file for the Mitel 5300 series PC Companion application. It contains information related to communications between the PC and the phone.
C:\Documents and Settings\username\Local
Settings\Application Data\Mitel_Networks_Corporatio\UCExpress.exe_Url_fwl5x3wpwyjtjdxyzsct
wdqpykcdpv4h\<Build Version>\user.config
This contains user defined application settings.