Migrating Oracle Application Container Cloud Service ... · Migrating Oracle Application Container...
64
Oracle® Cloud Migrating Oracle Application Container Cloud Service Applications to Oracle Cloud Infrastructure F15512-03 May 2019
Transcript of Migrating Oracle Application Container Cloud Service ... · Migrating Oracle Application Container...
Oracle® CloudMigrating Oracle Application Container CloudService Applications to Oracle CloudInfrastructure
F15512-03May 2019
Oracle Cloud Migrating Oracle Application Container Cloud Service Applications to Oracle CloudInfrastructure,
F15512-03
Copyright © 2019, 2019, Oracle and/or its affiliates. All rights reserved.
Primary Authors: (primary author), (primary author)
Contributing Authors: (contributing author)
Contributors: (contributor)
This software and related documentation are provided under a license agreement containing restrictions onuse and disclosure and are protected by intellectual property laws. Except as expressly permitted in yourlicense agreement or allowed by law, you may not use, copy, reproduce, translate, broadcast, modify,license, transmit, distribute, exhibit, perform, publish, or display any part, in any form, or by any means.Reverse engineering, disassembly, or decompilation of this software, unless required by law forinteroperability, is prohibited.
The information contained herein is subject to change without notice and is not warranted to be error-free. Ifyou find any errors, please report them to us in writing.
If this is software or related documentation that is delivered to the U.S. Government or anyone licensing it onbehalf of the U.S. Government, then the following notice is applicable:
U.S. GOVERNMENT END USERS: Oracle programs, including any operating system, integrated software,any programs installed on the hardware, and/or documentation, delivered to U.S. Government end users are"commercial computer software" pursuant to the applicable Federal Acquisition Regulation and agency-specific supplemental regulations. As such, use, duplication, disclosure, modification, and adaptation of theprograms, including any operating system, integrated software, any programs installed on the hardware,and/or documentation, shall be subject to license terms and license restrictions applicable to the programs.No other rights are granted to the U.S. Government.
This software or hardware is developed for general use in a variety of information management applications.It is not developed or intended for use in any inherently dangerous applications, including applications thatmay create a risk of personal injury. If you use this software or hardware in dangerous applications, then youshall be responsible to take all appropriate fail-safe, backup, redundancy, and other measures to ensure itssafe use. Oracle Corporation and its affiliates disclaim any liability for any damages caused by use of thissoftware or hardware in dangerous applications.
Oracle and Java are registered trademarks of Oracle and/or its affiliates. Other names may be trademarks oftheir respective owners.
Intel and Intel Xeon are trademarks or registered trademarks of Intel Corporation. All SPARC trademarks areused under license and are trademarks or registered trademarks of SPARC International, Inc. AMD, Opteron,the AMD logo, and the AMD Opteron logo are trademarks or registered trademarks of Advanced MicroDevices. UNIX is a registered trademark of The Open Group.
This software or hardware and documentation may provide access to or information about content, products,and services from third parties. Oracle Corporation and its affiliates are not responsible for and expresslydisclaim all warranties of any kind with respect to third-party content, products, and services unless otherwiseset forth in an applicable agreement between you and Oracle. Oracle Corporation and its affiliates will not beresponsible for any loss, costs, or damages incurred due to your access to or use of third-party content,products, or services, except as set forth in an applicable agreement between you and Oracle.
Contents
1 About Migrating to Oracle Cloud Infrastructure
Why Migrate to Oracle Cloud Infrastructure 1-1
About the Migration Scope 1-1
About Oracle Cloud Infrastructure 1-2
About Oracle Cloud Infrastructure Container Engine for Kubernetes 1-3
About Oracle Cloud Infrastructure Users and Groups 1-3
About the Migration Task Flow 1-3
2 Prepare to Migrate Oracle Application Container Cloud Service toOracle Cloud Infrastructure Container Engine for Kubernetes
Before You Begin 2-1
Understand Downtime Requirements 2-2
Select Oracle Cloud Infrastructure Shapes 2-2
3 Migrate Your Oracle Application Container Cloud ServiceApplications to Oracle Cloud Infrastructure Container Engine forKubernetes
Migrate Your Applications Using the Script Tool 3-1
Download and Install the Migration Script Tool 3-3
Create a Configuration File 3-3
Set up the Environment Variables 3-6
Configure Java EE System and Service Binding Properties 3-7
System Properties 3-7
Service Binding Properties 3-7
Enable Connectivity between the Kubernetes Cluster and Oracle CloudServices 3-9
Create the Application 3-9
Delete the Application 3-11
Get Script Logs 3-12
Migrate Your Applications Manually 3-12
Create a Kubernetes Cluster 3-13
iii

Configure Kubectl 3-14
Build the Docker Image 3-14
Install Additional Linux Packages 3-18
Push the Docker Image to Oracle Cloud Infrastructure Registry 3-24
Set up the Environment Variables 3-26
Configure Java EE System and Service Binding Properties 3-27
Enable Connectivity between the Kubernetes Cluster and Oracle CloudServices 3-29
Create the Kubernetes Configuration Files 3-29
Set Up the Docker Registry Secret and the SSL Certificate 3-34
Deploy the Application 3-35
Set up a Custom URL 3-36
Create a DNS Zone 3-36
Add a DNS Record 3-36
Set up an Ingress Controller 3-37
Configure Role-Based Access 3-37
Create a Default Backend 3-40
Create an Ingress Controller 3-42
Deploy Your Application with an Ingress Controller Setup 3-45
Create an Ingress Resource 3-46
Customize an Ingress Resource 3-47
Create an Ingress Resource for Multiple Applications 3-48
Get Application Logs from the Kubernetes Cluster 3-48
Troubleshoot Migration Problems 3-49
Verify the Status of the Kubernetes Resources 3-49
Delete Resources Created During Migration 3-51
4 Complete the Post-Migrations Tasks
Test the Migrated Application 4-1
Clean Up the Infrastructure and Platform Resources in Oracle Cloud InfrastructureClassic 4-2
iv

1About Migrating to Oracle CloudInfrastructure
Learn about the benefits of migrating your existing Oracle Application Container CloudService applications to Oracle Cloud Infrastructure and get an overview of themigration process.
Topics:
• Why Migrate to Oracle Cloud Infrastructure
• About the Migration Scope
• About Oracle Cloud Infrastructure
• About Oracle Cloud Infrastructure Container Engine for Kubernetes
• About Oracle Cloud Infrastructure Users and Groups
• About the Migration Task Flow
Why Migrate to Oracle Cloud InfrastructureOracle encourages you to migrate your existing cloud resources from Oracle CloudInfrastructure Classic regions. You can gain several advantages by doing so.
In Oracle Cloud, you provision resources in specific regions, which are localized togeographic locations. A region supports either the Oracle Cloud Infrastructure Classicor Oracle Cloud Infrastructure platform.
Oracle Cloud Infrastructure is Oracle's more modern infrastructure platform that'sbased on the latest cloud technologies and standards. It typically provides betterperformance than Oracle Cloud Infrastructure Classic. Oracle Cloud Infrastructure alsohas more predictable pricing and lower costs in terms of Oracle Compute Units(OCPUs) per hour. Most importantly, Oracle continues to invest in Oracle CloudInfrastructure, including the addition of new regions, services, and features. See DataRegions for Platform and Infrastructure Services.
You can benefit from these additional administrative features in Oracle CloudInfrastructure when you migrate your cloud resources from Oracle Cloud InfrastructureClassic:
• Organize cloud resources into a hierarchy of logical compartments.
• Create fine-grained access policies for each compartment.
About the Migration ScopeBefore you migrate your Oracle Application Container Cloud Service applications toOracle Cloud Infrastructure Container Engine for Kubernetes, consider the scope andconstraints of this process.
1-1
Oracle doesn't support the migration of applications that meet any of these conditions:
• The application is configured to use Oracle Identity Cloud Service forauthentication.
• The application uses the cache service.
Most applications also connect to and use other Oracle Cloud services. You canmigrate your application to Oracle Cloud Infrastructure Container Engine forKubernetes and keep the connectivity to other Oracle Cloud services in Oracle CloudInfrastructure Classic or migrate the other services to Oracle Cloud Infrastructure. Thisguide doesn't include the detailed procedure for migrating these services from OracleCloud Infrastructure Classic to Oracle Cloud Infrastructure.
You must consider that after the migration process the application URL will change.
About Oracle Cloud InfrastructureGet familiar with basic Oracle Cloud Infrastructure security, network, and storageconcepts, and their equivalent concepts in Oracle Cloud Infrastructure Classic.
Cloud resources in Oracle Cloud Infrastructure are created in logical compartments.You also create fine-grained policies to control access to the resources within acompartment.
You create instances within an Oracle Cloud Infrastructure region. You also specify anavailability domain (AD), if supported in the selected region. Oracle CloudInfrastructure Classic does not use availability domains.
A virtual cloud network (VCN) is comprised of one or more subnets, and an instance isassigned to a specific subnet. In Oracle Cloud Infrastructure Classic, you assigninstances to IP networks or the shared network. Typically, you create one subnet forthe shared network, and create a separate subnet for each IP network in Oracle CloudInfrastructure Classic. Note that unlike Oracle Cloud Infrastructure Classic, OracleCloud Infrastructure does not allow you to reserve IP addresses for platform services.
A subnet's security lists permit and block traffic to and from specific IP addresses andports. In Oracle Cloud Infrastructure Classic, an instance's access rules provide similarcapabilities, although security lists are configured at the subnet level.
Instances can communicate with resources outside of Oracle Cloud by using OracleCloud Infrastructure FastConnect, which provides a fast, dedicated connection to youron-premises network. This service is equivalent to Oracle Cloud InfrastructureFastConnect Classic. Alternatively, use IPSec VPN in Oracle Cloud Infrastructure as areplacement for VPN as a Service (VPNaaS) or Corente in Oracle Cloud InfrastructureClassic.
A bucket in Oracle Cloud Infrastructure Object Storage can be used to store files andshare them with multiple instances. A user's generated authentication token (authtoken) is required to access the bucket. Oracle Cloud Infrastructure Object StorageClassic provides the same service in Oracle Cloud Infrastructure Classic, but does notuse auth tokens.
To learn more, see Key Concepts and Terminology in the Oracle Cloud Infrastructuredocumentation.
Chapter 1About Oracle Cloud Infrastructure
1-2
About Oracle Cloud Infrastructure Container Engine forKubernetes
Oracle Cloud Infrastructure Container Engine for Kubernetes is a fully-managed,scalable, and highly available service that you can use to deploy your containerizedapplications to the cloud.
You can use Oracle Cloud Infrastructure Container Engine for Kubernetes when yourdevelopment team wants to reliably build, deploy, and manage cloud-nativeapplications. You specify the compute resources that your applications require, andOracle Cloud Infrastructure Container Engine for Kubernetes provisions them onOracle Cloud Infrastructure in an existing tenancy.
A Kubernetes cluster is a group of nodes. The nodes are the machines runningapplications. Each node can be a physical machine or a virtual machine. The node'scapacity (its number of CPUs and amount of memory) is defined when the node iscreated. A cluster can be organized into namespaces, to divide the cluster's resourcesbetween multiple uses.
To learn more about Oracle Cloud Infrastructure Container Engine for Kubernetes, see Overview of Container Engine for Kubernetes.
About Oracle Cloud Infrastructure Users and GroupsUse the Identity and Access Management (IAM) system in Oracle Cloud Infrastructureto manage users, groups, and policies.
A policy is a document that specifies who can access which Oracle CloudInfrastructure resources that your company has, and how. To migrate your OracleApplication Container Cloud Service applications to Oracle Cloud Infrastructure youmust define the policies required to perform operations on Oracle Cloud InfrastructureContainer Engine for Kubernetes clusters and on the Oracle Cloud InfrastructureRegistry repositories . See Policy Configuration for Cluster Creation and Deploymentand Policies to Control Repository Access.
About the Migration Task FlowUnderstand the process of migrating your existing Oracle Application Container CloudService applications to Oracle Cloud Infrastructure Container Engine for Kubernetes.
The following diagram shows the process of deploying an Oracle ApplicationContainer Cloud Service application to Oracle Cloud Infrastructure Container Enginefor Kubernetes.
Chapter 1About Oracle Cloud Infrastructure Container Engine for Kubernetes
1-3

The migration process includes the following tasks:
1. Create the Kubernetes cluster. Create the cluster in Oracle Cloud InfrastructureContainer Engine for Kubernetes.
2. Configure kubectl. Download the kubeconfig file to have access to the cluster byusing kubectl.
3. Create a Docker image. Create the Dockerfile from a template depending on theruntime of your application.
4. Push the Docker image to Oracle Cloud Infrastructure Registry
5. Create the Kubernetes configuration. Set up the deployment.yaml,services.yaml, and env.properties files, including the configuration of theregistry and SSL secrets.
6. Deploy your application to the Kubernetes cluster.
Chapter 1About the Migration Task Flow
1-4
2Prepare to Migrate Oracle ApplicationContainer Cloud Service to Oracle CloudInfrastructure Container Engine forKubernetes
Plan the migration of your Oracle Application Container Cloud Service application toOracle Cloud Infrastructure Container Engine for Kubernetes.
Topics:
• Before You Begin
• Understand Downtime Requirements
• Select Oracle Cloud Infrastructure Shapes
Before You BeginBefore you start migrating your Oracle Application Container Cloud Serviceapplication, you need to meet certain prerequisites described in this section.
Ensure you have the following resources:
• An Oracle Cloud Infrastructure tenancy and a user account
• Access to an existing compartment. See Managing Compartments
• User permissions to perform operations on the Oracle Cloud InfrastructureContainer Engine for Kubernetes clusters and the Oracle Cloud InfrastructureRegistry repositories. See Policy Configuration for Cluster Creation andDeployment and Policies to Control Repository Access
• Generate an authentication token. See Getting an Auth Token
• The application archive, including the manifest.json, and deployment.json fileson your local disk. If you use the migration script tool, you may upload theapplication archive including the manifest.json and the deployment.json file inOracle Cloud Infrastructure Object Storage and generate a pre-authenticatedrequest for the object. See Managing Objects
• (Optional) A public domain name (myapp.example.com) to use for the migratedapplication
• (Optional) If your application requires an SSL endpoint, you need to obtain an SSLcertificate and private key for your application
Additionally, ensure you have installed and configured the following software:
• Docker Engine 17.03 or later (add the user to the Docker group. See ManageDocker as a non-root user)
• Kubectl 1.7.4 or later
2-1
• cURL or Wget
• Python 2.7.5, 3.5, or later (Python is required if you're using the migration scripttool.)
• Oracle Cloud Infrastructure CLI 2.4 or later
Understand Downtime RequirementsThe migration process in this guide does not impact the availability of your existingOracle Application Container Cloud Service instance on Oracle Cloud InfrastructureClassic. This instance continues to run and can serve client requests during thisprocess.
The process does not modify your deployed applications or significantly impact itsperformance.
After your applications are migrated successfully, clients can be rerouted to yourapplications running in Oracle Cloud Infrastructure.
Select Oracle Cloud Infrastructure ShapesIdentify compute shapes that provide similar IaaS resources in Oracle CloudInfrastructure to the shapes that you're currently using for your service instances onOracle Cloud Infrastructure Classic.
A compute shape defines the IaaS resources, such as OCPUs and memory, that areavailable to a specific node in a service instance. Oracle Cloud Infrastructure andOracle Cloud Infrastructure Classic each has its own set of standard compute shapes.See:
• About Shapes in Using Oracle Cloud Infrastructure Compute Classic
• Compute Shapes in the Oracle Cloud Infrastructure documentation
To ensure that a migrated service instance has the same performance characteristicsas the original instance, and can support an equivalent workload, choose Oracle CloudInfrastructure shapes that most closely map to the Oracle Cloud Infrastructure Classicshapes that you specified when you created the instance.
You must also confirm that the chosen shapes are available in your Oracle Cloudtenancy. Oracle configures shape limits for an Oracle Cloud Infrastructure region, orfor a specific availability domain within a region. You can use the console to view thecurrent shape limits for your tenancy, and to request a limit increase if necessary. See Service Limits in the Oracle Cloud Infrastructure documentation.
Chapter 2Understand Downtime Requirements
2-2
3Migrate Your Oracle Application ContainerCloud Service Applications to Oracle CloudInfrastructure Container Engine forKubernetes
You can migrate you Oracle Application Container Cloud Service applications toOracle Cloud Infrastructure Container Engine for Kubernetes using one of thefollowing methods:
• Using the migration script tool: The script helps you to automate the migrationprocess. It automatically creates the resources required to migrate your applicationto Oracle Cloud Infrastructure Container Engine for Kubernetes. It minimizespossible errors if you don't have experience with Kubernetes. The migration scripttool only supports Linux.
• Manually: It guides you through the migration process step by step. This methodgives you a better perspective of what are the resources required to deploy yourapplication in Oracle Cloud Infrastructure Container Engine for Kubernetes.
Topics:
• Migrate Your Applications Using the Script Tool
• Migrate Your Applications Manually
• Get Application Logs from the Kubernetes Cluster
• Troubleshoot Migration Problems
Migrate Your Applications Using the Script ToolMigrate your Oracle Application Container Cloud Service applications to Oracle CloudInfrastructure Container Engine for Kubernetes by using the migration script tool. Themigration script tool helps you to create the Oracle Cloud Infrastructure resourcesrequired to create a Kubernetes cluster and deploy your application. Also, you candeploy your application in an existing Kubernetes cluster.
Migrating an application using the migration script tool involves the following steps:
Create Application
1. Configures Kubectl for the given Kubernetes cluster in Oracle Cloud InfrastructureContainer Engine for Kubernetes. If the Kubernetes cluster doesn't exist, creates aKubernetes cluster with the following details:
• A VCN with the following:
– An Internet gateway
– A NAT gateway
3-1

– Two load balancer subnets. One per availability domain for two availabilitydomains
– Three worker node subnets. One per availability domain for threeavailability domains
– Security lists and routing rules for the load balancing and worker nodesubnets
• A worker node pool with the following:
– Three worker nodes. One per availability domain for three availabilitydomains.
– Node image: Oracle-Linux-7.5
– Node shape: VM.Standard2.1
2. Builds the application image
• If a URL is provided downloads the application image to the local disk
• Builds a local Docker image with optional Linux packages
• Pushes the local Docker image to Oracle Cloud Infrastructure Registry
3. Creates the application in the Kubernetes cluster
• Creates the ConfigMap for the environment variables
• Creates the secret for the TLS certificate and key, if SSL is required
• Creates the Kubernetes deployment and the service yaml configuration
• Creates the deployment and the service for the application using a yamlconfiguration
• Sets up an Nginx ingress controller, if HTTP to HTTPS redirect or IP_HASHload balancing policy is configured in application manifest
4. (Optional) Sets up a custom URL
• Creates a DNS zone (if it doesn't exist already)
• Adds a DNS record for the application in a DNS zone
Delete Application
1. Deletes the DNS record
2. Deletes the Kubernetes resources (service, deployment, ConfigMap and secrets)
3. (Optional) Deletes the temporary files (application archive and contents,Dockerfile, Kubernetes configuration file and logs)
Topics:
• Download and Install the Migration Script Tool
• Create a Configuration File
• Set up the Environment Variables
• Configure Java EE System and Service Binding Properties
• Enable Connectivity between the Kubernetes Cluster and Oracle Cloud Services
• Create the Application
• Delete the Application
Chapter 3Migrate Your Applications Using the Script Tool
3-2

Download and Install the Migration Script ToolThe migration script tool helps you to migrate your Oracle Application Container CloudService applications to Oracle Cloud Infrastructure Container Engine for Kubernetes.
To download and install the migration script tool:
1. In the Oracle Application Container Cloud Service console, click Help, then clickDownload Center, and download the migration script tool.
2. Extract the contents of zip file to a directory.
3. Open a command-line window and go to the directory where you extracted thecontent.
4. Run the help command.
python app.py -h
Example:
$ python app.py -husage: app.py [-h] [-a ACTION] [-f CONFIGFILE] Performs various actions on an application in OKE (OCI). optional arguments: -h, --help show this help message and exit -a ACTION, --action ACTION Action to perform: a) create - Create an application (default), b) delete - Delete an application. -f CONFIGFILE, --configFile CONFIGFILE Location of config file containing information required to perform the action.
Create a Configuration FileYou need to create a configuration file to migrate an application using the migrationscript tool. This file is required to create an application in Oracle Cloud InfrastructureContainer Engine for Kubernetes and contains the information in JSON format.
To create a configuration file, use the following template:
{ "account": { "authToken": "<auth-token>", "profile": "<oci-profile-name>", "OCIConfig":"<oci-config-path>" }, "application": { "name": "<application-name>", "runtime": "<application-runtime>", "source": "<application-archive-location>", "manifest": "<manifest-file>",
Chapter 3Migrate Your Applications Using the Script Tool
3-3
"deployment": "<deployment-file>", "ssl": { "tlsKey": "<TLS-key>", "tlsCert": "<TLS-certificate>" }, "environment-variables":{ "<env-var-key1>": "<env-var-value1>", "<env-var-key2>": "<env-var-value2>" } }, "cluster": { "compartmentOCID": "<compartmentOCID>", "name": "<oke-cluster-name>", "sshPublicKey": "<sshPublicKey>" }, "dnszone": { "name": "<dnszone-name>", "compartmentOCID": "<compartmentOCID-zone>" }}
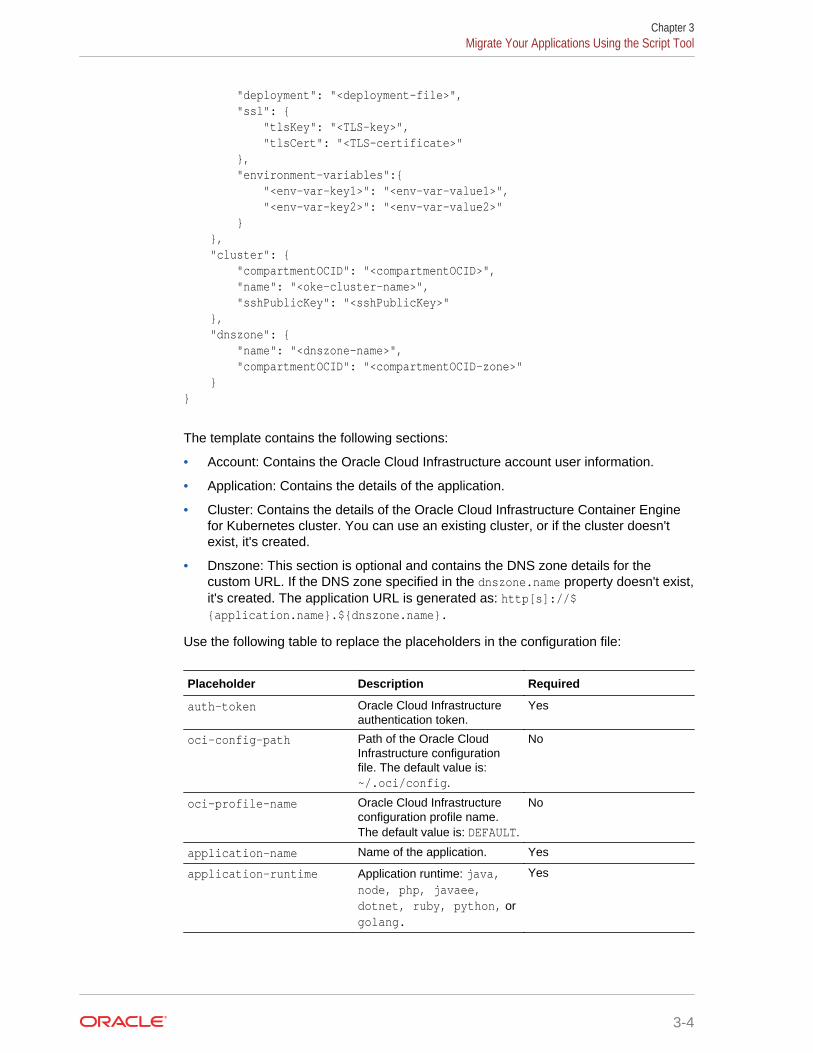
The template contains the following sections:
• Account: Contains the Oracle Cloud Infrastructure account user information.
• Application: Contains the details of the application.
• Cluster: Contains the details of the Oracle Cloud Infrastructure Container Enginefor Kubernetes cluster. You can use an existing cluster, or if the cluster doesn'texist, it's created.
• Dnszone: This section is optional and contains the DNS zone details for thecustom URL. If the DNS zone specified in the dnszone.name property doesn't exist,it's created. The application URL is generated as: http[s]://${application.name}.${dnszone.name}.
Use the following table to replace the placeholders in the configuration file:
Placeholder Description Required
auth-token Oracle Cloud Infrastructureauthentication token.
Yes
oci-config-path Path of the Oracle CloudInfrastructure configurationfile. The default value is:~/.oci/config.
No
oci-profile-name Oracle Cloud Infrastructureconfiguration profile name.The default value is: DEFAULT.
No
application-name Name of the application. Yes
application-runtime Application runtime: java,node, php, javaee,dotnet, ruby, python, orgolang.
Yes
Chapter 3Migrate Your Applications Using the Script Tool
3-4
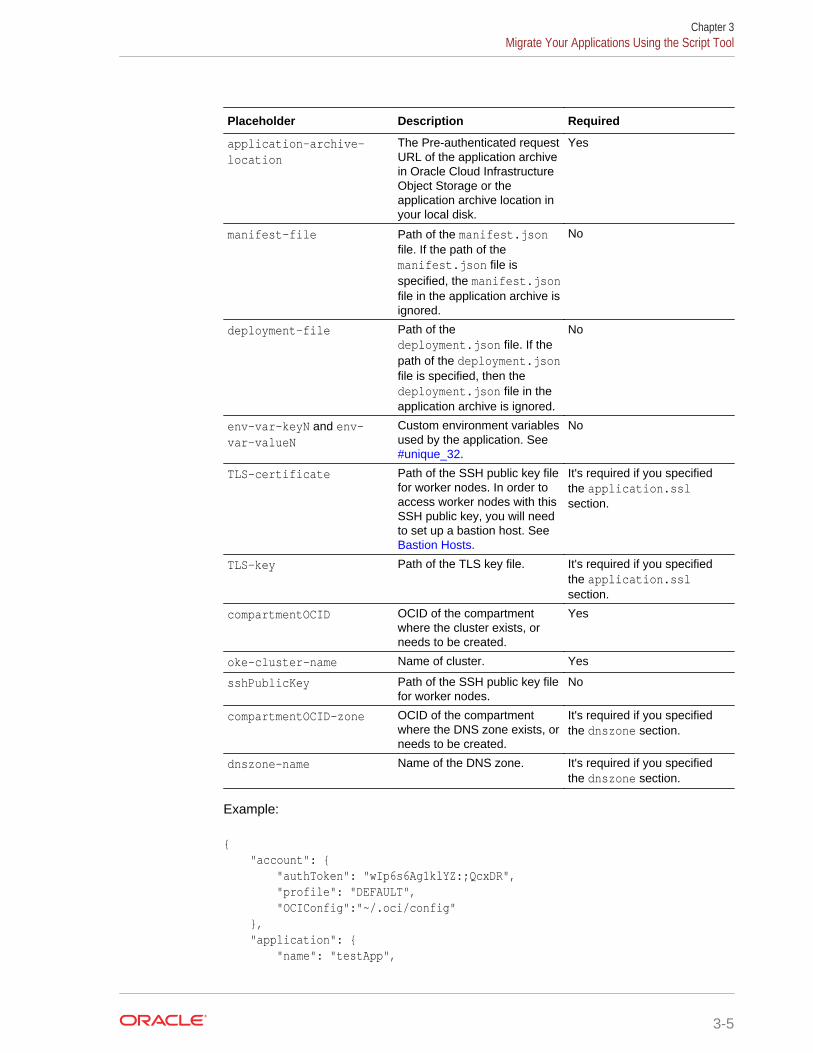
Placeholder Description Required
application-archive-location
The Pre-authenticated requestURL of the application archivein Oracle Cloud InfrastructureObject Storage or theapplication archive location inyour local disk.
Yes
manifest-file Path of the manifest.jsonfile. If the path of themanifest.json file isspecified, the manifest.jsonfile in the application archive isignored.
No
deployment-file Path of thedeployment.json file. If thepath of the deployment.jsonfile is specified, then thedeployment.json file in theapplication archive is ignored.
No
env-var-keyN and env-var-valueN
Custom environment variablesused by the application. See #unique_32.
No
TLS-certificate Path of the SSH public key filefor worker nodes. In order toaccess worker nodes with thisSSH public key, you will needto set up a bastion host. See Bastion Hosts.
It's required if you specifiedthe application.sslsection.
TLS-key Path of the TLS key file. It's required if you specifiedthe application.sslsection.
compartmentOCID OCID of the compartmentwhere the cluster exists, orneeds to be created.
Yes
oke-cluster-name Name of cluster. Yes
sshPublicKey Path of the SSH public key filefor worker nodes.
No
compartmentOCID-zone OCID of the compartmentwhere the DNS zone exists, orneeds to be created.
It's required if you specifiedthe dnszone section.
dnszone-name Name of the DNS zone. It's required if you specifiedthe dnszone section.
Example:
{ "account": { "authToken": "wIp6s6Ag1klYZ:;QcxDR", "profile": "DEFAULT", "OCIConfig":"~/.oci/config" }, "application": { "name": "testApp",
Chapter 3Migrate Your Applications Using the Script Tool
3-5
"runtime": "java", "source": "https://objectstorage.us-ashburn-1.oraclecloud.com/p/Wul6OaR7rjB9kHwgYSY-wEjF5a-VBO1zURGZCODL50k/n/tenancy1/b/dt-accs/o/java-sample-18.4.6.zip", "ssl": { "tlsKey": "tls.key", "tlsCert": "tls.crt" }, "environment-variables": { "key1": "value1", "key2": "value2" } }, "cluster": { "compartmentOCID": "ocid1.compartment.oc1..aaaaaaaac5auvec5dn746hr7cndfan5rscrawzdkzwolsgew4deow3shjyra", "name": "testCluster", "sshPublicKey": "/home/user1/.ssh/id_rsa.pub" }, "dnszone": { "name": "example.com", "compartmentOCID": "ocid1.compartment.oc1..aaaaaaaac5auvec5dn746hr7cndfan5rscrawzdkzwolsgew4deow3shjyra" }}
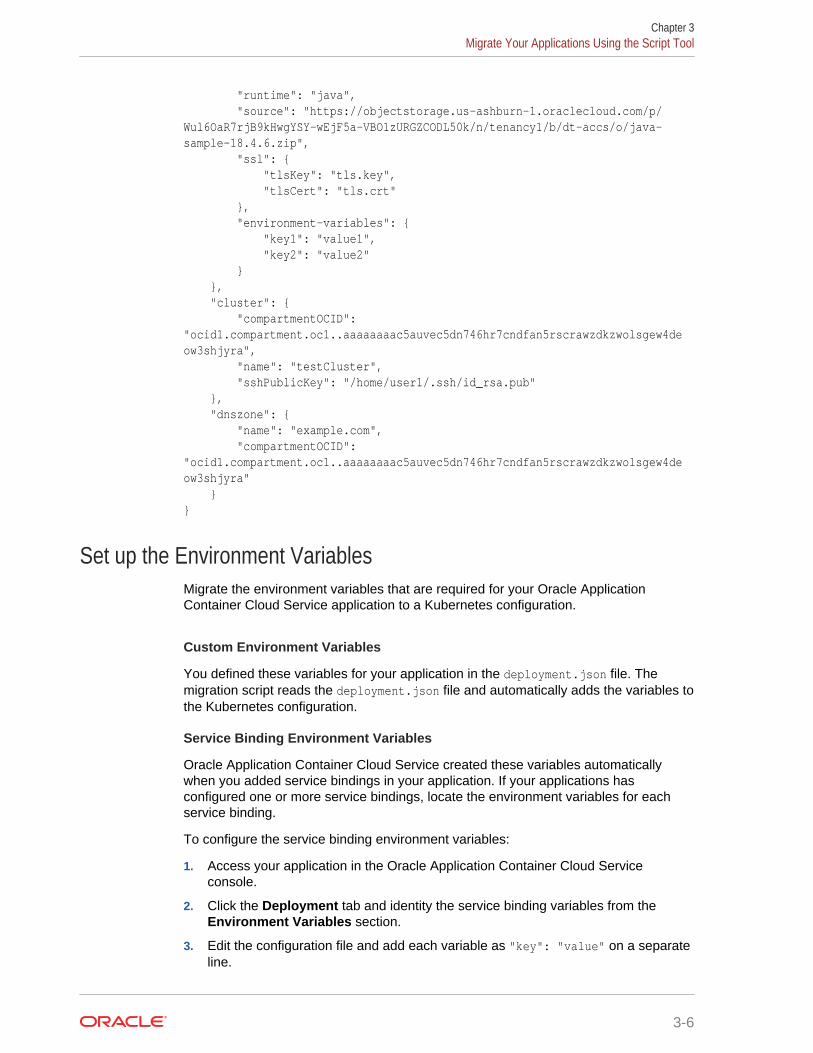
Set up the Environment VariablesMigrate the environment variables that are required for your Oracle ApplicationContainer Cloud Service application to a Kubernetes configuration.
Custom Environment Variables
You defined these variables for your application in the deployment.json file. Themigration script reads the deployment.json file and automatically adds the variables tothe Kubernetes configuration.
Service Binding Environment Variables
Oracle Application Container Cloud Service created these variables automaticallywhen you added service bindings in your application. If your applications hasconfigured one or more service bindings, locate the environment variables for eachservice binding.
To configure the service binding environment variables:
1. Access your application in the Oracle Application Container Cloud Serviceconsole.
2. Click the Deployment tab and identity the service binding variables from theEnvironment Variables section.
3. Edit the configuration file and add each variable as "key": "value" on a separateline.
Chapter 3Migrate Your Applications Using the Script Tool
3-6
Example:
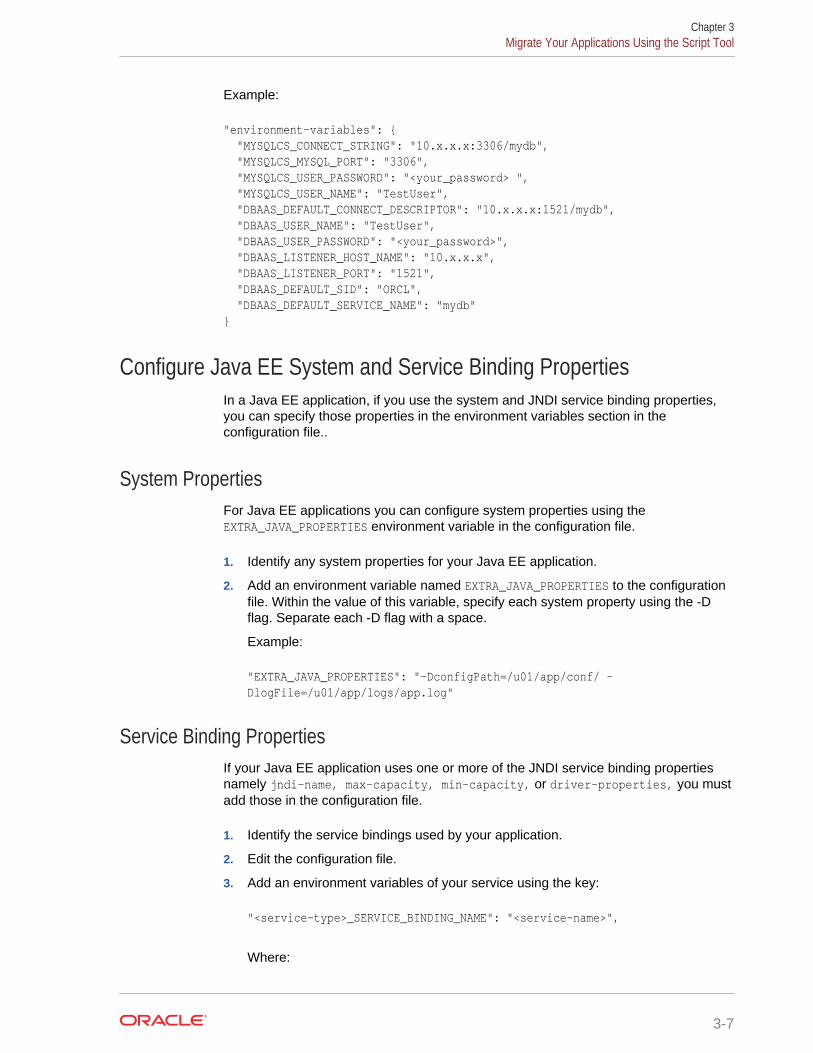
"environment-variables": { "MYSQLCS_CONNECT_STRING": "10.x.x.x:3306/mydb", "MYSQLCS_MYSQL_PORT": "3306", "MYSQLCS_USER_PASSWORD": "<your_password> ", "MYSQLCS_USER_NAME": "TestUser", "DBAAS_DEFAULT_CONNECT_DESCRIPTOR": "10.x.x.x:1521/mydb", "DBAAS_USER_NAME": "TestUser", "DBAAS_USER_PASSWORD": "<your_password>", "DBAAS_LISTENER_HOST_NAME": "10.x.x.x", "DBAAS_LISTENER_PORT": "1521", "DBAAS_DEFAULT_SID": "ORCL", "DBAAS_DEFAULT_SERVICE_NAME": "mydb"}
Configure Java EE System and Service Binding PropertiesIn a Java EE application, if you use the system and JNDI service binding properties,you can specify those properties in the environment variables section in theconfiguration file..
System PropertiesFor Java EE applications you can configure system properties using theEXTRA_JAVA_PROPERTIES environment variable in the configuration file.
1. Identify any system properties for your Java EE application.
2. Add an environment variable named EXTRA_JAVA_PROPERTIES to the configurationfile. Within the value of this variable, specify each system property using the -Dflag. Separate each -D flag with a space.
Example:
"EXTRA_JAVA_PROPERTIES": "-DconfigPath=/u01/app/conf/ -DlogFile=/u01/app/logs/app.log"
Service Binding PropertiesIf your Java EE application uses one or more of the JNDI service binding propertiesnamely jndi-name, max-capacity, min-capacity, or driver-properties, you mustadd those in the configuration file.
1. Identify the service bindings used by your application.
2. Edit the configuration file.
3. Add an environment variables of your service using the key:
"<service-type>_SERVICE_BINDING_NAME": "<service-name>",
Where:
Chapter 3Migrate Your Applications Using the Script Tool
3-7
• <service-type> is the service type. For example, DBAAS, MYSQLCS etc.
• <service-name> is the name of your service.
Example:
"DBAAS_SERVICE_BINDING_NAME": "testDb"
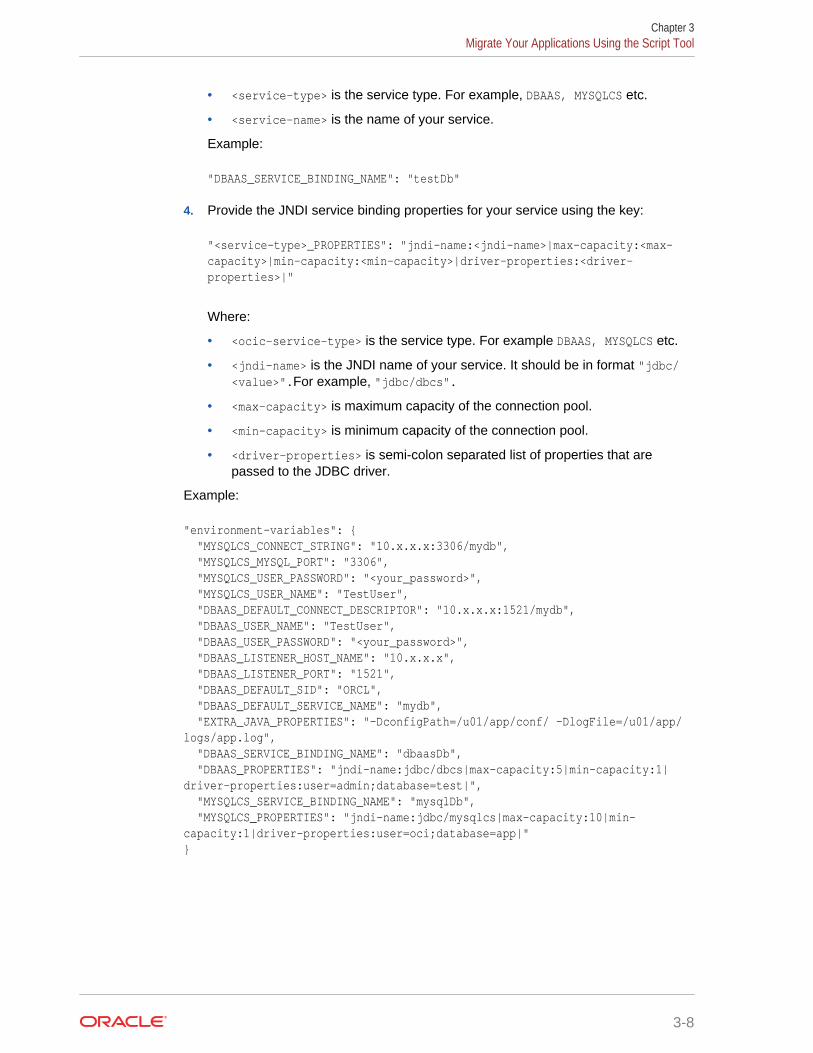
4. Provide the JNDI service binding properties for your service using the key:
"<service-type>_PROPERTIES": "jndi-name:<jndi-name>|max-capacity:<max-capacity>|min-capacity:<min-capacity>|driver-properties:<driver-properties>|"
Where:
• <ocic-service-type> is the service type. For example DBAAS, MYSQLCS etc.
• <jndi-name> is the JNDI name of your service. It should be in format "jdbc/<value>".For example, "jdbc/dbcs".
• <max-capacity> is maximum capacity of the connection pool.
• <min-capacity> is minimum capacity of the connection pool.
• <driver-properties> is semi-colon separated list of properties that arepassed to the JDBC driver.
Example:
"environment-variables": { "MYSQLCS_CONNECT_STRING": "10.x.x.x:3306/mydb", "MYSQLCS_MYSQL_PORT": "3306", "MYSQLCS_USER_PASSWORD": "<your_password>", "MYSQLCS_USER_NAME": "TestUser", "DBAAS_DEFAULT_CONNECT_DESCRIPTOR": "10.x.x.x:1521/mydb", "DBAAS_USER_NAME": "TestUser", "DBAAS_USER_PASSWORD": "<your_password>", "DBAAS_LISTENER_HOST_NAME": "10.x.x.x", "DBAAS_LISTENER_PORT": "1521", "DBAAS_DEFAULT_SID": "ORCL", "DBAAS_DEFAULT_SERVICE_NAME": "mydb", "EXTRA_JAVA_PROPERTIES": "-DconfigPath=/u01/app/conf/ -DlogFile=/u01/app/logs/app.log", "DBAAS_SERVICE_BINDING_NAME": "dbaasDb", "DBAAS_PROPERTIES": "jndi-name:jdbc/dbcs|max-capacity:5|min-capacity:1|driver-properties:user=admin;database=test|", "MYSQLCS_SERVICE_BINDING_NAME": "mysqlDb", "MYSQLCS_PROPERTIES": "jndi-name:jdbc/mysqlcs|max-capacity:10|min-capacity:1|driver-properties:user=oci;database=app|"}
Chapter 3Migrate Your Applications Using the Script Tool
3-8
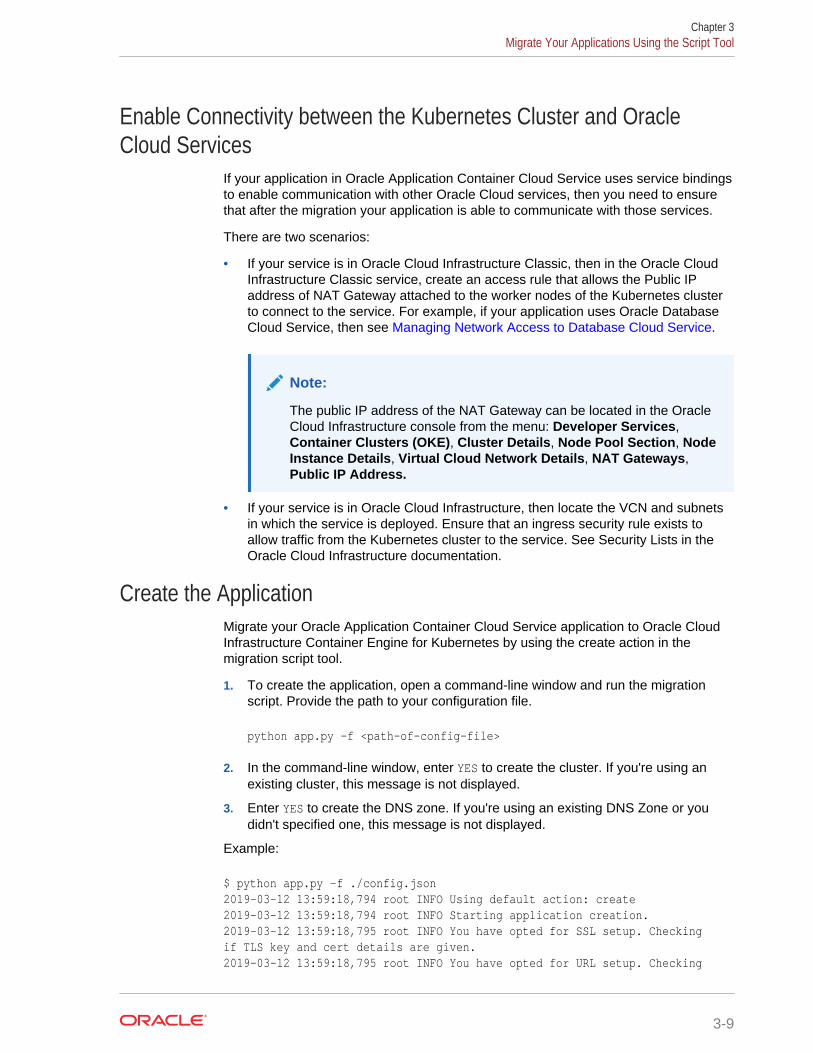
Enable Connectivity between the Kubernetes Cluster and OracleCloud Services
If your application in Oracle Application Container Cloud Service uses service bindingsto enable communication with other Oracle Cloud services, then you need to ensurethat after the migration your application is able to communicate with those services.
There are two scenarios:
• If your service is in Oracle Cloud Infrastructure Classic, then in the Oracle CloudInfrastructure Classic service, create an access rule that allows the Public IPaddress of NAT Gateway attached to the worker nodes of the Kubernetes clusterto connect to the service. For example, if your application uses Oracle DatabaseCloud Service, then see Managing Network Access to Database Cloud Service.
Note:
The public IP address of the NAT Gateway can be located in the OracleCloud Infrastructure console from the menu: Developer Services,Container Clusters (OKE), Cluster Details, Node Pool Section, NodeInstance Details, Virtual Cloud Network Details, NAT Gateways,Public IP Address.
• If your service is in Oracle Cloud Infrastructure, then locate the VCN and subnetsin which the service is deployed. Ensure that an ingress security rule exists toallow traffic from the Kubernetes cluster to the service. See Security Lists in theOracle Cloud Infrastructure documentation.
Create the ApplicationMigrate your Oracle Application Container Cloud Service application to Oracle CloudInfrastructure Container Engine for Kubernetes by using the create action in themigration script tool.
1. To create the application, open a command-line window and run the migrationscript. Provide the path to your configuration file.
python app.py -f <path-of-config-file>
2. In the command-line window, enter YES to create the cluster. If you're using anexisting cluster, this message is not displayed.
3. Enter YES to create the DNS zone. If you're using an existing DNS Zone or youdidn't specified one, this message is not displayed.
Example:
$ python app.py -f ./config.json2019-03-12 13:59:18,794 root INFO Using default action: create2019-03-12 13:59:18,794 root INFO Starting application creation.2019-03-12 13:59:18,795 root INFO You have opted for SSL setup. Checking if TLS key and cert details are given.2019-03-12 13:59:18,795 root INFO You have opted for URL setup. Checking
Chapter 3Migrate Your Applications Using the Script Tool
3-9
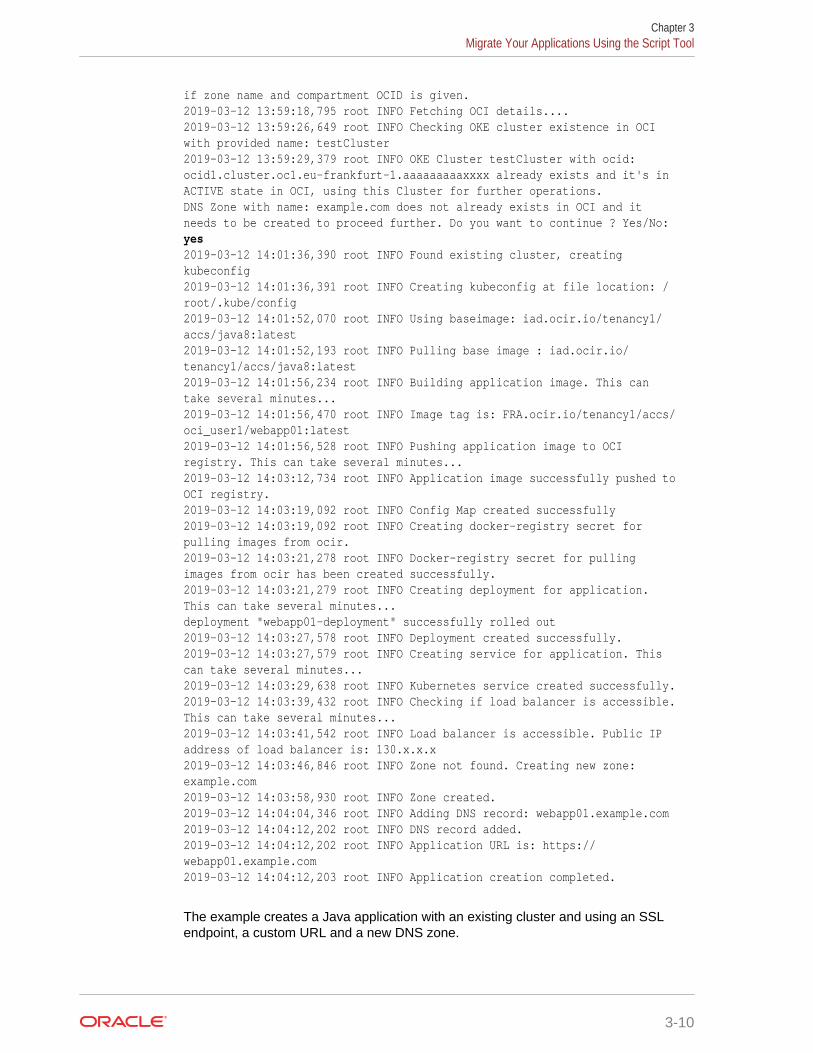
if zone name and compartment OCID is given.2019-03-12 13:59:18,795 root INFO Fetching OCI details....2019-03-12 13:59:26,649 root INFO Checking OKE cluster existence in OCI with provided name: testCluster2019-03-12 13:59:29,379 root INFO OKE Cluster testCluster with ocid: ocid1.cluster.oc1.eu-frankfurt-1.aaaaaaaaaxxxx already exists and it's in ACTIVE state in OCI, using this Cluster for further operations.DNS Zone with name: example.com does not already exists in OCI and it needs to be created to proceed further. Do you want to continue ? Yes/No: yes2019-03-12 14:01:36,390 root INFO Found existing cluster, creating kubeconfig2019-03-12 14:01:36,391 root INFO Creating kubeconfig at file location: /root/.kube/config2019-03-12 14:01:52,070 root INFO Using baseimage: iad.ocir.io/tenancy1/accs/java8:latest2019-03-12 14:01:52,193 root INFO Pulling base image : iad.ocir.io/tenancy1/accs/java8:latest2019-03-12 14:01:56,234 root INFO Building application image. This can take several minutes...2019-03-12 14:01:56,470 root INFO Image tag is: FRA.ocir.io/tenancy1/accs/oci_user1/webapp01:latest2019-03-12 14:01:56,528 root INFO Pushing application image to OCI registry. This can take several minutes...2019-03-12 14:03:12,734 root INFO Application image successfully pushed to OCI registry.2019-03-12 14:03:19,092 root INFO Config Map created successfully2019-03-12 14:03:19,092 root INFO Creating docker-registry secret for pulling images from ocir.2019-03-12 14:03:21,278 root INFO Docker-registry secret for pulling images from ocir has been created successfully.2019-03-12 14:03:21,279 root INFO Creating deployment for application. This can take several minutes...deployment "webapp01-deployment" successfully rolled out2019-03-12 14:03:27,578 root INFO Deployment created successfully.2019-03-12 14:03:27,579 root INFO Creating service for application. This can take several minutes...2019-03-12 14:03:29,638 root INFO Kubernetes service created successfully.2019-03-12 14:03:39,432 root INFO Checking if load balancer is accessible. This can take several minutes...2019-03-12 14:03:41,542 root INFO Load balancer is accessible. Public IP address of load balancer is: 130.x.x.x2019-03-12 14:03:46,846 root INFO Zone not found. Creating new zone: example.com2019-03-12 14:03:58,930 root INFO Zone created.2019-03-12 14:04:04,346 root INFO Adding DNS record: webapp01.example.com2019-03-12 14:04:12,202 root INFO DNS record added.2019-03-12 14:04:12,202 root INFO Application URL is: https://webapp01.example.com2019-03-12 14:04:12,203 root INFO Application creation completed.
The example creates a Java application with an existing cluster and using an SSLendpoint, a custom URL and a new DNS zone.
Chapter 3Migrate Your Applications Using the Script Tool
3-10
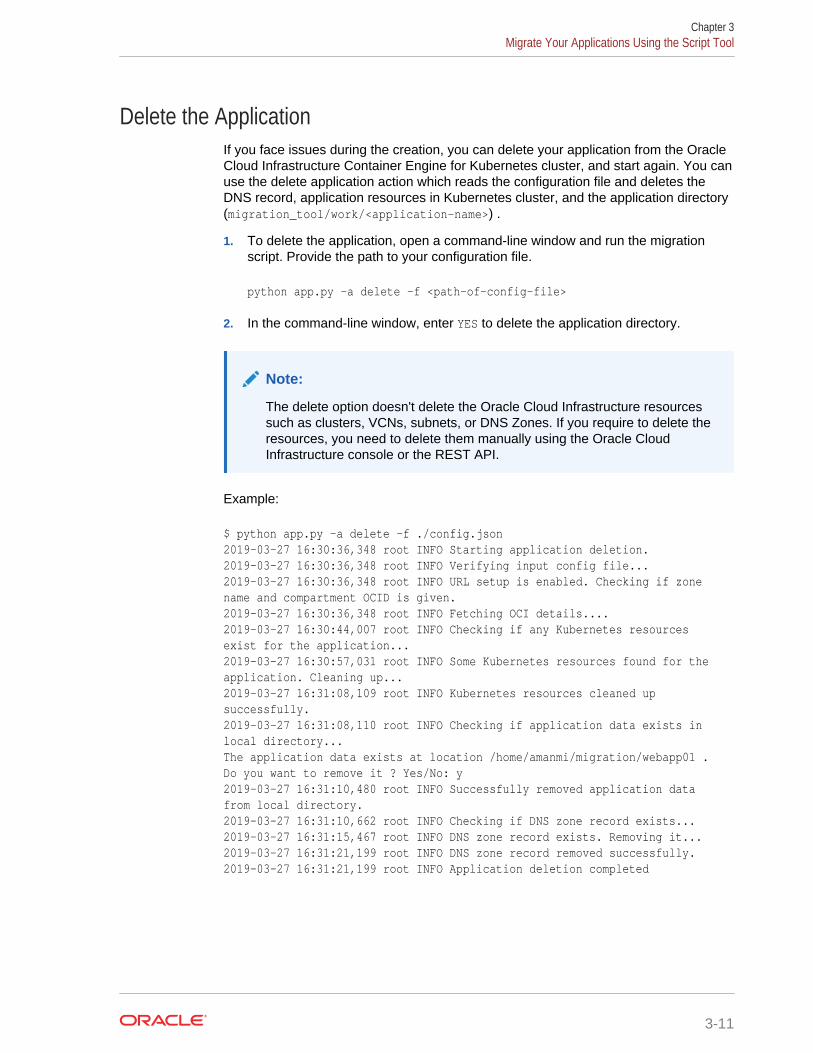
Delete the ApplicationIf you face issues during the creation, you can delete your application from the OracleCloud Infrastructure Container Engine for Kubernetes cluster, and start again. You canuse the delete application action which reads the configuration file and deletes theDNS record, application resources in Kubernetes cluster, and the application directory(migration_tool/work/<application-name>) .
1. To delete the application, open a command-line window and run the migrationscript. Provide the path to your configuration file.
python app.py -a delete -f <path-of-config-file>
2. In the command-line window, enter YES to delete the application directory.
Note:
The delete option doesn't delete the Oracle Cloud Infrastructure resourcessuch as clusters, VCNs, subnets, or DNS Zones. If you require to delete theresources, you need to delete them manually using the Oracle CloudInfrastructure console or the REST API.
Example:
$ python app.py -a delete -f ./config.json2019-03-27 16:30:36,348 root INFO Starting application deletion.2019-03-27 16:30:36,348 root INFO Verifying input config file...2019-03-27 16:30:36,348 root INFO URL setup is enabled. Checking if zone name and compartment OCID is given.2019-03-27 16:30:36,348 root INFO Fetching OCI details....2019-03-27 16:30:44,007 root INFO Checking if any Kubernetes resources exist for the application...2019-03-27 16:30:57,031 root INFO Some Kubernetes resources found for the application. Cleaning up...2019-03-27 16:31:08,109 root INFO Kubernetes resources cleaned up successfully.2019-03-27 16:31:08,110 root INFO Checking if application data exists in local directory...The application data exists at location /home/amanmi/migration/webapp01 . Do you want to remove it ? Yes/No: y2019-03-27 16:31:10,480 root INFO Successfully removed application data from local directory.2019-03-27 16:31:10,662 root INFO Checking if DNS zone record exists...2019-03-27 16:31:15,467 root INFO DNS zone record exists. Removing it...2019-03-27 16:31:21,199 root INFO DNS zone record removed successfully.2019-03-27 16:31:21,199 root INFO Application deletion completed
Chapter 3Migrate Your Applications Using the Script Tool
3-11

Get Script LogsYou can get detailed script logs from: $SCRIPT_ROOT_FOLDER/work/<app-name>/<action>/logs/accs-migration.log.
Where:
• $SCRIPT_ROOT_FOLDER the directory where it's the migration script tool (app.py).
• <app-name> it's the application name you specified in your configuration file.
Example:
$ tail -10 /home/user1/migration/work/webapp01/create/logs/accs-migration.log2019-03-11 20:30:59,143 root INFO Load balancer is accessible. Public IP address of load balancer is: 132.x.x.x2019-03-11 20:31:10,166 root INFO Zone already exists: example.com2019-03-11 20:31:10,167 root DEBUG DNS record: webapp01.example.com2019-03-11 20:31:14,101 root INFO Zone record already exists: {u'domain': u'webapp01.example.com', u'record-hash': u'd4b80feda63ed0a90523073253f6edfa', u'rtype': u'A', u'ttl': 1800, u'rdata': u'132.x.x.x', u'is-protected': False, u'rrset-version': u'146'}2019-03-11 20:31:14,101 root INFO Deleting existing zone record: webapp01.example.com2019-03-11 20:31:18,998 root INFO Zone record deleted.2019-03-11 20:31:18,998 root INFO Adding DNS record: webapp01.example.com2019-03-11 20:31:27,295 root INFO DNS record added.2019-03-11 20:31:27,296 root INFO Application URL is: https://webapp01.example.com2019-03-11 20:31:27,297 root INFO Application creation completed.
Migrate Your Applications ManuallyCreate a Docker image based on your Oracle Application Container Cloud Serviceapplication, and then deploy it to Oracle Cloud Infrastructure Container Engine forKubernetes.
Topics:
• Create a Kubernetes Cluster
• Configure Kubectl
• Build the Docker Image
• Install Additional Linux Packages
• Push the Docker Image to Oracle Cloud Infrastructure Registry
• Set up the Environment Variables
• Configure Java EE System and Service Binding Properties
• Enable Connectivity between the Kubernetes Cluster and Oracle Cloud Services
• Create the Kubernetes Configuration Files
• Set Up the Docker Registry Secret and the SSL Certificate
Chapter 3Migrate Your Applications Manually
3-12
• Deploy the Application
• Set up a Custom URL
• Set up an Ingress Controller
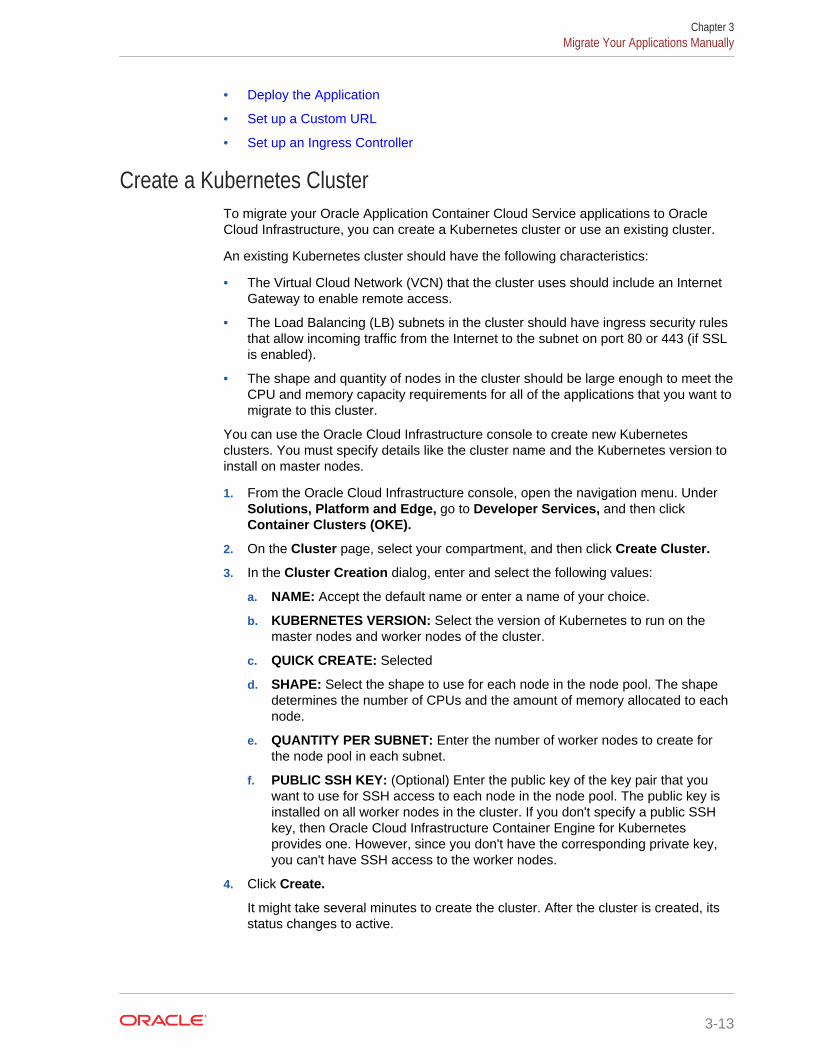
Create a Kubernetes ClusterTo migrate your Oracle Application Container Cloud Service applications to OracleCloud Infrastructure, you can create a Kubernetes cluster or use an existing cluster.
An existing Kubernetes cluster should have the following characteristics:
• The Virtual Cloud Network (VCN) that the cluster uses should include an InternetGateway to enable remote access.
• The Load Balancing (LB) subnets in the cluster should have ingress security rulesthat allow incoming traffic from the Internet to the subnet on port 80 or 443 (if SSLis enabled).
• The shape and quantity of nodes in the cluster should be large enough to meet theCPU and memory capacity requirements for all of the applications that you want tomigrate to this cluster.
You can use the Oracle Cloud Infrastructure console to create new Kubernetesclusters. You must specify details like the cluster name and the Kubernetes version toinstall on master nodes.
1. From the Oracle Cloud Infrastructure console, open the navigation menu. UnderSolutions, Platform and Edge, go to Developer Services, and then clickContainer Clusters (OKE).
2. On the Cluster page, select your compartment, and then click Create Cluster.
3. In the Cluster Creation dialog, enter and select the following values:
a. NAME: Accept the default name or enter a name of your choice.
b. KUBERNETES VERSION: Select the version of Kubernetes to run on themaster nodes and worker nodes of the cluster.
c. QUICK CREATE: Selected
d. SHAPE: Select the shape to use for each node in the node pool. The shapedetermines the number of CPUs and the amount of memory allocated to eachnode.
e. QUANTITY PER SUBNET: Enter the number of worker nodes to create forthe node pool in each subnet.
f. PUBLIC SSH KEY: (Optional) Enter the public key of the key pair that youwant to use for SSH access to each node in the node pool. The public key isinstalled on all worker nodes in the cluster. If you don't specify a public SSHkey, then Oracle Cloud Infrastructure Container Engine for Kubernetesprovides one. However, since you don't have the corresponding private key,you can't have SSH access to the worker nodes.
4. Click Create.
It might take several minutes to create the cluster. After the cluster is created, itsstatus changes to active.
Chapter 3Migrate Your Applications Manually
3-13
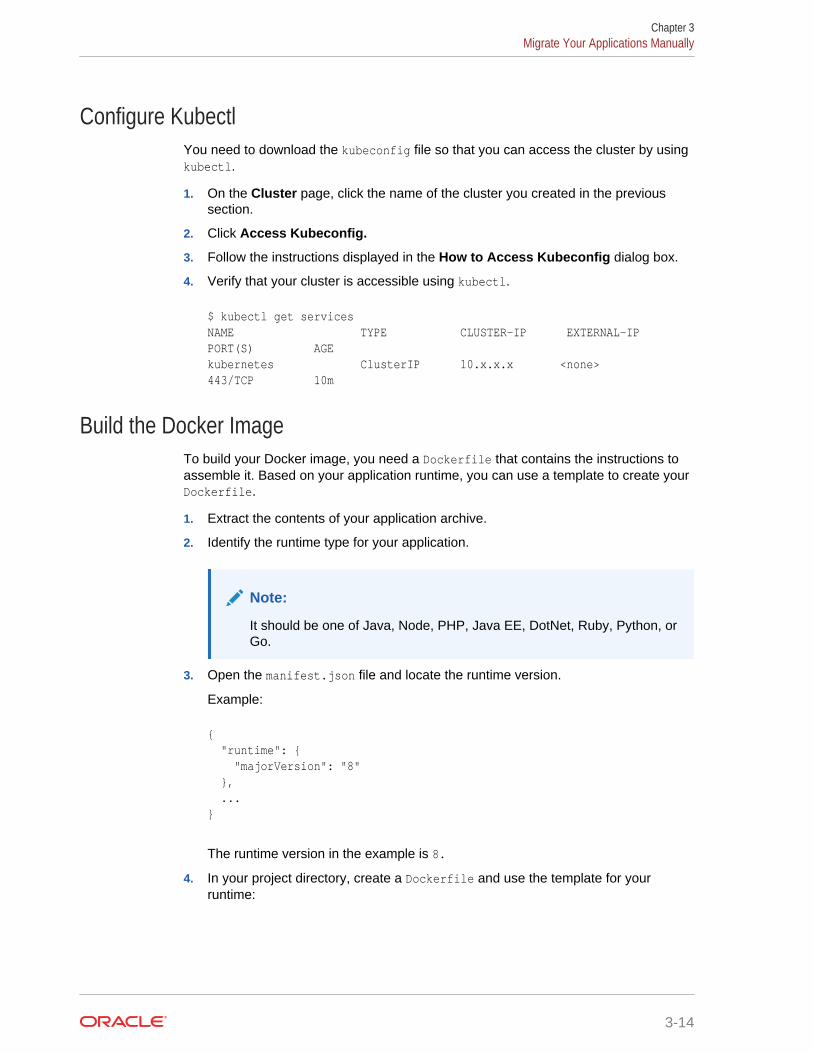
Configure KubectlYou need to download the kubeconfig file so that you can access the cluster by usingkubectl.
1. On the Cluster page, click the name of the cluster you created in the previoussection.
2. Click Access Kubeconfig.
3. Follow the instructions displayed in the How to Access Kubeconfig dialog box.
4. Verify that your cluster is accessible using kubectl.
$ kubectl get servicesNAME TYPE CLUSTER-IP EXTERNAL-IP PORT(S) AGEkubernetes ClusterIP 10.x.x.x <none> 443/TCP 10m
Build the Docker ImageTo build your Docker image, you need a Dockerfile that contains the instructions toassemble it. Based on your application runtime, you can use a template to create yourDockerfile.
1. Extract the contents of your application archive.
2. Identify the runtime type for your application.
Note:
It should be one of Java, Node, PHP, Java EE, DotNet, Ruby, Python, orGo.
3. Open the manifest.json file and locate the runtime version.
Example:
{ "runtime": { "majorVersion": "8" }, ...}
The runtime version in the example is 8.
4. In your project directory, create a Dockerfile and use the template for yourruntime:
Chapter 3Migrate Your Applications Manually
3-14

• Java:
FROM iad.ocir.io/psmsvc3/accs/java<runtime-version>:latestENV APP_HOME=/u01/appWORKDIR /u01/appEXPOSE 8080USER rootCOPY . /u01/appRUN if [ -f /u01/app/linux-packages.txt ] ; then chmod 755 /u01/app/package-installer.sh && /u01/app/package-installer.sh ; fiRUN mkdir -p /u01/scripts /u01/logs/ \ && chown -R apaas:apaas /u01/USER apaas
• Node:
FROM iad.ocir.io/psmsvc3/accs/node<runtime-version>:latestENV APP_HOME=/u01/appWORKDIR /u01/appEXPOSE 8080USER rootCOPY . /u01/appRUN if [ -f /u01/app/linux-packages.txt ] ; then chmod 755 /u01/app/package-installer.sh && /u01/app/package-installer.sh ; fiRUN mkdir -p /u01/scripts /u01/logs/ \ && chown -R apaas:apaas /u01/USER apaas
• Java EE:
FROM iad.ocir.io/psmsvc3/accs/javaee<runtime-version>:latestENV APP_HOME=/u01/appWORKDIR /u01/appEXPOSE 8080USER rootCOPY . /u01/appRUN if [ -f /u01/app/linux-packages.txt ] ; then chmod 755 /u01/app/package-installer.sh && /u01/app/package-installer.sh ; fiRUN mkdir -p /u01/logs/ \ && chown -R apaas:apaas /u01/USER apaasENTRYPOINT ["sh", "-c", "$SCRIPT_HOME/post-install.sh && $DOMAIN_HOME/startServer.sh"]
• PHP:
FROM iad.ocir.io/psmsvc3/accs/php<runtime-version>:latestENV APP_HOME=/u01/appWORKDIR /u01/appEXPOSE 8080USER root
Chapter 3Migrate Your Applications Manually
3-15
COPY . /u01/appRUN if [ -f /u01/app/linux-packages.txt ] ; then chmod 755 /u01/app/package-installer.sh && /u01/app/package-installer.sh ; fiRUN mkdir -p /u01/scripts /u01/logs/ \ && chown -R apaas:apaas /u01/USER apaasENTRYPOINT ["sh", "-c", "apache2-run"]
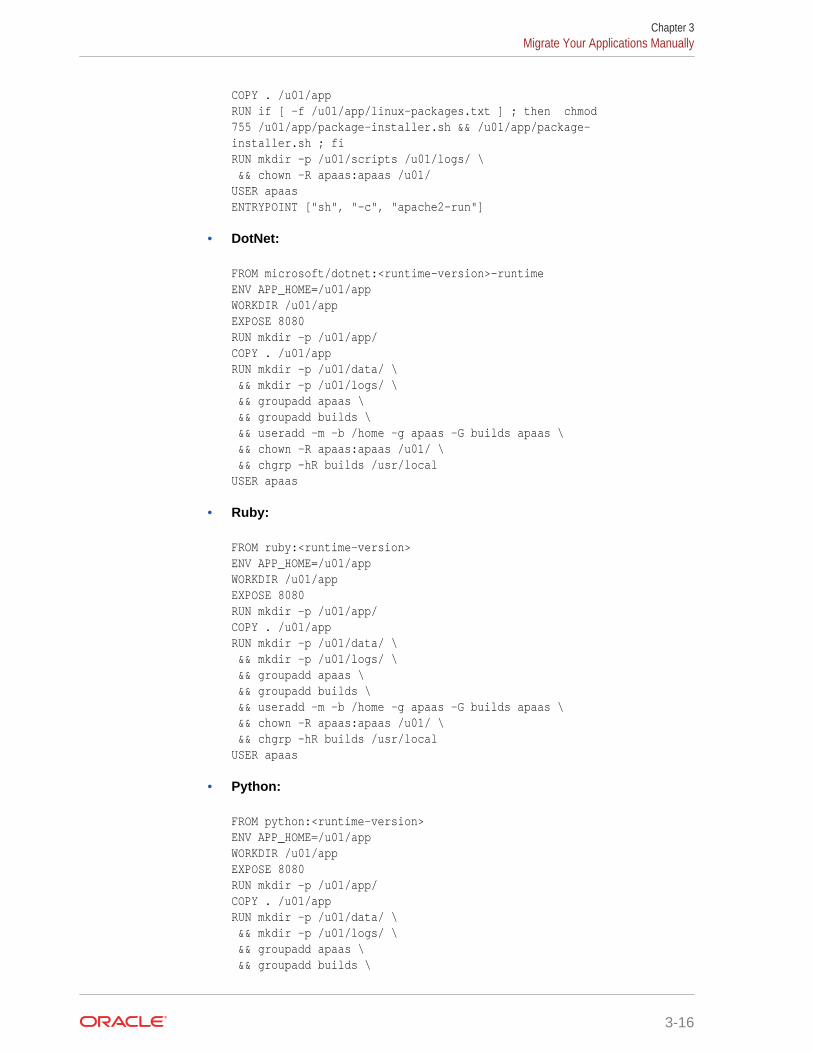
• DotNet:
FROM microsoft/dotnet:<runtime-version>-runtimeENV APP_HOME=/u01/appWORKDIR /u01/appEXPOSE 8080RUN mkdir -p /u01/app/COPY . /u01/appRUN mkdir -p /u01/data/ \ && mkdir -p /u01/logs/ \ && groupadd apaas \ && groupadd builds \ && useradd -m -b /home -g apaas -G builds apaas \ && chown -R apaas:apaas /u01/ \ && chgrp -hR builds /usr/localUSER apaas
• Ruby:
FROM ruby:<runtime-version>ENV APP_HOME=/u01/appWORKDIR /u01/appEXPOSE 8080RUN mkdir -p /u01/app/COPY . /u01/appRUN mkdir -p /u01/data/ \ && mkdir -p /u01/logs/ \ && groupadd apaas \ && groupadd builds \ && useradd -m -b /home -g apaas -G builds apaas \ && chown -R apaas:apaas /u01/ \ && chgrp -hR builds /usr/localUSER apaas
• Python:
FROM python:<runtime-version>ENV APP_HOME=/u01/appWORKDIR /u01/appEXPOSE 8080RUN mkdir -p /u01/app/COPY . /u01/appRUN mkdir -p /u01/data/ \ && mkdir -p /u01/logs/ \ && groupadd apaas \ && groupadd builds \
Chapter 3Migrate Your Applications Manually
3-16

&& useradd -m -b /home -g apaas -G builds apaas \ && chown -R apaas:apaas /u01/ \ && chgrp -hR builds /usr/localUSER apaas
• Go:
FROM golang:<runtime-version>ENV APP_HOME=/u01/appWORKDIR /u01/appEXPOSE 8080RUN mkdir -p /u01/app/COPY . /u01/appRUN mkdir -p /u01/data/ \ && mkdir -p /u01/logs/ \ && groupadd apaas \ && groupadd builds \ && useradd -m -b /home -g apaas -G builds apaas \ && chown -R apaas:apaas /u01/ \ && chgrp -hR builds /usr/localUSER apaas
5. Replace the <runtime-version> placeholder in the file with the runtime version ofyour application.
6. If your application needs additional Linux packages, in your project directory,include the package-installer.sh script along with your linux-packages.txt file.See Install Additional Linux Packages.
7. Open a command-line window, go to the project directory, and build the Dockerimage. Replace the <local-image-name> placeholder with the name of yourimage.
sudo docker build -t <local-image-name>:latest .
Note:
If you want to maintain multiple versions of your local images, you canuse an appropriate tag instead of "latest".
Example:
$ cd /home/user1/webapp01/$ sudo docker build -t webapp01-image:latest .[sudo] password for user1:Sending build context to Docker daemon 13.81MBStep 1/8 : FROM iad.ocir.io/psmsvc3/accs/java8:latest ---> 0f6c786aee03Step 2/8 : ENV APP_HOME=/u01/app ---> Using cache ---> a75170744b32Step 3/8 : WORKDIR /u01/app
Chapter 3Migrate Your Applications Manually
3-17
---> Using cache ---> 5d78fc7b6c4bStep 4/8 : EXPOSE 8080 ---> Using cache ---> 07860c3576c0Step 5/8 : USER root ---> Using cache ---> f7775cdf5760Step 6/8 : ADD ./ /u01/app ---> Using cache ---> ea04804d0b6eStep 7/8 : RUN mkdir -p /u01/scripts /u01/logs/ && chown -R apaas:apaas /u01/ ---> Using cache ---> e4f1d2d0b53aStep 8/8 : USER apaas ---> Using cache ---> 79880a9d2c15Successfully built 79880a9d2c15Successfully tagged webapp01-image:latest
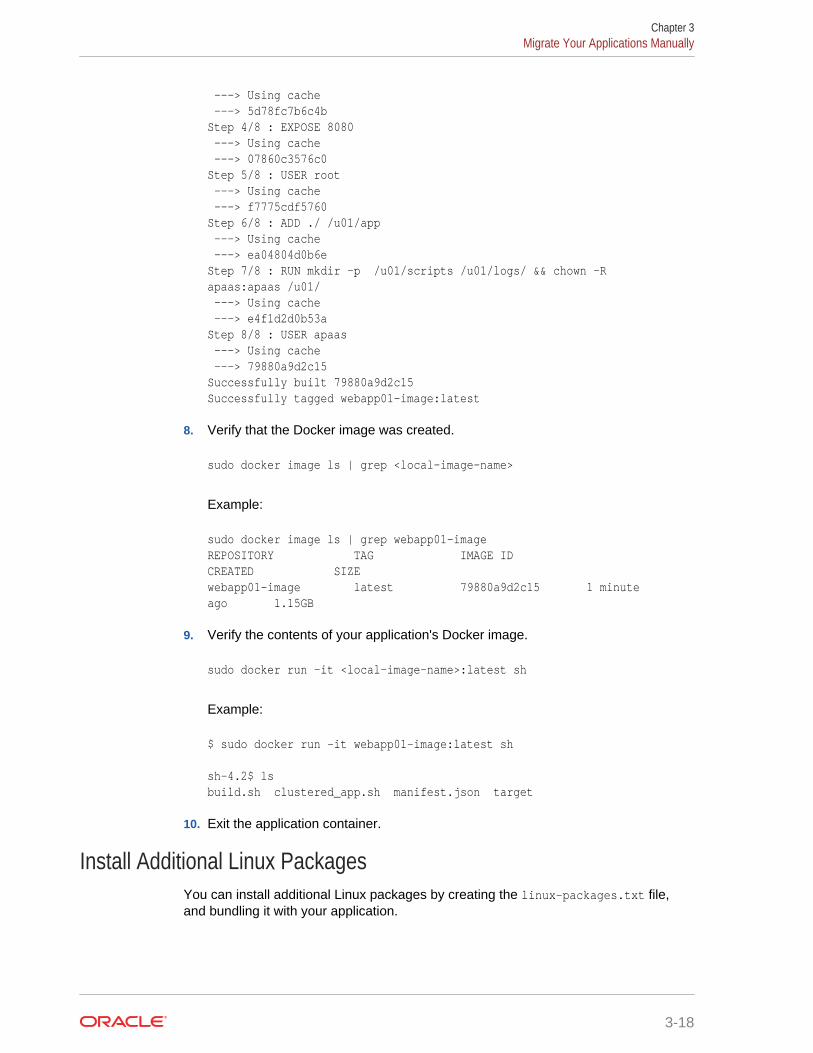
8. Verify that the Docker image was created.
sudo docker image ls | grep <local-image-name>
Example:
sudo docker image ls | grep webapp01-imageREPOSITORY TAG IMAGE ID CREATED SIZEwebapp01-image latest 79880a9d2c15 1 minute ago 1.15GB
9. Verify the contents of your application's Docker image.
sudo docker run -it <local-image-name>:latest sh
Example:
$ sudo docker run -it webapp01-image:latest sh sh-4.2$ lsbuild.sh clustered_app.sh manifest.json target
10. Exit the application container.
Install Additional Linux PackagesYou can install additional Linux packages by creating the linux-packages.txt file,and bundling it with your application.
Chapter 3Migrate Your Applications Manually
3-18
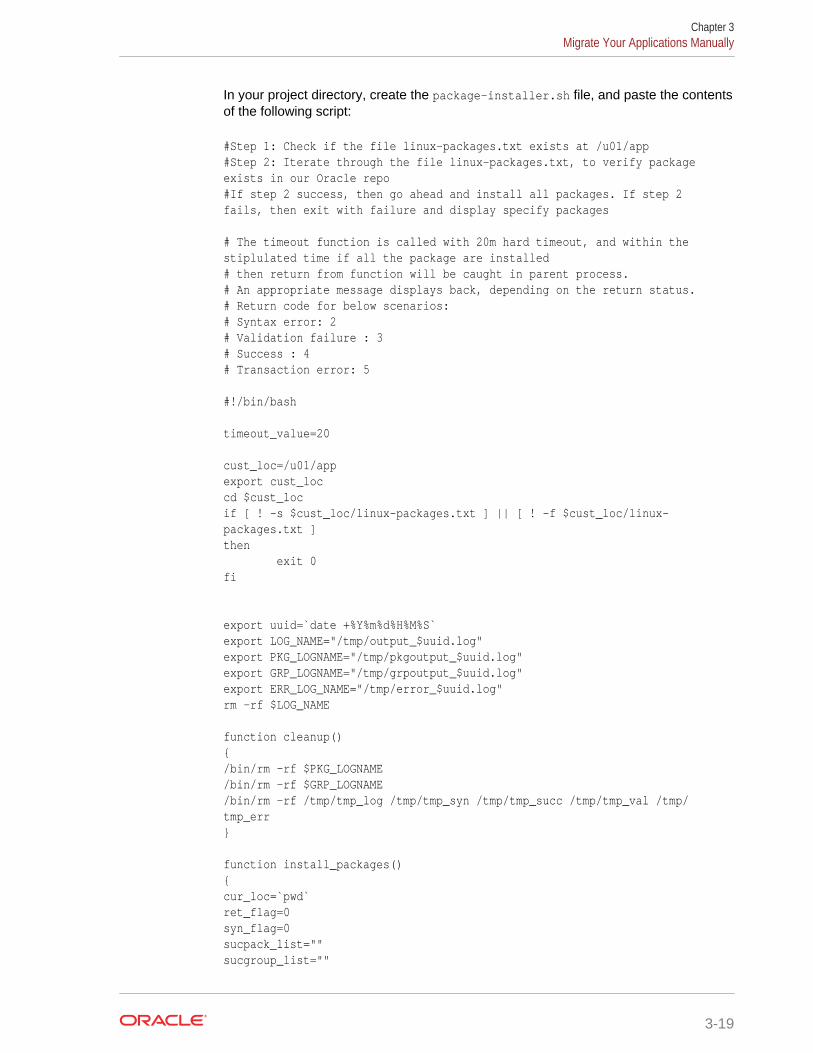
In your project directory, create the package-installer.sh file, and paste the contentsof the following script:
#Step 1: Check if the file linux-packages.txt exists at /u01/app#Step 2: Iterate through the file linux-packages.txt, to verify package exists in our Oracle repo#If step 2 success, then go ahead and install all packages. If step 2 fails, then exit with failure and display specify packages # The timeout function is called with 20m hard timeout, and within the stiplulated time if all the package are installed# then return from function will be caught in parent process.# An appropriate message displays back, depending on the return status.# Return code for below scenarios:# Syntax error: 2# Validation failure : 3# Success : 4# Transaction error: 5 #!/bin/bash timeout_value=20 cust_loc=/u01/appexport cust_loccd $cust_locif [ ! -s $cust_loc/linux-packages.txt ] || [ ! -f $cust_loc/linux-packages.txt ]then exit 0fi export uuid=`date +%Y%m%d%H%M%S`export LOG_NAME="/tmp/output_$uuid.log"export PKG_LOGNAME="/tmp/pkgoutput_$uuid.log"export GRP_LOGNAME="/tmp/grpoutput_$uuid.log"export ERR_LOG_NAME="/tmp/error_$uuid.log"rm -rf $LOG_NAME function cleanup(){/bin/rm -rf $PKG_LOGNAME/bin/rm -rf $GRP_LOGNAME/bin/rm -rf /tmp/tmp_log /tmp/tmp_syn /tmp/tmp_succ /tmp/tmp_val /tmp/tmp_err} function install_packages(){cur_loc=`pwd`ret_flag=0syn_flag=0sucpack_list=""sucgroup_list=""
Chapter 3Migrate Your Applications Manually
3-19
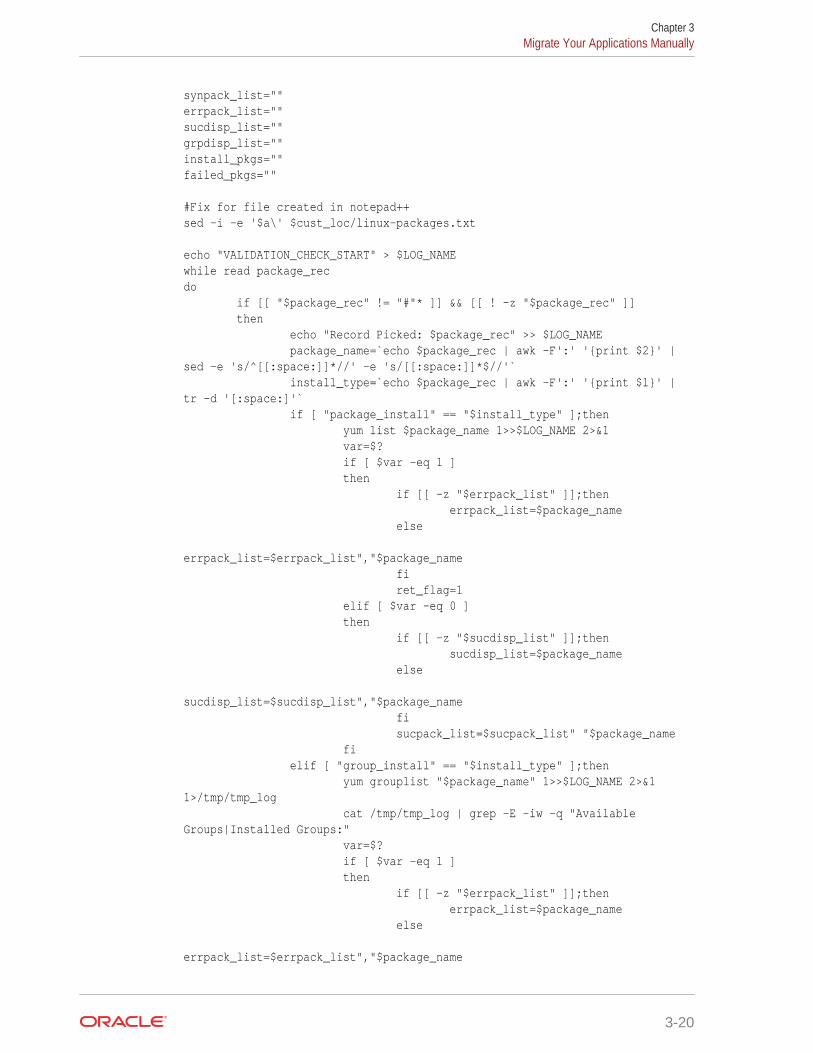
synpack_list=""errpack_list=""sucdisp_list=""grpdisp_list=""install_pkgs=""failed_pkgs="" #Fix for file created in notepad++sed -i -e '$a\' $cust_loc/linux-packages.txt echo "VALIDATION_CHECK_START" > $LOG_NAMEwhile read package_recdo if [[ "$package_rec" != "#"* ]] && [[ ! -z "$package_rec" ]] then echo "Record Picked: $package_rec" >> $LOG_NAME package_name=`echo $package_rec | awk -F':' '{print $2}' | sed -e 's/^[[:space:]]*//' -e 's/[[:space:]]*$//'` install_type=`echo $package_rec | awk -F':' '{print $1}' | tr -d '[:space:]'` if [ "package_install" == "$install_type" ];then yum list $package_name 1>>$LOG_NAME 2>&1 var=$? if [ $var -eq 1 ] then if [[ -z "$errpack_list" ]];then errpack_list=$package_name else errpack_list=$errpack_list","$package_name fi ret_flag=1 elif [ $var -eq 0 ] then if [[ -z "$sucdisp_list" ]];then sucdisp_list=$package_name else sucdisp_list=$sucdisp_list","$package_name fi sucpack_list=$sucpack_list" "$package_name fi elif [ "group_install" == "$install_type" ];then yum grouplist "$package_name" 1>>$LOG_NAME 2>&1 1>/tmp/tmp_log cat /tmp/tmp_log | grep -E -iw -q "Available Groups|Installed Groups:" var=$? if [ $var -eq 1 ] then if [[ -z "$errpack_list" ]];then errpack_list=$package_name else errpack_list=$errpack_list","$package_name
Chapter 3Migrate Your Applications Manually
3-20
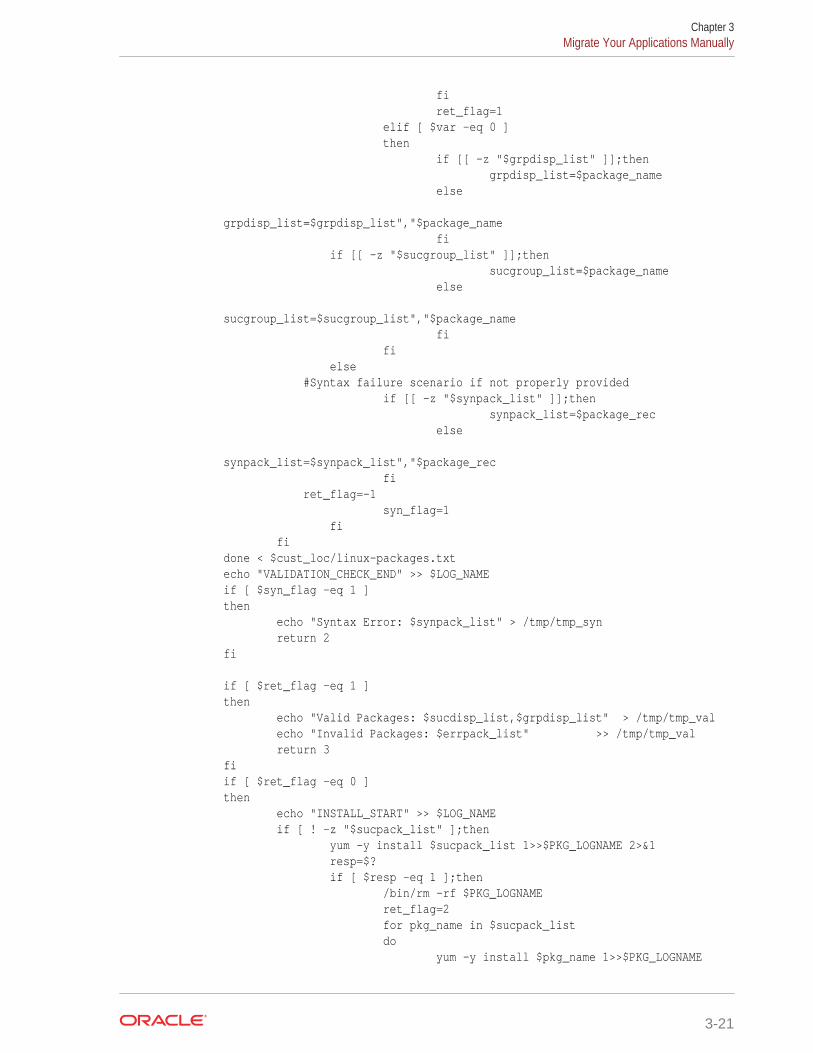
fi ret_flag=1 elif [ $var -eq 0 ] then if [[ -z "$grpdisp_list" ]];then grpdisp_list=$package_name else grpdisp_list=$grpdisp_list","$package_name fi if [[ -z "$sucgroup_list" ]];then sucgroup_list=$package_name else sucgroup_list=$sucgroup_list","$package_name fi fi else #Syntax failure scenario if not properly provided if [[ -z "$synpack_list" ]];then synpack_list=$package_rec else synpack_list=$synpack_list","$package_rec fi ret_flag=-1 syn_flag=1 fi fidone < $cust_loc/linux-packages.txtecho "VALIDATION_CHECK_END" >> $LOG_NAMEif [ $syn_flag -eq 1 ]then echo "Syntax Error: $synpack_list" > /tmp/tmp_syn return 2fi if [ $ret_flag -eq 1 ]then echo "Valid Packages: $sucdisp_list,$grpdisp_list" > /tmp/tmp_val echo "Invalid Packages: $errpack_list" >> /tmp/tmp_val return 3fiif [ $ret_flag -eq 0 ]then echo "INSTALL_START" >> $LOG_NAME if [ ! -z "$sucpack_list" ];then yum -y install $sucpack_list 1>>$PKG_LOGNAME 2>&1 resp=$? if [ $resp -eq 1 ];then /bin/rm -rf $PKG_LOGNAME ret_flag=2 for pkg_name in $sucpack_list do yum -y install $pkg_name 1>>$PKG_LOGNAME
Chapter 3Migrate Your Applications Manually
3-21
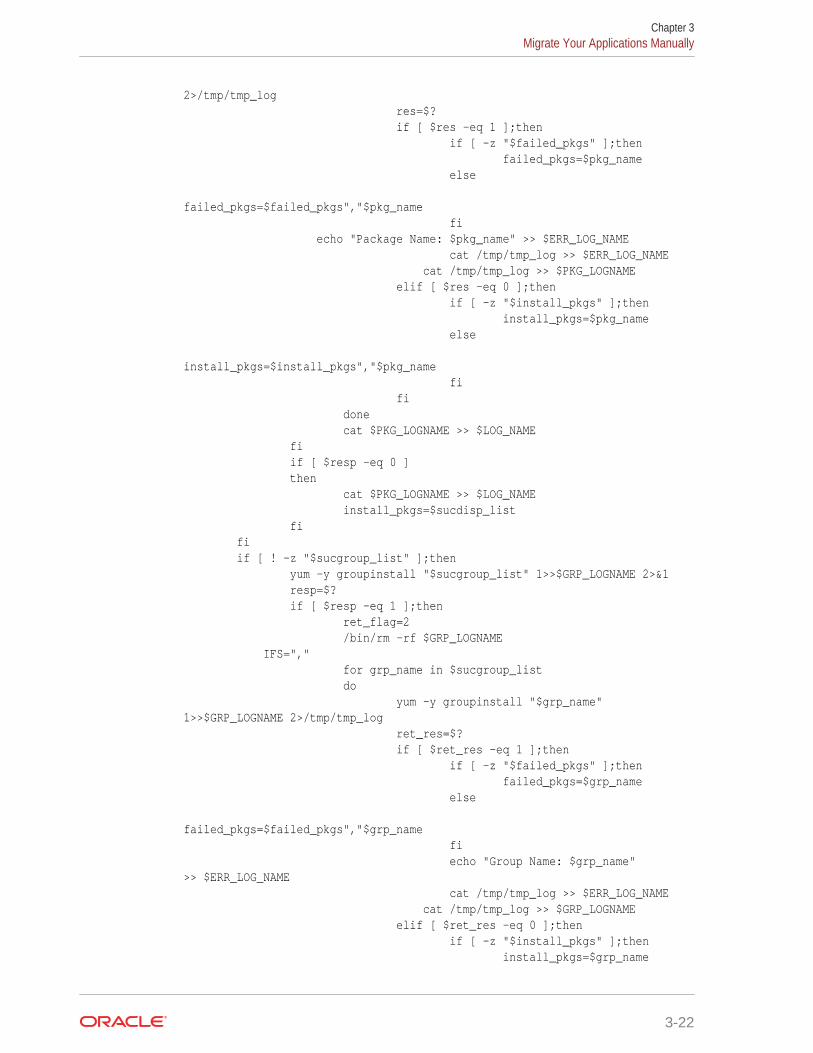
2>/tmp/tmp_log res=$? if [ $res -eq 1 ];then if [ -z "$failed_pkgs" ];then failed_pkgs=$pkg_name else failed_pkgs=$failed_pkgs","$pkg_name fi echo "Package Name: $pkg_name" >> $ERR_LOG_NAME cat /tmp/tmp_log >> $ERR_LOG_NAME cat /tmp/tmp_log >> $PKG_LOGNAME elif [ $res -eq 0 ];then if [ -z "$install_pkgs" ];then install_pkgs=$pkg_name else install_pkgs=$install_pkgs","$pkg_name fi fi done cat $PKG_LOGNAME >> $LOG_NAME fi if [ $resp -eq 0 ] then cat $PKG_LOGNAME >> $LOG_NAME install_pkgs=$sucdisp_list fi fi if [ ! -z "$sucgroup_list" ];then yum -y groupinstall "$sucgroup_list" 1>>$GRP_LOGNAME 2>&1 resp=$? if [ $resp -eq 1 ];then ret_flag=2 /bin/rm -rf $GRP_LOGNAME IFS="," for grp_name in $sucgroup_list do yum -y groupinstall "$grp_name" 1>>$GRP_LOGNAME 2>/tmp/tmp_log ret_res=$? if [ $ret_res -eq 1 ];then if [ -z "$failed_pkgs" ];then failed_pkgs=$grp_name else failed_pkgs=$failed_pkgs","$grp_name fi echo "Group Name: $grp_name" >> $ERR_LOG_NAME cat /tmp/tmp_log >> $ERR_LOG_NAME cat /tmp/tmp_log >> $GRP_LOGNAME elif [ $ret_res -eq 0 ];then if [ -z "$install_pkgs" ];then install_pkgs=$grp_name
Chapter 3Migrate Your Applications Manually
3-22

else install_pkgs=$install_pkgs","$grp_name fi fi done cat $GRP_LOGNAME >> $LOG_NAME fi if [ $resp -eq 0 ] then cat $GRP_LOGNAME >> $LOG_NAME if [ -z "$install_pkgs" ];then install_pkgs=$sucgroup_list else install_pkgs=$install_pkgs","$sucgroup_list fi fi fi echo "INSTALL_END" >> $LOG_NAMEfiif [ -z "$failed_pkgs" ];then ret_flag=0fiif [ $ret_flag -eq 0 ];then echo "Installed Packages: $sucdisp_list,$grpdisp_list" > /tmp/tmp_succ return 4fiif [ $ret_flag -eq 2 ];then echo "Installable Packages: $install_pkgs" > /tmp/tmp_err echo "Failed Packages: $failed_pkgs" >> /tmp/tmp_err return 5fi } #End of install_package function export -f install_packagestimeout "$timeout_value"m bash -c install_packagesrest_status=$? # Timeout scenarioif [ $rest_status -eq 124 ]then echo "RESULT_START" echo "SYNTAX_ERROR" echo "Error Message : Timed out while installing & configuring linux packages/groups. Reduce the number of specified linux packages/groups." echo "RESULT_END" cleanup exit 1fi # Syntax error scenarioif [ $rest_status -eq 2 ]
Chapter 3Migrate Your Applications Manually
3-23

then echo "RESULT_START" echo "SYNTAX_ERROR" cat /tmp/tmp_syn echo "RESULT_END" cleanup exit 1fi #Validation error scenarioif [ $rest_status -eq 3 ]then echo "RESULT_START" echo "VALIDATION_FAILURE" cat /tmp/tmp_val echo "RESULT_END" cat $LOG_NAME cleanup exit 1fi #Success scenarioif [ $rest_status -eq 4 ]then echo "RESULT_START" echo "SUCCESS" cat /tmp/tmp_succ echo "RESULT_END" cleanup cat $LOG_NAME exit 0fi #Transaction error scenarioif [ $rest_status -eq 5 ]then echo "RESULT_START" echo "ERROR_PACKAGE" cat /tmp/tmp_err echo "RESULT_END" echo "ERROR_PKGS_START" cat $ERR_LOG_NAME echo "ERROR_PKGS_END" cleanup cat $LOG_NAME exit 1fi
Push the Docker Image to Oracle Cloud Infrastructure RegistryAfter you build your Docker image, you can push it to Oracle Cloud InfrastructureRegistry and make it available in the cloud.
Chapter 3Migrate Your Applications Manually
3-24
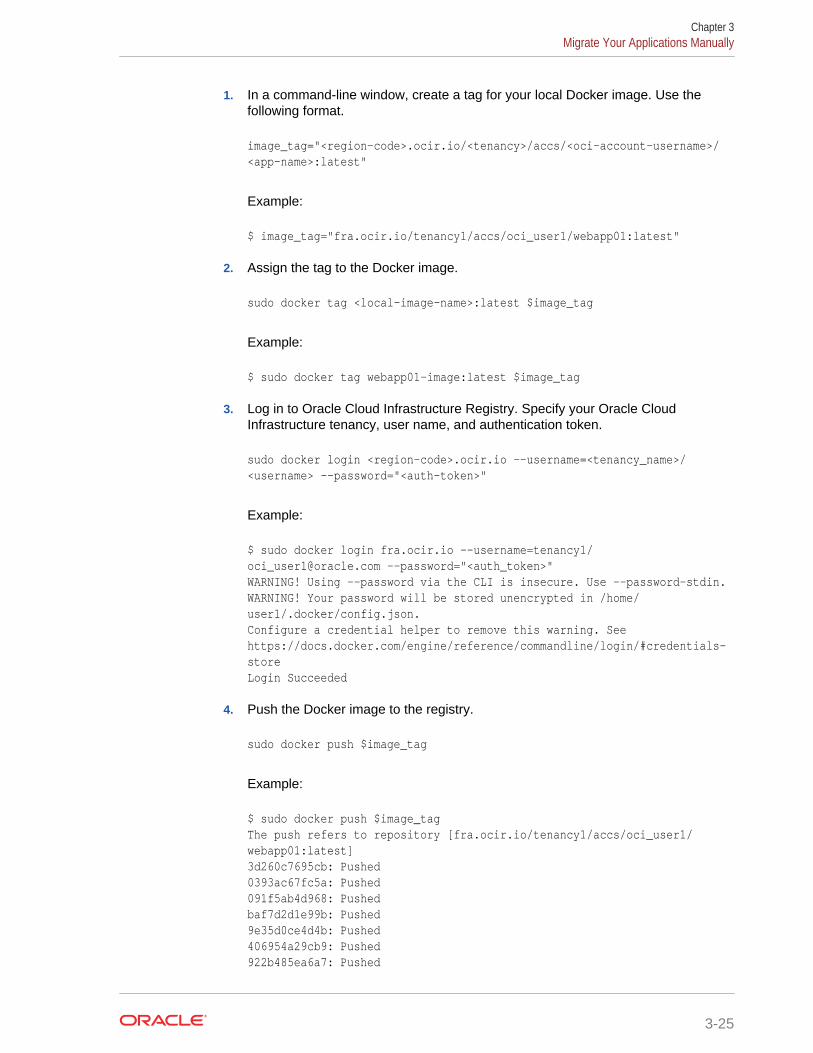
1. In a command-line window, create a tag for your local Docker image. Use thefollowing format.
image_tag="<region-code>.ocir.io/<tenancy>/accs/<oci-account-username>/<app-name>:latest"
Example:
$ image_tag="fra.ocir.io/tenancy1/accs/oci_user1/webapp01:latest"
2. Assign the tag to the Docker image.
sudo docker tag <local-image-name>:latest $image_tag
Example:
$ sudo docker tag webapp01-image:latest $image_tag
3. Log in to Oracle Cloud Infrastructure Registry. Specify your Oracle CloudInfrastructure tenancy, user name, and authentication token.
sudo docker login <region-code>.ocir.io --username=<tenancy_name>/<username> --password="<auth-token>"
Example:
$ sudo docker login fra.ocir.io --username=tenancy1/[email protected] --password="<auth_token>" WARNING! Using --password via the CLI is insecure. Use --password-stdin.WARNING! Your password will be stored unencrypted in /home/user1/.docker/config.json.Configure a credential helper to remove this warning. Seehttps://docs.docker.com/engine/reference/commandline/login/#credentials-storeLogin Succeeded
4. Push the Docker image to the registry.
sudo docker push $image_tag
Example:
$ sudo docker push $image_tagThe push refers to repository [fra.ocir.io/tenancy1/accs/oci_user1/webapp01:latest]3d260c7695cb: Pushed0393ac67fc5a: Pushed091f5ab4d968: Pushedbaf7d2d1e99b: Pushed9e35d0ce4d4b: Pushed406954a29cb9: Pushed922b485ea6a7: Pushed
Chapter 3Migrate Your Applications Manually
3-25

latest: digest: sha256:7dc38495f2be3513e5da3996efe12f2e864e197d68561582a7fa3b72a67f48f4 size: 1792
Set up the Environment VariablesMigrate the environment variables that are required for you Oracle ApplicationContainer Cloud Service application to a Kubernetes configuration.
There are three types of environment variables:
• Oracle Application Container Cloud Service environment variables: OracleApplication Container Cloud Service created these variables automatically whenyou deployed your application. These environment variables are required and youcan't remove them from the configuration file. See Configure EnvironmentVariables.
• Custom environment variables: You defined these variables for your application inthe deployment.json file or by using the Oracle Application Container CloudService console.
• Service binding environment variables: Oracle Application Container CloudService created these variables automatically when you added service bindings inyour application.
To migrate the environment variables for your application:
1. If your applications has configured one or more service bindings, locate theenvironment variables for each service binding. From the Oracle ApplicationContainer Cloud Service console, select your application deployment and identitythe service binding variables from the Environment Variables section.
2. In your project directory, create the env.properties file.
3. Edit the env.properties file and add the environment variables for yourapplication. Use the following template:
# ACCS environment variables (DO NOT REMOVE)HOSTNAME=<app-name>-service:<port>APP_HOME=/u01/appPORT=8080ORA_PORT=8080ORA_APP_NAME=<app-name> # Custom environment variables<key>=<value><key>=<value> # Service bindings environment variables<key>=<value><key>=<value>
4. Provide an appropriate value for the <app-name> and <port> placeholders. The<port> value is 80, or 443 if SSL is enabled. For worker applications the port is80.
Chapter 3Migrate Your Applications Manually
3-26
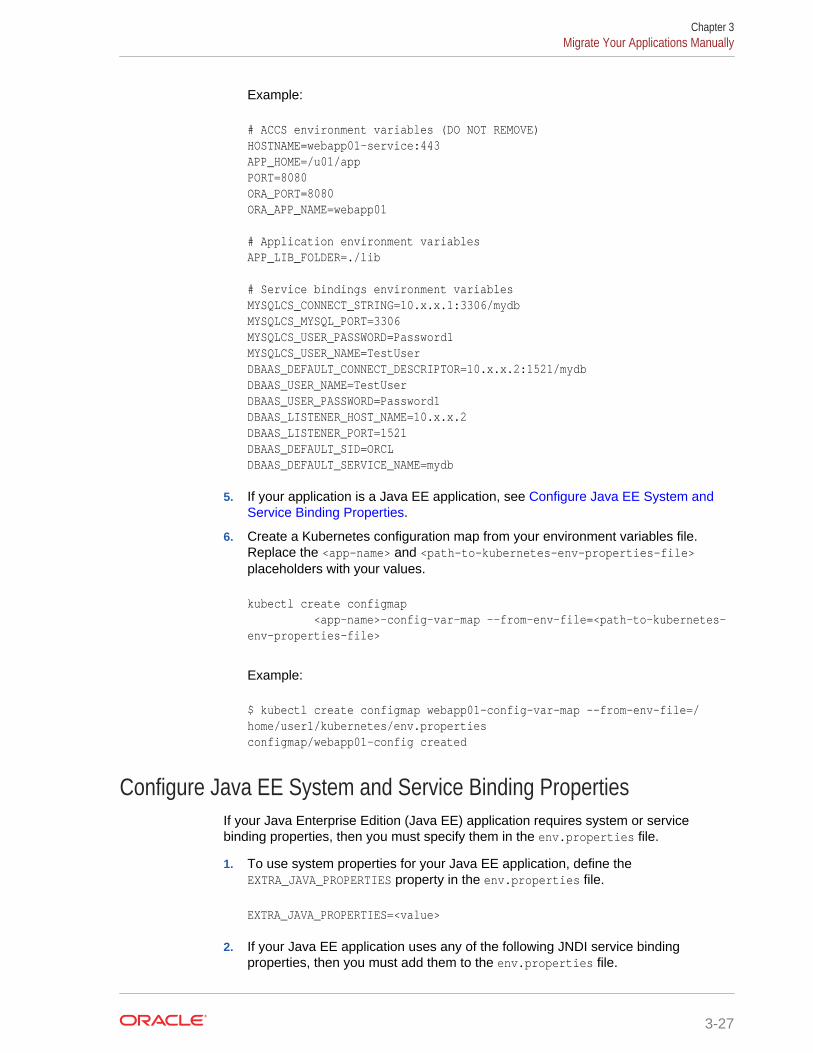
Example:
# ACCS environment variables (DO NOT REMOVE)HOSTNAME=webapp01-service:443APP_HOME=/u01/appPORT=8080ORA_PORT=8080ORA_APP_NAME=webapp01 # Application environment variablesAPP_LIB_FOLDER=./lib # Service bindings environment variablesMYSQLCS_CONNECT_STRING=10.x.x.1:3306/mydbMYSQLCS_MYSQL_PORT=3306MYSQLCS_USER_PASSWORD=Password1MYSQLCS_USER_NAME=TestUserDBAAS_DEFAULT_CONNECT_DESCRIPTOR=10.x.x.2:1521/mydbDBAAS_USER_NAME=TestUserDBAAS_USER_PASSWORD=Password1DBAAS_LISTENER_HOST_NAME=10.x.x.2DBAAS_LISTENER_PORT=1521DBAAS_DEFAULT_SID=ORCLDBAAS_DEFAULT_SERVICE_NAME=mydb
5. If your application is a Java EE application, see Configure Java EE System andService Binding Properties.
6. Create a Kubernetes configuration map from your environment variables file.Replace the <app-name> and <path-to-kubernetes-env-properties-file>placeholders with your values.
kubectl create configmap <app-name>-config-var-map --from-env-file=<path-to-kubernetes-env-properties-file>
Example:
$ kubectl create configmap webapp01-config-var-map --from-env-file=/home/user1/kubernetes/env.properties configmap/webapp01-config created
Configure Java EE System and Service Binding PropertiesIf your Java Enterprise Edition (Java EE) application requires system or servicebinding properties, then you must specify them in the env.properties file.
1. To use system properties for your Java EE application, define theEXTRA_JAVA_PROPERTIES property in the env.properties file.
EXTRA_JAVA_PROPERTIES=<value>
2. If your Java EE application uses any of the following JNDI service bindingproperties, then you must add them to the env.properties file.
Chapter 3Migrate Your Applications Manually
3-27
• jndi-name
• max-capacity
• min-capacity
• driver-properties
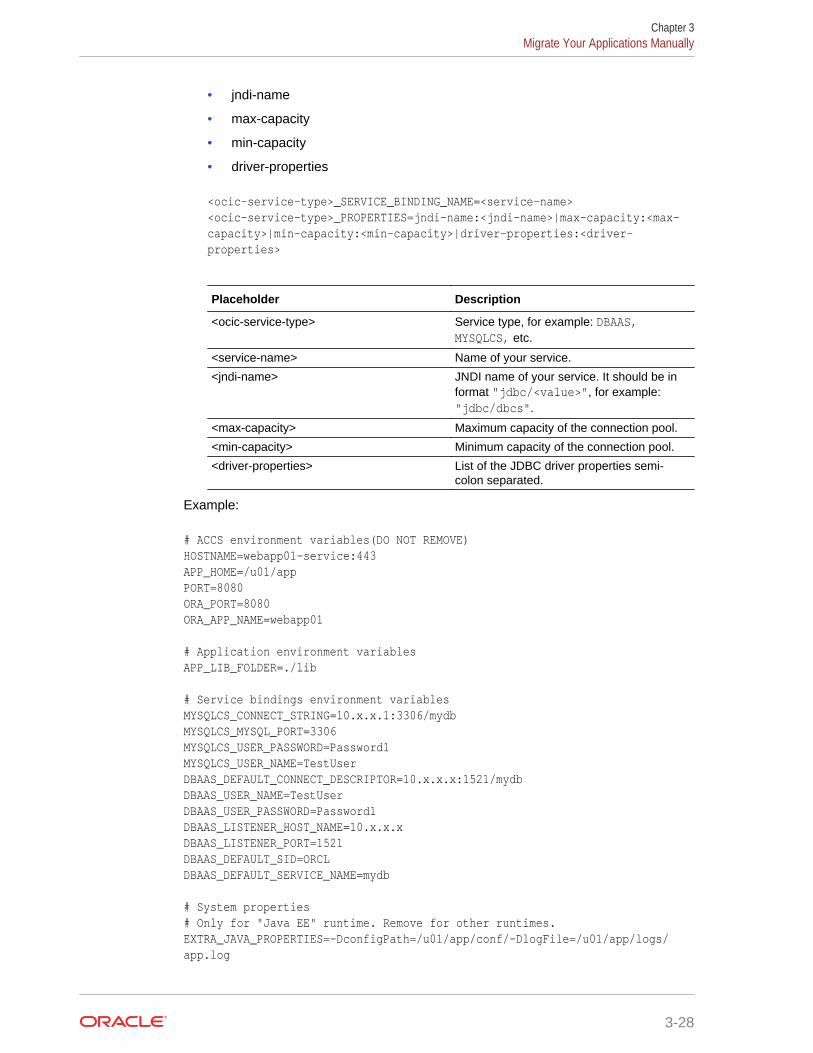
<ocic-service-type>_SERVICE_BINDING_NAME=<service-name><ocic-service-type>_PROPERTIES=jndi-name:<jndi-name>|max-capacity:<max-capacity>|min-capacity:<min-capacity>|driver-properties:<driver-properties>
Placeholder Description
<ocic-service-type> Service type, for example: DBAAS,MYSQLCS, etc.
<service-name> Name of your service.
<jndi-name> JNDI name of your service. It should be informat "jdbc/<value>", for example:"jdbc/dbcs".
<max-capacity> Maximum capacity of the connection pool.
<min-capacity> Minimum capacity of the connection pool.
<driver-properties> List of the JDBC driver properties semi-colon separated.
Example:
# ACCS environment variables(DO NOT REMOVE)HOSTNAME=webapp01-service:443APP_HOME=/u01/appPORT=8080ORA_PORT=8080ORA_APP_NAME=webapp01
# Application environment variablesAPP_LIB_FOLDER=./lib
# Service bindings environment variablesMYSQLCS_CONNECT_STRING=10.x.x.1:3306/mydbMYSQLCS_MYSQL_PORT=3306MYSQLCS_USER_PASSWORD=Password1MYSQLCS_USER_NAME=TestUserDBAAS_DEFAULT_CONNECT_DESCRIPTOR=10.x.x.x:1521/mydbDBAAS_USER_NAME=TestUserDBAAS_USER_PASSWORD=Password1DBAAS_LISTENER_HOST_NAME=10.x.x.xDBAAS_LISTENER_PORT=1521DBAAS_DEFAULT_SID=ORCLDBAAS_DEFAULT_SERVICE_NAME=mydb
# System properties# Only for "Java EE" runtime. Remove for other runtimes.EXTRA_JAVA_PROPERTIES=-DconfigPath=/u01/app/conf/-DlogFile=/u01/app/logs/app.log
Chapter 3Migrate Your Applications Manually
3-28
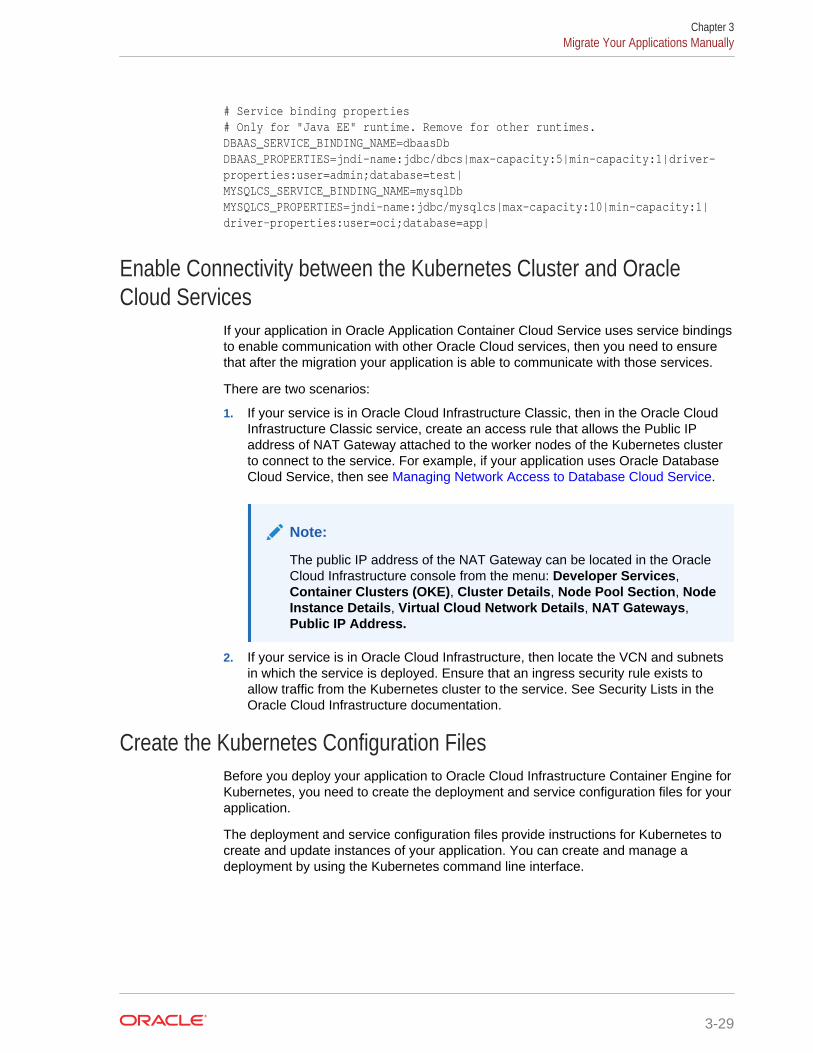
# Service binding properties# Only for "Java EE" runtime. Remove for other runtimes.DBAAS_SERVICE_BINDING_NAME=dbaasDbDBAAS_PROPERTIES=jndi-name:jdbc/dbcs|max-capacity:5|min-capacity:1|driver-properties:user=admin;database=test|MYSQLCS_SERVICE_BINDING_NAME=mysqlDbMYSQLCS_PROPERTIES=jndi-name:jdbc/mysqlcs|max-capacity:10|min-capacity:1|driver-properties:user=oci;database=app|
Enable Connectivity between the Kubernetes Cluster and OracleCloud Services
If your application in Oracle Application Container Cloud Service uses service bindingsto enable communication with other Oracle Cloud services, then you need to ensurethat after the migration your application is able to communicate with those services.
There are two scenarios:
1. If your service is in Oracle Cloud Infrastructure Classic, then in the Oracle CloudInfrastructure Classic service, create an access rule that allows the Public IPaddress of NAT Gateway attached to the worker nodes of the Kubernetes clusterto connect to the service. For example, if your application uses Oracle DatabaseCloud Service, then see Managing Network Access to Database Cloud Service.
Note:
The public IP address of the NAT Gateway can be located in the OracleCloud Infrastructure console from the menu: Developer Services,Container Clusters (OKE), Cluster Details, Node Pool Section, NodeInstance Details, Virtual Cloud Network Details, NAT Gateways,Public IP Address.
2. If your service is in Oracle Cloud Infrastructure, then locate the VCN and subnetsin which the service is deployed. Ensure that an ingress security rule exists toallow traffic from the Kubernetes cluster to the service. See Security Lists in theOracle Cloud Infrastructure documentation.
Create the Kubernetes Configuration FilesBefore you deploy your application to Oracle Cloud Infrastructure Container Engine forKubernetes, you need to create the deployment and service configuration files for yourapplication.
The deployment and service configuration files provide instructions for Kubernetes tocreate and update instances of your application. You can create and manage adeployment by using the Kubernetes command line interface.
Chapter 3Migrate Your Applications Manually
3-29

Create the Deployment Configuration File
1. Create the deployment.yaml file using the following template:
apiVersion: apps/v1kind: Deploymentmetadata: name: "<app-name>-deployment"spec: replicas: ${replicas} selector: matchLabels: app: "<app-name>-selector" template: metadata: labels: app: "<app-name>-selector" spec: containers: - name: "<app-name>" image: "<region-code>.ocir.io/<tenancy>/accs/<oci-account-username>/<app-name>:latest" command: ["${command}"] args: ["${args}"] ports: - containerPort: 8080 env: - name: ORA_INSTANCE_NAME valueFrom: fieldRef: fieldPath: metadata.name envFrom: - configMapRef: name: "<app-name>-config-var-map" resources: limits: memory: "${memory}i" requests: memory: "${memory}i" # The following section "livenessProbe" should be removed if Health Check URL # is not available. livenessProbe: httpGet: path: "${healthCheckHttpPath}" port: 8080 initialDelaySeconds: 5 periodSeconds: 600 timeoutSeconds: 30 failureThreshold: 3 imagePullSecrets: - name: "<app-name>-secret"
Chapter 3Migrate Your Applications Manually
3-30
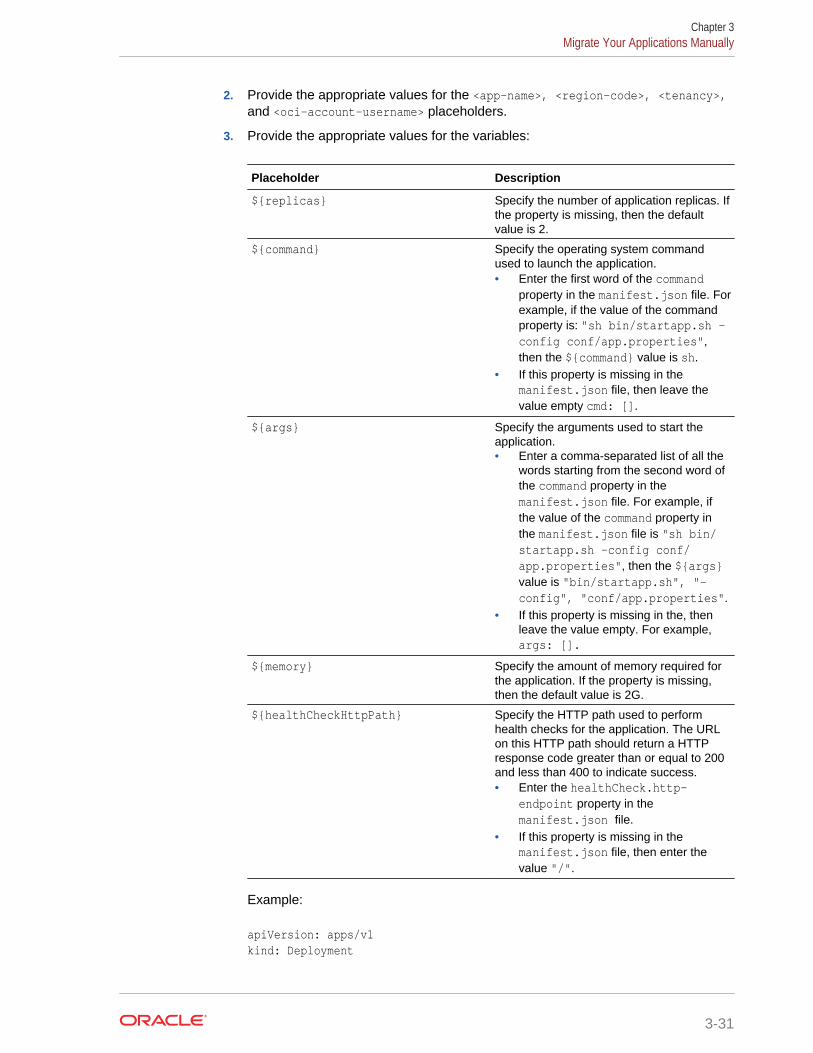
2. Provide the appropriate values for the <app-name>, <region-code>, <tenancy>,and <oci-account-username> placeholders.
3. Provide the appropriate values for the variables:
Placeholder Description
${replicas} Specify the number of application replicas. Ifthe property is missing, then the defaultvalue is 2.
${command} Specify the operating system commandused to launch the application.• Enter the first word of the command
property in the manifest.json file. Forexample, if the value of the commandproperty is: "sh bin/startapp.sh -config conf/app.properties",then the ${command} value is sh.
• If this property is missing in themanifest.json file, then leave thevalue empty cmd: [].
${args} Specify the arguments used to start theapplication.• Enter a comma-separated list of all the
words starting from the second word ofthe command property in themanifest.json file. For example, ifthe value of the command property inthe manifest.json file is "sh bin/startapp.sh -config conf/app.properties", then the ${args}value is "bin/startapp.sh", "-config", "conf/app.properties".
• If this property is missing in the, thenleave the value empty. For example,args: [].
${memory} Specify the amount of memory required forthe application. If the property is missing,then the default value is 2G.
${healthCheckHttpPath} Specify the HTTP path used to performhealth checks for the application. The URLon this HTTP path should return a HTTPresponse code greater than or equal to 200and less than 400 to indicate success.• Enter the healthCheck.http-
endpoint property in themanifest.json file.
• If this property is missing in themanifest.json file, then enter thevalue "/".
Example:
apiVersion: apps/v1kind: Deployment
Chapter 3Migrate Your Applications Manually
3-31

metadata: name: "webapp01-deployment"spec: replicas: 2 selector: matchLabels: app: "webapp01-selector" template: metadata: labels: app: "webapp01-selector" spec: containers: - name: "webapp01" image: "fra.ocir.io/tenancy1/accs/oci_user1/webapp01:latest" command: ["sh"] args: ["bin/startapp.sh", "-config", "conf/app.properties"] ports: - containerPort: 8080 env: - name: ORA_INSTANCE_NAME valueFrom: fieldRef: fieldPath: metadata.name envFrom: - configMapRef: name: "webapp01-config-var-map" resources: limits: memory: "2Gi" requests: memory: "2Gi" # The following section "livenessProbe" should be removed if Health Check # is not required. livenessProbe: httpGet: path: "/" port: 8080 initialDelaySeconds: 5 periodSeconds: 300 timeoutSeconds: 30 failureThreshold: 3 imagePullSecrets: - name: "webapp01-secret"
Create the Service Configuration File
1. Create the service.yaml file with the following template:
kind: ServiceapiVersion: v1metadata: name: "<app-name>-service" # The following section "annotations" should be removed if SSL
Chapter 3Migrate Your Applications Manually
3-32
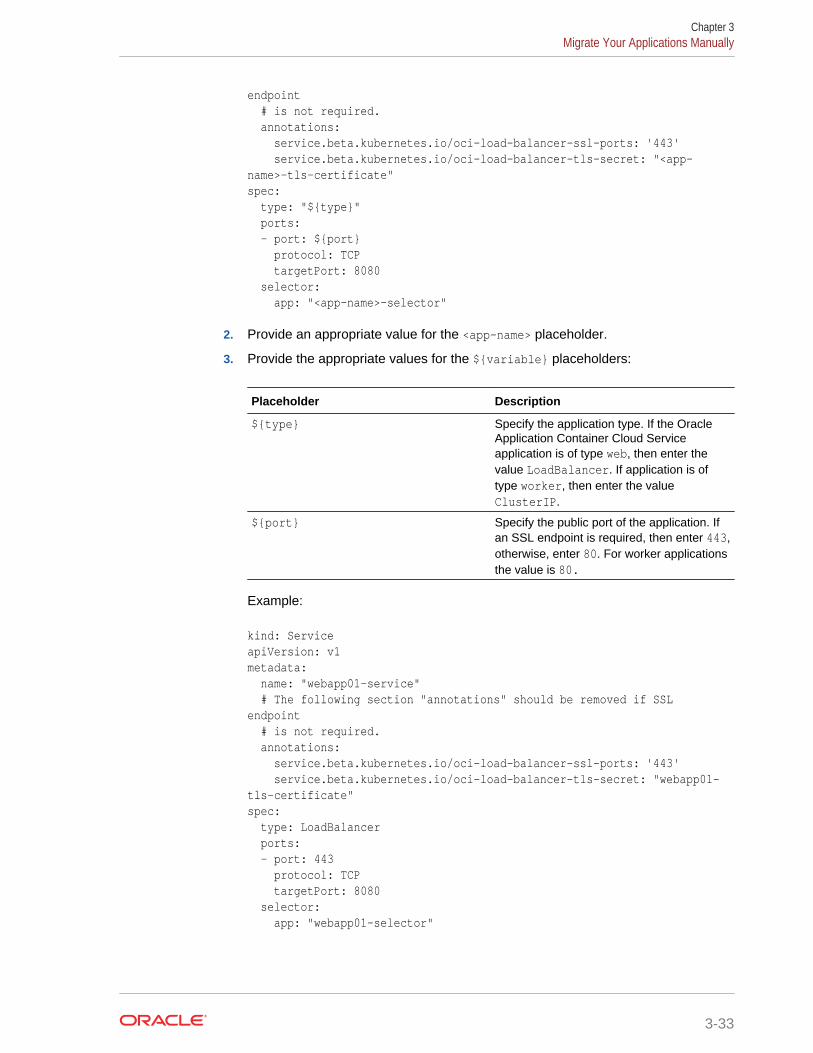
endpoint # is not required. annotations: service.beta.kubernetes.io/oci-load-balancer-ssl-ports: '443' service.beta.kubernetes.io/oci-load-balancer-tls-secret: "<app-name>-tls-certificate"spec: type: "${type}" ports: - port: ${port} protocol: TCP targetPort: 8080 selector: app: "<app-name>-selector"
2. Provide an appropriate value for the <app-name> placeholder.
3. Provide the appropriate values for the ${variable} placeholders:
Placeholder Description
${type} Specify the application type. If the OracleApplication Container Cloud Serviceapplication is of type web, then enter thevalue LoadBalancer. If application is oftype worker, then enter the valueClusterIP.
${port} Specify the public port of the application. Ifan SSL endpoint is required, then enter 443,otherwise, enter 80. For worker applicationsthe value is 80.
Example:
kind: ServiceapiVersion: v1metadata: name: "webapp01-service" # The following section "annotations" should be removed if SSL endpoint # is not required. annotations: service.beta.kubernetes.io/oci-load-balancer-ssl-ports: '443' service.beta.kubernetes.io/oci-load-balancer-tls-secret: "webapp01-tls-certificate"spec: type: LoadBalancer ports: - port: 443 protocol: TCP targetPort: 8080 selector: app: "webapp01-selector"
Chapter 3Migrate Your Applications Manually
3-33

Set Up the Docker Registry Secret and the SSL CertificateIn order for Kubernetes to pull an image from Oracle Cloud Infrastructure Registrywhen deploying an application, you need to create a Kubernetes secret. If yourapplication requires an SSL endpoint, then you need to create a TLS secret using thecertificate and the private key for your application.
The secret includes all of the same details that you would provide if you were manuallylogging in to Oracle Cloud Infrastructure Registry using the docker login command,including your authentication token.
1. To create a Docker registry secret, in a command-line window, run the followingcommand. Provide appropriate values for the <app-name>, <region-code>,<tenancy>, <oci-account-username>, and <auth-token> placeholders.
kubectl create secret docker-registry <app-name>-secret --docker-server="<region-code>.ocir.io" --docker-username=<tenancy>/<oci-account-username> --docker-password='<auth-token>' --docker-email=<oci-account-username>
Example:
$ kubectl create secret docker-registry webapp01-secret --docker-server="fra.ocir.io" --docker-username=tenancy1/[email protected] --docker-password='cIv3s8Aw2klYZ:QOcyFA' [email protected]/webapp01-secret created
2. To create the TLS secret, in a command-line window, run the following command.Provide appropriate values for the <app-name>, <path-to-tls-key-file> and<path-to-tls-cert-file> placeholders.
kubectl create secret tls <app-name>-tls-certificate --key <path-to-tls-key-file> --cert <path-to-tls-cert-file>
Example:
$ kubectl create secret tls webapp01-tls-certificate --key /home/user1/kubernetes/tls.key --cert /home/user1/kubernetes/tls.crtsecret/webapp01-tls-certificate created
Note:
The <path-to-tls-cert-file> and <path-to-tls-key-file> are theabsolute paths to your public certificate and key files respectively.
Chapter 3Migrate Your Applications Manually
3-34
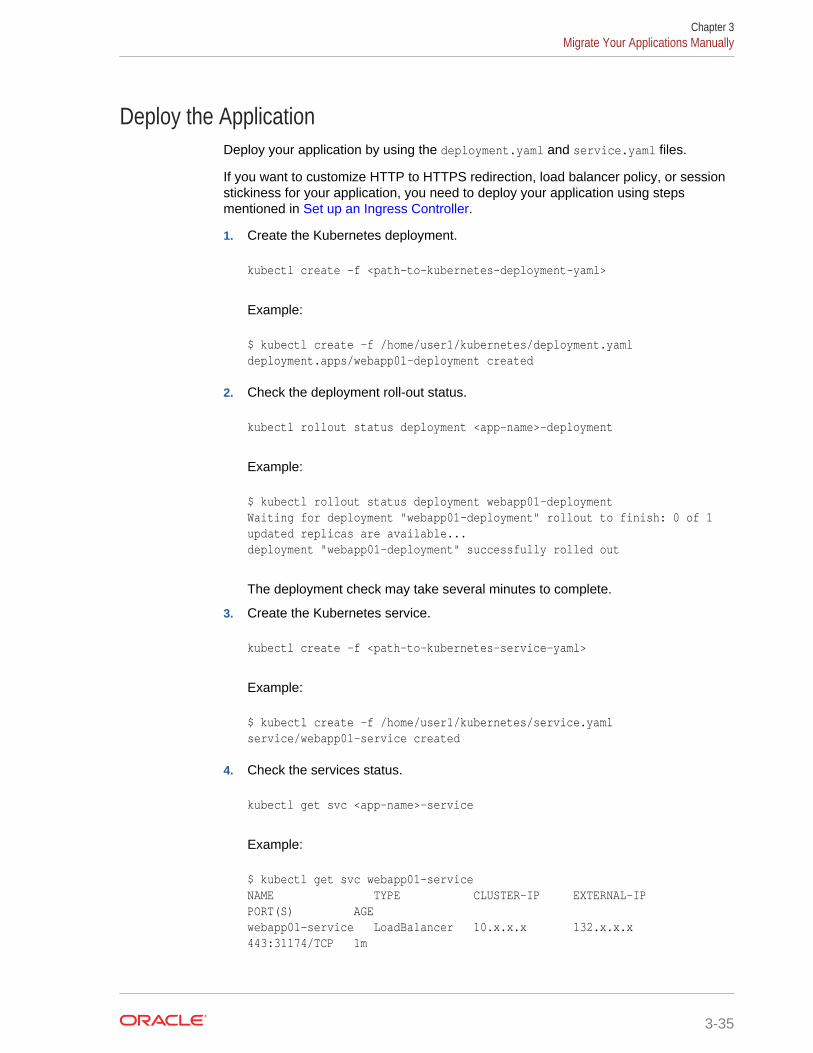
Deploy the ApplicationDeploy your application by using the deployment.yaml and service.yaml files.
If you want to customize HTTP to HTTPS redirection, load balancer policy, or sessionstickiness for your application, you need to deploy your application using stepsmentioned in Set up an Ingress Controller.
1. Create the Kubernetes deployment.
kubectl create -f <path-to-kubernetes-deployment-yaml>
Example:
$ kubectl create -f /home/user1/kubernetes/deployment.yamldeployment.apps/webapp01-deployment created
2. Check the deployment roll-out status.
kubectl rollout status deployment <app-name>-deployment
Example:
$ kubectl rollout status deployment webapp01-deploymentWaiting for deployment "webapp01-deployment" rollout to finish: 0 of 1 updated replicas are available...deployment "webapp01-deployment" successfully rolled out
The deployment check may take several minutes to complete.
3. Create the Kubernetes service.
kubectl create -f <path-to-kubernetes-service-yaml>
Example:
$ kubectl create -f /home/user1/kubernetes/service.yamlservice/webapp01-service created
4. Check the services status.
kubectl get svc <app-name>-service
Example:
$ kubectl get svc webapp01-serviceNAME TYPE CLUSTER-IP EXTERNAL-IP PORT(S) AGEwebapp01-service LoadBalancer 10.x.x.x 132.x.x.x 443:31174/TCP 1m
Chapter 3Migrate Your Applications Manually
3-35

The service may take several minutes to start. After it is completed, write down thepublic IP address under the EXTERNAL-IP column.
Note:
If you have deployed a cluster application, your service instances couldcommunicate with each other using the service name. The service name willbe available in your application as the HOSTNAME environment variable.
Set up a Custom URLIf you want to use a custom URL for your application, then you need a public domainname. You need to map the domain name to the public IP address of your application.
Create a DNS ZoneA Domain Name System (DNS) zone is a contiguous portion of the global DNS that ismanaged by a specific organization or administrator.
If you already created a DNS zone, then these steps aren't required.
1. From the Oracle Cloud Infrastructure console, open the navigation menu. UnderSolutions, Platform and Edge, go to Edge Services and click DNS ZonesManagement.
2. Click Create Zone, enter a Zone name and leave the default values for the otherfields.
3. Click Submit.
Note:
A list of name servers that host the DNS records for your DNS zone isdisplayed .
4. Add the name servers in your public DNS hosting provider's service.
Add a DNS RecordAfter you create the DNS zone, you need to add a DNS record to create the sub-domain name.
1. From the Zone information page, click Add Record, and then enter or select thefollowing values:
a. RECORD TYPE: A - IPv4 Address
b. Name: Enter your application name.
c. Address: Enter the public IP address of your application.
2. Click Submit.
3. Click Publish Changes.
Chapter 3Migrate Your Applications Manually
3-36

The custom URL for your application has this form: http[s]://<name>.<zone-name>[:<port>]/. For example, if you enter webapp01 for the name of your record, andthe zone name is example.com, then the HTTPS URL is https://webapp01.example.com.
Set up an Ingress ControllerIf you want to customize HTTP to HTTPS redirection, load balancer, or session stickinessfor your application, then you need to set up a Nginx ingress controller. The ingresscontroller handles the traffic between an external load balancer and your application.
Configure Role-Based AccessYou create the cluster-admin role and assign it to you Oracle Cloud Infrastructureadministrator user. Then use the rbac.yaml file to create a service account, a clusterrole, and a cluster role binding.
1. To assign the cluster-admin role to your Oracle Cloud Infrastructureadministrator user, in a command-line window, run the following command.Provide an appropriate value for the <user-ocid> placeholder.
kubectl create clusterrolebinding ingress-binding --clusterrole=cluster-admin --user=<user-ocid>
Example:
$ kubectl create clusterrolebinding ingress-binding --clusterrole=cluster-admin --user=ocid1.user.oc1..aaaaaaaa3vslnnqmypaummkievofbe5r4afaihdh4wi503dig3bkys2msgaqclusterrolebinding.rbac.authorization.k8s.io/ingress-binding created
2. Create the rbac.yaml file using the following content:
apiVersion: v1kind: ServiceAccountmetadata: name: nginx-ingress-serviceaccount namespace: default ---apiVersion: rbac.authorization.k8s.io/v1beta1kind: ClusterRolemetadata: name: nginx-ingress-clusterrolerules: - apiGroups: - "" resources: - configmaps - endpoints - nodes - pods
Chapter 3Migrate Your Applications Manually
3-37
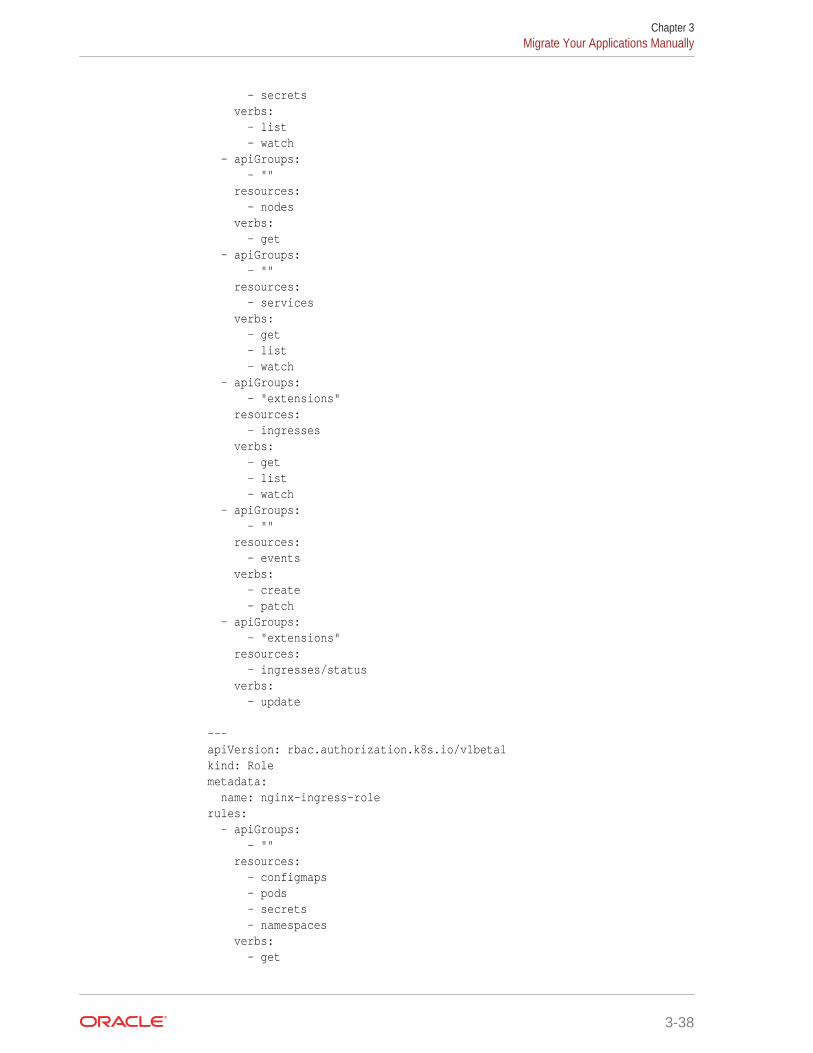
- secrets verbs: - list - watch - apiGroups: - "" resources: - nodes verbs: - get - apiGroups: - "" resources: - services verbs: - get - list - watch - apiGroups: - "extensions" resources: - ingresses verbs: - get - list - watch - apiGroups: - "" resources: - events verbs: - create - patch - apiGroups: - "extensions" resources: - ingresses/status verbs: - update ---apiVersion: rbac.authorization.k8s.io/v1beta1kind: Rolemetadata: name: nginx-ingress-rolerules: - apiGroups: - "" resources: - configmaps - pods - secrets - namespaces verbs: - get
Chapter 3Migrate Your Applications Manually
3-38
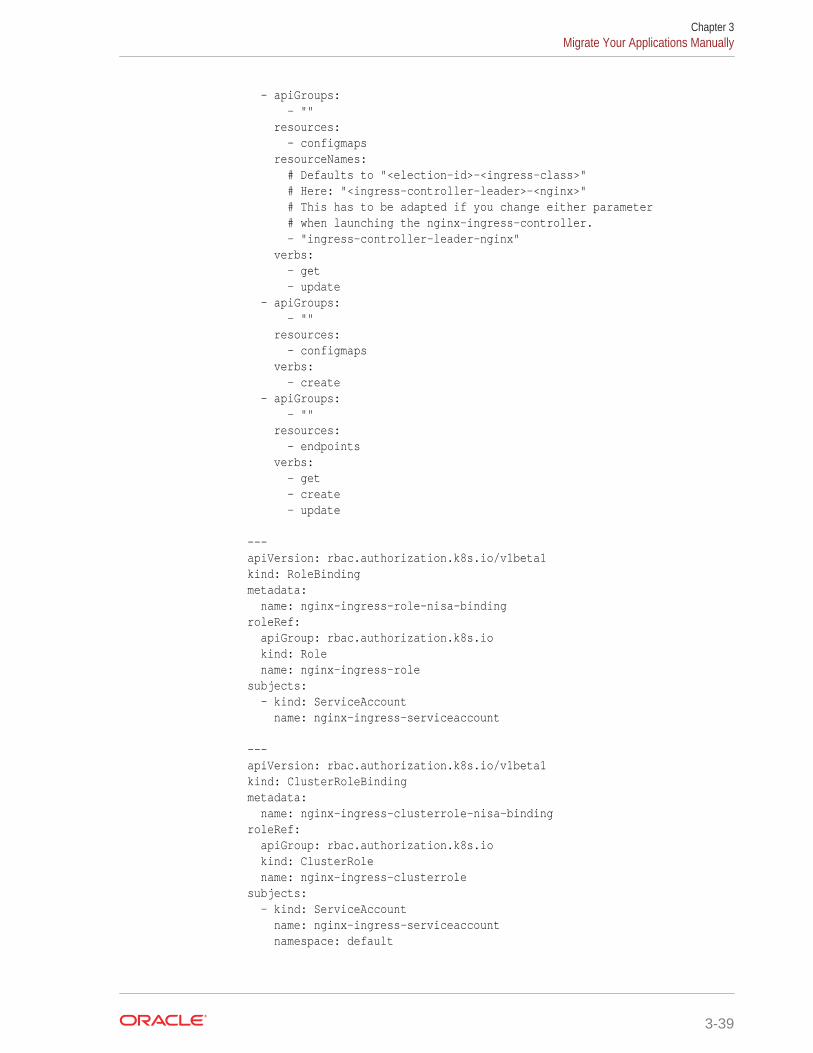
- apiGroups: - "" resources: - configmaps resourceNames: # Defaults to "<election-id>-<ingress-class>" # Here: "<ingress-controller-leader>-<nginx>" # This has to be adapted if you change either parameter # when launching the nginx-ingress-controller. - "ingress-controller-leader-nginx" verbs: - get - update - apiGroups: - "" resources: - configmaps verbs: - create - apiGroups: - "" resources: - endpoints verbs: - get - create - update ---apiVersion: rbac.authorization.k8s.io/v1beta1kind: RoleBindingmetadata: name: nginx-ingress-role-nisa-bindingroleRef: apiGroup: rbac.authorization.k8s.io kind: Role name: nginx-ingress-rolesubjects: - kind: ServiceAccount name: nginx-ingress-serviceaccount ---apiVersion: rbac.authorization.k8s.io/v1beta1kind: ClusterRoleBindingmetadata: name: nginx-ingress-clusterrole-nisa-bindingroleRef: apiGroup: rbac.authorization.k8s.io kind: ClusterRole name: nginx-ingress-clusterrolesubjects: - kind: ServiceAccount name: nginx-ingress-serviceaccount namespace: default
Chapter 3Migrate Your Applications Manually
3-39

---
3. To create a service account, a cluster role, and a cluster role binding between theservice account and the cluster role, run the following command. Provide theappropriate value for the <path-to-rbac-yaml> placeholder.
kubectl create -f <path-to-rbac-yaml>
Example:
$ kubectl create -f /home/user1/kubernetes/rbac.yamlserviceaccount/nginx-ingress-serviceaccount createdclusterrole.rbac.authorization.k8s.io/nginx-ingress-clusterrole createdrole.rbac.authorization.k8s.io/nginx-ingress-role createdrolebinding.rbac.authorization.k8s.io/nginx-ingress-role-nisa-binding createdclusterrolebinding.rbac.authorization.k8s.io/nginx-ingress-clusterrole-nisa-binding created
Create a Default BackendCreate a Kubernetes deployment and service for a default backend.
1. Create the default-deployment.yaml file using the following content:
apiVersion: apps/v1kind: Deploymentmetadata: name: default-http-backend labels: app: default-http-backendspec: replicas: 1 selector: matchLabels: app: default-http-backend template: metadata: labels: app: default-http-backend spec: terminationGracePeriodSeconds: 60 containers: - name: default-http-backend # Any image is permissable as long as: # 1. It serves a 404 page at / # 2. It serves 200 on a /healthz endpoint image: gcr.io/google_containers/defaultbackend:1.0 livenessProbe: httpGet: path: /healthz port: 8080 scheme: HTTP
Chapter 3Migrate Your Applications Manually
3-40
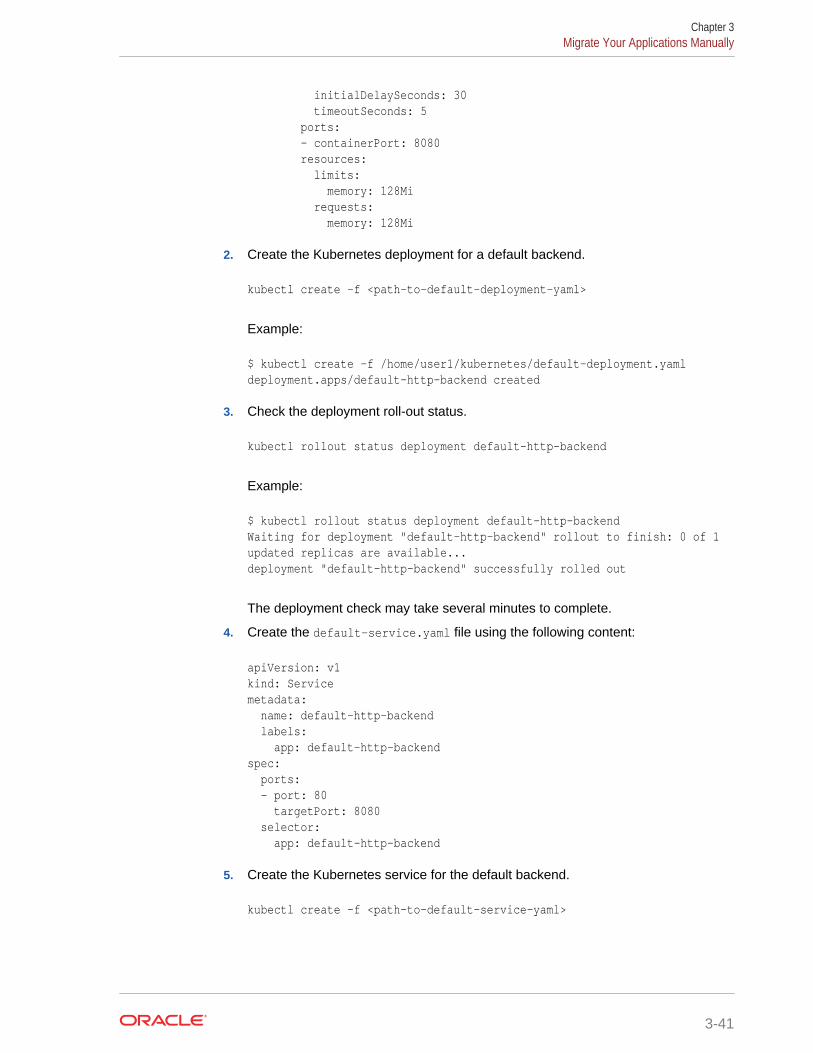
initialDelaySeconds: 30 timeoutSeconds: 5 ports: - containerPort: 8080 resources: limits: memory: 128Mi requests: memory: 128Mi
2. Create the Kubernetes deployment for a default backend.
kubectl create -f <path-to-default-deployment-yaml>
Example:
$ kubectl create -f /home/user1/kubernetes/default-deployment.yamldeployment.apps/default-http-backend created
3. Check the deployment roll-out status.
kubectl rollout status deployment default-http-backend
Example:
$ kubectl rollout status deployment default-http-backendWaiting for deployment "default-http-backend" rollout to finish: 0 of 1 updated replicas are available...deployment "default-http-backend" successfully rolled out
The deployment check may take several minutes to complete.
4. Create the default-service.yaml file using the following content:
apiVersion: v1kind: Servicemetadata: name: default-http-backend labels: app: default-http-backendspec: ports: - port: 80 targetPort: 8080 selector: app: default-http-backend
5. Create the Kubernetes service for the default backend.
kubectl create -f <path-to-default-service-yaml>
Chapter 3Migrate Your Applications Manually
3-41

Example:
$ kubectl create -f /home/user1/kubernetes/default-service.yamlservice/default-http-backend created
6. Check the service roll-out status.
kubectl get svc default-http-backend
Example:
$ kubectl get svc default-http-backendNAME TYPE CLUSTER-IP EXTERNAL-IP PORT(S) AGEdefault-http-backend ClusterIP 10.x.x.x <none> 80/TCP 5s
The deployment may take several minutes to complete.
Create an Ingress ControllerCreate a Kubernetes deployment and service for the Nginx ingress controller.
Create an Ingress Controller Deployment
1. Create the nginx-deployment.yaml file using the following template.
apiVersion: apps/v1kind: Deploymentmetadata: name: nginx-ingress-controller labels: app: nginx-ingress-controllerspec: replicas: 1 selector: matchLabels: app: nginx-ingress-controller template: metadata: labels: app: nginx-ingress-controller spec: terminationGracePeriodSeconds: 60 serviceAccountName: nginx-ingress-serviceaccount containers: - image: quay.io/kubernetes-ingress-controller/nginx-ingress-controller:0.23.0 name: nginx-ingress-controller readinessProbe: httpGet: path: /healthz
Chapter 3Migrate Your Applications Manually
3-42
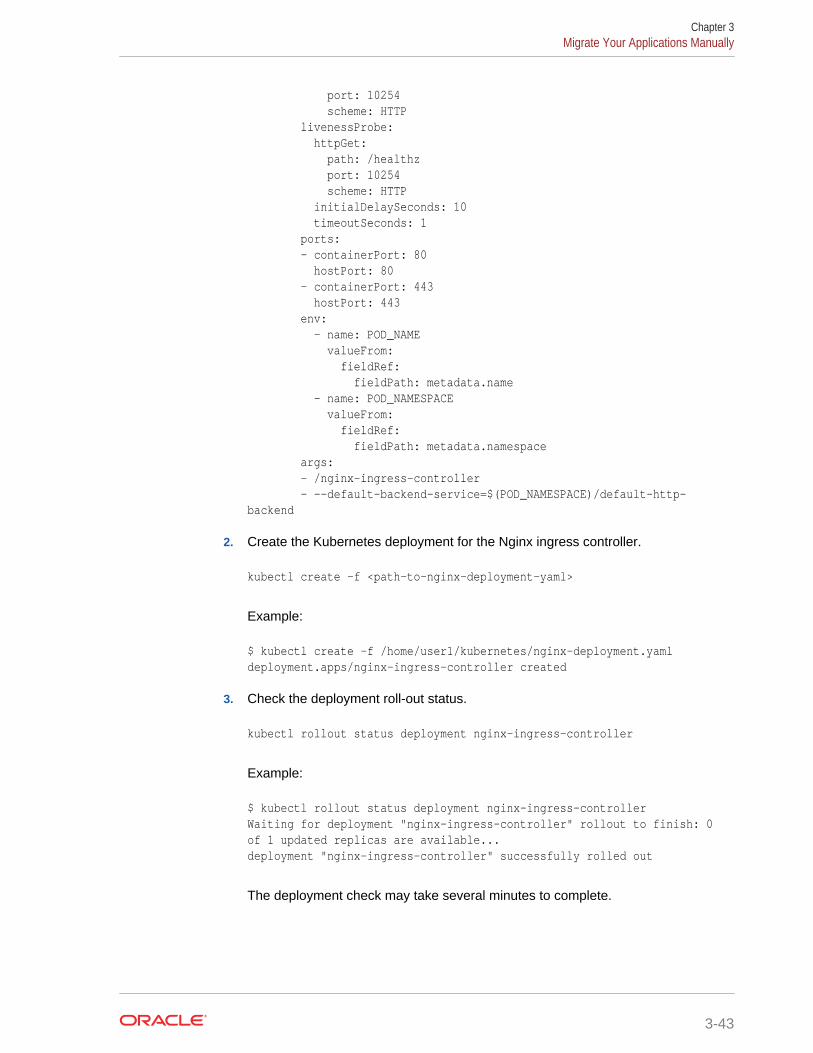
port: 10254 scheme: HTTP livenessProbe: httpGet: path: /healthz port: 10254 scheme: HTTP initialDelaySeconds: 10 timeoutSeconds: 1 ports: - containerPort: 80 hostPort: 80 - containerPort: 443 hostPort: 443 env: - name: POD_NAME valueFrom: fieldRef: fieldPath: metadata.name - name: POD_NAMESPACE valueFrom: fieldRef: fieldPath: metadata.namespace args: - /nginx-ingress-controller - --default-backend-service=$(POD_NAMESPACE)/default-http-backend
2. Create the Kubernetes deployment for the Nginx ingress controller.
kubectl create -f <path-to-nginx-deployment-yaml>
Example:
$ kubectl create -f /home/user1/kubernetes/nginx-deployment.yamldeployment.apps/nginx-ingress-controller created
3. Check the deployment roll-out status.
kubectl rollout status deployment nginx-ingress-controller
Example:
$ kubectl rollout status deployment nginx-ingress-controllerWaiting for deployment "nginx-ingress-controller" rollout to finish: 0 of 1 updated replicas are available...deployment "nginx-ingress-controller" successfully rolled out
The deployment check may take several minutes to complete.
Chapter 3Migrate Your Applications Manually
3-43
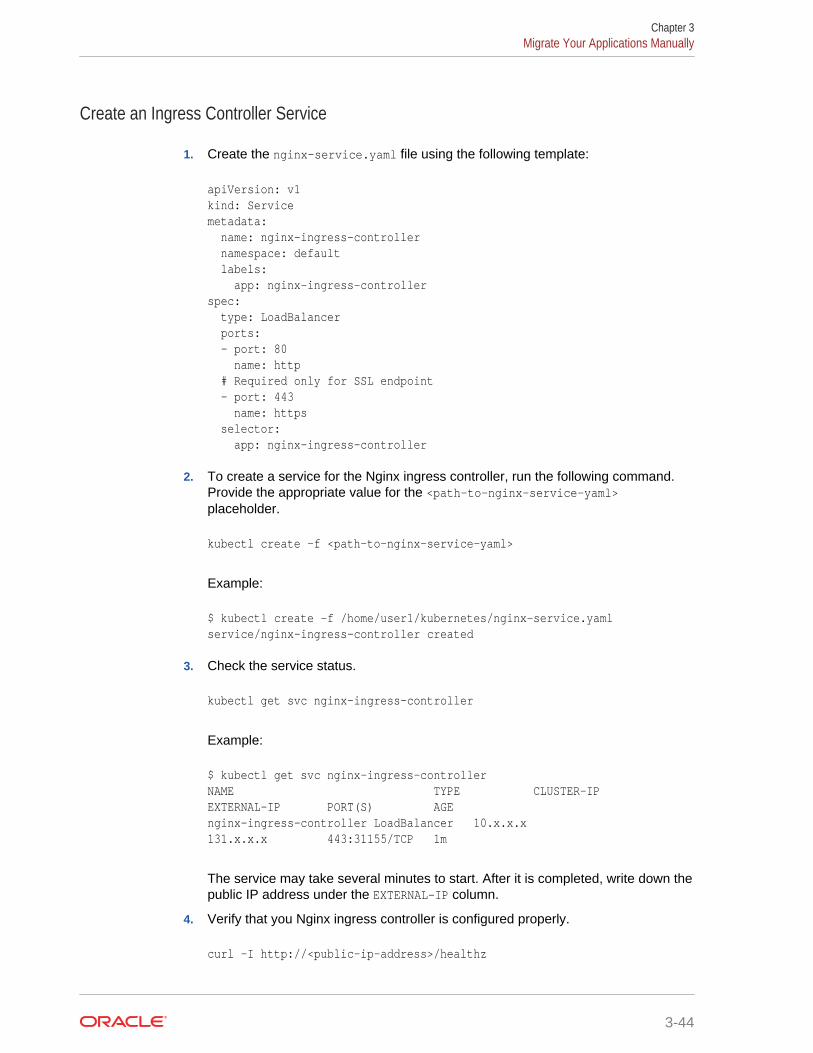
Create an Ingress Controller Service
1. Create the nginx-service.yaml file using the following template:
apiVersion: v1kind: Servicemetadata: name: nginx-ingress-controller namespace: default labels: app: nginx-ingress-controllerspec: type: LoadBalancer ports: - port: 80 name: http # Required only for SSL endpoint - port: 443 name: https selector: app: nginx-ingress-controller
2. To create a service for the Nginx ingress controller, run the following command.Provide the appropriate value for the <path-to-nginx-service-yaml>placeholder.
kubectl create -f <path-to-nginx-service-yaml>
Example:
$ kubectl create -f /home/user1/kubernetes/nginx-service.yamlservice/nginx-ingress-controller created
3. Check the service status.
kubectl get svc nginx-ingress-controller
Example:
$ kubectl get svc nginx-ingress-controllerNAME TYPE CLUSTER-IP EXTERNAL-IP PORT(S) AGEnginx-ingress-controller LoadBalancer 10.x.x.x 131.x.x.x 443:31155/TCP 1m
The service may take several minutes to start. After it is completed, write down thepublic IP address under the EXTERNAL-IP column.
4. Verify that you Nginx ingress controller is configured properly.
curl -I http://<public-ip-address>/healthz
Chapter 3Migrate Your Applications Manually
3-44

Example:
$ curl -I http://131.x.x.x/healthzHTTP/1.1 200 OK
After you deploy your application and create and ingress resource, you can accessyour application using the public URL.
Deploy Your Application with an Ingress Controller Setup
Deploy your application using the steps mentioned in Deploy the Application. Tocreate the service use the following configuration:
1. Create the service.yaml file with the following template:
kind: ServiceapiVersion: v1metadata: name: "<app-name>-service"spec: type: ClusterIP ports: - port: 80 protocol: TCP targetPort: 8080 selector: app: "<app-name>-selector"
2. Provide an appropriate value for the <app-name> placeholder.Example:
kind: ServiceapiVersion: v1metadata: name: "webapp01-service"spec: type: ClusterIP ports: - port: 80 protocol: TCP targetPort: 8080 selector: app: "webapp01-selector"
3. Create the Kubernetes service.
kubectl create -f <path-to-kubernetes-service-yaml>
4. Check the services status.
kubectl get svc <app-name>-service
The service may take several minutes to start.
Chapter 3Migrate Your Applications Manually
3-45

Create an Ingress ResourceCreate an ingress resource that the Nginx ingress controller uses to forward the trafficto your application.
1. (Optional) If your application requires an SSL endpoint, run the following commandto create a secret for the TLS key and a certificate. Provide appropriate values forthe <app-name>, <path-to-tls-key-file>, and <path-to-tls-cert-file>placeholders.
kubectl create secret tls ingress-tls-certificate --key <path-to-tls-key-file> --cert <path-to-tls-cert-file>
Example:
$ kubectl create secret tls ingress-tls-certificate --key /home/user1/kubernetes/tls.key --cert /home/user1/kubernetes/tls.crtsecret/ingress-tls-certificate created
2. Create the nginx-ingress.yaml file using the following template:
apiVersion: extensions/v1beta1kind: Ingressmetadata: name: ingress-resource annotations: kubernetes.io/ingress.class: "nginx" nginx.ingress.kubernetes.io/load-balance: "round_robin"spec: # Required only for SSL endpoint tls: - hosts: - <host-name> secretName: ingress-tls-certificate rules: - host: <host-name> http: paths: - path: / backend: serviceName: <app-name>-service servicePort: 80
3. Provide an appropriate value for the <app-name> placeholder.
Example:
apiVersion: extensions/v1beta1kind: Ingressmetadata: name: ingress-resource annotations: kubernetes.io/ingress.class: "nginx"
Chapter 3Migrate Your Applications Manually
3-46

nginx.ingress.kubernetes.io/load-balance: "round_robin"spec: # Required only for SSL endpoint tls: - hosts: - webapp01.example.com secretName: ingress-tls-certificate rules: - host: webapp01.example.com http: paths: - path: / backend: serviceName: webapp01-service servicePort: 80
4. To create the ingress resource, in a command-line window, run the followingcommand. Provide an appropriate value for the <path-to-nginx-ingress-yaml>placeholder.
kubectl create -f <path-to-nginx-ingress-yaml>
Example:
$ kubectl create -f /home/user1/kubernetes/nginx-ingress.yamlingress.extensions/ingress-resource created
5. To check the ingress resource status, run the following command.
kubectl get ingress ingress-resource
Example:
$ kubectl get ingress ingress-resourceNAME HOSTS ADDRESS PORTS AGEingress-resource webapp01.example.com 80, 443 1m
6. Test your application using the public URL of your Nginx ingress controller service.
Customize an Ingress ResourceYou can customize HTTP to HTTPS redirection, load balancer policy, and sessionstickiness in the nginx-ingress.yaml file.
• HTTP to HTTPS redirect is enabled by default. If you want to disable it, then in theannotation section, add the following: ingress.kubernetes.io/ssl-redirect:False.
• The load balancer policy by default is round_robin. To use the ip_hash loadbalancer policy, use the annotation: nginx.ingress.kubernetes.io/upstream-hash-by: "$binary_remote_addr".
• To enable session stickiness, you need to use ip_hash as load balancer policy.
Chapter 3Migrate Your Applications Manually
3-47
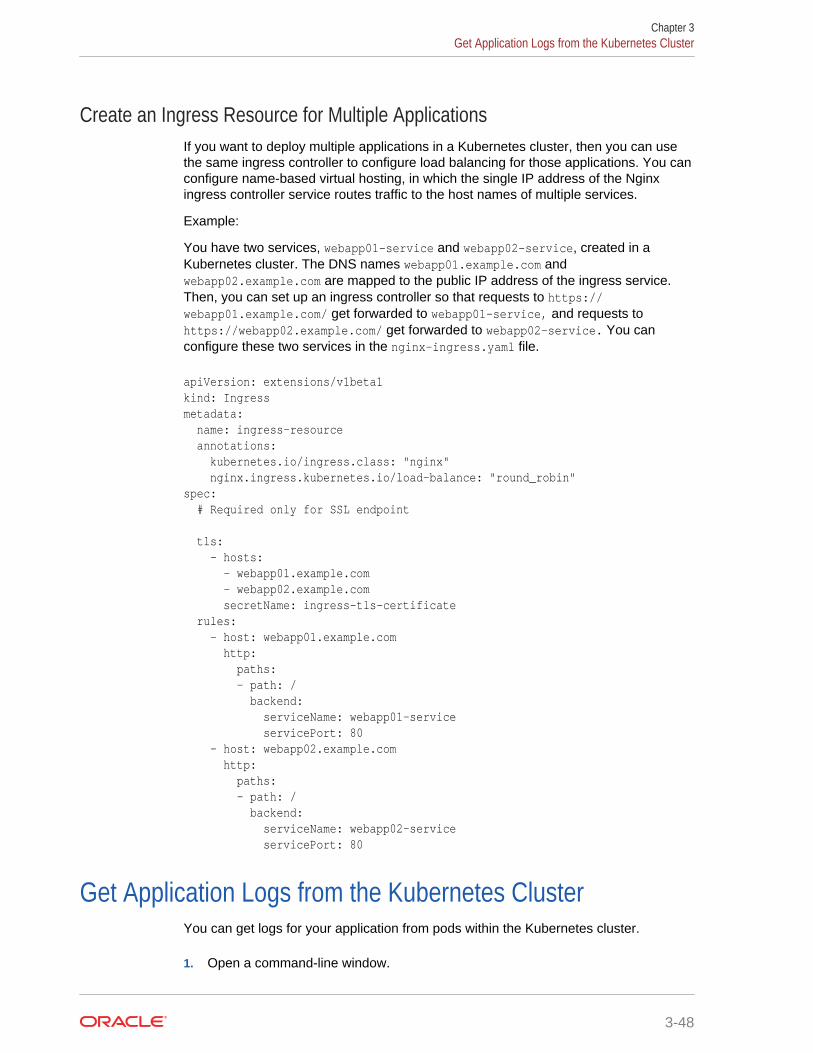
Create an Ingress Resource for Multiple ApplicationsIf you want to deploy multiple applications in a Kubernetes cluster, then you can usethe same ingress controller to configure load balancing for those applications. You canconfigure name-based virtual hosting, in which the single IP address of the Nginxingress controller service routes traffic to the host names of multiple services.
Example:
You have two services, webapp01-service and webapp02-service, created in aKubernetes cluster. The DNS names webapp01.example.com andwebapp02.example.com are mapped to the public IP address of the ingress service.Then, you can set up an ingress controller so that requests to https://webapp01.example.com/ get forwarded to webapp01-service, and requests tohttps://webapp02.example.com/ get forwarded to webapp02-service. You canconfigure these two services in the nginx-ingress.yaml file.
apiVersion: extensions/v1beta1kind: Ingressmetadata: name: ingress-resource annotations: kubernetes.io/ingress.class: "nginx" nginx.ingress.kubernetes.io/load-balance: "round_robin"spec: # Required only for SSL endpoint tls: - hosts: - webapp01.example.com - webapp02.example.com secretName: ingress-tls-certificate rules: - host: webapp01.example.com http: paths: - path: / backend: serviceName: webapp01-service servicePort: 80 - host: webapp02.example.com http: paths: - path: / backend: serviceName: webapp02-service servicePort: 80
Get Application Logs from the Kubernetes ClusterYou can get logs for your application from pods within the Kubernetes cluster.
1. Open a command-line window.
Chapter 3Get Application Logs from the Kubernetes Cluster
3-48
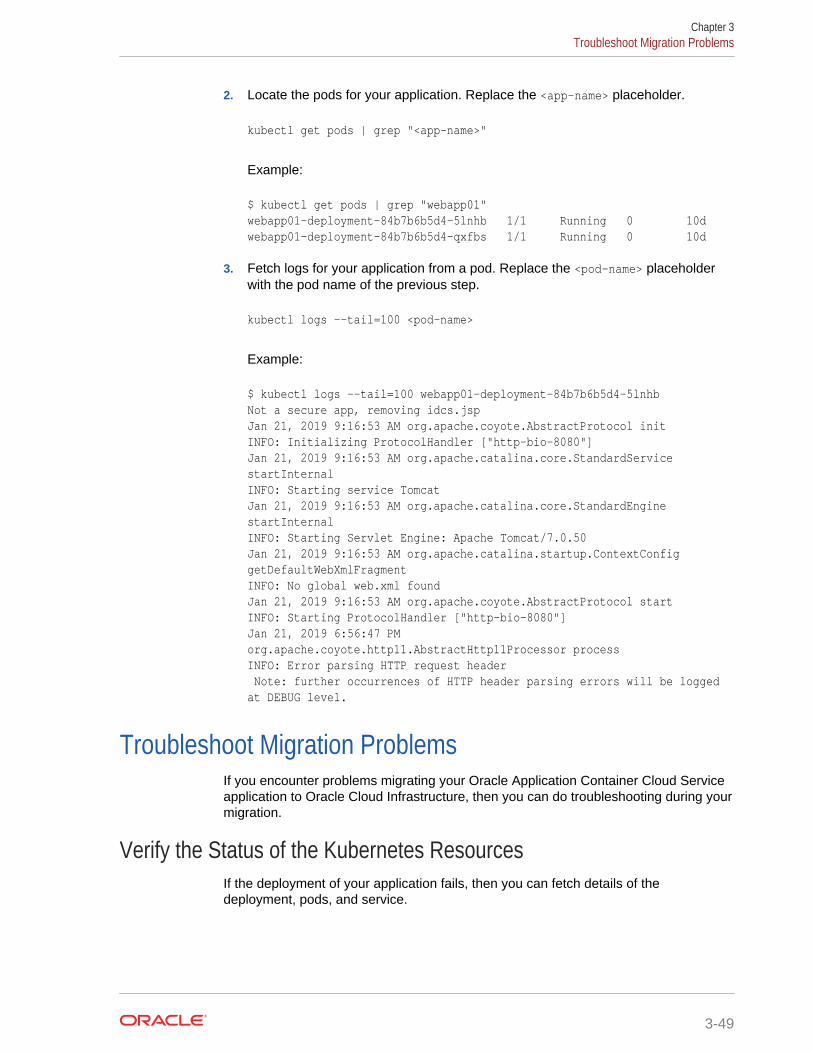
2. Locate the pods for your application. Replace the <app-name> placeholder.
kubectl get pods | grep "<app-name>"
Example:
$ kubectl get pods | grep "webapp01"webapp01-deployment-84b7b6b5d4-5lnhb 1/1 Running 0 10dwebapp01-deployment-84b7b6b5d4-qxfbs 1/1 Running 0 10d
3. Fetch logs for your application from a pod. Replace the <pod-name> placeholderwith the pod name of the previous step.
kubectl logs --tail=100 <pod-name>
Example:
$ kubectl logs --tail=100 webapp01-deployment-84b7b6b5d4-5lnhbNot a secure app, removing idcs.jspJan 21, 2019 9:16:53 AM org.apache.coyote.AbstractProtocol initINFO: Initializing ProtocolHandler ["http-bio-8080"]Jan 21, 2019 9:16:53 AM org.apache.catalina.core.StandardService startInternalINFO: Starting service TomcatJan 21, 2019 9:16:53 AM org.apache.catalina.core.StandardEngine startInternalINFO: Starting Servlet Engine: Apache Tomcat/7.0.50Jan 21, 2019 9:16:53 AM org.apache.catalina.startup.ContextConfig getDefaultWebXmlFragmentINFO: No global web.xml foundJan 21, 2019 9:16:53 AM org.apache.coyote.AbstractProtocol startINFO: Starting ProtocolHandler ["http-bio-8080"]Jan 21, 2019 6:56:47 PM org.apache.coyote.http11.AbstractHttp11Processor processINFO: Error parsing HTTP request header Note: further occurrences of HTTP header parsing errors will be logged at DEBUG level.
Troubleshoot Migration ProblemsIf you encounter problems migrating your Oracle Application Container Cloud Serviceapplication to Oracle Cloud Infrastructure, then you can do troubleshooting during yourmigration.
Verify the Status of the Kubernetes ResourcesIf the deployment of your application fails, then you can fetch details of thedeployment, pods, and service.
Chapter 3Troubleshoot Migration Problems
3-49
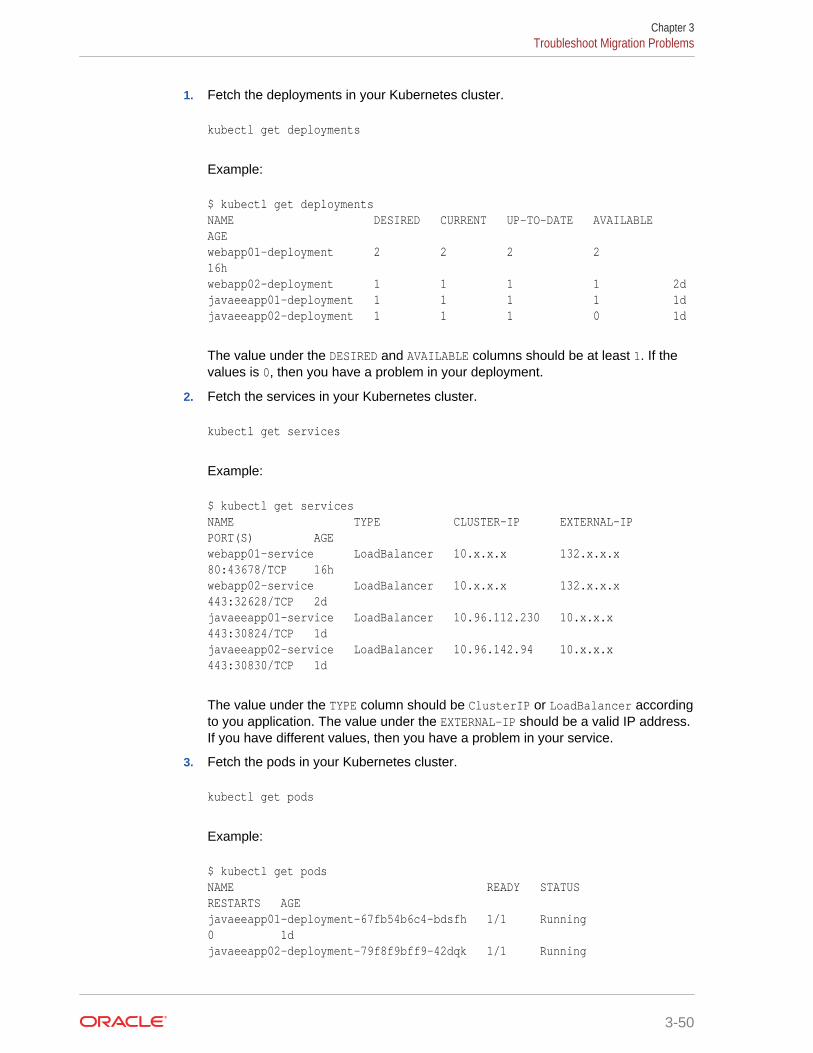
1. Fetch the deployments in your Kubernetes cluster.
kubectl get deployments
Example:
$ kubectl get deploymentsNAME DESIRED CURRENT UP-TO-DATE AVAILABLE AGEwebapp01-deployment 2 2 2 2 16hwebapp02-deployment 1 1 1 1 2djavaeeapp01-deployment 1 1 1 1 1djavaeeapp02-deployment 1 1 1 0 1d
The value under the DESIRED and AVAILABLE columns should be at least 1. If thevalues is 0, then you have a problem in your deployment.
2. Fetch the services in your Kubernetes cluster.
kubectl get services
Example:
$ kubectl get servicesNAME TYPE CLUSTER-IP EXTERNAL-IP PORT(S) AGEwebapp01-service LoadBalancer 10.x.x.x 132.x.x.x 80:43678/TCP 16hwebapp02-service LoadBalancer 10.x.x.x 132.x.x.x 443:32628/TCP 2djavaeeapp01-service LoadBalancer 10.96.112.230 10.x.x.x 443:30824/TCP 1djavaeeapp02-service LoadBalancer 10.96.142.94 10.x.x.x 443:30830/TCP 1d
The value under the TYPE column should be ClusterIP or LoadBalancer accordingto you application. The value under the EXTERNAL-IP should be a valid IP address.If you have different values, then you have a problem in your service.
3. Fetch the pods in your Kubernetes cluster.
kubectl get pods
Example:
$ kubectl get podsNAME READY STATUS RESTARTS AGEjavaeeapp01-deployment-67fb54b6c4-bdsfh 1/1 Running 0 1djavaeeapp02-deployment-79f8f9bff9-42dqk 1/1 Running
Chapter 3Troubleshoot Migration Problems
3-50
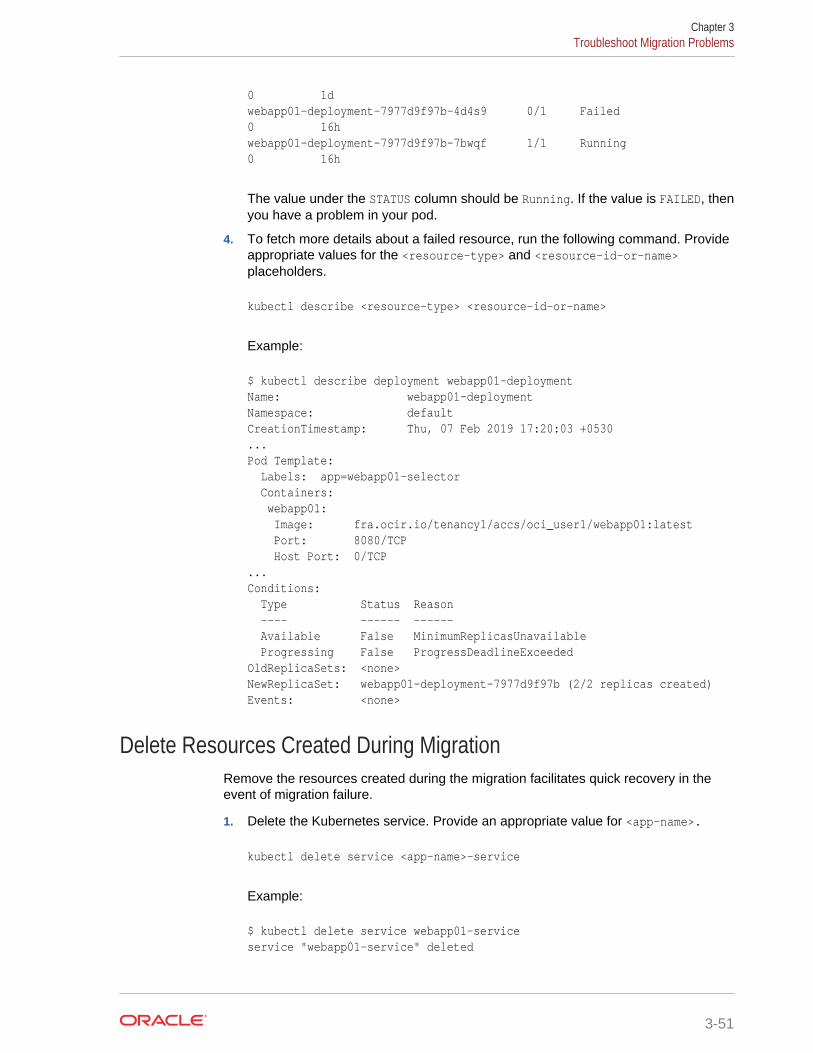
0 1dwebapp01-deployment-7977d9f97b-4d4s9 0/1 Failed 0 16hwebapp01-deployment-7977d9f97b-7bwqf 1/1 Running 0 16h
The value under the STATUS column should be Running. If the value is FAILED, thenyou have a problem in your pod.
4. To fetch more details about a failed resource, run the following command. Provideappropriate values for the <resource-type> and <resource-id-or-name>placeholders.
kubectl describe <resource-type> <resource-id-or-name>
Example:
$ kubectl describe deployment webapp01-deploymentName: webapp01-deploymentNamespace: defaultCreationTimestamp: Thu, 07 Feb 2019 17:20:03 +0530...Pod Template: Labels: app=webapp01-selector Containers: webapp01: Image: fra.ocir.io/tenancy1/accs/oci_user1/webapp01:latest Port: 8080/TCP Host Port: 0/TCP...Conditions: Type Status Reason ---- ------ ------ Available False MinimumReplicasUnavailable Progressing False ProgressDeadlineExceededOldReplicaSets: <none>NewReplicaSet: webapp01-deployment-7977d9f97b (2/2 replicas created)Events: <none>
Delete Resources Created During MigrationRemove the resources created during the migration facilitates quick recovery in theevent of migration failure.
1. Delete the Kubernetes service. Provide an appropriate value for <app-name>.
kubectl delete service <app-name>-service
Example:
$ kubectl delete service webapp01-serviceservice "webapp01-service" deleted
Chapter 3Troubleshoot Migration Problems
3-51
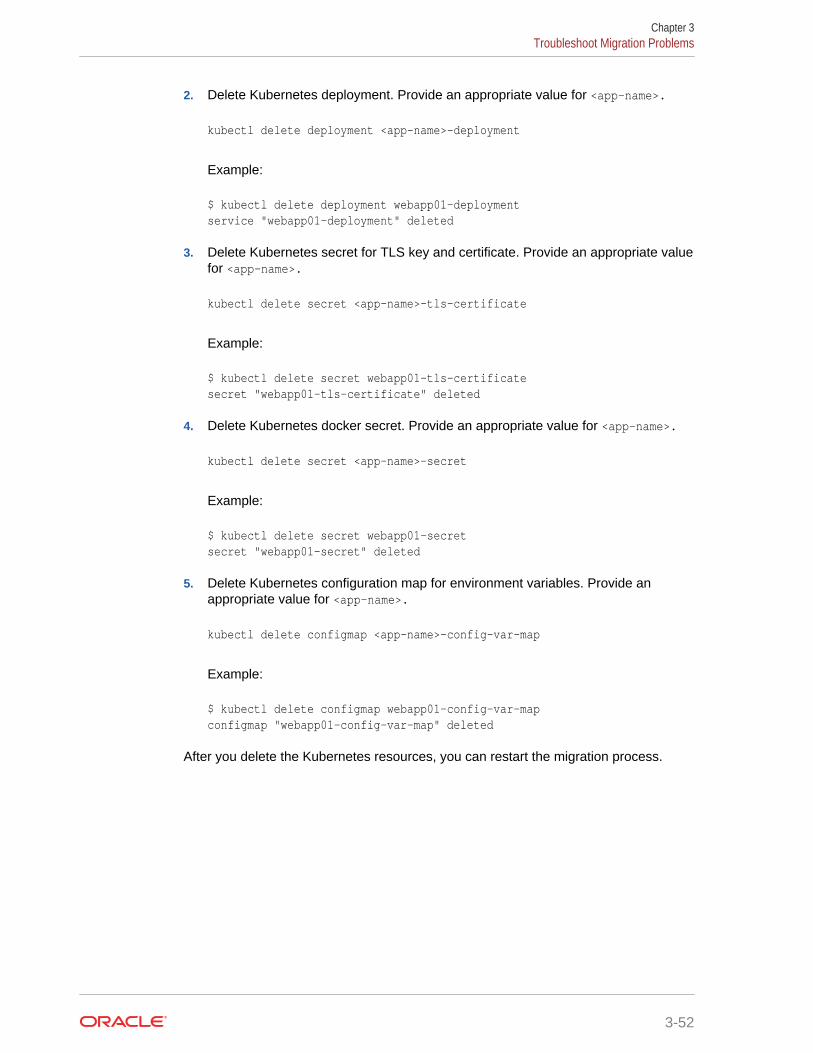
2. Delete Kubernetes deployment. Provide an appropriate value for <app-name>.
kubectl delete deployment <app-name>-deployment
Example:
$ kubectl delete deployment webapp01-deploymentservice "webapp01-deployment" deleted
3. Delete Kubernetes secret for TLS key and certificate. Provide an appropriate valuefor <app-name>.
kubectl delete secret <app-name>-tls-certificate
Example:
$ kubectl delete secret webapp01-tls-certificatesecret "webapp01-tls-certificate" deleted
4. Delete Kubernetes docker secret. Provide an appropriate value for <app-name>.
kubectl delete secret <app-name>-secret
Example:
$ kubectl delete secret webapp01-secretsecret "webapp01-secret" deleted
5. Delete Kubernetes configuration map for environment variables. Provide anappropriate value for <app-name>.
kubectl delete configmap <app-name>-config-var-map
Example:
$ kubectl delete configmap webapp01-config-var-mapconfigmap "webapp01-config-var-map" deleted
After you delete the Kubernetes resources, you can restart the migration process.
Chapter 3Troubleshoot Migration Problems
3-52

4Complete the Post-Migrations Tasks
After successfully migrating your Oracle Application Container Cloud Serviceapplications from Oracle Cloud Infrastructure Classic to Oracle Cloud Infrastructure,test your applications thoroughly, and then perform cleanup and other optionalconfiguration tasks.
Topics:
• Test the Migrated Application
• Clean Up the Infrastructure and Platform Resources in Oracle Cloud InfrastructureClassic
Test the Migrated ApplicationTo test your application you use the external IP address of the load balancer for yourapplication, or the custom URL if you configured one. You can use a command-linetool or a web browser to transfer data from and to your application.
Use a command-line tool
Using a command-line tool, for example cURL or GNU Wget, you can send requeststo the endpoints of your application and retrieve the response.
Example 4-1 cURL Command
$ curl -k https://123.x.x.x/<!DOCTYPE html><html xmlns="http://www.w3.org/1999/xhtml">......</html>
Example 4-2 GNU Wget Command
$ wget --no-check-certificate -O - https://123.x.x.x/--2019-02-05 15:42:29-- https://123.x.x.x/Request sent, awaiting response... 200 OKLength: unspecified [text/html]Saving to: ¿STDOUT¿<!DOCTYPE html><html xmlns="http://www.w3.org/1999/xhtml">......</html>
4-1
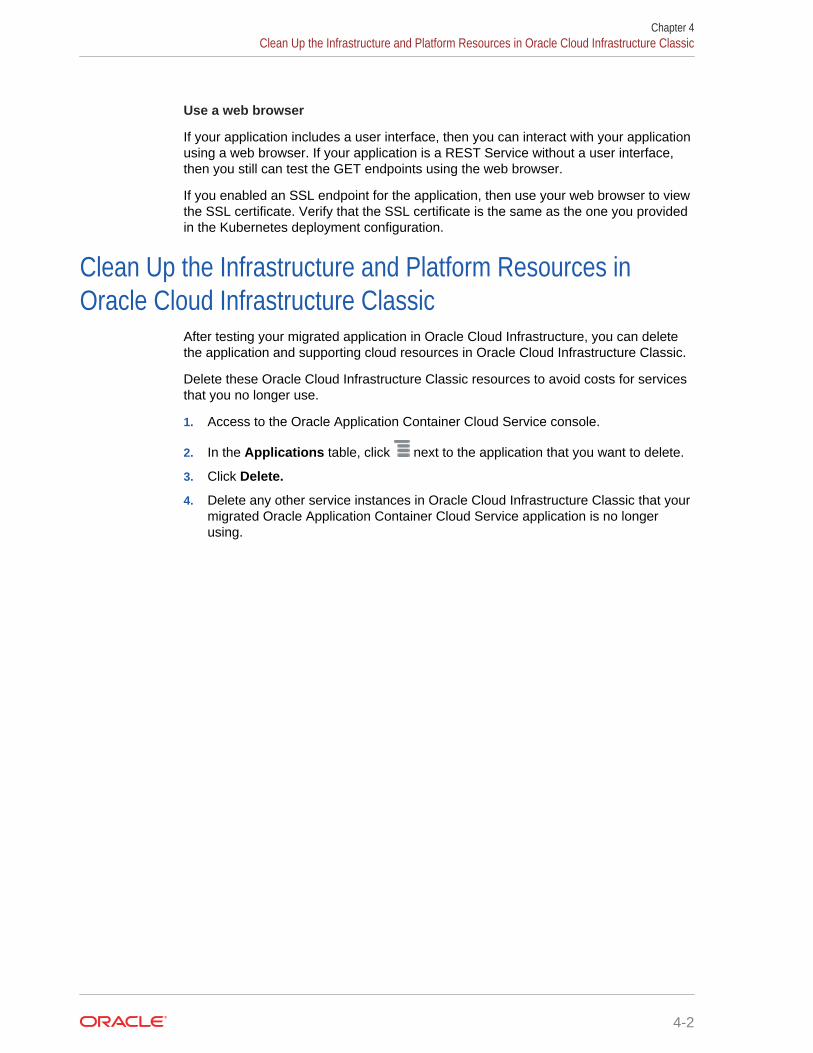
Use a web browser
If your application includes a user interface, then you can interact with your applicationusing a web browser. If your application is a REST Service without a user interface,then you still can test the GET endpoints using the web browser.
If you enabled an SSL endpoint for the application, then use your web browser to viewthe SSL certificate. Verify that the SSL certificate is the same as the one you providedin the Kubernetes deployment configuration.
Clean Up the Infrastructure and Platform Resources inOracle Cloud Infrastructure Classic
After testing your migrated application in Oracle Cloud Infrastructure, you can deletethe application and supporting cloud resources in Oracle Cloud Infrastructure Classic.
Delete these Oracle Cloud Infrastructure Classic resources to avoid costs for servicesthat you no longer use.
1. Access to the Oracle Application Container Cloud Service console.
2. In the Applications table, click next to the application that you want to delete.
3. Click Delete.
4. Delete any other service instances in Oracle Cloud Infrastructure Classic that yourmigrated Oracle Application Container Cloud Service application is no longerusing.
Chapter 4Clean Up the Infrastructure and Platform Resources in Oracle Cloud Infrastructure Classic
4-2