Microsoft Word 2010 Step-by-Step Guide - Montgomery...
22
Microsoft Word 2010 Step-by-Step Guide Created by Andrea Philo and Kathy Sweeney October 2012 Page 1 of 22 Montgomery County-Norristown Public Library Table of Contents Introduction ............................................................................................................................................................................ 3 Exploring the Word 2010 Environment .................................................................................................................................. 3 Creating, Saving, Closing and Opening a Document ............................................................................................................... 5 Creating a document........................................................................................................................................................... 5 Saving the new document in the Word 2010 format ......................................................................................................... 5 Saving the new document in a different format................................................................................................................. 5 Back-up savings ................................................................................................................................................................... 6 Closing a document............................................................................................................................................................. 6 Creating a new blank document ......................................................................................................................................... 6 Opening an existing document – Protected View .............................................................................................................. 7 Opening an existing document (InternetPolicy.docx) ......................................................................................................... 7 Moving Around in a Document ............................................................................................................................................... 8 Insertion point..................................................................................................................................................................... 8 Keyboard keys ..................................................................................................................................................................... 9 Undo button........................................................................................................................................................................ 9 Controlling the Appearance and Location of Text .................................................................................................................. 9 Highlighting ......................................................................................................................................................................... 9 Changing text attributes ................................................................................................................................................... 10 Changing alignment and spacing ...................................................................................................................................... 10 Changing location of text .................................................................................................................................................. 11 Changing paragraph indentation ...................................................................................................................................... 11 Controlling the Appearance of your Document .................................................................................................................... 11 Changing page margins ..................................................................................................................................................... 11 To add interest… ............................................................................................................................................................... 12 Page Breaks ....................................................................................................................................................................... 12 Headers and Footers - text that appears at the top and bottom of every page .............................................................. 12 Correction and Editing Tools ................................................................................................................................................. 13 Printing your document ........................................................................................................................................................ 14 Tables .................................................................................................................................................................................... 16 Inserting Tables ................................................................................................................................................................. 16
Transcript of Microsoft Word 2010 Step-by-Step Guide - Montgomery...
Microsoft Word 2010 Step-by-Step Guide
Created by Andrea Philo and Kathy Sweeney October 2012 Page 1 of 22
Montgomery County-Norristown Public Library
Table of Contents Introduction ............................................................................................................................................................................ 3
Exploring the Word 2010 Environment .................................................................................................................................. 3
Creating, Saving, Closing and Opening a Document ............................................................................................................... 5
Creating a document ........................................................................................................................................................... 5
Saving the new document in the Word 2010 format ......................................................................................................... 5
Saving the new document in a different format................................................................................................................. 5
Back-up savings ................................................................................................................................................................... 6
Closing a document ............................................................................................................................................................. 6
Creating a new blank document ......................................................................................................................................... 6
Opening an existing document – Protected View .............................................................................................................. 7
Opening an existing document (InternetPolicy.docx) ......................................................................................................... 7
Moving Around in a Document ............................................................................................................................................... 8
Insertion point ..................................................................................................................................................................... 8
Keyboard keys ..................................................................................................................................................................... 9
Undo button ........................................................................................................................................................................ 9
Controlling the Appearance and Location of Text .................................................................................................................. 9
Highlighting ......................................................................................................................................................................... 9
Changing text attributes ................................................................................................................................................... 10
Changing alignment and spacing ...................................................................................................................................... 10
Changing location of text .................................................................................................................................................. 11
Changing paragraph indentation ...................................................................................................................................... 11
Controlling the Appearance of your Document .................................................................................................................... 11
Changing page margins ..................................................................................................................................................... 11
To add interest… ............................................................................................................................................................... 12
Page Breaks ....................................................................................................................................................................... 12
Headers and Footers - text that appears at the top and bottom of every page .............................................................. 12
Correction and Editing Tools ................................................................................................................................................. 13
Printing your document ........................................................................................................................................................ 14
Tables .................................................................................................................................................................................... 16
Inserting Tables ................................................................................................................................................................. 16
Microsoft Word 2010 Step-by-Step Guide
Created by Andrea Philo and Kathy Sweeney October 2012 Page 2 of 22
Montgomery County-Norristown Public Library
Entering Information ......................................................................................................................................................... 16
Customizing Tables ........................................................................................................................................................... 16
Pictures/Clip Art /Shapes/Text boxes ................................................................................................................................... 18
Inserting Clip Art/Pictures ................................................................................................................................................. 18
Formatting and Moving Pictures....................................................................................................................................... 18
Inserting lines, arrows and shapes .................................................................................................................................... 18
Inserting text boxes ........................................................................................................................................................... 19
Picture Effects (optional) .................................................................................................................................................. 19
Bulleted/Numbered Lists (optional) ..................................................................................................................................... 20
Templates (optional) ............................................................................................................................................................. 21
Calendar Wizard ................................................................................................................................................................ 21
Search for a template online............................................................................................................................................. 22
Using Help (optional) ............................................................................................................................................................ 22
Microsoft Word 2010 Step-by-Step Guide
Created by Andrea Philo and Kathy Sweeney October 2012 Page 3 of 22
Montgomery County-Norristown Public Library
Introduction
Word Processing is when you use a computer program, such as Word, to create, edit and produce text documents. Microsoft Word 2010 is built on the Ribbon concept that was introduced in Word 2007 and adds some features pertaining to security of documents as well as some enhanced artistic effects that make documents more visually appealing.
Previous versions of Word cannot open documents created in Word 2007 or 2010 unless a compatibility pack is installed. Also significant is that while Word 2010 documents share a file extension with Word 2007 (*.docx) the Word 2010 file is a unique file type. Documents created in previous versions of Word that are opened in Word 2010 will open in Compatibility mode and will not have certain of the new Word 2010 tools available to use unless re-saved as a Word 2010 document. Re-saving as a Word 2010 document requires responding to a disclaimer statement that the previous version may lose some formatting. Follow the instructions below to learn how to use Word. Note: The instructions refer to settings and customizations that we have chosen for our Computer Lab. They may not be present on your home computer.
Exploring the Word 2010 Environment
1. Open Word by using the Start menu or by double-clicking on the desktop icon for Microsoft Office Word 2010.
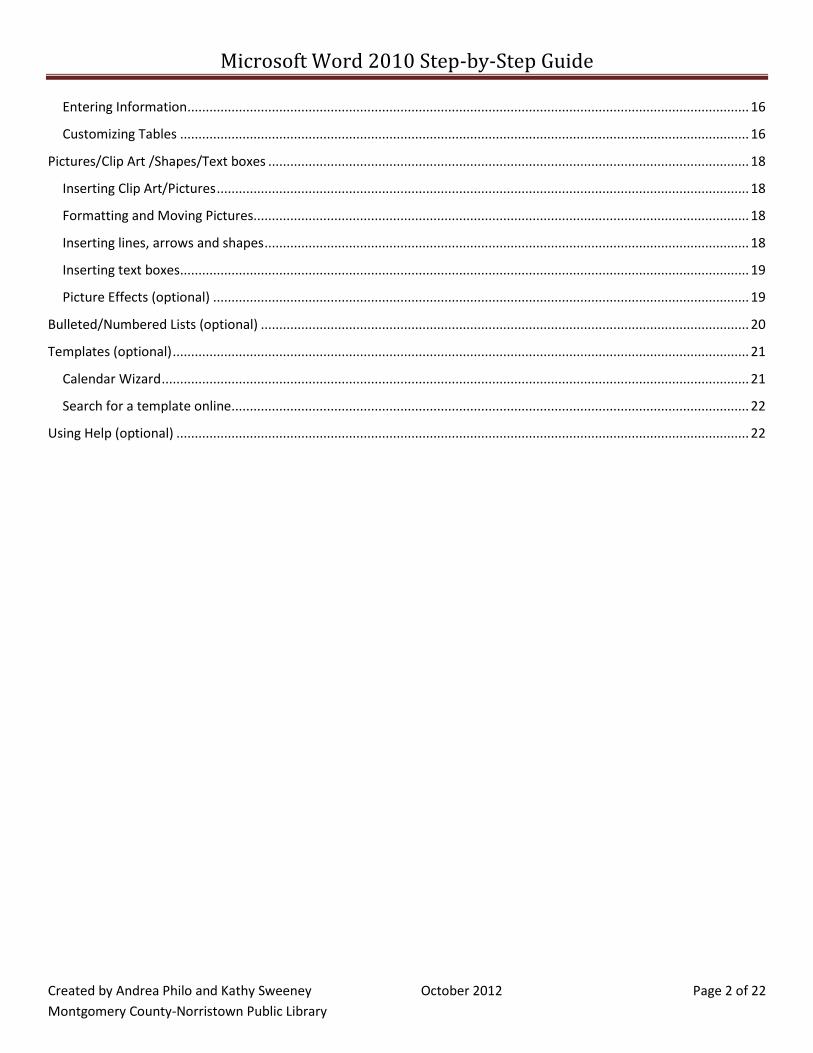
2. By default, Word will open with the Home tab of the Ribbon active. 3. Look for the Ribbon in the area underneath the Title Bar.
a. The Ribbon makes all the capabilities of Word available in a single area. b. Commands related to working with document content are represented as buttons
on the tabs that make up the Ribbon. Hover over some other active buttons to observe ScreenTips.
c. The Home tab is the active tab by default. Try clicking on other tabs to view their buttons.
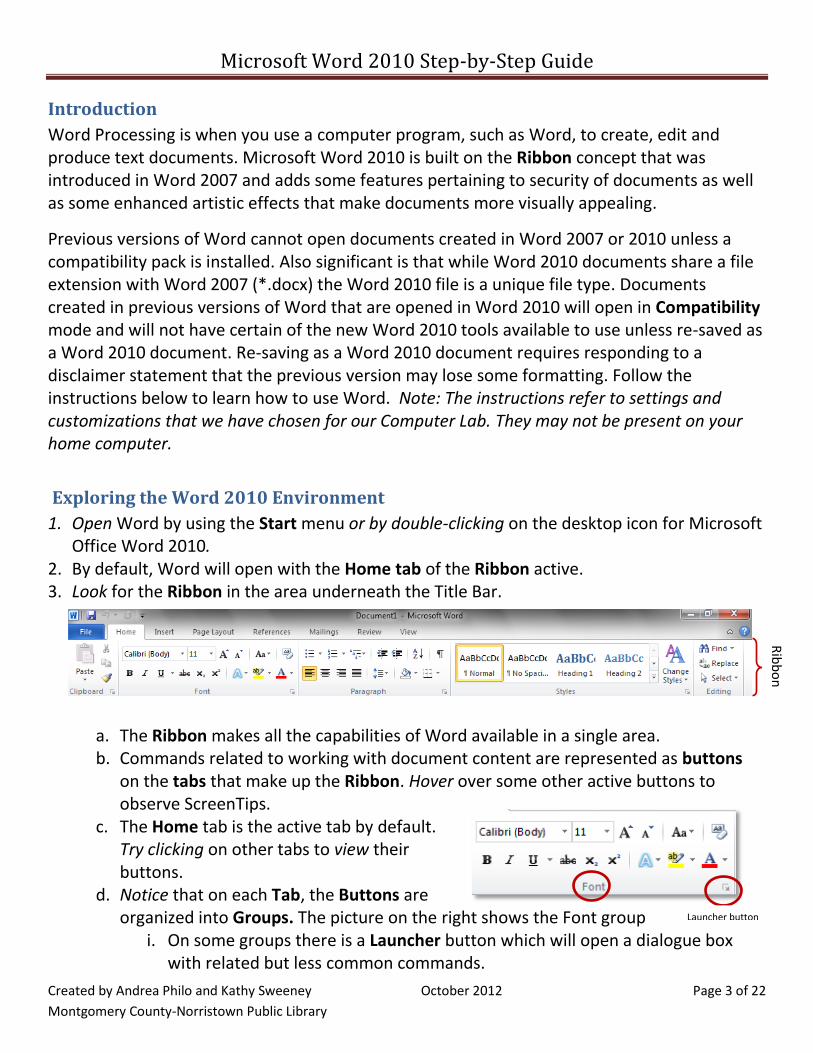
d. Notice that on each Tab, the Buttons are organized into Groups. The picture on the right shows the Font group
i. On some groups there is a Launcher button which will open a dialogue box with related but less common commands.
Rib
bo
n
Launcher button

Microsoft Word 2010 Step-by-Step Guide
Created by Andrea Philo and Kathy Sweeney October 2012 Page 4 of 22
Montgomery County-Norristown Public Library
ii. Some buttons in the groups have arrows:
e. Click on the File tab: i. The File tab replaces the Microsoft Office Button and the File menu used in
earlier releases of Microsoft Office, and provides a Backstage view of your document.
ii. The File tab contains a set of commands that you use to perform actions TO a document rather than IN a document.
iii. The Info section of the File tab offers an easy to use interface for inspecting documents for hidden properties or personal information.
iv. To return to the document from the Backstage view, click any other tab. 4. Look for the Quick Access Toolbar on the Title Bar all the way to the left.
a. It contains frequently used commands and can be customized using the drop-down menu. Point to each small icon to view its screen tip.
b. Click the Customize Quick Access Toolbar button, check New on the menu and see it added to the Quick Access Toolbar.
The Quick Access Toolbar can also be moved to show below the Ribbon. Move the Quick Access Tool Bar back above the ribbon
5. Locate the Word Control icon to the left of the Quick Access Toolbar. Oddly, there is no screen tip. This button has the same controls as the Window controls on the right side of the title bar.
6. Locate the Minimize the Ribbon button (underneath the window control buttons)
and click it. This button essentially takes the Ribbon out of view, with the exception of the names of the ribbon tabs. Clicking on tabs will make its tools available but the contents will not stay in view permanently unless you uncheck minimize the ribbon. Click the same button to Expand the Ribbon. Note – it is also possible to minimize the ribbon by double-clicking on an active tab.
7. Look below the document window area and find the Status Bar
Clicking this button’s list arrow
displays a list of options
Clicking the actual button
carries out the command with
the current settings
Quick Access Toolbar
Microsoft Word 2010 Step-by-Step Guide
Created by Andrea Philo and Kathy Sweeney October 2012 Page 5 of 22
Montgomery County-Norristown Public Library
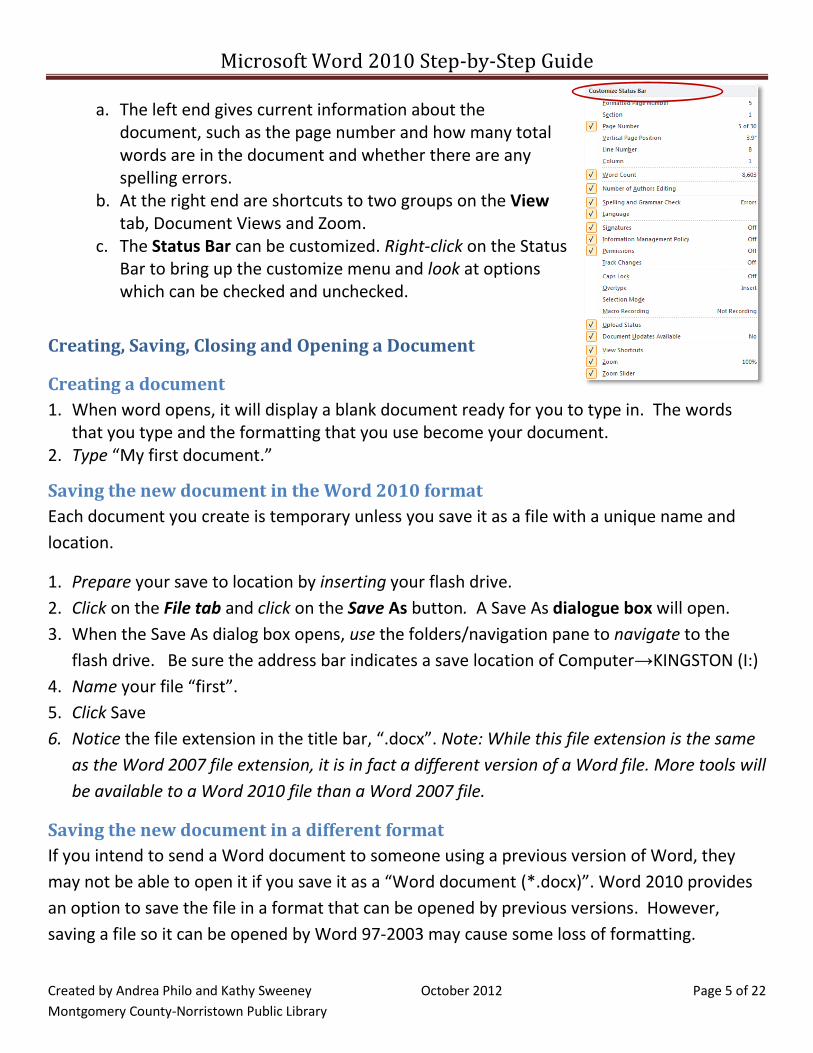
a. The left end gives current information about the document, such as the page number and how many total words are in the document and whether there are any spelling errors.
b. At the right end are shortcuts to two groups on the View tab, Document Views and Zoom.
c. The Status Bar can be customized. Right-click on the Status Bar to bring up the customize menu and look at options which can be checked and unchecked.
Creating, Saving, Closing and Opening a Document
Creating a document
1. When word opens, it will display a blank document ready for you to type in. The words that you type and the formatting that you use become your document.
2. Type “My first document.”
Saving the new document in the Word 2010 format
Each document you create is temporary unless you save it as a file with a unique name and
location.
1. Prepare your save to location by inserting your flash drive.
2. Click on the File tab and click on the Save As button. A Save As dialogue box will open.
3. When the Save As dialog box opens, use the folders/navigation pane to navigate to the
flash drive. Be sure the address bar indicates a save location of Computer→KINGSTON (I:)
4. Name your file “first”.
5. Click Save
6. Notice the file extension in the title bar, “.docx”. Note: While this file extension is the same
as the Word 2007 file extension, it is in fact a different version of a Word file. More tools will
be available to a Word 2010 file than a Word 2007 file.
Saving the new document in a different format
If you intend to send a Word document to someone using a previous version of Word, they
may not be able to open it if you save it as a “Word document (*.docx)”. Word 2010 provides
an option to save the file in a format that can be opened by previous versions. However,
saving a file so it can be opened by Word 97-2003 may cause some loss of formatting.
Microsoft Word 2010 Step-by-Step Guide
Created by Andrea Philo and Kathy Sweeney October 2012 Page 6 of 22
Montgomery County-Norristown Public Library
1. Open the File tab and move your cursor to the Save As button, but this time, use the list
arrow in the Save as type field and select Word 97-2003 document (*.doc) Notice that the
file name has an extension of “.doc”.
2. Click save.
3. Notice that the file name in the title bar says Compatibility Mode. This means that certain
tools will not be able to be used in this document.
4. Minimize Word and open the flash drive icon to view the two versions of the document.
Open the two documents. Notice how the Text Effects tool (one of the new tools in Word
2010) in the Font group is not active in the .doc file. Close the .doc file.
Back-up savings
It is important to save your work routinely, just in case “something happens.” To save changes
as you are working in your document click the Save button on the Quick Access Toolbar. Save
as… a different file name if you aren’t sure if you want to keep your current changes.
Closing a document
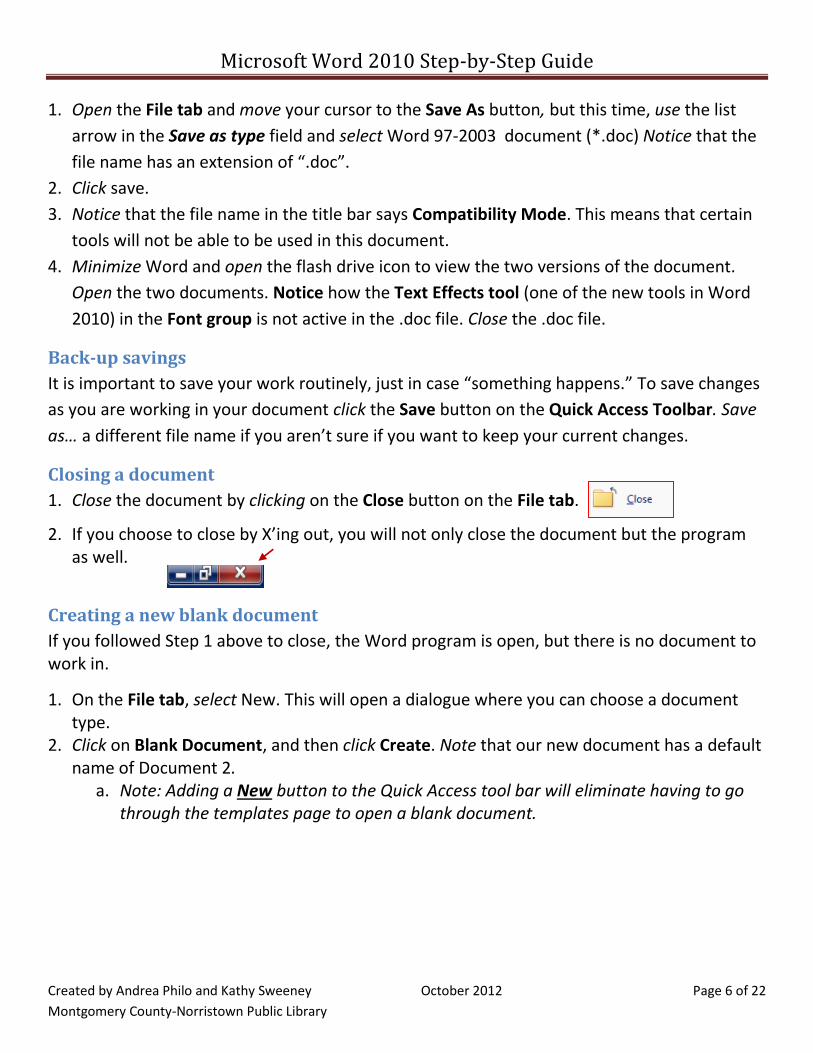
1. Close the document by clicking on the Close button on the File tab.
2. If you choose to close by X’ing out, you will not only close the document but the program as well.
Creating a new blank document
If you followed Step 1 above to close, the Word program is open, but there is no document to work in.
1. On the File tab, select New. This will open a dialogue where you can choose a document type.
2. Click on Blank Document, and then click Create. Note that our new document has a default name of Document 2.
a. Note: Adding a New button to the Quick Access tool bar will eliminate having to go through the templates page to open a blank document.
Microsoft Word 2010 Step-by-Step Guide
Created by Andrea Philo and Kathy Sweeney October 2012 Page 7 of 22
Montgomery County-Norristown Public Library
Opening an existing document – Protected View
A new security feature in Word 2010 results in a warning when a document that was
downloaded from the internet is opened, such as a document that was attached to an email.
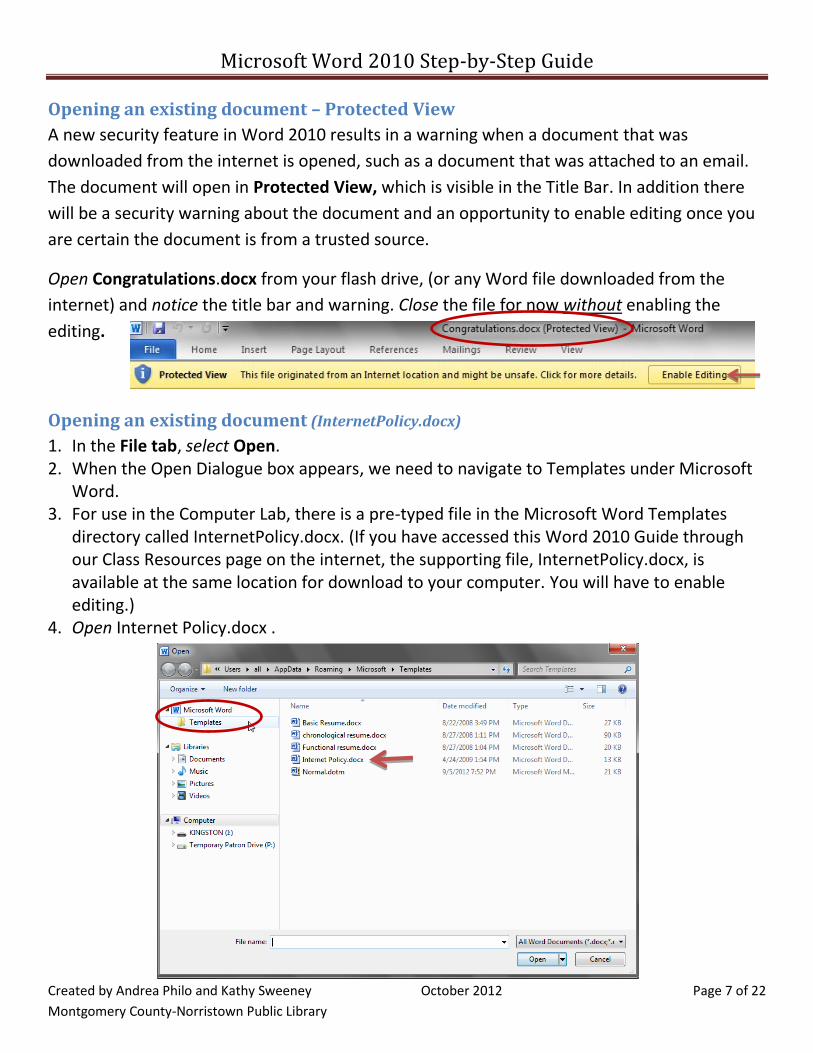
The document will open in Protected View, which is visible in the Title Bar. In addition there
will be a security warning about the document and an opportunity to enable editing once you
are certain the document is from a trusted source.
Open Congratulations.docx from your flash drive, (or any Word file downloaded from the
internet) and notice the title bar and warning. Close the file for now without enabling the
editing.
Opening an existing document (InternetPolicy.docx)
1. In the File tab, select Open. 2. When the Open Dialogue box appears, we need to navigate to Templates under Microsoft
Word. 3. For use in the Computer Lab, there is a pre-typed file in the Microsoft Word Templates
directory called InternetPolicy.docx. (If you have accessed this Word 2010 Guide through our Class Resources page on the internet, the supporting file, InternetPolicy.docx, is available at the same location for download to your computer. You will have to enable editing.)
4. Open Internet Policy.docx .
Microsoft Word 2010 Step-by-Step Guide
Created by Andrea Philo and Kathy Sweeney October 2012 Page 8 of 22
Montgomery County-Norristown Public Library
Moving Around in a Document
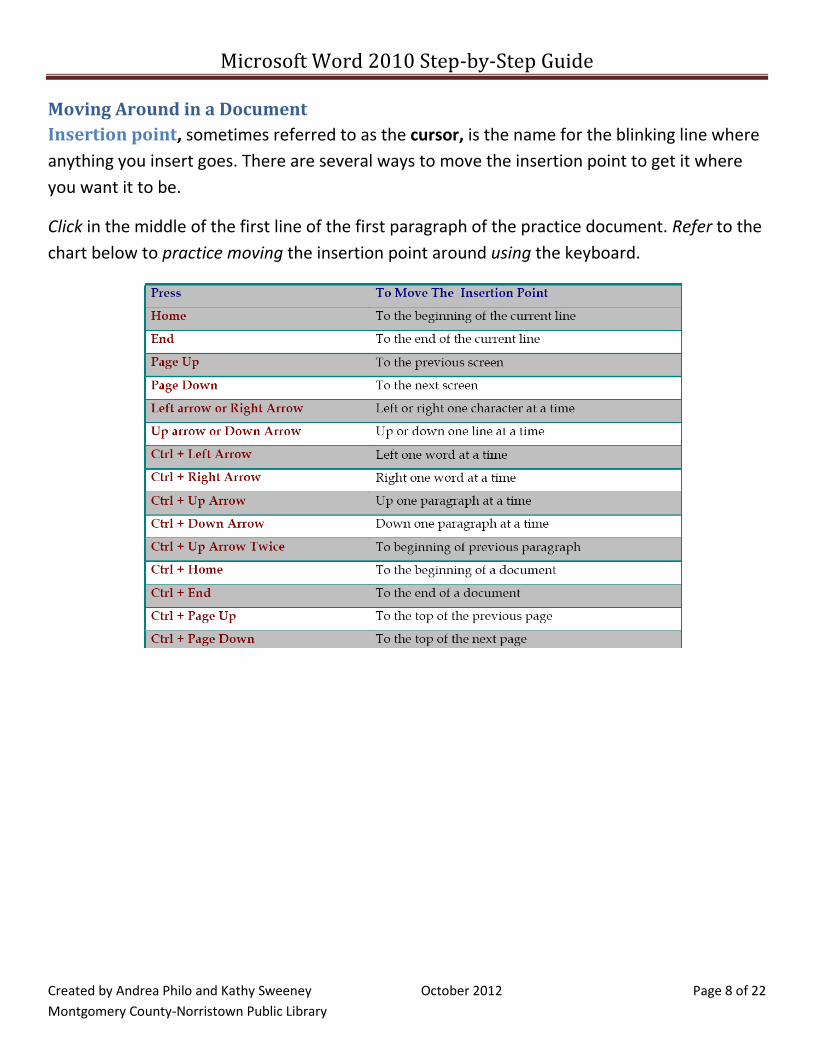
Insertion point, sometimes referred to as the cursor, is the name for the blinking line where
anything you insert goes. There are several ways to move the insertion point to get it where
you want it to be.
Click in the middle of the first line of the first paragraph of the practice document. Refer to the
chart below to practice moving the insertion point around using the keyboard.
Microsoft Word 2010 Step-by-Step Guide
Created by Andrea Philo and Kathy Sweeney October 2012 Page 9 of 22
Montgomery County-Norristown Public Library
Keyboard keys - there are several other keyboard keys that are important to know.
1. Enter- pressing the enter key will move the insertion point to a new line, but it also creates
a new paragraph. (When you are typing in Word, the insertion point will move and show
where the next character you type will appear. When the insertion point reaches the right
margin, the word you are typing moves to the next line. Because of this word wrap
feature, you should only press enter to start a new paragraph.)
2. Space Bar- pressing the space bar several times will create a small space between words.
3. Delete- pressing delete will remove characters to the right of the insertion point.
4. Backspace- pressing backspace will remove characters to the left of the insertion point.
5. Shift/Caps lock- both of these keys will change case to capitals; Shift for only one letter.
Caps lock for all letters after it is pressed. (Note – Word 2010 is preset to capitalize the first
word of every sentence and the word “I”.)
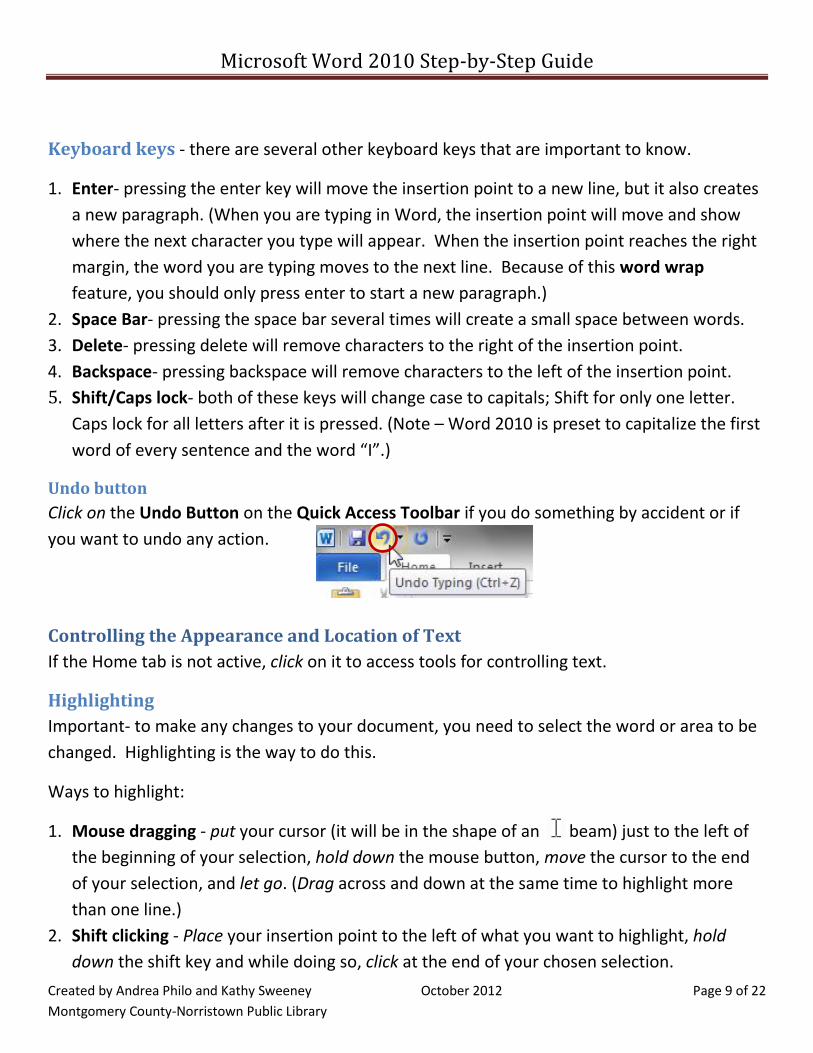
Undo button
Click on the Undo Button on the Quick Access Toolbar if you do something by accident or if
you want to undo any action.
Controlling the Appearance and Location of Text
If the Home tab is not active, click on it to access tools for controlling text.
Highlighting
Important- to make any changes to your document, you need to select the word or area to be
changed. Highlighting is the way to do this.
Ways to highlight:
1. Mouse dragging - put your cursor (it will be in the shape of an beam) just to the left of
the beginning of your selection, hold down the mouse button, move the cursor to the end
of your selection, and let go. (Drag across and down at the same time to highlight more
than one line.)
2. Shift clicking - Place your insertion point to the left of what you want to highlight, hold
down the shift key and while doing so, click at the end of your chosen selection.
Microsoft Word 2010 Step-by-Step Guide
Created by Andrea Philo and Kathy Sweeney October 2012 Page 10 of 22
Montgomery County-Norristown Public Library
3. Shift clicking to add to or reduce your selection - If you have a selection already
highlighted, you can increase or decrease that selection by holding down the shift key and
clicking at a different endpoint.
4. Clicking to select lines, words, paragraph
a. Double-clicking on a word will select the word.
b. Triple-clicking anywhere within a paragraph will select the whole paragraph.
5. Clicking in left selection area - your cursor will change to an arrow pointing to the right.
a. Single-clicking to the left of a line will highlight the line. Drag to select multiple lines.
b. Double clicking to the left of a paragraph will select the entire paragraph.
Changing text attributes
1. Select the second line in the first paragraph.
2. In the Font group apply the Bold, Italic and Underline attributes. Notice how the buttons
change colors when they are active. Click in a blank area in the right margin to see the
changes.
3. Select the second paragraph. Use the font drop-down box to select a different
font(CurlzMT) and the font size drop- down box to select a different font size(8). (Notice
that you can see the effects in Live Preview before you make an actual selection.)
4. Experiment with other buttons in the Font group to change the appearance of your
selected text.
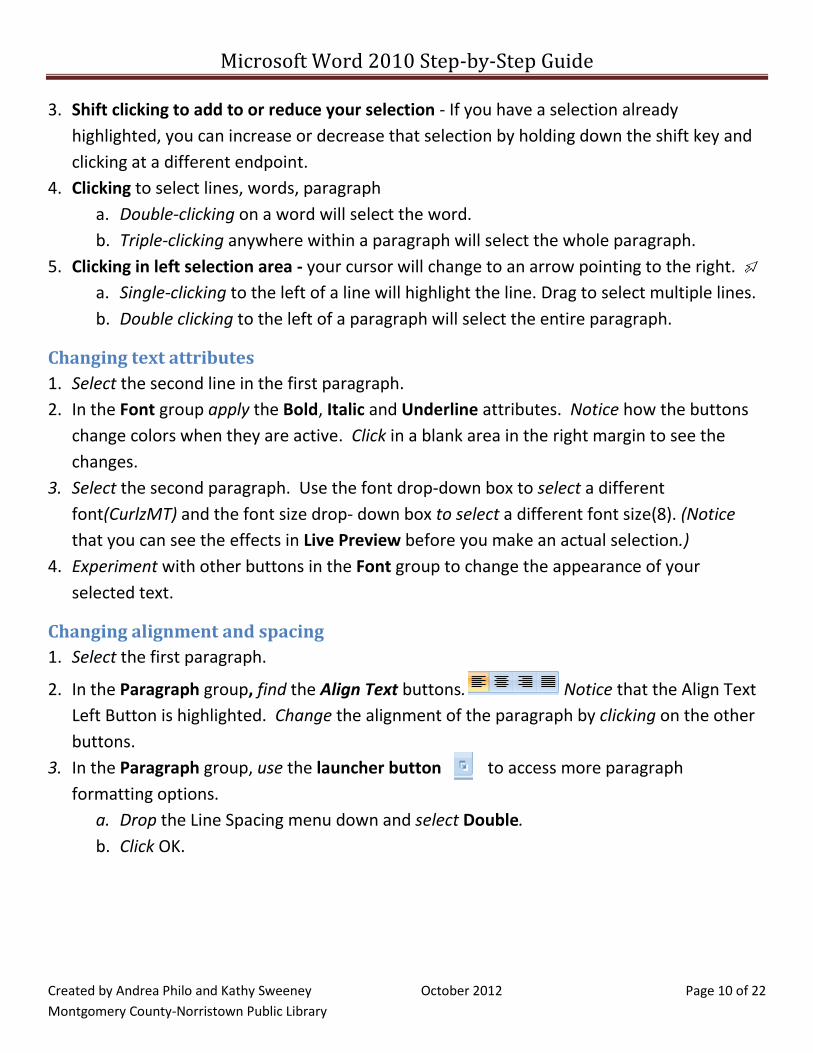
Changing alignment and spacing
1. Select the first paragraph.
2. In the Paragraph group, find the Align Text buttons. Notice that the Align Text
Left Button is highlighted. Change the alignment of the paragraph by clicking on the other
buttons.
3. In the Paragraph group, use the launcher button to access more paragraph
formatting options.
a. Drop the Line Spacing menu down and select Double.
b. Click OK.
Microsoft Word 2010 Step-by-Step Guide
Created by Andrea Philo and Kathy Sweeney October 2012 Page 11 of 22
Montgomery County-Norristown Public Library
Changing location of text
1. To move text by dragging, highlight the third paragraph. Change the Font color to red.
With your cursor on the highlighted paragraph, hold down your mouse button and move
the insertion point to the blank space between the first and second paragraphs.
Notice that your cursor is an arrow with a small square attached to it and the insertion
point looks like a dotted line. Release your mouse button.
2. Cut/copy and paste- these commands are located in the Clipboard group of the Home tab.
a. Cut/paste- with the same paragraph selected, click the Cut button. Move your
insertion point to the space between the second and third paragraphs, and then click
the Paste button.
b. Copy/paste – select the third paragraph and click the Copy button. Move your
insertion point to the space between the first and second paragraphs and click the
Paste button. Notice that the selection appears in both locations.
Changing paragraph indentation
1. Select the first paragraph and align left. Shift click to add the second paragraph to the
selected area.
2. In the Paragraph group use the launcher button to access more paragraph formatting
options. Under the Indentation area, click the drop down arrow under Special. Click on
First line. Click ok. Notice how the first line of each paragraph is now indented.
3. Hanging indent (all lines of a paragraph are indented except the first line) - using the same
instructions as above, change indentation to Hanging under Special. Click ok. Again,
notice the changes.
Controlling the Appearance of your Document
Open the Page Layout tab to access buttons to change the appearance of your document
Changing page margins
1. In the Page Setup group, click on the Margins button. A drop down menu will appear that
will have your current settings highlighted. Click on the Wide option to see how it will
affect your document.
2. Click on the Margins button again and click on Custom Margins at the bottom of the menu.
When the dialog box opens, use the arrows to change the top, left, bottom and right
Microsoft Word 2010 Step-by-Step Guide
Created by Andrea Philo and Kathy Sweeney October 2012 Page 12 of 22
Montgomery County-Norristown Public Library
margins to 0.8”. Click ok. Click on the Margins button again and notice how the margin list
has now populated with your customization.
To add interest… Page Background group
1. Click on the Page Color button to display a palette of colors. Mouse-over the colors and
observe Live Preview changes to your document. Click on any light color that you like. (Use
a color from the second row.)
2. Click on Watermark to place a semi-transparent message or picture on your document.
3. Click on Page Borders to place a border around your document. On the Page Border tab,
click on different settings, styles, color, width or picture. See a preview in the right pane.
Click the drop down arrow in the art selection box. Scroll down and select the Christmas
Tree. Click ok to add the border.
4. Remove the border by clicking into Page Borders again and select None under Setting on
the Page Border tab. Click ok.
Page Breaks –Place your insertion point at the end of paragraph 3. Click on the Insert tab, in
the Pages group, click on Page Break. Notice how the lines below are now on the next page.
Headers and Footers - text that appears at the top and bottom of every page
1. Click on the Insert tab.
2. In the Header & Footer group, click on the Header button to open a menu of different
header options. Scroll down the menu to view all the options and click on Blank. Type “My
Document”. (Notice that a new Contextual Tab (Design) has opened).
3. Remaining in the Design Contextual tab, in the Header & Footer group, click on the Footer
button to open a menu of different footer options. Again, Scroll down the menu to view all
the options and then click on Blank (Three Columns).
a. Click on the left Type Text box and type your name. Do not hit enter.
b. Click on the middle box and, still in the Contextual tab, go to the Insert group and
click on the Date & Time button. When the dialog box opens, click on the third
option under Available Formats in the left pane and click ok.
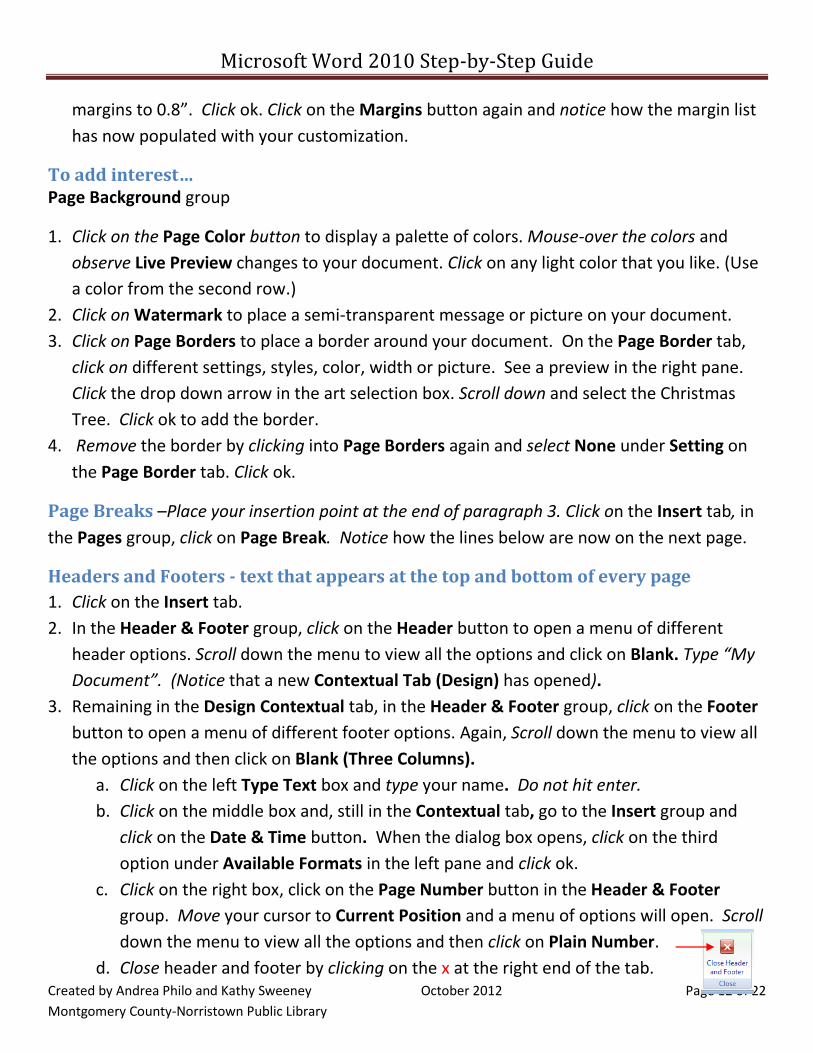
c. Click on the right box, click on the Page Number button in the Header & Footer
group. Move your cursor to Current Position and a menu of options will open. Scroll
down the menu to view all the options and then click on Plain Number.
d. Close header and footer by clicking on the x at the right end of the tab.
Microsoft Word 2010 Step-by-Step Guide
Created by Andrea Philo and Kathy Sweeney October 2012 Page 13 of 22
Montgomery County-Norristown Public Library
4. Notice that “my document” appears at the top of every page and your name,the date and
sequential page numbers appear at the bottom.
5. If you double click on the Header, you open the Contextual tab again and you can
experiment with different Header and Footer options.
6. Double click in the body of the document when finished.
Correction and Editing Tools
1. Find/replace-
a. Place your insertion point at the beginning of the document.
b. On the Home tab, in the Editing group, click the Find button.
c. A pane will open on the left.
d. Click into the Search Document field, type “library.”
e. Notice all instances of the word library are highlighted in your document.
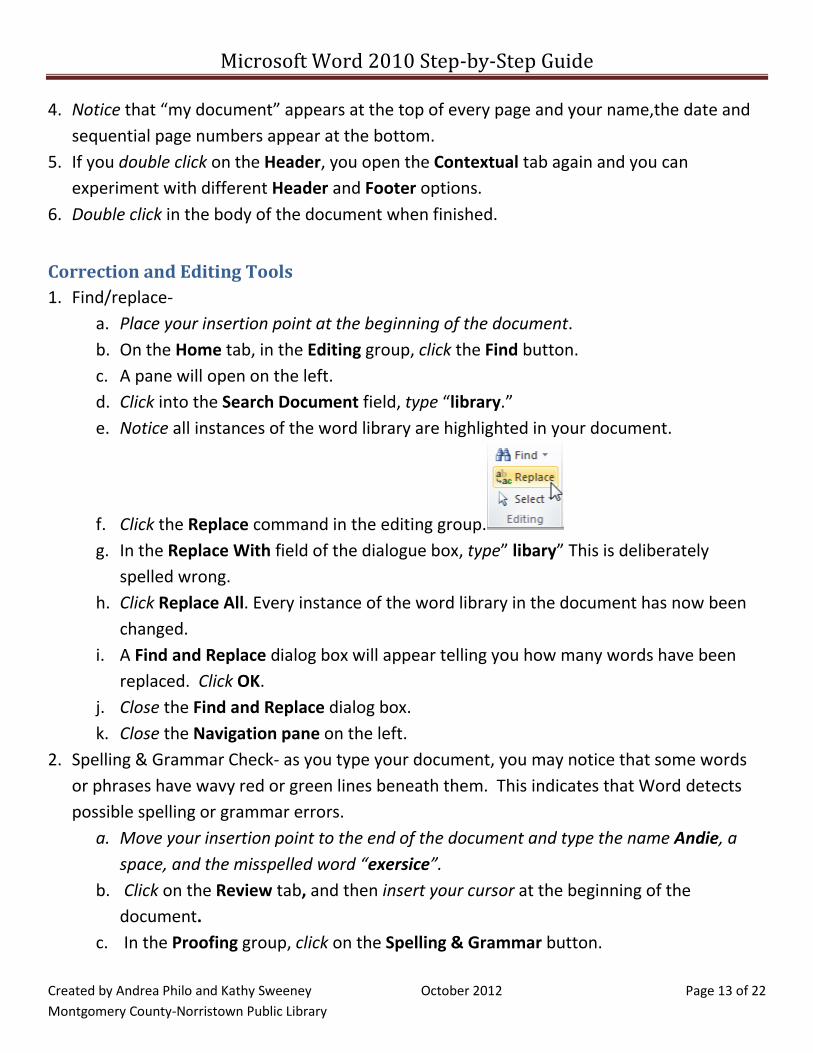
f. Click the Replace command in the editing group.
g. In the Replace With field of the dialogue box, type” libary” This is deliberately
spelled wrong.
h. Click Replace All. Every instance of the word library in the document has now been
changed.
i. A Find and Replace dialog box will appear telling you how many words have been
replaced. Click OK.
j. Close the Find and Replace dialog box.
k. Close the Navigation pane on the left.
2. Spelling & Grammar Check- as you type your document, you may notice that some words
or phrases have wavy red or green lines beneath them. This indicates that Word detects
possible spelling or grammar errors.
a. Move your insertion point to the end of the document and type the name Andie, a
space, and the misspelled word “exersice”.
b. Click on the Review tab, and then insert your cursor at the beginning of the
document.
c. In the Proofing group, click on the Spelling & Grammar button.

Microsoft Word 2010 Step-by-Step Guide
Created by Andrea Philo and Kathy Sweeney October 2012 Page 14 of 22
Montgomery County-Norristown Public Library
d. A dialog box will open and Word will address every issue of misspelling or grammar
mistake that it thinks it finds. Your options:
i. If there is an error, select the suggested
option that is correct and click Change or
Change All. (When the word” library
“appears, click Change All.)
ii. If there is no error, click Ignore Once or
Ignore All. The computer is not always right! (click Ignore Once when the
words “are found” appear)
iii. If a word (usually a name, in this case Andie) is highlighted that you normally
use and it is correct, you can click Add to Dictionary. The word will never
appear again on spell check. At the end, we’ll test this feature with the name
Andie.
iv. If a word is highlighted that you commonly misspell, you can select
AutoCorrect and every time you misspell it again, it will be corrected. When
exersice is highlighted, make sure that the correct suggested spelling is
highlighted and click AutoCorrect.
v. If no suggestions are correct, make your own correction and click change.
e. A spell check complete message will appear when all has been corrected. Click OK.
f. Retype the name Andie and the misspelled word “exersice”. What happens?
3. Auto Correct- Word is programmed with many common spelling errors and fixes them
automatically as you type. Move your insertion point to the end of the document, type
“teh”and press the space bar. Notice how it automatically changed to “the.”
Printing your document
1. Always preview before you print
a. Open the File tab, and click on Print.
b. Notice the Print Preview pane on the right. Note how the page color is not being
displayed. This is because printing background colors and images is an option you
have to select in the Print Options. By default this option is not checked because
printing background colors uses a lot of toner.
Microsoft Word 2010 Step-by-Step Guide
Created by Andrea Philo and Kathy Sweeney October 2012 Page 15 of 22
Montgomery County-Norristown Public Library
c. Check the number of pages in your document by looking in the lower left of the Print
Preview pane.
d. Scroll down or use the right arrow to see page 2.
e. To see both pages of your document side by side, lower the zoom using the zoom
slider at the bottom right of the print Print Preview pane.
f. If you need to amend your document, click on the Home tab and make all necessary
changes.
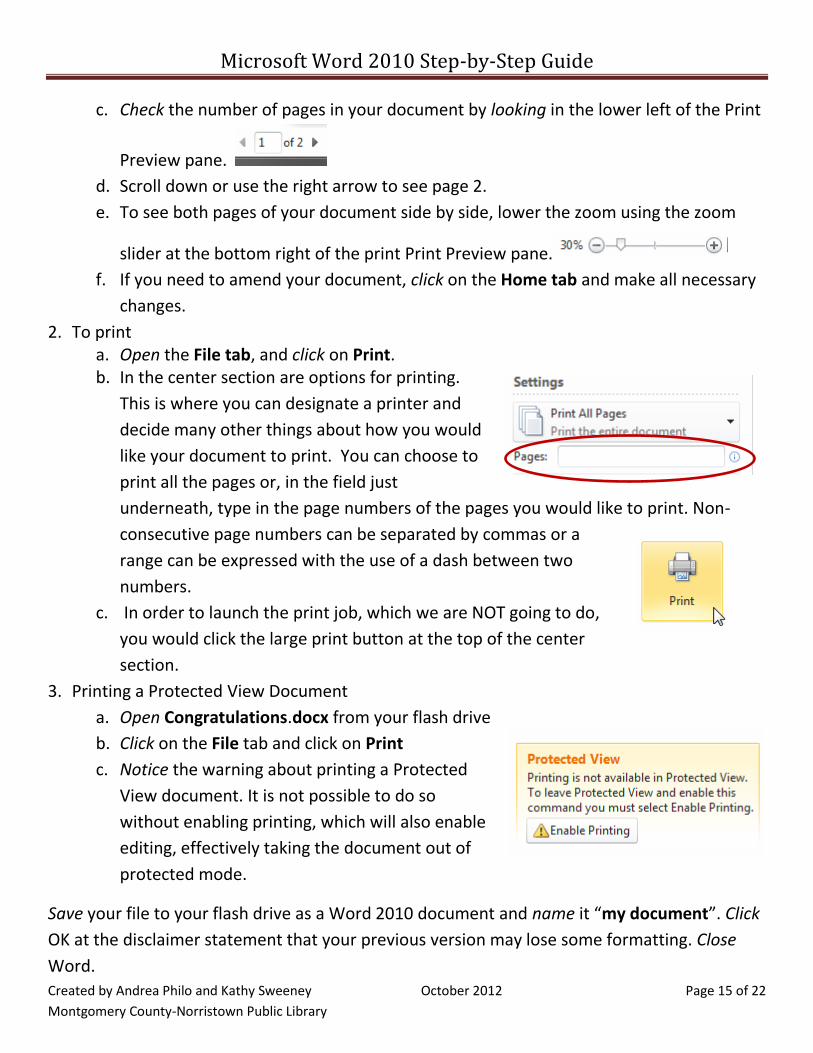
2. To print a. Open the File tab, and click on Print. b. In the center section are options for printing.
This is where you can designate a printer and
decide many other things about how you would
like your document to print. You can choose to
print all the pages or, in the field just
underneath, type in the page numbers of the pages you would like to print. Non-
consecutive page numbers can be separated by commas or a
range can be expressed with the use of a dash between two
numbers.
c. In order to launch the print job, which we are NOT going to do,
you would click the large print button at the top of the center
section.
3. Printing a Protected View Document
a. Open Congratulations.docx from your flash drive
b. Click on the File tab and click on Print
c. Notice the warning about printing a Protected
View document. It is not possible to do so
without enabling printing, which will also enable
editing, effectively taking the document out of
protected mode.
Save your file to your flash drive as a Word 2010 document and name it “my document”. Click
OK at the disclaimer statement that your previous version may lose some formatting. Close
Word.
Microsoft Word 2010 Step-by-Step Guide
Created by Andrea Philo and Kathy Sweeney October 2012 Page 16 of 22
Montgomery County-Norristown Public Library
Tables
Inserting Tables
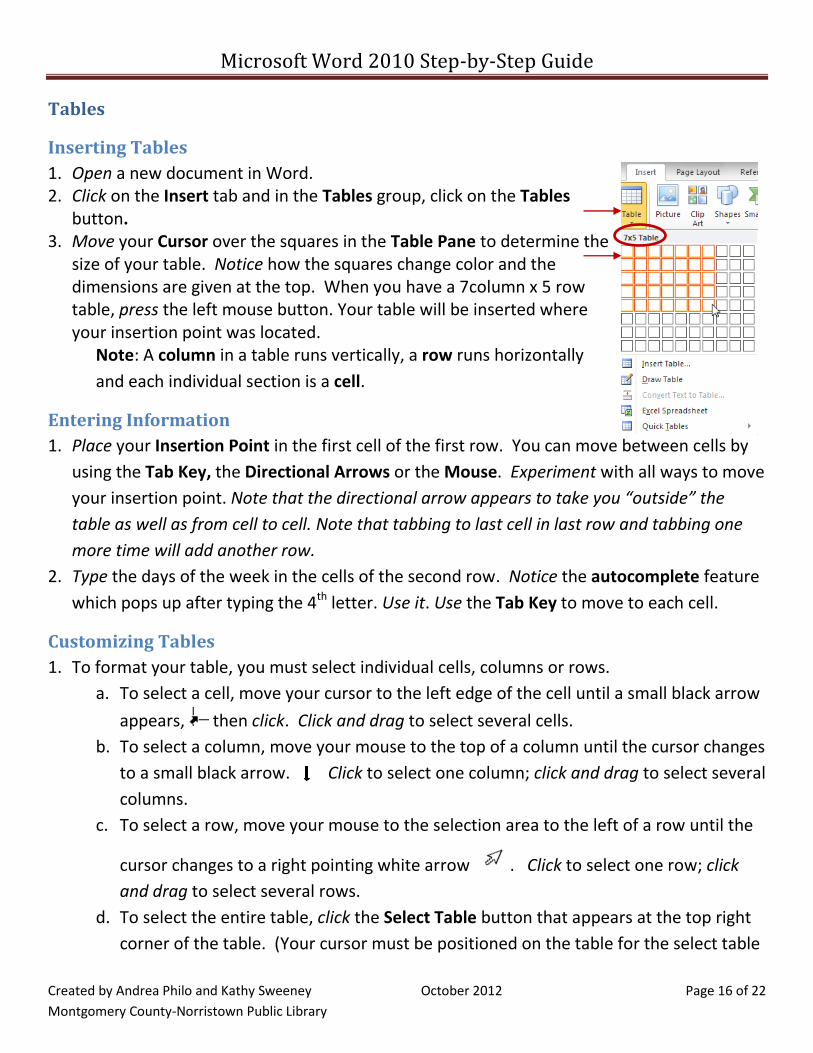
1. Open a new document in Word. 2. Click on the Insert tab and in the Tables group, click on the Tables
button. 3. Move your Cursor over the squares in the Table Pane to determine the
size of your table. Notice how the squares change color and the dimensions are given at the top. When you have a 7column x 5 row table, press the left mouse button. Your table will be inserted where your insertion point was located.
Note: A column in a table runs vertically, a row runs horizontally
and each individual section is a cell.
Entering Information
1. Place your Insertion Point in the first cell of the first row. You can move between cells by
using the Tab Key, the Directional Arrows or the Mouse. Experiment with all ways to move
your insertion point. Note that the directional arrow appears to take you “outside” the
table as well as from cell to cell. Note that tabbing to last cell in last row and tabbing one
more time will add another row.
2. Type the days of the week in the cells of the second row. Notice the autocomplete feature
which pops up after typing the 4th letter. Use it. Use the Tab Key to move to each cell.
Customizing Tables
1. To format your table, you must select individual cells, columns or rows.
a. To select a cell, move your cursor to the left edge of the cell until a small black arrow
appears, then click. Click and drag to select several cells.
b. To select a column, move your mouse to the top of a column until the cursor changes
to a small black arrow. Click to select one column; click and drag to select several
columns.
c. To select a row, move your mouse to the selection area to the left of a row until the
cursor changes to a right pointing white arrow . Click to select one row; click
and drag to select several rows.
d. To select the entire table, click the Select Table button that appears at the top right
corner of the table. (Your cursor must be positioned on the table for the select table
Microsoft Word 2010 Step-by-Step Guide
Created by Andrea Philo and Kathy Sweeney October 2012 Page 17 of 22
Montgomery County-Norristown Public Library
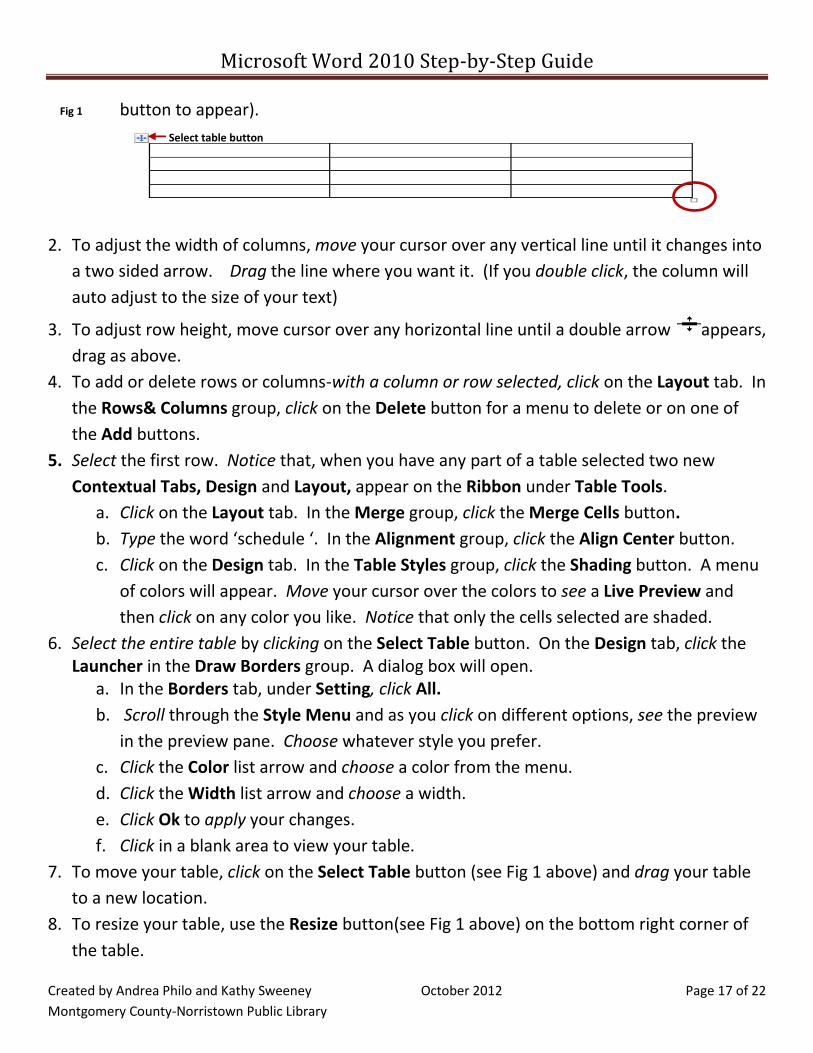
button to appear).
2. To adjust the width of columns, move your cursor over any vertical line until it changes into
a two sided arrow. Drag the line where you want it. (If you double click, the column will
auto adjust to the size of your text)
3. To adjust row height, move cursor over any horizontal line until a double arrow appears,
drag as above.
4. To add or delete rows or columns-with a column or row selected, click on the Layout tab. In
the Rows& Columns group, click on the Delete button for a menu to delete or on one of
the Add buttons.
5. Select the first row. Notice that, when you have any part of a table selected two new
Contextual Tabs, Design and Layout, appear on the Ribbon under Table Tools.
a. Click on the Layout tab. In the Merge group, click the Merge Cells button.
b. Type the word ‘schedule ‘. In the Alignment group, click the Align Center button.
c. Click on the Design tab. In the Table Styles group, click the Shading button. A menu
of colors will appear. Move your cursor over the colors to see a Live Preview and
then click on any color you like. Notice that only the cells selected are shaded.
6. Select the entire table by clicking on the Select Table button. On the Design tab, click the Launcher in the Draw Borders group. A dialog box will open.
a. In the Borders tab, under Setting, click All.
b. Scroll through the Style Menu and as you click on different options, see the preview
in the preview pane. Choose whatever style you prefer.
c. Click the Color list arrow and choose a color from the menu.
d. Click the Width list arrow and choose a width.
e. Click Ok to apply your changes.
f. Click in a blank area to view your table.
7. To move your table, click on the Select Table button (see Fig 1 above) and drag your table
to a new location.
8. To resize your table, use the Resize button(see Fig 1 above) on the bottom right corner of
the table.
Select table button
Fig 1
Microsoft Word 2010 Step-by-Step Guide
Created by Andrea Philo and Kathy Sweeney October 2012 Page 18 of 22
Montgomery County-Norristown Public Library
Pictures/Clip Art /Shapes/Text boxes
Inserting Clip Art/Pictures
1. Place your Insertion Point outside of the table. On the Insert tab, in the Illustrations
group, click the Clip Art button.
2. A Clip Art Pane will open on the right side. In the Search For box, type “sports” and click
the Go button. Thumbnails of Clip Art that has been installed on the computer will appear
below. Move your mouse pointer to the football helmet and click on the Drop Down Arrow
that appears. Click Insert. The picture will be inserted into your document at the insertion
point.
3. Click in a clear space to deselect the picture.
4. Close the Clip Art Pane.
5. To insert a picture, click the Picture button. Navigate to your flash drive and choose one of
your saved pictures, and then click Insert.
Formatting and Moving Pictures
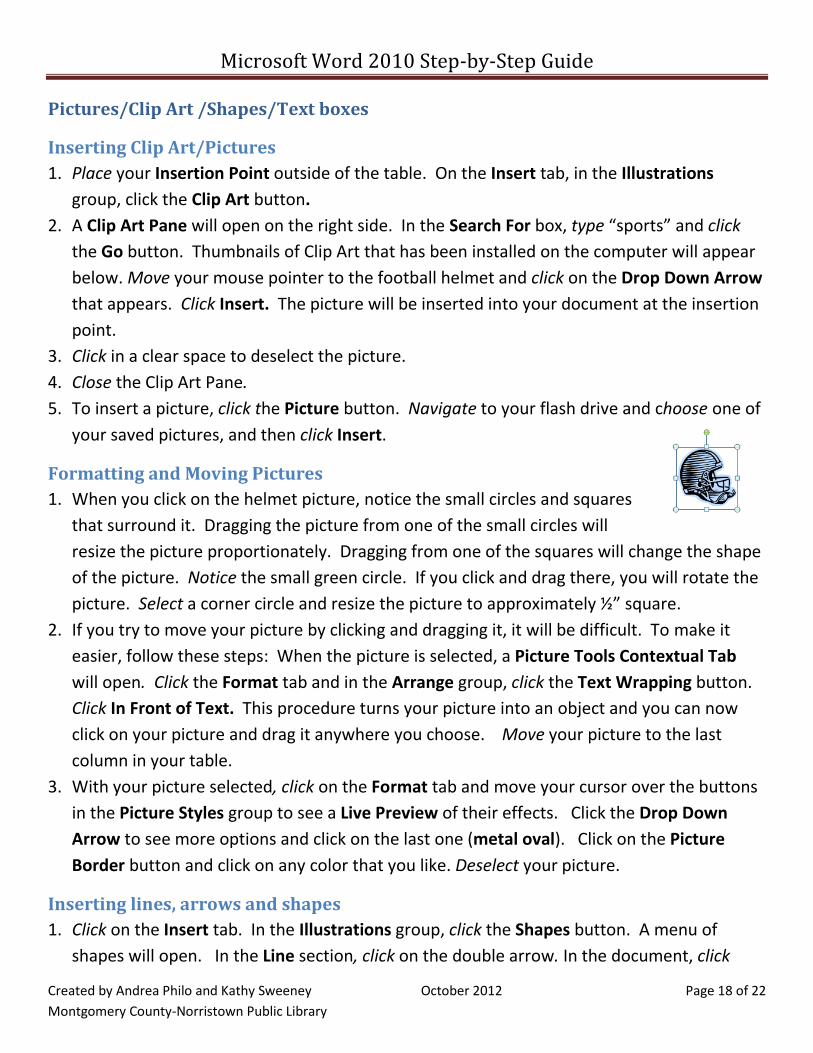
1. When you click on the helmet picture, notice the small circles and squares
that surround it. Dragging the picture from one of the small circles will
resize the picture proportionately. Dragging from one of the squares will change the shape
of the picture. Notice the small green circle. If you click and drag there, you will rotate the
picture. Select a corner circle and resize the picture to approximately ½” square.
2. If you try to move your picture by clicking and dragging it, it will be difficult. To make it
easier, follow these steps: When the picture is selected, a Picture Tools Contextual Tab
will open. Click the Format tab and in the Arrange group, click the Text Wrapping button.
Click In Front of Text. This procedure turns your picture into an object and you can now
click on your picture and drag it anywhere you choose. Move your picture to the last
column in your table.
3. With your picture selected, click on the Format tab and move your cursor over the buttons
in the Picture Styles group to see a Live Preview of their effects. Click the Drop Down
Arrow to see more options and click on the last one (metal oval). Click on the Picture
Border button and click on any color that you like. Deselect your picture.
Inserting lines, arrows and shapes
1. Click on the Insert tab. In the Illustrations group, click the Shapes button. A menu of
shapes will open. In the Line section, click on the double arrow. In the document, click
Microsoft Word 2010 Step-by-Step Guide
Created by Andrea Philo and Kathy Sweeney October 2012 Page 19 of 22
Montgomery County-Norristown Public Library
where you want your line to start and drag it to where you want it to end. Use the buttons
at the ends to position the arrow, move tool to move it. Format the selected arrow using
the Shape Outline button in the Shape Styles group in the Drawing Tools Contextual Tab
(Format). Give it a color and a heavier weight.
2. Repeat the above steps, except choose the 5- point star shape located in the Stars and
Banners section. Move your star to the right side of the document.
3. When your star shape has been inserted and while it is still selected, a Drawing Tools
Contextual Tab (Format) appears with buttons to format your shape. In the Shape Styles
group, click the drop down arrow to see other shape styles that could be used. Mouse over
the selections to see a live preview of the different styles. Click on whichever one you like.
Inserting text boxes
A text box is a free standing object that can contain words. Some of the shapes that you can
insert are actually text boxes.
1. Click on the Insert tab. In the Text group, click the Text Box button, a menu of text boxes
opens and a variety of text box styles will open. To have more control over placement and
size, click on Draw Text Box.
2. Click in your document where you want the text box to start and drag to where you want it
to end.
3. The blinking cursor within the box indicates that what you type will be inserted into the
box. Type your name. Resize the text box to just fit around your name.
4. You can change formatting using buttons on the Drawing Tools Contextual Tab (Format).
With the text box selected, click on the Format tab. In the Shape Styles group, click on the
drop down arrow of the Shape Outline button, move down to Weight and over to the 3 pt
button. Click on it. You may need to resize your text box again.
5. To move your text box, make sure it is selected, then move your cursor to the edge of the
box until a four-way arrow appears. Then click and drag your box wherever you choose.
Picture Effects (optional)
1. Color Effects and Artistic Effects
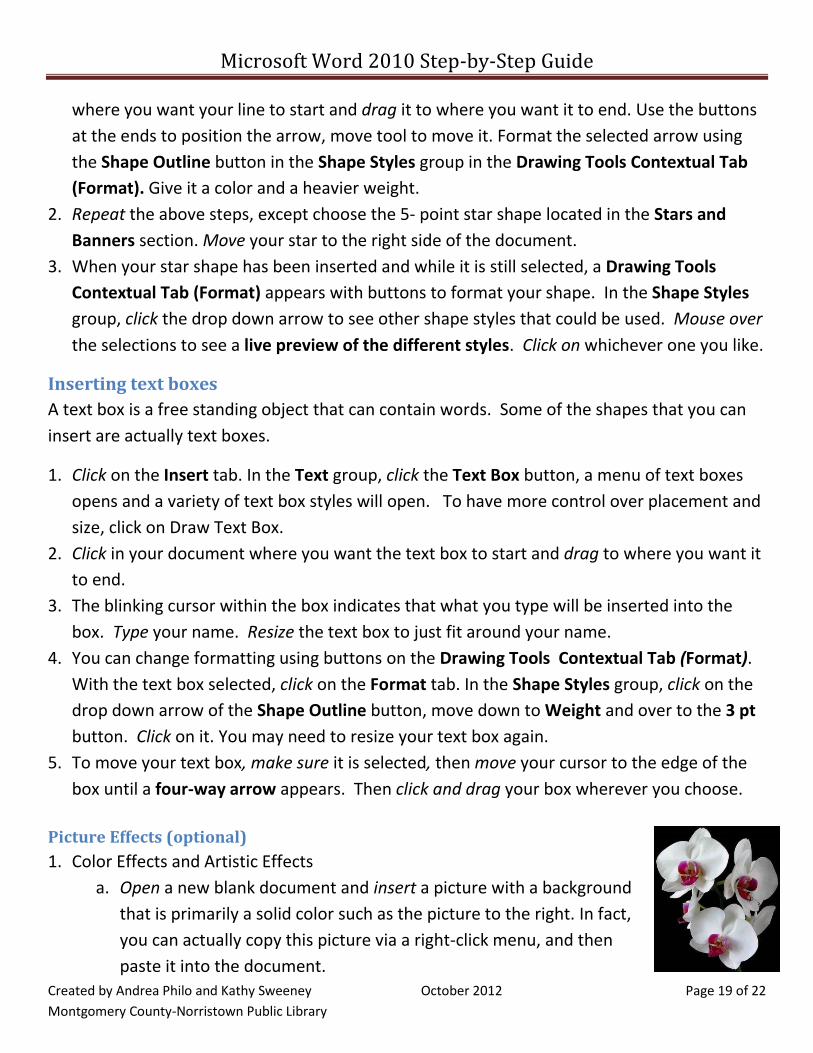
a. Open a new blank document and insert a picture with a background
that is primarily a solid color such as the picture to the right. In fact,
you can actually copy this picture via a right-click menu, and then
paste it into the document.
Microsoft Word 2010 Step-by-Step Guide
Created by Andrea Philo and Kathy Sweeney October 2012 Page 20 of 22
Montgomery County-Norristown Public Library
b. Make sure your inserted picture is selected and resize it so it is bigger.
c. Change the Text wrapping style to “in front of text”.
d. Move your picture to the right side of your document.
e. On the Format tab of the Picture Tools contextual tab find the Adjust group, and click
on Color and mouse over the coloring effects that could be applied to your picture.
f. Clear the Color menu by clicking on the title bar.
g. In the Adjust group, click on Artistic Effects and mouse over the artistic effects that
could be applied to your picture.
h. Clear the Color menu by clicking on the title bar.
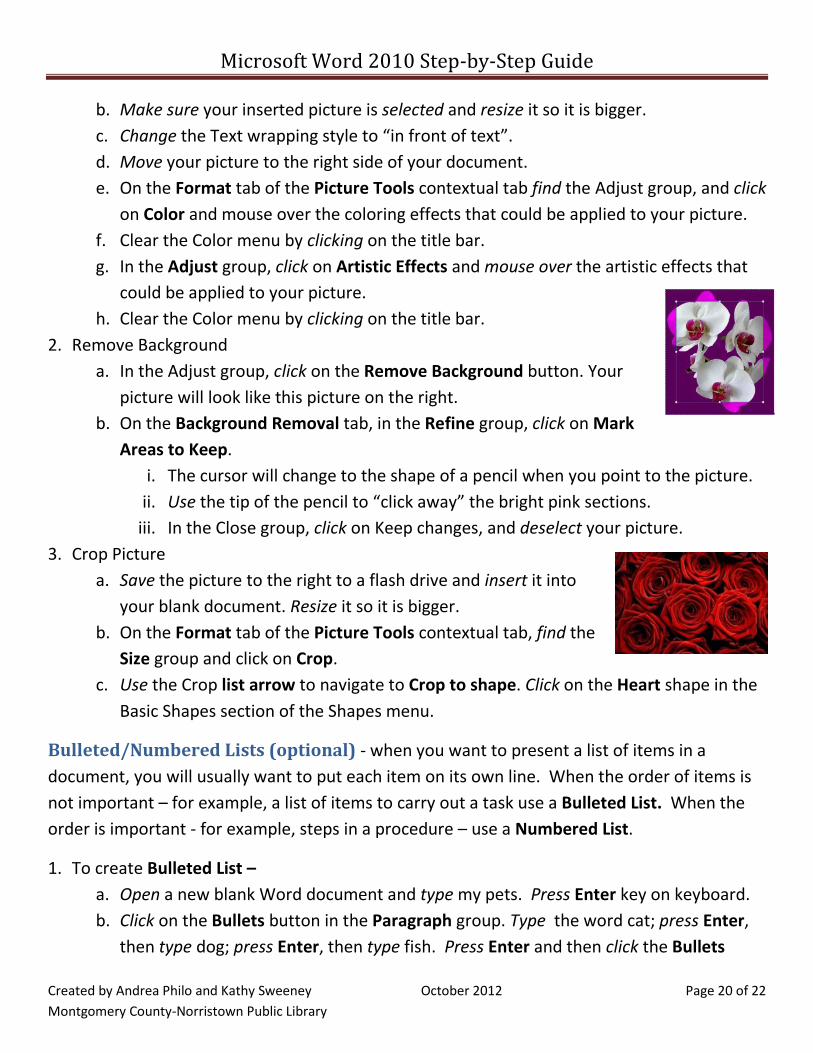
2. Remove Background
a. In the Adjust group, click on the Remove Background button. Your
picture will look like this picture on the right.
b. On the Background Removal tab, in the Refine group, click on Mark
Areas to Keep.
i. The cursor will change to the shape of a pencil when you point to the picture.
ii. Use the tip of the pencil to “click away” the bright pink sections.
iii. In the Close group, click on Keep changes, and deselect your picture.
3. Crop Picture
a. Save the picture to the right to a flash drive and insert it into
your blank document. Resize it so it is bigger.
b. On the Format tab of the Picture Tools contextual tab, find the
Size group and click on Crop.
c. Use the Crop list arrow to navigate to Crop to shape. Click on the Heart shape in the
Basic Shapes section of the Shapes menu.
Bulleted/Numbered Lists (optional) - when you want to present a list of items in a
document, you will usually want to put each item on its own line. When the order of items is
not important – for example, a list of items to carry out a task use a Bulleted List. When the
order is important - for example, steps in a procedure – use a Numbered List.
1. To create Bulleted List –
a. Open a new blank Word document and type my pets. Press Enter key on keyboard.
b. Click on the Bullets button in the Paragraph group. Type the word cat; press Enter,
then type dog; press Enter, then type fish. Press Enter and then click the Bullets
Microsoft Word 2010 Step-by-Step Guide
Created by Andrea Philo and Kathy Sweeney October 2012 Page 21 of 22
Montgomery County-Norristown Public Library
button. This will end your list. Notice how each word is on a separate line and
proceeded by a bullet.
2. To create a Numbered List – use to prioritize
a. Type caring for my dog. If your cursor is not at the end of the line, place it there.
Press Enter.
b. Click on the Numbering button in the Paragraph group.
c. Type feed; press Enter. Type walk; press Enter. Type play; press Enter. Click the
Numbering button to end your list.
To create a Multilevel List – a. Type Where things are, press Enter.
b. In the Paragraph group, click on the Multilevel List button. A menu of styles will
open. Hover your mouse cursor over the various styles to view them and then under
List Library, click the first option on the second row.
c. Type Office. press Enter, press Tab, type desk. press Enter, press Tab, type top
drawer. press Enter, press Tab, type pencils; press Enter, type stapler; press Enter,
type ruler. Press enter twice; type middle drawer. Press Enter, press Tab, type
paper; press Enter, type tax forms. Press enter three times; type filing cabinet.
(press Enter to create a new item at the same level, Tab to move down a level and
Enter twice to move up a level. When finished with your list, press Enter until no
more bullets appear.)
3. To customize your lists
a. Changing the style of bullets or numbers – i. Select the cat, dog and fish lines of text. In the Paragraph group, click the drop
down arrows on the Bullets or Numbering button and hover over each option to see a live preview of changes.
b. Changing the indent – select the list you want to change. In the Paragraph group, click the Increase Indent or the Decrease Indent buttons to make changes.
Close Word without saving changes.
Templates (optional)
Calendar Wizard
1. On the File menu, select New.
Microsoft Word 2010 Step-by-Step Guide
Created by Andrea Philo and Kathy Sweeney October 2012 Page 22 of 22
Montgomery County-Norristown Public Library
2. In the center pane there is a selection of templates that can be used to assist in creating a document. Some templates are installed on the computer and some need to be downloaded from Office.com. We’re going to get one that is online.
3. Scroll down through the online templates until you see Calendars and click on it. 4. Click on Other Calendars. 5. Scroll down and select Calendar Wizard by clicking on it and then click download in the
lower right corner of the dialogue window. 6. With the wizard we can choose specifics to create our calendar. When the wizard opens,
click next. Choose the boxes and borders style, click next. Choose landscape and check the no radio button; click next. Choose the date range of May 2013 to May 2013: click next. Click finish.
3. Let’s do some formatting: a. Select all the numbers and change the font size to 14 and right align them. b. Add a grid to the calendar. (Home tab Paragraph group Borders Button arrow All Borders)
c. Insert a text box into the first day of the month and type May Day into it. d. Format the text box to have no outline. (Format tab Text Box Styles group Shape Outline button No Outline)
4. Close Word
Search for a template online
1. On the File tab, select New. 2. In the center pane there is a selection of templates that can be used to assist in creating a
document. 3. In the Office.com templates section, there is a search box.
4. Type tear off and press the Go arrow button.
5. Choose the “Flyer with tear off tabs and art” and click Download.
6. Replace objects and text as desired. Note how the tear off tabs all populate with
information entered into the first one! Very handy!
Using Help (optional)
When you are working in Word, while it is not particularly intuitive, the most convenient place
to look for help is Word’s built-in help system. To access help click the small question mark in
the upper right corner.