
Microsoft Word 2010 - Illustrated Unit C: Formatting Text and Paragraphs.
46
Microsoft Word 2010 - Illustrated Unit C: Formatting Text and Paragraphs
-
Upload
baldric-glenn -
Category
Documents
-
view
248 -
download
1
Transcript of Microsoft Word 2010 - Illustrated Unit C: Formatting Text and Paragraphs.

Microsoft Word 2010 - IllustratedUnit C:
Formatting Text and Paragraphs

Objectives
• Format with fonts• Copy formats using the Format
Painter• Change line and paragraph spacing• Align paragraphs• Work with tabs
2Microsoft Office Word 2010 - Illustrated Complete 2

Objectives (continued)
• Work with indents• Add bullets and numbering• Add borders and shading• Insert clip art
3Microsoft Office Word 2010 - Illustrated Complete 3

Formatting with Fonts
• Formatting text with fonts is a powerful way to alter the appearance of a document• A font is a complete set of characters
with the same typeface or design• Arial, Times New Roman, Tahoma, and
Calibri are examples of fonts• Each font has a specific design and feel
4Microsoft Office Word 2010 - Illustrated Complete 4

Formatting with Fonts (continued)
5Microsoft Office Word 2010 - Illustrated Complete 5
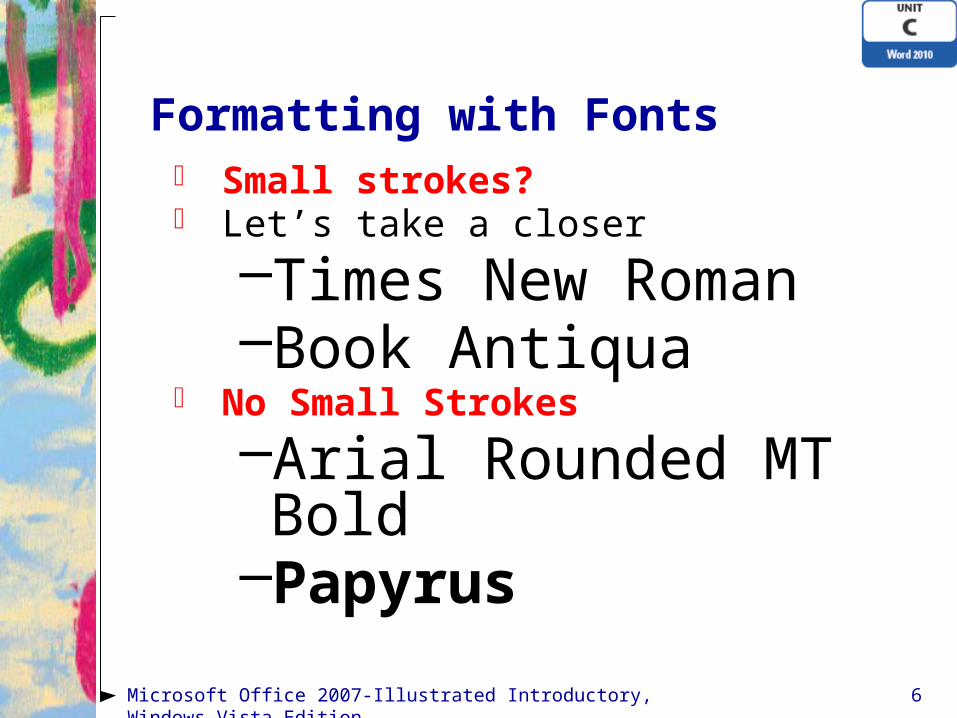
Serif fonts have a small stroke, called a serif, on the ends of characters, and are often used for body text:– Times New Roman– Garamond– Book Antiqua– Californian FB
Sans serif fonts do not have a serif, and are often used for headings: – Arial Rounded MT Bold– Comic Sans MS– Franklin Gothic Demi– Papyrus
Microsoft Office 2007-Illustrated Introductory, Windows Vista Edition 6
Formatting with Fonts Small strokes? Let’s take a closer
–Times New Roman–Book Antiqua
No Small Strokes
–Arial Rounded MT Bold
–Papyrus

Formatting with Fonts (continued)
• Changing the size of text, or the font size, is another way to determine the impact of text• Font size is measured in points• A point is 1/72 of an inch• 11-point Calibri is the default font size
and font for a new Word document• You can also change the font color
7Microsoft Office Word 2010 - Illustrated Complete 7

Formatting with Fonts (continued) • Change fonts using the Font
list arrow• Change font size using the
Font Size list arrow• Change font color using the
Font Color list arrow
8Microsoft Office Word 2010 - Illustrated Complete 8
Font list arrow
Font Size list arrow
Font names are formatted in the font

Formatting with Fonts (continued)
• Adding a drop cap• A drop cap is a large
initial capital letter, often used to set off the first paragraph of an article
• To insert a drop cap, click the Drop Cap button in the Text group on the Insert tab
9Microsoft Office Word 2010 - Illustrated Complete 9
• Enhance a drop cap with font colors, styles, and effects, as well as shading and borders

Copying Formats Using the Format Painter• Font styles
• Make text darker and thicker by applying bold
• Click the Bold button to apply bold
• Slant text by applying italic • Click the Italic button to apply italic
• Underline text for emphasis• Click the Underline list arrow, then select
an underline style
10Microsoft Office Word 2010 - Illustrated Complete 10

Copying Formats Using the Format Painter (continued)• The Format Painter allows you to
copy the format setting applied to selected text to other text• Use to copy format settings to single or
multiple items• Click the Format Painter button once to
apply the format settings to one item• Double-click the Format Painter button to
activate the Format Painter and apply settings to multiple items
11Microsoft Office Word 2010 - Illustrated Complete 11

Copying Formats Using the Format Painter (continued)
• Font dialog box• Options to change the
font, font size, font style, and font color, and add font effects
• Open the Font Text Effects dialog box to add text effects, such as:
• Shadows• Outlines• Reflections
12Microsoft Office Word 2010 - Illustrated Complete 12
Click to open the Font Text Effects dialog
box

Copying Formats Using the Format Painter (continued)
• Character-spacing effects• Apply character-spacing effects using
the Advanced tab in the Font dialog box• Change the width, or scale, of characters• Change the spacing between characters• Raise or lower characters relative to the
line of text
13Microsoft Office Word 2010 - Illustrated Complete 13

Copying Formats Using the Format Painter (continued)
14Microsoft Office Word 2010 - Illustrated Complete 14
48 point, green,
shadow effect, 80% character
scale
Italic Bold
Copying Formats Using the Format Painter (continued)• Changing the case of letters
• Change letters from uppercase to lowercase and vice versa
• Sentence case capitalizes the first letter of a sentence
• Capitalize Each Word capitalizes the first letter of each word
• Toggle case switches all letters to the opposite case
• Use the Change Case button in the Font group on the Home tab
15Microsoft Office Word 2010 - Illustrated Complete 15

Changing Line and Paragraph Spacing
• Adding white space to a document can make it easier to read• Increase space between lines using the
Line and Paragraph Spacing list arrow • Increase space between paragraphs
using the Before and After text boxes in the Paragraph group on the Page Layout tab
16Microsoft Office Word 2010 - Illustrated Complete 16

Changing Line and Paragraph Spacing (continued)
17Microsoft Office Word 2010 - Illustrated Complete 17
12 points of space added before title paragraph
Line spacing is 1.5
Spacing section shows paragraph
spacing for paragraph where insertion point is
located
Line spacing is 1.15
6 points of space added after heading paragraph

Changing Line and Paragraph Spacing (continued)
• Formatting with Quick Styles• Apply multiple format settings in one step
with a style• Use styles to give your document a more
cohesive look• A style is a set of format settings that are
named and stored together• Styles can include character and
paragraph format settings• Apply Quick Styles by selecting a style
from the Quick Styles gallery
18Microsoft Office Word 2010 - Illustrated Complete 18

Changing Line and Paragraph Spacing (continued)• Each Quick Style
set includes styles for a title, several heading levels, body text, quotes, and lists
• Each Quick Style Set has a different design
19Microsoft Office Word 2010 - Illustrated Complete

Aligning Paragraphs
• Paragraphs are aligned relative to the left and right margins• Left-aligned text is flush with the left
margin and has a ragged right edge• Text is left-aligned by default
• Right-aligned text is flush with the right margin
• Centered text is positioned evenly between the margins
• Justified text is flush with both the left and right margins
20Microsoft Office Word 2010 - Illustrated Complete 20

Aligning Paragraphs (continued)
• Change paragraph alignment using the alignment buttons in the Paragraph group on the Home tab
21Microsoft Office Word 2010 - Illustrated Complete 21
Centered
Justified
Right-aligned
Left-aligned

Aligning Paragraphs (continued)
• Indents and Spacing tab in the Paragraph dialog box
22Microsoft Office Word 2010 - Illustrated Complete 22
• Shows the format settings for the active text and paragraph
• Use to check, change, and compare format settings

Aligning Paragraphs (continued)• Format a document using themes• A theme is a complete set of theme
colors, fonts, and effects• Preview a theme before applying it
• Applying a Theme changes all content that uses theme colors, font and table styles, and graphics effects
• Click the Themes button in the Themes group on the Page Layout tab to select and apply a theme
23Microsoft Office Word 2010 - Illustrated Complete

Working with Tabs
• Tabs help you to align text vertically at a specific location on a page• A tab stop is a point on the horizontal ruler that
identifies a text alignment location• By default, tab stops are located every ½ inch
from the left margin• You can create custom tab stops • Text can be aligned to the left, right, or center
of a tab stop, or aligned with a bar character or decimal point
24Microsoft Office Word 2010 - Illustrated Complete 24

Working with Tabs (continued)
• Set tabs using the ruler • Click the tab indicator at the left end of the
horizontal ruler to select the type of tab• Set the tab by clicking the ruler at the location
you want the tab stop to be• Tab stop applies to:
• The active paragraph, or • The selected paragraphs
• Drag a tab stop on the ruler to change its location
25Microsoft Office Word 2010 - Illustrated Complete 25

Working with Tabs (continued)
26Microsoft Office Word 2010 - Illustrated Complete 26
Tabbed text left-aligned
Left tab stop Right tab stop
Tabbed text right-aligned
Tab leader
Tab indicator

Working with Tabs (continued)
• Set tabs using the Tabs dialog box
27Microsoft Office Word 2010 - Illustrated Complete 27
• Create new tab stops• Change the position or
alignment of existing tab stops
• Clear tab stops• Apply a tab leader, a line
that appears in front of tabbed text

Working with Indents• Indenting a paragraph moves the edge of
the paragraph in from the left or right margin• Indent the entire left or right edge of a
paragraph• Indent just the first line• Indent all lines except the first line• Indent the left edge of a paragraph to the left
of the left margin• Indent markers on the horizontal ruler
identify the indent settings for the paragraph in which the insertion point is located
28Microsoft Office Word 2010 - Illustrated Complete 28

Working with Indents (continued)
• To indent a paragraph:• Drag an indent marker to a new
location on the ruler• Click the Increase Indent button or the
Decrease Indent button in the Paragraph group on the Home tab
• Change the indent settings on the Indents and Spacing tab in the Paragraph dialog box
29Microsoft Office Word 2010 - Illustrated Complete 29
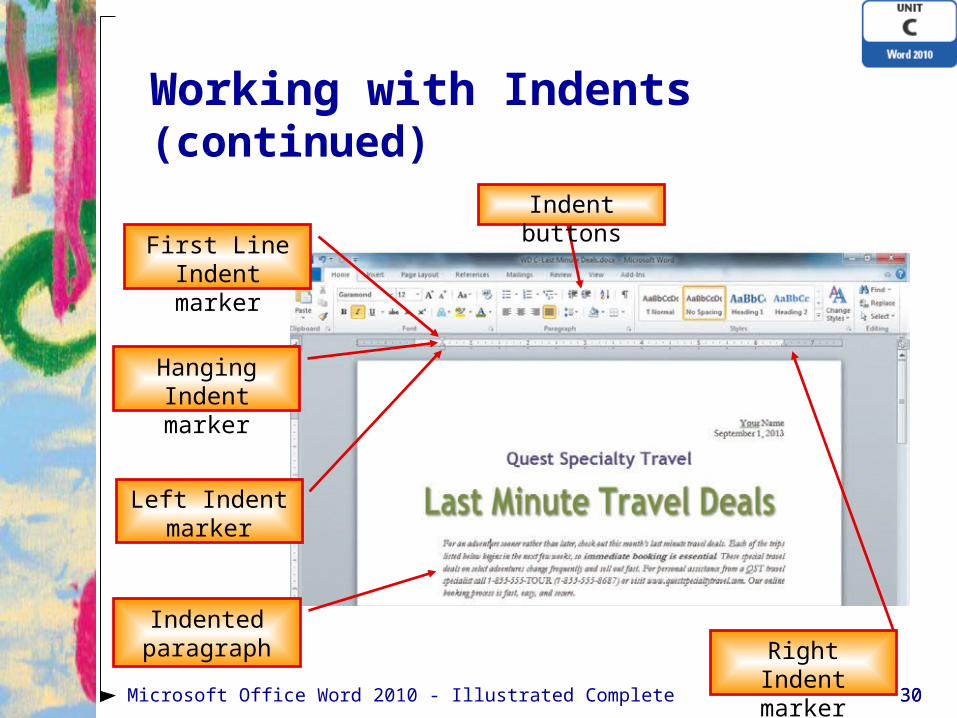
Working with Indents (continued)
30Microsoft Office Word 2010 - Illustrated Complete 30
First Line Indent marker
Hanging Indent marker
Left Indent marker
Indented paragraph Right Indent
marker
Indent buttons
Working with Indents (continued)• Clearing text formatting
• Use the Clear Formatting command to return text to its default settings:
• 11-point Calibri text• Left-aligned, 1.15 paragraph spacing, 10
points below, and with no indents
• To clear formatting, select the text and click the Clear Formatting button in the Font group on the Home tab
• To remove all paragraph formatting, click the No Spacing button in the Styles group on the Home tab
31Microsoft Office Word 2010 - Illustrated Complete 31

Adding Bullets and Numbering
• Formatting paragraphs with bullets and numbering can help to organize ideas in a document• A bullet is a character, often a small
circle, that appears before the items in a list to add emphasis
• Numbering the items in a list helps to illustrate sequence and priority
32Microsoft Office Word 2010 - Illustrated Complete 32

Adding Bullets and Numbering (continued)• Use the Bullets button or Numbering button in the
Paragraph group on the Home tab to apply bullets or numbering to paragraphs
33Microsoft Office Word 2010 - Illustrated Complete 33
Numbered list
Check mark
bulleted list
Bullets and Numbering
buttons
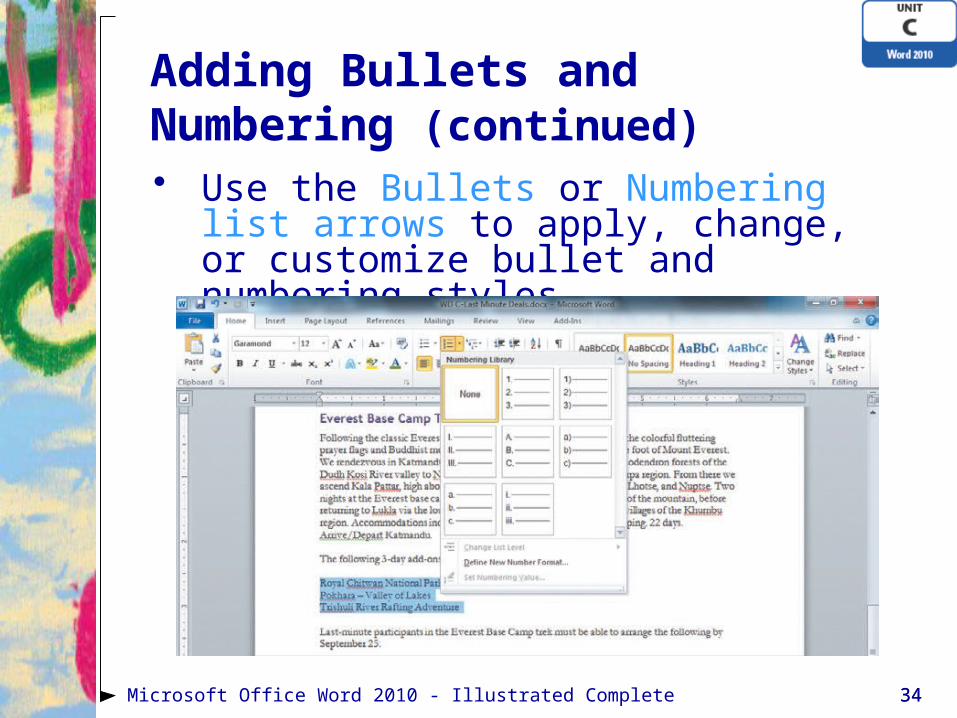
Adding Bullets and Numbering (continued)• Use the Bullets or Numbering list arrows to
apply, change, or customize bullet and numbering styles
34Microsoft Office Word 2010 - Illustrated Complete 34

Adding Bullets and Numbering (continued)
• Creating outlines• To create a hierarchical structure in a
list, apply a multilevel list style• Click the Multilevel List list arrow to
select and apply a multilevel list style• Format an existing list
• Demote items using the Increase Indent button
• Promote items using the Decrease Indent button
35Microsoft Office Word 2010 - Illustrated Complete 35

Adding Borders and Shading
• Adding borders and shading to text can help to enhance the information in a document• A border is a line added above, below, to the
side of, or around words or paragraphs• Shading is a color or pattern that is added
behind words or paragraphs• Use the Borders button or the Shading button
in the Paragraph group on the Home tab
36Microsoft Office Word 2010 - Illustrated Complete 36

Adding Borders and Shading (continued)
• Border options• Box• Shadow• 3-D• Custom• Line style• Line color• Line width
37Microsoft Office Word 2010 - Illustrated Complete 37

Adding Borders and Shading (continued)
• Shading options• Fill color
• Theme color• Standard color• Custom color
• Pattern style• Tint (e.g. 75%)• Pattern (e.g. diagonal lines)
38Microsoft Office Word 2010 - Illustrated Complete 38

Adding Borders and Shading (continued)
39Microsoft Office Word 2010 - Illustrated Complete 39
BorderShading

Adding Borders and Shading (continued) • Highlighting text in a document
• Highlighting is transparent color that is applied to text using the Highlight pointer
• Highlighting is most effective when a document is viewed on screen
• Highlighting does print• To highlight text, click the Text Highlight
Color list arrow in the Font group on the Home tab, select a color, then select the text
40Microsoft Office Word 2010 - Illustrated Complete 40

Inserting Clip Art
• Illustrate a document with clip art • Clip art is a collection of graphic images
that you can insert in a document• Clip art images are stored in the Clip
Organizer• Clips are the media files, including
graphics, photographs, sounds, movies, and animations, that come with Word
• Add clips by clicking the Clip Art button in the Illustrations group on the Insert tab
41Microsoft Office Word 2010 - Illustrated Complete 41

Inserting Clip Art (continued)
• Search for clips using the ClipArt task pane
42Microsoft Office Word 2010 - Illustrated Complete 42
Search using a keyword
Results of a clip search
Choose type of clips to search

Inserting Clip Art (continued)
• A clip is inserted as an inline graphic at the location of the insertion point• An inline graphic is a graphic that is
part of the line of text• A floating graphic is independent from
text and can be moved anywhere on a page
• Drag the sizing handles to reduce or enlarge the size of a graphic
43Microsoft Office Word 2010 - Illustrated Complete 43

Inserting Clip Art (continued)
• Wrap text around the graphic• Apply a text wrapping style • Click the Wrap Text button in the Arrange group
on the Picture Tools Format tab
44Microsoft Office Word 2010 - Illustrated Complete 44
Floating graphic
Faded image shows graphic being dragged
Sizing handle

Inserting Clip Art (continued)
• Picture Tools Format tab• Adjust contrast, brightness,
compression, and so on in the Adjust group
• Apply a style from the gallery and add picture effects in the Picture Styles group
• Position, wrap text, flip, group, and so on in the Arrange group
• Crop and change height or width in the Size group
45Microsoft Office Word 2010 - Illustrated Complete 45

Summary
• Enhance documents with formatting• Format characters:
• Font, font size, font styles, font effects, and character-spacing
• Format paragraphs• Alignment, line spacing, paragraph spacing, tabs,
indents, bullets, numbering, borders, and shading
• Insert clip art images into a document
• Choose appropriate formatting for the document’s purpose and audience
• Take care not to over format a document
46Microsoft Office Word 2010 - Illustrated Complete 46


