Melodic Munitions - Worcester Polytechnic Institute · B. - Melodic Munitions Concept Document The...
117
1 Melodic Munitions Project Number: JR1 3333 MM: A Major Qualifying Project Report: submitted to the Faculty of the WORCESTER POLYTECHNIC INSTITUTE in partial fulfillment of the requirements for the Degree of Bachelor of Science by Robert Banahan Joseph Chipman Dylan James Kyle Sarnik Approved: Professor Joshua Rosenstock, Major Advisor Professor David Finkel, Major Advisor
Transcript of Melodic Munitions - Worcester Polytechnic Institute · B. - Melodic Munitions Concept Document The...

1
Melodic
Munitions
Project Number: JR1 3333
MM: A Major Qualifying Project Report: submitted to the Faculty of the WORCESTER
POLYTECHNIC INSTITUTE in partial fulfillment of the requirements for the Degree of
Bachelor of Science by
Robert Banahan
Joseph Chipman
Dylan James
Kyle Sarnik
Approved:
Professor Joshua Rosenstock, Major Advisor
Professor David Finkel, Major Advisor

2
Table of Contents
Title Page ……………………………………………………………….1
Table of Contents………………………………………………………..2
Abstract………………………………………………………………….5
A. - Introduction……………………………………….………………...6
B. - Melodic Munitions Concept Document…………….………………8
C. - Evolution of Original Concept…………………….………………10
C.1 - Introduction……………...…………………………………10
C.2 - Evolution of Concept………...…………………………….10
C.3 - Goals Utilizing Sound………………………………...……17
D. - Melodic Munitions Game Overview…………………….………..19
D.1 - Technical Overview…………………………………...…...19
D.1a - Design Goals……………………………….……….19
D.1b - Game Engine – Unity………………………………20
D.1c - Player State………………………………….……...24
D.1d - MIDI Implementation……………………….……...25
D.2 - Artistic Overview……………………………………...…...28
D.2a - Artistic Vision………………………………….…...28
D.2b - Concept Art………………………………………....31
E. - Melodic Munitions Game Design…………………………….…...36
E.1 - Composition Mode…………………………………………36
E.1a - Composition Mode Technical Design…………..…..36
E.1a.1 - Introduction………………………………....36
E.1a.2 - Patterns & Composition Storage……...….…36
E.1a.3 - Step Sequencer…………………………..….38
E.1a.4 - Piano Roll………………………………...…41
E.1a.5 - Import/Export & Other Features….......…….45
E. 2 - Battle Mode…………………………………………...…...46
E.2a Battle Mode Technical Design…………………...…..46
E.2a.1 - Introduction……………………………..…..46
E.2a.2 - Playback/Beats…………………………..….47
E.2a.3 - Tempo…………………………………...…..48
E.2a.4 - GUI…………………………………...……..48
E.2a.5 - Monsters……….……………………….…...53

3
E.2a.6 - Monster Attacks………………………….....54
E.2a.7 - Battle Sequence Implementation………...….56
E.2a.8 - Monster Pool……………………………..…57
E.2a.9 - Battle Sequences………………………...…..58
E.2b - Battle Mode Artistic Design…………………..…….58
E.2b.1 - Level Design………………………..………58
E.2b.2 - UI Elements………………………...……….60
E.3 - Upgrade Shop………………………………………………61
E.3a - Upgrade Shop Technical Design………..…………..61
E.3a.1 - Implementation…………………...…………61
E.3b - Upgrade Shop Artistic Design……………….……..63
E.4 - Map Screen…………………………………………………64
E.4a - Map Screen Technical Design…………………..…..64
E.4a.1 - Introduction………………………………....64
E.4a.2 - Interface……………………………...……...64
E.4a.3 - Structure………………………………..…...65
E.4b - Map Screen Artistic Design………………………...65
E.5 - Monsters……………………………………………………66
E.5a - Monster Technical Design…………………..………66
E.5a.1 - Implementation…………………...…………66
E.5a.2 - Monster Types……………………...……….67
E.5a.2 - Monster Modifiers……………...…………...70
E.5b - Monster - Artistic Design……………………...……72
E.5b.1 - Design Principles………………………..….72
E.5b.2 - Monsters and Animation……………..……..73
E.6 - Instruments…………………………………………………78
E.6a - Instruments Technical Design………….…………...78
E.6a.1 - Introduction……………………..…………..78
E.6a.2 - Structure…………………………..………...79
E.6b - Instruments Artistic Design……………………..…..80
E.6b.1 - Introduction…………………………..……..80
E.6b.2 - Wind……………………………………..….80
E.6b.3 - String……………………………..…………85
E.6b.4 - Percussion………………………..…………91
E.7 - Instrumentalists…………………………………………….98

4
E.7a - Instrumentalists Technical Design………….………98
E.7a.1 - Implementation………………………...……98
E.7b - Instrumentalists Artistic Design……………….……99
E.7b.1 - Introduction………………………..………..99
E.7b.2 - Modeling…………………………....……..100
E.7b.3 - Animation…………………………...……..102
F. - Sound Design…………………………………………………….104
F.1 - Process of Composing Game Music…………...………....104
F.2 - Process of Creating Sound Effects…………………...…...106
G. - Postmortem……………………………………………………....107
G.1 - Introduction………………………………...……………..107
G.2 - Success………………………………………...………….107
G.3 - Failure…………………………………...………………..108
G.4 - What We Learned………………………...………………109
H. - Future Work………………………………………….…………..112
H.1 Given an Additional Term……………………….………...112
I. - Conclusion………………………..……………………………….113
J. - Appendixes………..……..…………………………………..……116
J.1 - Appendix A………...….……………………….………….116
5
Abstract
The goal of Melodic Munitions was to utilize user-generated compositions as a core
game mechanic. Our team successfully created three separate game modes which balance free-
form musical creativity and intense battle mechanics: Battle Mode features original scenery and
fully animated monsters/characters, Composition Mode features a custom musical composition
interface, and the Upgrade Shop features a custom, branching unlocking system. Though we feel
our core goal was met, our game remains open to the implementation of additional, more
sophisticated, features.

6
A. - Introduction
The initial creative force behind this project was Professor Joshua Rosenstock who came
up with the original premise for the game itself and wished to form a team to adapt and transform
it into a fully fleshed out game. Once our team was formed we set out to explore all the
interesting possibilities Professor Rosenstock‟s original premise offered as well as what we
wanted to achieve and get out of the project. Our team discussions, under the guidance of
Professor Rosenstock, as well as Professor David Finkel, ultimately led to our final game design,
Melodic Munitions. Our team consisted of:
Dylan James Class of 2011, IMGD Tech
Dylan James was one of the lead coders on the team working heavily on the composition
and battle modes. He further worked on the map screen and instrumentalist implementation.
Dylan was also responsible for administering the projects blog as the team‟s webmaster. He was
also the team‟s calendar keeper, responsible for managing task lists, adding tasks to the blog,
checking off completed tasks, and communicating with other team members about their progress.
Kyle Sarnik Class of 2011, IMGD Tech
Kyle Sarnik was one of the team‟s lead coders working primarily on the upgrade shop as
well as monster implementation within Battle Mode. Kyle was also the team‟s agenda maker,
responsible for compiling agenda items, printing weekly agendas to each team meeting, and
keeping meetings on track. In addition Kyle was also one of the team‟s project documenters,
responsible for taking and collecting photos, videos, screen captures, and other artifacts of the
ongoing design process.
Robert Banahan

7
Class of 2011, IMGD Art
Robert Banahan was the lead instrument and instrumentalist modeler and instrumentalist
animator. He also worked on the art for the Map screen as well as the Upgrade Shop. He was
also the team‟s note taker, responsible for taking notes during group meetings and posting notes
on the team‟s blog, and the person in charge of external relations, the spokesperson for the
project responsible for outreach/communication with interested parties outside of the team and
with the public.
Joseph Chipman Class of 2011, IMGD Art
Joseph Chipman was the lead monster modeler and animator throughout the project. He
crafted the artistic appearance and styles for the monsters in Melodic Munitions as well as
creating the Battle Mode UI art. He also designed the cityscape in which the player will confront
the monsters. He was also one of the team‟s project documenters, responsible for taking and
collecting photos, videos, screen captures, and other artifacts of the ongoing design process.
With assistance from Brian Seney Class of 2013, CS/IMGD Tech
Brian Seney headed up the sound design for Melodic Munitions. He compiled many of
the instrument sounds featured in game. He also composed many sample musical sequences and
patterns incorporated into the game as pre-composed patterns available for purchase. As a
sophomore Brian Seney‟s involvement in the project would count as an ISP.

8
B. - Melodic Munitions Concept Document
The basic premise of the game places the player in a world highly inspired and influenced
by music. This world is populated by wildly original and dangerous monsters that must be
defeated. The game presents the player with an interface with which they can compose rhythmic
and melodic sequences. The player then utilizes their composed sequences to fight off oncoming
monsters that are sensitive to one of the three classes of featured instruments in a battle mode.
These different instruments are represented by animated avatars that “perform” the user-
generated sequences currently being played. At the outset, the player begins with a limited set of
simplistic musical instruments available to them which, in turn, limit the complexity and
diversity of their initial compositions. As they progress through the game a greater number of
more complex instruments become available to them, enabling them to create more elaborate
musical sequences to fight off more complicated monsters.
Game Modes
Composition Mode: This is the interface where players build their compositions using the
instruments available to them. They can edit either individual measures or longer musical
phrases. Players can save and load different patterns across applicable instruments and also be
able to test different combinations of musical sequences for different instruments.
Battle Mode: In battle mode players can utilize their composed musical sequences to
fight off oncoming monsters. The player‟s sequences are represented by animated avatars
playing a specific instrument. The player decides which sequences and which instruments are
ideal in defeating the monsters, which are strong or weak against certain instruments or
sequences of notes, in order to defeat all the monsters and win the battle. The player is able to
switch between their different composed sequences for each instrument, as well as the

9
instruments themselves, in each avatar slot. Battles are arranged in a progression of series within
a map screen.
Upgrade Mode: A “shop” where players may redeem their points, accrued through
playing through the single player campaign, to unlock more instruments to add to their ensemble.
The instruments are divided into three sections based on the three instrument classes used in
game.

10
C. - Evolution of Original Concept
C.1 - Introduction
The original concept for this MQP was introduced to the team by our advisor Professor
Rosenstock (see appendix A). Using the concept document he presented to us as a base, we
began to weigh the advantages, disadvantages, and opportunities that this proposal offered.
Professor Rosenstock‟s original concept document would ultimately serve as the foundation for
our further game design decisions; from that point on we discussed different changes we might
want to make to the concept as well as other goals we contemplated trying to achieve through
this MQP. What follows is the natural progression and evolution of our game as it transformed
from abstract inspiration to actual game.
C.2 - Evolution of Concept
The first major change that was implemented was the removal of some kind of scoring
system to determine the winner and instead focusing on possibly developing an online
community for the game, the members of which would be able to vote and determine the winner
in a specific battle. Ultimately we decided that we wanted the game to be more self-contained; in
order to accomplish this goal we removed the idea of an online community and replaced it with a
more single player/campaign focused game mode where players would use their own
compositions to fight against advancing waves of monsters.
After making that decision we developed a revised concept document which presented
players with a variety of interfaces through which they could compose both rhythmic and
melodic sequences. The player would have a variety of different instruments and sound sources
at their disposal. While only some instruments would be available to the player at the outset, a
greater number of instruments would become unlocked and available as they progress through

11
the game. The player would utilize these musical sequences, represented by an instrumentalist
from their band playing each instrument, to fight off oncoming monsters. Certain monsters
would be weak to certain instruments and the musical components of their compositions. Our re-
designed game concepts featured elaborations on our previous game modes:
Composition Mode – Consists of a single mode where players can compose original
sequences.
Battle Mode – In battle mode players will utilize their composed musical sequences to
fight off oncoming monsters. The player must decide which sequences and which
instruments would be ideal in defeating the monsters, which are strong or weak against
certain instruments or notes, in order to defeat all the monsters, score points, and win the
battle. The player will be able to switch between their different compositions for each
instrument during the battle. Battles would be arranged in a progression of series within a
map screen.
Upgrade Mode – A shop where players may redeem their points to upgrade their
ensemble. These upgrades may be new instruments, increases to the number of
instruments the player can use at one time during a battle, or special characters which
provide added bonuses.
With this new game concept we attempted to further explore other options or features that
could be included in the game. Many of these features revolved around the idea of determining
in what fashion the player‟s compositions would defeat the monsters. Some of the ideas we
considered ranged from:
Utilizing harmonious sequences to defeat monsters who fed on disharmonies

12
Monsters being able to disrupt and alter a player‟s compositions which would need to
be fixed on the fly
Monster requirements which influence the player to compose sequences which
according to a specific song or musical genre/style
Removing the idea of monsters altogether and instead focus on the player using their
sequences to attract as many audience members as possible, depending on the quality
of their compositions
Having to win battles by composing in a certain key
The idea of attracting audience members led us to recognize the fact that using some kind
of objective system or AI to determine the quality of a player‟s composed sequences might be
incredibly difficult and/or limiting. Even humans can have an incredibly difficult time in
deciding what music is good and what music is bad and if we were to judge a players composed
sequences objectively, on what basis or rubric would those judgments be made? We thought
about setting up arbitrary guidelines (such as rewarded greater points for specific note
structures/patterns), but we quickly realized those types of guidelines would be an incredible
hindrance rather than a help; the player would be forced to compose essentially what the rules
told them to compose, instead of allowing the player to freely compose as they please. This
issue, how to properly determine the musical quality of a players sequences, would endure to be
an important one throughout the rest of the evolution of the game concept as we debated whether
our game should place priority on the act of freely being able to compose sequences or on the
mechanics of actual battle mode gameplay.
During this early stage of concept development we also wanted to try and incorporate a
multiplayer or co-op mode and spent time developing different ideas based on our various

13
options for how to defeat monsters. Some of these ideas included having one player‟s
compositions be translated into a monster; other players would be able to battle against these
monsters, of which the only way to defeat them is to compose a sequence similar to the pattern
that originally created the monster. Another idea was to have two players take turns in
composing sequences in some kind of co-op mode.
The bulk of our remaining time actually developing the game concept revolved around
elaborating on the different ways of altering and enhancing the mechanic by which sequences
can destroy monsters. Mechanics such as real-time editing of disrupted patterns and attracting
audience members were ultimately dropped in favor of monsters that would be weak to certain
instruments as well as having monsters with prerequisites only able to be satisfied by special
effects of different and upgraded instruments.
Our original goal was for each monster to have a specific requirement which would be
satisfied by either an individual instrument or a special effect of an upgraded instrument. This
goal led us to consider different musical components and notations we could use to generate a
list of possible monster/instrument requirements and interactions. This included the use of
certain notes, pitches, volumes, and keys. These monster/instrument interactions would be
further enhanced by having upgraded and improved instruments unlocked in the shop. Some
examples of this would be an electric guitar which, when played, would cause lighting to strike
and ground flying monsters allowing them to take damage, or a monster that had to be driven out
of the ground using drums. Examples of our initial monster designs include:
Monster that obscures part of the field
Monster that, when destroyed, spawns two smaller monsters
Monster that requires an instrument slot to be empty

14
Monster that can change form thus changing its requirements for defeat
Monster that is a bomb which explodes if it reaches the player
Monster that attacks the player‟s instrumentalists
Monsters that take more damage if notes are being played up or down a scale
Other monsters which relied on programmatic mechanics such as being weak to
certain notes, certain instruments, and speed of notes
During this time we also thought about what other features and content we would want
available in the upgrade shop such as the use of different types of notes, how many beats are
available in a measure, unlocking more instrumentalist slots, and special instrumentalists. In
terms of unlocking instruments the shop would utilize a tier based system. The player would
begin the game with only simple percussion instruments, followed by pitched instruments, and
then ultimately multi-note instruments.
Having fleshed out many of these design decisions we revisited the idea of a multiplayer or
co-op mode based on our current concept framework and came up with four main ideas:
1. A cooperative Boss Battle Mode where three players would control a single
instrument each which they would compose for. The synergy of their respective
compositions would be paramount in defeating the boss monster.
2. A cooperative mode where players take turn composing the same sequence, which is
then used to fight waves of monsters.
3. Purely an online community where players could upload and share their original
compositions.
4. A multiplayer mode which allowed players to design their own monsters for others to
face or a versus mode where one player controls the type of monsters to be spawned

15
in a given wave and the other player composes sequences accordingly to combat the
monsters.
Half way through the design process our team decided to focus on devoting the bulk of
our attention towards the single player/campaign mode of the game and put possible multiplayer
and co-op game modes on the back burner. However, in order to not abandon some form of
multiplayer completely, we decided on our top two options for multiplayer should we have
enough time to work on and implement it. These top two options were:
1. Player Monsters vs. Player Compositions – One player controls/creates monsters
and sends them against another player‟s compositions.
2. Co-op Mode – Where each of three players controls, and composes for, a single
instrument tree. Each player would be responsible for composing for certain
monsters during a battle.
In conjunction with deciding on our top multiplayer options, and shifting more of our
focus towards the single player/campaign, we decided to make sure our game wasn‟t becoming
too ambitious. To accomplish this we transitioned from adding additional game features and
parameters, to streamlining our already established design features and, from there, deciding
what else we felt was missing or needed to be revised or implemented to make the game
complete.
The largest change that came as a result of this streamlining was the reclassification of all
instruments into three classes based on instrument type: wind, string, and percussion. In addition
to this, we moved away from specific instruments having specific effects required for specific
monsters, and redesigned each class of instruments to have one or two special effects shared by
all instruments within that class with increasing levels of effectiveness to combat more difficult

16
monsters. Accordingly, the concept of arbitrarily unlocking “upgraded” versions of certain
instruments in the Upgrade Shop was abandoned and, instead, each class of instruments was
arranged in the form of a tree with simple instruments at the top and more advanced instruments
at the bottom.
The branching structure of the instrument trees required us to reconsider the relationship
between winning battles and unlocking things in the store. In order to address this issue we
decided that at certain points in the progression of the game the player would receive credits
which would allow them to unlock instruments further down an instrument tree. In addition to
this credits system we would also implement some kind of scoring system based on how
efficiently and quickly a player won a battle. A player‟s score would reward them additional
currency that could be spent unlocking other things in the upgrade shop such as pre-composed
patterns and additional instrumentalist slots.
At this time there were concerns over how interesting the game was to actually play and
the level of player responsibility and interaction during battles. To counter this we contemplated
other mechanics which would give interaction between the player and their instrumentalists more
importance. The solution we arrived at was to incorporate some kind of fatigue system for each
instrumentalist; in this way players would be forced to manage their instrumentalists during a
battle encouraging greater player interaction.
To promote even more variety we intended different battles to feature wind, string, or
percussion monsters more heavily. Accordingly, we also decided to limit the number of
instrumentalists a player could bring to a battle. Further, we restricted any given instrumentalist
to be able to play instruments from only one tree, thus causing the player to have to consider how
many instrumentalists of a certain instrument class they want to bring to a battle based on the

17
battle focus; too much of the wrong instrument class or too little of the correct one could lead to
defeat.
The other large design feature implemented at this time was a global time slider during
battles. The tempo slider would only adjust the speed of the player‟s compositions and would
allow for the implementation of other monster types sensitive to the density of notes within a
certain period of time. The slider would also affect the rate at which instrumentalists become
fatigued.
Arguably our largest and most impactful design decisions occurred very early on in the
design process as we took a couple of the overall ideas from Professor Rosenstock‟s original
concept proposal and built a new game around them with the introduction of monsters. The
remainder of the design process revolved around flushing out the properties of monsters and
instruments and their relationships, and what impact these relationships and game mechanics
could have on a potential multiplayer mode. As time passed we decided that our best course of
action would be to simplify the features and attributes we had already decided on instead of
trying to add more and more complex elements; as a result we streamlined all of the existing
features and placed multiplayer on the back burner.
C.3 - Goals Utilizing Sound
Our goal for this project was to create a musical experience that is accessible to players of
all musical backgrounds. A large portion of the game is based on user creation of short musical
phrases: “patterns,” which can then be mixed and combined to fight off enemies. An adept
musician will immediately be able to compose very interesting music using the engine, which
was designed to facilitate composition. However, those without any musical training can still
experience everything the game has to offer. A variety of pre-made patterns are available for
18
purchase in the in-game shop, which bridges the gap between performance and composition. For
example, a novice player might buy some patterns which sound cool, and combine them in a way
that sounds pleasing to them. Then, if the player is sufficiently curious, they can modify their
existing, pre-made patterns, and even compose new ones. The availability of pre-made patterns
goes a long way towards introducing beginners to the world of music. On the other hand,
players can only purchase pre-made patterns, and that is also a successful way to play the game.
No restriction is placed on how creative (or not) a player must be to play and enjoy the game.
As far as composed sounds go, the goal was to create a variety of tunes that would
emphasize the range of instrument types available. Different instruments play different sounds
when unlocked or clicked, which introduces players to their different timbres. Percussive
background tracks set the mood for the game. Overall, the sound design is meant to be only a
supplement to the real sound designer, which is naturally the player.

19
D. - Melodic Munitions Game Overview
D.1 - Technical Overview
D.1a - Design Goals
Many aspects of our game were unique and hadn‟t been done before – music games are a
new trend though composition games are near non-existent, user-generated functional content
hasn‟t seen much development, and battles based off user compositions is a totally new concept.
Because of all this, even the game design decisions we had made were uncertain, meaning things
were always subject to rapid or drastic changes. In order to be able to keep up with these
changes, a key goal of our design was to remain flexible and forward-compatible with any
changes that were to come. Another factor in these changes was that we also wanted the project
to be open to improvements or additions later. This was heavily reflected in our prototyping and
initial testing of game mechanics, though it still remained important throughout the rest of the
development. As always, some final decisions need to be made near the start, but since we
weren‟t exactly sure on certain pieces and mechanics, even these early decisions needed to
remain flexible. As such, a lot of the decisions made that show through in the final version of the
project are still there for their flexibility.
Another goal was to keep the game open to the players influence. One of the biggest
places this shows through is in the ability for the user to create their own music which would
then be played back during a battle. Aside from affecting the game design, this also brings
multiple new technical tasks, requirements, and considerations to the table, including an interface
for the user to compose the music, a process to store and retrieve user compositions, a system to
play back user compositions, an interface to select which compositions they want to use, and

20
how to translate the compositions playback into game play damage or effects. Some other things
the player could change which we had to take into consideration when designing the technical
aspects included the player controlled tempo and the future possibility of player controlled
battles. These player controlled factors all influenced the way that the technical aspects needed to
be designed, as the real flow and progression of the game was unpredictable.
D.1b Game Engine – Unity
When we first started this project, one of our first decisions to make was which game
engine we should use. This would affect the rest of the project and had to fit any of our possible
requirements. We needed to start with something and switching later on could cause an issue.
Unity posed us multiple advantages with very few drawbacks.
Advantages
Rapid Development
Since we were doing a game that was unique in many aspects, we figured that we
would need to do lots of prototyping and we would probably be making frequent
changes. We needed an engine that made prototyping easy and could support quick
changes.
Unity is well known for the ability to get something working quickly. Unity
provides a good base of functionality in addition to component driven development and a
scene/object based environment. Though many engines provide a lot of basic
functionality to their engines, Unity makes it very easily accessible. Unity‟s editor allows
you to define game objects in a clearly laid out GUI by allowing you to directly
manipulate the scene graph and provides a live preview of the scene. It also provides a
GUI to easily interact with the objects you put in your scene by allowing you to visually
21
attach scripts and modify their settings. This allows you to get something working
quickly, but also to modify the settings in your functionality on the fly (even while the
game is running) in a graphical interface. Both of these features are crucial to rapid
prototyping.
Unity provides live previews of the scene and the game can be run instantly at the
click of a button. You can also easily compile the project to an executable or web
application that can be distributed for easy play testing.
Unity allowed us to quickly develop functionality, to easily tweak aspects of said
functionality, and to rapidly deploy and test our project. This provided us an environment
well suited to the rapid prototyping we would need to be doing.
Simple Asset Integration
Another appealing feature of Unity is its asset integration. Unity handles the
importing of models and other resource files on the fly with a simple drag and drop
interface and automatic importing. This allowed us to quickly and easily bring in any
assets that we built in Maya or Photoshop without a hassle and without having to rebuild.
Since Unity directly imports the source Maya or Photoshop files, they can be opened
directly, edited, and saved, and Unity will update those changes on the fly. It also
provided very quick and simple access to any settings necessary with those imports. This
simple asset integration greatly helped us to prototype quickly and to make changes as we
went.
Networking
Initially we hoped to have some form of multiplayer implemented into our game.
Though this did end up getting cut in the long run, we wanted an engine which would

22
support this fairly well, even if it was something that would be added on later. Unity
provides relatively easy-to-use networking support, and it is implemented in a way which
doesn‟t require major changes to be made to the way the game is technically
implemented. Even if we were to implement multiplayer in the future, we didn‟t have to
worry about it much while working through our single player version. Implementing our
game in such a way that would support multiplayer later did not require much overhead
or extra work as we went along – and it could fall into place later if we decided to do it.
With many other engines, multiplayer requires a lot of planning and design to go into the
entire process, while with Unity we didn‟t have to worry about it too much.
Platforms
One of Unity‟s big advantages is the cross platform development. The same
projects built for PC can be built to Mac, the Web Player, Android, iOS, etc. We wanted
this to be a widely accessible game, so this was very attractive to us.
With our initial design, we wanted to support web deployment of our game. We
were hoping to make our game easily accessible on the web to make it widely available.
Unity supports web deployment through their Web Player. It is a simple plug in to install
into most browsers, very similar to Flash. Unity allows you to build your game like you
would a desktop application and later deploy it to the Web Player. The only factors you
have to consider are that certain features are unavailable in the Web Player.
Programming
Unity scripting can all be done in a familiar Visual Studio or MonoDevelop
environment using the standard languages C# and JavaScript. The engine API is well
integrated into these environments and very well documented. The scripts you build can

23
contain public variables which are accessible right inside the Unity Editor, allowing you
to drag and drop object references or quickly change certain properties of objects. While
we were doing the project, Unity also added more functionality for debugging your
project at runtime through MonoDevelop. All of these things make programming in
Unity much more user-friendly than other engines.
Disadvantages
Web Player MIDI Support
Though we were initially really looking forward to leveraging the Web Player and
the possibility of deploying our game to the web, we later ended up having to choose
against it. The Web Player doesn‟t support .DLL references, and as such our MIDI
system would not work on the Web Player. We decided that MIDI brought us more
advantages and it was worth the cut, but it would‟ve been nice to do both.
It was unclear to us whether it was possible to somehow write our own MIDI
scripts in such a way that we could still deploy to the Web Player, but this was not the
first thing on our list and we didn‟t have time. This may still be a possibility.
GUI Implementation
Another major hurdle that Unity brought us was in developing GUIs. Unity
support for GUIs is fairly simplistic and not as well developed as the other parts of the
engine are. A lot of the stuff we needed to do could still be implemented manually but it
would‟ve been nice if common tasks like dragging and dropping were built into the
engine better. A lot of game engines don‟t have great GUI features, so Unity‟s not alone
here, but it could still use some work.

24
D.1c - Player State
As is the case with most games, information about the player‟s progress needed to be
stored. In our case, we needed to keep track of their battle progress, unlocked instruments,
unlocked instrumentalists, patterns they had created, their progress on the battle map, and their
money. Since this would be relatively constant across a single game session, and needed to be
persistent across the different game modes, we decided to implement this as a singleton class.
This way, there could only ever be one, but we could implement ways to change it for new
games or loading games.
For the most part, this class just contained lists of the necessary information like unlocks
and saved patterns. Since it also held onto the amount of money and such the player had, it made
sense to put the unlocking logic here as well; Other menus could ask the PlayerState to try to
unlock a certain instrument or instrumentalist through one of its methods. If the PlayerState had
the necessary currency, the item would be unlocked and the player‟s currency reduced.
The other job that this class played was the saving and loading of games. We made sure
most of the data was simple, by using things like the type of instrument unlocked as opposed to
the instrument object itself, and just serialized it to XML using the .NET Serialization methods.
This allowed us a quick and easy way to store the game state to a file and to retrieve it from a
file. The player would not need to be able to save during a battle, so saving this state object was
enough.
The biggest problem here became the map progress. The map was implemented in such a
way that the PlayerState kept a reference to the entire Map object, and the progress was stored
into the information on each battle. This was done to keep the map flexible, so that custom maps

25
or multiple maps could be implemented later. This ran us into a few issues, as we then had to
store all the data contained in the Map as well, but forced us to update the Map to a cleaner
implementation anyway which was less reliant on instantiated objects. This allowed us to
implement a more flexible Map, which would be editable and customizable in the future.
D.1d - MIDI Implementation
When we realized we wanted to provide more flexibility with the users compositions, one
of the big things we wanted to add was the ability to have different length notes. In order to
support this, our initial system of using audio clip samples of instruments would need to have an
extremely large number of samples. This would take lots of work to obtain all the samples, and
would make our software much larger. The alternative was to use MIDI.
MIDI provides a way to play notes of a standard set of pitches on a variety of different
instruments with any desired length. This provided us an easier way to do more flexible play
back, but had both advantages and disadvantages.
The main advantage was ease of use. We no longer had to record individual samples of
different instruments, pitches, and lengths. It provided us with a standard set of instruments and
pitches and allowed us to play notes of any length. This greatly increased the scope of audio that
we could play back and came relatively easily.
There were still a few disadvantages though. The biggest problem was that it took away
the ability for us to be able to use the Unity Web Player. MIDI is provided by the operating
system and requires method calls which are not supported by the Web Player. Since it is
provided by the operating system, it is there for operating system dependent. Different operating
systems implement their own versions of MIDI, so each one sounds slightly different – giving us
variable and less predictable results.

26
Another large disadvantage was the fact that we would have to write code to do the MIDI
handling, which isn‟t supported by Unity as well as we would‟ve hoped. It is doable through
using methods provided by .NET, but this restricts us from the web player and is much less
convenient than using Unity functions to just play back an audio file. A system would have to be
put in place to handle all the MIDI messaging and setup.
Since MIDI uses Note On messages to start playing notes and Note Off messages to stop
playing notes, we needed a system which would handle both the beginning and the end of any
notes that were played. This was mentioned in the Patterns section of the paper, and we were
able to address it relatively easily with the system we still had in place, but it required some extra
work.
Though there were a few disadvantages we had to address, the advantages still
outweighed the cost – sampling all those instruments would have been a lot of work if it was
even possible; Using MIDI would save us a lot of time and effort, even if it still required some
implementation and restricted our use a little bit.
MIDI Message Handling
In order to address the issue of the low level MIDI handling and message passing, we
needed to implement a system that would interact with the operating systems MIDI interface and
our game. Though this was doable, it would take a significant amount of time to implement, and
would require some testing. We knew that Unity supported .NET libraries even in the free
version, so we looked around for a library which would do this for us. Since .NET is common,
we figured someone would have made a MIDI library already which we could use.
We ended up finding a library online called the C# MIDI Toolkit
(http://www.codeproject.com/KB/audio-video/MIDIToolkit.aspx). It is available under the MIT

27
License, so it is free to use. It provides a set of .NET DLLs which we could plug into Unity, and
provides a relatively simple interface to the MIDI system. It also provided more functionality
than we needed, making it flexible moving forward if our requirements changed. Using this
tackled one of the large disadvantages of MIDI – implementing a system to interface with it.
This library provided us with an easy interface to use, and fit well with the code that we already
had – we just needed an interface between it and the rest of our code.
MIDI Manager
To address the issue of interfacing with the C# MIDI Toolkit from our code, we
implemented a MIDI Manager class. The normal use of MIDI involves sending different
commands to a certain device. These commands are most commonly turning notes on and off,
but also switching voices and other effects. The MIDI Manager handled obtaining a MIDI output
device through the C# MIDI Toolkit, and provided methods for the common MIDI functions.
Most of our game just wanted to play certain notes with certain voices, and stop those
notes afterward. In order to address this, we made a function for each one – playing a note and
stopping a note. These functions had parameters for a pitch, a voice, and optionally a channel,
and would convert that data into MIDI commands for Note On/Offs and voice changes
appropriately through C# MIDI Toolkit. This way, the rest of our game didn‟t really need to
worry about much. Since the parameters that were being passed (pitch and voice) were things
that were already relevant to the battles anyway, this was a good abstraction that removed any
extra information from having to be passed around.

28
D.2 - Artistic Overview
D.2a - Artistic Vision
Our artistic vision for Melodic Munitions wasn‟t something that was immediately
apparent at the beginning of the project. Instead, it was something that developed over time as
the concept and defining features of our game evolved and took shape. Once we developed our
core game mechanics and features into what they are now, we then were able to judge what
artistic and conceptual qualities would best fit those features, as well as add to the overall quality
and experience of the game itself.
The largest issue that governed the development of our artistic vision was the nature of
our monsters. Our original conceptualizations involved monsters looking like the instruments to
which they were weak. As we expanded upon our monster ideas to also incorporate different
qualities, such as flying, our designs for the monsters took on additional, other-worldly features.
Ultimately we decided that a vibrant and cartoonish artistic style would best fit these kinds of
monsters.

29
Screenshot featuring the exaggerated, rich, and cartoony style of the monsters and environment.
The other area where our decision of a cartoonish style would have the most impact was
the level designs for Battle Mode. We reasoned that because the creation and use of music was
such an important element of our game, then it would make sense for it to also be an important
element within the world of our game itself. We further reasoned that in a world where music
and instruments would seem to have such importance, then that theme would shine through in
nearly every aspect about the world, including the setting. Thus, in the city level of Battle Mode,
buildings would be inspired by, and incorporate into their design, as many different instruments
and musical concepts as possible.

30
Screenshot of the city environment and the incorporation of instruments into building design.
This cartoonish style of the monsters and the setting is balanced by the fairly realistic
depiction of the instruments as well as the instrumentalists. Because we had always intended to
include real instruments in the game it made the most sense that the people who inhabit our game
also be human to be able to play those instruments. The specificity inherently involved in
recreating real life instruments, with all their detail and complexity, and creating and animating a
humanoid model, presented intriguing artistic challenges which the artists wished to tackle.

31
Rendered image of a trumpet Initial modeling process for the humanoid instrumentalist
We felt that when both elements are combined, the monsters/setting and
instruments/instrumentalists, the game is given an overall holistic artistic balance which
successfully refrains from pushing the game too far in either direction.
D.2b - Concept Art
This section is dedicated to concept art drawn during the design process of Melodic
Munitions. We discussed several possible features that could be implemented into the game before
programming and art construction began, as well as during the creation of the game. Along the way,
the artists drew concept art in an attempt to clarify the ideas that the team discussed. In some cases,
this concept art was also used as reference material to create the art assets.

32
These were two versions of sample monsters for the game during its early stages of
conception. From the start, the idea arose to create monsters that incorporate musical elements into
their design. In each picture, the creatures on the left were the more direct approach to this idea:
using musical symbols to design the monsters. On the right side of each picture is an alternate
approach to this design: make known creatures that somehow incorporate musical symbols into their
physical form.

33
These were early designs of what the battle mode of Melodic Munitions might look like.
Many variations on the HUD are displayed here, and there are also a few ideas presented that were
not implemented into the game. For example, originally there were only a few instruments, and each
had unique properties. The guitars, for instance, were going to be effective on flying enemies by
calling down lightning. The monsters (Cacos) displayed here were not developed into much of a
style yet.
On the left, we have early ideas for the fast-note monster, which would later become
Bibibibi. The idea was to have a window or treasure chest that blocks some attacks before opening
up and becoming vulnerable. On the right are early concepts for the “goon” enemies. Although
Horngoon and Bongoon are similar to their final forms, Targoon experienced a redesign from this
banjo shape to a more traditional guitar shape.
34
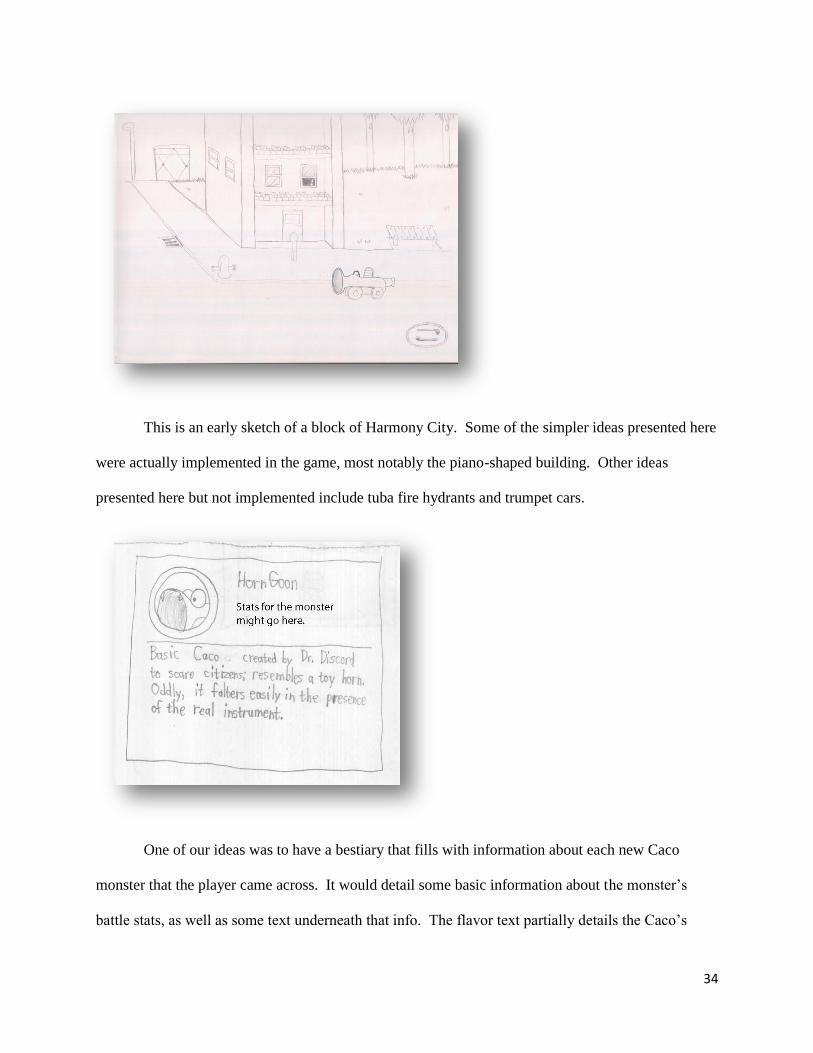
This is an early sketch of a block of Harmony City. Some of the simpler ideas presented here
were actually implemented in the game, most notably the piano-shaped building. Other ideas
presented here but not implemented include tuba fire hydrants and trumpet cars.
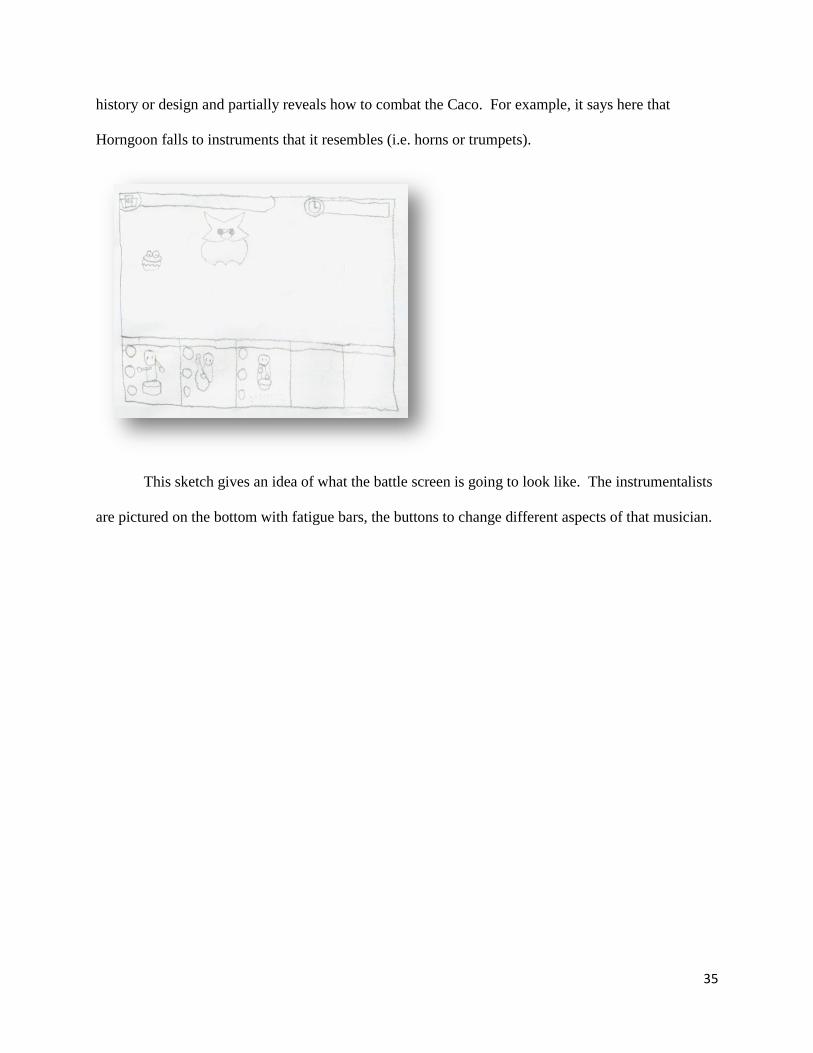
One of our ideas was to have a bestiary that fills with information about each new Caco
monster that the player came across. It would detail some basic information about the monster‟s
battle stats, as well as some text underneath that info. The flavor text partially details the Caco‟s
35
history or design and partially reveals how to combat the Caco. For example, it says here that
Horngoon falls to instruments that it resembles (i.e. horns or trumpets).
This sketch gives an idea of what the battle screen is going to look like. The instrumentalists
are pictured on the bottom with fatigue bars, the buttons to change different aspects of that musician.

36
E. - Melodic Munitions Game Design
E.1 - Composition Mode
E.1a - Composition Mode Technical Design
E.1a.1 - Introduction
The composition mode was one of the components of our game whose design changed
partly through the process. Initially we designed a simple step sequencer with fixed-duration
notes, but soon realized that this was excessively limiting on the player. Undoubtedly, players
would want more flexibility in their compositions and to be able to do more with it than this
system allowed. To address this, we later redesigned the composition mode to be more like a
piano roll with arbitrary note durations. Another change in our design came up later when we
decided that we wanted to allow users to share their compositions with friends, requiring import
and export functionality.
E.1a.2 - Patterns & Composition Storage
One of the key aspects of the game play was for players to be able to compose a musical
pattern in the composition mode, and play it back during a battle to attack monsters. In order to
be able to get data between the Composition Mode and the Battle Mode, we needed some sort of
data structure for the musical data that the player was creating. These patterns would need to be
able to be saved between sessions and exported to XML so that the user could share them with
friends.
Because our design kept changing, the way our patterns were stored had to change as
well. We weren‟t sure how the play back might change, so we knew the resulting note structure
was probably going to change a lot as well. It was initially just a pitch to be played, but we soon

37
realized that more data would be needed, and we would need different types of notes. Because
we knew that changes like this were likely to happen, we kept the general idea of a pattern
separate from the idea of the individual notes which make it up.
The basic idea behind a pattern was to store a set of note structures for a set of beats. This
basically came down to being an array of arrays of notes, with some tags like what instrument
class it was made for and a name. The first array would represent the different beats in the
pattern, while the arrays of notes would contain the notes to be played in that beat.
The most basic type of note was a simple struct which only contained a pitch (an
enumeration value). Once we started using MIDI and variable duration notes, a duration variable
was added as well. This structure was the foundation for the storing of the patterns, as it was
small and simple. When serialized to XML, it was human-readable. When we were initially
using samples for note playback, this data was fine, but when it came to playback through MIDI,
we realized more information would be useful.
When playing notes in MIDI, two messages are sent: one to indicate the start of the note
(NoteOn), and one to indicate the end of the note (NoteOff). As such, we realized that there
needed to be a distinction so that we could generically pass the notes to the MIDI system and let
it handle the on and off values itself. To do this, we made two MIDI note structures –
NoteOnMessage and NoteOffMessage. When playing the data through MIDI, these structures
were more useful, and could be constructed from the simpler note structures.
This made us realize that our patterns were being used in two different ways, so we
developed different types of patterns for each scenario. The simple example we started with
ended up turning into how we stored patterns, and we started referring to it as a StoredPattern.
This pattern structure was very simple and could easily be written to and read from XML. At the

38
time of playback though, MIDI data was necessary, which we did not want to be creating on the
fly, so we decided a second pattern structure was necessary.
This structure is what we referred to as a LoadedPattern, as it was a version of the data
we loaded from a StoredPattern and used at runtime. The basic idea here is that it would provide
access to both simple note structures and MIDI note structures for each beat in the pattern. It also
came to include other data such as pricing, names, and what type of pattern it was written for.
During battles, we needed access to the simple note structures so we could use it to attack the
monsters, but we also needed the MIDI data to be able to play back the audio. This structure
allowed us to do both. This structure could be created from one of the stored patterns by creating
MIDI note structures from the simple ones in the stored pattern. Each simple structure would be
turned into a pair of MIDI note structures – a NoteOnMessage stored at the beat the note starts
on and a NoteOffMessage stored on the beat the note would end on (based off the duration). This
way, we could just query the current beat to get the data to attack monsters with, any notes that
should be turned on, and any notes that should be turned off. This way, we did not have to loop
through all the notes in the pattern to see which notes we would need to turn off every time the
beat changed – all the NoteOff positions were precomputed and could be accessed in constant
time.
E.1a.3 - Step Sequencer
The first basic design we came up with was a simple step sequencer – a common standard
in the music industry. The idea is to have a two-dimensional grid for the user to interact with.
Going side to side along the screen (x-axis) represents time and going up and down (y-axis)
represents the pitch. Each square represents a note of the selected pitch, y, to be played at the
given time, x, for the duration of that square. Clicking a square will toggle it on or off. Step

39
sequencers generally play back the sequence as it is being edited, looping the pattern repeatedly.
There is also a sort of playback head which indicates which part of the pattern is being played
back so the user can connect the visual representation and the audio playback.
An example step sequencer. The orange squares represent toggled on notes. The yellow
bar represents the playback head. When the head gets to a new column, all toggled notes in that
column will be played.
Source: http://making-music.blogspot.com/2010/02/step-sequencer-wok-blip2000-pc.html

40
Our prototype step sequencer in Unity. Lighter gray squares represent toggled on notes.
The column of X‟s represents the playback head.
Implementing this simple step sequencer in Unity was fairly straightforward – though it
wasn‟t fully polished or complete since we moved on to a more sophisticated piano roll later in
the project. This step sequencer had two features besides the basic functionality of a step
sequencer – instrument selection and pattern saving. Instrument selection would simply change
which instrument was playing back the pattern, which would in turn change what type of
instruments would be allowed to play back the pattern. Saving the pattern simply stored it in the
users available patterns so that they could use it during a battle.
The step sequencer grid was made up GUI.Buttons provided by Unity. A two-
dimensional array of Booleans was used to store the toggle state of the each square and we kept
another array to map the vertical dimension to pitch numbers. We then would push the playback
head forward one beat after the appropriate interval of time had passed, and play any notes that
needed to be played on that beat. We would check the column in the two-dimensional array for
any toggled on notes, find the appropriate pitch from the pitch map, and use this (combined with
the currently selected instrument) to construct a Note object which could be passed to the MIDI
system and then played.

41
E.1a.4 - Piano Roll
After realizing that fixed-duration notes were too limiting, we decided to change the
composition mode to a piano roll – another music industry standard which is more sophisticated.
Piano rolls follow a similar layout to step sequencers; They have time going increasing left to
right (x-axis) and pitch increasing from top to bottom (y-axis). The main difference is that
instead of toggleable buttons in a grid shape, it is a continuous background which the user
“paints” squares over – the user clicks the beat in which a note should start, and drags it to the
right for the desired duration. In our case, they snap to predefined intervals, limiting the user a
little bit, but avoiding the problem of having to deal with an infinite resolution of beats. After
they have placed a note, they can right click it to remove it. The big difference here is really that
the user can now define different length notes. This brings many more possibilities and makes
the composition system much more flexible.

42
One version of our Piano Roll implementation. The darker gray squares are toggled on
notes, with different durations. The green line represents the playback head.
As you can see in the above image, we also decided to add some other features to the
composition mode as our idea evolved. The biggest change was the availability of more notes –
we widened the range to three octaves of notes feeling that this gave the user more flexibility
without being extremely overwhelming. We also chose to include accidentals (sharps) to the set
of usable notes, allowing the user access to every pitch in the three octaves. We also included a
slider in the top right for the playback tempo of the pattern as the user is editing it, allowing them
to see how the pattern would sound at different speeds. There are also additional buttons for
creating new compositions, opening ones they had made previously for editing purposes, and
exporting their compositions.
Allowing these new features, namely the dragging and right clicking functionality,
required new technical implementation, as the controls provided by Unity did not include this
functionality. We divide the pieces up into parts that could be done with functionality provided
by Unity, and merged them together to make something that would seem like the appropriate
controls.
New Data Structures
We needed two new data structures for the implementation of the Piano Roll.
Mouse Data
Firstly, we needed to store information about what the mouse was doing. We could
get access to where on the screen the mouse was, but this would need to be mapped to a
specific square on the grid so we knew which note to activate and when. As such, we made a
data structure, PianoRollMouseInfo, which would store the beat and the pitch where the
mouse was. This would be stored each draw call, therefore updating as the mouse moved.

43
Then, when a mouse event occurred, the latest information could be grabbed from the
PianoRollMouseInfo, and we could update the underlying musical data accordingly.
Note Info
Unlike our previous note storing, we now also needed to store information about
which grid square the info corresponded to, and where it should be drawn. This meant that
our data structure needed to keep of the screen space in which it needed to be drawn. Also,
now that we were dealing with durations, information about the lengths of notes had to be
stored as well. The Piano Roll would keep a list of all the notes that the player had added.
Drawing & Updating
As we did before with the Step Sequencer, we divided the Piano Roll up into a grid of
rectangles. During each draw call, we would loop through each of the rectangles in the grid.
First, we used GUILayoutUtility.GetRect() to get a rectangle in screen space of the appropriate
size, reserving space for that grid square. We would then detect if the mouse was currently
positioned over that square, and if so we would update the current MouseInfo to match the data
of the current grid square. We would then draw a GUI.Box corresponding to the grid square to
make it visible to the user.
If any sort of mouse event was fired, we would handle it here. There were four events we
were interested in: Left mouse down, left mouse drag, left mouse up, and right mouse down. In
the case of mouse dragging, we realized that we needed to keep data about the note being
dragged. To accomplish this, we kept a NoteInfo class variable which represented the current
drag as the note that the drag was representing. All left click events would modify or access this
note.

44
Left Mouse Down
In this case, the mouse had just been clicked down. We would create a new
NoteInfo, which represented the shortest duration note, in the box that the mouse was
currently over (Current MouseInfo stored above).
Left Mouse Drag
In this case, the mouse had already been clicked and the user was dragging. The
only change should be the duration of the note. We would check the current box the
mouse was over from the MouseInfo stored above, and compare it to the current
NoteInfo. If this was a logical extension of the note (being dragged to the right to
increase duration, no change in pitch), we would modify the note‟s duration to match the
position of the mouse.
Left Mouse Up
In this case, the user is letting go of the mouse, so we would just store the current
NoteInfo in the list of notes the player had added.
Right Mouse Down
In this case, the user was right clicking to delete a note. Therefore, we would just
remove the note corresponding to the box in the MouseInfo from the list of notes the
player had added.
After handling any mouse data, we would continue the draw cycle. The next step was to
loop through all the notes the player had added, and draw their GUI.Boxes appropriately, in a
different color than the background grid squares. Since we were handling the mouse data and
events manually, we did not need interactive controls. Next we would draw the play head by
drawing a texture in the column of the currently playing beat. Lastly, we would draw the

45
GUI.Box for the note the user was currently dragging, in another different color so the user could
see what they were dragging and distinguish it from the rest of the notes.
Since most of the logic was covered in the GUI Draw calls, not much more had to be
done in the Update calls. The only logic that needed to be handled here was to check if it was
time to proceed to the next beat. If so, the appropriate data would be updated, and we would
check for new notes by looping through all the NoteInfos added by the player. If any of them
started on the new beat, they would be played by constructing a NoteOnMessage and passing it
through the currently selected Instrument. If any of the NoteInfos ended on the new beat, a
NoteOffMessage would be constructed and passed through the currently selected Instrument.
(See the MIDI Implementation section for more details on Instruments and playback)
E.1a.5 - Import/Export & Other Features
The composition mode kept growing and also had some other features added to it besides
just the Step Sequencer/Piano Roll logic.
Saving
The first, most obvious functionality we needed was the ability for the user to save the
composition that they just made. This just meant converting the NoteInfo data we had been
storing for that session into a StoredPattern and since the data structures were fairly simple, it
was a straightforward process. The only other data we needed were an instrument to bind it to
and a name; We would select the instrument type for the StoredPattern based off the instrument
that the user had been composing with, and prompted them for a name.
Import/Export & XML
We eventually created functionality for the Composition Mode to allow the user to
import and export the patterns they were creating. We wanted the user to be able to share

46
patterns with friends, and this seemed like the easiest way to do it. We had originally envisioned
a sort of community which would allow transfer of patterns, but this was a step towards that
anyway.
Since the StoredPattern structure and the Note structure which made it up were both very
simple structures, they were simply serialized to and deserialized from XML using the standard
.NET System.XML.Serialization.XmlSerializer. The resulting .xml files are stored in a
“Patterns” folder in the game directory. At startup, this folder is searched for .xml files. Any files
which are found are deserialized and made available for purchase in the store. If a user would
like to share a pattern they made with a friend, they can open it and export it to .xml, then send
them the resulting file in their patterns folder.
Playback Tempo
During our project, we ended up implementing a tempo mechanic to the playback during
battles. Since the users patterns could end up being played back at various tempos during the
battle, we decided that they should be able to listen to their compositions at different tempos in
the Composition Mode. As such, we added in a slider which would vary the speed of playback,
though this information is not stored to the pattern.
E.2 - Battle Mode
E.2a - Battle Mode Technical Design
E.2a.1 - Introduction
The main “conflict” of our game is the Battle Mode. After composing patterns, unlocking
instruments, and purchasing instrumentalists, players bring all these to a battle against the
computer. The battle follows a typical survival concept where monsters spawn and move towards

47
the player‟s end of the field. The monsters have a certain amount of health and the player must
use their instrumentalists to play music at the monsters in order to damage them. After doing
enough damage, the monsters will be defeated. If a monster is not defeated by the time it gets
close enough to the players end of the field, the player will lose a life. If the player runs out of
lives, they lose the battle. If the player manages to defeat all the monsters in a certain battle, then
they win and receive some amount of money and credits to unlock instruments.
A screenshot of Battle Mode.
This battle concept includes a bunch of systems and mechanics which needed to be
designed and implemented including the following.
E.2a.2 - Playback/Beats
In order to keep things moving, we needed a system to manage the musical beats and to
trigger our instrumentalists. We made a Game Object to handle the timing and beating of the

48
game, which we named the PlaybackManager. The PlaybackManager kept a current BPM, or
beats per minute. Every update loop, it would check how much time had passed. If enough time
had passed for it to be time for the next beat, it would inform all the instrumentalists. The
instrumentalists would check for notes in the new beat and attack using them, and send any
necessary updates to the MIDI system. This centralized beating system made sure that all the
instrumentalists stayed together and updated together. This also allowed us to control the speed
all in one place.
E.2a.3 - Tempo
During our testing, we realized that we wanted the game to be more dynamic and
engaging, and wanted to provide the player with some more choices and alternatives. One thing
that occurred to us is that we could change the tempo that the playback was being done. Turning
the tempo up would allow the instrumentalist to play notes faster, therefore dealing more damage
to the monsters. Since we had already implemented a fatigue system, we realized that this would
balance itself out – the instrumentalists would run out of stamina just as fast as they were
playing. This created an interesting mechanic in which the player could try to kill a lot of
monsters in a panic by turning up the tempo, but then they would be out of stamina and have to
wait to regenerate. They could also aim to take advantage of the increasing stamina regeneration
speed by turning up the tempo and wiping out all the monsters, and then having a break to
regenerate.
E.2a.4 - GUI
In order for the player to be able to interact with these different instrumentalists, their
instruments, and the patterns they were playing, we needed a GUI for the player to use. We
originally had buttons under each instrumentalist for each of the things the player may want to

49
change, but this clearly wasn‟t easy enough to use. Instead, we decided to implement a selection
based card system standard to RTS games, while still displaying the stamina of each
instrumentalist on the field.
Screenshot of the player GUI for controlling instrumentalists.
Selection
The first issue to address was selection. We wanted to have a lot of space on the screen
for the options the user would have, so we decided it made the most sense to only have on
instrumentalist‟s full data and options shown at a time. To do this, the player needed to be able to
select from the instrumentalists.
The most intuitive way to do this was to allow them to click on them. This was fairly
easy in Unity, as each Game Object has an OnMouseDown method which is executed when the
Game Object is clicked. We used this hook to capture clicks on the instrumentalists, and would
then set this as the selected instrumentalists.

50
We also implemented a selection indicator by creating a Game Object with a selection
indicator model, and moving it around. Every time the selection changed, we would move it to
the position of the selected instrumentalist to indicate the selection.
Status Card
Once the player had selected an instrumentalist, there were a few different things they
would want to see or actions they would want to take. These were all implemented in a status
card type fashion which is typical among RTS games. The idea is that the player will want to
mainly be interacting with what they have selected, so it can take up a lot of screen space and
display lots of information and buttons or other actions.
Instrumentalist View
The most obvious thing shown on the status card is a live render of a front view of
the instrumentalist the player has selected. This was done to give the player another
indication of the instrumentalist they have selected, the instrument they are playing, as
well as to give the player a better feel of the instrumentalists. In our early testing, we
noticed that we were constantly looking at the back side of the instrumentalists and felt
sort of disconnected. This view from the front provided another look at the
instrumentalist and helped to make the player feel more connected to their choices.
To achieve this, we created a second camera which moves to the currently
selected instrumentalist the same way that the selection circle does. Using Unity cameras
Camera.pixelRect property and manual Camera.Render method, we were able to
manually render this instrumentalist camera over the rest of the GUI during the status
cards OnGUI method.

51
Close up screenshot of instrumentalist rendered over the GUI.
Status Indicators
One of the important functions of the status card is to show the current status of
the selected instrumentalist. On the left hand side, a set of indicators show the type of
instrumentalist, the instrument they are playing, the pattern they are playing, and a bar
representing their fatigue. (Details on the fatigue bar are given in the following Stamina
section, as both use the same functionality) This gives the player all the information they
need to know about the current state of the instrumentalist.
Tabs & Changing Actions
Another important function of the status card was to enable the player to make the
changes to the instrumentalist that they needed. This came down to three things:
swapping instrumentalists, changing instruments, and changing patterns. Since the player
would be doing this one by one and many choices would be available for each thing they
wanted to change, we decided to go with a tabbed layout. We created three buttons, one

52
for each thing they would want to swap. Clicking on a button would change the large
right side of the status card to the clicked context – i.e. clicking the instrumentalist button
would display a set of instrumentalists to choose from. Since certain actions wouldn‟t
make sense at certain times, like trying to select a pattern without having an instrument,
we would only enable the buttons which were applicable.
We weren‟t sure if some options would want to be displayed in different ways
than others, or if new types of things would come around, so we abstracted the panels.
Basically, the status card would keep track of three HUDPanel objects, which was an
abstract class. Clicking the three context buttons would change which one was the
currently active one, and the status card would just draw whichever was active. This
would allow us to change the functionality of each one individually, and make it easy to
plug in new ones later if necessary.
Play/Stop
Through play testing, we realized that commonly the player would click on an
instrumentalist just to stop it from playing, or start it again with what it had already been
playing. In order to make this much easier than changing patterns and such, we
implemented a simple play and stop button.
Stamina
Even when the player had a specific instrumentalist selected, they would want to see the
fatigue of the instrumentalist. Most of the other important information, like what type of
instrumentalist was there and whether they were playing, could be determined by looking at the
instrumentalist on the field, but the stamina could not.
53
To resolve this, we decided to display this information on the GUI at all times. Making
another analogy to RTS games and health bars, we decided to put stamina bars underneath the
instrumentalists at all times. Since we would want to use these bars in other places, like on the
status card, we made our own control for displaying a percent.
Basically this was a class which had a texture for each of the end caps of the bar, a
texture for the empty middle of the bar, a texture for the fill, a fill percentage, and a rectangle in
which to draw it all. It then had a public Draw method which would draw the appropriate data in
the current rectangle. This was reusable in both situations.
In order to draw them in the right place, we would use the main camera to convert the
position of each instrumentalist to a screen point, and then modify it slightly to get it out of the
way. We would then use this screen point as the center for the rectangle of the stamina bar
control, and set its percentage each update.
Tempo
One other thing we needed to include on the GUI was a way to change the tempo. This
was implemented as a simple slider control which was provided by Unity.
Lives
Another thing we need to display on the GUI was the players current lives, to let them
know how they were doing and how many monsters they could still let by without losing.
E.2a.5 - Monsters
In order for the game to be a challenge, we needed something for the player to fight. As
mentioned before, the game would keep spawning monsters for the instrumentalists to defeat.
They would move towards the player, and if they got close enough, would take a life away.
There were multiple different variations and types of monsters, which will be described in a later

54
section. Here we will talk about the logic pertaining more to the battle – spawning and
management.
Monster Spawning
The first thing we needed to do was to spawn the monsters. We were thinking that in the
future we may want to have other options such as allowing other players to spawn the monsters
in a multiplayer mode, so we had to keep this system flexible. To do this, we created a
RemoteMonsterSpawner class. This class basically held onto a list of prefabs of monsters that it
could instantiate. This list would be pre-populated with all the types of monsters we had, and
would be constant across all battles. It had a method SpawnMonsters which took a list of types –
the types of the monsters to spawn. It would check its list of prefabs for monsters of that type and
actually instantiate them into the battle. This allowed us to simply pass types of monsters to
spawn when we wanted to spawn them, which could be reused if a player wanted to spawn
certain types of monsters.
Monster Management
Throughout the battle, something would have to keep track of all the monsters. To do
this, we created a MonsterManager. This object would keep track of all the currently living
monsters. When they were spawned, the MonsterSpawner would add them to the list, and when
they were killed the monsters would remove themselves from the list. This also allowed us to
easily apply global effects and distribute attacks to all the monsters at once.
E.2a.6 - Monster Attacks
As stated before, each time the instrumentalists play a note, they attack the monsters.
This system needed to be handled in such a way that the monsters could respond to all the
different factors that went into attacks. As we didn‟t know if we would want to add different

55
factors later, such as the duration of the note or some other sort of damage factor, we needed to
keep the system flexible and forward-compatible. To do this, the attacking was handled as a
series of steps. Each step would handle a NoteAttack structure which represented the attack. At
each step, the relevant factors could be factored in, modifying the NoteAttack, and passing it
along until it reached the monsters. In this way, we could even change the flow of the steps and
insert a new one if it was necessary, without directly affecting every other step in the process.
Note Attack
The different steps needed some sort of standard way to communicate and pass data
between each other. In order to do this, we came up with the NoteAttack. It was a simple
structure which contained some information about the attack and its properties. It carried
information such as the pitch of the note, the instrumentalist and instrument which played it, and
the base damage it would deal. At each step, this could be modified if necessary – mainly the
damage.
Step One: Instrumentalist – Generation
The first step was to generate the NoteAttack. When the instrumentalist went to
play the next note, it would create a new NoteAttack based off its current instrument etc,
filling in all the information. This would then be passed along to the next step.
Step Two: Monster Manager – Distribution
The next step along the way was the MonsterManager. Mentioned previously, this
object handled all the references to the living monsters. The instrumentalist would pass
the NoteAttack to the MonsterManager, which would in turn distribute it to all the
individual monsters. If there were any sort of global effects going on, they could be
handled here, before the NoteAttack was distributed to each monster.

56
Step Three: Monsters – Response
Once the monsters got the NoteAttack, they would respond to it. Another half step
which was later added in was the monster‟s modifiers. Some monsters had special effects
on them which would alter the way that they would take damage – shielding or reducing
damage from certain types of attacks. After the monster received the attack, it would
distribute it to all its modifiers, before it itself responded to the NoteAttack by taking
damage
E.2a.7 - Battle Sequence Implementation
In order to get different battles going, we needed some sort of system to handle the events
of a battle. We needed some logic to figure out which monsters to spawn and when which would
then make the appropriate calls to spawn them. Like the rest of the project, we wanted to keep
this flexible. This was especially important here because we wanted to be able to implement
many different battles. We needed some way for us to easily build multiple different battles
without scripting in every monster spawn, as we aimed for having lots of monsters in each fight
and multiple different fights.
We were also hoping that this would still somehow be reusable to a multiplayer
extension. We wanted another player to be able to play the monster side of things and to select
monsters to spawn. If we structured it the right way, we could use the same monsters for balance
but let them choose timing and such, so this was another consideration we kept in the back of our
minds.
Another goal we hoped for was to create battles which wouldn‟t always be the same.
Many games with timed scripts tend to get boring as you always expect the same thing to
happen. We wanted our game to be more dynamic and allow the battles to be a little bit different

57
each time to keep the player on their toes. We still wanted to have a similar overarching flow of
each battle so that we would still have some control over the balance of the game.
To build battles where we could script some sort of (somewhat) dynamic battle
progression without having to script individual monster spawns, we decided to implement a
sequenced system that was based on groups of monsters instead of individual monsters.
E.2a.8 - Monster Pool
The first concept we came up with, was the idea of a MonsterPool. The basic idea was
that we would create a group of monsters, or a pool, which would contain any number of types of
monsters. At run time, the game would pick randomly from this pool at some interval and spawn
a monster of the randomly selected type.
This provided us with a system that could be used both in single-player mode and multi-
player mode. The same pool which was used during a single-player battle could be provided to
the monster player in a multi-player game. The player could be allowed to select a monster from
the pool at the same interval that the single-player game would do the selections.
While designing battles, we realized that we wanted to add one additional element. In
some cases, we would want some monsters in the same pool, but for one of them to be rarer than
another. We didn‟t want to hard code this as a separate MonsterPool on a different timer, as it
would just appear consistently – we wanted some randomness. To do this, we decided to
implement a weighting system. Each monster in the pool would have some weight associated to
it, making it more or less common to spawn. This idea still carried over to multiplayer fairly well
and we came up with two solutions. One idea was that we could force the player to follow
certain ratios through cool downs on monster spawns which followed the weights. Another idea
was to give them a certain number of each monster in each pool which followed the weights.

58
E.2a.9 - Battle Sequences
In order to turn these into more elaborate battles than just one set of monsters spawning
all the time, we needed to come up with some sort of way to sequence these pools together.
The idea we came up with was to make a battle out of groups of MonsterPools. During
the sequence of the battle, we would turn MonsterPools on, and later turn them off. While they
were active, they would continue to spawn their monsters randomly at their assigned interval.
Once all the pools had been turned off and all the spawned monsters were defeated, the player
would win.
This system provided a simple abstraction away from individual monsters and let us
script more dynamic groups of monsters. As a result, the battles felt more dynamic by making
them little bit different each time they were played. This also gave us an extensible system which
could be reused for multi-player; we wouldn‟t have to build a new set of battles – we could reuse
the same ones as the single-player game.
E.2b - Battle Mode Artistic Design
E.2b.1 - Level Design
Originally, we were planning a large range of venues for the game to take place in.
Places we talked about included a forest, the open sea, and the laboratory of the scientist that
built all of the monsters. Due to time constraints, only one environment is included in this
version of Melodic Munitions.
This environment is an urban location that contains several city blocks that have
buildings inspired by musical instruments. There are buildings with piano keys as balconies or
sun roofs, some buildings are bongo drums, and others are trumpets. Originally, we only had
piano buildings in the city, and the city was only one block in length. To make the city slightly

59
more believable, the city was expanded to 3 blocks wide and 3 long and the other kinds of
buildings were added.
A screenshot of the musically inspired city level.
The street lights in this area had to be recognizable and plausible as street lights. They
are, however, supposed to somewhat resemble quarter notes to extend the musical theme. On one
side of the city, there is also an unusual red and pale green building that is designed like a drum
set. This building, the Harmony Museum, is meant to be a major landmark for the city that
makes it recognizable. The drum set fit perfectly within this design as the different drums
involved in the set allowed for an interesting model that the player would likely notice. The pale

60
green coloring on a good deal of this building also contrasts it from the other brightly-colored
structures of the city.
The Harmony Museum model, influenced by a drum set.
E.2b.2 - UI Elements
In battle, we needed some visual indicators to tell how the player was doing. Along the
bottom of the screen, there is a row of square slots that will display a picture of each of the
musicians the player has in the field. In these boxes, the players will also see each musician‟s
fatigue bar, which will indicate how much energy that instrumentalist can spend before tiring
out. The box also displays three different buttons that the player can use to adjust that slot. One
will swap the instrumentalist performing in that spot with another one, one changes the pattern
he is playing, and the last will exchange his instrument. The settings are displayed like this so
that the player would not have to pause the game and interrupt the flow of the music to keep
playing.

61
Screenshot featuring the UI features during Battle Mode.
E.3 - Upgrade Shop
E.3a - Upgrade Shop Technical Design
E.3a.1 - Implementation
In the original design, the store was conceived to allow players to purchase miscellaneous
items such as pre-composed patterns, new instrumentalists, and other things that that didn't fit
into the primary gameplay. Players collect money from playing the battles that they can use to
purchase items at the store. The purchasable patterns were introduced to allow players with little
or no musical background to have some good sounding compositions to play with. As the design
incorporated the use of a limited number of instrumentalists for the player to use during battles,
the store also became the method of acquiring new instrumentalists.
The basic GUI elements provided by Unity slightly limited the design of the store
interface. It would have been preferable to have a list where the user could see all the items and
their prices, select one, and use a "Buy" button to purchase the selected item. Since Unity does

62
not currently feature a List element, a more creative solution was required. The final
implementation utilizes a scrolling view that consists of vertically listed Unity Toggles. These
toggles display the item name and price and a small checkbox that could be toggled on and off.
The use of toggles allows the user to select any number of items from the list, and a single button
at the bottom of the scrolling view displays the total and allows the user to purchase all of the
selected items. If the player does not have enough for the selected items, the button is disabled.
Unity did not provide a simple way to disable GUI elements, so a simple Box is drawn in place
of the button while it's disabled. This is the commonly used method for most of the GUI
elements in the game. Most items could only be purchased once, so these items also needed to be
disabled in the list. For this, another Box is used to replace the toggle checkbox and a Label to
replace the toggle's text. Additional instrumentalists can be purchased any number of times.
The backend of the store uses a simple list of objects that are subclassed from an abstract
class to represent the different types of items available in the store. One such type of item is the
buyable composition patterns. The patterns are collected from another class that imports them
from XML, wrapped in an appropriate store item class and added to the list. When an item is
purchased, the GUI controller calls a Purchase method that all the item classes implement. In the
case of the patterns, the Purchase method adds the pattern to a list of unlocked patterns in a class
that stores all of the player information. A similar Purchase method exists for instrumentalists,
which when invoked instantiates a new copy of an instrumentalist that it references and adds it to
the player info class.
The store implementation is quite simple. The simplified GUI components in Unity
presented some challenges but for the most part the store followed the same patterns used for
many of the other GUI elements in the game.

63
E.3b - Upgrade Shop Artistic Design
The major artistic component of the Upgrade Shop is the icons to represent instruments,
both locked and unlocked. Each instrument has its own Shop icon which represents its unlocked
state. When an instrument is unavailable its icon will be greyed out with an image of a padlock
dissolved over it. Each individual instrument icon was drawn in Adobe Photoshop CS5 by
coloring over a screenshot of the instrument‟s model. Instead of individually creating an
unlocked and locked icon for each instrument, a general „Locked‟ image, featuring the padlock,

64
was created in Photoshop with the same dimensions as the instrument icons. This general
„Locked‟ image was then overlaid each instrument icon as a new layer, with its transparency
adjusted, to achieve the desired effect of an instrument-locked icon.
Examples of an unlocked and locked icon for the Trombone.
E.4 - Map Screen
E.4a - Map Screen Technical Design
E.4a.1 - Introduction
The map was one of the most straightforward parts of our game which did not change too
much as we went through our iterations of design. From the beginning, the idea was fairly
consistent. Players would progress through a tree of battles, where they must win a battle to
unlock the next ones. Players would be able to progress down different paths which could
possibly end in the same place. They would also be able to replay battles they had already won
for repeated rewards.
E.4a.2 - Interface
The interface to the map was really just an image with buttons on top of it to represent the
battles. These battles could be one of three states: unavailable, unlocked, or completed. To
represent this, the button would just have three states to match, each with different graphics. We
ended up making the button look “clickable” when it was unlocked or completed, with a green
circle icon for completed battles and yellow circle icons for unlocked battles. Locked battles
were represented with a button which did not look clickable and had a red circle icon.

65
E.4a.3 - Structure
For the structure of the map, we implemented it as a tree/graph structure. The nodes of
this tree were the battle structures themselves, containing the information on the monster pools in
the battle and whether or not the player had completed this battle. To enable multiple paths,
nodes needed to be capable of having multiple children. To enable converging paths, nodes
needed to be able to have multiple parents.
To determine the state of the battle, we simply traverse the tree, starting from the root.
We initialize all the battles to a locked state and then start the traversal. At each node we check
whether it had been completed. If so, we set its state, and unlock its children. We then continue
the traversal through the nodes children. Any nodes that are unreached remain locked.
E.4b - Map Screen Artistic Design
The main map screen was also drawn in Adobe Photoshop CS5 and features a total of
eighteen battles. The main setup of the map begins on a small island which serves as the location

66
for the initial battles when the player is still learning the game. Once the player has a general
understanding of the game mechanics the battles then shift to the larger, main island on the map.
Once there, the battle progression branches out into different paths with each path featuring an
emphasis on a certain instrument class.
The islands on the map are designed to reflect the fact that our game features only one
city level. Accordingly, the islands essentially constitute a single giant city spanning the entire
surface of the islands.
E.5 - Monsters
E.5a - Monster Technical Design
E.5a.1 - Implementation
The monsters are implemented in a way similar to the template method pattern. There is
an abstract class Monster that contains the game object methods and basic behavior for
initializing, updating, and removal of the object. These methods control the basic movement and
animation of the monsters. Additionally, these methods call a number of other virtual methods
that contain more variable behaviors such as how they respond to a note attack, or additional
initialization behaviors. These methods can be overridden by the other monster type
implementations that derive from this class.
The Monster class also maintains a list of MonsterModifiers; these are objects that can be
added to and removed from monsters that, when applied, alter the behavior in some way. These
modifiers also have a set of template methods for initialization, updating, and responding to
notes, which are subsequently invoked after their respective counterparts in the Monster class.
Finally, the Monster class contains several fields that describe certain attributes of the monster,

67
such as health, movement speed, and the percentage of damage taken from each instrument class.
These are accompanied by a set of public methods that define some common behavior; for
example, adjusting the health based on the base received damage value and its associated
instrument class, or adjusting the movement speed based on a movement speed multiplier. Once
again, inheriting monster classes can manipulate these values to allow variation among the
different monster types.
E.5a.2 - Monster Types
For each of the envisioned monster types, there is an associated subclass of Monster that
defines their specific behavior.
Basic Monster
The BasicMonster class contains the behavior for the most basic monster types of each of
the three instrument classes. Each of these monsters share the same behavior with the exception
that they take damage differently depending on their type. For example, the basic percussion
monster takes full damage from percussion attacks, but significantly less damage from strings
and wind attacks. The behavior script for these monsters inherits directly from the Monster class.
The variation in receiving damage is not controlled in the script, but is achieved by modifying
the initial values for the previously mentioned damage multipliers inherited from the Monster
class. These values can be easily changed for each of the monster prefabs in the Unity Editor.
The basic monster class does however implement the behavior for slowing the monsters when
they are attacked by a wind note, as well as applying damage to the monster when attacked. The
rest of the behavior for the basic monsters is inherited from the Monster class.
Most of the other monster types are essentially evolutions of these basic monsters and
thus share much of the basic monster's behavior, so many of them are derived from the

68
BasicMonster class. Because of this, the BasicMonster class also implements a
BasicNoteResponse method that contains the shared behavior for responding to notes (this is
essentially all of the basic monster behavior). BasicMonster overrides the template method from
Monster for responding to notes so that it simply invokes the BasicNoteResponse method.
Classes that inherit from BasicMonster can then override that method again with new behavior
and simply call the BasicNoteResponse for the common behavior.
Flying Monster
The flying monsters were originally designed to essentially be flying versions of the basic
monsters. With this in mind, the behavior script for the flying monsters implements a
FlyingMonster class that inherits from BasicMonster. The flying monster retains all of the
behavior of the basic monster, but adds behavior for flying. The FlyingMonster class makes use
of a FlyingModifier, which is a type of MonsterModifier. The modifier contains all of the logic
for making the monster fly, which is discussed in detail in the Monster Modifiers section. A
modifier was used for the flying behavior in case there needed to be any variation in the flying
behavior itself or the monsters that used the flying behavior. The FlyingMonster instantiates a
new FlyingModifier with parameters for flying speed and "flying health" (discussed in detail
elsewhere). A simple isFlying flag, declared in the Monster class, is used to determine if the
monster is flying or grounded. The FlyingModifier contains its own note response, so whilst
flying the FlyingMonster ignores note responses, and once grounded it reverts to the
BasicNoteResponse behavior.
Defensive Monster
The DefensiveMonster class describes the behavior for the set of monsters that shield
other monsters from certain note classes. The DefensiveMonster also derives from

69
BasicMonster, and only adds additional behavior. Implementing this monster identified several
design problems. The first problem required the affected monsters to change how they responded
to notes. This problem was solved using a type of MonsterModifier called DamageModifier.
This modifier is also discussed in more detail in its own section.
The second problem required the DefensiveMonster's presence to affect not only the
existing monsters, but new monsters that spawned after the DefensiveMonster. For this problem,
an OnMonsterSpawn event was added to the Monster abstract class that gets called for all
monsters currently on the field every time a new monster is spawned. The method is passed a
reference to the newly spawned monster. The DefensiveMonster implementation of the
OnMonsterSpawn method first checks that the new monster is not itself, and then applies new
DamageModifiers to the new monsters. The DamageModifiers are also applied to the existing
monsters when the DefensiveMonster is initialized by querying the MonsterManager, which
keeps a list of active monsters. This implementation also allows the effects from multiple
defensive monsters to stacked, or applied over each other. The DefensiveMonster also
implements a death event that all of the modifiers it applied listen for. This event is fired when
the DefensiveMonster is killed, causing the DamageModifiers to remove themselves.
The DefensiveMonster uses a simple set of public fields that determine the defensive
bonus it applies for each instrument class. These fields can be varied at the prefab level similar to
the BasicMonster's damage multiplier fields.
Fast Tempo Monster & Slow Tempo Monster
One of the monster designs includes a pair of monsters that take more damage from faster
tempos or slower tempos. The behaviors for these monsters are defined in FastTempoMonster
and SlowTempoMonster respectively. These are similar enough to be described together.

70
FastTempoMonster inherits from BasicMonster but overrides the note response method.
When a note is received, it applies a modifier to the damage. The modifier starts at 1.0 so that the
first note does normal damage. After the damage is applied, the modifier is multiplied by a value
greater than 1. The result is that each successive note increases in damage. There is also a timer
that resets the modifier to 1, as well as itself, after a specified period of time. This timer is
constantly running and resetting. If the monster receives notes faster than the timer resets the
modifier, then each additional note received before the timer resets does additional damage.
The SlowTempoMonster works exactly the same way. It inherits from
FastTempoMonster and the only difference is that the modifier is divided from the received
damage. Playing notes too quickly results in the notes doing increasingly less damage.
E.5a.3 - Monster Modifiers
An abstract class MonsterModifier was defined to allow monster behavior to be altered at
run time. As mentioned in Monsters Implementation, the modifiers use several template methods
that allow the monster to which they are added to be manipulated on certain events. These allow
additional behavior to be executed during initialization of the monster, during the update call,
and while responding to a note. There is an additional method that is invoked when the modifier
is removed, and the constructor can be used to execute additional behavior when the modifier is
added to a monster. Several subclasses of MonsterModifier were created that implement
different behavior modifications.
Flying Modifier
The FlyingModifier adds flying behavior to a monster. It contains parameters for flying
speed and flying health. The speed is multiplied by the monster's ground speed, allowing them to
move faster or slower when flying, and the health determines how much wind damage the
71
monster can take before being knocked to the ground. When the monster is initialized, the
FlyingModifier offsets the height of the monster's model so it appears above the ground, and
adjusts the monster's movement speed. When the modifier responds to a wind class note, it
adjusts the flying health. During the update call the modifier checks if the flying health is
depleted, in which case it tells the monster to remove itself from the monster. This invokes the
remove method, which resets the monster's height and speed. The modifier also maintains a
simple isFlying flag that allows external classes (including the monster itself) to know whether
or not it's currently flying.
Damage Modifier
Another type of modifier is the DamageModifier. This is a simple modifier that alters the
damage a monster receives from a single instrument class. The DamageModifier is instantiated
with a specific instrument class and a multiplier value. This value is multiplied to the existing
damage multiplier of the monster for the specified instrument class. This is achieved by
accessing a map implemented in the Monster abstract class that contains a key for each of the
three instrument classes and an associated multiplier value. When the DamageModifier is
removed it divides the value by its own multiplier value to restore the original value.
The DamageModifier contains additional methods for handling death events for the
DefensiveMonster. When the DefensiveMonster instantiates DamageModifiers, it invokes a
method that adds a new death event handler to the DefensiveMonster. This event handler invokes
another method in DamageModifier that removes itself from the monster it's added to. The use of
the event handler is only to allow the DefensiveMonster to more efficiently remove the
DamageModifiers it creates.

72
E.5b - Monster Artistic Design
E.5b.1 - Design Principles
The monster designs were created to be visual representations of musical symbolism. For
the purpose of conceptualization we imagined that all of these monsters were created by a mad
scientist who wanted to terrorize “Harmony City.” Following this motive, we decided that most
of the monsters would resemble or include various symbols used in music, both abstract and
concrete.
Abstract musical symbols include various marks commonly used on written
compositions. Some, such as quarter notes, are extremely simple in design. Symbols like the G-
clef, on the other hand, are a bit more complex. Sometimes, the musical symbolism might not be
as obvious on certain monsters as it is on others, but it still exists. Regardless, using these
designs allowed artists to focus on creativity in construction of the monsters.
Symbols and other musicaly iconography, such as these musical notes, were a large
influence on the visual design and „look‟ of the game.
More concrete examples were also included on some monsters. Certain monsters in the
game were designed to resemble certain musical instruments, most notably some of the early-
game monsters. This was initially used to help telegraph the weaknesses of early monsters that
the player would encounter. Sometimes, though, concrete designs were used to visually display

73
an idea. This principle was not limited to musical instruments, either, since some of the
monsters have other forms related to sound, such as a microphone or a set of headphones.
Expanding into these more visual examples allow artists some more ideas to work with.
Overall, the monsters were meant to represent music or sound. Their form, in terms of
story, is used to make the citizens of the city afraid of the very theme of their world. In terms of
art design, it is used to allow the artists to use abstract marks creatively. The monsters might be
a threatening force in the world, but they also often possess cartoony styles to draw in the player
with captivating, colorful designs.
E.5b.2 - Monsters and Animation
All monsters were modeled and animated in Autodesk Maya 2010 and 2011. The
monsters were each shaped individually to present a wide variety of obstacles for the player to
defeat. The design of each monster is meant to convey information to the player about how to
defeat the monsters without resorting to the bestiary.
As a general rule of thumb, if string instruments are the main ones involved in fighting
the monster, then it will be green. Percussion-weak monsters will mainly be purple, and orange
or brown signifies foes that are weak to wind instruments.
“Goons”
Horngoon, Bongoon, and Targoon are the game‟s basic enemies, the first and most
common set of monsters the player is introduced to. Because of this, their designs are something
that the player can easily identify by what instrument they can use to defeat it. We molded them
into the shape of the instrument that is meant to vanquish each kind of enemy, a method that flat-
out tells them to use that instrument with this monster approaching. Each monster is also colored
in that instrument‟s matching color. Thus, Horngoon is an orange bugle, Bongoon is a purple

74
bongo drum, and Targoon is a green guitar with four strings. The wide eyes were added to
introduce the cartoony design.
The beginning monsters Bongoon, Targoon, and Horngoon.
Bomb
This toy bomb activates near the end of
battle. It marches toward the players and detonates
after a certain amount of time. As the player must
play a lot of notes at once to keep the bomb from
blowing up on the band, it was most appropriate to
color the bomb purple for percussion. The bomb
marches forward with a stride, and its wick shrinks

75
up until the moment the bomb is supposed to blow up.
Micropus
This creature is a microphone with eight tentacle-like cords
coming from underneath him. It uses those tentacles as a means of
propulsion by wiggling them. When it moves around, the
Micropus‟s arms reach out and pull back in one at a time. If it floats
still, then it pulls up the tentacles and strikes them all out at once
while bobbing up and down. When the micropus is beaten, it will
fall head first. The green coloring was due to the perceived
versatility of the string instruments.
Sprorb
The Sprorb is our concept for the spring enemy, a combination of the words “spring” and
“orb”. The spring is a very light shade of green, which is meant to signify that string instruments
actually WILL NOT work on this monster. The spring was also constructed with exactly five
coils to represent a musical staff, which is made of five horizontal lines. The ball inside the
spring furthers the message to use drums or wind instruments on it by being pink, which is meant
to be a color in-between purple and orange. The Sprorb‟s spring actually retracts and extends
like a spring normally would, and it uses it to bounce forward. When defeated, the orb flies out
of its spring as both tumble to the ground.
Bibibibi
The name of this hornet-like monster is a reference to how one should deal with this
monster. This is the monster the player must defeat by playing notes quickly. It zigzags around
frantically and flaps its wings rapidly before it starts to hear notes. The headphones attached to

76
its head are its shield against incoming notes.
When it ought to take damage, the headphones
inflate to protect Bibibibi from the next note
played. After enough hits, the headphones fly
off and leave this monster vulnerable to
attacks. Defeat tumbles Bibibibi forward and
reels the headphones backwards.
Burnbrush
We wanted to include a monster
that was on fire, and we eventually came
up with Burnbrush, a burning tree. His
appearance overall is vastly different
from the other monsters, since he is
meant to appear much creepier. His
body slowly lumbers toward the band,
hesitating to recover from each step.
When wind instruments blow Burnbrush out, he reels back for a moment before igniting himself
again. After being damaged enough, his branches shrivel up, and Burnbrush falls over.

77
Goooooob
In contrast to Bibibibi,
this monster is the one that is
suspectible to playing a long
drawn-out note. Its design was
intended to be related to
Bibibibi somehow. The team
thought of making this one
some kind of slime monster.
Since Bibibibi looks a lot like a
bee, Goooooob was designed into
a robotic butterfly that controls the giant slime blob. The butterfly‟s wings are made of G-clefs,
the musical symbol often used at the beginning of treble notes, because the G-clef looks like it
could be an intricate wing design. The butterfly pushes up and brings the blob with it at first,
and it pushes the blob down during its descent. During a long note, however, the butterfly loses
focus and begins to fall, nearly flattening the blob. When defeated, the blob will wrap itself
around the butterfly and then shrink to non-existence.
Undertone
The burrowing monster was a concept proposed early in the game‟s development to give
variety to the different enemies the player would face. Such a monster would be digging through
the ground to attack, but the player would need a way to know it was coming. To send this
signal, the monster would need some kind of indication or “flag” to signify its approach.

78
Therefore, this monster was designed as an eighth note, a musical note that wears a flag on the
top of its tail. The eighth note was then given a set of drill arms to burrow in the ground.
E.6 - Instruments
E.6a - Instrument Technical Design
E.6a.1 - Introduction
The instrument unlocking tree was another straightforward part of our game which stayed
consistent through our design process. It was also fairly similar to our map implementation, as it
was a tree of instruments that the player could unlock. The main difference here was that there
were three different independent trees – one for each type of instrument: wind, string, and
percussion. The player would begin with one of each type of instrument unlocked. They would
then progress down the tree towards different instruments. This is very similar to a standard skill
tree found in role playing games.
Interface
Since this is a relatively standard interface, we didn‟t really need to decide much in terms
of how the interface would look. We would display icons of the different instruments available to
the player. When they could unlock them, they would be shown with a green border indicating
that they could be unlocked. The player would then clock on these outlined icons to unlock them.
Instruments which they could not unlock would be shown grayed out with a padlock icon over
them.
We then realized that it would be more visually intuitive if the instruments were only
available if the player had the points to unlock them. This way, the nodes would stay highlighted

79
in green while the player could unlock them, but once they were out of points they would go
back to a locked state so the player understands that they cannot unlock any more instruments.
The instrument trees for the three instrument classes.
E.6a.2 - Structure
The structure for the instrument unlocking tree was very similar to the tree used in the
map implementation. Each node was an instrument and whether or not it was unlocked. Each
node could have multiple children, but multiple parents were not necessary. Each node had three
states: unlocked, available, and locked.
To determine the state of the instruments, we traverse the tree from the root. We start by
setting all the instruments to a locked state and then begin traversing the tree. When we reach a
node, we check whether it has been unlocked or not. If so, we set its state, and we set its children
to available if the player has enough points to unlock them. We then continue the traversal by
examining the children of this node. Any nodes which are unreached remain locked.

80
E.6b - Instrument Artistic Design
E.6b.1 - Introduction
The number of instruments featured in Melodic Munitions equals forty-four in total, all of
which were modeled and textured using Autodesk Maya 2011. These forty-four are divided into
three classes based on which family of instrument it belongs.
E.6b.2 - Wind
Bottles Pan Flute

81
Recorder Clarinet
Flute

82
Oboe Bassoon

83
Saxophone Bugle
Trumpet Whistle

84
French Horn Trombone
Tuba.
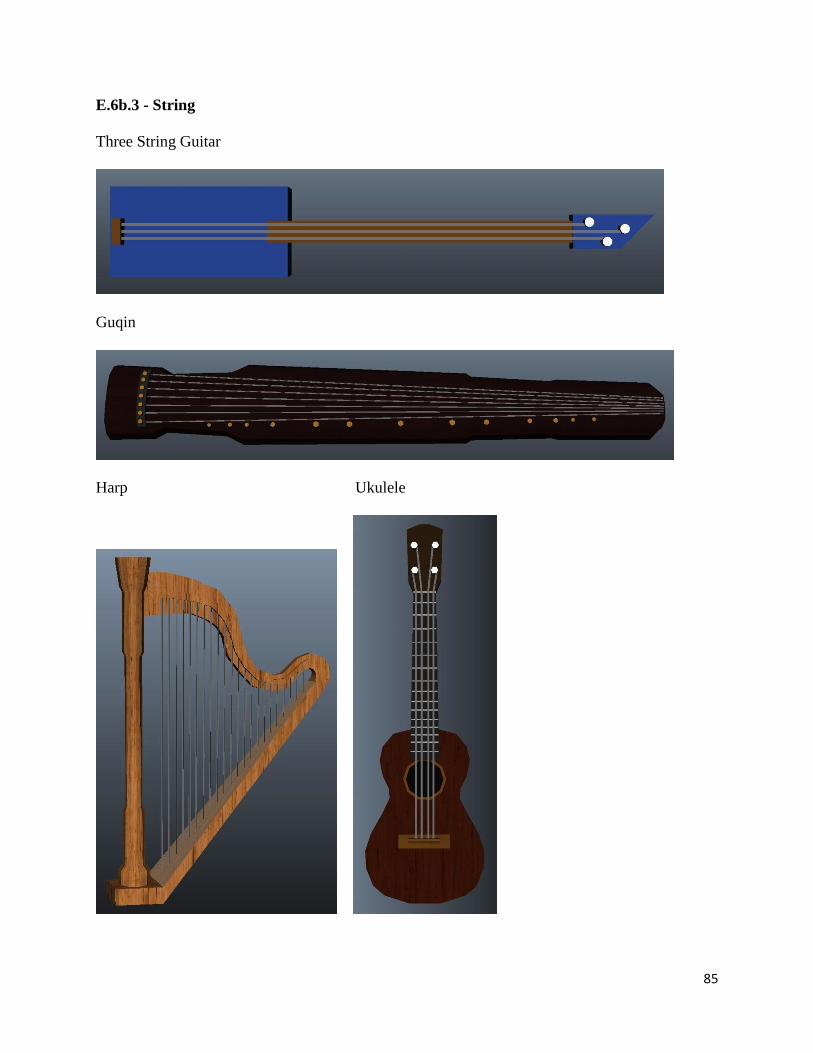
85
E.6b.3 - String
Three String Guitar
Guqin
Harp Ukulele

86
Banjo
Acoustic Guitar
Mandolin

87
Electric Guitar
Bass Guita

88
Erhu Viola

89
Violin Contrabass

90
Cello

91
E.6b.4 - Percussion
Sticks Bongo Drum
Tambourine

92
Tomtom
Crash Cymbals Snare Drum

93
Bass Drum
Drum Set

94
Timpani
Triangle

95
Chimes
Glockenspiel

96
Xylophone
Marimba

97
Xylorimba
Vibraphone

98
E.7 - Instrumentalists
E.7a - Instrumentalist Technical Design
E.7a.1 - Implementation
The player has a certain number of spots in which they can place instrumentalists, so they
are only allowed a certain number of instrumentalists on the field at any given time.
Instrumentalists come in three different types, one for each type of instrument, and they can only
play the instruments of their type. At any time, the player can switch what instrument the
instrumentalist is playing. The instrumentalist can then be assigned a pattern of their type, which
they repeatedly play until they are told to stop. Each note they play then “attacks” the monsters
and can deal damage or have other effects.
Fatigue
After testing our concept a bit, we realized that it would be possible for the player to have
all their instrumentalists constantly playing lots of notes, and therefore always be dealing lots of
damage to the monsters. There was no incentive to stop or slow down the notes, and no reason
for the player to choose any other path. In order to balance the game, we came up with a
fatigue/stamina system.
Each instrumentalist starts with a certain amount of stamina. Every time they play a note,
they lose some of this stamina. If their stamina reaches zero, the instrumentalist becomes
fatigued and can no longer play. If the instrumentalist does not play any notes for a certain
amount of time, they start to regenerate their stamina. The longer the instrumentalist isn‟t
playing, the faster they regenerate.

99
This mechanic made the Battle Mode more interactive. It forced the player to actually
turn off instrumentalists at times and to think about when each instrumentalist should be playing.
This gave the player more decisions to be making during the battle and made the battles more
engaging.
Swapping
Since some instrumentalists could become fatigued, there were different types of
instrumentalists, and only so many instrumentalists could be used at a time, we decided to
implement an instrumentalist swapping mechanism. The player brings all the instrumentalists
that they have unlocked to a battle, though only a few can be used at a time so the rest stay “in
reserve”. At any time, the player can swap one of their reserved instrumentalists into one of the
spots on the field. This allows them to give instrumentalists breaks and to rotate between their
instrumentalists. Again, this gives the player more decisions to make and makes the battle more
engaging.
E.7b - Instrumentalist Artistic Design
E.7b.1 - Introduction
The Instrumentalists are the virtual avatars which play the instruments the player has
selected during each battle. During these battles the player will have a limited number of slots of
which they can assign instrumentalists to. Each instrumentalist specializes in playing instruments
from a single instrument class; the color of each instrumentalist‟s uniform corresponds to which
class of instruments that instrumentalist is capable of playing: orange for wind instruments, green
for string instruments, and purple for percussion instruments.

100
E.7b.2 - Modeling
A single Instrumentalist model was created using Autodesk Maya 2011 through a process
of polygonal extrusions according to reference images. The reason for designing the
instrumentalist more realistically as opposed to cartoonish is because its creation presented a
unique and valuable artistic challenge. The model was designed to look like it was wearing a
marching band uniform. Once completed, the single model was subsequently textured three
different times to match up with the three distinct instrument classes; in each case the
instrumentalist‟s uniform was colored to match its corresponding instrument class.

101
Fully Textured Wind Instrumentalist
Fully Textured String Instrumentalist
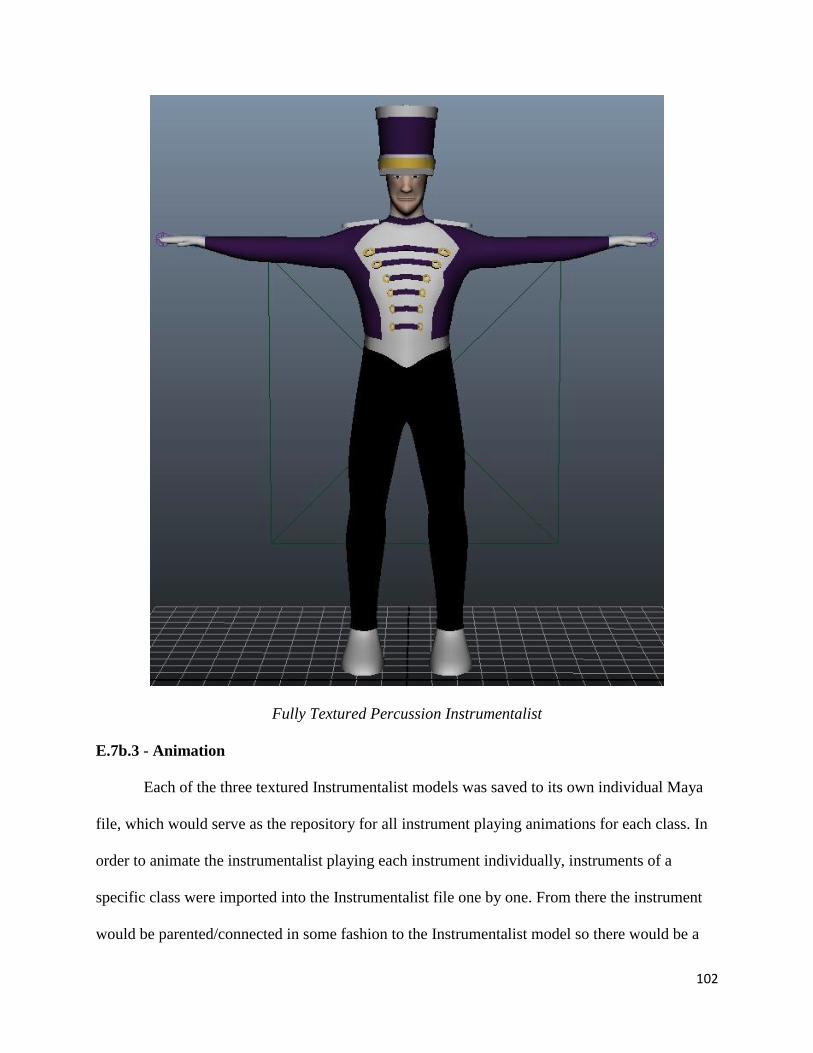
102
Fully Textured Percussion Instrumentalist
E.7b.3 - Animation
Each of the three textured Instrumentalist models was saved to its own individual Maya
file, which would serve as the repository for all instrument playing animations for each class. In
order to animate the instrumentalist playing each instrument individually, instruments of a
specific class were imported into the Instrumentalist file one by one. From there the instrument
would be parented/connected in some fashion to the Instrumentalist model so there would be a

103
reference of where the instrument was during animation and where it would need to be placed
once imported into the game. Whenever applicable, the same Instrumentalist animation was used
for as many instruments within a certain class as possible in order to be as efficient as possible.

104
F. - Sound Design
F.1 - Process of Composing Game Music
In the game, there are three basic types of player-controlled musical instruments: winds,
percussion, and strings. These categories can be broken up into respective subcategories:
brass/woodwinds, pitch/battery percussion, and orchestral/modern strings. Each of the
subcategories has a unique feel, and a type of music that they thrive in. A major part of the game
is focused on purchasing new instruments and upgrades for the player to use in different ways.
Therefore, a major part of the sound design was based on that store. The player can purchase
each of the six instrument subcategories in the shop; when an instrument is purchased, a short
tune is played relevant to the instrument‟s traditional style. For example, if the player purchases
a brass instrument, powerful brass chords will begin to play. Similarly, if the player acquires a
woodwind instrument, a light fugue-like melody will begin, initiated by the bassoon, and
eventually flowing to the rest of the woodwind section. Each of the six instrument subcategories
has one of these „purchase tunes,‟ which may give the player incentive to purchase each type of
instrument, just so they can have heard each of the melodies.
Two percussion tracks were composed to suit various purposes. One is based primarily
on battery percussion, such as the bass drum and toms, and the other utilizes pitch percussion
instruments, like the marimba and glockenspiel. The sounds are about twenty seconds long;
much longer than the purchase tunes, and can be easily looped to greater lengths. The tracks are
primarily meant to be heard in the background as the player navigates the menus and makes
selections before a battle.
As this is an interactive game, each battle can go one of two ways: victory or defeat.
Therefore, the music reflects this. If the player succeeds in a level, a short, cheery melody will

105
play that exemplifies their success. In the tune, the brass section creates an unresolved sound,
only to resolve it to a major („happy‟ sounding) chord. The tension-release vibe is similar to the
challenge the player experiences; difficulty during the level, and then liberation when the level is
finished successfully. On the other hand, if the player loses a level, a markedly different melody
plays. The distant sounds of the ocean can be heard below a slow, plodding bass melody. Minor
(„sad‟) chords complete the picture of loss and defeat. Fortunately, the player can always try
again, and achieve a more musically satisfying end to the level.
A large number of in-game patterns were also created to increase the depth of the store.
Therefore, a player without any musical knowledge can still buy pre-made musical tracks to use
in the game. This flows from our desire to make the game not only musically pleasing, but
musically accessible to people of all ages and backgrounds. Some of the patterns follow from
standard musical devices. For example, there are pre-composed patterns that play major scales,
minor scales (both natural, harmonic, and melodic), and chromatic scales. This can serve to
teach the interested player basic music skills and terminology. Other patterns have a percussive
feel, such as basic snare and bass drum beats. These patterns have no tonality, meaning they can
fit together with a variety of styles and other tracks. A few select groups of patterns were
composed to fit together. For example, the patterns “P54Guitar” and “P54Bass” are in the same
key and time signature, and complement each other. Another group of patterns are synth chords
that sound very ethereal, creating an interesting sound for the player to work with. As a whole,
the patterns were designed to represent a variety of different styles that can draw the player into
composing their own, unique patterns.
106
F.2 - Process of Creating Sound Effects
Similarly to the composed songs, the sound effects reflect the unique timbres of the
different instrument types. Each instrument type has a designated sound effect that plays when
the player clicks on an instrumentalist mid-battle. For example, the standard button click effect,
as well as the battery percussion „click‟ sound, is a bass drum layered with a subtle „tick‟ noise.
The combined effect is more substantial than either of the individual sounds combined. For
other examples, the woodwind „click‟ sound is a brief mordent (a shorter trill); the string section
plays an open fifth on the „pizzicato strings‟ MIDI setting. Each of the click sounds are designed
to be short and light, so not to detract from the rest of the music playing.

107
G. - Postmortem
G.1 - Introduction
Like every other group effort or project we each have done in the past during our college
careers, this MQP was a powerful learning experience. In this section we would like to share
what we thought were some of the highlights of working on this project and what we were
ultimately able to take away from it. In addition, at the beginning of the design process there
were a plethora of other ideas and game features we considered working towards which
ultimately had to be dropped, most of which documented earlier in this paper. If given another
term we certainly would like to work towards implementing some of these features, some
technical and some purely aesthetic, that we feel would further enrich the gaming experience.
G.2 - Success
One thing that the team was successfully able to utilize was the use of prototypes. We
were able to implement the basic mechanics of the game that we had planned to add, including
using a variety of monsters and allowing the player to create his or her own melodies. The song
creation did not quite have the depth that we hoped to include, however, since we had originally
planned to have a more sophisticated scoring system implemented. Some of our monsters do
change how the player is meant to play music in this game, such as Bibibibi and Goooooob
altering the tempo required for each of them. We planned, however, to include similar kinds of
monsters, such as one variety that must be defeated by playing notes that ascend the scale. Our
monster implementation turned out well, but we did hope for a bit more.

108
G.3 - Failure
We had several ideas for how to include a multiplayer mode. One plan was to simply
have two bands actually battle each other, using their musical talents to vanquish the other band.
This idea was scrapped because we thought that having the two bands play music against each
other would result in a lot of noise. A spinoff to this scheme was that players could convert their
performances for multiplayer battles into swarms of monsters. This way, the multiplayer mode
could become extra levels for players to compete against and create. Another idea we concocted
was a mode where two bands would play, one after another, and an audience would input their
votes for which band gave a better performance in that mission. On that same note, we also
thought about a feature that allowed players to upload their performances to a database, where
other people who played Melodic Munitions could give the group a score. By judging other
groups and receiving judgment, the bands / players might rise in rank and gain special
instruments.
Unfortunately, we never got around to creating a multiplayer mode for Melodic
Munitions. We did not have time to implement this feature, and we could not fully agree on the
best route to take with the multiplayer. If we took the route where other people could judge how
a player did, then the possibility existed that somebody could try to smear the player‟s score for
personal reasons. Also, we lacked the time necessary to both create a computer AI that could
objectively judge “good music” and to implement a conversion between what the player
composed into monsters. Because of all this, we dropped the multiplayer feature of Melodic
Munitions altogether for this iteration.

109
G.4 - What We Learned
Dylan James
Working on this project taught me a lot about a few different topics but my most notable
lesson was about prototyping and abstraction; I learned a lot about how to set up early prototypes
that would be flexible and extensible to future design changes. I needed to start working on the
project early on in the design, but because it wasn't concretely defined yet. As such, I had to set
up prototypes of certain functionality, while keeping other pieces abstract for future features. I
spent a lot of time abstracting different functionality into packages which could interconnect.
These packages were replaceable if we wanted to change any of the functionality, or even
removable if we didn't have time to implement the full scope of the project. Though I was
keeping the implementation flexible and abstract, I started to learn that too much abstraction led
to its own problems. Keeping things flexible at both higher and lower ends of the code made
parts of it confusing, vague and unclear. Because I had to keep jumping back and forth on
different aspects of the project, I would sometimes forget how some of the pieces functioned and
would have to relearned them. I started to realize that I needed to develop things in some sort of
middle ground because throwing out some code occasionally was better than spending time
trying to work with such a complex design.
Kyle Sarnik
While working on this project, it quickly became apparent that team collaboration was
going to be a challenge. The lack of proper version control software limited our ability to
efficiently consolidate all of our work. Most significantly, this limitation resulted in slower
development of our art-tech pipelines. This also led to times where the development of some
things would end up waiting on others, and overall reduced the amount of things that could be

110
done in parallel. These limitations have demonstrated the need for strong collaboration and clear
communication. Using Unity Pro, which offers better support for version control, might have
helped alleviate the problem. It also demonstrated the need to develop iteratively; to get the
pipelines in place and to get as many of the major hurdles or unknowns working early on before
spending time to improve them. In other words, don‟t put these significant milestones off until
the last minute. Better planning and a stricter design outline would have been beneficial in this
regard. While these considerations were always in the back of our minds throughout the entire
project, it goes to show just how difficult they can be to adhere to, and that they really can make
a big difference.
Robert Banahan
I think one of the fortunate things about working on this project is that both Joey and I
were able to play to our respective creative and artistic strengths due to the fact that our game
concept and design uniquely allowed for it. I felt more comfortable modeling from reference and
Joey felt more comfortable modeling purely creative and original things and so we were both
able to put forth our best effort within the style we were the more passionate about. I think Joey
did a really good job on translating the technical mechanics of the monsters into interesting
visual designs, as well as really being able to bring the monsters alive through their animations.
Conversely it would be fun to get to model real life instruments in addition to the challenge of
creating a humanoid character entirely in Maya. One of the other larger things I took away from
working on the game is a greater depth of knowledge concerning animation using ik handles and
joint orientations. It was something that I had never previously looked into or known much about
but can play a huge role in determining the quality of your animations.

111
Joseph Chipman
I have personally learned that Unity dislikes deformers, which led to some reworking of
animation rigs. I first encountered this problem when I tried to animate Sprorb. If you simply
try to stretch a spring by scaling it, then the width of said spring also changes. When a real
spring compresses, the space between coils decreases, but the coils stay the same width. I did
manage to do that at one point by using a coiled NURBS curve and a wire deformer. The
animation looked great when I played it in Maya, but when we imported Sprorb to Unity, the
spring no longer compressed. The orb of Sprorb, however, still moved up and down, since that
part was a simple translation. In the interest of time, I simply squashed and stretched the spring
portion. Burnbrush‟s IK handles also failed to bend the skeleton after he was imported into
Unity, despite the fact that you attach IK handles to the joints of the skeleton. Apparently, Unity
seems to dislike animations that aren‟t directly attached to the skeleton joints or
models. Perhaps, someday, either Unity will be able to accept new ways of deforming objects,
or Maya will provide game-engine-friendly animation settings.

112
H. - Future Work
H.1 - Given an Additional Term
If given an additional term the first thing we would do is design more levels and dynamic
and complex battles for the player. Having new and more diverse battles would further
complement the other game modes. It would allow us to introduce additional items in the
upgrade shop as well as allow the player to further experiment in composition mode.
The next largest thing we would like to accomplish is some kind of multiplayer mode.
Multiplayer was one of the initial features of our game which was unfortunately more and more
marginalized as the project went on and our design moved farther away from the initial concept.
However, despite this persistent marginalization, multiplayer was something we consistently
gave thought to and tried to flesh out if we were ever to implement it. Accordingly, if given an
additional term, we would decide which of our top two multiplayer ideas, battling user-created
monsters or a co-op mode, we would like to pursue and do as much as we could to implement
that feature.
Farther down the priorities list would be introducing additional monsters with more
complex and dynamic requirements to be defeated, and perhaps a more diverse array of
instruments. We knew we would be limiting ourselves if we didn‟t try to include instruments
from other cultures, hence our use of the Erhu and Guqin, both traditional Chinese instruments.
However, if given more time we would definitely like to include instruments from other cultures
to diversify our instrument trees.

113
I. - Conclusion
The fact that our initial concept was inspired by Brazilian samba schools helped to create
the foundation for our game and would endure to be of great importance. Since Professor
Rosenstock was able to immediately present us with a premise for a project, with which all the
team members were on board, it proved immensely helpful in the early days of the project as it
allowed us to immediately begin refining the core gameplay aspects that we wanted to achieve.
Subsequently, though our game is considerably different from Professor Rosenstock‟s initial
concept, the spirit of the Brazilian samba schools is still embodied in our game of which without
it the creation of Melodic Munitions would have been impossible.
The design of Melodic Munitions presented some interesting challenges towards the
coders as modern day music games have yet to utilize and capitalize on user-generated content
never mind incorporating such content into battles. As a result, the technical components of the
game were designed to be as open as possible to further changes and improvements. This
technical philosophy is reflected in the evolution of the game‟s compositional interface as well as
the implementation of saving and loading compositions, as well as translating musical patterns
into damage and incorporating a tempo slider in Battle Mode.
For the artists arguably the largest force of artistic influence can be attributed to the
ongoing evolution of our game‟s basic design itself. As artists we looked at what the most
important mechanics of our game were and tried to craft our artistic style, not just around them,
but so that our style would also complement the type of experience we were trying to achieve
through those mechanics.
Once we looked over our final game design and saw instruments that carried with them
special effects and original monsters whose visual design was influenced by musical properties

114
and iconography, we naturally leaned towards a more cartoony style rather than a more realistic
one. However, that decision wouldn‟t prove to be all-encompassing as we had also decided to
feature human characters and real world instruments in the game in the game as well. What we
ended up with was a style which wasn‟t entirely cartoony or entirely realistic, but rather an
amalgamation of both to create the world of Melodic Munitions.
One of the bigger struggles we had throughout the design process was the
implementation and utilization of sound as a fundamental aspect of gameplay. The struggle
broke down into a back and forth between whether we wanted to allow for completely free
composition, at the risk of significantly watering down gameplay, versus having more rigid
limitations on composition to foster more dynamic gameplay but at the cost of unrestricted
creativity. What we ultimately decided was to keep compositional limitations at a minimum and
focus on player creativity, allowing the player to dictate what they wanted to compose and what
they felt like listening to throughout the entire game.
Overall nearly all of the things we set out to accomplish as part of this project were
ultimately accomplished. All three game modes were fully realized and all important art assets
were successfully integrated into the game. In addition, all relevant technical features and
elements essential to the functioning of the three game modes and many of the art assets were
successfully devised and implemented, itself a tribute to the careful design and implementation
philosophy of our coders. The only blemish would be the unfortunate exclusion of some kind of
multiplayer or co-op mode. Just as user-generated compositions can be seen as the next step in
music games, competitively matching creative wits or the collaboration of mutual creative efforts
are the next steps from the experience we have established in Melodic Munitions. Regardless, we
feel that the musical gaming experience Melodic Munitions does achieve is certainly one that can

115
help pave the way for a new genre of musical games revolving around singular unique player
experiences and invigorating player creativity.

116
J. - Appendixes
J.1 - Appendix A
Professor Rosenstock‟s Original Concept Proposal
“Interactive Social Instrument/Music Composition Game Concept Document”
This project is inspired by Brazilian samba schools - large ensembles of musicians that
perform competitively in parades.
The basic game concept presents the player with an interface with which they can
compose rhythmic musical sequences. Different instruments or sound sources are represented by
animated avatars that “perform” the sound being played. At the outset, the player has a very
limited set of musical options, such as a character banging two sticks together. As they progress
through the game, the players build ever larger ensembles of virtual performers and gain access
to a wider palette of sounds and more compositional parameters, enabling them to create more
elaborate musical sequences.
Game modes
Composition mode - This is the interface where players build their compositions and play them
back. This might be broken down into 2 sub-modes: in the first, players build short rhythmic
phrases. In the 2nd, players combine these phrases into longer sequences.
Battle mode - Players are matched by the system with an opponent who is at an equal experience
level. The two compositions are played. Members of the community vote and comment to
determine the “winner” of the battle. Players gain points by winning competitions, as well as by
voting (giving them incentive to participate in the voting). There are leaderboards with featured
compositions, players, and judges.
Upgrade mode - A “shop” where players may redeem their points to upgrade their ensemble.

117
These may be new characters (ie an electric guitar player), expansions of existing characters (3
guitar players, which gives access to more guitar sounds/tracks/licks), or special boss characters
(Jimi Hendrix character, who can actually be “played” more interactively/with greater control
than the normal rhythm characters).