MediaHub Mini™ | TA-3350
23
MediaHub Mini ™ | TA-3350 .HHSLQJ <RXU :RUOG &RQQHFWHG
Transcript of MediaHub Mini™ | TA-3350

MediaHub Mini™ | TA-3350
Tele
Adap
t M
edia
Hub
Min
i |
Inst
alla
tion
Gui
de
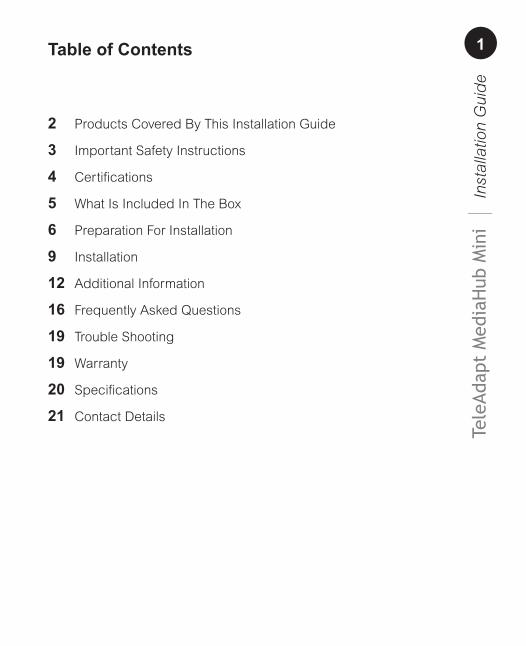
1Table of Contents
2 Products Covered By This Installation Guide
3 Important Safety Instructions
4 Certifications
5 What Is Included In The Box
6 Preparation For Installation
9 Installation
12 Additional Information
16 Frequently Asked Questions
19 Trouble Shooting
19 Warranty
20 Specifications
21 Contact Details
Tele
Adap
t M
edia
Hub
Min
i |
Inst
alla
tion
Gui
de
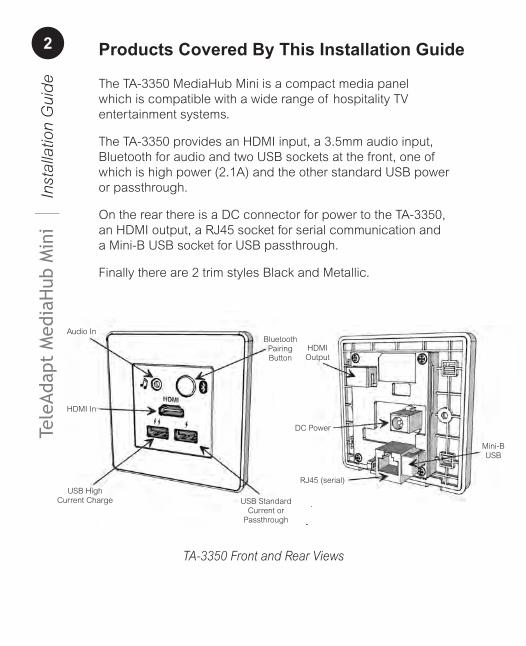
2 Products Covered By This Installation Guide
The TA-3350 MediaHub Mini is a compact media panel which is compatible with a wide range of hospitality TV entertainment systems.
The TA-3350 provides an HDMI input, a 3.5mm audio input, Bluetooth for audio and two USB sockets at the front, one of which is high power (2.1A) and the other standard USB power or passthrough.
On the rear there is a DC connector for power to the TA-3350, an HDMI output, a RJ45 socket for serial communication and a Mini-B USB socket for USB passthrough.
Finally there are 2 trim styles Black and Metallic.
TA-3350 Front and Rear Views
Audio In
HDMI In
USB High Current Charge
Bluetooth Pairing Button
USB Standard Current or
Passthrough
HDMI Output
DC Power
RJ45 (serial)
Mini-B USB
Tele
Adap
t M
edia
Hub
Min
i |
Inst
alla
tion
Gui
de
3Important Safety Instructions
Read these instructions carefully before attempting any installation. Follow all instructions and heed all warnings. These instructions should be kept for future reference.
1 This equipment must be securely attached to furniture in strict accordance with these installation instructions. 2 This equipment is designed for indoor use only. 3 Only use with attachments and accessories as specified by the manufacturer, including but not limited to the PSU and mains cable. 4 The mains plug used to disconnect this equipment from its power source must be readily accessible at all times. 5 The PSU should be installed in a serviceable location such that in the event of failure it can be easily replaced. 6 Ensure the mains power cord is uncoiled before installation. 7 The PSU will generate heat and should therefore be installed in a well ventilated location. Failure to provide adequate ventilation will mean the PSU will run hot and its operational life may be reduced. 8 Protect the power cord from being walked on or pinched particularly at plugs, convenience receptacles and the point where they exit from the equipment. 9 Clean only with a dry cloth.
Continued on page 4
Tele
Adap
t M
edia
Hub
Min
i |
Inst
alla
tion
Gui
de
4
10 Refer all servicing to qualified service personnel. Servicing is required when the equipment has been damaged in any way, for example if the power supply plug or cord is damaged, liquid has been spilled or objects have fallen into the equipment, the equipment has been exposed to rain or moisture, does not operate normally or has been dropped or damaged. 11 Unplug this equipment during lightning storms or when unused for long periods of time. 12 Do NOT modify this equipment in any way, doing so may invalidate any statutory approvals and/or warranty. 13 Do NOT install or use this equipment near water. 14 Do NOT expose this apparatus to rain or moisture. 15 Do NOT expose to dripping or splashing. No objects filled with liquid such as vases shall be placed on the equipment. 16 Do NOT install near any heat sources such as radiators, convection heaters or other apparatus such as amplifiers that produce heat.
Certifications
All US variants are UL listed for US and Canada and are approved to UL 60950 and FCC Part 15 Subpart B.
All EU, UK, EK variants are CE compliant and are tested against EN60950, EN55022, EN55024 and EN50581.
Tele
Adap
t M
edia
Hub
Min
i |
Inst
alla
tion
Gui
de
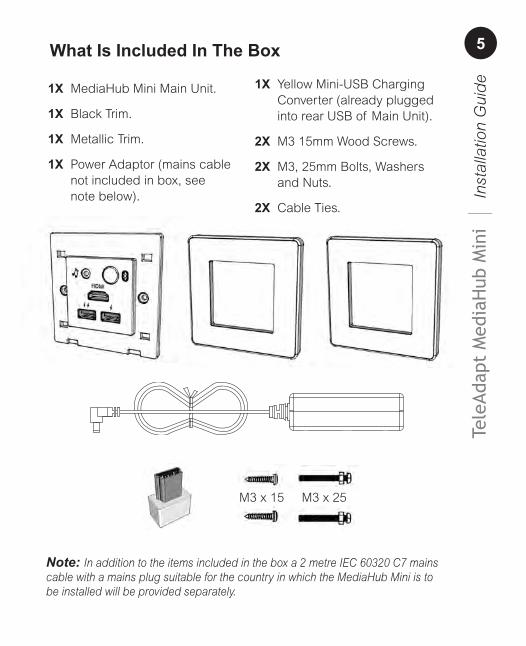
5What Is Included In The Box
1X MediaHub Mini Main Unit.
1X Black Trim.
1X Metallic Trim.
1X Power Adaptor (mains cable not included in box, see note below).
Note: In addition to the items included in the box a 2 metre IEC 60320 C7 mains cable with a mains plug suitable for the country in which the MediaHub Mini is to be installed will be provided separately.
1X Yellow Mini-USB Charging Converter (already plugged into rear USB of Main Unit).
2X M3 15mm Wood Screws.
2X M3, 25mm Bolts, Washers and Nuts.
2X Cable Ties.
M3 x 15 M3 x 25

Tele
Adap
t M
edia
Hub
Min
i |
Inst
alla
tion
Gui
de
6 Preparation For Installation
The MediaHub Mini is designed to be installed in furniture. Ensure the location chosen for the equipment complies with the requirements of the “Important Safety Instructions” on pages 3 and 4 of this guide. A cutout will need to be made in the furniture. Other than this the only tool you will need is a medium sized cross head screwdriver. Cutout dimensions are given in the “Installation” section of this guide. In addition to the items supplied with the MediaHub Mini you will also need:
• an HDMI cable (see HDMI Cables below). Depending upon your installation you MAY also need:
• a flexible HDMI cable adaptor (see HDMI Cables) • a USB cable (see USB Cables), • a serial cable (see Serial Cables). Please contact TeleAdapt about these additional items (see contact details on page 21 of this guide). TVs and System Integrators Before installation you should be satisfied that the TV model selected and/or system integrator is configured to work with the MediaHub Mini and that all necessary control mechanisms (CEC or serial) and cabling are defined and in place. You can find more information about this in the “Additional Information” section (page 12), or contact TeleAdapt for help and advice (see contact details on page 21 of this guide).

Tele
Adap
t M
edia
Hub
Min
i |
Inst
alla
tion
Gui
de
7
Maximum Dimensions for HDMI overmould and strain relief
Dimensions are maximum for overmould and strain relief
Dimension is maximum for overmould and strain relief
20.0mm
8.8mm
37.0mm
HDMI Cables It is recommended to use TeleAdapt supplied HDMI cables that are fully compatible with the MediaHub Mini (CAB-42683D5). If however, you choose to supply your own HDMI cable, then it must meet the following specifications in order to be compatible with the MediaHub Mini:
• Genuine HDMI ATC Certified High Speed (category 2) cable. • Although HDMI cables with Ethernet support (HEC) will work with the MediaHub Mini, it is not necessary to use Ethernet enabled HDMI cables. • To avoid damage to the MediaHub Mini the HDMI connector dimensions (overmould and strain relief) should be within the dimensions shown below.
Genuine HDMI ATC Certified High Speed cables will work well with the MediaHub Mini. However if you require an HDMI cable in excess of 10 metres please contact TeleAdapt about a range of suitable solutions (see contact details on page 21 of this guide).
Continued on page 8
Tele
Adap
t M
edia
Hub
Min
i |
Inst
alla
tion
Gui
de
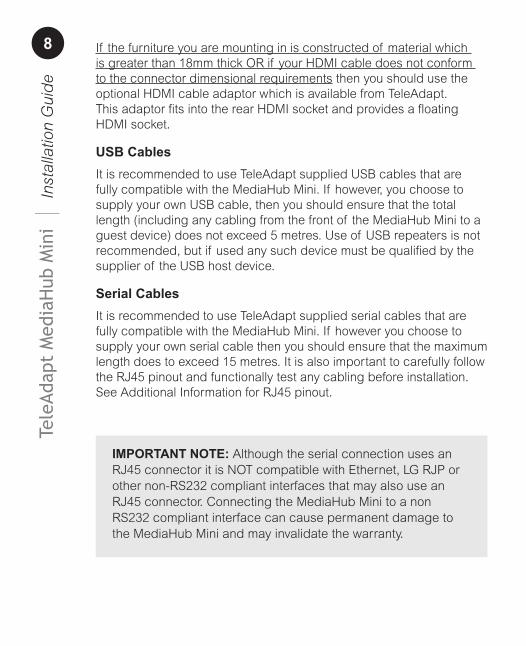
8 If the furniture you are mounting in is constructed of material which is greater than 18mm thick OR if your HDMI cable does not conform to the connector dimensional requirements then you should use the optional HDMI cable adaptor which is available from TeleAdapt. This adaptor fits into the rear HDMI socket and provides a floating HDMI socket. USB Cables It is recommended to use TeleAdapt supplied USB cables that are fully compatible with the MediaHub Mini. If however, you choose to supply your own USB cable, then you should ensure that the total length (including any cabling from the front of the MediaHub Mini to a guest device) does not exceed 5 metres. Use of USB repeaters is not recommended, but if used any such device must be qualified by the supplier of the USB host device. Serial Cables It is recommended to use TeleAdapt supplied serial cables that are fully compatible with the MediaHub Mini. If however you choose to supply your own serial cable then you should ensure that the maximum length does to exceed 15 metres. It is also important to carefully follow the RJ45 pinout and functionally test any cabling before installation. See Additional Information for RJ45 pinout.
IMPORTANT NOTE: Although the serial connection uses an RJ45 connector it is NOT compatible with Ethernet, LG RJP or other non-RS232 compliant interfaces that may also use an RJ45 connector. Connecting the MediaHub Mini to a non RS232 compliant interface can cause permanent damage to the MediaHub Mini and may invalidate the warranty.
Tele
Adap
t M
edia
Hub
Min
i |
Inst
alla
tion
Gui
de
9
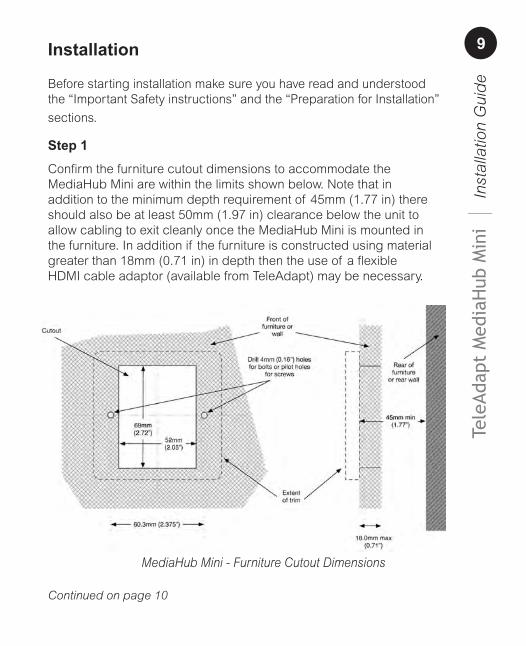
MediaHub Mini - Furniture Cutout Dimensions
Installation
Before starting installation make sure you have read and understood the “Important Safety instructions” and the “Preparation for Installation”
sections. Step 1 Confirm the furniture cutout dimensions to accommodate the MediaHub Mini are within the limits shown below. Note that in addition to the minimum depth requirement of 45mm (1.77 in) there should also be at least 50mm (1.97 in) clearance below the unit to allow cabling to exit cleanly once the MediaHub Mini is mounted in the furniture. In addition if the furniture is constructed using material greater than 18mm (0.71 in) in depth then the use of a flexible HDMI cable adaptor (available from TeleAdapt) may be necessary.
Continued on page 10
Tele
Adap
t M
edia
Hub
Min
i |
Inst
alla
tion
Gui
de
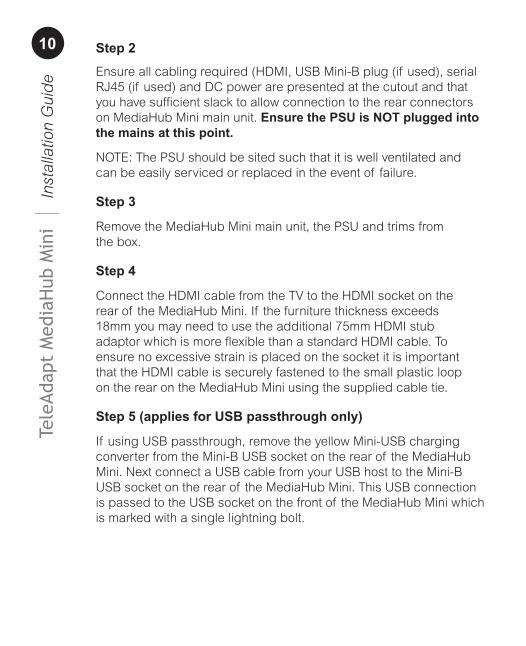
10 Step 2 Ensure all cabling required (HDMI, USB Mini-B plug (if used), serial RJ45 (if used) and DC power are presented at the cutout and that you have sufficient slack to allow connection to the rear connectors on MediaHub Mini main unit. Ensure the PSU is NOT plugged into the mains at this point. NOTE: The PSU should be sited such that it is well ventilated and can be easily serviced or replaced in the event of failure.
Step 3 Remove the MediaHub Mini main unit, the PSU and trims from the box.
Step 4 Connect the HDMI cable from the TV to the HDMI socket on the rear of the MediaHub Mini. If the furniture thickness exceeds 18mm you may need to use the additional 75mm HDMI stub adaptor which is more flexible than a standard HDMI cable. To ensure no excessive strain is placed on the socket it is important that the HDMI cable is securely fastened to the small plastic loop on the rear on the MediaHub Mini using the supplied cable tie.
Step 5 (applies for USB passthrough only) If using USB passthrough, remove the yellow Mini-USB charging converter from the Mini-B USB socket on the rear of the MediaHub Mini. Next connect a USB cable from your USB host to the Mini-B USB socket on the rear of the MediaHub Mini. This USB connection is passed to the USB socket on the front of the MediaHub Mini which is marked with a single lightning bolt.
Tele
Adap
t M
edia
Hub
Min
i |
Inst
alla
tion
Gui
de
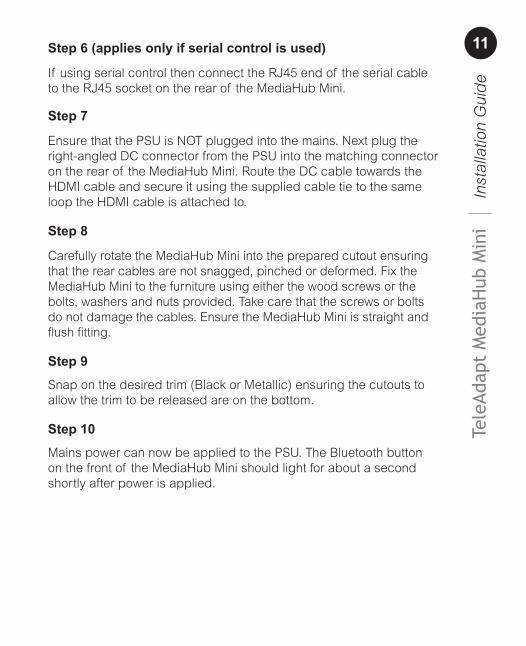
11Step 6 (applies only if serial control is used) If using serial control then connect the RJ45 end of the serial cable to the RJ45 socket on the rear of the MediaHub Mini. Step 7 Ensure that the PSU is NOT plugged into the mains. Next plug the right-angled DC connector from the PSU into the matching connector on the rear of the MediaHub Mini. Route the DC cable towards the HDMI cable and secure it using the supplied cable tie to the same loop the HDMI cable is attached to.
Step 8 Carefully rotate the MediaHub Mini into the prepared cutout ensuring that the rear cables are not snagged, pinched or deformed. Fix the MediaHub Mini to the furniture using either the wood screws or the bolts, washers and nuts provided. Take care that the screws or bolts do not damage the cables. Ensure the MediaHub Mini is straight and flush fitting.
Step 9 Snap on the desired trim (Black or Metallic) ensuring the cutouts to allow the trim to be released are on the bottom.
Step 10 Mains power can now be applied to the PSU. The Bluetooth button on the front of the MediaHub Mini should light for about a second shortly after power is applied.
Tele
Adap
t M
edia
Hub
Min
i |
Inst
alla
tion
Gui
de
12 Additional Information HDMI-CEC vs. Serial Control for Auto-Switching
In planning the installation of a MediaHub Mini it is important to determine the best method of auto-switching the TV. The MediaHub Mini can use either HDMI-CEC or serial control. The method chosen will be determined largely by the TV model(s) installed and the re-quirements of any content providers who may themselves be taking control of the TV. Cabling will also be affected by the choices made, so it is important that this is decided prior to installation. HDMI-CEC is supported by the majority of all new TVs and allows the MediaHub Mini to switch the TV inputs over the HDMI cable that goes to the TV. This approach is simple and has the minimum cabling requirement. Serial control may be required if your TV is older and does not support HDMI-CEC or if the content provider requires exclusive control of the TV (for example if the guest pays for content, switching the TV input without informing the content provider may mean the guest is charged for content that they have not viewed). TeleAdapt works closely with major TV manufacturers and content providers to ensure the guest experience is seamless. Prior to any installation it is crucial that the best auto-switching strategy is determined. To determine which approach is right for you ensure you contact either TeleAdapt, the TV manufacturer or the content provider well in advance of any installation. Guides for direct connection to a range of TVs as well as integration guides for various content providers will be posted on the TeleAdapt website as and when they are available. Go to:http://www.teleadapt.com/support/mediahubs/mediahub-mini) Configuring Serial Communication
The MediaHub Mini will detect the TV manufacturer automatically and if it supports a suitable serial protocol this will be automatically
Tele
Adap
t M
edia
Hub
Min
i |
Inst
alla
tion
Gui
de
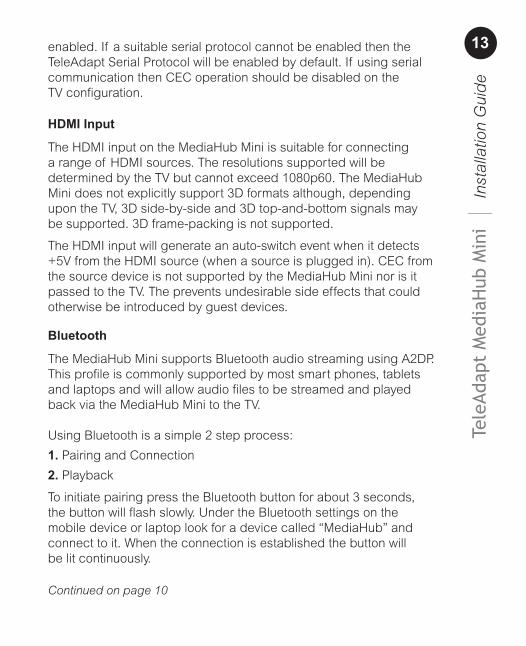
13enabled. If a suitable serial protocol cannot be enabled then the TeleAdapt Serial Protocol will be enabled by default. If using serial communication then CEC operation should be disabled on the TV configuration. HDMI Input
The HDMI input on the MediaHub Mini is suitable for connecting a range of HDMI sources. The resolutions supported will be determined by the TV but cannot exceed 1080p60. The MediaHub Mini does not explicitly support 3D formats although, depending upon the TV, 3D side-by-side and 3D top-and-bottom signals maybe supported. 3D frame-packing is not supported. The HDMI input will generate an auto-switch event when it detects +5V from the HDMI source (when a source is plugged in). CEC from the source device is not supported by the MediaHub Mini nor is it passed to the TV. The prevents undesirable side effects that could otherwise be introduced by guest devices. Bluetooth
The MediaHub Mini supports Bluetooth audio streaming using A2DP. This profile is commonly supported by most smart phones, tablets and laptops and will allow audio files to be streamed and played back via the MediaHub Mini to the TV. Using Bluetooth is a simple 2 step process:
1. Pairing and Connection
2. Playback To initiate pairing press the Bluetooth button for about 3 seconds, the button will flash slowly. Under the Bluetooth settings on the mobile device or laptop look for a device called “MediaHub” and connect to it. When the connection is established the button will be lit continuously.
Continued on page 10
Tele
Adap
t M
edia
Hub
Min
i |
Inst
alla
tion
Gui
de
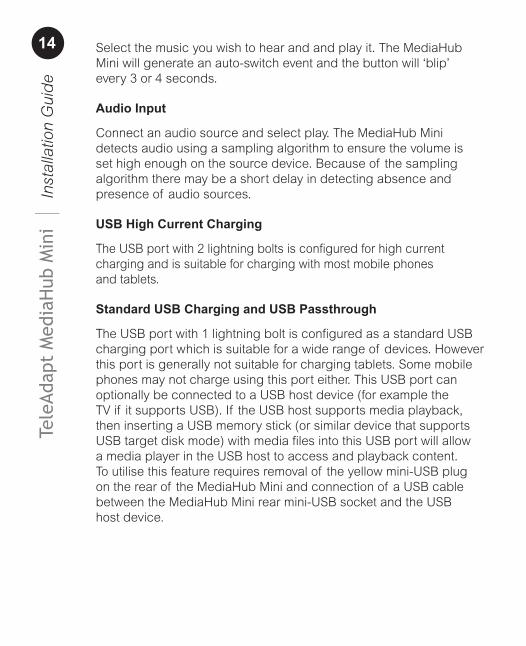
14 Select the music you wish to hear and and play it. The MediaHub Mini will generate an auto-switch event and the button will ‘blip’ every 3 or 4 seconds. Audio Input
Connect an audio source and select play. The MediaHub Mini detects audio using a sampling algorithm to ensure the volume is set high enough on the source device. Because of the sampling algorithm there may be a short delay in detecting absence and presence of audio sources. USB High Current Charging
The USB port with 2 lightning bolts is configured for high current charging and is suitable for charging with most mobile phones and tablets. Standard USB Charging and USB Passthrough
The USB port with 1 lightning bolt is configured as a standard USB charging port which is suitable for a wide range of devices. However this port is generally not suitable for charging tablets. Some mobile phones may not charge using this port either. This USB port can optionally be connected to a USB host device (for example the TV if it supports USB). If the USB host supports media playback, then inserting a USB memory stick (or similar device that supports USB target disk mode) with media files into this USB port will allow a media player in the USB host to access and playback content. To utilise this feature requires removal of the yellow mini-USB plug on the rear of the MediaHub Mini and connection of a USB cable between the MediaHub Mini rear mini-USB socket and the USB host device.
Tele
Adap
t M
edia
Hub
Min
i |
Inst
alla
tion
Gui
de
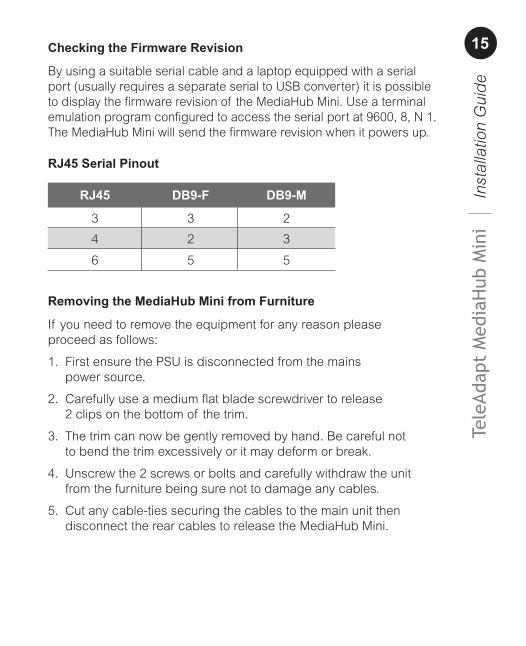
15Checking the Firmware Revision
By using a suitable serial cable and a laptop equipped with a serial port (usually requires a separate serial to USB converter) it is possible to display the firmware revision of the MediaHub Mini. Use a terminal emulation program configured to access the serial port at 9600, 8, N 1. The MediaHub Mini will send the firmware revision when it powers up. RJ45 Serial Pinout
Removing the MediaHub Mini from Furniture
If you need to remove the equipment for any reason please proceed as follows:
1. First ensure the PSU is disconnected from the mains power source.
2. Carefully use a medium flat blade screwdriver to release 2 clips on the bottom of the trim. 3. The trim can now be gently removed by hand. Be careful not to bend the trim excessively or it may deform or break.
4. Unscrew the 2 screws or bolts and carefully withdraw the unit from the furniture being sure not to damage any cables.
5. Cut any cable-ties securing the cables to the main unit then disconnect the rear cables to release the MediaHub Mini.
RJ45 DB9-F DB9-M 3 3 2
4 2 3
6 5 5
Tele
Adap
t M
edia
Hub
Min
i |
Inst
alla
tion
Gui
de
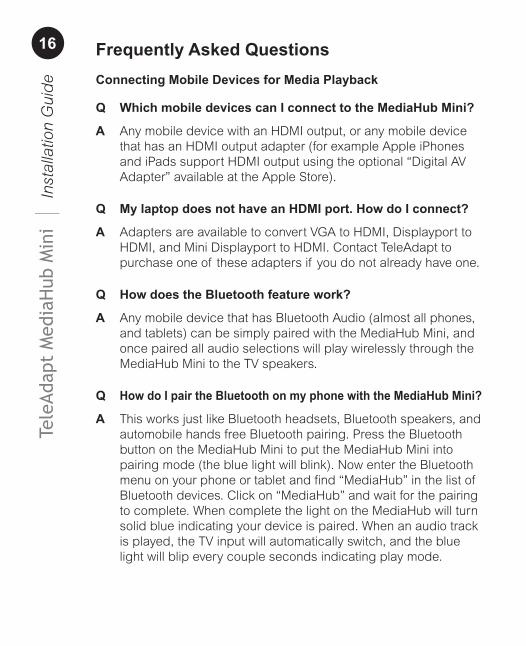
16 Frequently Asked Questions Connecting Mobile Devices for Media Playback
Q Which mobile devices can I connect to the MediaHub Mini?
A Any mobile device with an HDMI output, or any mobile device that has an HDMI output adapter (for example Apple iPhones and iPads support HDMI output using the optional “Digital AV Adapter” available at the Apple Store).
Q My laptop does not have an HDMI port. How do I connect?
A Adapters are available to convert VGA to HDMI, Displayport to HDMI, and Mini Displayport to HDMI. Contact TeleAdapt to purchase one of these adapters if you do not already have one.
Q How does the Bluetooth feature work?
A Any mobile device that has Bluetooth Audio (almost all phones, and tablets) can be simply paired with the MediaHub Mini, and once paired all audio selections will play wirelessly through the MediaHub Mini to the TV speakers.
Q How do I pair the Bluetooth on my phone with the MediaHub Mini?
A This works just like Bluetooth headsets, Bluetooth speakers, and automobile hands free Bluetooth pairing. Press the Bluetooth button on the MediaHub Mini to put the MediaHub Mini into pairing mode (the blue light will blink). Now enter the Bluetooth menu on your phone or tablet and find “MediaHub” in the list of Bluetooth devices. Click on “MediaHub” and wait for the pairing to complete. When complete the light on the MediaHub will turn solid blue indicating your device is paired. When an audio track is played, the TV input will automatically switch, and the blue light will blip every couple seconds indicating play mode.
Tele
Adap
t M
edia
Hub
Min
i |
Inst
alla
tion
Gui
de
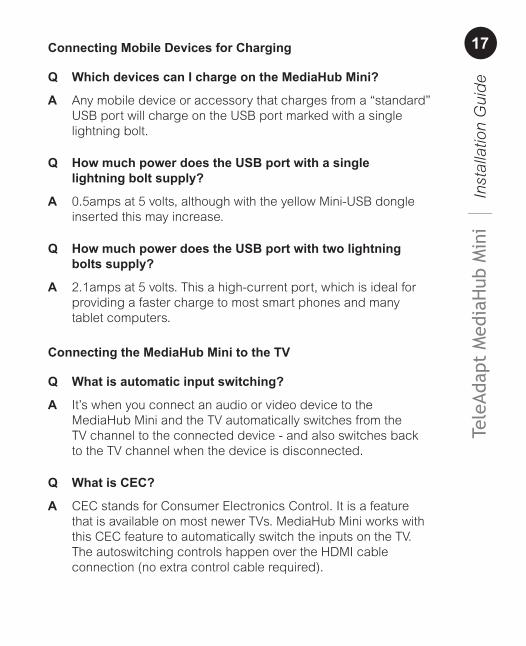
17Connecting Mobile Devices for Charging
Q Which devices can I charge on the MediaHub Mini?
A Any mobile device or accessory that charges from a “standard” USB port will charge on the USB port marked with a single lightning bolt.
Q How much power does the USB port with a single lightning bolt supply?
A 0.5amps at 5 volts, although with the yellow Mini-USB dongle inserted this may increase.
Q How much power does the USB port with two lightning bolts supply?
A 2.1amps at 5 volts. This a high-current port, which is ideal for providing a faster charge to most smart phones and many tablet computers.
Connecting the MediaHub Mini to the TV
Q What is automatic input switching?
A It’s when you connect an audio or video device to the MediaHub Mini and the TV automatically switches from the TV channel to the connected device - and also switches back to the TV channel when the device is disconnected.
Q What is CEC?
A CEC stands for Consumer Electronics Control. It is a feature that is available on most newer TVs. MediaHub Mini works with this CEC feature to automatically switch the inputs on the TV. The autoswitching controls happen over the HDMI cable connection (no extra control cable required).
Tele
Adap
t M
edia
Hub
Min
i |
Inst
alla
tion
Gui
de
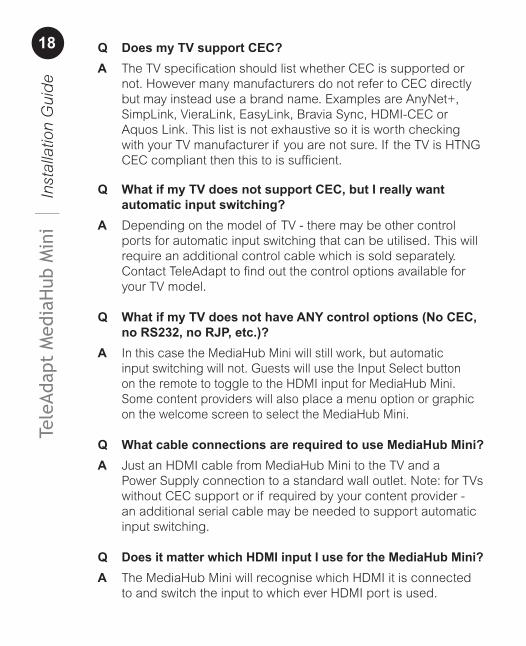
18 Q Does my TV support CEC?A The TV specification should list whether CEC is supported or not. However many manufacturers do not refer to CEC directly but may instead use a brand name. Examples are AnyNet+, SimpLink, VieraLink, EasyLink, Bravia Sync, HDMI-CEC or Aquos Link. This list is not exhaustive so it is worth checking with your TV manufacturer if you are not sure. If the TV is HTNG CEC compliant then this to is sufficient.
Q What if my TV does not support CEC, but I really want automatic input switching?A Depending on the model of TV - there may be other control ports for automatic input switching that can be utilised. This will require an additional control cable which is sold separately. Contact TeleAdapt to find out the control options available for your TV model.
Q What if my TV does not have ANY control options (No CEC, no RS232, no RJP, etc.)?A In this case the MediaHub Mini will still work, but automatic input switching will not. Guests will use the Input Select button on the remote to toggle to the HDMI input for MediaHub Mini. Some content providers will also place a menu option or graphic on the welcome screen to select the MediaHub Mini.
Q What cable connections are required to use MediaHub Mini?A Just an HDMI cable from MediaHub Mini to the TV and a Power Supply connection to a standard wall outlet. Note: for TVs without CEC support or if required by your content provider - an additional serial cable may be needed to support automatic input switching.
Q Does it matter which HDMI input I use for the MediaHub Mini?A The MediaHub Mini will recognise which HDMI it is connected to and switch the input to which ever HDMI port is used.
Tele
Adap
t M
edia
Hub
Min
i |
Inst
alla
tion
Gui
de
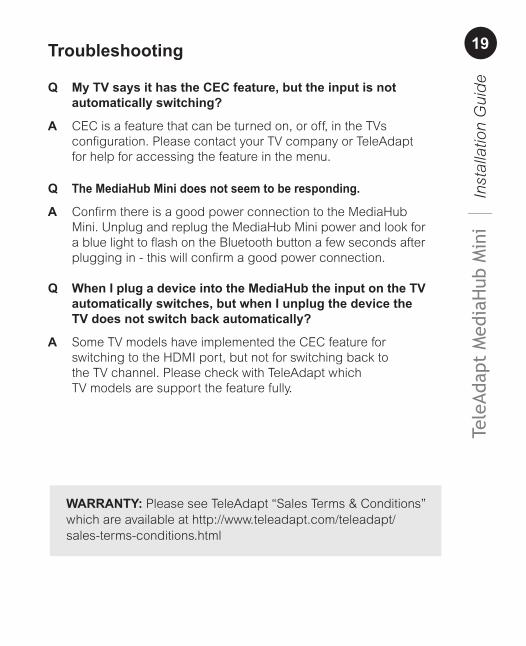
19Troubleshooting
Q My TV says it has the CEC feature, but the input is not automatically switching?
A CEC is a feature that can be turned on, or off, in the TVs configuration. Please contact your TV company or TeleAdapt for help for accessing the feature in the menu.
Q The MediaHub Mini does not seem to be responding.
A Confirm there is a good power connection to the MediaHub Mini. Unplug and replug the MediaHub Mini power and look for a blue light to flash on the Bluetooth button a few seconds after plugging in - this will confirm a good power connection.
Q When I plug a device into the MediaHub the input on the TV automatically switches, but when I unplug the device the TV does not switch back automatically?
A Some TV models have implemented the CEC feature for switching to the HDMI port, but not for switching back to the TV channel. Please check with TeleAdapt which TV models are support the feature fully.
WARRANTY: Please see TeleAdapt “Sales Terms & Conditions” which are available at http://www.teleadapt.com/teleadapt/sales-terms-conditions.html
Tele
Adap
t M
edia
Hub
Min
i |
Inst
alla
tion
Gui
de
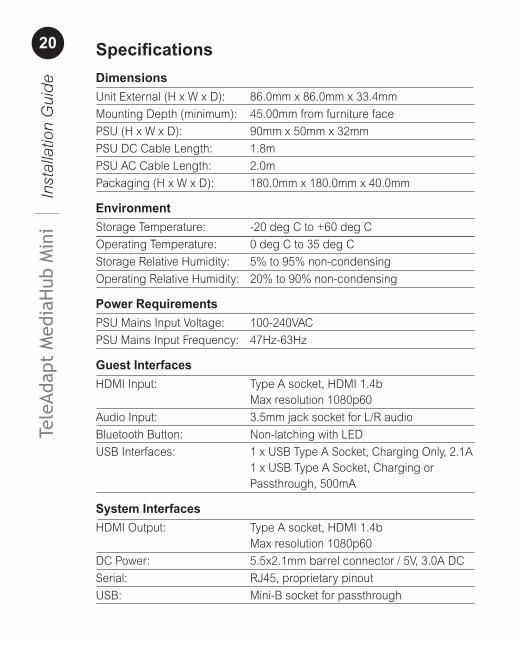
20 SpecificationsDimensionsUnit External (H x W x D): 86.0mm x 86.0mm x 33.4mm
Mounting Depth (minimum): 45.00mm from furniture face
PSU (H x W x D): 90mm x 50mm x 32mm
PSU DC Cable Length: 1.8m
PSU AC Cable Length: 2.0m
Packaging (H x W x D): 180.0mm x 180.0mm x 40.0mm
EnvironmentStorage Temperature: -20 deg C to +60 deg C
Operating Temperature: 0 deg C to 35 deg C
Storage Relative Humidity: 5% to 95% non-condensing
Operating Relative Humidity: 20% to 90% non-condensing
Power RequirementsPSU Mains Input Voltage: 100-240VAC
PSU Mains Input Frequency: 47Hz-63Hz
Guest InterfacesHDMI Input: Type A socket, HDMI 1.4b Max resolution 1080p60
Audio Input: 3.5mm jack socket for L/R audio
Bluetooth Button: Non-latching with LED
USB Interfaces: 1 x USB Type A Socket, Charging Only, 2.1A 1 x USB Type A Socket, Charging or Passthrough, 500mA
System InterfacesHDMI Output: Type A socket, HDMI 1.4b Max resolution 1080p60
DC Power: 5.5x2.1mm barrel connector / 5V, 3.0A DC
Serial: RJ45, proprietary pinout
USB: Mini-B socket for passthrough

Tele
Adap
t M
edia
Hub
Min
i |
Inst
alla
tion
Gui
de
Contact Details
Europe
TeleAdapt LimitedAxis 5Rhodes WayWatfordWD24 4YWUnited KingdomTel: +44 (0)1923 810200
Americas
TeleAdapt Inc1315 Greg StreetSuite 110SparksNV 89431USATel: +1 775 355 8585
Middle East
TeleAdapt LimitedDubai Media CityThuraya Tower 1Office 1008PO Box 500344DubaiUAETel: +971 367 8283
Asia
TeleAdapt HK, LtdUnit G, 15/F, Block 2Leader Industrial CenterNo. 188-202 Texaco RoadTseun WanHong KongTel: +852 2780 9020
Website
For information on other TeleAdapt products designed for the hospitality industry, including specification and cut sheet downloads, please visit our website at: www.teleadapt.com
21

Visit our website at: www.teleadapt.com
MediaHub Mini Installation Guide_05/2014_REV-0