Manual BasicMaker - · PDF fileString (function ... Manual BasicMaker Using the script editor...
335
Manual BasicMaker © 1987-2016 SoftMaker Software GmbH
Transcript of Manual BasicMaker - · PDF fileString (function ... Manual BasicMaker Using the script editor...

Manual
BasicMaker
© 1987-2016 SoftMaker Software GmbH

Manual BasicMaker Contents iii
Contents
Welcome! 9
What is BasicMaker? .......................................................................................... 9
Using the script editor 11
Starting BasicMaker .......................................................................................... 11 Commands in the File menu of the script editor ............................................... 11
Using the file manager ................................................................................ 12 Commands in the Edit menu of the script editor ............................................... 13
Searching and replacing in the script editor ................................................ 14 Commands in the View menu of the script editor ............................................. 15 Commands in the Insert menu of the script editor ............................................ 16
Using SmartText .......................................................................................... 16 Bookmarks and the Go to... command ........................................................ 17
Commands in the Program menu of the script editor ........................................ 18 Commands in the Tools menu of the script editor ............................................. 19
Changing the preferences of the script editor .............................................. 19 Customizing the toolbars of the script editor ............................................... 21 Customizing toolbar icons ........................................................................... 23 Customizing the keyboard shortcuts of the script editor ............................. 23 Editing the shortcuts in a keyboard mapping .............................................. 24
Commands in the Window menu of the script editor ........................................ 26 Starting scripts................................................................................................... 27 Debugging scripts ............................................................................................. 27
Running a script step by step ....................................................................... 27 Using breakpoints ........................................................................................ 28 Watching variables ...................................................................................... 28
Using the dialog editor ...................................................................................... 28 General information .................................................................................... 28 Opening/closing the dialog editor ................................................................ 29 Commands in the File menu of the dialog editor ........................................ 29 Commands in the Edit menu of the dialog editor ........................................ 30 Commands in the Insert menu of the dialog editor ...................................... 31
Language elements of SoftMaker Basic 32
Syntax fundamentals ......................................................................................... 32 Data types.......................................................................................................... 33
Special behavior of the Variant data type .................................................... 34 User-defined data types ............................................................................... 34
Variables ............................................................................................................ 35 Arrays ................................................................................................................ 35 Operators ........................................................................................................... 36 Flow control ...................................................................................................... 37 Subroutines and functions ................................................................................. 39
Passing parameters via ByRef or ByVal ...................................................... 39 Calling functions in DLLs ................................................................................. 40 File operations ................................................................................................... 40 Dialog boxes ..................................................................................................... 41
Dialog definition.......................................................................................... 41 Controls of a dialog box .............................................................................. 42 The dialog function ..................................................................................... 45
OLE Automation ............................................................................................... 47
BasicMaker and TextMaker 50
Programming TextMaker .................................................................................. 50 Connecting to TextMaker ............................................................................ 50
iv Contents Manual BasicMaker
Getting and setting TextMaker properties ................................................... 51 Using TextMaker’s methods ........................................................................ 52 Using pointers to other objects .................................................................... 52 Using collections ......................................................................................... 53 Hints for simplifying notations .................................................................... 54
TextMaker’s object model ................................................................................. 55 Application (object) ..................................................................................... 56 Options (object) ........................................................................................... 63 UserProperties (collection) .......................................................................... 66 UserProperty (object) .................................................................................. 67 CommandBars (collection) .......................................................................... 68 CommandBar (object) ................................................................................. 70 AutoCorrect (object) .................................................................................... 71 AutoCorrectEntries (collection) .................................................................. 73 AutoCorrectEntry (object) ........................................................................... 74 Documents (collection) ............................................................................... 76 Document (object) ....................................................................................... 79 DocumentProperties (collection) ................................................................. 86 DocumentProperty (object) ......................................................................... 88 PageSetup (object) ....................................................................................... 90 Selection (object) ......................................................................................... 93 Font (object) ................................................................................................ 99 Paragraphs (collection) .............................................................................. 104 Paragraph (object) ..................................................................................... 105 Range (object) ........................................................................................... 110 DropCap (object) ....................................................................................... 111 Tables (collection) ..................................................................................... 113 Table (object) ............................................................................................. 114 Rows (collection) ...................................................................................... 117 Row (object) .............................................................................................. 118 Cells (collection) ....................................................................................... 120 Cell (object) ............................................................................................... 121 Borders (collection) ................................................................................... 124 Border (object) .......................................................................................... 126 Shading (object) ........................................................................................ 128 FormFields (collection) ............................................................................. 131 FormField (object) ..................................................................................... 132 TextInput (object) ...................................................................................... 135 CheckBox (object) ..................................................................................... 136 DropDown (object) .................................................................................... 138 ListEntries (collection) .............................................................................. 139 ListEntry (object) ...................................................................................... 141 Windows (collection) ................................................................................ 142 Window (object) ........................................................................................ 144 View (object) ............................................................................................. 147 Zoom (object) ............................................................................................ 151 RecentFiles (collection) ............................................................................. 152 RecentFile (object) .................................................................................... 154 FontNames (collection) ............................................................................. 155 FontName (object) ..................................................................................... 156
BasicMaker and PlanMaker 158
Programming PlanMaker ................................................................................ 158 Connecting to PlanMaker .......................................................................... 158 Getting and setting PlanMaker properties ................................................. 159 Using PlanMaker's methods ...................................................................... 160 Using pointers to other objects .................................................................. 160 Using collections ....................................................................................... 160 Hints for simplifying notations .................................................................. 161
PlanMaker's object model ............................................................................... 162 Application (object) ................................................................................... 164 Options (object) ......................................................................................... 174
Manual BasicMaker Contents v
UserProperties (collection) ........................................................................ 176 UserProperty (object) ................................................................................ 177 CommandBars (collection) ........................................................................ 178 CommandBar (object) ............................................................................... 180 AutoCorrect (object) .................................................................................. 181 AutoCorrectEntries (collection) ................................................................ 182 AutoCorrectEntry (object) ......................................................................... 184 Workbooks (collection) ............................................................................. 185 Workbook (object) ..................................................................................... 188 DocumentProperties (collection) ............................................................... 197 DocumentProperty (object) ....................................................................... 198 Sheets (collection) ..................................................................................... 201 Sheet (object) ............................................................................................. 203 PageSetup (object) ..................................................................................... 209 Range (object) ........................................................................................... 213 Rows (collection) ...................................................................................... 228 Columns (collection) ................................................................................. 230 FormatConditions (collection) ................................................................... 232 FormatCondition (object) .......................................................................... 234 NumberFormatting (object) ....................................................................... 238 Font (object) .............................................................................................. 242 Borders (collection) ................................................................................... 247 Border (object) .......................................................................................... 249 Shading (object) ........................................................................................ 251 Validation (object) ..................................................................................... 254 AutoFilter (object) ..................................................................................... 260 Filters (collection) ..................................................................................... 261 Filter (object) ............................................................................................. 262 Windows (collection) ................................................................................ 263 Window (object) ........................................................................................ 264 RecentFiles (collection) ............................................................................. 270 RecentFile (object) .................................................................................... 272 FontNames (collection) ............................................................................. 273 FontName (object) ..................................................................................... 274
Commands and functions from A to Z 276
#include (statement) ........................................................................................ 276 Abs (function) ................................................................................................. 277 AppActivate (statement) ................................................................................. 277 AppDataMaker (function) ............................................................................... 277 AppPlanMaker (function) ............................................................................... 278 AppSoftMakerPresentations (function) ........................................................... 278 AppTextMaker (function) ............................................................................... 278 Asc (function) ................................................................................................. 279 Atn (function) .................................................................................................. 279 Beep (statement) ............................................................................................. 279 Begin Dialog ... End Dialog (statement) ......................................................... 280 Call (statement) ............................................................................................... 280 CDbl (function) ............................................................................................... 280 ChDir (statement) ............................................................................................ 281 ChDrive (statement) ........................................................................................ 281 Chr (function) .................................................................................................. 282 CInt (function) ................................................................................................ 282 CLng (function) .............................................................................................. 282 Close (statement) ............................................................................................ 283 Const (statement) ............................................................................................ 283 Cos (function) ................................................................................................. 283 CreateObject (function) ................................................................................... 284 CSng (function) ............................................................................................... 284 CStr (function) ................................................................................................ 284 CurDir (function) ............................................................................................ 285 Date (function) ................................................................................................ 285
vi Contents Manual BasicMaker
DateSerial (function) ....................................................................................... 285 DateValue (function) ....................................................................................... 286 Day (function) ................................................................................................. 286 Declare (statement) ......................................................................................... 286 Dialog (function) ............................................................................................. 287 Dim (statement) .............................................................................................. 288 DlgEnable (statement) ..................................................................................... 289 DlgText (statement) ......................................................................................... 289 DlgVisible (statement) .................................................................................... 290 Do ... Loop (statement) ................................................................................... 290 End (statement) ............................................................................................... 290 EOF (function) ................................................................................................ 291 Erase (statement) ............................................................................................. 291 Exit (statement) ............................................................................................... 292 Exp (function) ................................................................................................. 292 FileCopy (statement) ....................................................................................... 292 FileLen (function) ........................................................................................... 292 Fix (function) .................................................................................................. 293 For Each ... Next (statement) .......................................................................... 293 For ... Next (statement) ................................................................................... 293 Format (function) ............................................................................................ 294
Numeric formats of the Format function ................................................... 294 Date/time formats of the Format function ................................................. 296 String formats of the Format function ....................................................... 297
FreeFile (function) .......................................................................................... 298 Function (statement) ....................................................................................... 298 GetObject (function) ....................................................................................... 299 Gosub ... Return (statement) ........................................................................... 299 Goto (statement) .............................................................................................. 299 Hex (function) ................................................................................................. 300 Hour (function) ............................................................................................... 300 If ... Then ... Else (statement) .......................................................................... 301 Input (function) ............................................................................................... 301 InputBox (function)......................................................................................... 302 InStr (function) ................................................................................................ 302 Int (function) ................................................................................................... 303 IsDate (function) ............................................................................................. 303 IsEmpty (function) .......................................................................................... 303 IsNull (function) .............................................................................................. 303 IsNumeric (function) ....................................................................................... 304 Kill (statement) ............................................................................................... 304 LBound (function)........................................................................................... 305 LCase (function) ............................................................................................. 305 Left (function) ................................................................................................. 305 Len (function) ................................................................................................. 306 Let (statement) ................................................................................................ 306 Line Input # (statement) .................................................................................. 306 Log (function) ................................................................................................. 307 Mid (function) ................................................................................................. 307 Minute (function) ............................................................................................ 307 MkDir (statement) ........................................................................................... 308 Month (function) ............................................................................................. 308 MsgBox (function) .......................................................................................... 308 Name (statement) ............................................................................................ 310 Now (function) ................................................................................................ 310 Oct (function) .................................................................................................. 310 On Error (statement) ....................................................................................... 311 Open (statement) ............................................................................................. 313 Option Base (statement) .................................................................................. 314 Option Explicit (statement) ............................................................................. 314 Print (statement) .............................................................................................. 314 Print # (statement) ........................................................................................... 314 ReDim (statement) .......................................................................................... 315
Manual BasicMaker Contents vii
Rem (statement) .............................................................................................. 316 Resume (statement) ......................................................................................... 316 Right (function) ............................................................................................... 317 RmDir (statement)........................................................................................... 317 Rnd (function) ................................................................................................. 318 Second (function) ............................................................................................ 318 Seek (statement) .............................................................................................. 318 Select Case (statement) ................................................................................... 319 SendKeys (statement) ..................................................................................... 319
Special keys supported by the SendKeys command .................................. 320 Set (statement) ................................................................................................ 321 Sgn (function) ................................................................................................. 321 Shell (function) ............................................................................................... 322 Sin (function) .................................................................................................. 322 Space (function) .............................................................................................. 323 Sqr (function) .................................................................................................. 323 Static (statement) ............................................................................................. 323 Stop (statement) .............................................................................................. 324 Str (function) ................................................................................................... 324 StrComp (function) ......................................................................................... 324 String (function) .............................................................................................. 325 Sub (statement) ............................................................................................... 325 Tan (function) .................................................................................................. 326 Time (function) ............................................................................................... 326 TimeSerial (function) ...................................................................................... 326 TimeValue (function) ...................................................................................... 327 Trim, LTrim, RTrim (function) ........................................................................ 327 Type (statement) .............................................................................................. 327 UBound (function) .......................................................................................... 328 UCase (function) ............................................................................................. 329 Val (function) .................................................................................................. 329 VarType (function) .......................................................................................... 329 Weekday (function) ......................................................................................... 330 While ... Wend (statement) .............................................................................. 330 With (statement) .............................................................................................. 330 Write # (statement) .......................................................................................... 331 Year (function) ................................................................................................ 332
Appendix 333
Color constants ................................................................................................ 333 Color constants for BGR colors ................................................................ 333 Color constants for index colors ................................................................ 334

8 Welcome! Manual BasicMaker

Manual BasicMaker Welcome! 9
Welcome! Welcome to BasicMaker!
This manual describes how to use BasicMaker, a programming environment that allows you to control TextMaker,
PlanMaker and other VBA-compatible Windows programs using SoftMaker Basic scripts.
Note: BasicMaker is available only under Windows. It is not included in all versions of SoftMaker Office.
The manual is divided into the following chapters:
Welcome!
The chapter that you are currently reading. It contains information on the general use of BasicMaker.
Using the script editor
In the second chapter, you learn everything about the operation of the script editor of BasicMaker, which you use to
build, execute and test your scripts.
Language elements of SoftMaker Basic
Here you can find basic information about the syntax of SoftMaker Basic.
BasicMaker and TextMaker
BasicMaker was primarily developed in order to be able to program TextMaker and PlanMaker. This chapter con-
tains all details about programming TextMaker via BasicMaker scripts.
BasicMaker and PlanMaker
In this chapter you will find information about programming PlanMaker via BasicMaker scripts.
Commands and functions from A to Z
This chapter covers descriptions of all commands and functions available in SoftMaker Basic.
What is BasicMaker?
BasicMaker is an easy to use development environment for the programming language SoftMaker Basic.
Note: BasicMaker is available only under Windows. It is not included in all versions of SoftMaker Office.
What is SoftMaker Basic?
SoftMaker Basic is modeled after the industry standard Visual Basic for Applications (VBA) from Microsoft.
It is a rather easy to learn programming language that is optimized to work together with applications. For example,
with some simple Basic instructions, you can change fonts in a TextMaker document, open another document etc.
BasicMaker does not produce directly executable program files, as it does not contain a compiler that creates executable
files. Instead, you build so-called scripts with BasicMaker. These can be opened and executed from within BasicMaker.
An overview of the language elements of SoftMaker Basic and its application can be found in the chapter "Language
elements of SoftMaker Basic". For an A-Z reference of the Basic commands available, see the chapter "Commands and
functions from A to Z".
What does BasicMaker consist of?
BasicMaker consists of the following components:
10 Welcome! Manual BasicMaker
The control center of BasicMaker is the script editor, for you to create and edit SoftMaker Basic scripts. For infor-
mation on how to operate the editor, refer to the chapter "Using the script editor".
Integrated into the editor is an interpreter for the programming language SoftMaker Basic. This interpreter is re-
sponsible for the execution of the scripts. SoftMaker Basic scripts cannot be compiled to executable programs, but
have to be started from the script editor.
Additionally, you can execute a script from inside TextMaker or PlanMaker. When they are running, click on the
menu entry Tools > Run Script and choose the desired script. BasicMaker will then run the script.
Further information about running scripts can be found in the section "Starting scripts".
Beyond that, a Debugger for testing scripts is integrated in the script editor, so that you can process a script step by
step and inspect variables. This helps to find errors. You can find more information about this in "Debugging
scripts".
Finally, BasicMaker contains a graphical dialog editor. You can use it to create dialog boxes which allow users to
interact with your scripts. More information about this can be found in "Using the dialog editor".

Manual BasicMaker Using the script editor 11
Using the script editor In this chapter, you will learn how to work with BasicMaker’s script editor:
Starting BasicMaker
Commands in the File menu of the script editor
Commands in the Edit menu of the script editor
Commands in the View menu of the script editor
Commands in the Insert menu of the script editor
Commands in the Program menu of the script editor
Commands in the Tools menu of the script editor
Commands in the Window menu of the script editor
Starting scripts
Debugging scripts
Using the dialog editor
Starting BasicMaker
To start BasicMaker, do any of the following:
Starting BasicMaker from the Start menu
You can start BasicMaker by clicking successively on Start > All Programs > SoftMaker Office > Utilities >
BasicMaker in the Start menu.
BasicMaker’s script editor will open. It can be used for creating and editing scripts as well as running scripts. For
details on each of its menu commands, see the sections that follow.
Starting BasicMaker from TextMaker/PlanMaker
You can also start BasicMaker from within TextMaker or PlanMaker. From the main menu in TextMak-
er/PlanMaker, choose the command Tools > Edit Script.
Starting BasicMaker from TextMaker/PlanMaker and immediately running a script
When you invoke the command Tools > Run Script in TextMaker/PlanMaker, a file dialog appears. Choose a
script, confirm with OK, and the script will be executed.
The same happens when you invoke BasicMaker using the command basicmaker /s scriptname.bas. BasicMaker
will start, run the specified script, and then close.
Commands in the File menu of the script editor
With the commands in the File menu of the script editor, you can open, save, print and manage files:
File > New
Creates a new (empty) script.
File > Open
Opens an existing script.

12 Using the script editor Manual BasicMaker
You can also open VBA scripts (VBA = Visual Basic for Applications), however, not all VBA commands are sup-
ported by BasicMaker.
File > Close
Closes the current window.
File > Save
Saves the script in the current window.
File > Save As
Saves the script in the current window under another name and/or in another folder.
File > Save All
Saves the scripts in all open windows that have changed since the last time they were saved.
File > File Manager
Opens the file manager, which you can used to easily find, open, delete and print files. More information about this
can be found in "Using the file manager".
File > Page Setup
Lets you adjust the paper format and margins for printing.
File > Print
Prints the script in the current window.
File > Exit
Exits BasicMaker.
Using the file manager
The file manager displays a list of documents from one or more folders and lets you open, print, delete or view any
document with a click of the mouse. Furthermore, you can search for files.
To start the file manager, use the command File > File Manager, or you can use the keyboard shortcut (F12).
To invoke a command, select a file and then click on one of the buttons.
The buttons in the file manager have the following functions:
Open
Clicking this button will open the selected file.

Manual BasicMaker Using the script editor 13
Close
Clicking this button will close the file manager.
Search
Click this button to search for a certain file or to choose the folder for the file manager to display.
A dialog box with the following functions appears:
File name
Allows you to specify a unique filename or a filename pattern as the search target. With the default setting *.BAS, the
search function will find all Basic scripts.
If you specify a unique filename like LISTFONTS.BAS, only files with exactly this name will be found.
If you specify a filename pattern like LIST*.BAS, all scripts whose filenames begin with "List" will be found.
File type
From this list, you can choose the type of the files to be targeted in the search.
Folders
Here you can select the drive and folder in which the file manager is to carry out the search.
Include subfolders
If this option is enabled, the file manager searches not only the selected folder, but also all folders below the selected
folder.
"New list" button
Starts a new search with the current settings.
"Add to list" button
Also starts a new search; however, any previous search results remain in the list rather than being cleared from the
list.
"Quick paths" button
Quick paths allow you to create shortcuts to the folders that you use most often, so that they can easily be accessed
in file dialogs. For details, see the TextMaker or PlanMaker manual, keyword "Quick paths".
If you click this button, the selected file will be printed.
Delete
If you click this button, the selected file will be deleted (after confirmation).
Rename
If you click this button, the selected file will be renamed. BasicMaker will request the new file name from you.
Commands in the Edit menu of the script editor
The commands in the Edit menu of the script editor allow you to edit scripts:
14 Using the script editor Manual BasicMaker
Edit > Undo
Undo’s the last action/change of text carried out in the current window. You can invoke this command several times,
in order to undo the last x changes.
Edit > Redo
Restores the effect of your most recently Undo operations. This command can also be invoked repeatedly.
Edit > Cut
Deletes the content of a selection, but not permanently. Instead, it places this content in the clipboard, so that it
remains available for later insertion anywhere in the document.
Edit > Copy
Copies the selection of content to the clipboard.
Edit > Paste
Inserts the content of the clipboard into the text at any specified point and can be used repeatedly.
Edit > Delete
Deletes the selected text.
Edit > Select All
Selects the entire text.
Edit > Search
Lets you search the text. More information about this can be found in the section "Searching and replacing in the
script editor".
Edit > Replace
Lets you search the text and replace certain words with some other text. More information about this can be found in
the section "Searching and replacing in the script editor".
Edit > Search Again
Repeats the last search or replace command carried out. More information about this can be found in the section
"Searching and replacing in the script editor".
Edit > Go to...
Lets you mark text (a sort of "bookmark") in the script. More about this can be found in the section "Bookmarks and
the Go to... command".
Edit > Edit Dialogs
Opens the dialog editor, where you can create and edit user-defined dialog boxes. For more information, see the
section "Using the dialog editor".
Searching and replacing in the script editor
With the commands Edit > Search and Edit > Replace you can search for a certain piece of text in the script, and/or
replace it with another piece of text.
Searching
To search for text, invoke the Edit > Search command. Type in the term for which you want to search and click the
Search button.
Options available in the search dialog:
Manual BasicMaker Using the script editor 15
Case sensitive: If this option is checked, the case of the letters in the found text must be the same as the search term.
Thus, if you search for "Print", only "Print would be found, and not "print" or "PRINT".
Whole words only: If checked, only those occurrences of the search term that are separate words (not just part of a
word) will be found.
Search from top: If checked, the search begins from the beginning of the script, instead of the current position of the
cursor.
Search Backwards: If checked, the search is conducted from the position of the cursor backwards to the beginning of
the script, otherwise forwards.
Replacing
To search for text and replace it with other text, invoke the Edit > Replace command. Type in the search term and the
replacement term and click the Search button.
Options: see above
When the script editor finds the search text, it scrolls to its position in the document and selects it.
You can then do any of the following:
A) You can click on Replace to have the editor replace the selected occurrence of the search term with the replacement
term and jump to the next occurrence of the search term.
B) You can click on Search again to have the editor jump to the next occurrence of the search term – without replacing
the selected occurrence.
C) You can click on Replace all to have the editor replace the selected occurrence of the search term and all subsequent
occurrences it finds in the text.
D) You can click on Close to end the search and close the search dialog.
Searching again
The Edit > Search Again command can be used to repeat the search/replacement of the last search term.
Commands in the View menu of the script editor
The commands in the View menu of the script editor allow you to change the presentation of the program:
View > Toolbars
Lets you enable/disable and modify the toolbars available in the script editor. For more information, see the section
"Customizing the toolbars of the script editor".
View > Bookmarks
Allows you to choose if bookmarks are displayed or not.
View > Output Window
Opens the output window. Outputs made with the Print statement are displayed in this window. Error messages are
also shown there.
View > Watch Window
Opens the watch window. Here, the values of variables can be supervised during the execution of the script. For
more information, see the section "Watching variables".
View > Save Window Layout
Saves the position and size of the current script window, the output window and the variable window.
16 Using the script editor Manual BasicMaker
View > Restore Window Layout
Restores the position and size of the current script window, the output window and the variable window to as it was
stored with the View > Save Window Layout command.
View > Use Default Layout
Resets to position and size of the current script window, the output window and the variable window to default
values.
Commands in the Insert menu of the script editor
In the Insert menu of the script editor, the following commands are available:
Insert > Symbol
Opens up a new window containing all the different symbols and other special characters that you can insert in the
text. Select the desired character and click the Insert button.
Insert > Document
Inserts another script or text document at the current position of the cursor. A file dialog appears where you can
choose the desired document.
Insert > SmartText
Allows you to insert and edit SmartText entries. For more information, see the section "Using SmartText".
Tip: Using SmartText entries for frequently used instructions or routines can save you a lot of time!
Insert > Bookmark
Creates a bookmark at the current position. With Edit > Go to... you can quickly jump to any bookmarks made.
More on this can be found in the section "Bookmarks and the Go to... command".
Using SmartText
Exactly like in the word processor TextMaker, you can setup SmartText entries in the script editor. This feature can save
you a lot of typing time: You can define entries for frequently needed names or source code fragments and then call
them up quickly and easily.
For example, create a SmartText entry named "tma" containing "tm.Application.ActiveDocument". Now you can call
out this SmartText entry at any time. In the script, simply type "tma" and press the spacebar, the Enter key, or a punctua-
tion character key. Immediately, "tma" will be replaced with "tm.Application.ActiveDocument".
Instructions in detail:
Creating SmartText entries
To create, for example, a SmartText entry with the name "tma" containing "tm.Application.ActiveDocument", proceed
as follows:
1. Invoke the command Insert > SmartText.
2. Click on the New button to create a new SmartText entry.
3. Give the SmartText entry a name ("tma" in our example).
Later, the SmartText entry can be called up by using the specified name.
4. Confirm with OK, which takes you back to the main dialog.
5. Type in the text for the SmartText entry in the large input field ("tm.Application.ActiveDocument" in our example).
Manual BasicMaker Using the script editor 17
6. Click on Save to save your new SmartText entry.
7. Exit the dialog by clicking on the Close button.
The SmartText entry has now been created.
Inserting SmartText entries
Calling out SmartText entries is simple: In the script, type in the name of the SmartText entry ("tma" in our example),
and then press the space bar, the Enter key or a punctuation character. Immediately, "tma" will be replaced by the
content of the SmartText entry, in our example "tm.Application.ActiveDocument".
Note: If this does not work, the Expand SmartText entries option might be disabled. If so, invoke the command
Tools > Options, switch to the General tab, and turn on this option.
Alternatively, you can use a dialog to insert SmartText entries by invoking the command Insert > SmartText, choosing
the desired entry, and then clicking the Insert button.
Editing SmartText entries
You can edit SmartText entries that you have previously defined with the command Insert > SmartText.
Creating a new SmartText entry
To create a new SmartText entry, click the New button (see above).
Deleting an entry
To delete an entry, select it from the list and click on the Delete button.
Renaming an entry
To change the name of an entry, select it from the list, click on Rename and enter a new name.
Editing an entry
To edit an entry, select it from the list and then click in the large input field. Now you can modify the content of the
SmartText entry.
Inserting an entry
To insert a SmartText entry into the script, select it from the list and click on the Insert button
Closing the dialog
With the Close button, you can close the dialog box.
Bookmarks and the Go to... command
Exactly like in the word processor TextMaker, you can use bookmarks in the script editor, which helps to keep track of
certain points in the script.
To insert a bookmark, invoke the Insert > Bookmark command at the desired position in the text and give the book-
mark a name. Once you have marked a position in the text in this way, you can jump to it at any time with the Edit >
Go to command.
Setting bookmarks
To set up a bookmark, do the following:
1. Move the cursor to the text position where you want to place the bookmark.
2. Choose the command Insert > Bookmark.
18 Using the script editor Manual BasicMaker
3. Type in the name for the bookmark.
Bookmark names may contain only letters, numbers and underscores. Special characters are not allowed. The name must always begin with a
letter.
4. Click on OK to set the bookmark.
You can define an unlimited number of bookmarks.
Calling a bookmark
To return to a bookmarked position in the script, do the following:
1. Choose the Edit > Go to ... command or press (F5).
2. Choose the desired bookmark from the list or type in its name.
3. Click on OK.
The text cursor will now jump to the position where the bookmark was created.
Deleting bookmarks
When a bookmark is no longer needed, you can delete it using the following procedure:
1. Choose the command Insert > Bookmark.
2. Select the bookmark you want to delete from the list, or enter its name manually.
3. Click on Delete.
Note: When you delete a passage of text containing a bookmark, the bookmark is deleted automatically.
Sending the cursor to a certain line
Additionally, the Edit > Go to command can be used to place the text cursor in a certain line in the script. To do this,
invoke the command and type in the number of the line.
Commands in the Program menu of the script editor
The commands in the Program menu of the script editor can be used to execute the current script.
Program > Start (keyboard shortcut: F9)
Executes the script. See also section "Starting scripts".
The other options in this menu help with finding errors. So for example you can run the script step by step or set break-
points at which execution of the script will be automatically paused.
For this, the following commands are available:
Program > Trace Into (keyboard shortcut: F7)
Carries out the next instruction, and then stops.
Program > Step Over (keyboard shortcut: F8)
Similar to the previous instruction, this command only follows the next instruction – with the difference that proce-
dures (functions and subs) are not processed in single steps, but as a whole group.
Program > Reset (keyboard shortcut: Ctrl+F2)
This breaks the execution and puts the script back to its first line.
Manual BasicMaker Using the script editor 19
Program > Insert/Delete Breakpoint (keyboard shortcut: F2)
Creates a breakpoint in the current line or removes it again. The execution of scripts will be automatically interrupt-
ed as soon as it reaches a breakpoint.
Program > Delete All Breakpoints (keyboard shortcut: Alt+F2)
Deletes all breakpoints in the script.
Detailed instructions about the above commands can be found in the section "Debugging scripts".
Commands in the Tools menu of the script editor
With the commands in the Tools menu of the script editor you can configure the editor.
Tools > Customize
Lets you configure the toolbars and keyboard mappings of the editor. You can read more about this in "Customizing
the toolbars of the script editor" und "Customizing the keyboard shortcuts of the script editor".
Tools > Options
Lets you control the settings of the editor. Read more about this in the section "Changing the preferences of the
script editor".
Changing the preferences of the script editor
Use the Tools > Options command to configure the script editor to suit your work habits.
The available settings are distributed on several dialog tabs:
View tab
Here you can change settings related to the appearance of scripts:
Typeface and Size
Lets you choose the font face and size to be used in the editor. It is recommended to choose a non proportional font
like "Courier New".
Tabs
Lets you adjust the width of tabs (in characters).
Show bookmarks
Normally, bookmarks are not visible in the script. However, if you enable this option, bookmarks will be displayed.
Details about the use of bookmarks can be found in the section "Bookmarks and the Go to... command".
General tab
Here you can change general settings:
Maximum number of undo steps
Lets you specify the number of actions that can be reversed with the Edit > Undo command.
Expand SmartText entries
When this option is enabled, SmartText entries can be expanded directly in the text. All you have to do is type the
abbreviation for the SmartText entry (e.g. "tma") and then press the space bar, Enter key or a punctuation key in
order to replace the abbreviation with the content of the SmartText entry. (See "Using SmartText".)
20 Using the script editor Manual BasicMaker
If this option is disabled, SmartText entries can be called out only with the Insert > SmartText command.
Document tabs
Lets you specify if document tabs should be displayed for each open window below the toolbar. (See TextMaker
manual, keyword "Document tabs" for details.)
Show document icon: If enabled, an icon indicating the file type is displayed on the left of each tab.
Show close button on inactive tabs: If enabled, an x button is displayed on the right of each tab. You can click this
button to close the corresponding window. If you deactivate this option, the x button is displayed in the tab for the
current window only.
Appearance tab
Here you can customize the user interface of BasicMaker:
Dialog style
Sets the general style of the program’s dialog boxes and toolbars. This does not change the way you use the soft-
ware, only the way it appears.
Dialog language
Lets you select the language to be used in menus and dialog boxes. The selections available here depend on what
alternative user interface languages were installed along with the program.
Show fonts in font list
When this option is enabled, the program renders the names of fonts that appear in font lists (e.g. in the preferences
dialog) using their corresponding fonts. This lets you see at a glance how each font looks like.
Show tooltips
Lets you specify whether or not tooltips should be displayed when you position the mouse pointer over certain
screen elements, for example a button in a toolbar.
Beep on errors
When this option is enabled, a sound plays when an error or warning message is to be displayed.
Use system file dialogs
This option controls the type of dialogs that appear when commands to open and save files are issued. If it is disa-
bled, then BasicMaker’s own file dialog will be displayed. If it is enabled, then the standard file dialog provided by
your operating system will be displayed.
Use large icons
When this option is enabled, larger icons are displayed in toolbars and menus.
Note: Changes to this setting become effective only after BasicMaker is restarted.
Smooth edges of screen fonts
When this option is enabled, BasicMaker uses a technology called "anti-aliasing" to smooth the edges of fonts and
improve their appearance on the screen.
Depending on your operating system, different options are available.
Workspace color
This option allows you to change the background color of document windows.
Files tab
Here you can change options concerning the opening and saving of files.
Manual BasicMaker Using the script editor 21
Auto recovery: Save state every ... minutes
When this option is enabled, BasicMaker automatically makes a temporary backup copy of every open script on a
periodic basis. You can enter a period of 1 to 100 minutes.
When you exit BasicMaker in the normal manner, these temporary backup copies are automatically deleted. Howev-
er, if BasicMaker is abruptly shut down by a power failure, for example, while you are working on open scripts,
these copies become available when the program is restarted. BasicMaker recognizes that there has been a failure
and offers to open the automatic backup copies of all scripts that had been modified but not saved just prior to the
failure.
You can then check each of the restored scripts to determine if any of the most recently made changes have actually
been lost, and then save them.
Open documents in new windows
If this option is checked, whenever you open a script using File > Open or File > New, a new document window
will be created. If it is unchecked, the current script will be closed and the new file will be opened in the same
window.
Recently used files in File menu
BasicMaker displays a list of the files most recently opened in it in the File menu. If you select an item on the list,
the corresponding file will be opened immediately. Using the Recently used files option you can specify the number
of files to be displayed in the list.
Backup
Here you can specify if the program should, whenever you save a script, automatically create a backup copy contain-
ing its previous version.
The dropdown list in this section offers the following options:
No backup
When you choose this option, no backup copy is created when you save a script. (Not recommended.)
Simple backup
Here, exactly one backup copy is created when you save a script. This copy contains the previous (i.e. last saved)
version of the script. It is saved as a file with the name extension .BAK, stored in the same folder as the script.
Advanced backup
With this option, multiple generations of backup copies are kept for each script. All of these copies are stored in a
special Backup folder.
Tip: When this option is selected, also the File > Revert to Previous Version command becomes available. It
provides a comfortable means of returning to a previous version of the current script.
Additional options:
Folder for backup files: Here you can change the location of the Backup folder in which all backup copies are
stored.
Number of backup files per document: Here you can specify the maximum number of backup copies (=
generations) to be kept for each document (= script).
More detailed information on the usage of backup copies can be found in the TextMaker manual, keyword “Backup
copy”.
Customizing the toolbars of the script editor
Toolbars, such as the Standard toolbar, provide quick access to the program’s functions. Each icon on a toolbar repre-
sents a particular command. When you click on an icon, the corresponding command is executed.
You can configure the toolbars by choosing the View > Toolbars command.
22 Using the script editor Manual BasicMaker
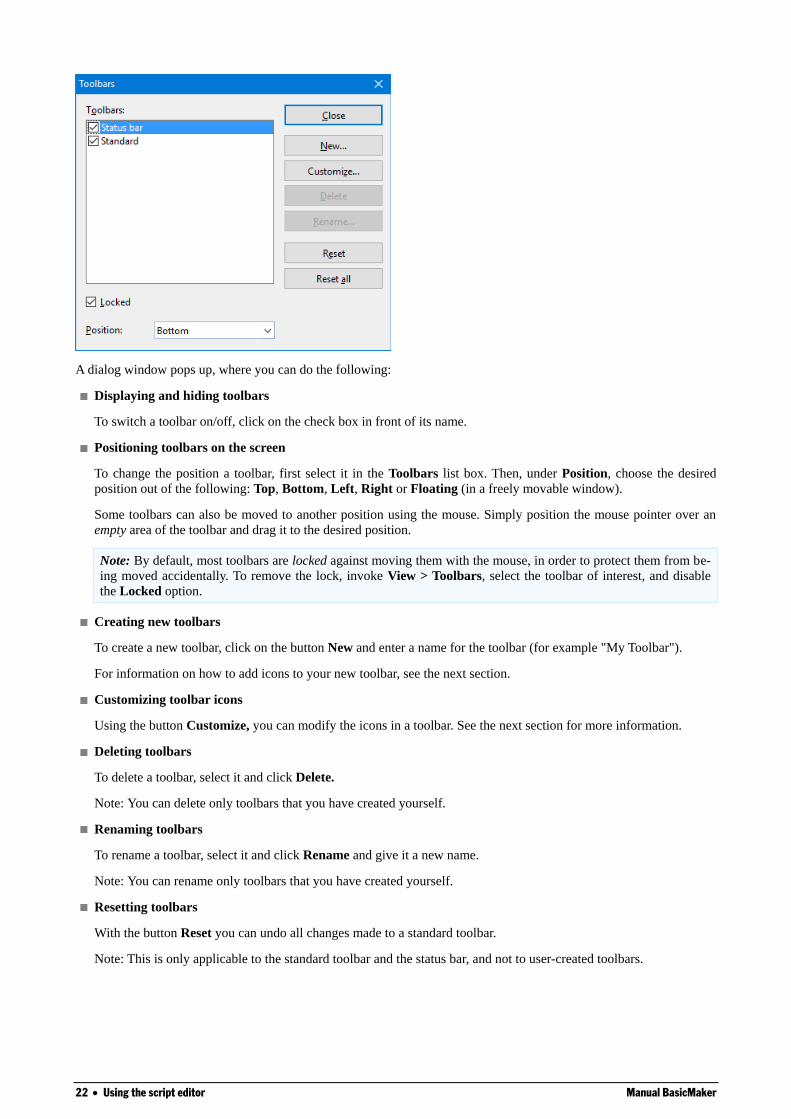
A dialog window pops up, where you can do the following:
Displaying and hiding toolbars
To switch a toolbar on/off, click on the check box in front of its name.
Positioning toolbars on the screen
To change the position a toolbar, first select it in the Toolbars list box. Then, under Position, choose the desired
position out of the following: Top, Bottom, Left, Right or Floating (in a freely movable window).
Some toolbars can also be moved to another position using the mouse. Simply position the mouse pointer over an
empty area of the toolbar and drag it to the desired position.
Note: By default, most toolbars are locked against moving them with the mouse, in order to protect them from be-
ing moved accidentally. To remove the lock, invoke View > Toolbars, select the toolbar of interest, and disable
the Locked option.
Creating new toolbars
To create a new toolbar, click on the button New and enter a name for the toolbar (for example "My Toolbar").
For information on how to add icons to your new toolbar, see the next section.
Customizing toolbar icons
Using the button Customize, you can modify the icons in a toolbar. See the next section for more information.
Deleting toolbars
To delete a toolbar, select it and click Delete.
Note: You can delete only toolbars that you have created yourself.
Renaming toolbars
To rename a toolbar, select it and click Rename and give it a new name.
Note: You can rename only toolbars that you have created yourself.
Resetting toolbars
With the button Reset you can undo all changes made to a standard toolbar.
Note: This is only applicable to the standard toolbar and the status bar, and not to user-created toolbars.
Manual BasicMaker Using the script editor 23
Customizing toolbar icons
You can edit the icons on a toolbar whenever you wish. Specifically, you can add, remove, and reposition the icons, and
you can also insert and remove separator lines.
This can be accomplished as follows:
1. Make sure that the toolbar to be edited is enabled. If it is not, invoke View > Toolbars and enable it.
2. Invoke the command Tools > Customize > Toolbars. Alternatively, you can invoke this command by clicking the
Customize button in the View > Toolbars dialog box.
3. Use one of the procedures described below to add, remove, or reposition an icon.
4. Exit the dialog by clicking on Close.
Tip: The Tools > Customize > Toolbars command can also be invoked from the context menu for toolbars or by
double clicking on an empty area in any of the toolbars.
When you invoke this command, a dialog box appears and presents a list of all the icons that are available for addition
to a toolbar.
The icons for the individual commands are organized under several categories to make them easier to find. If you select
a category in the Group list, all the available icons in that category will be displayed in the Command list.
Editing the icons in a toolbar can be accomplished as follows:
Adding an icon
Simply drag the icon with the mouse from the dialog box directly to the desired position on the toolbar.
Deleting an icon
Drag the icon off the toolbar (into the text, for example) to delete it.
Moving an icon
Drag the icon to the desired position in the toolbar with your mouse. When you drag an icon to a position between
two other icons, it is inserted there.
You can also drag an icon from one toolbar to another.
Inserting a separator line or space
If you drag an icon a small distance to the right, a separator line or space (depending on the operating system) will
be inserted to the left of the icon.
Removing a separator line or space
If you drag the icon that is to the immediate right of the separator line or space a little to the left, the separator or
space will be removed.
Customizing the keyboard shortcuts of the script editor
The most common commands of the script editor can be invoked using "keyboard shortcuts". For example, you can
execute the File > Save command very quickly by pressing the key combination (Ctrl)(S).
With the Tools > Customize > Keyboard Mappings command, these keyboard shortcuts can be customized, as
desired. You can assign new shortcuts to commands and change or delete existing shortcuts.
Activating a keyboard mapping
You can select which keyboard mapping to active as follows:
1. Invoke the command Tools > Customize > Keyboard Mappings.
2. Select the desired keyboard mapping.
24 Using the script editor Manual BasicMaker
3. Click on Apply to activate it.
Now the shortcuts defined in this keyboard mapping become available.
By default, the following two keyboard mappings are pre-defined:
Standard (the standard shortcuts)
Classic (a largely WordStar compatible keyboard mapping)
If necessary, you can modify either of these two standard mappings and also create your own keyboard mappings, as
covered below.
Creating a new keyboard mapping
The Tools > Customize > Keyboard mappings command allows you to build complete keyboard mappings. Thus, you
can set up different keyboard mappings to be used for different purposes, and switch between them as needed.
Note: If you simply want to add or change a few keyboard shortcuts, it is not necessary to set up your own keyboard
mapping. Simply click on the Edit button and modify the standard keyboard mapping itself.
To create a new keyboard mapping, complete the following steps:
1. Invoke the command Tools > Customize > Keyboard mappings.
2. Choose the existing keyboard mapping that you want to use as a basis for the new one.
Note: The new keyboard mapping will automatically be assigned all the keyboard shortcuts contained in the map-
ping you choose here.
3. Click the New button.
4. A dialog box appears and prompts you to enter a name for the new keyboard mapping. Enter, for example "My
keyboard mapping" and then confirm with OK.
The new keyboard mapping is now set up. Next a dialog appears to allow you to modify the shortcuts contained in it.
You will find information about this in the next section.
Renaming or deleting a keyboard mapping
These tasks are carried out as follows:
1. Invoke the Tools > Customize > Keyboard mappings command.
2. Select the keyboard mapping you want to delete or rename with a mouse click.
3. Click on Rename to give it a new name.
Or: Click on Delete to delete it.
You can rename or delete only keyboard mappings that you have created yourself. The predefined Standard and Clas-
sic mappings cannot be renamed or removed.
Changing shortcut keys of a keyboard layout
With the button Edit you can change the shortcut keys of a keyboard mapping. You will find information about this in
the next section.
Editing the shortcuts in a keyboard mapping
The Tools > Customize > Keyboard mappings command is not only for managing keyboard mappings. The most
important function of this command is the modification of the shortcuts contained in a mapping. The Edit button
handles this function.
Manual BasicMaker Using the script editor 25
Assigning a shortcut for a command
When you find that you are using one of the menu commands frequently, you can assign a shortcut for it, so that in the
future you will be able to execute it quickly with a simple keystroke combination.
As an example, we will assign the shortcut (F6) to the Edit > Select All command as follows.
1. Invoke the Tools > Customize > Keyboard mappings command.
2. If necessary, select the desired keyboard mapping (if you want to modify a keyboard mapping other than the one that
is currently activated).
3. Click on the Edit button.
4. Select a command category from the Group list. Then, from the Command list, select the command whose shortcut
you want to modify.
In our example, you would select "Edit" in the Group list and "Select All" from the Command list.
5. Click in the Please press accelerator field and then press the desired shortcut. In the example, you would press (F6).
Hint: If you make a typing mistake, you can always press the backspace key (æ__) to remove the keyboard
shortcut you entered.
6. Don’t forget: Click on Add to assign this shortcut to the command.
7. Confirm with OK, and exit the main dialog box with Close.
From now on, you can execute the Edit > Select All command with the key (F6).
Available keyboard shortcuts
Notice that some of the keystroke combinations that are possible on your keyboard are not allowed as shortcuts.
As a rule, you should use alphabetic keys, numeric keys or function keys for shortcuts. You can combine them with (Ctrl), (Alt) and/or the (Shiftª) key.
You can easily check to see if the key combination you want to use is allowed. Click in the Please press accelerator
field, and then try to enter your key combination. If it does not appear in the field, it is not allowed.
Some examples of valid keyboard shortcuts:
(Ctrl)(A)
(Alt)(A) (However, key combinations including the Alt key are not recommended, since they are usually occupied
by the main menu entries).
(Ctrl)(Alt)(A)
(Ctrl)(Shiftª)(A)
(Ctrl)(Alt)(Shiftª)(A)
(Ctrl)(F1)
etc.
Note: Alphabetic keys by themselves are not allowed. Thus, you cannot use (A) or (Shiftª)(A) as a shortcut.
Shortcut already assigned: If you press a shortcut that is already assigned, the current assignment will be shown just below
the entry field. You should press the Backspace key (æ__) to delete your shortcut and try a different shortcut.
Otherwise, you will overwrite the existing assignment for the shortcut.
Two part shortcuts: You can also use two part shortcuts (in accordance with the WordStar standard), for example, (Ctrl)(K)(X). However, in this case only shortcuts of the form "Ctrl + letter + letter" are allowed.
26 Using the script editor Manual BasicMaker
Removing a keyboard shortcut
Any time after assigning a shortcut to a command, you can undo your actions and remove the assignment.
To do this, proceed as follows:
1. Invoke, as described above, the Edit Keyboard Mapping dialog.
2. Select the command category from the Group list and then select the desired command from the Command list.
3. All the shortcuts currently assigned to this command appear in the Current shortcut keys field. Select the shortcut
you want to remove and click on the Remove button.
4. Confirm with OK, and exit the main dialog box with Close.
The shortcut is now removed, and the command cannot be invoked with this shortcut anymore.
Resetting the shortcuts of a keyboard layout
If you click on the Reset button in the dialog box of the Tools > Customize > Keyboard mappings command, all the
shortcuts of the selected keyboard mapping will be reset to their default settings.
Note: During this process, all modifications that you have made to the shortcuts in this keyboard mapping are lost.
This function is applicable only to the pre-defined keyboard mappings, Standard and Classic.
Commands in the Window menu of the script editor
In the Window menu of the script editor, the following commands are available:
Window > Cascade
Arranges all presently opened windows one behind another.
Window > Tile Vertically
Arranges the windows next to each other.
Window > Tile Horizontally
Arranges the windows one below another.
Window > Arrange Icons
Arranges the icons of all the minimized windows in the bottom left corner of the program window.
Window > Close All
Closes all windows that are currently open.
Window > Document Tabs
Specifies if document tabs for each open window should be displayed below the toolbar. (For details, see TextMaker
manual, keyword "Document tabs".)
Window list in the Window menu
Lists all currently opened windows. If you click on an entry, the corresponding window will become the active
window.
Manual BasicMaker Using the script editor 27
Starting scripts
BASIC scripts can be started from BasicMaker, TextMaker, or from PlanMaker:
Starting from BasicMaker
To run a script, in BasicMaker click on Program > Start or press the shortcut key F9.
Starting from TextMaker/PlanMaker
You can also start a script from TextMaker or PlanMaker. In TextMaker/PlanMaker choose the command Tools >
Run Script . A file dialog appears. Choose a script, confirm with OK, and the script will be executed.
The same happens when you invoke BasicMaker using the command basicmaker /s scriptname.bas. BasicMaker
will start, run the specified script, and then close.
Aborting running scripts
You can abort scripts once they are running by pressing the key combination (Ctrl)(Break). (If another application has
the focus, you must switch to the BasicMaker application window beforehand.)
Debugging scripts
The script editor comes with functions that are very useful for finding and fixing errors ("debugging" scripts):
Running a script step by step
Using breakpoints
Watching variables
Running a script step by step
The following commands enable you to run a script step by step:
Program > Trace Into (keyboard shortcut: F7)
If you use Program > Trace Into, only a single line of the script is carried out and then the process is stopped. If you
invoke this command again, then the next line will run, then pause again – etc.
Therefore, you can run a script line by line in single steps.
Program > Step Over (keyboard shortcut: F8)
By using Program > Step Over only one part of the script will be run, then it will be paused.
The difference between this and Trace Into: Procedures are not processed line by line, but as a whole.
Explanation: If you invoke a procedure (a function or a sub) in your code, then Trace Into will go into this procedure,
run the first line, and then wait. Step Over will treat the whole function/sub as a single piece and process it completely
in one go before pausing.
Program > Reset (keyboard shortcut: Ctrl+F2)
The command Program > Reset will break the step by step execution and set the script back to the first line.
28 Using the script editor Manual BasicMaker
Using breakpoints
If you place a breakpoint in a line of your script and then run the script, it will stop at this line.
To continue with the execution of the program afterwards, choose Program > Start or alternatively invoke Program >
Trace Into or Program > Step Over to continue execution step by step.
The following commands are available for working with breakpoints:
Program > Insert/Delete Breakpoint (keyboard shortcut: F2)
Places or removes a breakpoint in the current line.
Program > Delete All Breakpoints (keyboard shortcut: Alt+F2)
Deletes all previously set breakpoints.
Watching variables
Use the watch window to view the content of variables during the execution of a script. This is especially useful when
running a script step by step.
In order to watch a variable, do the following:
1. If the watch window is currently not visible, activate it by using View > Watch Window.
2. In the script, click on the name of the variable that you want to watch. Then, do a right-click to open the context
menu and choose Show Variable from it.
Hint: You can also simply type in the name of the variable in watch window.
3. Start the script with Program > Start or alternatively Program > Trace Into or Program > Step Over.
The content of the variable will be shown in the watch window and be constantly updated.
Using the dialog editor
In this section, the operation of the dialog editor included in BasicMaker is explained.
The following topics are covered:
General information
Opening/closing the dialog editor
Commands in the File menu of the dialog editor
Commands in the Edit menu of the dialog editor
Commands in the Insert menu of the dialog editor
General information
In SoftMaker Basic, you can build dialog boxes in order to allow your scripts interaction with the user.
To create a dialog box, you must define a dialog. The dialog definition can either be entered manually in the script (see
section "Dialog definition") or you can use the dialog editor for this (see next section).
Manual BasicMaker Using the script editor 29
The dialog editor provides a graphical user interface for creating dialogs. You can insert dialogs controls using the
toolbar or the commands in the Insert menu of the dialog editor. Existing elements can be moved and resized just like
with a drawing program, and their properties can be changed through the Edit menu.
See the next pages for details.
Opening/closing the dialog editor
The dialog editor can be opened using the command Edit > Edit Dialogs, as follows:
Creating a new dialog
To create a new dialog box, with help from the dialog editor, the following steps are necessary:
1. In the source code, place the text cursor at the position where the dialog definition should go (BeginDialog ...
EndDialog).
2. Choose the Edit > Edit Dialogs command.
3. Click on the New button.
4. The dialog editor will start and you can now design the dialog. (Information about using the dialog editor can be
found in the sections that follow).
5. When the dialog is completed, close the dialog editor with File > Exit.
6. Leave the dialog window by clicking Close.
The dialog definition is now inserted into the source code.
Editing an existing dialog
To edit an existing dialog definition, the following steps are necessary:
1. Choose the Edit > Edit Dialogs command.
2. Choose the dialog that you want to edit from the list.
3. Click on the Edit button.
4. The dialog editor will be started and you can edit the dialog.
5. When all changes have been made, end the dialog editor with: File > Exit.
6. Close the dialog box with Close.
The dialog definition is changed accordingly in the source code.
Deleting an existing dialog
To delete a dialog definition, you can remove it by hand from the source code or go to Edit > Edit Dialogs, select the
dialog in the list and click the Delete button.
Commands in the File menu of the dialog editor
The commands in the File menu of the dialog editor have the following functions:
File > Reset Dialog
Resets all changes made to the dialog that you are currently editing.
30 Using the script editor Manual BasicMaker
File > Abort
Exits the dialog editor – without storing your changes.
File > Exit
Stores your changes and exits the dialog editor.
Commands in the Edit menu of the dialog editor
The Edit menu of the dialog editor provides commands for editing dialog elements.
For many of these commands you first have to select the dialog element that you want to change. To select an object,
click on it. To select multiple objects, click on them successively while holding down the Shift key or draw a rectangle
around them with the mouse.
Edit > Cut
Cuts out dialog elements and puts them into the clipboard.
Edit > Copy
Copies dialog elements into the clipboard.
Edit > Paste
Inserts the content of the clipboard.
Edit > Delete
Deletes dialog elements.
Edit > Delete All
Deletes all dialog elements in the dialog.
Edit > Snap to grid
Aligns dialog elements on a grid. The grid size can be adjusted with the command Edit > Grid.
Edit > Bring to Front
If you have overlapping dialog elements, this command brings the selected element to the foreground.
Edit > Send to Back
If you have overlapping dialog elements, this command send the selected element to the background.
Edit > Alignment
Changes the alignment of the currently selected dialog elements. Options available:
No change: No change is made.
Left: Aligns the elements to the left border of the leftmost element.
Center: Aligns the elements to their horizontal center.
Right: Aligns the elements to the right border of the rightmost element.
Space evenly: Spaces the elements evenly between the left border of the leftmost and the right border of the
rightmost element.
Centered in window: Centers the elements within the dialog window.
The settings in the Vertical column work accordingly.
Edit > Size
Changes the size of the currently selected dialog elements. Options available:
Manual BasicMaker Using the script editor 31
No change: No change is made.
Minimum width: The width is adapted to that of the narrowest marked item.
Maximum width: The width is adapted to that of the widest marked item.
Value: The width is set to a fixed value (entered in screen pixels).
The settings in the Height column work accordingly.
Edit > Grid
Here you can configure the grid. The grid is a positioning aide for dialog elements. When it is enabled, elements
cannot be shifted to arbitrary positions; instead they snap from one grid point to the next. Options available:
Show Grid: Determines if grid points should be displayed (in the dialog editor).
Snap to grid: Determines if the grid is activate.
X and Y increment: Determines the distance of the grid points.
Hint: To fit elements on the grid that have already been inserted, use the Edit > Snap to Grid command.
Commands in the Insert menu of the dialog editor
With the commands in the Insert menu of the dialog editor, you can add new elements to a dialog box. Alternatively,
you can use the following tools on the toolbar, or the keys F2 to F10:
Dialog element Tool Key
OK button
F2
Cancel button
F3
Button
F4
Radio button
F5
Check box
F6
Text
F7
Input box
F8
Group box
F9
List box
F10
Combo box
Drop-down list
First, choose which kind of dialog element you want to insert. Then, in the dialog box drag a frame with the desired size
and position.
Detailed information on each dialog element can be found in the section "Controls of a dialog box".
32 Language elements of SoftMaker Basic Manual BasicMaker
Language elements of SoftMaker Basic In this section you will find basic information about the commands that can be used in BasicMaker scripts:
Syntax fundamentals
Data types
Variables
Arrays
Operators
Flow control
Subroutines and functions
Calling functions in DLLs
File operations
Dialog boxes
OLE Automation
Syntax fundamentals
Comments
Text that is preceded by the keyword Rem or an apostrophe (') will be seen as comments and not executed. You can use
comments to annotate your scripts.
'This is a comment
rem This too
REM This too
Rem This too
As you can see, the Rem instruction is not case-sensitive. This is the same with all keywords in SoftMaker Basic.
Comments can also be placed at the end of a line:
MsgBox Msg ' Display Message
The text after the apostrophe is a comment.
Multiple instructions in a line
You can place several instructions on the same line, separating them by colons:
X.AddPoint(25,100) : Y.AddPoint(0,75)
... is identical to...
X.AddPoint(25,100)
Y.AddPoint(0,75)
Instructions spanning several lines
You can make an instruction span several lines by ending each line except the last with a space and an underscore (_).
Print _
Manual BasicMaker Language elements of SoftMaker Basic 33
"Hello!"
... is identical to ...
Print "Hello!"
Numbers
You can write numbers in three different ways: in decimal, in octal, and in hexadecimal:
Decimal numbers: Most of the examples in this manual employ decimal numbers (base 10).
Octal numbers: If you would like to use octal numbers (base 8), place &O in front of the number – for example
&O37.
Hexadecimal numbers: For hexadecimal numbers (base 16), use the prefix &H – for example &H1F.
Names
Variables, constants, subroutines and functions are addressed by their names. The following naming conventions apply:
Only the letters A-Z and a-z, underscores (_) and the digits 0-9 are allowed.
Names are not case-sensitive.
The first letter of a name must always be a letter.
The length may not exceed 40 characters.
Keywords of SoftMaker Basic may not be used.
Data types
The following data types are available:
Type Suffix Syntax of the declaration Size
String $ Dim <Name> As String 0 to 65,500 characters
String*n Dim <Name> As String*n Exactly n characters
Integer % Dim <Name> As Integer 2 bytes
Long & Dim <Name> As Long 4 bytes
Single ! Dim <Name> As Single 4 bytes
Double # Dim <Name> As Double 8 bytes
Boolean Dim <Name> As Boolean 2 bytes
Variant Dim <Name> As Variant Depends on contents
Or: Dim <Name> As Any
Or simply: Dim <Name>
Object (see section "OLE Automation")
User-defined (see section "User-defined data types")
Information on using variables can be found in the section "Variables".

34 Language elements of SoftMaker Basic Manual BasicMaker
Special behavior of the Variant data type
In SoftMaker Basic, a variable does not necessarily have to be declared before it is used for the first time. (Exception: if
Option Explicit was set.) SoftMaker Basic will automatically declare the variable on its first occurrence – as a special
data type called Variant.
The Variant data type can be used to store either numbers or character strings or date/time values. Type conversion is
performed automatically whenever needed.
You can also explicitly declare variables to be of the variant type, for example with Dim x As Variant or simply
with Dim x.
An example for the use of variant variables:
Sub Main
Dim x 'Variant variable
x = 10
x = x + 8
x = "F" & x
print x 'Result: "F18"
End Sub
When numbers are stored in a variant variable, SoftMaker Basic automatically chooses the most compact data type
possible. As a result, numbers will be represented as one of the following (in this order): Integer, Long, Single, Double.
The data type used by a variant variable can change at any time. To determine the current data type, the function
VarType can be used. Also, the function IsNumeric lets you test if the variable currently has a numeric value.
Variant variables can take two special values which are not available in other data types:
Empty is the value of a variant variable that has not yet been initialized. This value can be tested against with the
function IsEmpty. In numeric operations, Empty variables evaluate to 0; in string operations, they return an empty
string.
The value Null serves to signal the fact that no (valid) value is available. It can be tested against with the function
IsNull. Every operation with a Null value returns a Null value again.
Concatenating Variant variables
If you use the + operator on a text string and a number, the result will be a text string.
If you use the + operator on two numbers, the result will be a number. If you wish to receive a text string instead, use
the & operator in place of +. This operator will always return a text string, independent of the data type.
User-defined data types
The Type instruction allows you to define your own data types. This must happen before any procedures are declared,
since user-defined data types are always in global scope. The variables of a user-defined type can however be declared
locally or globally.
Note: The use of arrays in user-defined types is not allowed. Furthermore, user-defined variable types cannot be passed
to DLLs that expect C structures.
Type Person
LastName As String
FirstName As String
Gender As String*1 ' ("m" or "f")
Birthday As String
End Type
You can declare variables based on such a definition with Dim or Static, like you do with any other variable. Its indi-
vidual elements can be accessed using the dot notation Variable.Element (see also With instruction).
Example:
Dim p As Person
Manual BasicMaker Language elements of SoftMaker Basic 35
p.LastName = "Smith"
Variables
Declaring variables
Variables can be declared with the instructions Dim or Static. By default, variables are of the variant type. If another
data type is desired, you must specify this by appending As Type or by means of a type suffix (e.g. % for Integer, see
section "Data types").
Dim X ' Declares X as a variant
Dim X As Integer ' Declares X as an integer
Dim X% ' Same as the above instruction
Dim X%, Name$ ' Several declarations in a single line
Scope of variables
Variables can be either local or global:
Global variables are created using the Dim instruction outside of all procedures. They can be accessed everywhere
in your program.
Local variables are created using the Dim or the Static instruction inside a procedure (subroutine or function). They
are only valid within that specific procedure.
Arrays
SoftMaker Basic supports one- and multi-dimensional arrays. In arrays, series of values can be stored under a uniform
name. Each value can be accessed by an index.
All elements in an array have the same data type. The following data types are allowed: Integer, Long, Single, Double
or String.
Note: In some Basic variants, arrays can be used without previous declaration. In SoftMaker Basic, this is not allowed.
Arrays must be declared before their first use, using either Dim or Static.
To set the size of an array, you indicate the upper limit (and optionally the lower limit) for the index. Only fixed values
are allowed (no variables).
If the lower limit is omitted, the value defined by the Option Base instruction is taken – by default, this is zero.
Dim a(10) As Integer 'a(0)..a(10)
Dim b(-10 To 10) As Double 'b(-10)..b(10)
You can use loops to efficiently access the elements of arrays. For example, the following For loop initializes all ele-
ments of the array "A" with 1:
Static A (1 To 20) As Integer
Dim i As Integer
For i = 1 To 20
A (i) = 1
Next i
Multi-dimensional arrays
Arrays can also have multiple dimensions, for example:

36 Language elements of SoftMaker Basic Manual BasicMaker
Static a(10, 10) As Double 'two-dimensional
Dim b(5, 3, 2) 'three-dimensional
Operators
SoftMaker Basic supports the following operators:
Arithmetic operators
Operator Function Example
+ Addition x = a + b
- Subtraction x = a - b
also: Negation x = -a
* Multiplication x = a * 3
/ Division x = a / b
Mod Modulo x = a Mod b%
^ Exponentiation x = a ^ b
String operators
Operator Function Example
+ Concatenation x = "Good " + "Day"
& Concatenation x = "Good " & "Day"
The difference between the operators + and & is in the handling of variant variables that contain numbers: the + opera-
tor adds these numbers, whereas the & operator concatenates them as strings (see example).
Example:
Sub Main
Dim a, b as Any ' 2 variant variables
a = 2
b = 3
print a + b ' Returns the number 5
print a & b ' Returns the string "23"
End Sub
Logical operators
Operator Function Example
< Less than If x < y Then ...
<= Less than or equal to If x <= y Then ...
= Equal to If x = y Then ...
>= Greater than or equal to If x >= y Then ...
> Greater than If x > y Then ...
<> Not equal to If x <> y Then ...
The result of comparisons with these operators is an Integer value:
-1 (True) if the condition applies
Manual BasicMaker Language elements of SoftMaker Basic 37
0 (False) if the condition does not apply
Logical and bitwise operators
Operator Function Example
Not Negation If Not (x = a) Then ...
And And If (x > a) And (x < b) Then ...
Or Or If (x = y) Or (x = z) Then ...
These operators work bitwise. This means that you can use them for logic testing as well as for bitwise operations.
Precedence of operators
Operators are processed in the following order:
Operator Function Precedence
( ) Parentheses Highest
^ Exponentiation
+ - Positive/negative sign
/ * Division/multiplication
+ - Addition/subtraction
Mod Modulo
= <> > < <= >= Logical operators
Not Negation
And And
Or Or Lowest
Flow control
SoftMaker Basic provides a number of commands that can be used to control the program flow in scripts. For example,
there are instructions that perform, skip or repeat instructions depending on a condition.
The following flow control instructions are available:
Goto branches
Goto Label1
.
.
.
Label1:
The Goto instruction performs an unconditional jump the specified label – in the above example to the label "Label1".
Gosub branches
Gosub Label1
.
.
.
38 Language elements of SoftMaker Basic Manual BasicMaker
Label1:
Instruction(s)...
Return
The Gosub instruction also performs an unconditional jump to the specified label, but unlike the Goto instruction, the
script returns to the calling place as soon as a Return instruction is encountered.
Do loops
With a Do ... Loop loop, a group of instructions can be run multiple times. There are the following variations:
Do While|Until Condition
Instruction(s)...
[Exit Do]
Instruction(s)...
Loop
Or:
Do
Instruction(s)...
Loop While|Until Condition
The difference is this:
Do While and Do Until check the condition before beginning the execution of the instruction(s) inside the loop. These
will be executed only if the condition is true.
With Do ... Loop While and Do ... Loop Until, the condition is checked after the loop has been executed for the first
time. This means that the instruction(s) inside the loop are carried out at least once.
While loops
While ... Wend loops are identical to Do While ... Loop loops. The condition is also checked before the first execution
of the instruction(s) in the loop.
While Condition
Instruction(s)...
Wend
For ... Next loops
A For ... Next loop repeats instructions for an exact number of times. With every pass through the loop, a counter is
increased (or decreased) by the given increment. If no increment is specified, the value 1 (one) will be used as incre-
ment.
For number = StartValue To EndValue [Step Increment]
Instruction(s)...
Next
If branches
In an If ... Then block, instructions are only carried out if the specified condition is matched. This condition must be an
expression that returns either True or False (for example If a<b Then ...).
An If ... Then block can be comprised of one or more lines. If it extends over multiple lines, it must be ended with an
End If instruction.
If Condition Then Instruction(s)... ' One line syntax
Or:
If Condition Then ' Multiple lines syntax
Instructions...
End If
Manual BasicMaker Language elements of SoftMaker Basic 39
A variation of this are If ... Then ... Else constructs. Here, the instructions after Else are executed if the condition is not
true.
If Condition Then
Instruction(s)...
Else
Instruction(s)...
End If
Further branches can be achieved by chaining multiple If ... Then ... ElseIf instructions together. However, this may
lead to untidy code, and for this reason it is recommended to use the Select Case instruction for such cases instead (see
below).
If Condition Then
Instruction(s)...
ElseIf Condition Then
Instruction(s)...
Else
Instruction(s)...
End If
Select Case branches
In a Select Case construct, a variable is checked against certain values.
Select Case Variable
Case Value1
Instruction(s)...
Case Value2
Instruction(s)...
Case Value3
Instruction(s)...
[Case Else
Instruction(s)...]
End Select
If the variable contains, for example, the value "Value1", the instructions below Case Value1 will be executed. If it has
none of the specified values, the code will jump to the instructions below Case Else (if given; otherwise the structure
will simply be exited from.)
Subroutines and functions
You can define your own functions and subroutines and use them like the built-in functions and instructions that Soft-
Maker Basic already has. Furthermore, it is possible to call functions that reside in DLLs.
User-defined subroutines can be defined with the Sub instruction.
User-defined functions can be defined with the Function instruction.
Functions in DLLs can be declared with the Declare instruction (see section "Calling functions in DLLs").
Notes on the naming of subroutines and functions
Names for subroutines and functions may contain the letters A-Z and a-z, underscores (_) and the digits 0-9. The first
characters must always be a letter. Names may not have more than 40 characters and may not be identical to SoftMaker
Basic keywords.
Passing parameters via ByRef or ByVal
Parameters can be passed to procedures either by reference (ByRef) or by value (ByVal):
40 Language elements of SoftMaker Basic Manual BasicMaker
ByRef
The ByRef ("by reference") keyword indicates that a parameter is passed in such a way that the called procedure can
change the value of the underlying variable. When the script returns from the procedure, the variable that was passed
to the procedure has the new value.
ByRef is the default method for passing parameters and therefore does not have to be explicitly specified. Sub
Test(j As Integer) is the same as Sub Test(ByRef j As Integer).
ByVal
With ByVal ("by value") the procedure merely obtains a copy of the variable, so that changes of the parameter
inside the procedure do not affect the specified variable.
To pass a parameter by value, place the keyword ByVal in front of the parameter: Sub Joe(ByVal j As
Integer).
Alternatively, you can achieve this by passing the parameter in parentheses. Here, for example, the parameter Var3 is
passed by value:
SubOne Var1, Var2, (Var3)
Calling functions in DLLs
Before you can execute functions that are stored in DLLs, you must declare them with the Declare instruction. If the
desired procedure does not return a value, you should declare it with a Sub instruction, else use a Function instruction.
Example:
Declare Function GetPrivateProfileString Lib "Kernel32" (ByVal lpApplicationName As
String, ByVal lpKeyName As String, ByVal lpDefault As String, ByVal lpReturnedString As
String, ByVal nSize As Integer, ByVal lpFileName As String) As Integer
Declare Sub InvertRect Lib "User32" (ByVal hDC As Integer, aRect As Rectangle)
Once the procedure has been declared, it can be used like any other BASIC function or command.
File operations
In SoftMaker Basic, you have access to all the usual file operations. Below is a small example. Further information of
particular instructions can be found in the chapter "Commands and functions from A to Z".
Example:
Sub FileIO_Example
Dim Msg ' Declare variables
Call Make3Files()
Msg = "Three test files have been created. "
Msg = Msg & "Press OK to delete them."
MsgBox Msg
For I = 1 To 3
Kill "TEST" & I ' Delete files again
Next I
End Sub
Sub Make3Files
Dim I, FNum, Fname
For I = 1 To 3
FNum = FreeFile ' Get the next free file number
FName = "TEST" & FNum
Open FName For Output As FNum ' Open the file
Print #I, "This is test #" & I ' Write to the file
Print #I, "Here is another "; "line"; I
Next I
Manual BasicMaker Language elements of SoftMaker Basic 41
Close ' Close all files
End Sub
Dialog boxes
You can define your own dialog boxes and then show and evaluate them with the Dialog function.
Dialogs can be created either by manually entering their contents in a dialog definition or through use of the built-in
dialog editor.
A dialog can optionally be connected to a Dialog Function, which allows you to dynamically enable and disable dialog
controls and even makes it possible to create nested dialogs.
Dialog definition
To create a dialog box, you need to insert a dialog definition in the script. You can use either the built-in dialog editor
(see section "Using the dialog editor") or enter the dialog definition manually.
On the next pages, we will have a closer look at dialog definitions.
Syntax of a dialog definition
Dialog definitions must be surrounded by the instructions Begin Dialog and End Dialog:
Begin Dialog DialogName [X, Y,] Width, Height, Title$ [,.DialogFunction]
' Define your dialog controls here
End Dialog
The individual parameters have the following meaning:
Parameter Description
DialogName Name of the dialog definition. After you have set up the dialog definition, you can declare a variable of
this type (Dim Name As DialogName).
X, Y Optional. Sets the screen coordinates for the upper left corner of the dialog box (in screen pixels).
Width, Height Sets the width and height of the dialog (in screen pixels)
Title$ The title of the dialog – will be shown in the title bar of the dialog.
.DialogFunction Optional. The dialog function for this dialog. Allows you to dynamically enable and disable dialog
controls while the dialog is displayed and makes it possible to create nested dialogs (see the section "The
dialog function").
Inside the dialog definition, you can define the dialog controls that you want to display. Use the keywords covered on
the next pages for this.
Example:
Sub Main
Begin Dialog QuitDialogTemplate 16,32,116,64,"Quit?"
Text 4,8,108,8,"Would you like to quit the program?"
CheckBox 32,24,63,8,"Save Changes",.SaveChanges
OKButton 12,40,40,14
CancelButton 60,40,40,14
End Dialog
Dim QuitDialog As QuitDialogTemplate
rc% = Dialog(QuitDialog)
' Here you can evaluate the result (rc%) of the dialog
End Sub
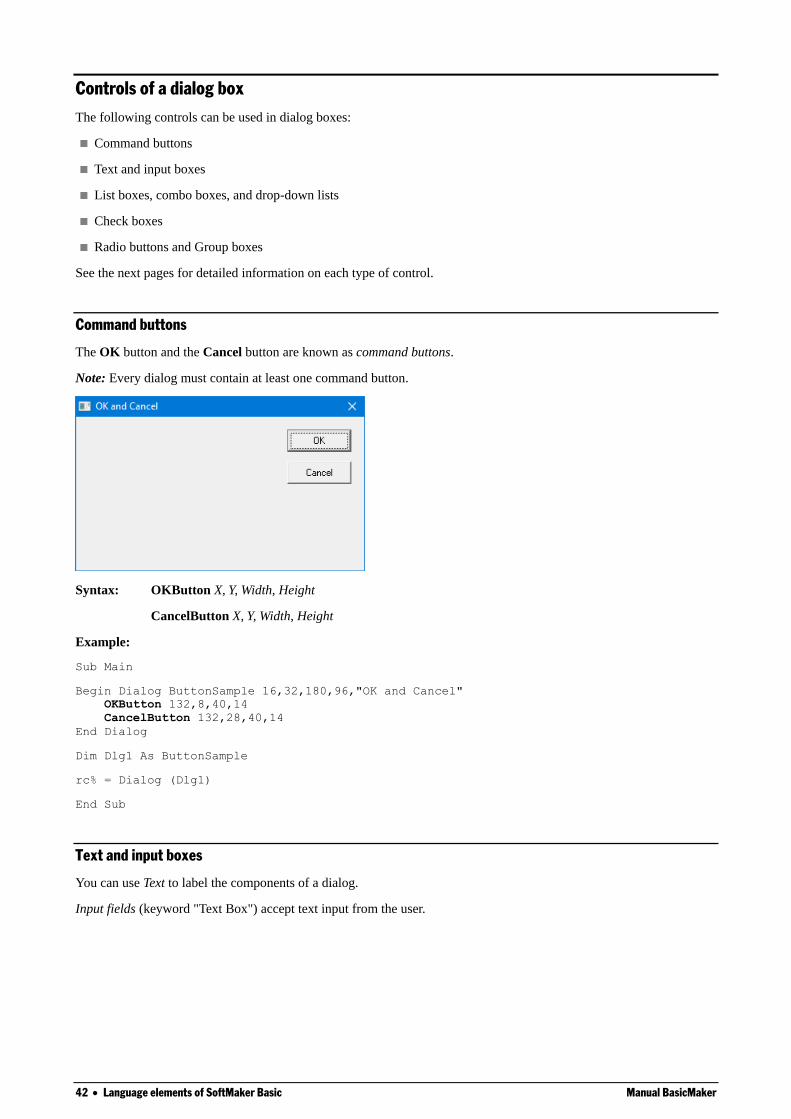
42 Language elements of SoftMaker Basic Manual BasicMaker
Controls of a dialog box
The following controls can be used in dialog boxes:
Command buttons
Text and input boxes
List boxes, combo boxes, and drop-down lists
Check boxes
Radio buttons and Group boxes
See the next pages for detailed information on each type of control.
Command buttons
The OK button and the Cancel button are known as command buttons.
Note: Every dialog must contain at least one command button.
Syntax: OKButton X, Y, Width, Height
CancelButton X, Y, Width, Height
Example:
Sub Main
Begin Dialog ButtonSample 16,32,180,96,"OK and Cancel"
OKButton 132,8,40,14
CancelButton 132,28,40,14
End Dialog
Dim Dlg1 As ButtonSample
rc% = Dialog (Dlg1)
End Sub
Text and input boxes
You can use Text to label the components of a dialog.
Input fields (keyword "Text Box") accept text input from the user.
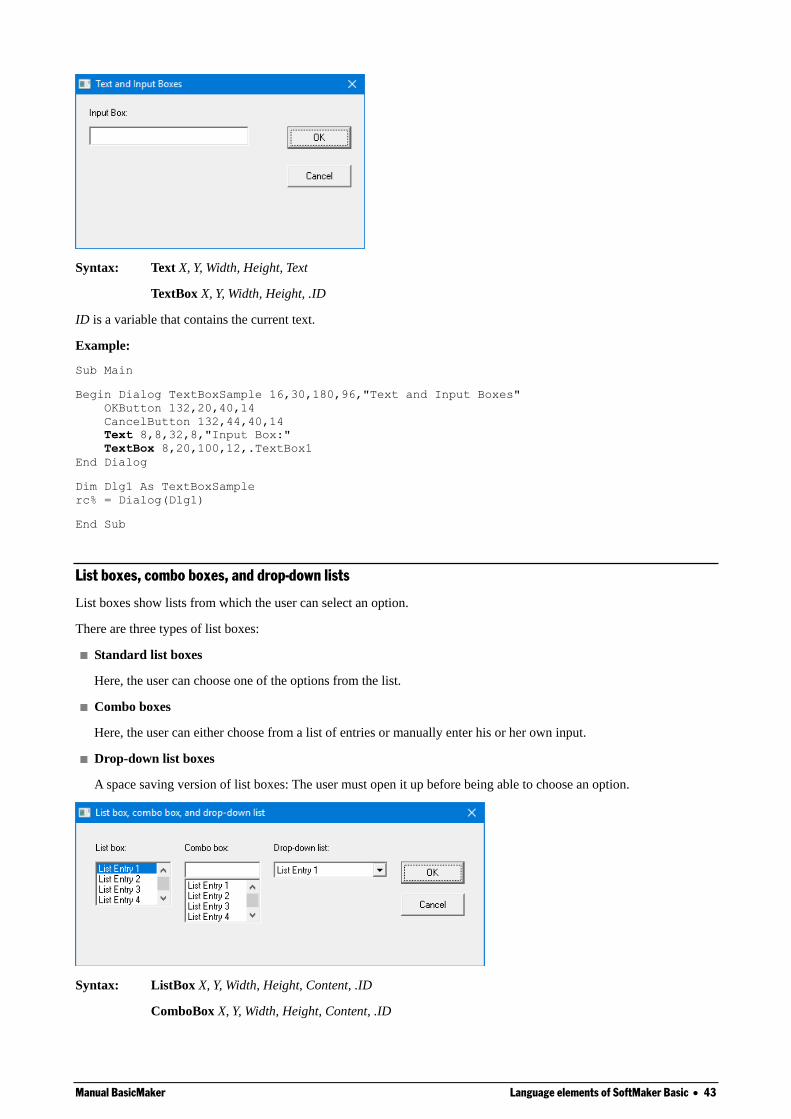
Manual BasicMaker Language elements of SoftMaker Basic 43
Syntax: Text X, Y, Width, Height, Text
TextBox X, Y, Width, Height, .ID
ID is a variable that contains the current text.
Example:
Sub Main
Begin Dialog TextBoxSample 16,30,180,96,"Text and Input Boxes"
OKButton 132,20,40,14
CancelButton 132,44,40,14
Text 8,8,32,8,"Input Box:"
TextBox 8,20,100,12,.TextBox1
End Dialog
Dim Dlg1 As TextBoxSample
rc% = Dialog(Dlg1)
End Sub
List boxes, combo boxes, and drop-down lists
List boxes show lists from which the user can select an option.
There are three types of list boxes:
Standard list boxes
Here, the user can choose one of the options from the list.
Combo boxes
Here, the user can either choose from a list of entries or manually enter his or her own input.
Drop-down list boxes
A space saving version of list boxes: The user must open it up before being able to choose an option.
Syntax: ListBox X, Y, Width, Height, Content, .ID
ComboBox X, Y, Width, Height, Content, .ID
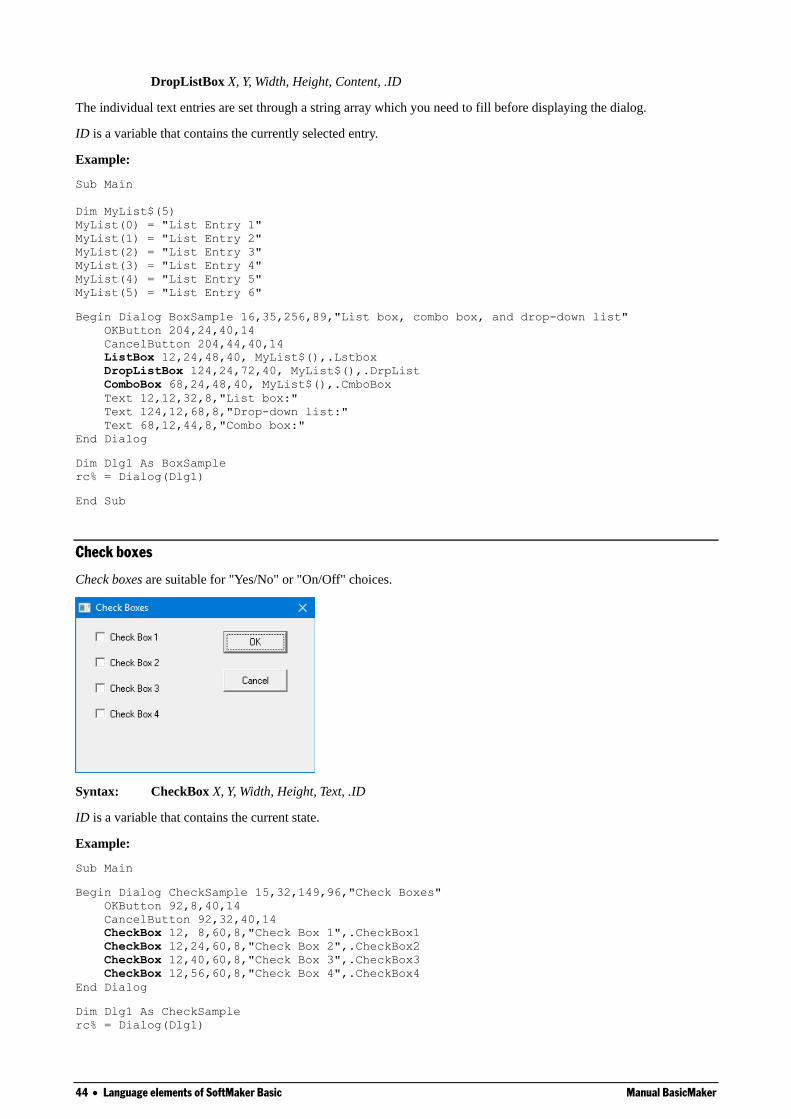
44 Language elements of SoftMaker Basic Manual BasicMaker
DropListBox X, Y, Width, Height, Content, .ID
The individual text entries are set through a string array which you need to fill before displaying the dialog.
ID is a variable that contains the currently selected entry.
Example:
Sub Main
Dim MyList$(5)
MyList(0) = "List Entry 1"
MyList(1) = "List Entry 2"
MyList(2) = "List Entry 3"
MyList(3) = "List Entry 4"
MyList(4) = "List Entry 5"
MyList(5) = "List Entry 6"
Begin Dialog BoxSample 16,35,256,89,"List box, combo box, and drop-down list"
OKButton 204,24,40,14
CancelButton 204,44,40,14
ListBox 12,24,48,40, MyList$(),.Lstbox
DropListBox 124,24,72,40, MyList$(),.DrpList
ComboBox 68,24,48,40, MyList$(),.CmboBox
Text 12,12,32,8,"List box:"
Text 124,12,68,8,"Drop-down list:"
Text 68,12,44,8,"Combo box:"
End Dialog
Dim Dlg1 As BoxSample
rc% = Dialog(Dlg1)
End Sub
Check boxes
Check boxes are suitable for "Yes/No" or "On/Off" choices.
Syntax: CheckBox X, Y, Width, Height, Text, .ID
ID is a variable that contains the current state.
Example:
Sub Main
Begin Dialog CheckSample 15,32,149,96,"Check Boxes"
OKButton 92,8,40,14
CancelButton 92,32,40,14
CheckBox 12, 8,60,8,"Check Box 1",.CheckBox1
CheckBox 12,24,60,8,"Check Box 2",.CheckBox2
CheckBox 12,40,60,8,"Check Box 3",.CheckBox3
CheckBox 12,56,60,8,"Check Box 4",.CheckBox4
End Dialog
Dim Dlg1 As CheckSample
rc% = Dialog(Dlg1)
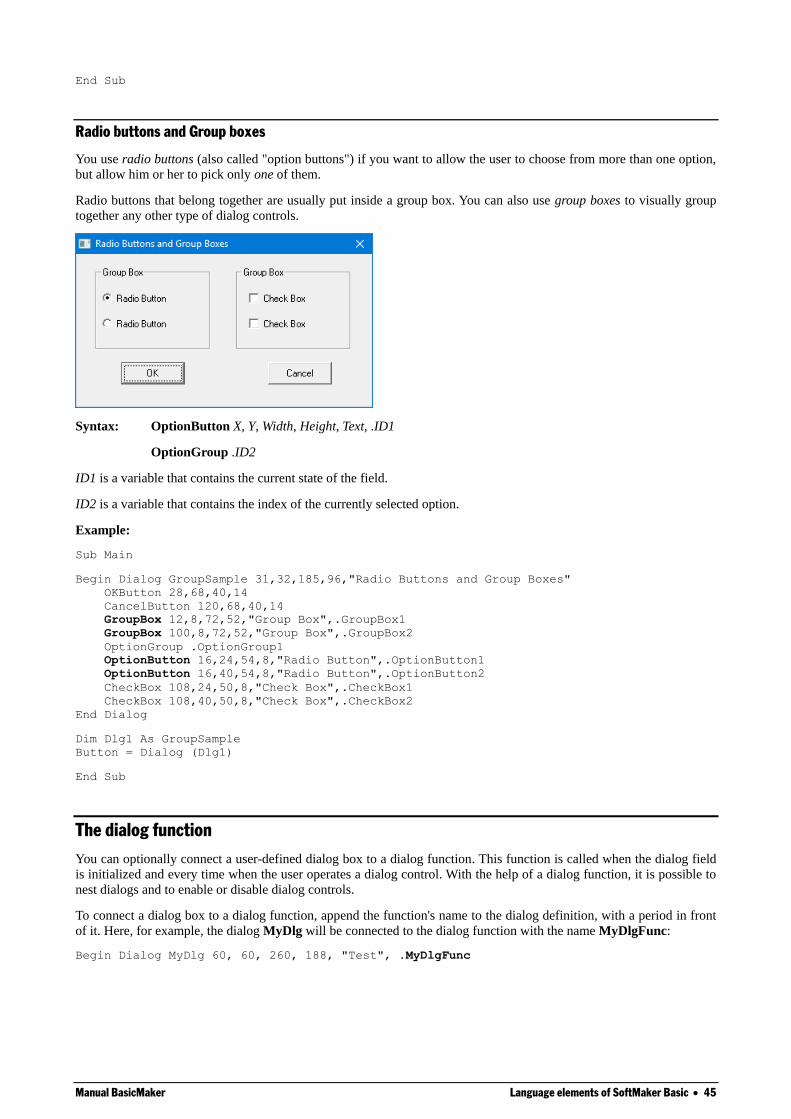
Manual BasicMaker Language elements of SoftMaker Basic 45
End Sub
Radio buttons and Group boxes
You use radio buttons (also called "option buttons") if you want to allow the user to choose from more than one option,
but allow him or her to pick only one of them.
Radio buttons that belong together are usually put inside a group box. You can also use group boxes to visually group
together any other type of dialog controls.
Syntax: OptionButton X, Y, Width, Height, Text, .ID1
OptionGroup .ID2
ID1 is a variable that contains the current state of the field.
ID2 is a variable that contains the index of the currently selected option.
Example:
Sub Main
Begin Dialog GroupSample 31,32,185,96,"Radio Buttons and Group Boxes"
OKButton 28,68,40,14
CancelButton 120,68,40,14
GroupBox 12,8,72,52,"Group Box",.GroupBox1
GroupBox 100,8,72,52,"Group Box",.GroupBox2
OptionGroup .OptionGroup1
OptionButton 16,24,54,8,"Radio Button",.OptionButton1
OptionButton 16,40,54,8,"Radio Button",.OptionButton2
CheckBox 108,24,50,8,"Check Box",.CheckBox1
CheckBox 108,40,50,8,"Check Box",.CheckBox2
End Dialog
Dim Dlg1 As GroupSample
Button = Dialog (Dlg1)
End Sub
The dialog function
You can optionally connect a user-defined dialog box to a dialog function. This function is called when the dialog field
is initialized and every time when the user operates a dialog control. With the help of a dialog function, it is possible to
nest dialogs and to enable or disable dialog controls.
To connect a dialog box to a dialog function, append the function's name to the dialog definition, with a period in front
of it. Here, for example, the dialog MyDlg will be connected to the dialog function with the name MyDlgFunc:
Begin Dialog MyDlg 60, 60, 260, 188, "Test", .MyDlgFunc
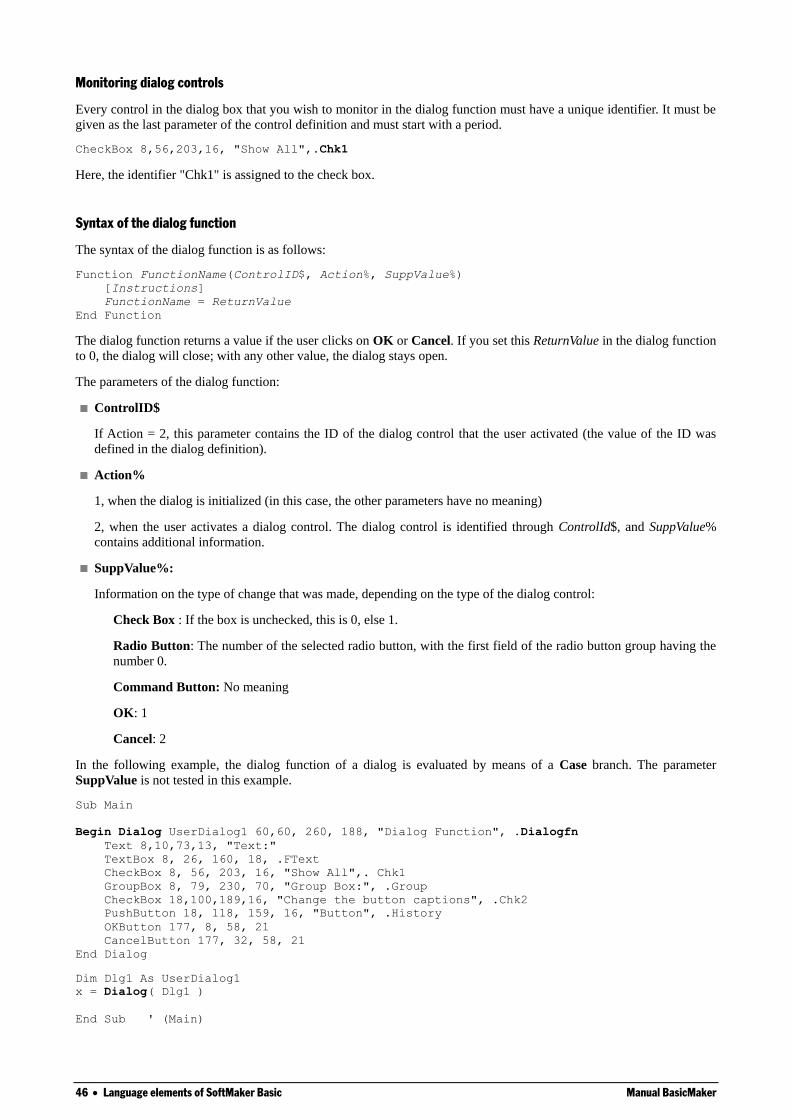
46 Language elements of SoftMaker Basic Manual BasicMaker
Monitoring dialog controls
Every control in the dialog box that you wish to monitor in the dialog function must have a unique identifier. It must be
given as the last parameter of the control definition and must start with a period.
CheckBox 8,56,203,16, "Show All",.Chk1
Here, the identifier "Chk1" is assigned to the check box.
Syntax of the dialog function
The syntax of the dialog function is as follows:
Function FunctionName(ControlID$, Action%, SuppValue%)
[Instructions]
FunctionName = ReturnValue
End Function
The dialog function returns a value if the user clicks on OK or Cancel. If you set this ReturnValue in the dialog function
to 0, the dialog will close; with any other value, the dialog stays open.
The parameters of the dialog function:
ControlID$
If Action = 2, this parameter contains the ID of the dialog control that the user activated (the value of the ID was
defined in the dialog definition).
Action%
1, when the dialog is initialized (in this case, the other parameters have no meaning)
2, when the user activates a dialog control. The dialog control is identified through ControlId$, and SuppValue%
contains additional information.
SuppValue%:
Information on the type of change that was made, depending on the type of the dialog control:
Check Box : If the box is unchecked, this is 0, else 1.
Radio Button: The number of the selected radio button, with the first field of the radio button group having the
number 0.
Command Button: No meaning
OK: 1
Cancel: 2
In the following example, the dialog function of a dialog is evaluated by means of a Case branch. The parameter
SuppValue is not tested in this example.
Sub Main
Begin Dialog UserDialog1 60,60, 260, 188, "Dialog Function", .Dialogfn
Text 8,10,73,13, "Text:"
TextBox 8, 26, 160, 18, .FText
CheckBox 8, 56, 203, 16, "Show All",. Chk1
GroupBox 8, 79, 230, 70, "Group Box:", .Group
CheckBox 18,100,189,16, "Change the button captions", .Chk2
PushButton 18, 118, 159, 16, "Button", .History
OKButton 177, 8, 58, 21
CancelButton 177, 32, 58, 21
End Dialog
Dim Dlg1 As UserDialog1
x = Dialog( Dlg1 )
End Sub ' (Main)
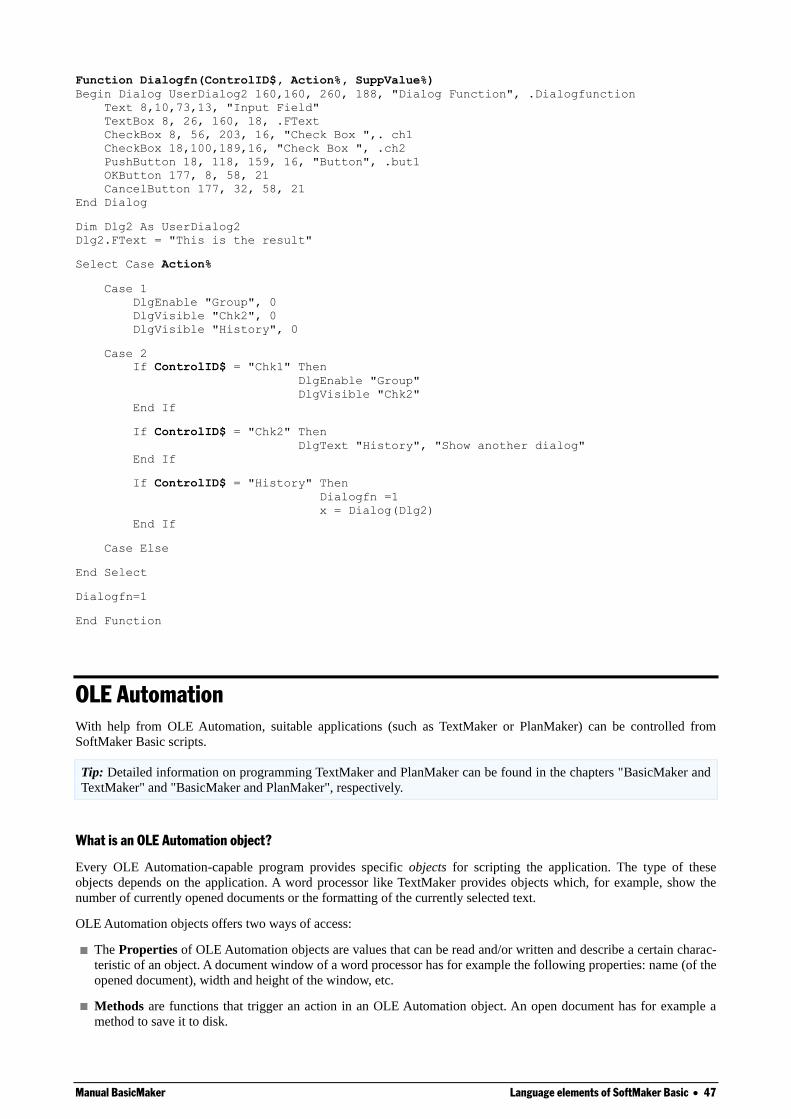
Manual BasicMaker Language elements of SoftMaker Basic 47
Function Dialogfn(ControlID$, Action%, SuppValue%)
Begin Dialog UserDialog2 160,160, 260, 188, "Dialog Function", .Dialogfunction
Text 8,10,73,13, "Input Field"
TextBox 8, 26, 160, 18, .FText
CheckBox 8, 56, 203, 16, "Check Box ",. ch1
CheckBox 18,100,189,16, "Check Box ", .ch2
PushButton 18, 118, 159, 16, "Button", .but1
OKButton 177, 8, 58, 21
CancelButton 177, 32, 58, 21
End Dialog
Dim Dlg2 As UserDialog2
Dlg2.FText = "This is the result"
Select Case Action%
Case 1
DlgEnable "Group", 0
DlgVisible "Chk2", 0
DlgVisible "History", 0
Case 2
If ControlID$ = "Chk1" Then
DlgEnable "Group"
DlgVisible "Chk2"
End If
If ControlID$ = "Chk2" Then
DlgText "History", "Show another dialog"
End If
If ControlID$ = "History" Then
Dialogfn =1
x = Dialog(Dlg2)
End If
Case Else
End Select
Dialogfn=1
End Function
OLE Automation
With help from OLE Automation, suitable applications (such as TextMaker or PlanMaker) can be controlled from
SoftMaker Basic scripts.
Tip: Detailed information on programming TextMaker and PlanMaker can be found in the chapters "BasicMaker and
TextMaker" and "BasicMaker and PlanMaker", respectively.
What is an OLE Automation object?
Every OLE Automation-capable program provides specific objects for scripting the application. The type of these
objects depends on the application. A word processor like TextMaker provides objects which, for example, show the
number of currently opened documents or the formatting of the currently selected text.
OLE Automation objects offers two ways of access:
The Properties of OLE Automation objects are values that can be read and/or written and describe a certain charac-
teristic of an object. A document window of a word processor has for example the following properties: name (of the
opened document), width and height of the window, etc.
Methods are functions that trigger an action in an OLE Automation object. An open document has for example a
method to save it to disk.
48 Language elements of SoftMaker Basic Manual BasicMaker
Accessing OLE Automation objects
To access an OLE Automation object, you first must declare a variable of the type Object.
Example:
Dim MyObj As Object
This must then be "connected" to the application. There are two functions for this: While CreateObject starts the
application automatically if it is not already running, GetObject can only connect to an instance of an application that is
already running.
Example:
Set MyObj = CreateObject("TextMaker.Application")
The variable MyObj now contains a reference to the main OLE Automation object of the application, and incidentally its
name is always Application. You can access its child objects through dot notation – for example My-
Obj.Application.Documents (see also the next section).
If the OLE Automation connection is no longer needed, the variable should be separated from the object by setting its
value to Nothing:
Example:
Set MyObj = Nothing ' Detach variable from object
Properties
To access the properties of an object, use dot notation in the style Object.Property.
Example:
x = MyObj.Application.Width ' Retrieve the width of the program window
Or:
MyObj.Application.Width = 5 ' Set the width of the program window
Methods
When calling methods, dot notation is also used: Object.Method
Example:
MyObj.Application.Quit ' Exit from the application
Using collections
Apart from simple objects, there are also collections of objects.
TextMaker offers, for example, the collection Documents (a collection of all open documents). A collection is itself an
object that is mainly accessible through properties of its parent object.
You can use the For Each ... Next instruction to enumerate all elements of a collection.
All collections offer the following properties and methods by default:
Count Returns the number of elements (read only).
Item(i) Provides the i-th element.
Add Adds a new object to the collection.
Manual BasicMaker Language elements of SoftMaker Basic 49
Example
Let us conclude with an example that demonstrates the use of OLE automation in practice. The example uses TextMak-
er’s Documents collection which represents all currently opened documents. First, the number of opened documents is
retrieved, then the names of all open documents are given. Finally, the documents are closed.
Hint: Detailed information on the subjects "BasicMaker and TextMaker" and "BasicMaker and PlanMaker" can be
found in their respective chapters.
Sub Main
Dim tm As Object
Set tm = CreateObject("TextMaker.Application")
tm.Visible = TRUE ' Make TM visible
tm.Activate ' Bring TM into the foreground
tm.Documents.Add ' Create three new documents
tm.Documents.Add
tm.Documents.Add
Print tm.Documents.Count & " Documents opened"
Dim x As Object
For Each x in tm.Documents
Print x.Name ' Gives the names of the documents
Next
tm.Documents.Close ' Close all documents
Set tm = Nothing ' Cut connection to TM
End Sub
50 BasicMaker and TextMaker Manual BasicMaker
BasicMaker and TextMaker BasicMaker was developed for the main purpose of allowing the user to script TextMaker and PlanMaker, in other
words "control" or "program" them. This chapter contains all information on programming TextMaker. It contains the
following sections:
Programming TextMaker
This section contains all the basic information required to program the word processor TextMaker with BasicMaker.
TextMaker’s object model
This chapter describes all objects exposed by TextMaker for programming.
Note: Programming PlanMaker is covered in a separate chapter: "BasicMaker and PlanMaker".
Programming TextMaker
Programming the word processor TextMaker and the spreadsheet PlanMaker is practically identical. The only difference
is that some keywords have different names (for example PlanMaker.Application instead of TextMaker.Application). If
you have already worked through the section "Programming PlanMaker" you will notice that the section you are cur-
rently reading is almost identical to it.
Naturally, the objects exposed by TextMaker are different from those of PlanMaker. A list of all objects exposed can be
found in the next section "TextMaker’s object model".
To program TextMaker with BasicMaker, you mainly use OLE Automation commands. General information on this
subject can be found in section "OLE Automation".
Follow this schematic outline (details follow subsequently):
1. Declare a variable of type Object:
Dim tm as Object
2. Make a connection to TextMaker via OLE Automation (TextMaker will be launched automatically if it is not already
running):
Set tm = CreateObject("TextMaker.Application")
3. Set the property Application.Visible to True so that TextMaker becomes visible:
tm.Application.Visible = True
4. Now you can program TextMaker by reading and writing its "properties" and by invoking the "methods" it provides.
5. As soon as the TextMaker object is not required anymore, you should cut the connection to TextMaker:
Set tm = Nothing
That was just a quick rundown of the necessary steps. More detailed information on programming TextMaker follows
on the next pages. A list of all TextMaker objects and their respective properties and methods can be found in the
section "TextMaker’s object model".
Connecting to TextMaker
In order to control TextMaker from BasicMaker, you first need to connect to TextMaker via OLE Automation. For this,
first declare a variable of type Object, then assign to it the object "TextMaker.Application" through use of the Cre-
ateObject function.
Dim tm as Object
Set tm = CreateObject("TextMaker.Application")
Manual BasicMaker BasicMaker and TextMaker 51
If TextMaker is already running, this function simply connects to TextMaker; if not, then TextMaker will be started
beforehand.
The object variable "tm" now contains a reference to TextMaker.
Important: Making TextMaker visible
Please note: If you start TextMaker in the way just described, its application window will be invisible by default. In
order to make it visible, you must set the property Visible to True.
The complete chain of commands should therefore be as follows:
Dim tm as Object
Set tm = CreateObject("TextMaker.Application")
tm.Application.Visible = True
The "Application" object
The fundamental object that TextMaker exposes for programming is Application. All other objects – such as collections
of open documents and windows – are attached to the Application object.
The Application object contains not only its own properties (such as Application.Left for the x coordinate of the
application window) and methods (such as Application.Quit for exiting from TextMaker), but also contains pointers to
other objects, for example Application.Options, that in turn have their own properties and methods, and pointers to
collections such as Documents (the collection of all currently open documents).
Notations
As mentioned in the previous section, you need to use dot notation as usual with OLE Automation to access the provid-
ed properties, methods etc.
For example, Application.Left lets you address the Left property of the Application object. Applica-
tion.Documents.Add references the Add method of the Documents collection which in turn is a member of Applica-
tion.
Getting and setting TextMaker properties
As soon as a connection with TextMaker has been made, you can "control" the application. For this, properties and
methods are provided – this has already been discussed in the section "OLE Automation".
Let’s first talk about properties. Properties are options and settings that can be retrieved and sometimes modified.
For example, if you wish to retrieve TextMaker’s application name, you can use the Name property of the Application
object:
MsgBox "The name of this application is " & tm.Application.Name
Application.Name is a property that can only be read, but not written to. Other properties can be both retrieved and
changed from BasicMaker scripts. For example, the coordinates of the TextMaker application window are stored in the
properties Left, Top, Width, and Height. You can retrieve them as follows:
MsgBox "The left window position is at: " & tm.Application.Left
But you can also change the content of this property:
tm.Application.Left = 200
TextMaker reacts immediately and moves the left border of the application window to the screen position 200. You can
also mix reading and changing the values of properties, as in the following example:
tm.Application.Left = tm.Application.Left + 100
52 BasicMaker and TextMaker Manual BasicMaker
Here, the current left border value is retrieved, increased by 100 and set as the new value for the left border. This will
instruct TextMaker to move its left window position 100 pixels to the right.
There is a large number of properties in the Application object. A list of them can be found in the section "TextMaker’s
object model".
Using TextMaker’s methods
In addition to properties, methods exist, and they implement commands that direct TextMaker to execute a specific
action.
For example, Application.Quit instructs TextMaker to stop running, and Application.Activate lets you force Text-
Maker to bring its application window to the foreground (if it’s covered by windows from other applications):
tm.Application.Activate
Function methods and procedure methods
There are two types of methods: those that return a value to the BASIC program and those that do not. The former are
called (in the style of other programming languages) "function methods" or simply "functions", the latter "procedure
methods" or simply "procedures".
This distinction may sound a bit picky to you, but it is not because it effects on the notation of instructions.
As long as you call a method without parameters, there is no syntactical difference:
Call as procedure:
tm.Documents.Add ' Add a document to the collection of open documents
Call as function:
Dim newDoc as Object
Set newDoc = tm.Documents.Add ' The same (returning an object this time)
As soon as you access methods with parameters, you need to employ two different styles:
Call as procedure:
tm.ActiveDocument.Tables.Add 3, 3 ' Insert a 3-by-3 table
Call as function:
Dim newTable as Object
Set newTable = tm.ActiveDocument.Tables.Add(3, 3) ' now with a return value
As you can see, if you call the method as a procedure, you may not surround the parameters with parentheses. If you
call it as a function, you must surround them with parentheses.
Using pointers to other objects
A third group of members of the Application object are pointers to other objects.
This may first sound a bit abstract at first, but is actually quite simple: It would clutter the Application object if all
properties and methods of TextMaker were attached directly to the Application method. To prevent this, groups of
related properties and methods have been parceled out and placed into objects of their own. For example, TextMaker
has an Options object that lets you read out and modify many fundamental program settings:
tm.Application.Options.CreateBackup = True
MsgBox "Overwrite mode activated? " & tm.Application.Options.Overtype
Manual BasicMaker BasicMaker and TextMaker 53
Using collections
The fourth group of members of the Application object are pointers to collections.
Collections are, as their name indicates, lists of objects belonging together. For example, there is a collection called
Application.Documents that contains all open documents and a collection called Application.RecentFiles with all
files that are listed in the history section of the File menu.
There are two standardized ways of accessing collections, and TextMaker supports both of them. The more simple way
is through the Item property that is part of every collection:
' Display the name of the first open document:
MsgBox tm.Application.Documents.Item(1).Name
' Close the (open) document "Test.tmd":
tm.Application.Documents.Item("Test.tmd").Close
If you wish to list all open documents, for example, first find out the number of open documents through the standard-
ized Count property, then access the objects one by one:
' Return the names of all open documents:
For i=1 To tm.Application.Documents.Count
MsgBox tm.Application.Documents.Item(i).Name
Next i
Every collection contains, by definition, the Count property which lets you retrieve the number of entries in the collec-
tion, and the Item property that lets you directly access one entry.
Item always accepts the number of the desired entry as an argument. Where it makes sense, it is also possible to pass
other arguments to it, for example file names. You have seen this already above, when we passed both a number and a
file name to Item.
For most collections, there is matching object type for their individual entries. The collection Windows, for example,
has individual entries of type Window – note the use of the singular! One entry of the Documents collection is called
Document, and an entry of the RecentFiles collection has the object type RecentFile.
A more elegant approach to collections: For Each ... Next
There is a more elegant way to access all entries in a collection consecutively: BasicMaker also supports the For Each
instruction:
' Display the names of all open documents
Dim x As Object
For Each x In tm.Application.Documents
MsgBox x.Name
Next x
This gives the same results as the method previously described:
For i=1 To tm.Application.Documents.Count
MsgBox tm.Application.Documents.Item(i).Name
Next i
Collections may have their own properties and methods
Some collections may have their own properties and methods, in addition to the standard members Item and Count.
For example, if you wish to create an empty document in TextMaker, this is achieved by adding a new entry to its
Documents collection:
tm.Application.Documents.Add ' Create an empty document
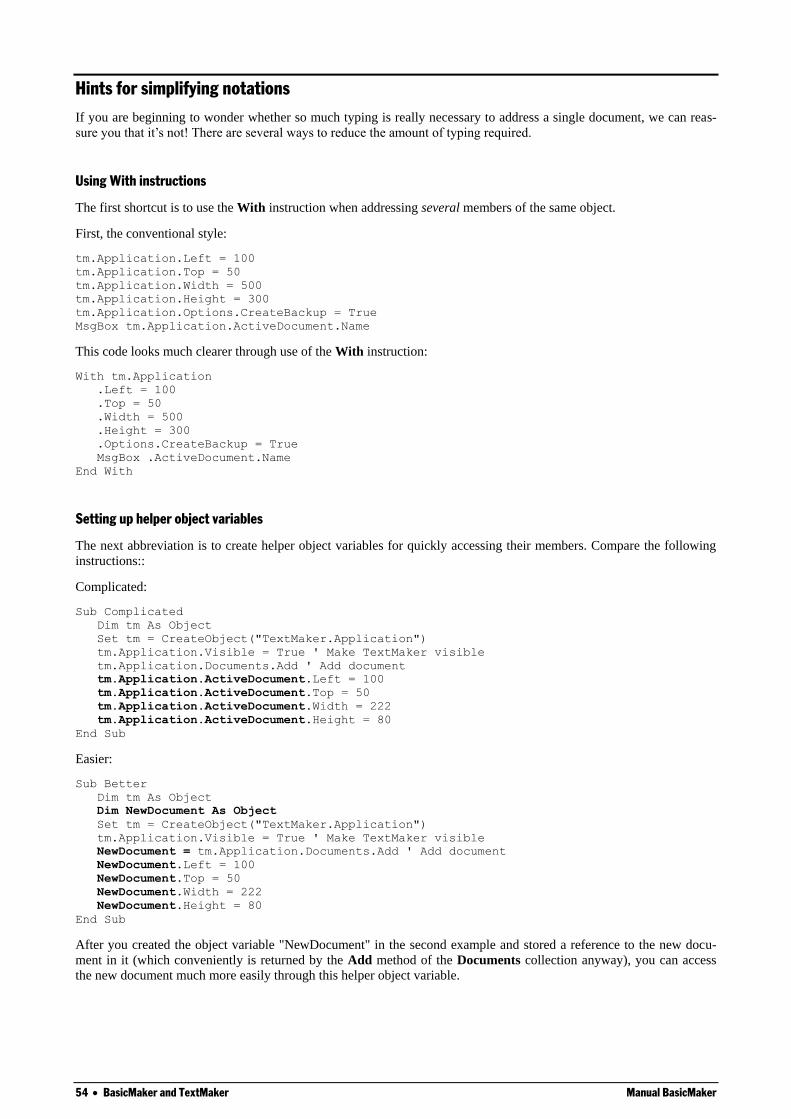
54 BasicMaker and TextMaker Manual BasicMaker
Hints for simplifying notations
If you are beginning to wonder whether so much typing is really necessary to address a single document, we can reas-
sure you that it’s not! There are several ways to reduce the amount of typing required.
Using With instructions
The first shortcut is to use the With instruction when addressing several members of the same object.
First, the conventional style:
tm.Application.Left = 100
tm.Application.Top = 50
tm.Application.Width = 500
tm.Application.Height = 300
tm.Application.Options.CreateBackup = True
MsgBox tm.Application.ActiveDocument.Name
This code looks much clearer through use of the With instruction:
With tm.Application
.Left = 100
.Top = 50
.Width = 500
.Height = 300
.Options.CreateBackup = True
MsgBox .ActiveDocument.Name
End With
Setting up helper object variables
The next abbreviation is to create helper object variables for quickly accessing their members. Compare the following
instructions::
Complicated:
Sub Complicated
Dim tm As Object
Set tm = CreateObject("TextMaker.Application")
tm.Application.Visible = True ' Make TextMaker visible
tm.Application.Documents.Add ' Add document
tm.Application.ActiveDocument.Left = 100
tm.Application.ActiveDocument.Top = 50
tm.Application.ActiveDocument.Width = 222
tm.Application.ActiveDocument.Height = 80
End Sub
Easier:
Sub Better
Dim tm As Object
Dim NewDocument As Object
Set tm = CreateObject("TextMaker.Application")
tm.Application.Visible = True ' Make TextMaker visible
NewDocument = tm.Application.Documents.Add ' Add document
NewDocument.Left = 100
NewDocument.Top = 50
NewDocument.Width = 222
NewDocument.Height = 80
End Sub
After you created the object variable "NewDocument" in the second example and stored a reference to the new docu-
ment in it (which conveniently is returned by the Add method of the Documents collection anyway), you can access
the new document much more easily through this helper object variable.
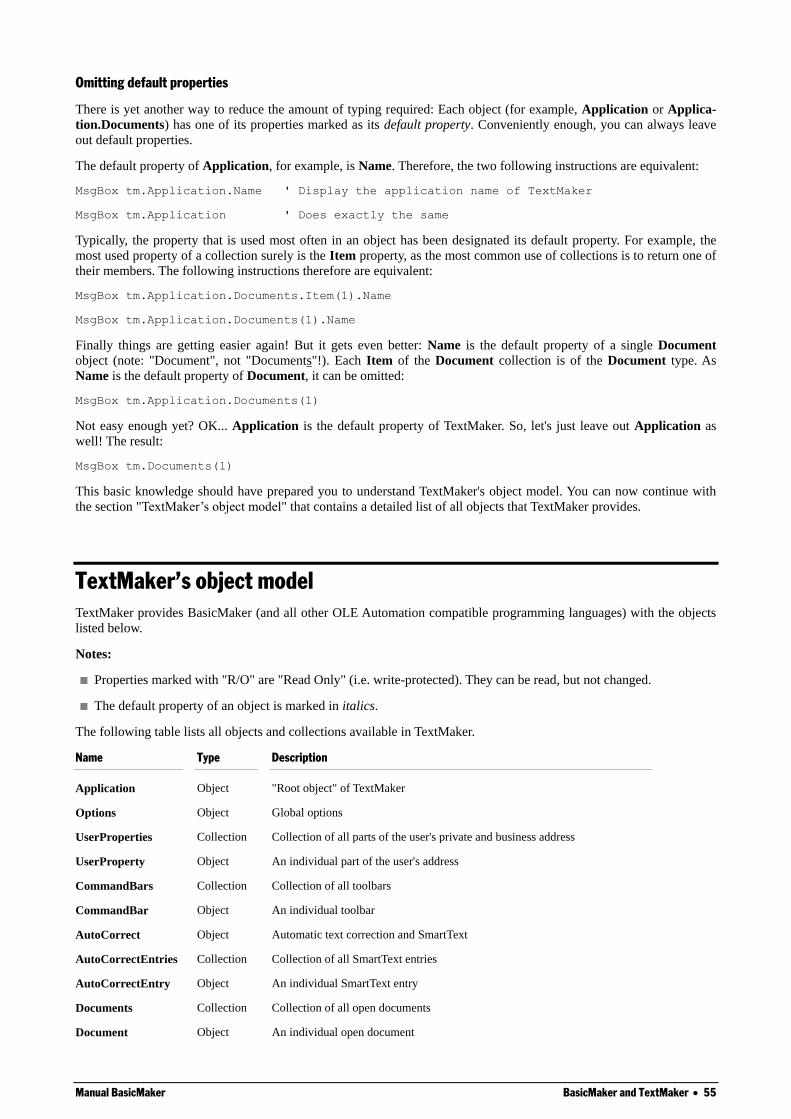
Manual BasicMaker BasicMaker and TextMaker 55
Omitting default properties
There is yet another way to reduce the amount of typing required: Each object (for example, Application or Applica-
tion.Documents) has one of its properties marked as its default property. Conveniently enough, you can always leave
out default properties.
The default property of Application, for example, is Name. Therefore, the two following instructions are equivalent:
MsgBox tm.Application.Name ' Display the application name of TextMaker
MsgBox tm.Application ' Does exactly the same
Typically, the property that is used most often in an object has been designated its default property. For example, the
most used property of a collection surely is the Item property, as the most common use of collections is to return one of
their members. The following instructions therefore are equivalent:
MsgBox tm.Application.Documents.Item(1).Name
MsgBox tm.Application.Documents(1).Name
Finally things are getting easier again! But it gets even better: Name is the default property of a single Document
object (note: "Document", not "Documents"!). Each Item of the Document collection is of the Document type. As
Name is the default property of Document, it can be omitted:
MsgBox tm.Application.Documents(1)
Not easy enough yet? OK... Application is the default property of TextMaker. So, let's just leave out Application as
well! The result:
MsgBox tm.Documents(1)
This basic knowledge should have prepared you to understand TextMaker's object model. You can now continue with
the section "TextMaker’s object model" that contains a detailed list of all objects that TextMaker provides.
TextMaker’s object model
TextMaker provides BasicMaker (and all other OLE Automation compatible programming languages) with the objects
listed below.
Notes:
Properties marked with "R/O" are "Read Only" (i.e. write-protected). They can be read, but not changed.
The default property of an object is marked in italics.
The following table lists all objects and collections available in TextMaker.
Name Type Description
Application Object "Root object" of TextMaker
Options Object Global options
UserProperties Collection Collection of all parts of the user's private and business address
UserProperty Object An individual part of the user's address
CommandBars Collection Collection of all toolbars
CommandBar Object An individual toolbar
AutoCorrect Object Automatic text correction and SmartText
AutoCorrectEntries Collection Collection of all SmartText entries
AutoCorrectEntry Object An individual SmartText entry
Documents Collection Collection of all open documents
Document Object An individual open document
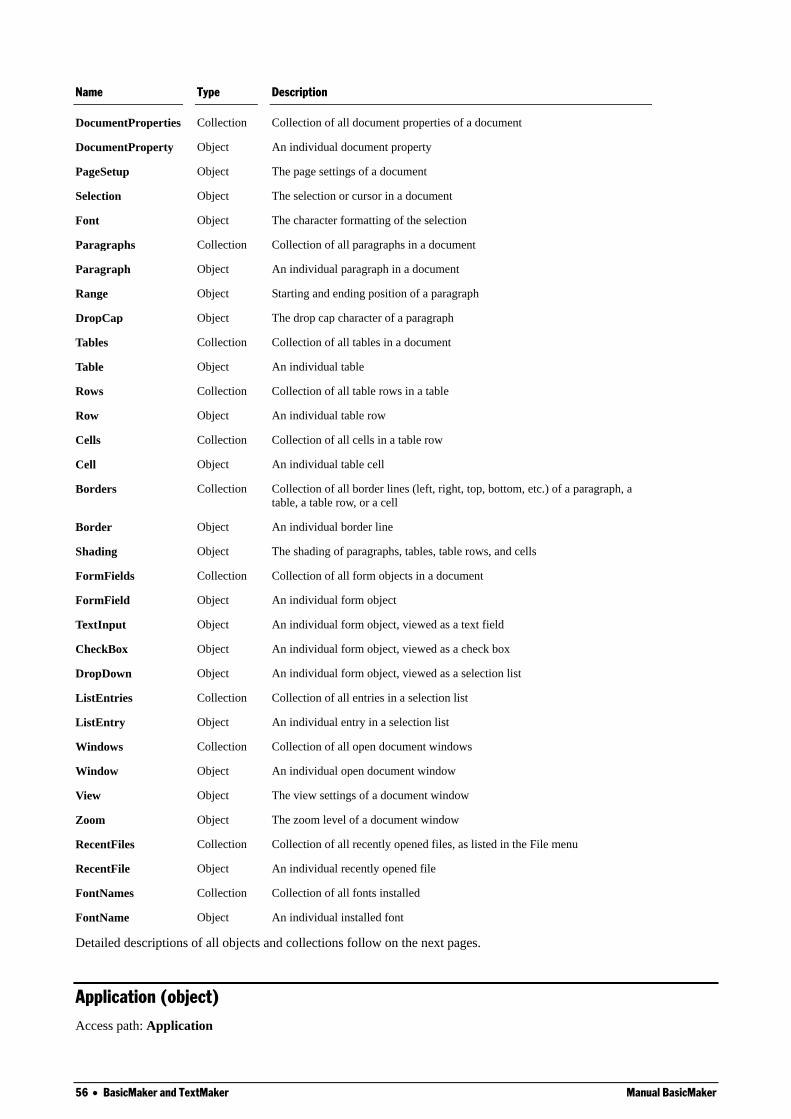
56 BasicMaker and TextMaker Manual BasicMaker
Name Type Description
DocumentProperties Collection Collection of all document properties of a document
DocumentProperty Object An individual document property
PageSetup Object The page settings of a document
Selection Object The selection or cursor in a document
Font Object The character formatting of the selection
Paragraphs Collection Collection of all paragraphs in a document
Paragraph Object An individual paragraph in a document
Range Object Starting and ending position of a paragraph
DropCap Object The drop cap character of a paragraph
Tables Collection Collection of all tables in a document
Table Object An individual table
Rows Collection Collection of all table rows in a table
Row Object An individual table row
Cells Collection Collection of all cells in a table row
Cell Object An individual table cell
Borders Collection Collection of all border lines (left, right, top, bottom, etc.) of a paragraph, a
table, a table row, or a cell
Border Object An individual border line
Shading Object The shading of paragraphs, tables, table rows, and cells
FormFields Collection Collection of all form objects in a document
FormField Object An individual form object
TextInput Object An individual form object, viewed as a text field
CheckBox Object An individual form object, viewed as a check box
DropDown Object An individual form object, viewed as a selection list
ListEntries Collection Collection of all entries in a selection list
ListEntry Object An individual entry in a selection list
Windows Collection Collection of all open document windows
Window Object An individual open document window
View Object The view settings of a document window
Zoom Object The zoom level of a document window
RecentFiles Collection Collection of all recently opened files, as listed in the File menu
RecentFile Object An individual recently opened file
FontNames Collection Collection of all fonts installed
FontName Object An individual installed font
Detailed descriptions of all objects and collections follow on the next pages.
Application (object)
Access path: Application
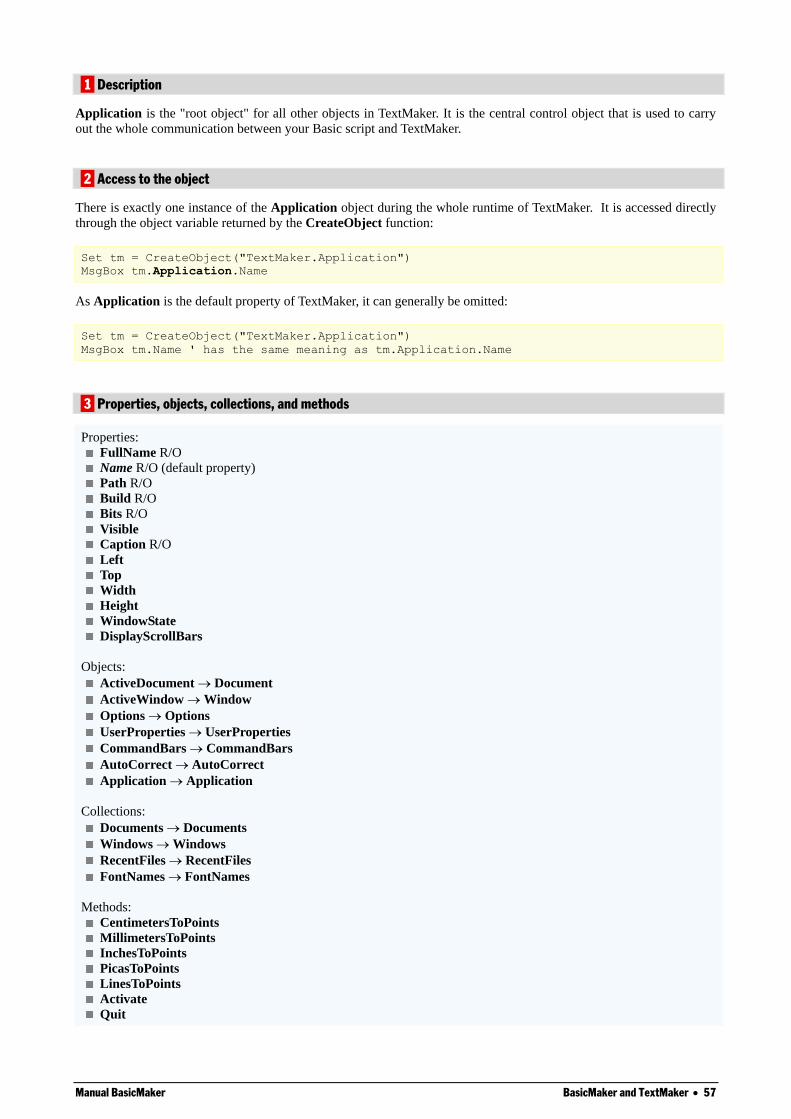
Manual BasicMaker BasicMaker and TextMaker 57
1 Description
Application is the "root object" for all other objects in TextMaker. It is the central control object that is used to carry
out the whole communication between your Basic script and TextMaker.
2 Access to the object
There is exactly one instance of the Application object during the whole runtime of TextMaker. It is accessed directly
through the object variable returned by the CreateObject function:
Set tm = CreateObject("TextMaker.Application")
MsgBox tm.Application.Name
As Application is the default property of TextMaker, it can generally be omitted:
Set tm = CreateObject("TextMaker.Application")
MsgBox tm.Name ' has the same meaning as tm.Application.Name
3 Properties, objects, collections, and methods
Properties:
FullName R/O
Name R/O (default property)
Path R/O
Build R/O
Bits R/O
Visible Caption R/O
Left
Top
Width
Height
WindowState
DisplayScrollBars
Objects:
ActiveDocument Document
ActiveWindow Window
Options Options
UserProperties UserProperties
CommandBars CommandBars
AutoCorrect AutoCorrect
Application Application
Collections:
Documents Documents
Windows Windows
RecentFiles RecentFiles
FontNames FontNames
Methods:
CentimetersToPoints
MillimetersToPoints
InchesToPoints
PicasToPoints
LinesToPoints
Activate
Quit
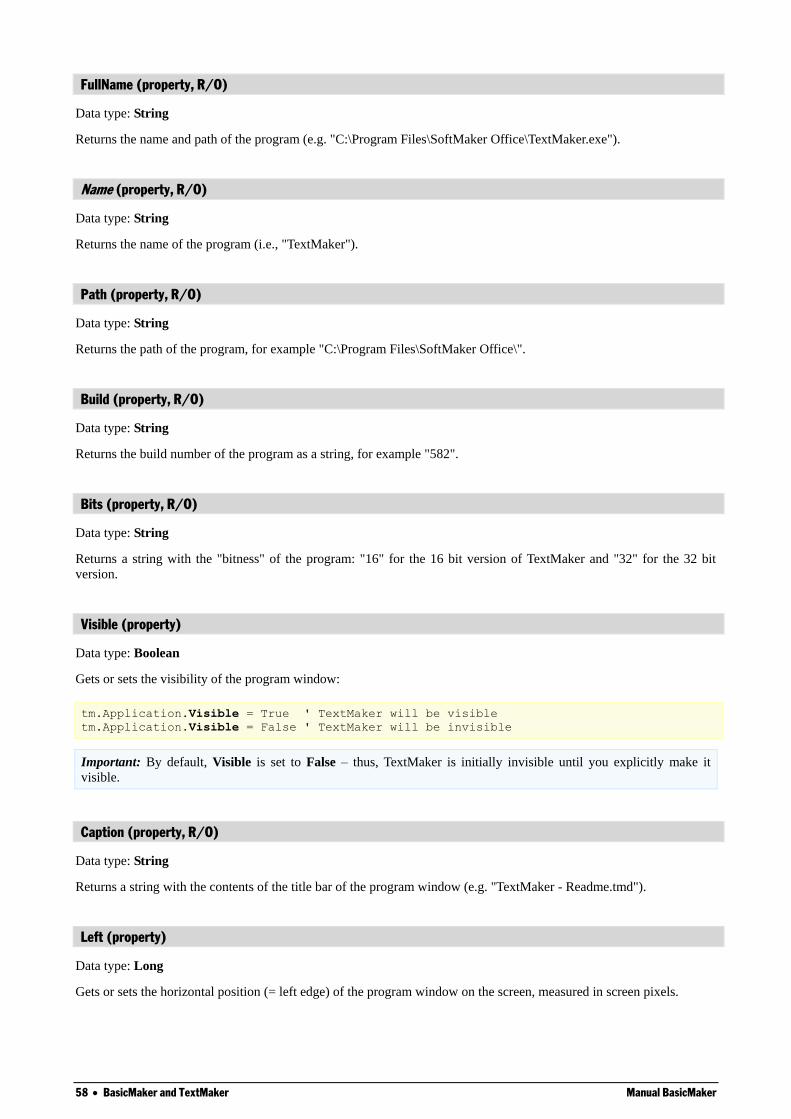
58 BasicMaker and TextMaker Manual BasicMaker
FullName (property, R/O)
Data type: String
Returns the name and path of the program (e.g. "C:\Program Files\SoftMaker Office\TextMaker.exe").
Name (property, R/O)
Data type: String
Returns the name of the program (i.e., "TextMaker").
Path (property, R/O)
Data type: String
Returns the path of the program, for example "C:\Program Files\SoftMaker Office\".
Build (property, R/O)
Data type: String
Returns the build number of the program as a string, for example "582".
Bits (property, R/O)
Data type: String
Returns a string with the "bitness" of the program: "16" for the 16 bit version of TextMaker and "32" for the 32 bit
version.
Visible (property)
Data type: Boolean
Gets or sets the visibility of the program window:
tm.Application.Visible = True ' TextMaker will be visible
tm.Application.Visible = False ' TextMaker will be invisible
Important: By default, Visible is set to False – thus, TextMaker is initially invisible until you explicitly make it
visible.
Caption (property, R/O)
Data type: String
Returns a string with the contents of the title bar of the program window (e.g. "TextMaker - Readme.tmd").
Left (property)
Data type: Long
Gets or sets the horizontal position (= left edge) of the program window on the screen, measured in screen pixels.
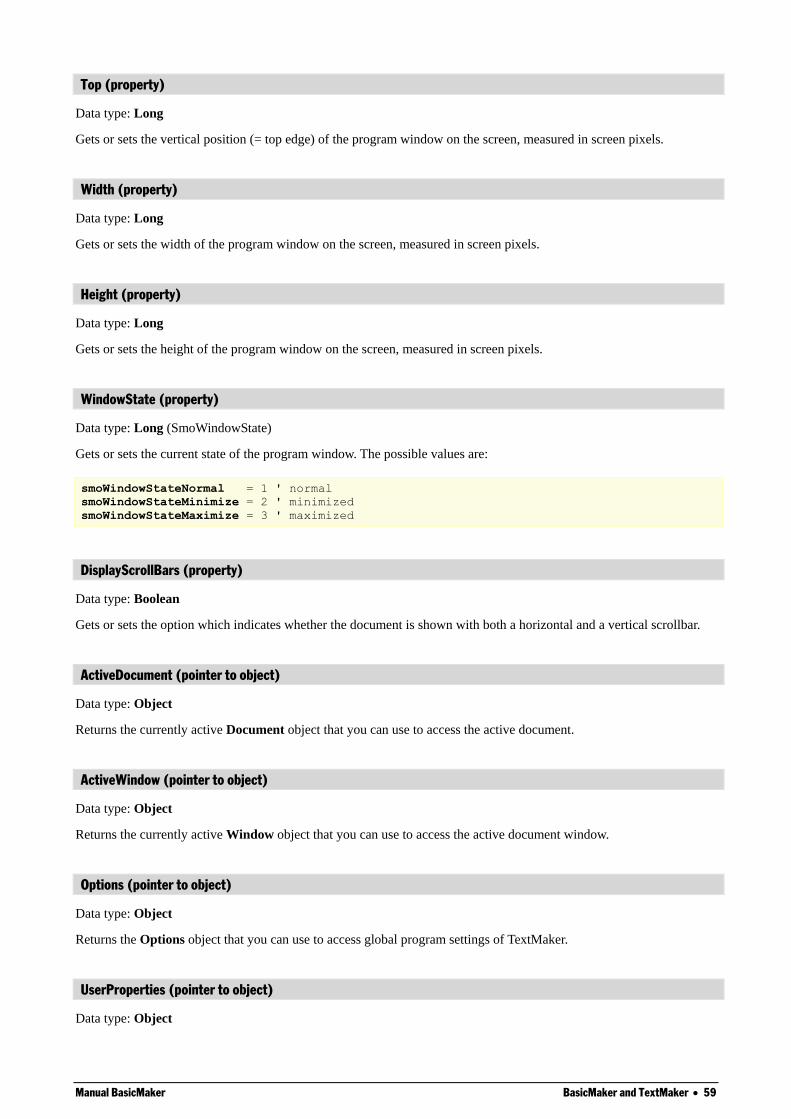
Manual BasicMaker BasicMaker and TextMaker 59
Top (property)
Data type: Long
Gets or sets the vertical position (= top edge) of the program window on the screen, measured in screen pixels.
Width (property)
Data type: Long
Gets or sets the width of the program window on the screen, measured in screen pixels.
Height (property)
Data type: Long
Gets or sets the height of the program window on the screen, measured in screen pixels.
WindowState (property)
Data type: Long (SmoWindowState)
Gets or sets the current state of the program window. The possible values are:
smoWindowStateNormal = 1 ' normal
smoWindowStateMinimize = 2 ' minimized
smoWindowStateMaximize = 3 ' maximized
DisplayScrollBars (property)
Data type: Boolean
Gets or sets the option which indicates whether the document is shown with both a horizontal and a vertical scrollbar.
ActiveDocument (pointer to object)
Data type: Object
Returns the currently active Document object that you can use to access the active document.
ActiveWindow (pointer to object)
Data type: Object
Returns the currently active Window object that you can use to access the active document window.
Options (pointer to object)
Data type: Object
Returns the Options object that you can use to access global program settings of TextMaker.
UserProperties (pointer to object)
Data type: Object
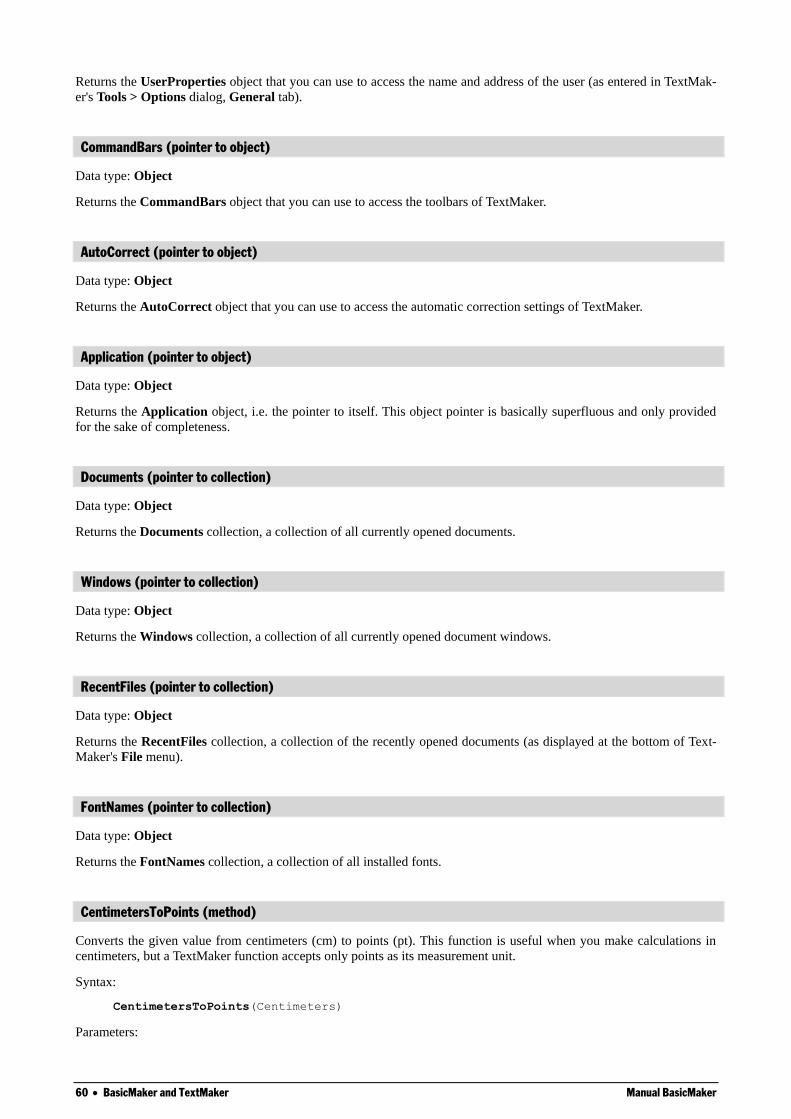
60 BasicMaker and TextMaker Manual BasicMaker
Returns the UserProperties object that you can use to access the name and address of the user (as entered in TextMak-
er's Tools > Options dialog, General tab).
CommandBars (pointer to object)
Data type: Object
Returns the CommandBars object that you can use to access the toolbars of TextMaker.
AutoCorrect (pointer to object)
Data type: Object
Returns the AutoCorrect object that you can use to access the automatic correction settings of TextMaker.
Application (pointer to object)
Data type: Object
Returns the Application object, i.e. the pointer to itself. This object pointer is basically superfluous and only provided
for the sake of completeness.
Documents (pointer to collection)
Data type: Object
Returns the Documents collection, a collection of all currently opened documents.
Windows (pointer to collection)
Data type: Object
Returns the Windows collection, a collection of all currently opened document windows.
RecentFiles (pointer to collection)
Data type: Object
Returns the RecentFiles collection, a collection of the recently opened documents (as displayed at the bottom of Text-
Maker's File menu).
FontNames (pointer to collection)
Data type: Object
Returns the FontNames collection, a collection of all installed fonts.
CentimetersToPoints (method)
Converts the given value from centimeters (cm) to points (pt). This function is useful when you make calculations in
centimeters, but a TextMaker function accepts only points as its measurement unit.
Syntax:
CentimetersToPoints(Centimeters)
Parameters:

Manual BasicMaker BasicMaker and TextMaker 61
Centimeters (type: Single) specifies the value to be converted.
Return type:
Single
Example:
' Set the top margin of the active document to 3cm
tm.ActiveDocument.PageSetup.TopMargin = tm.Application.CentimetersToPoints(3)
MillimetersToPoints (method)
Converts the given value from millimeters (mm) to points (pt). This function is useful if you make calculations in
millimeters, but a TextMaker function accepts only points as its measurement unit.
Syntax:
MillimetersToPoints(Millimeters)
Parameters:
Millimeters (type: Single) specifies the value to be converted.
Return type:
Single
Example:
' Set the top margin of the active document to 30mm
tm.ActiveDocument.PageSetup.TopMargin = tm.Application.MillimetersToPoints(30)
InchesToPoints (method)
Converts the given value from inches to points (pt). This function is useful if you make calculations in inches, but a
TextMaker function accepts only points as its measurement unit.
Syntax:
InchesToPoints(Inches)
Parameters:
Inches (type: Single) specifies the value to be converted.
Return type:
Single
Example:
' Set the bottom margin of the active document to 1 inch
tm.ActiveDocument.PageSetup.BottomMargin = tm.Application.InchesToPoints(1)
PicasToPoints (method)
Converts the given value from picas to points (pt). This function is useful if you make calculations in picas, but a
TextMaker function accepts only points as its measurement unit.
Syntax:
PicasToPoints(Picas)
Parameters:
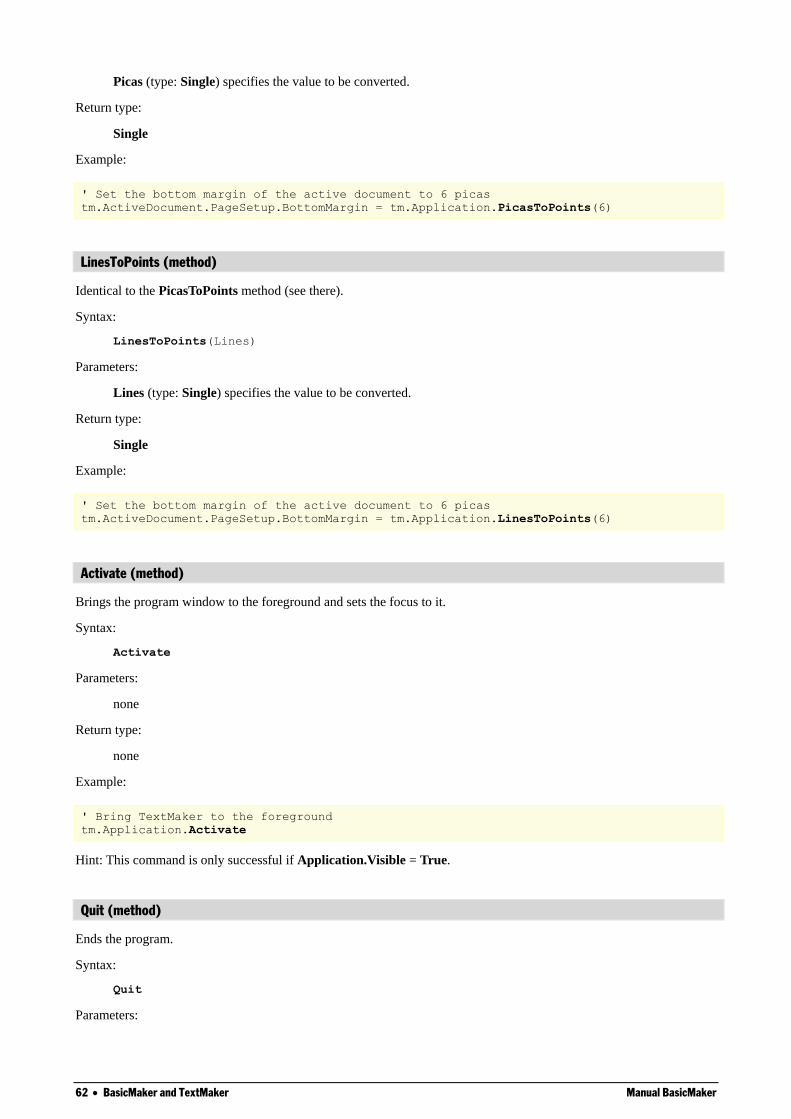
62 BasicMaker and TextMaker Manual BasicMaker
Picas (type: Single) specifies the value to be converted.
Return type:
Single
Example:
' Set the bottom margin of the active document to 6 picas
tm.ActiveDocument.PageSetup.BottomMargin = tm.Application.PicasToPoints(6)
LinesToPoints (method)
Identical to the PicasToPoints method (see there).
Syntax:
LinesToPoints(Lines)
Parameters:
Lines (type: Single) specifies the value to be converted.
Return type:
Single
Example:
' Set the bottom margin of the active document to 6 picas
tm.ActiveDocument.PageSetup.BottomMargin = tm.Application.LinesToPoints(6)
Activate (method)
Brings the program window to the foreground and sets the focus to it.
Syntax:
Activate
Parameters:
none
Return type:
none
Example:
' Bring TextMaker to the foreground
tm.Application.Activate
Hint: This command is only successful if Application.Visible = True.
Quit (method)
Ends the program.
Syntax:
Quit
Parameters:
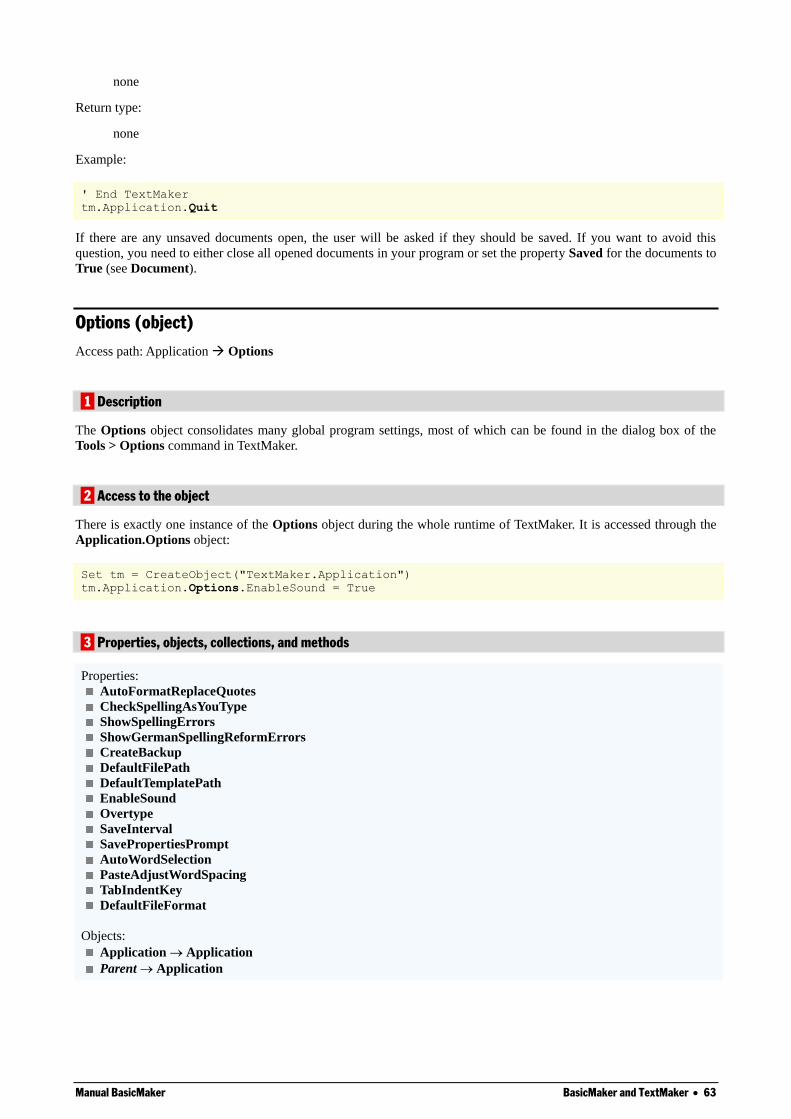
Manual BasicMaker BasicMaker and TextMaker 63
none
Return type:
none
Example:
' End TextMaker
tm.Application.Quit
If there are any unsaved documents open, the user will be asked if they should be saved. If you want to avoid this
question, you need to either close all opened documents in your program or set the property Saved for the documents to
True (see Document).
Options (object)
Access path: Application Options
1 Description
The Options object consolidates many global program settings, most of which can be found in the dialog box of the
Tools > Options command in TextMaker.
2 Access to the object
There is exactly one instance of the Options object during the whole runtime of TextMaker. It is accessed through the
Application.Options object:
Set tm = CreateObject("TextMaker.Application")
tm.Application.Options.EnableSound = True
3 Properties, objects, collections, and methods
Properties:
AutoFormatReplaceQuotes
CheckSpellingAsYouType
ShowSpellingErrors
ShowGermanSpellingReformErrors
CreateBackup
DefaultFilePath
DefaultTemplatePath
EnableSound
Overtype
SaveInterval
SavePropertiesPrompt
AutoWordSelection
PasteAdjustWordSpacing
TabIndentKey
DefaultFileFormat
Objects:
Application Application
Parent Application
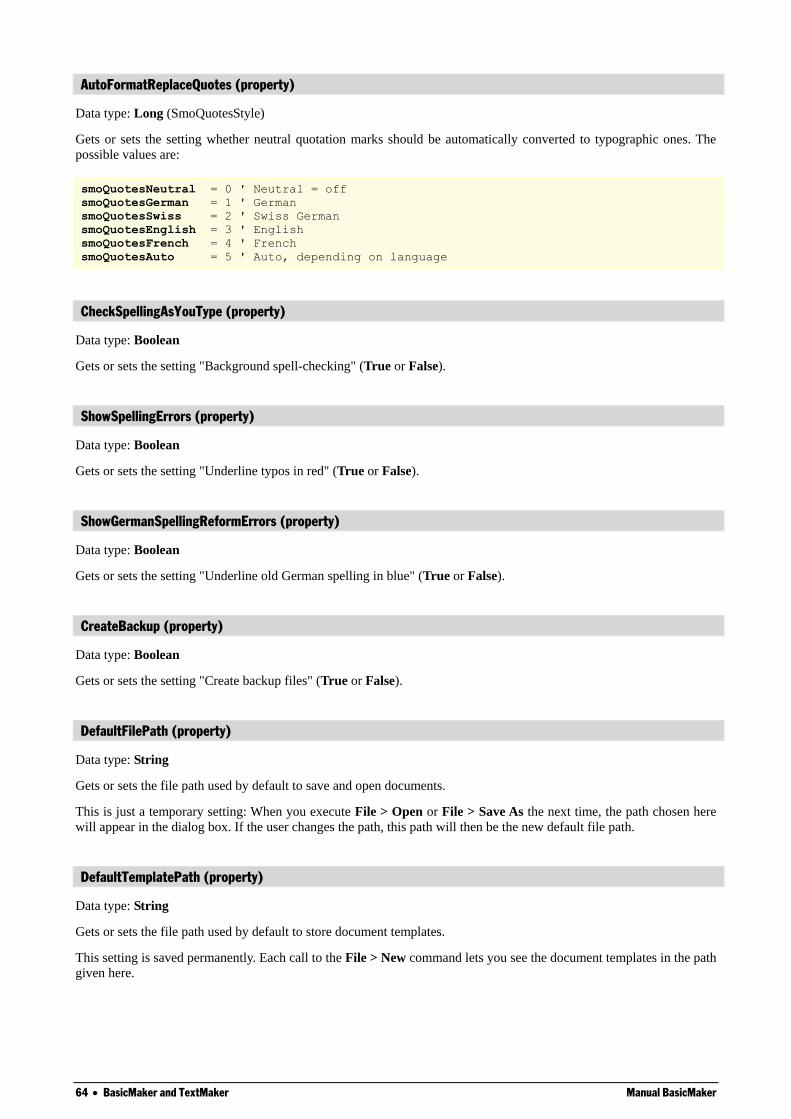
64 BasicMaker and TextMaker Manual BasicMaker
AutoFormatReplaceQuotes (property)
Data type: Long (SmoQuotesStyle)
Gets or sets the setting whether neutral quotation marks should be automatically converted to typographic ones. The
possible values are:
smoQuotesNeutral = 0 ' Neutral = off
smoQuotesGerman = 1 ' German
smoQuotesSwiss = 2 ' Swiss German
smoQuotesEnglish = 3 ' English
smoQuotesFrench = 4 ' French
smoQuotesAuto = 5 ' Auto, depending on language
CheckSpellingAsYouType (property)
Data type: Boolean
Gets or sets the setting "Background spell-checking" (True or False).
ShowSpellingErrors (property)
Data type: Boolean
Gets or sets the setting "Underline typos in red" (True or False).
ShowGermanSpellingReformErrors (property)
Data type: Boolean
Gets or sets the setting "Underline old German spelling in blue" (True or False).
CreateBackup (property)
Data type: Boolean
Gets or sets the setting "Create backup files" (True or False).
DefaultFilePath (property)
Data type: String
Gets or sets the file path used by default to save and open documents.
This is just a temporary setting: When you execute File > Open or File > Save As the next time, the path chosen here
will appear in the dialog box. If the user changes the path, this path will then be the new default file path.
DefaultTemplatePath (property)
Data type: String
Gets or sets the file path used by default to store document templates.
This setting is saved permanently. Each call to the File > New command lets you see the document templates in the path
given here.
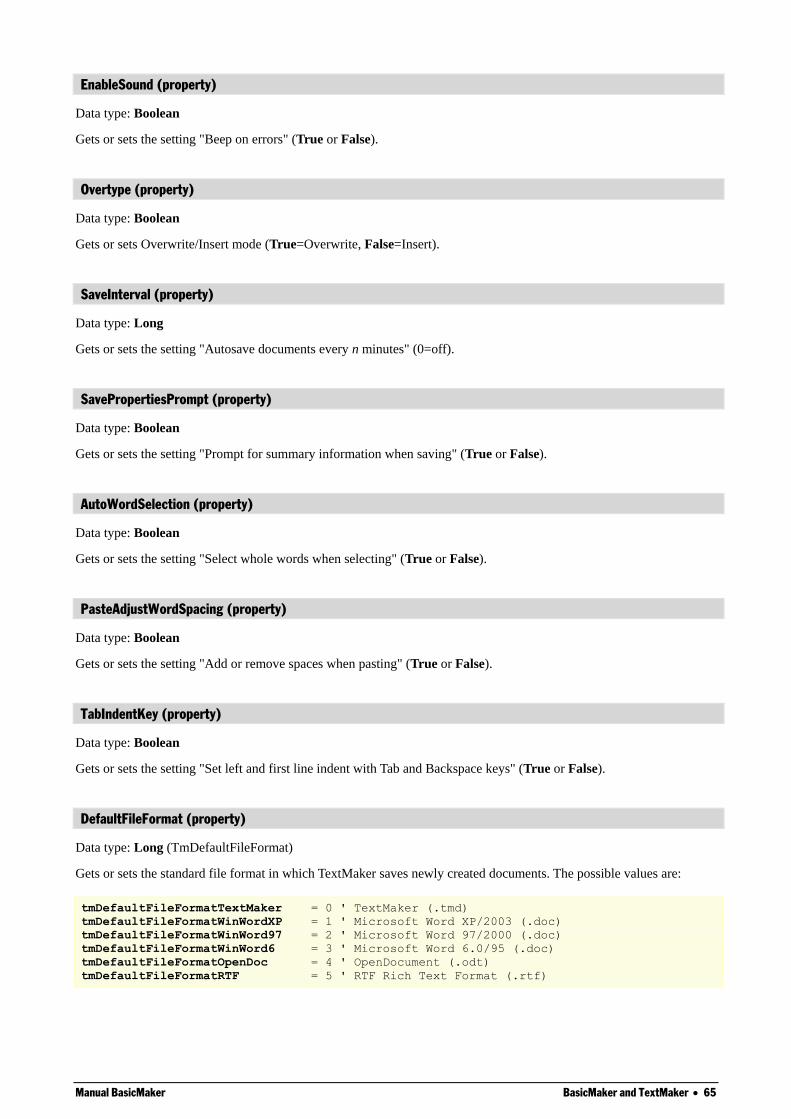
Manual BasicMaker BasicMaker and TextMaker 65
EnableSound (property)
Data type: Boolean
Gets or sets the setting "Beep on errors" (True or False).
Overtype (property)
Data type: Boolean
Gets or sets Overwrite/Insert mode (True=Overwrite, False=Insert).
SaveInterval (property)
Data type: Long
Gets or sets the setting "Autosave documents every n minutes" (0=off).
SavePropertiesPrompt (property)
Data type: Boolean
Gets or sets the setting "Prompt for summary information when saving" (True or False).
AutoWordSelection (property)
Data type: Boolean
Gets or sets the setting "Select whole words when selecting" (True or False).
PasteAdjustWordSpacing (property)
Data type: Boolean
Gets or sets the setting "Add or remove spaces when pasting" (True or False).
TabIndentKey (property)
Data type: Boolean
Gets or sets the setting "Set left and first line indent with Tab and Backspace keys" (True or False).
DefaultFileFormat (property)
Data type: Long (TmDefaultFileFormat)
Gets or sets the standard file format in which TextMaker saves newly created documents. The possible values are:
tmDefaultFileFormatTextMaker = 0 ' TextMaker (.tmd)
tmDefaultFileFormatWinWordXP = 1 ' Microsoft Word XP/2003 (.doc)
tmDefaultFileFormatWinWord97 = 2 ' Microsoft Word 97/2000 (.doc)
tmDefaultFileFormatWinWord6 = 3 ' Microsoft Word 6.0/95 (.doc)
tmDefaultFileFormatOpenDoc = 4 ' OpenDocument (.odt)
tmDefaultFileFormatRTF = 5 ' RTF Rich Text Format (.rtf)
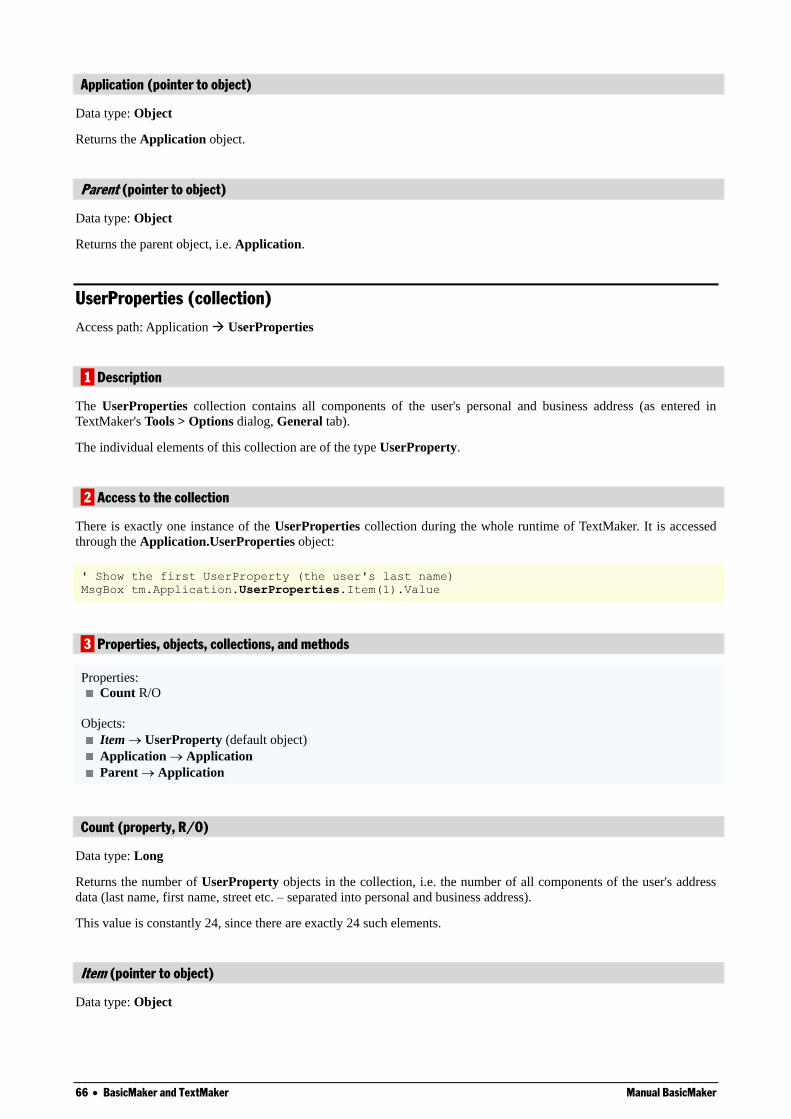
66 BasicMaker and TextMaker Manual BasicMaker
Application (pointer to object)
Data type: Object
Returns the Application object.
Parent (pointer to object)
Data type: Object
Returns the parent object, i.e. Application.
UserProperties (collection)
Access path: Application UserProperties
1 Description
The UserProperties collection contains all components of the user's personal and business address (as entered in
TextMaker's Tools > Options dialog, General tab).
The individual elements of this collection are of the type UserProperty.
2 Access to the collection
There is exactly one instance of the UserProperties collection during the whole runtime of TextMaker. It is accessed
through the Application.UserProperties object:
' Show the first UserProperty (the user's last name)
MsgBox tm.Application.UserProperties.Item(1).Value
3 Properties, objects, collections, and methods
Properties:
Count R/O
Objects:
Item UserProperty (default object)
Application Application
Parent Application
Count (property, R/O)
Data type: Long
Returns the number of UserProperty objects in the collection, i.e. the number of all components of the user's address
data (last name, first name, street etc. – separated into personal and business address).
This value is constantly 24, since there are exactly 24 such elements.
Item (pointer to object)
Data type: Object
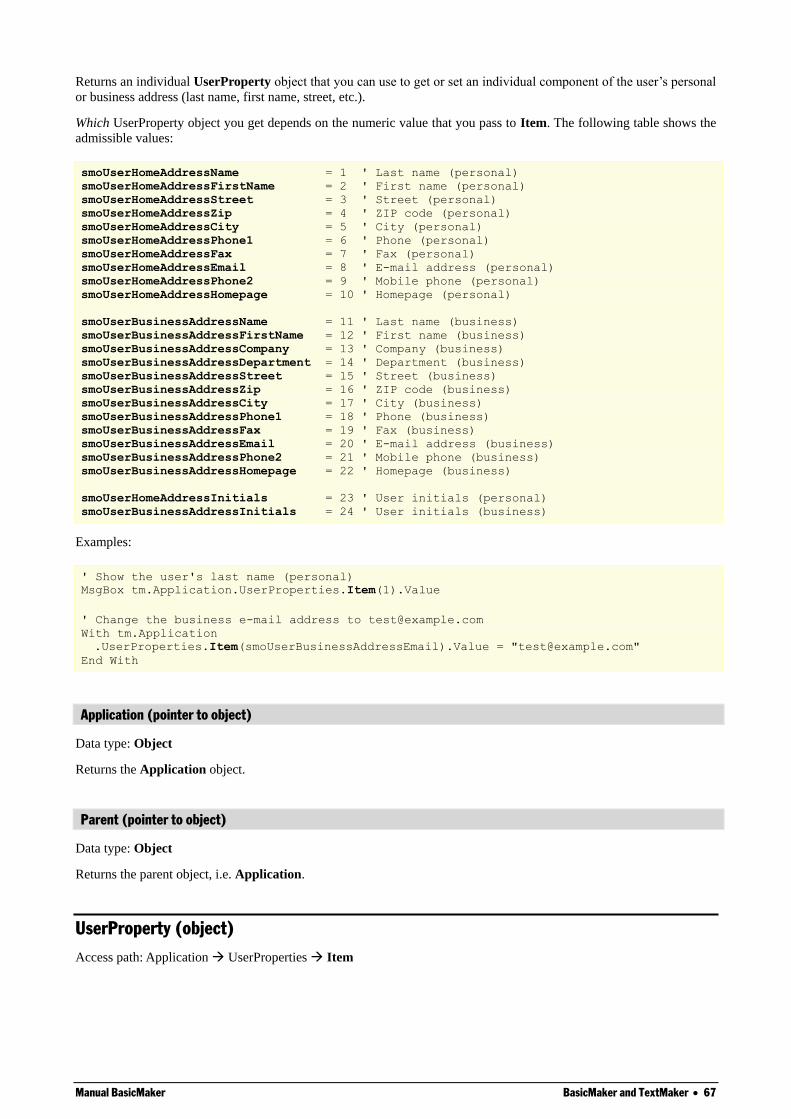
Manual BasicMaker BasicMaker and TextMaker 67
Returns an individual UserProperty object that you can use to get or set an individual component of the user’s personal
or business address (last name, first name, street, etc.).
Which UserProperty object you get depends on the numeric value that you pass to Item. The following table shows the
admissible values:
smoUserHomeAddressName = 1 ' Last name (personal)
smoUserHomeAddressFirstName = 2 ' First name (personal)
smoUserHomeAddressStreet = 3 ' Street (personal)
smoUserHomeAddressZip = 4 ' ZIP code (personal)
smoUserHomeAddressCity = 5 ' City (personal)
smoUserHomeAddressPhone1 = 6 ' Phone (personal)
smoUserHomeAddressFax = 7 ' Fax (personal)
smoUserHomeAddressEmail = 8 ' E-mail address (personal)
smoUserHomeAddressPhone2 = 9 ' Mobile phone (personal)
smoUserHomeAddressHomepage = 10 ' Homepage (personal)
smoUserBusinessAddressName = 11 ' Last name (business)
smoUserBusinessAddressFirstName = 12 ' First name (business)
smoUserBusinessAddressCompany = 13 ' Company (business)
smoUserBusinessAddressDepartment = 14 ' Department (business)
smoUserBusinessAddressStreet = 15 ' Street (business)
smoUserBusinessAddressZip = 16 ' ZIP code (business)
smoUserBusinessAddressCity = 17 ' City (business)
smoUserBusinessAddressPhone1 = 18 ' Phone (business)
smoUserBusinessAddressFax = 19 ' Fax (business)
smoUserBusinessAddressEmail = 20 ' E-mail address (business)
smoUserBusinessAddressPhone2 = 21 ' Mobile phone (business)
smoUserBusinessAddressHomepage = 22 ' Homepage (business)
smoUserHomeAddressInitials = 23 ' User initials (personal)
smoUserBusinessAddressInitials = 24 ' User initials (business)
Examples:
' Show the user's last name (personal)
MsgBox tm.Application.UserProperties.Item(1).Value
' Change the business e-mail address to [email protected]
With tm.Application
.UserProperties.Item(smoUserBusinessAddressEmail).Value = "[email protected]"
End With
Application (pointer to object)
Data type: Object
Returns the Application object.
Parent (pointer to object)
Data type: Object
Returns the parent object, i.e. Application.
UserProperty (object)
Access path: Application UserProperties Item
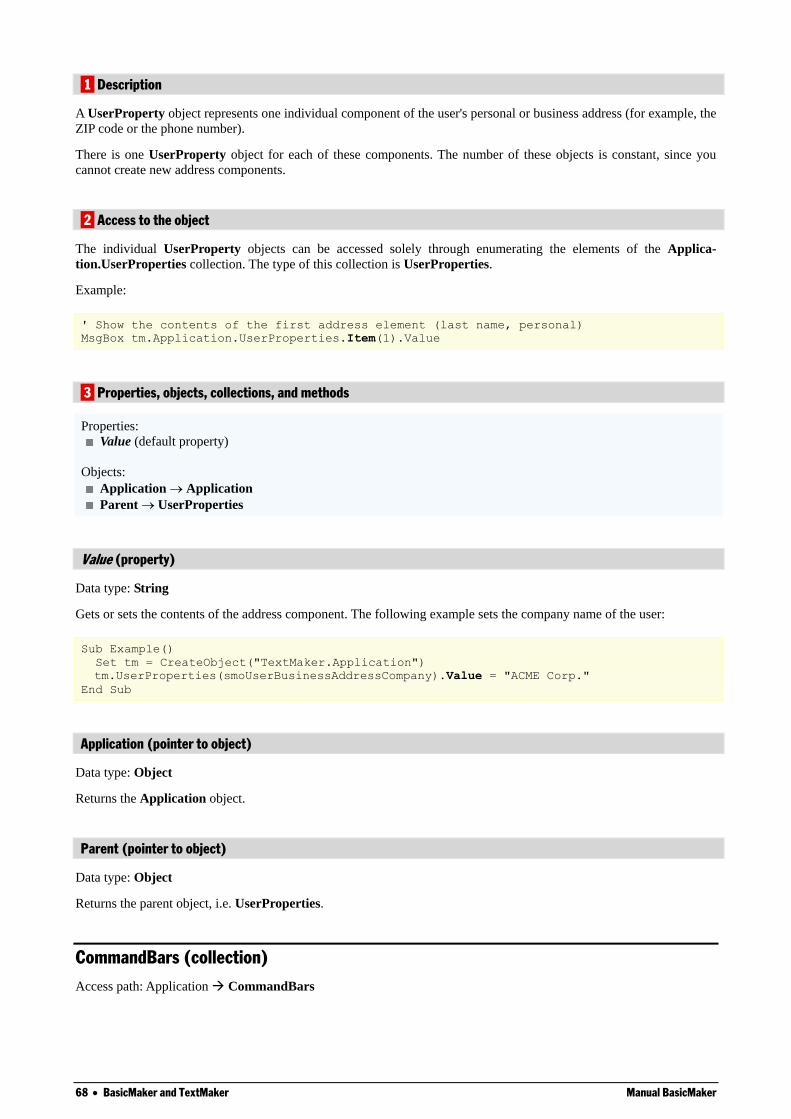
68 BasicMaker and TextMaker Manual BasicMaker
1 Description
A UserProperty object represents one individual component of the user's personal or business address (for example, the
ZIP code or the phone number).
There is one UserProperty object for each of these components. The number of these objects is constant, since you
cannot create new address components.
2 Access to the object
The individual UserProperty objects can be accessed solely through enumerating the elements of the Applica-
tion.UserProperties collection. The type of this collection is UserProperties.
Example:
' Show the contents of the first address element (last name, personal)
MsgBox tm.Application.UserProperties.Item(1).Value
3 Properties, objects, collections, and methods
Properties:
Value (default property)
Objects:
Application Application
Parent UserProperties
Value (property)
Data type: String
Gets or sets the contents of the address component. The following example sets the company name of the user:
Sub Example()
Set tm = CreateObject("TextMaker.Application")
tm.UserProperties(smoUserBusinessAddressCompany).Value = "ACME Corp."
End Sub
Application (pointer to object)
Data type: Object
Returns the Application object.
Parent (pointer to object)
Data type: Object
Returns the parent object, i.e. UserProperties.
CommandBars (collection)
Access path: Application CommandBars
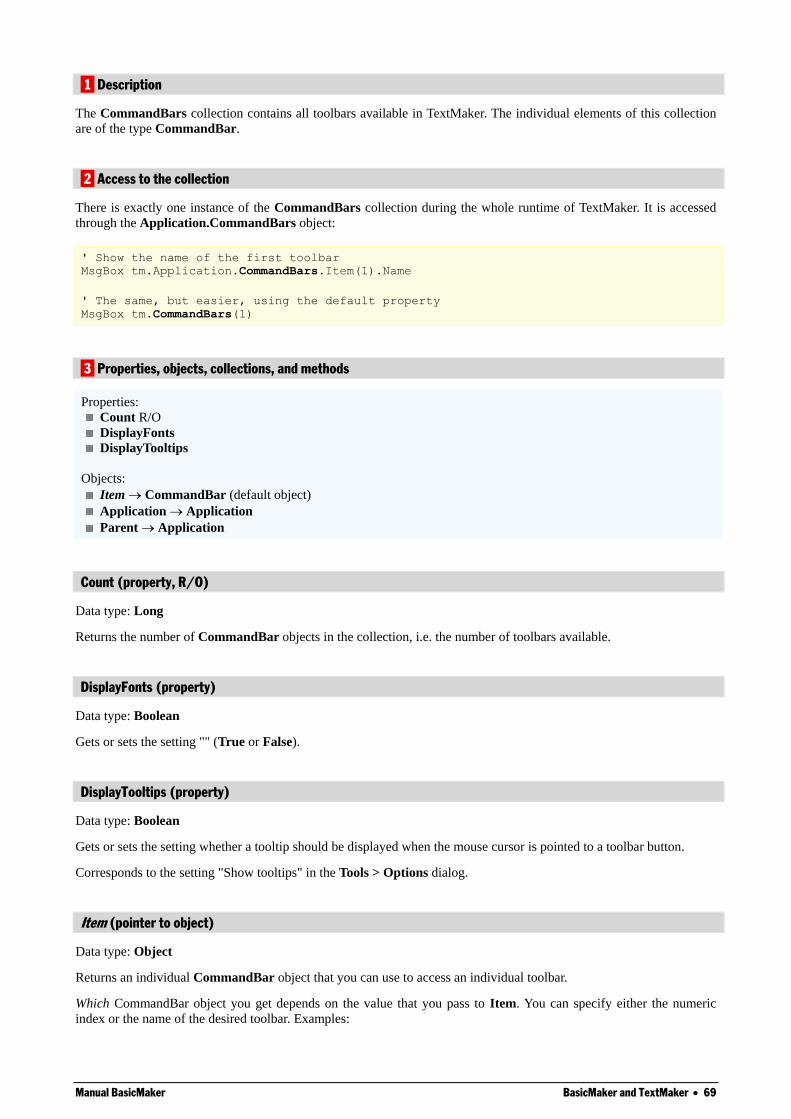
Manual BasicMaker BasicMaker and TextMaker 69
1 Description
The CommandBars collection contains all toolbars available in TextMaker. The individual elements of this collection
are of the type CommandBar.
2 Access to the collection
There is exactly one instance of the CommandBars collection during the whole runtime of TextMaker. It is accessed
through the Application.CommandBars object:
' Show the name of the first toolbar
MsgBox tm.Application.CommandBars.Item(1).Name
' The same, but easier, using the default property
MsgBox tm.CommandBars(1)
3 Properties, objects, collections, and methods
Properties:
Count R/O
DisplayFonts
DisplayTooltips
Objects:
Item CommandBar (default object)
Application Application
Parent Application
Count (property, R/O)
Data type: Long
Returns the number of CommandBar objects in the collection, i.e. the number of toolbars available.
DisplayFonts (property)
Data type: Boolean
Gets or sets the setting "" (True or False).
DisplayTooltips (property)
Data type: Boolean
Gets or sets the setting whether a tooltip should be displayed when the mouse cursor is pointed to a toolbar button.
Corresponds to the setting "Show tooltips" in the Tools > Options dialog.
Item (pointer to object)
Data type: Object
Returns an individual CommandBar object that you can use to access an individual toolbar.
Which CommandBar object you get depends on the value that you pass to Item. You can specify either the numeric
index or the name of the desired toolbar. Examples:
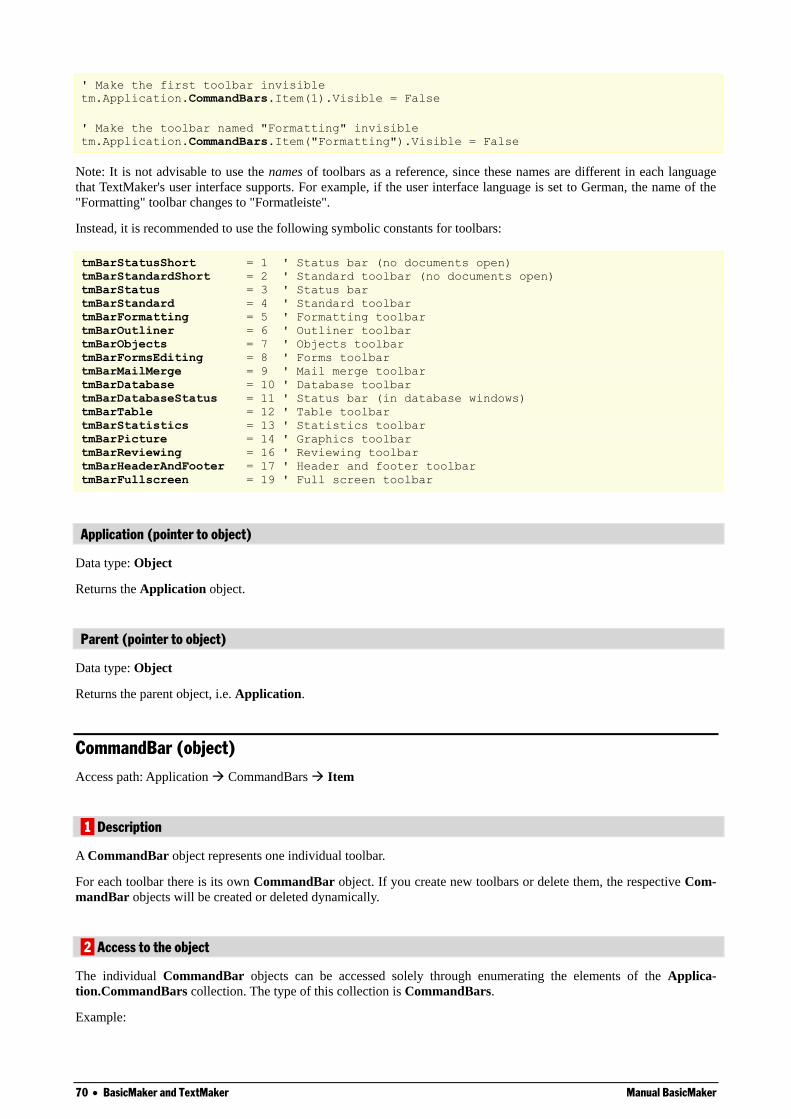
70 BasicMaker and TextMaker Manual BasicMaker
' Make the first toolbar invisible
tm.Application.CommandBars.Item(1).Visible = False
' Make the toolbar named "Formatting" invisible
tm.Application.CommandBars.Item("Formatting").Visible = False
Note: It is not advisable to use the names of toolbars as a reference, since these names are different in each language
that TextMaker's user interface supports. For example, if the user interface language is set to German, the name of the
"Formatting" toolbar changes to "Formatleiste".
Instead, it is recommended to use the following symbolic constants for toolbars:
tmBarStatusShort = 1 ' Status bar (no documents open)
tmBarStandardShort = 2 ' Standard toolbar (no documents open)
tmBarStatus = 3 ' Status bar
tmBarStandard = 4 ' Standard toolbar
tmBarFormatting = 5 ' Formatting toolbar
tmBarOutliner = 6 ' Outliner toolbar
tmBarObjects = 7 ' Objects toolbar
tmBarFormsEditing = 8 ' Forms toolbar
tmBarMailMerge = 9 ' Mail merge toolbar
tmBarDatabase = 10 ' Database toolbar
tmBarDatabaseStatus = 11 ' Status bar (in database windows)
tmBarTable = 12 ' Table toolbar
tmBarStatistics = 13 ' Statistics toolbar
tmBarPicture = 14 ' Graphics toolbar
tmBarReviewing = 16 ' Reviewing toolbar
tmBarHeaderAndFooter = 17 ' Header and footer toolbar
tmBarFullscreen = 19 ' Full screen toolbar
Application (pointer to object)
Data type: Object
Returns the Application object.
Parent (pointer to object)
Data type: Object
Returns the parent object, i.e. Application.
CommandBar (object)
Access path: Application CommandBars Item
1 Description
A CommandBar object represents one individual toolbar.
For each toolbar there is its own CommandBar object. If you create new toolbars or delete them, the respective Com-
mandBar objects will be created or deleted dynamically.
2 Access to the object
The individual CommandBar objects can be accessed solely through enumerating the elements of the Applica-
tion.CommandBars collection. The type of this collection is CommandBars.
Example:
Manual BasicMaker BasicMaker and TextMaker 71
' Show the name of the first toolbar
MsgBox tm.Application.CommandBars.Item(1).Name
' The same, but easier, using the default property
MsgBox tm.CommandBars(1)
3 Properties, objects, collections, and methods
Properties:
Name (default property)
Visible
Objects:
Application Application
Parent CommandBars
Name (property)
Data type: String
Gets or sets the name of the toolbar.
Example:
' Show the name of the first toolbar
MsgBox tm.Application.CommandBars.Item(1).Name
Visible (property)
Data type: Boolean
Gets or sets the visibility of the toolbar. The following example makes the "Formatting" toolbar invisible:
Sub Example()
Set tm = CreateObject("TextMaker.Application")
tm.Application.CommandBars.Item("Formatting").Visible = False
End Sub
Application (pointer to object)
Data type: Object
Returns the Application object.
Parent (pointer to object)
Data type: Object
Returns the parent object, i.e. CommandBars.
AutoCorrect (object)
Access path: Application AutoCorrect
72 BasicMaker and TextMaker Manual BasicMaker
1 Description
The AutoCorrect object contains settings related to automatic text correction and all SmartText entries.
2 Access to the object
There is exactly one instance of the AutoCorrect object during the whole runtime of TextMaker. It is accessed through
the Application.AutoCorrect object:
' Show the number of SmartText entries
Set tm = CreateObject("TextMaker.Application")
MsgBox tm.Application.AutoCorrect.Entries.Count
3 Properties, objects, collections, and methods
Properties:
CorrectInitialCaps
CorrectSentenceCaps
ReplaceText
Objects:
Application Application
Parent Application
Collections:
Entries AutoCorrectEntries
CorrectInitialCaps (property)
Data type: Boolean
Gets or sets the setting "Correct first two uppercase letters".
If this property is True, TextMaker automatically corrects the case of the second letter in words that begin with two
capital letters (for example "HEnry" will be changed to "Henry").
CorrectSentenceCaps (property)
Data type: Boolean
Gets or sets the setting "Capitalize first letter of sentences".
If this property is True, TextMaker capitalizes the first letter of a sentence in case it was accidently written in lower-
case.
ReplaceText (property)
Data type: Boolean
Gets or sets the setting "Expand SmartText entries".
If this property is True, SmartText entries entered in the document will be automatically replaced by the SmartText
content (for example: You type "sd" and TextMaker expands it with "sales department").
Application (pointer to object)
Data type: Object
Manual BasicMaker BasicMaker and TextMaker 73
Returns the Application object.
Parent (pointer to object)
Data type: Object
Returns the parent object, i.e. Application.
Entries (pointer to collection)
Data type: Object
Returns the AutoCorrectEntries collection which contains all SmartText entries.
AutoCorrectEntries (collection)
Access path: Application AutoCorrect Entries
1 Description
The AutoCorrectEntries collection contains all SmartText entries defined. The individual elements of this collection
are of the type AutoCorrectEntry.
2 Access to the collection
There is exactly one instance of the AutoCorrectEntries collection during the whole runtime of TextMaker. It is
accessed through the Application.AutoCorrect.Entries object:
' Create a SmartText entry named "sd" containing "sales department"
tm.Application.AutoCorrect.Entries.Add "sd", "sales department"
3 Properties, objects, collections, and methods
Properties:
Count R/O
Objects:
Item AutoCorrectEntry (default object)
Application Application
Parent AutoCorrect
Methods:
Add
Count (property, R/O)
Data type: Long
Returns the number of AutoCorrectEntry objects, i.e. the number of the currently defined SmartText entries.
Item (pointer to object)
Data type: Object
74 BasicMaker and TextMaker Manual BasicMaker
Returns an individual AutoCorrectEntry object, i.e. the definition of one individual SmartText entry.
Which AutoCorrect object you get depends on the value that you pass to Item. You can specify either the numeric index
or the name of the desired SmartText entry. Examples:
' Show the contents of the first defined SmartText entry
MsgBox tm.Application.AutoCorrect.Entries.Item(1).Value
' Show the contents of the SmartText entry with the name "sd"
MsgBox tm.Application.AutoCorrect.Entries.Item("sd").Value
Application (pointer to object)
Data type: Object
Returns the Application object.
Parent (pointer to object)
Data type: Object
Returns the parent object, i.e. AutoCorrect.
Add (method)
Add a new AutoCorrectEntry entry.
Syntax:
Add Name, Value
Parameters:
Name (type: String): The name for the new SmartText entry. If the name is empty or already exists, the call of
the method fails.
Value (type: String): The text for the new SmartText entry. If the passed string is empty, the call of the method
fails.
Return type:
Object (an AutoCorrectEntry object which represents the new SmartText entry)
Example:
' Create a SmartText entry named "sd" containing "sales department"
tm.Application.AutoCorrect.Entries.Add "sd", "sales department"
AutoCorrectEntry (object)
Access path: Application AutoCorrect Entries Item
1 Description
An AutoCorrectEntry object represents one individual SmartText entry, for example, "sd" for "sales department".
For each SmartText entry there is its own AutoCorrectEntry object. If you create SmartText entries or delete them, the
respective AutoCorrectEntry objects will be created or deleted dynamically.
Manual BasicMaker BasicMaker and TextMaker 75
2 Access to the object
The individual AutoCorrectEntry objects can be accessed solely through enumerating the elements of the collection
Application.AutoCorrect.Entries. The type of this collection is AutoCorrectEntries.
Example:
' Show the name of the first SmartText entry
MsgBox tm.Application.AutoCorrect.Entries.Item(1).Name
3 Properties, objects, collections, and methods
Properties:
Name (default property)
Value
Objects:
Application Application
Parent AutoCorrectEntries
Methods:
Delete
Name (property)
Data type: String
Gets or sets the name of the SmartText entry (e.g. "sd").
Value (property)
Data type: String
Gets or sets the contents of the SmartText entry (e.g. "sales department").
Application (pointer to object)
Data type: Object
Returns the Application object.
Parent (pointer to object)
Data type: Object
Returns the parent object, i.e. AutoCorrectEntries.
Delete (method)
Deletes an AutoCorrectEntry object from the AutoCorrectEntries collection.
Syntax:
Delete
Parameters:
none
76 BasicMaker and TextMaker Manual BasicMaker
Return type:
none
Examples:
' Delete the first SmartText entry
tm.Application.AutoCorrect.Entries.Item(1).Delete
' Delete the SmartText entry with the name "sd"
tm.Application.AutoCorrect.Entries.Item("sd").Delete
Documents (collection)
Access path: Application Documents
1 Description
The Documents collection contains all opened documents. The individual elements of this collection are of the type
Document.
2 Access to the collection
There is exactly one instance of the Documents collection during the whole runtime of TextMaker. It is accessed
through the Application.Documents object:
' Show the number of opened documents
MsgBox tm.Application.Documents.Count
' Show the name of the first opened document
MsgBox tm.Application.Documents(1).Name
3 Properties, objects, collections, and methods
Properties:
Count R/O
Objects:
Item Document (default object)
Application Application
Parent Application
Methods:
Add
Open
Close
Count (property, R/O)
Data type: Long
Returns the number of Document objects in the collection, i.e. the number of the currently opened documents.
Manual BasicMaker BasicMaker and TextMaker 77
Item (pointer to object)
Data type: Object
Returns an individual Document object, i.e. an individual open document.
Which Document object you get depends on the value that you pass to Item. You can specify either the numeric index
or the name of the desired document. Examples:
' Show the name of the first document
MsgBox tm.Application.Documents.Item(1).FullName
' Show the name of the document "Test.tmd" (provided that is it opened)
MsgBox tm.Application.Documents.Item("Test.tmd").FullName
' You can also specify the full path
MsgBox tm.Application.Documents.Item("c:\Documents\Test.tmd").FullName
Application (pointer to object)
Data type: Object
Returns the Application object.
Parent (pointer to object)
Data type: Object
Returns the parent object, i.e. Application.
Add (method)
Creates a new empty document, based either on the standard document template Normal.tmv or any other document
template you specify.
Syntax:
Add [Template]
Parameters:
Template (optional; type: String): Path and file name of the document template on which your document should
be based. If omitted, the standard template Normal.tmv will be used.
If you omit the path or give only a relative path, TextMaker's default template path will be automatically pre-
fixed. If you omit the file extension .tmv, it will be automatically added.
Return type:
Object (a Document object which represents the new document)
Example:
Sub Sample()
Dim tm as Object
Dim newDoc as Object
Set tm = CreateObject("TextMaker.Application")
tm.Visible = True
Set newDoc = tm.Documents.Add
MsgBox newDoc.Name
End Sub

78 BasicMaker and TextMaker Manual BasicMaker
You can use the Document object returned by the Add method like any other document. Alternatively, you can ignore
the return value of the Add method and access the new document with the ActiveDocument method, for example.
Open (method)
Opens an existing document.
Syntax:
Open FileName, [ReadOnly], [Password], [WritePassword], [FileFormat]
Parameters:
FileName (type: String): Path and file name of the document or document template to be opened.
ReadOnly (optional; type: Boolean): Indicates whether the document should be opened only for reading.
Password (optional; type: String): The read password for password-protected documents. If you omit this
parameter for a password-protected document, the user will be asked to input the read password.
WritePassword (optional; type: String): The write password for password-protected documents. If you omit this
parameter for a password-protected document, the user will be asked to input the write password.
FileFormat (optional; type: Long or TmSaveFormat): The file format of the document to be opened. The
possible values are:
tmFormatDocument = 0 ' TextMaker document
tmFormatTemplate = 1 ' TextMaker document template
tmFormatWinWord97 = 2 ' Microsoft Word 97 and 2000
tmFormatOpenDocument = 3 ' OpenDocument, OpenOffice.org, StarOffice
tmFormatRTF = 4 ' Rich Text Format
tmFormatPocketWordPPC = 5 ' Pocket Word for Pocket PCs
tmFormatPocketWordHPC = 6 ' Pocket Word for Handheld PCs (Windows CE)
tmFormatPlainTextAnsi = 7 ' Text file with Windows character set (ANSI)
tmFormatPlainTextDOS = 8 ' Text file with DOS character set
tmFormatPlainTextUnicode = 9 ' Text file with Unicode character set
tmFormatPlainTextUTF8 = 10 ' Text file with UTF8 character set
tmFormatHTML = 12 ' HTML document
tmFormatWinWord6 = 13 ' Microsoft Word 6.0
tmFormatPlainTextUnix = 14 ' Text file for UNIX, Linux, FreeBSD
tmFormatWinWordXP = 15 ' Microsoft Word XP and 2003
tmFormatTM2006 = 16 ' TextMaker 2006 document
tmFormatOpenXML = 17 ' Microsoft Word 2007 and later (.docx)
tmFormatTM2008 = 18 ' TextMaker 2008 document
If you omit this parameter, the value tmFormatDocument will be taken.
Tip: Independent of the value for the FileFormat parameter TextMaker always tries to determine the file format
by itself and ignores evidently false inputs.
Return type:
Object (a Document object which represents the opened document)
Examples:
' Open a document
tm.Documents.Open "c:\docs\test.tmd"
' Open a document only for reading
tm.Documents.Open "c:\docs\Test.tmd", True
Close (method)
Closes all currently opened documents.
Syntax:
Manual BasicMaker BasicMaker and TextMaker 79
Close [SaveChanges]
Parameters:
SaveChanges (optional; type: Long or SmoSaveOptions) indicates whether the documents which were changed
since they were last saved should be saved or not. If you omit this parameter, the user will be asked to indicate it
(if necessary). The possible values are:
smoDoNotSaveChanges = 0 ' Don't ask, don't save
smoPromptToSaveChanges = 1 ' Ask the user
smoSaveChanges = 2 ' Save without asking
Return type:
none
Example:
' Close all opened documents without saving them
tm.Documents.Close smoDoNotSaveChanges
Document (object)
Access paths:
Application Documents Item
Application ActiveDocument
Application Windows Item Document
Application ActiveWindow Document
1 Description
A Document object represents one individual document opened in TextMaker.
For each document there is its own Document object. If you open or close documents, the respective Document objects
will be created or deleted dynamically.
2 Access to the object
The individual Document objects can be accessed in the following ways:
All currently open documents are administrated in the Application.Documents collection (type: Documents):
' Show the names of all opened documents
For i = 1 To tm.Application.Documents.Count
MsgBox tm.Application.Documents.Item(i).Name
Next i
The active document can be accessed through the Application.ActiveDocument object:
' Show the name of the current document
MsgBox tm.Application.ActiveDocument.Name
Document is the Parent object for different objects which are linked with it, for example, BuiltInDocumentProp-
erties or Selection:
' Show the name of the current document in an indirect way
MsgBox tm.Application.ActiveDocument.BuiltInDocumentProperties.Parent.Name
The objects Window and Selection include the object pointer to the document which belongs to them:
' Access the active document through the active document window
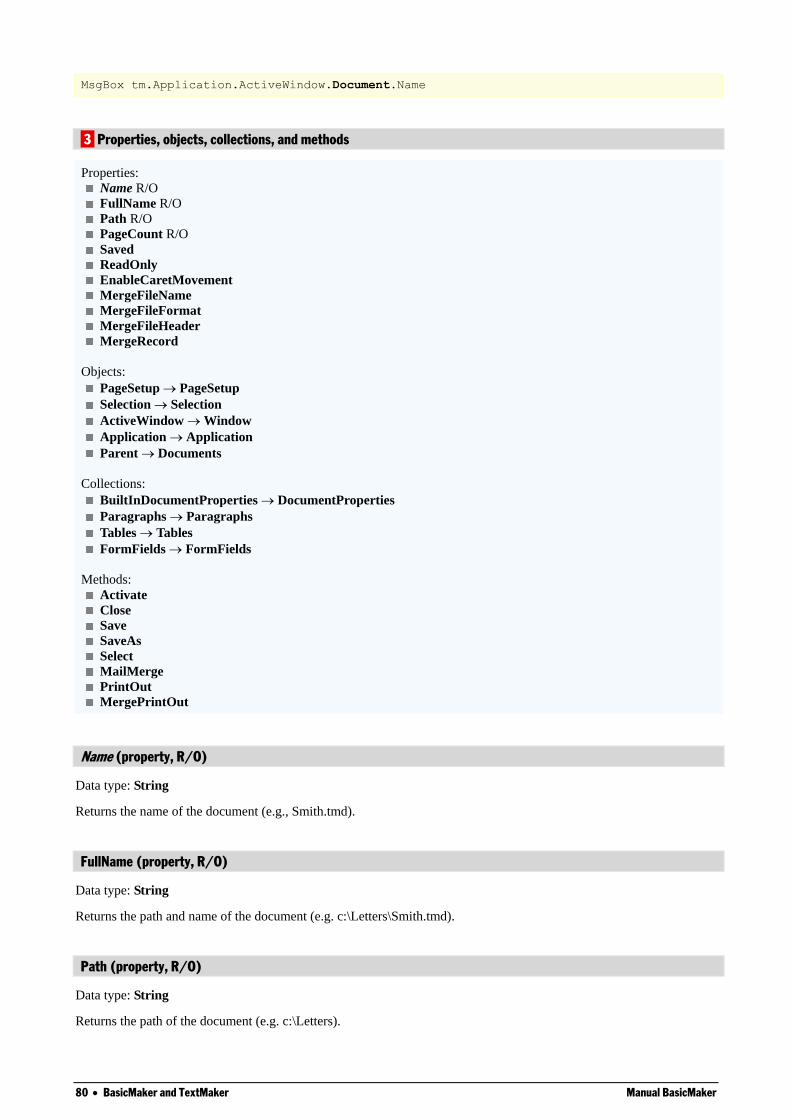
80 BasicMaker and TextMaker Manual BasicMaker
MsgBox tm.Application.ActiveWindow.Document.Name
3 Properties, objects, collections, and methods
Properties:
Name R/O
FullName R/O
Path R/O
PageCount R/O
Saved
ReadOnly
EnableCaretMovement
MergeFileName
MergeFileFormat
MergeFileHeader
MergeRecord
Objects:
PageSetup PageSetup
Selection Selection
ActiveWindow Window
Application Application
Parent Documents
Collections:
BuiltInDocumentProperties DocumentProperties
Paragraphs Paragraphs
Tables Tables
FormFields FormFields
Methods:
Activate
Close
Save
SaveAs
Select
MailMerge
PrintOut
MergePrintOut
Name (property, R/O)
Data type: String
Returns the name of the document (e.g., Smith.tmd).
FullName (property, R/O)
Data type: String
Returns the path and name of the document (e.g. c:\Letters\Smith.tmd).
Path (property, R/O)
Data type: String
Returns the path of the document (e.g. c:\Letters).

Manual BasicMaker BasicMaker and TextMaker 81
PageCount (property, R/O)
Data type: Long
Returns the number of pages in the document.
Saved (property)
Data type: Boolean
Gets or sets the Saved property of the document. It indicates whether a document was changed since it was last saved:
If Saved is set to True, the document was not changed since it was last saved.
If Saved is set to False, the document was changed since it was last saved. When closing the document, the user will
be asked if it should be saved.
Note: As soon as the user changes something in a document, its Saved property will be set to False automatically.
ReadOnly (property)
Data type: Boolean
Gets or sets the ReadOnly property of the document.
If the property is True, the document is protected against user changes. Users will not be able to edit, delete, or add
content.
If you set this property to True, the EnableCaretMovement property (see there) will be automatically set to False.
Therefore, the cursor cannot be moved inside the document anymore. However, you can always set the Ena-
bleCaretMovement property to True if you want to make cursor movement possible.
EnableCaretMovement (property)
Data type: Boolean
Gets or sets the EnableCaretMovement property of the document. This property is sensible only in combination with
the ReadOnly property (see there).
If the EnableCaretMovement property is True, the cursor can be moved freely inside a write-protected document. If it
is set to False, cursor movement is not possible.
MergeFileName (property)
Data type: String
Gets or sets the name of the merge database to which the document is assigned.
MergeFileFormat (property)
Data type: Long (TmMergeType)
Gets or sets the file format of the merge database to which the document is assigned. The possible values are:
tmMergeCSVAnsi = 3
tmMergeDBaseAnsi = 5
tmMergeCSVDos = 64
tmMergeDBaseDos = 66
tmMergeDBaseUnicode = 69

82 BasicMaker and TextMaker Manual BasicMaker
MergeFileHeader (property)
Data type: Boolean
Gets or sets the option Get field names from the first record (as found in TextMaker's Tools > Assign Database
dialog).
This property is applicable only for the CSV files (tmMergeCSVAnsi, tmMergeCSVDos).
MergeRecord (property)
Data type: Long
Gets or sets the record number of the record shown in a merge document. Corresponds to the setting Show merge
record in the dialog of the File > Properties command, View tab.
PageSetup (pointer to object)
Data type: Object
Returns the PageSetup object that you can use to access the page formatting of the document (paper format, margins,
etc.).
Selection (pointer to object)
Data type: Object
Returns the Selection object that you can use to access the currently selected text in the document. If nothing is select-
ed, the object returns the current text cursor.
ActiveWindow (pointer to object)
Data type: Object
Returns the Window object that contains settings related to the document window of a document (for example, its
height and width).
Application (pointer to object)
Data type: Object
Returns the Application object.
Parent (pointer to object)
Data type: Object
Returns the parent object, i.e. Documents.
BuiltInDocumentProperties (pointer to collection)
Data type: Object
Returns the DocumentProperties collection that you can use to access the document info (title, subject, author etc.).

Manual BasicMaker BasicMaker and TextMaker 83
Paragraphs (pointer to collection)
Data type: Object
Returns the Paragraphs collection, a collection of all paragraphs in the document.
Tables (pointer to collection)
Data type: Object
Returns the Tables collection, a collection of all tables in the document.
FormFields (pointer to collection)
Data type: Object
Returns the FormFields collection, a collection of all form objects in the document.
Activate (method)
Brings the document window to the front (if the Visible property is True) and sets the focus to the document window.
Syntax:
Activate
Parameters:
none
Return type:
none
Example:
' Bring the first document of the Documents collection to the front
tm.Documents(1).Activate
Close (method)
Closes the document.
Syntax:
Close [SaveChanges]
Parameters:
SaveChanges (optional; type: Long or SmoSaveOptions) indicates whether the document should be saved or
not. If you omit this parameter, the user will be asked – but only if the document was changed since it was last
saved. The possible values are:
smoDoNotSaveChanges = 0 ' Don't ask, don't save
smoPromptToSaveChanges = 1 ' Ask the user
smoSaveChanges = 2 ' Save without asking
Return type:
none
Example:
' Close the active document without saving
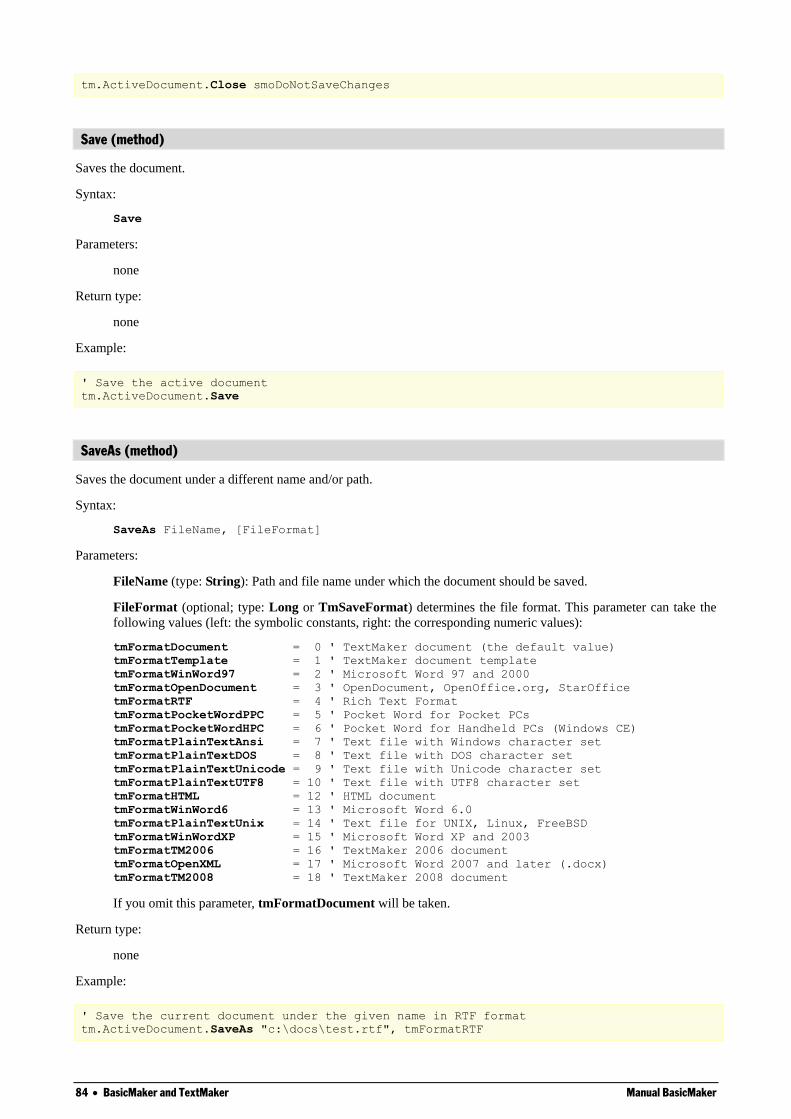
84 BasicMaker and TextMaker Manual BasicMaker
tm.ActiveDocument.Close smoDoNotSaveChanges
Save (method)
Saves the document.
Syntax:
Save
Parameters:
none
Return type:
none
Example:
' Save the active document
tm.ActiveDocument.Save
SaveAs (method)
Saves the document under a different name and/or path.
Syntax:
SaveAs FileName, [FileFormat]
Parameters:
FileName (type: String): Path and file name under which the document should be saved.
FileFormat (optional; type: Long or TmSaveFormat) determines the file format. This parameter can take the
following values (left: the symbolic constants, right: the corresponding numeric values):
tmFormatDocument = 0 ' TextMaker document (the default value)
tmFormatTemplate = 1 ' TextMaker document template
tmFormatWinWord97 = 2 ' Microsoft Word 97 and 2000
tmFormatOpenDocument = 3 ' OpenDocument, OpenOffice.org, StarOffice
tmFormatRTF = 4 ' Rich Text Format
tmFormatPocketWordPPC = 5 ' Pocket Word for Pocket PCs
tmFormatPocketWordHPC = 6 ' Pocket Word for Handheld PCs (Windows CE)
tmFormatPlainTextAnsi = 7 ' Text file with Windows character set
tmFormatPlainTextDOS = 8 ' Text file with DOS character set
tmFormatPlainTextUnicode = 9 ' Text file with Unicode character set
tmFormatPlainTextUTF8 = 10 ' Text file with UTF8 character set
tmFormatHTML = 12 ' HTML document
tmFormatWinWord6 = 13 ' Microsoft Word 6.0
tmFormatPlainTextUnix = 14 ' Text file for UNIX, Linux, FreeBSD
tmFormatWinWordXP = 15 ' Microsoft Word XP and 2003
tmFormatTM2006 = 16 ' TextMaker 2006 document
tmFormatOpenXML = 17 ' Microsoft Word 2007 and later (.docx)
tmFormatTM2008 = 18 ' TextMaker 2008 document
If you omit this parameter, tmFormatDocument will be taken.
Return type:
none
Example:
' Save the current document under the given name in RTF format
tm.ActiveDocument.SaveAs "c:\docs\test.rtf", tmFormatRTF
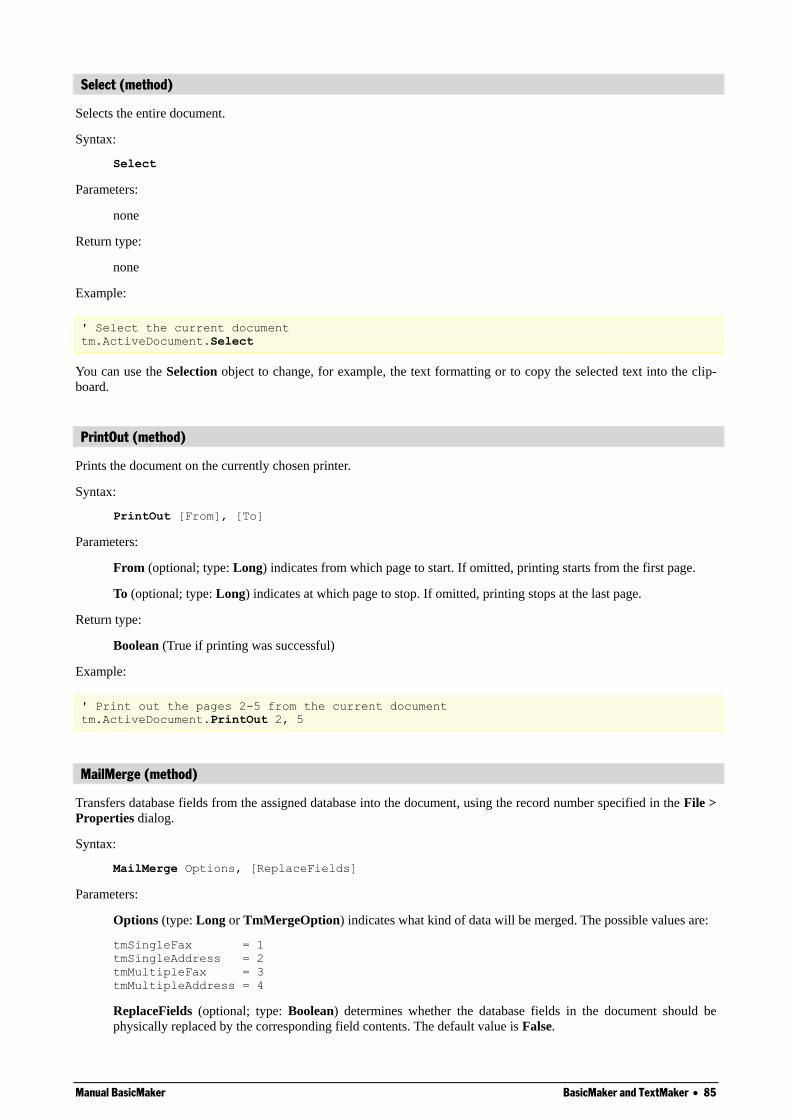
Manual BasicMaker BasicMaker and TextMaker 85
Select (method)
Selects the entire document.
Syntax:
Select
Parameters:
none
Return type:
none
Example:
' Select the current document
tm.ActiveDocument.Select
You can use the Selection object to change, for example, the text formatting or to copy the selected text into the clip-
board.
PrintOut (method)
Prints the document on the currently chosen printer.
Syntax:
PrintOut [From], [To]
Parameters:
From (optional; type: Long) indicates from which page to start. If omitted, printing starts from the first page.
To (optional; type: Long) indicates at which page to stop. If omitted, printing stops at the last page.
Return type:
Boolean (True if printing was successful)
Example:
' Print out the pages 2-5 from the current document
tm.ActiveDocument.PrintOut 2, 5
MailMerge (method)
Transfers database fields from the assigned database into the document, using the record number specified in the File >
Properties dialog.
Syntax:
MailMerge Options, [ReplaceFields]
Parameters:
Options (type: Long or TmMergeOption) indicates what kind of data will be merged. The possible values are:
tmSingleFax = 1
tmSingleAddress = 2
tmMultipleFax = 3
tmMultipleAddress = 4
ReplaceFields (optional; type: Boolean) determines whether the database fields in the document should be
physically replaced by the corresponding field contents. The default value is False.
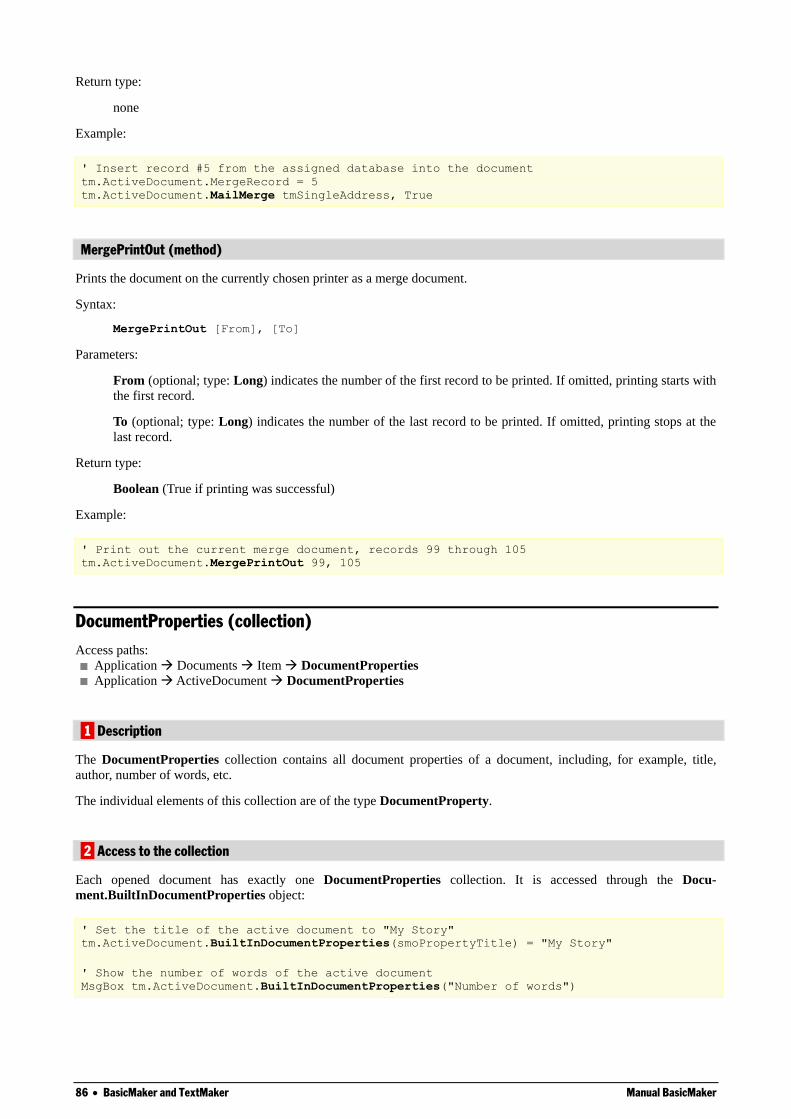
86 BasicMaker and TextMaker Manual BasicMaker
Return type:
none
Example:
' Insert record #5 from the assigned database into the document
tm.ActiveDocument.MergeRecord = 5
tm.ActiveDocument.MailMerge tmSingleAddress, True
MergePrintOut (method)
Prints the document on the currently chosen printer as a merge document.
Syntax:
MergePrintOut [From], [To]
Parameters:
From (optional; type: Long) indicates the number of the first record to be printed. If omitted, printing starts with
the first record.
To (optional; type: Long) indicates the number of the last record to be printed. If omitted, printing stops at the
last record.
Return type:
Boolean (True if printing was successful)
Example:
' Print out the current merge document, records 99 through 105
tm.ActiveDocument.MergePrintOut 99, 105
DocumentProperties (collection)
Access paths:
Application Documents Item DocumentProperties
Application ActiveDocument DocumentProperties
1 Description
The DocumentProperties collection contains all document properties of a document, including, for example, title,
author, number of words, etc.
The individual elements of this collection are of the type DocumentProperty.
2 Access to the collection
Each opened document has exactly one DocumentProperties collection. It is accessed through the Docu-
ment.BuiltInDocumentProperties object:
' Set the title of the active document to "My Story"
tm.ActiveDocument.BuiltInDocumentProperties(smoPropertyTitle) = "My Story"
' Show the number of words of the active document
MsgBox tm.ActiveDocument.BuiltInDocumentProperties("Number of words")
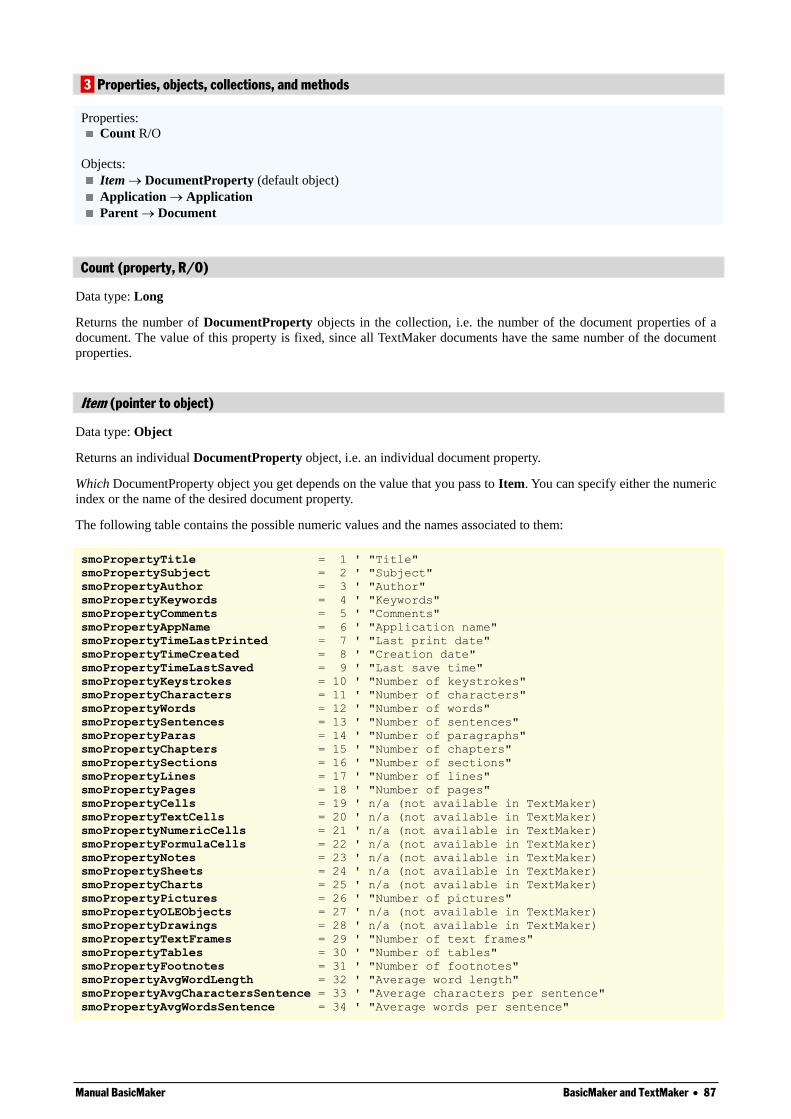
Manual BasicMaker BasicMaker and TextMaker 87
3 Properties, objects, collections, and methods
Properties:
Count R/O
Objects:
Item DocumentProperty (default object)
Application Application
Parent Document
Count (property, R/O)
Data type: Long
Returns the number of DocumentProperty objects in the collection, i.e. the number of the document properties of a
document. The value of this property is fixed, since all TextMaker documents have the same number of the document
properties.
Item (pointer to object)
Data type: Object
Returns an individual DocumentProperty object, i.e. an individual document property.
Which DocumentProperty object you get depends on the value that you pass to Item. You can specify either the numeric
index or the name of the desired document property.
The following table contains the possible numeric values and the names associated to them:
smoPropertyTitle = 1 ' "Title"
smoPropertySubject = 2 ' "Subject"
smoPropertyAuthor = 3 ' "Author"
smoPropertyKeywords = 4 ' "Keywords"
smoPropertyComments = 5 ' "Comments"
smoPropertyAppName = 6 ' "Application name"
smoPropertyTimeLastPrinted = 7 ' "Last print date"
smoPropertyTimeCreated = 8 ' "Creation date"
smoPropertyTimeLastSaved = 9 ' "Last save time"
smoPropertyKeystrokes = 10 ' "Number of keystrokes"
smoPropertyCharacters = 11 ' "Number of characters"
smoPropertyWords = 12 ' "Number of words"
smoPropertySentences = 13 ' "Number of sentences"
smoPropertyParas = 14 ' "Number of paragraphs"
smoPropertyChapters = 15 ' "Number of chapters"
smoPropertySections = 16 ' "Number of sections"
smoPropertyLines = 17 ' "Number of lines"
smoPropertyPages = 18 ' "Number of pages"
smoPropertyCells = 19 ' n/a (not available in TextMaker)
smoPropertyTextCells = 20 ' n/a (not available in TextMaker)
smoPropertyNumericCells = 21 ' n/a (not available in TextMaker)
smoPropertyFormulaCells = 22 ' n/a (not available in TextMaker)
smoPropertyNotes = 23 ' n/a (not available in TextMaker)
smoPropertySheets = 24 ' n/a (not available in TextMaker)
smoPropertyCharts = 25 ' n/a (not available in TextMaker)
smoPropertyPictures = 26 ' "Number of pictures"
smoPropertyOLEObjects = 27 ' n/a (not available in TextMaker)
smoPropertyDrawings = 28 ' n/a (not available in TextMaker)
smoPropertyTextFrames = 29 ' "Number of text frames"
smoPropertyTables = 30 ' "Number of tables"
smoPropertyFootnotes = 31 ' "Number of footnotes"
smoPropertyAvgWordLength = 32 ' "Average word length"
smoPropertyAvgCharactersSentence = 33 ' "Average characters per sentence"
smoPropertyAvgWordsSentence = 34 ' "Average words per sentence"
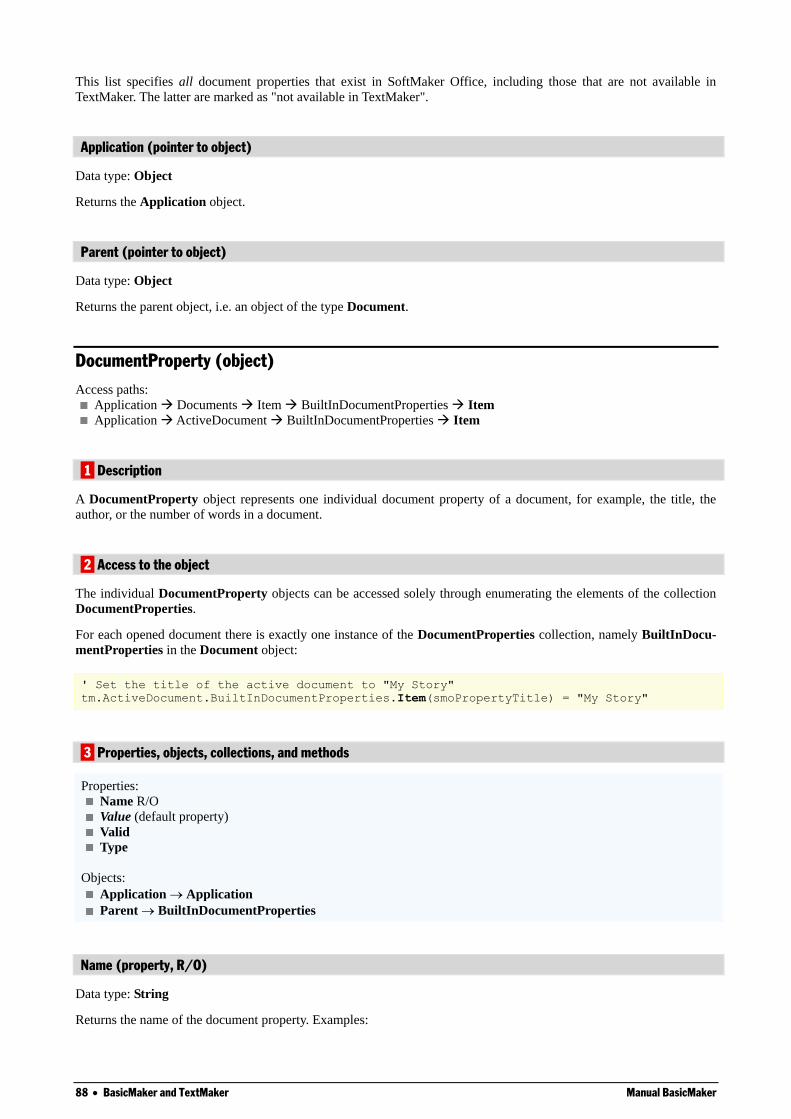
88 BasicMaker and TextMaker Manual BasicMaker
This list specifies all document properties that exist in SoftMaker Office, including those that are not available in
TextMaker. The latter are marked as "not available in TextMaker".
Application (pointer to object)
Data type: Object
Returns the Application object.
Parent (pointer to object)
Data type: Object
Returns the parent object, i.e. an object of the type Document.
DocumentProperty (object)
Access paths:
Application Documents Item BuiltInDocumentProperties Item
Application ActiveDocument BuiltInDocumentProperties Item
1 Description
A DocumentProperty object represents one individual document property of a document, for example, the title, the
author, or the number of words in a document.
2 Access to the object
The individual DocumentProperty objects can be accessed solely through enumerating the elements of the collection
DocumentProperties.
For each opened document there is exactly one instance of the DocumentProperties collection, namely BuiltInDocu-
mentProperties in the Document object:
' Set the title of the active document to "My Story"
tm.ActiveDocument.BuiltInDocumentProperties.Item(smoPropertyTitle) = "My Story"
3 Properties, objects, collections, and methods
Properties:
Name R/O
Value (default property)
Valid
Type
Objects:
Application Application
Parent BuiltInDocumentProperties
Name (property, R/O)
Data type: String
Returns the name of the document property. Examples:
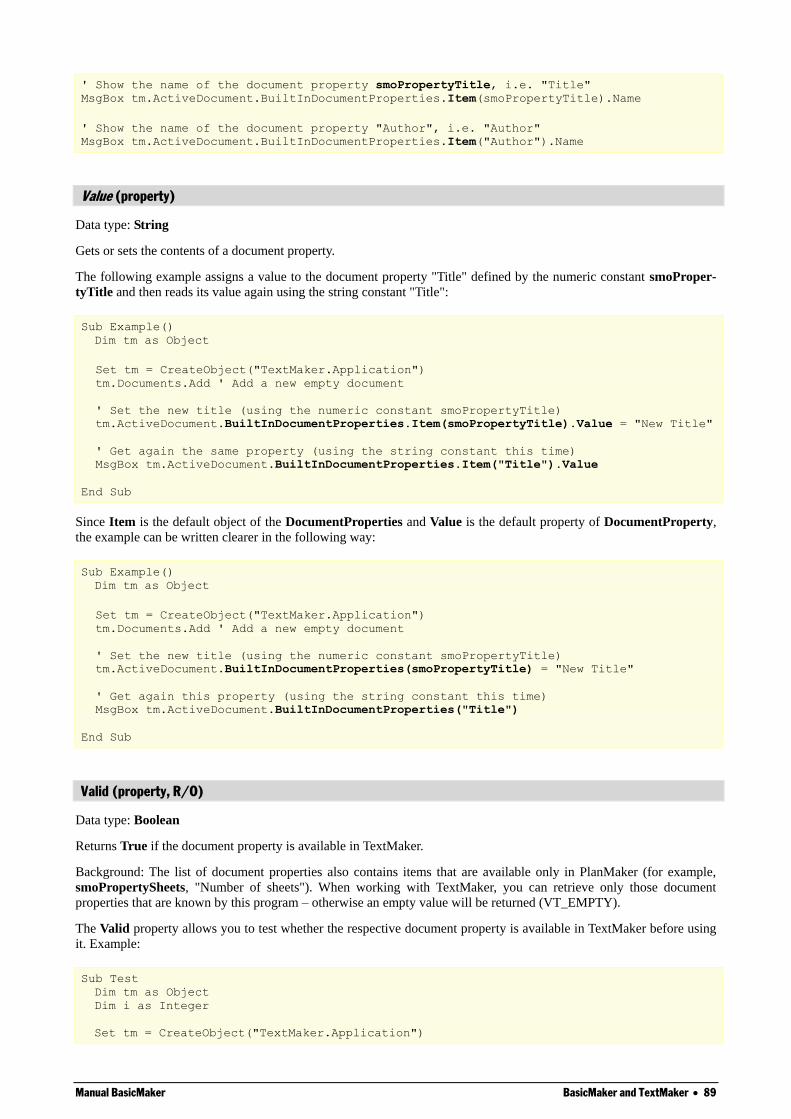
Manual BasicMaker BasicMaker and TextMaker 89
' Show the name of the document property smoPropertyTitle, i.e. "Title"
MsgBox tm.ActiveDocument.BuiltInDocumentProperties.Item(smoPropertyTitle).Name
' Show the name of the document property "Author", i.e. "Author"
MsgBox tm.ActiveDocument.BuiltInDocumentProperties.Item("Author").Name
Value (property)
Data type: String
Gets or sets the contents of a document property.
The following example assigns a value to the document property "Title" defined by the numeric constant smoProper-
tyTitle and then reads its value again using the string constant "Title":
Sub Example()
Dim tm as Object
Set tm = CreateObject("TextMaker.Application")
tm.Documents.Add ' Add a new empty document
' Set the new title (using the numeric constant smoPropertyTitle)
tm.ActiveDocument.BuiltInDocumentProperties.Item(smoPropertyTitle).Value = "New Title"
' Get again the same property (using the string constant this time)
MsgBox tm.ActiveDocument.BuiltInDocumentProperties.Item("Title").Value
End Sub
Since Item is the default object of the DocumentProperties and Value is the default property of DocumentProperty,
the example can be written clearer in the following way:
Sub Example()
Dim tm as Object
Set tm = CreateObject("TextMaker.Application")
tm.Documents.Add ' Add a new empty document
' Set the new title (using the numeric constant smoPropertyTitle)
tm.ActiveDocument.BuiltInDocumentProperties(smoPropertyTitle) = "New Title"
' Get again this property (using the string constant this time)
MsgBox tm.ActiveDocument.BuiltInDocumentProperties("Title")
End Sub
Valid (property, R/O)
Data type: Boolean
Returns True if the document property is available in TextMaker.
Background: The list of document properties also contains items that are available only in PlanMaker (for example,
smoPropertySheets, "Number of sheets"). When working with TextMaker, you can retrieve only those document
properties that are known by this program – otherwise an empty value will be returned (VT_EMPTY).
The Valid property allows you to test whether the respective document property is available in TextMaker before using
it. Example:
Sub Test
Dim tm as Object
Dim i as Integer
Set tm = CreateObject("TextMaker.Application")
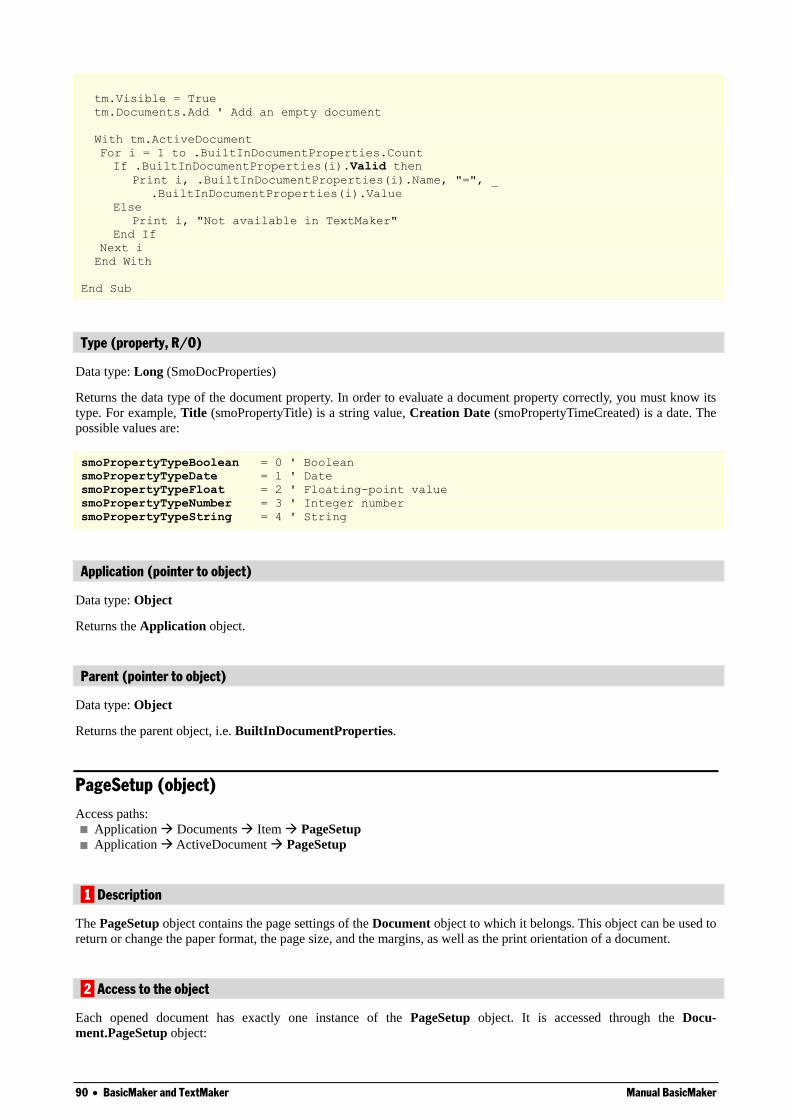
90 BasicMaker and TextMaker Manual BasicMaker
tm.Visible = True
tm.Documents.Add ' Add an empty document
With tm.ActiveDocument
For i = 1 to .BuiltInDocumentProperties.Count
If .BuiltInDocumentProperties(i).Valid then
Print i, .BuiltInDocumentProperties(i).Name, "=", _
.BuiltInDocumentProperties(i).Value
Else
Print i, "Not available in TextMaker"
End If
Next i
End With
End Sub
Type (property, R/O)
Data type: Long (SmoDocProperties)
Returns the data type of the document property. In order to evaluate a document property correctly, you must know its
type. For example, Title (smoPropertyTitle) is a string value, Creation Date (smoPropertyTimeCreated) is a date. The
possible values are:
smoPropertyTypeBoolean = 0 ' Boolean
smoPropertyTypeDate = 1 ' Date
smoPropertyTypeFloat = 2 ' Floating-point value
smoPropertyTypeNumber = 3 ' Integer number
smoPropertyTypeString = 4 ' String
Application (pointer to object)
Data type: Object
Returns the Application object.
Parent (pointer to object)
Data type: Object
Returns the parent object, i.e. BuiltInDocumentProperties.
PageSetup (object)
Access paths:
Application Documents Item PageSetup
Application ActiveDocument PageSetup
1 Description
The PageSetup object contains the page settings of the Document object to which it belongs. This object can be used to
return or change the paper format, the page size, and the margins, as well as the print orientation of a document.
2 Access to the object
Each opened document has exactly one instance of the PageSetup object. It is accessed through the Docu-
ment.PageSetup object:
Manual BasicMaker BasicMaker and TextMaker 91
' Set the left margin of the page to 2 cm
tm.ActiveDocument.PageSetup.LeftMargin = tm.CentimetersToPoints(2)
Hint: TextMaker allows you to divide a document into multiple chapters and then define different page settings for each
of them. In this case, the PageSetup object always refers to the page settings of the chapter where the text cursor is
placed at the moment.
3 Properties, objects, collections, and methods
Properties:
LeftMargin
RightMargin
TopMargin
BottomMargin
PageHeight
PageWidth
Orientation
PaperSize
Objects:
Application Application
Parent Document
LeftMargin (property)
Data type: Single
Gets or sets the left page margin of the document in points (1 point corresponds to 1/72 inches).
RightMargin (property)
Data type: Single
Gets or sets the right page margin of the document in points (1 point corresponds to 1/72 inches).
TopMargin (property)
Data type: Single
Gets or sets the top page margin of the document in points (1 point corresponds to 1/72 inches).
BottomMargin (property)
Data type: Single
Gets or sets the bottom page margin of the document in points (1 point corresponds to 1/72 inches).
PageHeight (property)
Data type: Single
Gets or sets the page height of the document in points (1 point corresponds to 1/72 inches).
If you set this property, the PaperSize property (see below) will be automatically changed to a corresponding paper
format.
92 BasicMaker and TextMaker Manual BasicMaker
PageWidth (property)
Data type: Single
Gets or sets the page width of the document in points (1 point corresponds to 1/72 inches).
If you set this property, the PaperSize property (see below) will be automatically changed to a corresponding paper
format.
Orientation (property)
Data type: Long (SmoOrientation)
Gets or sets the page orientation. The following constants are allowed:
smoOrientLandscape = 0 ' Landscape format
smoOrientPortrait = 1 ' Orient portrait
PaperSize (property)
Data type: Long (SmoPaperSize)
Gets or sets the page size of the document. The following constants are allowed:
smoPaperCustom = -1
smoPaperLetter = 1
smoPaperLetterSmall = 2
smoPaperTabloid = 3
smoPaperLedger = 4
smoPaperLegal = 5
smoPaperStatement = 6
smoPaperExecutive = 7
smoPaperA3 = 8
smoPaperA4 = 9
smoPaperA4Small = 10
smoPaperA5 = 11
smoPaperB4 = 12
smoPaperB5 = 13
smoPaperFolio = 14
smoPaperQuarto = 15
smoPaper10x14 = 16
smoPaper11x17 = 17
smoPaperNote = 18
smoPaperEnvelope9 = 19
smoPaperEnvelope10 = 20
smoPaperEnvelope11 = 21
smoPaperEnvelope12 = 22
smoPaperEnvelope14 = 23
smoPaperCSheet = 24
smoPaperDSheet = 25
smoPaperESheet = 26
smoPaperEnvelopeDL = 27
smoPaperEnvelopeC5 = 28
smoPaperEnvelopeC3 = 29
smoPaperEnvelopeC4 = 30
smoPaperEnvelopeC6 = 31
smoPaperEnvelopeC65 = 32
smoPaperEnvelopeB4 = 33
smoPaperEnvelopeB5 = 34
smoPaperEnvelopeB6 = 35
smoPaperEnvelopeItaly = 36
smoPaperEnvelopeMonarch = 37
smoPaperEnvelopePersonal = 38
smoPaperFanfoldUS = 39
smoPaperFanfoldStdGerman = 40
Manual BasicMaker BasicMaker and TextMaker 93
smoPaperFanfoldLegalGerman = 41
Application (pointer to object)
Data type: Object
Returns the Application object.
Parent (pointer to object)
Data type: Object
Returns the parent object, i.e. an object of the type Document.
Selection (object)
Access paths:
Application Documents Item Selection
Application ActiveDocument Selection
1 Description
Selection identifies the current selection in a document.
If text is selected, the Selection object stands for the contents of this selection. If nothing is selected, the Selection
object stands for the current cursor position. If you add text (for example, with the method Selection.TypeText), the
contents of the selected area will be replaced with this text. If nothing was selected, the text will be pasted at the current
cursor position.
You can use the Font object accessible from the Selection object to make changes in the text formatting. Example:
tm.ActiveDocument.Selection.Font.Size = 24 changes the font size for the text selected in the active document to 24
points.
2 Access to the object
Each opened document has exactly one instance of the Selection object. It can be accessed through the Docu-
ment.Selection object:
' Copy the selection from the active document to the clipboard
tm.ActiveDocument.Selection.Copy
3 Properties, objects, collections, and methods
Objects:
Document Document
Font Font
Application Application
Parent Document
Methods:
Copy
Cut
Paste
Delete
TypeText
94 BasicMaker and TextMaker Manual BasicMaker
TypeParagraph
TypeBackspace
InsertBreak
GoTo
ConvertToTable
SetRange
InsertPicture
Document (pointer to object)
Data type: Object
Returns the Document object which is assigned to the current selection.
Font (pointer to object)
Data type: Object
Returns the Font object which is assigned to the current selection. It contains the properties which get and set the
chosen character formatting inside the selection area.
Application (pointer to object)
Data type: Object
Returns the Application object.
Parent (pointer to object)
Data type: Object
Returns the parent object, i.e. an object of the type Document.
Copy (method)
Copies the contents of the selection to the clipboard.
Syntax:
Copy
Parameters:
none
Return type:
none
Example:
' Copy the active selection to the clipboard
tm.ActiveDocument.Selection.Copy
Cut (method)
Cuts out the contents of the selection and places them in the clipboard.
Syntax:
Manual BasicMaker BasicMaker and TextMaker 95
Cut
Parameters:
none
Return type:
none
Example:
' Cut the active selection and place it in the clipboard
tm.ActiveDocument.Selection.Cut
Paste (method)
Pastes the contents of the clipboard to the selection.
Syntax:
Paste
Parameters:
none
Return type:
none
Example:
' Replace the active selection with the contents of the clipboard
tm.ActiveDocument.Selection.Paste
Delete (method)
Deletes the contents of the selection.
Syntax:
Delete
Parameters:
none
Return type:
none
Example:
' Delete the active selection
tm.ActiveDocument.Selection.Delete
TypeText (method)
Insert a string into the selection.
Syntax:
TypeText Text
96 BasicMaker and TextMaker Manual BasicMaker
Parameters:
Text (type: String) is the string to be inserted.
Return type:
none
Example:
' Insert text at the current cursor position in the active document
tm.ActiveDocument.Selection.TypeText "Programming with BasicMaker"
TypeParagraph (method)
Insert a carriage return sign (CR) into the selection.
Syntax:
TypeParagraph
Parameters:
none
Return type:
none
Example:
' Insert a CR sign at the current cursor position in the active document
tm.ActiveDocument.Selection.TypeParagraph
TypeBackspace (method)
Insert a backspace character.
Syntax:
TypeBackspace
Parameters:
none
Return type:
none
Example:
' Executes backspace at the current cursor position in the active document
tm.ActiveDocument.Selection.TypeBackspace
InsertBreak (method)
Insert a manual break.
Syntax:
InsertBreak [Type]
Parameters:
Manual BasicMaker BasicMaker and TextMaker 97
Type (optional; type: Long or TmBreakType) defines the type of the break. The possible values are:
tmLineBreak = 0 ' Line break
tmColumnBreak = 1 ' Column break
tmSectionBreak = 2 ' Section break
tmPageBreak = 3 ' Page break
tmChapterBreak = 4 ' Chapter break
If you omit the Type parameter, the value tmPageBreak will be taken.
Return type:
none
Example:
' Insert a page break at the current cursor position
tm.ActiveDocument.Selection.InsertBreak tmPageBreak
GoTo (method)
Moves the text cursor to the specified position.
Syntax:
GoTo [What], [Which], [Count], [NumRow], [NumCol]
Parameters:
What (optional; type: Long or TmGoToItem) indicates whether the destination is a table or a paragraph:
tmGoToParagraph = 1 ' Paragraph
tmGoToTable = 2 ' Table
If you omit the What parameter, the value tmGoToParagraph will be taken.
Which (optional; type: Long or TmGoToDirection) indicates whether the movement should be absolute or
relative to the current position:
tmGoToAbsolute = 1 ' absolute
tmGoToRelative = 2 ' relative
If you omit the Which parameter, the value tmGoToAbsolute will be taken.
Count (optional; type: Long) indicates the number of the item (i.e. the index of the table or the index of the
paragraph in the document) that should be accessed.
If you omit the Count parameter, the value 1 will be taken.
NumRow (optional; type: Long): If What is set to tmGoToTable, this parameter optionally allows you to
specify into which line of the table the cursor should be moved.
NumCol (optional; type: Long): If What is set to tmGoToTable, this parameter optionally allows you to specify
into which row of the table the cursor should be moved.
Return type:
none
Examples:
' Move the cursor to the fourth paragraph
tm.ActiveDocument.Selection.GoTo tmGoToParagraph, tmGoToAbsolute, 4
' Move the cursor to the previous paragraph
tm.ActiveDocument.Selection.GoTo tmGoToParagraph, tmGoToRelative, -1
' Move the cursor to the first line of the first table
tm.ActiveDocument.Selection.GoTo tmGoToTable, tmGoToAbsolute, 1, 1, 1
98 BasicMaker and TextMaker Manual BasicMaker
ConvertToTable (method)
Converts the selected text to a table.
Syntax:
ConvertToTable [NumRows], [NumCols], [Separator], [RemoveQuotationMarks],
[RemoveSpaces]
Parameters:
NumRows (optional; type: Long) indicates how many lines the table should have. If omitted, TextMaker will
calculate the number of lines by itself.
NumCols (optional; type: Long) indicates how many columns the table should have. If omitted, TextMaker will
calculate the number of columns by itself.
Separator (optional; type: either String or Long or TmTableFieldSeparator) specifies one or more characters
that TextMaker should use to recognize the columns. You can indicate either a string or one of the following con-
stants:
tmSeparateByCommas = 0 ' Columns separated by commas
tmSeparateByParagraphs = 1 ' Columns separated by paragraphs
tmSeparateByTabs = 2 ' Columns separated by tabs
tmSeparateBySemicolons = 3 ' Columns separated by semicolons
If you omit this parameter, the value tmSeparateByTabs will be taken.
RemoveQuotationMarks (optional; type: Boolean): Set this parameter to True, if TextMaker should delete all
leading and trailing quotation marks from the entries. If you omit this parameter, the value False will be taken.
RemoveSpaces (optional; type: Boolean): Set this parameter to True, if TextMaker should delete all leading and
trailing space characters from the entries. If you omit this parameter, the value True will be taken.
Return type:
Object (a Table object which represents the new table).
Example:
' Convert the current selection to a table. Column separator is comma.
tm.ActiveDocument.Selection.ConvertToTable Separator := tmSeparateByCommas
' Here, slashes are used as the separator
tm.ActiveDocument.Selection.ConvertToTable Separator := "/"
SetRange (method)
Sets the start and end point of the selection, by specifying their character positions.
Syntax:
SetRange Start, End
Parameters:
Start (type: Long) sets the start position of the new selection, specified as the number of characters from the
document beginning.
End (type: Long) sets the end position of the new selection, specified as the number of characters from the
document beginning.
Return type:
none
Examples:
Manual BasicMaker BasicMaker and TextMaker 99
' Select the area from character 1 to character 4
tm.ActiveDocument.Selection.SetRange 1, 4
Hint: You can also use this method to select whole paragraphs. For this purpose, use the Paragraph.Range.Start and
Paragraph.Range.End values to indicate the start and end position of the paragraph and pass it to the SetRange
method.
InsertPicture (method)
Insert a picture from a file into the selection.
Syntax:
InsertPicture PictureName
Parameters:
PictureName (type: String) is the path and file name of the picture to be inserted.
Return type:
none
Examples:
' Insert a picture at the current position
tm.ActiveDocument.Selection.InsertPicture "c:\Pictures\Fish.bmp"
Font (object)
Access paths:
Application Documents Item Selection Font
Application ActiveDocument Selection Font
1 Description
The Font object describes the character formatting of a text fragment. It is a child object of Selection and allows you to
get and set all character attributes of the current selection.
2 Access to the object
Each opened document has exactly one instance of the Font object. It is accessed through the Docu-
ment.Selection.Font object:
' Assign the Arial font to the current selection
tm.ActiveDocument.Selection.Font.Name = "Arial"
3 Properties, objects, collections, and methods
Properties:
Name (default property)
Size
Bold
Italic
Underline
StrikeThrough
Superscript
100 BasicMaker and TextMaker Manual BasicMaker
Subscript
AllCaps
SmallCaps
PreferredSmallCaps
Blink
Color
ColorIndex
BColor
BColorIndex
Spacing
Pitch
Objects:
Application Application
Parent Selection
Name (property)
Data type: String
Gets or sets the font name (as a string).
If multiple fonts are used inside the selection, an empty string will be returned.
Size (property)
Data type: Single
Gets or sets the font size in points (pt).
If multiple font sizes are used inside the selection, the constant smoUndefined (9.999.999) will be returned.
Example:
' Set the size of the selected text to 10.3 pt
tm.ActiveDocument.Selection.Font.Size = 10.3
Bold (property)
Data type: Long
Gets or sets the character formatting "Bold":
True: Bold on
False: Bold off
smoToggle (only when setting): The current state is reversed.
smoUndefined (only when reading): The selection is partly bold and partly not.
Italic (property)
Data type: Long
Gets or sets the character formatting "Italic":
True: Italic on
False: Italic off
Manual BasicMaker BasicMaker and TextMaker 101
smoToggle (only when setting): The current state is reversed.
smoUndefined (only when reading): The selection is partly italic and partly not.
Underline (property)
Data type: Long (TmUnderline)
Gets or sets the character formatting "Underline". The following values are allowed:
tmUnderlineNone = 0 ' off
tmUnderlineSingle = 1 ' single underline
tmUnderlineDouble = 2 ' double underline
tmUnderlineWords = 3 ' word underline
tmUnderlineWordsDouble = 4 ' double word underline
If you are reading this property and the selection is partly underlined and partly not, the constant smoUndefined will be
returned.
StrikeThrough (property)
Data type: Long
Gets or sets the character formatting "StrikeThrough":
True: StrikeThrough on
False: StrikeThrough off
smoToggle (only when setting): The current state is reversed.
smoUndefined (only when reading): The selection is partly struck through and partly not.
Superscript (property)
Data type: Long
Gets or sets the character formatting "Superscript":
True: Superscript on
False: Superscript off
smoToggle (only when setting): The current state is reversed.
smoUndefined (only when reading): The selection is partly superscripted and partly not.
Subscript (property)
Data type: Long
Gets or sets the character formatting "Subscript":
True: Subscript on
False: Subscript off
smoToggle (only when setting): The current state is reversed.
smoUndefined (only when reading): The selection is partly subscripted and partly not.
102 BasicMaker and TextMaker Manual BasicMaker
AllCaps (property)
Data type: Long
Gets or sets the character formatting "All caps" (whole text in uppercase letters):
True: AllCaps on
False: AllCaps off
smoToggle (only when setting): The current state is reversed.
smoUndefined (only when reading): The option is partly set and partly not in the selection.
SmallCaps (property)
Data type: Long
Gets or sets the character formatting "Small caps":
True: SmallCaps on
False: SmallCaps off
smoToggle (only when setting): The current state is reversed.
smoUndefined (only when reading): The selection is partly in small capitals and partly not.
PreferredSmallCaps (property)
Data type: Long
Gets or sets the character formatting "Small caps", but as opposed to the SmallCaps property, lets you choose the scale
factor. The value 0 turns small caps off, all other values represent the percental scale factor of the small capitals.
Example:
' Format the selected text in small capitals with 75% of size
tm.ActiveDocument.Selection.Font.PreferredSmallCaps = 75
' Deactivate the SmallCaps formatting
tm.ActiveDocument.Selection.Font.PreferredSmallCaps = 0
Blink (property)
Data type: Long
Gets or sets the character formatting "Blink" (obsolete):
True: Blink on
False: Blink off
smoToggle (only when setting): The current state is reversed.
smoUndefined (only when reading): The selection is partly blinking and partly not.
Color (property)
Data type: Long (SmoColor)
Gets or sets the foreground color of text as a "BGR" value (Blue-Green-Red triplet). You can either specify an arbitrary
value or use one of the predefined BGR color constants
Manual BasicMaker BasicMaker and TextMaker 103
If the selection is formatted in different colors, the constant smoUndefined will be returned when you read this proper-
ty.
ColorIndex (property)
Data type: Long (SmoColorIndex)
Gets or sets the foreground color of text using an index color. "Index colors" consist of the 16 standard colors of Text-
Maker, numbered from 0 for black to 15 for light gray. Only values listed in the Color Indices table are allowed.
If the selection is formatted in different colors or in a color that is not an index color, the constant smoUndefined will
be returned when you read this property.
Note: It is recommended to use the Color property (see above) instead of this one, since it is not limited to the 16
standard colors but enables you to access the entire BGR color palette.
BColor (property)
Data type: Long (SmoColor)
Gets or sets the background color of text as a "BGR" value (Blue-Green-Red triplet). You can either specify an arbitrary
value or use one of the predefined BGR color constants.
If the selection is formatted in different colors, the constant smoUndefined will be returned when you read this proper-
ty.
BColorIndex (property)
Data type: Long (SmoColorIndex)
Gets or sets the background color of text using an index color. "Index colors" consist of the 16 standard colors of Text-
Maker, numbered from -1 for transparent to 15 for light gray. Only values listed in the Color Indices table are allowed.
If the selection is formatted in different colors or in a color that is not an index color, the constant smoUndefined will
be returned when you read this property.
Note: It is recommended to use the BColor property (see above) instead of this one, since it is not limited to the stand-
ard colors but enables you to access the entire BGR color palette.
Spacing (property)
Data type: Long
Gets or sets the character spacing. The standard value is 100 (normal character spacing of 100%).
If you are reading this property and the selection is formatted in different character spacings, the constant smoUnde-
fined will be returned.
Pitch (property)
Data type: Long
Gets or sets the character pitch. The standard value is 100 (normal character pitch of 100%).
If you are reading this property and the selection is formatted in different character pitches, the constant smoUndefined
will be returned.
Note that some printers ignore changes to the character pitch for their internal fonts.
104 BasicMaker and TextMaker Manual BasicMaker
Application (pointer to object)
Data type: Object
Returns the Application object.
Parent (pointer to object)
Data type: Object
Returns the parent object, i.e. an object of the type Document.
Paragraphs (collection)
Access paths:
Application Documents Item Paragraphs
Application ActiveDocument Paragraphs
1 Description
Paragraphs is a collection of all paragraphs in a document. The individual elements of this collection are of the type
Paragraph.
2 Access to the collection
Each open document has exactly one instance of the Paragraphs collection. It is accessed through the Docu-
ment.Paragraphs object:
' Show the number of paragraphs in the current document
MsgBox tm.ActiveDocument.Paragraphs.Count
3 Properties, objects, collections, and methods
Properties:
Count R/O
Objects:
Item Paragraph (default object)
Application Application
Parent Document
Count (property, R/O)
Data type: Long
Returns the number of Paragraph objects in the document – in other words: the number of paragraphs in the document.
Item (pointer to object)
Data type: Object
Returns an individual Paragraph object, i.e. an individual paragraph.
Which Paragraph object you get depends on the numeric value that you pass to Item: 1 for the first paragraph in the
document, 2 for the second, etc.
Manual BasicMaker BasicMaker and TextMaker 105
Application (pointer to object)
Data type: Object
Returns the Application object.
Parent (pointer to object)
Data type: Object
Returns the parent object, i.e. an object of the type Document.
Paragraph (object)
Access paths:
Application Documents Item Paragraphs Item
Application ActiveDocument Paragraphs Item
1 Description
A Paragraph object represents one individual paragraph of the document and allows you to change its formatting.
For each paragraph there is its own Paragraph object. If you add paragraphs to a document or delete them, the respec-
tive Paragraph objects will be created or deleted dynamically.
2 Access to the object
The individual Paragraph objects can be accessed solely through enumerating the elements of the Paragraphs collec-
tion. Each document has exactly one instance of this collection.
An example:
' Set alignment to "justified" for the first paragraph
tm.ActiveDocument.Paragraphs.Item(1).Alignment = tmAlignParagraphJustify
' The same using an auxiliary object
Dim paragr as Object
Set paragr = tm.ActiveDocument.Paragraphs.Item(1)
paragr.Alignment = tmAlignParagraphJustify
Set paragr = Nothing ' Auxiliary object deleted again
3 Properties, objects, collections, and methods
Properties:
BorderBounds
FirstLineIndent
LeftIndent
RightIndent
LineSpacingRule
LineSpacing
PreferredLineSpacing
SpaceBefore
SpaceAfter
Alignment
Hyphenation
OutlineLevel
PageBreakBefore
ColumnBreakBefore

106 BasicMaker and TextMaker Manual BasicMaker
KeepWithNext
KeepTogether
WidowControl
BorderClearance
Objects:
Shading Shading
DropCap DropCap
Range Range
Application Application
Parent Paragraphs
Collections:
Borders Borders
BorderBounds (property)
Data type: Long (TmBorderBounds)
Gets or sets the spacing between the paragraph borders and the paragraph itself. The possible values are:
tmBoundsPage = 0 ' Borders extend to the page margins
tmBoundsIndents = 1 ' Borders extend to the paragraph margins
tmBoundsText = 2 ' Borders extend to the paragraph text
FirstLineIndent (property)
Data type: Single
Gets or sets the first line indent of the paragraph in points (1 point corresponds to 1/72 inches).
LeftIndent (property)
Data type: Single
Gets or sets the left indent of the paragraph in points (1 point corresponds to 1/72 inches).
RightIndent (property)
Data type: Single
Gets or sets the right indent of the paragraph in points (1 point corresponds to 1/72 inches).
LineSpacingRule (property)
Data type: Long (TmLineSpacing)
Gets or sets the way in which the line spacing of the paragraph is performed. The possible values are:
tmLineSpaceAuto = 0 ' Automatically (in percent)
tmLineSpaceExactly = 1 ' Exactly (in points)
tmLineSpaceAtLeast = 2 ' At least (in points)
LineSpacing (property)
Data type: Single
Manual BasicMaker BasicMaker and TextMaker 107
Gets or sets the line spacing of the paragraph.
Unlike the property PreferredLineSpacing (see below), the line spacing mode (see LineSpacingRule) is ignored here
– the line spacing will be always specified in points and normalized to a standard font size of 12 points.
In other words: No matter if the line spacing is set to "Automatically 100%", to "Exactly 12 pt" or to "At least 12
points", this property will always return the result 12.
PreferredLineSpacing (property)
Data type: Single
Gets or sets the line spacing of the paragraph.
This property returns and expects values dependent on the chosen line spacing mode (see LineSpacingRule):
tmLineSpaceAuto: The values are expressed in percent. For example, 100 stands for 100% line spacing.
tmLineSpaceExactly: The values are absolute values in points.
tmLineSpaceAtLeast: The values are absolute values in points.
Example:
' Set the line spacing to "Automatically 150%"
tm.ActiveDocument.Paragraphs(1).LineSpacingRule = LineSpacingAuto
tm.ActiveDocument.Paragraphs(1).PreferredLineSpacing = 150
SpaceBefore (property)
Data type: Single
Gets or sets the space above the paragraph in points (1 point corresponds to 1/72 inches).
SpaceAfter (property)
Data type: Single
Gets or sets the space below the paragraph in points (1 point corresponds to 1/72 inches).
Alignment (property)
Data type: Long (TmParagraphAlignment)
Gets or sets the alignment of the paragraph. The possible values are:
tmAlignParagraphLeft = 0 ' left aligned
tmAlignParagraphRight = 1 ' right aligned
tmAlignParagraphCenter = 2 ' centered
tmAlignParagraphJustify = 3 ' justified
Hyphenation (property)
Data type: Long (TmHyphenation)
Gets or sets the hyphenation mode. The possible values are:
tmHypenationNone = 0 ' no hyphenation
tmHypenationAlways = 1 ' hyphenate wherever possible
tmHypenationEvery2Lines = 2 ' 2 lines hyphenation
108 BasicMaker and TextMaker Manual BasicMaker
tmHypenationEvery3Lines = 3 ' 3 lines hyphenation
OutlineLevel (property)
Data type: Long (TmOutlineLevel)
Gets or sets the outline level of the paragraph. The possible values are:
tmOutlineLevelBodyText = 0 ' Body Text
tmOutlineLevel1 = 1 ' Level 1
tmOutlineLevel2 = 2 ' Level 2
tmOutlineLevel3 = 3 ' Level 3
tmOutlineLevel4 = 4 ' Level 4
tmOutlineLevel5 = 5 ' Level 5
tmOutlineLevel6 = 6 ' Level 6
tmOutlineLevel7 = 7 ' Level 7
tmOutlineLevel8 = 8 ' Level 8
tmOutlineLevel9 = 9 ' Level 9
PageBreakBefore (property)
Data type: Boolean
Gets or sets the property "Page break" of the paragraph (True or False).
ColumnBreakBefore (property)
Data type: Boolean
Gets or sets the property "Column break" of the paragraph (True or False).
KeepWithNext (property)
Data type: Boolean
Gets or sets the property "Keep with next" (paragraph) of the paragraph (True or False).
KeepTogether (property)
Data type: Boolean
Gets or sets the property "Keep together" of the paragraph (True or False).
WidowControl (property)
Data type: Boolean
Gets or sets the property "Avoid widows/orphans" of the paragraph (True or False).
BorderClearance (property)
Gets or sets the spacing between the paragraph borders and the paragraph text. Each of four sides can be accessed
individually.
Syntax 1 (setting a value):
BorderClearance(Index) = n
Manual BasicMaker BasicMaker and TextMaker 109
Syntax 2 (reading a value):
n = BorderClearance(Index)
Parameters:
Index (type: Long or TmBorderClearance) indicates which side of the paragraph should be accessed:
tmBorderClearanceLeft = 1
tmBorderClearanceRight = 2
tmBorderClearanceTop = 3
tmBorderClearanceBottom = 4
n (type: Single) identifies the spacing in points.
Return type:
Single
Examples:
' Set the spacing to the left border to 5 pt in the first paragraph
tm.ActiveDocument.Paragraphs(1).BorderClearance(tmBorderClearanceLeft) = 5
' Get the spacing to the left border in the first paragraph
MsgBox tm.ActiveDocument.Paragraphs(1).BorderClearance(tmBorderClearanceLeft)
Shading (pointer to object)
Data type: Object
Returns the Shading object that describes the shading of the paragraph.
DropCap (pointer to object)
Data type: Object
Returns the DropCap object that describes the drop cap character of the paragraph.
Range (pointer to object)
Data type: Object
Returns the Range object that describes the start and end position of the paragraph calculated as the number of signs
from the document beginning.
Application (pointer to object)
Data type: Object
Returns the Application object.
Parent (pointer to object)
Data type: Object
Returns the parent object, i.e. an object of the type Paragraphs.
110 BasicMaker and TextMaker Manual BasicMaker
Borders (pointer to collection)
Data type: Object
Returns the Borders collection which represents the five border lines of a paragraph. You can use this collection to get
or change the line settings (thickness, color, etc.).
Range (object)
Access paths:
Application Documents Item Paragraphs Item Range
Application ActiveDocument Paragraphs Item Range
1 Description
The Range object is a child object of the Paragraph object. It returns the start and end position of the paragraph,
expressed as the number of characters from the beginning of the document.
2 Access to the object
For each Paragraph object there is exactly one Range object. This Range object can be accessed solely through the
object pointer Range in the associated Paragraph object:
' Display the end position of the first paragraph in the active document
MsgBox tm.ActiveDocument.Paragraphs.Item(1).Range.End
3 Properties, objects, collections, and methods
Properties:
Start R/O
End R/O
Objects:
Application Application
Parent Paragraph
Start (property, R/O)
Data type: Long
Returns the start position of the paragraph, expressed as the number of character from the beginning of the document.
End (property, R/O)
Data type: Long
Returns the end position of the paragraph, expressed as the number of characters from the beginning of the document.
An example for the Start and End properties:
If the first paragraph of a document consists of the text "The first paragraph", the following applies:
tm.ActiveDocument.Paragraphs.Item(1).Range.Start returns the value 0 ("the zeroth character from the begin-
ning of the document").
tm.ActiveDocument.Paragraphs.Item(1).Range.End returns 20.
Manual BasicMaker BasicMaker and TextMaker 111
You can use these values to select a paragraph or a part of it:
' Select the first two signs from the first paragraph
tm.ActiveDocument.Selection.SetRange 0, 1
' Select the whole paragraph
With tm.ActiveDocument
.Selection.SetRange .Paragraphs(1).Range.Start, .Paragraphs(1).Range.End
End With
You can select the first four paragraphs as follows:
With tm.ActiveDocument
.Selection.SetRange .Paragraphs(1).Range.Start, .Paragraphs(4).Range.End
End With
Application (pointer to object)
Data type: Object
Returns the Application object.
Parent (pointer to object)
Data type: Object
Returns the parent object, i.e. an object of the type Paragraph.
DropCap (object)
Access paths:
Application Documents Item Paragraphs Item DropCap
Application ActiveDocument Paragraphs Item DropCap
1 Description
The DropCap object describes the drop cap character of a paragraph. It is a child object of Paragraph and allows you
to get and set the properties of the drop cap character.
2 Access to the object
Each paragraph has exactly one instance of the DropCap object. It is accessed through the object pointer DropCap in
the Paragraph object:
' Activate a drop cap for the first paragraph
tm.ActiveDocument.Paragraphs(1).DropCap.Position = tmDropNormal
' ... and change the font of the drop cap character
tm.ActiveDocument.Paragraphs(1).DropCap.FontName = "Arial"
3 Properties, objects, collections, and methods
Properties:
FontName
Size
Position
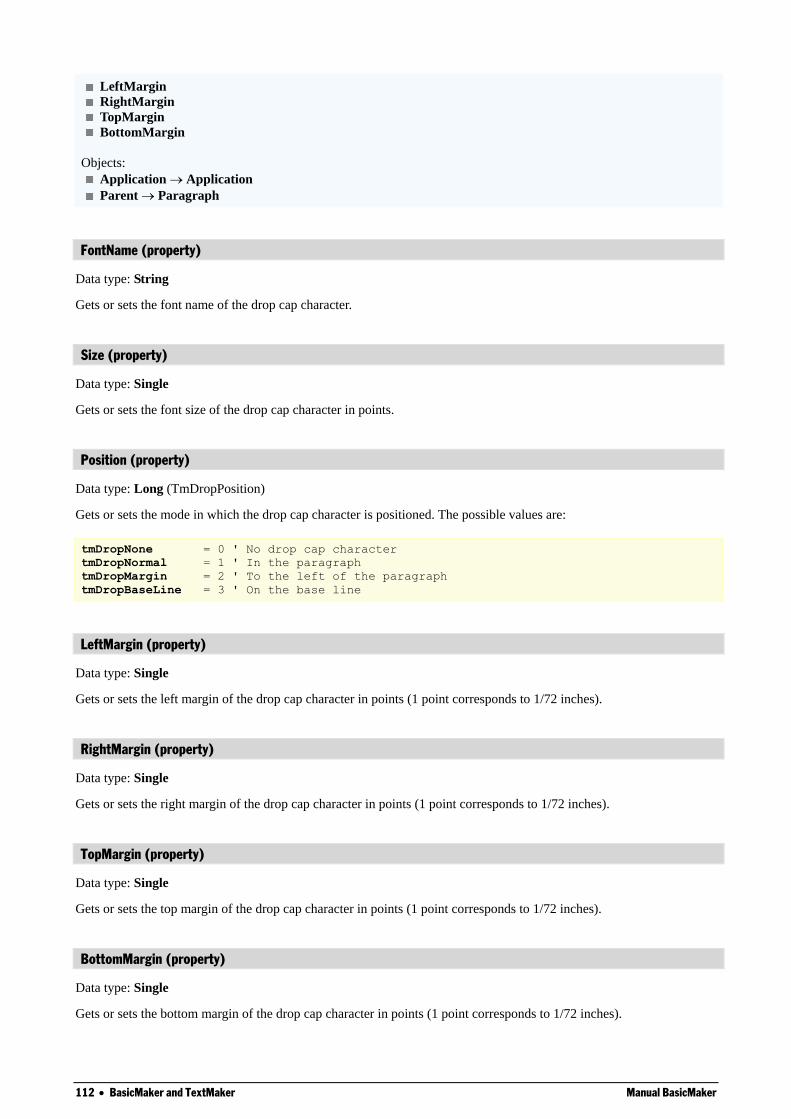
112 BasicMaker and TextMaker Manual BasicMaker
LeftMargin
RightMargin
TopMargin
BottomMargin
Objects:
Application Application
Parent Paragraph
FontName (property)
Data type: String
Gets or sets the font name of the drop cap character.
Size (property)
Data type: Single
Gets or sets the font size of the drop cap character in points.
Position (property)
Data type: Long (TmDropPosition)
Gets or sets the mode in which the drop cap character is positioned. The possible values are:
tmDropNone = 0 ' No drop cap character
tmDropNormal = 1 ' In the paragraph
tmDropMargin = 2 ' To the left of the paragraph
tmDropBaseLine = 3 ' On the base line
LeftMargin (property)
Data type: Single
Gets or sets the left margin of the drop cap character in points (1 point corresponds to 1/72 inches).
RightMargin (property)
Data type: Single
Gets or sets the right margin of the drop cap character in points (1 point corresponds to 1/72 inches).
TopMargin (property)
Data type: Single
Gets or sets the top margin of the drop cap character in points (1 point corresponds to 1/72 inches).
BottomMargin (property)
Data type: Single
Gets or sets the bottom margin of the drop cap character in points (1 point corresponds to 1/72 inches).
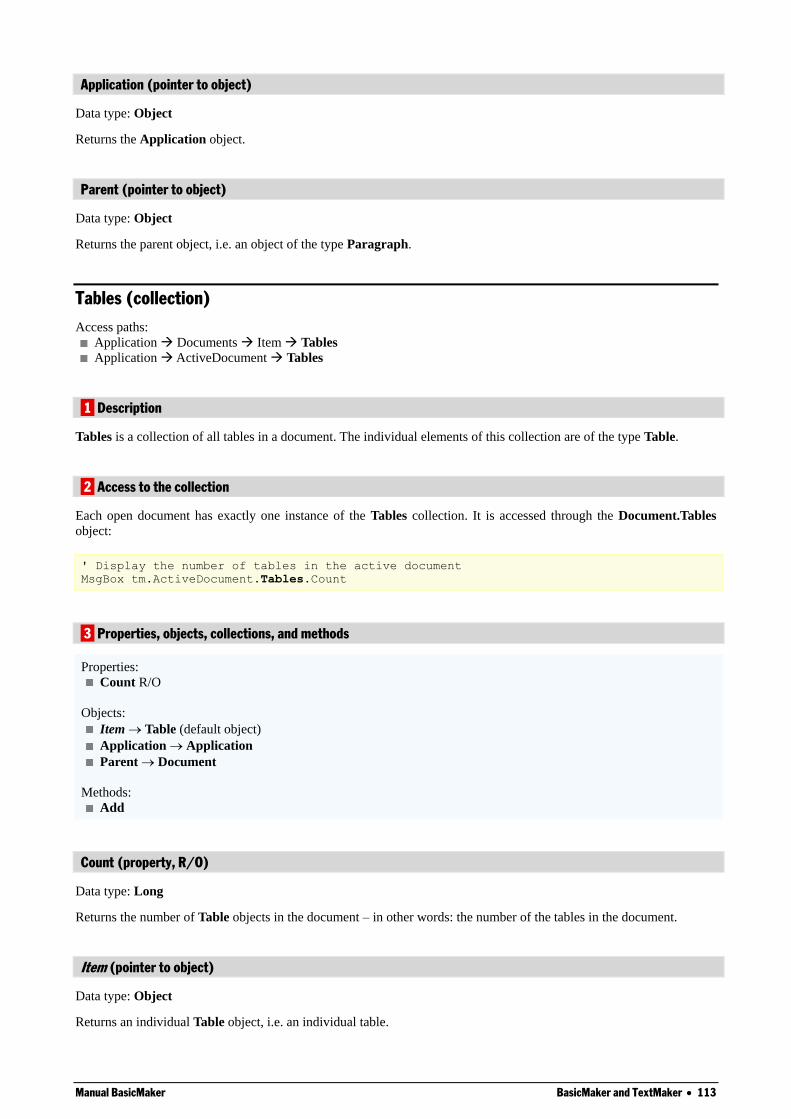
Manual BasicMaker BasicMaker and TextMaker 113
Application (pointer to object)
Data type: Object
Returns the Application object.
Parent (pointer to object)
Data type: Object
Returns the parent object, i.e. an object of the type Paragraph.
Tables (collection)
Access paths:
Application Documents Item Tables
Application ActiveDocument Tables
1 Description
Tables is a collection of all tables in a document. The individual elements of this collection are of the type Table.
2 Access to the collection
Each open document has exactly one instance of the Tables collection. It is accessed through the Document.Tables
object:
' Display the number of tables in the active document
MsgBox tm.ActiveDocument.Tables.Count
3 Properties, objects, collections, and methods
Properties:
Count R/O
Objects:
Item Table (default object)
Application Application
Parent Document
Methods:
Add
Count (property, R/O)
Data type: Long
Returns the number of Table objects in the document – in other words: the number of the tables in the document.
Item (pointer to object)
Data type: Object
Returns an individual Table object, i.e. an individual table.
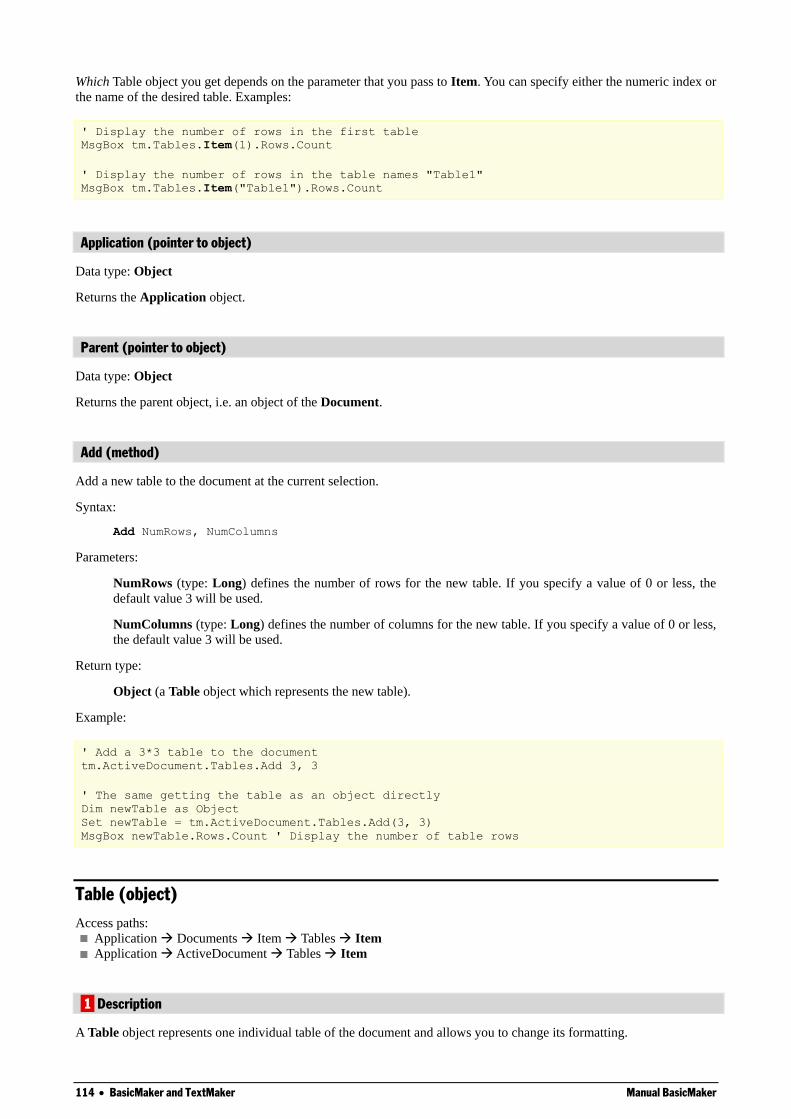
114 BasicMaker and TextMaker Manual BasicMaker
Which Table object you get depends on the parameter that you pass to Item. You can specify either the numeric index or
the name of the desired table. Examples:
' Display the number of rows in the first table
MsgBox tm.Tables.Item(1).Rows.Count
' Display the number of rows in the table names "Table1"
MsgBox tm.Tables.Item("Table1").Rows.Count
Application (pointer to object)
Data type: Object
Returns the Application object.
Parent (pointer to object)
Data type: Object
Returns the parent object, i.e. an object of the Document.
Add (method)
Add a new table to the document at the current selection.
Syntax:
Add NumRows, NumColumns
Parameters:
NumRows (type: Long) defines the number of rows for the new table. If you specify a value of 0 or less, the
default value 3 will be used.
NumColumns (type: Long) defines the number of columns for the new table. If you specify a value of 0 or less,
the default value 3 will be used.
Return type:
Object (a Table object which represents the new table).
Example:
' Add a 3*3 table to the document
tm.ActiveDocument.Tables.Add 3, 3
' The same getting the table as an object directly
Dim newTable as Object
Set newTable = tm.ActiveDocument.Tables.Add(3, 3)
MsgBox newTable.Rows.Count ' Display the number of table rows
Table (object)
Access paths:
Application Documents Item Tables Item
Application ActiveDocument Tables Item
1 Description
A Table object represents one individual table of the document and allows you to change its formatting.
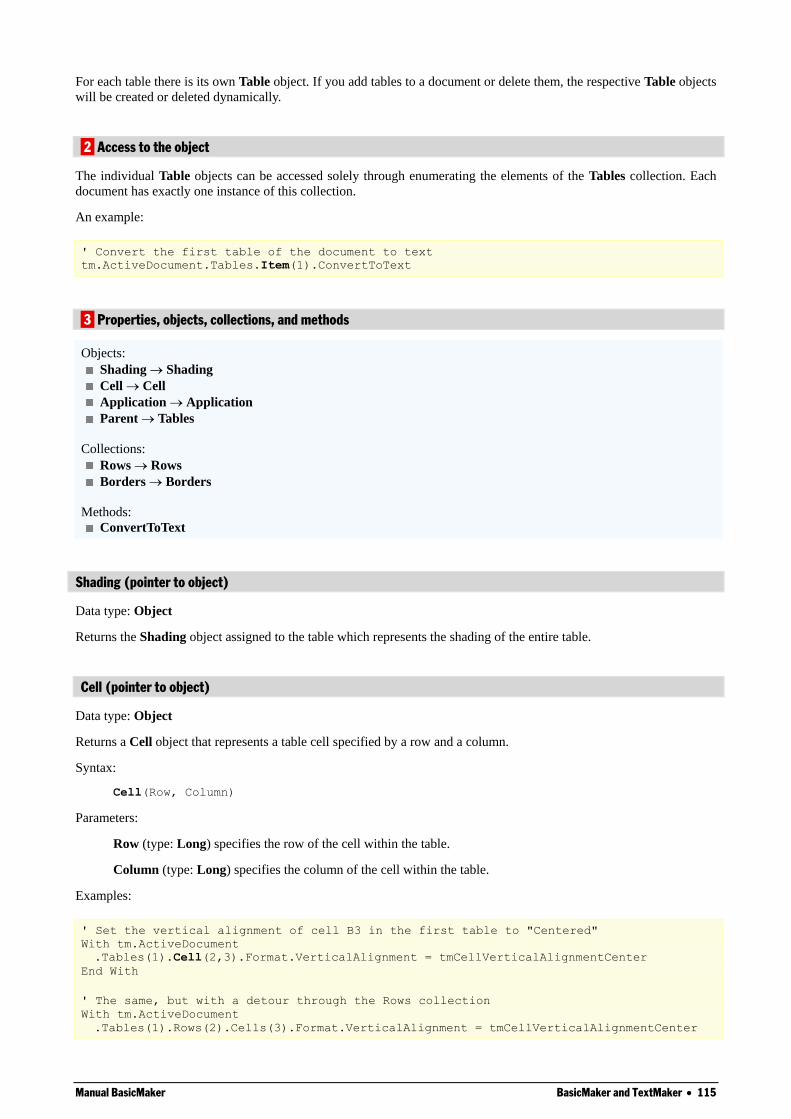
Manual BasicMaker BasicMaker and TextMaker 115
For each table there is its own Table object. If you add tables to a document or delete them, the respective Table objects
will be created or deleted dynamically.
2 Access to the object
The individual Table objects can be accessed solely through enumerating the elements of the Tables collection. Each
document has exactly one instance of this collection.
An example:
' Convert the first table of the document to text
tm.ActiveDocument.Tables.Item(1).ConvertToText
3 Properties, objects, collections, and methods
Objects:
Shading Shading
Cell Cell
Application Application
Parent Tables
Collections:
Rows Rows
Borders Borders
Methods:
ConvertToText
Shading (pointer to object)
Data type: Object
Returns the Shading object assigned to the table which represents the shading of the entire table.
Cell (pointer to object)
Data type: Object
Returns a Cell object that represents a table cell specified by a row and a column.
Syntax:
Cell(Row, Column)
Parameters:
Row (type: Long) specifies the row of the cell within the table.
Column (type: Long) specifies the column of the cell within the table.
Examples:
' Set the vertical alignment of cell B3 in the first table to "Centered"
With tm.ActiveDocument
.Tables(1).Cell(2,3).Format.VerticalAlignment = tmCellVerticalAlignmentCenter
End With
' The same, but with a detour through the Rows collection
With tm.ActiveDocument
.Tables(1).Rows(2).Cells(3).Format.VerticalAlignment = tmCellVerticalAlignmentCenter
116 BasicMaker and TextMaker Manual BasicMaker
End With
Application (pointer to object)
Data type: Object
Returns the Application object.
Parent (pointer to object)
Data type: Object
Returns the parent object, i.e. an object of the type Tables.
Rows (pointer to collection)
Data type: Object
Returns the Rows collection assigned to the table. You can use it to enumerate the individual rows in the table, allowing
you to get or set their formatting.
Borders (pointer to collection)
Data type: Object
Returns the Borders collection which represents the six border lines of a table. You can use this collection to get or
change the line settings (thickness, color, etc.).
ConvertToText (method)
Converts the table to text.
Syntax:
ConvertToText [Separator]
Parameters:
Separator (optional; type: either String or Long or TmTableFieldSeparator) indicates the character that
should be used to separate the columns. You can specify either an arbitrary character or one of the following
symbolic constants:
tmSeparateByCommas = 0 ' Columns separated by commas
tmSeparateByParagraphs = 1 ' Columns separated by paragraphs
tmSeparateByTabs = 2 ' Columns separated by tabulators
tmSeparateBySemicolons = 3 ' Columns separated by semicolons
If you omit this parameter, the constant tmSeparateByTabs will be used.
Return type:
Object (a Range object which represents the converted text)
Example:
' Convert the first table in the document to text
tm.ActiveDocument.Tables.Item(1).ConvertToText tmSeparateByTabs
Manual BasicMaker BasicMaker and TextMaker 117
Rows (collection)
Access paths:
Application Documents Item Tables Item Rows
Application ActiveDocument Tables Item Rows
1 Description
Rows is a collection of all table rows in a table. The individual elements of this collection are of the type Row.
2 Access to the collection
Each table has exactly one instance of the Rows collection. It is accessed through the object pointer Rows of the table:
' Display the number of rows in the first table of the document
MsgBox tm.ActiveDocument.Tables(1).Rows.Count
3 Properties, objects, collections, and methods
Properties:
Count R/O
Objects:
Item Row (default object)
Application Application
Parent Table
Count (property, R/O)
Data type: Long
Returns the number of Row objects in the table – in other words: the number of rows in the table.
Item (pointer to object)
Data type: Object
Returns an individual Row object, i.e. an individual table row.
Which Row object you get depends on the numeric value that you pass to Item: 1 for the first row in the table, 2 for the
second, etc.
Application (pointer to object)
Data type: Object
Returns the Application object.
Parent (pointer to object)
Data type: Object
Returns the parent object, i.e. an object of the type Table.
118 BasicMaker and TextMaker Manual BasicMaker
Row (object)
Access paths:
Application Documents Item Tables Item Rows Item
Application ActiveDocument Tables Item Rows Item
1 Description
A Row object represents one individual table row of a table and allows you to change the formatting of this table row.
For each table row there is its own Row object. If you add the rows to a table or delete them, the respective Row objects
will be created or deleted dynamically.
2 Access to the object
The individual Row objects can be accessed solely through enumerating the elements of the Rows collection. Each
table has exactly one instance of this collection.
An example:
' Display the height of the 2nd row of the 1st table
MsgBox tm.ActiveDocument.Tables(1).Rows.Item(2).Height
3 Properties, objects, collections, and methods
Properties:
Height
HeightRule
KeepTogether
BreakPageAtRow
AllowBreakInRow
RepeatAsHeaderRow
Objects:
Shading Shading
Application Application
Parent Rows
Collections:
Cells Cells
Borders Borders
Height (property)
Data type: Single
Gets or sets the height of the table represented by Row in points (1 point corresponds to 1/72 inches).
Please note that the following applies if the HeightRule property (see below) of the table row is set to "Automatic":
When reading this property, the value SmoUndefined (9.999.999) will be returned.
When changing this property, the method used to determine the height of the table row (HeightRule) will automati-
cally be changed to "At least".
Manual BasicMaker BasicMaker and TextMaker 119
HeightRule (property)
Data type: Long (TmRowHeightRule)
Gets or sets the method used to determine the height of the table row represented by Row. The possible values are:
tmRowHeightAuto = 0 ' Set row height to "automatic"
tmRowHeightExact = 1 ' Set row height to "exact"
tmRowHeightAtLeast = 2 ' Set row height to "at least"
KeepTogether (property)
Data type: Boolean
Gets or sets the property "Keep together with next row".
If set to True, TextMaker will not be allowed to insert an automatic page break between the table row and the next one.
Instead, the break will be inserted above the row.
BreakPageAtRow (property)
Data type: Boolean
Gets or sets the property "Break page at row". If set to True, TextMaker inserts a page break above the table row.
AllowBreakInRow (property)
Data type: Boolean
Gets or sets the property "Allow page break in row".
If set to True, TextMaker is allowed to insert a page break within the row if required. If set to False, the whole table
row will be transferred to the next page.
RepeatAsHeaderRow (property)
Data type: Boolean
Gets or sets the property "Repeat row as header". This property is available only for the first row in a table.
If set to True, TextMaker repeats the row on every page, if the table extends over two or more pages. This is useful for
repeating table headings on each page.
Shading (pointer to object)
Data type: Object
Returns the Shading object assigned to the Row object which represents the shading of the entire table row.
Application (pointer to object)
Data type: Object
Returns the Application object.
120 BasicMaker and TextMaker Manual BasicMaker
Parent (pointer to object)
Data type: Object
Returns the parent object, i.e. an object of the type Rows.
Cells (pointer to collection)
Data type: Object
Returns the Cells collection assigned to the table which contains all cells of the table row.
Borders (pointer to collection)
Data type: Object
Returns the Borders collection which represents the five border lines of a table row. You can use this collection to get
or change the line settings (thickness, color, etc.).
Cells (collection)
Access paths:
Application Documents Item Tables Item Rows Item Cells
Application ActiveDocument Tables Item Rows Item Cells
1 Description
Cells is a collection of all table cells in an individual table row. The individual elements of this collection are of the type
Cell.
2 Access to the collection
Each row of a table has exactly one instance of the Cells collection. It is accessed through the object pointer Cells of the
table row:
' Display the number of cells in the 2nd row of the 1st table
MsgBox tm.ActiveDocument.Tables(1).Rows(2).Cells.Count
3 Properties, objects, collections, and methods
Properties:
Count R/O
Objects:
Item Cell (default object)
Application Application
Parent Row
Count (property, R/O)
Data type: Long
Returns the number of Cell objects in the table row – in other words: the number of cells in the table row.
Manual BasicMaker BasicMaker and TextMaker 121
Item (pointer to object)
Data type: Object
Returns an individual Cell object, i.e. an individual table cell.
Which Cell object you get depends on the numeric value that you pass to Item: 1 for the first cell in the table row, 2 for
the second, etc.
Application (pointer to object)
Data type: Object
Returns the Application object.
Parent (pointer to object)
Data type: Object
Returns the parent object, i.e. an object of the type Table.
Cell (object)
Access paths:
Application Documents Item Tables Item Cell(x, y) Item
Application ActiveDocument Tables Item Cell(x, y) Item
Application Documents Item Tables Item Rows Item Cells Item
Application ActiveDocument Tables Item Rows Item Cells Item
1 Description
A Cell object represents one individual cell of a table row and allows you to retrieve and change the formatting of this
table cell.
For each cell there is its own Cell object. If you add cells to a table row or delete them, the respective Cell objects will
be created or deleted dynamically.
2 Access to the object
The individual Cell objects can be accessed solely through enumerating the elements of the Cells collection. Each row
of a table has exactly one instance of this collection.
An example:
' Set the width of the 5th cell in the 2nd row of the 1st table to 25
tm.ActiveDocument.Tables(1).Rows(2).Cells(5).PreferredWidth = 25
3 Properties, objects, collections, and methods
Properties:
PreferredWidthType
PreferredWidth
Width
VerticalAlignment
Orientation
LockText
LeftPadding
122 BasicMaker and TextMaker Manual BasicMaker
RightPadding
TopPadding
BottomPadding
Objects:
Shading Shading
Application Application
Parent Row
Collections:
Borders Borders
PreferredWidthType (property)
Data type: Long (TmPreferredWidthType)
Gets or sets the method used to determine the width of the cell. The possible values are:
tmPreferredWidthPoints = 0 ' Width in points
tmPreferredWidthPercent = 1 ' Width in percent
tmPreferredWidthAuto = 2 ' Automatic width
PreferredWidth (property)
Data type: Single
Gets or sets the width of the cell. It depends on the width type of the cell whether the value is expressed in points or in
percent (see PreferredWidthType above).
Example:
' Set the width for the first cell to 25 percent
tm.ActiveDocument.Tables(1).Rows(1).Cells(1).PreferredWidthType =
tmPreferredWidthPercent
tm.ActiveDocument.Tables(1).Rows(1).Cells(1).PreferredWidth = 25
' Set the width for the second cell to 3.5cm
tm.ActiveDocument.Tables(1).Rows(1).Cells(2).PreferredWidthType = tmPreferredWidthPoints
tm.ActiveDocument.Tables(1).Rows(1).Cells(1).PreferredWidth =
tm.CentimetersToPoints(3.5)
Width (property)
Data type: Single
Gets or sets the width of the cell in points (1 point corresponds to 1/72 inches).
Unlike the PreferredWidth property (see there), it will be ignored whether the cell has an absolute, percental or auto-
matic width – it will always return the width in points.
VerticalAlignment (property)
Data type: Long (TmCellVerticalAlignment)
Gets or sets the vertical alignment of the text inside the cell. The possible values are:
tmCellVerticalAlignmentTop = 0 ' top alignment
tmCellVerticalAlignmentCenter = 1 ' center alignment
tmCellVerticalAlignmentBottom = 2 ' bottom alignment
Manual BasicMaker BasicMaker and TextMaker 123
tmCellVerticalAlignmentJustify = 3 ' vertical justification
Orientation (property)
Data type: Long
Gets or sets the print orientation of the cell. The possible values are: 0, 90, 180 and -90, corresponding to the respective
rotation angle.
Note: The value 270 will be automatically converted to -90.
LockText (property)
Data type: Boolean
Gets or sets the property "Lock text" for the cell (True or False).
Note that TextMaker locks the cell only if forms mode is enabled.
LeftPadding (property)
Data type: Single
Gets or sets the left text margin inside the cell, measured in points (1 point corresponds to 1/72 inches).
RightPadding (property)
Data type: Single
Gets or sets the right text margin inside the cell, measured in points (1 point corresponds to 1/72 inches).
TopPadding (property)
Data type: Single
Gets or sets the top text margin inside the cell, measured in points (1 point corresponds to 1/72 inches).
BottomPadding (property)
Data type: Single
Gets or sets the bottom text margin inside the cell, measured in points (1 point corresponds to 1/72 inches).
Shading (pointer to object)
Data type: Object
Returns the Shading object which you can use to access the shading of the table cell.
Application (pointer to object)
Data type: Object
Returns the Application object.
124 BasicMaker and TextMaker Manual BasicMaker
Parent (pointer to object)
Data type: Object
Returns the parent object, i.e. an object of the type Row.
Borders (pointer to collection)
Data type: Object
Returns the Borders collection which represents the four border lines of a table cell. You can use this collection to get
or change the line settings (thickness, color, etc.).
Borders (collection)
Access paths for paragraph borders:
Application Documents Item Paragraphs Item Borders
Application ActiveDocument Paragraphs Item Borders
Access paths for table borders:
Application Documents Item Tables Item Borders
Application ActiveDocument Tables Item Borders
Access path for table row borders:
Application Documents Item Tables Item Rows Item Borders
Application ActiveDocument Tables Item Rows Item Borders
Access path for table cell borders:
Application Documents Item Tables Item Cell(x, y) Borders
Application ActiveDocument Tables Item Cell(x, y) Borders
Application Documents Item Tables Item Rows Item Cells Item Borders
Application ActiveDocument Tables Item Rows Item Cells Item Borders
1 Description
Borders is a collection of the border lines (left, right, top, bottom, etc.) of a paragraph, a table, a table row, or a cell.
Accordingly, it is a child object of the Paragraph, Table, Row or Cell object.
The individual elements of this collection are of the type Border.
2 Access to the object
Each paragraph, table, table tow or cell has exactly one instance of the Borders collection. It is accessed through the
object pointer Borders in the respective object. The parameter you pass is the number of the border that you would like
to access, as follows:
tmBorderTop = -1 ' Top border line
tmBorderLeft = -2 ' Left border line
tmBorderBottom = -3 ' Bottom border line
tmBorderRight = -4 ' Right border line
tmBorderHorizontal = -5 ' Horizontal grid line (only for tables)
tmBorderVertical = -6 ' Vertical grid line (only for tables and table rows)
tmBorderBetween = -7 ' Border line between paragraphs (only for paragraphs)
Some examples:
' Change the left border of the first paragraph
tm.ActiveDocument.Paragraphs(1).Borders(tmBorderLeft).Type = tmLineStyleSingle
' Change the top border of the first table
Manual BasicMaker BasicMaker and TextMaker 125
tm.ActiveDocument.Tables(1).Borders(tmBorderTop).Type = tmLineStyleDouble
' Change the vertical grid lines of the second row in the first table
tm.ActiveDocument.Tables(1).Rows(2).Borders(tmBorderVertical).Color = smoColorRed
' Change the bottom border of the third cell in the second row from the first table
tm.ActiveDocument.Tables(1).Rows(2).Cells(3).Borders(tmBorderBottom).Type =
tmLineStyleDouble
3 Properties, objects, collections, and methods
Properties:
Count R/O
Objects:
Item Border (default object)
Application Application
Parent Paragraph, Table, Row or Cell
Count (property, R/O)
Data type: Long
Returns the number of Border objects in the collection, i.e. the number of border lines available for an object:
When used with a child object of a Paragraph object, 5 is returned, since paragraphs can have five different types
of border lines (left, right, top, bottom, between the paragraphs).
When used with a child object of a Table object, 6 is returned, since tables can have six different types of border
lines (left, right, top, bottom, horizontal gutter, vertical gutter).
When used with a child object of a Row object, 5 is returned, since table rows can have five different types of
border lines (left, right, top, bottom, vertical gutter).
When used with a child object of a Cell object, 4 is returned, since table cells can have four different types of border
lines (left, right, top, bottom).
Item (pointer to object)
Data type: Object
Returns an individual Border object that you can use to get or set the properties (thickness, color, etc.) of one individual
border line.
Which Border object you get depends on the numeric value that you pass to Item. The following table shows the admis-
sible values:
tmBorderTop = -1 ' Top border line
tmBorderLeft = -2 ' Left border line
tmBorderBottom = -3 ' Bottom border line
tmBorderRight = -4 ' Right border line
tmBorderHorizontal = -5 ' Horizontal grid line (only for tables)
tmBorderVertical = -6 ' Vertical grid line (only for tables and table rows)
tmBorderBetween = -7 ' Border line between paragraphs (only for paragraphs)
Application (pointer to object)
Data type: Object
126 BasicMaker and TextMaker Manual BasicMaker
Returns the Application object
Parent (pointer to object)
Data type: Object
Returns the parent object, i.e. an object of the types Paragraph, Table, Row or Cell.
Example for the usage of the Borders collection
Sub Main
Dim tm as Object
Set tm = CreateObject("TextMaker.Application")
tm.Visible = True
With tm.ActiveDocument.Paragraphs.Item(1)
.Borders(tmBorderLeft).Type = tmLineStyleSingle
.Borders(tmBorderLeft).Thick1 = 4
.Borders(tmBorderLeft).Color = smoColorBlue
.Borders(tmBorderRight).Type = tmLineStyleDouble
.Borders(tmBorderRight).Thick1 = 1
.Borders(tmBorderRight).Thick2 = 1
.Borders(tmBorderRight).Color = smoColorRed
End With
Set tm = Nothing
End Sub
Border (object)
Access paths for paragraph borders:
Application Documents Item Paragraphs Item Borders Item
Application ActiveDocument Paragraphs Item Borders Item
Access paths for table borders:
Application Documents Item Tables Item Borders Item
Application ActiveDocument Tables Item Borders Item
Access path for table row borders:
Application Documents Item Tables Item Rows Item Borders Item
Application ActiveDocument Tables Item Rows Item Borders Item
Access path for table cell borders:
Application Documents Item Tables Item Cell(x, y) Borders Item
Application ActiveDocument Tables Item Cell(x, y) Borders Item
Application Documents Item Tables Item Rows Item Cells Item Borders Item
Application ActiveDocument Tables Item Rows Item Cells Item Borders Item
1 Description
A Border object represents one individual border line of a paragraph, a table, a table row, or a table cell – for example
the left, right, top, or bottom line. You can use this object to get or change the line settings (thickness, color, etc.) of a
border line.
Manual BasicMaker BasicMaker and TextMaker 127
2 Access to the object
The individual Border objects can be accessed solely through enumerating the elements of the Borders collection of a
paragraph, table, table row, or table cell. As a parameter, you pass the number of the border that you would like to
access, as follows:
tmBorderTop = -1 ' Top border line
tmBorderLeft = -2 ' Left border line
tmBorderBottom = -3 ' Bottom border line
tmBorderRight = -4 ' Right border line
tmBorderHorizontal = -5 ' Horizontal grid line (only for tables)
tmBorderVertical = -6 ' Vertical grid line (only for tables and table rows)
tmBorderBetween = -7 ' Border line between paragraphs (only for paragraphs)
Examples:
' Change the left border of the first paragraph
tm.ActiveDocument.Paragraphs(1).Borders(tmBorderLeft).Type = tmLineStyleSingle
' Change the top border of the first table
tm.ActiveDocument.Tables(1).Borders(tmBorderTop).Type = tmLineStyleDouble
' Change the vertical grid lines of the second row in the first table
tm.ActiveDocument.Tables(1).Rows(2).Borders(tmBorderVertical).Color = smoColorRed
' Change the bottom border of the third cell in the second row from the first table
tm.ActiveDocument.Tables(1).Rows(2).Cells(3).Borders(tmBorderBottom).Type =
tmLineStyleDouble
3 Properties, objects, collections, and methods
Properties:
Type
Thick1
Thick2
Separation
Color
ColorIndex
Objects:
Application Application
Parent Borders
Type (property)
Data type: Long (TmLineStyle)
Gets or sets the type of the border line. The possible values are:
tmLineStyleNone = 0 ' No border
tmLineStyleSingle = 1 ' Simple border
tmLineStyleDouble = 2 ' Double border
Thick1 (property)
Data type: Single
Gets or sets the thickness of the first border line in points (1 point corresponds to 1/72 inches).

128 BasicMaker and TextMaker Manual BasicMaker
Thick2 (property)
Data type: Single
Gets or sets the thickness of the second border line in points (1 point corresponds to 1/72 inches).
This property is used only if the type of the border is set to tmLineStyleDouble.
Separation (property)
Data type: Single
Gets or sets the offset between two border lines in points (1 point corresponds to 1/72 inches).
This property is used only if the type of the border is set to tmLineStyleDouble.
Color (property)
Data type: Long (SmoColor)
Gets or sets the color of the border line(s) as a "BGR" value (Blue-Green-Red triplet). You can either specify an arbi-
trary value or use one of the predefined BGR color constants.
ColorIndex (property)
Data type: Long (SmoColorIndex)
Gets or sets the color of the border line(s) as an index color. "Index colors" are the standard colors of TextMaker,
consecutively numbered from 0 for black to 15 for light gray. You can use only one of the values listed in the Color
Indices table.
Note: It is recommended to use the Color property (see above) instead of this one, since it is not limited to the 16
standard colors but enables you to access the entire BGR color palette.
Application (pointer to object)
Data type: Object
Returns the Application object
Parent (pointer to object)
Data type: Object
Returns the parent object, i.e. Borders.
Shading (object)
Access paths for paragraph shading:
Application Documents Item Paragraphs Item Shading
Application ActiveDocument Paragraphs Item Shading
Access paths for table shading:
Application Documents Item Tables Item Shading
Application ActiveDocument Tables Item Shading
Access paths for table row shading:
Application Documents Item Tables Item Rows Item Shading
Application ActiveDocument Tables Item Rows Item Shading
Manual BasicMaker BasicMaker and TextMaker 129
Access paths for table cell shading:
Application Documents Item Tables Item Cell(x, y) Shading
Application ActiveDocument Tables Item Cell(x, y) Shading
Application Documents Item Tables Item Rows Item Cells Item Shading
Application ActiveDocument Tables Item Rows Item Cells Item Shading
1 Description
The Shading object represents the shading of one of the following objects: paragraphs, tables, table rows or cells. It is a
child object of the Paragraph, Table, Row or Cell object.
2 Access to the object
Each paragraph, table, table tow or cell has exactly one instance of the Shading object. It is accessed through the object
pointer Shading in the respective object:
' Change the shading of the first paragraph
tm.ActiveDocument.Paragraphs(1).Shading.Texture = smoPatternHalftone
' Change the shading of the first table
tm.ActiveDocument.Tables(1).Shading.Texture = smoPatternHalftone
' Change the shading of the second row in the first table
tm.ActiveDocument.Tables(1).Rows(2).Shading.Texture = smoPatternHalftone
' Change the shading of the third cell in the second row from the first table
tm.ActiveDocument.Tables(1).Rows(2).Cells(3).Shading.Texture = smoPatternHalftone
3 Properties, objects, collections, and methods
Properties:
Texture
Intensity
ForegroundPatternColor
ForegroundPatternColorIndex
BackgroundPatternColor
BackgroundPatternColorIndex
Objects:
Application Application
Parent Paragraph, Table, Row oder Cell
Texture (property)
Data type: Long (SmoShadePatterns)
Gets or sets the fill pattern for the shading. The possible values are:
smoPatternNone = 0
smoPatternHalftone = 1
smoPatternRightDiagCoarse = 2
smoPatternLeftDiagCoarse = 3
smoPatternHashDiagCoarse = 4
smoPatternVertCoarse = 5
smoPatternHorzCoarse = 6
smoPatternHashCoarse = 7
smoPatternRightDiagFine = 8
smoPatternLeftDiagFine = 9
smoPatternHashDiagFine = 10
130 BasicMaker and TextMaker Manual BasicMaker
smoPatternVertFine = 11
smoPatternHorzFine = 12
smoPatternHashFine = 13
To add a shading, set the Texture property to smoPatternHalftone and specify the required intensity of shading with
the Intensity property.
To add a pattern, set the Texture property to one of the values between smoPatternRightDiagCoarse and smoPat-
ternHashFine.
To remove an existing shading or pattern, set the Texture property to smoPatternNone.
Intensity (property)
Data type: Long
Gets or sets the intensity of the shading. The possible values are between 0 and 100 (percent).
This value can be set or get only if a shading was chosen with the Texture property (i.e., the Texture property was set
to smoPatternHalftone). If a pattern was chosen (i.e., the Texture property has any other value), accessing the Intensi-
ty property fails.
ForegroundPatternColor (property)
Data type: Long (SmoColor)
Gets or sets the foreground color for the shading or pattern as a "BGR" value (Blue-Green-Red triplet). You can either
specify an arbitrary value or use one of the predefined BGR color constants.
ForegroundPatternColorIndex (property)
Data type: Long (SmoColorIndex)
Gets or sets the foreground color for the shading or pattern as an index color. "Index colors" are the standard colors of
TextMaker, consecutively numbered from 0 for black to 15 for light gray. You can use only one of the values presented
in the Color Indices table.
Note: It is recommended to use the ForegroundPatternColor property (see above) instead of this one, since it is not
limited to the 16 standard colors but enables you to access the entire BGR color palette.
BackgroundPatternColor (property)
Data type: Long (SmoColor)
Gets or sets the background color for the shading or pattern as a "BGR" value (Blue-Green-Red triplet). You can either
specify an arbitrary value or use one of the predefined BGR color constants.
BackgroundPatternColorIndex (property)
Data type: Long (SmoColorIndex)
Gets or sets the background color for the shading or pattern as an index color. "Index colors" are the standard colors of
TextMaker, consecutively numbered from 0 for black to 15 for light gray. You can use only one of the values presented
in the Color Indices table.
Note: It is recommended to use the BackgroundPatternColor property (see above) instead of this one, since it is not
limited to the 16 standard colors but enables you to access the entire BGR color palette.
Manual BasicMaker BasicMaker and TextMaker 131
Application (pointer to object)
Data type: Object
Returns the Application object
Parent (pointer to object)
Data type: Object
Returns the parent object, i.e. an object of the types Paragraph, Table, Row or Cell.
Example for the usage of the Shading object
Sub Main
Dim tm as Object
Set tm = CreateObject("TextMaker.Application")
tm.Visible = True
With tm.ActiveDocument.Paragraphs.Item(1)
.Shading.Texture = smoPatternHorzFine
.Shading.BackgroundPatternColor = smoColorAqua
End With
Set tm = Nothing
End Sub
FormFields (collection)
Access paths:
Application Documents Item FormFields
Application ActiveDocument FormFields
1 Description
FormFields is a collection of all form objects (text fields, check boxes and drop-down lists) in a document. The indi-
vidual elements of this collection are of the type FormField.
2 Access to the collection
Each opened document has exactly one instance of the FormFields collection. It is accessed through the Docu-
ment.FormFields object:
' Display the number of form fields in the active document
MsgBox tm.ActiveDocument.FormFields.Count
3 Properties, objects, collections, and methods
Properties:
Count R/O
DisplayFieldNames
Shaded
Objects:
132 BasicMaker and TextMaker Manual BasicMaker
Item FormField (default object)
Application Application
Parent Document
Count (property, R/O)
Data type: Long
Returns the number of FormField objects in the document – in other words: the number of form objects in the docu-
ment.
DisplayFieldNames (property)
Data type: Boolean
Gets or sets the setting "Display field names" in the respective document (True or False).
Shaded (property)
Data type: Boolean
Gets or sets the setting "Shade fields" in the respective document (True or False).
Item (pointer to object)
Data type: Object
Returns an individual FormField object, i.e. an individual form object.
Which FormField object you get depends on the parameter that you pass to Item. You can specify either the numeric
index or the name of the desired form object. Examples:
' Show the numeric type of the first form field in the document
MsgBox tm.ActiveDocument.FormFields(1).Type
' Show the numeric type of the form field named "DropDown1"
MsgBox tm.ActiveDocument.FormFields("DropDown1").Type
Application (pointer to object)
Data type: Object
Returns the Application object.
Parent (pointer to object)
Data type: Object
Returns the parent object, i.e. an object of the type Document.
FormField (object)
Access paths:
Application Documents Item FormFields Item
Application ActiveDocument FormFields Item
Manual BasicMaker BasicMaker and TextMaker 133
1 Description
A FormField object represents one individual form object of a document and allows you to retrieve the value it returns
or to change its formatting.
Each form object can represent either a text field, a check box or a drop-down list.
For each form object there is its own FormField object. If you add form objects to a document or delete them, the
respective FormField objects will be created or deleted dynamically.
2 Access to the object
The individual FormField objects can be accessed solely through enumerating the elements of the FormFields collec-
tion. Each document has exactly one instance of this collection.
An example:
' Show the name of the first form object in the document
MsgBox tm.ActiveDocument.FormFields(1).Name
Text fields, checkboxes and drop-down lists have common properties as well as type-specific ones. Accessing these
properties can be performed in different ways:
Properties that are available in all form objects (for example, whether they are visible) can be found directly in the
FormField object. Details on these properties will follow below.
On the other hand, properties that are type-specific (for example, only drop-down lists have a list of the items they
contain) can be found in the child objects TextInput, CheckBox and DropDown. Details on these properties will be
presented for each child object separately.
3 Properties, objects, collections, and methods
Properties:
Name
Visible
Printable
Locked
Tabstop Type R/O
Result R/O
Objects:
TextInput TextInput
CheckBox CheckBox
DropDown DropDown
Application Application
Parent FormFields
Name (property)
Data type: String
Gets or sets the name of the object. Corresponds to the Name option in the dialog box of TextMaker's Object > Proper-
ties command.
Visible (property)
Data type: Boolean
134 BasicMaker and TextMaker Manual BasicMaker
Gets or sets the "Visible" setting of the object (True or False). Corresponds to the "Visible" option in the dialog box of
TextMaker's Object > Properties command.
Printable (property)
Data type: Boolean
Gets or sets the "Printable" setting of the object (True or False). Corresponds to the "Printable" option in the dialog box
of TextMaker's Object > Properties command.
Locked (property)
Data type: Boolean
Gets or sets the "Locked" setting of the object (True or False). Corresponds to the "Locked" option in the dialog box of
TextMaker's Object > Properties command.
Tabstop (property)
Data type: Boolean
Gets or sets the setting whether the object has a tab stop (True or False). Corresponds to the "Tab stop" option in the
dialog box of TextMaker's Object > Properties command.
Type (property, R/O)
Data type: Long (TmFieldType)
Returns the type of the object as an integer. The possible values are:
tmFieldFormTextInput = 1 ' Text field
tmFieldFormCheckBox = 10 ' Check box
tmFieldFormDropDown = 11 ' Drop-down list
Result (property, R/O)
Data type: String
Returns the current result of the object:
For CheckBox: the text of the checkbox if it is checked; otherwise an empty string
For DropDown: the entry selected at the moment (as text)
For TextInput: the content of the text field
TextInput (pointer to object)
Data type: Object
Returns the TextInput object that allows you to access the text field specific properties of the form object.
Note: The form object represents a text field or a text frame only if the property TextInput.Valid returns True.
CheckBox (pointer to object)
Data type: Object
Manual BasicMaker BasicMaker and TextMaker 135
Returns the CheckBox object that allows you to access the checkbox specific properties of the form object.
Note: The form object represents a checkbox only if the property CheckBox.Valid returns True.
DropDown (pointer to object)
Data type: Object
Returns the DropDown object that allows you to access the drop-down list specific properties of the form object.
Note: The form object represents a drop-down list only if the property DropDown.Valid returns True.
Application (pointer to object)
Data type: Object
Returns the Application object.
Parent (pointer to object)
Data type: Object
Returns the parent object, i.e. an object of the type FormFields.
TextInput (object)
Access paths:
Application Documents Item FormFields Item TextInput
Application ActiveDocument FormFields Item TextInput
1 Description
A TextInput object represents one individual form object of the type TextInput and allows you to retrieve and change
its value.
A TextInput object can be any of the following object types:
a text field (created by Object > New Form Object > Text Field)
a text frame (created by Object > New Text Frame)
a drawing, to which text has been added using the Add Text command
TextInput is a child object of the FormField object.
2 Access to the object
The TextInput object can be accessed solely through the parent object FormField.
Only if the property TextInput.Valid returns the value True, the form object really represents a text field – and not a
checkbox or a drop-down list.
An example:
' Check the type of the first form object.
' If it is a TextInput object, retrieve the text it contains
If tm.ActiveDocument.FormFields(1).TextInput.Valid Then
MsgBox tm.ActiveDocument.FormFields(1).TextInput.Text
136 BasicMaker and TextMaker Manual BasicMaker
End If
3 Properties, objects, collections, and methods
Properties:
Text (default property)
Valid R/O
LockText
Objects:
Application Application
Parent FormField
Text (property)
Data type: String
Gets or sets the content of the text field.
Valid (property, R/O)
Data type: Boolean
Returns False if the object is not a TextInput object.
LockText (property)
Data type: Boolean
Gets or sets the setting "Lock text" of the text field (True or False). Corresponds to the option "Lock text" in the dialog
box of TextMaker's Object > Properties command.
Note that TextMaker locks the text field for text input only when forms mode is active.
Application (pointer to object)
Data type: Object
Returns the Application object.
Parent (pointer to object)
Data type: Object
Returns the parent object, i.e. an object of the type FormField.
CheckBox (object)
Access paths:
Application Documents Item FormFields Item CheckBox
Application ActiveDocument FormFields Item CheckBox

Manual BasicMaker BasicMaker and TextMaker 137
1 Description
A CheckBox object represents one individual form object of the type CheckBox and allows you to retrieve and change
its value.
CheckBox is a child object of the FormField object.
2 Access to the object
The CheckBox object can be accessed solely through the parent object FormField.
Only if the property CheckBox.Valid returns the value True, the form object really represents a checkbox – and not a
text field or a drop-down list.
An example:
' Check the type of the first form object. If it is a
' CheckBox object, display its value (True or False).
If tm.ActiveDocument.FormFields(1).CheckBox.Valid Then
MsgBox tm.ActiveDocument.FormFields(1).CheckBox.Value
End If
3 Properties, objects, collections, and methods
Properties:
Value (default property)
Text
Valid R/O
Objects:
Application Application
Parent FormField
Value (property)
Data type: Boolean
Gets or sets the property whether the checkbox is checked or not (True or False).
Text (property)
Data type: String
Gets or sets the text of the checkbox.
Valid (property, R/O)
Data type: Boolean
Returns False if the object is not a CheckBox object.
Application (pointer to object)
Data type: Object
Returns the Application object.
138 BasicMaker and TextMaker Manual BasicMaker
Parent (pointer to object)
Data type: Object
Returns the parent object, i.e. an object of the type FormField.
DropDown (object)
Access paths:
Application Documents Item FormFields Item DropDown
Application ActiveDocument FormFields Item DropDown
1 Description
A DropDown object represents one individual form object of the type DropDown (drop-down list) and allows you to
retrieve and change its value.
DropDown is a child object of the FormField object.
2 Access to the object
The DropDown object can be accessed solely through the parent object FormField.
Only if the property DropDown.Valid returns the value True, the form object really represents a drop-down list – and
not a text field or a checkbox.
An example:
' Check the type of the first form object. If it is
' a DropDown object, display the index of the selected entry.
If tm.ActiveDocument.FormFields(1).DropDown.Valid Then
MsgBox tm.ActiveDocument.FormFields(1).DropDown.Value
End If
3 Properties, objects, collections, and methods
Properties:
Value (default property)
Valid R/O
ListEntries
Objects:
Application Application
Parent FormField
Value (property)
Data type: Long
Gets or sets the numeric index of the selected list entry.
Valid (property, R/O)
Data type: Boolean
Returns False if the object is not a DropDown object.
Manual BasicMaker BasicMaker and TextMaker 139
ListEntries (pointer to collection)
Data type: Object
Returns the ListEntries collection that contains all entries in the drop-down list. You can use this collection to retrieve
and edit the entries of the drop-down list (such as: delete existing entries and add new ones).
Application (pointer to object)
Data type: Object
Returns the Application object.
Parent (pointer to object)
Data type: Object
Returns the parent object, i.e. an object of the type FormField.
ListEntries (collection)
Access paths:
Application Documents Item FormFields Item DropDown ListEntries
Application ActiveDocument FormFields Item DropDown ListEntries
1 Description
ListEntries is a collection of all list entries in a DropDown object. You can use it to retrieve and edit the individual
entries of a drop-down list.
The individual elements of this collection are of the type ListEntry.
2 Access to the collection
Each DropDown form object has exactly one instance of the ListEntries collection. It is accessed through the
DropDown.ListEntries object:
' Show the number of list entries in the first form element
' (if it is really a drop-down list)
If tm.ActiveDocument.FormFields(1).DropDown.Valid Then
MsgBox tm.ActiveDocument.FormFields(1).DropDown.ListEntries.Count
End If
3 Properties, objects, collections, and methods
Properties:
Count R/O
Objects:
Item ListEntry (default object)
Application Application
Parent DropDown
Methods:
Add

140 BasicMaker and TextMaker Manual BasicMaker
Clear
Count (property, R/O)
Data type: Long
Returns the number of ListEntry objects in the collection – in other words: the number of entries in the drop-down list.
Item (pointer to object)
Data type: Object
Returns an individual ListEntry object, i.e. an individual list entry in the drop-down list.
Which ListEntry object you get depends on the parameter that you pass to Item. You can specify either the numeric
index or the name of the desired list entry. Examples:
' Show the first list entry
MsgBox tm.FormFields(1).DropDown.ListEntries.Item(1).Name
' Show the list entry with the text "Test"
MsgBox tm.FormFields(1).DropDown.ListEntries.Item("Test").Name
Application (pointer to object)
Data type: Object
Returns the Application object.
Parent (pointer to object)
Data type: Object
Returns the parent object, i.e. an object of the type DropDown.
Add (method)
Adds a new entry to the drop-down list.
Syntax:
Add Name
Parameters:
Name (type: String) specifies the string to be added.
Return type:
Object (a ListEntry object that represents the new entry)
Example:
' Add an entry to the first form field in the document (a drop-down list)
tm.ActiveDocument.FormFields(1).DropDown.ListEntries.Add "Green"
' The same, but using the return value (mind the parentheses!)
Dim entry as Object
Set entry = tm.ActiveDocument.FormFields(1).DropDown.ListEntries.Add("Green")
Manual BasicMaker BasicMaker and TextMaker 141
Clear (method)
Deletes all entries from the drop-down list.
Syntax:
Clear
Parameters:
none
Return type:
none
Example:
' Delete all entries from the first form field in the document
tm.ActiveDocument.FormFields(1).DropDown.ListEntries.Clear
ListEntry (object)
Access paths:
Application Documents Item FormFields Item DropDown ListEntries Item
Application ActiveDocument FormFields Item DropDown ListEntries Item
1 Description
A ListEntry object represents one individual entry in a drop-down list (a form object) and allows you to retrieve,
change and delete it.
For each entry in a drop-down list there is its own ListEntry object. If you add entries to a drop-down list or delete
them, the respective ListEntry objects will be created or deleted dynamically.
2 Access to the object
The individual FormField objects can be accessed solely through enumerating the elements of the ListEntries collec-
tion. Each drop-down list has exactly one instance of this collection.
An example:
' Show an entry from the first form field in the document (a drop-down list)
MsgBox tm.ActiveDocument.FormFields(1).DropDown.ListEntries.Item(1).Name
3 Properties, objects, collections, and methods
Properties:
Name (default property)
Objects:
Application Application
Parent ListEntries
Methods:
Delete
142 BasicMaker and TextMaker Manual BasicMaker
Name (property)
Data type: String
Gets or sets the content of the ListEntry object – in other words: the content of the respective list entry.
Examples:
' Show the first list entry
MsgBox tm.ActiveDocument.FormFields(1).DropDown.ListEntries.Item(1).Name
' Set a new value for the first list entry
tm.ActiveDocument.FormFields(1).DropDown.ListEntries.Item(1).Name = "Green"
Hint: You can use this method to replace the text only in already existing list entries. If you want to add new entries to
the list, use the method Add from the ListEntries collection.
Application (pointer to object)
Data type: Object
Returns the Application object.
Parent (pointer to object)
Data type: Object
Returns the parent object, i.e. an object of the type ListEntries.
Delete (method)
Deletes the ListEntry object from the parent ListEntries collection.
Syntax:
Delete
Parameters:
none
Return type:
none
Example:
' Delete the first list entry
tm.ActiveDocument.FormFields(1).DropDown.ListEntries.Item(1).Delete
Windows (collection)
Access path: Application Windows
1 Description
The Windows collection contains all open document windows. The individual elements of this collection are of the type
Window.
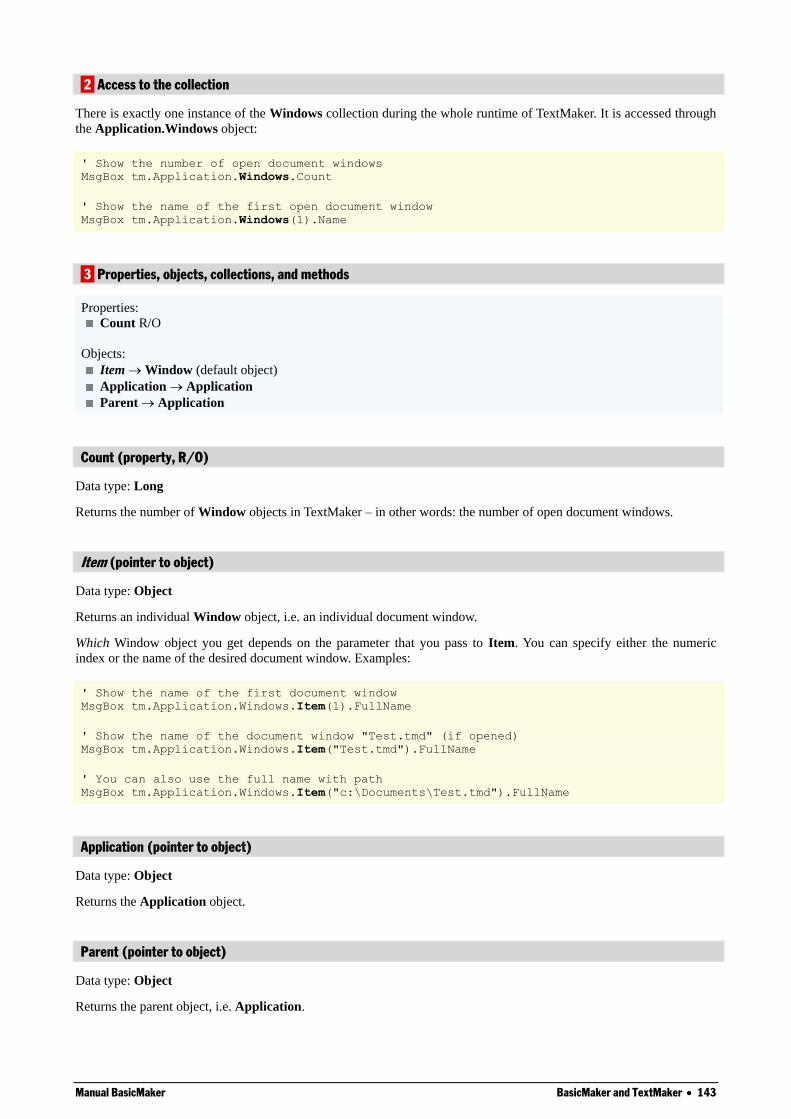
Manual BasicMaker BasicMaker and TextMaker 143
2 Access to the collection
There is exactly one instance of the Windows collection during the whole runtime of TextMaker. It is accessed through
the Application.Windows object:
' Show the number of open document windows
MsgBox tm.Application.Windows.Count
' Show the name of the first open document window
MsgBox tm.Application.Windows(1).Name
3 Properties, objects, collections, and methods
Properties:
Count R/O
Objects:
Item Window (default object)
Application Application
Parent Application
Count (property, R/O)
Data type: Long
Returns the number of Window objects in TextMaker – in other words: the number of open document windows.
Item (pointer to object)
Data type: Object
Returns an individual Window object, i.e. an individual document window.
Which Window object you get depends on the parameter that you pass to Item. You can specify either the numeric
index or the name of the desired document window. Examples:
' Show the name of the first document window
MsgBox tm.Application.Windows.Item(1).FullName
' Show the name of the document window "Test.tmd" (if opened)
MsgBox tm.Application.Windows.Item("Test.tmd").FullName
' You can also use the full name with path
MsgBox tm.Application.Windows.Item("c:\Documents\Test.tmd").FullName
Application (pointer to object)
Data type: Object
Returns the Application object.
Parent (pointer to object)
Data type: Object
Returns the parent object, i.e. Application.
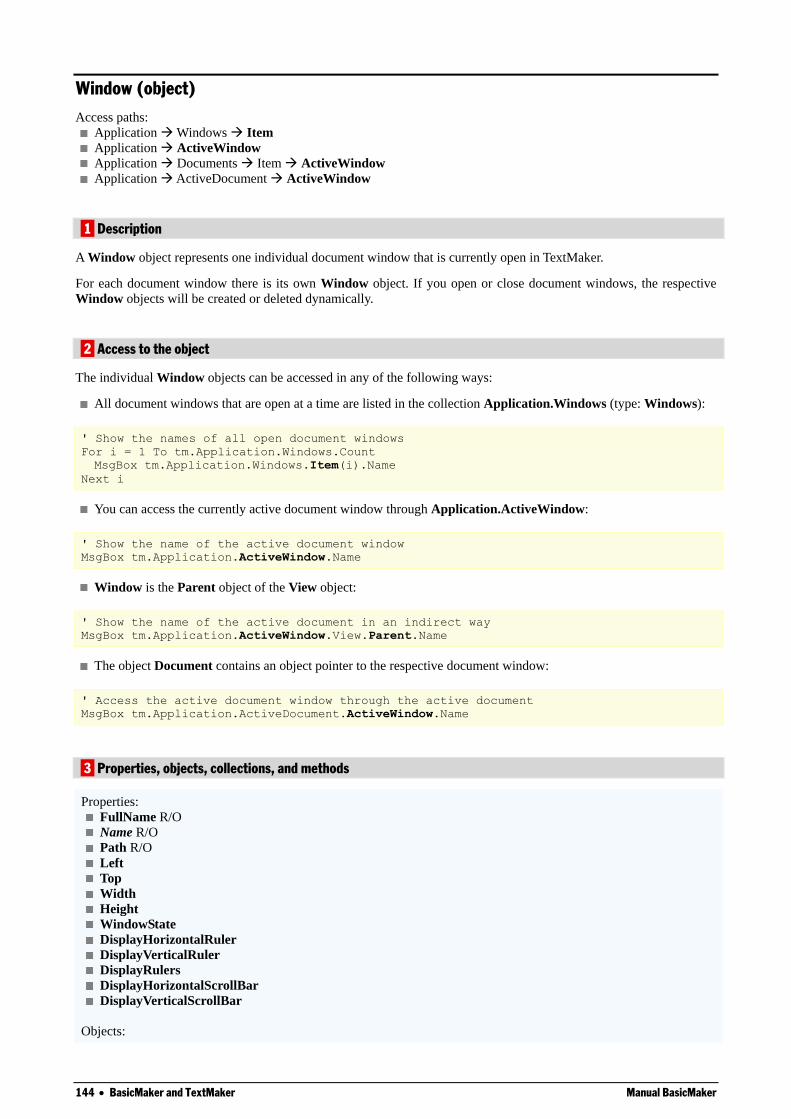
144 BasicMaker and TextMaker Manual BasicMaker
Window (object)
Access paths:
Application Windows Item
Application ActiveWindow
Application Documents Item ActiveWindow
Application ActiveDocument ActiveWindow
1 Description
A Window object represents one individual document window that is currently open in TextMaker.
For each document window there is its own Window object. If you open or close document windows, the respective
Window objects will be created or deleted dynamically.
2 Access to the object
The individual Window objects can be accessed in any of the following ways:
All document windows that are open at a time are listed in the collection Application.Windows (type: Windows):
' Show the names of all open document windows
For i = 1 To tm.Application.Windows.Count
MsgBox tm.Application.Windows.Item(i).Name
Next i
You can access the currently active document window through Application.ActiveWindow:
' Show the name of the active document window
MsgBox tm.Application.ActiveWindow.Name
Window is the Parent object of the View object:
' Show the name of the active document in an indirect way
MsgBox tm.Application.ActiveWindow.View.Parent.Name
The object Document contains an object pointer to the respective document window:
' Access the active document window through the active document
MsgBox tm.Application.ActiveDocument.ActiveWindow.Name
3 Properties, objects, collections, and methods
Properties:
FullName R/O
Name R/O
Path R/O
Left
Top
Width
Height
WindowState
DisplayHorizontalRuler
DisplayVerticalRuler
DisplayRulers
DisplayHorizontalScrollBar
DisplayVerticalScrollBar
Objects:
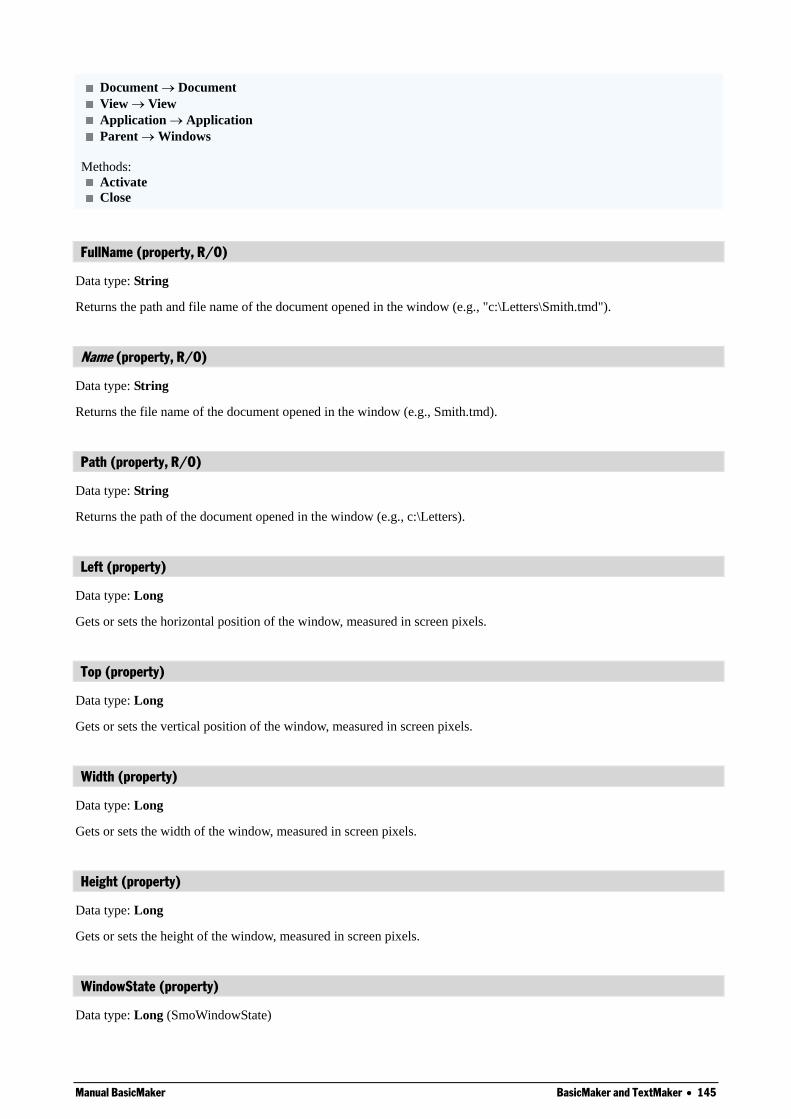
Manual BasicMaker BasicMaker and TextMaker 145
Document Document
View View
Application Application
Parent Windows
Methods:
Activate
Close
FullName (property, R/O)
Data type: String
Returns the path and file name of the document opened in the window (e.g., "c:\Letters\Smith.tmd").
Name (property, R/O)
Data type: String
Returns the file name of the document opened in the window (e.g., Smith.tmd).
Path (property, R/O)
Data type: String
Returns the path of the document opened in the window (e.g., c:\Letters).
Left (property)
Data type: Long
Gets or sets the horizontal position of the window, measured in screen pixels.
Top (property)
Data type: Long
Gets or sets the vertical position of the window, measured in screen pixels.
Width (property)
Data type: Long
Gets or sets the width of the window, measured in screen pixels.
Height (property)
Data type: Long
Gets or sets the height of the window, measured in screen pixels.
WindowState (property)
Data type: Long (SmoWindowState)
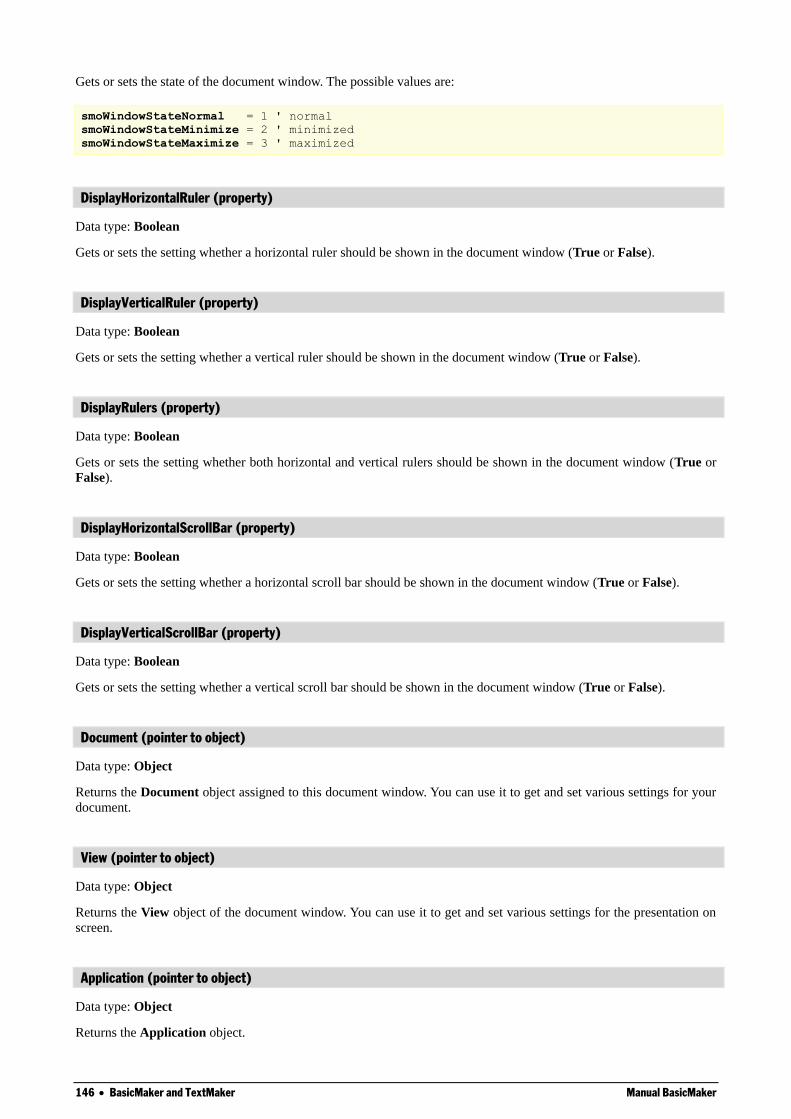
146 BasicMaker and TextMaker Manual BasicMaker
Gets or sets the state of the document window. The possible values are:
smoWindowStateNormal = 1 ' normal
smoWindowStateMinimize = 2 ' minimized
smoWindowStateMaximize = 3 ' maximized
DisplayHorizontalRuler (property)
Data type: Boolean
Gets or sets the setting whether a horizontal ruler should be shown in the document window (True or False).
DisplayVerticalRuler (property)
Data type: Boolean
Gets or sets the setting whether a vertical ruler should be shown in the document window (True or False).
DisplayRulers (property)
Data type: Boolean
Gets or sets the setting whether both horizontal and vertical rulers should be shown in the document window (True or
False).
DisplayHorizontalScrollBar (property)
Data type: Boolean
Gets or sets the setting whether a horizontal scroll bar should be shown in the document window (True or False).
DisplayVerticalScrollBar (property)
Data type: Boolean
Gets or sets the setting whether a vertical scroll bar should be shown in the document window (True or False).
Document (pointer to object)
Data type: Object
Returns the Document object assigned to this document window. You can use it to get and set various settings for your
document.
View (pointer to object)
Data type: Object
Returns the View object of the document window. You can use it to get and set various settings for the presentation on
screen.
Application (pointer to object)
Data type: Object
Returns the Application object.
Manual BasicMaker BasicMaker and TextMaker 147
Parent (pointer to object)
Data type: Object
Returns the parent object, i.e. an object of the type Windows.
Activate (method)
Brings the document window to the foreground (if the property Visible for this document is True) and sets the focus to
it.
Syntax:
Activate
Parameters:
none
Return type:
none
Example:
' Activate the first document window
tm.Windows(1).Activate
Close (method)
Closes the document window.
Syntax:
Close [SaveChanges]
Parameters:
SaveChanges (optional; type: Long or SmoSaveOptions) indicates whether the document opened in the win-
dow should be saved or not (if it was changed since last save). If you omit this parameter, the user will be asked
to decide on it. The possible values for the parameter SaveChanges are:
smoDoNotSaveChanges = 0 ' Don't ask, don't save
smoPromptToSaveChanges = 1 ' Ask the user
smoSaveChanges = 2 ' Save without asking
Return type:
none
Example:
' Close the active window without saving it
tm.ActiveWindow.Close smoDoNotSaveChanges
View (object)
Access paths:
Application Windows Item View
Application ActiveWindow View
Application Documents Item ActiveWindow View
Application ActiveDocument ActiveWindow View

148 BasicMaker and TextMaker Manual BasicMaker
1 Description
The View object contains the various settings for the presentation on screen. It is a child object of the Window object.
Hint: The presentation settings provided by the View object are document window specific – i.e., each document win-
dow has its own settings. The common settings (valid for all documents) can be found in the objects Application and
Options.
2 Access to the object
Each document window has exactly one instance of the View object. It is accessed through the object pointer View in
the Window object:
' Show all special characters (tabs etc.) in the active window
tm.ActiveWindow.View.ShowAll = True
3 Properties, objects, collections, and methods
Properties:
Type
Mode
FieldShading
HighlightComments
RevisionsBalloonSide
RevisionsBalloonWidth
CommentsPaneAutoShow
ShowHiddenText
PrintHiddenText
ShowParagraphs
ShowSpaces
ShowTabs
ShowAll
ShowBookmarks
ShowTextBoundaries
WrapToWindow
Objects:
Zoom Zoom
Application Application
Parent Window
Type (property)
Data type: Long (TmViewType)
Gets or sets the view type of the document window. The possible values are:
tmPrintView = 0 ' View > Normal
tmMasterView = 1 ' View > Master Pages
tmNormalView = 2 ' View > Continuous
tmOutlineView = 3 ' View > Outline
Mode (property)
Data type: Long (TmViewMode)
Gets or sets the view mode of the document window. The possible values are:
Manual BasicMaker BasicMaker and TextMaker 149
tmViewModeText = 0 ' Editing mode
tmViewModeObject = 1 ' Object mode
If you set this property to tmViewModeObject while the view type of the document window (see above) is tmNor-
malView (View > Continuous) or tmOutlineView (View > Outline), TextMaker automatically switches to the value
tmPrintView, because object mode is not available in the above-mentioned view types.
FieldShading (property)
Data type: Long (TmFieldShading)
Gets or sets the property "Shade fields" in the dialog box of TextMaker's File > Properties > View command. The
possible values are:
tmFieldShadingNever = 0 ' Do not shade fields in gray
tmFieldShadingAlways = 1 ' Shade fields in gray
HighlightComments (property)
Data type: Boolean
Gets or sets the property of the document window whether comments in the document are color-highlighted (True or
False).
RevisionsBalloonSide (property)
Data type: Long (TmRevisionsBalloonMargin)
Gets or sets the position where comments appear inside the document window. The possible values are:
tmRightMargin = 0 ' at the right
tmLeftMargin = 1 ' at the left
tmOuterMargin = 2 ' outside
tmInnerMargin = 3 ' inside
RevisionsBalloonWidth (property)
Data type: Long
Gets or sets the width of the comment field in the document window, measured in points (1 point corresponds to 1/72
inches).
CommentsPaneAutoShow (property)
Data type: Boolean
Gets or sets the setting of the document window whether the comment field should be automatically shown (True or
False).
ShowHiddenText (property)
Data type: Boolean
Gets or sets the setting of the document window whether hidden text should be shown or not (True or False).
150 BasicMaker and TextMaker Manual BasicMaker
PrintHiddenText (property)
Data type: Boolean
Gets or sets the setting of the document window whether hidden text should be printed or not (True or False).
ShowParagraphs (property)
Data type: Boolean
Gets or sets the setting of the document window whether paragraph end marks (¶) should be shown or not (True or
False).
ShowSpaces (property)
Data type: Boolean
Gets or sets the setting of the document window whether space characters should be displayed with a small point (·) or
not (True or False).
ShowTabs (property)
Data type: Boolean
Gets or sets the setting of the document window whether tab stops should be displayed with an arrow (→) or not (True
or False).
ShowAll (property)
Data type: Boolean
Gets or sets the setting of the document window whether all unprintable characters (paragraph signs, tab stops, space
characters) should be displayed or not (True or False).
ShowBookmarks (property)
Data type: Boolean
Gets or sets the setting of the document window whether bookmarks should be shown or not (True or False).
ShowTextBoundaries (property)
Data type: Boolean
Gets or sets the setting of the document whether the page borders should be displayed as dotted lines or not (True or
False).
WrapToWindow (property)
Data type: Boolean
Gets or sets the setting of the document window whether the text should be wrapped at the window border or not (True
or False).
Manual BasicMaker BasicMaker and TextMaker 151
Zoom (pointer to object)
Data type: Object
Returns the Zoom object which contains the zoom level setting of the document window.
Application (pointer to object)
Data type: Object
Returns the Application object.
Parent (pointer to object)
Data type: Object
Returns the parent object, i.e. an object of the type Window.
Zoom (object)
Access paths:
Application Windows Item View Zoom
Application ActiveWindow View Zoom
Application Documents Item ActiveWindow View Zoom
Application ActiveDocument ActiveWindow View Zoom
1 Description
The Zoom object contains the settings for the zoom level of a document window. It is a child object of the View object.
2 Access to the object
Each document window has exactly one instance of the View object and it has in turn exactly one instance of the Zoom
object. The latter is accessed through the object pointer Zoom in the View object:
' Zoom the document window to 140%
tm.ActiveWindow.View.Zoom.Percentage = 140
3 Properties, objects, collections, and methods
Properties:
Percentage
Objects:
Application Application
Parent View
Percentage (property)
Data type: Long
Gets or sets the zoom level of the document window, expressed in percent.
Example:
152 BasicMaker and TextMaker Manual BasicMaker
' Zoom the document window to 140%
tm.ActiveWindow.View.Zoom.Percentage = 140
Application (pointer to object)
Data type: Object
Returns the Application object.
Parent (pointer to object)
Data type: Object
Returns the parent object, i.e. an object of the type View.
RecentFiles (collection)
Access path: Application RecentFiles
1 Description
RecentFiles is a collection of all recently opened files listed in the File menu. The individual elements of this collection
are of the type RecentFile.
2 Access to the collection
There is exactly one instance of the RecentFiles collection during the whole runtime of TextMaker. It is accessed
directly through the Application.RecentFiles object:
' Show the name of the first recent file in the File menu
MsgBox tm.Application.RecentFiles.Item(1).Name
' Open the first recent file in the File menu
tm.Application.RecentFiles.Item(1).Open
3 Properties, objects, collections, and methods
Properties:
Count R/O
Maximum
Objects:
Item RecentFile (default object)
Application Application
Parent Application
Methods:
Add
Count (property, R/O)
Data type: Long
Manual BasicMaker BasicMaker and TextMaker 153
Returns the number of RecentFile objects in TextMaker – in other words: the number of the recently opened files listed
in the File menu.
Maximum (property, R/O)
Data type: Long
Gets or sets the setting "Recently used files in File menu" – in other words: how many recently opened files are dis-
played in the File menu.
The value may be between 0 and 9.
Item (pointer to object)
Data type: Object
Returns an individual RecentFile object, i.e. one individual file entry in the File menu.
Which RecentFile object you get depends on the numeric value that you pass to Item: 1 for the first of the recently
opened files, 2 for the second, etc.
Application (pointer to object)
Data type: Object
Returns the Application object.
Parent (pointer to object)
Data type: Object
Returns the parent object, i.e. Application.
Add (method)
Adds a document to the list of recently opened files.
Syntax:
Add Document, [FileFormat]
Parameters:
Document is a string containing the file path and name of the document to be added.
FileFormat (optional; type: Long or TmSaveFormat) specifies the file format of the document to be added.
The possible values are:
tmFormatDocument = 0 ' TextMaker document
tmFormatTemplate = 1 ' TextMaker document template
tmFormatWinWord97 = 2 ' Microsoft Word 97 and 2000
tmFormatOpenDocument = 3 ' OpenDocument, OpenOffice.org, StarOffice
tmFormatRTF = 4 ' Rich Text Format
tmFormatPocketWordPPC = 5 ' Pocket Word for Pocket PCs
tmFormatPocketWordHPC = 6 ' Pocket Word for Handheld PCs (Windows CE)
tmFormatPlainTextAnsi = 7 ' Text file with Windows character set
tmFormatPlainTextDOS = 8 ' Text file with DOS character set
tmFormatPlainTextUnicode = 9 ' Text file with Unicode character set
tmFormatPlainTextUTF8 = 10 ' Text file with UTF8 character set
tmFormatHTML = 12 ' HTML document
tmFormatWinWord6 = 13 ' Microsoft Word 6.0
tmFormatPlainTextUnix = 14 ' Text file for UNIX, Linux, FreeBSD
tmFormatWinWordXP = 15 ' Microsoft Word XP and 2003
154 BasicMaker and TextMaker Manual BasicMaker
tmFormatTM2006 = 16 ' TextMaker 2006 document
tmFormatOpenXML = 17 ' Microsoft Word 2007 and later (.docx)
tmFormatTM2008 = 18 ' TextMaker 2008 document
If you omit this parameter, the value tmFormatDocument will be taken.
Tip: Independent of the value for the FileFormat parameter TextMaker always tries to determine the file format
by itself and ignores evidently false inputs.
Return type:
Object (a RecentFile object which represents the document to be added)
Example:
' Add the file Test.rtf to the File menu
tm.Application.RecentFiles.Add "Test.rtf", tmFormatRTF
' Do the same, but evaluate the return value (mind the brackets!)
Dim fileObj as Object
Set fileObj = tm.Application.RecentFiles.Add("Test.rtf", tmFormatRTF)
MsgBox fileObj.Name
RecentFile (object)
Access path: Application RecentFiles Item
1 Description
A RecentFile object represents one individual of the recently opened files. You can use it to retrieve the properties of
such a file and to open it again.
For each recently opened file there is its own RecentFile object. For each document that you open or close, the list of
these files in the File menu will change accordingly – i.e., the respective RecentFile objects will be created or deleted
dynamically.
2 Access to the object
The individual RecentFile objects can be accessed solely through enumerating the elements of the RecentFiles collec-
tion. It can be accessed through the Application.RecentFiles object:
' Show the name of the first file in the File menu
MsgBox tm.Application.RecentFiles.Item(1).Name
3 Properties, objects, collections, and methods
Properties:
FullName R/O
Name R/O (default property)
Path R/O
Objects:
Application Application
Parent RecentFiles
Methods:
Open
Manual BasicMaker BasicMaker and TextMaker 155
FullName (property, R/O)
Data type: String
Returns the path and name of the document in the File menu (e.g., "c:\Letters\Smith.tmd").
Name (property, R/O)
Data type: String
Returns the name of the document (e.g., Smith.tmd).
Path (property, R/O)
Data type: String
Returns the path of the document (e.g., c:\Letters).
Application (pointer to object)
Data type: Object
Returns the Application object.
Parent (pointer to object)
Data type: Object
Returns the parent object, i.e. Application.
Open (method)
Opens the appropriate document and returns the Document object for it.
Syntax:
Open
Parameters:
none
Return type:
Document
Example:
' Open the first document displayed in the File menu
tm.Application.RecentFiles(1).Open
FontNames (collection)
Access path: Application FontNames
156 BasicMaker and TextMaker Manual BasicMaker
1 Description
FontNames is a collection of all fonts installed in Windows. The individual elements of this collection are of the type
FontName.
2 Access to the collection
There is exactly one instance of the FontNames collection during the whole runtime of TextMaker. It is accessed
through the Application.FontNames object:
' Display the name of the first installed font
MsgBox tm.Application.FontNames.Item(1).Name
' The same, but shorter, omitting the default properties:
MsgBox tm.FontNames(1)
3 Properties, objects, collections, and methods
Properties:
Count R/O
Objects:
Item FontName (default object)
Application Application
Parent Application
Count (property, R/O)
Data type: Long
Returns the number of FontName objects – in other words: the number of fonts installed in Windows.
Item (pointer to object)
Data type: Object
Returns an individual FontName object, i.e. an individual installed font.
Which FontName object you get depends on the numeric value that you pass to Item: 1 for the first installed font, 2 for
the second, etc.
Application (pointer to object)
Data type: Object
Returns the Application object.
Parent (pointer to object)
Returns the parent object, i.e. Application.
FontName (object)
Access path: Application FontNames Item
Manual BasicMaker BasicMaker and TextMaker 157
1 Description
A FontName object represents one individual of the fonts installed in Windows. For each installed font there is its own
FontName object.
2 Access to the object
The individual FontName objects can be accessed solely through enumerating the elements of the FontNames collec-
tion. It can be accessed through the Application.FontNames object:
' Display the name of the first installed font
MsgBox tm.Application.FontNames.Item(1).Name
' The same, but shorter, omitting the default properties:
MsgBox tm.FontNames(1)
3 Properties, objects, collections, and methods
Properties:
Name R/O (default property)
Charset
Objekts:
Application Application
Parent FontNames
Name (property, R/O)
Data type: String
Returns the name of the respective font.
Charset (property, R/O)
Data type: Long (SmoCharset)
Returns the character set of the respective font. The possible values are:
smoAnsiCharset = 0 ' normal character set
smoSymbolCharset = 2 ' symbol character set
Application (pointer to object)
Data type: Object
Returns the Application object.
Parent (pointer to object)
Data type: Object
Returns the parent object, i.e. FontNames.
158 BasicMaker and PlanMaker Manual BasicMaker
BasicMaker and PlanMaker You can use BasicMaker to program the spreadsheet application PlanMaker in the same way that you can program
TextMaker. This chapter contains all the information about programming PlanMaker. It is structured as follows:
Programming PlanMaker
This section contains all the basic information required to program PlanMaker with BasicMaker.
PlanMaker's object model
This chapter describes all objects exposed by PlanMaker for programming.
Programming PlanMaker
Programming the word processor TextMaker and the spreadsheet PlanMaker is practically identical. The only difference
is that some keywords have different names (for example PlanMaker.Application instead of TextMaker.Application). If
you have already worked through the section "Programming TextMaker" you will notice that the section you are cur-
rently reading is almost identical to it.
Naturally, the objects exposed by PlanMaker are different from those of TextMaker. A list of all objects exposed can be
found in the next section "PlanMaker's object model".
To program PlanMaker with BasicMaker, you mainly use OLE Automation commands. General information on this
subject can be found in section "OLE Automation".
Follow this schematic outline (details follow subsequently):
1. Declare a variable of type Object:
Dim pm as Object
2. Make a connection to PlanMaker via OLE Automation (PlanMaker will be launched automatically if it is not already
running):
Set pm = CreateObject("PlanMaker.Application")
3. Set the property Application.Visible to True so that PlanMaker becomes visible:
pm.Application.Visible = True
4. Now you can program PlanMaker by reading and writing its "properties" and by invoking the "methods" it provides.
5. As soon as the PlanMaker object is not required anymore, you should cut the connection to PlanMaker:
Set pm = Nothing
That was just a quick rundown of the necessary steps. More detailed information on programming PlanMaker follows
on the next pages. A list of all PlanMaker objects and their respective properties and methods can be found in the
section "PlanMaker's object model".
Connecting to PlanMaker
In order to control PlanMaker from BasicMaker, you first need to connect to PlanMaker via OLE Automation. For this,
first declare a variable of type Object, then assign to it the object "PlanMaker.Application" through use of the Cre-
ateObject function.
Dim pm as Object
Set pm = CreateObject("PlanMaker.Application")
If PlanMaker is already running, this function simply connects to PlanMaker; if not, then PlanMaker will be started
beforehand.
The object variable "pm" now contains a reference to PlanMaker.

Manual BasicMaker BasicMaker and PlanMaker 159
Important: Making PlanMaker visible
Please note: If you start PlanMaker in the way just described, its application window will be invisible by default. In
order to make it visible, you must set the property Visible to True.
The complete chain of commands should therefore be as follows:
Dim pm as Object
Set pm = CreateObject("PlanMaker.Application")
pm.Application.Visible = True
The "Application" object
The fundamental object that PlanMaker exposes for programming is Application. All other objects – such as collections
of open documents and windows – are attached to the Application object.
The Application object contains not only its own properties (such as Application.Left for the x coordinate of the
application window) and methods (such as Application.Quit for exiting from PlanMaker), but also contains pointers to
other objects, for example Application.Options, that in turn have their own properties and methods, and pointers to
collections such as Workbooks (the collection of all currently open documents).
Notations
As mentioned in the previous section, you need to use dot notation as usual with OLE Automation to access the provid-
ed properties, methods etc.
For example, Application.Left lets you address the Left property of the Application object. Applica-
tion.Documents.Add references the Add method of the Documents collection which in turn is a member of Applica-
tion.
Getting and setting PlanMaker properties
As soon as a connection with PlanMaker has been made, you can "control" the application. For this, properties and
methods are provided – this has already been discussed in the section "OLE Automation".
Let’s first talk about properties. Properties are options and settings that can be retrieved and sometimes modified.
For example, if you wish to retrieve PlanMaker’s application name, you can use the Name property of the Application
object:
MsgBox "The name of this application is " & pm.Application.Name
Application.Name is a property that can only be read, but not written to. Other properties can be both retrieved and
changed from BasicMaker scripts. For example, the coordinates of the PlanMaker application window are stored in the
properties Left, Top, Width, and Height. You can retrieve them as follows:
MsgBox "The left window position is at: " & pm.Application.Left
But you can also change the content of this property:
pm.Application.Left = 200
PlanMaker reacts immediately and moves the left border of the application window to the screen position 200. You can
also mix reading and changing the values of properties, as in the following example:
pm.Application.Left = pm.Application.Left + 100
Here, the current left border value is retrieved, increased by 100 and set as the new value for the left border. This will
instruct PlanMaker to move its left window position 100 pixels to the right.
There is a large number of properties in the Application object. A list of them can be found in the section "PlanMaker's
object model".
160 BasicMaker and PlanMaker Manual BasicMaker
Using PlanMaker's methods
In addition to properties, methods exist, and they implement commands that direct PlanMaker to execute a specific
action.
For example, Application.Quit instructs PlanMaker to stop running, and Application.Activate lets you force
PlanMaker to bring its application window to the foreground (if it’s covered by windows from other applications):
pm.Application.Activate
Function methods and procedure methods
There are two types of methods: those that return a value to the BASIC program and those that do not. The former are
called (in the style of other programming languages) "function methods" or simply "functions", the latter "procedure
methods" or simply "procedures".
This distinction may sound a bit picky to you, but it is not because it effects on the notation of instructions.
As long as you call a method without parameters, there is no syntactical difference:
Call as procedure:
pm.Workbooks.Add ' Add a document to the collection of open documents
Call as function:
Dim newDoc as Object
Set newDoc = pm.Workbooks.Add ' The same (returning an object this time)
As soon as you access methods with parameters, you need to employ two different styles:
Call as procedure:
pm.Application.RecentFiles.Add "Test.pmd"
Call as function:
Dim x as Object
Set x = pm.Application.RecentFiles.Add("Test.pmd") ' now with a return value
As you can see, if you call the method as a procedure, you may not surround the parameters with parentheses. If you
call it as a function, you must surround them with parentheses.
Using pointers to other objects
A third group of members of the Application object are pointers to other objects.
This may first sound a bit abstract at first, but is actually quite simple: It would clutter the Application object if all
properties and methods of PlanMaker were attached directly to the Application method. To prevent this, groups of
related properties and methods have been parceled out and placed into objects of their own. For example, PlanMaker
has an Options object that lets you read out and modify many fundamental program settings:
pm.Application.Options.CreateBackup = True
MsgBox "Overwrite mode activated? " & pm.Application.Options.Overtype
Using collections
The fourth group of members of the Application object are pointers to collections.
Collections are, as their name indicates, lists of objects belonging together. For example, there is a collection called
Application.Workbooks that contains all open documents and a collection called Application.RecentFiles with all
files that are listed in the history section of the File menu.
There are two standardized ways of accessing collections, and PlanMaker supports both of them. The more simple way
is through the Item property that is part of every collection:
Manual BasicMaker BasicMaker and PlanMaker 161
' Display the name of the first open document:
MsgBox pm.Application.Workbooks.Item(1).Name
' Close the (open) document "Test.tmd":
pm.Application.Workbooks.Item("Test.pmd").Close
If you wish to list all open documents, for example, first find out the number of open documents through the standard-
ized Count property, then access the objects one by one:
' Return the names of all open documents:
For i=1 To pm.Application.Workbooks.Count
MsgBox pm.Application.Workbooks.Item(i).Name
Next i
Every collection contains, by definition, the Count property which lets you retrieve the number of entries in the collec-
tion, and the Item property that lets you directly access one entry.
Item always accepts the number of the desired entry as an argument. Where it makes sense, it is also possible to pass
other arguments to it, for example file names. You have seen this already above, when we passed both a number and a
file name to Item.
For most collections, there is matching object type for their individual entries. The collection Windows, for example,
has individual entries of type Window – note the use of the singular! One entry of the Workbooks collection is called
Workbook, and an entry of the RecentFiles collection has the object type RecentFile.
A more elegant approach to collections: For Each ... Next
There is a more elegant way to access all entries in a collection consecutively: BasicMaker also supports the For Each
instruction:
' Display the names of all open documents
Dim x As Object
For Each x In pm.Application.Workbooks
MsgBox x.Name
Next x
This gives the same results as the method previously described:
For i=1 To pm.Application.Workbooks.Count
MsgBox pm.Application.Workbooks.Item(i).Name
Next i
Collections may have their own properties and methods
Some collections may have their own properties and methods, in addition to the standard members Item and Count.
For example, if you wish to create an empty document in PlanMaker, this is achieved by adding a new entry to its
Workbooks collection:
pm.Application.Workbooks.Add ' leeres Dokument anlegen
Hints for simplifying notations
If you are beginning to wonder whether so much typing is really necessary to address a single document, we can reas-
sure you that it’s not! There are several ways to reduce the amount of typing required.
Using with instructions
The first shortcut is to use the With instruction when addressing several members of the same object.
First, the conventional style:
pm.Application.Left = 100
pm.Application.Top = 50
162 BasicMaker and PlanMaker Manual BasicMaker
pm.Application.Width = 500
pm.Application.Height = 300
msgbox pm.Application.Options.CreateBackup
This code looks much clearer through use of the With instruction:
With pm.Application
.Left = 100
.Top = 50
.Width = 500
.Height = 300
msgbox .Options.CreateBackup
End With
Omitting default properties
There is yet another way to reduce the amount of typing required: Each object (for example, Application or Applica-
tion.Workbooks) has one of its properties marked as its default property. Conveniently enough, you can always leave
out default properties.
The default property of Application, for example, is Name. Therefore, the two following instructions are equivalent:
MsgBox pm.Application.Name ' Display the application name of PlanMaker
MsgBox pm.Application ' Does exactly the same
Typically, the property that is used most often in an object has been designated its default property. For example, the
most used property of a collection surely is the Item property, as the most common use of collections is to return one of
their members. The following instructions therefore are equivalent:
MsgBox pm.Application.Workbooks.Item(1).Name
MsgBox pm.Application.Workbooks(1).Name
Finally things are getting easier again! But it gets even better: Name is the default property of a single Workbook
object (note: "Workbook", not "Workbooks"!). Each Item of the Workbook collection is of the Workbook type. As
Name is the default property of Workbook, it can be omitted:
MsgBox pm.Application.Workbooks(1)
Not easy enough yet? OK... Application is the default property of PlanMaker. So, let's just leave out Application as
well! The result:
MsgBox pm.Workbooks(1)
This basic knowledge should have prepared you to understand PlanMaker's object model. You can now continue with
the next section that contains a detailed list of all objects that PlanMaker provides.
PlanMaker's object model
PlanMaker provides BasicMaker (and all other OLE Automation compatible programming languages) with the objects
listed below.
Notes:
The properties marked with "R/O" are "Read Only" (i.e. write-protected). They can be read, but not changed.
The default property of an object is marked in italics.
The following table lists all objects and collections available in PlanMaker.
Name Type Description
Application Object "Root object" of PlanMaker
Options Object Global options
Manual BasicMaker BasicMaker and PlanMaker 163
Name Type Description
UserProperties Collection Collection of all parts of the user's private and business address
UserProperty Object An individual part of the user's address
CommandBars Collection Collection of all toolbars
CommandBar Object An individual toolbar
AutoCorrect Object Automatic text correction and SmartText
AutoCorrectEntries Collection Collection of all SmartText entries
AutoCorrectEntry Object An individual SmartText entry
Workbooks Collection Collection of all open documents
Workbook Object An individual open document
DocumentProperties Collection Collection of all document properties of a document
DocumentProperty Object An individual document property
Sheets Collection Collection of all spreadsheets of a document
Sheet Object An individual spreadsheet of a document
PageSetup Object The page settings of a spreadsheet
Range Object A range of cells in a spreadsheet
Rows Collection Collection of all rows in a spreadsheet or range
Columns Collection Collection of all columns in a spreadsheet or range
FormatConditions Collection Collection of all conditional formattings in a range
FormatCondition Object An individual conditional formatting in a range
NumberFormatting Object The number formatting of a range
Font Object The character formatting of a range or a conditional formatting
Borders Collection Collection of all border lines of a range or a conditional formatting
Border Object An individual border line
Shading Object The shading of a range or a conditional formatting
Validation Object The input validation settings of a range
AutoFilter Object The AutoFilter of a worksheet
Filters Collection Collection of all columns in an AutoFilter
Filter Object An individual column in an AutoFilter
Windows Collection Collection of all open document windows
Window Object An individual document window
RecentFiles Collection Collection of all recently opened files, as listed in the File menu
RecentFile Object An individual recently opened file
FontNames Collection Collection of all fonts installed
FontName Object An individual installed font
Detailed descriptions of all objects and collections follow on the next pages.
164 BasicMaker and PlanMaker Manual BasicMaker
Application (object)
Access path: Application
1 Description
Application is the "root object" for all other objects in PlanMaker. It is the central control object that is used to carry
out the whole communication between your Basic script and PlanMaker.
2 Access to the object
There is exactly one instance of the Application object during the whole runtime of PlanMaker. It is accessed directly
through the object variable returned by the CreateObject function:
Set pm = CreateObject("PlanMaker.Application")
MsgBox pm.Application.Name
As Application is the default property of PlanMaker, it can generally be omitted:
Set pm = CreateObject("PlanMaker.Application")
MsgBox pm.Name ' has the same meaning as pm.Application.Name
3 Properties, objects, collections, and methods
Properties:
FullName R/O
Name R/O (default property)
Path R/O
Build R/O
Bits R/O
Visible
Caption R/O
Left
Top
Width
Height
WindowState
Calculation
CalculateBeforeSave
DisplayCommentIndicator
EditDirectlyInCell
MoveAfterReturn
MoveAfterReturnDirection
PromptForSummaryInfo
WarningOnError
Objects:
Options Options
UserProperties UserProperties
CommandBars CommandBars
AutoCorrect AutoCorrect
ActiveWorkbook Workbook
ActiveSheet Sheet
ActiveWindow Window
ActiveCell Range
Selection Range
Range Range
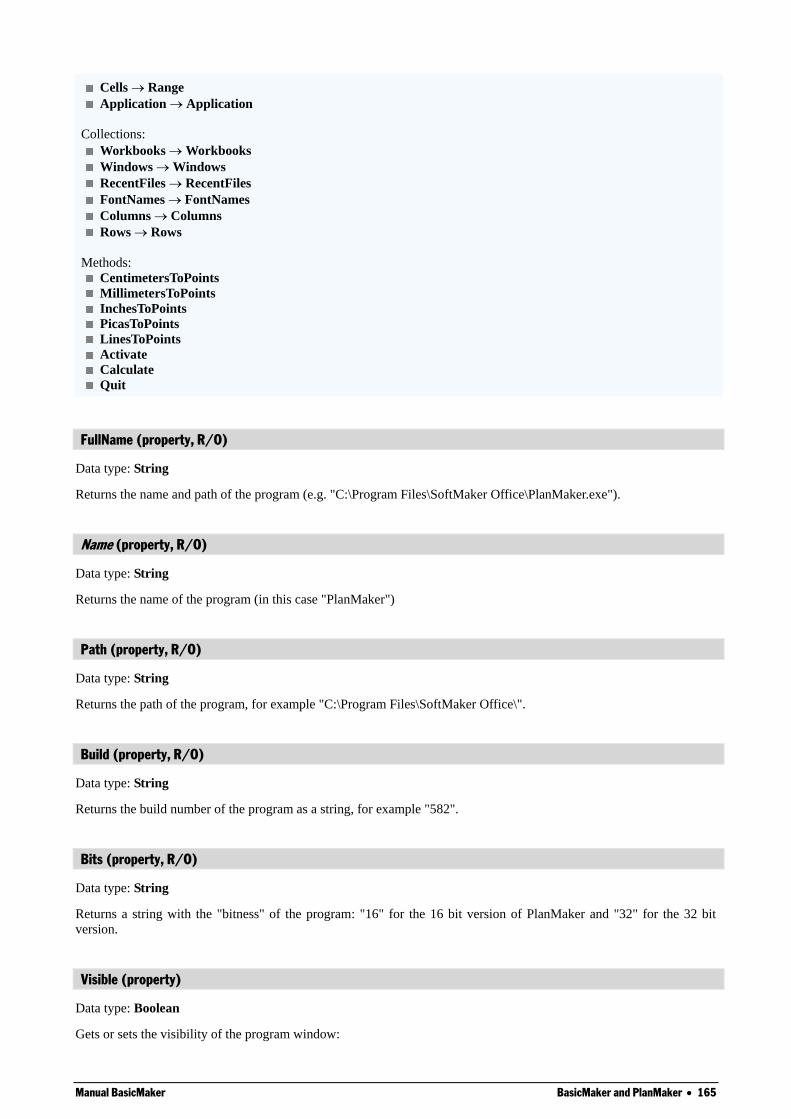
Manual BasicMaker BasicMaker and PlanMaker 165
Cells Range
Application Application
Collections:
Workbooks Workbooks
Windows Windows
RecentFiles RecentFiles
FontNames FontNames
Columns Columns
Rows Rows
Methods:
CentimetersToPoints
MillimetersToPoints
InchesToPoints
PicasToPoints
LinesToPoints
Activate
Calculate
Quit
FullName (property, R/O)
Data type: String
Returns the name and path of the program (e.g. "C:\Program Files\SoftMaker Office\PlanMaker.exe").
Name (property, R/O)
Data type: String
Returns the name of the program (in this case "PlanMaker")
Path (property, R/O)
Data type: String
Returns the path of the program, for example "C:\Program Files\SoftMaker Office\".
Build (property, R/O)
Data type: String
Returns the build number of the program as a string, for example "582".
Bits (property, R/O)
Data type: String
Returns a string with the "bitness" of the program: "16" for the 16 bit version of PlanMaker and "32" for the 32 bit
version.
Visible (property)
Data type: Boolean
Gets or sets the visibility of the program window:
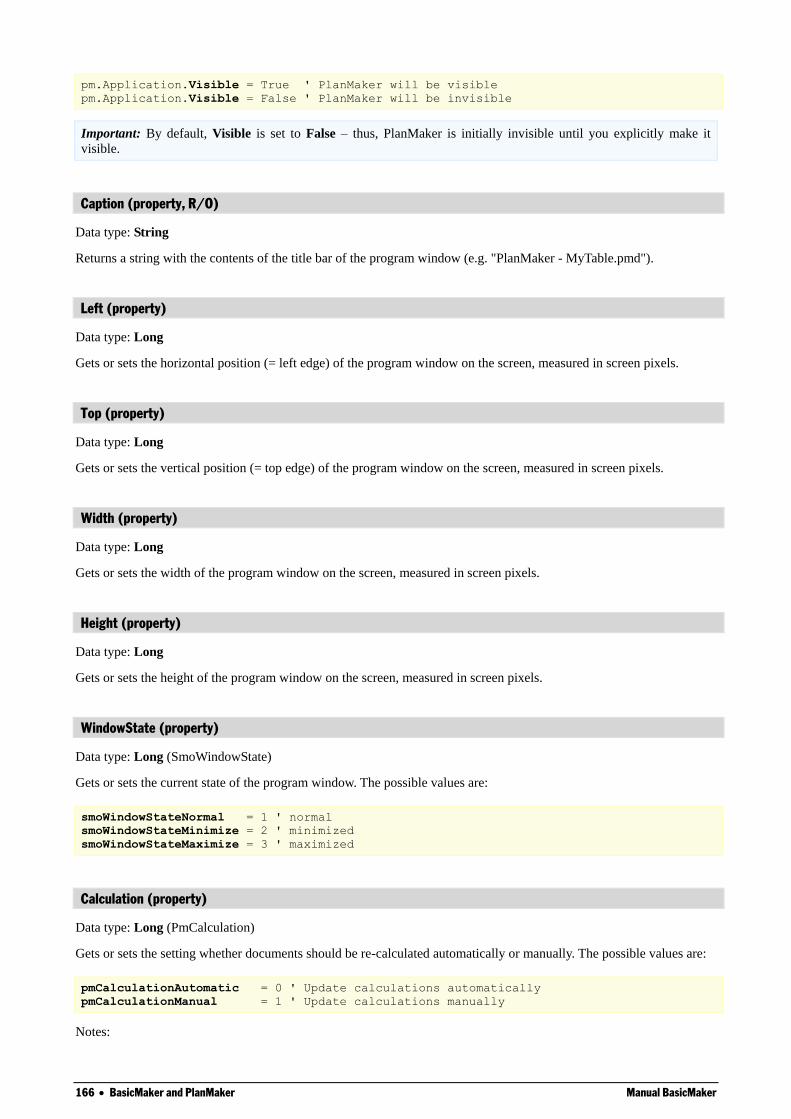
166 BasicMaker and PlanMaker Manual BasicMaker
pm.Application.Visible = True ' PlanMaker will be visible
pm.Application.Visible = False ' PlanMaker will be invisible
Important: By default, Visible is set to False – thus, PlanMaker is initially invisible until you explicitly make it
visible.
Caption (property, R/O)
Data type: String
Returns a string with the contents of the title bar of the program window (e.g. "PlanMaker - MyTable.pmd").
Left (property)
Data type: Long
Gets or sets the horizontal position (= left edge) of the program window on the screen, measured in screen pixels.
Top (property)
Data type: Long
Gets or sets the vertical position (= top edge) of the program window on the screen, measured in screen pixels.
Width (property)
Data type: Long
Gets or sets the width of the program window on the screen, measured in screen pixels.
Height (property)
Data type: Long
Gets or sets the height of the program window on the screen, measured in screen pixels.
WindowState (property)
Data type: Long (SmoWindowState)
Gets or sets the current state of the program window. The possible values are:
smoWindowStateNormal = 1 ' normal
smoWindowStateMinimize = 2 ' minimized
smoWindowStateMaximize = 3 ' maximized
Calculation (property)
Data type: Long (PmCalculation)
Gets or sets the setting whether documents should be re-calculated automatically or manually. The possible values are:
pmCalculationAutomatic = 0 ' Update calculations automatically
pmCalculationManual = 1 ' Update calculations manually
Notes:
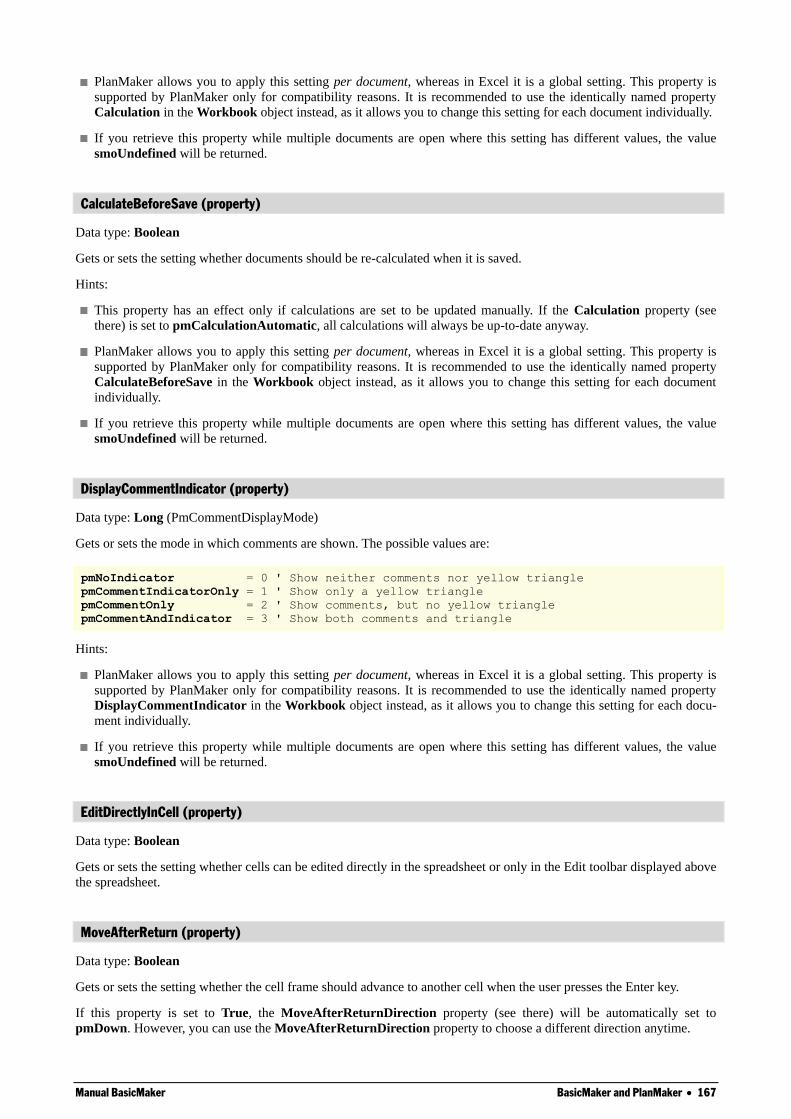
Manual BasicMaker BasicMaker and PlanMaker 167
PlanMaker allows you to apply this setting per document, whereas in Excel it is a global setting. This property is
supported by PlanMaker only for compatibility reasons. It is recommended to use the identically named property
Calculation in the Workbook object instead, as it allows you to change this setting for each document individually.
If you retrieve this property while multiple documents are open where this setting has different values, the value
smoUndefined will be returned.
CalculateBeforeSave (property)
Data type: Boolean
Gets or sets the setting whether documents should be re-calculated when it is saved.
Hints:
This property has an effect only if calculations are set to be updated manually. If the Calculation property (see
there) is set to pmCalculationAutomatic, all calculations will always be up-to-date anyway.
PlanMaker allows you to apply this setting per document, whereas in Excel it is a global setting. This property is
supported by PlanMaker only for compatibility reasons. It is recommended to use the identically named property
CalculateBeforeSave in the Workbook object instead, as it allows you to change this setting for each document
individually.
If you retrieve this property while multiple documents are open where this setting has different values, the value
smoUndefined will be returned.
DisplayCommentIndicator (property)
Data type: Long (PmCommentDisplayMode)
Gets or sets the mode in which comments are shown. The possible values are:
pmNoIndicator = 0 ' Show neither comments nor yellow triangle
pmCommentIndicatorOnly = 1 ' Show only a yellow triangle
pmCommentOnly = 2 ' Show comments, but no yellow triangle
pmCommentAndIndicator = 3 ' Show both comments and triangle
Hints:
PlanMaker allows you to apply this setting per document, whereas in Excel it is a global setting. This property is
supported by PlanMaker only for compatibility reasons. It is recommended to use the identically named property
DisplayCommentIndicator in the Workbook object instead, as it allows you to change this setting for each docu-
ment individually.
If you retrieve this property while multiple documents are open where this setting has different values, the value
smoUndefined will be returned.
EditDirectlyInCell (property)
Data type: Boolean
Gets or sets the setting whether cells can be edited directly in the spreadsheet or only in the Edit toolbar displayed above
the spreadsheet.
MoveAfterReturn (property)
Data type: Boolean
Gets or sets the setting whether the cell frame should advance to another cell when the user presses the Enter key.
If this property is set to True, the MoveAfterReturnDirection property (see there) will be automatically set to
pmDown. However, you can use the MoveAfterReturnDirection property to choose a different direction anytime.
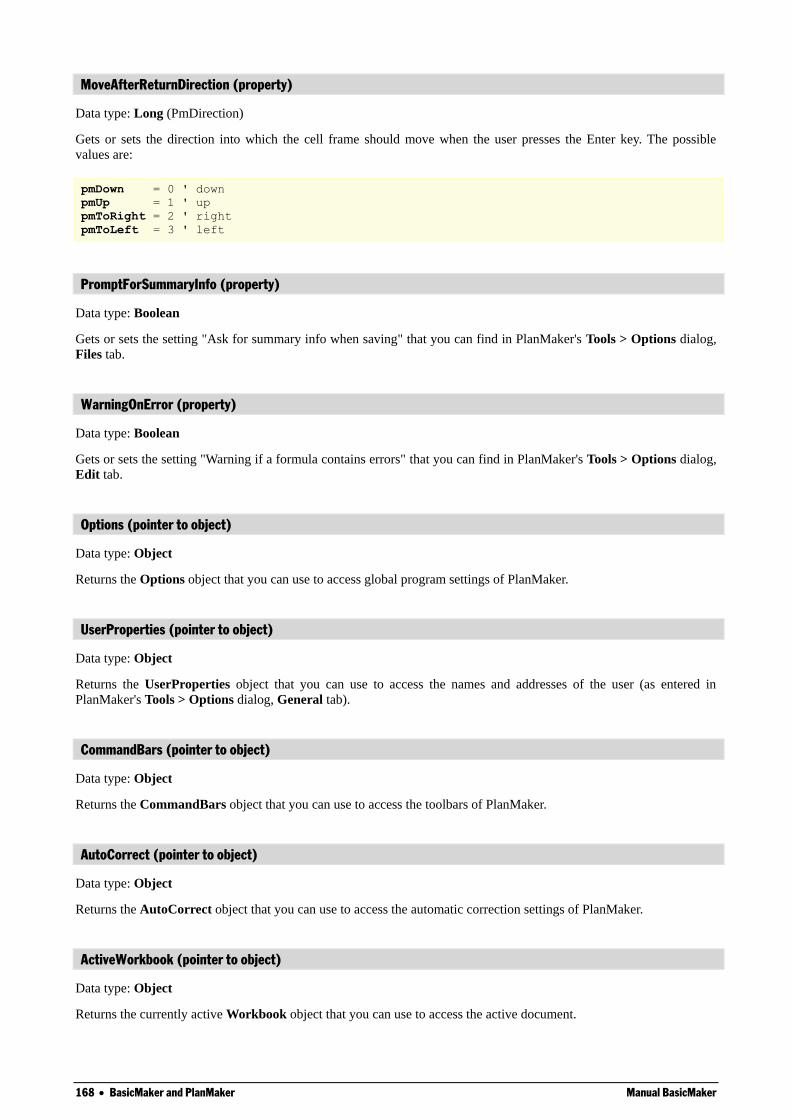
168 BasicMaker and PlanMaker Manual BasicMaker
MoveAfterReturnDirection (property)
Data type: Long (PmDirection)
Gets or sets the direction into which the cell frame should move when the user presses the Enter key. The possible
values are:
pmDown = 0 ' down
pmUp = 1 ' up
pmToRight = 2 ' right
pmToLeft = 3 ' left
PromptForSummaryInfo (property)
Data type: Boolean
Gets or sets the setting "Ask for summary info when saving" that you can find in PlanMaker's Tools > Options dialog,
Files tab.
WarningOnError (property)
Data type: Boolean
Gets or sets the setting "Warning if a formula contains errors" that you can find in PlanMaker's Tools > Options dialog,
Edit tab.
Options (pointer to object)
Data type: Object
Returns the Options object that you can use to access global program settings of PlanMaker.
UserProperties (pointer to object)
Data type: Object
Returns the UserProperties object that you can use to access the names and addresses of the user (as entered in
PlanMaker's Tools > Options dialog, General tab).
CommandBars (pointer to object)
Data type: Object
Returns the CommandBars object that you can use to access the toolbars of PlanMaker.
AutoCorrect (pointer to object)
Data type: Object
Returns the AutoCorrect object that you can use to access the automatic correction settings of PlanMaker.
ActiveWorkbook (pointer to object)
Data type: Object
Returns the currently active Workbook object that you can use to access the active document.
Manual BasicMaker BasicMaker and PlanMaker 169
ActiveSheet (pointer to object)
Data type: Object
Returns the currently active Sheet object that you can use to access the active worksheet of the active document.
ActiveSheet is an abbreviation for the ActiveWorkbook.ActiveSheet. The following both calls have the same mean-
ing:
MsgBox pm.Application.ActiveWorkbook.ActiveSheet
MsgBox pm.Application.ActiveSheet
ActiveWindow (pointer to object)
Data type: Object
Returns the currently active Window object that you can use to access the active document window.
ActiveCell (pointer to object)
Data type: Object
Returns a Range object that represents the active cell in the active document window. You can use this object to retrieve
and change the formatting and the contents of the cell.
ActiveCell is an abbreviation for ActiveWindow.ActiveCell. The following both calls have the same meaning:
pm.Application.ActiveWindow.ActiveCell.Font.Size = 14
pm.Application.ActiveCell.Font.Size = 14
Please note that ActiveCell always returns just one individual cell – even if a range of cells is selected in the worksheet.
After all, selected cell ranges have exactly one active cell as well. You can see that when you select cells and then press
the Enter key: a cell frame appears within to selection to indicate the active cell.
Selection (pointer to object)
Data type: Object
Returns a Range object that represents the selected cells in the active worksheet of the current document window.
Selection is an abbreviation for ActiveWorkbook.ActiveSheet.Selection. The following both calls have the same
meaning:
pm.Application.ActiveWorkbook.ActiveSheet.Selection.Font.Size = 14
pm.Application.Selection.Font.Size = 14
Range (pointer to object)
Data type: Object
Creates a Range object in the active worksheet of the current document and returns a pointer to it. You can use this
object to access the cells in a cell range and, for example, get or set their values.
Syntax 1:
obj = Range(Cell1)
Syntax 2:
obj = Range(Cell1, Cell2)
170 BasicMaker and PlanMaker Manual BasicMaker
Parameters:
If Syntax 1 is used, Cell1 (type: String) specifies the cell or cell range. (Cell2 should be omitted.)
If Syntax 2 is used, Cell1 specifies the left top corner and Cell2 the right bottom corner of the cell range.
Cell2 (optional; type: String) should be used only if Cell1 refers to an individual cell.
Examples for syntax 1:
Range("A1:B20") ' Cells A1 to B20
Range("A1") ' Only cell A1
Range("A:A") ' The whole column A
Range("3:3") ' The whole row 3
Range("Summer") ' Range labeled "Summer"
Example for syntax 2:
Range("A1", "B20") ' Cells A1 to B20
Range is an abbreviation for ActiveWorkbook.ActiveSheet.Range. The following both calls have the same meaning:
pm.Application.ActiveWorkbook.ActiveSheet.Range("A1:B5").Value = 42
pm.Application.Range("A1:B5").Value = 42
Cells (pointer to object)
Data type: Object
Returns a Range object that covers all cells of the current worksheet. This is useful for two applications:
To apply an operation (e.g., formatting) to every cell in the entire worksheet:
' Colorize the whole active worksheet with red color
pm.Cells.Shading.ForegroundPatternColor = smoColorRed
To address individual cells with loop variables instead of specifying the address as a string (such as, "B5" for the
second column in the fifth row). To do this, use the Item property of the Range object that is addressed through the
Cells pointer:
' Fill the first 5 * 10 cells of the active worksheet with 42
Dim row, col as Integer
For row = 1 To 5
For col = 1 to 10
pm.Cells.Item(row, col).Value = 42
Next col
Next row
Cells is an abbreviation for ActiveSheet.Cells. The following both calls have the same meaning:
pm.Application.ActiveSheet.Cells(1, 1).Font.Size = 14
pm.Application.Cells(1, 1).Font.Size = 14
Application (pointer to object)
Data type: Object
Returns the Application object, i.e. the pointer to itself. This object pointer is basically superfluous and only provided
for the sake of completeness.
Workbooks (pointer to collection)
Data type: Object
Manual BasicMaker BasicMaker and PlanMaker 171
Returns the Workbooks collection, a collection of all currently opened documents.
Windows (pointer to collection)
Data type: Object
Returns the Windows collection, a collection of all currently opened document windows.
RecentFiles (pointer to collection)
Data type: Object
Returns the RecentFiles collection, a collection of the recently opened documents (as displayed at the bottom of
PlanMaker's File menu).
FontNames (pointer to collection)
Data type: Object
Returns the FontNames collection, a collection of all installed fonts.
Columns (pointer to collection)
Data type: Object
Returns the Columns collection, a collection of all columns in the active worksheet.
Columns is an abbreviation for ActiveWorkbook.ActiveSheet.Columns. The following both calls have the same
meaning:
MsgBox pm.Application.ActiveWorkbook.ActiveSheet.Columns.Count
MsgBox pm.Application.Columns.Count
Rows (pointer to collection)
Data type: Object
Returns the Rows collection, a collection of all rows in the active worksheet.
Rows is an abbreviation for ActiveWorkbook.ActiveSheet.Rows. The following both calls have the same meaning:
MsgBox pm.Application.ActiveWorkbook.ActiveSheet.Rows.Count
MsgBox pm.Application.Rows.Count
CentimetersToPoints (method)
Converts the given value from centimeters (cm) to points (pt). This function is useful if you make calculations in centi-
meters, but a PlanMaker function accepts only points as its measurement unit.
Syntax:
CentimetersToPoints(Centimeters)
Parameters:
Centimeters (type: Single) specifies the value to be converted.
Return value:
172 BasicMaker and PlanMaker Manual BasicMaker
Single
Example:
' Set the top margin of the active worksheet to 3cm
pm.ActiveSheet.PageSetup.TopMargin = pm.Application.CentimetersToPoints(3)
MillimetersToPoints (method)
Converts the given value from millimeters (mm) to points (pt). This function is useful if you make calculations in
millimeters, but a PlanMaker function accepts only points as its measurement unit.
Syntax:
MillimetersToPoints(Millimeters)
Parameters:
Millimeters (type: Single) specifies the value to be converted.
Return value:
Single
Example:
' Set the top margin of the active worksheet to 30mm
pm.ActiveSheet.PageSetup.TopMargin = pm.Application.MillimetersToPoints(30)
InchesToPoints (method)
Converts the given value from inches (in) to points (pt). This function is useful if you make calculations in inches, but a
PlanMaker function accepts only points as its measurement unit.
Syntax:
InchesToPoints(Inches)
Parameters:
Inches (type: Single) specifies the value to be converted.
Return value:
Single
Example:
' Set the bottom margin of the active worksheet to 1 inch
pm.ActiveSheet.PageSetup.BottomMargin = pm.Application.InchesToPoints(1)
PicasToPoints (method)
Converts the given value from picas to points (pt). This function is useful if you make calculations in picas, but a
PlanMaker function accepts only points as its measurement unit.
Syntax:
PicasToPoints(Picas)
Parameters:
Picas (type: Single) specifies the value to be converted.
Return value:
Manual BasicMaker BasicMaker and PlanMaker 173
Single
Example:
' Set the bottom margin of the active worksheet to 6 picas
pm.ActiveSheet.PageSetup.BottomMargin = pm.Application.PicasToPoints(6)
LinesToPoints (method)
Identical to the PicasToPoints method (see there).
Syntax:
LinesToPoints(Lines)
Parameters:
Lines (type: Single) specifies the value to be converted.
Return value:
Single
Example:
' Set the bottom margin of the active worksheet to 6 picas
pm.ActiveSheet.PageSetup.BottomMargin = pm.Application.LinesToPoints(6)
Activate (method)
Brings the program window to the foreground and sets the focus to it.
Syntax:
Activate
Parameters:
none
Return value:
none
Example:
' Bring PlanMaker to the foreground
pm.Application.Activate
Hint: This command is only successful if Application.Visible = True.
Calculate (method)
Re-calculates all currently open documents (similar to the menu command Tools > Recalculate in PlanMaker, but the
menu command re-calculates only the active workbook).
Syntax:
Calculate
Parameters:
none
Return value:
174 BasicMaker and PlanMaker Manual BasicMaker
none
Example:
' Re-calculate all open workbooks (documents)
pm.Application.Calculate
Quit (method)
Ends the program.
Syntax:
Quit
Parameters:
none
Return value:
none
Example:
' End PlanMaker
pm.Application.Quit
If there are any unsaved documents open, the user will be asked if they should be saved. If you want to avoid this
question, you need to either close all opened documents in your program or set the property Saved for the documents to
True (see Workbook).
Options (object)
Access path: Application Options
1 Description
The Options object consolidates many global program settings, most of which can be found in the dialog box of the
Tools > Options command in PlanMaker.
2 Access to the object
There is exactly one instance of the Options object during the whole runtime of PlanMaker. It is accessed through the
Application.Options object:
Set pm = CreateObject("PlanMaker.Application")
pm.Application.Options.EnableSound = True
3 Properties, objects, collections, and methods
Properties:
CheckSpellingAsYouType
CreateBackup
DefaultFilePath
DefaultTemplatePath
EnableSound
Overtype
Manual BasicMaker BasicMaker and PlanMaker 175
SaveInterval
SavePropertiesPrompt
Objects:
Application Application
Parent Application (default object)
CheckSpellingAsYouType (property)
Data type: Boolean
Gets or sets the setting "Background spell-checking" (True or False).
CreateBackup (property)
Data type: Boolean
Gets or sets the setting "Create backup files" (True or False).
DefaultFilePath (property)
Data type: String
Gets or sets the file path used by default to save and open documents.
This is just a temporary setting: When you execute File > Open or File > Save As the next time, the path chosen here
will appear in the dialog box. If the user changes the path, this path will then be the new default file path.
DefaultTemplatePath (property)
Data type: String
Gets or sets the file path used by default to store document templates.
This setting is saved permanently. Each call to the File > New command lets you see the document templates in the path
given here.
EnableSound (property)
Data type: Boolean
Gets or sets the setting "Beep on errors" (True or False).
Overtype (property)
Data type: Boolean
Gets or sets Overwrite/Insert mode (True=Overwrite, False=Insert).
SaveInterval (property)
Data type: Long
Gets or sets the setting "Autosave documents every n minutes" (0=off).

176 BasicMaker and PlanMaker Manual BasicMaker
SavePropertiesPrompt (property)
Data type: Boolean
Gets or sets the setting "Prompt for summary information when saving" (True or False).
Application (pointer to object)
Data type: Object
Returns the Application object.
Parent (pointer to object)
Data type: Object
Returns the parent object, i.e. Application.
UserProperties (collection)
Access path: Application UserProperties
1 Description
The UserProperties collection contains all components of the user's personal and business address (as entered in
PlanMaker's Tools > Options dialog, General tab).
The individual elements of this collection are of the type UserProperty.
2 Access to the collection
There is exactly one instance of the UserProperties collection during the whole runtime of PlanMaker. It is accessed
through the Application.UserProperties object:
' Show the first UserProperty (the user's last name)
MsgBox pm.Application.UserProperties.Item(1).Value
3 Properties, objects, collections, and methods
Properties:
Count R/O
Objects:
Item UserProperty (default object)
Application Application
Parent Application
Count (property, R/O)
Data type: Long
Returns the number of UserProperty objects in the collection, i.e. the number of all components of the user's address
data (last name, first name, street etc. – separated into personal and business address).
This value is constantly 24, since there are exactly 24 such elements.
Manual BasicMaker BasicMaker and PlanMaker 177
Item (pointer to object)
Data type: Object
Returns an individual UserProperty object that you can use to get or set an individual component of the user’s personal
or business address (last name, first name, street, etc.).
Which UserProperty object you get depends on the numeric value that you pass to Item. The following table shows the
admissible values:
smoUserHomeAddressName = 1 ' Last name (personal)
smoUserHomeAddressFirstName = 2 ' First name (personal)
smoUserHomeAddressStreet = 3 ' Street (personal)
smoUserHomeAddressZip = 4 ' ZIP code (personal)
smoUserHomeAddressCity = 5 ' City (personal)
smoUserHomeAddressPhone1 = 6 ' Phone (personal)
smoUserHomeAddressFax = 7 ' Fax (personal)
smoUserHomeAddressEmail = 8 ' E-mail address (personal)
smoUserHomeAddressPhone2 = 9 ' Mobile phone (personal)
smoUserHomeAddressHomepage = 10 ' Homepage (personal)
smoUserBusinessAddressName = 11 ' Last name (business)
smoUserBusinessAddressFirstName = 12 ' First name (business)
smoUserBusinessAddressCompany = 13 ' Company (business)
smoUserBusinessAddressDepartment = 14 ' Department (business)
smoUserBusinessAddressStreet = 15 ' Street (business)
smoUserBusinessAddressZip = 16 ' ZIP code (business)
smoUserBusinessAddressCity = 17 ' City (business)
smoUserBusinessAddressPhone1 = 18 ' Phone (business)
smoUserBusinessAddressFax = 19 ' Fax (business)
smoUserBusinessAddressEmail = 20 ' E-mail address (business)
smoUserBusinessAddressPhone2 = 21 ' Mobile phone (business)
smoUserBusinessAddressHomepage = 22 ' Homepage (business)
smoUserHomeAddressInitials = 23 ' User initials (personal)
smoUserBusinessAddressInitials = 24 ' User initials (business)
Examples:
' Show the user's first name (personal)
MsgBox pm.Application.UserProperties.Item(1).Value
' Change the business e-mail address to [email protected]
With pm.Application
.UserProperties.Item(smoUserBusinessAddressEmail).Value = "[email protected]"
End With
Application (pointer to object)
Data type: Object
Returns the Application object.
Parent (pointer to object)
Data type: Object
Returns the parent object, i.e. Application.
UserProperty (object)
Access path: Application UserProperties Item

178 BasicMaker and PlanMaker Manual BasicMaker
1 Description
A UserProperty object represents one individual component of the user's personal or business address (for example, the
ZIP code or the phone number).
There is one UserProperty object for each of these components. The number of these objects is constant, since you
cannot create new address components.
2 Access to the object
The individual UserProperty objects can be accessed solely through enumerating the elements of the Applica-
tion.UserProperties collection. The type of this collection is UserProperties.
Example:
' Show the contents of the first address element (last name, personal)
MsgBox pm.Application.UserProperties.Item(1).Value
3 Properties, objects, collections, and methods
Properties:
Value (default property)
Objects:
Application Application
Parent UserProperties
Value (property)
Data type: String
Gets or sets the contents of the address component. The following example sets the company name of the user:
Sub Example()
Set pm = CreateObject("PlanMaker.Application")
pm.UserProperties(smoUserBusinessAddressCompany).Value = "ACME Corp."
End Sub
Application (pointer to object)
Data type: Object
Returns the Application object.
Parent (pointer to object)
Data type: Object
Returns the parent object, i.e. UserProperties.
CommandBars (collection)
Access path: Application CommandBars
Manual BasicMaker BasicMaker and PlanMaker 179
1 Description
The CommandBars collection contains all toolbars available in PlanMaker. The individual elements of this collection
are of the type CommandBar.
2 Access to the collection
There is exactly one instance of the CommandBars collection during the whole runtime of PlanMaker. It is accessed
through the Application.CommandBars object:
' Show the name of the first toolbar
MsgBox pm.Application.CommandBars.Item(1).Name
' The same, but easier, using the default property
MsgBox pm.CommandBars(1)
3 Properties, objects, collections, and methods
Properties:
Count R/O
DisplayFonts
DisplayTooltips
Objects:
Item CommandBar (default object)
Application Application
Parent Application
Count (property, R/O)
Data type: Long
Returns the number of CommandBar objects in the collection, i.e. the number of toolbars available.
DisplayFonts (property)
Data type: Boolean
Gets or sets the setting "Show fonts in font lists" (True or False).
DisplayTooltips (property)
Data type: Boolean
Gets or sets the setting whether a tooltip should be displayed when the mouse cursor is pointed to a toolbar button.
Corresponds to the setting "Show tooltips" in the Tools > Options dialog.
Item (pointer to object)
Data type: Object
Returns an individual CommandBar object that you can use to access an individual toolbar.
Which CommandBar object you get depends on the value that you pass to Item. You can specify either the numeric
index or the name of the desired toolbar. Examples:
180 BasicMaker and PlanMaker Manual BasicMaker
' Make the first toolbar invisible
pm.Application.CommandBars.Item(1).Visible = False
' Make the toolbar named "Formatting" invisible
pm.Application.CommandBars.Item("Formatting").Visible = False
Note: It is not advisable to use the names of toolbars as a reference, since these names are different in each language
that PlanMaker's user interface supports. For example, if the user interface language is set to German, the name of the
"Formatting" toolbar changes to "Formatleiste".
Instead, it is recommended to use the following symbolic constants for toolbars:
pmBarStatusShort = 1 ' Status bar (no documents open)
pmBarStandardShort = 2 ' Standard toolbar (no documents open)
pmBarStatus = 3 ' Status bar
pmBarStandard = 4 ' Standard toolbar
pmBarFormatting = 5 ' Formatting toolbar
pmBarObjects = 6 ' Objects toolbar
pmBarEdit = 7 ' Edit toolbar
pmBarOutliner = 8 ' Outliner toolbar
pmBarChart = 9 ' Chart toolbar
pmBarFormsEditing = 10 ' Forms toolbar
pmBarPicture = 11 ' Graphics toolbar
pmBarFullscreen = 12 ' Full screen toolbar
Application (pointer to object)
Data type: Object
Returns the Application object.
Parent (pointer to object)
Data type: Object
Returns the parent object, i.e. Application.
CommandBar (object)
Access path: Application CommandBars Item
1 Description
A CommandBar object represents one individual toolbar.
For each toolbar there is its own CommandBar object. If you create new toolbars or delete them, the respective Com-
mandBar objects will be created or deleted dynamically.
2 Access to the object
The individual CommandBar objects can be accessed solely through enumerating the elements of the Applica-
tion.CommandBars collection. The type of this collection is CommandBars.
Example:
' Show the name of the first toolbar
MsgBox pm.Application.CommandBars.Item(1).Name
' The same, but easier, using the default property
Manual BasicMaker BasicMaker and PlanMaker 181
MsgBox pm.CommandBars(1)
3 Properties, objects, collections, and methods
Properties:
Name (default property)
Visible
Objects:
Application Application
Parent CommandBars
Name (property)
Data type: String
Gets or sets the name of the toolbar.
Example:
' Show the name of the first toolbar
MsgBox pm.Application.CommandBars.Item(1).Name
Visible (property)
Data type: Boolean
Gets or sets the visibility of the toolbar. The following example makes the "Formatting" toolbar invisible:
Sub Beispiel()
Set pm = CreateObject("PlanMaker.Application")
pm.Application.CommandBars.Item("Formatting").Visible = False
End Sub
Application (pointer to object)
Data type: Object
Returns the Application object.
Parent (pointer to object)
Data type: Object
Returns the parent object, i.e. CommandBars.
AutoCorrect (object)
Access path: Application AutoCorrect
1 Description
The AutoCorrect object allows accessing the defined SmartText entries.
182 BasicMaker and PlanMaker Manual BasicMaker
2 Access to the object
There is exactly one instance of the AutoCorrect object during the whole runtime of PlanMaker. It is accessed though
the Application.AutoCorrect object:
' Show the number of SmartText entries
Set pm = CreateObject("PlanMaker.Application")
MsgBox pm.Application.AutoCorrect.Entries.Count
3 Properties, objects, collections, and methods
Objects:
Application Application
Parent Application
Collections:
Entries AutoCorrectEntries
Application (pointer to object)
Data type: Object
Returns the Application object.
Parent (pointer to object)
Data type: Object
Returns the parent object, i.e. Application.
Entries (pointer to collection)
Data type: Object
Returns the AutoCorrectEntries collection which contains all SmartText entries.
AutoCorrectEntries (collection)
Access path: Application AutoCorrect Entries
1 Description
The AutoCorrectEntries collection contains all SmartText entries defined. The individual elements of this collection
are of the type AutoCorrectEntry.
2 Access to the collection
There is exactly one instance of the AutoCorrectEntries collection during the whole runtime of PlanMaker. It is
accessed through the Application.AutoCorrect.Entries object:
' Create a SmartText entry named "sd" containing "sales department"
pm.Application.AutoCorrect.Entries.Add "sd", "sales department"
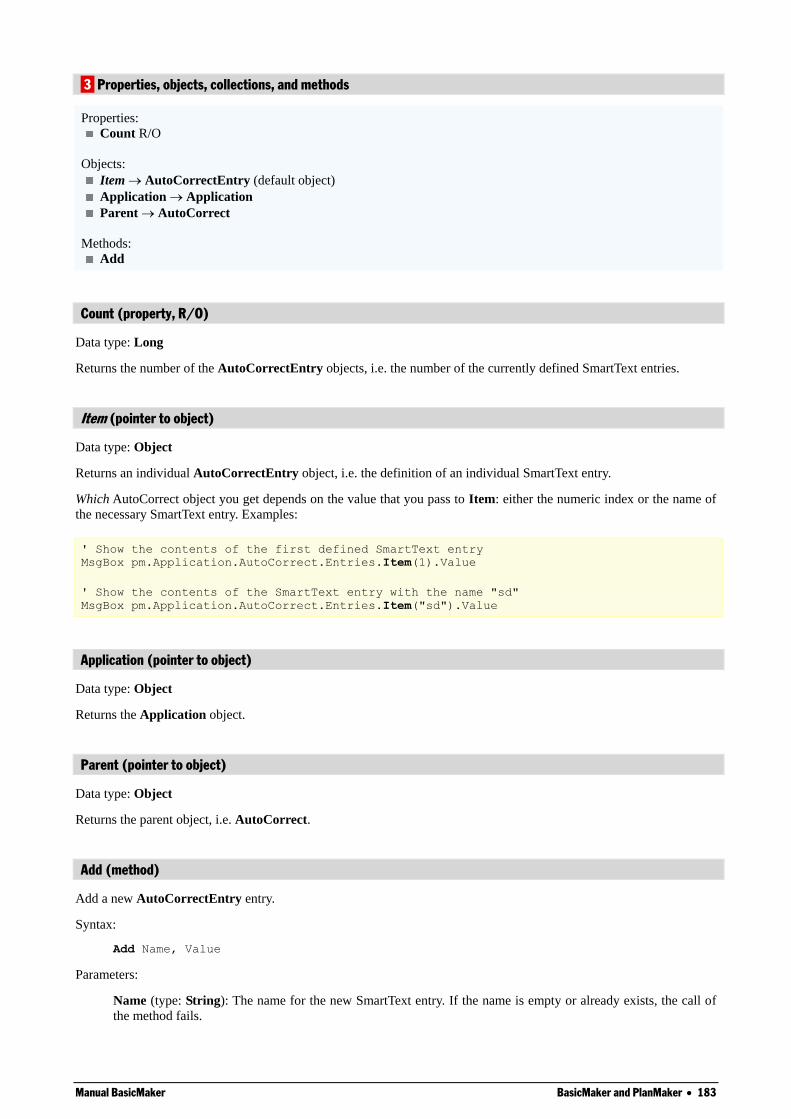
Manual BasicMaker BasicMaker and PlanMaker 183
3 Properties, objects, collections, and methods
Properties:
Count R/O
Objects:
Item AutoCorrectEntry (default object)
Application Application
Parent AutoCorrect
Methods:
Add
Count (property, R/O)
Data type: Long
Returns the number of the AutoCorrectEntry objects, i.e. the number of the currently defined SmartText entries.
Item (pointer to object)
Data type: Object
Returns an individual AutoCorrectEntry object, i.e. the definition of an individual SmartText entry.
Which AutoCorrect object you get depends on the value that you pass to Item: either the numeric index or the name of
the necessary SmartText entry. Examples:
' Show the contents of the first defined SmartText entry
MsgBox pm.Application.AutoCorrect.Entries.Item(1).Value
' Show the contents of the SmartText entry with the name "sd"
MsgBox pm.Application.AutoCorrect.Entries.Item("sd").Value
Application (pointer to object)
Data type: Object
Returns the Application object.
Parent (pointer to object)
Data type: Object
Returns the parent object, i.e. AutoCorrect.
Add (method)
Add a new AutoCorrectEntry entry.
Syntax:
Add Name, Value
Parameters:
Name (type: String): The name for the new SmartText entry. If the name is empty or already exists, the call of
the method fails.
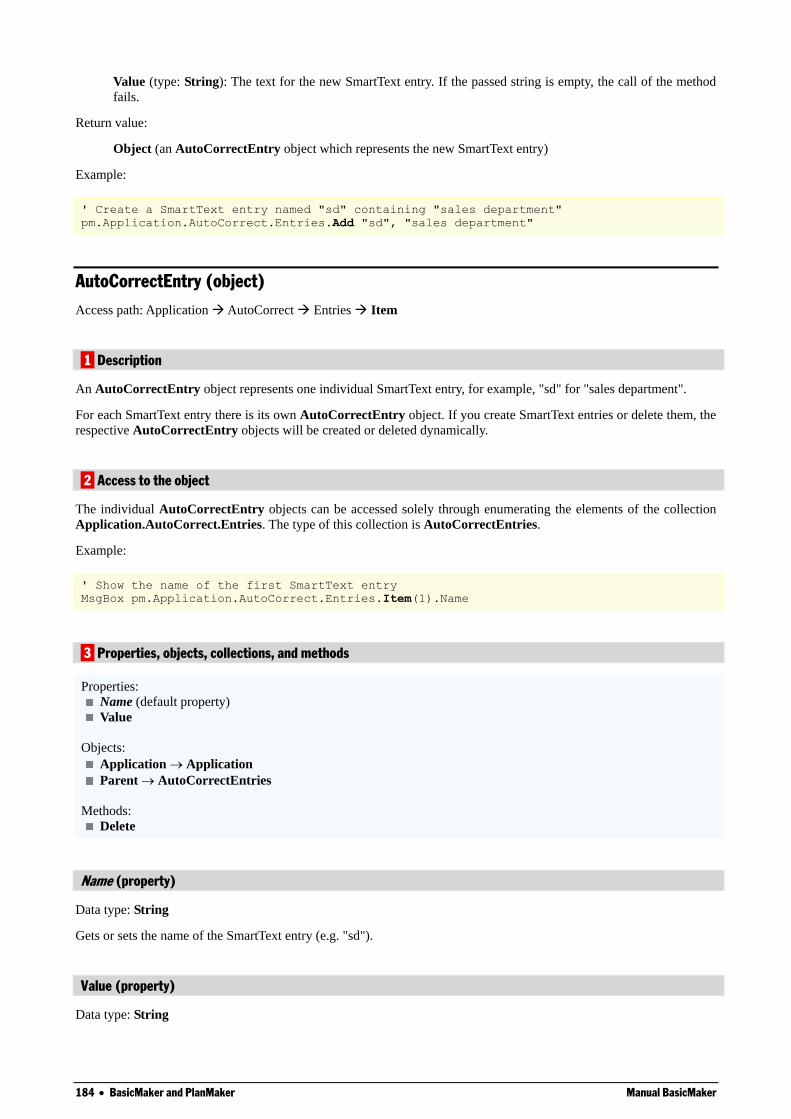
184 BasicMaker and PlanMaker Manual BasicMaker
Value (type: String): The text for the new SmartText entry. If the passed string is empty, the call of the method
fails.
Return value:
Object (an AutoCorrectEntry object which represents the new SmartText entry)
Example:
' Create a SmartText entry named "sd" containing "sales department"
pm.Application.AutoCorrect.Entries.Add "sd", "sales department"
AutoCorrectEntry (object)
Access path: Application AutoCorrect Entries Item
1 Description
An AutoCorrectEntry object represents one individual SmartText entry, for example, "sd" for "sales department".
For each SmartText entry there is its own AutoCorrectEntry object. If you create SmartText entries or delete them, the
respective AutoCorrectEntry objects will be created or deleted dynamically.
2 Access to the object
The individual AutoCorrectEntry objects can be accessed solely through enumerating the elements of the collection
Application.AutoCorrect.Entries. The type of this collection is AutoCorrectEntries.
Example:
' Show the name of the first SmartText entry
MsgBox pm.Application.AutoCorrect.Entries.Item(1).Name
3 Properties, objects, collections, and methods
Properties:
Name (default property)
Value
Objects:
Application Application
Parent AutoCorrectEntries
Methods:
Delete
Name (property)
Data type: String
Gets or sets the name of the SmartText entry (e.g. "sd").
Value (property)
Data type: String
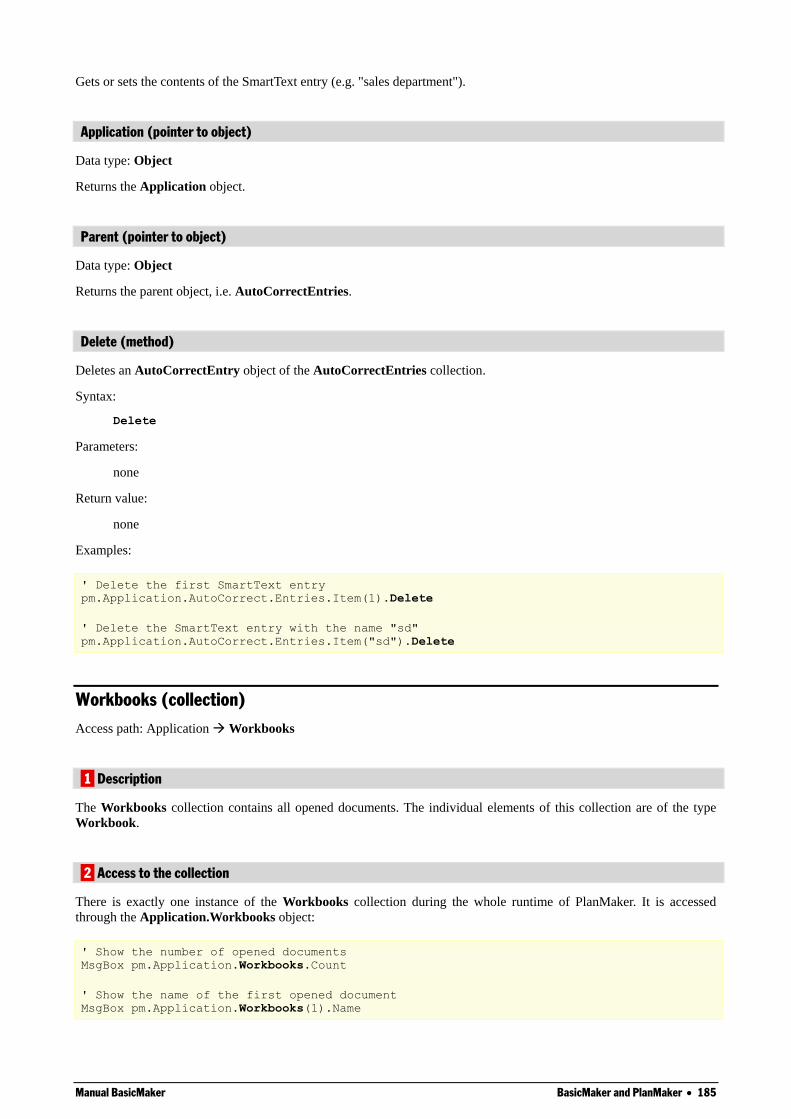
Manual BasicMaker BasicMaker and PlanMaker 185
Gets or sets the contents of the SmartText entry (e.g. "sales department").
Application (pointer to object)
Data type: Object
Returns the Application object.
Parent (pointer to object)
Data type: Object
Returns the parent object, i.e. AutoCorrectEntries.
Delete (method)
Deletes an AutoCorrectEntry object of the AutoCorrectEntries collection.
Syntax:
Delete
Parameters:
none
Return value:
none
Examples:
' Delete the first SmartText entry
pm.Application.AutoCorrect.Entries.Item(1).Delete
' Delete the SmartText entry with the name "sd"
pm.Application.AutoCorrect.Entries.Item("sd").Delete
Workbooks (collection)
Access path: Application Workbooks
1 Description
The Workbooks collection contains all opened documents. The individual elements of this collection are of the type
Workbook.
2 Access to the collection
There is exactly one instance of the Workbooks collection during the whole runtime of PlanMaker. It is accessed
through the Application.Workbooks object:
' Show the number of opened documents
MsgBox pm.Application.Workbooks.Count
' Show the name of the first opened document
MsgBox pm.Application.Workbooks(1).Name
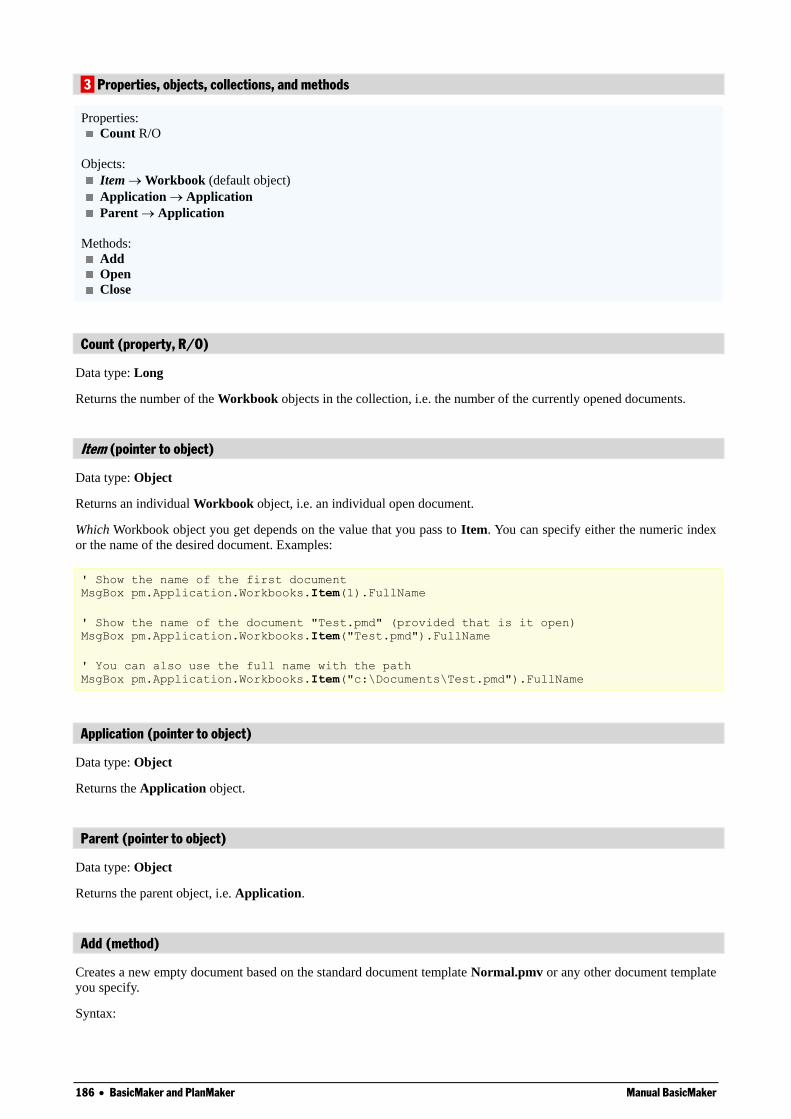
186 BasicMaker and PlanMaker Manual BasicMaker
3 Properties, objects, collections, and methods
Properties:
Count R/O
Objects:
Item Workbook (default object)
Application Application
Parent Application
Methods:
Add
Open
Close
Count (property, R/O)
Data type: Long
Returns the number of the Workbook objects in the collection, i.e. the number of the currently opened documents.
Item (pointer to object)
Data type: Object
Returns an individual Workbook object, i.e. an individual open document.
Which Workbook object you get depends on the value that you pass to Item. You can specify either the numeric index
or the name of the desired document. Examples:
' Show the name of the first document
MsgBox pm.Application.Workbooks.Item(1).FullName
' Show the name of the document "Test.pmd" (provided that is it open)
MsgBox pm.Application.Workbooks.Item("Test.pmd").FullName
' You can also use the full name with the path
MsgBox pm.Application.Workbooks.Item("c:\Documents\Test.pmd").FullName
Application (pointer to object)
Data type: Object
Returns the Application object.
Parent (pointer to object)
Data type: Object
Returns the parent object, i.e. Application.
Add (method)
Creates a new empty document based on the standard document template Normal.pmv or any other document template
you specify.
Syntax:
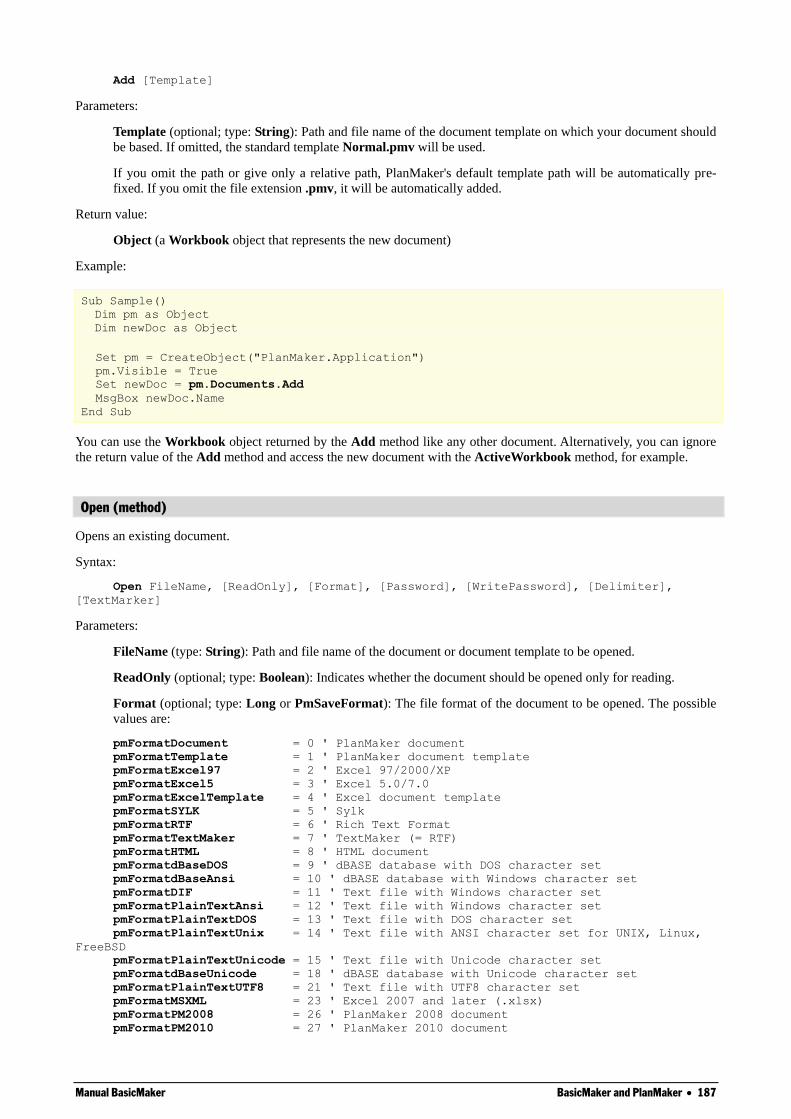
Manual BasicMaker BasicMaker and PlanMaker 187
Add [Template]
Parameters:
Template (optional; type: String): Path and file name of the document template on which your document should
be based. If omitted, the standard template Normal.pmv will be used.
If you omit the path or give only a relative path, PlanMaker's default template path will be automatically pre-
fixed. If you omit the file extension .pmv, it will be automatically added.
Return value:
Object (a Workbook object that represents the new document)
Example:
Sub Sample()
Dim pm as Object
Dim newDoc as Object
Set pm = CreateObject("PlanMaker.Application")
pm.Visible = True
Set newDoc = pm.Documents.Add
MsgBox newDoc.Name
End Sub
You can use the Workbook object returned by the Add method like any other document. Alternatively, you can ignore
the return value of the Add method and access the new document with the ActiveWorkbook method, for example.
Open (method)
Opens an existing document.
Syntax:
Open FileName, [ReadOnly], [Format], [Password], [WritePassword], [Delimiter],
[TextMarker]
Parameters:
FileName (type: String): Path and file name of the document or document template to be opened.
ReadOnly (optional; type: Boolean): Indicates whether the document should be opened only for reading.
Format (optional; type: Long or PmSaveFormat): The file format of the document to be opened. The possible
values are:
pmFormatDocument = 0 ' PlanMaker document
pmFormatTemplate = 1 ' PlanMaker document template
pmFormatExcel97 = 2 ' Excel 97/2000/XP
pmFormatExcel5 = 3 ' Excel 5.0/7.0
pmFormatExcelTemplate = 4 ' Excel document template
pmFormatSYLK = 5 ' Sylk
pmFormatRTF = 6 ' Rich Text Format
pmFormatTextMaker = 7 ' TextMaker (= RTF)
pmFormatHTML = 8 ' HTML document
pmFormatdBaseDOS = 9 ' dBASE database with DOS character set
pmFormatdBaseAnsi = 10 ' dBASE database with Windows character set
pmFormatDIF = 11 ' Text file with Windows character set
pmFormatPlainTextAnsi = 12 ' Text file with Windows character set
pmFormatPlainTextDOS = 13 ' Text file with DOS character set
pmFormatPlainTextUnix = 14 ' Text file with ANSI character set for UNIX, Linux,
FreeBSD
pmFormatPlainTextUnicode = 15 ' Text file with Unicode character set
pmFormatdBaseUnicode = 18 ' dBASE database with Unicode character set
pmFormatPlainTextUTF8 = 21 ' Text file with UTF8 character set
pmFormatMSXML = 23 ' Excel 2007 and later (.xlsx)
pmFormatPM2008 = 26 ' PlanMaker 2008 document
pmFormatPM2010 = 27 ' PlanMaker 2010 document
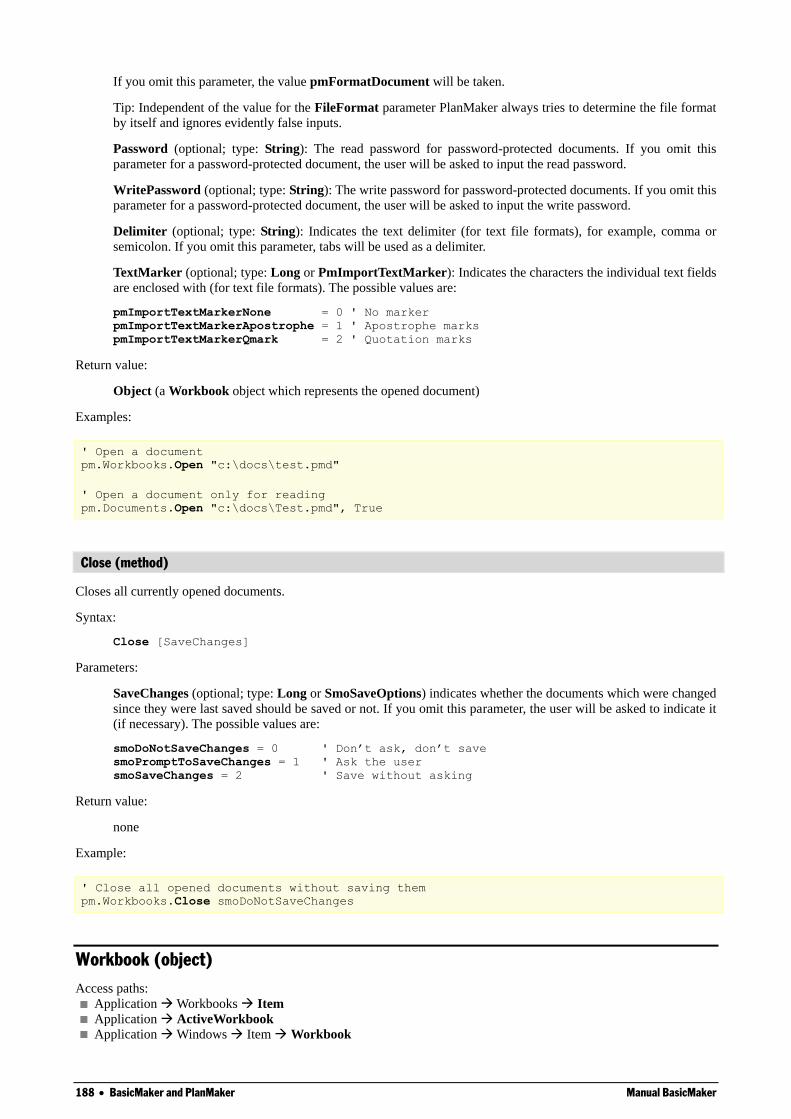
188 BasicMaker and PlanMaker Manual BasicMaker
If you omit this parameter, the value pmFormatDocument will be taken.
Tip: Independent of the value for the FileFormat parameter PlanMaker always tries to determine the file format
by itself and ignores evidently false inputs.
Password (optional; type: String): The read password for password-protected documents. If you omit this
parameter for a password-protected document, the user will be asked to input the read password.
WritePassword (optional; type: String): The write password for password-protected documents. If you omit this
parameter for a password-protected document, the user will be asked to input the write password.
Delimiter (optional; type: String): Indicates the text delimiter (for text file formats), for example, comma or
semicolon. If you omit this parameter, tabs will be used as a delimiter.
TextMarker (optional; type: Long or PmImportTextMarker): Indicates the characters the individual text fields
are enclosed with (for text file formats). The possible values are:
pmImportTextMarkerNone = 0 ' No marker
pmImportTextMarkerApostrophe = 1 ' Apostrophe marks
pmImportTextMarkerQmark = 2 ' Quotation marks
Return value:
Object (a Workbook object which represents the opened document)
Examples:
' Open a document
pm.Workbooks.Open "c:\docs\test.pmd"
' Open a document only for reading
pm.Documents.Open "c:\docs\Test.pmd", True
Close (method)
Closes all currently opened documents.
Syntax:
Close [SaveChanges]
Parameters:
SaveChanges (optional; type: Long or SmoSaveOptions) indicates whether the documents which were changed
since they were last saved should be saved or not. If you omit this parameter, the user will be asked to indicate it
(if necessary). The possible values are:
smoDoNotSaveChanges = 0 ' Don’t ask, don’t save
smoPromptToSaveChanges = 1 ' Ask the user
smoSaveChanges = 2 ' Save without asking
Return value:
none
Example:
' Close all opened documents without saving them
pm.Workbooks.Close smoDoNotSaveChanges
Workbook (object)
Access paths:
Application Workbooks Item
Application ActiveWorkbook
Application Windows Item Workbook
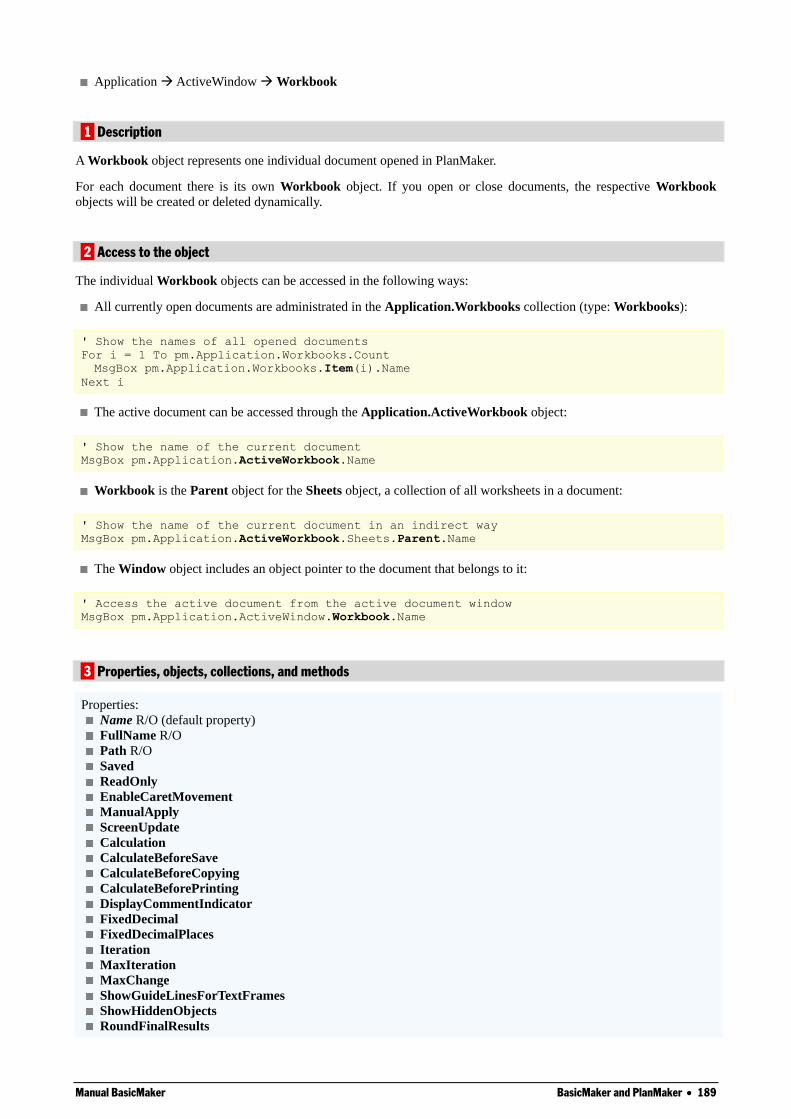
Manual BasicMaker BasicMaker and PlanMaker 189
Application ActiveWindow Workbook
1 Description
A Workbook object represents one individual document opened in PlanMaker.
For each document there is its own Workbook object. If you open or close documents, the respective Workbook
objects will be created or deleted dynamically.
2 Access to the object
The individual Workbook objects can be accessed in the following ways:
All currently open documents are administrated in the Application.Workbooks collection (type: Workbooks):
' Show the names of all opened documents
For i = 1 To pm.Application.Workbooks.Count
MsgBox pm.Application.Workbooks.Item(i).Name
Next i
The active document can be accessed through the Application.ActiveWorkbook object:
' Show the name of the current document
MsgBox pm.Application.ActiveWorkbook.Name
Workbook is the Parent object for the Sheets object, a collection of all worksheets in a document:
' Show the name of the current document in an indirect way
MsgBox pm.Application.ActiveWorkbook.Sheets.Parent.Name
The Window object includes an object pointer to the document that belongs to it:
' Access the active document from the active document window
MsgBox pm.Application.ActiveWindow.Workbook.Name
3 Properties, objects, collections, and methods
Properties:
Name R/O (default property)
FullName R/O
Path R/O
Saved
ReadOnly
EnableCaretMovement
ManualApply
ScreenUpdate
Calculation
CalculateBeforeSave
CalculateBeforeCopying
CalculateBeforePrinting
DisplayCommentIndicator
FixedDecimal
FixedDecimalPlaces
Iteration
MaxIteration
MaxChange
ShowGuideLinesForTextFrames
ShowHiddenObjects
RoundFinalResults
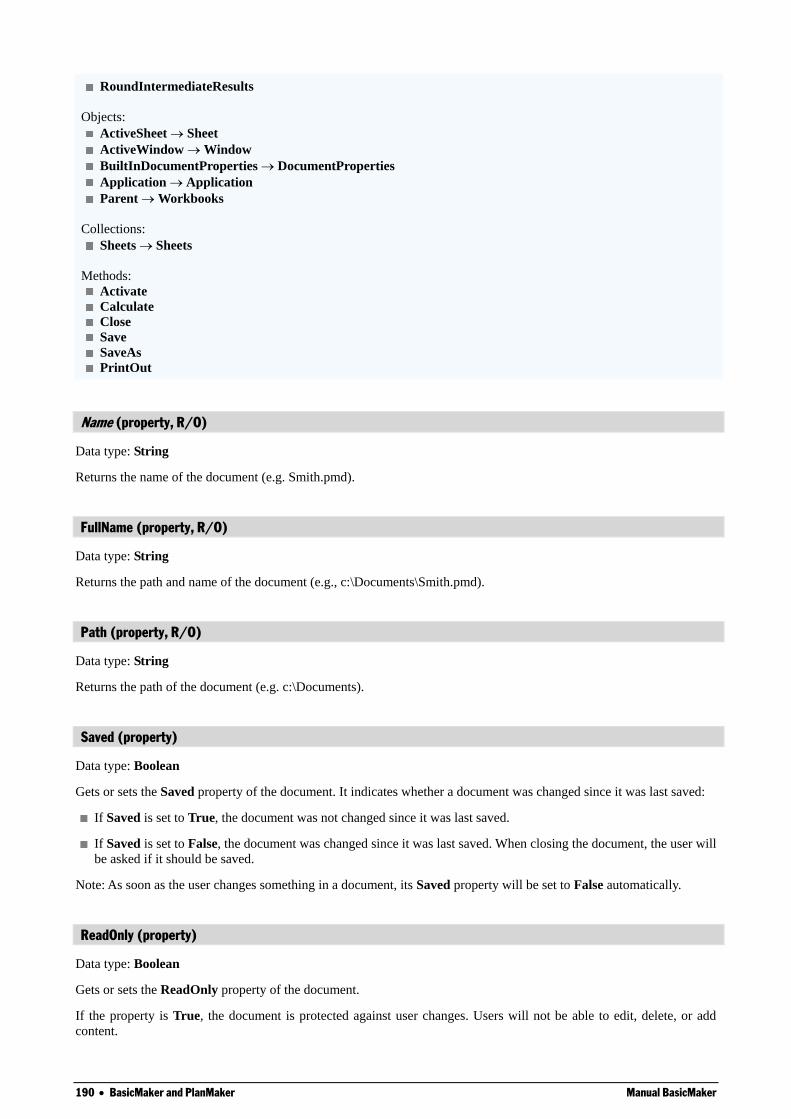
190 BasicMaker and PlanMaker Manual BasicMaker
RoundIntermediateResults
Objects:
ActiveSheet Sheet
ActiveWindow Window
BuiltInDocumentProperties DocumentProperties
Application Application
Parent Workbooks
Collections:
Sheets Sheets
Methods:
Activate
Calculate
Close
Save
SaveAs
PrintOut
Name (property, R/O)
Data type: String
Returns the name of the document (e.g. Smith.pmd).
FullName (property, R/O)
Data type: String
Returns the path and name of the document (e.g., c:\Documents\Smith.pmd).
Path (property, R/O)
Data type: String
Returns the path of the document (e.g. c:\Documents).
Saved (property)
Data type: Boolean
Gets or sets the Saved property of the document. It indicates whether a document was changed since it was last saved:
If Saved is set to True, the document was not changed since it was last saved.
If Saved is set to False, the document was changed since it was last saved. When closing the document, the user will
be asked if it should be saved.
Note: As soon as the user changes something in a document, its Saved property will be set to False automatically.
ReadOnly (property)
Data type: Boolean
Gets or sets the ReadOnly property of the document.
If the property is True, the document is protected against user changes. Users will not be able to edit, delete, or add
content.
Manual BasicMaker BasicMaker and PlanMaker 191
If you set this property to True, the EnableCaretMovement property (see there) will be automatically set to False.
Therefore, the cursor cannot be moved inside the document anymore. However, you can always set the Ena-
bleCaretMovement property to True if you want to make cursor movement possible.
EnableCaretMovement (property)
Data type: Boolean
Gets or sets the EnableCaretMovement property of the document. This property is sensible only in combination with
the ReadOnly property (see there).
If the EnableCaretMovement property is True, the cursor can be moved freely inside a write-protected document. If it
is set to False, cursor movement is not possible.
ManualApply (property)
Data type: Boolean
Gets or sets the setting whether formatting changes made by your BasicMaker script should be applied instantly or not.
By default, this property is set to False, causing formatting commands like Range.Font.Size = 12 to be applied instant-
ly.
If you would like to apply a large number of the formattings, you can set the ManualApply property to True. In this
case, PlanMaker accumulates all formatting commands until you call the Range.ApplyFormatting method (see there).
This leads to a speed advantage.
ScreenUpdate (property)
Data type: Boolean
Gets or sets the setting whether PlanMaker should update the display after each change.
If you set this property to false and then change the contents or formatting of cells, these changes will not be shown on
the screen until you set the property to True again. This can cause a speed advantage if you change many cells at once.
Calculation (property)
Data type: Long (PmCalculation)
Gets or sets the setting whether the document should be re-calculated automatically or manually. The possible values
are:
pmCalculationAutomatic = 0 ' Update calculations automatically
pmCalculationManual = 1 ' Update calculations manually
CalculateBeforeSave (property)
Data type: Boolean
Gets or sets the setting whether the document should be re-calculated when it is saved.
This property has an effect only if the document is set to be re-calculated manually. If the Calculation property (see
there) is set to pmCalculationAutomatic, all calculations will always be up-to-date anyway.
CalculateBeforeCopying (property)
Data type: Boolean
192 BasicMaker and PlanMaker Manual BasicMaker
Gets or sets the setting whether the document should be re-calculated before copying or cutting cells.
This property has an effect only if the document is set to be re-calculated manually. If the Calculation property (see
there) is set to pmCalculationAutomatic, all calculations will always be up-to-date anyway.
CalculateBeforePrinting (property)
Data type: Boolean
Gets or sets the setting whether the document should be re-calculated before printing.
This property has an effect only if the document is set to be re-calculated manually. If the Calculation property (see
there) is set to pmCalculationAutomatic, all calculations will always be up-to-date anyway.
DisplayCommentIndicator (property)
Data type: Long (PmCommentDisplayMode)
Gets or sets the mode in which comments are shown. The possible values are:
pmNoIndicator = 0 ' Show neither comments nor yellow triangle
pmCommentIndicatorOnly = 1 ' Show only a yellow triangle
pmCommentOnly = 2 ' Show comments, but no yellow triangle
pmCommentAndIndicator = 3 ' Show both comments and triangle
FixedDecimal (property)
Data type: Boolean
Gets or sets the setting whether the decimal separator should be automatically shifted after the input of numbers.
The number of positions to shift the decimal separator is specified by the FixedDecimalPlaces property (see there).
Example:
' Move the decimal separator 2 positions to the left after input
pm.ActiveWorkbook.FixedDecimal = True
pm.ActiveWorkbook.FixedDecimalPlaces = 2 ' 4235 will become 42.35
' Move the decimal separator 2 positions to the right after input
pm.ActiveWorkbook.FixedDecimal = True
pm.ActiveWorkbook.FixedDecimalPlaces = -2 ' 42 will become 4200
FixedDecimalPlaces (property)
Data type: Boolean
Gets or sets the number of positions to shift the decimal separator after the input of the numbers.
Note: This has no effect unless the FixedDecimal property (see there) is set to True.
Iteration (property)
Data type: Boolean
Gets or sets the setting "Use iterations" in the File > Properties dialog, Calculate tab.
If you enable this property, you should also specify values for the MaxChange and MaxIteration properties (see
there).
Manual BasicMaker BasicMaker and PlanMaker 193
MaxIteration (property)
Data type: Long
Gets or sets the setting "Maximal iterations" in the File > Properties dialog, Calculate tab. Applicable only if the
Iteration property (see there) is set to True.
MaxChange (property)
Data type: Long
Gets or sets the setting "Maximal change" (for iterations) in the File > Properties dialog, Calculate tab. Applicable
only if the Iteration property (see there) is set to True.
ShowGuideLinesForTextFrames (property)
Data type: Boolean
Gets or sets the setting "Guidelines for text frames" in the File > Properties dialog, Options tab.
ShowHiddenObjects (property)
Data type: Boolean
Gets or sets the setting "Show hidden objects" in the File > Properties dialog, Options tab.
RoundFinalResults (property)
Data type: Boolean
Gets or sets the setting "Round final results" in the File > Properties dialog, Calculate tab.
RoundIntermediateResults (property)
Data type: Boolean
Gets or sets the setting "Round intermediate results" in the File > Properties dialog, Calculate tab.
ActiveSheet (pointer to object)
Data type: Object
Returns the currently active Sheet object that you can use to access the active worksheet.
ActiveWindow (pointer to object)
Data type: Object
Returns the currently active Window object that you can use to access the active document window.
BuiltInDocumentProperties (pointer to object)
Data type: Object
Returns the DocumentProperties collection that you can use to access the document infos (title, subject, author etc.).
194 BasicMaker and PlanMaker Manual BasicMaker
Application (pointer to object)
Data type: Object
Returns the Application object.
Parent (pointer to object)
Data type: Object
Returns the parent object, i.e. Workbooks.
Sheets (pointer to collection)
Data type: Object
Returns the Sheets collection, a collection of all worksheets in the document.
Activate (method)
Brings the document window to the front (if its Visible property is True) and sets the focus to the document window.
Syntax:
Activate
Parameters:
none
Return value:
none
Example:
' Bring the first document in the Workbooks collection to the front
pm.Workbooks(1).Activate
Calculate (method)
Re-calculates the document (corresponds to the command Tools > Recalculate in PlanMaker).
Syntax:
Calculate
Parameters:
none
Return value:
none
Example:
' Recalculate the first document in the Workbooks collection
pm.Workbooks(1).Calculate
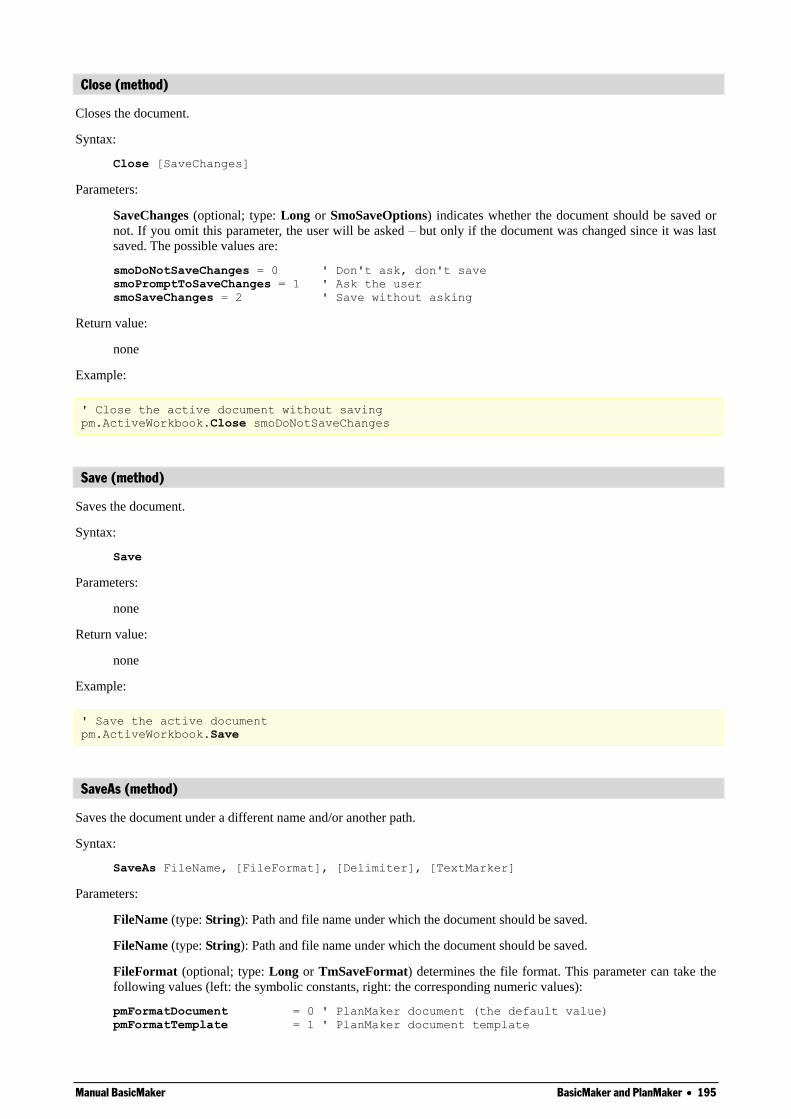
Manual BasicMaker BasicMaker and PlanMaker 195
Close (method)
Closes the document.
Syntax:
Close [SaveChanges]
Parameters:
SaveChanges (optional; type: Long or SmoSaveOptions) indicates whether the document should be saved or
not. If you omit this parameter, the user will be asked – but only if the document was changed since it was last
saved. The possible values are:
smoDoNotSaveChanges = 0 ' Don't ask, don't save
smoPromptToSaveChanges = 1 ' Ask the user
smoSaveChanges = 2 ' Save without asking
Return value:
none
Example:
' Close the active document without saving
pm.ActiveWorkbook.Close smoDoNotSaveChanges
Save (method)
Saves the document.
Syntax:
Save
Parameters:
none
Return value:
none
Example:
' Save the active document
pm.ActiveWorkbook.Save
SaveAs (method)
Saves the document under a different name and/or another path.
Syntax:
SaveAs FileName, [FileFormat], [Delimiter], [TextMarker]
Parameters:
FileName (type: String): Path and file name under which the document should be saved.
FileName (type: String): Path and file name under which the document should be saved.
FileFormat (optional; type: Long or TmSaveFormat) determines the file format. This parameter can take the
following values (left: the symbolic constants, right: the corresponding numeric values):
pmFormatDocument = 0 ' PlanMaker document (the default value)
pmFormatTemplate = 1 ' PlanMaker document template
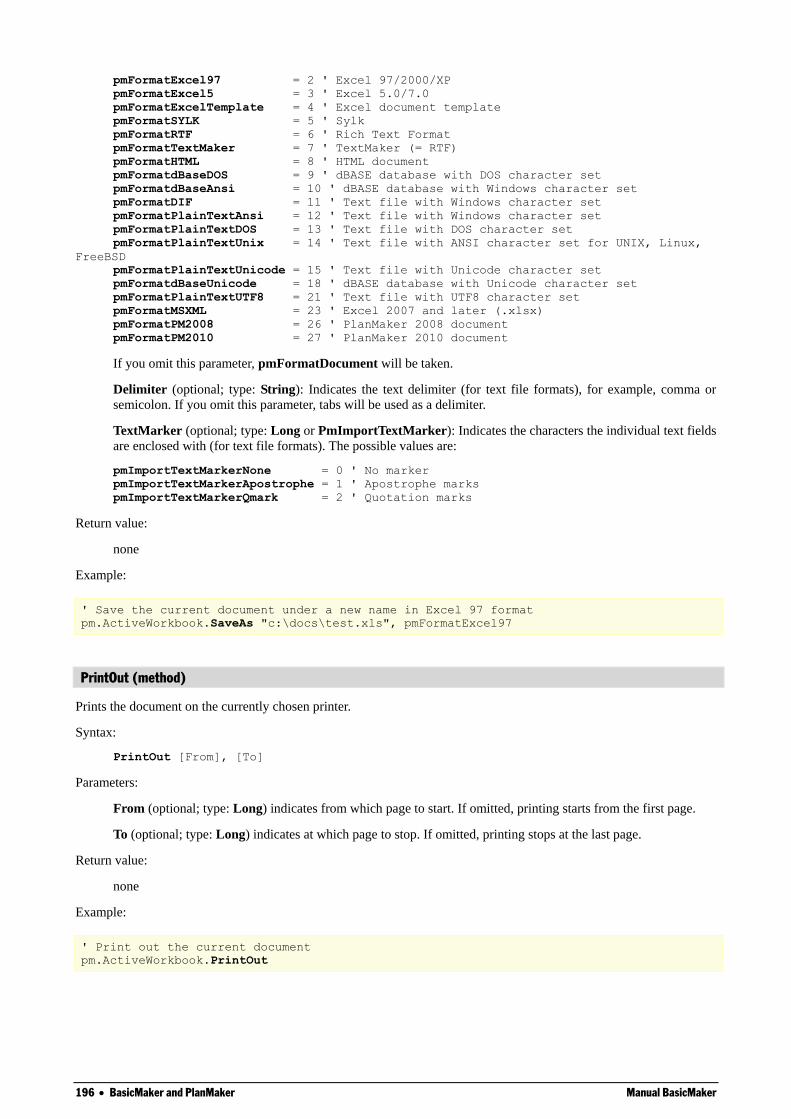
196 BasicMaker and PlanMaker Manual BasicMaker
pmFormatExcel97 = 2 ' Excel 97/2000/XP
pmFormatExcel5 = 3 ' Excel 5.0/7.0
pmFormatExcelTemplate = 4 ' Excel document template
pmFormatSYLK = 5 ' Sylk
pmFormatRTF = 6 ' Rich Text Format
pmFormatTextMaker = 7 ' TextMaker (= RTF)
pmFormatHTML = 8 ' HTML document
pmFormatdBaseDOS = 9 ' dBASE database with DOS character set
pmFormatdBaseAnsi = 10 ' dBASE database with Windows character set
pmFormatDIF = 11 ' Text file with Windows character set
pmFormatPlainTextAnsi = 12 ' Text file with Windows character set
pmFormatPlainTextDOS = 13 ' Text file with DOS character set
pmFormatPlainTextUnix = 14 ' Text file with ANSI character set for UNIX, Linux,
FreeBSD
pmFormatPlainTextUnicode = 15 ' Text file with Unicode character set
pmFormatdBaseUnicode = 18 ' dBASE database with Unicode character set
pmFormatPlainTextUTF8 = 21 ' Text file with UTF8 character set
pmFormatMSXML = 23 ' Excel 2007 and later (.xlsx)
pmFormatPM2008 = 26 ' PlanMaker 2008 document
pmFormatPM2010 = 27 ' PlanMaker 2010 document
If you omit this parameter, pmFormatDocument will be taken.
Delimiter (optional; type: String): Indicates the text delimiter (for text file formats), for example, comma or
semicolon. If you omit this parameter, tabs will be used as a delimiter.
TextMarker (optional; type: Long or PmImportTextMarker): Indicates the characters the individual text fields
are enclosed with (for text file formats). The possible values are:
pmImportTextMarkerNone = 0 ' No marker
pmImportTextMarkerApostrophe = 1 ' Apostrophe marks
pmImportTextMarkerQmark = 2 ' Quotation marks
Return value:
none
Example:
' Save the current document under a new name in Excel 97 format
pm.ActiveWorkbook.SaveAs "c:\docs\test.xls", pmFormatExcel97
PrintOut (method)
Prints the document on the currently chosen printer.
Syntax:
PrintOut [From], [To]
Parameters:
From (optional; type: Long) indicates from which page to start. If omitted, printing starts from the first page.
To (optional; type: Long) indicates at which page to stop. If omitted, printing stops at the last page.
Return value:
none
Example:
' Print out the current document
pm.ActiveWorkbook.PrintOut
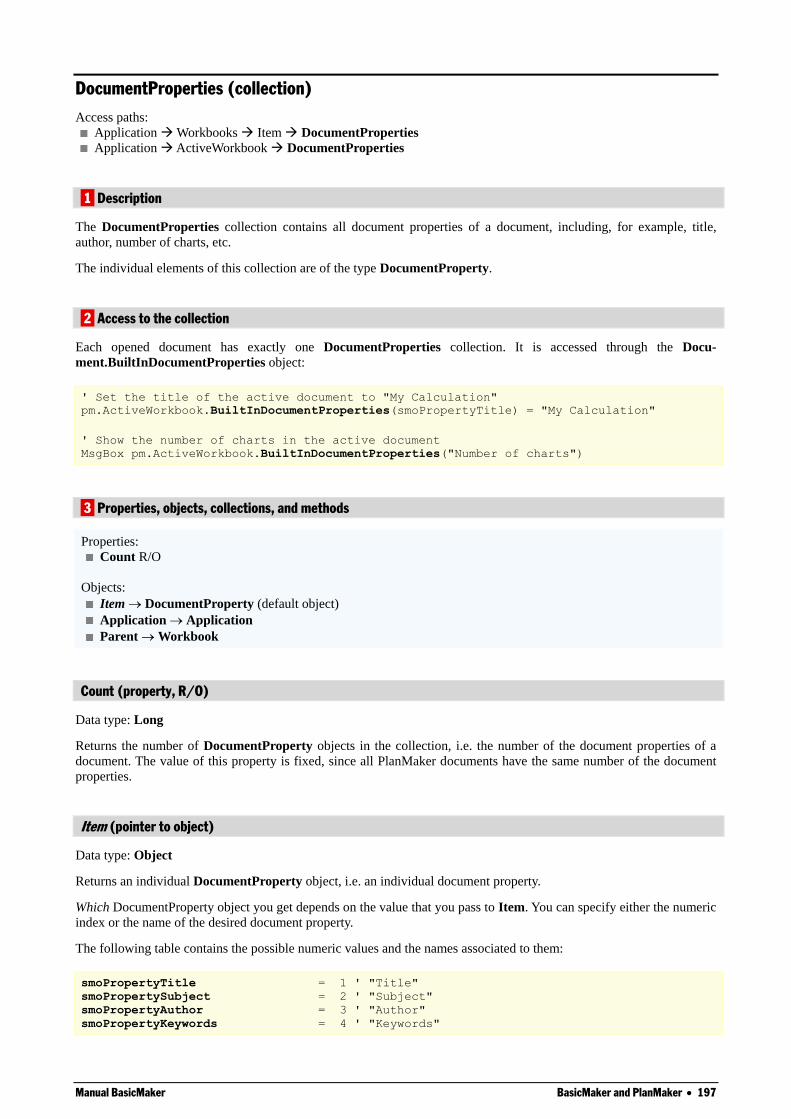
Manual BasicMaker BasicMaker and PlanMaker 197
DocumentProperties (collection)
Access paths:
Application Workbooks Item DocumentProperties
Application ActiveWorkbook DocumentProperties
1 Description
The DocumentProperties collection contains all document properties of a document, including, for example, title,
author, number of charts, etc.
The individual elements of this collection are of the type DocumentProperty.
2 Access to the collection
Each opened document has exactly one DocumentProperties collection. It is accessed through the Docu-
ment.BuiltInDocumentProperties object:
' Set the title of the active document to "My Calculation"
pm.ActiveWorkbook.BuiltInDocumentProperties(smoPropertyTitle) = "My Calculation"
' Show the number of charts in the active document
MsgBox pm.ActiveWorkbook.BuiltInDocumentProperties("Number of charts")
3 Properties, objects, collections, and methods
Properties:
Count R/O
Objects:
Item DocumentProperty (default object)
Application Application
Parent Workbook
Count (property, R/O)
Data type: Long
Returns the number of DocumentProperty objects in the collection, i.e. the number of the document properties of a
document. The value of this property is fixed, since all PlanMaker documents have the same number of the document
properties.
Item (pointer to object)
Data type: Object
Returns an individual DocumentProperty object, i.e. an individual document property.
Which DocumentProperty object you get depends on the value that you pass to Item. You can specify either the numeric
index or the name of the desired document property.
The following table contains the possible numeric values and the names associated to them:
smoPropertyTitle = 1 ' "Title"
smoPropertySubject = 2 ' "Subject"
smoPropertyAuthor = 3 ' "Author"
smoPropertyKeywords = 4 ' "Keywords"
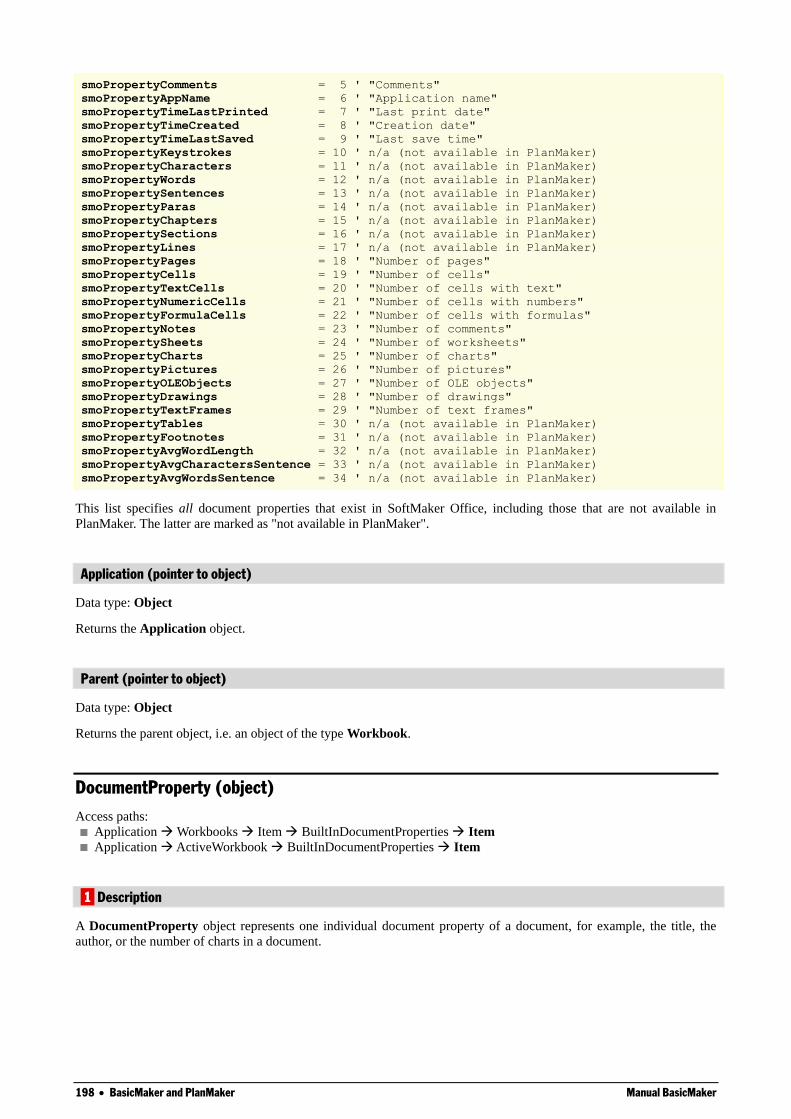
198 BasicMaker and PlanMaker Manual BasicMaker
smoPropertyComments = 5 ' "Comments"
smoPropertyAppName = 6 ' "Application name"
smoPropertyTimeLastPrinted = 7 ' "Last print date"
smoPropertyTimeCreated = 8 ' "Creation date"
smoPropertyTimeLastSaved = 9 ' "Last save time"
smoPropertyKeystrokes = 10 ' n/a (not available in PlanMaker)
smoPropertyCharacters = 11 ' n/a (not available in PlanMaker)
smoPropertyWords = 12 ' n/a (not available in PlanMaker)
smoPropertySentences = 13 ' n/a (not available in PlanMaker)
smoPropertyParas = 14 ' n/a (not available in PlanMaker)
smoPropertyChapters = 15 ' n/a (not available in PlanMaker)
smoPropertySections = 16 ' n/a (not available in PlanMaker)
smoPropertyLines = 17 ' n/a (not available in PlanMaker)
smoPropertyPages = 18 ' "Number of pages"
smoPropertyCells = 19 ' "Number of cells"
smoPropertyTextCells = 20 ' "Number of cells with text"
smoPropertyNumericCells = 21 ' "Number of cells with numbers"
smoPropertyFormulaCells = 22 ' "Number of cells with formulas"
smoPropertyNotes = 23 ' "Number of comments"
smoPropertySheets = 24 ' "Number of worksheets"
smoPropertyCharts = 25 ' "Number of charts"
smoPropertyPictures = 26 ' "Number of pictures"
smoPropertyOLEObjects = 27 ' "Number of OLE objects"
smoPropertyDrawings = 28 ' "Number of drawings"
smoPropertyTextFrames = 29 ' "Number of text frames"
smoPropertyTables = 30 ' n/a (not available in PlanMaker)
smoPropertyFootnotes = 31 ' n/a (not available in PlanMaker)
smoPropertyAvgWordLength = 32 ' n/a (not available in PlanMaker)
smoPropertyAvgCharactersSentence = 33 ' n/a (not available in PlanMaker)
smoPropertyAvgWordsSentence = 34 ' n/a (not available in PlanMaker)
This list specifies all document properties that exist in SoftMaker Office, including those that are not available in
PlanMaker. The latter are marked as "not available in PlanMaker".
Application (pointer to object)
Data type: Object
Returns the Application object.
Parent (pointer to object)
Data type: Object
Returns the parent object, i.e. an object of the type Workbook.
DocumentProperty (object)
Access paths:
Application Workbooks Item BuiltInDocumentProperties Item
Application ActiveWorkbook BuiltInDocumentProperties Item
1 Description
A DocumentProperty object represents one individual document property of a document, for example, the title, the
author, or the number of charts in a document.
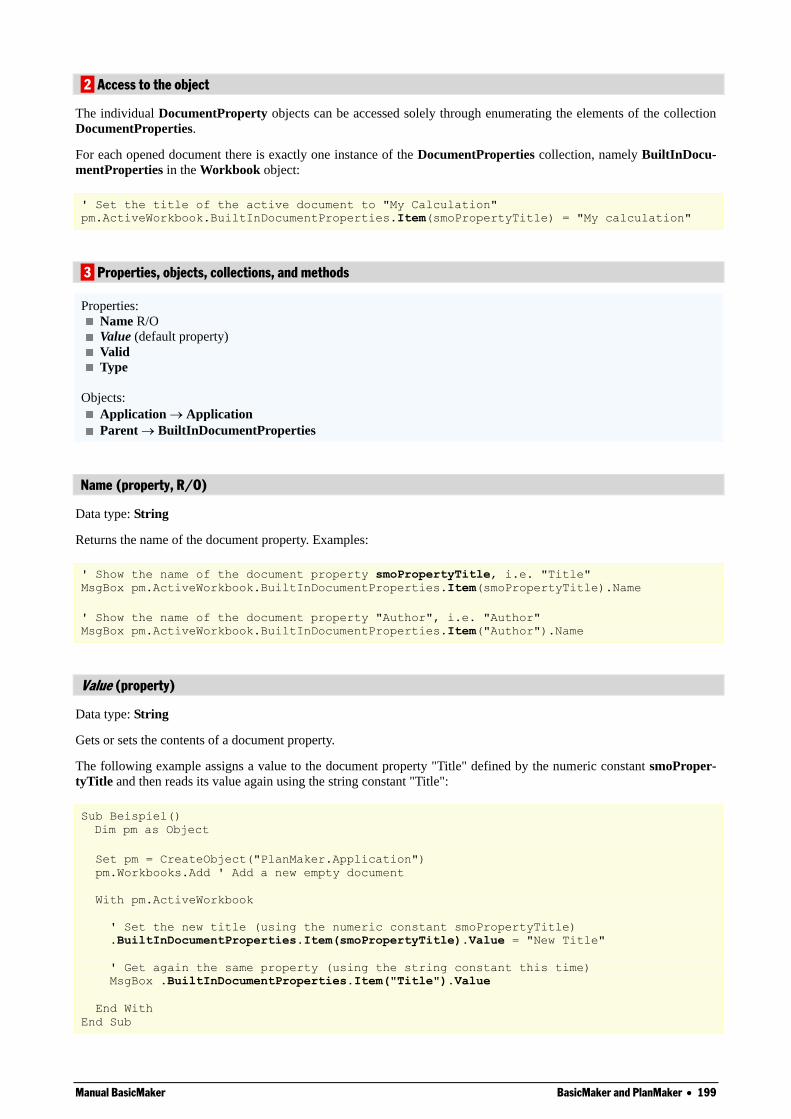
Manual BasicMaker BasicMaker and PlanMaker 199
2 Access to the object
The individual DocumentProperty objects can be accessed solely through enumerating the elements of the collection
DocumentProperties.
For each opened document there is exactly one instance of the DocumentProperties collection, namely BuiltInDocu-
mentProperties in the Workbook object:
' Set the title of the active document to "My Calculation"
pm.ActiveWorkbook.BuiltInDocumentProperties.Item(smoPropertyTitle) = "My calculation"
3 Properties, objects, collections, and methods
Properties:
Name R/O
Value (default property)
Valid
Type
Objects:
Application Application
Parent BuiltInDocumentProperties
Name (property, R/O)
Data type: String
Returns the name of the document property. Examples:
' Show the name of the document property smoPropertyTitle, i.e. "Title"
MsgBox pm.ActiveWorkbook.BuiltInDocumentProperties.Item(smoPropertyTitle).Name
' Show the name of the document property "Author", i.e. "Author"
MsgBox pm.ActiveWorkbook.BuiltInDocumentProperties.Item("Author").Name
Value (property)
Data type: String
Gets or sets the contents of a document property.
The following example assigns a value to the document property "Title" defined by the numeric constant smoProper-
tyTitle and then reads its value again using the string constant "Title":
Sub Beispiel()
Dim pm as Object
Set pm = CreateObject("PlanMaker.Application")
pm.Workbooks.Add ' Add a new empty document
With pm.ActiveWorkbook
' Set the new title (using the numeric constant smoPropertyTitle)
.BuiltInDocumentProperties.Item(smoPropertyTitle).Value = "New Title"
' Get again the same property (using the string constant this time)
MsgBox .BuiltInDocumentProperties.Item("Title").Value
End With
End Sub
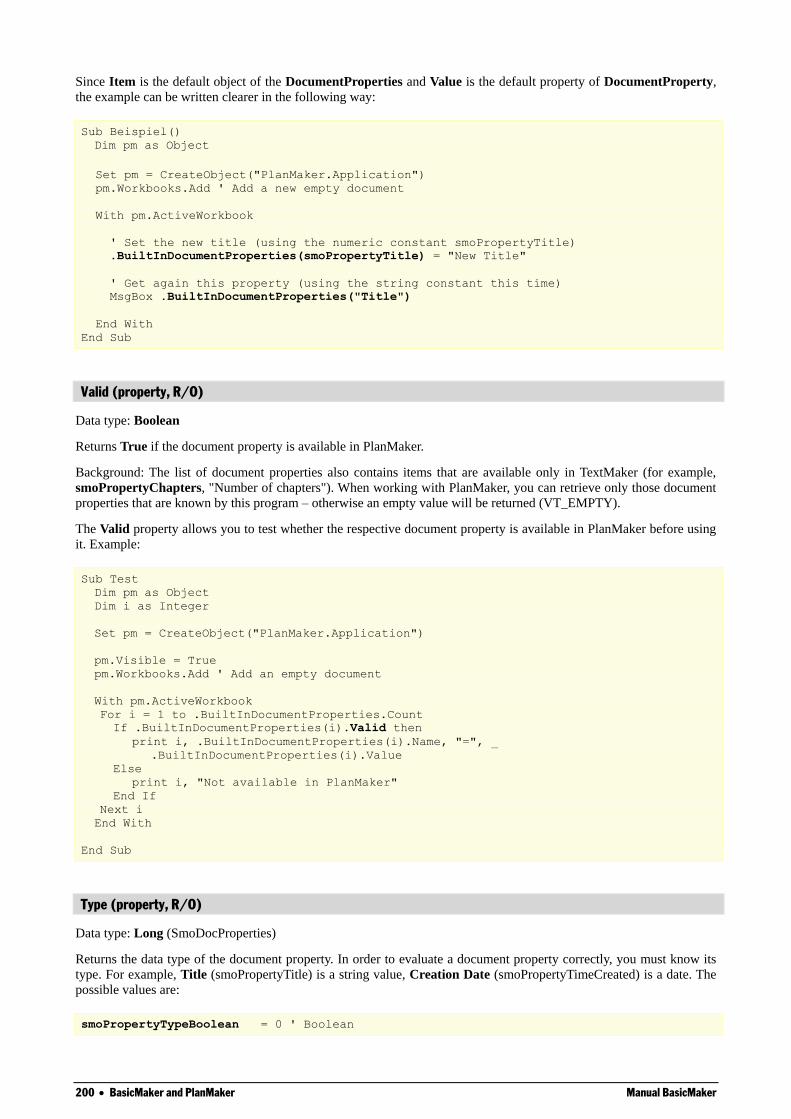
200 BasicMaker and PlanMaker Manual BasicMaker
Since Item is the default object of the DocumentProperties and Value is the default property of DocumentProperty,
the example can be written clearer in the following way:
Sub Beispiel()
Dim pm as Object
Set pm = CreateObject("PlanMaker.Application")
pm.Workbooks.Add ' Add a new empty document
With pm.ActiveWorkbook
' Set the new title (using the numeric constant smoPropertyTitle)
.BuiltInDocumentProperties(smoPropertyTitle) = "New Title"
' Get again this property (using the string constant this time)
MsgBox .BuiltInDocumentProperties("Title")
End With
End Sub
Valid (property, R/O)
Data type: Boolean
Returns True if the document property is available in PlanMaker.
Background: The list of document properties also contains items that are available only in TextMaker (for example,
smoPropertyChapters, "Number of chapters"). When working with PlanMaker, you can retrieve only those document
properties that are known by this program – otherwise an empty value will be returned (VT_EMPTY).
The Valid property allows you to test whether the respective document property is available in PlanMaker before using
it. Example:
Sub Test
Dim pm as Object
Dim i as Integer
Set pm = CreateObject("PlanMaker.Application")
pm.Visible = True
pm.Workbooks.Add ' Add an empty document
With pm.ActiveWorkbook
For i = 1 to .BuiltInDocumentProperties.Count
If .BuiltInDocumentProperties(i).Valid then
print i, .BuiltInDocumentProperties(i).Name, "=", _
.BuiltInDocumentProperties(i).Value
Else
print i, "Not available in PlanMaker"
End If
Next i
End With
End Sub
Type (property, R/O)
Data type: Long (SmoDocProperties)
Returns the data type of the document property. In order to evaluate a document property correctly, you must know its
type. For example, Title (smoPropertyTitle) is a string value, Creation Date (smoPropertyTimeCreated) is a date. The
possible values are:
smoPropertyTypeBoolean = 0 ' Boolean
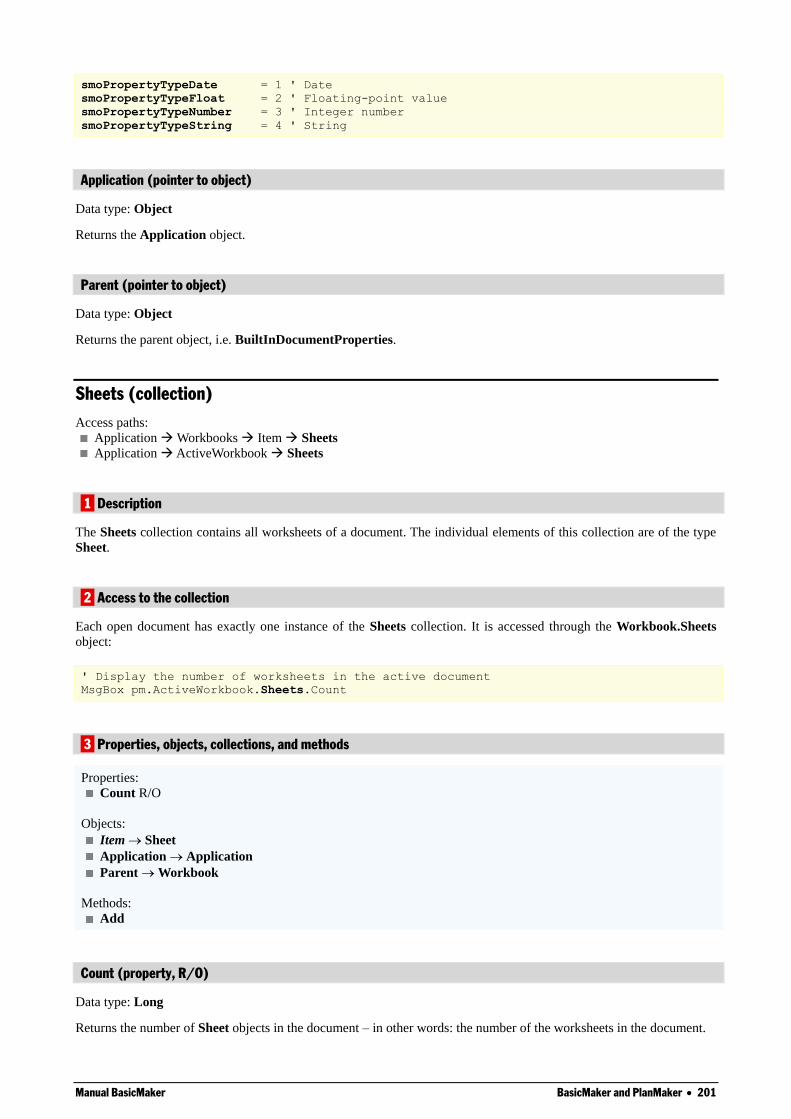
Manual BasicMaker BasicMaker and PlanMaker 201
smoPropertyTypeDate = 1 ' Date
smoPropertyTypeFloat = 2 ' Floating-point value
smoPropertyTypeNumber = 3 ' Integer number
smoPropertyTypeString = 4 ' String
Application (pointer to object)
Data type: Object
Returns the Application object.
Parent (pointer to object)
Data type: Object
Returns the parent object, i.e. BuiltInDocumentProperties.
Sheets (collection)
Access paths:
Application Workbooks Item Sheets
Application ActiveWorkbook Sheets
1 Description
The Sheets collection contains all worksheets of a document. The individual elements of this collection are of the type
Sheet.
2 Access to the collection
Each open document has exactly one instance of the Sheets collection. It is accessed through the Workbook.Sheets
object:
' Display the number of worksheets in the active document
MsgBox pm.ActiveWorkbook.Sheets.Count
3 Properties, objects, collections, and methods
Properties:
Count R/O
Objects:
Item Sheet
Application Application
Parent Workbook
Methods:
Add
Count (property, R/O)
Data type: Long
Returns the number of Sheet objects in the document – in other words: the number of the worksheets in the document.
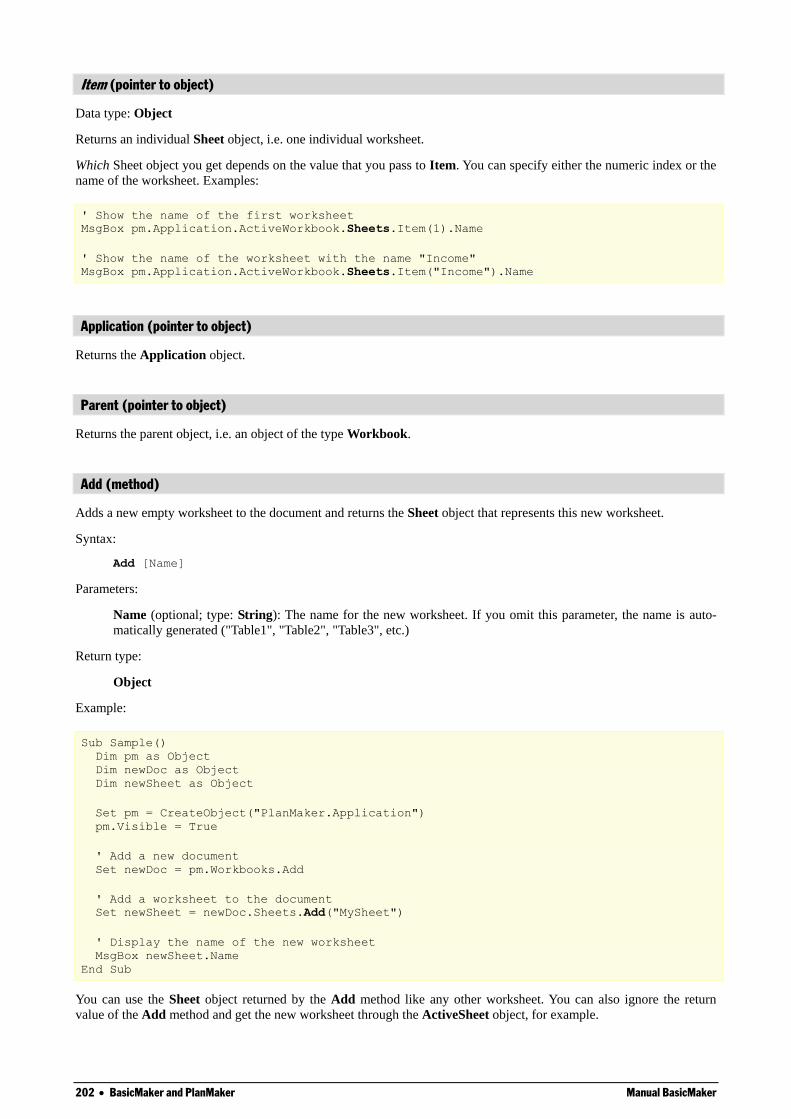
202 BasicMaker and PlanMaker Manual BasicMaker
Item (pointer to object)
Data type: Object
Returns an individual Sheet object, i.e. one individual worksheet.
Which Sheet object you get depends on the value that you pass to Item. You can specify either the numeric index or the
name of the worksheet. Examples:
' Show the name of the first worksheet
MsgBox pm.Application.ActiveWorkbook.Sheets.Item(1).Name
' Show the name of the worksheet with the name "Income"
MsgBox pm.Application.ActiveWorkbook.Sheets.Item("Income").Name
Application (pointer to object)
Returns the Application object.
Parent (pointer to object)
Returns the parent object, i.e. an object of the type Workbook.
Add (method)
Adds a new empty worksheet to the document and returns the Sheet object that represents this new worksheet.
Syntax:
Add [Name]
Parameters:
Name (optional; type: String): The name for the new worksheet. If you omit this parameter, the name is auto-
matically generated ("Table1", "Table2", "Table3", etc.)
Return type:
Object
Example:
Sub Sample()
Dim pm as Object
Dim newDoc as Object
Dim newSheet as Object
Set pm = CreateObject("PlanMaker.Application")
pm.Visible = True
' Add a new document
Set newDoc = pm.Workbooks.Add
' Add a worksheet to the document
Set newSheet = newDoc.Sheets.Add("MySheet")
' Display the name of the new worksheet
MsgBox newSheet.Name
End Sub
You can use the Sheet object returned by the Add method like any other worksheet. You can also ignore the return
value of the Add method and get the new worksheet through the ActiveSheet object, for example.
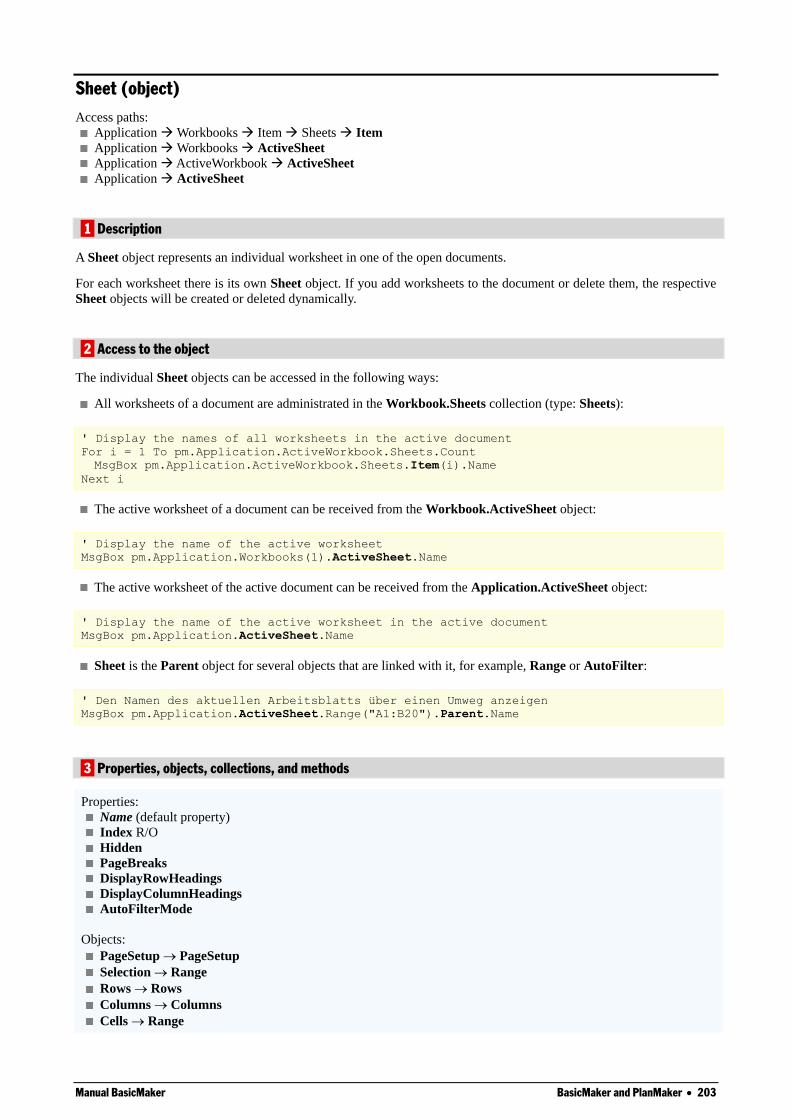
Manual BasicMaker BasicMaker and PlanMaker 203
Sheet (object)
Access paths:
Application Workbooks Item Sheets Item
Application Workbooks ActiveSheet
Application ActiveWorkbook ActiveSheet
Application ActiveSheet
1 Description
A Sheet object represents an individual worksheet in one of the open documents.
For each worksheet there is its own Sheet object. If you add worksheets to the document or delete them, the respective
Sheet objects will be created or deleted dynamically.
2 Access to the object
The individual Sheet objects can be accessed in the following ways:
All worksheets of a document are administrated in the Workbook.Sheets collection (type: Sheets):
' Display the names of all worksheets in the active document
For i = 1 To pm.Application.ActiveWorkbook.Sheets.Count
MsgBox pm.Application.ActiveWorkbook.Sheets.Item(i).Name
Next i
The active worksheet of a document can be received from the Workbook.ActiveSheet object:
' Display the name of the active worksheet
MsgBox pm.Application.Workbooks(1).ActiveSheet.Name
The active worksheet of the active document can be received from the Application.ActiveSheet object:
' Display the name of the active worksheet in the active document
MsgBox pm.Application.ActiveSheet.Name
Sheet is the Parent object for several objects that are linked with it, for example, Range or AutoFilter:
' Den Namen des aktuellen Arbeitsblatts über einen Umweg anzeigen
MsgBox pm.Application.ActiveSheet.Range("A1:B20").Parent.Name
3 Properties, objects, collections, and methods
Properties:
Name (default property)
Index R/O
Hidden
PageBreaks
DisplayRowHeadings
DisplayColumnHeadings
AutoFilterMode
Objects:
PageSetup PageSetup
Selection Range
Rows Rows
Columns Columns
Cells Range
204 BasicMaker and PlanMaker Manual BasicMaker
Range Range
AutoFilter AutoFilter
Application Application
Parent Sheets
Methods:
Activate
Delete
Move
Select
ShowAllData
Name (property)
Data type: String
Gets or sets the name of the worksheet.
Index (property, R/O)
Data type: Long
Returns the numeric index of the worksheet within the other worksheets (see also Move).
Hidden (property)
Data type: Boolean
Gets or sets the setting whether the worksheet is hidden. Corresponds to the commands Table > Worksheet > Show
and Hide in PlanMaker.
PageBreaks (property)
Data type: Boolean
Gets or sets the setting whether page breaks should be displayed in the worksheet. Corresponds to the Page breaks
option in the dialog of PlanMaker's Table > Properties command.
DisplayRowHeadings (property)
Data type: Boolean
Gets or sets the setting whether the row headings should be shown in the worksheet. Corresponds to the Row header
option in the dialog of PlanMaker's Table > Properties command.
DisplayColumnHeadings (property)
Data type: Boolean
Gets or sets the setting whether the column headings should be shown in the worksheet. Corresponds to the Column
header option in the dialog of PlanMaker's Table > Properties command.
DisplayGridlines (property)
Data type: Boolean
Manual BasicMaker BasicMaker and PlanMaker 205
Gets or sets the setting whether grid lines should be shown in the worksheet. Corresponds to the Grid option in the
dialog of PlanMaker's Table > Properties command.
GridlineColor (property)
Data type: Long (SmoColor)
Gets or sets the color of the grid lines as a "BGR" value (Blue-Green-Red triplet). You can either indicate an arbitrary
value or use one of the pre-defined BGR color constants.
GridlineColorIndex (property)
Data type: Long (SmoColorIndex)
Gets or sets the color of the grid lines as an index color. "Index colors" are the standard colors of PlanMaker, consecu-
tively numbered from -1 for transparent to 15 for light gray. You can use only one of the values presented in the Color
Indices table.
Note: It is recommended to use the GridlineColor property (see above) instead of this one, since it is not limited to the
standard colors but enables you to access the entire BGR color palette.
AutoFilterMode (property)
Gets or sets the setting whether drop-down arrows should be shown for active AutoFilters.
Note: You can always read this setting. But if you want to change it, you should note that this property can only be used
to hide the drop-down arrows of AutoFilters. To show the arrows, you must call the AutoFilter method from the Range
object instead.
PageSetup (pointer to object)
Data type: Object
Returns the PageSetup object that you can use to access the page formatting of the worksheet (paper size, margins,
etc.).
Selection (pointer to object)
Data type: Object
Returns a Range object that represents the currently selected cells in the worksheet. You can use it to get and set their
contents, formattings, etc..
If nothing is selected in the worksheet, the Range object represents the current cell.
Rows (pointer to object)
Data type: Object
Returns the Rows collection, a collection of all rows in the worksheet.
The individual elements of this collection are Range objects, so you can use all properties and methods available for
range objects with them.
Example:
' Set the font for all cells in row 10 to Courier New
pm.ActiveSheet.Rows(10).Font.Name = "Courier New"
206 BasicMaker and PlanMaker Manual BasicMaker
Columns (pointer to object)
Data type: Object
Returns the Columns collection, a collection of all rows in the worksheet.
The individual elements of this collection are Range objects, so you can use all properties and methods available for
range objects with them.
Example:
' Set the font for all cells in column C (= 3rd column) to Courier New
pm.ActiveSheet.Columns(3).Font.Name = "Courier New"
Cells (pointer to object)
Data type: Object
Returns a Range object that contains all cells of the entire worksheets. This is useful for two types of applications:
You can apply an operation to each cell in the worksheet (for example, a different formatting):
' Colorize the whole worksheet red
pm.ActiveSheet.Cells.Shading.ForegroundPatternColor = smoColorRed
You can address the individual cells using loop variables instead of manually building a string with the cell address
(for example, "B5" for the second column in the fifth row). To do this, use the Item property of the Range object
returned by the Cells pointer, for example:
' Fill the first 5 by 10 cells of the active worksheet
Dim row, col as Integer
For row = 1 To 5
For col = 1 to 10
pm.ActiveSheet.Cells.Item(row, col).Value = 42
Next col
Next row
Range (pointer to object)
Data type: Object
Returns a Range object according to the specified parameters. You can use this object to access the cells in a cell range
and, for example, get or set their values.
Syntax 1:
obj = Range(Cell1)
Syntax 2:
obj = Range(Cell1, Cell2)
Parameters:
If Syntax 1 is used, Cell1 (type: String) specifies the cell or cell range. (Cell2 should be omitted.)
If Syntax 2 is used, Cell1 specifies the left top corner and Cell2 the right bottom corner of the cell range.
Cell2 (optional; type: String) should be used only if Cell1 refers to an individual cell.
Examples for syntax 1:
Range("A1:B20") ' Cells A1 to B20
Range("A1") ' Only cell A1
Range("A:A") ' The whole column A
Range("3:3") ' The whole row 3
Manual BasicMaker BasicMaker and PlanMaker 207
Range("Summer") ' Range labeled "Summer"
Example for syntax 2:
Range("A1", "B20") ' Cells A1 to B20
Example:
' Select the cells from A1 to B20 in the active worksheet
pm.ActiveSheet.Range("A1:B20").Select
AutoFilter (pointer to object)
Data type: Object
Returns the AutoFilter object that you can use to access the AutoFilter of the worksheet.
Application (pointer to object)
Returns the Application object.
Parent (pointer to object)
Returns the parent object, i.e. Sheets.
Activate (method)
Makes the worksheet become the active worksheet.
Syntax:
Activate
Parameters:
none
Return type:
none
Example:
' Bring the first sheet of the active document to the front
pm.ActiveWorkbook.Sheets(1).Activate
Calculate (method)
Re-calculates the worksheet (similar to the menu command Tools > Recalculate in PlanMaker, but the menu command
re-calculates all worksheets in a workbook).
Syntax:
Calculate
Parameters:
none
Return value:
none
208 BasicMaker and PlanMaker Manual BasicMaker
Example:
' Re-calculate the first worksheet
pm.ActiveWorkbook.Sheets(1).Calculate
Delete (method)
Deletes the worksheet from the document.
Syntax:
Delete
Parameters:
none
Return type:
none
Example:
' Delete the first sheet from the active document
pm.ActiveWorkbook.Sheets(1).Delete
Move (method)
Changes the position of the worksheet within the other worksheets.
Syntax:
Move Index
Parameters:
Index (type: Long) indicates the target position.
Return type:
none
Example:
' Move the active worksheet to the third position
pm.ActiveSheet.Move 3
Select (method)
Selects all cells in the worksheet (corresponds to the command Edit > Select all in PlanMaker).
Syntax:
Select
Parameters:
none
Return type:
none
Example:
Manual BasicMaker BasicMaker and PlanMaker 209
' Alle Zellen im aktuellen Arbeitsblatt selektieren
pm.ActiveSheet.Select
ShowAllData (method)
Makes all cells that are currently hidden by an AutoFilter visible again. Corresponds to clicking the entry "(All") in the
drop-down menu that appears when you click on the arrow button of an AutoFilter.
PageSetup (object)
Access paths:
Application Workbooks Item Sheets Item PageSetup
Application Workbooks ActiveSheet PageSetup
Application ActiveWorkbook ActiveSheet PageSetup
Application ActiveSheet PageSetup
1 Description
The PageSetup object contains the page settings of the Sheet object to which it belongs. You can use it to get or set the
paper format (page size, margins, print orientation, etc.) of an individual worksheet.
2 Access to the object
Each worksheet in a document has exactly one instance of the PageSetup object. It is accessed through the
Sheet.PageSetup object:
' Set the left margin of the active sheet to 2cm
pm.ActiveSheet.PageSetup.LeftMargin = pm.CentimetersToPoints(2)
Hint: You can define different page settings for each individual worksheet in a document.
3 Properties, objects, collections, and methods
Properties:
LeftMargin
RightMargin
TopMargin
BottomMargin
HeaderMargin
FooterMargin
PageHeight
PageWidth
Orientation
PaperSize
PrintComments
CenterHorizontally
CenterVertically
Zoom
FirstPageNumber
PrintGridlines
PrintHeadings
Order
PrintArea
PrintTitleRows
PrintTitleColumns
210 BasicMaker and PlanMaker Manual BasicMaker
Objects:
Application Application
Parent Sheet
LeftMargin (property)
Data type: Single
Gets or sets the left page margin of the worksheet in points (1 point corresponds to 1/72 inches).
RightMargin (property)
Data type: Single
Gets or sets the right page margin of the worksheet in points (1 point corresponds to 1/72 inches).
TopMargin (property)
Data type: Single
Gets or sets the top page margin of the worksheet in points (1 point corresponds to 1/72 inches).
BottomMargin (property)
Data type: Single
Gets or sets the bottom page margin of the worksheet in points (1 point corresponds to 1/72 inches).
HeaderMargin (property)
Data type: Single
Gets or sets the distance between the header and the top edge of the sheet in points (1 point corresponds to 1/72 inches).
FooterMargin (property)
Data type: Single
Gets or sets the distance between the footer and the bottom edge of the sheet in points (1 point corresponds to 1/72
inches).
PageHeight (property)
Data type: Single
Gets or sets the page height of the worksheet in points (1 point corresponds to 1/72 inches).
If you set this property, the PaperSize property (see below) will be automatically changed to a corresponding paper
format.
PageWidth (property)
Data type: Single
Gets or sets the page width of the worksheet in points (1 point corresponds to 1/72 inches).
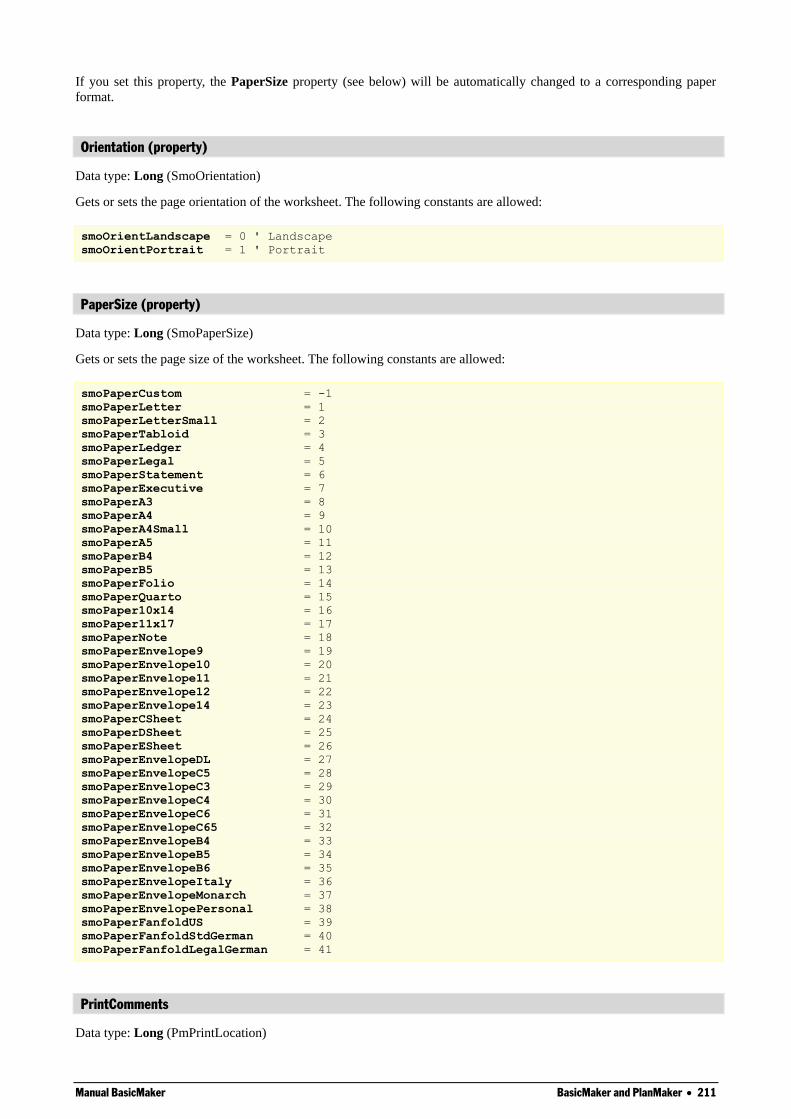
Manual BasicMaker BasicMaker and PlanMaker 211
If you set this property, the PaperSize property (see below) will be automatically changed to a corresponding paper
format.
Orientation (property)
Data type: Long (SmoOrientation)
Gets or sets the page orientation of the worksheet. The following constants are allowed:
smoOrientLandscape = 0 ' Landscape
smoOrientPortrait = 1 ' Portrait
PaperSize (property)
Data type: Long (SmoPaperSize)
Gets or sets the page size of the worksheet. The following constants are allowed:
smoPaperCustom = -1
smoPaperLetter = 1
smoPaperLetterSmall = 2
smoPaperTabloid = 3
smoPaperLedger = 4
smoPaperLegal = 5
smoPaperStatement = 6
smoPaperExecutive = 7
smoPaperA3 = 8
smoPaperA4 = 9
smoPaperA4Small = 10
smoPaperA5 = 11
smoPaperB4 = 12
smoPaperB5 = 13
smoPaperFolio = 14
smoPaperQuarto = 15
smoPaper10x14 = 16
smoPaper11x17 = 17
smoPaperNote = 18
smoPaperEnvelope9 = 19
smoPaperEnvelope10 = 20
smoPaperEnvelope11 = 21
smoPaperEnvelope12 = 22
smoPaperEnvelope14 = 23
smoPaperCSheet = 24
smoPaperDSheet = 25
smoPaperESheet = 26
smoPaperEnvelopeDL = 27
smoPaperEnvelopeC5 = 28
smoPaperEnvelopeC3 = 29
smoPaperEnvelopeC4 = 30
smoPaperEnvelopeC6 = 31
smoPaperEnvelopeC65 = 32
smoPaperEnvelopeB4 = 33
smoPaperEnvelopeB5 = 34
smoPaperEnvelopeB6 = 35
smoPaperEnvelopeItaly = 36
smoPaperEnvelopeMonarch = 37
smoPaperEnvelopePersonal = 38
smoPaperFanfoldUS = 39
smoPaperFanfoldStdGerman = 40
smoPaperFanfoldLegalGerman = 41
PrintComments
Data type: Long (PmPrintLocation)
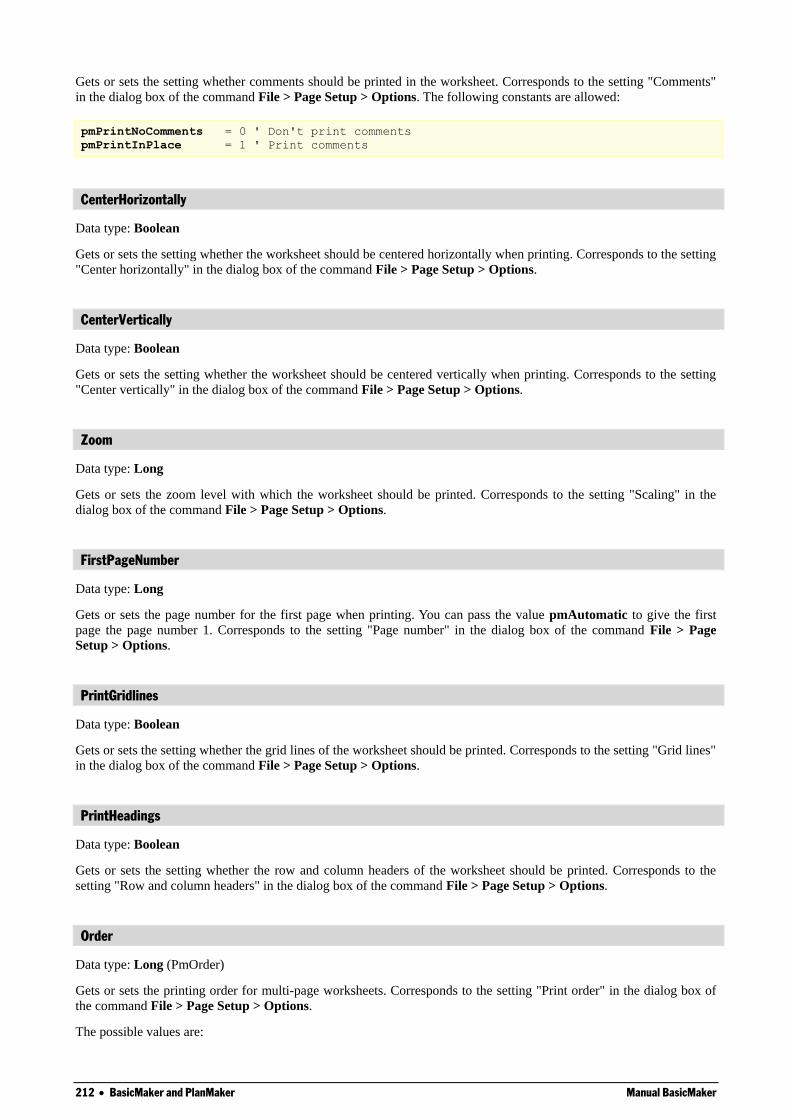
212 BasicMaker and PlanMaker Manual BasicMaker
Gets or sets the setting whether comments should be printed in the worksheet. Corresponds to the setting "Comments"
in the dialog box of the command File > Page Setup > Options. The following constants are allowed:
pmPrintNoComments = 0 ' Don't print comments
pmPrintInPlace = 1 ' Print comments
CenterHorizontally
Data type: Boolean
Gets or sets the setting whether the worksheet should be centered horizontally when printing. Corresponds to the setting
"Center horizontally" in the dialog box of the command File > Page Setup > Options.
CenterVertically
Data type: Boolean
Gets or sets the setting whether the worksheet should be centered vertically when printing. Corresponds to the setting
"Center vertically" in the dialog box of the command File > Page Setup > Options.
Zoom
Data type: Long
Gets or sets the zoom level with which the worksheet should be printed. Corresponds to the setting "Scaling" in the
dialog box of the command File > Page Setup > Options.
FirstPageNumber
Data type: Long
Gets or sets the page number for the first page when printing. You can pass the value pmAutomatic to give the first
page the page number 1. Corresponds to the setting "Page number" in the dialog box of the command File > Page
Setup > Options.
PrintGridlines
Data type: Boolean
Gets or sets the setting whether the grid lines of the worksheet should be printed. Corresponds to the setting "Grid lines"
in the dialog box of the command File > Page Setup > Options.
PrintHeadings
Data type: Boolean
Gets or sets the setting whether the row and column headers of the worksheet should be printed. Corresponds to the
setting "Row and column headers" in the dialog box of the command File > Page Setup > Options.
Order
Data type: Long (PmOrder)
Gets or sets the printing order for multi-page worksheets. Corresponds to the setting "Print order" in the dialog box of
the command File > Page Setup > Options.
The possible values are:
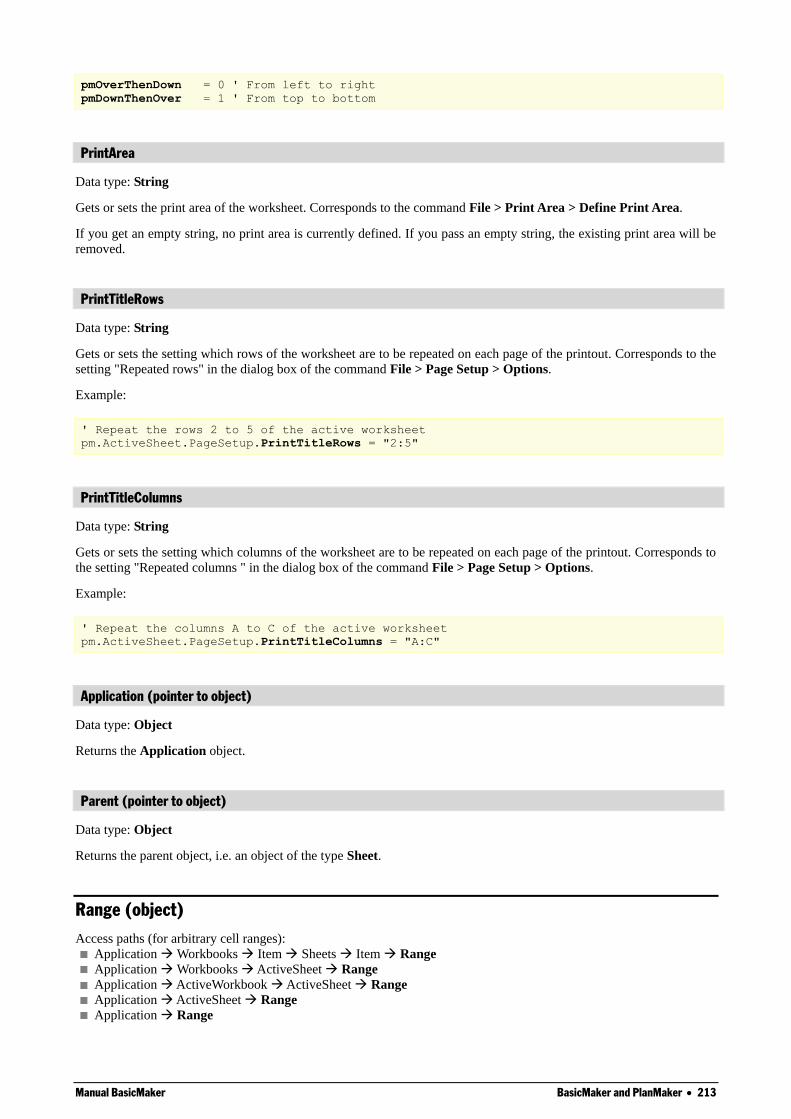
Manual BasicMaker BasicMaker and PlanMaker 213
pmOverThenDown = 0 ' From left to right
pmDownThenOver = 1 ' From top to bottom
PrintArea
Data type: String
Gets or sets the print area of the worksheet. Corresponds to the command File > Print Area > Define Print Area.
If you get an empty string, no print area is currently defined. If you pass an empty string, the existing print area will be
removed.
PrintTitleRows
Data type: String
Gets or sets the setting which rows of the worksheet are to be repeated on each page of the printout. Corresponds to the
setting "Repeated rows" in the dialog box of the command File > Page Setup > Options.
Example:
' Repeat the rows 2 to 5 of the active worksheet
pm.ActiveSheet.PageSetup.PrintTitleRows = "2:5"
PrintTitleColumns
Data type: String
Gets or sets the setting which columns of the worksheet are to be repeated on each page of the printout. Corresponds to
the setting "Repeated columns " in the dialog box of the command File > Page Setup > Options.
Example:
' Repeat the columns A to C of the active worksheet
pm.ActiveSheet.PageSetup.PrintTitleColumns = "A:C"
Application (pointer to object)
Data type: Object
Returns the Application object.
Parent (pointer to object)
Data type: Object
Returns the parent object, i.e. an object of the type Sheet.
Range (object)
Access paths (for arbitrary cell ranges):
Application Workbooks Item Sheets Item Range
Application Workbooks ActiveSheet Range
Application ActiveWorkbook ActiveSheet Range
Application ActiveSheet Range
Application Range
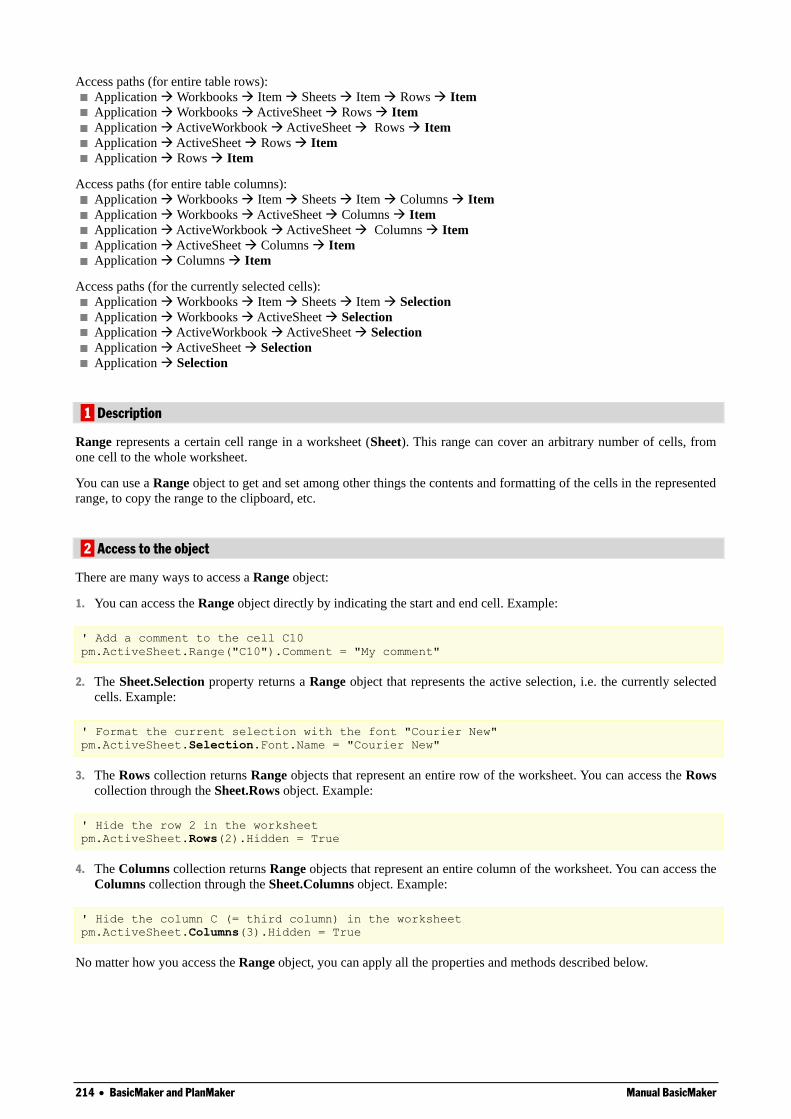
214 BasicMaker and PlanMaker Manual BasicMaker
Access paths (for entire table rows):
Application Workbooks Item Sheets Item Rows Item
Application Workbooks ActiveSheet Rows Item
Application ActiveWorkbook ActiveSheet Rows Item
Application ActiveSheet Rows Item
Application Rows Item
Access paths (for entire table columns):
Application Workbooks Item Sheets Item Columns Item
Application Workbooks ActiveSheet Columns Item
Application ActiveWorkbook ActiveSheet Columns Item
Application ActiveSheet Columns Item
Application Columns Item
Access paths (for the currently selected cells):
Application Workbooks Item Sheets Item Selection
Application Workbooks ActiveSheet Selection
Application ActiveWorkbook ActiveSheet Selection
Application ActiveSheet Selection
Application Selection
1 Description
Range represents a certain cell range in a worksheet (Sheet). This range can cover an arbitrary number of cells, from
one cell to the whole worksheet.
You can use a Range object to get and set among other things the contents and formatting of the cells in the represented
range, to copy the range to the clipboard, etc.
2 Access to the object
There are many ways to access a Range object:
1. You can access the Range object directly by indicating the start and end cell. Example:
' Add a comment to the cell C10
pm.ActiveSheet.Range("C10").Comment = "My comment"
2. The Sheet.Selection property returns a Range object that represents the active selection, i.e. the currently selected
cells. Example:
' Format the current selection with the font "Courier New"
pm.ActiveSheet.Selection.Font.Name = "Courier New"
3. The Rows collection returns Range objects that represent an entire row of the worksheet. You can access the Rows
collection through the Sheet.Rows object. Example:
' Hide the row 2 in the worksheet
pm.ActiveSheet.Rows(2).Hidden = True
4. The Columns collection returns Range objects that represent an entire column of the worksheet. You can access the
Columns collection through the Sheet.Columns object. Example:
' Hide the column C (= third column) in the worksheet
pm.ActiveSheet.Columns(3).Hidden = True
No matter how you access the Range object, you can apply all the properties and methods described below.
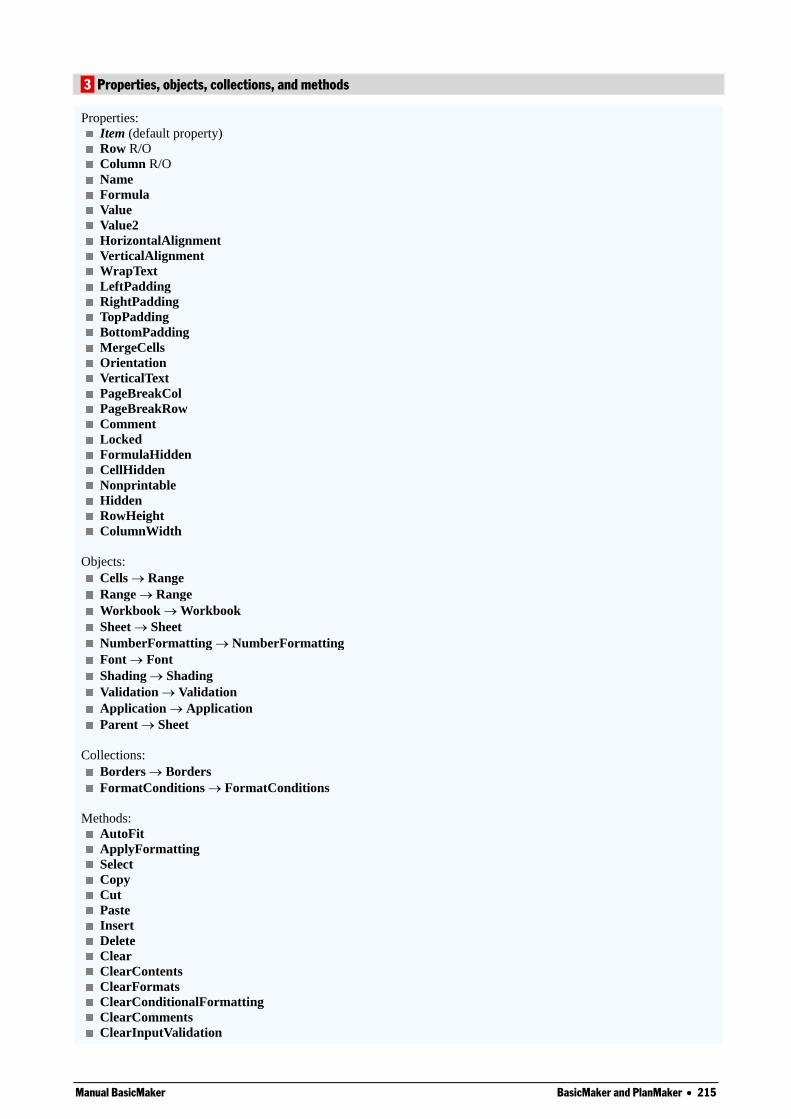
Manual BasicMaker BasicMaker and PlanMaker 215
3 Properties, objects, collections, and methods
Properties:
Item (default property)
Row R/O
Column R/O
Name
Formula
Value
Value2
HorizontalAlignment
VerticalAlignment
WrapText
LeftPadding
RightPadding
TopPadding
BottomPadding
MergeCells
Orientation
VerticalText
PageBreakCol
PageBreakRow
Comment
Locked
FormulaHidden
CellHidden
Nonprintable
Hidden
RowHeight
ColumnWidth
Objects:
Cells Range
Range Range
Workbook Workbook
Sheet Sheet
NumberFormatting NumberFormatting
Font Font
Shading Shading
Validation Validation
Application Application
Parent Sheet
Collections:
Borders Borders
FormatConditions FormatConditions
Methods:
AutoFit
ApplyFormatting
Select
Copy
Cut
Paste
Insert
Delete
Clear
ClearContents
ClearFormats
ClearConditionalFormatting
ClearComments
ClearInputValidation
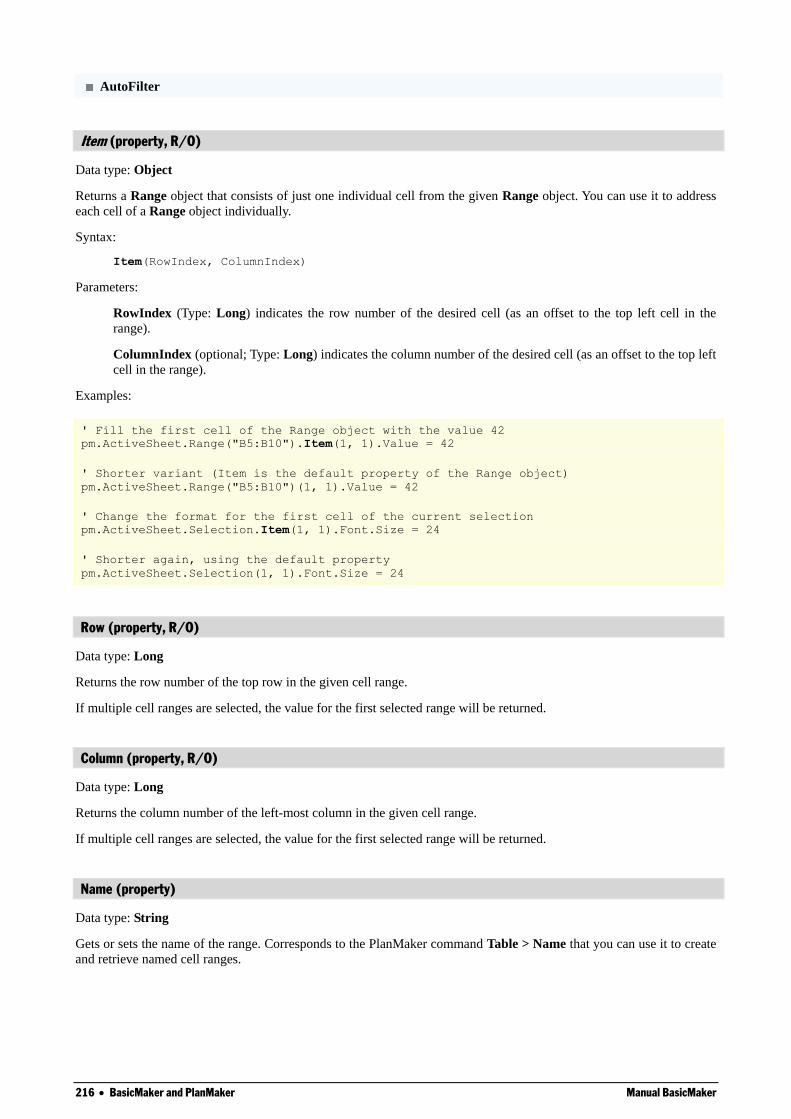
216 BasicMaker and PlanMaker Manual BasicMaker
AutoFilter
Item (property, R/O)
Data type: Object
Returns a Range object that consists of just one individual cell from the given Range object. You can use it to address
each cell of a Range object individually.
Syntax:
Item(RowIndex, ColumnIndex)
Parameters:
RowIndex (Type: Long) indicates the row number of the desired cell (as an offset to the top left cell in the
range).
ColumnIndex (optional; Type: Long) indicates the column number of the desired cell (as an offset to the top left
cell in the range).
Examples:
' Fill the first cell of the Range object with the value 42
pm.ActiveSheet.Range("B5:B10").Item(1, 1).Value = 42
' Shorter variant (Item is the default property of the Range object)
pm.ActiveSheet.Range("B5:B10")(1, 1).Value = 42
' Change the format for the first cell of the current selection
pm.ActiveSheet.Selection.Item(1, 1).Font.Size = 24
' Shorter again, using the default property
pm.ActiveSheet.Selection(1, 1).Font.Size = 24
Row (property, R/O)
Data type: Long
Returns the row number of the top row in the given cell range.
If multiple cell ranges are selected, the value for the first selected range will be returned.
Column (property, R/O)
Data type: Long
Returns the column number of the left-most column in the given cell range.
If multiple cell ranges are selected, the value for the first selected range will be returned.
Name (property)
Data type: String
Gets or sets the name of the range. Corresponds to the PlanMaker command Table > Name that you can use it to create
and retrieve named cell ranges.
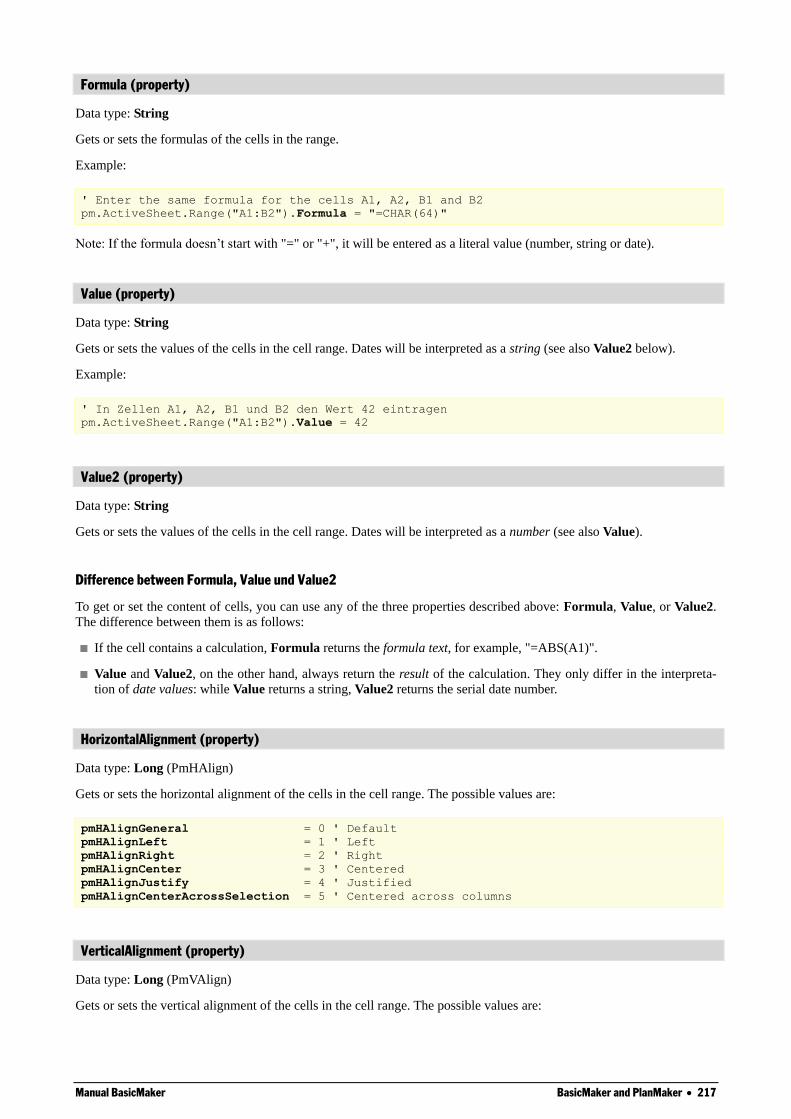
Manual BasicMaker BasicMaker and PlanMaker 217
Formula (property)
Data type: String
Gets or sets the formulas of the cells in the range.
Example:
' Enter the same formula for the cells A1, A2, B1 and B2
pm.ActiveSheet.Range("A1:B2").Formula = "=CHAR(64)"
Note: If the formula doesn’t start with "=" or "+", it will be entered as a literal value (number, string or date).
Value (property)
Data type: String
Gets or sets the values of the cells in the cell range. Dates will be interpreted as a string (see also Value2 below).
Example:
' In Zellen A1, A2, B1 und B2 den Wert 42 eintragen
pm.ActiveSheet.Range("A1:B2").Value = 42
Value2 (property)
Data type: String
Gets or sets the values of the cells in the cell range. Dates will be interpreted as a number (see also Value).
Difference between Formula, Value und Value2
To get or set the content of cells, you can use any of the three properties described above: Formula, Value, or Value2.
The difference between them is as follows:
If the cell contains a calculation, Formula returns the formula text, for example, "=ABS(A1)".
Value and Value2, on the other hand, always return the result of the calculation. They only differ in the interpreta-
tion of date values: while Value returns a string, Value2 returns the serial date number.
HorizontalAlignment (property)
Data type: Long (PmHAlign)
Gets or sets the horizontal alignment of the cells in the cell range. The possible values are:
pmHAlignGeneral = 0 ' Default
pmHAlignLeft = 1 ' Left
pmHAlignRight = 2 ' Right
pmHAlignCenter = 3 ' Centered
pmHAlignJustify = 4 ' Justified
pmHAlignCenterAcrossSelection = 5 ' Centered across columns
VerticalAlignment (property)
Data type: Long (PmVAlign)
Gets or sets the vertical alignment of the cells in the cell range. The possible values are:

218 BasicMaker and PlanMaker Manual BasicMaker
pmVAlignTop = 0 ' Top
pmVAlignCenter = 1 ' Centered
pmVAlignBottom = 2 ' Bottom
pmVAlignJustify = 3 ' Justified
WrapText (property)
Data type: Long
Gets or sets the setting "Wrap text" for the cells in the cell range. Corresponds to the Word-wrap option in the dialog
box of PlanMaker's Format > Cell command.
LeftPadding (property)
Data type: Single
Gets or sets the left inner margin of the cells, measured in points (1 point corresponds to 1/72 inches).
RightPadding (property)
Data type: Single
Gets or sets the right inner margin of the cells, measured in points (1 point corresponds to 1/72 inches).
TopPadding (property)
Data type: Single
Gets or sets the top inner margin of the cells, measured in points (1 point corresponds to 1/72 inches).
BottomPadding (property)
Data type: Single
Gets or sets the bottom inner margin of the cells, measured in points (1 point corresponds to 1/72 inches).
MergeCells (property)
Data type: Long
Gets or sets the setting "Join cells" in the dialog box of PlanMaker's Format > Cell command: All cells of the cell range
are merged to one big cell (True) or the cell connection will be removed again (False).
Orientation (property)
Data type: Long
Gets or sets the print orientation of the cells in the cell range. The possible values are: 0, 90, 180 and -90 corresponding
to the respective rotation angle.
Hint: The value 270 will be automatically converted to -90.
VerticalText (property)
Data type: Long
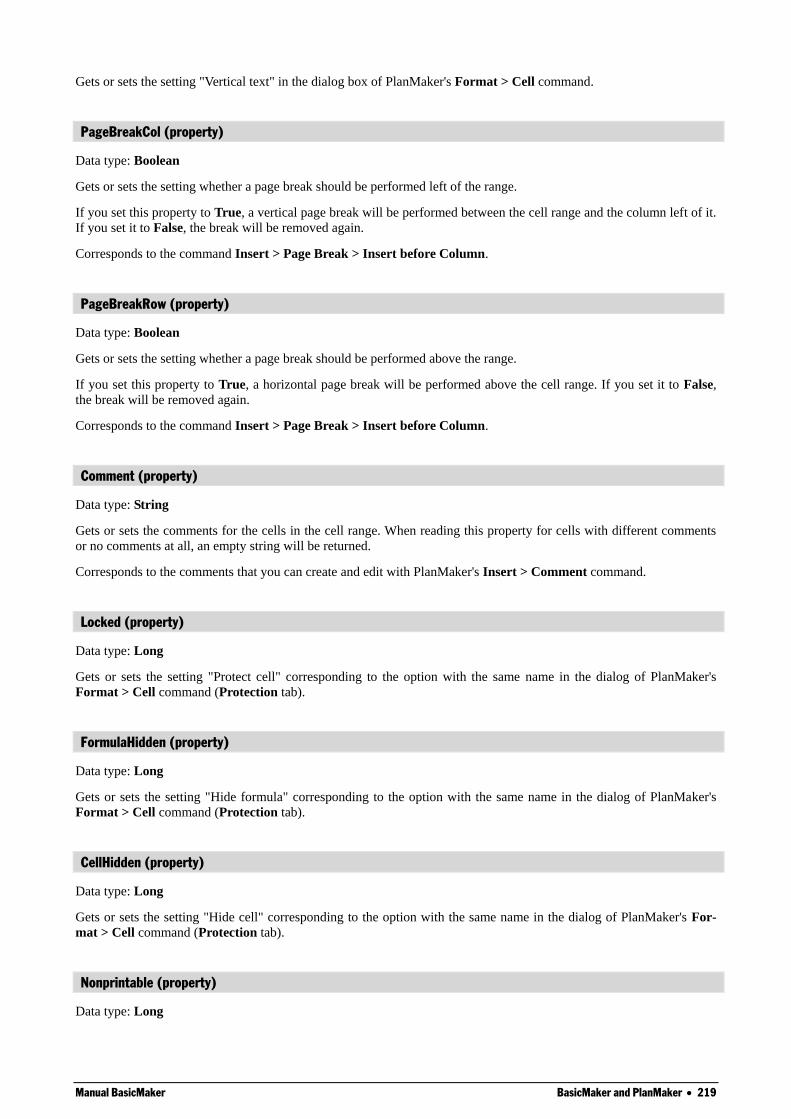
Manual BasicMaker BasicMaker and PlanMaker 219
Gets or sets the setting "Vertical text" in the dialog box of PlanMaker's Format > Cell command.
PageBreakCol (property)
Data type: Boolean
Gets or sets the setting whether a page break should be performed left of the range.
If you set this property to True, a vertical page break will be performed between the cell range and the column left of it.
If you set it to False, the break will be removed again.
Corresponds to the command Insert > Page Break > Insert before Column.
PageBreakRow (property)
Data type: Boolean
Gets or sets the setting whether a page break should be performed above the range.
If you set this property to True, a horizontal page break will be performed above the cell range. If you set it to False,
the break will be removed again.
Corresponds to the command Insert > Page Break > Insert before Column.
Comment (property)
Data type: String
Gets or sets the comments for the cells in the cell range. When reading this property for cells with different comments
or no comments at all, an empty string will be returned.
Corresponds to the comments that you can create and edit with PlanMaker's Insert > Comment command.
Locked (property)
Data type: Long
Gets or sets the setting "Protect cell" corresponding to the option with the same name in the dialog of PlanMaker's
Format > Cell command (Protection tab).
FormulaHidden (property)
Data type: Long
Gets or sets the setting "Hide formula" corresponding to the option with the same name in the dialog of PlanMaker's
Format > Cell command (Protection tab).
CellHidden (property)
Data type: Long
Gets or sets the setting "Hide cell" corresponding to the option with the same name in the dialog of PlanMaker's For-
mat > Cell command (Protection tab).
Nonprintable (property)
Data type: Long
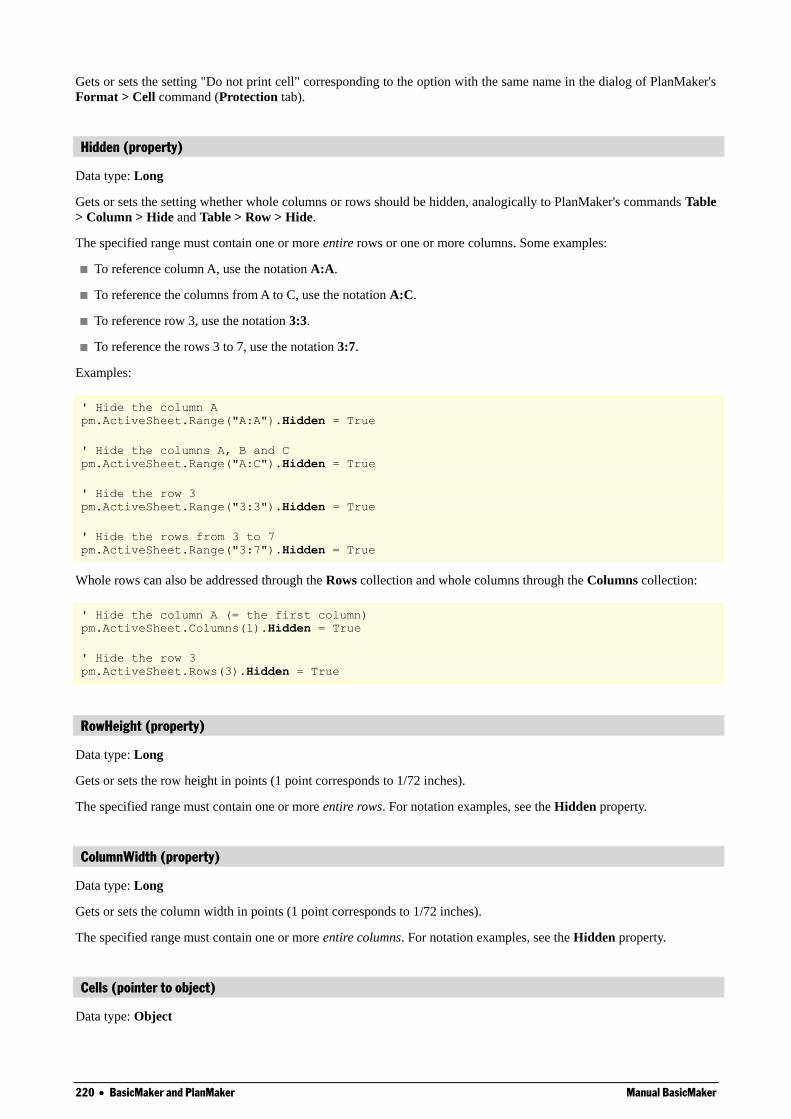
220 BasicMaker and PlanMaker Manual BasicMaker
Gets or sets the setting "Do not print cell" corresponding to the option with the same name in the dialog of PlanMaker's
Format > Cell command (Protection tab).
Hidden (property)
Data type: Long
Gets or sets the setting whether whole columns or rows should be hidden, analogically to PlanMaker's commands Table
> Column > Hide and Table > Row > Hide.
The specified range must contain one or more entire rows or one or more columns. Some examples:
To reference column A, use the notation A:A.
To reference the columns from A to C, use the notation A:C.
To reference row 3, use the notation 3:3.
To reference the rows 3 to 7, use the notation 3:7.
Examples:
' Hide the column A
pm.ActiveSheet.Range("A:A").Hidden = True
' Hide the columns A, B and C
pm.ActiveSheet.Range("A:C").Hidden = True
' Hide the row 3
pm.ActiveSheet.Range("3:3").Hidden = True
' Hide the rows from 3 to 7
pm.ActiveSheet.Range("3:7").Hidden = True
Whole rows can also be addressed through the Rows collection and whole columns through the Columns collection:
' Hide the column A (= the first column)
pm.ActiveSheet.Columns(1).Hidden = True
' Hide the row 3
pm.ActiveSheet.Rows(3).Hidden = True
RowHeight (property)
Data type: Long
Gets or sets the row height in points (1 point corresponds to 1/72 inches).
The specified range must contain one or more entire rows. For notation examples, see the Hidden property.
ColumnWidth (property)
Data type: Long
Gets or sets the column width in points (1 point corresponds to 1/72 inches).
The specified range must contain one or more entire columns. For notation examples, see the Hidden property.
Cells (pointer to object)
Data type: Object
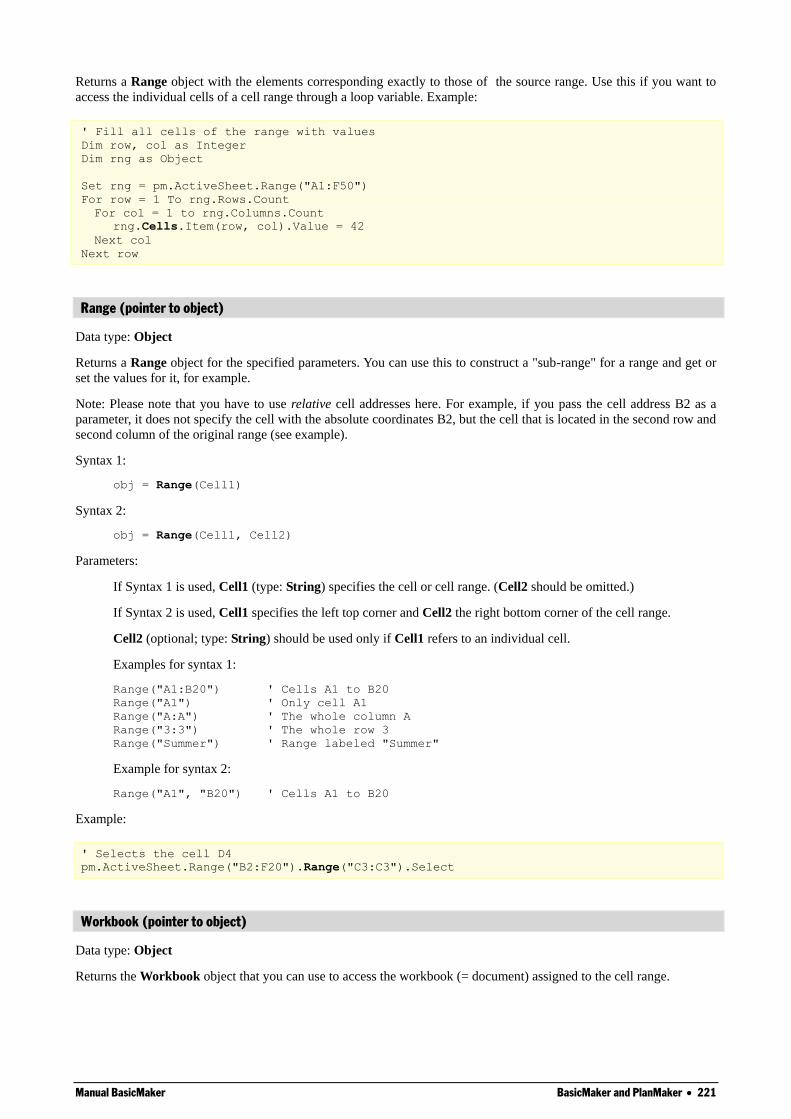
Manual BasicMaker BasicMaker and PlanMaker 221
Returns a Range object with the elements corresponding exactly to those of the source range. Use this if you want to
access the individual cells of a cell range through a loop variable. Example:
' Fill all cells of the range with values
Dim row, col as Integer
Dim rng as Object
Set rng = pm.ActiveSheet.Range("A1:F50")
For row = 1 To rng.Rows.Count
For col = 1 to rng.Columns.Count
rng.Cells.Item(row, col).Value = 42
Next col
Next row
Range (pointer to object)
Data type: Object
Returns a Range object for the specified parameters. You can use this to construct a "sub-range" for a range and get or
set the values for it, for example.
Note: Please note that you have to use relative cell addresses here. For example, if you pass the cell address B2 as a
parameter, it does not specify the cell with the absolute coordinates B2, but the cell that is located in the second row and
second column of the original range (see example).
Syntax 1:
obj = Range(Cell1)
Syntax 2:
obj = Range(Cell1, Cell2)
Parameters:
If Syntax 1 is used, Cell1 (type: String) specifies the cell or cell range. (Cell2 should be omitted.)
If Syntax 2 is used, Cell1 specifies the left top corner and Cell2 the right bottom corner of the cell range.
Cell2 (optional; type: String) should be used only if Cell1 refers to an individual cell.
Examples for syntax 1:
Range("A1:B20") ' Cells A1 to B20
Range("A1") ' Only cell A1
Range("A:A") ' The whole column A
Range("3:3") ' The whole row 3
Range("Summer") ' Range labeled "Summer"
Example for syntax 2:
Range("A1", "B20") ' Cells A1 to B20
Example:
' Selects the cell D4
pm.ActiveSheet.Range("B2:F20").Range("C3:C3").Select
Workbook (pointer to object)
Data type: Object
Returns the Workbook object that you can use to access the workbook (= document) assigned to the cell range.
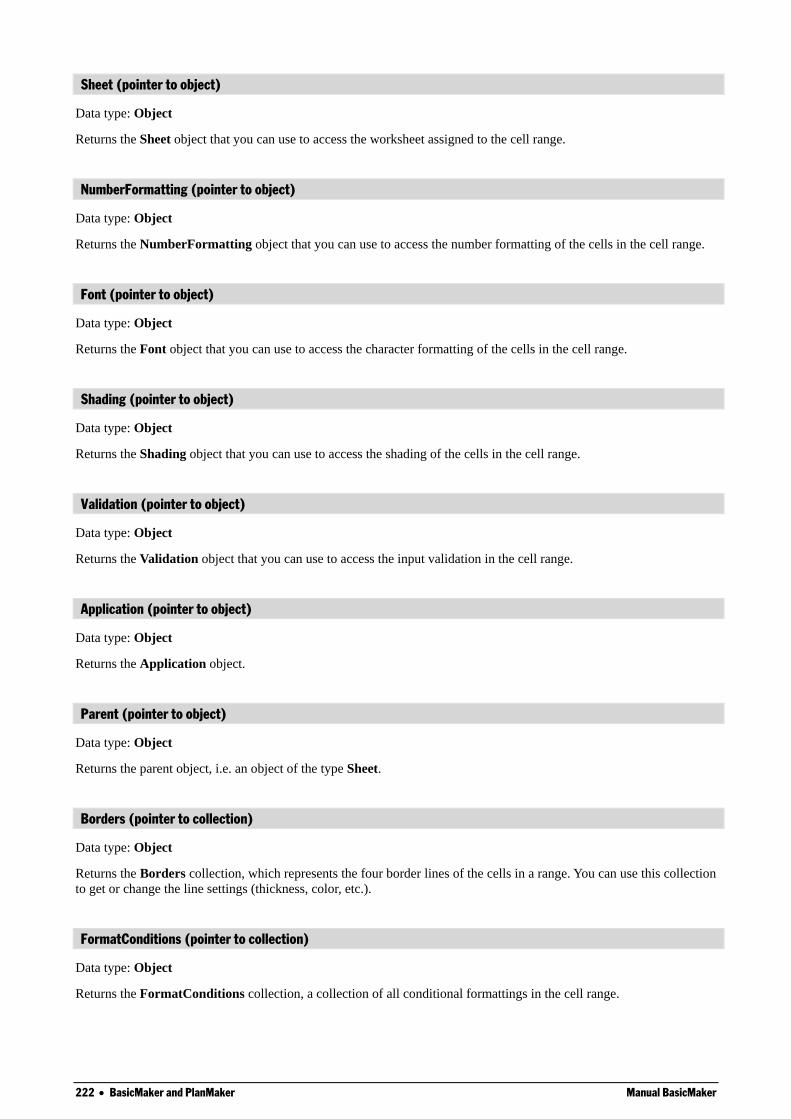
222 BasicMaker and PlanMaker Manual BasicMaker
Sheet (pointer to object)
Data type: Object
Returns the Sheet object that you can use to access the worksheet assigned to the cell range.
NumberFormatting (pointer to object)
Data type: Object
Returns the NumberFormatting object that you can use to access the number formatting of the cells in the cell range.
Font (pointer to object)
Data type: Object
Returns the Font object that you can use to access the character formatting of the cells in the cell range.
Shading (pointer to object)
Data type: Object
Returns the Shading object that you can use to access the shading of the cells in the cell range.
Validation (pointer to object)
Data type: Object
Returns the Validation object that you can use to access the input validation in the cell range.
Application (pointer to object)
Data type: Object
Returns the Application object.
Parent (pointer to object)
Data type: Object
Returns the parent object, i.e. an object of the type Sheet.
Borders (pointer to collection)
Data type: Object
Returns the Borders collection, which represents the four border lines of the cells in a range. You can use this collection
to get or change the line settings (thickness, color, etc.).
FormatConditions (pointer to collection)
Data type: Object
Returns the FormatConditions collection, a collection of all conditional formattings in the cell range.
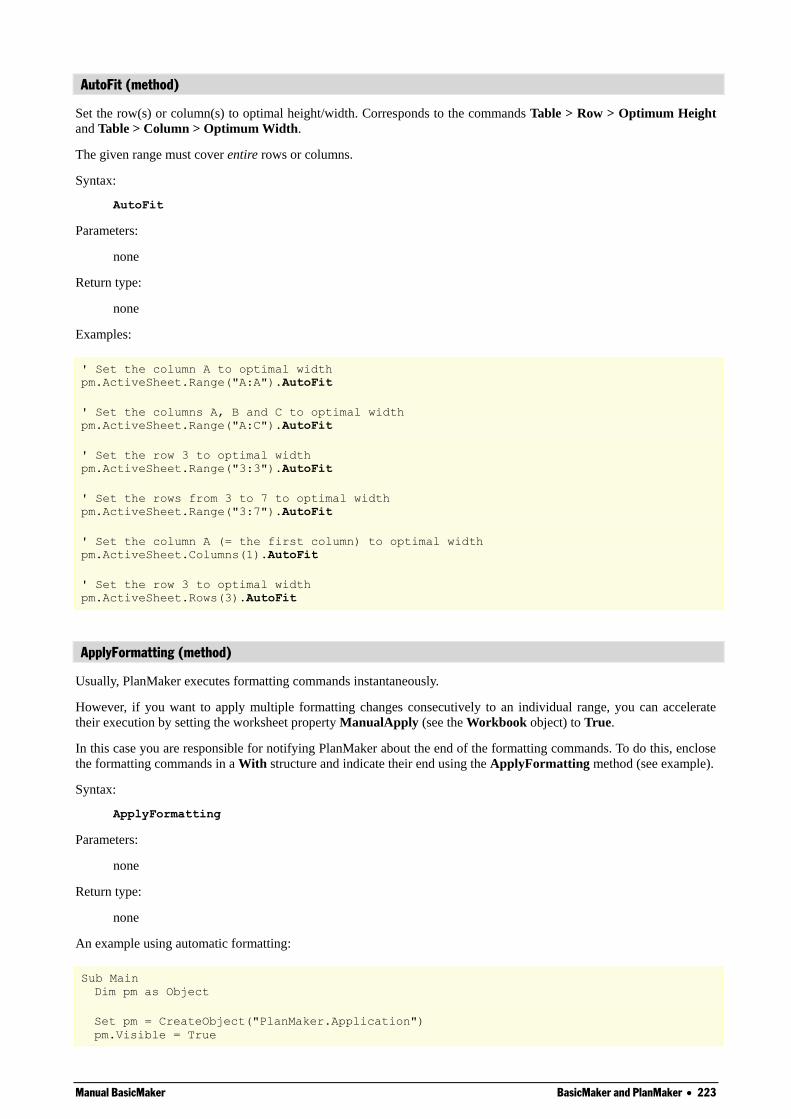
Manual BasicMaker BasicMaker and PlanMaker 223
AutoFit (method)
Set the row(s) or column(s) to optimal height/width. Corresponds to the commands Table > Row > Optimum Height
and Table > Column > Optimum Width.
The given range must cover entire rows or columns.
Syntax:
AutoFit
Parameters:
none
Return type:
none
Examples:
' Set the column A to optimal width
pm.ActiveSheet.Range("A:A").AutoFit
' Set the columns A, B and C to optimal width
pm.ActiveSheet.Range("A:C").AutoFit
' Set the row 3 to optimal width
pm.ActiveSheet.Range("3:3").AutoFit
' Set the rows from 3 to 7 to optimal width
pm.ActiveSheet.Range("3:7").AutoFit
' Set the column A (= the first column) to optimal width
pm.ActiveSheet.Columns(1).AutoFit
' Set the row 3 to optimal width
pm.ActiveSheet.Rows(3).AutoFit
ApplyFormatting (method)
Usually, PlanMaker executes formatting commands instantaneously.
However, if you want to apply multiple formatting changes consecutively to an individual range, you can accelerate
their execution by setting the worksheet property ManualApply (see the Workbook object) to True.
In this case you are responsible for notifying PlanMaker about the end of the formatting commands. To do this, enclose
the formatting commands in a With structure and indicate their end using the ApplyFormatting method (see example).
Syntax:
ApplyFormatting
Parameters:
none
Return type:
none
An example using automatic formatting:
Sub Main
Dim pm as Object
Set pm = CreateObject("PlanMaker.Application")
pm.Visible = True
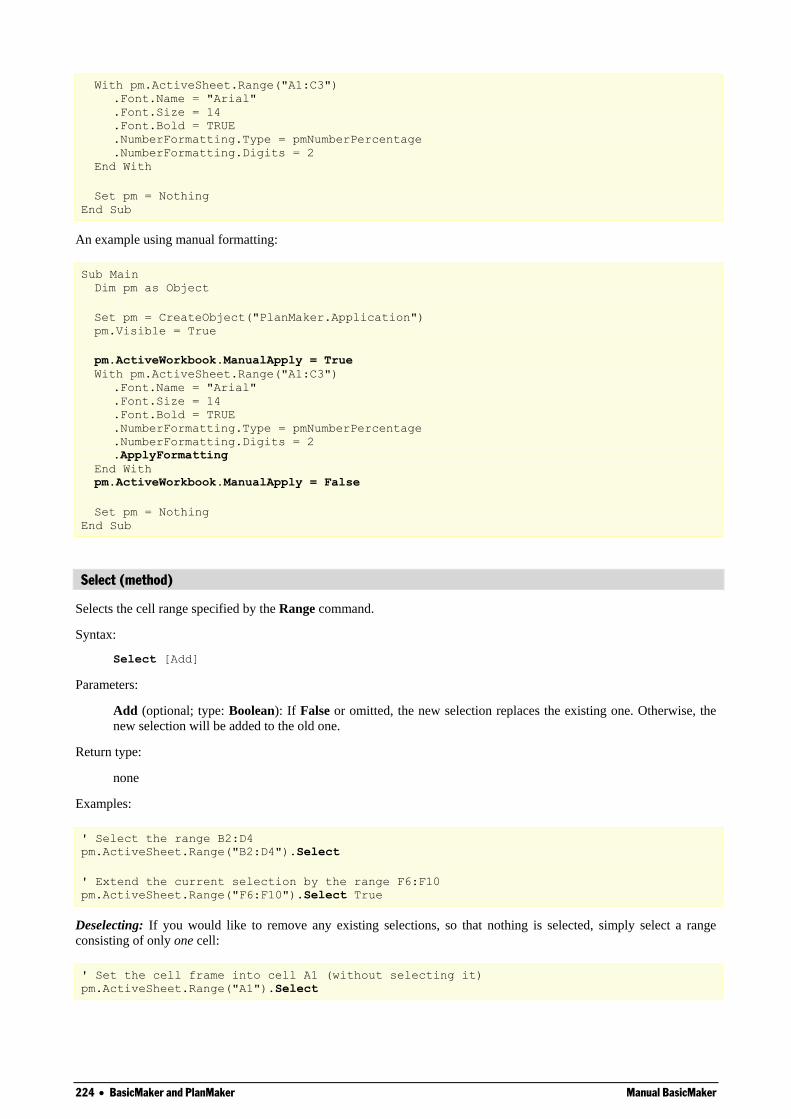
224 BasicMaker and PlanMaker Manual BasicMaker
With pm.ActiveSheet.Range("A1:C3")
.Font.Name = "Arial"
.Font.Size = 14
.Font.Bold = TRUE
.NumberFormatting.Type = pmNumberPercentage
.NumberFormatting.Digits = 2
End With
Set pm = Nothing
End Sub
An example using manual formatting:
Sub Main
Dim pm as Object
Set pm = CreateObject("PlanMaker.Application")
pm.Visible = True
pm.ActiveWorkbook.ManualApply = True
With pm.ActiveSheet.Range("A1:C3")
.Font.Name = "Arial"
.Font.Size = 14
.Font.Bold = TRUE
.NumberFormatting.Type = pmNumberPercentage
.NumberFormatting.Digits = 2
.ApplyFormatting
End With
pm.ActiveWorkbook.ManualApply = False
Set pm = Nothing
End Sub
Select (method)
Selects the cell range specified by the Range command.
Syntax:
Select [Add]
Parameters:
Add (optional; type: Boolean): If False or omitted, the new selection replaces the existing one. Otherwise, the
new selection will be added to the old one.
Return type:
none
Examples:
' Select the range B2:D4
pm.ActiveSheet.Range("B2:D4").Select
' Extend the current selection by the range F6:F10
pm.ActiveSheet.Range("F6:F10").Select True
Deselecting: If you would like to remove any existing selections, so that nothing is selected, simply select a range
consisting of only one cell:
' Set the cell frame into cell A1 (without selecting it)
pm.ActiveSheet.Range("A1").Select
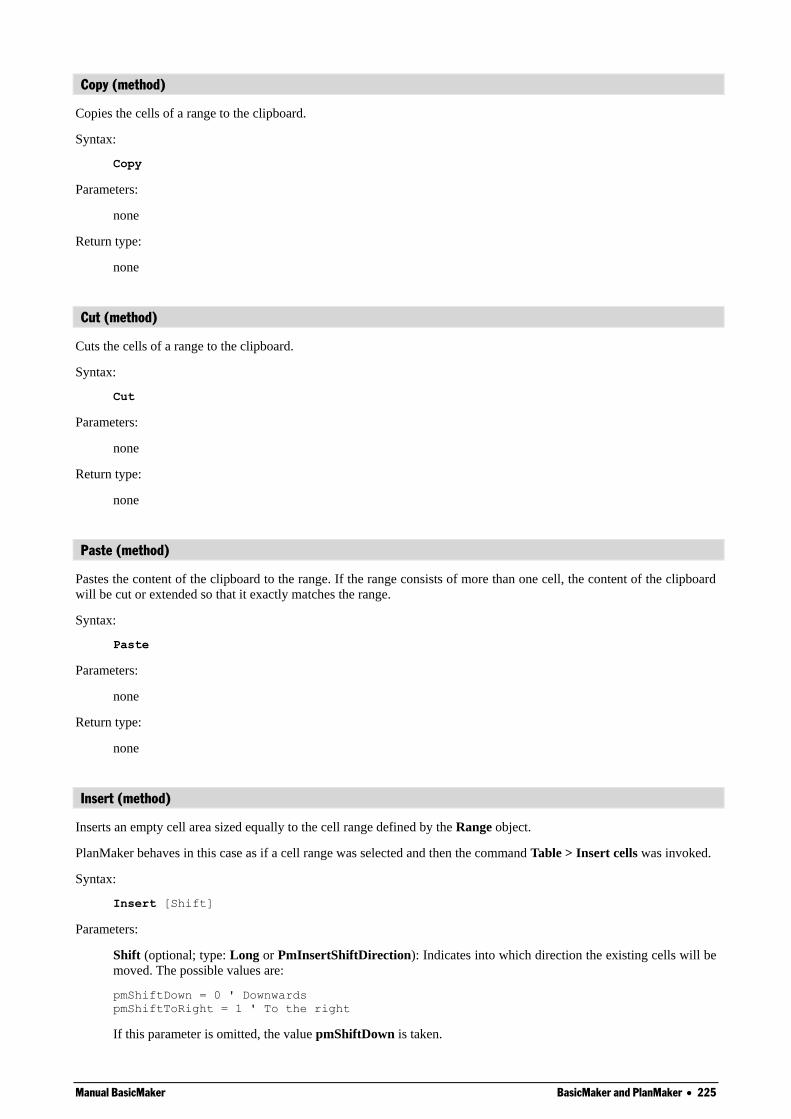
Manual BasicMaker BasicMaker and PlanMaker 225
Copy (method)
Copies the cells of a range to the clipboard.
Syntax:
Copy
Parameters:
none
Return type:
none
Cut (method)
Cuts the cells of a range to the clipboard.
Syntax:
Cut
Parameters:
none
Return type:
none
Paste (method)
Pastes the content of the clipboard to the range. If the range consists of more than one cell, the content of the clipboard
will be cut or extended so that it exactly matches the range.
Syntax:
Paste
Parameters:
none
Return type:
none
Insert (method)
Inserts an empty cell area sized equally to the cell range defined by the Range object.
PlanMaker behaves in this case as if a cell range was selected and then the command Table > Insert cells was invoked.
Syntax:
Insert [Shift]
Parameters:
Shift (optional; type: Long or PmInsertShiftDirection): Indicates into which direction the existing cells will be
moved. The possible values are:
pmShiftDown = 0 ' Downwards
pmShiftToRight = 1 ' To the right
If this parameter is omitted, the value pmShiftDown is taken.
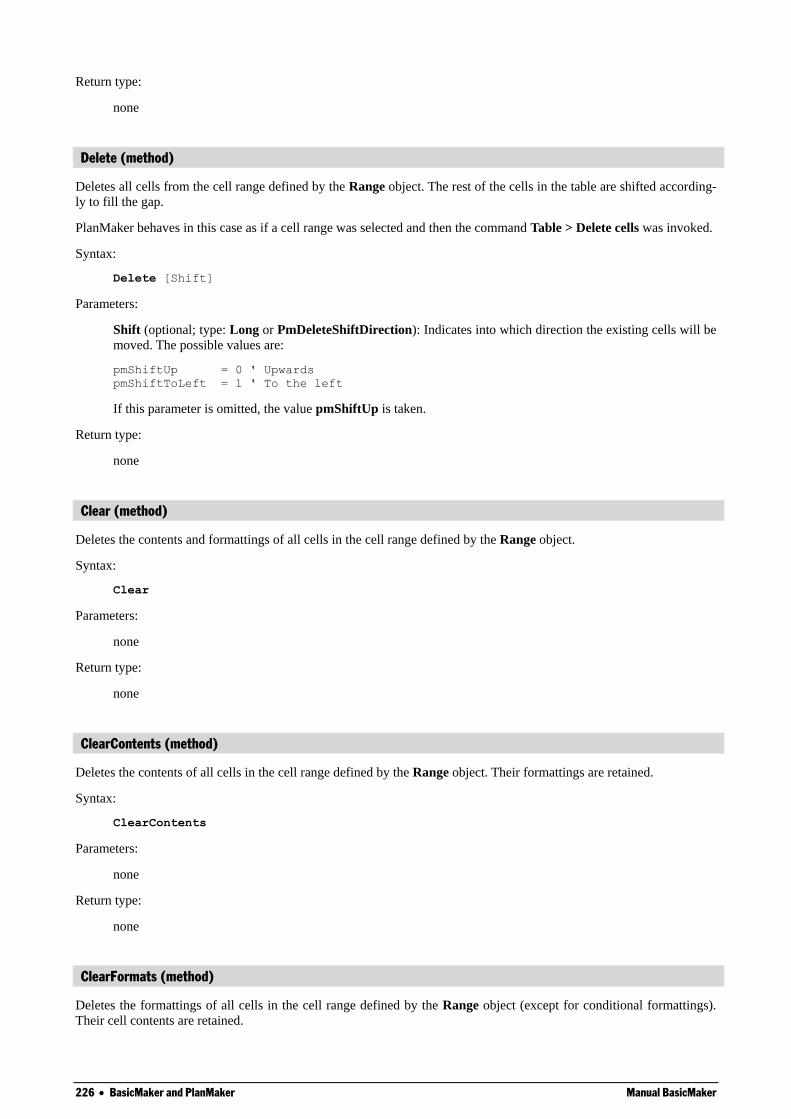
226 BasicMaker and PlanMaker Manual BasicMaker
Return type:
none
Delete (method)
Deletes all cells from the cell range defined by the Range object. The rest of the cells in the table are shifted according-
ly to fill the gap.
PlanMaker behaves in this case as if a cell range was selected and then the command Table > Delete cells was invoked.
Syntax:
Delete [Shift]
Parameters:
Shift (optional; type: Long or PmDeleteShiftDirection): Indicates into which direction the existing cells will be
moved. The possible values are:
pmShiftUp = 0 ' Upwards
pmShiftToLeft = 1 ' To the left
If this parameter is omitted, the value pmShiftUp is taken.
Return type:
none
Clear (method)
Deletes the contents and formattings of all cells in the cell range defined by the Range object.
Syntax:
Clear
Parameters:
none
Return type:
none
ClearContents (method)
Deletes the contents of all cells in the cell range defined by the Range object. Their formattings are retained.
Syntax:
ClearContents
Parameters:
none
Return type:
none
ClearFormats (method)
Deletes the formattings of all cells in the cell range defined by the Range object (except for conditional formattings).
Their cell contents are retained.

Manual BasicMaker BasicMaker and PlanMaker 227
Syntax:
ClearFormats
Parameters:
none
Return type:
none
ClearConditionalFormatting (method)
Deletes the conditional formattings of all cells in the cell range defined by the Range object. Their cell contents are
retained.
Syntax:
ClearConditionalFormatting
Parameters:
none
Return type:
none
ClearComments (method)
Deletes all comments in the cell range defined by the Range object.
Syntax:
ClearComments
Parameters:
none
Return type:
none
ClearInputValidation (method)
Removes all input validation settings in the cell range defined by the Range object.
Syntax:
ClearInputValidation
Parameters:
none
Return type:
none
AutoFilter (method)
Activates, deactivates, or configures an AutoFilter for the range.
Syntax:
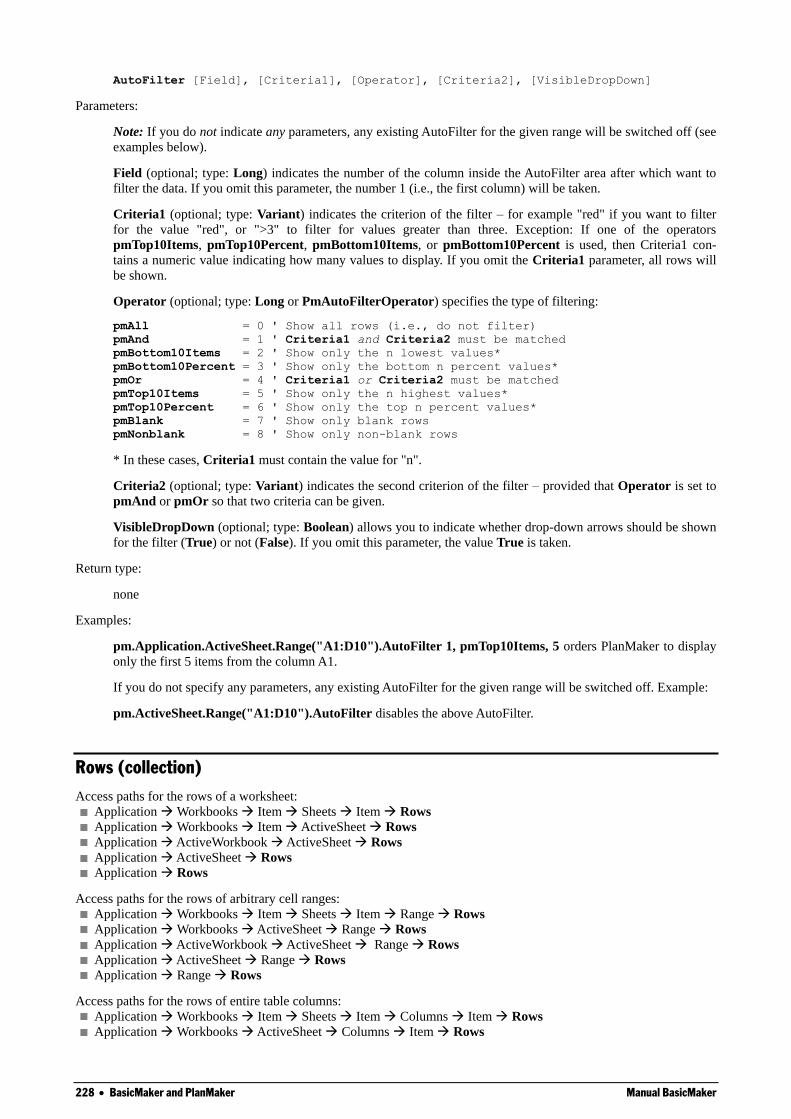
228 BasicMaker and PlanMaker Manual BasicMaker
AutoFilter [Field], [Criteria1], [Operator], [Criteria2], [VisibleDropDown]
Parameters:
Note: If you do not indicate any parameters, any existing AutoFilter for the given range will be switched off (see
examples below).
Field (optional; type: Long) indicates the number of the column inside the AutoFilter area after which want to
filter the data. If you omit this parameter, the number 1 (i.e., the first column) will be taken.
Criteria1 (optional; type: Variant) indicates the criterion of the filter – for example "red" if you want to filter
for the value "red", or ">3" to filter for values greater than three. Exception: If one of the operators
pmTop10Items, pmTop10Percent, pmBottom10Items, or pmBottom10Percent is used, then Criteria1 con-
tains a numeric value indicating how many values to display. If you omit the Criteria1 parameter, all rows will
be shown.
Operator (optional; type: Long or PmAutoFilterOperator) specifies the type of filtering:
pmAll = 0 ' Show all rows (i.e., do not filter)
pmAnd = 1 ' Criteria1 and Criteria2 must be matched
pmBottom10Items = 2 ' Show only the n lowest values*
pmBottom10Percent = 3 ' Show only the bottom n percent values*
pmOr = 4 ' Criteria1 or Criteria2 must be matched
pmTop10Items = 5 ' Show only the n highest values*
pmTop10Percent = 6 ' Show only the top n percent values*
pmBlank = 7 ' Show only blank rows
pmNonblank = 8 ' Show only non-blank rows
* In these cases, Criteria1 must contain the value for "n".
Criteria2 (optional; type: Variant) indicates the second criterion of the filter – provided that Operator is set to
pmAnd or pmOr so that two criteria can be given.
VisibleDropDown (optional; type: Boolean) allows you to indicate whether drop-down arrows should be shown
for the filter (True) or not (False). If you omit this parameter, the value True is taken.
Return type:
none
Examples:
pm.Application.ActiveSheet.Range("A1:D10").AutoFilter 1, pmTop10Items, 5 orders PlanMaker to display
only the first 5 items from the column A1.
If you do not specify any parameters, any existing AutoFilter for the given range will be switched off. Example:
pm.ActiveSheet.Range("A1:D10").AutoFilter disables the above AutoFilter.
Rows (collection)
Access paths for the rows of a worksheet:
Application Workbooks Item Sheets Item Rows
Application Workbooks Item ActiveSheet Rows
Application ActiveWorkbook ActiveSheet Rows
Application ActiveSheet Rows
Application Rows
Access paths for the rows of arbitrary cell ranges:
Application Workbooks Item Sheets Item Range Rows
Application Workbooks ActiveSheet Range Rows
Application ActiveWorkbook ActiveSheet Range Rows
Application ActiveSheet Range Rows
Application Range Rows
Access paths for the rows of entire table columns:
Application Workbooks Item Sheets Item Columns Item Rows
Application Workbooks ActiveSheet Columns Item Rows
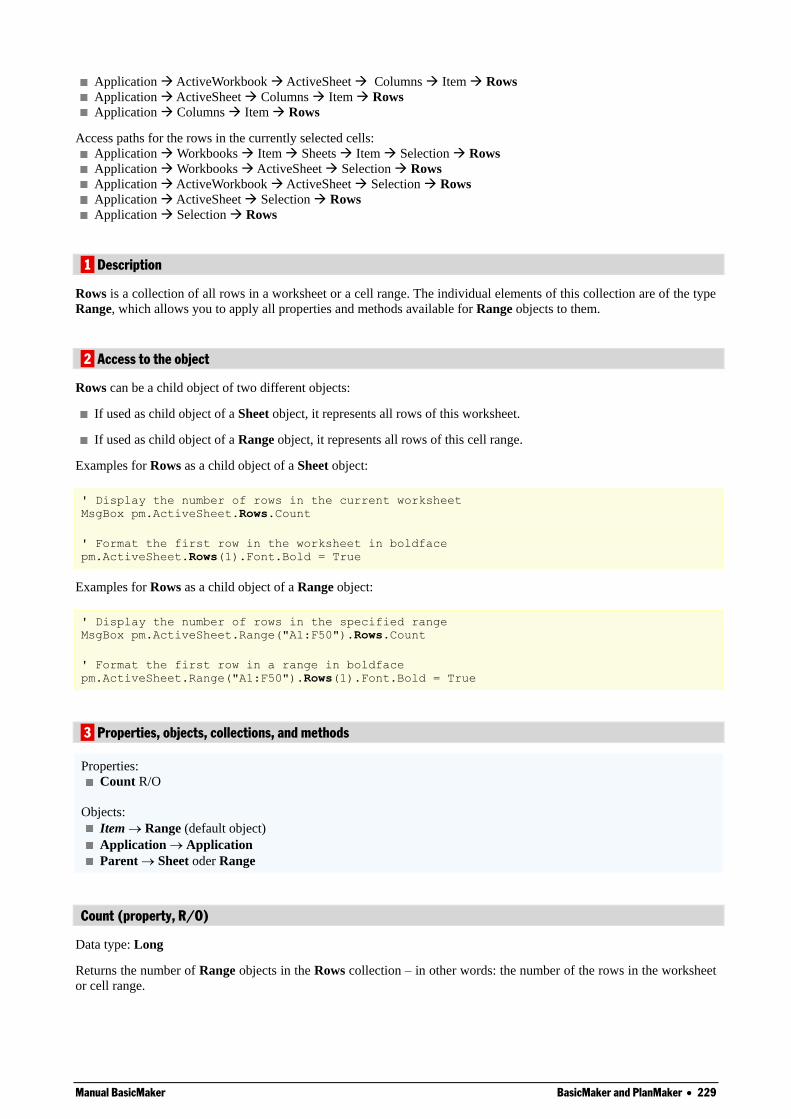
Manual BasicMaker BasicMaker and PlanMaker 229
Application ActiveWorkbook ActiveSheet Columns Item Rows
Application ActiveSheet Columns Item Rows
Application Columns Item Rows
Access paths for the rows in the currently selected cells:
Application Workbooks Item Sheets Item Selection Rows
Application Workbooks ActiveSheet Selection Rows
Application ActiveWorkbook ActiveSheet Selection Rows
Application ActiveSheet Selection Rows
Application Selection Rows
1 Description
Rows is a collection of all rows in a worksheet or a cell range. The individual elements of this collection are of the type
Range, which allows you to apply all properties and methods available for Range objects to them.
2 Access to the object
Rows can be a child object of two different objects:
If used as child object of a Sheet object, it represents all rows of this worksheet.
If used as child object of a Range object, it represents all rows of this cell range.
Examples for Rows as a child object of a Sheet object:
' Display the number of rows in the current worksheet
MsgBox pm.ActiveSheet.Rows.Count
' Format the first row in the worksheet in boldface
pm.ActiveSheet.Rows(1).Font.Bold = True
Examples for Rows as a child object of a Range object:
' Display the number of rows in the specified range
MsgBox pm.ActiveSheet.Range("A1:F50").Rows.Count
' Format the first row in a range in boldface
pm.ActiveSheet.Range("A1:F50").Rows(1).Font.Bold = True
3 Properties, objects, collections, and methods
Properties:
Count R/O
Objects:
Item Range (default object)
Application Application
Parent Sheet oder Range
Count (property, R/O)
Data type: Long
Returns the number of Range objects in the Rows collection – in other words: the number of the rows in the worksheet
or cell range.
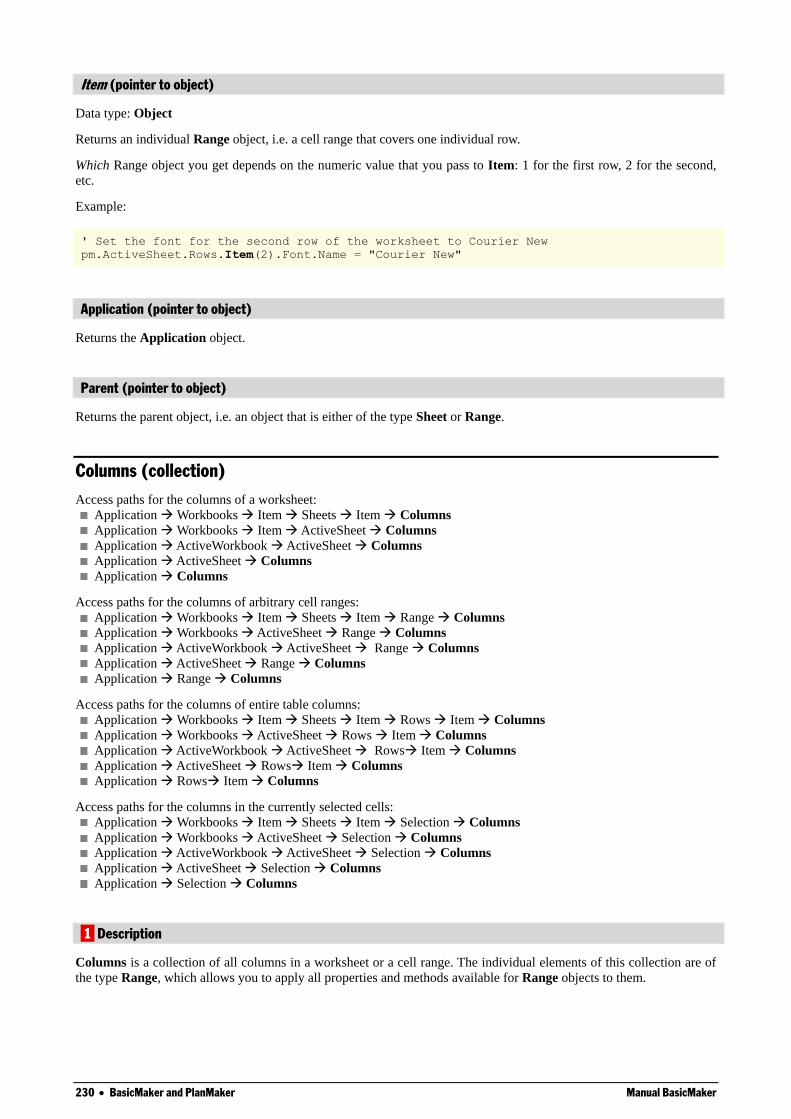
230 BasicMaker and PlanMaker Manual BasicMaker
Item (pointer to object)
Data type: Object
Returns an individual Range object, i.e. a cell range that covers one individual row.
Which Range object you get depends on the numeric value that you pass to Item: 1 for the first row, 2 for the second,
etc.
Example:
' Set the font for the second row of the worksheet to Courier New
pm.ActiveSheet.Rows.Item(2).Font.Name = "Courier New"
Application (pointer to object)
Returns the Application object.
Parent (pointer to object)
Returns the parent object, i.e. an object that is either of the type Sheet or Range.
Columns (collection)
Access paths for the columns of a worksheet:
Application Workbooks Item Sheets Item Columns
Application Workbooks Item ActiveSheet Columns
Application ActiveWorkbook ActiveSheet Columns
Application ActiveSheet Columns
Application Columns
Access paths for the columns of arbitrary cell ranges:
Application Workbooks Item Sheets Item Range Columns
Application Workbooks ActiveSheet Range Columns
Application ActiveWorkbook ActiveSheet Range Columns
Application ActiveSheet Range Columns
Application Range Columns
Access paths for the columns of entire table columns:
Application Workbooks Item Sheets Item Rows Item Columns
Application Workbooks ActiveSheet Rows Item Columns
Application ActiveWorkbook ActiveSheet Rows Item Columns
Application ActiveSheet Rows Item Columns
Application Rows Item Columns
Access paths for the columns in the currently selected cells:
Application Workbooks Item Sheets Item Selection Columns
Application Workbooks ActiveSheet Selection Columns
Application ActiveWorkbook ActiveSheet Selection Columns
Application ActiveSheet Selection Columns
Application Selection Columns
1 Description
Columns is a collection of all columns in a worksheet or a cell range. The individual elements of this collection are of
the type Range, which allows you to apply all properties and methods available for Range objects to them.
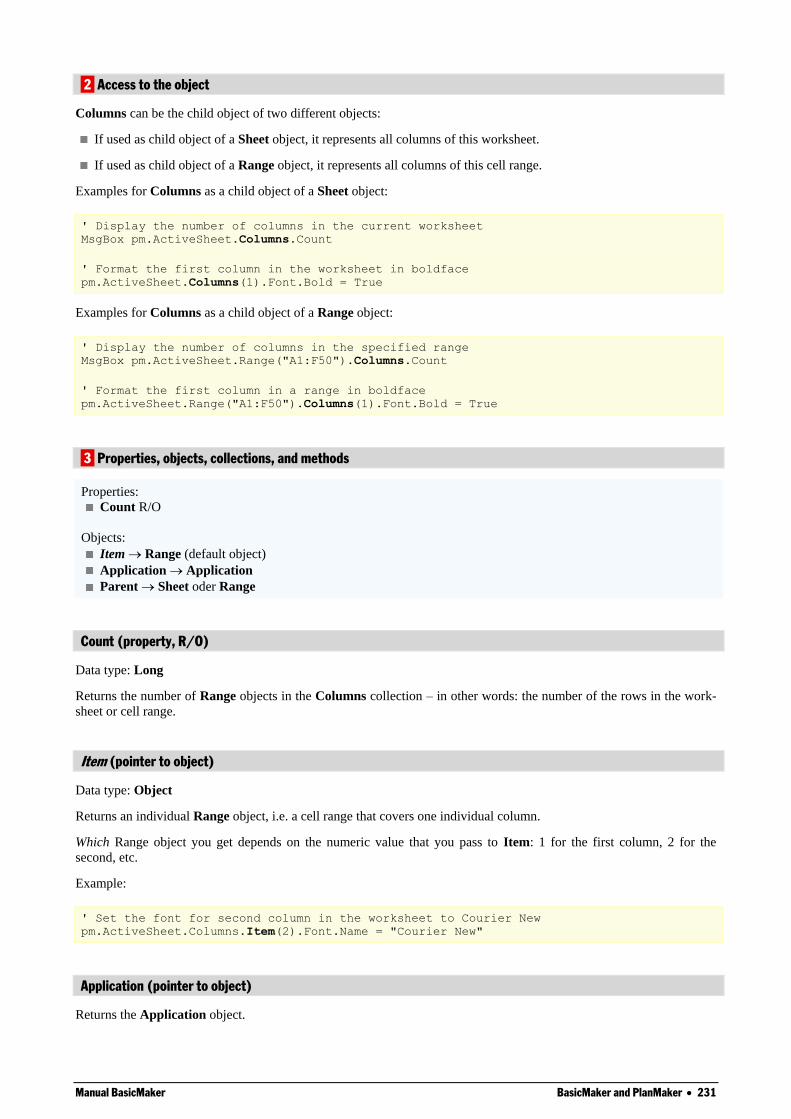
Manual BasicMaker BasicMaker and PlanMaker 231
2 Access to the object
Columns can be the child object of two different objects:
If used as child object of a Sheet object, it represents all columns of this worksheet.
If used as child object of a Range object, it represents all columns of this cell range.
Examples for Columns as a child object of a Sheet object:
' Display the number of columns in the current worksheet
MsgBox pm.ActiveSheet.Columns.Count
' Format the first column in the worksheet in boldface
pm.ActiveSheet.Columns(1).Font.Bold = True
Examples for Columns as a child object of a Range object:
' Display the number of columns in the specified range
MsgBox pm.ActiveSheet.Range("A1:F50").Columns.Count
' Format the first column in a range in boldface
pm.ActiveSheet.Range("A1:F50").Columns(1).Font.Bold = True
3 Properties, objects, collections, and methods
Properties:
Count R/O
Objects:
Item Range (default object)
Application Application
Parent Sheet oder Range
Count (property, R/O)
Data type: Long
Returns the number of Range objects in the Columns collection – in other words: the number of the rows in the work-
sheet or cell range.
Item (pointer to object)
Data type: Object
Returns an individual Range object, i.e. a cell range that covers one individual column.
Which Range object you get depends on the numeric value that you pass to Item: 1 for the first column, 2 for the
second, etc.
Example:
' Set the font for second column in the worksheet to Courier New
pm.ActiveSheet.Columns.Item(2).Font.Name = "Courier New"
Application (pointer to object)
Returns the Application object.
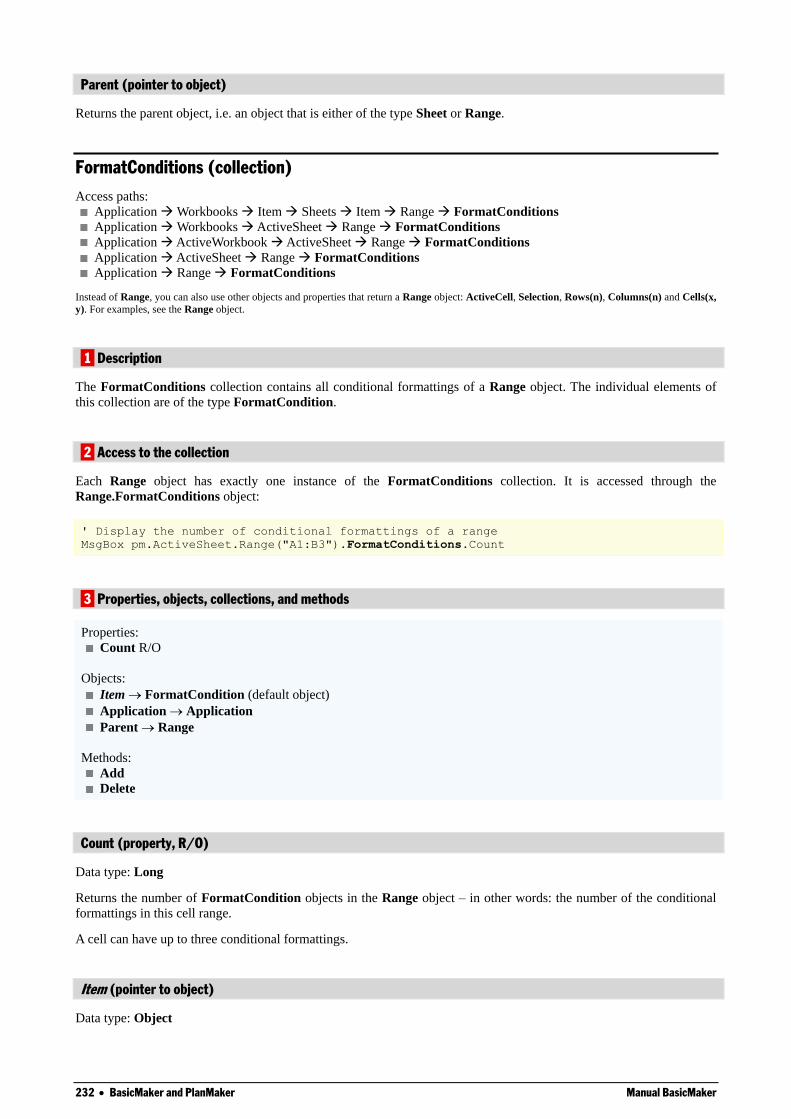
232 BasicMaker and PlanMaker Manual BasicMaker
Parent (pointer to object)
Returns the parent object, i.e. an object that is either of the type Sheet or Range.
FormatConditions (collection)
Access paths:
Application Workbooks Item Sheets Item Range FormatConditions
Application Workbooks ActiveSheet Range FormatConditions
Application ActiveWorkbook ActiveSheet Range FormatConditions
Application ActiveSheet Range FormatConditions
Application Range FormatConditions
Instead of Range, you can also use other objects and properties that return a Range object: ActiveCell, Selection, Rows(n), Columns(n) and Cells(x,
y). For examples, see the Range object.
1 Description
The FormatConditions collection contains all conditional formattings of a Range object. The individual elements of
this collection are of the type FormatCondition.
2 Access to the collection
Each Range object has exactly one instance of the FormatConditions collection. It is accessed through the
Range.FormatConditions object:
' Display the number of conditional formattings of a range
MsgBox pm.ActiveSheet.Range("A1:B3").FormatConditions.Count
3 Properties, objects, collections, and methods
Properties:
Count R/O
Objects:
Item FormatCondition (default object)
Application Application
Parent Range
Methods:
Add
Delete
Count (property, R/O)
Data type: Long
Returns the number of FormatCondition objects in the Range object – in other words: the number of the conditional
formattings in this cell range.
A cell can have up to three conditional formattings.
Item (pointer to object)
Data type: Object
Manual BasicMaker BasicMaker and PlanMaker 233
Returns one individual FormatCondition object, i.e. one individual conditional formatting.
Which FormatCondition object you get depends on the numeric value that you pass to Item: 1 for the first conditional
formatting of the range, 2 for the second, etc.
Example:
' Show the formula for the second conditional formatting in the cell A1
MsgBox pm.ActiveSheet.Range("A1").FormatConditions.Item(2).Formula1
Application (pointer to object)
Returns the Application object.
Parent (pointer to object)
Returns the parent object, i.e. Range.
Add (method)
Adds a new conditional formatting.
Syntax:
Add Type, [Operator], [Formula1], [Formula2]
Parameters:
Type (type: Long or PmFormatConditionType) defines the type of the conditional formatting. The possible
values are:
pmCellValue = 0 ' Check against a cell value
pmExpression = 1 ' Check against a formula
Operator (optional; type: Long or PmFormatConditionOperator) defines the relational operator for the
conditional formatting. The possible values are:
pmBetween = 0 ' is between
pmNotBetween = 1 ' is not between
pmEqual = 2 ' is equal to
pmNotEqual = 3 ' is not equal to
pmGreater = 4 ' is greater than
pmLess = 5 ' is less than
pmGreaterEqual = 6 ' is greater than or equal to
pmLessEqual = 7 ' is less than or equal to
Formula1 (optional; type: Variant) is either a numeric value, a string containing a number, a reference to a cell,
or a formula. For pmBetween and pmNotBetween it specifies the minimum, for all other operators the value.
Formula2 (optional; type: Variant) is either a numeric value, a string containing a number, a reference to a cell,
or a formula. It indicates the maximum. Has to be specified only if pmBetween or pmNotBetween is used.
Return type:
Object (a FormatCondition object that represents the new conditional formatting)
Summary of all parameter combinations possible:
Type Operator Formula1 Formula2
pmCellValue All listed above A) The value to be checked
against or
B) The minimum (when
The maximum (only
applicable when
pmBetween or pmNotBe-
tween is used)
234 BasicMaker and PlanMaker Manual BasicMaker
pmBetween or pmNotBe-
tween is used)
pmExpression (n/a) An expression that returns
True if the condition is
matched, otherwise returns
False
(n/a)
Example:
' Add a conditional formatting (values from 1 to 50) to cell A1
Dim newCondition as Object
Set newCondition = pm.ActiveSheet.Range("A1").FormatConditions.Add(pmCellValue,
pmBetween, 1, 50)
' Set the conditional formatting to change the font color to red
newCondition.Font.Color = smoColorRed
Delete (method)
Removes all conditional formattings from the cell range.
Syntax:
Delete
Parameters:
none
Return type:
none
Example:
' Remove all conditional formattings from the cells A1 and A2
pm.Application.ActiveSheet.Range("A1:A2").FormatConditions.Delete
FormatCondition (object)
Access paths:
Application Workbooks Item Sheets Item Range FormatConditions Item
Application Workbooks ActiveSheet Range FormatConditions Item
Application ActiveWorkbook ActiveSheet Range FormatConditions Item
Application ActiveSheet Range FormatConditions Item
Application ActiveSheet Range FormatConditions Item
Instead of Range, you can also use other objects and properties that return a Range object: ActiveCell, Selection, Rows(n), Columns(n) and Cells(x,
y). For examples, see the Range object.
1 Description
A FormatCondition object represents one individual conditional formatting.
If you add conditional formattings to a cell range or delete them, the respective FormatCondition objects will be
created or deleted dynamically.
2 Access to the object
The individual FormatCondition objects can be accessed solely through enumerating the elements of the correspond-
ing FormatConditions collection.
Manual BasicMaker BasicMaker and PlanMaker 235
For each range there is exactly one instance of the FormatConditions collection. It is accessed through the
Range.FormatConditions object:
' Show the formula of the second conditional formatting for the cell A1
MsgBox pm.ActiveSheet.Range("A1").FormatConditions.Item(2).Formula1
3 Properties, objects, collections, and methods
Type R/O
Operator R/O
Formula1 R/O
Formula2 R/O
Objects:
Font Font
Shading Shading
Application Application
Parent FormatConditions
Collections:
Borders Borders
Methods:
Modify
Delete
Type (property, R/O)
Data type: Long (PmFormatConditionType)
Returns the type of the conditional formatting. The possible values are:
pmCellValue = 0 ' Check against a cell value
pmExpression = 1 ' Check against a formula
Operator (property, R/O)
Data type: Long (PmFormatConditionOperator)
Returns the relational operator for the conditional formatting. The possible values are:
pmBetween = 0 ' is between
pmNotBetween = 1 ' is not between
pmEqual = 2 ' is equal to
pmNotEqual = 3 ' is not equal to
pmGreater = 4 ' is greater than
pmLess = 5 ' is less than
pmGreaterEqual = 6 ' is greater than or equal to
pmLessEqual = 7 ' is less than or equal to
Formula1 (property, R/O)
Data type: String
If the type is pmCellValue and the operator is pmBetween or pmNotBetween, returns the minimum to test against.
If the type is pmCellValue and the operator is different from pmBetween or pmNotBetween, returns the value to test
against.
236 BasicMaker and PlanMaker Manual BasicMaker
If the type is pmExpression, returns the calculation formula to test against.
Formula2 (property, R/O)
Data type: String
If the type is pmCellValue and the operator is pmBetween or pmNotBetween, returns the maximum to test against.
Font (pointer to object)
Data type: Object
Returns the Font object that you can use to access the character formatting that is to be changed by a conditional for-
matting.
Hint: Those character formattings that are not explicitly set by the conditional formatting will be returned as "unde-
fined" (i.e., smoUndefined or an empty string). The reason is that conditional formattings are always additive: For
example, you can hard-format cells in the font "Arial 10" and then use the conditional formatting only to add the font
color "Red" – in this case only the font color will be changed by FormatCondition.Font.
Shading (pointer to object)
Data type: Object
Returns the Shading object that you can use to access the shading that is to be changed by the conditional formatting.
Please pay attention to the hint on undefined formattings at the Font object pointer (see above).
Application (pointer to object)
Data type: Object
Returns the Application object.
Parent (pointer to object)
Data type: Object
Returns the parent object, i.e. an object of the type FormatConditions.
Borders (pointer to collection)
Data type: Object
Returns the Borders collection which represents one of the four border lines that is to be changed by a conditional
formatting. You can use these objects to get or change the line settings (thickness, color, etc.).
Please pay attention to the hint on undefined formattings at the Font object pointer (see above).
Modify (method)
Modifies an existing conditional formatting.
Syntax:
Modify Type, [Operator], [Formula1], [Formula2]
Parameters:
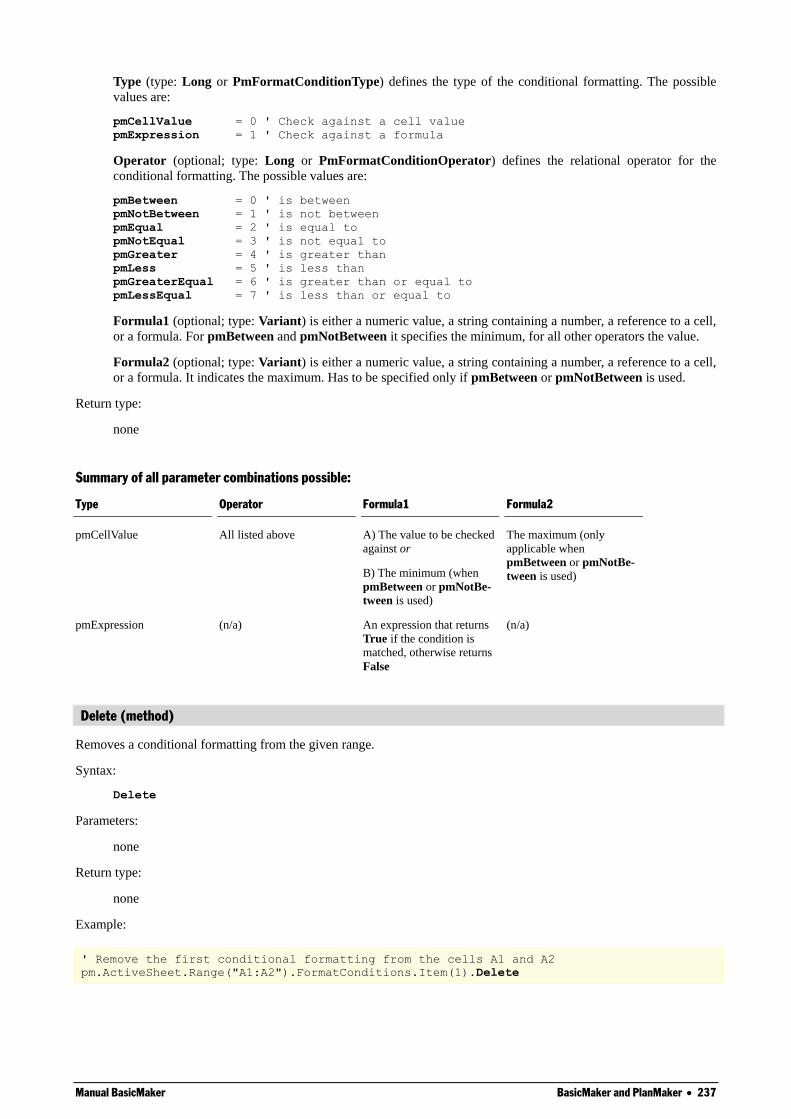
Manual BasicMaker BasicMaker and PlanMaker 237
Type (type: Long or PmFormatConditionType) defines the type of the conditional formatting. The possible
values are:
pmCellValue = 0 ' Check against a cell value
pmExpression = 1 ' Check against a formula
Operator (optional; type: Long or PmFormatConditionOperator) defines the relational operator for the
conditional formatting. The possible values are:
pmBetween = 0 ' is between
pmNotBetween = 1 ' is not between
pmEqual = 2 ' is equal to
pmNotEqual = 3 ' is not equal to
pmGreater = 4 ' is greater than
pmLess = 5 ' is less than
pmGreaterEqual = 6 ' is greater than or equal to
pmLessEqual = 7 ' is less than or equal to
Formula1 (optional; type: Variant) is either a numeric value, a string containing a number, a reference to a cell,
or a formula. For pmBetween and pmNotBetween it specifies the minimum, for all other operators the value.
Formula2 (optional; type: Variant) is either a numeric value, a string containing a number, a reference to a cell,
or a formula. It indicates the maximum. Has to be specified only if pmBetween or pmNotBetween is used.
Return type:
none
Summary of all parameter combinations possible:
Type Operator Formula1 Formula2
pmCellValue All listed above A) The value to be checked
against or
B) The minimum (when
pmBetween or pmNotBe-
tween is used)
The maximum (only
applicable when
pmBetween or pmNotBe-
tween is used)
pmExpression (n/a) An expression that returns
True if the condition is
matched, otherwise returns
False
(n/a)
Delete (method)
Removes a conditional formatting from the given range.
Syntax:
Delete
Parameters:
none
Return type:
none
Example:
' Remove the first conditional formatting from the cells A1 and A2
pm.ActiveSheet.Range("A1:A2").FormatConditions.Item(1).Delete

238 BasicMaker and PlanMaker Manual BasicMaker
NumberFormatting (object)
Access paths:
Application Workbooks Item Sheets Item Range NumberFormatting
Application Workbooks ActiveSheet Range NumberFormatting
Application ActiveWorkbook ActiveSheet Range NumberFormatting
Application ActiveSheet Range NumberFormatting
Instead of Range, you can also use other objects and properties that return a Range object: ActiveCell, Selection, Rows(n), Columns(n) and Cells(x,
y). For examples, see the Range object.
1 Description
You can use the NumberFormatting object to get and set the number format of a cell range (corresponds to the options
of the PlanMaker command Format > Cells > Number Format).
2 Access to the object
NumberFormatting is a child object of the Range object – for each Range object there is exactly one NumberFor-
matting object.
3 Properties, objects, collections, and methods
Properties:
Type (default property)
DateFormat
CustomFormat
Currency
Accounting
Digits
NegativeRed
SuppressMinus
SuppressZeros
ThousandsSeparator
Objects:
Application Application
Parent Range
Type (property)
Data type: Long (PmNumberFormatting)
Gets or sets the number format for the cells in the cell range. The possible values are:
pmNumberGeneral = 0 ' Standard
pmNumberDecimal = 1 ' Number
pmNumberScientific = 2 ' Scientific
pmNumberFraction = 3 ' Fraction (see also Digits property)
pmNumberDate = 4 ' Date/Time (see note)
pmNumberPercentage = 5 ' Percentage
pmNumberCurrency = 6 ' Currency (see note)
pmNumberBoolean = 7 ' Boolean
pmNumberCustom = 8 ' Custom (see note)
pmNumberText = 9 ' Text
pmNumberAccounting = 10 ' Accounting (see note)
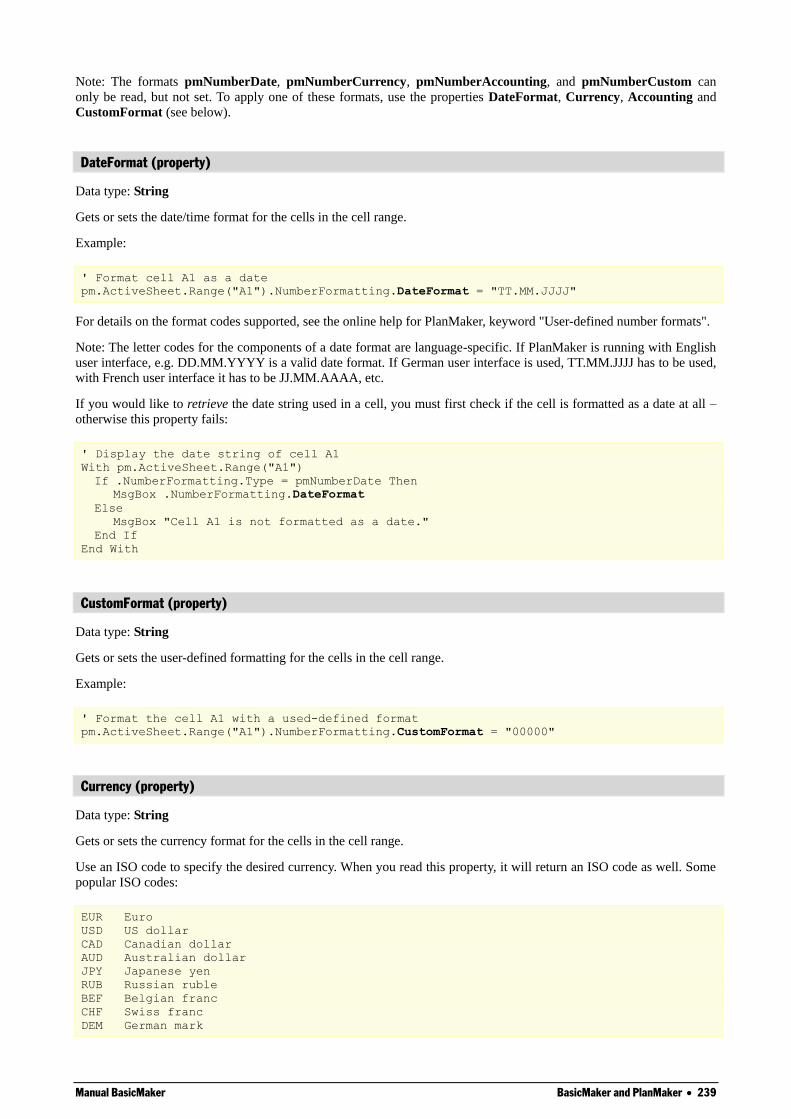
Manual BasicMaker BasicMaker and PlanMaker 239
Note: The formats pmNumberDate, pmNumberCurrency, pmNumberAccounting, and pmNumberCustom can
only be read, but not set. To apply one of these formats, use the properties DateFormat, Currency, Accounting and
CustomFormat (see below).
DateFormat (property)
Data type: String
Gets or sets the date/time format for the cells in the cell range.
Example:
' Format cell A1 as a date
pm.ActiveSheet.Range("A1").NumberFormatting.DateFormat = "TT.MM.JJJJ"
For details on the format codes supported, see the online help for PlanMaker, keyword "User-defined number formats".
Note: The letter codes for the components of a date format are language-specific. If PlanMaker is running with English
user interface, e.g. DD.MM.YYYY is a valid date format. If German user interface is used, TT.MM.JJJJ has to be used,
with French user interface it has to be JJ.MM.AAAA, etc.
If you would like to retrieve the date string used in a cell, you must first check if the cell is formatted as a date at all –
otherwise this property fails:
' Display the date string of cell A1
With pm.ActiveSheet.Range("A1")
If .NumberFormatting.Type = pmNumberDate Then
MsgBox .NumberFormatting.DateFormat
Else
MsgBox "Cell A1 is not formatted as a date."
End If
End With
CustomFormat (property)
Data type: String
Gets or sets the user-defined formatting for the cells in the cell range.
Example:
' Format the cell A1 with a used-defined format
pm.ActiveSheet.Range("A1").NumberFormatting.CustomFormat = "00000"
Currency (property)
Data type: String
Gets or sets the currency format for the cells in the cell range.
Use an ISO code to specify the desired currency. When you read this property, it will return an ISO code as well. Some
popular ISO codes:
EUR Euro
USD US dollar
CAD Canadian dollar
AUD Australian dollar
JPY Japanese yen
RUB Russian ruble
BEF Belgian franc
CHF Swiss franc
DEM German mark
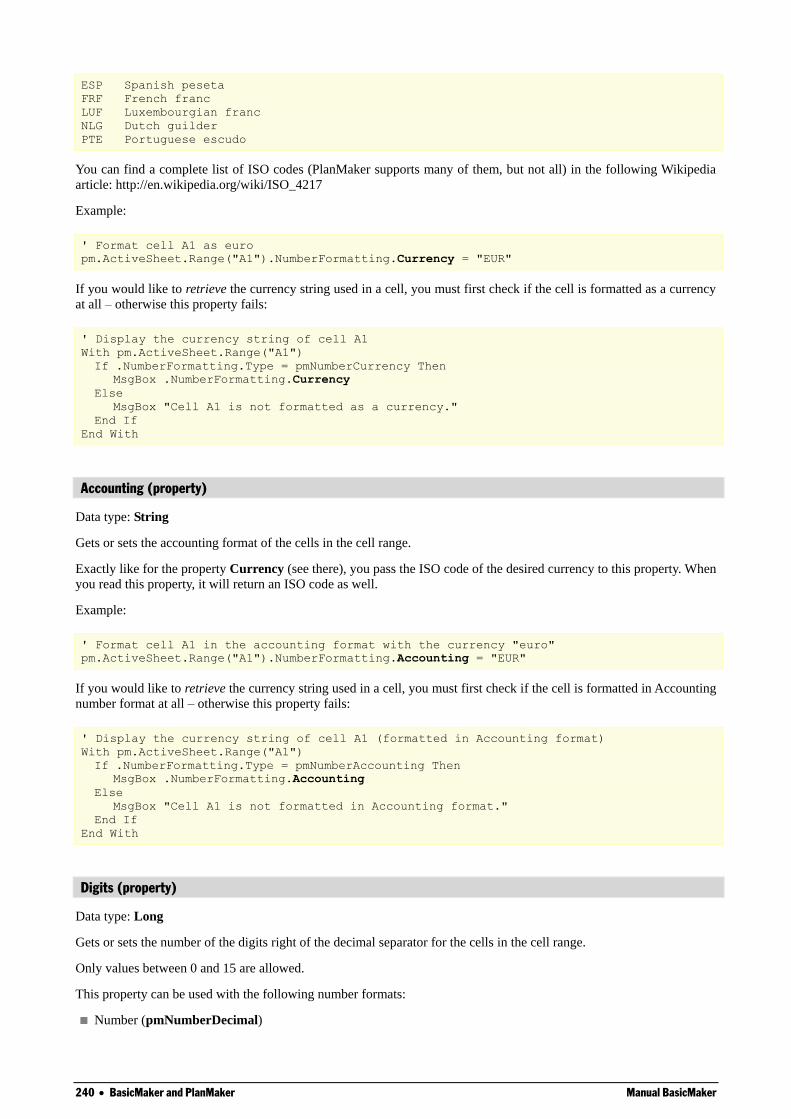
240 BasicMaker and PlanMaker Manual BasicMaker
ESP Spanish peseta
FRF French franc
LUF Luxembourgian franc
NLG Dutch guilder
PTE Portuguese escudo
You can find a complete list of ISO codes (PlanMaker supports many of them, but not all) in the following Wikipedia
article: http://en.wikipedia.org/wiki/ISO_4217
Example:
' Format cell A1 as euro
pm.ActiveSheet.Range("A1").NumberFormatting.Currency = "EUR"
If you would like to retrieve the currency string used in a cell, you must first check if the cell is formatted as a currency
at all – otherwise this property fails:
' Display the currency string of cell A1
With pm.ActiveSheet.Range("A1")
If .NumberFormatting.Type = pmNumberCurrency Then
MsgBox .NumberFormatting.Currency
Else
MsgBox "Cell A1 is not formatted as a currency."
End If
End With
Accounting (property)
Data type: String
Gets or sets the accounting format of the cells in the cell range.
Exactly like for the property Currency (see there), you pass the ISO code of the desired currency to this property. When
you read this property, it will return an ISO code as well.
Example:
' Format cell A1 in the accounting format with the currency "euro"
pm.ActiveSheet.Range("A1").NumberFormatting.Accounting = "EUR"
If you would like to retrieve the currency string used in a cell, you must first check if the cell is formatted in Accounting
number format at all – otherwise this property fails:
' Display the currency string of cell A1 (formatted in Accounting format)
With pm.ActiveSheet.Range("A1")
If .NumberFormatting.Type = pmNumberAccounting Then
MsgBox .NumberFormatting.Accounting
Else
MsgBox "Cell A1 is not formatted in Accounting format."
End If
End With
Digits (property)
Data type: Long
Gets or sets the number of the digits right of the decimal separator for the cells in the cell range.
Only values between 0 and 15 are allowed.
This property can be used with the following number formats:
Number (pmNumberDecimal)

Manual BasicMaker BasicMaker and PlanMaker 241
Scientific (pmNumberScientific)
Percent (pmNumberPercentage)
Currency (pmNumberCurrency)
Accounting (pmNumberAccounting)
Example:
' Set cell A1 to 4 decimal places
pm.ActiveSheet.Range("A1").NumberFormatting.Digits = 4
You can also use this property with the number format "Fraction" (pmNumberFraction), but in this case it sets the
denominator of the fraction. Here, values between 0 and 1000 are allowed. Example:
' Format the cell A1 as a fraction with the denominator 8
With pm.ActiveSheet.Range("A1")
.NumberFormatting.Type = pmNumberFraction
.NumberFormatting.Digits = 8
End With
NegativeRed (property)
Data type: Boolean
Gets or sets the setting "Negative numbers in red" for the cells in the cell range, corresponding to the option with the
same name in the dialog box of the command Format > Cells.
SuppressMinus (property)
Data type: Boolean
Gets or sets the setting "Suppress minus sign", corresponding to the option with the same name in the dialog box of the
command Format > Cells.
SuppressZeros (property)
Data type: Boolean
Gets or sets the setting "Don’t show zero", corresponding to the option with the same name in the dialog box of the
command Format > Cells.
ThousandsSeparator (property)
Data type: Boolean
Gets or sets the setting "Thousands separator", corresponding to the option with the same name in the dialog box of the
command Format > Cells.
Application (pointer to object)
Returns the Application object.
Parent (pointer to object)
Returns the parent object, i.e. an object of the type Range.
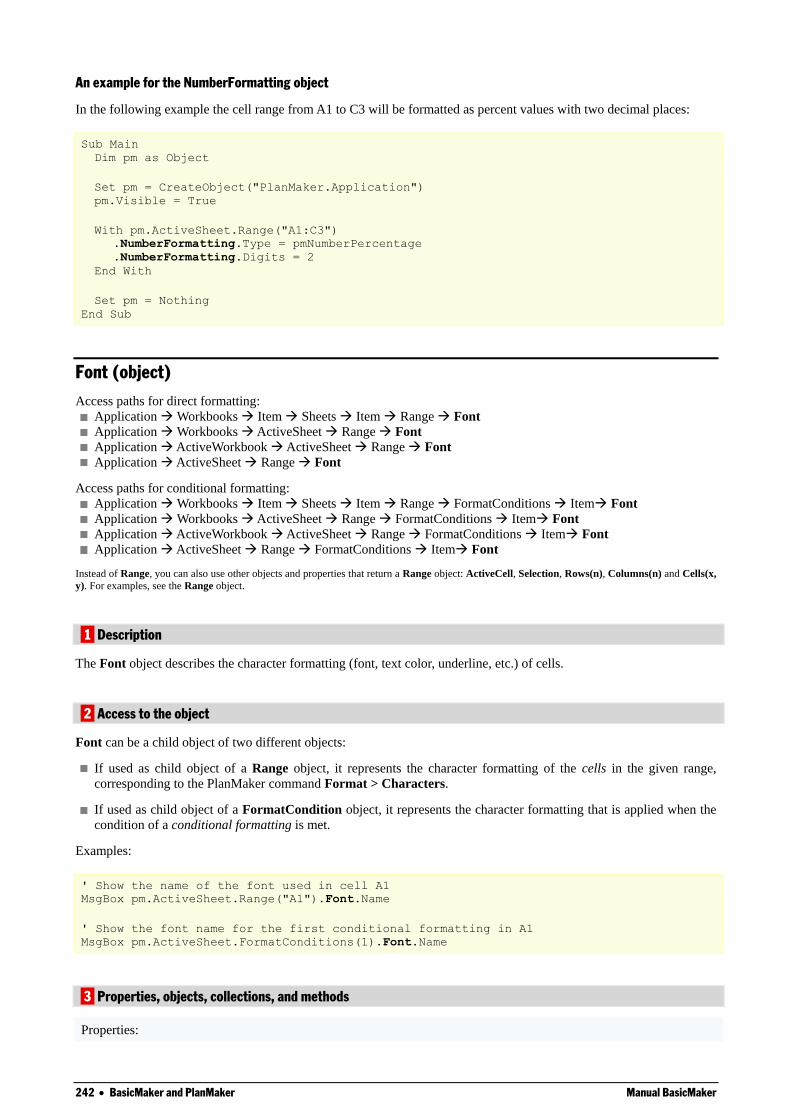
242 BasicMaker and PlanMaker Manual BasicMaker
An example for the NumberFormatting object
In the following example the cell range from A1 to C3 will be formatted as percent values with two decimal places:
Sub Main
Dim pm as Object
Set pm = CreateObject("PlanMaker.Application")
pm.Visible = True
With pm.ActiveSheet.Range("A1:C3")
.NumberFormatting.Type = pmNumberPercentage
.NumberFormatting.Digits = 2
End With
Set pm = Nothing
End Sub
Font (object)
Access paths for direct formatting:
Application Workbooks Item Sheets Item Range Font
Application Workbooks ActiveSheet Range Font
Application ActiveWorkbook ActiveSheet Range Font
Application ActiveSheet Range Font
Access paths for conditional formatting:
Application Workbooks Item Sheets Item Range FormatConditions Item Font
Application Workbooks ActiveSheet Range FormatConditions Item Font
Application ActiveWorkbook ActiveSheet Range FormatConditions Item Font
Application ActiveSheet Range FormatConditions Item Font
Instead of Range, you can also use other objects and properties that return a Range object: ActiveCell, Selection, Rows(n), Columns(n) and Cells(x,
y). For examples, see the Range object.
1 Description
The Font object describes the character formatting (font, text color, underline, etc.) of cells.
2 Access to the object
Font can be a child object of two different objects:
If used as child object of a Range object, it represents the character formatting of the cells in the given range,
corresponding to the PlanMaker command Format > Characters.
If used as child object of a FormatCondition object, it represents the character formatting that is applied when the
condition of a conditional formatting is met.
Examples:
' Show the name of the font used in cell A1
MsgBox pm.ActiveSheet.Range("A1").Font.Name
' Show the font name for the first conditional formatting in A1
MsgBox pm.ActiveSheet.FormatConditions(1).Font.Name
3 Properties, objects, collections, and methods
Properties:

Manual BasicMaker BasicMaker and PlanMaker 243
Name (default property)
Size
Bold
Italic
Underline
StrikeThrough
Superscript
Subscript
AllCaps
SmallCaps
PreferredSmallCaps
Blink
Color
ColorIndex
BColor
BColorIndex
Spacing
Pitch
Objects:
Application Application
Parent Range oder FormatCondition
Name (property)
Data type: String
Gets or sets the font name (as a string).
If the cells are formatted in different typefaces, an empty string will be returned.
Size (property)
Data type: Single
Gets or sets the font size in points (pt).
If the cells are formatted in different font sizes, the constant smoUndefined (9.999.999) will be returned.
Example:
' Set the font size of the currently selected cells to 10.3 pt
pm.ActiveSheet.Selection.Font.Size = 10.3
Bold (property)
Data type: Long
Gets or sets the character formatting "Boldface":
True: Boldface on
False: Boldface off
smoUndefined (only when reading): The cells are partly bold and partly not.
Italic (property)
Data type: Long
244 BasicMaker and PlanMaker Manual BasicMaker
Gets or sets the character formatting "Italic":
True: Italic on
False: Italic off
smoUndefined (only when reading): The cells are partly italic and partly not.
Underline (property)
Data type: Long (PmUnderline)
Gets or sets the character formatting "Underline". The following values are allowed:
pmUnderlineNone = 0 ' off
pmUnderlineSingle = 1 ' single underline
pmUnderlineDouble = 2 ' double underline
pmUnderlineWords = 3 ' word underline
pmUnderlineWordsDouble = 4 ' double word underline
When you read this property and the cells are partly underlined and partly not, smoUndefined is returned.
StrikeThrough (property)
Data type: Long
Gets or sets the character formatting "Strike Through":
True: Strike through on
False: Strike through off
smoUndefined (only when reading): The cells are partly stroke through and partly not.
Superscript (property)
Data type: Long
Gets or sets the character formatting "Superscript":
True: Strike through on
False: Strike through off
smoUndefined (only when reading): The cells are partly superscripted and partly not.
Subscript (property)
Data type: Long
Gets or sets the character formatting "Subscript":
True: Strike through on
False: Strike through off
smoUndefined (only when reading): The cells are partly subscripted and partly not.
AllCaps (property)
Data type: Long
Manual BasicMaker BasicMaker and PlanMaker 245
Gets or sets the character formatting "All caps":
True: All caps on
False: All caps off
smoUndefined (only when reading): Some of the cells are formatted in "All caps", some not.
SmallCaps (property)
Data type: Long
Gets or sets the character formatting "Small caps":
True: Small caps on
False: Small caps off
smoUndefined (only when reading): Some of the cells are formatted in "Small caps", some not.
PreferredSmallCaps (property)
Data type: Long
Gets or sets the character formatting "Small caps", but unlike the SmallCaps property, lets you choose the scale factor.
The value 0 turns SmallCaps off, all other values represent the percental scale factor of the small capitals.
Example:
' Format the current cell in small capitals with 75% of size
pm.ActiveCell.Font.PreferredSmallCaps = 75
' Deactivate the SmallCaps formatting
pm.ActiveCell.Font.PreferredSmallCaps = 0
Blink (property)
Data type: Long
Gets or sets the character formatting "Blink" (obsolete):
True: Blink on
False: Blink off
smoUndefined (only when reading): The cells are partly blinking and partly not.
Color (property)
Data type: Long (SmoColor)
Gets or sets the foreground color of text as a "BGR" value (Blue-Green-Red triplet). You can either indicate an arbitrary
value or use one of the pre-defined BGR color constants.
If the cells are formatted in different colors, the constant smoUndefined will be returned when you read this property.
ColorIndex (property)
Data type: Long (SmoColorIndex)
246 BasicMaker and PlanMaker Manual BasicMaker
Gets or sets the foreground color of text as an index color. "Index colors" are the standard colors of PlanMaker, consec-
utively numbered from 0 for black to 15 for light gray. You can use only one of the values presented in the Color Indices
table.
If the cells are formatted in different colors or in a color that is not an index color, the constant smoUndefined will be
returned when you read this property.
Note: It is recommended to use the Color property (see above) instead of this one, since it is not limited to the standard
colors but enables you to access the entire BGR color palette.
BColor (property)
Data type: Long (SmoColor)
Gets or sets the background color of text as a "BGR" value (Blue-Green-Red triplet). You can either indicate an arbi-
trary value or use one of the pre-defined BGR color constants.
If the cells are formatted in different colors, the constant smoUndefined will be returned when you read this property.
BColorIndex (property)
Data type: Long (SmoColorIndex)
Gets or sets the background color of text as an index color. "Index colors" are the standard colors of PlanMaker, con-
secutively numbered from 0 for black to 15 for light gray. You can use only one of the values presented in the Color
Indices table.
If the cells are formatted in different colors or in a color that is not an index color, the constant smoUndefined will be
returned when you read this property.
Note: It is recommended to use the BColor property (see above) instead of this one, since it is not limited to the stand-
ard colors but enables you to access the entire BGR color palette.
Spacing (property)
Data type: Long
Gets or sets the character spacing. The standard value is 100 (normal character spacing of 100%).
If you are reading this property and the cells are formatted in different character spacings, the constant smoUndefined
will be returned.
Pitch (property)
Data type: Long
Gets or sets the character pitch. The standard value is 100 (normal character pitch of 100%).
If you are reading this property and the cells are formatted in different character pitches, the constant smoUndefined
will be returned.
Note that some printers ignore changes to the character pitch for their internal fonts.
Application (pointer to object)
Data type: Object
Returns the Application object.
Manual BasicMaker BasicMaker and PlanMaker 247
Parent (pointer to object)
Data type: Object
Returns the parent object, i.e. an object that is either of the type Range or FormatCondition.
Example for the usage of the Font object
In the following example the cells A1 to C3 will be formatted in Times New Roman, bold, 24 points.
Sub Main
Dim pm as Object
Set pm = CreateObject("PlanMaker.Application")
pm.Visible = True
With pm.ActiveSheet.Range("A1:C3")
.Font.Name = "Times New Roman"
.Font.Size = 24
.Font.Bold = True
End With
Set pm = Nothing
End Sub
Borders (collection)
Access paths for direct formatting:
Application Workbooks Item Sheets Item Range Borders
Application Workbooks ActiveSheet Range Borders
Application ActiveWorkbook ActiveSheet Range Borders
Application ActiveSheet Range Borders
Access paths for conditional formatting:
Application Workbooks Item Sheets Item Range FormatConditions Item Borders
Application Workbooks ActiveSheet Range FormatConditions Item Borders
Application ActiveWorkbook ActiveSheet Range FormatConditions Item Borders
Application ActiveSheet Range FormatConditions Item Borders
Instead of Range, you can also use other objects and properties that return a Range object: ActiveCell, Selection, Rows(n), Columns(n) and Cells(x,
y). For examples, see the Range object.
1 Description
The Borders collection represents the four border lines of cells (left, right, top, and bottom). You can use this collection
to get or change the line settings (thickness, color, etc.) of each border line.
The individual elements of the Borders collection are of the type Border.
The parameter you pass to the Borders collection is the number of the border line you want to access:
pmBorderTop = -1 ' Top border line
pmBorderLeft = -2 ' Left border line
pmBorderBottom = -3 ' Bottom border line
pmBorderRight = -4 ' Right border line
pmBorderHorizontal = -5 ' Horizontal grid lines
pmBorderVertical = -6 ' Vertical grid lines
Example:
' Set the color of the left line of cell A1 to red
pm.ActiveSheet.Range("A1").Borders(pmBorderLeft).Color = smoColorRed

248 BasicMaker and PlanMaker Manual BasicMaker
2 Access to the object
Borders can be a child object of two different objects:
If used as child object of a Range object, it represents the border lines of the cells in the given range, corresponding
to the PlanMaker command Format > Borders.
If used as child object of a FormatCondition object, it represents the border lines that are applied when the condi-
tion of a conditional formatting is met.
Examples:
' Draw a bottom border for the cell A1
pm.ActiveSheet.Range("A1").Borders(pmBorderBottom).Type = pmLineStyleSingle
' Show the left border for the first conditional formatting in the cell A1
MsgBox pm.ActiveSheet.Range("A1").FormatConditions(1).Borders(pmBorderLeft).Type
3 Properties, objects, collections, and methods
Properties:
Count R/O
Objects:
Item Border (default object)
Application Application
Parent Range or FormatCondition
Count (property, R/O)
Data type: Long
Returns the number of Border objects in the collection, which is always 4 (since there are exactly four different border
lines available: left, right, top, bottom).
Item (pointer to object)
Data type: Object
Returns an individual Border object that you can use to get or set the properties (thickness, color, etc.) of one individual
border line.
Which Border object you get depends on the numeric value that you pass to Item. The following table shows the admis-
sible values:
pmBorderTop = -1 ' Top border line
pmBorderLeft = -2 ' Left border line
pmBorderBottom = -3 ' Bottom border line
pmBorderRight = -4 ' Right border line
pmBorderHorizontal = -5 ' Horizontal grid lines
pmBorderVertical = -6 ' Vertical grid lines
Application (pointer to object)
Data type: Object
Returns the Application object.
Manual BasicMaker BasicMaker and PlanMaker 249
Parent (pointer to object)
Data type: Object
Returns the parent object, i.e. an object that is either of the type Range or FormatCondition.
Example for the usage of the Borders object
In the following example, a 4 point thick blue line will be applied to the left border of the cell range from B2 to D4.
Then, a thin red double line will be applied to the right border.
Sub Main
Dim pm as Object
Set pm = CreateObject("PlanMaker.Application")
pm.Visible = True
With pm.ActiveSheet.Range("B2:D4")
.Borders(pmBorderLeft).Type = pmLineStyleSingle
.Borders(pmBorderLeft).Thick1 = 4
.Borders(pmBorderLeft).Color = pmColorBlue
.Borders(pmBorderRight).Type = pmLineStyleDouble
.Borders(pmBorderRight).Thick1 = 1
.Borders(pmBorderRight).Thick2 = 1
.Borders(pmBorderRight).Color = smoColorRed
End With
Set pm = Nothing
End Sub
Border (object)
Access paths for direct formatting of cells:
Application Workbooks Item Sheets Item Range Borders Item
Application Workbooks ActiveSheet Range Borders Item
Application ActiveWorkbook ActiveSheet Range Borders Item
Application ActiveSheet Range Borders Item
Access paths for conditional formatting:
Application Workbooks Item Sheets Item Range FormatConditions Item Borders Item
Application Workbooks ActiveSheet Range FormatConditions Item Borders Item
Application ActiveWorkbook ActiveSheet Range FormatConditions Item Borders Item
Application ActiveSheet Range FormatConditions Item Borders Item
Instead of Range, you can also use other objects and properties that return a Range object: ActiveCell, Selection, Rows(n), Columns(n) and Cells(x,
y). For examples, see the Range object.
1 Description
A Border object represents one individual border line of cells – for example the left, right, top, or bottom line. You can
use this object to get or change the line settings (thickness, color, etc.) of a border line.
2 Access to the object
The individual Border objects can be accessed solely through enumerating the elements of the Borders collection. This
collection can be a child object of the following two objects:
If used as child object of a Range object, Borders.Item(n) represents one of the border lines of the cells in the
given range, corresponding to the PlanMaker command Format > Borders.
250 BasicMaker and PlanMaker Manual BasicMaker
If used as child object of a FormatCondition object, Borders.Item(n) represents one of the border lines that are
applied when the condition of a conditional formatting is met.
As a parameter, you pass the number of the border that you would like to access, as follows:
pmBorderTop = -1 ' Top border line
pmBorderLeft = -2 ' Left border line
pmBorderBottom = -3 ' Bottom border line
pmBorderRight = -4 ' Right border line
pmBorderHorizontal = -5 ' Horizontal grid lines
pmBorderVertical = -6 ' Vertical grid lines
Example:
' Set the color of the left line of cell A1 to red
pm.ActiveSheet.Range("A1").Borders(pmBorderLeft).Color = smoColorRed
3 Properties, objects, collections, and methods
Properties:
Type (default property)
Thick1
Thick2
Separator
Color
ColorIndex
Objects:
Application Application
Parent Borders
Type (property)
Data type: Long (PmLineStyle)
Gets or sets the type of the border line. The possible values are:
pmLineStyleNone = 0 ' No border
pmLineStyleSingle = 1 ' Simple border
pmLineStyleDouble = 2 ' Double border
Thick1 (property)
Data type: Single
Gets or sets the thickness of the first border line in points (1 point corresponds to 1/72 inches).
Thick2 (property)
Data type: Single
Gets or sets the thickness of the second border line in points (1 point corresponds to 1/72 inches).
This property is used only if the type of the border is set to pmLineStyleDouble.
Thick1, Thick2 and Separator taken together must not be greater than 12.
Manual BasicMaker BasicMaker and PlanMaker 251
Separator (property)
Data type: Single
Gets or sets the offset between two border lines in points (1 point corresponds to 1/72 inches).
This property is used only if the type of the border is set to pmLineStyleDouble.
Thick1, Thick2 and Separator taken together must not be greater than 12.
Color (property)
Data type: Long (SmoColor)
Gets or sets the color of the border line(s) as a "BGR" value (Blue-Green-Red triplet). You can either specify an arbi-
trary value or use one of the predefined BGR color constants.
ColorIndex (property)
Data type: Long (SmoColorIndex)
Gets or sets the color of the border line(s) as an index color. "Index colors" are the standard colors of PlanMaker,
consecutively numbered from 0 for black to 15 for light gray. You can use only one of the values listed in the Color
Indices table.
Note: It is recommended to use the Color property (see above) instead of this one, since it is not limited to the 16
standard colors but enables you to access the entire BGR color palette.
Application (pointer to object)
Data type: Object
Returns the Application object.
Parent (pointer to object)
Data type: Object
Returns the parent object, i.e. an object that is of the type Borders.
Shading (object)
Access paths for direct formatting:
Application Workbooks Item Sheets Item Range Shading
Application Workbooks ActiveSheet Range Shading
Application ActiveWorkbook ActiveSheet Range Shading
Application ActiveSheet Range Shading
Access paths for conditional formatting:
Application Workbooks Item Sheets Item Range FormatConditions Item Shading
Application Workbooks ActiveSheet Range FormatConditions Item Shading
Application ActiveWorkbook ActiveSheet Range FormatConditions Item Shading
Application ActiveSheet Range FormatConditions Item Shading
Instead of Range, you can also use other objects and properties that return a Range object: ActiveCell, Selection, Rows(n), Columns(n) and Cells(x,
y). For examples, see the Range object.
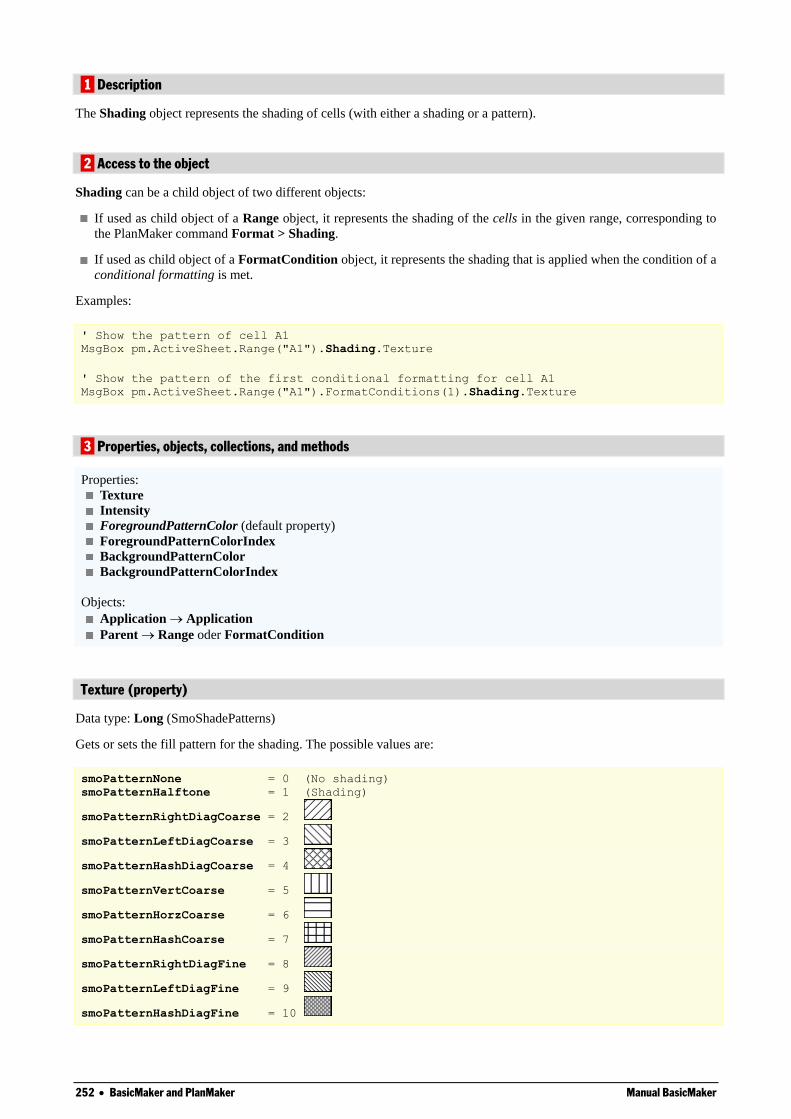
252 BasicMaker and PlanMaker Manual BasicMaker
1 Description
The Shading object represents the shading of cells (with either a shading or a pattern).
2 Access to the object
Shading can be a child object of two different objects:
If used as child object of a Range object, it represents the shading of the cells in the given range, corresponding to
the PlanMaker command Format > Shading.
If used as child object of a FormatCondition object, it represents the shading that is applied when the condition of a
conditional formatting is met.
Examples:
' Show the pattern of cell A1
MsgBox pm.ActiveSheet.Range("A1").Shading.Texture
' Show the pattern of the first conditional formatting for cell A1
MsgBox pm.ActiveSheet.Range("A1").FormatConditions(1).Shading.Texture
3 Properties, objects, collections, and methods
Properties:
Texture
Intensity
ForegroundPatternColor (default property)
ForegroundPatternColorIndex
BackgroundPatternColor
BackgroundPatternColorIndex
Objects:
Application Application
Parent Range oder FormatCondition
Texture (property)
Data type: Long (SmoShadePatterns)
Gets or sets the fill pattern for the shading. The possible values are:
smoPatternNone = 0 (No shading)
smoPatternHalftone = 1 (Shading)
smoPatternRightDiagCoarse = 2
smoPatternLeftDiagCoarse = 3
smoPatternHashDiagCoarse = 4
smoPatternVertCoarse = 5
smoPatternHorzCoarse = 6
smoPatternHashCoarse = 7
smoPatternRightDiagFine = 8
smoPatternLeftDiagFine = 9
smoPatternHashDiagFine = 10
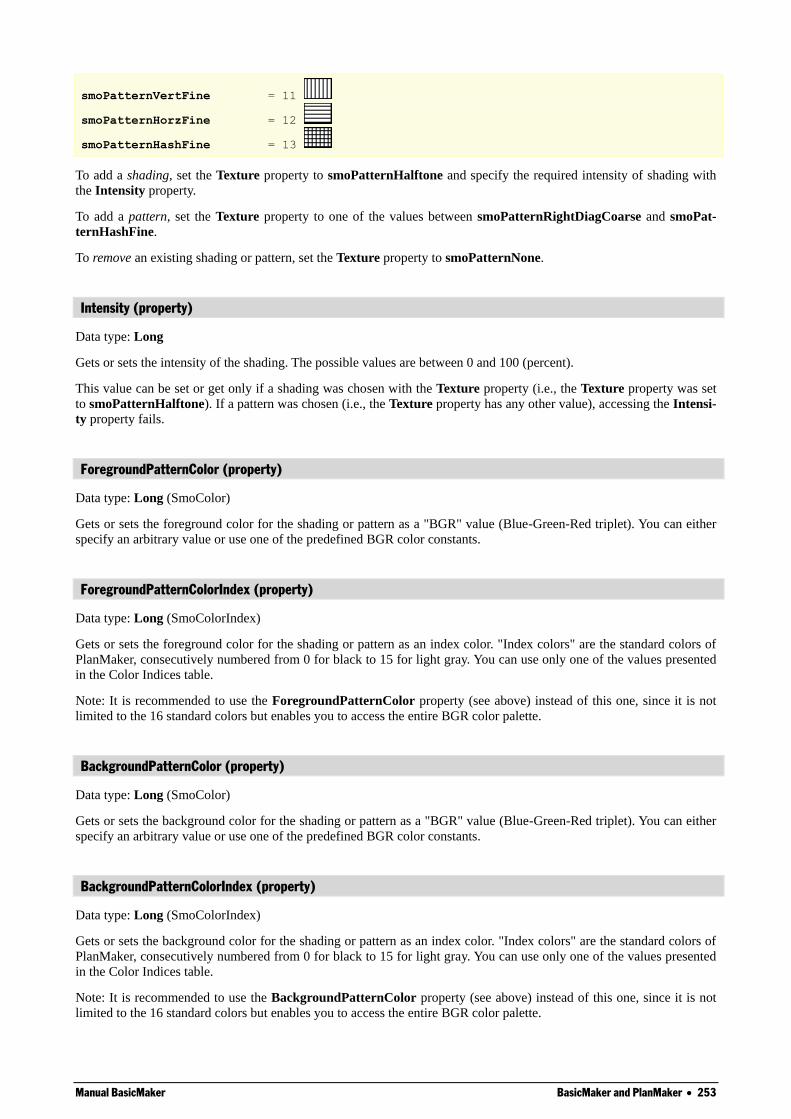
Manual BasicMaker BasicMaker and PlanMaker 253
smoPatternVertFine = 11
smoPatternHorzFine = 12
smoPatternHashFine = 13
To add a shading, set the Texture property to smoPatternHalftone and specify the required intensity of shading with
the Intensity property.
To add a pattern, set the Texture property to one of the values between smoPatternRightDiagCoarse and smoPat-
ternHashFine.
To remove an existing shading or pattern, set the Texture property to smoPatternNone.
Intensity (property)
Data type: Long
Gets or sets the intensity of the shading. The possible values are between 0 and 100 (percent).
This value can be set or get only if a shading was chosen with the Texture property (i.e., the Texture property was set
to smoPatternHalftone). If a pattern was chosen (i.e., the Texture property has any other value), accessing the Intensi-
ty property fails.
ForegroundPatternColor (property)
Data type: Long (SmoColor)
Gets or sets the foreground color for the shading or pattern as a "BGR" value (Blue-Green-Red triplet). You can either
specify an arbitrary value or use one of the predefined BGR color constants.
ForegroundPatternColorIndex (property)
Data type: Long (SmoColorIndex)
Gets or sets the foreground color for the shading or pattern as an index color. "Index colors" are the standard colors of
PlanMaker, consecutively numbered from 0 for black to 15 for light gray. You can use only one of the values presented
in the Color Indices table.
Note: It is recommended to use the ForegroundPatternColor property (see above) instead of this one, since it is not
limited to the 16 standard colors but enables you to access the entire BGR color palette.
BackgroundPatternColor (property)
Data type: Long (SmoColor)
Gets or sets the background color for the shading or pattern as a "BGR" value (Blue-Green-Red triplet). You can either
specify an arbitrary value or use one of the predefined BGR color constants.
BackgroundPatternColorIndex (property)
Data type: Long (SmoColorIndex)
Gets or sets the background color for the shading or pattern as an index color. "Index colors" are the standard colors of
PlanMaker, consecutively numbered from 0 for black to 15 for light gray. You can use only one of the values presented
in the Color Indices table.
Note: It is recommended to use the BackgroundPatternColor property (see above) instead of this one, since it is not
limited to the 16 standard colors but enables you to access the entire BGR color palette.
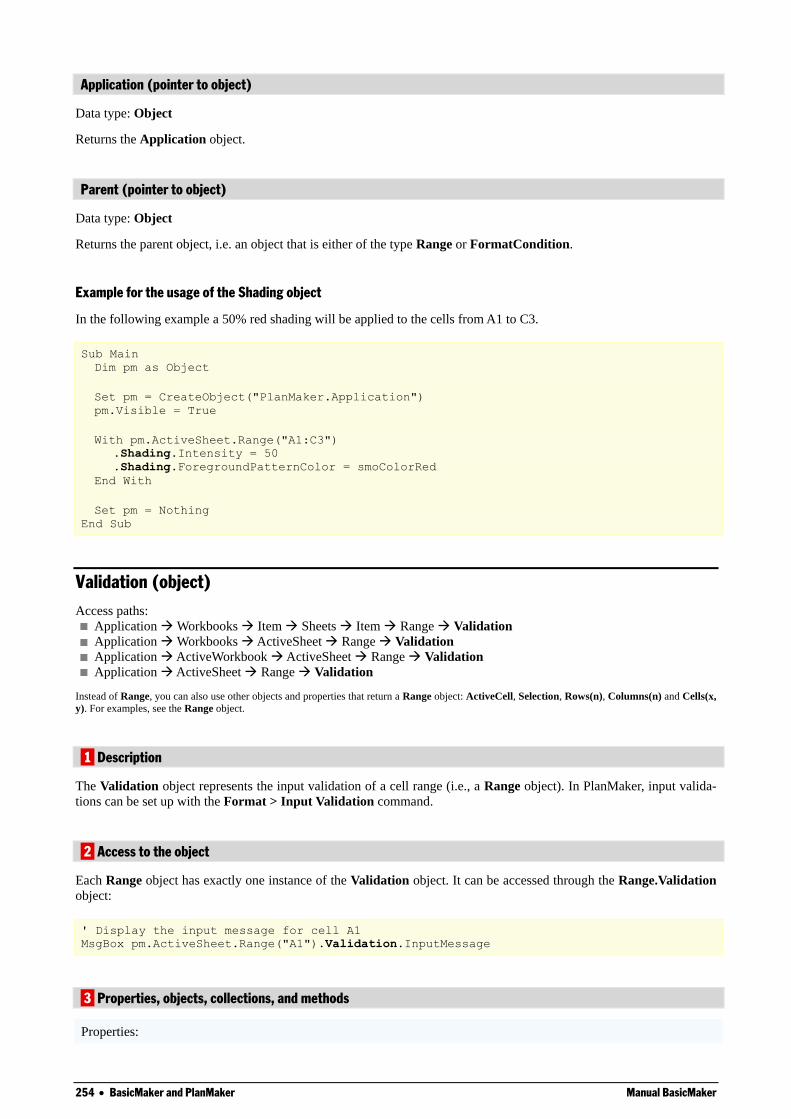
254 BasicMaker and PlanMaker Manual BasicMaker
Application (pointer to object)
Data type: Object
Returns the Application object.
Parent (pointer to object)
Data type: Object
Returns the parent object, i.e. an object that is either of the type Range or FormatCondition.
Example for the usage of the Shading object
In the following example a 50% red shading will be applied to the cells from A1 to C3.
Sub Main
Dim pm as Object
Set pm = CreateObject("PlanMaker.Application")
pm.Visible = True
With pm.ActiveSheet.Range("A1:C3")
.Shading.Intensity = 50
.Shading.ForegroundPatternColor = smoColorRed
End With
Set pm = Nothing
End Sub
Validation (object)
Access paths:
Application Workbooks Item Sheets Item Range Validation
Application Workbooks ActiveSheet Range Validation
Application ActiveWorkbook ActiveSheet Range Validation
Application ActiveSheet Range Validation
Instead of Range, you can also use other objects and properties that return a Range object: ActiveCell, Selection, Rows(n), Columns(n) and Cells(x,
y). For examples, see the Range object.
1 Description
The Validation object represents the input validation of a cell range (i.e., a Range object). In PlanMaker, input valida-
tions can be set up with the Format > Input Validation command.
2 Access to the object
Each Range object has exactly one instance of the Validation object. It can be accessed through the Range.Validation
object:
' Display the input message for cell A1
MsgBox pm.ActiveSheet.Range("A1").Validation.InputMessage
3 Properties, objects, collections, and methods
Properties:
Manual BasicMaker BasicMaker and PlanMaker 255
Type R/O
AlertStyle
Value R/O
ShowInput
InputTitle
InputMessage
ShowError
ErrorTitle
ErrorMessage Operator R/O
Formula1 R/O
Formula2 R/O
InCellDropDown
IgnoreBlank
Objects:
Application Application
Parent Range
Methods:
Add
Modify
Delete
Type (property, R/O)
Data type: Long (PmDVType)
Gets or sets the setting which type of values to allow. The possible values are:
pmValidateInputOnly = 0 ' Allow all types of values
pmValidateWholeNumber = 1 ' Allow only integer numbers
pmValidateDecimal = 2 ' Allow only decimal numbers
pmValidateList = 3 ' Allow only values from a pre-defined list
pmValidateDate = 4 ' Allow only date values
pmValidateTime = 5 ' Allow only time values
pmValidateTextLength = 6 ' Allow only values of a certain length
pmValidateCustom = 7 ' User-defined check
AlertStyle (property)
Data type: Long (PmDVAlertStyle)
Gets or sets the style of the error message for invalid values. The possible values are:
pmValidAlertStop = 0 ' Error message
pmValidAlertWarning = 1 ' Warning message
pmValidAlertInformation = 2 ' Information message
Value (property, R/O)
Data type: Boolean
Returns True, when the range contains valid values (i.e. values passing the input validation check), else False.
ShowInput (property)
Data type: Long
256 BasicMaker and PlanMaker Manual BasicMaker
Gets or sets the setting if an input message should be displayed when the cell is activated. Corresponds to the check box
"Show input message when cell is selected" in the dialog of the Format > Input Validation dialog, Input message tab.
InputTitle (property)
Data type: String
Gets or sets the title of the input message that appears when the cell is activated. Corresponds to the input box "Title" in
the dialog of the Format > Input Validation dialog, Input message tab.
InputMessage (property)
Data type: String
Gets or sets the text of the input message that appears when the cell is activated. Corresponds to the input box "Mes-
sage" in the dialog of the Format > Input Validation dialog, Input message tab.
ShowError (property)
Data type: Long
Gets or sets the setting whether a message should be displayed when a value that do not pass the input validation check
is entered into the cell. Corresponds to the check box "Show error message after invalid data is entered" in the dialog of
the Format > Input Validation dialog, Error message tab.
ErrorTitle (property)
Data type: String
Gets or sets the title of the message that is displayed when an invalid value is entered into the cell. Corresponds to the
input box "Title" in the dialog of the Format > Input Validation dialog, Error message tab.
ErrorMessage (property)
Data type: String
Gets or sets the text of the message that is displayed when an invalid value is entered into the cell. Corresponds to the
input box "Message" in the dialog of the Format > Input Validation dialog, Error message tab.
Operator (property, R/O)
Data type: Long (PmDVOperator)
Gets or sets the relational operator used by the input validation check.
pmDVBetween = 0 ' is between
pmDVNotBetween = 1 ' is not between
pmDVEqual = 2 ' is equal to
pmDVNotEqual = 3 ' is not equal to
pmDVGreater = 4 ' is greater than
pmDVLess = 5 ' is less than
pmDVGreaterEqual = 6 ' is greater than or equal to
pmDVLessEqual = 7 ' is less than or equal to
Formula1 (property, R/O)
Data type: String
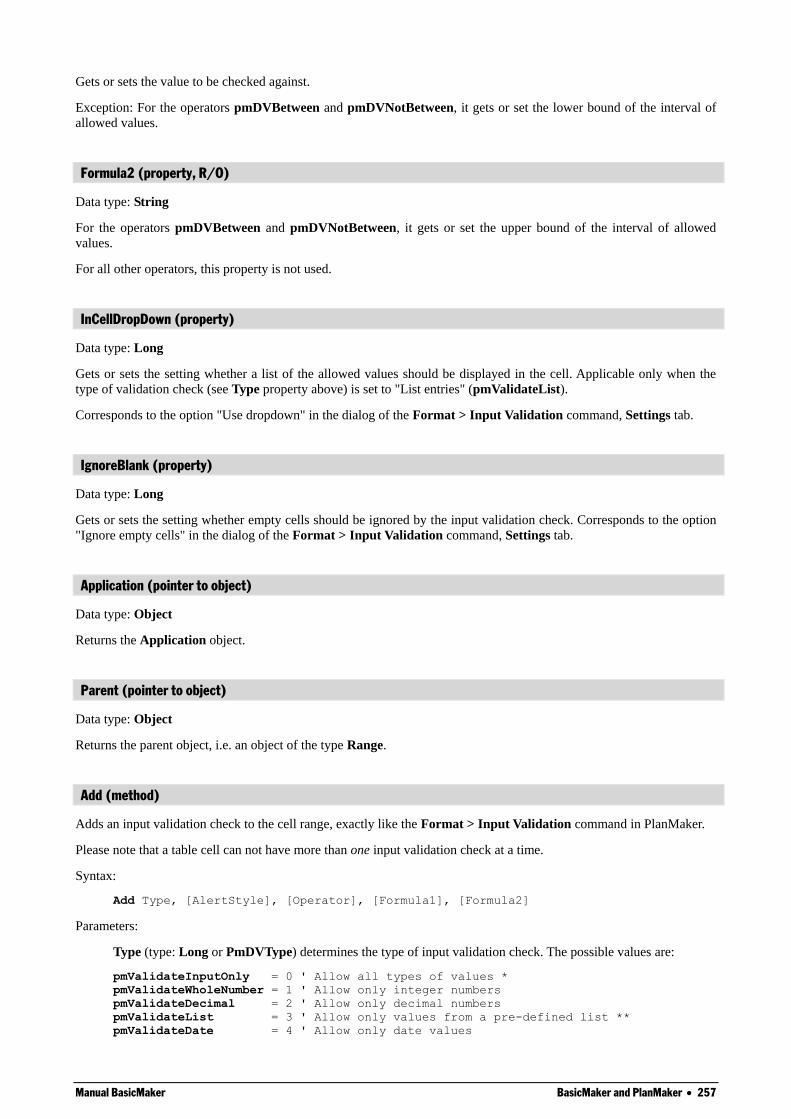
Manual BasicMaker BasicMaker and PlanMaker 257
Gets or sets the value to be checked against.
Exception: For the operators pmDVBetween and pmDVNotBetween, it gets or set the lower bound of the interval of
allowed values.
Formula2 (property, R/O)
Data type: String
For the operators pmDVBetween and pmDVNotBetween, it gets or set the upper bound of the interval of allowed
values.
For all other operators, this property is not used.
InCellDropDown (property)
Data type: Long
Gets or sets the setting whether a list of the allowed values should be displayed in the cell. Applicable only when the
type of validation check (see Type property above) is set to "List entries" (pmValidateList).
Corresponds to the option "Use dropdown" in the dialog of the Format > Input Validation command, Settings tab.
IgnoreBlank (property)
Data type: Long
Gets or sets the setting whether empty cells should be ignored by the input validation check. Corresponds to the option
"Ignore empty cells" in the dialog of the Format > Input Validation command, Settings tab.
Application (pointer to object)
Data type: Object
Returns the Application object.
Parent (pointer to object)
Data type: Object
Returns the parent object, i.e. an object of the type Range.
Add (method)
Adds an input validation check to the cell range, exactly like the Format > Input Validation command in PlanMaker.
Please note that a table cell can not have more than one input validation check at a time.
Syntax:
Add Type, [AlertStyle], [Operator], [Formula1], [Formula2]
Parameters:
Type (type: Long or PmDVType) determines the type of input validation check. The possible values are:
pmValidateInputOnly = 0 ' Allow all types of values *
pmValidateWholeNumber = 1 ' Allow only integer numbers
pmValidateDecimal = 2 ' Allow only decimal numbers
pmValidateList = 3 ' Allow only values from a pre-defined list **
pmValidateDate = 4 ' Allow only date values
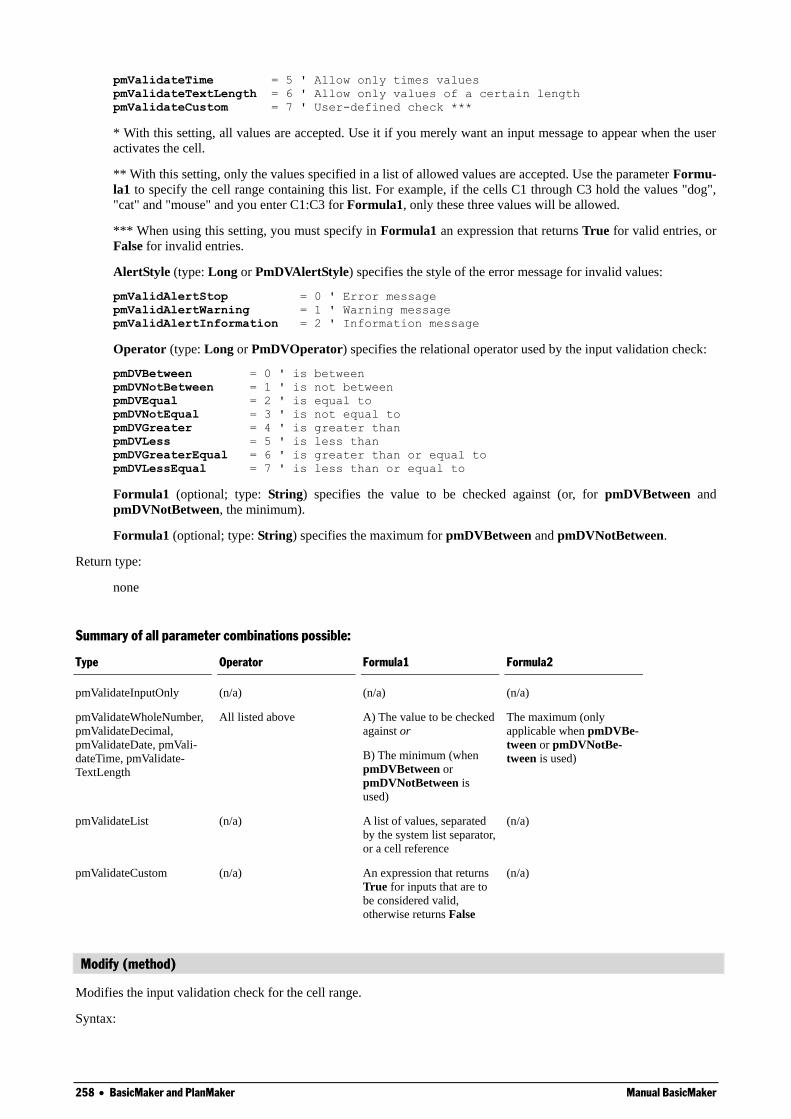
258 BasicMaker and PlanMaker Manual BasicMaker
pmValidateTime = 5 ' Allow only times values
pmValidateTextLength = 6 ' Allow only values of a certain length
pmValidateCustom = 7 ' User-defined check ***
* With this setting, all values are accepted. Use it if you merely want an input message to appear when the user
activates the cell.
** With this setting, only the values specified in a list of allowed values are accepted. Use the parameter Formu-
la1 to specify the cell range containing this list. For example, if the cells C1 through C3 hold the values "dog",
"cat" and "mouse" and you enter C1:C3 for Formula1, only these three values will be allowed.
*** When using this setting, you must specify in Formula1 an expression that returns True for valid entries, or
False for invalid entries.
AlertStyle (type: Long or PmDVAlertStyle) specifies the style of the error message for invalid values:
pmValidAlertStop = 0 ' Error message
pmValidAlertWarning = 1 ' Warning message
pmValidAlertInformation = 2 ' Information message
Operator (type: Long or PmDVOperator) specifies the relational operator used by the input validation check:
pmDVBetween = 0 ' is between
pmDVNotBetween = 1 ' is not between
pmDVEqual = 2 ' is equal to
pmDVNotEqual = 3 ' is not equal to
pmDVGreater = 4 ' is greater than
pmDVLess = 5 ' is less than
pmDVGreaterEqual = 6 ' is greater than or equal to
pmDVLessEqual = 7 ' is less than or equal to
Formula1 (optional; type: String) specifies the value to be checked against (or, for pmDVBetween and
pmDVNotBetween, the minimum).
Formula1 (optional; type: String) specifies the maximum for pmDVBetween and pmDVNotBetween.
Return type:
none
Summary of all parameter combinations possible:
Type Operator Formula1 Formula2
pmValidateInputOnly (n/a) (n/a) (n/a)
pmValidateWholeNumber,
pmValidateDecimal,
pmValidateDate, pmVali-
dateTime, pmValidate-
TextLength
All listed above A) The value to be checked
against or
B) The minimum (when
pmDVBetween or
pmDVNotBetween is
used)
The maximum (only
applicable when pmDVBe-
tween or pmDVNotBe-
tween is used)
pmValidateList (n/a) A list of values, separated
by the system list separator,
or a cell reference
(n/a)
pmValidateCustom (n/a) An expression that returns
True for inputs that are to
be considered valid,
otherwise returns False
(n/a)
Modify (method)
Modifies the input validation check for the cell range.
Syntax:
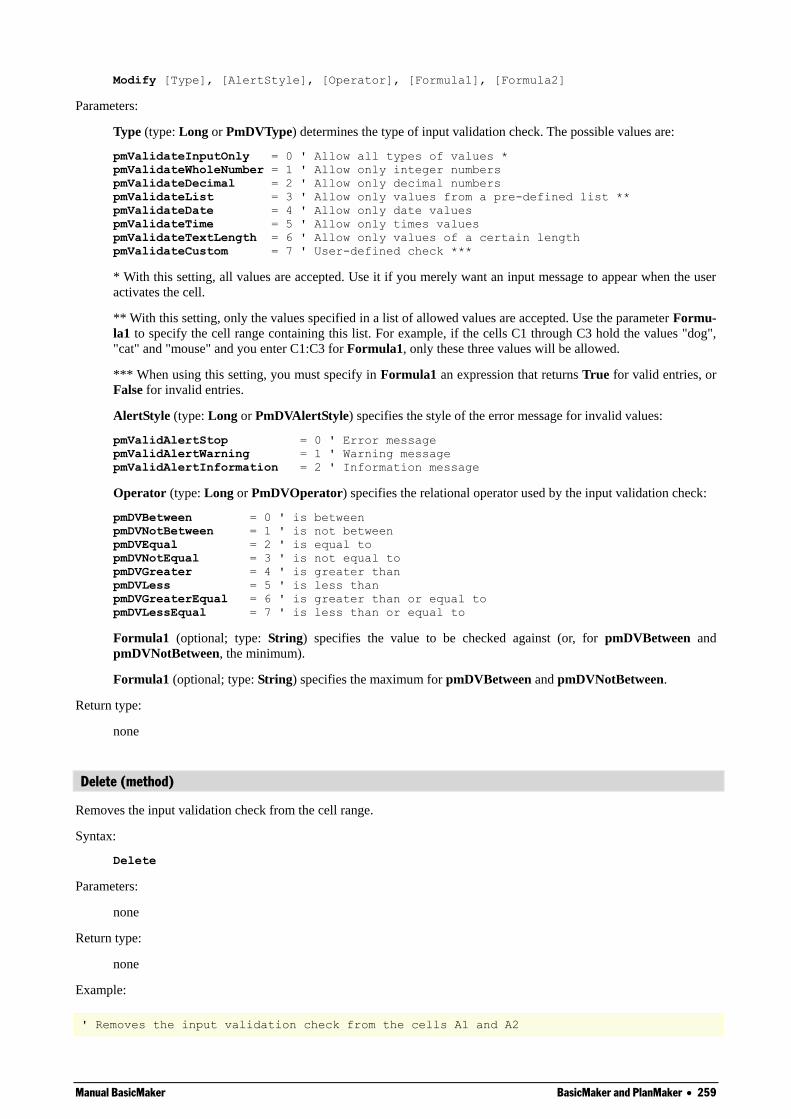
Manual BasicMaker BasicMaker and PlanMaker 259
Modify [Type], [AlertStyle], [Operator], [Formula1], [Formula2]
Parameters:
Type (type: Long or PmDVType) determines the type of input validation check. The possible values are:
pmValidateInputOnly = 0 ' Allow all types of values *
pmValidateWholeNumber = 1 ' Allow only integer numbers
pmValidateDecimal = 2 ' Allow only decimal numbers
pmValidateList = 3 ' Allow only values from a pre-defined list **
pmValidateDate = 4 ' Allow only date values
pmValidateTime = 5 ' Allow only times values
pmValidateTextLength = 6 ' Allow only values of a certain length
pmValidateCustom = 7 ' User-defined check ***
* With this setting, all values are accepted. Use it if you merely want an input message to appear when the user
activates the cell.
** With this setting, only the values specified in a list of allowed values are accepted. Use the parameter Formu-
la1 to specify the cell range containing this list. For example, if the cells C1 through C3 hold the values "dog",
"cat" and "mouse" and you enter C1:C3 for Formula1, only these three values will be allowed.
*** When using this setting, you must specify in Formula1 an expression that returns True for valid entries, or
False for invalid entries.
AlertStyle (type: Long or PmDVAlertStyle) specifies the style of the error message for invalid values:
pmValidAlertStop = 0 ' Error message
pmValidAlertWarning = 1 ' Warning message
pmValidAlertInformation = 2 ' Information message
Operator (type: Long or PmDVOperator) specifies the relational operator used by the input validation check:
pmDVBetween = 0 ' is between
pmDVNotBetween = 1 ' is not between
pmDVEqual = 2 ' is equal to
pmDVNotEqual = 3 ' is not equal to
pmDVGreater = 4 ' is greater than
pmDVLess = 5 ' is less than
pmDVGreaterEqual = 6 ' is greater than or equal to
pmDVLessEqual = 7 ' is less than or equal to
Formula1 (optional; type: String) specifies the value to be checked against (or, for pmDVBetween and
pmDVNotBetween, the minimum).
Formula1 (optional; type: String) specifies the maximum for pmDVBetween and pmDVNotBetween.
Return type:
none
Delete (method)
Removes the input validation check from the cell range.
Syntax:
Delete
Parameters:
none
Return type:
none
Example:
' Removes the input validation check from the cells A1 and A2
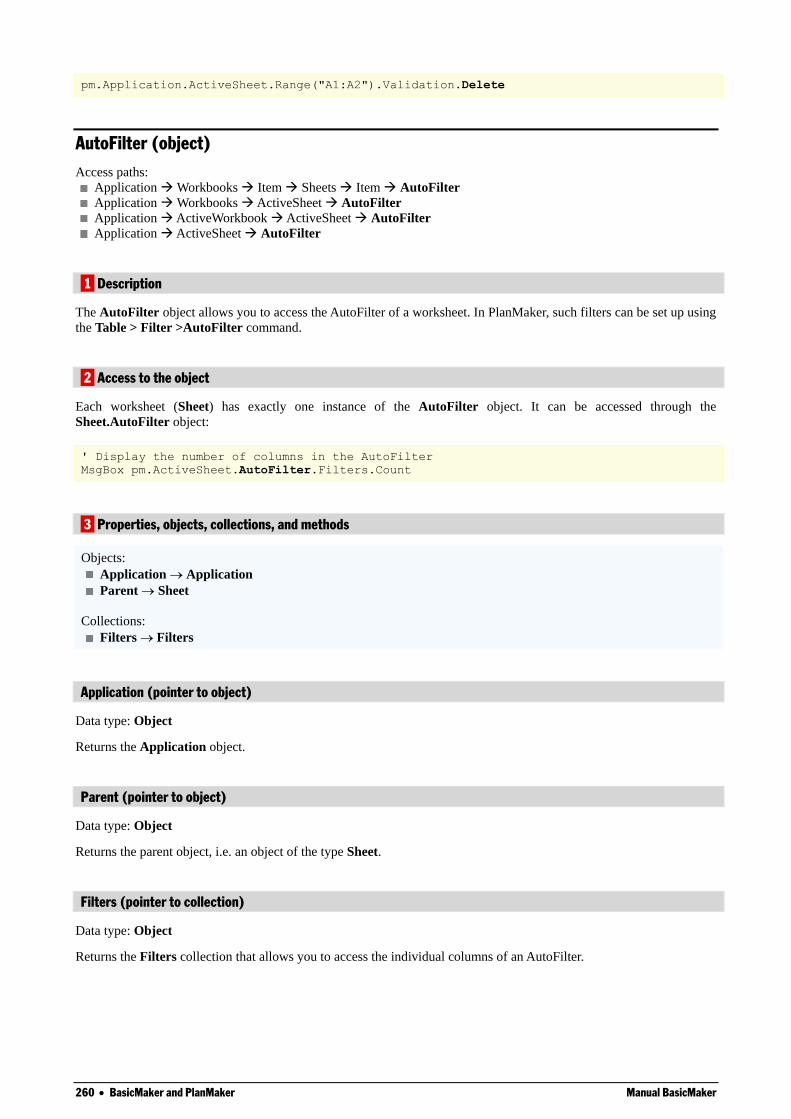
260 BasicMaker and PlanMaker Manual BasicMaker
pm.Application.ActiveSheet.Range("A1:A2").Validation.Delete
AutoFilter (object)
Access paths:
Application Workbooks Item Sheets Item AutoFilter
Application Workbooks ActiveSheet AutoFilter
Application ActiveWorkbook ActiveSheet AutoFilter
Application ActiveSheet AutoFilter
1 Description
The AutoFilter object allows you to access the AutoFilter of a worksheet. In PlanMaker, such filters can be set up using
the Table > Filter >AutoFilter command.
2 Access to the object
Each worksheet (Sheet) has exactly one instance of the AutoFilter object. It can be accessed through the
Sheet.AutoFilter object:
' Display the number of columns in the AutoFilter
MsgBox pm.ActiveSheet.AutoFilter.Filters.Count
3 Properties, objects, collections, and methods
Objects:
Application Application
Parent Sheet
Collections:
Filters Filters
Application (pointer to object)
Data type: Object
Returns the Application object.
Parent (pointer to object)
Data type: Object
Returns the parent object, i.e. an object of the type Sheet.
Filters (pointer to collection)
Data type: Object
Returns the Filters collection that allows you to access the individual columns of an AutoFilter.
Manual BasicMaker BasicMaker and PlanMaker 261
Filters (collection)
Access paths:
Application Workbooks Item Sheets Item AutoFilter Filters
Application Workbooks ActiveSheet AutoFilter Filters
Application ActiveWorkbook ActiveSheet AutoFilter Filters
Application ActiveSheet AutoFilter Filters
1 Description
The Filters collection contains all columns of the currently active AutoFilter.
The individual elements of this collection are of the type Filter. You can use the individual Filter objects to retrieve
criteria and filter type of each column of the AutoFilter.
2 Access to the collection
Each AutoFilter has exactly one Filters collection. It is accessed through the AutoFilter.Filters object:
' Display the number of columns in the AutoFilter
MsgBox pm.ActiveSheet.AutoFilter.Filters.Count
3 Properties, objects, collections, and methods
Properties:
Count R/O
Objects:
Item Filter (default object)
Application Application
Parent AutoFilter
Count (property, R/O)
Data type: Long
Returns the number of Filter objects in the collection, i.e. the number of columns in the range that is filtered.
Item (pointer to object)
Data type: Object
Returns an individual Filter object, i.e. one column of the AutoFilter.
Which column you get depends on the numeric value that you pass to Item: 1 for the first column, 2 for the second, etc.
Application (pointer to object)
Data type: Object
Returns the Application object.
Parent (pointer to object)
Data type: Object
262 BasicMaker and PlanMaker Manual BasicMaker
Returns the parent object, i.e. an object of the type AutoFilter.
Filter (object)
Access paths:
Application Workbooks Item Sheets Item AutoFilter Filters Item
Application Workbooks ActiveSheet AutoFilter Filters Item
Application ActiveWorkbook ActiveSheet AutoFilter Filters Item
Application ActiveSheet AutoFilter Filters Item
1 Description
A Filter object represents one individual column of on AutoFilter. You can use it to retrieve criteria and filter type of
each column.
2 Access to the object
The individual Filter objects can be accessed solely through enumerating the elements of the corresponding Filters
collection.
For each AutoFilter there is exactly one instance of the Filter collection. It is accessed through the AutoFilter.Filters
object:
' Display the criterion for the first column of the AutoFilter
MsgBox pm.ActiveSheet.AutoFilter.Filters.Item(1).Criteria1
Please note that all properties of the Filter object are read-only. To set up a new AutoFilter, use the AutoFilter method
in the Range object.
3 Properties, objects, collections, and methods
Properties:
Operator R/O
Criteria1 R/O
Criteria2 R/O
Objects:
Application Application
Parent Filters
Operator (property, R/O)
Data type: Long (PmAutoFilterOperator)
Returns the type of the filter. The possible values are:
pmAll = 0 ' Show all rows (= do not filter)
pmAnd = 1 ' Criteria1 and Criteria2 must be matched
pmBottom10Items = 2 ' Show only the n lowest values*
pmBottom10Percent = 3 ' Show only the bottom n percent values*
pmOr = 4 ' Criteria1 or Criteria2 must be matched
pmTop10Items = 5 ' Show only the n highest values*
pmTop10Percent = 6 ' Show only the top n percent values*
pmBlank = 7 ' Show only blank rows
pmNonblank = 8 ' Show only non-blank rows
pmCustom = 9 ' User-defined filter
Manual BasicMaker BasicMaker and PlanMaker 263
* In these cases, Criteria1 contains the value for "n".
Criteria1 (property, R/O)
Data type: String
Returns the criterion of the filter – for example "red" if you have filtered for the value "red".
Exception: If one of the operators pmTop10Items, pmTop10Percent, pmBottom10Items, or pmBottom10Percent is
used, then Criteria1 contains a numeric value indicating how many values to display.
Criteria2 (property, R/O)
Data type: String
Returns the second criterion of the filter – provided that Operator is set to pmAnd or pmOr so that two criteria can be
given.
Application (pointer to object)
Data type: Object
Returns the Application object.
Parent (pointer to object)
Data type: Object
Returns the parent object, i.e. Filters.
Windows (collection)
Access path: Application Windows
1 Description
The Windows collection contains all open document windows. The individual elements of this collection are of the type
Window.
2 Access to the collection
There is exactly one instance of the Windows collection during the whole runtime of PlanMaker. It is accessed through
the Application.Windows object:
' Show the number of open document windows
MsgBox pm.Application.Windows.Count
' Show the name of the first open document window
MsgBox pm.Application.Windows(1).Name
3 Properties, objects, collections, and methods
Properties:
Count R/O
264 BasicMaker and PlanMaker Manual BasicMaker
Objects:
Item Window (default object)
Application Application
Parent Application
Count (property, R/O)
Data type: Long
Returns the number of Window objects in PlanMaker – in other words: the number of open document windows.
Item (pointer to object)
Data type: Object
Returns an individual Window object, i.e. an individual document window.
Which Window object you get depends on the parameter that you pass to Item. You can specify either the numeric
index or the name of the desired document window. Examples:
' Show the name of the first document window
MsgBox pm.Application.Windows.Item(1).FullName
' Show the name of the document window "Test.pmd" (if opened)
MsgBox pm.Application.Windows.Item("Test.pmd").FullName
' You can also use the full name with path
MsgBox pm.Application.Windows.Item("c:\Documents\Test.pmd").FullName
Application (pointer to object)
Returns the Application object.
Parent (pointer to object)
Returns the parent object, i.e. Application.
Window (object)
Access paths:
Application Windows Item
Application ActiveWindow
Application Workbooks Item ActiveWindow
Application ActiveWorkbook ActiveWindow
1 Description
A Window object represents one individual document window that is currently open in PlanMaker.
For each document window there is its own Window object. If you open or close document windows, the respective
Window objects will be created or deleted dynamically.

Manual BasicMaker BasicMaker and PlanMaker 265
2 Access to the object
The individual Window objects can be accessed in any of the following ways:
All document windows that are open at a time are listed in the collection Application.Windows (type: Windows):
' Show the names of all open document windows
For i = 1 To pm.Application.Windows.Count
MsgBox pm.Application.Windows.Item(i).Name
Next i
You can access the currently active document window through Application.ActiveWindow:
' Show the name of the active document window
MsgBox pm.Application.ActiveWindow.Name
The object Workbook contains an object pointer to the respective document window:
' Access the active document window through the active document
MsgBox pm.Application.ActiveWorkbook.ActiveWindow.Name
3 Properties, objects, collections, and methods
FullName R/O
Name R/O
Path R/O
Left
Top
Width
Height
WindowState
DisplayFormulas
DisplayVerticalScrollBar
DisplayHorizontalScrollBar
DisplayWorkbookTabs
DisplayHeadings
Zoom
DisplayGridlines
GridlineColor
GridlineColorIndex
Objects:
Workbook Workbook
ActiveCell Range
ActiveSheet Sheet
Application Application
Parent Windows
Methods:
Activate
Close
FullName (property, R/O)
Data type: String
Returns the path and file name of the document opened in the window (e.g., "c:\Documents\Smith.pmd").
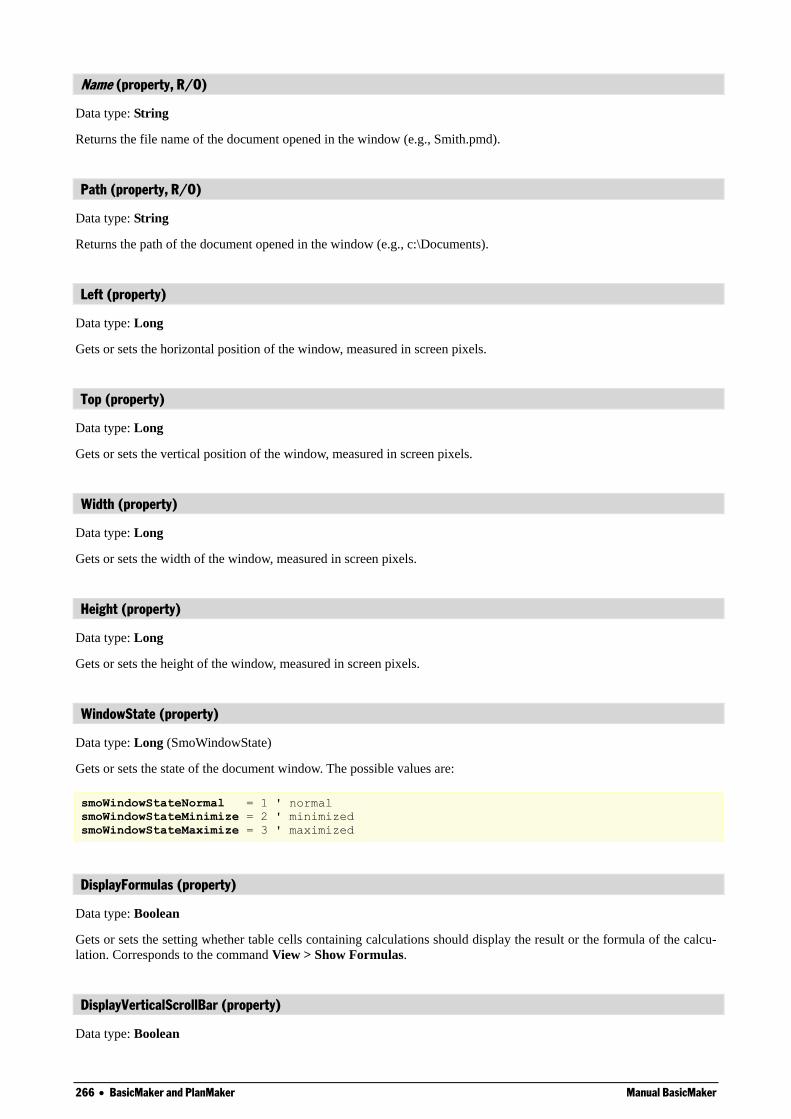
266 BasicMaker and PlanMaker Manual BasicMaker
Name (property, R/O)
Data type: String
Returns the file name of the document opened in the window (e.g., Smith.pmd).
Path (property, R/O)
Data type: String
Returns the path of the document opened in the window (e.g., c:\Documents).
Left (property)
Data type: Long
Gets or sets the horizontal position of the window, measured in screen pixels.
Top (property)
Data type: Long
Gets or sets the vertical position of the window, measured in screen pixels.
Width (property)
Data type: Long
Gets or sets the width of the window, measured in screen pixels.
Height (property)
Data type: Long
Gets or sets the height of the window, measured in screen pixels.
WindowState (property)
Data type: Long (SmoWindowState)
Gets or sets the state of the document window. The possible values are:
smoWindowStateNormal = 1 ' normal
smoWindowStateMinimize = 2 ' minimized
smoWindowStateMaximize = 3 ' maximized
DisplayFormulas (property)
Data type: Boolean
Gets or sets the setting whether table cells containing calculations should display the result or the formula of the calcu-
lation. Corresponds to the command View > Show Formulas.
DisplayVerticalScrollBar (property)
Data type: Boolean
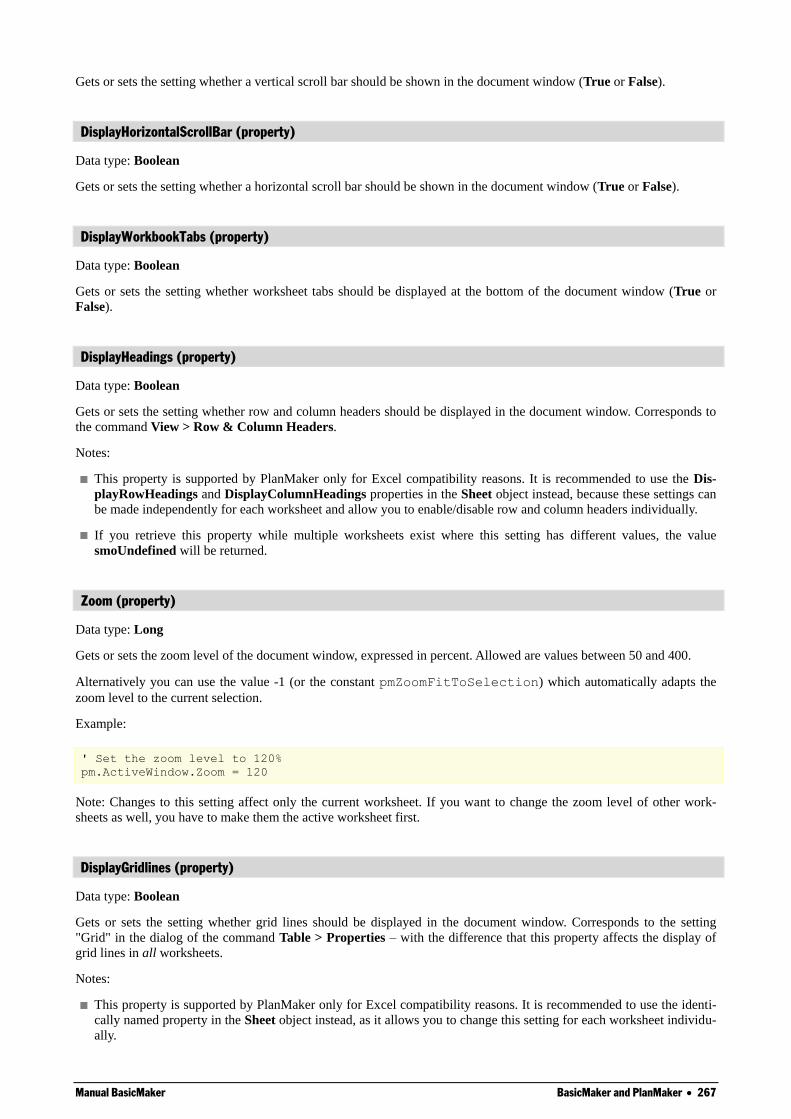
Manual BasicMaker BasicMaker and PlanMaker 267
Gets or sets the setting whether a vertical scroll bar should be shown in the document window (True or False).
DisplayHorizontalScrollBar (property)
Data type: Boolean
Gets or sets the setting whether a horizontal scroll bar should be shown in the document window (True or False).
DisplayWorkbookTabs (property)
Data type: Boolean
Gets or sets the setting whether worksheet tabs should be displayed at the bottom of the document window (True or
False).
DisplayHeadings (property)
Data type: Boolean
Gets or sets the setting whether row and column headers should be displayed in the document window. Corresponds to
the command View > Row & Column Headers.
Notes:
This property is supported by PlanMaker only for Excel compatibility reasons. It is recommended to use the Dis-
playRowHeadings and DisplayColumnHeadings properties in the Sheet object instead, because these settings can
be made independently for each worksheet and allow you to enable/disable row and column headers individually.
If you retrieve this property while multiple worksheets exist where this setting has different values, the value
smoUndefined will be returned.
Zoom (property)
Data type: Long
Gets or sets the zoom level of the document window, expressed in percent. Allowed are values between 50 and 400.
Alternatively you can use the value -1 (or the constant pmZoomFitToSelection) which automatically adapts the
zoom level to the current selection.
Example:
' Set the zoom level to 120%
pm.ActiveWindow.Zoom = 120
Note: Changes to this setting affect only the current worksheet. If you want to change the zoom level of other work-
sheets as well, you have to make them the active worksheet first.
DisplayGridlines (property)
Data type: Boolean
Gets or sets the setting whether grid lines should be displayed in the document window. Corresponds to the setting
"Grid" in the dialog of the command Table > Properties – with the difference that this property affects the display of
grid lines in all worksheets.
Notes:
This property is supported by PlanMaker only for Excel compatibility reasons. It is recommended to use the identi-
cally named property in the Sheet object instead, as it allows you to change this setting for each worksheet individu-
ally.
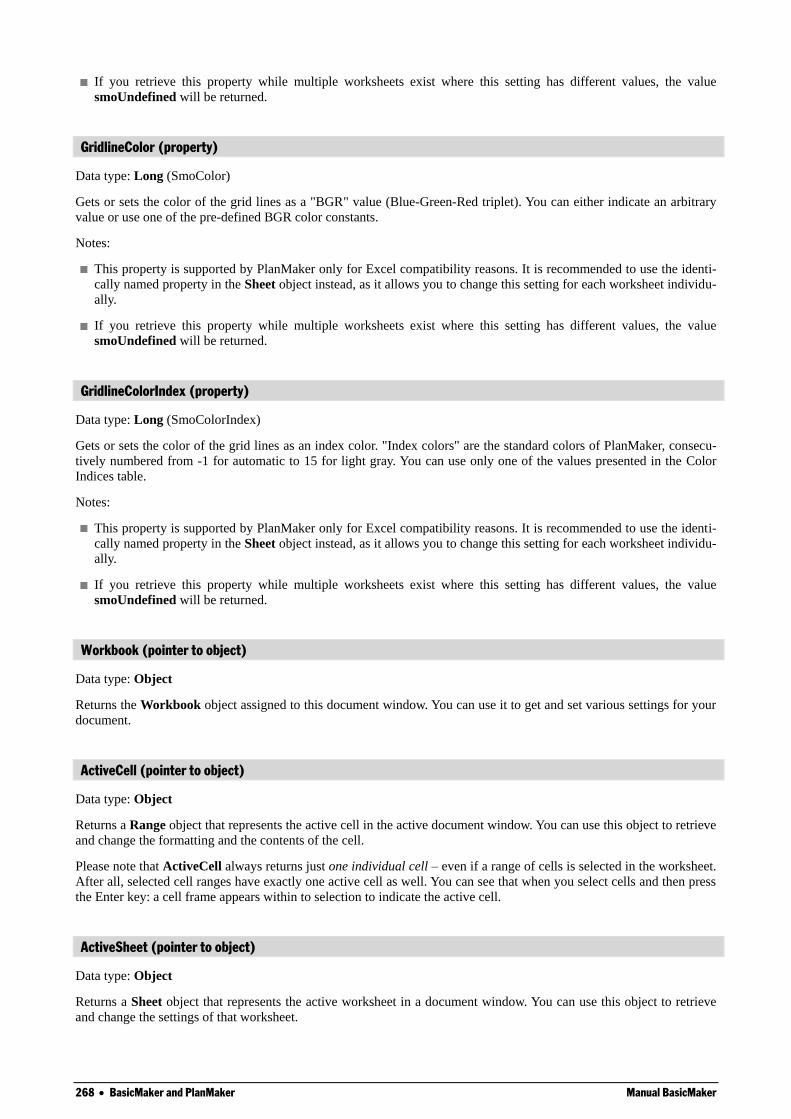
268 BasicMaker and PlanMaker Manual BasicMaker
If you retrieve this property while multiple worksheets exist where this setting has different values, the value
smoUndefined will be returned.
GridlineColor (property)
Data type: Long (SmoColor)
Gets or sets the color of the grid lines as a "BGR" value (Blue-Green-Red triplet). You can either indicate an arbitrary
value or use one of the pre-defined BGR color constants.
Notes:
This property is supported by PlanMaker only for Excel compatibility reasons. It is recommended to use the identi-
cally named property in the Sheet object instead, as it allows you to change this setting for each worksheet individu-
ally.
If you retrieve this property while multiple worksheets exist where this setting has different values, the value
smoUndefined will be returned.
GridlineColorIndex (property)
Data type: Long (SmoColorIndex)
Gets or sets the color of the grid lines as an index color. "Index colors" are the standard colors of PlanMaker, consecu-
tively numbered from -1 for automatic to 15 for light gray. You can use only one of the values presented in the Color
Indices table.
Notes:
This property is supported by PlanMaker only for Excel compatibility reasons. It is recommended to use the identi-
cally named property in the Sheet object instead, as it allows you to change this setting for each worksheet individu-
ally.
If you retrieve this property while multiple worksheets exist where this setting has different values, the value
smoUndefined will be returned.
Workbook (pointer to object)
Data type: Object
Returns the Workbook object assigned to this document window. You can use it to get and set various settings for your
document.
ActiveCell (pointer to object)
Data type: Object
Returns a Range object that represents the active cell in the active document window. You can use this object to retrieve
and change the formatting and the contents of the cell.
Please note that ActiveCell always returns just one individual cell – even if a range of cells is selected in the worksheet.
After all, selected cell ranges have exactly one active cell as well. You can see that when you select cells and then press
the Enter key: a cell frame appears within to selection to indicate the active cell.
ActiveSheet (pointer to object)
Data type: Object
Returns a Sheet object that represents the active worksheet in a document window. You can use this object to retrieve
and change the settings of that worksheet.
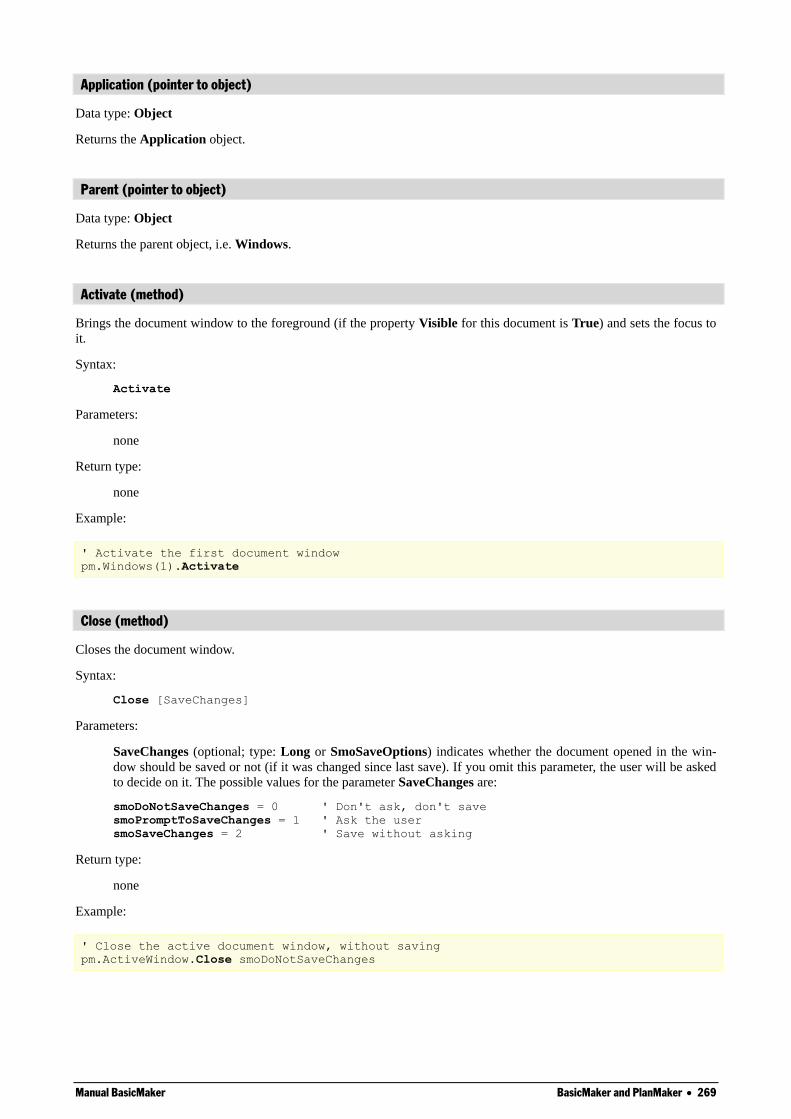
Manual BasicMaker BasicMaker and PlanMaker 269
Application (pointer to object)
Data type: Object
Returns the Application object.
Parent (pointer to object)
Data type: Object
Returns the parent object, i.e. Windows.
Activate (method)
Brings the document window to the foreground (if the property Visible for this document is True) and sets the focus to
it.
Syntax:
Activate
Parameters:
none
Return type:
none
Example:
' Activate the first document window
pm.Windows(1).Activate
Close (method)
Closes the document window.
Syntax:
Close [SaveChanges]
Parameters:
SaveChanges (optional; type: Long or SmoSaveOptions) indicates whether the document opened in the win-
dow should be saved or not (if it was changed since last save). If you omit this parameter, the user will be asked
to decide on it. The possible values for the parameter SaveChanges are:
smoDoNotSaveChanges = 0 ' Don't ask, don't save
smoPromptToSaveChanges = 1 ' Ask the user
smoSaveChanges = 2 ' Save without asking
Return type:
none
Example:
' Close the active document window, without saving
pm.ActiveWindow.Close smoDoNotSaveChanges
270 BasicMaker and PlanMaker Manual BasicMaker
RecentFiles (collection)
Access path: Application RecentFiles
1 Description
RecentFiles is a collection of all recently opened files listed in the File menu. The individual elements of this collection
are of the type RecentFile.
2 Access to the collection
There is exactly one instance of the RecentFiles collection during the whole runtime of PlanMaker. It is accessed
directly through the Application.RecentFiles object:
' Show the name of the first recent file in the File menu
MsgBox pm.Application.RecentFiles.Item(1).Name
' Open the first recent file in the File menu
pm.Application.RecentFiles.Item(1).Open
3 Properties, objects, collections, and methods
Properties:
Count R/O
Maximum
Objects:
Item RecentFile (default object)
Application Application
Parent Application
Methods:
Add
Count (property, R/O)
Data type: Long
Returns the number of RecentFile objects in PlanMaker – in other words: the number of the recently opened files listed
in the File menu.
Maximum (property, R/O)
Data type: Long
Gets or sets the setting "Recently used files in File menu", which determines how many recently opened files can be
displayed in the File menu.
The value may be between 0 and 9.
Item (pointer to object)
Data type: Object
Returns an individual RecentFile object, i.e. one individual file entry in the File menu.
Manual BasicMaker BasicMaker and PlanMaker 271
Which RecentFile object you get depends on the numeric value that you pass to Item: 1 for the first of the recently
opened files, 2 for the second, etc.
Application (pointer to object)
Data type: Object
Returns the Application object.
Parent (pointer to object)
Data type: Object
Returns the parent object, i.e. Application.
Add (method)
Adds a document to the list of recently opened files.
Syntax:
Add Document, [FileFormat]
Parameters:
Document is a string containing the file path and name of the document to be added.
FileFormat (optional; type: Long or PmSaveFormat) specifies the file format of the document to be added.
The possible values are:
pmFormatDocument = 0 ' PlanMaker document
pmFormatTemplate = 1 ' PlanMaker document template
pmFormatExcel97 = 2 ' Excel 97/2000/XP
pmFormatExcel5 = 3 ' Excel 5.0/7.0
pmFormatExcelTemplate = 4 ' Excel document template
pmFormatSYLK = 5 ' Sylk
pmFormatRTF = 6 ' Rich Text Format
pmFormatTextMaker = 7 ' TextMaker (= RTF)
pmFormatHTML = 8 ' HTML document
pmFormatdBaseDOS = 9 ' dBASE database with DOS character set
pmFormatdBaseAnsi = 10 ' dBASE database with Windows character set
pmFormatDIF = 11 ' Text file with Windows character set
pmFormatPlainTextAnsi = 12 ' Text file with Windows character set
pmFormatPlainTextDOS = 13 ' Text file with DOS character set
pmFormatPlainTextUnix = 14 ' Text file with ANSI character set for UNIX, Linux,
FreeBSD
pmFormatPlainTextUnicode = 15 ' Text file with Unicode character set
pmFormatdBaseUnicode = 18 ' dBASE database with Unicode character set
pmFormatPlainTextUTF8 = 21 ' Text file with UTF8 character set
pmFormatMSXML = 23 ' Excel 2007 and later (.xlsx)
pmFormatPM2008 = 26 ' PlanMaker 2008 document
pmFormatPM2010 = 27 ' PlanMaker 2010 document
If you omit this parameter, the value pmFormatDocument will be taken.
Tip: Independent of the value for the FileFormat parameter PlanMaker always tries to determine the file format
by itself and ignores evidently false inputs.
Return type:
Object (a RecentFile object which represents the opened document)
Example:
' Add the file Test.pmd to the File menu
pm.Application.RecentFiles.Add "Test.pmd"
272 BasicMaker and PlanMaker Manual BasicMaker
' Do the same, but evaluate the return value (mind the brackets!)
Dim fileObj as Object
Set fileObj = pm.Application.RecentFiles.Add("Test.pmd")
MsgBox fileObj.Name
RecentFile (object)
Access path: Application RecentFiles Item
1 Description
A RecentFile object represents one individual of the recently opened files. You can use it to retrieve the properties of
such a file and to open it again.
For each recently opened file there is its own RecentFile object. For each document that you open or close, the list of
these files in the File menu will change accordingly – i.e., the respective RecentFile objects will be created or deleted
dynamically.
2 Access to the object
The individual RecentFile objects can be accessed solely through enumerating the elements of the RecentFiles collec-
tion. It can be accessed through the Application.RecentFiles object:
' Show the name of the first file in the File menu
MsgBox pm.Application.RecentFiles.Item(1).Name
3 Properties, objects, collections, and methods
Properties:
FullName R/O
Name (default property) R/O
Path R/O
Objects:
Application Application
Parent RecentFiles
Methods:
Open
FullName (property, R/O)
Data type: String
Returns the path and name of the document in the File menu (e.g. "c:\Documents\Smith.tmd").
Name (property, R/O)
Data type: String
Returns the name of the document (e.g. Smith.pmd).
Manual BasicMaker BasicMaker and PlanMaker 273
Path (property, R/O)
Data type: String
Returns the path of the document (e.g. c:\Documents).
Application (pointer to object)
Data type: Object
Returns the Application object.
Parent (pointer to object)
Data type: Object
Returns the parent object, i.e. RecentFiles.
Open (method)
Opens the appropriate document and returns the Workbook object for it.
Syntax:
Open
Parameters:
none
Return type:
Workbook
Example:
' Open the first recent file displayed in the File menu
pm.Application.RecentFiles(1).Open
FontNames (collection)
Access path: Application FontNames
1 Description
FontNames is a collection of all fonts installed in Windows. The individual elements of this collection are of the type
FontName.
2 Access to the collection
There is exactly one instance of the FontNames collection during the whole runtime of PlanMaker. It is accessed
through the Application.FontNames object:
' Display the name of the first installed font
MsgBox pm.Application.FontNames.Item(1).Name
' The same, but shorter, omitting the default properties:
MsgBox pm.FontNames(1)
274 BasicMaker and PlanMaker Manual BasicMaker
3 Properties, objects, collections, and methods
Properties:
Count R/O
Objects:
Item FontName (default object)
Application Application
Parent Application
Count (property, R/O)
Data type: Long
Returns the number of FontName objects – in other words: the number of fonts installed in Windows.
Item (pointer to object)
Data type: Object
Returns an individual FontName object, i.e. an individual installed font.
Which FontName object you get depends on the numeric value that you pass to Item: 1 for the first installed font, 2 for
the second, etc.
Application (pointer to object)
Data type: Object
Returns the Application object.
Parent (pointer to object)
Data type: Object
Returns the parent object, i.e. Application.
FontName (object)
Access path: Application FontNames Item
1 Description
A FontName object represents one individual of the fonts installed in Windows. For each installed font there is its own
FontName object.
2 Access to the object
The individual FontName objects can be accessed solely through enumerating the elements of the FontNames collec-
tion. It can be accessed through the Application.FontNames object:
' Display the name of the first installed font
MsgBox pm.Application.FontNames.Item(1).Name
' The same, but shorter, omitting the default properties:
Manual BasicMaker BasicMaker and PlanMaker 275
MsgBox pm.FontNames(1)
3 Properties, objects, collections, and methods
Properties:
Name (default property) R/O
Charset R/O
Objects:
Application Application
Parent FontNames
Name (property, R/O)
Data type: String
Returns the name of the respective font.
Charset (property, R/O)
Data type: Long (SmoCharset)
Returns the character set of the respective font. The possible values are:
smoAnsiCharset = 0 ' normal character set
smoSymbolCharset = 2 ' symbol character set
Application (pointer to object)
Data type: Object
Returns the Application object.
Parent (pointer to object)
Data type: Object
Returns the parent object, i.e. FontNames.
276 Commands and functions from A to Z Manual BasicMaker
Commands and functions from A to Z
In this chapter you will find descriptions of all commands and functions available in SoftMaker Basic:
Flow control
Do ... Loop, End, Exit, For ... Next, Gosub, Goto, If ... Then ... Else, Return, Select Case, Stop, While ... Wend
Conversion
Asc, CDbl, Chr, CInt, CLng, CSng, CStr, Fix, Format, Hex, Int, Oct, Str, Val
Date and Time
Date, DateSerial, DateValue, Day, Hour, Minute, Month, Now, Second, Time, TimeSerial, TimeValue, Weekday,
Year
Dialogs
Dialog, Dialog function, DlgEnable, DlgText, DlgVisible
File operations
ChDir, ChDrive, Close, CurDir, EOF, FileCopy, FileLen, FreeFile, Input, Kill, Line Input #, MkDir, Open, Print #,
RmDir, Seek, Write #
Arithmetic
Abs, Atn, Cos, Exp, Log, Rnd, Sgn, Sin, Sqr, Tan
Procedures
Call, Declare, Exit, Function ... End Function, Sub ... End Sub
String handling
Asc, Chr, InStr, LCase, Left, Len, LTrim, Mid, Right, RTrim, Space, Str, StrComp, String, Trim
Variables and constants
Const, Dim, IsDate, IsEmpty, IsNull, IsNumeric, Option Explicit, VarType
Arrays
Dim, Erase, LBound, Option Base, Option Explicit, Static, UBound
Applications and OLE
AppActivate, AppDataMaker, AppPlanMaker, AppSoftMakerPresentations, AppTextMaker, CreateObject,
GetObject, SendKeys, Shell
Miscellaneous
#include, Beep, Rem
#include (statement)
#include "[Path\]Filename"
Embeds a file with Basic statements into the current script – as if the file's content was copied and pasted at the place
where the #include statement resides.
For example, you can create a file that contains the definitions of some constants or dialogs that you want to reuse in
multiple scripts. To embed this file into any script, simply add the #include command at the desired position.
Note: You can omit the file path if the file to embed resides in the same folder.
Manual BasicMaker Commands and functions from A to Z 277
Example:
#include "code_snippet.bas"
#include "c:\scripts\code_snippet.bas"
Abs (function)
Abs(Num)
Returns the absolute value of the numeric value Num, i.e., removes its sign. If Num is zero, Abs returns zero.
The type of the return value corresponds to the type of the passed parameter Num. Exception: if Num is a Variant of
VarType 8 (String) and can be converted to a number, the result will have the type Variant of VarType 5 (Double).
See also: Sgn
Example:
Sub Main
Dim Msg, x, y
x = InputBox("Enter a number:")
y = Abs(x)
Msg = "The absolute value of " & x & " is: " & y
MsgBox Msg
End Sub
AppActivate (statement)
AppActivate "Title"
Activates an already running application, i.e., brings the application window to the front and sets the focus to the appli-
cation.
The text string Title is the application name as it appears in the title bar.
See also: AppDataMaker, AppPlanMaker, AppTextMaker, CreateObject, GetObject, Shell
Example:
Sub Main
X = Shell("Calc.exe", 1) ' Run the Calculator application
For i = 1 To 5
SendKeys i & "{+}", True ' Send keystrokes
Next i
Msg = "The Calculator will be closed now."
MsgBox Msg
AppActivate "Calculator" ' Set the focus to the calculator
SendKeys "%{F4}", True ' Send Alt+F4 to close the application
End Sub
AppDataMaker (function)
AppDataMaker ["Command line parameters"]
Starts the database program DataMaker.
The return value is a task ID that identifies the program. Values below 32 indicate that launching the program failed.
278 Commands and functions from A to Z Manual BasicMaker
You can pass the name of the file to be opened as a command line parameter – for example:
AppDataMaker "c:\Data\Customers.dbf"
To ensure that this command does not fail, DataMaker must be registered in the Windows Registry. If this is not the
case, it is sufficient to start DataMaker once conventionally. The program will then automatically update its settings in
the Registry.
See also: AppPlanMaker, AppSoftMakerPresentations, AppTextMaker, CreateObject, GetObject, Shell
AppPlanMaker (function)
AppPlanMaker ["Command line parameters"]
Starts the spreadsheet program PlanMaker.
The return value is a task ID that identifies the program. Values below 32 indicate that launching the program failed.
You can pass the name of the file to be opened as a command line parameter – for example:
AppPlanMaker "c:\Data\Table1.pmd"
To ensure that this command does not fail, PlanMaker must be registered in the Windows Registry. If this is not the
case, it is sufficient just to start PlanMaker once conventionally. The program will then automatically update its settings
in the Registry.
Hint: This command simply starts the PlanMaker application without establishing an OLE Automation connection. If
you would like to make an OLE Automation connection to PlanMaker, you can use the function GetObject after
invoking AppPlanMaker. Alternatively, you can use the function CreateObject in place of AppPlanMaker. In this
case, PlanMaker will be launched and an OLE Automation connection will be established at the same time.
See also: AppDataMaker, AppSoftMakerPresentations, AppTextMaker, CreateObject, GetObject, Shell
AppSoftMakerPresentations (function)
AppSoftMakerPresentations ["Command line parameters"]
Starts the presentation graphics program Presentations.
The return value is a task ID that identifies the program. Values below 32 indicate that launching the program failed.
You can pass the name of the file to be opened as a command line parameter – for example:
AppSoftMakerPresentations "c:\Data\Presentation1.prd"
To ensure that this command does not fail, Presentations must be registered in the Windows Registry. If this is not the
case, it is sufficient just to start Presentations once conventionally. The program will then automatically update its
settings in the Registry.
See also: AppDataMaker, AppTextMaker, CreateObject, GetObject, Shell
AppTextMaker (function)
AppTextMaker ["Command line parameters"]
Starts the word processor TextMaker.
The return value is a task ID that identifies the program. Values below 32 indicate that launching the program failed.
You can pass the name of the file to be opened as a command line parameter – for example:
Manual BasicMaker Commands and functions from A to Z 279
AppTextMaker "c:\Documents\Letter.tmd"
To ensure that this command does not fail, TextMaker must be registered in the Windows Registry. If this is not the
case, it is sufficient just to start TextMaker once conventionally. The program will then automatically update its settings
in the Registry.
Hint: This command simply starts the TextMaker application without establishing an OLE Automation connection. If
you would like to make an OLE Automation connection to TextMaker, you can use the function GetObject after
invoking AppTextMaker. Alternatively, you can use the function CreateObject in place of AppTextMaker. In this
case, TextMaker will be launched and an OLE Automation connection will be established at the same time.
See also: AppDataMaker, AppPlanMaker, AppSoftMakerPresentations, CreateObject, GetObject, Shell
Asc (function)
Asc(Str)
Returns the character code of the first letter in a string according to the Unicode character table (UCS-2).
The result is an integer value between 0 and 32767.
See also: Chr
Example:
Sub Main
Dim i, Msg
For i = Asc("A") To Asc("Z")
Msg = Msg & Chr(i)
Next i
MsgBox Msg
End Sub
Atn (function)
Atn(Num)
Returns the arctangent of a number.
The result is expressed in radians.
See also: Cos, Sin, Tan
Example:
Sub AtnExample
Dim Msg, Pi ' Declare variables
Pi = 4 * Atn(1) ' Calculate Pi
Msg = "Pi = " & Str(Pi)
MsgBox Msg ' The result: "Pi = 3.1415..."
End Sub
Beep (statement)
Beep
Emits a short tone.
Example:
280 Commands and functions from A to Z Manual BasicMaker
Sub Beep3x
Dim i As Integer
For i = 1 to 3
Beep
Next i
End Sub
Begin Dialog ... End Dialog (statement)
Begin Dialog DialogName [X, Y,] Width, Height, Title$ [,.DialogFunction]
DialogDefinition...
End Dialog
Is used to define a custom dialog box. See the section "Dialog definition".
More information about creating custom dialog boxes can be found in the section "Dialog boxes".
Call (statement)
Call Name [(Parameters)]
Or:
Name [Parameters]
Executes the Sub or Function procedure or DLL function with the name Name.
Parameters is a comma-separated list of parameters which can be passed to the procedure.
The keyword Call is usually omitted. If it is used, the parameter list must be enclosed in parentheses, otherwise paren-
theses may not be used.
Call Name(Parameter1, Parameter2 ...) has therefore the same meaning as Name Parameter1, Parameter2 ...
Functions can also be executed using the instruction Call, however their return value will then be lost.
See also: Declare, Function, Sub
Example:
Sub Main
Call Beep
End Sub
CDbl (function)
CDbl(Expression)
Converts an expression to the Double data type. The parameter Expression must be a number or a string.
See also: CInt, CLng, CSng, CStr
Example:
Sub Main
Dim y As Integer
y = 25
If VarType(y) = 2 Then
Print y
x = CDbl(y)
Manual BasicMaker Commands and functions from A to Z 281
Print x
End If
End Sub
ChDir (statement)
ChDir [Drive:]Folder
Changes to a different current drive/folder.
Drive is an optional parameter (the default value is the current drive).
Folder is the name of the folder on the given drive.
The full path may not have more than 255 characters.
See also: CurDir, ChDrive, MkDir, RmDir
Example:
Sub Main
Dim Answer, Msg, NL
NL = Chr(10) ' Chr(10)=New line
CurPath = CurDir() ' Determine current path
ChDir "\"
Msg = "The folder was changed to " & CurDir() & "."
Msg = Msg & NL & NL & "Click on OK "
Msg = Msg & "to return to the previous folder."
Answer = MsgBox(Msg)
ChDir CurPath ' Back to the old folder
Msg = "We are now back to the folder " & CurPath & "."
MsgBox Msg
End Sub
ChDrive (statement)
ChDrive Drive
Changes the current drive.
Drive is a text string specifying the drive letter.
If Drive is a multi-character string, only the first character will be used.
See also: ChDir, CurDir, MkDir, RmDir
Example:
Sub Main
Dim Answer, Msg, NL
NL = Chr(10) ' Chr(10)=New Line
CurPath = CurDir() ' Determine current path
ChDrive "D"
Msg = "The folder was changed to " & CurDir() & "."
Msg = Msg & NL & NL & "Click on OK "
Msg = Msg & "to return to the previous folder."
Answer = MsgBox(Msg)
ChDir CurPath ' Back to the original folder
Msg = " We are now back to the folder " & CurPath & "."
MsgBox Msg
End Sub
282 Commands and functions from A to Z Manual BasicMaker
Chr (function)
Chr(Num)
Returns the character associated with the specified character code from the Unicode character table (UCS-2).
The parameter Num can take an integer value between 0 and 32767.
See also: Asc
Example:
Sub Main
Dim i, Msg
For i = Asc("A") To Asc("Z")
Msg = Msg & Chr(i)
Next i
MsgBox Msg
End Sub
CInt (function)
CInt(Expression)
Converts an expression to the Integer data type.
The parameter Expression must be a number or a string consisting of a number.
The valid range of values:
-32768 <= Expression <= 32768
See also: CDbl, CLng, CSng, CStr
Example:
Sub Main
Dim y As Long
y = 25
x = CInt(y)
Print x
End Sub
CLng (function)
CLng(Expression)
Converts an expression to the Long data type.
The parameter Expression must be a number or a string consisting of a number.
The valid range of values:
-2147483648 <= Expression <= 2147483648
See also: CDbl, CInt, CSng, CStr
Example:
Sub Main
Dim y As Integer
y = 25
If VarType(y) = 2 Then
Print y
Manual BasicMaker Commands and functions from A to Z 283
x = CLng(y)
Print x
End If
End Sub
Close (statement)
Close [[#]FileNumber]
Closes a specific open file or all open files.
FileNumber is the number assigned to the file by the Open command. If you omit it, all currently opened files will be
closed.
See also: Open
Example:
Sub Make3Files
Dim i, FNum, Fname
For i = 1 To 3
FNum = FreeFile ' Retrieve a free file index
FName = "TEST" & FNum
Open FName For Output As Fnum ' Open file
Print #I, "This is test #" & i ' Write to file
Print #I, "One more line"
Next i
Close ' Close all files
End Sub
Const (statement)
Const Name = Expression
Defines a symbolic name for a constant.
Constants defined outside of procedures are always global.
A type suffix (e.g. % for Integer, see the section "Data types") can be attached to the name, determining the data type of
the constant. Otherwise, the type is Long, Double, or String, depending on the constant value.
See also: Section "Data types"
Example:
Global Const GlobalConst = 142
Const MyConst = 122
Sub Main
Dim Answer, Msg
Const PI = 3.14159
.
.
.
Cos (function)
Cos(Num)
Returns the cosine of an angle.
284 Commands and functions from A to Z Manual BasicMaker
The angle must be expressed in radians.
See also: Atn, Sin, Tan
Example:
Sub Main
pi = 4 * Atn(1)
rad = 180 * (pi/180)
x = Cos(rad)
Print x
End Sub
CreateObject (function)
CreateObject(Class)
Creates an OLE Automation object and returns a reference to this object.
The function expects the following syntax for the Class parameter:
Application.Class
Application is the application name and Class is the object type. Class is the name under which the object is listed the
Windows Registry.
Example:
Set tm = CreateObject("TextMaker.Application")
When you invoke this function and the respective application is not already running, it will launch automatically.
As soon as the object has been created, its methods and properties can be accessed using dot notation – for example:
tm.Visible = True ' makes TextMaker's application window visible
See also: GetObject, Set, section "OLE Automation"
CSng (function)
CSng(Expression)
Converts an expression to the Single data type.
See also: CDbl, CInt, CLng, CStr
Example:
Sub Main
Dim y As Integer
y = 25
If VarType(y) = 2 Then
Print y
x = CSng(y)
Print x
End If
End Sub
CStr (function)
CStr(Expression)
Manual BasicMaker Commands and functions from A to Z 285
Converts an expression to the String data type.
Unlike the Str function, the string returned by CStr does not have a leading space character if it contains a positive
number.
See also: CDbl, CInt, CLng, CSng, Str
CurDir (function)
CurDir(Drive)
Returns the current folder on the given drive.
Drive is a text string specifying the drive letter.
If Drive is not specified, the current drive will be used.
See also: ChDir, ChDrive, MkDir, RmDir
Example:
Sub Main
MsgBox "The current folder is: " & CurDir()
End Sub
Date (function)
Date [()]
Returns the current system date in short date format.
The short date format can be changed using the Regional Settings applet in the Windows Control Panel.
The result is a Variant of VarType 8 (String).
See also: DateSerial, DateValue, Day, Month, Now, Time, Weekday, Year
Example:
Sub Main
MsgBox "Today is " & Date & "."
End Sub
DateSerial (function)
DateSerial(Year, Month, Day)
Returns a Variant variable (type: date) corresponding to the specified year, month, and day.
See also: DateValue, Day, Month, Now, Time, TimeSerial, TimeValue, Weekday, Year
Example:
Sub Main
Print DateSerial(2016,09,25)
End Sub
286 Commands and functions from A to Z Manual BasicMaker
DateValue (function)
DateValue(DateExpression)
Returns a Variant variable (type: date) corresponding to the specified date expression. DateExpression can be a string or
any expression that represents a date, a time, or both a date and a time.
See also: DateSerial, Day, Month, Now, Time, TimeSerial, TimeValue, Weekday, Year
Example:
Sub Main
Print DateValue("Sep 25, 2016")
End Sub
Day (function)
Day(Expression)
Returns the day of the month for the given date expressed as an integer value.
Expression is a numeric or string expression which represents a date.
See also: Date, Hour, Minute, Month, Now, Second, Time, Weekday, Year
Example:
Sub Main
T1 = Now ' Now = current date + time
MsgBox T1
MsgBox "Day: " & Day(T1)
MsgBox "Month: " & Month(T1)
MsgBox "Year: " & Year(T1)
MsgBox "Hours: " & Hour(T1)
MsgBox "Minutes: " & Minute(T1)
MsgBox "Seconds: " & Second(T1)
End Sub
Declare (statement)
Declare Sub Name Lib LibName$ [Alias AliasName$] [(Parameters)]
Or:
Declare Function Name Lib LibName$ [Alias AliasName$] [(Parameters)] [As Type]
Declares a procedure or a function contained in a Dynamic Link Library (DLL).
Name is the name of the procedure or function.
LibName is the name of the DLL in which the procedure or function resides.
AliasName is the name under which the procedure or the function is exported from the DLL. If AliasName is omitted, it
will be the same as Name. An alias is required, for example, if the exported name is a reserved name in SoftMaker Basic
or contains characters which are not allowed in names.
Parameters is a comma-separated list of parameter declarations (see below).
Type specifies the data type (String, Integer, Double, Long, Variant). Alternatively, the type can be indicated by
appending a type suffix (e.g. % for Integer) to the function name (see the section "Data types").

Manual BasicMaker Commands and functions from A to Z 287
The Declare command can be used only outside of Sub and Function declarations.
Declaring parameters
[ByVal | ByRef] Variable [As Type]
The keywords ByVal or ByRef (default value) are used to indicate whether the parameter is passed by value or by
reference (see the section "Passing parameters via ByRef or ByVal").
Type specifies the data type (String, Integer, Double, Long, Variant). Alternatively, the type can be indicated using a
type suffix – e.g. % for Integer (see the section "Data types").
See also: Call, section "Data types"
Dialog (function)
Dialog(Dlg)
Displays a custom dialog box.
Dlg is the name of a dialog variable that must have been declared previously with the Dim command.
The return value is the index of the button that was pressed by the user:
-1 OK
0 Cancel
> 0 User-defined command buttons (1 for the first, 2 for the second, etc.)
See also: DlgEnable, DlgText, DlgVisible, section "Dialog boxes"
Example:
' Shows different information, depending on
' which button was pressed.
Sub Main
Dim MyList$(2)
MyList(0) = "Banana"
MyList(1) = "Orange"
MyList(2) = "Apple"
Begin Dialog DialogName1 60, 60, 240, 184, "Test Dialog"
Text 10, 10, 28, 12, "Name:"
TextBox 40, 10,50, 12, .joe
ListBox 102, 10, 108, 16, MyList$(), .MyList1
ComboBox 42, 30, 108, 42, MyList$(), .Combo1
DropListBox 42, 76, 108, 36, MyList$(), .DropList1$
OptionGroup .grp1
OptionButton 42, 100, 48, 12, "Option&1"
OptionButton 42, 110, 48, 12, "Option&2"
OptionGroup .grp2
OptionButton 42, 136, 48, 12, "Option&3"
OptionButton 42, 146, 48, 12, "Option&4"
GroupBox 132, 125, 70, 36, "Group"
CheckBox 142, 100, 48, 12, "Check&A", .Check1
CheckBox 142, 110, 48, 12, "Check&B", .Check2
CheckBox 142, 136, 48, 12, "Check&C", .Check3
CheckBox 142, 146, 48, 12, "Check&D", .Check4
CancelButton 42, 168, 40, 12
OKButton 90, 168, 40, 12
PushButton 140, 168, 40, 12, "Button1"
PushButton 190, 168, 40, 12, "Button2"
End Dialog
288 Commands and functions from A to Z Manual BasicMaker
Dim Dlg1 As DialogName1
Dlg1.joe = "Hare"
Dlg1.MyList1 = 1
Dlg1.Combo1 = "Kiwi"
Dlg1.DropList1 = 2
Dlg1.grp2 = 1
' Dialog returns -1 for OK, 0 for Cancel, # for Button1/2
button = Dialog(Dlg1)
If button = 0 Then Return
MsgBox "Input Box: "& Dlg1.joe
MsgBox "List Box: " & Dlg1.MyList1
MsgBox Dlg1.Combo1
MsgBox Dlg1.DropList1
MsgBox "Group1: " & Dlg1.grp1
MsgBox "Group2: " & Dlg1.grp2
Begin Dialog DialogName2 60, 60, 160, 60, "Test Dialog 2"
Text 10, 10, 28, 12, "Name:"
TextBox 42, 10, 108, 12, .fred
OkButton 42, 44, 40, 12
End Dialog
If button = 2 Then
Dim Dlg2 As DialogName2
Dialog Dlg2
MsgBox Dlg2.fred
ElseIf button = 1 Then
Dialog Dlg1
MsgBox Dlg1.Combo1
End If
End Sub
Dim (statement)
Dim Name [(Subscripts)][As Type] [, ...]
Allocates memory for a variable and defines its type.
Name is the name of the variable.
Subscripts indicates the number and size of the dimensions, in case an array is created (see the section "Arrays"). Use
the following syntax:
[LowerLimit To] UpperLimit [, [LowerLimit To] UpperLimit ] ...
For LowerLimit and UpperLimit, you should give integer values that determine the largest and smallest allowed
values for the array index, thereby specifying the array size. Only fixed values are allowed (no variables).
If LowerLimit is omitted, it will take the value specified through the Option Base command (0 or 1).
To declare dynamic arrays (see the ReDim command), omit all limits:
Dim a()
Type specifies the data type (Integer, Long, Single, Double, String, String*n, Boolean, Variant, Object or a user-
defined). Alternatively, the type can be indicated by appending a type suffix (e.g. % for Integer) to the variable name
(see the section "Data types").
For example:
Dim Value As Integer
is identical to:
Dim Value%
If neither a data type nor a type suffix is given, a Variant variable will be created.
Manual BasicMaker Commands and functions from A to Z 289
See also: Option Base, ReDim, section "Variables"
Example:
Sub Main
Dim a As Integer ' (alternatively: Dim a%)
Dim b As Long
Dim c As Single
Dim d As Double
Dim e As String
Dim f As Variant ' (alternatively: Dim f or Dim f as Any)
Dim g(10,10) As Integer ' Array of variables
.
.
.
DlgEnable (statement)
DlgEnable "Name" [, State]
Enables or disables a dialog control in a custom dialog box. A disabled dialog control is shown in gray. It cannot be
changed by the user.
This command can be called from inside dialog functions.
The string Name is the name of the dialog control in the dialog box.
If State = 0, the dialog control will be disabled; for all other values of State it will be enabled. If State is not specified,
the state of the dialog control will be toggled.
See also: DlgText, DlgVisible, section "Dialog boxes"
Example:
If ControlID$ = "Chk1" Then
DlgEnable "Group", 1
DlgVisible "Chk2"
DlgVisible "History"
End If
DlgText (statement)
DlgText "Name", Text
Sets the text of a dialog control in a custom dialog box.
This command can be called from inside dialog functions.
The string Name is the name of the dialog control in the dialog box.
The string Text is the text to be set.
See also: DlgEnable, DlgVisible, section "Dialog boxes"
Example:
If ControlID$ = "Chk2" Then
DlgText "t1", "Open"
End If
290 Commands and functions from A to Z Manual BasicMaker
DlgVisible (statement)
DlgVisible "Name", [Value]
Hides a dialog control in a custom dialog box or makes it visible again.
This command can be called from inside dialog functions.
The string Name is the name of the dialog control in the dialog box.
If Value = 0, the dialog control will be hidden, for all other values of Value it will be displayed. If Value is not specified,
the dialog control will be hidden if it is currently visible, and vice versa.
See also: DlgEnable, DlgText, section "Dialog boxes"
Example:
If ControlID$ = "Chk1" Then
DlgEnable "Group", 1
DlgVisible "Chk2"
DlgVisible "Open"
End If
Do ... Loop (statement)
Do [{While|Until} Condition]
[Commands]
[Exit Do]
[Commands]
Loop
Or:
Do
[Commands]
[Exit Do]
[Commands]
Loop [{While|Until} Condition]
Executes a group of commands repeatedly as long as a condition is true (Do ... While) or until a condition becomes true
(Do ... Until). See also the section "Flow control".
See also: While ... Wend, section "Flow control"
Example:
Sub Main
Dim Value, Msg
Do
Value = InputBox("Enter a number between 5 and 10.")
If Value >= 5 And Value <= 10 Then
Exit Do ' Number is OK -> Exit
Else
Beep ' Number is not OK -> try once more
End If
Loop
End Sub
End (statement)
End [{Function|If|Sub}]
Stops executing a script or a command block.
Manual BasicMaker Commands and functions from A to Z 291
See also: Exit, Function, If ... Then ... Else, Select Case, Stop, Sub
Example:
In this example, the End command ends the program execution within the routine "Test".
Sub Main
Dim Var1 as String
Var1 = "Hello"
MsgBox "Test"
Test Var1
MsgBox Var1
End Sub
Sub Test(wvar1 as String)
wvar1 = "End"
MsgBox "Program terminated because of the End command"
End
End Sub
EOF (function)
EOF(FileNumber)
Returns True if the end of the file" has been reached.
FileNumber is the number assigned to the respective file by the Open command.
See also: Open
Example:
' Read 10 characters at a time from a file and display them.
' "Testfile" must already exist.
Sub Main
Open "TESTFILE" For Input As #1 ' Open file
Do While Not EOF(1) ' Repeat until end of file
MyStr = Input(10, #1) ' Read 10 characters
MsgBox MyStr
Loop
Close #1 ' Close file
End Sub
Erase (statement)
Erase ArrayName [, ...]
Re-initializes the elements of an array.
See also: Dim
Example:
Option Base 1
Sub Main
Dim a(10) As Double
Dim i As Integer
For i = 1 to 3
a(i) = 2 + i
Next i
Erase a
Print a(1), a(2), a(3) ' Returns 0 0 0
End Sub
292 Commands and functions from A to Z Manual BasicMaker
Exit (statement)
Exit {Do|For|Function|Sub}
Exits from a Do loop, a For loop, a function, or a procedure.
See also: End, Stop
Example:
Sub Main
Dim Value, Msg
Do
Value = InputBox("Enter a number between 5 and 10.")
If Value >= 5 And Value <= 10 Then
Exit Do ' Number is OK -> Exit from the loop
Else
Beep ' Number is not OK -> try once more
End If
Loop
End Sub
Exp (function)
Exp(Number)
Calculates the exponential function (e ^ Number).
The value of the constant e (Euler's constant) is approximately 2.71828.
See also: Log
Example:
' Exp(x)=e^x, therefore Exp(1)=e
Sub ExpExample
Dim Msg, ValueOfE
ValueOfE = Exp(1)
Msg = "The value of e is " & ValueOfE
MsgBox Msg
End Sub
FileCopy (statement)
FileCopy SourceFile, TargetFile
Copies the file SourceFile to TargetFile.
The parameters SourceFile and TargetFile must be strings with the desired file names. Wildcard characters such as "*"
or "?" are not allowed.
FileLen (function)
FileLen(Filename)
Returns the size of the specified file in bytes (as a Long Integer).
The parameter Filename must be a string with the desired file name. Wildcard characters such as "*" or "?" are not
allowed.
Manual BasicMaker Commands and functions from A to Z 293
Fix (function)
Fix(Num)
Returns the integral part of a numerical expression.
The difference to the Int function is in the handling of negative numbers: while Int always returns the next integer less
than or equal to Num, the function Fix simply removes the part after the decimal separator (see example).
See also: Int
Example:
Sub Main
Print Int( 1.4) ' -> 1
Print Fix( 1.4) ' -> 1
Print Int(-1.4) ' -> -2
Print Fix(-1.4) ' -> -1
End Sub
For Each ... Next (statement)
For Each Element In Group
[Commands]
[Exit For]
[Commands]
Next [Element]
Executes a group of commands for all elements of a field or a collection.
Element is a variable of type Variant (for arrays) or Object (for collections) that successively takes on the values of the
individual elements from Group.
For Each ... Next cannot be used with arrays of user-defined types.
See also: For ... Next, Exit, section "Arrays", section "Using collections"
Example:
Sub Main
Dim z(1 To 4) As Double
z(1) = 1.11
z(2) = 2.22
z(3) = 3.33
z(4) = 4.44
For Each v In z
Print v
Next v
End Sub
For ... Next (statement)
For Counter = InitialValue To FinalValue [Step StepSize]
[Commands]
[Exit For]
[Commands]
Next [Counter]
Executes a group of commands in a loop.
Counter is the counter variable that is increased by the value indicated in StepSize at each iteration.
InitialValue is the initial value for Counter.
294 Commands and functions from A to Z Manual BasicMaker
FinalValue is the final value for Counter.
StepSize is the step value. If it is omitted, the step value is 1.
In the first iteration, Counter assumes the value of InitialValue. At each additional iteration, StepSize is added to the
value of Counter. The loop execution will end as soon as FinalValue is exceeded.
See also: For Each ... Next, Exit, section "Flow control"
Example:
Sub Main
Dim x, y, z
For x = 1 To 3
For y = 1 To 3
For z = 1 To 3
Print z, y, x
Next z
Next y
Next x
End Sub
Format (function)
Format(Expression [,Format])
Returns a string consisting of the Expression parameter formatted according to the chosen formatting instructions.
The desired format is specified using the string parameter Format. You can choose from several predefined formats that
are listed on the pages that follow. Additionally, more precise formatting can be achieved using user-defined formats.
If the parameter Format is empty and Expression is a number, the Format function will return the same result as the Str
function, with the exception that Format does not prepend a space character to positive numbers.
For numeric formats, Expression must be a numeric expression; for string formats it must be a string.
For date/time formats, Expression must be a string with the same structure as returned by the Now function.
See also: Str, sections "Numeric formats of the Format function", "Date/time formats of the Format function", and
"String formats of the Format function"
Example:
Sub Main
MsgBox Format(Date, "long date")
MsgBox Format(Date, "dd.mm.yy")
End Sub
Numeric formats of the Format function
The following table lists the predefined numeric formats for the Format function:
Format name Description
General Number Output the unformatted number
Fixed Output with at least one digit to the left and exactly two digits to the right of the decimal separator
Standard Output with at least one digit to the left and exactly two digits to the right of the decimal separator;
additionally, the thousands separator is used for numbers >= 1000
Percent Output with at least one digit to the left and exactly two digits to the right of the decimal separator;
additionally, the number is multiplied by 100 and a percent sign is appended
Scientific Output with at least one digit to the left and exactly two digits to the right of the decimal separator
using scientific notation (exponential notation)
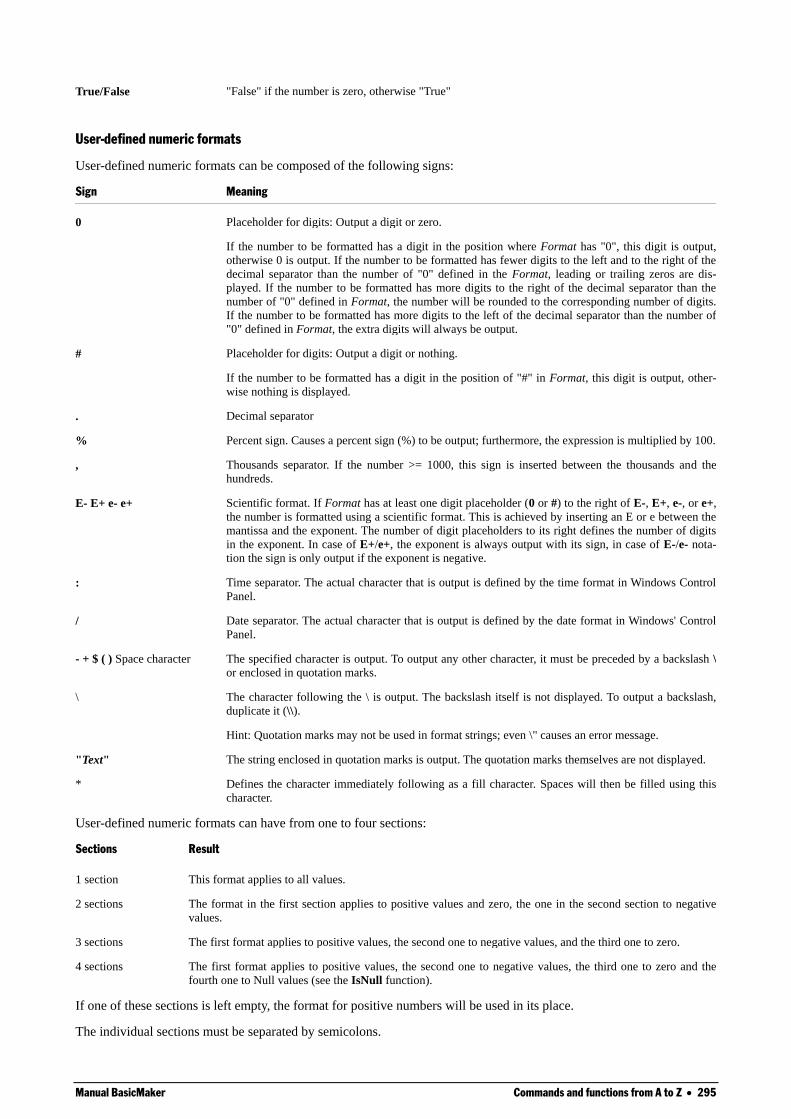
Manual BasicMaker Commands and functions from A to Z 295
True/False "False" if the number is zero, otherwise "True"
User-defined numeric formats
User-defined numeric formats can be composed of the following signs:
Sign Meaning
0 Placeholder for digits: Output a digit or zero.
If the number to be formatted has a digit in the position where Format has "0", this digit is output,
otherwise 0 is output. If the number to be formatted has fewer digits to the left and to the right of the
decimal separator than the number of "0" defined in the Format, leading or trailing zeros are dis-
played. If the number to be formatted has more digits to the right of the decimal separator than the
number of "0" defined in Format, the number will be rounded to the corresponding number of digits.
If the number to be formatted has more digits to the left of the decimal separator than the number of
"0" defined in Format, the extra digits will always be output.
# Placeholder for digits: Output a digit or nothing.
If the number to be formatted has a digit in the position of "#" in Format, this digit is output, other-
wise nothing is displayed.
. Decimal separator
% Percent sign. Causes a percent sign (%) to be output; furthermore, the expression is multiplied by 100.
, Thousands separator. If the number >= 1000, this sign is inserted between the thousands and the
hundreds.
E- E+ e- e+ Scientific format. If Format has at least one digit placeholder (0 or #) to the right of E-, E+, e-, or e+,
the number is formatted using a scientific format. This is achieved by inserting an E or e between the
mantissa and the exponent. The number of digit placeholders to its right defines the number of digits
in the exponent. In case of E+/e+, the exponent is always output with its sign, in case of E-/e- nota-
tion the sign is only output if the exponent is negative.
: Time separator. The actual character that is output is defined by the time format in Windows Control
Panel.
/ Date separator. The actual character that is output is defined by the date format in Windows' Control
Panel.
- + $ ( ) Space character The specified character is output. To output any other character, it must be preceded by a backslash \
or enclosed in quotation marks.
\ The character following the \ is output. The backslash itself is not displayed. To output a backslash,
duplicate it (\\).
Hint: Quotation marks may not be used in format strings; even \" causes an error message.
"Text" The string enclosed in quotation marks is output. The quotation marks themselves are not displayed.
* Defines the character immediately following as a fill character. Spaces will then be filled using this
character.
User-defined numeric formats can have from one to four sections:
Sections Result
1 section This format applies to all values.
2 sections The format in the first section applies to positive values and zero, the one in the second section to negative
values.
3 sections The first format applies to positive values, the second one to negative values, and the third one to zero.
4 sections The first format applies to positive values, the second one to negative values, the third one to zero and the
fourth one to Null values (see the IsNull function).
If one of these sections is left empty, the format for positive numbers will be used in its place.
The individual sections must be separated by semicolons.
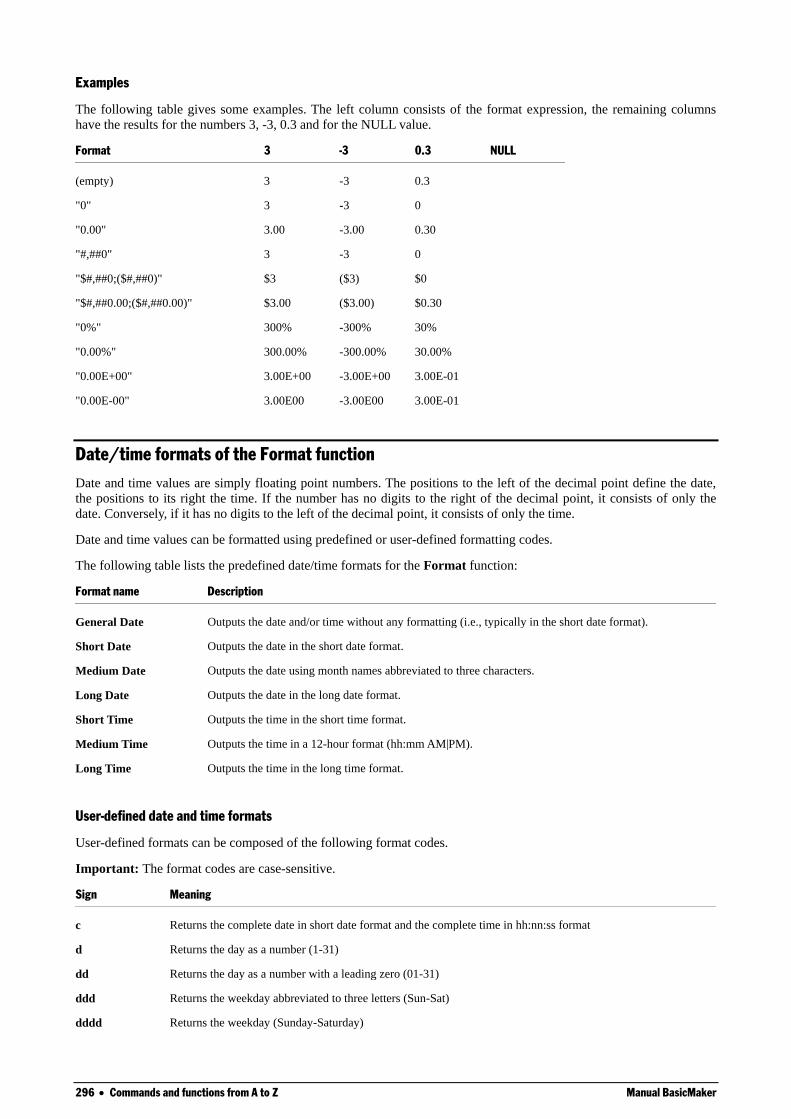
296 Commands and functions from A to Z Manual BasicMaker
Examples
The following table gives some examples. The left column consists of the format expression, the remaining columns
have the results for the numbers 3, -3, 0.3 and for the NULL value.
Format 3 -3 0.3 NULL
(empty) 3 -3 0.3
"0" 3 -3 0
"0.00" 3.00 -3.00 0.30
"#,##0" 3 -3 0
"$#,##0;($#,##0)" $3 ($3) $0
"$#,##0.00;($#,##0.00)" $3.00 ($3.00) $0.30
"0%" 300% -300% 30%
"0.00%" 300.00% -300.00% 30.00%
"0.00E+00" 3.00E+00 -3.00E+00 3.00E-01
"0.00E-00" 3.00E00 -3.00E00 3.00E-01
Date/time formats of the Format function
Date and time values are simply floating point numbers. The positions to the left of the decimal point define the date,
the positions to its right the time. If the number has no digits to the right of the decimal point, it consists of only the
date. Conversely, if it has no digits to the left of the decimal point, it consists of only the time.
Date and time values can be formatted using predefined or user-defined formatting codes.
The following table lists the predefined date/time formats for the Format function:
Format name Description
General Date Outputs the date and/or time without any formatting (i.e., typically in the short date format).
Short Date Outputs the date in the short date format.
Medium Date Outputs the date using month names abbreviated to three characters.
Long Date Outputs the date in the long date format.
Short Time Outputs the time in the short time format.
Medium Time Outputs the time in a 12-hour format (hh:mm AM|PM).
Long Time Outputs the time in the long time format.
User-defined date and time formats
User-defined formats can be composed of the following format codes.
Important: The format codes are case-sensitive.
Sign Meaning
c Returns the complete date in short date format and the complete time in hh:nn:ss format
d Returns the day as a number (1-31)
dd Returns the day as a number with a leading zero (01-31)
ddd Returns the weekday abbreviated to three letters (Sun-Sat)
dddd Returns the weekday (Sunday-Saturday)
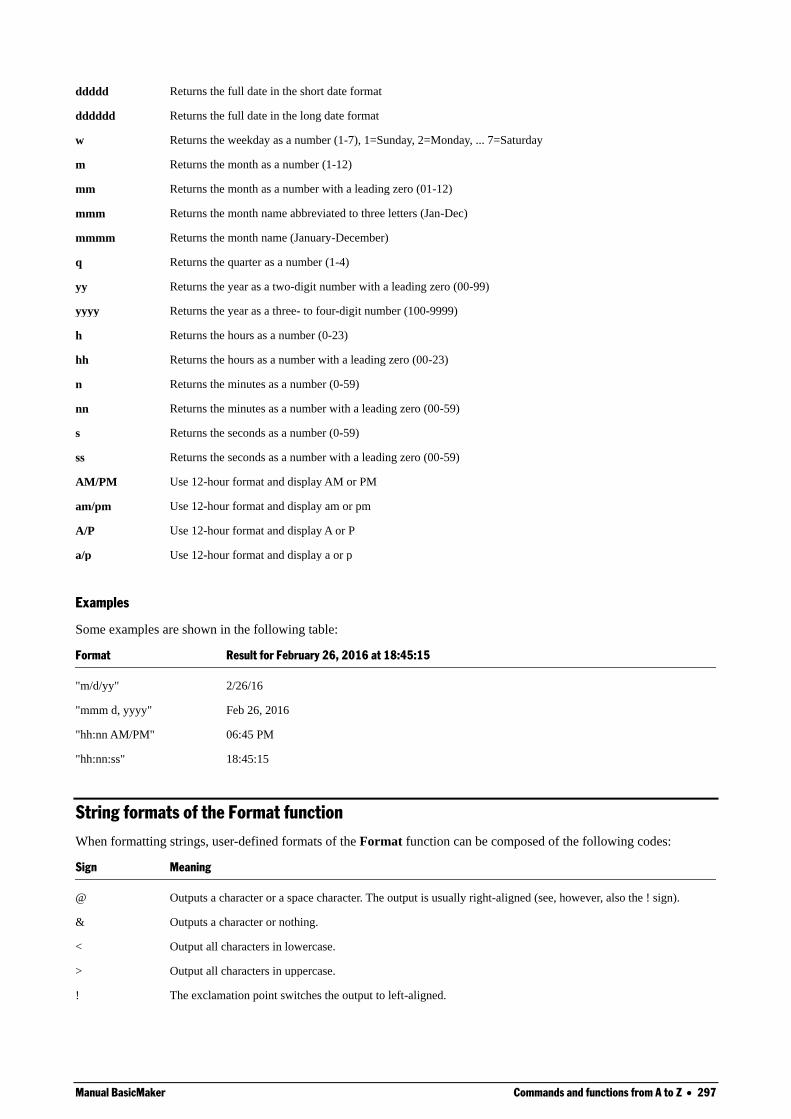
Manual BasicMaker Commands and functions from A to Z 297
ddddd Returns the full date in the short date format
dddddd Returns the full date in the long date format
w Returns the weekday as a number (1-7), 1=Sunday, 2=Monday, ... 7=Saturday
m Returns the month as a number (1-12)
mm Returns the month as a number with a leading zero (01-12)
mmm Returns the month name abbreviated to three letters (Jan-Dec)
mmmm Returns the month name (January-December)
q Returns the quarter as a number (1-4)
yy Returns the year as a two-digit number with a leading zero (00-99)
yyyy Returns the year as a three- to four-digit number (100-9999)
h Returns the hours as a number (0-23)
hh Returns the hours as a number with a leading zero (00-23)
n Returns the minutes as a number (0-59)
nn Returns the minutes as a number with a leading zero (00-59)
s Returns the seconds as a number (0-59)
ss Returns the seconds as a number with a leading zero (00-59)
AM/PM Use 12-hour format and display AM or PM
am/pm Use 12-hour format and display am or pm
A/P Use 12-hour format and display A or P
a/p Use 12-hour format and display a or p
Examples
Some examples are shown in the following table:
Format Result for February 26, 2016 at 18:45:15
"m/d/yy" 2/26/16
"mmm d, yyyy" Feb 26, 2016
"hh:nn AM/PM" 06:45 PM
"hh:nn:ss" 18:45:15
String formats of the Format function
When formatting strings, user-defined formats of the Format function can be composed of the following codes:
Sign Meaning
@ Outputs a character or a space character. The output is usually right-aligned (see, however, also the ! sign).
& Outputs a character or nothing.
< Output all characters in lowercase.
> Output all characters in uppercase.
! The exclamation point switches the output to left-aligned.
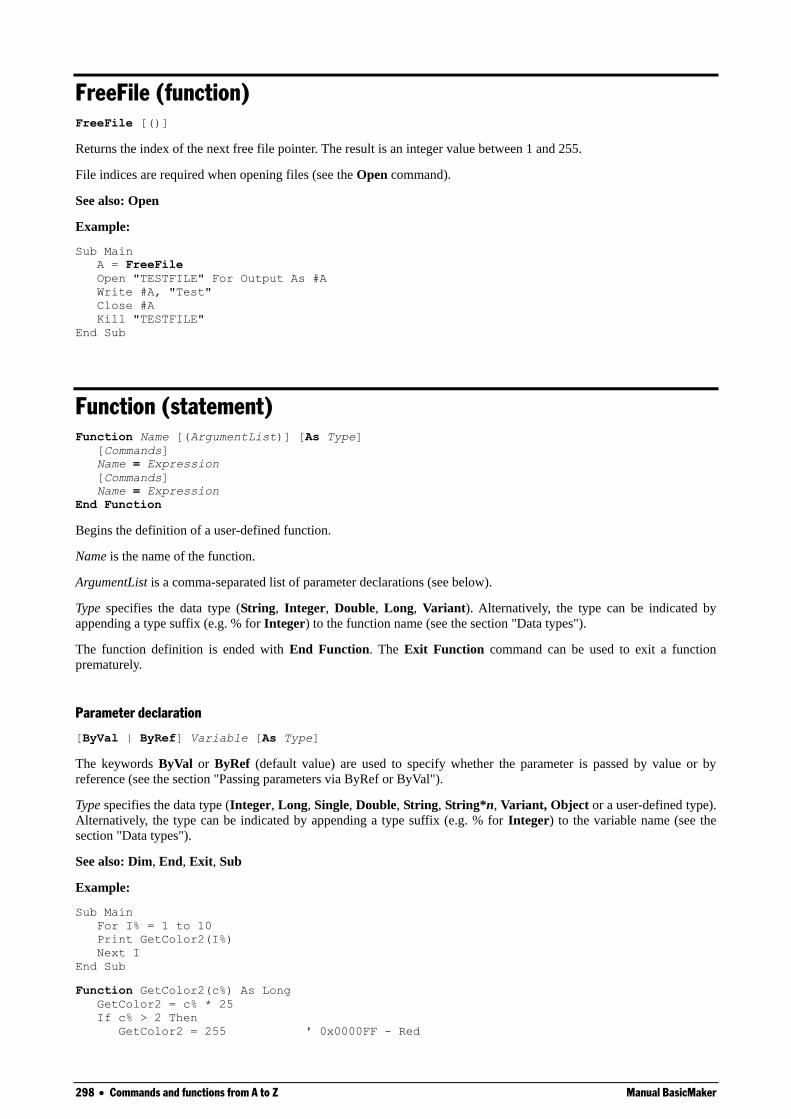
298 Commands and functions from A to Z Manual BasicMaker
FreeFile (function)
FreeFile [()]
Returns the index of the next free file pointer. The result is an integer value between 1 and 255.
File indices are required when opening files (see the Open command).
See also: Open
Example:
Sub Main
A = FreeFile
Open "TESTFILE" For Output As #A
Write #A, "Test"
Close #A
Kill "TESTFILE"
End Sub
Function (statement)
Function Name [(ArgumentList)] [As Type]
[Commands]
Name = Expression
[Commands]
Name = Expression
End Function
Begins the definition of a user-defined function.
Name is the name of the function.
ArgumentList is a comma-separated list of parameter declarations (see below).
Type specifies the data type (String, Integer, Double, Long, Variant). Alternatively, the type can be indicated by
appending a type suffix (e.g. % for Integer) to the function name (see the section "Data types").
The function definition is ended with End Function. The Exit Function command can be used to exit a function
prematurely.
Parameter declaration
[ByVal | ByRef] Variable [As Type]
The keywords ByVal or ByRef (default value) are used to specify whether the parameter is passed by value or by
reference (see the section "Passing parameters via ByRef or ByVal").
Type specifies the data type (Integer, Long, Single, Double, String, String*n, Variant, Object or a user-defined type).
Alternatively, the type can be indicated by appending a type suffix (e.g. % for Integer) to the variable name (see the
section "Data types").
See also: Dim, End, Exit, Sub
Example:
Sub Main
For I% = 1 to 10
Print GetColor2(I%)
Next I
End Sub
Function GetColor2(c%) As Long
GetColor2 = c% * 25
If c% > 2 Then
GetColor2 = 255 ' 0x0000FF - Red

Manual BasicMaker Commands and functions from A to Z 299
End If
If c% > 5 Then
GetColor2 = 65280 ' 0x00FF00 - Green
End If
If c% > 8 Then
GetColor2 = 16711680 ' 0xFF0000 - Blue
End If
End Function
GetObject (function)
GetObject(Name [,Class])
Returns a reference to an OLE object that has already been created.
Name is the name of a file that includes the object. If Name is empty, Class must be indicated.
Class is the name under which the object is listed in the Windows Registry.
See also: CreateObject, Set, section "OLE Automation"
Gosub ... Return (statement)
Gosub Label
.
.
.
Label:
Command(s)
Return
Gosub jumps to a place in the script that is marked with the jump target Label; Return goes back to the calling place.
The jump target Label must reside inside the same subroutine or function from which the Gosub command is called.
Hint: Gosub ... Return is provided only for compatibility with older Basic versions. It is recommended to use the
command Sub for subroutines instead.
See also: Goto, Sub, section "Flow control"
Example:
Sub Main
Print "Main program"
Gosub Detour
Exit Sub
Detour:
Print "Subroutine"
Return
End Sub
Goto (statement)
Goto Label
.
.
.
Label:
Commands
300 Commands and functions from A to Z Manual BasicMaker
Unconditional jump to the jump target Label.
The jump target Label must reside inside the same subroutine or function from which the command Goto is called.
Hint: This command is provided only for compatibility reasons. Usage of Goto commands makes program code unnec-
essarily complicated. It is recommended to use structured control commands (Do ... Loop, For ... Next, If ... Then ...
Else, Select Case) instead.
See also: Gosub ... Return, Sub, section "Flow control"
Example:
Sub Main
Dim x
For x = 1 to 5
Print x
If x > 3 Then
Goto Label1
End If
Next x
Label1:
Print "That's enough!"
End Sub
Hex (function)
Hex(Num)
Returns a string with the hexadecimal representation of the given number.
Num can be any numeric expression; it is rounded to the next integer.
The result can be up to eight digits long.
See also: Oct
Example:
Sub Main
Dim Msg As String, x%
x% = 1024
Msg =Str(x%) & " decimal is identical to "
Msg = Msg & Hex(x%) & " hexadecimal."
MsgBox Msg
End Sub
Hour (function)
Hour(Expression)
Returns the hour of the day for the given time as an integer value.
Expression is a numeric or a string expression which represents a time.
See also: Date, Day, Minute, Month, Now, Second, Time, Weekday, Year
Example:
Sub Main
T1 = Now ' Now = current date + time
MsgBox T1
Manual BasicMaker Commands and functions from A to Z 301
MsgBox "Day: " & Day(T1)
MsgBox "Month: " & Month(T1)
MsgBox "Year: " & Year(T1)
MsgBox "Hours: " & Hour(T1)
MsgBox "Minutes: " & Minute(T1)
MsgBox "Seconds: " & Second(T1)
End Sub
If ... Then ... Else (statement)
If Condition Then
[Commands]
[ElseIf Condition Then
[Commands]]...
[Else
[Commands]]
End If
Or:
If Condition Then Command [Else Command]
Executes a group of commands if Condition is true. Optionally executes a different group of commands if Condition is
false (see also the section "Flow control").
See also: Select Case, section "Flow control"
Example:
Sub IfTest
Dim Gender as String
Gender = InputBox("Enter your gender (m or f)")
If Gender = "m" Then
MsgBox "You are male."
ElseIf Gender = "f" Then
MsgBox "You are female."
Else
MsgBox "Please enter either m or f!"
End If
End Sub
Input (function)
Input(n, [#]FileNumber)
Reads a string from a file.
n is the number of the characters (bytes) to be read.
FileNumber is the number assigned to the respective file by the Open command.
See also: Line Input, Open, Seek
Example:
Sub Main
Open "TESTFILE" For Input As #1 ' Open file
Do While Not EOF(1) ' Repeat until end of file
MyStr = Input(10, #1) ' Read 10 characters
MsgBox MyStr
Loop
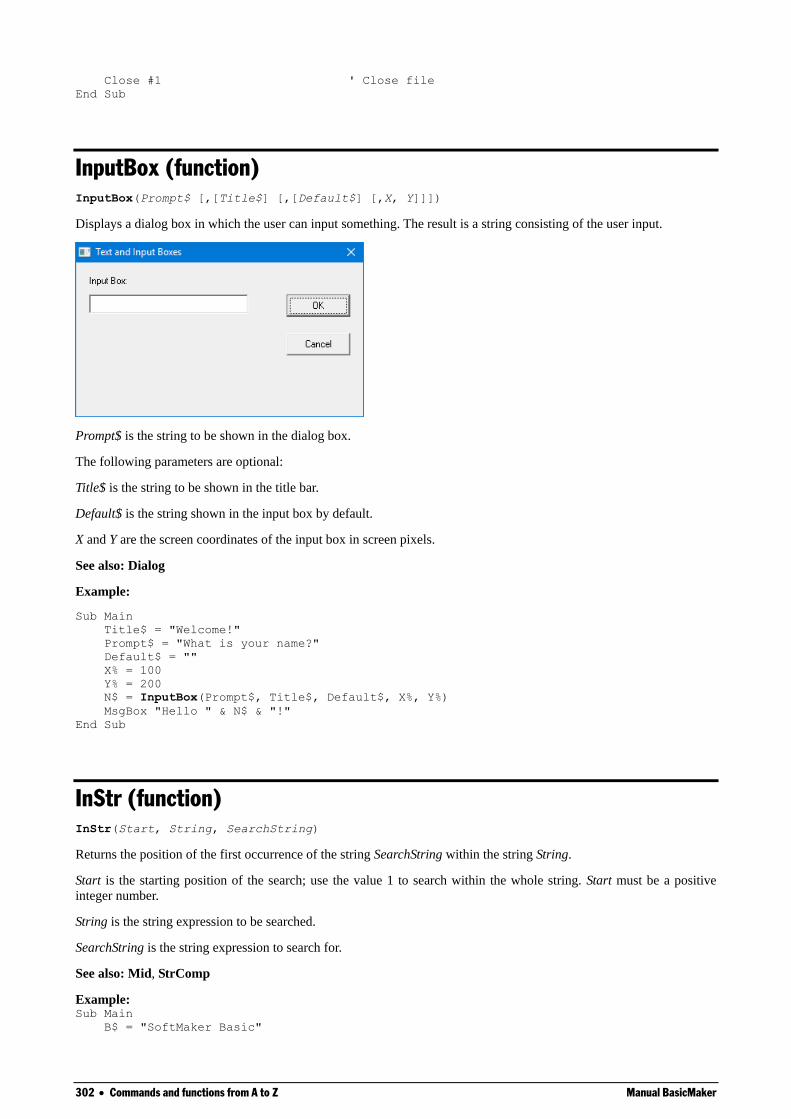
302 Commands and functions from A to Z Manual BasicMaker
Close #1 ' Close file
End Sub
InputBox (function)
InputBox(Prompt$ [,[Title$] [,[Default$] [,X, Y]]])
Displays a dialog box in which the user can input something. The result is a string consisting of the user input.
Prompt$ is the string to be shown in the dialog box.
The following parameters are optional:
Title$ is the string to be shown in the title bar.
Default$ is the string shown in the input box by default.
X and Y are the screen coordinates of the input box in screen pixels.
See also: Dialog
Example:
Sub Main
Title$ = "Welcome!"
Prompt$ = "What is your name?"
Default$ = ""
X% = 100
Y% = 200
N$ = InputBox(Prompt$, Title$, Default$, X%, Y%)
MsgBox "Hello " & N$ & "!"
End Sub
InStr (function)
InStr(Start, String, SearchString)
Returns the position of the first occurrence of the string SearchString within the string String.
Start is the starting position of the search; use the value 1 to search within the whole string. Start must be a positive
integer number.
String is the string expression to be searched.
SearchString is the string expression to search for.
See also: Mid, StrComp
Example: Sub Main
B$ = "SoftMaker Basic"
Manual BasicMaker Commands and functions from A to Z 303
A = InStr(2, B$, "Basic")
MsgBox A
End Sub
Int (function)
Int(Num)
Returns the integral part of a numerical expression.
The difference to the Fix function is in the handling of negative numbers: While Int always returns the next integer less
than or equal to Num, the function Fix simply removes the part after the decimal point (see example).
See also: Fix
Example:
Sub Main
Print Int( 1.4) ' -> 1
Print Fix( 1.4) ' -> 1
Print Int(-1.4) ' -> -2
Print Fix(-1.4) ' -> -1
End Sub
IsDate (function)
IsDate(Variant)
Checks whether the passed Variant variable can be converted to a date.
See also: IsEmpty, IsNull, IsNumeric, VarType
IsEmpty (function)
IsEmpty(Variant)
Checks whether the passed Variant variable has been initialized.
See also: IsDate, IsNull, IsNumeric, VarType, section "Special behavior of the Variant data type"
Example:
Sub Main
Dim x ' Empty because no value was assigned
MsgBox "IsEmpty(x): " & IsEmpty(x)
x = 5 ' Is not empty anymore
MsgBox "IsEmpty(x): " & IsEmpty(x)
x = Empty ' Is empty again
MsgBox "IsEmpty(x): " & IsEmpty(x)
End Sub
IsNull (function)
IsNull(Variant)
304 Commands and functions from A to Z Manual BasicMaker
Checks whether the passed Variant variable has the value "Null".
The special value "Null" shows that the variable does not have any value. Please note that this value is different from
the numeric value 0, from empty strings, and from the special value Empty which shows that a variable has not been
initialized.
See also: IsDate, IsEmpty, IsNumeric, VarType, section "Special behavior of the Variant data type"
IsNumeric (function)
IsNumeric(Variant)
Checks whether the passed Variant variable can be converted to a number.
See also: IsDate, IsEmpty, IsNull, VarType
Example:
Sub Test
Dim TestVar
TestVar = InputBox("Enter a number or text:")
If IsNumeric(TestVar) Then
MsgBox "Input is numeric."
Else
MsgBox "Input is not numeric."
End If
End Sub
Kill (statement)
Kill FileName
Deletes the given file(s).
You can use wildcard characters such as "*" and "?" in FileName. For example, the following command deletes all files
with the file extension "bak":
Kill "*.bak"
See also: RmDir
Example:
Const NumberOfFiles = 3
Sub Main
Dim Msg ' Declare variables
Call MakeFiles() ' Create files
Msg = "Some test files were created. "
Msg = Msg & "Click on OK to delete them again."
MsgBox Msg
For I = 1 To NumberOfFiles
Kill "TEST" & I ' Delete files
Next I
End Sub
Sub MakeFiles()
Dim I, FNum, FName ' Declare variables
For I = 1 To NumberOfFiles
FNum = FreeFile ' Next free file pointer
FName = "TEST" & I
Open FName For Output As Fnum ' Open file
Print #FNum, "This is test #" & I ' Write in file
Print #FNum, "Here is another "; "line"; I
Next I
Manual BasicMaker Commands and functions from A to Z 305
Close ' Close all files
End Sub
LBound (function)
LBound(Array [,Dimension])
Returns the lowest index for the given dimension of an array.
If Dimension is not indicated, the first dimension of the array is used.
See also: Dim, Option Base, ReDim, UBound
Example:
Option Base 1
Sub Main
Dim a(10,20)
Print "1st dimension: " & LBound(a) & " to " & UBound(a)
Print "2nd dimension: " & LBound(a, 2) & " to " & UBound(a, 2)
End Sub
LCase (function)
LCase(String)
Converts a string to lowercase.
See also: UCase
Example:
Sub Main
MsgBox LCase("Think BIG!") ' gives "think big!"
End Sub
Left (function)
Left(String, n)
Returns a string consisting of the first n characters of the passed string String.
See also: Len, Mid, Right
Example:
Sub Main
Dim LWord, Msg, RWord, SpcPos, UsrInp
Msg = "Enter two words "
Msg = Msg & "separated by a space character."
UsrInp = InputBox(Msg)
SpcPos = InStr(1, UsrInp, " ") ' Find space character
If SpcPos Then
LWord = Left(UsrInp, SpcPos - 1) ' Left word
RWord = Right(UsrInp, Len(UsrInp) - SpcPos) ' Right word
Msg = "The first word is " & LWord & ","
Msg = Msg & " the second word is " & RWord & "."
Else
Msg = "You did not enter two words."
End If
MsgBox Msg
306 Commands and functions from A to Z Manual BasicMaker
End Sub
Len (function)
Len(String)
Returns the length of a string.
See also: InStr
Example:
Sub Main
A$ = "BasicMaker"
StrLen = Len(A$) 'Result: 10
MsgBox StrLen
End Sub
Let (statement)
[Let] Variable = Expression
Assigns a value to a variable.
The keyword Let was necessary only in older versions of BASIC. Nowadays it is usually omitted.
Example:
Sub Main
Dim Msg, Pi
Let Pi = 4 * Atn(1)
Msg = "Pi = " & Str(Pi)
MsgBox Msg
End Sub
Line Input # (statement)
Line Input [#]FileNumber, Name
Reads a line from a file and stores the result in the string or Variant variable Name.
FileNumber is the number assigned to the file by the Open command. The file must have been opened with the com-
mand Open for reading beforehand.
The command Line Input reads the characters from the file until a line feed (LF) or a combination of carriage return +
line feed (CR+LF) is encountered.
See also: Input, Open, Seek
Example:
Sub Main
Open "c:\autoexec.bat" For Input As #1 ' Open file
While Not EOF(1) ' Repeat until end of file
Line Input #1, TextLine ' Read lines from file
Print TextLine ' Output lines
Wend
Close #1 ' Close file
End Sub
Manual BasicMaker Commands and functions from A to Z 307
Log (function)
Log(Num)
Returns the natural logarithm of a number.
The parameter Num must be greater than 0.
See also: Exp
Example:
Sub Main
For I = 1 to 3
Print Log(I)
Next I
End Sub
Mid (function)
Mid(String, Start [, Length])
Returns a substring of the passed string String. It starts with the position Start and is Length characters long. If Length is
omitted, the entire rest of the string is returned.
See also: Len, Left, Right
Example:
Sub Main
MidTest = Mid("Potato salad", 8, 4)
MsgBox MidTest 'Result: "sala"
End Sub
Minute (function)
Minute(Expression)
Returns the minute of the hour for the given time as an integer number.
Expression is a numeric or string expression which represents a time.
See also: Date, Day, Hour, Month, Now, Second, Time, Weekday, Year
Example:
Sub Main
T1 = Now ' Now = current date + time
MsgBox T1
MsgBox "Day: " & Day(T1)
MsgBox "Month: " & Month(T1)
MsgBox "Year: " & Year(T1)
MsgBox "Hours: " & Hour(T1)
MsgBox "Minutes: " & Minute(T1)
MsgBox "Seconds: " & Second(T1)
End Sub
308 Commands and functions from A to Z Manual BasicMaker
MkDir (statement)
MkDir Path
Creates a new folder.
The parameter Path may not have more than 255 characters.
See also: ChDir, ChDrive, RmDir
Example:
Sub Main
ChDir "c:\"
MkDir "Test"
MsgBox "The folder c:\Test was created."
End Sub
Month (function)
Month(Expression)
Returns the month of the year for the given date as an integer number.
Expression is a numeric or string expression which represents a date.
See also: Date, Day, Hour, Minute, Now, Second, Time, Weekday, Year
Example:
Sub Main
T1 = Now ' Now = current date + time
MsgBox T1
MsgBox "Day: " & Day(T1)
MsgBox "Month: " & Month(T1)
MsgBox "Year: " & Year(T1)
MsgBox "Hours: " & Hour(T1)
MsgBox "Minutes: " & Minute(T1)
MsgBox "Seconds: " & Second(T1)
End Sub
MsgBox (function)
MsgBox(Text [, Type] [, Title])
Displays a message box.
The return value shows which button was pressed to dismiss the message box (see below).
Text is the string to be shown in the message box.
The optional parameter Type indicates which buttons and which icon are displayed in the message box (see below). The
default setting is to show only the OK button without any icons.
The optional parameter Title indicates which text will be displayed in the title bar (default value: empty).
See also: Dialog, InputBox
Manual BasicMaker Commands and functions from A to Z 309
Values for the parameter "Type":
Symbolic constant Value Meaning
MB_OK 0 Display only the OK button
MB_OKCANCEL 1 Display the buttons OK and Cancel
MB_ABORTRETRYIGNORE 2 Display the buttons Cancel, Retry, Ignore
MB_YESNOCANCEL 3 Display the buttons Yes, No, Cancel
MB_YESNO 4 Display the buttons Yes and No
MB_RETRYCANCEL 5 Display the buttons Retry and Cancel
MB_ICONSTOP 16 Display the icon for critical messages
MB_ICONQUESTION 32 Display the icon for questions
MB_ICONEXCLAMATION 48 Display the icon for warning messages
MB_ICONINFORMATION 64 Display the icon for informational messages
MB_DEFBUTTON1 0 Make the first button the default button
MB_DEFBUTTON2 256 Make the second button the default button
MB_DEFBUTTON3 512 Make the third button the default button
MB_APPLMODAL 0 The message box is application-modal. The current task does not accept input
until the user closes the message box.
MB_SYSTEMMODAL 4096 The message box is system-modal. The whole system does not accept any
input until the user closes the message box (use only for critical errors!).
From each of the four shown groups a value can be chosen. Combine the individual constants by adding their values.
The return values of the MsgBox function
The return value of this function indicates which button was pressed to dismiss the message box:
Symbolic constant Value Meaning
IDOK 1 Button OK
IDCANCEL 2 Button Cancel
IDABORT 3 Button Abort
IDRETRY 4 Button Retry
IDIGNORE 5 Button Ignore
IDYES 6 Button Yes
IDNO 7 Button No
Example:
This example uses MsgBox to display a confirmation dialog.
Sub Main
Dim DgDef, Msg, Response, Title
Title = "MsgBox Example"
Msg = "Do you want to continue?"
DgDef = MB_YESNOCANCEL + MB_ICONQUESTION + MB_DEFBUTTON3
Response = MsgBox(Msg, DgDef, Title)
If Response = IDYES Then
Msg = "You chose Yes."
ElseIf Response = IDCANCEL Then
Msg = "You chose Cancel."
310 Commands and functions from A to Z Manual BasicMaker
Else
Msg = "You chose No."
End If
MsgBox Msg
End Sub
Name (statement)
Name OldName As NewName
Renames the file OldName to NewName.
Each of the two parameters must identify an individual file. Wildcard characters such as "*" or "?" are not allowed.
See also: ChDir, Kill
Example:
Sub Main
Name "testfile" As "newtest"
End Sub
Now (function)
Now[()]
Returns the current system time (date and time).
The Now function returns a result of the type Variant consisting of date and time. The positions to the left of the decimal
point define the date, the positions to its right the time.
See also: Date, Day, Hour, Minute, Month, Second, Time, Weekday, Year
Example:
Sub Main
T1 = Now ' Now = current date + time
MsgBox T1
MsgBox "Day: " & Day(T1)
MsgBox "Month: " & Month(T1)
MsgBox "Year: " & Year(T1)
MsgBox "Hours: " & Hour(T1)
MsgBox "Minutes: " & Minute(T1)
MsgBox "Seconds: " & Second(T1)
End Sub
Oct (function)
Oct(Num)
Returns a string with the octal representation of the given number.
Num can be any numeric expression; it is rounded to the next integer.
See also: Hex
Manual BasicMaker Commands and functions from A to Z 311
Example:
Sub Main
Dim Msg, Num
Num = InputBox("Enter a number.")
Msg = "The decimal value " & Num & " is identical to "
Msg = Msg & "octal" & Oct(Num)
MsgBox Msg
End Sub
On Error (statement)
On Error Goto Label
Or:
On Error Resume Next
Or:
On Error Goto 0
Enables an error handling routine for the handling of runtime errors:
On Error Goto Label indicates that in case of a runtime error execution should continue at the given jump target
Label.
On Error Resume Next indicates that runtime errors are simply ignored. Attention: In this case, a runtime error can
cause unpredictable results.
On Error Goto 0 disables error trapping – runtime errors cause the program to terminate with an error message.
An On Error command is only valid inside the subroutine or function in which it resides.
If the script jumps to a label using the On Error Goto command, you can resume execution at the calling place using
the Resume command. The script execution will then continue with the next line.
See also: Resume
Example:
In this example, an error is intentionally caused in order to execute the error handling routine at the label "Error". Then
the user is asked whether the script’s execution should be continued or not. If the answer is "Yes", execution will con-
tinue using the Resume Next command with the next line after the runtime error. If the answer is "No", execution ends
with the Stop command.
Sub Main
On Error Goto MyErrorHandler
Print 1/0 'Causes a 'division by zero' error
MsgBox "End"
Exit Sub
MyErrorHandler: 'Error handling routine
Dim DgDef, Msg, Response, Title
Title = "Error"
Msg = "A runtime error has been raised. Do you want to resume execution?"
DgDef = MB_YESNO + MB_ICONEXCLAMATION
Response = MsgBox(Msg, DgDef, Title)
If Response = IDYES Then
Resume Next
Else
Stop
End If
End Sub
For testing reasons, runtime errors can be artificially raised using the Err.Raise command.
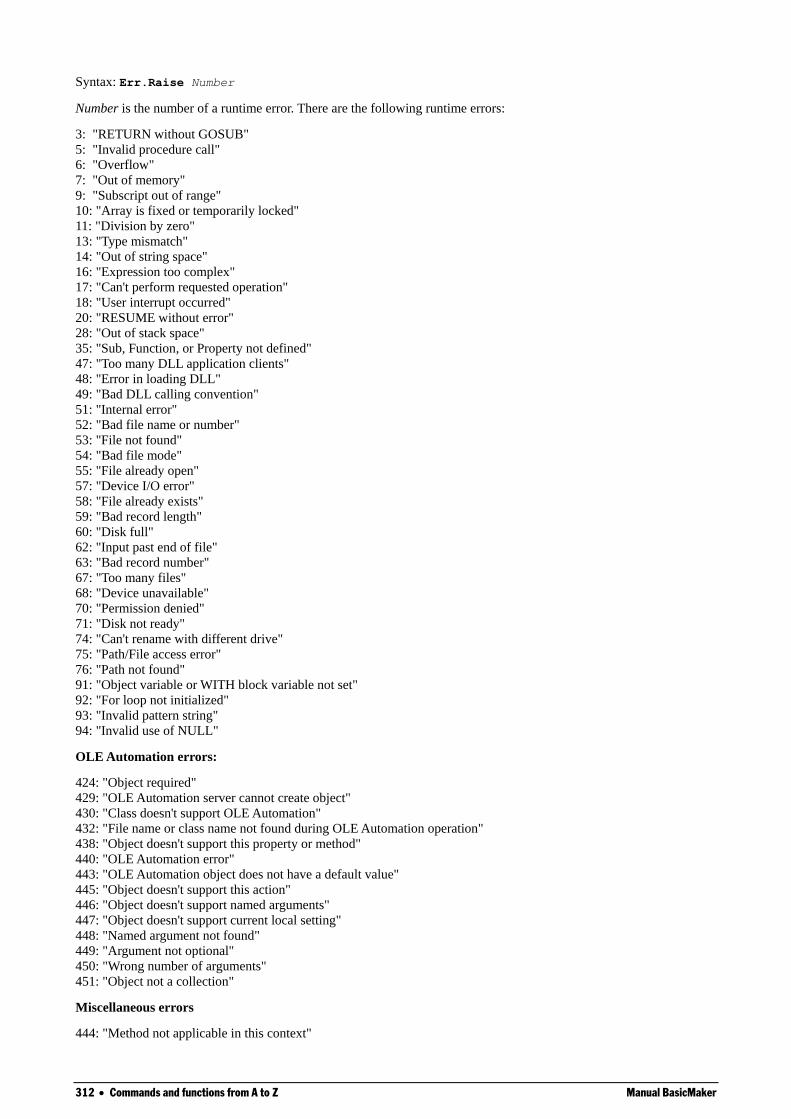
312 Commands and functions from A to Z Manual BasicMaker
Syntax: Err.Raise Number
Number is the number of a runtime error. There are the following runtime errors:
3: "RETURN without GOSUB"
5: "Invalid procedure call"
6: "Overflow"
7: "Out of memory"
9: "Subscript out of range"
10: "Array is fixed or temporarily locked"
11: "Division by zero"
13: "Type mismatch"
14: "Out of string space"
16: "Expression too complex"
17: "Can't perform requested operation"
18: "User interrupt occurred"
20: "RESUME without error"
28: "Out of stack space"
35: "Sub, Function, or Property not defined"
47: "Too many DLL application clients"
48: "Error in loading DLL"
49: "Bad DLL calling convention"
51: "Internal error"
52: "Bad file name or number"
53: "File not found"
54: "Bad file mode"
55: "File already open"
57: "Device I/O error"
58: "File already exists"
59: "Bad record length"
60: "Disk full"
62: "Input past end of file"
63: "Bad record number"
67: "Too many files"
68: "Device unavailable"
70: "Permission denied"
71: "Disk not ready"
74: "Can't rename with different drive"
75: "Path/File access error"
76: "Path not found"
91: "Object variable or WITH block variable not set"
92: "For loop not initialized"
93: "Invalid pattern string"
94: "Invalid use of NULL"
OLE Automation errors:
424: "Object required"
429: "OLE Automation server cannot create object"
430: "Class doesn't support OLE Automation"
432: "File name or class name not found during OLE Automation operation"
438: "Object doesn't support this property or method"
440: "OLE Automation error"
443: "OLE Automation object does not have a default value"
445: "Object doesn't support this action"
446: "Object doesn't support named arguments"
447: "Object doesn't support current local setting"
448: "Named argument not found"
449: "Argument not optional"
450: "Wrong number of arguments"
451: "Object not a collection"
Miscellaneous errors
444: "Method not applicable in this context"

Manual BasicMaker Commands and functions from A to Z 313
452: "Invalid ordinal"
453: "Specified DLL function not found"
457: "Duplicate Key"
460: "Invalid Clipboard format"
461: "Specified format doesn't match format of data"
480: "Can't create AutoRedraw image"
Open (statement)
Open FileName [For Mode] [Access AccessMode] As [#]FileNumber
Opens a file for input/output operations.
FileName is the name of the file.
The optional parameter Mode can take one of the following values:
Mode Description
Input Sequential input. The file must already exist. AccessMode, if given, must be set to Read.
Output Sequential output. The file is automatically created for output. If a file with the given name already exists, the
file will be overwritten. AccessMode, if given, must be set to Write.
Append Sequential output. Identical to Output, however the file pointer will be set to the end of the file, so that all
following output commands append data to the existing file.
The optional parameter AccessMode restricts the type of access to the file:
AccessMode Description
Read Opens the file only for reading.
Write Opens the file only for writing.
Read Write Opens the file for reading and writing.
If the file does not exist, it will be automatically created, if either Append or Output mode was chosen; otherwise the
Open command fails.
If the file is already opened by another process or the desired access mode is not possible, the Open command fails.
FileNumber is an integer value between 1 and 255 which identifies the file in the following access functions. The index
of the next free file pointer can be returned using the FreeFile function.
See also: Close, FreeFile
Example:
Sub Main
Open "TESTFILE" For Output As #1 ' Create file
userData1$ = InputBox("Enter one text line.")
userData2$ = InputBox("Enter one more text line.")
Write #1, userData1, userData2 ' Write lile
Close #1
Open "TESTFILE" for Input As #2 ' Open file
Print "File contents:"
Do While Not EOF(2)
Line Input #2, FileData ' Read line
Print FileData
Loop
Close #2 ' Close file
Kill "TESTFILE" ' Delete file
End Sub
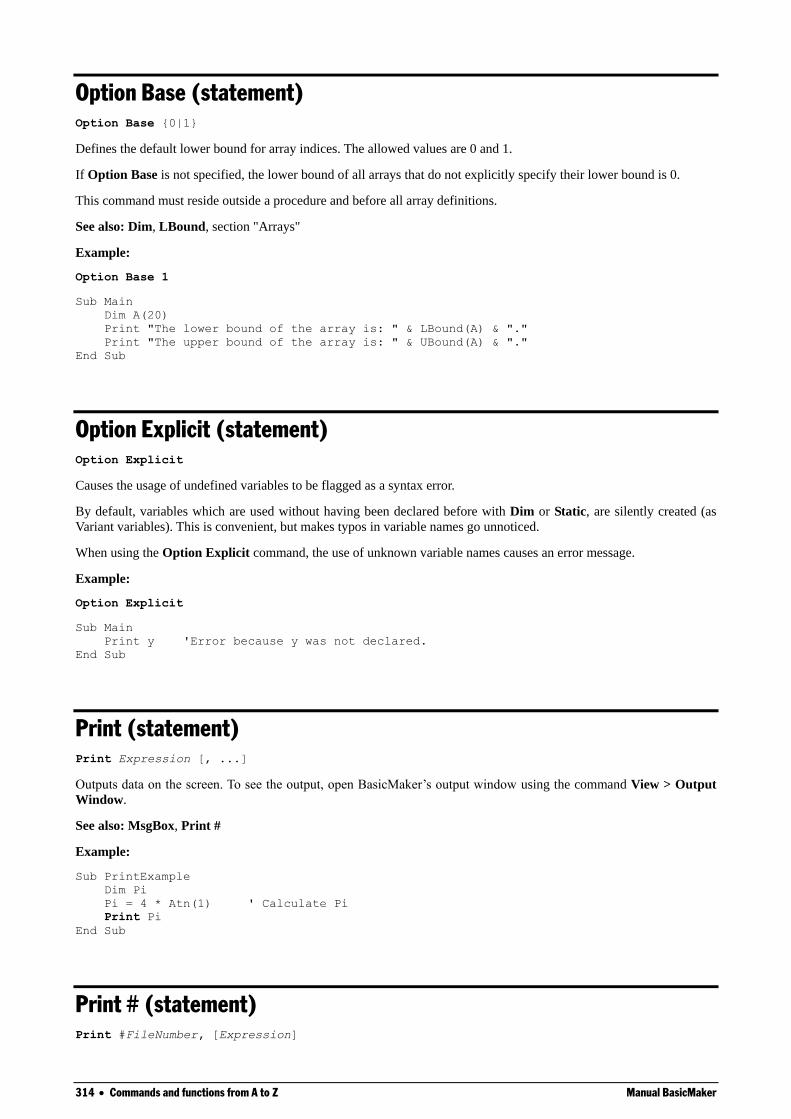
314 Commands and functions from A to Z Manual BasicMaker
Option Base (statement)
Option Base {0|1}
Defines the default lower bound for array indices. The allowed values are 0 and 1.
If Option Base is not specified, the lower bound of all arrays that do not explicitly specify their lower bound is 0.
This command must reside outside a procedure and before all array definitions.
See also: Dim, LBound, section "Arrays"
Example:
Option Base 1
Sub Main
Dim A(20)
Print "The lower bound of the array is: " & LBound(A) & "."
Print "The upper bound of the array is: " & UBound(A) & "."
End Sub
Option Explicit (statement)
Option Explicit
Causes the usage of undefined variables to be flagged as a syntax error.
By default, variables which are used without having been declared before with Dim or Static, are silently created (as
Variant variables). This is convenient, but makes typos in variable names go unnoticed.
When using the Option Explicit command, the use of unknown variable names causes an error message.
Example:
Option Explicit
Sub Main
Print y 'Error because y was not declared.
End Sub
Print (statement)
Print Expression [, ...]
Outputs data on the screen. To see the output, open BasicMaker’s output window using the command View > Output
Window.
See also: MsgBox, Print #
Example:
Sub PrintExample
Dim Pi
Pi = 4 * Atn(1) ' Calculate Pi
Print Pi
End Sub
Print # (statement)
Print #FileNumber, [Expression]
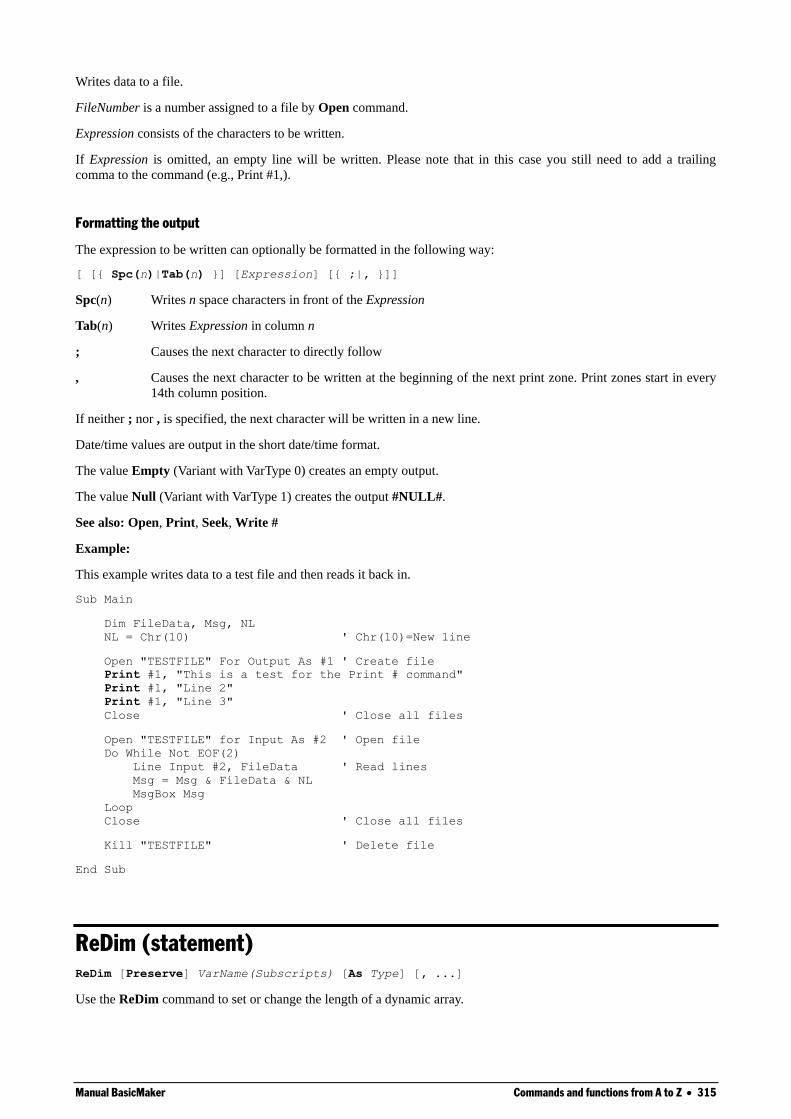
Manual BasicMaker Commands and functions from A to Z 315
Writes data to a file.
FileNumber is a number assigned to a file by Open command.
Expression consists of the characters to be written.
If Expression is omitted, an empty line will be written. Please note that in this case you still need to add a trailing
comma to the command (e.g., Print #1,).
Formatting the output
The expression to be written can optionally be formatted in the following way:
[ [{ Spc(n)|Tab(n) }] [Expression] [{ ;|, }]]
Spc(n) Writes n space characters in front of the Expression
Tab(n) Writes Expression in column n
; Causes the next character to directly follow
, Causes the next character to be written at the beginning of the next print zone. Print zones start in every
14th column position.
If neither ; nor , is specified, the next character will be written in a new line.
Date/time values are output in the short date/time format.
The value Empty (Variant with VarType 0) creates an empty output.
The value Null (Variant with VarType 1) creates the output #NULL#.
See also: Open, Print, Seek, Write #
Example:
This example writes data to a test file and then reads it back in.
Sub Main
Dim FileData, Msg, NL
NL = Chr(10) ' Chr(10)=New line
Open "TESTFILE" For Output As #1 ' Create file
Print #1, "This is a test for the Print # command"
Print #1, "Line 2"
Print #1, "Line 3"
Close ' Close all files
Open "TESTFILE" for Input As #2 ' Open file
Do While Not EOF(2)
Line Input #2, FileData ' Read lines
Msg = Msg & FileData & NL
MsgBox Msg
Loop
Close ' Close all files
Kill "TESTFILE" ' Delete file
End Sub
ReDim (statement)
ReDim [Preserve] VarName(Subscripts) [As Type] [, ...]
Use the ReDim command to set or change the length of a dynamic array.
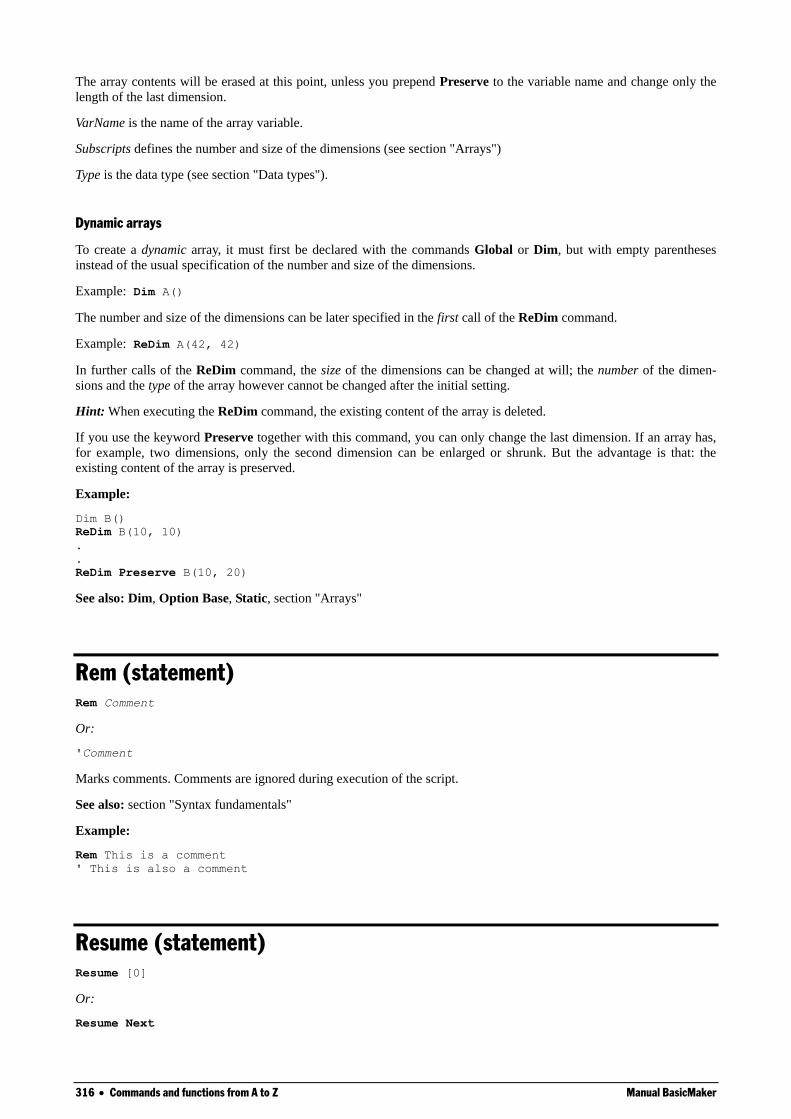
316 Commands and functions from A to Z Manual BasicMaker
The array contents will be erased at this point, unless you prepend Preserve to the variable name and change only the
length of the last dimension.
VarName is the name of the array variable.
Subscripts defines the number and size of the dimensions (see section "Arrays")
Type is the data type (see section "Data types").
Dynamic arrays
To create a dynamic array, it must first be declared with the commands Global or Dim, but with empty parentheses
instead of the usual specification of the number and size of the dimensions.
Example: Dim A()
The number and size of the dimensions can be later specified in the first call of the ReDim command.
Example: ReDim A(42, 42)
In further calls of the ReDim command, the size of the dimensions can be changed at will; the number of the dimen-
sions and the type of the array however cannot be changed after the initial setting.
Hint: When executing the ReDim command, the existing content of the array is deleted.
If you use the keyword Preserve together with this command, you can only change the last dimension. If an array has,
for example, two dimensions, only the second dimension can be enlarged or shrunk. But the advantage is that: the
existing content of the array is preserved.
Example:
Dim B()
ReDim B(10, 10)
.
.
ReDim Preserve B(10, 20)
See also: Dim, Option Base, Static, section "Arrays"
Rem (statement)
Rem Comment
Or:
'Comment
Marks comments. Comments are ignored during execution of the script.
See also: section "Syntax fundamentals"
Example:
Rem This is a comment
' This is also a comment
Resume (statement)
Resume [0]
Or:
Resume Next
Manual BasicMaker Commands and functions from A to Z 317
Or:
Resume Label
Ends an error handling routine called by the On Error command and continues the script execution.
See also: On Error
Example:
Sub Main
On Error Goto MyErrorHandler
Print 1/0 'Causes a 'division by zero' error
MsgBox "End"
Exit Sub
MyErrorHandler: 'Error handling routine
Dim DgDef, Msg, Response, Title
Title = "Error"
Msg = "A runtime error has been raised. Do you want to resume execution?"
DgDef = MB_YESNO + MB_ICONEXCLAMATION
Response = MsgBox(Msg, DgDef, Title)
If Response = IDYES Then
Resume Next
Else
Stop
End If
End Sub
Right (function)
Right(String, n)
Returns a string consisting of the last n characters of the passed string String.
See also: Len, Left, Mid
Example:
Sub Main
Dim LWord, Msg, RWord, SpcPos, UsrInp
Msg = "Enter two words "
Msg = Msg & "separated by a space character."
UsrInp = InputBox(Msg)
SpcPos = InStr(1, UsrInp, " ") ' Find space character
If SpcPos Then
LWord = Left(UsrInp, SpcPos - 1) ' Left word
RWord = Right(UsrInp, Len(UsrInp) - SpcPos) ' Right word
Msg = "The first word is " & LWord & ","
Msg = Msg & " the second word is " & RWord & "."
Else
Msg = "You did not enter two words."
End If
MsgBox Msg
End Sub
RmDir (statement)
RmDir Path
Removes the given folder.
The parameter must contain the folder path in the notation DriveLetter:Folder.
318 Commands and functions from A to Z Manual BasicMaker
See also: ChDir, ChDrive, CurDir, Kill
Example:
Sub Main
Dim dirName As String
dirName = "t1"
MkDir dirName
MkDir "t2"
MsgBox "Folders t1 and t2 were created. Click on OK to remove them."
RmDir "t1"
RmDir "t2"
End Sub
Rnd (function)
Rnd [()]
Generates a random number between 0 and 1.
Second (function)
Second(Expression)
Returns the second of the hour for the given time as an integer number.
Expression is a numeric or string expression which represents a time.
See also: Date, Day, Hour, Minute, Month, Now, Time, Weekday, Year
Example:
Sub Main
T1 = Now ' Now = current date + time
MsgBox T1
MsgBox "Day: " & Day(T1)
MsgBox "Month: " & Month(T1)
MsgBox "Year: " & Year(T1)
MsgBox "Hours: " & Hour(T1)
MsgBox "Minutes: " & Minute(T1)
MsgBox "Seconds: " & Second(T1)
End Sub
Seek (statement)
Seek [#]FileNumber, Position
Sets the file pointer to a new position in a file. This command works only on open files.
FileNumber is the number assigned to the file by Open command.
Position is the position within the file from which the next read or write operation should start (as offset in bytes from
the beginning of the file).
See also: Open
Manual BasicMaker Commands and functions from A to Z 319
Example:
Sub Main
Open "TESTFILE" For Input As #1 ' Open file
For i = 0 To 24 Step 3
Seek #1, i ' Set file pointer
MyChar = Input(1, #1) ' Read character
Print MyChar ' Output character
Next i
Close #1 ' Close file
End Sub
Select Case (statement)
Select Case Expression
[Case Value1
[Commands]]
[Case Value2
[Commands]]
.
.
.
[Case Else
[Command]]
End Select
Executes one of several command blocks, depending on the value of the given expression (see also the section "Flow
control").
A Select Case structure must be closed with the End Select keyword.
See also: If ... Then ... Else, section "Flow control"
Example:
Sub Main
Number = InputBox("Enter an integer number between 1 and 3:")
Select Case Val(Number)
Case 1
MsgBox "You entered the number One."
Case 2
MsgBox "You entered the number Two."
Case 3
MsgBox "You entered the number Three."
Case Else
MsgBox "Only the integer values between 1 and 3 are allowed!"
End Select
End Sub
SendKeys (statement)
SendKeys(Keys, [Wait])
Simulates keystrokes.
320 Commands and functions from A to Z Manual BasicMaker
Keys is a string containing the keys to be pressed.
If the optional parameter Wait is True, control returns to the script only when the receiving application has completed
processing of the keystroke.
To pass "regular" keys, just type them – for example, "Test". Special keys such as the Enter or Alt key can be added as
follows:
The keys + ^ ~ % ( ) [ ] { and } have a special meaning. If you want to use them verbatim, they must be enclosed by
curly braces – for example: "{%}" or {(}.
Special keys such as the Enter key must be also enclosed by curly braces – for example: {Enter}. A list of the extra
keys you can find in the next section "Special keys supported by the SendKeys command".
Key combinations containing the Shift, Alt and Ctrl keys can be added using one of the following prefixes (+, ^ or
%):
Shift+Enter: "+{Enter]"
Alt+F4: "%{F4}"
Ctrl+C: "^c" (not ^C!)
Pay attention to case: For example, "^c" represents the key combination Ctrl+C, but "^C" represents Ctrl+Shift+C.
If quotation marks need to be passed, they must be doubled – for example, "Arthur ""Two Sheds"" Jackson"
A sequence of keys can be added by following the keystrokes with the number of repetitions, all enclosed by curly
braces: "{a 10}" repeats the key a ten times, {Enter 2} repeats the Enter key twice.
The Enter key can be also expressed with the code ~. The code "ab~cd", for example, is identical to "ab{Enter}cd"
Example:
Sub Main
X = Shell("Calc.exe", 1) ' Run the Calculator application
For i = 1 To 5
SendKeys i & "{+}", True ' Send keystrokes
Next i
Msg = "Calculator will be closed now."
MsgBox Msg
AppActivate "Calculator" ' Set the focus to the calculator
SendKeys "%{F4}", True ' Send Alt+F4 to close the application
End Sub
Special keys supported by the SendKeys command
The following special keys can be used with the Sendkeys command:
Special key String to pass
Escape {Escape} or {Esc}
Enter {Enter}
Shift key Prepend the sign + (for example +{F9} for Shift+F9)
Alt key Prepend the sign % (for example %{F9} for Alt+F9)
Ctrl key Prepend the sign ^ (for example ^{F9} for Ctrl+F9)
Tab {Tab}
Cursor Left {Left}
Cursor Right {Right}
Cursor Down {Down}
Cursor Up {Up}
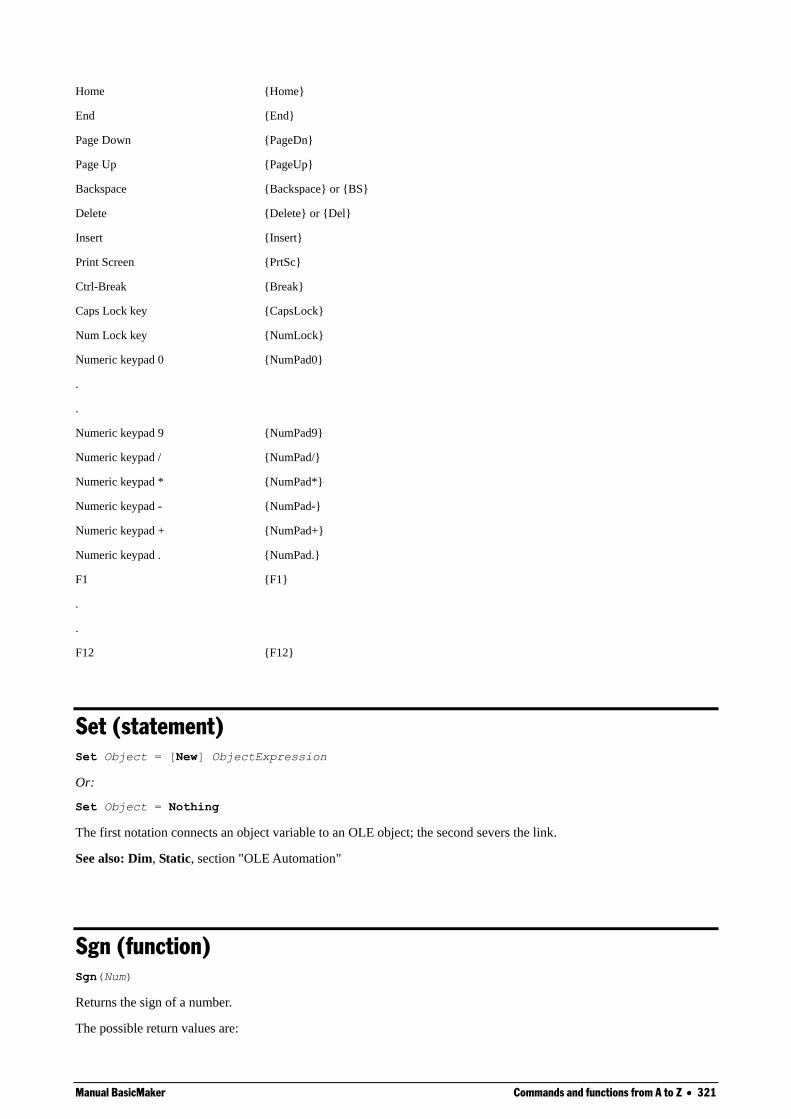
Manual BasicMaker Commands and functions from A to Z 321
Home {Home}
End {End}
Page Down {PageDn}
Page Up {PageUp}
Backspace {Backspace} or {BS}
Delete {Delete} or {Del}
Insert {Insert}
Print Screen {PrtSc}
Ctrl-Break {Break}
Caps Lock key {CapsLock}
Num Lock key {NumLock}
Numeric keypad 0 {NumPad0}
.
.
Numeric keypad 9 {NumPad9}
Numeric keypad / {NumPad/}
Numeric keypad * {NumPad*}
Numeric keypad - {NumPad-}
Numeric keypad + {NumPad+}
Numeric keypad . {NumPad.}
F1 {F1}
.
.
F12 {F12}
Set (statement)
Set Object = [New] ObjectExpression
Or:
Set Object = Nothing
The first notation connects an object variable to an OLE object; the second severs the link.
See also: Dim, Static, section "OLE Automation"
Sgn (function)
Sgn(Num)
Returns the sign of a number.
The possible return values are:
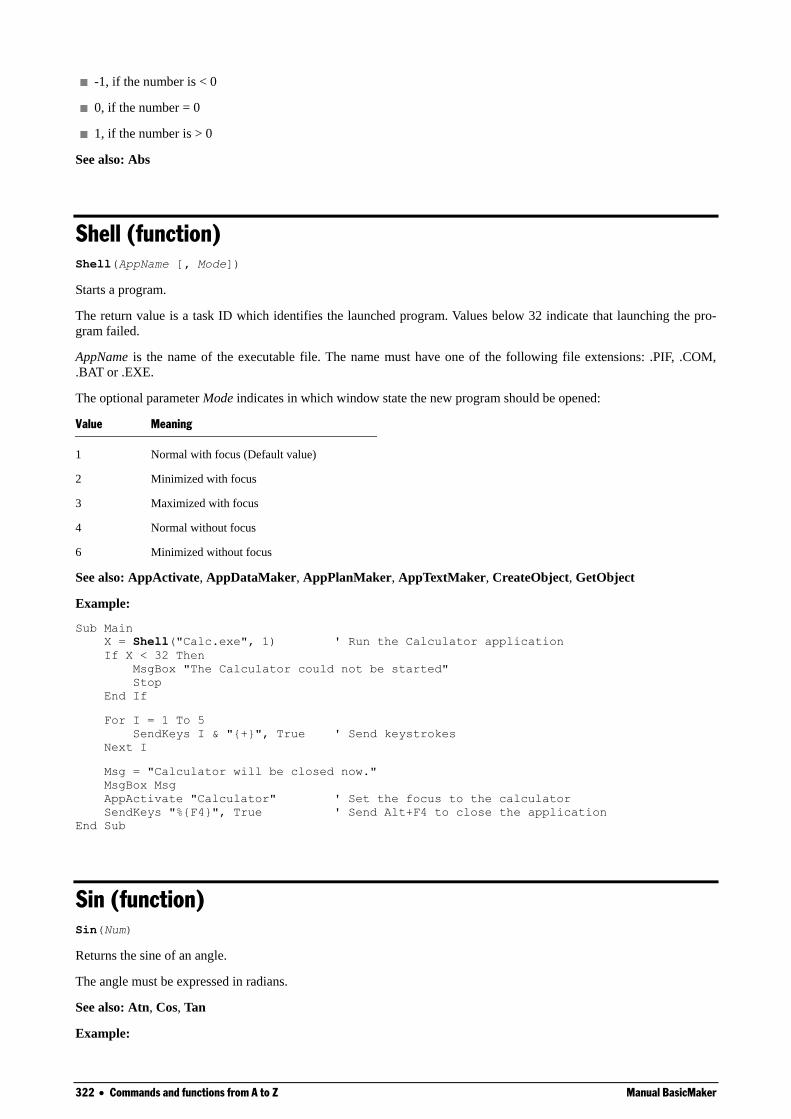
322 Commands and functions from A to Z Manual BasicMaker
-1, if the number is < 0
0, if the number = 0
1, if the number is > 0
See also: Abs
Shell (function)
Shell(AppName [, Mode])
Starts a program.
The return value is a task ID which identifies the launched program. Values below 32 indicate that launching the pro-
gram failed.
AppName is the name of the executable file. The name must have one of the following file extensions: .PIF, .COM,
.BAT or .EXE.
The optional parameter Mode indicates in which window state the new program should be opened:
Value Meaning
1 Normal with focus (Default value)
2 Minimized with focus
3 Maximized with focus
4 Normal without focus
6 Minimized without focus
See also: AppActivate, AppDataMaker, AppPlanMaker, AppTextMaker, CreateObject, GetObject
Example:
Sub Main
X = Shell("Calc.exe", 1) ' Run the Calculator application
If X < 32 Then
MsgBox "The Calculator could not be started"
Stop
End If
For I = 1 To 5
SendKeys I & "{+}", True ' Send keystrokes
Next I
Msg = "Calculator will be closed now."
MsgBox Msg
AppActivate "Calculator" ' Set the focus to the calculator
SendKeys "%{F4}", True ' Send Alt+F4 to close the application
End Sub
Sin (function)
Sin(Num)
Returns the sine of an angle.
The angle must be expressed in radians.
See also: Atn, Cos, Tan
Example:
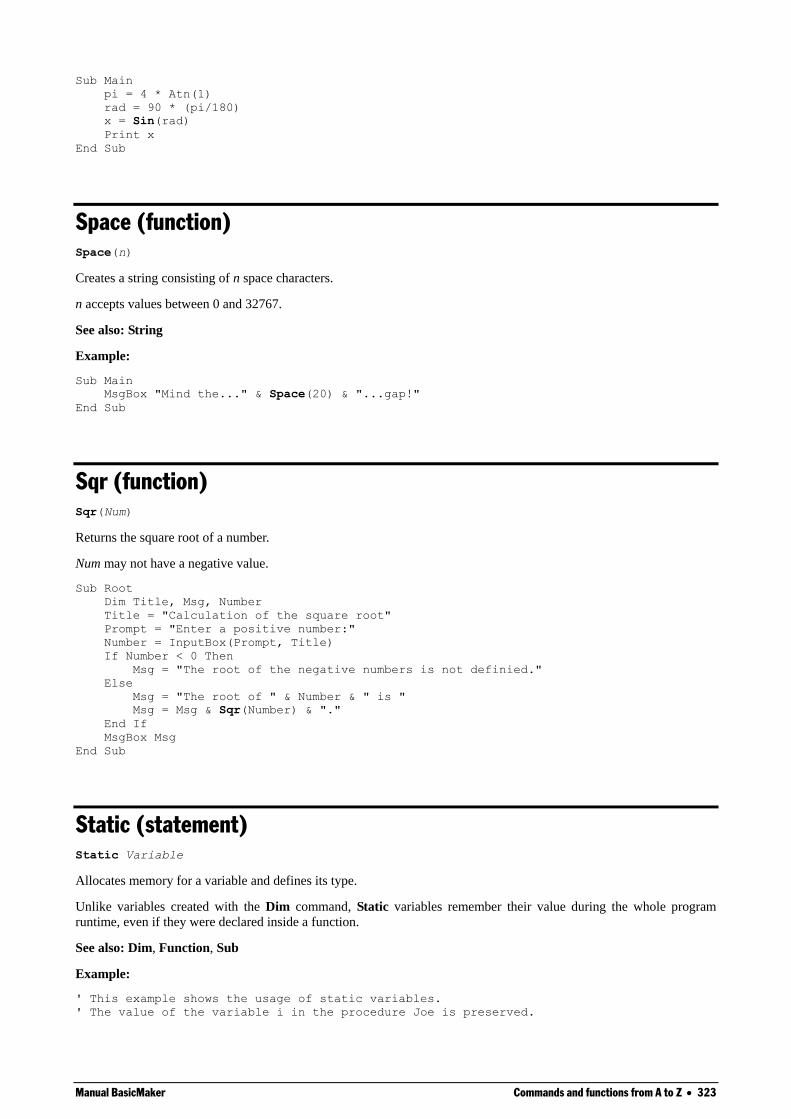
Manual BasicMaker Commands and functions from A to Z 323
Sub Main
pi = 4 * Atn(1)
rad = 90 * (pi/180)
x = Sin(rad)
Print x
End Sub
Space (function)
Space(n)
Creates a string consisting of n space characters.
n accepts values between 0 and 32767.
See also: String
Example:
Sub Main
MsgBox "Mind the..." & Space(20) & "...gap!"
End Sub
Sqr (function)
Sqr(Num)
Returns the square root of a number.
Num may not have a negative value.
Sub Root
Dim Title, Msg, Number
Title = "Calculation of the square root"
Prompt = "Enter a positive number:"
Number = InputBox(Prompt, Title)
If Number < 0 Then
Msg = "The root of the negative numbers is not definied."
Else
Msg = "The root of " & Number & " is "
Msg = Msg & Sqr(Number) & "."
End If
MsgBox Msg
End Sub
Static (statement)
Static Variable
Allocates memory for a variable and defines its type.
Unlike variables created with the Dim command, Static variables remember their value during the whole program
runtime, even if they were declared inside a function.
See also: Dim, Function, Sub
Example:
' This example shows the usage of static variables.
' The value of the variable i in the procedure Joe is preserved.
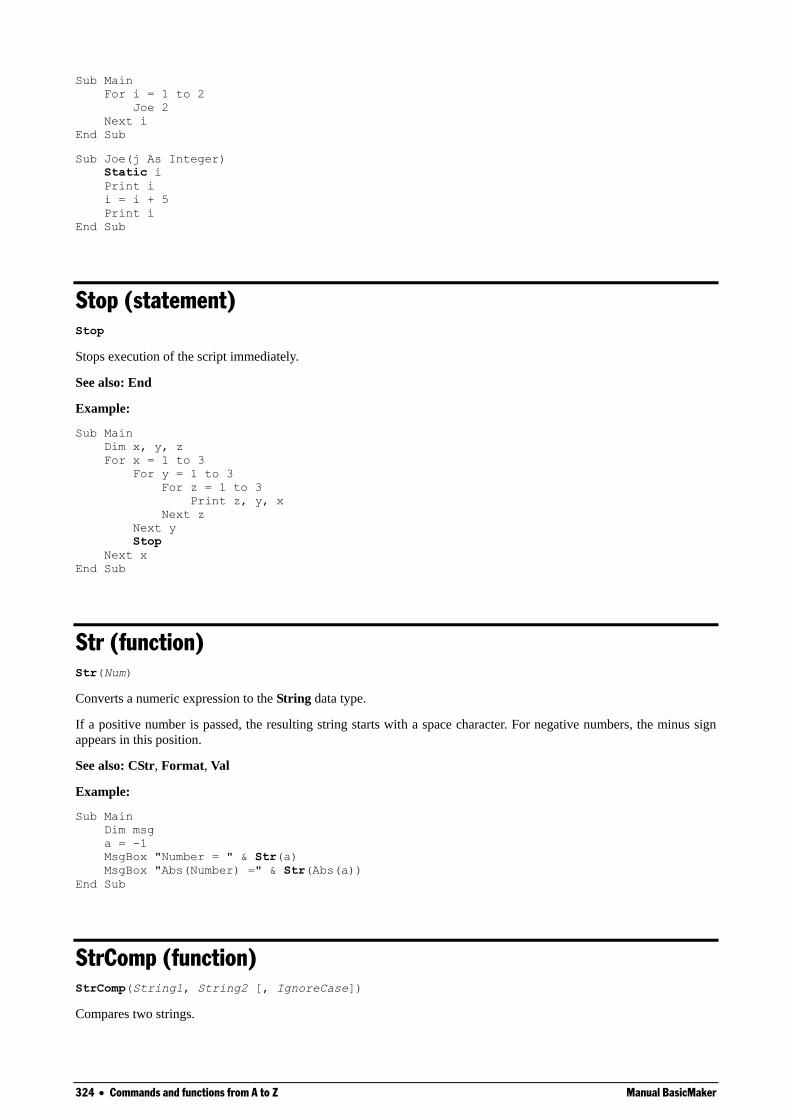
324 Commands and functions from A to Z Manual BasicMaker
Sub Main
For i = 1 to 2
Joe 2
Next i
End Sub
Sub Joe(j As Integer)
Static i
Print i
i = i + 5
Print i
End Sub
Stop (statement)
Stop
Stops execution of the script immediately.
See also: End
Example:
Sub Main
Dim x, y, z
For x = 1 to 3
For y = 1 to 3
For z = 1 to 3
Print z, y, x
Next z
Next y
Stop
Next x
End Sub
Str (function)
Str(Num)
Converts a numeric expression to the String data type.
If a positive number is passed, the resulting string starts with a space character. For negative numbers, the minus sign
appears in this position.
See also: CStr, Format, Val
Example:
Sub Main
Dim msg
a = -1
MsgBox "Number = " & Str(a)
MsgBox "Abs(Number) =" & Str(Abs(a))
End Sub
StrComp (function)
StrComp(String1, String2 [, IgnoreCase])
Compares two strings.
Manual BasicMaker Commands and functions from A to Z 325
If the parameter IgnoreCase is True, the comparison is case-insensitive (case is ignored). If it is False or omitted, the
comparison is case-sensitive.
The function returns the following result:
0, if the strings are equal
-1, if String1 < String2
1, if String1 > String2
String (function)
String(Num, Character)
Creates a string consisting of a specific character repeated n times.
Num is the desired number of repetitions.
Character is the character to be repeated.
See also: Space
Example:
Print String(80, "-")
Sub (statement)
Sub Name [(ArgumentList)]
[Dim Variable(s)]
[Commands]
[Exit Sub]
End Sub
Begins the definition of a subroutine.
Name is the name of the subroutine.
ArgumentList is a comma-separated list of parameter declarations (see below).
The subroutine definition is ended with the End Sub command.
The Exit Sub command can be used to exit a subroutine prematurely.
Parameter declaration
[ByVal | ByRef] Variable [As Type]
The keywords ByVal or ByRef (default value) are used to specify whether the parameter is passed by value or by
reference (see the section "Passing parameters via ByRef or ByVal").
Type specifies the data type (String, Integer, Double, Long, Variant). Alternatively, the type can be indicated using a
type suffix – e.g. % for Integer (see the section "Data types").
See also: Call, Dim, Function
Example:
Sub Main
Dim Var1 as String
Var1 = "Hello"
MsgBox "Test"
Test Var1
326 Commands and functions from A to Z Manual BasicMaker
MsgBox Var1
End Sub
Sub Test(wvar1 as String)
wvar1 = "Bye!"
End Sub
Tan (function)
Tan(Num)
Returns the tangent of an angle.
The angle must be expressed in radians.
See also: Atn, Cos, Sin
Example:
Sub Main
Dim Msg, Pi
Pi = 4 * Atn(1) ' Calculate Pi
x = Tan(Pi/4)
MsgBox "Tan(Pi/4)=" & x
End Sub
Time (function)
Time [()]
Returns the current system time in the format HH:MM:SS.
The separator can be changed using the Regional Settings applet in the Windows Control Panel.
See also: Date, DateSerial, DateValue, Hour, Minute, Now, Second, TimeSerial, TimeValue
Example:
Sub Main
T1 = Time
MsgBox T1
MsgBox "Hours: " & Hour(T1)
MsgBox "Minutes: " & Minute(T1)
MsgBox "Seconds: " & Second(T1)
End Sub
TimeSerial (function)
TimeSerial(Hour, Minute, Second)
Returns the time serial corresponding to the specified hour, minute, and second.
See also: DateSerial, DateValue, Hour, Minute, Now, Second, Time, TimeValue
Example:
Sub Main
Print TimeSerial(09,30,59)
End Sub
Manual BasicMaker Commands and functions from A to Z 327
TimeValue (function)
TimeValue(TimeString)
Returns a double precision serial number corresponding to the specified time string. TimeString can be any string that
represents a time.
See also: DateSerial, DateValue, Hour, Minute, Now, Second, Time, TimeSerial
Example:
Sub Main
Print TimeValue("09:30:59")
End Sub
Trim, LTrim, RTrim (function)
Removes the leading or trailing space characters from a string.
LTrim(String) removes the leading spaces.
RTrim(String) removes the trailing spaces.
Trim(String) removes both leading and trailing spaces.
Example:
Sub Main
MyString = " <-Trim-> "
TrimString = LTrim(MyString) ' "<-Trim-> ".
MsgBox "|" & TrimString & "|"
TrimString = RTrim(MyString)) ' " <-Trim->".
MsgBox "|" & TrimString & "|"
TrimString = LTrim(RTrim(MyString)) ' "<-Trim->".
MsgBox "|" & TrimString & "|"
TrimString = Trim(MyString) ' "<-Trim->".
MsgBox "|" & TrimString & "|"
End Sub
Type (statement)
Type TypeName
Element As Type
Element As Type
Element As Type
.
.
.
End Type
Declares a user-defined type.
TypeName is the name of the new type.
Element is the name of an element of this type.
Type is the data type of this element (Integer, Long, Single, Double, String, String*n, Variant or a user-defined type).
328 Commands and functions from A to Z Manual BasicMaker
After you have declared a user-defined type, you can declare variables of this new type using the commands Dim x As
TypeName and Static x As TypeName.
To access an element, use a dot notation like this: Variable.Element.
The Type command may not be used inside Sub or Function commands.
See also: Dim, Static, With, section "Data types"
Example:
Type type1
a As Integer
d As Double
s As String
End Type
Type type2
a As String
o As type1
End Type
Type type3
b As Integer
c As type2
End Type
Dim var2a As type2
Dim var2b As type2
Dim var1a As type1
Dim var3a as type3
Sub Test
a = 5
var1a.a = 7472
var1a.d = 23.1415
var1a.s = "TEST"
var2a.a = "43 – forty-three"
var2a.o.s = "Hi"
var3a.c.o.s = "COS"
var2b.a = "943 – nine hundred forty-three"
var2b.o.s = "Yogi"
MsgBox var1a.a
MsgBox var1a.d
MsgBox var1a.s
MsgBox var2a.a
MsgBox var2a.o.s
MsgBox var2b.a
MsgBox var2b.o.s
MsgBox var3a.c.o.s
MsgBox a
End Sub
UBound (function)
UBound(ArrayName[, Dimension])
Returns the upper bound (= highest possible index) for the given dimension of an array.
If Dimension is omitted, the first dimension of the array is used.
See also: Dim, LBound, ReDim
Example:
Option Base 1
Sub Main
Dim a(10, 20 To 40)
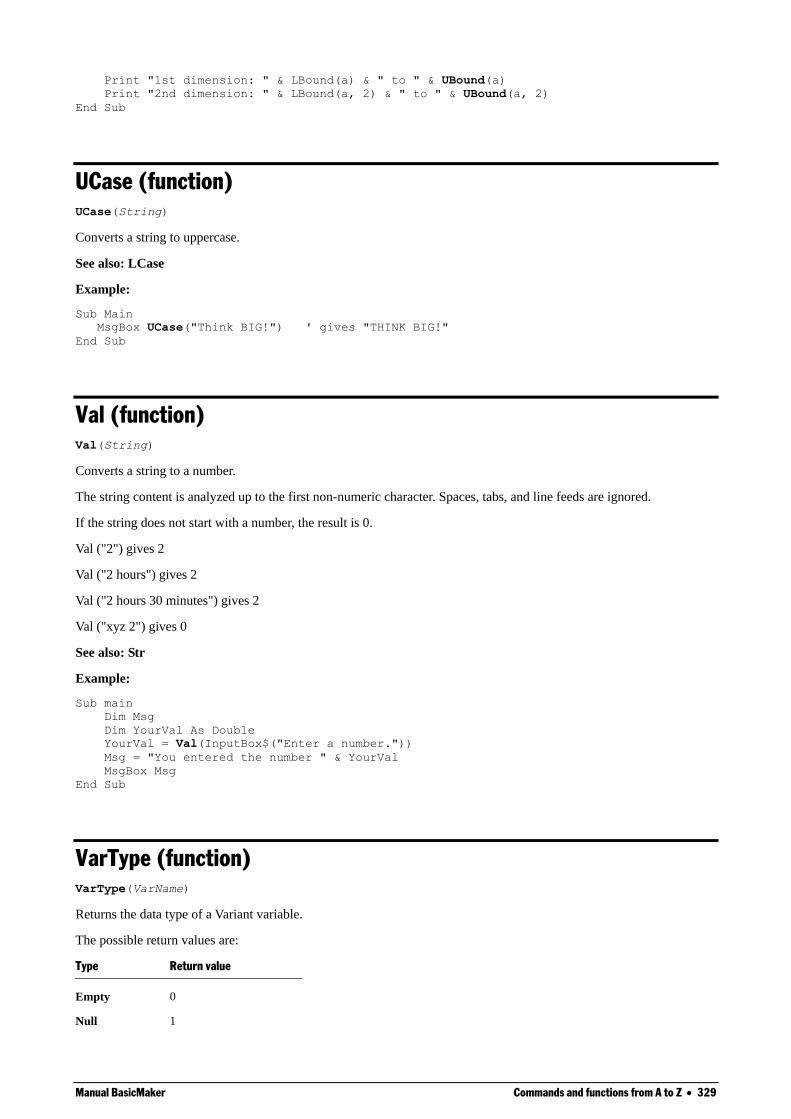
Manual BasicMaker Commands and functions from A to Z 329
Print "1st dimension: " & LBound(a) & " to " & UBound(a)
Print "2nd dimension: " & LBound(a, 2) & " to " & UBound(a, 2)
End Sub
UCase (function)
UCase(String)
Converts a string to uppercase.
See also: LCase
Example:
Sub Main
MsgBox UCase("Think BIG!") ' gives "THINK BIG!"
End Sub
Val (function)
Val(String)
Converts a string to a number.
The string content is analyzed up to the first non-numeric character. Spaces, tabs, and line feeds are ignored.
If the string does not start with a number, the result is 0.
Val ("2") gives 2
Val ("2 hours") gives 2
Val ("2 hours 30 minutes") gives 2
Val ("xyz 2") gives 0
See also: Str
Example:
Sub main
Dim Msg
Dim YourVal As Double
YourVal = Val(InputBox$("Enter a number."))
Msg = "You entered the number " & YourVal
MsgBox Msg
End Sub
VarType (function)
VarType(VarName)
Returns the data type of a Variant variable.
The possible return values are:
Type Return value
Empty 0
Null 1
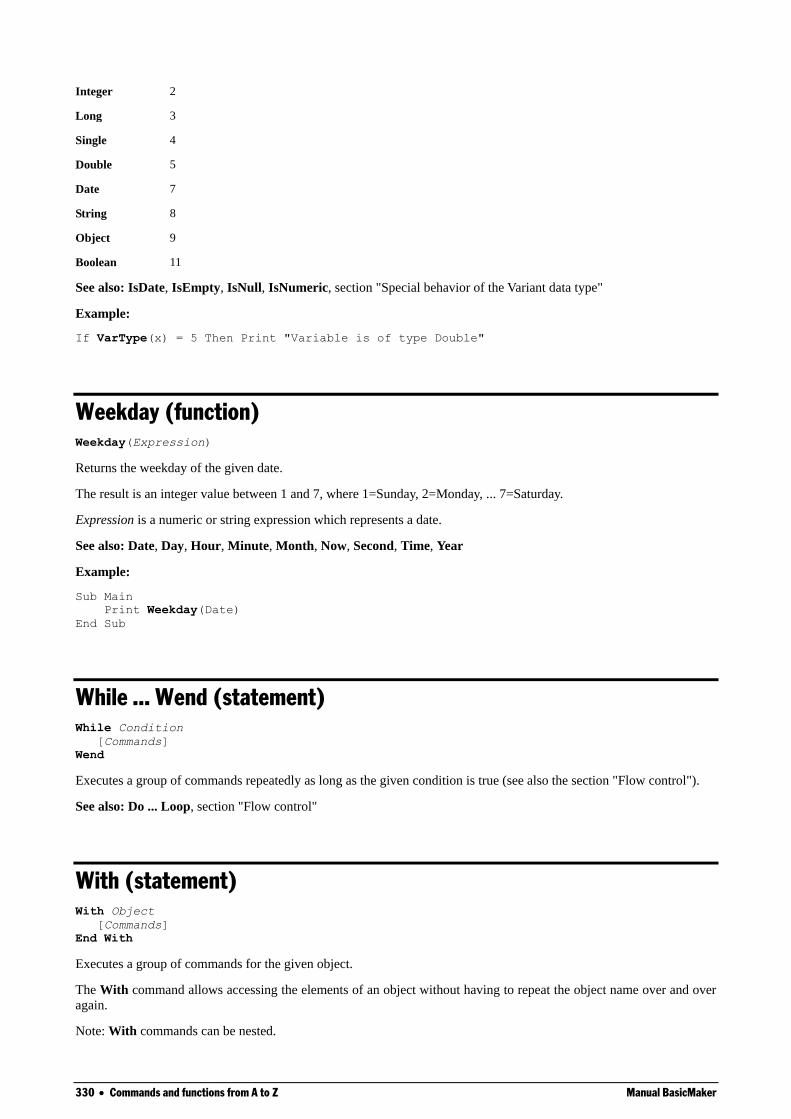
330 Commands and functions from A to Z Manual BasicMaker
Integer 2
Long 3
Single 4
Double 5
Date 7
String 8
Object 9
Boolean 11
See also: IsDate, IsEmpty, IsNull, IsNumeric, section "Special behavior of the Variant data type"
Example:
If VarType(x) = 5 Then Print "Variable is of type Double"
Weekday (function)
Weekday(Expression)
Returns the weekday of the given date.
The result is an integer value between 1 and 7, where 1=Sunday, 2=Monday, ... 7=Saturday.
Expression is a numeric or string expression which represents a date.
See also: Date, Day, Hour, Minute, Month, Now, Second, Time, Year
Example:
Sub Main
Print Weekday(Date)
End Sub
While ... Wend (statement)
While Condition
[Commands]
Wend
Executes a group of commands repeatedly as long as the given condition is true (see also the section "Flow control").
See also: Do ... Loop, section "Flow control"
With (statement)
With Object
[Commands]
End With
Executes a group of commands for the given object.
The With command allows accessing the elements of an object without having to repeat the object name over and over
again.
Note: With commands can be nested.
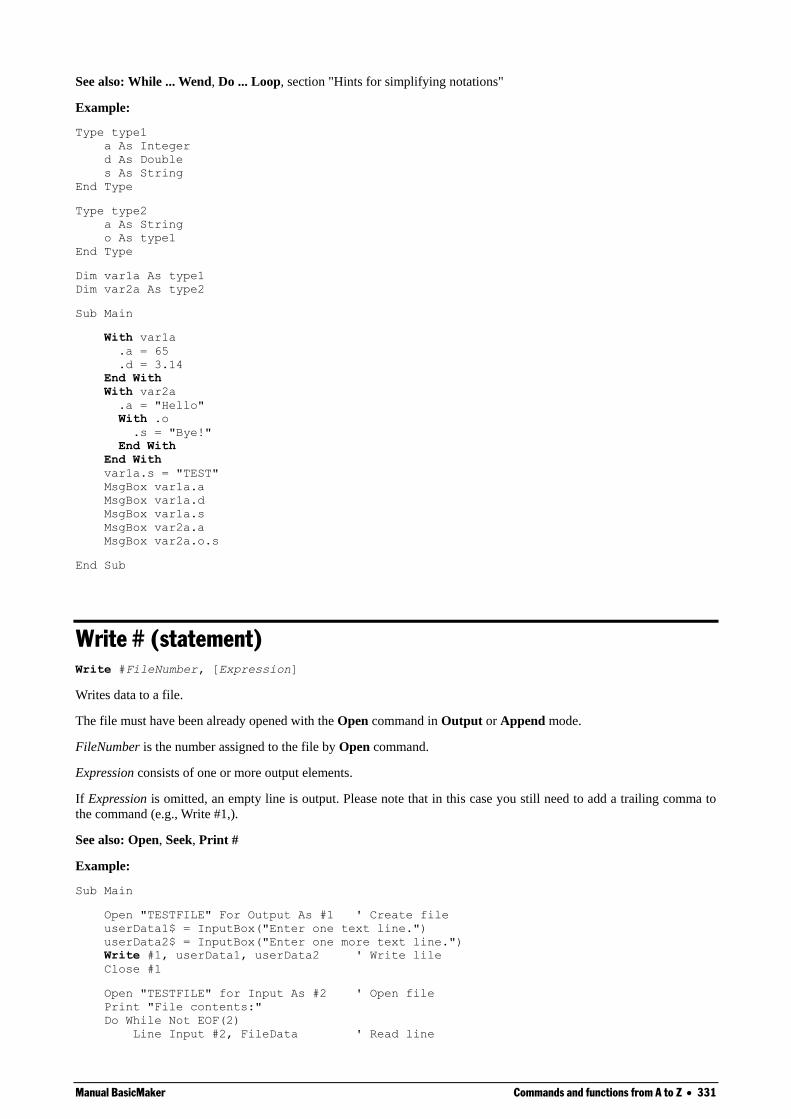
Manual BasicMaker Commands and functions from A to Z 331
See also: While ... Wend, Do ... Loop, section "Hints for simplifying notations"
Example:
Type type1
a As Integer
d As Double
s As String
End Type
Type type2
a As String
o As type1
End Type
Dim var1a As type1
Dim var2a As type2
Sub Main
With var1a
.a = 65
.d = 3.14
End With
With var2a
.a = "Hello"
With .o
.s = "Bye!"
End With
End With
var1a.s = "TEST"
MsgBox var1a.a
MsgBox var1a.d
MsgBox var1a.s
MsgBox var2a.a
MsgBox var2a.o.s
End Sub
Write # (statement)
Write #FileNumber, [Expression]
Writes data to a file.
The file must have been already opened with the Open command in Output or Append mode.
FileNumber is the number assigned to the file by Open command.
Expression consists of one or more output elements.
If Expression is omitted, an empty line is output. Please note that in this case you still need to add a trailing comma to
the command (e.g., Write #1,).
See also: Open, Seek, Print #
Example:
Sub Main
Open "TESTFILE" For Output As #1 ' Create file
userData1$ = InputBox("Enter one text line.")
userData2$ = InputBox("Enter one more text line.")
Write #1, userData1, userData2 ' Write lile
Close #1
Open "TESTFILE" for Input As #2 ' Open file
Print "File contents:"
Do While Not EOF(2)
Line Input #2, FileData ' Read line
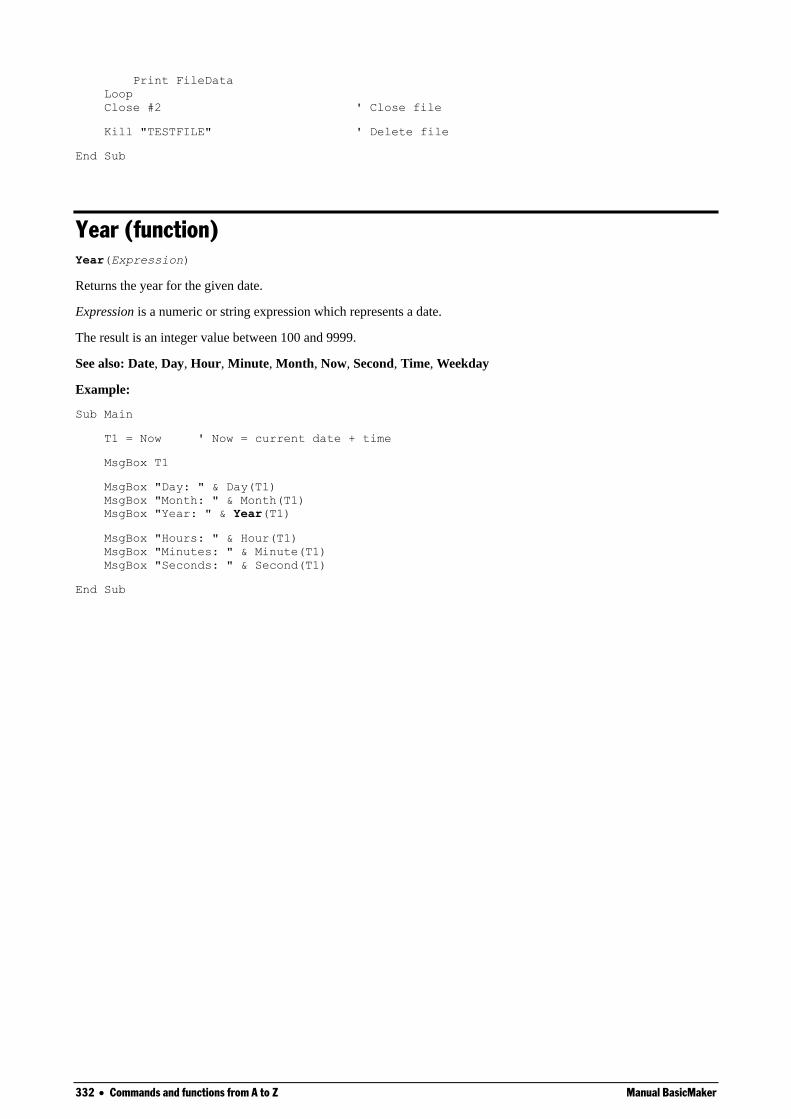
332 Commands and functions from A to Z Manual BasicMaker
Print FileData
Loop
Close #2 ' Close file
Kill "TESTFILE" ' Delete file
End Sub
Year (function)
Year(Expression)
Returns the year for the given date.
Expression is a numeric or string expression which represents a date.
The result is an integer value between 100 and 9999.
See also: Date, Day, Hour, Minute, Month, Now, Second, Time, Weekday
Example:
Sub Main
T1 = Now ' Now = current date + time
MsgBox T1
MsgBox "Day: " & Day(T1)
MsgBox "Month: " & Month(T1)
MsgBox "Year: " & Year(T1)
MsgBox "Hours: " & Hour(T1)
MsgBox "Minutes: " & Minute(T1)
MsgBox "Seconds: " & Second(T1)
End Sub
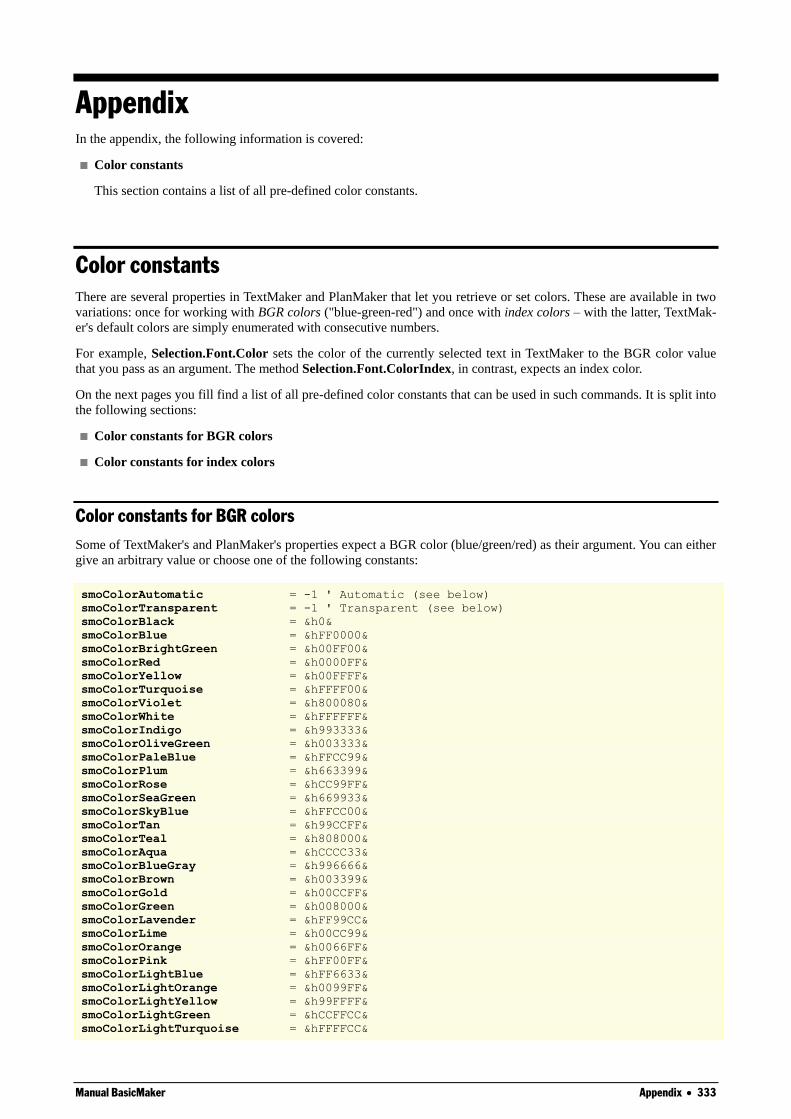
Manual BasicMaker Appendix 333
Appendix In the appendix, the following information is covered:
Color constants
This section contains a list of all pre-defined color constants.
Color constants
There are several properties in TextMaker and PlanMaker that let you retrieve or set colors. These are available in two
variations: once for working with BGR colors ("blue-green-red") and once with index colors – with the latter, TextMak-
er's default colors are simply enumerated with consecutive numbers.
For example, Selection.Font.Color sets the color of the currently selected text in TextMaker to the BGR color value
that you pass as an argument. The method Selection.Font.ColorIndex, in contrast, expects an index color.
On the next pages you fill find a list of all pre-defined color constants that can be used in such commands. It is split into
the following sections:
Color constants for BGR colors
Color constants for index colors
Color constants for BGR colors
Some of TextMaker's and PlanMaker's properties expect a BGR color (blue/green/red) as their argument. You can either
give an arbitrary value or choose one of the following constants:
smoColorAutomatic = -1 ' Automatic (see below)
smoColorTransparent = -1 ' Transparent (see below)
smoColorBlack = &h0&
smoColorBlue = &hFF0000&
smoColorBrightGreen = &h00FF00&
smoColorRed = &h0000FF&
smoColorYellow = &h00FFFF&
smoColorTurquoise = &hFFFF00&
smoColorViolet = &h800080&
smoColorWhite = &hFFFFFF&
smoColorIndigo = &h993333&
smoColorOliveGreen = &h003333&
smoColorPaleBlue = &hFFCC99&
smoColorPlum = &h663399&
smoColorRose = &hCC99FF&
smoColorSeaGreen = &h669933&
smoColorSkyBlue = &hFFCC00&
smoColorTan = &h99CCFF&
smoColorTeal = &h808000&
smoColorAqua = &hCCCC33&
smoColorBlueGray = &h996666&
smoColorBrown = &h003399&
smoColorGold = &h00CCFF&
smoColorGreen = &h008000&
smoColorLavender = &hFF99CC&
smoColorLime = &h00CC99&
smoColorOrange = &h0066FF&
smoColorPink = &hFF00FF&
smoColorLightBlue = &hFF6633&
smoColorLightOrange = &h0099FF&
smoColorLightYellow = &h99FFFF&
smoColorLightGreen = &hCCFFCC&
smoColorLightTurquoise = &hFFFFCC&

334 Appendix Manual BasicMaker
smoColorDarkBlue = &h800000&
smoColorDarkGreen = &h003300&
smoColorDarkRed = &h000080&
smoColorDarkTeal = &h663300&
smoColorDarkYellow = &h008080&
smoColorGray05 = &hF3F3F3&
smoColorGray10 = &hE6E6E6&
smoColorGray125 = &hE0E0E0&
smoColorGray15 = &hD9D9D9&
smoColorGray20 = &hCCCCCC&
smoColorGray25 = &hC0C0C0&
smoColorGray30 = &hB3B3B3&
smoColorGray35 = &hA6A6A6&
smoColorGray375 = &hA0A0A0&
smoColorGray40 = &h999999&
smoColorGray45 = &h8C8C8C&
smoColorGray50 = &h808080&
smoColorGray55 = &h737373&
smoColorGray60 = &h666666&
smoColorGray625 = &h606060&
smoColorGray65 = &h595959&
smoColorGray75 = &h404040&
smoColorGray85 = &h262626&
smoColorGray90 = &h191919&
smoColorGray70 = &h4C4C4C&
smoColorGray80 = &h333333&
smoColorGray875 = &h202020&
smoColorGray95 = &hC0C0C0&
The colors smoColorAutomatic and smoColorTransparent serve specific purposes and cannot be used at will:
smoColorAutomatic lets you set the color of the sheet grid in PlanMaker to "Automatic".
smoColorTransparent lets you set the background color of text to "Transparent" in TextMaker and PlanMaker.
Color constants for index colors
Some of TextMaker's and PlanMaker's properties expect an index color as their argument. You may exclusively use one
of the following values:
smoColorIndexAutomatic = -1 ' Automatic (see below)
smoColorIndexTransparent = -1 ' Transparent (see below)
smoColorIndexBlack = 0 ' Black
smoColorIndexBlue = 1 ' Blue
smoColorIndexCyan = 2 ' Cyan
smoColorIndexGreen = 3 ' Green
smoColorIndexMagenta = 4 ' Magenta
smoColorIndexRed = 5 ' Red
smoColorIndexYellow = 6 ' Yellow
smoColorIndexWhite = 7 ' White
smoColorIndexDarkBlue = 8 ' Dark blue
smoColorIndexDarkCyan = 9 ' Dark cyan
smoColorIndexDarkGreen = 10 ' Dark green
smoColorIndexDarkMagenta = 11 ' Dark magenta
smoColorIndexDarkRed = 12 ' Dark red
smoColorIndexBrown = 13 ' Brown
smoColorIndexDarkGray = 14 ' Dark gray
smoColorIndexLightGray = 15 ' Light gray
Hint: Those properties that use BGR colors are more flexible and should be used preferably.
The colors smoColorIndexAutomatic and smoColorIndexTransparent serve specific purposes, as follows:
smoColorIndexAutomatic sets the text color in TextMaker or the color of the sheet grid in PlanMaker to "Auto-
matic".
smoColorIndexTransparent sets the background color of text to "Transparent" in TextMaker or PlanMaker.

Manual BasicMaker Appendix 335