Lvp jcreator
12
Using JCreator JCreator is an integrated development environment (IDE). An IDE vides a workspace that allows for editing, compiling, and running of source code. The JCreator IDE has a graphical user interface, which makes it easy to learn and use. The JCreator IDE can be used to create Java applets, console applications, and Swing applications. JCreator maintains each applet and application as a project. Projects are created in a workspace environment, which consists of several windows: . The File View window displays the folders and files associated with the project workspace. The Package View window displays the classes associated with the project workspace. The code editor window is used to type and edit Java and HTML code. The Output window displays Java program output, build errors, a task list, and debug output. File View window Package View window —code editor window
-
Upload
edu-rivera -
Category
Documents
-
view
343 -
download
0
Transcript of Lvp jcreator

Using JCreator
JCreator is an integrated development environment (IDE). An IDE vides aworkspace that allows for editing, compiling, and running of source code.The JCreator IDE has a graphical user interface, which makes it easy tolearn and use.
The JCreator IDE can be used to create Java applets, console applications,and Swing applications. JCreator maintains each applet and application asa project. Projects are created in a workspace environment, which consistsof several windows:
.
Packw
window
File ViewThe File View window displays the folders and files associatedwith the project workspace.
The Package View window displays the classes associated witthe project workspace.
The code editor window is used to type and edit Java and HTMcode.
The Output window displays Java program output, build erroa task list, and debug output.
window
age Viewindow
h
L
rs,
—code editor
To start JCreator, double-click on the Desktop Icon or select Start - All Programs - JCreatorJCreator. When JCreator is started, if an existing workspace is open, it is important to select File CloseWorkspace before creating a new project because a workspace can contain more than one project.
Compiling and Running a ProgramIn JCreator, a Java applet or application must be compiled before it is run. Compiling automatically savesthe program file and converts the Java source code to bytecode. Select Build — Compile Project or click theCompile Project ( ) button on the toolbar to compile the program. If the program compiles successfully,the message "Process completed." will appear in the Build Output window. Next, select Build ExecuteProject or click the Execute Project (la - button on the toolbar to run the program and display theprogram output in a window.
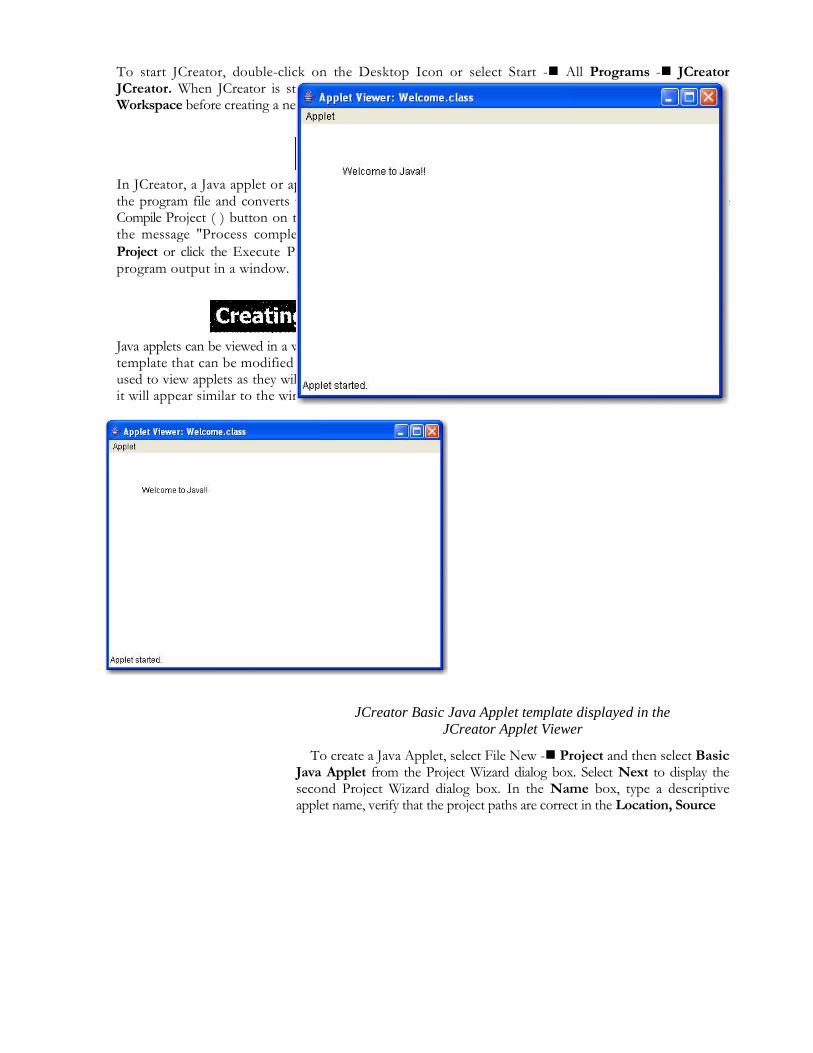
Java applets can be viewed in a website. Applets are created in Unit 4. JCreator contains a Basic Java Applettemplate that can be modified to easily create Java Applets. JCreator also contains an Applet Viewer that isused to view applets as they will appear on a web page. If the Basic Java Applet template is not modified,it will appear similar to the window below when it is compiled and run in JCreator:
JCreator Basic Java Applet template displayed in theJCreator Applet Viewer
To create a Java Applet, select File New - Project and then select BasicJava Applet from the Project Wizard dialog box. Select Next to display thesecond Project Wizard dialog box. In the Name box, type a descriptiveapplet name, verify that the project paths are correct in the Location, Source
Path, and Output Path boxes. If the project paths are notcorrect, click beside the corresponding box and select theappropriate path from the Select Directory dialog box.Select Finish to create the project workspace, folders, andfiles.
A Basic Java application template automaticallygenerates a .java file and an .htm file. To create anapplet, first modify and compile the .java file. Select File - Execute Project to view the applet in the JCreator AppletViewer. Next, modify the .htm file so that the applet isappropriately placed in the HTML document. The appletcan then be viewed in a web browser.
Review: WelcomeSTART 'CREATOR
CREATE A NEW PROJECT
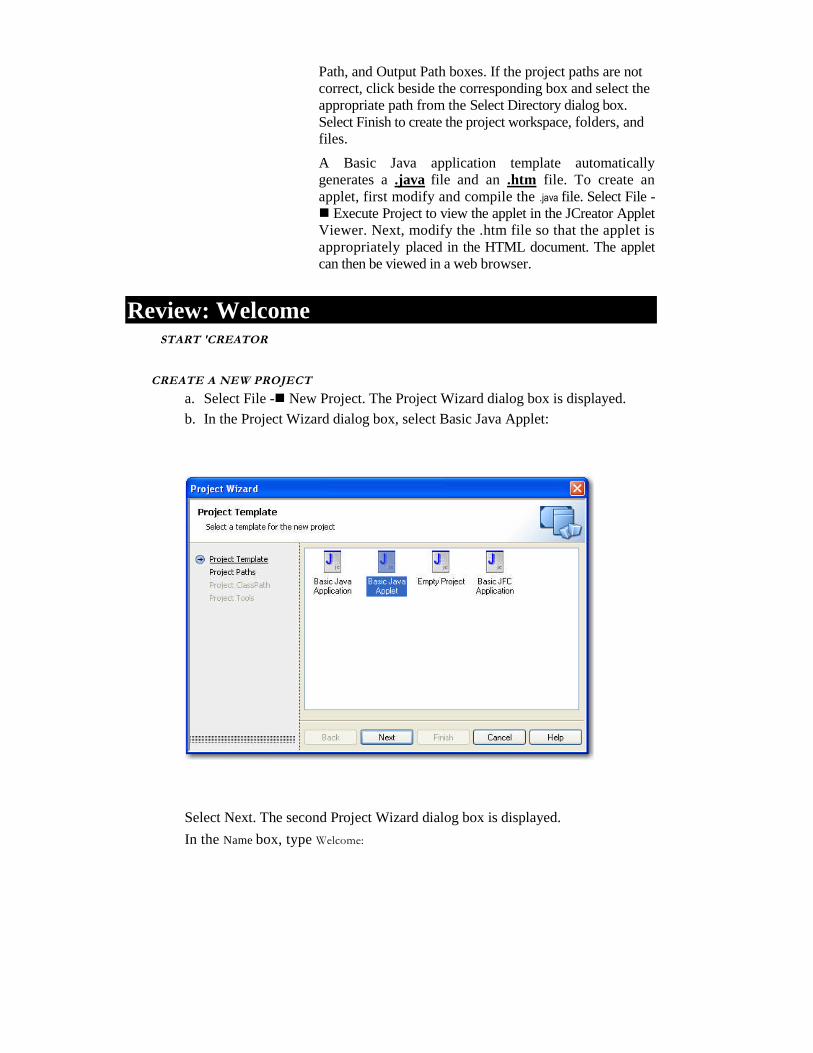
a. Select File - New Project. The Project Wizard dialog box is displayed.
b. In the Project Wizard dialog box, select Basic Java Applet:
Select Next. The second Project Wizard dialog box is displayed.
In the Name box, type Welcome:
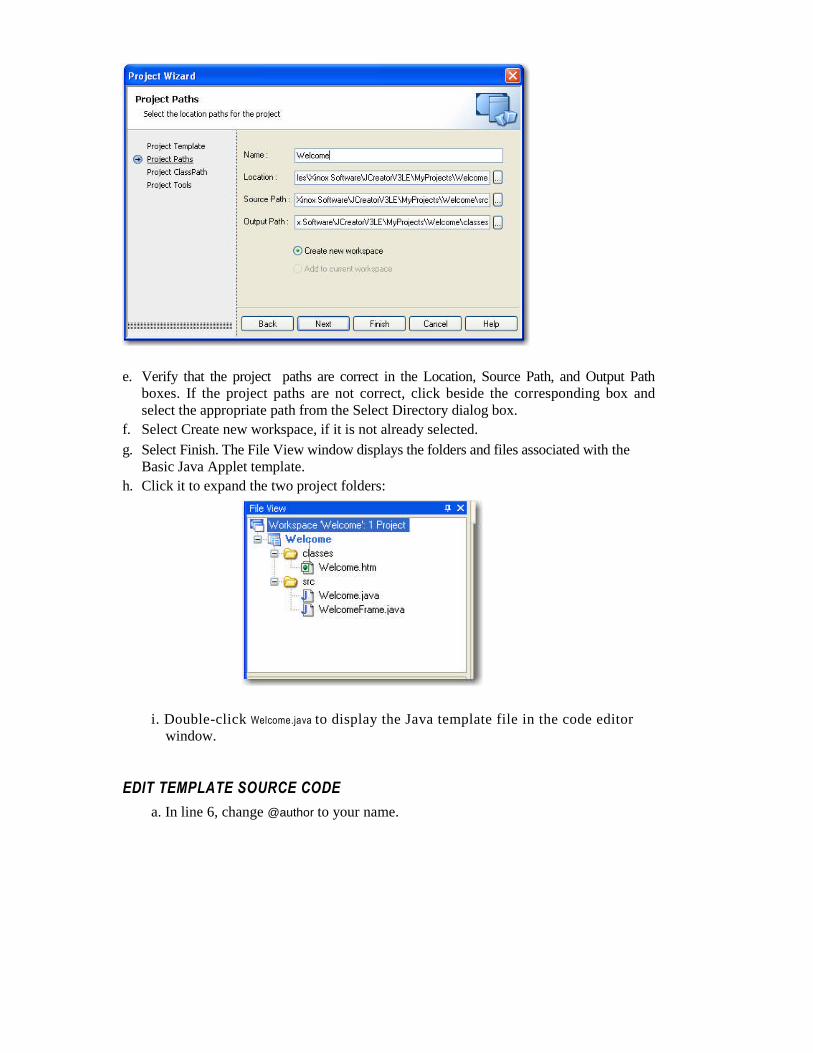
e. Verify that the project paths are correct in the Location, Source Path, and Output Pathboxes. If the project paths are not correct, click beside the corresponding box andselect the appropriate path from the Select Directory dialog box.
f. Select Create new workspace, if it is not already selected.
g. Select Finish. The File View window displays the folders and files associated with theBasic Java Applet template.
h. Click it to expand the two project folders:
i. Double-click Welcome.java to display the Java template file in the code editorwindow.
EDIT TEMPLATE SOURCE CODE
a. In line 6, change @author to your name.
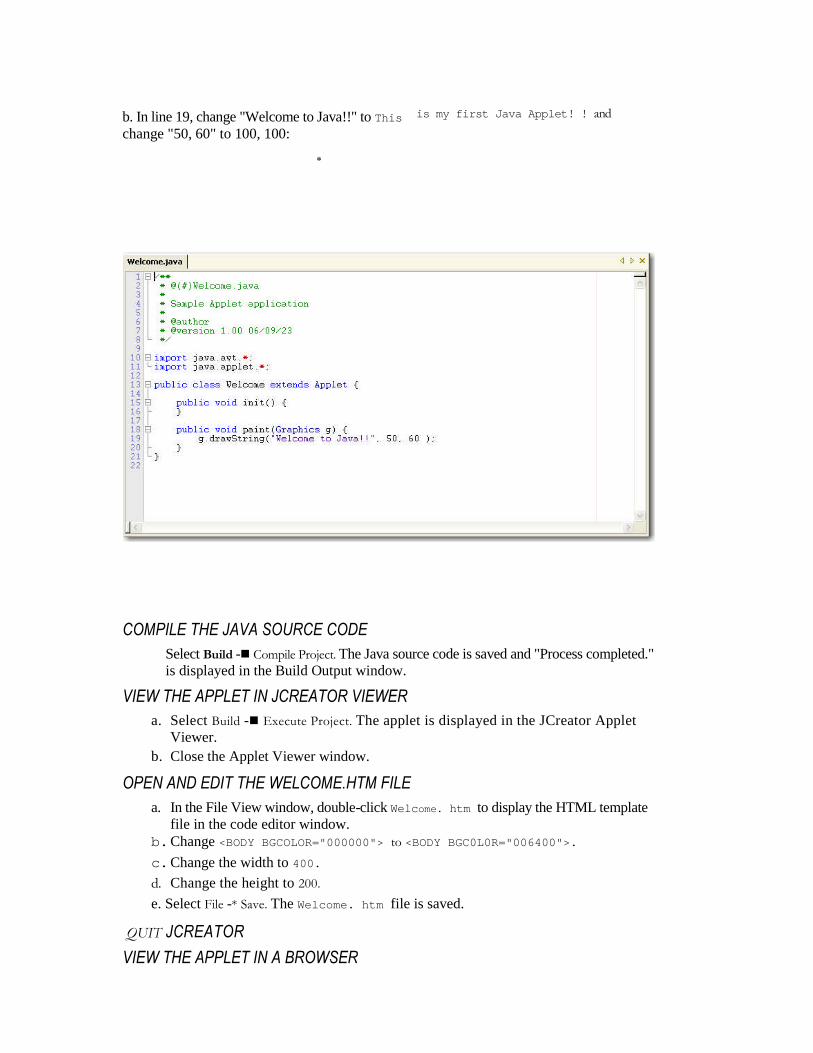
b. In line 19, change "Welcome to Java!!" to This
change "50, 60" to 100, 100:
is my first Java Applet! ! and
COMPILE THE JAVA SOURCE CODE
Select Build - Compile Project. The Java source code is saved and "Process completed."is displayed in the Build Output window.
VIEW THE APPLET IN JCREATOR VIEWER
a. Select Build - Execute Project. The applet is displayed in the JCreator AppletViewer.
b. Close the Applet Viewer window.
OPEN AND EDIT THE WELCOME.HTM FILE
a. In the File View window, double-click Welcome. htm to display the HTML templatefile in the code editor window.
b.Change <BODY BGCOLOR="000000"> to <BODY BGC0L0R="006400">.
c.Change the width to 400.
d. Change the height to 200.
e. Select File -* Save. The Welcome. htm file is saved.
QUIT JCREATOR
VIEW THE APPLET IN A BROWSER
NOTES : Project files for a console application will include
the Java source code (.java),
the Java bytecode (.class),
the workspace description file(.jcw)
and the project description file (.jcp)
A PROJECT MUST HAVE THE SAME NAME AS THEF FILE THATCONTAINS THE CONTROLLING CLASS
CREATING A CONSOLE APPLICATION
A console application displays output in a DOS window. Console applications are created in Chapters 3through 10 and Chapters 12 through 14. To create a console application, select File - New -• Project and
then select Empty Project from the Project Wizard dialog box. Select Next to display the second ProjectWizard dialog box. In the Name box, type a descriptive application name, verify that the project paths arecorrect in the Location, Source Path, and Output Path boxes. If the project paths are not correct, clickbeside the corresponding box and select the appropriate path from the Select Directory dialog box.Select Finish to create the project workspace and folder.
A new Java file is then created by selecting File New -+ File or clicking the New File button (j _II) onthe toolbar, which displays the File Wizard dialog box. In the Name box, type the same name as theapplication name and then select Finish.
After typing a program, select File y Save All to save the program file(s) and select File y Save Workspaceto associate the file with the workspace. If the workspace is not saved, the added program file will notappear in the File View window when the project workspace is opened even though the program file is inthe project directory. When finished working in JCreator, select File y Exit to remove the JCreator IDEfrom the Desktop
.
Review: Message part 1 of 2
You will create a project named Message.
START 'CREATOR
Select File Close Workspace if an existing project is displayed when the IDE is0started.
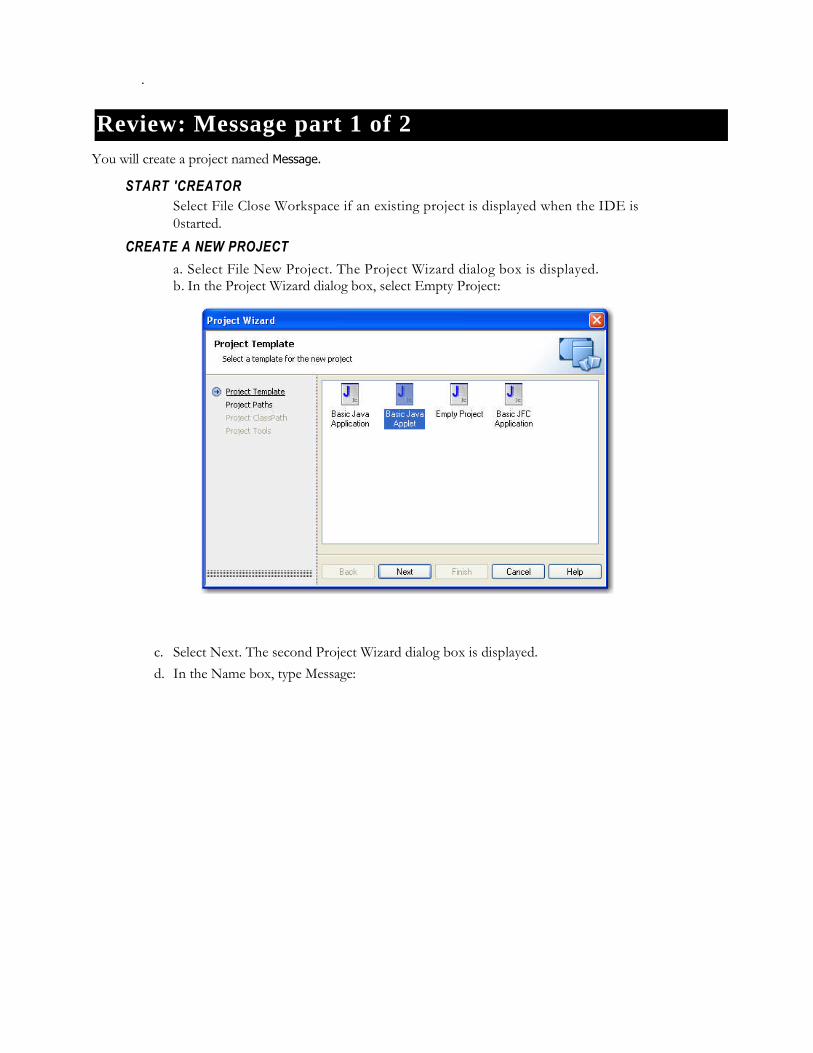
CREATE A NEW PROJECT
a. Select File New Project. The Project Wizard dialog box is displayed.b. In the Project Wizard dialog box, select Empty Project:
c. Select Next. The second Project Wizard dialog box is displayed.
d. In the Name box, type Message:
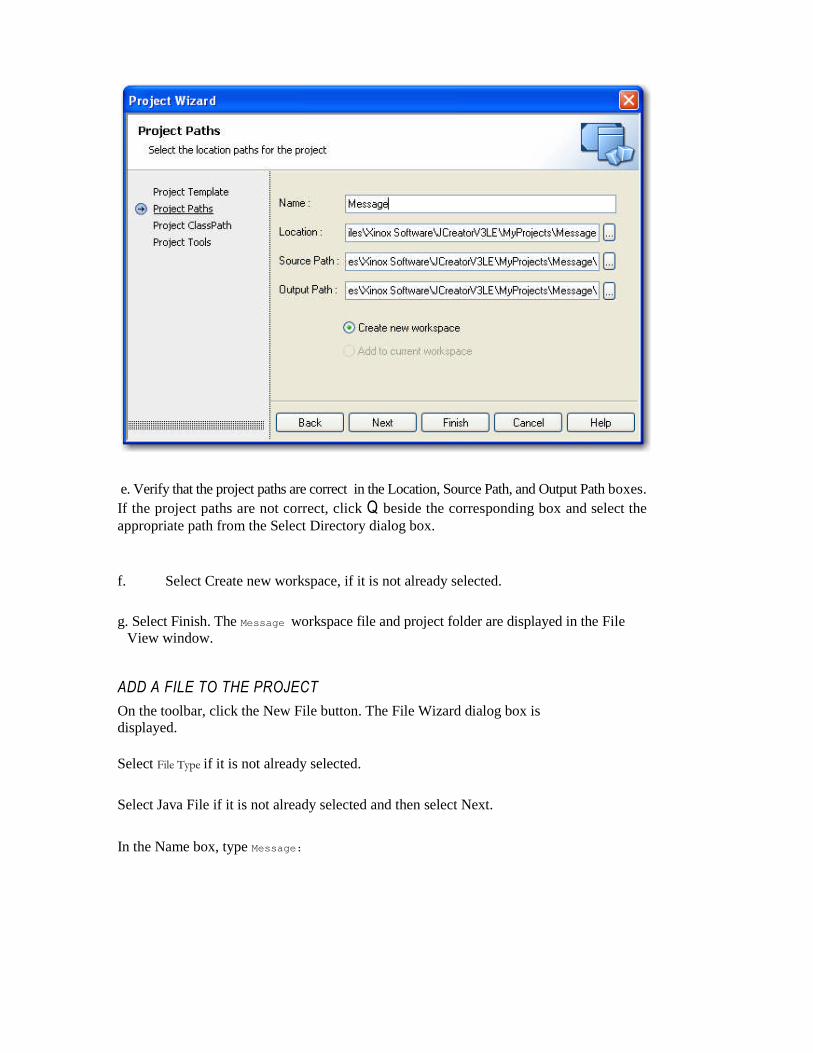
e. Verify that the project paths are correct in the Location, Source Path, and Output Path boxes.
If the project paths are not correct, click Q beside the corresponding box and select theappropriate path from the Select Directory dialog box.
f. Select Create new workspace, if it is not already selected.
g. Select Finish. The Message workspace file and project folder are displayed in the FileView window.
ADD A FILE TO THE PROJECT
On the toolbar, click the New File button. The File Wizard dialog box isdisplayed.
Select File Type if it is not already selected.
Select Java File if it is not already selected and then select Next.
In the Name box, type Message:
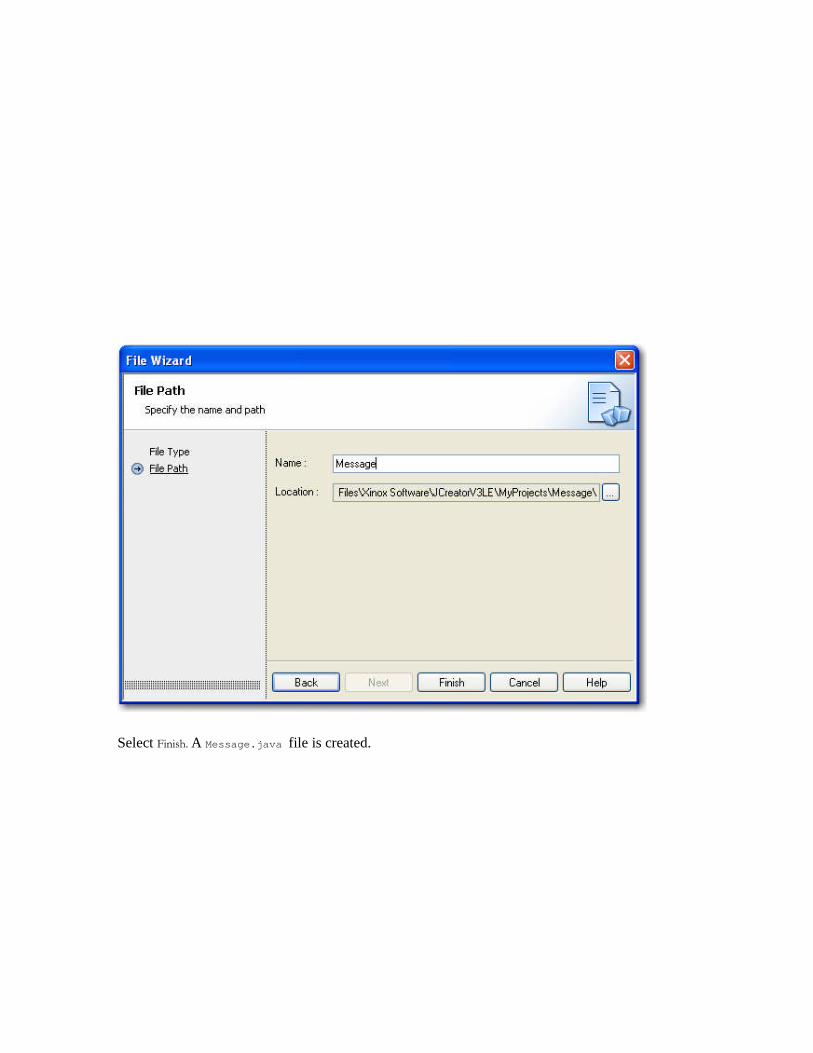
Select Finish. A Message.java file is created.
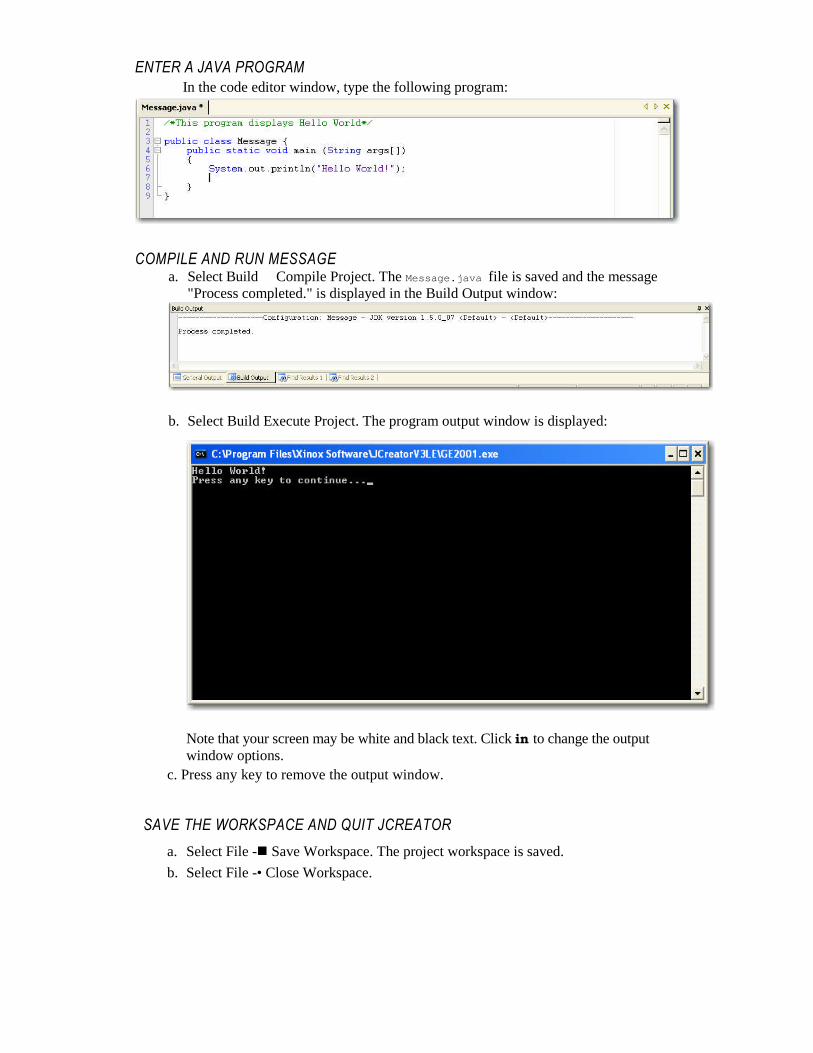
ENTER A JAVA PROGRAMIn the code editor window, type the following program:
COMPILE AND RUN MESSAGEa. Select Build Compile Project. The Message.java file is saved and the message
"Process completed." is displayed in the Build Output window:
b. Select Build Execute Project. The program output window is displayed:
Note that your screen may be white and black text. Click in to change the outputwindow options.
c. Press any key to remove the output window.
SAVE THE WORKSPACE AND QUIT JCREATOR
a. Select File - Save Workspace. The project workspace is saved.
b. Select File -• Close Workspace.

The JCreator compiler will display any errors in the Task List window when the program is compiled:
The Task List displays a description of the error and the error location
Double-click the error message to display a red arrow next to the line of code containing the error. To removean error message, correct the error and then compile the project.
Opening a Project Workspace and PrintingTo open a project's workspace, select File - Open Workspace. Use the Look in list and contents box to displaythe appropriate workspace file and then select Open.
To print the source code, click the code editor window and then select File -• Print. To print the contents ofthe output window, select SI -• Edit Select All and then select SI Edit y Copy. The contents can then be pastedinto a word processor and printed.
You will open the Message workspace and print the code.
OPEN MESSAGE WORKSPACEa. Select File — Open Workspace. A dialog box is displayed.
b. Use the Look in list and the contents box below it to display file name Message.
c. In the contents box, click Message and then select Open.
PRINT MESSAGEa. In the File View window, double-click Message.java.
b. Click the code editor window.
c. Select File - Print.
CLOSE THE MESSAGE WORKSPACE ®
QUIT JCREATOR
Adding Files to a Project
A Java application can include multiple classes. Only one class is the controlling class. Other classes defineabstract types used in the controlling class or within the additional classes. Applications that containmultiple classes are created in Chapters 8 through 14.
To add a new class to a project, add a file to the project and then type the new class code in this file. Toadd an existing class to a project, select Project -• Add Files, which displays the Open dialog box. Use theLook in list and contents box to display the appropriate file. Select the file and then select Open.
JCreator has several helpfeatures that can be accessed in the Help menu. The Help Contents and JDK Help commands access adatabase of help topics that can be searched and the JCreator on the Web command provides links totechnical support information on the JCreator website.