Low Throughput HLA Typing Protocol - Immucor Documents/LC1618RUO.3 - MIA FORA NGS HLA... ·...
14
Page 1 of 14 LC1618RUO.3 (11/16) Copyright © 2015, Immucor Transplant Diagnostics, Inc. All rights reserved. Immucor Transplant Diagnostics, Inc. 550 West Avenue, Stamford, CT 06902 USA Tel: (203) 328-9500 or (888) 329-0255, Fax: (203) 328-9599 WWW.IMMUCOR.COM Product Documentation and Translations available at: www.Immucor.com MIA FORA™ NGS HLA Typing Kit FOR RESEARCH USE ONLY. NOT FOR USE IN DIAGNOSTIC PROCEDURES TABLE OF CONTENTS Definition of Symbols………………..…………… 1 Specimen Collection and Preparation…………… 4 Reagents by catalog number……………………. 2 Procedure…………………………………………… 5 Purpose……………………………………… 3 A. Materials Provided………………………… 5 Summary and Explanation………………….…… 3 B. Materials required, but Not Provided……. 5 Principles of the Procedure……………………… 3 Directions for Use…………………………………. 5 Reagents………………………………………….. 3 Quality Control…………………………………….. 11 A. Identification…………………….………. 3 Limitation of the Procedure………………..……… 11 B. Warnings and Cautions………………… 3 Troubleshooting……………………………………. 13 C. Storage Instructions…………………….. 4 Limited Licenses……………….………….………. 14 D. Purification or Treatment for Use……… 4 Manufacturer Information………………………… 14 E. Instability Indications……………………. 4 Trademarks Used…………………………………. 14 Instrument Requirements……………………….. 4 Definition of Symbols Batch Code Catalog Number Temperature limitation Use by Serial Number SN Sufficient for <n> tests Caution Consult instructions for use Manufacturer For Research Use Only- Not for use in diagnostic procedures RUO Contains CONT PRODUCT INSERT
Transcript of Low Throughput HLA Typing Protocol - Immucor Documents/LC1618RUO.3 - MIA FORA NGS HLA... ·...
Page 1 of 14 LC1618RUO.3 (11/16) Copyright © 2015, Immucor Transplant Diagnostics, Inc. All rights reserved.
Immucor Transplant Diagnostics, Inc. 550 West Avenue, Stamford, CT 06902 USA
Tel: (203) 328-9500 or (888) 329-0255, Fax: (203) 328-9599 WWW.IMMUCOR.COM
Product Documentation and Translations available at: www.Immucor.com
MIA FORA™ NGS HLA Typing Kit FOR RESEARCH USE ONLY. NOT FOR USE IN DIAGNOSTIC PROCEDURES
TABLE OF CONTENTS
Definition of Symbols………………..…………… 1 Specimen Collection and Preparation…………… 4
Reagents by catalog number……………………. 2 Procedure…………………………………………… 5
Purpose……………………………………… 3 A. Materials Provided………………………… 5
Summary and Explanation………………….…… 3 B. Materials required, but Not Provided……. 5
Principles of the Procedure……………………… 3 Directions for Use…………………………………. 5
Reagents………………………………………….. 3 Quality Control…………………………………….. 11
A. Identification…………………….………. 3 Limitation of the Procedure………………..……… 11
B. Warnings and Cautions………………… 3 Troubleshooting……………………………………. 13
C. Storage Instructions…………………….. 4 Limited Licenses……………….………….………. 14
D. Purification or Treatment for Use……… 4 Manufacturer Information………………………… 14
E. Instability Indications……………………. 4 Trademarks Used…………………………………. 14
Instrument Requirements……………………….. 4
Definition of Symbols
Batch Code
Catalog Number
Temperature limitation
Use by
Serial Number SN Sufficient for <n> tests
Caution
Consult instructions for use
Manufacturer
For Research Use Only-Not for use in diagnostic procedures
RUO Contains CONT
08 Fall
P R O D U C T I N S E R T

Page 2 of 14 LC1618RUO.3 (11/16) Copyright © 2015, Immucor Transplant Diagnostics, Inc. All rights reserved.
REAGENTS BY CATALOG NUMBER MIA FORA NGS HLA Master Kit Part Number SR-800-00377 consisting of MIA FORA NGS HLA Typing Reagent Kit (SR-800-00365) and Magnetic Bead Kit (SR-800-00379). MIA FORA NGS HLA Typing Reagent Kit (SR-800-00365): a) PCR Reagents: Consisting of nine (9) individual vials
Reagent Product Number Fill volume Storage
24
1 HLA-A PCR Mix SR‐800‐00326
450µL -20 to -80°C
2 HLA-B PCR Mix SR‐800‐00327
3 HLA-C PCR Mix SR‐800‐00328
4 HLA-DPA1 PCR Mix SR‐800‐00329
5 HLA-DPB1 PCR Mix SR‐800‐00330
6 HLA-DQA1 PCR Mix SR‐800‐00331
7 HLA-DQB1 PCR Mix SR‐800‐00332
8 HLA-DRB1-S PCR Mix SR-800-00333
9 HLA-DRB1-L PCR Mix SR-800-00334
b) Library Preparation Reagents: Consisting of the twelve (12) individual vials
Reagent Product Number Fill volume Storage
24
10 Fragmentation Enzyme SR-800-00335 67 µL
-20 to -80°C
11 Fragmentation Buffer SR-800-00336 168 µL
12 STOP Buffer SR-800-00337 225 µL
13 End Repair Enzyme Mix SR-800-00338 34 µL
14 End Repair Buffer SR-800-00339 168 µL
15 A-tail Enzyme SR-800-00340 17µL
16 A-tail Buffer SR-800-00341 118 µL
17 Ligase Enzyme SR-800-00342 34 µL
18 2X Ligase Buffer SR-800-00343 917 µL
19 PCR Enzyme/Buffer Mix SR-800-00344 84 µL
20 Amplification Primers SR-800-00345 12 µL
21 Nuclease-free Water SR-800-00362 85 µL
c) Adaptor Plate (SR-800-00349):
Description Part Number Fill Volume Storage Index Adaptor Plate Three filled columns of a 96
well plate
SR-800-00349 5 µL/well -20 to -80°C
Magnetic Bead Kit (SR-800-00379):
a) Magnetic Beads: Consisting of one (1) vial
Description Part Number Fill Volume Storage
Filled Vial, Agencourt® AMPure® XP Bead
SR-800-00378 5mL 2 to 8°C

Page 3 of 14 LC1618RUO.3 (11/16) Copyright © 2015, Immucor Transplant Diagnostics, Inc. All rights reserved.
PURPOSE The MIA FORA
TM NGS HLA typing kit is designed for amplification and sequencing of HLA genes HLA -A, -B, -C, -DRB-1/3/4/5,
-DQA1, -DQB1, -DPA1, and -DPB1 on the Illumina NGS sequencing platform. The MIA FORA software is designed for use as a guide for determining HLA type from the data generated with the MIA FORA NGS HLA library kit. The test is intended for use in a laboratory proficient in handling DNA for amplification and sequencing.
SUMMARY AND EXPLANATION Sequence Based typing of PCR amplified exons of HLA genes is a common laboratory procedure. PCR amplification is used to enrich targeted sequences and the subsequent HLA typing is determined for the selected regions. Other methods such as sequence specific oligonucleotide probe (SSOP), sequence specific primer extension assays (SSP) have also been used to determine HLA typing. The MIA FORA NGS HLA typing system is a novel HLA typing methodology that utilizes the ability to capture all relevant regions of the HLA loci by long range PCR. Nine PCR master mixes that contain all required components to amplify each gene, including enzymes, buffers, dNTPs and primers for long range PCR amplification are provided in the kit. The amplified DNA can then be processed by using the MIA FORA NGS HLA library kit to generate DNA library for sequencing on the Illumina sequencing platform. The kit allows up to 24 samples to be sequenced in a multiplex fashion using the Illumina sequencing platform.
PRINCIPLES OF THE PROCEDURE The MIA FORA NGS HLA typing kit is designed to determine the typing of Class I and Class II HLA loci by sequencing the whole gene or the most informative exons and introns. The MIA FORA NGS HLA typing kit uses long range PCR to capture and enrich the major HLA genes, HLA -A, -B, -C,-DQA1,-DQB1, -DPA1 –DPB1, and –DRB1/3/4/5. The MIA FORA NGS Library Preparation reagent kit generates a library from the amplified DNA for sequencing on the Illumina sequencing platform. The MIA FORA NGS HLA typing software provides the sequence of the relevant HLA genes and phase information to achieve high resolution HLA typing.
REAGENTS A. Identification
See tables in Reagents by Catalog Number section for complete listing of products and catalog numbers.
B. Warnings and Cautions 1. For Research Use only. Not for use in diagnostic procedures. 2. Separate labs or enclosed lab spaces should be designated for Pre-PCR manipulations as well as for Post-PCR
manipulations. 3. Separate pipettes should be designated for Pre-PCR manipulations as well as for Post-PCR manipulations. 4. Biohazard: All biological and blood samples should be treated as potentially infectious. Use Universal Precautions when
handling. 5. Never pipette by mouth. Avoid contact of reagents and specimens with skin and mucous membranes. 6. Dispose of used materials in accordance with the Institution’s and/or local regulations for disposal of potential bio-hazardous
materials. 7. PCR technology is susceptible to contamination, especially from its own product. Aerosols of PCR amplicons that are
generated during the post-PCR steps are a frequent source of contamination. Thus care should be taken to prevent excessive splashing and generation of aerosols. Standard PCR laboratory measures that include wiping of work surfaces with freshly prepared 10% bleach before processing or preparing PCR samples, use of ultraviolet (UV) light in hoods or biosafety cabinets in between use, space and time separation of pre- and post-PCR activities, use of aliquoted PCR reagents, use of positive and negative controls, etc. should also be followed during the use of the kit. Use of consistent, careful technique coupled with liberal incorporation and monitoring of controls will ensure a vigilant, proactive approach to control and monitoring of PCR contamination.
8. Laboratories should validate their own cleaning procedures. 9. Contamination of reagents or specimens may cause erroneous results; therefore, care should be taken to avoid
contaminating this product during use. Do not use contaminated reagents. 10. Use the kit liquids as supplied. Dilution or alteration may generate erroneous results. Do not mix reagents between different
lots. 11. Do not use leaking or unlabeled vials. 12. Previously frozen samples or reagents should be thoroughly mixed and then centrifuged after thawing prior to testing. Avoid
generating foam and bubbles in the samples. 13. Keep all enzymes and master mixes on ice or cryo block (2 - 8°C) when thawing. 14. Ensure proper sample tube sealing prior to amplification to prevent evaporation. 15. Due to inherent differences in the mechanisms of thermal cycler performance, variation in results can occur when set
thermal profiles are transferred between different makes and models of thermal cycler instruments. In some cases, reaction specificity and sensitivity can be compromised, leading to the false interpretation and reporting of data. Alternate thermal cyclers and profiles must be validated by the user.
16. Incubation times or temperatures other than those specified may give erroneous results.
Page 4 of 14 LC1618RUO.3 (11/16) Copyright © 2015, Immucor Transplant Diagnostics, Inc. All rights reserved.
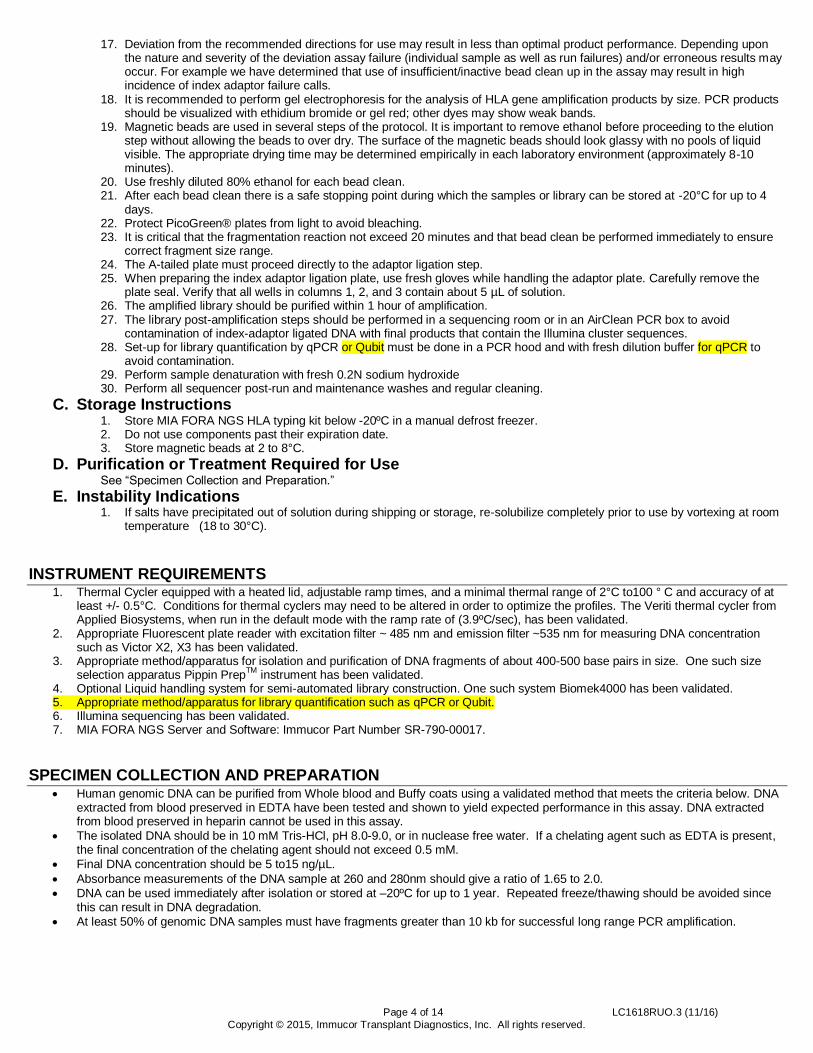
17. Deviation from the recommended directions for use may result in less than optimal product performance. Depending upon
the nature and severity of the deviation assay failure (individual sample as well as run failures) and/or erroneous results may occur. For example we have determined that use of insufficient/inactive bead clean up in the assay may result in high incidence of index adaptor failure calls.
18. It is recommended to perform gel electrophoresis for the analysis of HLA gene amplification products by size. PCR products should be visualized with ethidium bromide or gel red; other dyes may show weak bands.
19. Magnetic beads are used in several steps of the protocol. It is important to remove ethanol before proceeding to the elution step without allowing the beads to over dry. The surface of the magnetic beads should look glassy with no pools of liquid visible. The appropriate drying time may be determined empirically in each laboratory environment (approximately 8-10 minutes).
20. Use freshly diluted 80% ethanol for each bead clean. 21. After each bead clean there is a safe stopping point during which the samples or library can be stored at -20°C for up to 4
days. 22. Protect PicoGreen® plates from light to avoid bleaching. 23. It is critical that the fragmentation reaction not exceed 20 minutes and that bead clean be performed immediately to ensure
correct fragment size range. 24. The A-tailed plate must proceed directly to the adaptor ligation step. 25. When preparing the index adaptor ligation plate, use fresh gloves while handling the adaptor plate. Carefully remove the
plate seal. Verify that all wells in columns 1, 2, and 3 contain about 5 µL of solution. 26. The amplified library should be purified within 1 hour of amplification. 27. The library post-amplification steps should be performed in a sequencing room or in an AirClean PCR box to avoid
contamination of index-adaptor ligated DNA with final products that contain the Illumina cluster sequences. 28. Set-up for library quantification by qPCR or Qubit must be done in a PCR hood and with fresh dilution buffer for qPCR to
avoid contamination. 29. Perform sample denaturation with fresh 0.2N sodium hydroxide 30. Perform all sequencer post-run and maintenance washes and regular cleaning.
C. Storage Instructions 1. Store MIA FORA NGS HLA typing kit below -20ºC in a manual defrost freezer. 2. Do not use components past their expiration date. 3. Store magnetic beads at 2 to 8°C.
D. Purification or Treatment Required for Use See “Specimen Collection and Preparation.”
E. Instability Indications 1. If salts have precipitated out of solution during shipping or storage, re-solubilize completely prior to use by vortexing at room
temperature (18 to 30°C).
INSTRUMENT REQUIREMENTS 1. Thermal Cycler equipped with a heated lid, adjustable ramp times, and a minimal thermal range of 2°C to100 ° C and accuracy of at
least +/- 0.5°C. Conditions for thermal cyclers may need to be altered in order to optimize the profiles. The Veriti thermal cycler from Applied Biosystems, when run in the default mode with the ramp rate of (3.9ºC/sec), has been validated.
2. Appropriate Fluorescent plate reader with excitation filter ~ 485 nm and emission filter ~535 nm for measuring DNA concentration such as Victor X2, X3 has been validated.
3. Appropriate method/apparatus for isolation and purification of DNA fragments of about 400-500 base pairs in size. One such size selection apparatus Pippin Prep
TM instrument has been validated.
4. Optional Liquid handling system for semi-automated library construction. One such system Biomek4000 has been validated. 5. Appropriate method/apparatus for library quantification such as qPCR or Qubit. 6. Illumina sequencing has been validated. 7. MIA FORA NGS Server and Software: Immucor Part Number SR-790-00017.
SPECIMEN COLLECTION AND PREPARATION Human genomic DNA can be purified from Whole blood and Buffy coats using a validated method that meets the criteria below. DNA
extracted from blood preserved in EDTA have been tested and shown to yield expected performance in this assay. DNA extracted from blood preserved in heparin cannot be used in this assay.
The isolated DNA should be in 10 mM Tris-HCl, pH 8.0-9.0, or in nuclease free water. If a chelating agent such as EDTA is present, the final concentration of the chelating agent should not exceed 0.5 mM.
Final DNA concentration should be 5 to15 ng/µL.
Absorbance measurements of the DNA sample at 260 and 280nm should give a ratio of 1.65 to 2.0.
DNA can be used immediately after isolation or stored at –20ºC for up to 1 year. Repeated freeze/thawing should be avoided since this can result in DNA degradation.
At least 50% of genomic DNA samples must have fragments greater than 10 kb for successful long range PCR amplification.

Page 5 of 14 LC1618RUO.3 (11/16) Copyright © 2015, Immucor Transplant Diagnostics, Inc. All rights reserved.
PROCEDURE
A. Materials Provided (See table in Reagents by Catalog Number section for specific information)
PCR Reagents
Reagents for preparing library, index adaptor plate, Ampure® Magnetic beads
B. Materials, Reagents and Equipment Required, but Not Provided Thermal Cyclers: ABI Veriti ® Thermal Cycler has been validated
Magnetic racks for low volume elution in 96 well plates: Alpaqua Magnum FLX has been validated
Magnetic rack for magnetic separation of microcentrifuge tubes: DynaMag-2 Magnet has been validated
Bench top plate spinner and microcentrifuge tube spinner
Pipettors, Multichannel pipettors and tips (1-20µL, 20-200µL, 1000µL)
Adhesive seals for PCR plates. Accuseal Adhesive PCR film (E & K Scientific cat# T796150, 4titude cat# 4ti-0500) has been validated
1.5mL centrifuge tubes and PCR strip tubes
Vortex Mixer
Hard- Full-Height 96-well semi skirted plates (E & K Scientific cat# EK-75012, 4titude cat# 4ti-0770/C)
Plate 96 well PP Black, v-bottom chimney style (E & K Scientific cat# 21209, Greiner Bio-One cat#651209)
MicroAmp® Optical 96-Well Reaction Plate (ThermoFisher cat# N8010560)
MicroAmp® Optical Sealing Tape, Advanced Adhesive (E & K Scientific cat# T796400, ThermoFisher cat# 4311971)
Reagent Reservoirs
Clear Sealing Tape Pads
Aluminum Sealing Tape
Lens Paper
Filtered (aerosol resistant) disposable pipette tips covering the range 0.1μL to 1000 μL
Ethanol 200 proof Molecular Biology Grade
10mM Tris-HCl pH 8.0
100% Tween 20
Sodium Hydroxide,1N
Nuclease-free water
1.5% Agarose, dye-free, internal standards, Pippin PrepTM
, 250 bp -1.5kb, (Sage Science,CDF1510)
PhiX Control, v3 (Illumina cat# FC-110-3001)
Reagents for Fluorescent DNA concentration determination: Quant-iT ™ Picogreen®
dsDNA Assay Kit has been validated
MiSeq® V2 300 cycle kit (Illumina cat#MS102-2002)
MiniSeq® Mid Output Reagent Kit 300 cycle (Illumina cat# FC-420-1004)
Accurate Library quantification method/kit/apparatus: both the KAPA Library Quantification Kit and the Qubit fluorometer have been validated
DIRECTIONS FOR USE The assay for a 24-sample run can be performed using the manual protocol described below. Detailed manual assay protocols for 8, 16 or 24 samples and automation protocol for 24 samples using Biomek 4000 are available from your Immucor Technical Sales Specialist. NOTES:
• Take extreme caution in the aliquot process. Use calibrated pipettes. Failure to do so may result in reagent loss and assay failure.
• All temperatures must be precisely maintained. • Bring magnetic beads to room temperature before use.
• The amplified product can be stored up to 4 days at -20ºC prior to use. The amplified product can only be frozen and thawed once. Repeated freezing and thawing may result in degradation of amplified product and may yield poor results if used to generate library.
A. Genomic DNA Purification Purify genomic DNA using method of choice. The DNA sample requirements are as following:
Genomic DNA samples must be extracted from whole blood or buffy coat using a DNA extraction method that can generate high molecular weight DNA.
The DNA must be diluted in nuclease free water and stored at -20oC or below.
The final DNA concentration should be between 5-15 ng/µL, keeping all samples at similar concentrations. Adjust, if necessary, with nuclease free water.
At least 50% of extracted genomic DNA fragments should be 10 Kb or larger in size for successful long range PCR.

Page 6 of 14 LC1618RUO.3 (11/16) Copyright © 2015, Immucor Transplant Diagnostics, Inc. All rights reserved.
B. DNA Amplification (PCR)
PCR Set-up 1. Fill out Sample Barcode File (a Windows Comma Separated CSV file) with sample names and barcode assignments as shown
in Figure 1.
Figure 1. Sample Bar Code File Example
2. Generate a project in the MIA FORA software after creating a sample barcode file with the sample names and barcodes. This project name is needed for the sequencer run name.
3. Label three hard shell semi-skirted 96-well PCR plates. 4. Prepare a sample plate with 100 µL of genomic DNA per well for each sample at a concentration of 5-15 ng/µL diluted in
nuclease free water. Sample plate should be arranged in columns 1, 2, and 3 of a 96 well plate as shown in the sample plate in Figure 2. Well A1
should be the 10mM Tris-HCl pH 8.0 negative control (NTC) containing no DNA, followed by sample 1 in B1, sample 2 in C1, and continue with up to sample 23 in H3 (Figure 2, SAMPLE PLATE).
5. Thaw the PCR master mixes (P1-P9), mix by inversion or briefly vortex and spin down. 6. Centrifuge the sample plate from step 4 in a centrifuge with a plate holder for 2 min, to ensure genomic DNA is at the bottom of
the well. 7. Dispense 15 µL of PCR mixes P1-P9 into columns 1-9 of each of the three hard shell semi-skirted 96-well PCR plates so that
each well of a column has the same PCR mix (Figure 2). 8. Dispense carefully to avoid bubbles in the PCR master mix. 9. Dispense the samples from the sample plate with a multichannel pipette as follows (Figure 2):
Column 1 from sample plate: 10µL of NTC and samples 1-7 in column 1 (A1-H1) into each of the nine columns of PCR Plate1. Column 1 from sample plate: 10µL of samples 8-15 in-column 2 (A2-H2) into each of the nine columns of PCR Plate 2. Column 1 from sample plate: 10µL of samples 16-23 in column 3 (A3-H3) into each of the nine columns of PCR Plate 3. NOTE: samples must be mixed gently to avoid bubbles in PCR master mix as shown in the Figure 2.
10. Seal PCR plates with Adhesive PCR film. Briefly centrifuge PCR plates, place into 3 separate thermal cyclers, and run the MIA FORA HLA_PCR program using heated lid setting, See Table 1.
SAFE STOPPING POINT
PCR products may be stored at -20ºC up to 4 days until ready for gene balancing step.

Page 7 of 14 LC1618RUO.3 (11/16) Copyright © 2015, Immucor Transplant Diagnostics, Inc. All rights reserved.
Figure 2. Arrangement of samples and PCR set up
Table 1. Thermal Cycler Conditions for Amplification
Cycles (15) Cycles (20)
Initial hold Denaturation Anneal Extension Denaturation Anneal Extension Final Ext Hold
940C /30s 94
0C /1:15m 60
0C /30s 66
0C /7:30m 94
0C /30s 60
0C /30s 66
0C /7:30m 66
0C/10m 4
0C/∞
11. Optional: Amplification may be verified by running few representative samples on a 0.8% agarose gel containing ethidium
bromide or gel red. Electrophoresis should be conducted at 90 volts for 40 minutes. The PCR fragments may vary between
samples due to differences in introns. The approximate sizes for the PCR products are shown in Table 2.
Table 2: Sizes of amplification products
HLA Locus Size (kb)
HLA-A 3.2
HLA-B 4.1
HLA-C 4.4
HLA-DPA 5.0
HLA-DPB 5.2
HLA-DQA 5.8
HLA-DQB 6.3
HLA-DRB1 0.9
HLA-DRB2 5.6
C. Balancing and Pooling PCR Products
The concentration of each PCR product can be determined using an appropriate fluorescent DNA quantification reagent, such as PicoGreen®.
Based on the fluorescence measurements, the PCR products from all nine PCR reactions for each sample are balanced and pooled according to the output from SironaQuant
TM, available on the MIA FORA NGS HLA System. The pooled samples are then cleaned in
preparation for fragmentation.

Page 8 of 14 LC1618RUO.3 (11/16) Copyright © 2015, Immucor Transplant Diagnostics, Inc. All rights reserved.
Balancing and Pooling
Figure 3. PicoGreen® Assay Set up
1. Quantify PCR products using PicoGreen® reagent: Bring PicoGreen® reagent to room temperature and dilute with 1X TE buffer (50µL PicoGreen®+ 7450µL 1xTE). Vortex to mix and protect from light until use. Note: Follow the product insert of reagents if other reagents are used for PCR quantification.
2. Prepare serially diluted standards in microcentrifuge tubes using the 100ng/µL control provided with the PicoGreen® kit. Dispense 20 µL of each standard into PicoGreen® Plate 1 (black full-skirted measurement plates) wells A10 –E12 as shown in Figure 3. Transfer 20 µL of 1x TE Buffer in PicoGreen® Plate 1 wells F10, F11, F12 as shown in Figure 3.
3. Add 20µLof diluted PicoGreen® to each well of the three PicoGreen® plates, including standards wells in plate 1 as shown in Figure3.
4. Add 19 µL of 1x TE Buffer to three PicoGreen® plates in the same format as the three PCR plates. Add1 µL PCR products to the three PicoGreen® plates so that the arrangement matches the original PCR plates to make 1:20 dilution of PCR products. The final volume is 40µL in all measured wells.
5. Centrifuge the plate, and incubate at room temperature for at least 5 min. Protect the plates from light during the incubation.
6. Measure fluorescence with filter with excitation ~ 485 nm /emission ~535 nm, 0.1s (Victor X3) 7. Save output file using the following naming convention: (Note: Windows:use Text Tab Deliminated :MacOS: use
Windows Formated Text). Project_ COLUMN1_Date.txt (e.g. ProjectX_COLUMN1_123115.txt) Project_ COLUMN2_Date.txt (e.g. ProjectX_COLUMN2_123115.txt) Project_ COLUMN3_Date.txt (e.g. ProjectX_COLUMN3_123115.txt)
Run SironaQuant Balancing Program in The MIA FORA software. The recommended pmole value is between 0.0035 to 0.0009 pmol.
8. Spin down PCR plates and label a new plate for the next step as “Project_pooled PCR_date” 9. Dilute PCR products from each locus with 10mMTris HCl Buffer pH8.0 according to SironaQuant output prior to pooling. 10. Consolidate PCR products from all 9 PCR reactions for each sample by transferring volumes specified in SironaQuant
output. 11. Seal the plates and store at -20ºC if not proceeding to the beads cleaning step immediately. 12. Bring magnetic beads to room temperature and Mix magnetic beads by vortexing to evenly resuspend beads. 13. Add 55 µL beads per well of consolidated samples. Mix DNA and beads well by pipetting up and down at least 10 times. 14. Incubate the DNA Bead Mix at room temperature for 10 minutes. Transfer plate to the magnet for 5 minutes. 15. Carefully remove the supernatant without disturbing the beads while the plate is on the magnet. 16. Leave the plate on the magnet for the ethanol wash steps. Add 200µLof freshly diluted 80% ethanol to each well and,
incubate for 30 seconds then carefully remove and discard ethanol. 17. Repeat ethanol wash two more times (for a total of 3 washes). Remove all traces of ethanol after the third wash. 18. Remove the plate from magnet and allow the beads to air dry. The surface of the magnetic beads should look glassy
with no pools of liquid visible. The appropriate drying time may be determined empirically in each laboratory environment (5 -10 minutes).
19. Add 35 µL of room temperature 10mMTris-HCl pH8.0 to each well. Mix well by pipetting, and incubate for 5 minutes. 20. Place the plate on the magnet and incubate for 5 minutes or until solution is clear. 21. With the plate on the magnet, transfer 30 µL of eluate into the new 96-well PCR plate labeled:
Project_Balanced_clean_date.
SAFE STOPPING POINT Pooled and cleaned samples may be stored at -20ºC up to 4 days until ready for Fragmentation step.
Page 9 of 14 LC1618RUO.3 (11/16) Copyright © 2015, Immucor Transplant Diagnostics, Inc. All rights reserved.
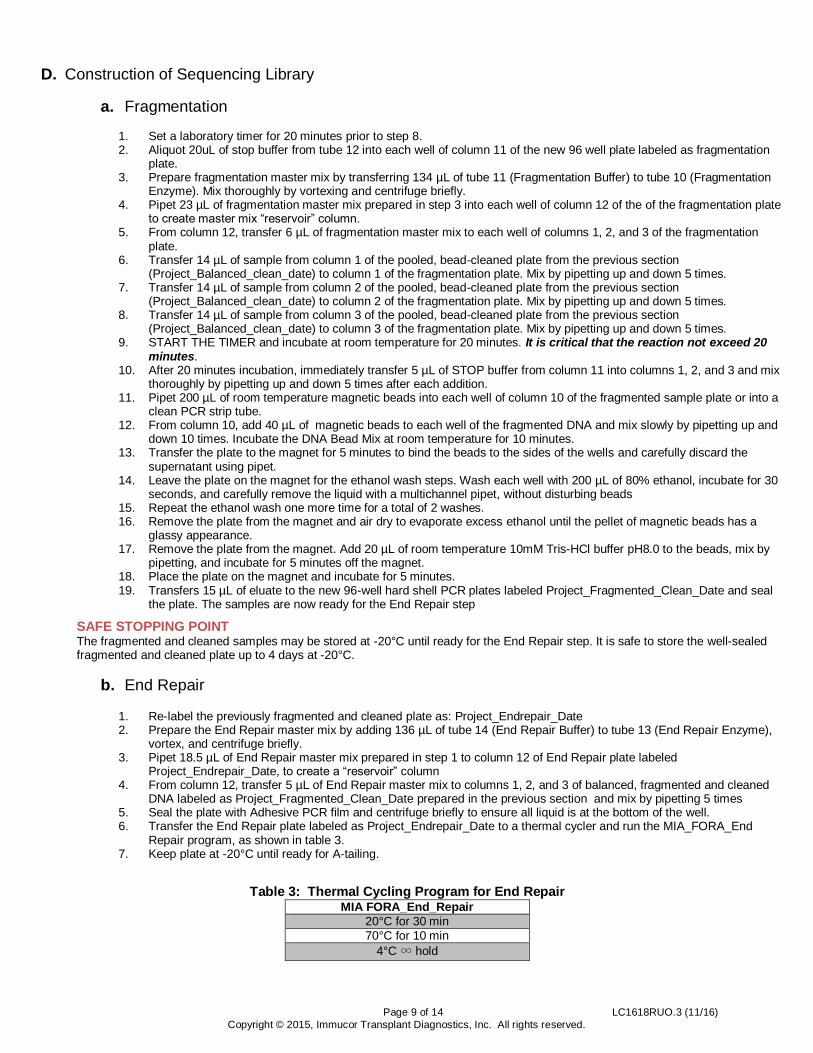
D. Construction of Sequencing Library
a. Fragmentation
1. Set a laboratory timer for 20 minutes prior to step 8. 2. Aliquot 20uL of stop buffer from tube 12 into each well of column 11 of the new 96 well plate labeled as fragmentation
plate. 3. Prepare fragmentation master mix by transferring 134 µL of tube 11 (Fragmentation Buffer) to tube 10 (Fragmentation
Enzyme). Mix thoroughly by vortexing and centrifuge briefly. 4. Pipet 23 µL of fragmentation master mix prepared in step 3 into each well of column 12 of the of the fragmentation plate
to create master mix “reservoir” column. 5. From column 12, transfer 6 µL of fragmentation master mix to each well of columns 1, 2, and 3 of the fragmentation
plate. 6. Transfer 14 µL of sample from column 1 of the pooled, bead-cleaned plate from the previous section
(Project_Balanced_clean_date) to column 1 of the fragmentation plate. Mix by pipetting up and down 5 times. 7. Transfer 14 µL of sample from column 2 of the pooled, bead-cleaned plate from the previous section
(Project_Balanced_clean_date) to column 2 of the fragmentation plate. Mix by pipetting up and down 5 times. 8. Transfer 14 µL of sample from column 3 of the pooled, bead-cleaned plate from the previous section
(Project_Balanced_clean_date) to column 3 of the fragmentation plate. Mix by pipetting up and down 5 times. 9. START THE TIMER and incubate at room temperature for 20 minutes. It is critical that the reaction not exceed 20
minutes. 10. After 20 minutes incubation, immediately transfer 5 µL of STOP buffer from column 11 into columns 1, 2, and 3 and mix
thoroughly by pipetting up and down 5 times after each addition. 11. Pipet 200 µL of room temperature magnetic beads into each well of column 10 of the fragmented sample plate or into a
clean PCR strip tube. 12. From column 10, add 40 µL of magnetic beads to each well of the fragmented DNA and mix slowly by pipetting up and
down 10 times. Incubate the DNA Bead Mix at room temperature for 10 minutes. 13. Transfer the plate to the magnet for 5 minutes to bind the beads to the sides of the wells and carefully discard the
supernatant using pipet. 14. Leave the plate on the magnet for the ethanol wash steps. Wash each well with 200 µL of 80% ethanol, incubate for 30
seconds, and carefully remove the liquid with a multichannel pipet, without disturbing beads 15. Repeat the ethanol wash one more time for a total of 2 washes. 16. Remove the plate from the magnet and air dry to evaporate excess ethanol until the pellet of magnetic beads has a
glassy appearance. 17. Remove the plate from the magnet. Add 20 µL of room temperature 10mM Tris-HCl buffer pH8.0 to the beads, mix by
pipetting, and incubate for 5 minutes off the magnet. 18. Place the plate on the magnet and incubate for 5 minutes. 19. Transfers 15 µL of eluate to the new 96-well hard shell PCR plates labeled Project_Fragmented_Clean_Date and seal
the plate. The samples are now ready for the End Repair step
SAFE STOPPING POINT The fragmented and cleaned samples may be stored at -20°C until ready for the End Repair step. It is safe to store the well-sealed fragmented and cleaned plate up to 4 days at -20°C.
b. End Repair
1. Re-label the previously fragmented and cleaned plate as: Project_Endrepair_Date 2. Prepare the End Repair master mix by adding 136 µL of tube 14 (End Repair Buffer) to tube 13 (End Repair Enzyme),
vortex, and centrifuge briefly. 3. Pipet 18.5 µL of End Repair master mix prepared in step 1 to column 12 of End Repair plate labeled
Project_Endrepair_Date, to create a “reservoir” column 4. From column 12, transfer 5 µL of End Repair master mix to columns 1, 2, and 3 of balanced, fragmented and cleaned
DNA labeled as Project_Fragmented_Clean_Date prepared in the previous section and mix by pipetting 5 times 5. Seal the plate with Adhesive PCR film and centrifuge briefly to ensure all liquid is at the bottom of the well. 6. Transfer the End Repair plate labeled as Project_Endrepair_Date to a thermal cycler and run the MIA_FORA_End
Repair program, as shown in table 3. 7. Keep plate at -20°C until ready for A-tailing.
Table 3: Thermal Cycling Program for End Repair
MIA FORA_End_Repair
20°C for 30 min
70°C for 10 min
4°C ∞ hold

Page 10 of 14 LC1618RUO.3 (11/16) Copyright © 2015, Immucor Transplant Diagnostics, Inc. All rights reserved.
c. A-Tailing
1. Prepare the A-tail master mix by adding 85 µL of tube 16 (A-tail Buffer) to tube 15 (A-tail Enzyme), vortex, and centrifuge briefly.
2. Pipet 12 µL of A-tail master mix prepared in step 1 to column 11 of the end-repaired plate to create a “reservoir” column. 3. From column 11, transfer 3 µL of A-tail master mix to each well of columns 1, 2, and 3 of the end-repaired plate labeled
as Project_Endrepair_Date from the previous section and mix by pipetting up and down 5 times. Relabel plate with Project Atail_Date.
4. Place the plate in thermal cycler and run the MIA FORA_A-tail program as shown in table 4. 5. PROCEED DIRECTLY TO INDEX ADAPTOR LIGATION STEP within 30 minutes.
Table 4: Thermal Cycling Program for A-tailing MIA FORA_A-tail
37°C for 30 min
75°C for 20 min
4°C ∞ hold
d. Index Adaptor Ligation
1. Use fresh gloves while handling the adaptor plate. Spin the adaptor plate briefly before removing the plate seal. Carefully
remove the plate seal from the adaptor plate. Verify that all wells in columns 1, 2, and 3 contain approximately 5 µL of solution.
2. Prepare the Ligation master mix by adding 850 µL from tube 18 (Ligase Buffer) to tube 17 (Ligase Enzyme), vortex, and centrifuge briefly.
3. Pipet 95 µL of Ligation master mix prepared in step 2 to column 10 of the A-tailed plate labeled as Project_Atail_Date from the previous section to create a “reservoir” column. Relabel plate with Project_Ligation_Date.
4. From Column 10, transfer 26 µL of Ligation master mix to each well of columns 1, 2, and 3 of the A-tailed plate and mix by pipetting up and down at least 5 times.
5. Transfer 2.5 µL of adaptor into corresponding wells of the ligation plate. 6. Mix thoroughly and seal the plate with adhesive PCR film. Centrifuge briefly. 7. Transfer the ligation plate to a thermal cycler and run the MIA FORA_ligation program as shown in table 5.
Table 5: Thermal Cycling Program for Adaptor Ligation MIA FORA_Ligation
25°C for 30 min
65°C for 10 min
4°C ∞ hold
e. Consolidation of Adaptor-Ligated Products
1. Combine 20µL from each well of Project_Ligation_Date plate from the previous section into a single1.5 mL Eppendorf tube. Label the tube with “Project-Date-Consolidated.”
2. Add 865 µL of magnetic beads to the microcentrifuge tube labeled as Project-Date-Consolidated. Mix thoroughly by vortexing. Incubate for 10 minutes.
3. Transfer the tube to magnetic rack until the solution is clear. Remove and discard supernatant. 4. While still on the magnet, add 1 mL of 80% ethanol and incubate for 30 seconds. Remove the 80% ethanol without
disturbing the bound beads. 5. Repeat ethanol wash (step4) for a total of 2 washes. Remove as much of ethanol as possible from the tube. 6. Remove the tube from the magnetic rack and allow beads to air dry for approximately 5-10 minutes until the pellet of
magnetic beads has a glassy appearance. 7. Resuspend beads in 63 µL of room temperature 10mMTris-HCl pH8.0. Vortex and incubate 5 minutes. 8. Place the tube on the magnet until the solution is clear, and transfer 60 µL of eluate that contains cleaned adaptor ligated
samples into a clean microcentrifuge tube.
SAFE STOPPING POINT Pooled and Cleaned adaptor ligated samples (Library) can be stored at -20°C until ready to perform Size Selection for up to 4 days.
f. .Size Selection and Amplification of Size Selected Library (Pippin Prep)
NOTE: The amplified library should be purified within 1 hour of amplification.
1. Perform an appropriate size selection method on the library preparation to isolate fragments of approximately 400-500 base pairs. Follow the instruction manual of the product if not using Pippin Prep.
2. Mix 30 µL of Library with 10µL of appropriate marker and load into one lane of Pippin cassette. 3. Create and run a program to select Library with fragment size between 400-500bp. 4. Thaw Amplification modules from Library preparation kit tube 19, 20, 21 and assemble reaction in a 0.2 mL PCR strip
tube as follows:

Page 11 of 14 LC1618RUO.3 (11/16) Copyright © 2015, Immucor Transplant Diagnostics, Inc. All rights reserved.
Mix 25µL amplification mix from tube 19, 2µL primers from tube 20, 18 µL nuclease free water from tube 21 and 5µL of size selected elution.
5. Gently mix and spin down. Transfer to thermal cycler and amplify with MIA FORA Library, as shown in table 6.
Table 6: MIA FORA_Library_PCR
Cycle (1) Cycles (12) Cycle (1)
Initial hold Denaturation Anneal Extension Final Ext Hold
980C /30s 98
0C /15s 65
0C /30s 72
0C /30 s 72
0C/5m 4
0C/∞
E. Sequencing Preparation for MiSeq®
NOTE: Open and handle all Post-Amplification steps in a designated section of the laboratory, and preferably in a PCR safe hood to prevent contamination of work surfaces and sequencing reagents.
1. Transfer 50uL amplified Library into a microcentrifuge tube. Add 50µL of room temperature magnetic beads to the Library. Mix thoroughly and incubate for 10 minutes.
2. After 10minutes, place the tube in magnetic tube holder until solution is clear, about 5-8min. Remove and discard supernatant.
3. While still on the magnet, add 200 µL of 80% ethanol and incubate for 30 seconds. Remove the 80% ethanol without disturbing the bound beads.
4. Repeat ethanol wash (step3) for a total of 2 washes. Remove as much of ethanol as possible from the tube. 5. Remove the tube from the magnetic rack and allow beads to air dry for 5 - 10 minutes until the pellet of magnetic beads has
a glassy appearance. 6. Resuspend beads in 17 µL of room temperature 10mMTris-HCl pH8.0. Vortex and incubate 5 minutes. 7. Place the tube on the magnet until the solution is clear, and transfer 15 µL of eluate that contains cleaned, amplified
sequencing library into a clean microcentrifuge tube.
SAFE STOPPING POINT Eluted samples may be stored at -20ºC for up to 4 days.
8. Determine the concentration of Library using methods that accurately measure DNA concentration. Immucor recommends either the qPCR or Qubit methods to estimate Library concentration.
9. Due to the nature of the sequencer, sequencing library concentration should preferably be higher than 10 nM. The size distribution of the library can be determined by using agarose gel electrophoresis or any capillary electrophoresis system to verify the size of the resulting libraries.
10. Dilute the library to 4nM and then prepare an 8pM (if used Qubit) or 12 pM (if used qPCR) final denatured library for the MiSeq® and 1.3pM (Qubit) final denatured library for the MiniSeq ®. The library can be spiked with 5% PhiX control if desired.
11. Load denatured library on cassette and run on the sequencer. 12. Follow Illumina instructions for sequencing of the. Make sure that the file name in the sample sheet matches the project
name generated during Long Range PCR set up.
F. Data Analysis
The fastq files generated by the MiSeq® instrument should be analyzed with the MIA FORA software to generate the HLA typing. The sample sheet with the sample names and barcodes, and the corresponding fastq files should be loaded into the project file of the MIA FORA software. For use of the MIA FORA software, follow the Software User Guide.
RESULTS
1. PCR amplification: Agarose gel analysis should show no product in the negative (NTC) control for the run to be valid. Agarose gel of amplified products can show variations in size based on differences in intronic sequences. Refer to Table 2 for approximate size of bands.
2. Library Preparation: Library Kit should generate a library when the input DNA level in SironaQuant is between 0.0009 and 0.0035 pmol. The final concentration of the library should be at least 10 nM, and should be accurately quantified before sequencing. Libraries should be diluted to 4nM prior to denaturation. Clustering on MiSeq® and MiniSeq® kits can vary depending on accuracy of quantification. Typically, cluster densities of 8-12pM libraries should range from 600-800 K/mm
2 on the MiSeq® and 160-220 K/mm
2 on the MiniSeq Care must be taken to
accurately quantify the library. All post adaptor ligated products must be contained to a PCR hood or designated area and fresh dilution reagents must be prepared to prevent contamination.
3. HLA Typing is generated by the MIA FORA NGS Software and is provided in a report. Follow MIA FORA Software User Guide for HLA typing data analysis.
QUALITY CONTROL It is required that one negative control and an optional known control be run with each test, such as a water blank and a previously typed sample respectively. Extreme care must be used when removing plate seals and the plates must be spun down prior to opening. New plate seals must be used at every step where the plates need to be sealed. The used pipette tips should be placed into appropriate containers and discarded. PCR set up must be performed in a Pre-PCR room separate from where amplified products are handled. All genomic DNA must be

Page 12 of 14 LC1618RUO.3 (11/16) Copyright © 2015, Immucor Transplant Diagnostics, Inc. All rights reserved.
diluted in nuclease-free water. After the DNA size selection and amplification, the amplified library must be handled in a separate area, preferably a PCR hood, and handled with a separate set of pipettes. Care should be taken to not contaminate the work areas with amplified libraries. The assay should be run as recommended in this product insert as well as performed with any other quality control procedures that are in accordance with local, state, federal and/or accreditation agencies requirements.
LIMITATIONS OF THE PROCEDURE 1. The PCR and assay described in this product insert require precisely controlled conditions. Deviations from validated parameters
may lead to product failure. 2. If at least 50% of initial DNA fragments are less than10 kb, sufficient quantity of long range PCR product may not be generated. 3. If the final library concentration is below 10 nM, accurate sequencing results may not be generated. 4. Ambiguities in the 4
th field will be observed due to lack of coverage in intron region.
5. Additives in the PCR mix may interfere with commonly used non-toxic ethidium bromide alternatives used in agarose gel electrophoresis and may lead to lower band intensity.
6. SYBR® green stained agarose gels do not work with the PCR products. Ethidium bromide or GelRed™ should be used for visualization of PCR products.
7. The DPB1 primer does not amplify exon 1 or exon 5. Therefore any known polymorphisms in these exons will not be sequenced, and will be listed as ambiguities in the report.
8. The lack of genomic reference sequences for DPB1 and the low levels of polymorphism in intron 2 (between exon 2 and 3) make it challenging to perform phasing analysis for heterozygous samples. Therefore there may be a genotype ambiguity that cannot be resolved.
9. The forward primers for DPB1 overlap with the first few bases on exon2. Therefore polymorphisms in those sequences will not be identified by sequencing.
10. The DRB loci are amplified as two fragments – one that amplifies exon 1 and another that amplifies exons 2 to 6. Intron 1 is not amplified in its entirety. Therefore the phasing of the entire locus is not possible for DRB1/3/4/5 and any polymorphisms present in Intron 1 will result in 4th field ambiguities.
11. The reverse primer for DRB exons 2 to 6 overlaps the 3’end of the exon 6, therefore polymorphisms in those sequences will not be determined by sequencing.
12. In most cases, the amplification products of exon 1 of DRB1,3,4,5 map poorly to exon 1 of the known reference sequences of DRB5; thus contig for exon 1 will not likely be generated for DRB5. Since there are no known exon 1 polymorphisms for DRB5, it does not lead to any ambiguity in the HLA typing for DRB5.
13. Due to the complex nature of HLA typing, qualified personnel should review data interpretation and typing assignments.

Page 13 of 14 LC1618RUO.3 (11/16) Copyright © 2015, Immucor Transplant Diagnostics, Inc. All rights reserved.
TROUBLESHOOTING
PROBLEM POSSIBLE CAUSE SOLUTION
No bands on gel after PCR amplification
DNA quality or quantity
OD 260/280 ratio less than 1.65 Re-purify the DNA to remove impurities
DNA fragmented At least 50% DNA should be greater than 10Kb
Re-extract DNA from the sample
DNA diluted in Tris-HCl or TE Dilute samples in water
Low Template DNA concentration Make sure that DNA concentration is 50- 150 ng/reaction
Ethidium alternatives used in agarose
gel
Use ethidium bromide if bands are weak on agarose gel since
some fluorescent dyes can be quenched because of PCR mix composition
Amplification dropout
Repeat PCR for amplification dropouts using leftover reagents,
of which there is sufficient for four samples. Leftover reagents stored at 2-8
oC are stable for one week.
Multiple bands or smear of bands after PCR amplification
Thermal cycler conditions
Ramp rates Ensure that the ramp rates are as specified in the protocol
Temperature Calibrate the PCR machine to verify the performance of the
PCR machines
DNA quality Ensure that the DNA is diluted in water and free of
contaminants
Fluorescent values
low for all loci PicoGreen® reagent
Photo bleaching of PicoGreen® reagent
Follow manufacturers’ instructions closely. Reagents must be protected from light
Incorrect dilution of reagent Dilute the PicoGreen® reagent according to the instructions
Standards diluted incorrectly Dilute the standards according to the instructions
DNA size selection incorrect
Pippin instrument
Check elution profile to ensure that elution occurred with no errors
Follow Sage Sciences trouble shooting guide to determine if instrument performance is according to specifications.
Instrument not calibrated
Run 2 µL of 1kb plus ladder (ThermoFisher) with excise
protocol of 400-600 base pairs. Run 15 µL of eluted product on agarose gel to visualize elution of 500 bp fragment
Reuse of Pippin cartridge Pippin cartridge should be used only once
qPCR R2 < 0.95 KAPA PCR
Caused by one clear outlier Repeat the analysis with the outlier omitted.
Contamination in the reagents Repeat the KAPA PCR with fresh standards
Amplified library
concentration low
Magnetic bead clean
Ethanol not removed completely Remove ethanol while plates are on magnetic holder. Remove all traces of ethanol, especially after final wash.
Beads stored incorrectly Store beads at 2 to 8°C – DO NOT FREEZE
Ethanol not freshly prepared 80% Ethanol should be prepared fresh before each use
Beads Over drying Drying time may depend on ambient temperature and humidity. Monitor beads closely to ensure that beads do not over dry and adjust the protocol as needed
Wrong concentration of Tris-HCL is used Make sure that Tris-HCL buffer is 10mM and pH is 8.0
Pippin prep not eluting DNA
Check pre and post elution for adaptor ligated products
Amplify 1 µL pre-pippin pooled clean library with half the amount of reagents for library amplification. Run amplified products (no purification needed) on a 2% agarose gel to
determine if a smear of fragments is present.
Amplified product lost during bead cleanup
Re-amplify 5µL of elution. If library is >25nM, the products can be visualized by running 5 µL on an agarose gel
Error in Fragmentation
through Ligation steps Fragmentation problems
Purify 20 µL 2-3 ligated samples and NTC using the bead clean protocol with 36 µL beads. Elute the products in 10 µL
and check for fragmentation on a 2% agarose gel. If fragmentation did not occur, call tech support for further trouble shooting instructions
MiSeq® Clustering less than expected
Library quantification incorrect
Kapa qPCR Follow manufacturers’ instructions paying close attention to dilutions, and verifying that standard curve is correct and Ct values fall within the linear range of the standard curve
Qubit fluorometer
Follow manufacturers’ instructions paying close attention to dilutions, and using fresh standard dilutions. If the sample falls out of the standard curve of the Broad
Range reagents, repeat with the High Sensitivity assay.
Illumina reagents Flow cell, instrument, or reagent problems
Contact Illumina tech support to trouble shoot reagent and instrument problems
Page 14 of 14 LC1618RUO.3 (11/16) Copyright © 2015, Immucor Transplant Diagnostics, Inc. All rights reserved.
LIMITED LICENSE IMPORTANT — READ CAREFULLY: This Label License Agreement ("Agreement") is the legal agreement between you (hereinafter "Licensee") and Immucor Transplant Diagnostics, Inc. ("Immucor") (individually, a "Party" or together, the "Parties"), for the use of reagents provided herein (“Reagents”). By use of the
Reagents, Licensee is agreeing to be bound by the terms set forth herein. 1. Use of Reagents by Licensee. Immucor grants to Licensee a non-exclusive, non-transferable right to use only the transferred amount of the Reagents solely in accordance with the procedures set forth in the attached label and subject to the limitations set forth herein. Title to the Reagents shall not transfer to the
Licensee. Immucor retains all rights not expressly granted herein, and there are no implied licenses granted herein. 2. Excluded Uses. No permission is granted hereunder for Licensee to use the Reagents other than as designated under Section 1 of this Agreement. Specifically, no permission is granted hereunder for Licensee to use the Reagents for the purposes of transferring, selling, disclosing, or otherwise providing
access to the Reagents or the Mia Fora product to any third party. Licensee shall not have the right to produce derivatives of any Reagent or to authorize any third party to use or sell any Reagents or derivatives of the Reagents. Licensee acknowledges that certain Reagents and their use are subject to third party patents and are licensed by Immucor. Licensee shall not use the Reagents except as explicitly permitted herein.
3. Misuse of the Reagents and Indemnification terms. To the extent provided by law, Licensee will defend, indemnify and hold harmless Immucor, Immucor's affiliates, their managers, directors, officers, employees, sponsors, and agents (collectively the "Indemnified Parties") against any and all liability, loss, damage, claim or expense, including attorney's fees, (collectively the "Indemnified Losses") arising out of or in connection with this Agreement, including, without limitation
Indemnified Losses resulting from any use by or on behalf of the Licensee. Licensee will indemnify and hold harmless the Indemnified Parties against any and all Indemnified Losses resulting from, arising out of or relating to Licensee's breach of this Agreement; and claims by a thi rd party that Licensee or Licensee's use of the Reagents infringes or misappropriates any patent, copyright, trademark, trade secret or other intellectual property rights of such third party.
4. This Agreement applies solely to the Reagents. All use of the Mia Fora software is subject to the applicable End User License Agreement. This agreement shall be interpreted and enforced in accordance with the laws of the State of New York in the United States. If the buyer is not willing to accept the terms of this Agreement, Immucor is willing to accept return of the product.
Manufactured By: Immucor, 35 Technology Drive, Suite 100, Warren, NJ 07059. Phone: (908) 226-8200, Fax: (908) 226-0800 European Technical Service: Phone: +32 (0)3 385 47 91
This document last revised and issued: Rev 3, 3 Nov 2016
TRADEMARKS USED MIA FORA and SIRONAQUANT are trademarks of Sirona Genomics, Inc. Agencourt and Ampure are registered trademarks of Beckman Coulter, Inc.
All other trademarks are the property of their respective owners.