Logging into JJ Nexus for the First Time - Avero Tech · Logging into JJ Nexus for the First Time...
26
JJ Nexus is accessible from the following URL: http://nexus.jjc.edu.sg 13 Logging into JJ Nexus for the First Time (for students)
Transcript of Logging into JJ Nexus for the First Time - Avero Tech · Logging into JJ Nexus for the First Time...
JJ Nexus is accessible from the following URL:
http://nexus.jjc.edu.sg
13
Logging into JJ Nexus for the First Time(for students)

For first time log in, please use:
User ID: your NRIC number with both the prefix and suffix letters in lower case
Password: your NRIC number with both the prefix and suffix letters in lower case
i.e. Your User ID and Password are the same. Once you have successfully logged in, you will be prompted to change both your User ID andyour password.
1
14

Enter your primary email address. This will be your new Login ID. Confirm your primary email address in the second field.
2
15

Enter your alternate email address.
Confirm your alternate email address in the second field.
Note that in event that you request for a password reset, the password reset email will be sent to both your primary and alternate email address. Please ensure that you remember these email accounts.
3
16

Enter and confirm your password.Note that for security reasons, you will be asked to change your password every 90 days.
4
17

Click “Close”.
You will be logged out of the system and will now need to re-login again with:
User ID: your newly registered primary email address (and not your NRIC number!).
Password: your newly registered password (and not your NRIC number!).
5
18

Now re-login again with:
User ID: your newly registered primary email address (and not your NRIC number!).
Password: your newly registered password (and not your NRIC number!).
6
19

If you have forgotten your password, you may click on “Reset it here”.Then select “I’m a Student”.
7
20

Once you select the “Reset Password” function, you will be prompted to enter your registered email and your NRIC number for verification.Note that this only works after you have successfully logged in once, and had registered your primary email address.Password reset emails will be sent to your registered primary and alternative email addresses.
8
21

Personal Particulars Updates &Subject Registration 2017
Upon successful first-time login using your newlyregistered email address (NOT NRIC anymore), you willbe prompted to perform a series of persona particularsupdate before registering for your subject combination.The following slides will guide you on how to updateyour particulars followed by registering for your subjectcombination.
9

The personal particulars update and subject combination registration system is only available at 1:00pm on 3rd February 2017 onwards, and will close on at 11:55pm on 5th February 2017. You will not be able to access the various steps in this module outside of this period.
10

Once the system is open for registration, you will be prompted to follow these 9 steps. All steps must be completed for successful registration of your subjects.
11
You may refer to these links for details on the prerequisites for each stream.
12
Select “Start” when you are ready to begin.
13

Update your personal particlars in Step 2
14
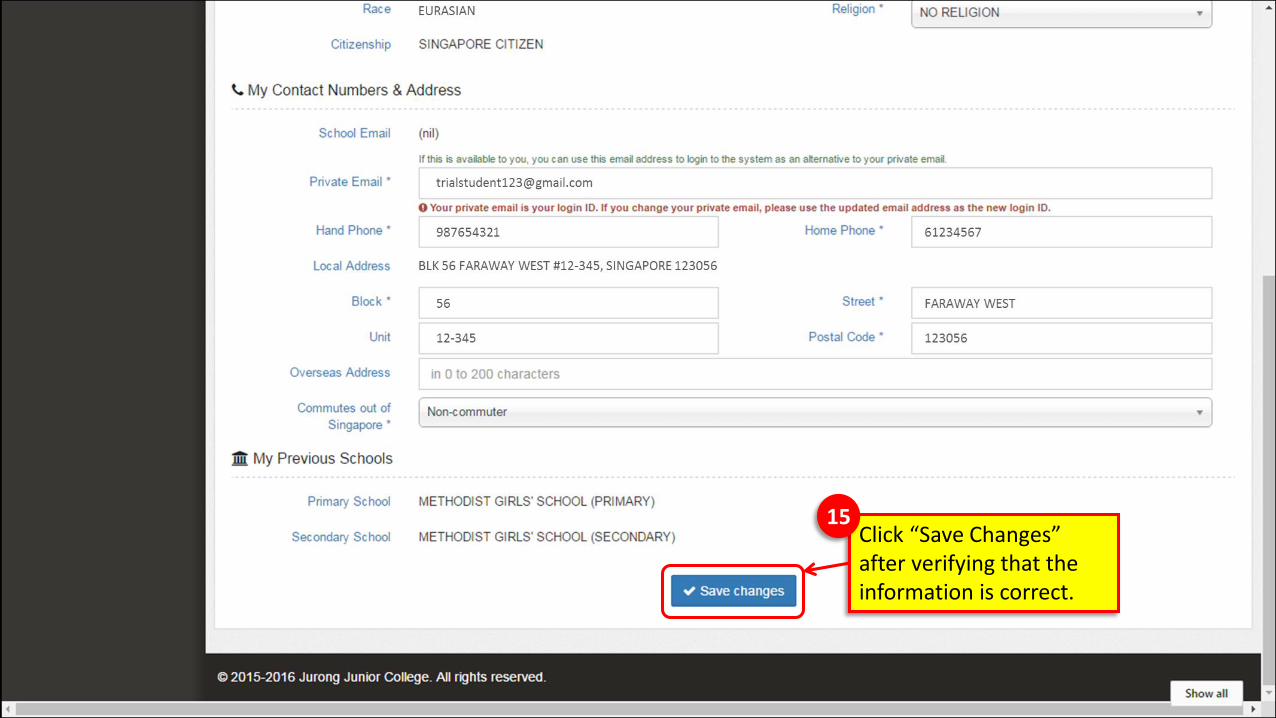
Click “Save Changes” after verifying that the information is correct.
15

Make sure that this is a unique and valid email address that is not already registered in this system before
17
Update your family contact information in Step 3
16
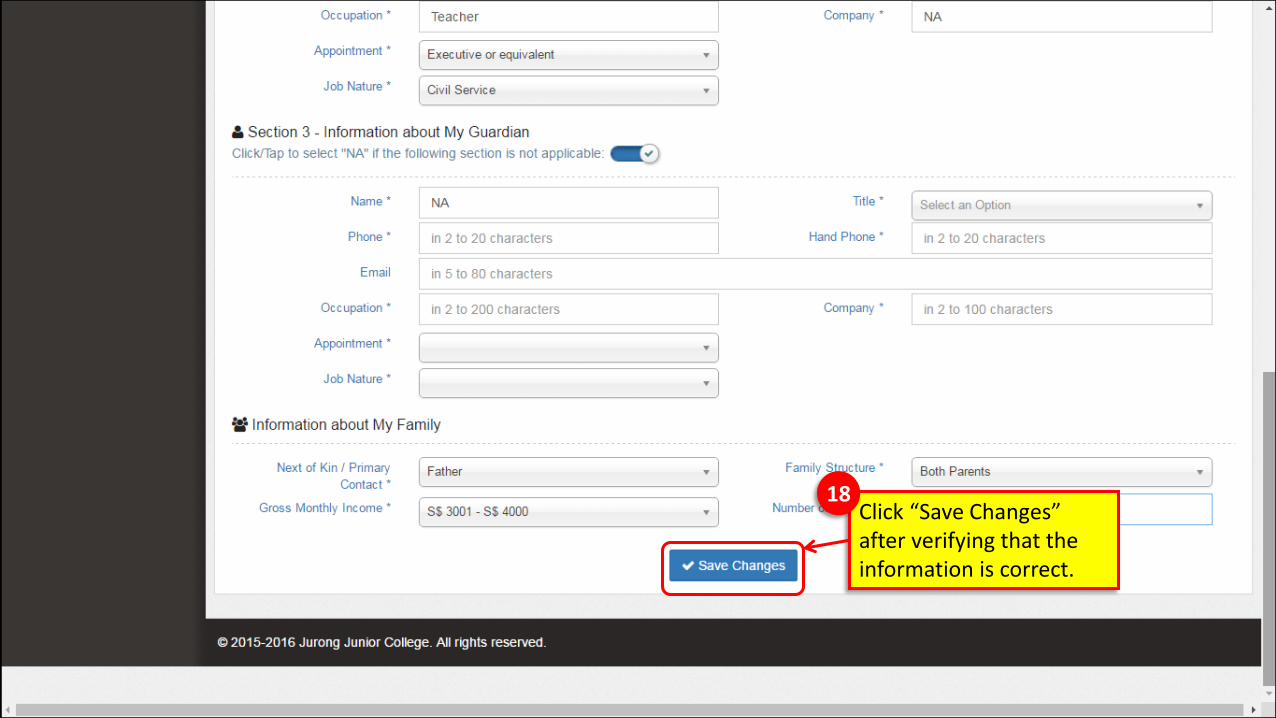
Click “Save Changes” after verifying that the information is correct.
18

Update your medical history (if any) in Step 4
19

Update your CCA records in Step 5
20
Your CCA records in primary and secondary school should be captured in this space already. Add missing information if necessary.
21

Give your consent on the release of personal data in Step 6
22
Click “Save Changes” after giving your consent
23

Verify your O-Level results in Step 7
24
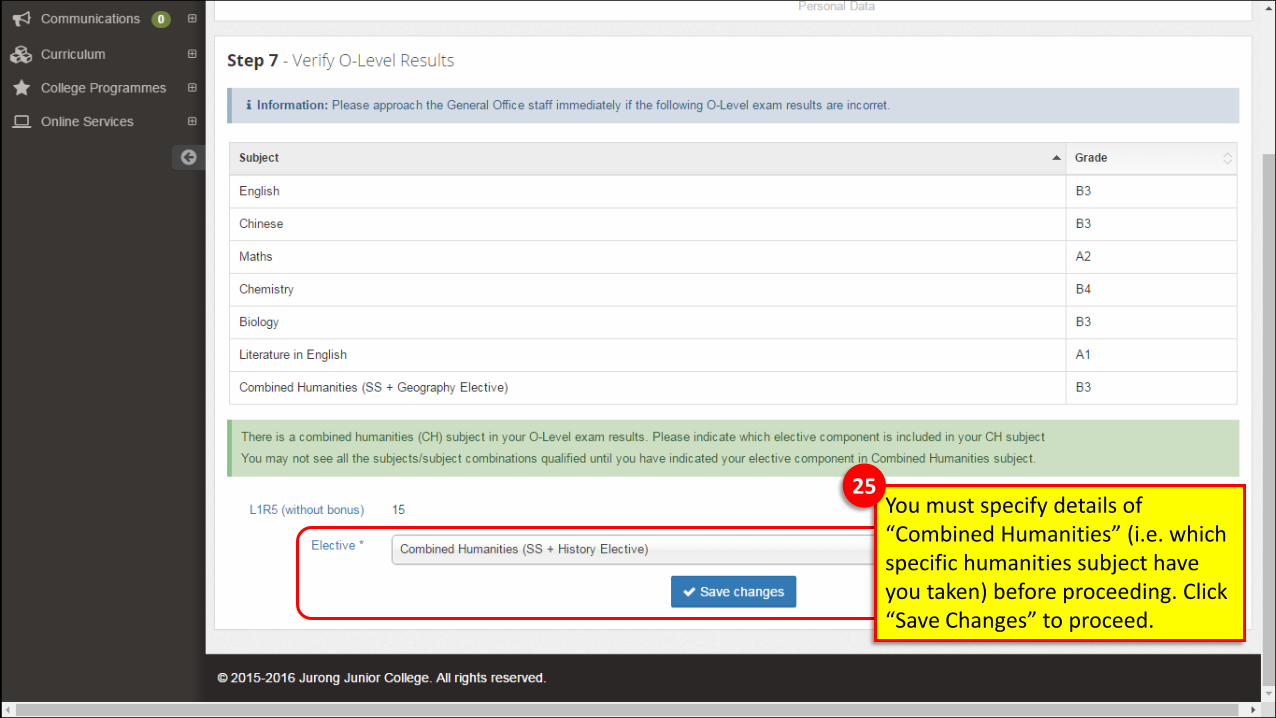
You must specify details of “Combined Humanities” (i.e. which specific humanities subject have you taken) before proceeding. Click “Save Changes” to proceed.
25
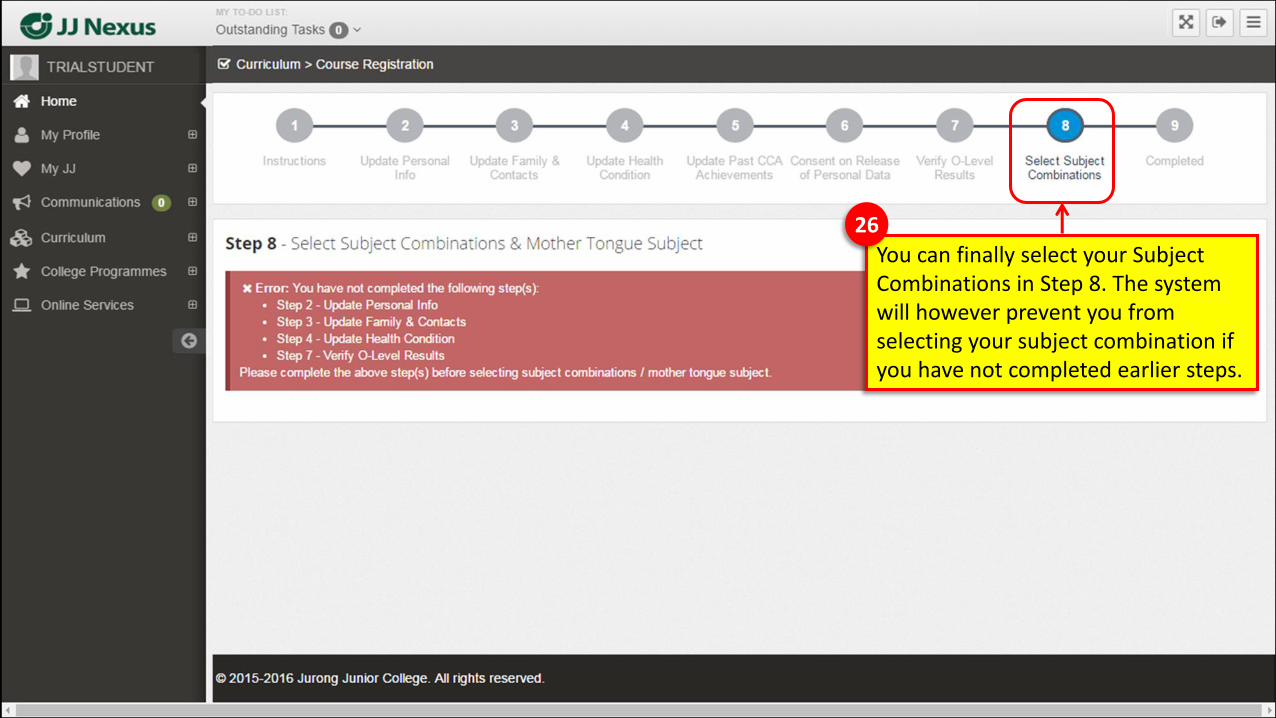
You can finally select your Subject Combinations in Step 8. The system will however prevent you from selecting your subject combination if you have not completed earlier steps.
26

If previous steps are completed, you will see the subject combination selection fields (“First Choice” and “Second Choice”) below.
27
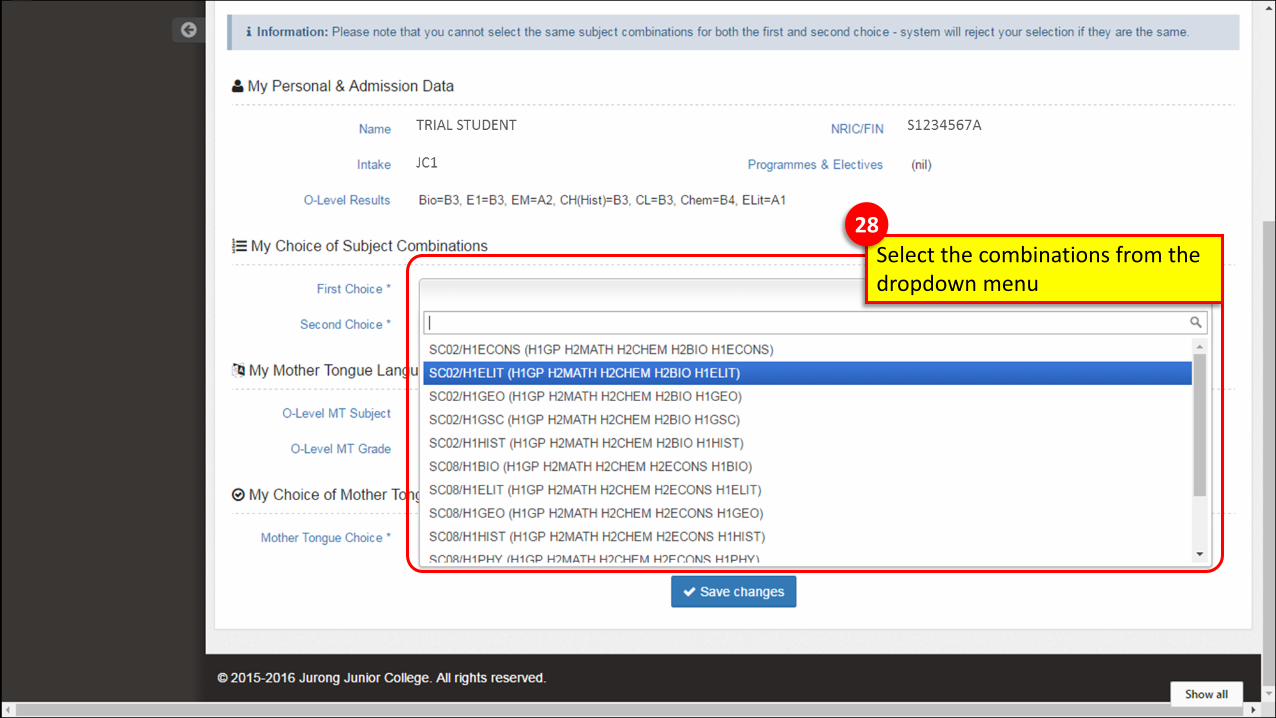
Select the combinations from the dropdown menu
28

Select your mother tongue subject, then click “Save Changes”.
29

If you have successfully registered for your subject combination, you should receive a receipt in your email inbox.
30
You can log out of the system when you are done registering.
31