
Lectora - OnPoint Digital · Lectora comes with several mobile templates although it is possible to...
28
LECTORA Content Planning Guide Summer 2014
Transcript of Lectora - OnPoint Digital · Lectora comes with several mobile templates although it is possible to...

LECTORA Content Planning Guide
Summer 2014

© OnPoint Digital, Inc. 2014 All Rights Reserved.
1
Table of Contents
Using Lectora on Your OnPoint Learning Platform ..................................................................... 2
What are the Advantages and Disadvantages of Lectora? ......................................................... 2
Use Cases for Lectora – Where does it fit? ................................................................................ 2
Where Does Lectora Fit/Work? .................................................................................................. 3
Getting Started ........................................................................................................................... 4
So, What is HTML5? .................................................................................................................. 4
Working from a Template ........................................................................................................... 5
Authoring Interface ..................................................................................................................... 6
Converting from Existing Content Documents ............................................................................ 7
Adding More Interactivity with Extensions .................................................................................. 7
Social Learning .......................................................................................................................... 7
Content ...................................................................................................................................... 8
Images ................................................................................................................................ 8
Audio .................................................................................................................................. 8
Video .................................................................................................................................. 8
Making Sure Your Test Works with SCORM ....................................................................... 8
Publish ....................................................................................................................................... 9
SCORM Compliant ............................................................................................................10
Non-SCORM ......................................................................................................................13
Import into OPLS/CellCast ........................................................................................................15
Advanced Optional Features ..............................................................................................20
Assigning Users and Groups .....................................................................................................22
Assigning Users .................................................................................................................22
Assigning Groups ...............................................................................................................24
Additional Resources ................................................................................................................26
Questions ..................................................................................................................................27

© OnPoint Digital, Inc. 2014 All Rights Reserved.
2
Using Lectora on Your OnPoint Learning Platform
This job aid provides instructions for using Lectora version 11.3 from Trivantis Corporation, a provider of
world-class publishing technologies and services for multimedia eLearning, to create content for online
and mobile delivery to OnPoint Digital’s OPLS and CellCast Solution platforms. Lectora is an authoring
software tool to design HTML5 content that can be exported and deployed into OnPoint’s OPLS and
CellCast Solution platforms quickly and easily.
What are the Advantages and Disadvantages of Lectora?
The biggest standout for Lectora is its feature to integrate extended code, such as JQuery which gives
you the opportunity to add more interactivity and customization. Additionally, Lectora offers comes with
two other great softwares: Camtasia and SnagIt. The main disadvantage to using Lectora is that the
software is not available for Mac users. If you are using timelines, Captivate or Articulate may be better
suited. Additionally, compared to its competitor, Storyline, they have fewer interactive theme templates,
such as tabbed content creation.
Use Cases for Lectora – Where does it fit?
Lectora is used to create online training courses, assessments, and presentations. It is also used for the
conversion of Microsoft PowerPoint presentations into eLearning content and offers an array of features
that Instructional Designers can leverage to create rapid eLearning digital courseware, performance
support tools and interactive marketing materials for their online and mobile audiences. The following
table summarizes the common use cases, supported communications methods and target devices
OnPoint believes are best suited for Lectora-created materials.

© OnPoint Digital, Inc. 2014 All Rights Reserved.
3
Where Does Lectora Fit/Work?
Supports
Common Use Cases
Learning Features
Interaction and
Engagement
Gaming Elements
Reference
Materials/EPSS
Social Features
Communication Methods With LMS/TM Platforms
Non-SCORM
SCORM v1.2
SCORM v2004
Tin Can/Experience API
Supported Devices
Desktop Mac/Windows/Linux: Microsoft Internet Explorer, Google Chrome, Mozilla Firefox,
Apple Safari
Apple iPad Tablets iOS5
iOS6
iOS7
Apple iPhones & iPod
touch
iOS5
iOS6
iOS7
Android Tablets V3.x - v4.x
Android Handsets v2.3.7- v4.x

© OnPoint Digital, Inc. 2014 All Rights Reserved.
4
Getting Started
To get started, you should have either purchased or signed up for a free 30-day trial account for the Lectora
authoring platform. If you need to sign up for a new account, visit http://lectora.com/lectora-publisher-free-
trial/. To install the software your system must support:
• Intel® or AMD® class processor
• 32MB RAM
• 40MB free hard drive space for application
• Windows® 98, NT, ME, 2000, or XP operating system
We also recommend that you attend Lectora’s online training course, Fundamentals of Lectora, before
beginning your project.
So, What is HTML5?
HTML5 is a markup language used for structuring and presenting content for the World Wide Web.
HTML5 improves the language with support for the latest multimedia while keeping it easily readable by
humans and consistently understood by computers and mobile devices. It includes detailed processing
models to encourage more interoperable implementations. It introduces markup and application
programming interfaces (APIs) for complex web applications. For the same reasons, HTML5 supports
cross-platform mobile applications. Many features of HTML5 have been built with the consideration of
being able to run on low-powered devices such as smartphones and tablets.

© OnPoint Digital, Inc. 2014 All Rights Reserved.
5
Working from a Template
There are several options for setting up a Lectora title for mobile delivery to CellCast-enabled devices and
tablets. While you can create pages any size with Lectora there are many templates included to get you
started. Lectora comes with several mobile templates although it is possible to create a more customized
interface.
Access the Mobile template by selecting the Design Wizard from the Create a New Title. You will be
presented with some screen size options, 1024 x 768 is recommended.

© OnPoint Digital, Inc. 2014 All Rights Reserved.
6
Authoring Interface
Lectora’s interface consists of:
Design Ribbon: The design ribbon at the top provides quick, organized access to objects, tools
and wizards that you can use to easily build your course.
Left-Hand Pane: The left-hand pane allows you to choose how you want to view your course.
Easily see pages of your course with Thumbnail View or see the entire structure of your course
with the Title Explorer.
Slide-Out Media Library: The media library in Lectora slides out from the tab on the right, giving
you quick access to your media. Separate tables organize media you imported, your personal
files and the stock library.
Work Area: This area allows you to drag and drop, resize and move objects, like media from the
slide-out media library.
© OnPoint Digital, Inc. 2014 All Rights Reserved.
7
Converting from Existing Content Documents
If you have courses already created and you would like to use them on CellCast, there are several
options. In most cases, content published for your Learning Management System will work as it exists.
There are two approaches to optimizing existing courseware for mobile consumption. The first strategy is
to use the existing title and change certain features for mobile use. This may include enlarging navigation
buttons, shortening text blocks, and replacing Flash content with content using Lectora actions. This
works for a fast solution, and may often be necessary, but is not always recommended.
The second strategy creates a more optimized mLearning course. In this strategy, you create a
completely new title and copy content from the existing title. By creating an empty title, you are more likely
to make wise design decisions when importing content from the old title. Remember that your title is
already built and that this process is a judicious revision. It can go quickly when you understand the
principles of mLearning design.
Note: Imported Flash content will need to be re-engineered to work on mobile devices.
Adding More Interactivity with Extensions
Extend Lectora’s interactivity with JQuery, or other JavaScript frameworks. This requires understanding of
sourcing dependent CSS and UI elements, but for the advanced users offers a lot of opportunity for
customization and interactivity of your courses.
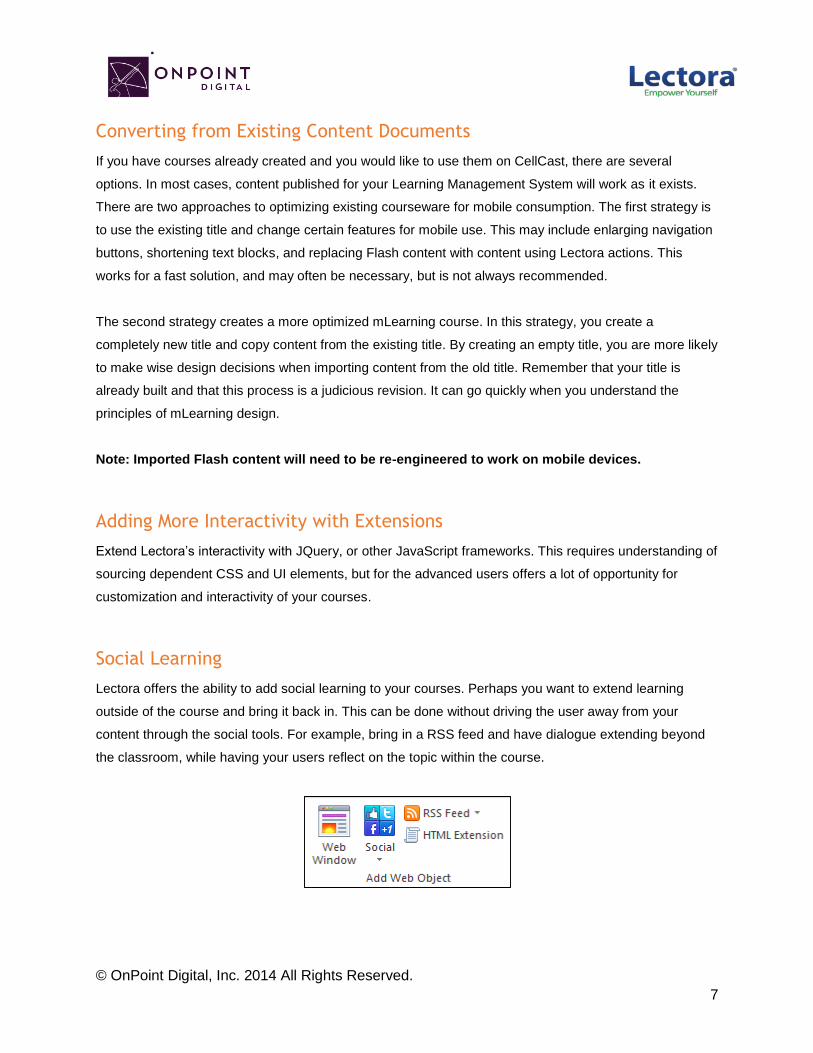
Social Learning
Lectora offers the ability to add social learning to your courses. Perhaps you want to extend learning
outside of the course and bring it back in. This can be done without driving the user away from your
content through the social tools. For example, bring in a RSS feed and have dialogue extending beyond
the classroom, while having your users reflect on the topic within the course.

© OnPoint Digital, Inc. 2014 All Rights Reserved.
8
Content
Images
Saving photos at the smallest size possible while still maintaining visual quality, is the best way to ensure
that images are responsive. Web images are saved as 72 DPI. . Images should be in PNG format to
ensure proper rendering in a mobile APP’s UI Web View Browser.
Audio
Any Audio should be in MP3 format and compressed for fast load times.
Video
Videos are most successful when they are 1-3 minutes in length. If your topic is longer, break into bite-
size subtopic videos. This will allow smaller files sizes and ensure efficient load times for downloading the
video. In addition to keeping videos short, ensure to compress the video to the smallest size while still
maintaining quality to ensure proper load times.
As a recommendation, the video should be sized at 480x320 as it still looks good when scaled up, but
keeps the file size down. Video and animations must be MP4 files encoded using an H264 codec for
widest device support.
Making Sure Your Test Works with SCORM
Once you have created your assessment, assign the SCORM properties to score test so that the results
can be sent to the LMS. To view the options, highlight Test in the Title Explorer and you will see new
options show up in your ribbon.

© OnPoint Digital, Inc. 2014 All Rights Reserved.
9
Select all desired options from the Behaviors Tab, but you must select Retain Answers Between
Sessions.
Assign your Results tab properties, Select Grade the Test, Include Test Score in Overall Score and
Show Test Results.
Publish
From the Home tab, publish your course. The dropdown will allow several options—CellCast supports
HTML or SCORM.

© OnPoint Digital, Inc. 2014 All Rights Reserved.
10
SCORM Compliant
From SCORM Options Tab, you can choose your SCORM output 1.2 or 2004. Make sure to unselect
Launch Course in a Separate Window from LMS and select Report Test to the LMS. Lastly, fill course
information section.

© OnPoint Digital, Inc. 2014 All Rights Reserved.
11
Lectora will create a ZIP package for you to upload into the LMS. However, the output is nested 2 folders
down. Make sure to only upload the zip file or the LMS will not recognize.

© OnPoint Digital, Inc. 2014 All Rights Reserved.
12
Lectora has compression options to ensure fast download times. These settings will depend on your
original source quality. The higher quality of the source, the more compression can be done without loss
of quality showing. This is something you should test to ensure you maintain quality media.
Once you have selected from available options, click OK to Publish.
© OnPoint Digital, Inc. 2014 All Rights Reserved.
13
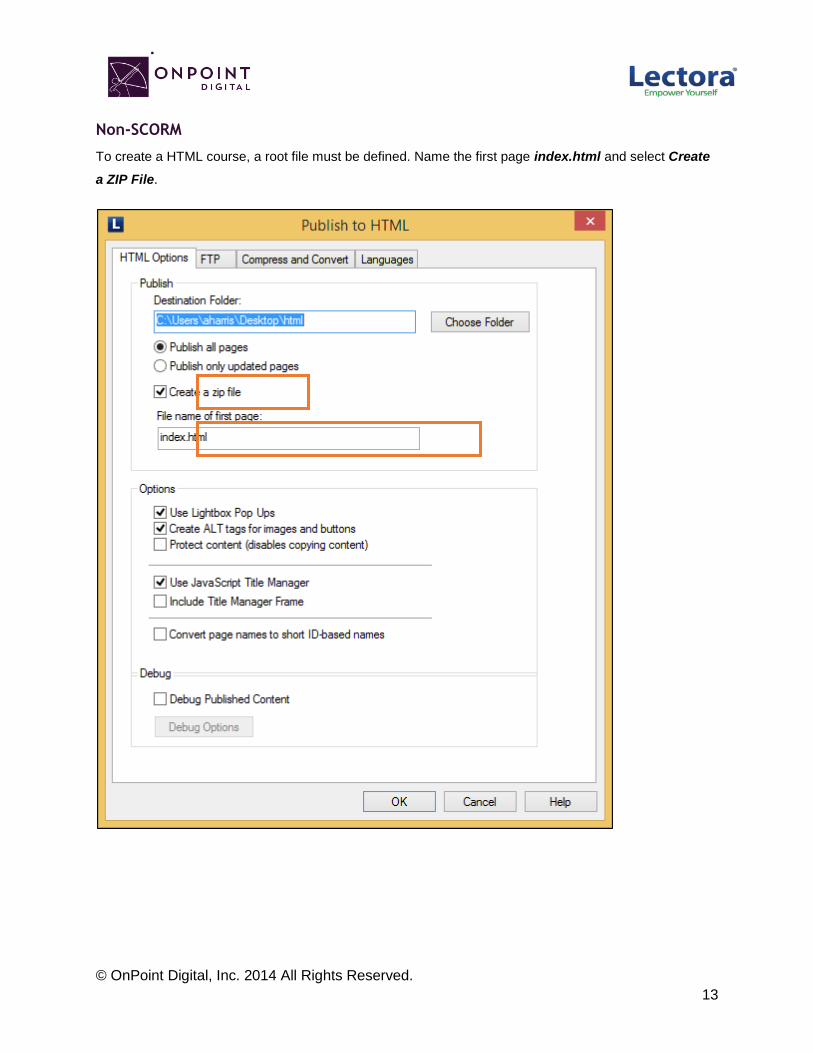
Non-SCORM
To create a HTML course, a root file must be defined. Name the first page index.html and select Create
a ZIP File.

© OnPoint Digital, Inc. 2014 All Rights Reserved.
14
Lectora has compression options to ensure fast download times. These settings will depend on your
original source quality. The higher quality of the source, the more compression can be done without loss
of quality showing. This is something you should test to ensure you maintain quality media.
Once you have selected from available options, click OK to Publish.

© OnPoint Digital, Inc. 2014 All Rights Reserved.
15
Import into OPLS/CellCast
From Content Tab, click Wizards.
The Wizards options screen will appear. Select Content Wizard.

© OnPoint Digital, Inc. 2014 All Rights Reserved.
16
Click SCORM or HTML, depending on file type, to begin upload options.
The Information screen will appear. Enter all the course information and click Continue when complete.

© OnPoint Digital, Inc. 2014 All Rights Reserved.
17
Browse for your ZIP package to upload course and click Continue.
Browse for and upload your course thumbnail image and click continue, or click Proceed… and use
default thumbnail.
1
2
1
2

© OnPoint Digital, Inc. 2014 All Rights Reserved.
18
Review course information and click Generate Course.
Once the generation is complete, a pop-up will display—click View and Publish Course.
3

© OnPoint Digital, Inc. 2014 All Rights Reserved.
19
Because your introduction was created within Lectora package, Hide the Welcome message so the user
goes straight to your content. Additionally, if you do not want your content to be eligible for self-service
enroll you must disable the OnPoint Content Viewer (“OPCV”) Catalog option by selecting No.
If your course
is for mobile
delivery,
always keep
hidden.

© OnPoint Digital, Inc. 2014 All Rights Reserved.
20
Select your publish options for browser and mobile and click Publish.
Your course is now published, click Continue.
Advanced Optional Features
There are advanced options to choose from to improve the user experience. One thing to think about is
screen real estate. To maximize your content’s real estate, you can choose settings in the Advanced Tab.
A: Select for
Online Portal
Delivery
B: Select to
Deliver for
CellCast App
C: Select to
Deliver for
Mobile Web
A
B
C
© OnPoint Digital, Inc. 2014 All Rights Reserved.
21
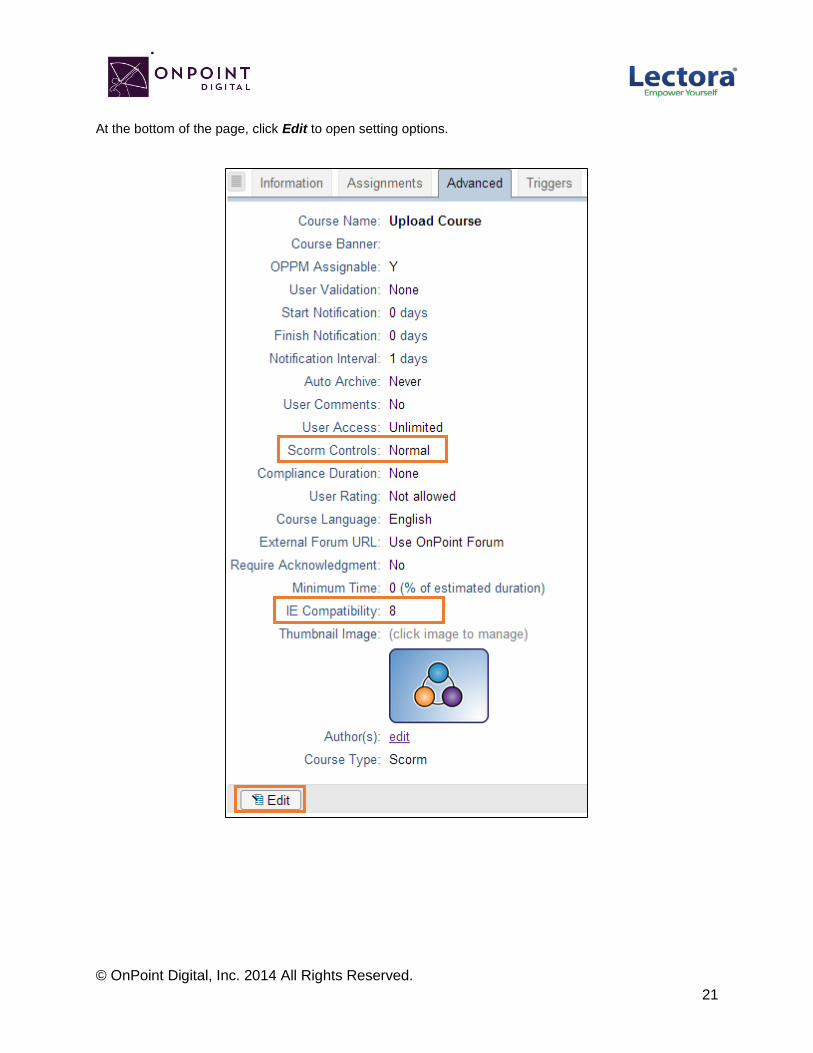
At the bottom of the page, click Edit to open setting options.

© OnPoint Digital, Inc. 2014 All Rights Reserved.
22
If you do not have an assessment or welcome page, a good setting to improve experience is set SCORM
to Minimum. This will remove the top bar and menu from the viewable screen.
The most important setting to ensure is IE8 compatibility is disabled. This is set to true by default and
must be unchecked.
Assigning Users and Groups
Once you have published your course, you can assign users or groups to be assigned to the course.
Assigning Users
From the Content Tab, select Courses.
A list of all courses will show. Select your Course Name from list.

© OnPoint Digital, Inc. 2014 All Rights Reserved.
23
From Assignments Tab, click Assign in the Assigned Users section.
Select desired User from Available Users and click Assign.

© OnPoint Digital, Inc. 2014 All Rights Reserved.
24
You will now see the user in the Assigned Users section. Click Finished..
Assigning Groups
From the Content Tab, select Courses.
Select Course from list.

© OnPoint Digital, Inc. 2014 All Rights Reserved.
25
From Assignments Tab, click Assign in the Assigned Users section.
Click Groups to view the list of groups to choose from.

© OnPoint Digital, Inc. 2014 All Rights Reserved.
26
From the list of available groups, select your Group.
You will now click Assigned and Finish, as you did before to assign a user.
Additional Resources
For additional resources, visit Lectora’s Web site http://cdn.lectora.com/V11UserGuide/.
To access Lectora Fundamentals online training, visit https://lectora.com/elearning-software-training-
online-lms-training and register.

© OnPoint Digital, Inc. 2014 All Rights Reserved.
27
Questions
If you have a question about this guide or would like OnPoint Digital’s support team contact us at 912-
898-9202 or email [email protected].


