LEARNING TO USE THE UNITY 2D GAME …gamewithus.ca/.../uploads/2017/05/learning-unity-2d.pdf10...
65
JASON BOWEY LEARNING TO USE THE UNITY 2D GAME ENGINE
Transcript of LEARNING TO USE THE UNITY 2D GAME …gamewithus.ca/.../uploads/2017/05/learning-unity-2d.pdf10...

J A S O N B O W E Y
L E A R N I N G T O U S E T H EU N I T Y 2 D G A M E E N G I N E

Contents
An Introduction to The Unity Game Engine 5
Using Version Control with Unity 21
Scripting 25
Animations 39
Building a Simple Platforming Game 47
Designing a Good Project Architecture 53
Building a Simple Top Down Game 61


An Introduction to The Unity Game Engine
Contents
Learning the Interface 6
Creating, Saving, and Opening a Project 6
Hierarchy Panel 9
Project Panel 10
Scene View 10
Game View 10
Editor Windows 11
GameObjects 12
Tags, Names, and Layers 12
Components 12
The Transform Component 13
Adding Components 13
Creating Custom Components 13
Sprites 13
The Sprite GameObject 14
Sprite Sheets 15
Physics 2D 17
Rigidbody2D 17
Collider2D 17
PhysicsMaterial2D 18
Project Settings 18
Prefabs 18
Asset Packages 19
6 learning to use the unity 2d game engine
Learning the Interface
The Unity3D Game Engine is a powerful tool, and in these tutorialswe will explore many of its powerful features. To have a firm un-derstanding of these features, however, it is important to becomeintimately familiar with the interface before jumping in and startingwith anything interesting.
Creating, Saving, and Opening a Project
Let’s start with the most basic operations in any computer programs:saving and loading. Since Unity is a complex system, saving andloading is a little different than other applications you may be usedto using, so let’s look at it step-by-step. Please note that for the cre-ation of these tutorials I am using OS X V10.11.15 and Unity V5.3.4f1Personal. There will likely be slight differences between my screen-shots and what you actually see, but the main idea will almost al-ways be the same.
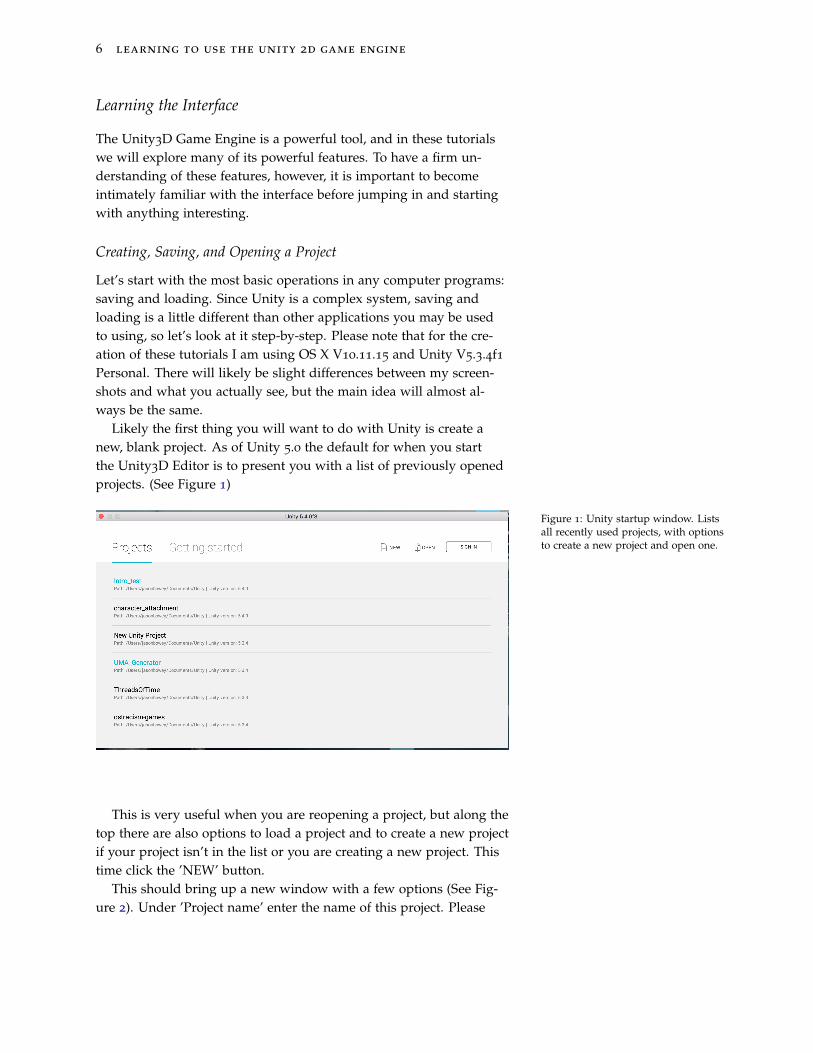
Likely the first thing you will want to do with Unity is create anew, blank project. As of Unity 5.0 the default for when you startthe Unity3D Editor is to present you with a list of previously openedprojects. (See Figure 1)
Figure 1: Unity startup window. Listsall recently used projects, with optionsto create a new project and open one.
This is very useful when you are reopening a project, but along thetop there are also options to load a project and to create a new projectif your project isn’t in the list or you are creating a new project. Thistime click the ’NEW’ button.
This should bring up a new window with a few options (See Fig-ure 2). Under ’Project name’ enter the name of this project. Please

an introduction to the unity game engine 7
please please put a name in this field. The marker will not appreciateeveryone handing in a project called ’New Unity Project’, it makes itvery difficult to download and keep track of. It also gets confusingfor you to remember if assignment 3 was in the project ’New UnityProject 4’ or ’New Unity Project 5’.
Figure 2: Unity Create New ProjectWindow. .
Under location you can set where the project will be saved. Notethat the project will be saved in that location as a directory, so youdon’t need to create a new blank directory to save the project inside.If you are using the Mac computers in third-floor Spinks, the savingprocedure is a little different. Speak with either myself or the TA ifyou plan on using the Mac computers.
You can set the default 2D/3D mode, but this isn’t important sinceit can easily be changed at anytime when building and running thegame.
The ’Asset packages’ button allows you to important externallibraries other people have made and distributed. By default thereare several available libraries created by Unity, but it is possible toimport your own. This will be covered in a later tutorial. For now,let’s not import any packages and just create a plain, blank project byclicking ’Create Project’.
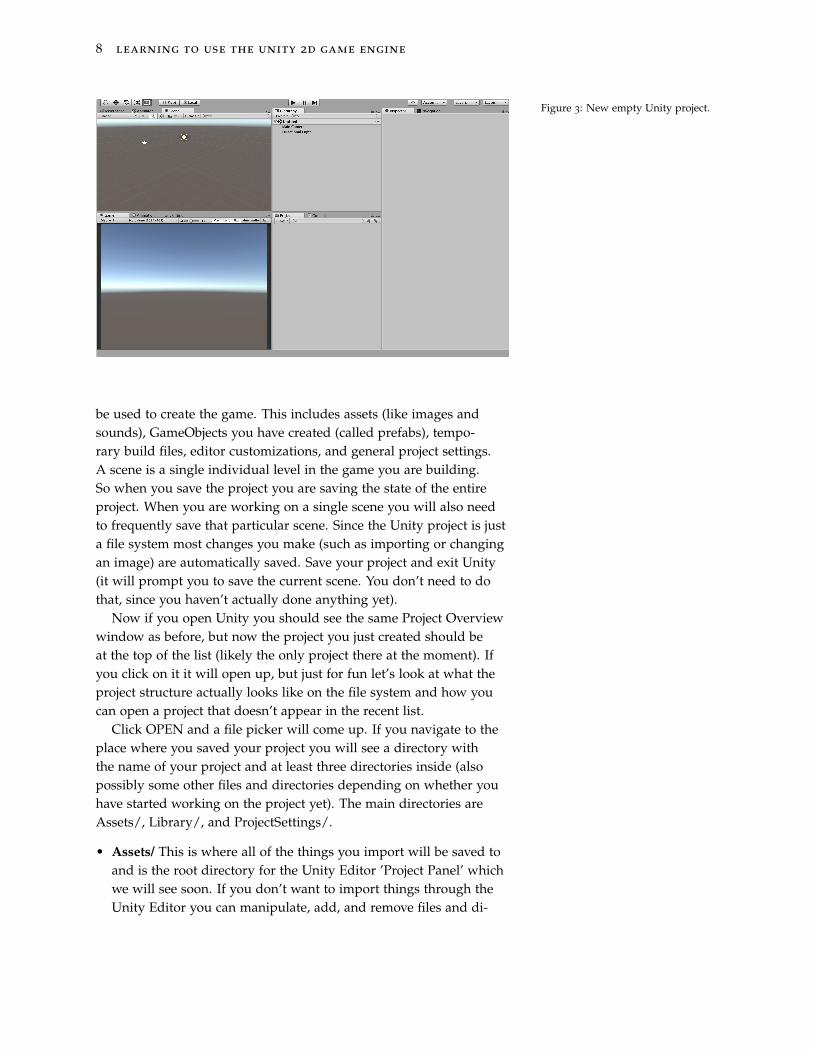
This should bring up the editor which will look something likeFigure 3 (probably not identical).
If you open up the ’File’ menu, you will see several options forloading and saving. These should be fairly straightforward, but onedistinction that should be made is the difference between a Projectand a Scene. The project is the entire collection of pieces that will
8 learning to use the unity 2d game engine
Figure 3: New empty Unity project.
be used to create the game. This includes assets (like images andsounds), GameObjects you have created (called prefabs), tempo-rary build files, editor customizations, and general project settings.A scene is a single individual level in the game you are building.So when you save the project you are saving the state of the entireproject. When you are working on a single scene you will also needto frequently save that particular scene. Since the Unity project is justa file system most changes you make (such as importing or changingan image) are automatically saved. Save your project and exit Unity(it will prompt you to save the current scene. You don’t need to dothat, since you haven’t actually done anything yet).
Now if you open Unity you should see the same Project Overviewwindow as before, but now the project you just created should beat the top of the list (likely the only project there at the moment). Ifyou click on it it will open up, but just for fun let’s look at what theproject structure actually looks like on the file system and how youcan open a project that doesn’t appear in the recent list.
Click OPEN and a file picker will come up. If you navigate to theplace where you saved your project you will see a directory withthe name of your project and at least three directories inside (alsopossibly some other files and directories depending on whether youhave started working on the project yet). The main directories areAssets/, Library/, and ProjectSettings/.
• Assets/ This is where all of the things you import will be saved toand is the root directory for the Unity Editor ’Project Panel’ whichwe will see soon. If you don’t want to import things through theUnity Editor you can manipulate, add, and remove files and di-
an introduction to the unity game engine 9
rectories within Assets/ and the changes will automatically beupdated in the Unity Editor (and vice versa). This directory is themeat of your game development, so it will definitely need to betracked under version control.
• Library/ This folder will contain all of the temporary build filesUnity Creates when you play a game within the editor. None ofthese are useful to us so just don’t touch this folder. If you acci-dentally delete it no harm done since Unity regenerates these fileswhen you press play anyway. As a result, you should not includethis file as part of your files tracked in version control.
• ProjectSettings/ This directory contains all of the settings you havecustomized for your project. So, for example, if you set the globalgravity setting to be -20 instead of -9.81, that change will be savedin a file called Physics2DSettings.asset. This directory needs tobe included in version control, since these settings will be oftenchanged and tweaked throughout development.
All other files are user specific settings and are only important foran individual developer (for example your customized editor layouts,plugins to integrate with monodevelop or visual studio IDEs, etc).
To Open the project you are looking at, make sure the project rootis selected in the file picker (this will be the directory with the Projectname) and click Open. You should be back at the new blank projectyou saved earlier before our little save and load detour. Now that you(hopefully) understand the underlying project structure let’s look atthe pieces of the Editor, which I will call Editor Windows.
Hierarchy Panel
Let’s start with the Hierarchy Panel. This window depends on thecurrent scene you have open, so its contents will look different fordifferent scenes. This is important because the Hierarchy Panel is alist of all of the GameObjects (things) currently in this level. More onGameObjects later, but just know that when you add something tothe game it will appear in the Hierarchy Panel. Even when you arerunning the game, spawned objects will appear in the Hierarchy anddeleted objects will disappear.
The Create button at the top of the Window allows you to cre-ate new GameObjects to add (surprise!) and the search bar filtersthrough the list of GameObjects.
If you drag and drop one GameObject onto another GameObject,the moved GameObject becomes a child of the other GameObject,inheriting its Transform (Position, Rotation, Scale). This is why it’s
10 learning to use the unity 2d game engine
called the Hierarchy, it is a list of GameObjects with a structure ofParent/Child relationships.
Project Panel
Next is the Project Panel. This is kind of like the hierarchy, only itis the list of Assets for the entire Project, instead of for a particularscene. Specifically, the Project Panel reflects the Assets/ directory wesaw earlier. Anything you add to that directory automatically ap-pears in the Project Panel, and any changes you make to the ProjectPanel changes the Assets/ directory directly.
There are several ways to important an asset to the Project Panel.The first, is adding the asset directly to the project file system. Thesecond way is to RIGHT CLICK in the Project Panel > Import NewAsset. The third way is to go through the menu at the top: Assets »Import New Asset.
The easiest way to add something from the Project Panel into thecurrent scene is to drag it into the Hierarchy (or the Scene View), butmore on that later.
Scene View
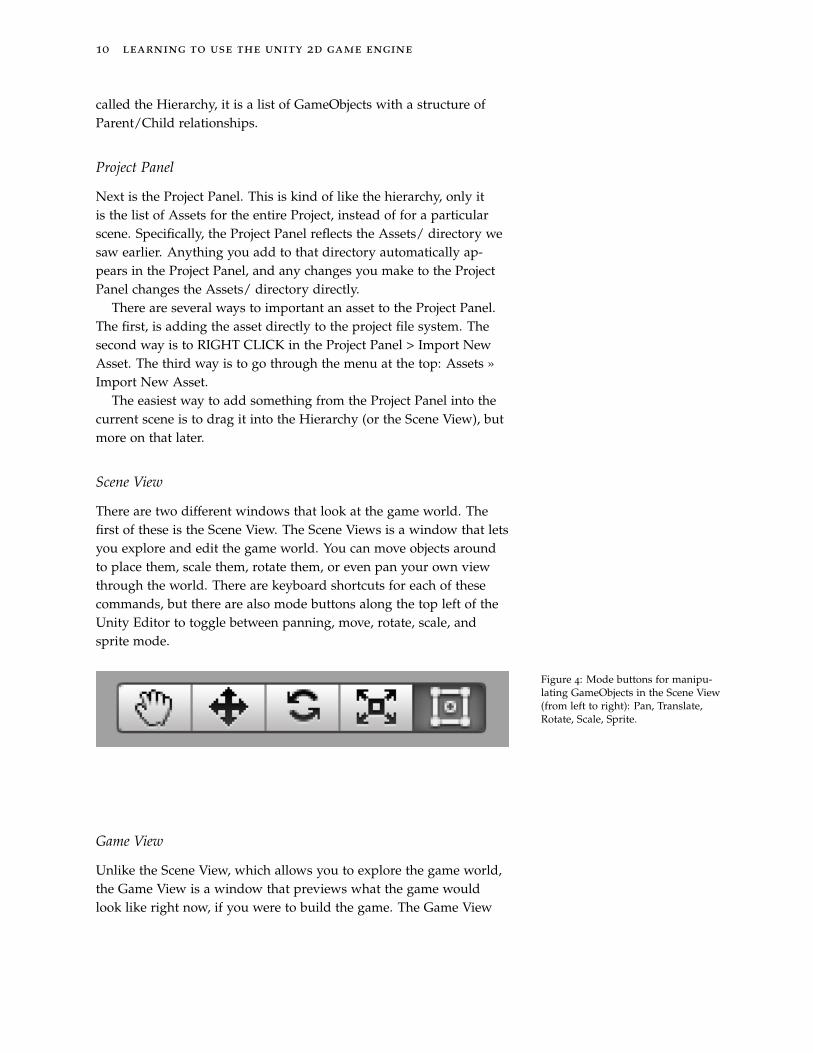
There are two different windows that look at the game world. Thefirst of these is the Scene View. The Scene Views is a window that letsyou explore and edit the game world. You can move objects aroundto place them, scale them, rotate them, or even pan your own viewthrough the world. There are keyboard shortcuts for each of thesecommands, but there are also mode buttons along the top left of theUnity Editor to toggle between panning, move, rotate, scale, andsprite mode.
Figure 4: Mode buttons for manipu-lating GameObjects in the Scene View(from left to right): Pan, Translate,Rotate, Scale, Sprite.
Game View
Unlike the Scene View, which allows you to explore the game world,the Game View is a window that previews what the game wouldlook like right now, if you were to build the game. The Game View

an introduction to the unity game engine 11
is controlled by the Play/Pause/Skip buttons along the top of theEditor.
It is important to warn that most changes you make to the hier-archy while in PLAY MODE will NOT be saved once you leave playmode. So if you play the game and move things around, when youunclick PLAY things will revert to their original positions. This canbe incredibly useful but will also result in lost work if you aren’tcareful.
Figure 5: Player controls for whenpreviewing in the Game Window.PLAY, PAUSE, SKIP FRAME
Perhaps the most useful Editor Window is the inspector panel.This panel will display all of the information of the thing you cur-rently have highlighted. So, when you click on a GameObject youwill be shown all of the values and information about that GameOb-ject. If you need to make a change of some kind you will likely needto go to the Inspector Panel to perform the change.
Editor Windows
There are many other editor windows available (Found under theWindow menu option along the top menu bar) and you can find orpurchase others online/in the Asset Store. You can even design andcreate your own (See tutorial here for details)
Also, the Unity interface is completely customizable. If you don’tlike the layout and want ’Window X’ where it is, just click on thewindow’s tab and drag it somewhere else. You can stack severalWindows in the same section and tab between them, or even splitan existing section, either horizontally or vertically. The possibilitiesare endless so feel free to customize to your preference and personalworkflow. For the purposes of this tutorial I will keep the windowsas the default, and in a few cases I will explicitly move certain win-dows around if needed.
12 learning to use the unity 2d game engine
GameObjects
Now that the boring interface stuff is out of the way, let’s get intothe... slightly less boring stuff: how to construct a GameObject.
Tags, Names, and Layers
For now, let’s just create a very simple, blank GameObject. In theHierarchy right click and select ’Create Empty’. Now you shouldhave a second Object in the Hierarchy named ’GameObject’. We willuse this as an example for the remainder of this section. Make surethe new GameObject is selected and look at the Inspector.
At the very top of the Inspector there are several toggles, textfields, and dropdown menus. The leftmost toggle enables/disablesthe GameObject, effectively turning it on or off in the Game. The textfield is the name of the GameObject, currently called ’GameObject’.Let’s change the name to ’Test’ and press ENTER. Now the name inthe Hierarchy should be changed.
There are two dropdown menus left: Tag and Layer. These are twooptions that every GameObject has, which allows you as a developerto assign that GameObject to two different categories. These can beanything you want, but generally Tags are used to label a GameOb-ject with a specific property or assign it to a category, and Layers areused in rendering, raycasting, and linecasting. For example, I couldassign a GameObject with a ’Player’ tag, which would indicate thatthis GameObject is the current Playable character. I could then createa ’Character’ layer, defining a broad group of GameObjects whichshare a similar rendering layer (all characters are drawn on top of thebackground, as an example). How you use tags and layers is up toyou, but they are both extremely useful and powerful.
Components
Contrary to what you may have studied in other courses and lan-guages which likely use some form of Model View Controller archi-tecture (MVC) Unity works best when using a Component-BasedArchitecture. Broadly speaking, rather than separating objects intoData, View, and Controller classes, GameObject’s behaviour is de-fined through several individual pieces called Components. In manycases this architecture seems similar to MVC but it can be fundamen-tally different.
A component is an individual piece of code that does a singlething (if designed well). Unity has several pre-defined componentsthat handle rendering, physics, even basic character controls. Asdevelopers we can also define custom components, called scripts,
an introduction to the unity game engine 13
which allow us to create unique components that do a specific thing.For example, as we will see in the next section, every GameOb-
ject has a component called Transform. This component determineswhere the GameObject is in the game world. To move the game Ob-ject, we will need to change the Transform component. Componentsare a very complex idea and it is difficult to get your head wrappedaround the architecture. We will go through a more detailed exam-ple in a later tutorial, but for now just remember that a componentmakes a GameObject behave or appear a certain way, and the combi-nation of components attached to a GameObject determines how itlooks and acts in your game.
The Transform Component
There is one more portion of our ’Test’ GameObject that has yet to beexplained: A collapsable section with the title ’Transform’. This is acomponent, and it is the one component that every single GameOb-ject must have, as it determines the GameObject’s position, rotation,and scale in the game world. Changing these values are the same asusing the movement tools in the Scene View.
Adding Components
At the very bottom of the Inspector is a button that says ’Add Com-ponent’. If you click it, you can browse through the componentspre-defined in the Unity Engine as well as any custom scripts youhave written in this project. If you know the name of the component(which matches the class name of the script) you can use the searchbar to find it faster.
Creating Custom Components
We will get into writing scripts in another tutorial but for now justremember that creating a script will allow us to have a custom com-ponent to attach to GameObjects.
Sprites
In the context of games, a sprite is simply a 2D image to be used asGameObjects such as characters, or interface components such asbuttons. Unity has a sprite rendering system that displays imagesand supports sprite animation: flipping between different 2D imagesto give the player the perception of animation, similar to how it isdone in cartoons.
14 learning to use the unity 2d game engine
Let’s start exploring the Unity Sprite system. In this examplewe will go over how to import sprites, add them to the game, lookclosely at how to construct a Sprite GameObject, and a simple way ofcreating sprite animations.
Before we do anything let’s save the current (and blank) scene (File» Save Scene As...). Organizing your project is very important, but fornow just save it somewhere in your Assets/ folder. Name the Scene’SpriteTest’. Remember to periodically save your scene, as well asyour project, so you don’t lose hours of work if (and likely when)Unity decides to crash.
The Sprite GameObject
If you haven’t done so already, download the image from the courseMoodle site, called ’knight.png’. Import the image into Unity. Theimage should now be in the Project Panel (if not, make sure youimported it using one of the methods described in previous sections).
Now that you have the image imported as part of the project wecan import it to the game. The first thing to check is to make surethat it is in the correct format to be used as a sprite. Click on theimage in the Project Panel so its information appears in the Inspector.The only thing we will change now is the Texture Type. The TextureType should be set to ’Sprite (2D and UI)’. Once this is changed clickthe Apply button.
Now that the image is in the correct sprite format, drag the spritefrom the Project Panel into the Hierarchy to import it into the currentscene. Click on the newly added entry to the Hierarchy and examineits construction in the Inspector. What do you notice about the fieldsin the Inspector?
The Sprite GameObject should look almost the same as our pre-vious blank GameObject, except it should have a second componentthat was automatically added: something called a SpriteRenderer.By adding this component to a GameObject, it tells the GameObjectto display a 2D sprite image. You should see that the Sprite Ren-derer has a field called Sprite with a box next to it that matches thename of the image you added to the scene. If you click on the box itshould highlight the sprite image you had imported and added to thescene. By dragging the sprite into the Hierarchy Unity automaticallyconstructed a Sprite GameObject to you by adding the renderer andassigning the Sprite field, but there is nothing stopping you fromchanging how the object appears by changing the Sprite in that field(you can drag any sprite image onto the Sprite Renderer’s Sprite fieldto change the Sprite associated with that GameObject). This is an im-portant observation to make about how Unity works: dragging assets
an introduction to the unity game engine 15
into the Hierarchy will create a simple GameObject, but all Unity isdoing is adding the components it thinks you will need. It will al-ways be possible (and in some cases easier or cleaner) to construct aGameObject from scratch yourself to have complete control over howit is constructed to match your design. We will see an example wherethis is the case when we look at animation construction.
Sprite Sheets
A sprite sheet is a single image file that contains multiple images,often arranged in rows and columns. When using the sprite sheetonly one image is displayed at a time, the remainder of the sheet ishidden by the system. This allows the system to use the same imagefile for multiple images, saving on memory.
Unity has an effective system for handling sprite sheets, easilyallowing developers to import sprite sheets and cutting them intoindividual pieces. Import a second image into your project, thespritesheet called elf.png. If you look at the image, you will see itis several rows of elf images and each row contains the separateposes of an animation. When we animate the elf sprite the GameOb-ject will cycle through each of these individual images very quicklyto give the perception of animation to the player. In the Inspector forthe spritesheet make sure Texture Type is set to ’Sprite (2D and UI)’and this type set the Sprite Mode from ’Single’ to ’Multiple’. This istelling Unity that this image is a sprite sheet and needs to be cut upinto more than one piece.
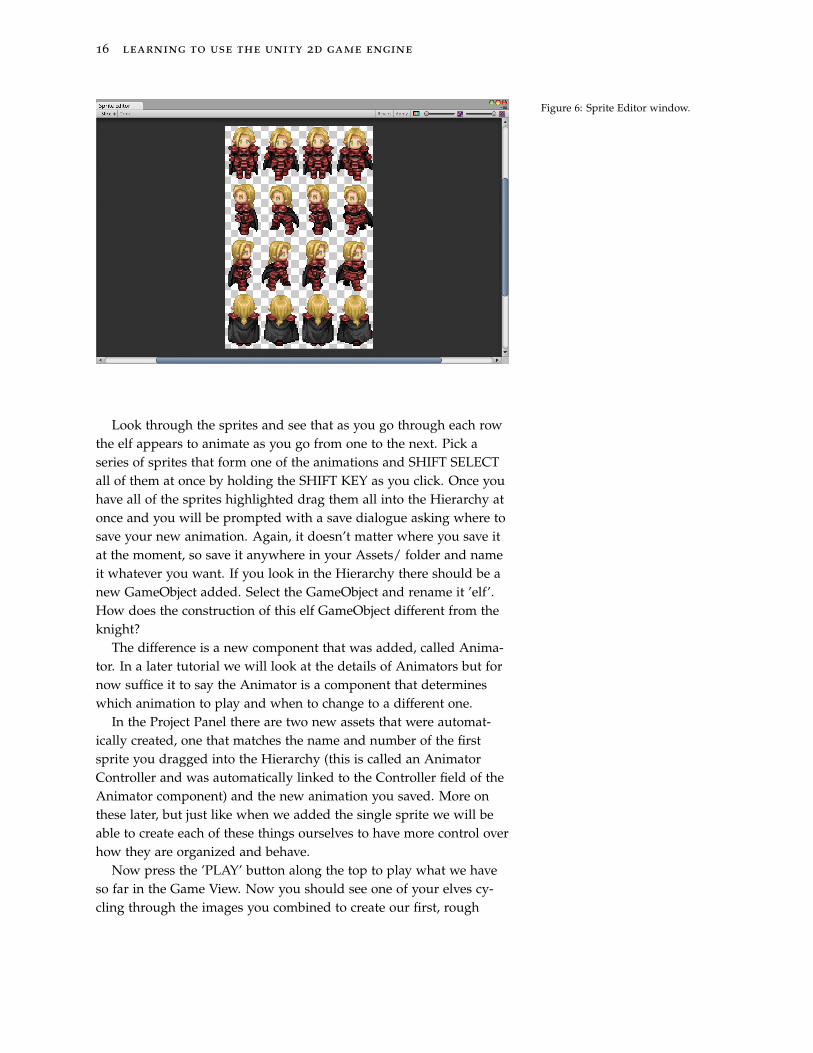
To do the actual cutting, click the Apply button to save the settingsand click the ’Sprite Editor’ button in the Inspector. This will openthe Sprite Editor window (see Figure 6).
Click on the ’Slice’ button in the top left corner to open the Slicemenu. Set the Type to ’Grid By Cell Count’ which will bring upseveral new fields. Set the ’Columns and Rows’ to 4 and 4 (specifyingthe sheet has 4 rows and 4 columns). All of the other options are finefor now, so press slice to slice up the sheet, press apply and close thesprite editor.
Now, you should see an arrow by your knight spritesheet in theProject Panel. Click this to expand and show all of the individualimages you just cut up in the sprite editor. Now when you use any ofthese individual images it will actually be using the sprite sheet un-der the hood, saving memory and complexity without you noticing!
The sprite sheet isn’t perfect, so there may be some cleaning up todo later on, but all of the individual images should now be availableand for our purposes that is the important part.
16 learning to use the unity 2d game engine
Figure 6: Sprite Editor window.
Look through the sprites and see that as you go through each rowthe elf appears to animate as you go from one to the next. Pick aseries of sprites that form one of the animations and SHIFT SELECTall of them at once by holding the SHIFT KEY as you click. Once youhave all of the sprites highlighted drag them all into the Hierarchy atonce and you will be prompted with a save dialogue asking where tosave your new animation. Again, it doesn’t matter where you save itat the moment, so save it anywhere in your Assets/ folder and nameit whatever you want. If you look in the Hierarchy there should be anew GameObject added. Select the GameObject and rename it ’elf’.How does the construction of this elf GameObject different from theknight?
The difference is a new component that was added, called Anima-tor. In a later tutorial we will look at the details of Animators but fornow suffice it to say the Animator is a component that determineswhich animation to play and when to change to a different one.
In the Project Panel there are two new assets that were automat-ically created, one that matches the name and number of the firstsprite you dragged into the Hierarchy (this is called an AnimatorController and was automatically linked to the Controller field of theAnimator component) and the new animation you saved. More onthese later, but just like when we added the single sprite we will beable to create each of these things ourselves to have more control overhow they are organized and behave.
Now press the ’PLAY’ button along the top to play what we haveso far in the Game View. Now you should see one of your elves cy-cling through the images you combined to create our first, rough
an introduction to the unity game engine 17
animation, congratulations!
Physics 2D
Now that you have a sprite and a basic animation, let’s look at the2D physics system. First of all, I would like to make a simple distinc-tion between 2D and 3D mode in Unity. Really, the only differencebetween the two modes is that 2D mode completely ignored the z-axis (depth). There is a toggle along the top of the Scene View thatswitches between the two modes, but that is literally all it does. Inboth modes your game world exists in a 3D space, but 2D mode com-presses everything together into the same depth. As a result, you asa developer only have two dimensions to work with, which makesprogramming the game much much simpler.
In terms of the Physics systems, Unity has a 2D and a 3D ver-sion. They are similar, with most of the major components havinganalogous components in both versions, but the two systems are notcompatible with one another. For the purposes of this course we willonly be dealing with the 2D versions for simplicity. If, for example,you accidentally added a 3D Collider onto an object it will not in-teract with a 2D Collider at all, since these are completely separatesystems. Let’s look at the three main components in the Physics2Dsystem: Rigidbody2D, Collider2D, and PhysicsMaterial2D.
Rigidbody2D
Let’s start with the Rigidbody2D component. To describe the Rigid-body2D in one line would be to say: adding a Ridibody2D compo-nent to a GameObject forces that GameObject to obey the laws of 2Dphysics. Adding a Ridibody2D component causes a GameObject toobey gravity as well as Newton’s Laws of Motion (Forces, accelera-tion, air resistance, etc) and similar physics of the natural world. Adda Rigidbody2D to one of your GameObjects and see what happens ifyou press play.
There are many values to change in the Rigidbody2D that affectshow the GameObject’s physics behave. Take a few minutes to playaround with the values and try to figure out what they do. See herehere for a complete description of the Rigidbody2D component.
Collider2D
Rigidbody2Ds control a GameObject’s adherence to the laws ofphysics, but Collider2Ds are required to give a rigidity to GameOb-jects. To actually register a collision between two GameObjects both

18 learning to use the unity 2d game engine
GameObjects must have a Collider2D attached. There are four differ-ent types of Collider2Ds: BoxCollider2D, CircleCollider2D, EdgeCol-lider2D, and PolygonCollider2D. Each of these are functionally thesame, but they define a different shaped region of collision.
PhysicsMaterial2D
A PhysicsMaterial2D is an asset that can be added to the ’material’field of Collider2Ds. PhysicsMaterial2D has two values that manipu-late the collider’s surface material: Friction and Bounciness. Each ofthese values range from 0 to 1.
To create a PhysicsMaterial2D right click in the ProjectPanel »Create » Physics Material 2D. To add the created asset to a GameOb-ject, simply click and drag the asset from the Project Panel onto theMaterial field of a GameObject’s Collider2D.
Project Settings
Unity allows you to set a wide range of global project settings. Thesecan be found in the top menu at Edit » Project Settings. The mostcommonly used Project Settings are: Input, Tags and Layers, andPhysics2D. There will be several instances in these tutorials whereProject Settings will be manipulated, but I encourage you to lookthrough the different options to see what Unity allows you to change.
Prefabs
In a ’real’ game, especially one with multiple levels it is likely thesame GameObjects will be used again and again. For example, theplayer character may behave the exact same in every level and thesame enemy types may be spawned again and again. In these cases,it would be useful to have a construct that allows developers to builda GameObject once and simply copy it everytime it is used. Fortu-nately, Unity provides such a construct: prefabs.
A prefab is to a GameObject the same way a class is related to anObject in classical Object Oriented programming. A prefab is simplya blueprint of instructions that can be used to create a GameOb-ject, or many GameObjects, within a game. The steps of creating aprefab are very simple: design a GameObject inside the Hierarchyand then drag it back to the Project Panel which creates a copy ofthe GameObject, a prefab. Once a prefab is created you can thendelete the GameObject in the Hierarchy. Try it now with one of yourGameObjects.
an introduction to the unity game engine 19
You can now drag your prefab into the Hierarchy as many timesas you want, adding a new copy to the game everytime.
You can edit a prefab in both the Hierarchy and directly in theProject Panel. If you edit it in the Hierarchy, however, you need topress the Apply button at the top of the inspector for the changes tobe applied to all other prefabs. Changing the prefab directly in theProject Panel does not require changes to be saved, they are automat-ically applied.
Asset Packages
The final introductory concept in this tutorial is Asset Packages.Asset Packages allow you to export a subset of the assets in yourProject Panel as a single entity that can then be imported into otherprojects. This is useful for sharing common assets or creating customlibraries to be used in multiple projects. Some of the tutorials in thiscourse will provide Asset Packages that contain the necessary assetsto be used in a particular tutorial.
Both export and import options can be found in Assets » ImportPackage (or Export Package). Most assets purchased on the UnityAsset Store will come as a package to be imported.


Using Version Control with Unity
Contents
A Very Brief overview of GIT and Why You Should Use it 21
Setting up a Repository 22
Creating a .gitignore 22
GIT Workflow 23
Tips and Tricks for working with Unity and GIT 23
A Very Brief overview of GIT and Why You Should Use it
By far the most annoying, and (with the exception of good groupcommunication) most important part of a large software projectis Version Control. Every aspect of it can be annoying but it is theone key piece of your project that MUST be in place early on andMUST be used by every group member. Besides the fact that all ofthe project milestones will be marked through your Repository (theTA will have access to your code base) it is the one thing between youand accidentally deleting your entire project at four in the morningon the night before the project is due.
In theory, version control is simple: it is a system that allows youas the developer to make changes to your code while also savingolder versions of your code at various stages over time. So, if youmess up or delete everything it is possible to revert back to a recent(ish) version where stuff still worked.
For this course it’s recommended you use a style of version controlcalled GIT, simply because it is widely used and both the instructorand TA are familiar with it. Other versions such as SVN are perfectlyfine to use, but if you do don’t count on having anyone who is able tohelp if the version control blows up (and chances are, at some point,it will). All references and suggestions in this tutorial are git-specific,but many of the general guidelines have analogues to other types,like SVN.
22 learning to use the unity 2d game engine
There is an excellent reference to git here including everythingfrom what git is and how it works (Chapter 1), to actually using it inpractice (Chapter 2), to more advanced features (everything else). Forthe purposes of this course, I would recommend reading Chapter 2
for sure (likely more than once) and Chapter 1 is pretty interesting(to me at least) but not required to be able to use git. Since it goesthrough the different steps and commands, I am not going to wastetime by repeating them here. Instead, this tutorial will focus on theUnity-specific part of version control, and tips and suggestions formanaging your project with a minimal number of repo explosions.
Setting up a Repository
There are several free cloud-based repositories that support git (somesupport others like SVN as well). The two main and most popularare bitbucket and github. Both support git and both have (for stu-dents) free private repositories (only members in the project cansee or access the code and clone the repository). The steps on bothof these are fairly straightforward: everyone creates an account,one group member creates a new project and adds everyone to thegroup (plus the course TA). If you are unfamiliar with either ofthese, I recommend using the deparement provided service, foundat git.cs.usask.ca.
Creating a .gitignore
The most important different between Unity projects and otherprojects (like a java application) is the sheer number of temporaryfiles created by the program. Everytime your press the play button(or build the game) unity builds and compiles many temperary filesto be able to run the game and these get replaced again and again.As such, you do not want to have these in your version control (imag-ine everyone having hundreds of completely different binary filesevery couple minutes and having git try to merge and resolve con-flicts between them everytime you try to push your changes to therepository). Not only that, but it is unnecessary to have these filestracked since they are not required to build the project and it justwastes space in your repository. So, git allows us to explicitly tell itwhat to track and what to ignore in a .gitignore file.
A .gitignore file is just a text file named .gitignore. Inside, you listall of the files and directories you do not want included in the ver-sion control. If you create a project in github (maybe in bitbucket aswell) you have an option to use a pre-written .gitignore file designedspecifically for Unity projects. There is a sample starter .gitignore file
using version control with unity 23
on Moodle, included with the First tutorial assets. You may need toadd things depending on what your project looks like, but as a gen-eral rule you should ignore everything except the Assets/ directoryand the ProjectSettings/ directory, as mentioned briefly in the firstchapter. The idea is you need to include all of the images, scripts,sounds, settings, etc (all of the things required to build and run yourgame) but don’t include any temporary or auto generated files whichwould add confusion and waste space.
GIT Workflow
As you would have seen in the GIT book linked above, the generalworkflow is as follows:
1. Make changes to stuff
2. When the project is free of errors and a major change has hap-pened, add your files and commit to your local copy of the reposi-tory
3. Periodically use pull to take the central repository and merge itwith your local repository (and hope nothing breaks)
4. Periodically push your local repository to the central reposi-tory for the rest of the group to then pull (and hope that YOURchanges don’t break anything now)
5. make more changes
6. repeat
In principle, it’s simple. In practice, not so much.
Tips and Tricks for working with Unity and GIT
I’ll end this tutorial with a few tips and tricks for group managementand avoid issues with GIT.
1. Communicate with your group ALL THE TIME
Use email if you must, but group chat applications such as Face-book, Google Hangouts, Skype, etc are much better because theyallow everyone to quickly and easily update and broadcast to ev-eryone. Email is too clunky and cumbersome to send to everyonewith messages like: ’I am working on the player character’s anima-tions’ ten times a day. Also, email easily gets lost and is too easy toignore.
24 learning to use the unity 2d game engine
Personally, I recommend using Slack which allows you to create agroup and individual channels to separate messages. It also allowsyou to message individual users directly and privately. So, for ex-ample, you could create channels for AI, Animations, Art, User In-put, etc and have everyone subscribe to each of these. Then if youare going to be working on the GoblinAI script just send a mes-sage in the AI channel so everyone sees that they shouldn’t touchthe GoblinAI script. Then once you have finished and pushed backto the repository you can inform your group that someone else canwork on the script if they want. As long as you check the chan-nel and make sure nobody else touches the code while you areworking on it, you will minimize most of the issues that may arise.
2. Only allow one person to work on something at a time
It was mentioned in the last point, but it really can’t be mentionedtoo many times. Git does do its best to auto merge files that aredifferent when pushing or pulling, but since Unity uses so manycomplex binary files (like the Project Settings) merging rarelyworks and usually requires manual merging. If only one personworks on a particular part of the game at once it should be per-fectly safe to have multiple people working on the project withouttoo many issues.
3. Enable meta-data
It is recommended to enable meta-data files when using versioncontrol with Unity. This basically creates a text file of metadatafor every asset file you have in your project. It is supposed to helpmake the whole process of pushing, pulling, and merging easier. Itclutters your project a little but it’s useful.
The setting can be found at Edit >> Project Settings >> Editor >> Version Control-Mode.
4. That script you are editing isn’t the only thing you are changing
This last tip is to point out that while creating scenes are prefabsare very handy, it is a double edged sword. Sometimes if you areworking on a script or editing an asset, the changes you make willalter the structure of an entire prefab or scene. As such, be care-ful which files you add to be committed and be aware of whichfiles you are actually making changes to. For example, if you andsomeone else are both working on different scripts, but they areboth part of the same prefab, you may both be making changes tothe prefab without intending to which will lead to merge conflicts.
Scripting
Contents
Creating a new Script 25
Using Public/Editor Variables 26
Awake(), Start(), Update(),and FixedUpdate() 27
Finding a GameObject Through Code, Sending Messages 29
Invoke and InvokeRepeating 31
Getting User Input 32
Instantiating Prefabs 34
Debugging 36
Linecasting and Raycasting 37
As mentioned in previous tutorials, Scripting in Unity is the wayyou as a developer can create custom components for GameObjects.A few common examples of scripts you may create are: PlayerCon-troller, EnemyAI, and EnemySpawner. Note that each of these scriptswould do a single thing, namely control the player, execute the en-emy AI, and spawn enemies. This idea of a single script doing asingle thing is best practice for Unity Project Architecture and will beexamined in detail in a later tutorial.
For simplicity of learning, this tutorial will violate some of thearchitecture best practices discussed later in the course. The impor-tant part of this tutorial is to look at the different pieces of writinga script, and it is easier to follow along at the beginning with every-thing in a single script. In later tutorials we will look at breaking acomplex script like this into smaller, more specific scripts.
Creating a new Script
Let’s get into writing some code! Right click in the Project Paneland select Create » C# Script. This will create a new script in theProject Panel and highlight the filename. Name the Script and press
26 learning to use the unity 2d game engine
ENTER to save the script. Double click on the script to open it forediting. By default the script will open in the IDE MonoDevelop, butit is possible to configure Unity Scripts to work with Visual Studioinstead. For these tutorials I will be using MonoDevelop.
Once the script opens you should have a basic skeleton script.This will be the default script everytime you create a new script. Oneimportant thing to check right away is to make sure the class nameof your script matches the filename in Unity. For example, if yourscript’s class is Test then the filename should be Test.cs (in Unity the.cs will be omitted from the name). If these don’t match, change oneor both so they do match, otherwise you will get an error about theclass name not being found.
Go back to Unity and drag the script onto a GameObject in yourHierarchy, it doesn’t really matter which one you choose.
Using Public/Editor Variables
In most languages declaring a variable as Public/Private/Protecteddetermines the visibility of that variable by other scripts. This is truein Unity, but it has a second use as well. Let’s find out what that useis. Class variables are declared inside the class definition and outsideof any defined methods, often before any methods is preferred forthe best code readability. Create two class variables like so:
using UnityEngine;
using System.Collections;
public class Test : MonoBehaviour {
public int publicNum;
private int privateNum;
// Use this for initialization
void Start () {
}
// Update is called once per frame
void Update () {
}
}
Save the script and go back to Unity. Wait a few seconds for thefile to update. Check the console window for errors (if you can’t find
scripting 27
the console window you can open it at Window » Console in the topmenu bar). If you have any errors make sure the code is identical tothe above code, and make sure the script was saved. With no errors,click on the GameObject your script is attached to. You should seeyour script attached as a component to the GameObject. What do younotice about the component fields?
You should see that the component has a field called ’Public Num’,which matches the public variable we just created in the script. Thisis the second use of declaring a variable as public: you can see andedit it directly from the Unity Editor, without having to go back tothe script to change it. It even works when testing the game!
It is important to note the order that variables are written when ascript starts. If you give the variable a value when you declare it inthe script like so:
public int publicNum = 5;
The value of publicNum is set to 5 first. If you change the numberin the component’s field in the Unity Editor, the number you enterwill overwrite the value 5. Finally, any game logic that changes thevariable will overwrite the value in the Editor.
Awake(), Start(), Update(),and FixedUpdate()
In scripts, Unity has many built-in methods and variables that havespecial meanings. The variables are often shortcuts to commonlyused components, such as the Transform component, and most of themethods will be automatically called when appropriate, if the par-ticular method is added to a script. All of these seemingly magicalmethods and variables are available because, by default, scripts in-herit from the superclass ’MonoBehaviour’. For more on inheritancesee the Architecture tutorial.
Looking at our test script, notice that there are two special meth-ods automatically included: void Start() and void Update(). We willget into what they do in a minute, but first add two more methods(the order you have them in the script does not matter in the slight-est): void Awake() and void FixedUpdate(). Finally, let’s add one Logstatement in each of the four methods. your final script should looksomething like this:
using UnityEngine;
using System.Collections;
public class Test : MonoBehaviour {
28 learning to use the unity 2d game engine
public int publicNum;
private int privateNum;
void Awake(){
Debug.Log("Awake");
}
void Start () {
Debug.Log("Start");
}
void Update () {
Debug.Log("Update");
}
void FixedUpdate(){
Debug.Log("Fixed Update");
}
}
Save the script and go back to the Unity Editor. Check for errors(and try to decipher what the problem is if any errors do occur. Ifind Google is a good friend for this) and if your console is clearpress play. As the game is playing, what do you notice about the logscoming into the console?
Look at the first two log messages: "Awake", and "Start". Try run-ning/stopping the game a few more times and see if the order ofthese two logs ever change. No matter how many times you run it,the order of these two won’t change. This is because of the order ofexecution for these two methods: when a GameObject is created (forexample, when the game starts) it will execute its Awake methodand then its Start method, always in that order. In fact, if you are cre-ating multiple GameObjects at the same time (like when the gamestarts) Unity will execute each of the Awake methods for all of theseGameObjects and then all of the Start methods. So, Start and Awakeare initialization methods. In particular, Awake is used to guarantee avalue is initialized before another GameObject’s Start method uses it.Generally, both are not needed except for specific cases where orderis crucial.
After the initialization methods, the game loops execute. The twomain game loops you have control over are Update() and FixedUp-date(). What did you notice about these two methods in the consolelogs? You probably didn’t notice much, except they didn’t alter-nate, sometimes you may have seen multiple Update calls before

scripting 29
a FixedUpdate call, or vice versa. That is because the frequency ofthese two methods differ.
Let’s use string concatenation to add a timer value after each ofthe log calls:
void Update(){
Debug.Log("Update " + Time.time);
}
void FixedUpdate(){
Debug.Log("Fixed Update " + Time.time);
}
Now what do you see when you run the game and look at thegame logs? What do the timing frequencies look like?
It looks like the FixedUpdate() is running very periodically (t=0.02,t=0.04, t=0.06, etc) and Update seems to be all over the place (for meI have 0.02, 0.119, 0.184, etc). As the name suggests, FixedUpdate() iscalled at regular, fixed intervals, and Update is called whenever it isready. FixedUpdate() is closely linked to the physics system, and iscalled in sync with the Physics calculations. Update is closely linkedto the rendering system, and is called in sync with when the screen isbeing redrawn.
Go to Edit » Project Settings » Time. This should open up the Timesettings in the Inspector. Look at the three values: "Fixed Timestep","Maximum Allowed Timestep", and "TimeScale". Simply put, TheFixed Timestep determines how often the FixedUpdate() call (and thephysics calculations) are performed. Maximum Allowed Timestepis the longest a frame can take before moving on to the next frame(if you are performing a complex calculation in Update that takeslonger than this time your calculation will be stopped where it isand Update will be called again). If all of the Update() calls finishearly then the next frame begins early. This makes the time betweenUpdate() calls very inconsistent. The final value in the Time Settingsis TimeScale, which makes time flow faster or slower than normal.
As a general rule: use Awake() to set values that need to be setbefore other objects need them, use Start() for basic initialization,use Update() for periodic calculations that do not require fixed inter-vals, and use FixedUpdate() for periodic calculations that need to beregular (for example, object motion).
Finding a GameObject Through Code, Sending Messages
Likely, your game will have more than one GameObject, and therewill be times where one GameObject will need to communicate with
30 learning to use the unity 2d game engine
another GameObject. For good Software Architecture, it should beyour goal to minimize the amount of communication and reliancebetween GameObjects but it is impossible to completely get rid of it.
There are two approaches to communicating between GameOb-jects:
1. Get a reference to the gameObject(s), access the script, then accessa method or variable
2. Get a reference to the gameObject(s), send a message to all of thescripts on that GameObject
It should be clear that the second method seems to be much betterfrom the point of view of Good Software architecture but the methodcan be limited and isn’t applicable in every situation. For this reason,it is a good idea to know both ways and pick the best one whenneeded.
There are several static methods (more on those a bit later) in theGameObject class that are useful for finding GameObject(s) currentlypart of the game:
• GameObject.Find(string name) - returns a reference to the firstGameObject in the Hierarchy with a matching name.
• GameObject.FindGameObjectWithTag(string tag) - returns a ref-erence to the first GameObject in the Hierarchy with a matchingtag.
• GameObject.FindGameObjectsWithTag(string tag) - returns a ref-erence to ALL of the GameObjects that match the provided tag(returns an array of GameObject, GameObject[]).
There are other methods that are similar (such as GameObject.FindObjectOfType...)but let’s just stick with these for now, since they are the most useful.
I’ll go through a couple common situations where these methodsare useful, but we will use these all the time throughout the tutorials,assignments, and in your own projects.
For these examples, let’s say you have a level with a tiled back-ground, several enemy GameObjects, and a player GameObject.Each of the tiles in the background is a Sprite GameObject, taggedas ’Background’, each of the enemies are tagged as ’Enemy’, and theplayer is tagged as ’Player’.
Say you have an AI script attached to the enemies that needs tofind a reference to the player GameObject and if the player is within acertain radius of the enemy and within line of sight the enemy walkstowards the player. In this case, it would be easiest to find the playerusing the ’FindGameObjectWithTag’ method:
scripting 31
GameObject player = GameObject.FindGameObjectWithTag("Player");
Say your player has a special ability that instantly kills all existingenemies with a bolt of lightning. In this case it would be tedious anddifficult to grab a reference to each enemy individually, so you coulduse the ’FindGameObjectsWithTag’ method to assign an entire arrayof GameObjects all at once, which you can then iterate through:
GameObject[] player = GameObject.FindGameObjectsWithTag("Enemy");
Notice it is only one line, just like the other version of the method,but there is a lot more going on behind the scenes so be aware thatif you have a large number of enemies (on the order of hundredsor thousands) it will take significantly longer to execute than whengrabbing a single GameObject.
Finally, imagine a situation where you have a unique enemy(maybe a boss or miniboss). Since it is an enemy it is tagged as ’En-emy’, just like the lesser, player-fodder, goblins and skeletons, youcan’t get this unique enemy by through its tag (sure you could justgive it a unique tag, but then you couldn’t group it with the otherenemies without adding a second condition to check this other tageverytime you need all of the enemies). The solution to this problemis to change the NAME of the boss as "Boss", (or something morecreative, likely) and access the object:
GameObject boss = GameObject.Find("Boss");
Be careful using the Find function, since it will only give you oneGameObject, even if you have several GameObjects that share thename. If there is more than one it will just return the first one itfinds.
Invoke and InvokeRepeating
Games, and Unity specifically, are based on the concept of periodicloops. As we saw, there are at least two implicit loops being calledthroughout the duration of the game (Update and FixedUpdate; thereare actually others but they don’t really matter yet), but what hap-pens if you want a FixedUpdate loop at a different frequency (forexample, every 3 seconds)? You could add a check in FixedUpdateto perform a modulus on the time or frame count to skip frames toapproximate the frame count, but that’s unnecessarily complicatedand messy. Luckily for us, Unity has two built-in methods that han-dle function scheduling (both single calls, and periodic calls). Thesemethods are called Invoke() and InvokeRepeating():
32 learning to use the unity 2d game engine
• Invoke(string MethodName, float time) - schedules method withmatching name to execute in time seconds
• InvokeRepeating(string MethodName, float time, float repeatRate)- schedules method with matching name to execute in time sec-onds, and then repeat every repeatRate seconds until either can-celled or the current level ends.
• CancelInvoke() - cancels all Invoke calls in the script
So, say you want to schedule something to happen 3 seconds inthe future (maybe a game event, such as open a door). You wouldneed to define a method with the following function signature:
void METHODNAME(){
}
and place this line of code where you want to schedule the method:
Invoke("METHODNAME", 3.0f);
Try this now in your your testing script. Try changing where theInvoke call is placed. What happens if you place it in Start vs. inUpdate? Why is this different? (hint: think about the lines of codefrom the perspective of the game loop executing)
Similarly, if you wanted to schedule something like an enemyspawner to start in 3 seconds, but then spawn an enemy every 5
seconds after, you could use InvokeRepeating(), like so:
InvokeRepeating("METHODNAME", 3.0f, 5.0f);
Finally, say you needed to cancel all of your enemy spawners, youcould use ’CancelInvoke()’ to cancel all Invoke calls you called fromTHIS SCRIPT.
Getting User Input
A game without user input is nothing but a movie, so an impor-tant part of writing game scripts is to get user input and use it dointeresting things in our game, like move the player around, attackenemies, etc. For our purposes, user input will include any eventstriggered by a mouse or keyboard (this can easily be extended tothings like an XBox controller).
To get input, there are several static methods built into the prede-fined Input class (just like we saw above with the GameObject class),

scripting 33
and these will be called in the same fashion ( Input.SOMETHING ).Before we see specific input calls, let’s look at the important differ-ence between a ’Key’ and a ’Button’, as Unity defines them.
• A Key refers to the raw input (for example the ’H’ key, or thespacebar)
• A Button refers to a predefined mapping between a key (or severalkeys) and a string name.
The difference between these two concepts is that of good soft-ware engineering and reusable code. A key refers to a particular key,whereas a button is simply a name that is associated with a particularkey in the project settings somewhere.
Let’s say you designed a game to be used with the WASD keys formovement, and all of your input scripts are looking for the WASDkeys specifically by their keyCode. Then let’s say you decide toswitch to the Arrow Keys (or even worse, you want to port yourgame to PlayStation and need to remap everything to controller ana-logues). Now you would have to go through all of your code lookingfor every instance where you got key input and replace it with yournew mapping code. Even worse, imagine you need to have both ver-sions, depending on the platform the game is running on. Luckily,defining Buttons will avoid all of this work. You call a button by aparticular name in your code, and then in the project settings you canswitch what those buttons mean in a single place, neat!
If you go to ’edit » ProjectSettings » Input’ the InputManagershould appear in the Inspector. You will see an expandable list calledAxes. Click on the arrow to expand the list and you will see all ofthe predefined Buttons currently in the project. If you open one, let’ssay ’Jump’, you will see several properties that define what ’Jump’means when you call it in a script. There are lots of properties here,but notice the name ("Jump") and the Positive Button ("space"). Thisis what defines the mapping. The button name "Jump" in the gameactually means spacebar. If you later decided to use the mouse but-ton to jump, all you would have to do is change that in the PositiveButton field and the change would apply to everything in your game.
So now let’s see how to actually call these things in code. Thereare two main types of buttons that are predefined:
• Button - a single button which is either pressed (TRUE/FALSE)
• Axis - a pair of buttons that represents a positive and negativedirection [-1,1]
So a single button, like the spacebar (or "Jump" like we saw above)would return either true or false, it’s either being pressed or not:

34 learning to use the unity 2d game engine
if(Input.GetButtonDown("Jump")) {
// do something to handle the input
}
Conversely, an axis returns a float (instead of a boolean), by de-fault between -1 and 1, depending on which direction it is beingpressed. The two predefined axes are "Horizontal" (both ’a’/’d’ and’LEFTARROW’/’RIGHTARROW’) and "Vertical" (both ’w’/’s’ and’UPARROW’/’DOWNARROW’):
float h = Input.GetAxis("Horizontal");
float v = Input.GetAxis("Vertical");
if(h<0) {
// move character left...
}
else if(h>0) {
// move character right...
}
... etc ...
If you absolutely NEED to get a key directly:
if(Input.GetKeyDown(KeyCode.A)) {
// do something
}
but I recommend you avoid this whenever possible.Finally, if you look at the Input documentation you will notice
there are variations of the functions (GetButton, GetButtonDown,GetButtonUp):
• GetButton returns true if the button is currently being presseddown, false otherwise
• GetButtonDown returns true if the button was pressed downTHIS FRAME (only called once each time the button is pressed),false otherwise
• GetButtonUp returns true if the button was released THIS FRAME(also once each time the button is pressed), false otherwise
Instantiating Prefabs
A common operation to perform in games is spawning new GameOb-jects into the Scene (For example, spawning enemies as the player
scripting 35
walked across the level). To do this, use the Instantiate() method.There are two versions of Instantiate which take different parameters,and the syntax for calling Instantiate is slightly different dependingon whether you need to assign the created GameObject to a variableor not.
Instantie can either have one or three parameters:
• Instantiate(prefab);
• Instantiate(prefab, position, rotation);
Where prefab is a reference to the prefab you want to spawn, and(optionally) the world position and rotation where the GameOb-ject should spawn. In the one argument form of the method, theGameObject is spawned at the origin (0,0,0) with zero rotation.
The first argument, the prefab that is to be spawned, is generally apublic GameObject variable. Once the variable is declared as public,a slot will appear in the component in the Inspector, and you candrag in a prefab that you have saved (make sure you are dragging theprefab that is saved in the Project Panel) which is then connected tothe variable and can be instantiated.
Generally, when working with 2D, there is no need to specify aparticular rotation, but you still need to specify a position. SinceUnity uses something called Quaternions to specify rotation in 3Dspace, there is a placeholder rotation that essentially evaluates to norotation (Quaternion.identity).
The position argument must be expressed as a Vector2 (if in 2Dmode) which is basically a data type that is a fancy kind of arraywhich is limited to two positions, and can be accessed by naming xand y as properties:
Vector2 myVector = new Vector2(myX, myY);
float x = myVector.x;
float y = myVector.y;
The final thing to note about Instantiate is the two variations insyntax, depending on whether or not you need to assign the resultingGameObject to a variable. If you do, then the normal method callneeds to be followed with ’as GameObject’ which is need to specifywhat type the Instantiate function needs to return. I’m not sure ex-actly why this is necessary, but it’s just something that is part of C#and needs to be done.
Here is an example of using a basic Instantiate call:
public GameObject enemyPrefab;
36 learning to use the unity 2d game engine
void Start() {
InvokeRepeating("Spawn", 0.5f, 2.0f);
}
void Spawn() {
Instantiate(enemyPrefab);
}
Assigning the resulting GameObject to a variable:
public GameObject enemyPrefab;
void Start() {
InvokeRepeating("Spawn", 0.5f, 2.0f);
}
void Spawn() {
GameObject ob = Instantiate(enemyPrefab) as GameObject;
}
Finally, adding in a position and rotation:
public GameObject enemyPrefab;
void Start() {
InvokeRepeating("Spawn", 0.5f, 2.0f);
}
void Spawn() {
GameObject ob = Instantiate(enemyPrefab, new Vector2(5, 10), Quaternion.identity) as GameObject;
}
Debugging
While MonoDevelop (and Visual Studio) do have built in debuggersthat automatically interact with Unity and allow you to set break-points, watch variables, and most things that your favourite debug-ger can do, there are also a few strategies that can be run directlythrough Unity without having to set up the debugger and break-points for a simple bug. Namely, these strategies mostly consist oflogging and print statements, as we used above when talking aboutUpdate and FixedUpdate.
scripting 37
• Debug.Log(string s) - there are various versions of Debug.Log(for example, Debug.LogError) but the main idea with all of themis they print a string to the Console. If you are having a problemwhere something isn’t working quite right, put in a quick De-bug.Log and print out the value(s) of variable(s) that you thinkwould be contributing to the problem. If you have a problemwhere you don’t think a function is getting called (or it is beingcalled too frequent) you can use a Debug.Log inside of that func-tion and see how often the Log is printed in the Console (just likewe did with Update and FixedUpdate).
• Debug.DrawLine / Debug.DrawRay - These are useful whendoing Linecasts and Raycasts (see next section). If your linecastdoesn’t seem to be behaving properly you can add a Debug.DrawLineto display the Line and see if the line is being drawn in the placeyou think it is.
• There are many other useful functions in the Debug class. For fulldocumentation, see here.
Linecasting and Raycasting
Finally, the last scripting trick we will look at in this tutorial isLinecasting and Raycasting, which are basically the same thing, orthey at least achieve the same outcome.
In essence, linecasting and raycasting draw an invisible line froma starting point in a particular direction (or towards a specific pointin space) and tell you whether or not they hit any colliders alongthe way. It is a way of doing a check for line of sight, whether or notthere is an unobstructed view between two GameObjects.
Linecasting and raycasting will be used a lot in AI, pathplanning,and Procedural Generation, but we will also see it in other mechan-ics, such as movement, in later tutorials.
For now, take a look at the documentation for linecasting andraycasting. This tutorial won’t look at how to use them, but just knowthat they exist and they will be an important tool at your disposalthroughout the course.

Animations
Contents
The Animator Component 39
Add Animator Component 40
Create Animator Controller 40
Creating an Animation 41
Creating the Animation Tree 42
Triggering Animation Events Through Code 44
Putting it All Together 45
Animations Asset PackAnimations Asset PackFor this tutorial you will need a character sprite sheet to use in
constructing an animated character. Feel free to use the spritesheetfrom the first tutorial, or the provided spritesheet for this tutorial,or find a free spritesheet online (a sidescrolling character with idle,walking, and jumping animations is recommended; this will makethe first assignment much easier).
The Animator Component
Before we get into anything too crazy with animations take a secondto review the simple animation we made in the first tutorial andfamiliarize yourself with the process. We will be doing a very similarthing in this tutorial, but since we will be creating more complexanimations we will be constructing them entirely from scratch sothe project remains organized and we have total control over whathappens.
In tutorial 1 we simply selected a series of sprite images anddragged them all into the game at once. Unity interpretted this ac-tion as wanting to create a new GameObject with the selected spritescombined into the GameObject’s default animation. This is a per-fectly fine way to do it, but in this tutorial we are going to go through
40 learning to use the unity 2d game engine
a detailed explanation on how to do it, as well as how to combinemultiple animations on the same GameObject and transition betweenthem.
Start with a scene with an empty GameObject, let’s call it Char-acter for now. This will be the character with all of our animationsattached to, and the basis for our first playable character in futuretutorials.
In general, these are the steps we will go through for creating ananimated character:
1. Add Animator Component
2. Create Animator Controller, and add to Animator
3. Create sprite Animations
4. Add Animations to Animator
5. Set up transitions between Animations
6. Write code to trigger Animation transitions in Animator
Add Animator Component
Select the GameObject, and click on the Add Component button.Search for Animator and select it.
Create Animator Controller
Like creating any asset inside Unity, RIGHT CLICK in the ProjectPanel, and navigate Create » Animator Controller. This will createa new, empty Animator Controller. Select your Character GameOb-ject, and drag the Animator Controller in the controller slot in theAnimator.
The Animator is the component that handles all the transitioningand manipulating of Animations. The Animator Controller we cre-ated is the device in which we actually save our animation structure(as we will create in a few minutes). The controller is independent ofthe Animator Component, which means you can save the controlleras a variable, change animator controllers in GameObjects, and evenapply the same Animator Controller to more than one GameObject.In our case, that would make every GameObject display the exactsame sequences of Sprites, but in 3D development the animations aremade up of changes in bone positions which can be applied to any3D character that has a similar skeleton structure.
For sprite animations, Unity has a neat variation called an ’Anima-tor Override Controller’ which allows you to create many characters

animations 41
with identical Animation structures, only having to define whichanimations are different in each subsequent GameObject. I won’t gointo detail in the tutorials, but I would recommend to consider usingthem in your project, where applicable. Find more information aboutthem here.
Creating an Animation
Now that our GameObject has an Animator component, and is tiedto the newly created Animator Controller, it’s time to create ouranimations. I will only go through the process for one Animation, asit is the exact same steps for each subsequent Animation.
Creating an Animation can be broken into several simple steps:
1. Create Animation(s)
In Project Panel, RIGHT CLICK » Create » Animation. This willcreate a blank Animation. Name it, and move it to the appropriatefolder location in your project structure (for now just create anAnimation folder, or something that makes sense to you. We willgo over recommendations for project structures in the tutorial onArchitecture.
Once your animation(s) are created, drag them onto your GameOb-ject. Repeat the Animation Creation process for every anima-tion you want to add (you can add more later, if needed). Openthe Animation window (Window » Animation) and select yourGameObject. At the top of the Animation Window you should seea small drop-down menu. Click on the menu and you should seeall of the Animations you just created and added to the GameOb-ject.
2. Drag Sprites into the Animation Window
In the Animation Window, select each of these entries in the drop-down menu one at a time. For each entry, drag in all of the spritesthat are part of that animation (either one at a time, evenly spaced,or all at once). This will define which sprites will be played duringthat particular animation.
3. Check frame rate of Animation
For each of the animations you created, you can press the playbutton in the Animation Window to see the Animation playing.It is likely the Animation will be too fast, because it is set to runtoo many samples per second by default. There is a box in theAnimation Window right next to the drop-down menu labelled’Samples’. Reducing this number will make the Animation playslower, increasing it will make the Animation play faster.

42 learning to use the unity 2d game engine
4. Uncheck Record Button
Finally, notice the record button in the top left of the AnimationWindow, to the left of the play button. When you add sprites tothe Animation, or make other changes, Unity will turn on therecord button. The record button, when on, will take almost anychange you make to the game and save it as part of the Anima-tion. For example, if you change the position of a GameObject thatnew position will be baked into the Animation (which is usuallythe cause if you have a GameObject jumping around the screenweirdly). Another, more useful case, is tinting the Sprite by chang-ing the colour in the Sprite Renderer. You can Change the colourof a Sprite to red in an ’injured’ Animation, for example, to indi-cate a character getting hurt. By recording animation states (suchas different colours at different points of the animation) the an-imation system will automatically interpolate between the twostates (slowly transition from white to red, for example). The in-terpolation is linear by default, but you can define a non-linearinterpolation if your animation needs it.
If you aren’t recording anything, it’s best to uncheck the buttonright away, to avoid weird, unexplainable errors.
Creating the Animation Tree
Now that you have all of your Animations created (or at least someof them) we can create transitions between Animations. The Anima-tions will be set up as a state machine, which each Animation actingas a single state. We will set up transitions between states, and thesechanges will be triggered by certain variable conditions betweenstates. As long as the Animator is on, the Character will be in onestate, and will play the corresponding Animation. If the requirementsto move to another state (all of the conditions set in the transition)are true, then the GameObject will move to that other state, and startplaying a different Animation.
To see and edit all of this, open the Animator window (Window »Animator). Again, make sure the Character GameObject is selectedand you should see a window with all of the Animations you cre-ated/added to the Character GameObject, as well as an ’Entry’ node,and an ’Any State’ node. One of your Animations will be orange(likely the first one you added). This one is the default Animation,so the one that will play when the game first starts. When designinga character, it is usually an Idle animation of some kind, since theplayer isn’t controlling the character right off the bat.
On the left portion of the Animator Window there are two tabs:

animations 43
Layers and Parameters. We are only going to deal with Parameters.These parameters are variables that are declared within the scope ofthe Animator. They can be accessed and changed through scripts, butmust be explicitly changed. So, if you name these variables exactlythe same as in a script, that doesn’t mean changing the variable inscript will update the Animator variables.
To create a new variable, click the little plus sign and select thevariable type. The options are Float, Int, Bool, and Trigger. The firstthree should make sense, and it should be easy to picture the kindsof things you would represent with them (floats can represent contin-uous variables like the speed a character is currently moving, an Intcan represent states, a Bool can represent a binary state like whetheror not an enemy is hostile and should attack). The one different vari-able is Trigger. A trigger is a special type of boolean, one that is al-ways false, except for the moment you invoke it (or trigger it) whichcauses it to be true for a single frame, just long enough to cause atransition to happen, before it is flipped back to false. So, it’s a boolyou can flip and don’t have to manually flip back. Triggers are usefulfor events, like attack or jump, which may never do anything with asecond value, so why bother setting it back manually everytime?
You can create as many variables as you need (name them de-scriptively and appropriately, obviously). You can also set the defaultvalue the variable should have when the game starts (speed=0, forexample).
With variables created they can be applied to transition betweenstates. Right click on the initial state and select ’Make Transition’.This will create a little arrow that follows the mouse cursor around.Click on the state you need to transition to to complete the transition.You can click on the transition arrow to specify the properties ofthe transition, and define the conditions to cause that transition tohappen.
For simplicity, let’s only look at Conditions which will give thebasic mechanics of the transitions. For a real game, you may need tolook into the settings and exit time options to smooth the transitionbut that’s for you to play around with and figure out when needed.
You should see an empty list called Conditions. This is where youcan define the transition conditions that must ALL be true for thetransition to happen. Click the plus sign to add a new condition.Select the variable you want to check, and select the value or relation-ship that needs to be true to cause this transition to happen. Add asmany conditions as necessary.
As an example, let’s say you are creating a transition betweenan Idle (stationary) state and a walking state. The transition wouldlikely rely on a speed variable (how fast the character is currently
44 learning to use the unity 2d game engine
moving). You would have one condition that uses this ’speed’ vari-able, and checks that it is greater than zero (or some small thresholdnumber). This means that when your player is standing still and youpress a key to make the player run the speed variable will be set andthe walking animation should now be played because the character ismoving (or should be).
Finally, let’s look at how to set that variable in code to make thetransition happen.
Triggering Animation Events Through Code
Incorporating Animation transitions in code requires a few things:
1. Create a Class variable to store a reference to the Animator com-ponent
2. Write game logic that requires a change in animations
3. Change the Animator variable when the change happens in code
I will show a script fragment first, and then explain the pieces of it:
public class MyAnimations : MonoBehaviour {
private Animator anim;
void Awake() {
anim = GetComponent<Animator>();
}
//triggered from somewhere else, when this character needs to attack
void Attack() {
anim.SetTrigger("Attack");
}
}
Let’s start by looking at the first step, getting a reference to theAnimator component. At the beginning of the script, a class variableof type Animator is declared. A class variable is a variable associatedwith this script, and is global to all functions in this script. So as longas this script is attached to a GameObject, once the variable has avalue it will keep that same value.
In the Awake method the GetComponent method is called to lookfor the Animator component and assign it to the variable, to pre-sumably be used later. Notice what GameObject the GetComponent

animations 45
method is being invoke upon: seemingly nothing (there is no OB-JECT.GetComponent<Animator>()). This is a special shortcut Unitylet’s you do. If you leave out the target (OBJECT. ) at the beginningof the method called, Unity assumes you mean the GameObject you(this script) is currently attached to. In this case the character we arebuilding and trying to animate.
So in simple terms, that line is looking at the GameObject THISSCRIPT is attached to (this script could be attached to many differentGameObjects) and finds the first component of type ANIMATOR.Assign a reference to that component to the anim variable. Now wehave a variable that points to the Animator component attached tothe same GameObject as this script. If you needed to get the com-ponent of a different GameObject, it would be identical, except youneed to put an OBJECT. in front, to declare what GameObject youare targeting (perhaps player.GetComponent..., in which player is aGameOject variable storing a reference to a different GameObject).This can be very confusing (but it is incredibly important) to under-stand. It is essential to know which GameObject the script you arewriting is or will be attached to, and know which GameObject youneed to communicate with, and which GameObjects you have ref-erences to. More guidelines and suggestions will be provided in theArchitecture Tutorial for common patterns and ways to minimize andorganize inter-GameObject communication.
Finally, in the Attack method the SetTrigger method is called (onthe Animator). In this case, it triggers a trigger variable named "At-tack". If it were a Boolean variable it would be something like:
anim.SetBool("Attack", true);
For a full list of available methods, see the Animator documenta-tion.
Putting it All Together
Now that we have gone through the basic process of setting up Ani-mations (though with enough empty spaces, vagueness, and muddyexplanations to have even more questions that need to be answered)take some time to practice what you have learned. Go online andfind a sprite sheet (just google ’free sprite sheet character’ or some-thing similar) and go through the processes learned in the last cou-ple tutorials. Go through cutting up the spritesheet, creating theGameObject, creating the individual Animations, and create tran-sitions between them. Try to find a sidescrolling character (or use

46 learning to use the unity 2d game engine
the spritesheet provided on Moodle which will put you in a goodposition for the sidescroller tutorial and for Assignment 1.
Building a Simple Platforming Game
Contents
Detecting Collisions 47
Adding Forces 49
Designing the Level 50
Writing the Player Script 51
Changing the Settings 51
This tutorial is a broad overview of how to build a platformer-styled game. Many parts of the tutorial will refer to previous con-cepts, or require previously learned concepts to understand what todo. Please refer to previous tutorials if you unfamiliar with some-thing. For specific requirements for the assignment, please see theAssignment description on the course webpage.
For the most part, from here on in, the tutorials will describe stepsand concepts at a much higher level. We will be dealing with increas-ingly complex algorithms and structures, so the specific details won’tbe provided. Instead, the remainder of the tutorials are designed togive you an understanding of how the problem or mechanic shouldbe implemented, and giving you a chance to implement it yourself.
So far in the course we have covered the majority of Unity basics,but there are still a few physics-related topics that have not yet beencovered. Specifically, detecting collisions between GameObjects andusing forces to push GameObjects around and make them move.
Detecting Collisions
In the first tutorial you likely saw the simplest form of detecting col-lisions: having the GameObjects actually collide and bounce awayfrom each other (or push each other, depending on the Rigidbody2Dsettings). In some cases you not only want the GameObjects to col-lide, but to also make something happen in code (for example, de-crease an enemy’s health when the player’s sword makes contact). In

48 learning to use the unity 2d game engine
still other cases, you want to avoid the physical collision entirely andjust trigger the code when the GameObjects ’collide’. These are thethree situations this section will look at.
For a platformer game, there really aren’t any collisions that needto trigger code. It’s mostly adding colliders to the platforms and theplayer, and using forces to push the Character around and jump.Nonetheless, we will look at the other two types of collision detectionin detail here, which will be necessary for the second assignment.
As was mentioned in the Animation tutorial, it is useful to look atUnity from the perspective of "who am I?" when you are writing ascript. It is useful to think of ’me’ as the GameObject the script is at-tached to. This allows you to access sibling components on yourself,and many special callbacks and methods only apply to other com-ponents also attached to ’you’. An example of this is the Collider2Dcallbacks. When a collision happens, any script attached to the sameGameObject as the Collider2Ds involved in the collision can receivethe Collision event, using the ’OnCollisionEnter’ method.
void OnCollisionEnter2D(Collision2D col)
{
// code to be executed everytime THIS GameObject collides with something else
}
So, to register a collision callback, just put the above method inthe script where you want the code to be (it must be attached asa component to the same GameObject as the Collider2D) and anycode you write inside the method will be called everytime anotherCollider2D comes into contact with THIS GameObject’s Collider2D.
Related to OnCollisionEnter2D are the methods OnCollisionExit2Dand OnCollisionStay2D, which are used the exact same way butmeasure different moments in the collision event (after and during).
The above is used to detect a physical collision between twoGameObjects with Collider2Ds attached. You probably noticed acheckbox on Collider2D components which says ’On Trigger’. Ifthis box is checked, the Collider2D does not behave as a collidableGameObject (other Collider2Ds will not bounce off of it, they willpass right through). The purpose of a trigger Collider2D is to Reg-ister an event when something passes within the field of the definedCollider2D without the physical interactions to happen. Triggers areuseful for things like moving the game forward (i.e. player walksthrough a trigger which causes enemies to spawn) and melee attacks(turn on a trigger when the character attacks and check if it is hittingan enemy or not). There are many other uses as well.
Detecting a Trigger Collision is the exact same as the previous

building a simple platforming game 49
explanation, except the method signature is slightly different, todistinguish it as a Trigger Collision:
void OnTriggerEnter2D(Collider2D col)
{
// code to be executed everytime another GameObject enters THIS GameObject’s trigger field
}
Finally, notice that for each of the above method signatures a vari-able is passed in, either of type Collider2D or Collision2D. Theseare two different Object types in Unity, but it is possible to use ei-ther type of variable to get the ’other’ GameObject involved in theCollision/Trigger. Since it is so easy to get the other GameObject,it doesn’t really matter which of the GameObjects you put the call-back on (Except the trigger callback has to be on the TriggerColliderGameObject) so pick whichever GameObject works best for the de-sign of your game.
Adding Forces
Before we get to how to put together a platformer, let’s look at howto add forces to a GameObject. Specifically, we will be adding a forcethrough the GameObject’s Rigidbody2D component (so it needs tohave a Rigidbody2D component).
The first thing you should do is declare a class variable in a scriptto store a reference to the Rigidbody2D, similar to what we did withAnimations, and assign that variable in Awake:
public static class myClass : MonoBehavior {
Rigidbody2D rbody;
void Awake() {
rbody = GetComponent<Rigidbody2D>();
}
}
From now on in this script, the variable rbody will reference theRigidbody2D component (unless the variable is assigned a new valueor the Rigidbody2D component is removed). This will just save usfrom having to call ’GetComponent<Rigidbody2D>()’ everytime,which makes the code a little cleaner and simpler to read and com-prehend.
Rigidbodies have an ’AddForce’ method, which applies a physicalforce onto the Rigidbody2D, pushing it in the desired direction. This
50 learning to use the unity 2d game engine
force will interact with the built in Physics2D system, fighting againstgravity and other competing forces, friction, etc. The signature for theAddForce method is as follows:
public void AddForce(Vector2 direction, ForceMode mode=ForceMode2D.Force);
The first argument is required (it specifies the direction and mag-nitude of the force to be applied; the X and Y components of theforce). The second argument is optional, and specifies the type offorce to be applied. Let’s look at a few examples:
rbody.AddForce(new Vector2(0,0));
This one would add no Force to the GameObject, because it ispushing 0 in the x direction and 0 in the y direction.
rbody.AddForce(new Vector2(100,0));
This one would push 100 units of force to the right (when apply-ing forces the forces often need to be in the hundreds to notice theforce; applying 2 units of force won’t do anything).
rbody.AddForce(new Vector2(0, -250));
This one would pull the GameObject downwards (-250 in the ydirection). Finally,
rbody.AddForce(new Vector2(200,200));
will push the GameObject up-right at a 45 degree angle (200 rightand 200 up). This will be the basis for the platformer movementdescribed below.
Designing the Level
Designing a simple platformer level is simple: find rectangularsprites (bricks, platforms, whetever style(s) you want to use) andapply a BoxCollider2D. Move the bounds of the BoxCollider2D to fitsnuggly around the edges of the platform sprites. Finally, check ’isK-inematic’ on the Rigidbody2D. Making it Kinematic basically meansthe Object will have infinite mass, so you won’t have the player push-ing the platforms around when she jumps on and off of them.

building a simple platforming game 51
Writing the Player Script
Finally, use the information from this tutorial and previous weeksto put everything together in a player script. See the AssignmentDescription for specific details and requirements, but the basics toassemble a platformer are as follows:
• Build Level with platforms
• Create walking, idle, and jumping animations for player character
• Add Animator to player, design animation transitions
• Get input for moving left/right and jumping (horizontal axis andsome button, such as spacebar)
• Use input to add forces left,right and up to move character aroundthe level
• Use Input to trigger appropriate animation transitions
Changing the Settings
If you have completed everything up to this point you should havesome sort of working version of a platformer but there are likelyseveral things wrong with it, or at least not as smooth and clean asyou would like. For example, maybe the character jumps too high,or not high enough, or maybe it doesn’t fall fast enough. All of thesetypes of things can be fixed by tweaking the values of the forcesuntil if feels just right. This takes time and it isn’t an easy step. Thisis why making games can be difficult and time consuming. Don’tworry too much about getting things perfect for the assignment, butfor your projects it is important to get the input to feel just right.

Designing a Good Project Architecture
Contents
Understanding a Component-Based Architecture 53
Organizing Your Project 54
Inheritance and Interfaces 54
Reusable Components 55
Interaction Between GameObjects 55
Sending Messages 56
ACTIVITY: A Sample Character Architecture 58
Understanding a Component-Based Architecture
One of the trickiest part of understanding Unity is wrapping yourhead around the project architecture, which is likely different fromprograms and languages you have previously used. As was men-tioned in the first tutorial, Unity uses a component-based architec-ture, rather than Model View Controller (MVC) which is the commonstructure for Object Oriented programming.
It’s important to understand that when you are writing a script,you are writing a class, which means it can exist in multiple placessimulataneously (when instantiated as an object). So, as a sim-ple example, if you write a class (or script) that moves a characteraround, keep in mind that the same script could be attached toANY GameObject and it would allow you to move that GameOb-ject around just like the character did. The majority of this tuto-rial will look at this idea: If you make a script simple and generalenough, you can reuse those scripts on all kinds of different types ofGameObjects, rather than writing almost duplicate code. The ques-tion is, how do we design a script to make it simple and general?
54 learning to use the unity 2d game engine
Organizing Your Project
Organization is key in developing a great game (or even in makinga working game...). In this tutorial we will look at tips and tricks fordesigning a good project architecture, but the first step is to create anorganizational structure early and stick to it. It is very easy to createa new animation and not put it in the Animations directory, butthat one Animation adds up and soon becomes 100 Animations, allnamed things like "New_Animation_1", "MyAnimation_0", "Idle", etc.Now try figuring out which Animation goes with which character.
When it comes down to it, it doesn’t matter how you organizeyour project, as long as you organize it in whatever way makes sensefor your group. Generally, I organize my projects like this:
Assets/
Animations/
Clips/
Controllers/
Prefabs/
Characters/
Objects/
Scenes/
Scripts/
Sprites/
Each of these directories would also be subdivided as more assetsare created or added. Generally, I find that once I have more than tenthings in a directory it helps to subdivide it to make it cleaner. Again,do what works for you, but if I ask you where your Enemy’s IdleAnimation clip is stored and you don’t know right away, you have aproblem with your organization.
Inheritance and Interfaces
While this tutorial will focus on making simple, general scripts, keepin mind that the rules of class Inheritance exist in C# (and thereforeyou can use them in Unity). I’m not going to get into talking aboutinheritance in these tutorials, but it works basically identical to javaor regular C#, if you are more familiar with that. Inheritance can stillbe quite useful when working with Unity, and there are times whenit is the best solution to a problem, but I find that if you focus onmaking simple and reusable components you can often avoid havingto deal with object inheritance in many cases, so we will focus on thatfor these tutorials.
designing a good project architecture 55
Reusable Components
When building Reusable Components, there are two keys to keep inmind when designing them:
1. Keep the scripts general
Keeping a script general can mean obvious things like keeping ev-erything as a visible class variable (for example, a CharacterMoverscript would have a speed variable, so both fast and slow charac-ters could use the same movement script), keep the code simple,and break everything into small methods. The generality can alsorefer to the design itself. As mentioned above, it would be greatto design a movement script that is simple and general enough tobe attached to every single GameObject that moves: The PlayableCharacter, Enemies, NPCs, Bullets, etc. This is very possible, and itis the sort of architecture you should strive to have in your game,since it allows quick and easy debugging, and expanding yourgame becomes incredibly quick and easy. Building a good archi-tecture takes time and it is usually a tradeoff between more workearly on but usually pays off with more results at the end of theproject.
2. The script should only do ONE thing
A related point is that every script should do one thing. Up un-til now (and moving forward) these tutorials, and likely yourprojects/assignments will not always follow this rule, and that isOK. It is sometimes unavoidable, or much easier, to not follow therule, but always be aware of what you should be doing. In biggergames it becomes necessary to have better architecture, but start-ing out it is often helpful to just try things and see what they doand how they work. Once you get it working, though, refactoringand redesigning is usually a very very good idea.
Some assignments will require you to follow a particular architec-ture, and your project milestones will be marked on the quality ofthe project architecture and organization, so it is important to at leasttry a few of the ideas in this tutorial and start thinking about what agood way of organizing your project will be.
Interaction Between GameObjects
Just as a quick review, we saw in the scripting tutorial a brief in-troduction to communicating between GameObjects. Two ways ofcommunicatng were discussed, and the first one was explained in
56 learning to use the unity 2d game engine
somewhat detail. We looked at how to get a reference to a GameOb-ject that exists in the game and how to then access methods andvariables through the components attached to that GameObject. Thetutorial also mentioned the second way, which is sending messages,but it wasn’t looked at in detail. We will look at that now.
Sending Messages
In our quest to write and design scripts that are as general as pos-sible, a key part will be sending messages, as opposed to accessingGameObjects directly. In the previously seen method, you need tonot only find the GameObject, but you also need to know which com-ponent(s) it has currently attached and know which variables andmethods are available to be used. This works for a simple game, butto do more interesting and complex things it becomes necessary tocome up with a better architecture.
Unlike the direct-access solution, message passing does not re-quire you to know what components a GameObject has. Instead, yousend a message to a GameObject (you obviously still need to find theGameObject, how else would you specify the target?), but instead ofpassing the message directly to a particular component (for example,the Attack() method we made in the Animation tutorial) you sim-ply pass a message to ALL scripts and components attached to thatGameObject. If the Component has the corresponding method, it isexecuted, if not then the message is ignored. This is the key to de-signing a general architecture and minimizing dependencies betweenGameObjects.
Here is what the SendMessage signature looks like:
public void SendMessage(string methodName, object value, SendMessageOptions options);
Its use is just like any other method, except you call it directly on agameObject, without needing to get a reference to a particular scriptor component. For example:
public class ExampleClass : MonoBehaviour {
GameObject enemy;
public void DealDamage(float damage) {
enemy.SendMessage("Damage", 10.0f);
}
}
designing a good project architecture 57
In this example, the script is likely on a player GameObject. TheDealDamage method would be called when the player attacks anenemy and a collision has been detected, so the player needs to sendthe damage message to the enemy. The first parameter is a string thatis the message that needs to be sent (and the receiver needs to havea public Damage method in order to catch the message). The secondparameter is an optional argument to pass with the message, in thiscase the amount of damage that needs to be done.
Note there is a third parameter to SendMessage, which allows youto specifiy whether or not the target GameObject needs to have atleast one public method that will receive the message. If your designrequires all potential targets to have at least one message catcher,then it is a good idea to pass ’SendMessageOptions.RequireReceiver’which will throw an error if there is nothing to catch the message.On the other hand, if you will be passing lots of messages and due toyour design some targets may not be handling the message, you canpass ’SendMessageOptions.DontRequireReceiver’ instead, which willjust ignore invalid messages.
Let’s look at a brief example of how message passing couldwork in a game. This is not an exhaustive or definitive example,but should instead be used to get you thinking about how a goodarchitecture could look and how you would build it in your ownprojects/assignments.
• We have a game with a player and several enemies
• The Player has an Input script which records all of the User Inputin Update()
• The Input script broadcasts an ’InputUpdated’ method to thePlayer GameObject which contains parameters for all input values(this could be separated into individual methods, as needed).
• The Player has an Attack script, which is triggered by a particularkey pressed (let’s say SPACEBAR)
• The Attack script reacts to the SPACEBAR being pressed, andbroadcasts an ’Attack’ message to the Player
• The Attack message is caught by an Animation Script (which trig-gers the attack animation), a Collision script which determineswhether an enemy is within range to be damaged, as well as any-thing else in the player which would respond to an attack (perhapsa cooldown or combo script)
• If the Collision script detects an enemy to damage, it would send a’Damage’ message to the Enemy
58 learning to use the unity 2d game engine
• The Damage message would be caught by the Enemy’s Animationscript, Health script, etc.
Notice how elegant this method is. All the Player had to knowabout the enemy was that it could (and should) be damaged whenthe player’s sword hits it. Beyond that, the Player didn’t have toknow how the enemy was constructed, what it’s animation tree lookslike, or how to reduce the enemy’s health. The Player just said ’Dam-age’ (probably also would need to pass a number with how muchdamage to do) and the Enemy responded accordingly. You couldcompletely redesign every aspect of the enemy, but as long as it stillcaught the Damage message the game would work perfectly.
Finally, you may be wondering why I included the Input script atthe beginning. It’s true, it is somewhat unnecessary, since it’s basi-cally doing the same thing as Unity does to broadcast the Input call-backs to all MonoBehaviours. It may seem like adding an extra layerto do nothing, but there is at least one situation where this would beextremely useful to do:
• Imagine you are building a fighting game (like Smash Bros., forexample)
• Players press buttons to perform attacks and damage each other
• Now say you want to add a ’replay’ feature which replays thebattle (maybe allowing players to move around the arena, slowdown/speed up time, etc.)
• This may seem like a daunting task at first, but wait. You alreadyhave a script which captures all input for every player and broad-casts it to the player GameObject.
• it wouldn’t be too much of a stretch to imagine adding a ’record’script to every player which receives the Input message and savesthe input data in a file or database.
• In replay mode, it would simply be a matter of turning off theInput script, and adding a script which reads from the data file (ordatabase) and use that data in the Input broadcast.
• It would still take a bit of work to make it perfect, but that is agreat start to implementing a record function, all from our orga-nized architecture
ACTIVITY: A Sample Character Architecture
• Now that we’ve gone through the basic idea behind setting up agood architecture, take some time to go through starting to actu-ally build it. Create the framework for a Playable Character.
designing a good project architecture 59
• Start by making a list of the kinds of things a player characterneeds to do (as you have seen so far in the course). Also considerwhat an Enemy character needs to do. Try to design both charac-ters as similar as possible (the only real difference should be thePlayer has an Input collecting script which sends messages and theEnemy has an AI script which can send the exact same messages).Each item on your list should be a separate script in your eventualcharacter
• Make a second list of the different interactions that will need tohappen between components (and between player and enemy)
• Look at your lists of scripts and interactions and decide whichmessages will need to be passed and when.
• Finally, create a blank skeleton script for each item in your firstlist. Put in the methods to catch the messages and start fleshingout code to match your lists above. You likely won’t get everythingfinished and working, it is quite a bit of work and we haven’tcovered everything yet. When you get to something you don’tknow how to do, put a comment where it should go with a note ofwhat it will eventually do.
• Try to integrate your Animations from the previous tutorial withyour character (or rebuild them)
NOTE: This ACTIVITY will be the starting point for the secondassignment, so take the time now to get started early, if you leave theentire assignment for the last minute you will not get it finished.


Building a Simple Top Down Game
Contents
Movement: Manually Changing Position 61
Linecasts and Raycasts 62
Shooting Projectiles 63
Designing the Level 64
Designing the Player 64
Designing the Enemy 64
Maintaining Character Health 64
Creating an Enemy Spawner 65
This tutorial will introduce several new concepts (A new type ofcharacter movement and shooting projectiles)
Movement: Manually Changing Position
In the previous tutorial on how to build a simple platformer theApplying Forces method of movement was described and expectedfor that assignment. For our top-down shooter game, we will look ata second type of movement: manually changing position.
This new type of movement has several downsides when com-pared to the applying forces method, but it has one or two situationswhere it significantly improves performance and makes developmentsimpler.
The downside:
• Can’t use built-in physics system to manage Velocity, Acceleration,and Collisions (it doesn’t work very well, at least)
• For some types of games, can feel unnatural
Where the method wins:
• Makes implementing networking a breeze (ha, not really, butmuch much more straightforward)
62 learning to use the unity 2d game engine
• much cleaner collisions with less jitter
At the end of the day, both methods work, but the big issues hereare collision jitter and networking. You may have seen that some-times if you move a GameObject against a collider (like a wall, forexample) the GameObject will bounce against the wall and jumpback and forth as the forces pushing the GameObject fight againstthe collision detection. This is an artifact of the input not matchingup with the collision detection frequency and leads to weird thingshappening. If this happens, trying this other movement method mayhelp.
The second benefit for using this method is networking. By main-taining the position manually, you have complete control over everystep in moving the GameObject, and so you can send a networkedmessage everytime you update position. Using the forces method,while it feels more natural, make it difficult to be able to send an ac-curate enough message across the network to maintain the correctposition of every GameObject. This requires you to periodically checkthe position error and implement extra code to correct position whenthe error gets too large. It’s not unheard of to use this method fornetworking, but it adds complexity and much more work to make itsmooth and usable.
When moving a character (or any GameObject) using this method,you will usually do the following steps:
1. Calculate where the GameObject should be based on the input/ai
2. Use a raycast (or linecast) in the direction where character shouldmove
3. if the cast detects something in the way, do not move
4. else, move the character to the desired position
This way, the moving GameObject will never stutter against a col-lider, it will predict if it is going to hit it and never actually moveagainst it. The consequence of this cleanliness, however, is that ’On-CollisionEnter2D’ methods won’t actually be called. Instead, you willneed to use the raycast to detect the potential collisions and includecollision-triggered code there (such as destroying enemy when bulletcollides).
Linecasts and Raycasts
Unity has two commonly used methods for performing line of sightcalculations: Linecasts and Raycasts. Both of these do the same thing,more or less, but the method of using them is slightly different.
building a simple top down game 63
From a high level, you will use one of these two methods if youwant to see if a GameObject is between two points (such as the playerand the enemy), or you want to detect if you are close to a collider(such as performing a ground check in a platformer game).
In a linecast, you define two points (Vector2s): the start point, andthe end point (you can also provide a layermask which determineswhich layers are affected by the cast). The linecast will draw a linebetween the two points and returns a RaycastHit2D object whichcontains all of the information about the first collider2D the linecasthit, going from start to end point.
Almost identical is the raycast, which does essentially the samething except represents the line using a start point and a direction,instead of two points like the linecast uses.
While both can be used interchangeably in most situations, it isgenerally easier to use linecasts to perform line of sight checks be-tween two things (such as an enemy AI checking if the player is inan unobstructed path which will trigger the enemy to become hos-tile. Raycasts, on the other hand, would be useful in something likea stealth game where the enemy would use a raycast to determineif the player is in the direction they are facing, rather than just plainline of sight. This allows the player to sneak around behind the en-emy without being detected.
In terms of the movement described in the previous section,linecasts could be used to detect if something is in the way whenthe player goes to move. Since the player movement script calculatesthe exact position the player should move to, the script can performa quick linecast between where it currently is and where it will beafter moving. If the linecast finds something, then that means there issomething obstructing the player’s path and shouldn’t move. A moresophisticated version of this could move the player right up to theedge of the collider2D, but not push the player completely against it.
Shooting Projectiles
Shooting projectiles combines many of the previously mentionedtopics together into one: Getting user input, Instantiating Prefabs,moving a GameObject, and Collision detection. It is assumed you al-ready know each of these pieces (see previous tutorials if unsure) sothe remainder of this tutorial will focus on designing the architectureat a higher level, using the pieces learned in previous tutorials (andfrom online research/looking on forums).
The steps for shooting a projectile are as follows:
1. Get user input (for example, SPACEBAR pressed)
64 learning to use the unity 2d game engine
2. Instantiate projectile prefab (at a position on the player that makessense, such as the barrel of a gun)
3. Set the direction the projectile should move (depends on how youdesign a movement script)
4. Projectile should move in that direction until it hits something(enemy, wall, etc)
5. Collision detection should behave according to game design orassignment specifications
Designing the Level
• Select an image or tile images to make the background (set thesorting layer in the sprite renderer for these image to a negativenumber, so they are behind the players and enemies).
• Create four rectangle sprites with box colliders, and place aroundthe edge of the gameplay area (same as the platforms in the plat-former (Assignment 1))
Designing the Player
• Get user input to move and rotate player (horizontal axis shouldrotate left/right, and vertical axis should move forward/backward)
• Write code to move/rotate player
• Create script to shoot projectile straight forward in direction playeris facing
Designing the Enemy
• Simple AI (literally just make it move towards the player at a con-stant speed) ( HINT: look at the Vector3.MoveTowards() method
• Write code to move/rotate enemy
• Enemy should die when projectile collides with it
Maintaining Character Health
The character may or may not have health, depending on project orassignment requires. If the health is a one-hit, then the player shoulddie just like the enemy when hit by a projectile, and restart the level.

building a simple top down game 65
Incorporating health at a more complicated level (more than onehit) requires a health variable. The best way to incorporate this is tocreate a health.cs script which maintains a health value, has publicfunctions to increase/decrease health, and checks for health <= 0 anddestroys GameObject. By doing this, you can use the same healthscript on Players, enemies, even on the projectiles.
Creating an Enemy Spawner
The final piece of designing a top-down shooter is spawning enemies.This is very similar to spawning a projectile, but instead of spawningan enemy on keyboard input, it will spawn enemies periodically. Youcan create an empty GameObject(s) and add a ’spawner’ script toit. This script should have a public variable to put an enemy prefabin (or even a list of possible enemies) and use InvokeRepeating toperiodically spawn another one).