Learning Through Play - McGraw-Hill...
144
The Developing Child Learning Through Play
Transcript of Learning Through Play - McGraw-Hill...
The Developing Child
Learning Through Play
2
Contributors
Donna R. McDanielRegional Manager of Community
Development InstituteProject Director for Head Start Training
and Technical Assistance Resource Center, Region VII
Raytown, Missouri
Karen StephensDirector, Illinois State University
Child Care Center Normal, Illinois
Preschool teachers at the Lee’s Summit Early Childhood CenterLee’s Summit, Missouri
Dawn MyersGlenda HinrichsBeth LaneRoxie LanierSheri SitzmannMaureen ZupanecDiane OuimetteDoris Kiple, Coordinator of early childhood services
Copyright © by The McGraw-Hill Companies, Inc.All rights reserved. Permission is granted to reproduce the material contained herein on the condition that such materials be reproduced only for classroom use; be provided to students, teachers, and families without charge; and be used solely in conjunction with The Developing Child program. Any other reproduction, for sale or other use, is expressly prohibited.
Kathy Griffi n Program CoordinatorTammy SchneiderPrekindergarten Lead TeacherBaptist Medical Center Child Care
and Development CenterKansas City, Missouri
Patricia S. LierzDirector of the Research Medical Center Child Development CenterKansas City, Missouri
Diane EichholzDirector, Hope Lutheran PreschoolShawnee, Kansas
Sherry RuddellMusic Teacher and Early Childhood Education SpecialistToledo, Ohio
Send all inquiries to:Glencoe/McGraw-Hill21600 Oxnard Street, Suite 500Woodland Hills, CA 91367
1 2 3 4 5 6 7 8 13 12 11 10 09

CONTENTS
Enhancing Learning Through Play ...................................................................................................... 5Are You Ready to Work with Young Children? ..................................................................................... 8Developmental Milestones: Age 2 ....................................................................................................... 9Developmental Milestones: Age 3 ..................................................................................................... 10Developmental Milestones: Age 4 ..................................................................................................... 11Developmental Milestones: Age 5 ..................................................................................................... 12Developmental Milestones: Age 6 ..................................................................................................... 13Planning a Preschool Program .......................................................................................................... 14Admission Application Form ............................................................................................................. 18Emergency and Health Information Form ......................................................................................... 19Sample Weekly Planning Chart ......................................................................................................... 20Weekly Planning Chart ..................................................................................................................... 21Sample Activity Planning Sheet ........................................................................................................ 22Activity Planning Sheet ..................................................................................................................... 24Promoting Positive Behavior ............................................................................................................. 26Safety and Health Considerations ..................................................................................................... 27Safety Checklist for Preschools ......................................................................................................... 29
Activity 1 Where Does It Belong? Ages 3–4 ..................................................................................... 32Activity 2 Mix and Match Ages 3–4 ................................................................................................. 33Activity 3 Who’s That? Ages 3–6 ..................................................................................................... 34Activity 4 Textured Shape Collage Ages 3–5 .................................................................................... 35Activity 5 Mystery Box Ages 3–5 ......................................................................................................37Activity 6 Marching Band Ages 3–6 ................................................................................................. 38Activity 7 Smelly Jars Ages 3–6 ....................................................................................................... 39Activity 8 What’s Missing? Ages 3–6 ............................................................................................... 41Activity 9 Listen Closely Ages 3–6 ................................................................................................... 43Activity 10 Taste Test Ages 3–6 .......................................................................................................... 44Activity 11 I’m Thinking of … Ages 3–6 ............................................................................................. 45Activity 12 Popcorn Predictions Ages 3–6 .......................................................................................... 47Activity 13 Texture Rubbings Ages 4–6 .............................................................................................. 49
Activity 1 Gloppy Goo Ages 3–5 ...................................................................................................... 52Activity 2 Sponge Painting Ages 3–5 ............................................................................................... 53Activity 3 Make Your Own Play Dough Ages 3–5 ............................................................................. 55Activity 4 Shaving Cream Delight Ages 3–5 ..................................................................................... 57Activity 5 Wire Sculpture Ages 3–5 ................................................................................................. 58Activity 6 A Life-Size Me Ages 3–6 .................................................................................................. 59Activity 7 Designer Toast Ages 3–6 .................................................................................................. 61Activity 8 Ice Painting Ages 3–6 ...................................................................................................... 63Activity 9 Printmaking Ages 3–6 ..................................................................................................... 65Activity 10 String Designs Ages 4–6 ................................................................................................... 67Activity 11 Bubble Painting Ages 4–6 ................................................................................................. 69Activity 12 Shake It to Make It Ages 4–6 ............................................................................................ 71Activity 13 Woodworking Ages 4–6 ................................................................................................... 73
Sensory Activities
Art Activities
3
4
Activity 14 Toast Baskets Ages 4–6 ..................................................................................................... 75Activity 15 Bead-It Ages 4–6 .............................................................................................................. 77Activity 16 Puzzle Challenge Ages 4–6 ............................................................................................... 79Activity 17 Pop-the-Balloon Balls Ages 5–6 ........................................................................................ 81Activity 18 Recipes for Art Activities ................................................................................................. 83
Activity 1 Fly Away Birds Ages 3–4 .................................................................................................. 86Activity 2 Wash the Baby Ages 3–4 .................................................................................................. 87Activity 3 Music Shakers Ages 3–4 .................................................................................................. 89Activity 4 Jump Over the Candlestick Ages 3–5 ............................................................................... 91Activity 5 Scarf Dancing Ages 3–5 ................................................................................................... 92Activity 6 Jump and Sing Ages 3–5 ................................................................................................. 93Activity 7 Wild Animal Parade Ages 3–6 .......................................................................................... 95Activity 8 Fishing for a Snack Ages 3–6 ........................................................................................... 97Activity 9 Pantomime Time Ages 3–6 .............................................................................................. 99Activity 10 Matching Sounds Ages 3–6 ............................................................................................ 100Activity 11 Same Song, Diff erent Voices Ages 3–6 ............................................................................ 101Activity 12 Circle Dance Ages 3–6 .................................................................................................... 102Activity 13 Prop Boxes All ages ........................................................................................................ 103
Activity 1 Shapes Bingo Ages 3–5 .................................................................................................. 106Activity 2 Cats and Dogs Math Ages 3–5 ....................................................................................... 107Activity 3 Circle Counting Ages 3–6 .............................................................................................. 108Activity 4 Shaped Snacks Ages 3–6 ............................................................................................... 109Activity 5 Egg Carton Math Ages 3–6 ............................................................................................ 110Activity 6 Balancing Buttons Ages 3–6 .......................................................................................... 111Activity 7 Mitten Match Ages 3–6 .................................................................................................. 112Activity 8 What’s the Pattern? Ages 3–6 ........................................................................................ 113Activity 9 Name Sort Ages 3–6 ...................................................................................................... 114Activity 10 Fraction Puzzles Ages 3–6 .............................................................................................. 115Activity 11 Estimation Station Ages 3–6 .......................................................................................... 117Activity 12 Shape Stretch Ages 3–6 .................................................................................................. 119Activity 13 Great Graphs Ages 3–6 ................................................................................................... 120
Activity 1 That’s Me! Ages 3–5 ...................................................................................................... 122Activity 2 Aquarium in a Bag Ages 3–6 .......................................................................................... 123Activity 3 Rain Painting Ages 3–6 ................................................................................................. 125Activity 4 Sink or Float? Ages 3–6 ................................................................................................. 127Activity 5 Going Fishing Ages 3–6 ................................................................................................. 129Activity 6 Fruity Treasure Hunt Ages 3–6 ...................................................................................... 131Activity 7 Human Tracks Ages 3–6 ................................................................................................ 133Activity 8 Magnet Discovery Ages 3–6 ........................................................................................... 135Activity 9 Ocean Sensory Ages 3–6 ............................................................................................... 137Activity 10 Ladybug Inn Ages 3–6 .................................................................................................... 139Activity 11 Snacks for the Birds Ages 3–6 ........................................................................................ 141Activity 12 Interesting Inspections Ages 3–6 .................................................................................... 143Activity 13 Creating Clouds Ages 4–6 .............................................................................................. 144
Drama and Music Activities
Math Activities
Science and Nature Activities
(Continued on next page)
Cop
yrig
ht ©
by
the
McG
raw
-Hill
Com
pani
es. A
ll ri
ghts
rese
rved
.
The Developing Child: Learning Through Play 5
Name ______________________________________________ Date ________________ Class __________________
Learning Through Play
It is by engaging in play that children develop and learn. Research studies have shown that even infants are continually learning through interac-tion with their surroundings and the people around them. Toddlers and preschoolers have turned these experiences into an astonishing array of skills and knowledge, and they are eager for more.
SETTING THE STAGEEach child is born with certain physical and
intellectual potential. However, those potentials are rarely achieved. Environment and opportunity play major roles in determining how far each child develops physically and intellectually.
What happens during a child’s early years has a lifelong impact. That’s why it is so important to provide children with an environment that stimu-lates learning and provides many opportunities for play. Without those conditions, important oppor-tunities for brain development and mastery of physical development are missed.
Providing a stimulating environment for chil-dren does not require spending lots of money. Rather, it requires imagination and an understand-ing of its importance. To be stimulating, an envi-ronment must include things that activate all of a child’s senses: sight, hearing, touch, taste, and smell. It must provide materials that invite children to try out things for themselves. Children who spend their days in front of the television or playing video games miss out on so many other activities and opportunities.
THE PRESCHOOL ENVIRONMENTIf you have ever visited a preschool, you probably
found it bright and inviting, fi lled with interesting things. Most preschools are organized around learning centers. (See text pages 616–617.) These contain a variety of items that promote specifi c
interests or types of learning. The number and cat-egories of learning centers depend on a program’s size and budget. Many items for learning centers are low-cost or free. For example, empty food boxes are useful in the dramatic play center for playing house or store. An old purse can serve as a letter carrier’s bag.
An area for outdoor play is also important. This area should be located away from traffi c and be fenced. There are special safety guidelines for out-door play equipment. These are available online through the Consumer Products Safety Commis-sion or early childhood education sites.
HELPING PRESCHOOLERS LEARNAny time you work with a group of preschoolers,
you have two main responsibilities. First, you must ensure their safety. Second, you will plan and carry out activities that will help the children learn through play.
Keeping Them Safe
Young children can be unpredictable. They do not always understand or remember what can hurt them. There are a variety of ways you can keep playtime safe.
• Provide a safe environment. An early child-hood classroom must be as free of hazards as possible. Plan and monitor outside activities carefully.
• Stay alert. Even though you may be working with a small group of children, you are still responsible for the whole group.
• Know and follow safety policies. Every pre-school program needs written guidelines for handling potentially dangerous situations, such as fi res and bad weather.
Enhancing Learning Through Play
(Continued on next page)
Cop
yrig
ht ©
by
the
McG
raw
-Hill
Com
pani
es. A
ll ri
ghts
rese
rved
.
The Developing Child: Learning Through Play 6
• Learn proper fi rst-aid procedures. Knowing what to do when a child scrapes a knee or falls from a swing are key skills for caregivers.
• Consider safety when planning activities. This includes choosing age-appropriate, or developmentally appropriate, activities. An activity that is safe for an eight-year-old may be too hazardous for a four-year-old. It is also important to use safety equipment, such as bike helmets, when appropriate.
Planning Activities
Most preschool programs combine free play (activities children choose for themselves) with activities planned by the staff . The planned activ-ities are designed to give the children specifi c experiences and opportunities for particular types of learning. Good activities enhance learning and development in several areas. For example, even a simple fi nger play, such as “The Itsy Bitsy Spi-der,” provides practice in fi ne motor skills, improves memory, gives an opportunity to develop social skills, and teaches about spiders.
The choice of planned activities should not be random. These are several ways to determine what they will be:
• A thematic approach. With this popular method, a variety of activities during the week are planned around a particular theme—such as a holiday, a time of year, or a concept like com-munity helpers.
• Specifi c skills. Using tools such as developmen-tal milestones charts, the teaching staff develops a list of specifi c skills a child of a particular age is expected to master. Activities are then planned to give children opportunities to practice these skills. The staff documents when each child dem-onstrates mastery of each specifi c skill.
• Observation. Some preschools are linked to a high school, college, or university that teaches child development, child care, or parenting classes. Sometimes activities at the preschool are planned to allow older students to observe par-ticular aspects of child development. For exam-ple, preschoolers might be given a drawing
activity so students can observe and assess the diff erences in drawing skills among children of the same age.
Finding Resources for Activity Planning
Preschool teachers and others who work with children know the value of developing their own personal fi les of activity ideas. As they use these ideas, they decide how to adapt them for their own needs, and they keep notes about what worked well and what didn’t. There are many sources of activity ideas, including teaching magazines and resource books (check libraries), ideas shared by other teachers, and Internet sites.
Organize the activity ideas you collect in a way that is convenient for you. You might choose to use fi les (electronic or paper), large envelopes, bind-ers, or large index cards. One advantage of large envelopes is that you can save activity materials, such as pictures, labels, or game pieces, to use each time you do the activity.
READY, SET, TEACHIf you are really ready to lead young children in
an activity, it is more likely to go smoothly. This means being prepared. Setting up the activity before it begins means you have everything you need. During actual teaching, you interact with the children during the activity.
Getting Ready
Whether you are presenting an activity yourself or as part of a group, you must be ready. This includes having:
• A specifi c, written activity plan.• The equipment and materials you will need.• Completed any preparation. Often some steps
need to be done before the activity starts.• Considered any health or safety hazards. For
example, many children have food allergies. Make sure no children are allergic to any foods used in activities or snacks.
• Learned the steps of the activity by heart. This allows you to lead it without referring to notes. If any parts are unclear, try them out yourself before you do the activity with the children.
The Developing Child: Learning Through Play 7
Cop
yrig
ht ©
by
the
McG
raw
-Hill
Com
pani
es. A
ll ri
ghts
rese
rved
.
• Tried to identify any problems that might come up. Decide whether there’s a way to avoid them and how to handle them if they do occur.
• Planned how you can increase children’s learning during the activity. Are there questions you can ask that will help them think in diff erent ways? Can you give a bit more information on a topic or relate it to a previous activity? Good teachers are always looking for ways to promote additional learning.
Getting Set
Getting set involves completing the fi nal steps before beginning an activity. Chairs may need to be rearranged. Supplies for the activity may need to be brought to the work table. All equipment should be in place.
All this is easier when you work as a group. In a preschool, lead teachers and assistant teachers help each other with activities. In a group teaching experience, you have more hands to help with preparation and set-up.
Teaching
The children are eagerly waiting for the activity to start and you’re on! If it is a perfect day, your well-planned activity will go as smoothly as you hoped. However, small children often do, say, and ask unexpected things. Even an experienced teacher can be caught by surprise. Experienced teachers know that good teaching requires fl exibil-ity and quick thinking, as well as careful planning. They cope with whatever happens.
You, too, can develop this ability. Your up-front consideration of possible problems may mean you already have a solution. If the problem was not on
your list, think a moment before you speak. Another group member may be able to help. Most impor-tantly, stay calm. The children need to know that you can handle the situation. They are counting on you. Staying calm also helps you to react thought-fully, rather than impulsively. Whether a child has been hurt, the special eff ects in your activity did not work, or children are pushing and shoving each other, rely on your common sense and knowledge. Ask for help, if necessary.
EVALUATING THE EXPERIENCELooking back after an activity or day is com-
pleted is the best way to get better at what you do. Your teacher may have you complete an evaluation of your own performance or that of the group. Figure out what went best and worst, and why. Was the activity appropriate for the ages of the chil-dren? Could you have been better prepared? Did you freeze up or shine when you had to think on your feet and solve a problem? Can you suggest modifying the activity in some way to help it work better the next time it is used?
Your teacher will also be evaluating how well things went. He or she may have some specifi c sug-gestions that will help you. Learning and improving as you gain more experience is normal. You get bet-ter at skills you practice. However, there is no excuse for not preparing carefully and giving the children your best. Remember that you are not just teaching them facts. You need to teach them that learning is fun and that they are learning through play.
The Developing Child: Learning Through Play 8
Name ______________________________________________ Date ________________ Class __________________
(Continued on next page)
Cop
yrig
ht ©
by
the
McG
raw
-Hill
Com
pani
es. A
ll ri
ghts
rese
rved
.Learning Through Play
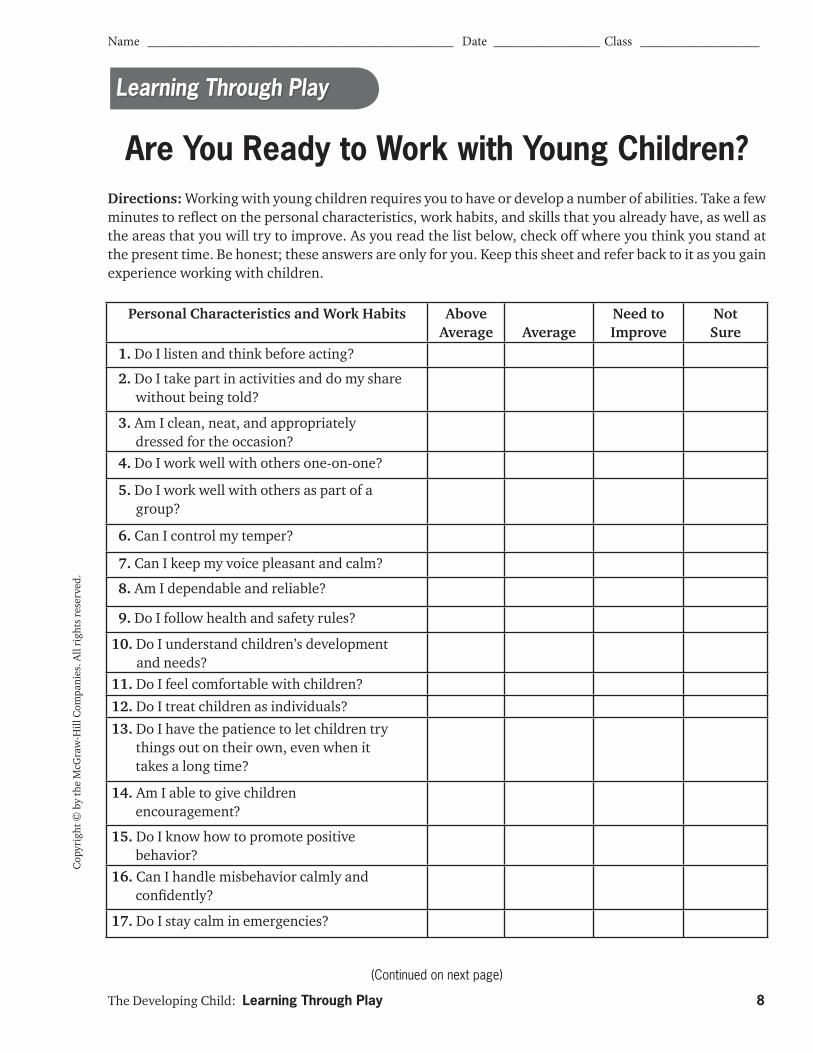
Directions: Working with young children requires you to have or develop a number of abilities. Take a few minutes to refl ect on the personal characteristics, work habits, and skills that you already have, as well as the areas that you will try to improve. As you read the list below, check off where you think you stand at the present time. Be honest; these answers are only for you. Keep this sheet and refer back to it as you gain experience working with children.
Personal Characteristics and Work Habits Above Average Average
Need toImprove
Not Sure
1. Do I listen and think before acting?
2. Do I take part in activities and do my share without being told?
3. Am I clean, neat, and appropriately dressed for the occasion?
4. Do I work well with others one-on-one?
5. Do I work well with others as part of a group?
6. Can I control my temper?
7. Can I keep my voice pleasant and calm?
8. Am I dependable and reliable?
9. Do I follow health and safety rules?
10. Do I understand children’s development and needs?
11. Do I feel comfortable with children?
12. Do I treat children as individuals?
13. Do I have the patience to let children try things out on their own, even when it takes a long time?
14. Am I able to give children encouragement?
15. Do I know how to promote positive behavior?
16. Can I handle misbehavior calmly and confi dently?
17. Do I stay calm in emergencies?
Are You Ready to Work with Young Children?
The Developing Child: Learning Through Play 9
Cop
yrig
ht ©
by
the
McG
raw
-Hill
Com
pani
es. A
ll ri
ghts
rese
rved
.Learning Through Play
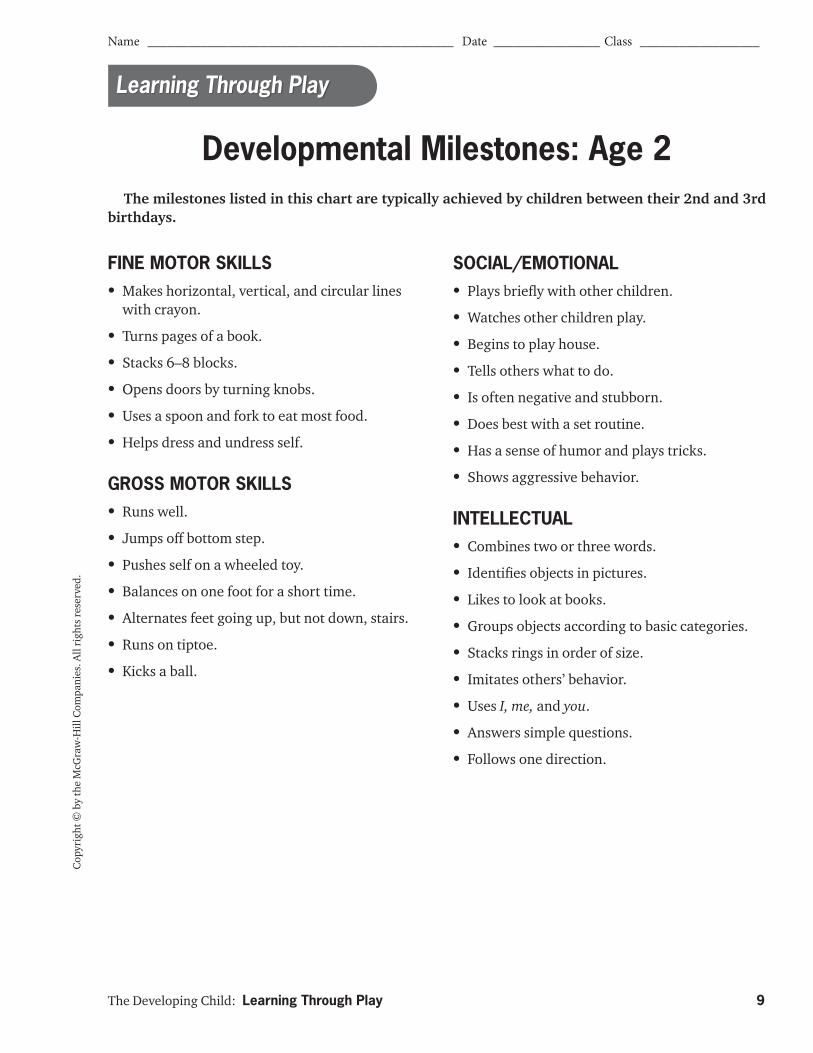
Developmental Milestones: Age 2
Name ______________________________________________ Date ________________ Class __________________
FINE MOTOR SKILLS• Makes horizontal, vertical, and circular lines
with crayon.
• Turns pages of a book.
• Stacks 6–8 blocks.
• Opens doors by turning knobs.
• Uses a spoon and fork to eat most food.
• Helps dress and undress self.
GROSS MOTOR SKILLS• Runs well.
• Jumps off bottom step.
• Pushes self on a wheeled toy.
• Balances on one foot for a short time.
• Alternates feet going up, but not down, stairs.
• Runs on tiptoe.
• Kicks a ball.
The milestones listed in this chart are typically achieved by children between their 2nd and 3rd birthdays.
SOCIAL/EMOTIONAL• Plays briefl y with other children.
• Watches other children play.
• Begins to play house.
• Tells others what to do.
• Is often negative and stubborn.
• Does best with a set routine.
• Has a sense of humor and plays tricks.
• Shows aggressive behavior.
INTELLECTUAL• Combines two or three words.
• Identifi es objects in pictures.
• Likes to look at books.
• Groups objects according to basic categories.
• Stacks rings in order of size.
• Imitates others’ behavior.
• Uses I, me, and you.
• Answers simple questions.
• Follows one direction.
Cop
yrig
ht ©
by
the
McG
raw
-Hill
Com
pani
es. A
ll ri
ghts
rese
rved
.
The Developing Child: Learning Through Play 10
Developmental Milestones: Age 3
Learning Through Play
The milestones listed in this chart are typically achieved by children between their 3rd and 4th birthdays.
FINE MOTOR SKILLS• Draws a person with three parts.
• Copies a vertical line and circle.
• Cuts with scissors.
• Stacks blocks 9–10 high.
• Strings large beads.
• Pours liquids.
• Feeds self with few spills.
• Unbuttons buttons and fastens large buttons.
• Undresses self but needs help dressing.
GROSS MOTOR SKILLS• Walks without watching feet.
• Learns to skip.
• Hops on one foot.
• Jumps up with two feet.
• Climbs stairs, alternating feet, while holding railing.
• Rides a tricycle.
• Catches a ball with arms straight.
SOCIAL/EMOTIONAL DEVELOPMENT• Mainly engages in parallel play, some coopera-
tive play.
• Tries to make friends.
• Does not like to share toys.
• Tries to solve disagreements.
• Takes turns.
• Can say things to deliberately hurt others.
• May have an imaginary friend.
• Plays house.
• Shows aff ection.
• Likes to help.
• Learns to say please and thank you.
• May have fears (monsters, the dark, etc.).
• Expresses some feelings verbally.
INTELLECTUAL DEVELOPMENT• Is learning pronouns.
• Learns many new words and concepts.
• Tells short stories.
• Understands in, out, on, over, and under.
• Understands time, including today and tomorrow.
• Asks why and how.
• Knows some colors.
• Can follow two related directions.
Name ______________________________________________ Date ________________ Class __________________
The Developing Child: Learning Through Play 11
Cop
yrig
ht ©
by
the
McG
raw
-Hill
Com
pani
es. A
ll ri
ghts
rese
rved
.Learning Through Play
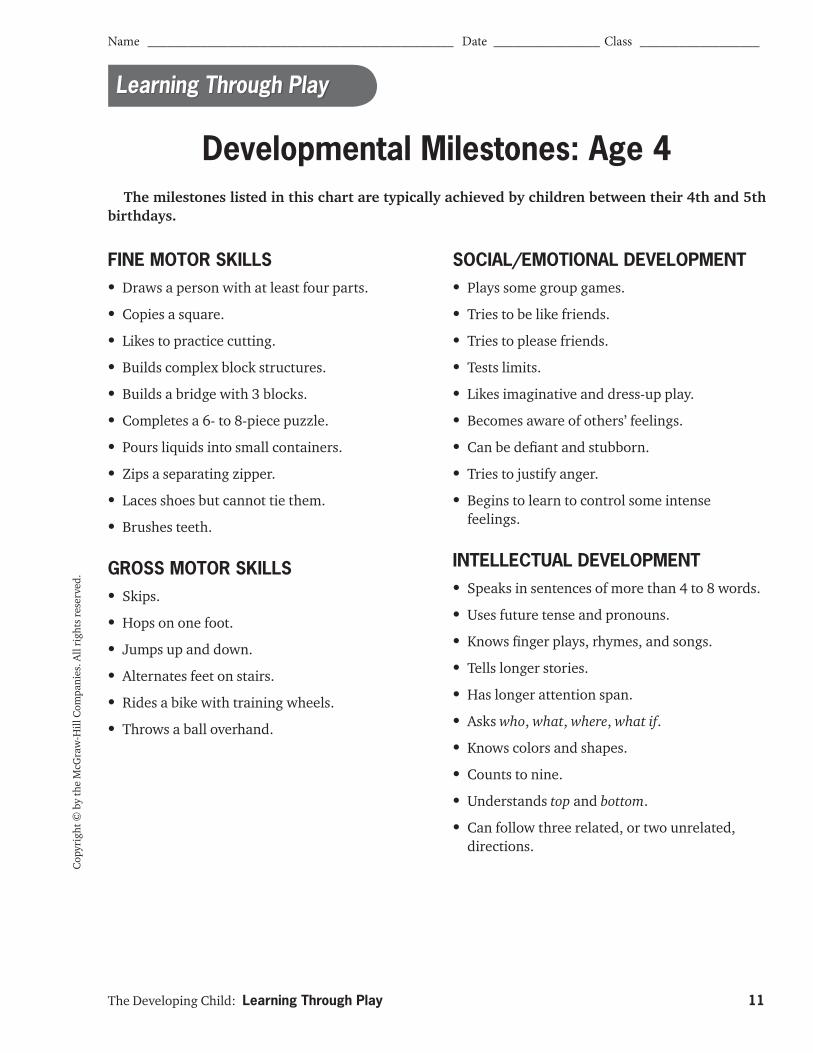
Developmental Milestones: Age 4The milestones listed in this chart are typically achieved by children between their 4th and 5th
birthdays.
Name ______________________________________________ Date ________________ Class __________________
FINE MOTOR SKILLS• Draws a person with at least four parts.
• Copies a square.
• Likes to practice cutting.
• Builds complex block structures.
• Builds a bridge with 3 blocks.
• Completes a 6- to 8-piece puzzle.
• Pours liquids into small containers.
• Zips a separating zipper.
• Laces shoes but cannot tie them.
• Brushes teeth.
GROSS MOTOR SKILLS• Skips.
• Hops on one foot.
• Jumps up and down.
• Alternates feet on stairs.
• Rides a bike with training wheels.
• Throws a ball overhand.
SOCIAL/EMOTIONAL DEVELOPMENT• Plays some group games.
• Tries to be like friends.
• Tries to please friends.
• Tests limits.
• Likes imaginative and dress-up play.
• Becomes aware of others’ feelings.
• Can be defi ant and stubborn.
• Tries to justify anger.
• Begins to learn to control some intense feelings.
INTELLECTUAL DEVELOPMENT• Speaks in sentences of more than 4 to 8 words.
• Uses future tense and pronouns.
• Knows fi nger plays, rhymes, and songs.
• Tells longer stories.
• Has longer attention span.
• Asks who, what, where, what if.
• Knows colors and shapes.
• Counts to nine.
• Understands top and bottom.
• Can follow three related, or two unrelated, directions.

Cop
yrig
ht ©
by
the
McG
raw
-Hill
Com
pani
es. A
ll ri
ghts
rese
rved
.
The Developing Child: Learning Through Play 12
Name ______________________________________________ Date ________________ Class __________________
Learning Through Play
The milestones listed in this chart are typically achieved by children between their 5th and 6th birthdays.
Developmental Milestones: Age 5
Name ______________________________________________ Date ________________ Class __________________
FINE MOTOR SKILLS• Draws a person with body, head, legs, and
arms.
• Copies a triangle.
• Cuts out pictures following their outlines.
• Builds three-dimensional block structures.
• Completes 10- to 15-piece puzzles.
• Likes to take things apart and put them back together.
• Prints some letters recognizably.
• Starts to use right or left hand consistently.
• Uses a fork and spoon to eat most foods.
• Dresses self quickly.
• Is learning to tie shoes.
GROSS MOTOR SKILLS• Runs well.
• Skips, alternating feet.
• Balances on one foot briefl y.
• Jumps over things.
• Walks backwards easily.
• Walks on tiptoe.
• Can coordinate movements to bike, swim.
• Throws and catches a small ball.
• Has high energy level.
SOCIAL/EMOTIONAL DEVELOPMENT• Plays cooperatively with other children.
• Prefers playing with children to adults.
• Takes turns.
• Follows rules.
• Has special friends or a best friend.
• May exclude others from group.
• Wants to be fi rst.
• Is willing to cooperate.
• Wants to make some of own decisions.
• Likes attention.
• Becomes competitive.
INTELLECTUAL DEVELOPMENT• Uses sentences of at least 6 to 8 words.
• Knows name and address.
• Asks meanings of words.
• Likes jokes and riddles.
• Believes thoughts cause events to happen.
• Makes up imaginative stories.
• Learns alphabet and many letter sounds.
• Has good long-term memory.
• Knows the words to songs.
• Likes to argue using because.
• Counts up to 20.
• Can sort by size.
• Understands above and below, before and after.
The Developing Child: Learning Through Play 13
Cop
yrig
ht ©
by
the
McG
raw
-Hill
Com
pani
es. A
ll ri
ghts
rese
rved
.Learning Through Play
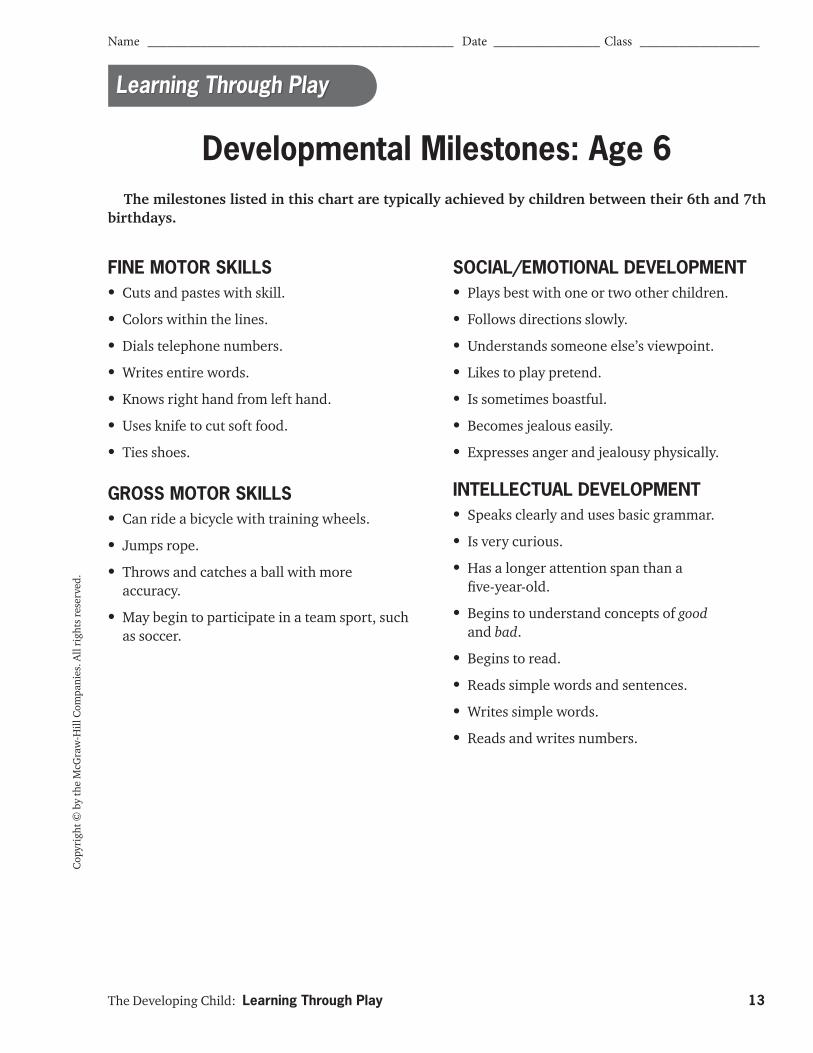
Developmental Milestones: Age 6The milestones listed in this chart are typically achieved by children between their 6th and 7th
birthdays.
Name ______________________________________________ Date ________________ Class __________________
FINE MOTOR SKILLS• Cuts and pastes with skill.
• Colors within the lines.
• Dials telephone numbers.
• Writes entire words.
• Knows right hand from left hand.
• Uses knife to cut soft food.
• Ties shoes.
GROSS MOTOR SKILLS• Can ride a bicycle with training wheels.
• Jumps rope.
• Throws and catches a ball with more accuracy.
• May begin to participate in a team sport, such as soccer.
SOCIAL/EMOTIONAL DEVELOPMENT• Plays best with one or two other children.
• Follows directions slowly.
• Understands someone else’s viewpoint.
• Likes to play pretend.
• Is sometimes boastful.
• Becomes jealous easily.
• Expresses anger and jealousy physically.
INTELLECTUAL DEVELOPMENT• Speaks clearly and uses basic grammar.
• Is very curious.
• Has a longer attention span than a fi ve-year-old.
• Begins to understand concepts of good and bad.
• Begins to read.
• Reads simple words and sentences.
• Writes simple words.
• Reads and writes numbers.
(Continued on next page)
Cop
yrig
ht ©
by
the
McG
raw
-Hill
Com
pani
es. A
ll ri
ghts
rese
rved
.
The Developing Child: Learning Through Play 14
Name ______________________________________________ Date ________________ Class __________________
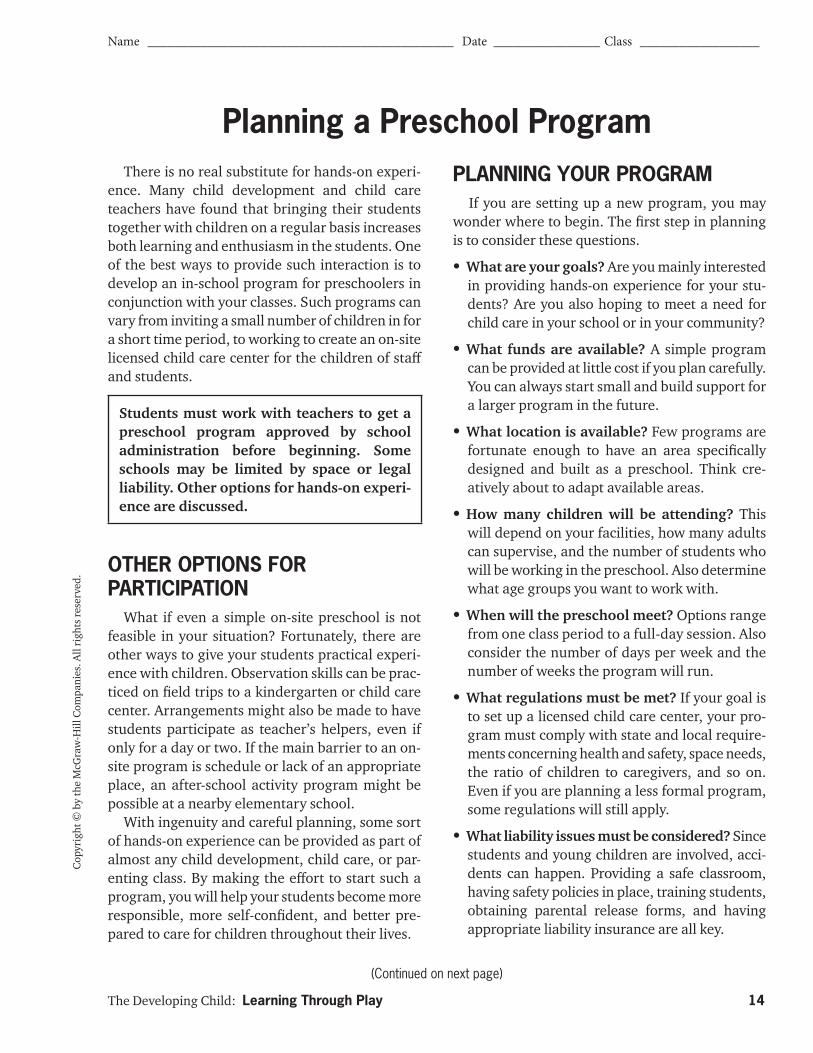
Planning a Preschool ProgramThere is no real substitute for hands-on experi-
ence. Many child development and child care teachers have found that bringing their students together with children on a regular basis increases both learning and enthusiasm in the students. One of the best ways to provide such interaction is to develop an in-school program for preschoolers in conjunction with your classes. Such programs can vary from inviting a small number of children in for a short time period, to working to create an on-site licensed child care center for the children of staff and students.
Students must work with teachers to get a preschool program approved by school administration before beginning. Some schools may be limited by space or legal liability. Other options for hands-on experi-ence are discussed.
OTHER OPTIONS FORPARTICIPATION
What if even a simple on-site preschool is not feasible in your situation? Fortunately, there are other ways to give your students practical experi-ence with children. Observation skills can be prac-ticed on fi eld trips to a kindergarten or child care center. Arrangements might also be made to have students participate as teacher’s helpers, even if only for a day or two. If the main barrier to an on-site program is schedule or lack of an appropriate place, an after-school activity program might be possible at a nearby elementary school.
With ingenuity and careful planning, some sort of hands-on experience can be provided as part of almost any child development, child care, or par-enting class. By making the eff ort to start such a program, you will help your students become more responsible, more self-confi dent, and better pre-pared to care for children throughout their lives.
PLANNING YOUR PROGRAMIf you are setting up a new program, you may
wonder where to begin. The fi rst step in planning is to consider these questions.
• What are your goals? Are you mainly interested in providing hands-on experience for your stu-dents? Are you also hoping to meet a need for child care in your school or in your community?
• What funds are available? A simple program can be provided at little cost if you plan carefully. You can always start small and build support for a larger program in the future.
• What location is available? Few programs are fortunate enough to have an area specifi cally designed and built as a preschool. Think cre-atively about to adapt available areas.
• How many children will be attending? This will depend on your facilities, how many adults can supervise, and the number of students who will be working in the preschool. Also determine what age groups you want to work with.
• When will the preschool meet? Options range from one class period to a full-day session. Also consider the number of days per week and the number of weeks the program will run.
• What regulations must be met? If your goal is to set up a licensed child care center, your pro-gram must comply with state and local require-ments concerning health and safety, space needs, the ratio of children to caregivers, and so on. Even if you are planning a less formal program, some regulations will still apply.
• What liability issues must be considered? Since students and young children are involved, acci-dents can happen. Providing a safe classroom, having safety policies in place, training students, obtaining parental release forms, and having appropriate liability insurance are all key.
(Continued on next page)
Cop
yrig
ht ©
by
the
McG
raw
-Hill
Com
pani
es. A
ll ri
ghts
rese
rved
.
The Developing Child: Learning Through Play 15
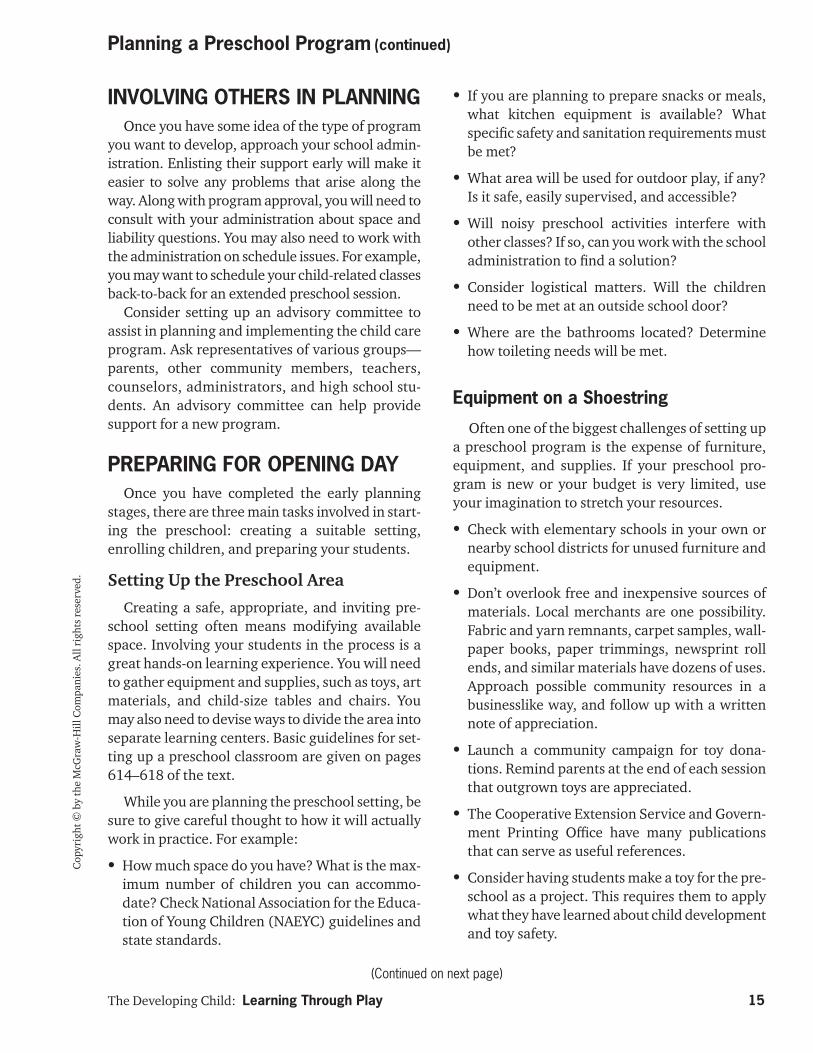
INVOLVING OTHERS IN PLANNINGOnce you have some idea of the type of program
you want to develop, approach your school admin-istration. Enlisting their support early will make it easier to solve any problems that arise along the way. Along with program approval, you will need to consult with your administration about space and liability questions. You may also need to work with the administration on schedule issues. For example, you may want to schedule your child-related classes back-to-back for an extended preschool session.
Consider setting up an advisory committee to assist in planning and implementing the child care program. Ask representatives of various groups—parents, other community members, teachers, counselors, administrators, and high school stu-dents. An advisory committee can help provide support for a new program.
PREPARING FOR OPENING DAYOnce you have completed the early planning
stages, there are three main tasks involved in start-ing the preschool: creating a suitable setting, enrolling children, and preparing your students.
Setting Up the Preschool AreaCreating a safe, appropriate, and inviting pre-
school setting often means modifying available space. Involving your students in the process is a great hands-on learning experience. You will need to gather equipment and supplies, such as toys, art materials, and child-size tables and chairs. You may also need to devise ways to divide the area into separate learning centers. Basic guidelines for set-ting up a preschool classroom are given on pages 614–618 of the text.
While you are planning the preschool setting, be sure to give careful thought to how it will actually work in practice. For example:
• How much space do you have? What is the max-imum number of children you can accommo-date? Check National Association for the Educa-tion of Young Children (NAEYC) guidelines and state standards.
• If you are planning to prepare snacks or meals, what kitchen equipment is available? What specifi c safety and sanitation requirements must be met?
• What area will be used for outdoor play, if any? Is it safe, easily supervised, and accessible?
• Will noisy preschool activities interfere with other classes? If so, can you work with the school administration to fi nd a solution?
• Consider logistical matters. Will the children need to be met at an outside school door?
• Where are the bathrooms located? Determine how toileting needs will be met.
Equipment on a Shoestring
Often one of the biggest challenges of setting up a preschool program is the expense of furniture, equipment, and supplies. If your preschool pro-gram is new or your budget is very limited, use your imagination to stretch your resources.
• Check with elementary schools in your own or nearby school districts for unused furniture and equipment.
• Don’t overlook free and inexpensive sources of materials. Local merchants are one possibility. Fabric and yarn remnants, carpet samples, wall-paper books, paper trimmings, newsprint roll ends, and similar materials have dozens of uses. Approach possible community resources in a businesslike way, and follow up with a written note of appreciation.
• Launch a community campaign for toy dona-tions. Remind parents at the end of each session that outgrown toys are appreciated.
• The Cooperative Extension Service and Govern-ment Printing Offi ce have many publications that can serve as useful references.
• Consider having students make a toy for the pre-school as a project. This requires them to apply what they have learned about child development and toy safety.
Planning a Preschool Program (continued)
(Continued on next page)
Cop
yrig
ht ©
by
the
McG
raw
-Hill
Com
pani
es. A
ll ri
ghts
rese
rved
.
The Developing Child: Learning Through Play 16
Planning a Preschool Program (continued)
Using TeamworkInvolving students in preparations for the opening of the preschool session helps generate enthusiasm and develop new skills. Possibilities include:
• Helping plan the arrangement of the preschool area and setting up learning centers.
• Checking the preschool area for safety hazards. Students can use the “Safety Checklist” (on pages 29–30 of this book). At the same time, discuss how to prevent and handle specifi c emergencies that might arise during preschool sessions. (For example, what procedures should be followed if the fi re alarm rings?)
• Making supplies, such as homemade play dough.
• Preparing name tags for children. (Simple con-struction paper shapes can be encased in clear, adhesive-backed plastic and attached with a safety pin.)
Enrolling ChildrenOnce you and your students begin to spread the
word about your program, you may fi nd it easy to recruit children. However, programs that are open for limited hours may pose diffi culties for working parents. Posting signs or distributing brochures in public places are simple but eff ective advertising. An article in a local newspaper is also a good way to generate publicity for a fl edgling program. At the end of each session, ask parents of enrolled children whether they would be interested in par-ticipating again. Keep their names and addresses on fi le for the next session.
Be sure to give parents complete information about the days and hours that the preschool will meet and the types of activities that children will participate in. Parents should also understand that a primary purpose of the preschool is to provide your students with experience that will enhance their understanding of child growth and develop-ment. State any fees clearly at the outset.
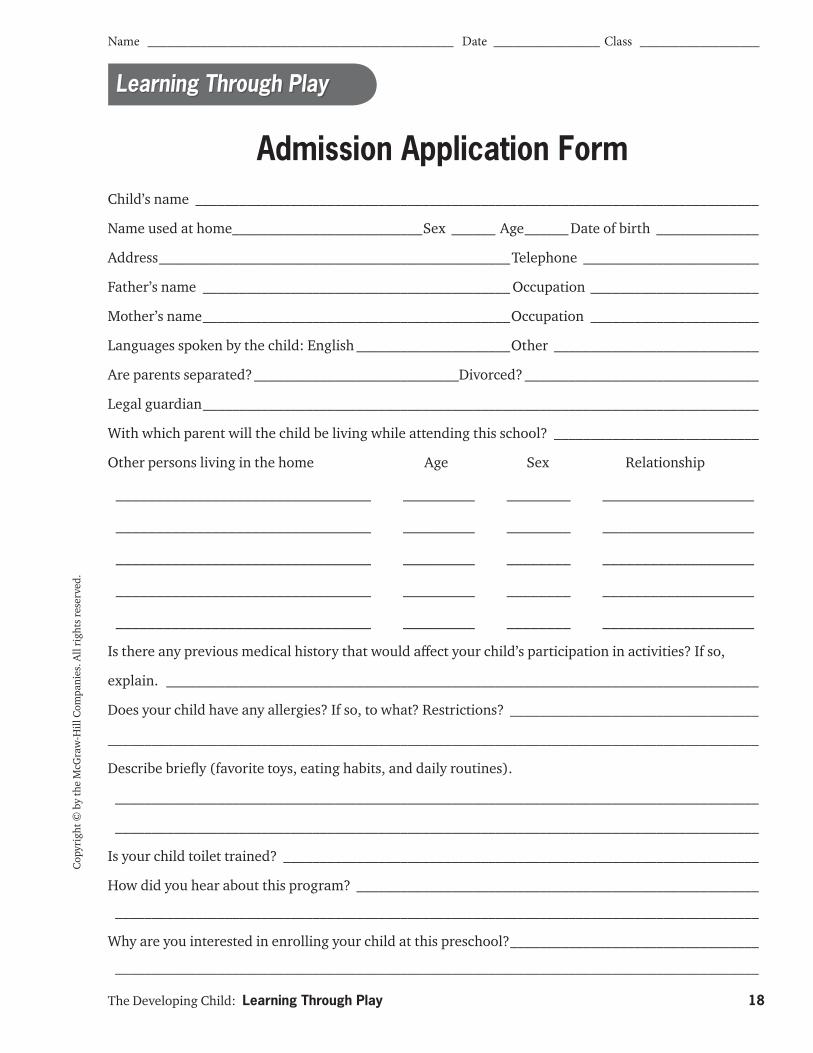
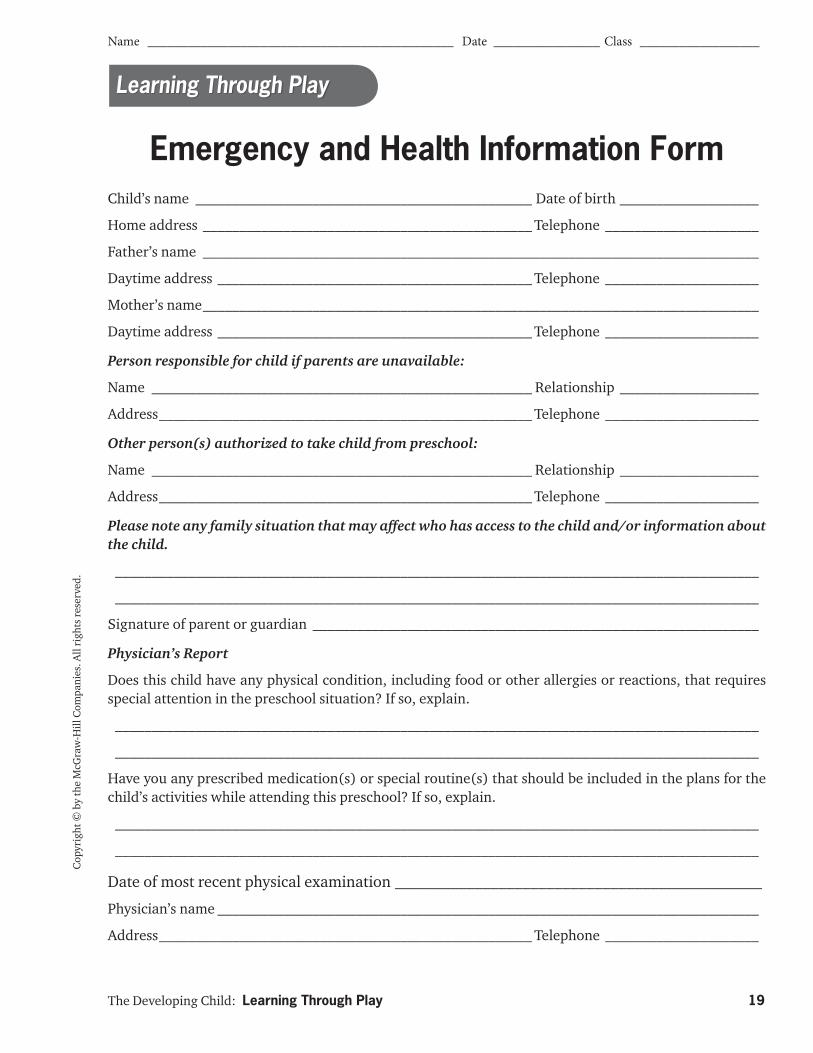
Be ready to give parents who are interested in the preschool an application form and a health and emergency information form, plus written infor-mation about the program. (Sample forms are
included in this section.) Follow up with a letter of acceptance that reminds parents what days and times the preschool will be in session.
Preparing Your StudentsAs part of your planning, you will need to
develop a structure for your students’ participation in the preschool. One eff ective way to organize the program is to divide your students into three groups. One group is assigned to work with the preschool children on a certain day or week. The second group observes and provides extra help with activities, if needed. The third group is busy planning and preparing for their turn to partici-pate. The three groups rotate tasks the following preschool period.
Developing a workable organization is essential to the success of the preschool. Equally important, however, is clearly communicating that organiza-tional plan to the students. They must understand their roles and responsibilities and how to carry them out.
Well before their preschool experience begins, use handouts and discussion to give your students basic information about the program and their part in it. For example:
• Groups and group responsibilities. If you are dividing the class, hand out a list of who is in each group and a schedule showing each group’s daily assignment. Explain the specifi c responsi-bilities associated with each assignment. (Is the group responsible for meeting children at the door? Requesting and gathering supplies? Clean-ing up?) Discuss how to divide tasks within each group. You may want to appoint a “director” and “assistant director” for each group, rotating these jobs throughout the session.
• Classroom routines. Establish routines for the children to follow, such as hanging up coats in a certain area, putting on name tags, washing hands before the snack, and so on.
• Professionalism. Make sure students under-stand professional standards of behavior. Use specifi c examples or play out situations.
The Developing Child: Learning Through Play 17
Cop
yrig
ht ©
by
the
McG
raw
-Hill
Com
pani
es. A
ll ri
ghts
rese
rved
.
• Planning activities. Give guidelines for plan-ning children’s learning activities. For example, you may want to specify that activities should emphasize a certain area of study each week (such as gross motor skills). Provide resources for researching activity ideas.
• Approving activity plans. Set up a procedure for approval of each group’s preschool activity plans prior to use.
• Additional assignments. Explain any special assignments, such as writing a case study, that will be part of the preschool experience.
• Grading policies. Explain and hand out infor-mation what students’ grades will be based upon.
Provide plenty of opportunities for students to practice skills, rehearse situations, and discuss problems and questions. Examples of appropriate activities appear on pages 31–134 of this booklet.
Before the fi rst day of preschool participation, review guidelines and discuss what to expect. Tak-ing the time for these preparations will help stu-dents feel more skilled and confi dent.
EVALUATING THE PROGRAMEvaluation is an important part of a successful
program. Have students evaluate themselves after each participation experience. How do they feel about the experience? What problems did they encounter, and what can they do better next time? Send an evaluation questionnaire to parents near the end of the preschool session. This can provide valuable information about the children’s reaction to preschool, as well as suggestions for improving the program.
Planning a Preschool Program (continued)
The Developing Child: Learning Through Play 18
Name ______________________________________________ Date ________________ Class __________________
Cop
yrig
ht ©
by
the
McG
raw
-Hill
Com
pani
es. A
ll ri
ghts
rese
rved
.
LAdmission Application Form
Learning Through Play
Child’s name _____________________________________________________________________________
Name used at home __________________________Sex ______ Age ______ Date of birth ______________
Address ________________________________________________Telephone ________________________
Father’s name __________________________________________ Occupation _______________________
Mother’s name __________________________________________Occupation _______________________
Languages spoken by the child: English _____________________Other ____________________________
Are parents separated? ____________________________Divorced? ________________________________
Legal guardian ____________________________________________________________________________
With which parent will the child be living while attending this school? ____________________________
Other persons living in the home Age Sex Relationship
________________________________ _________ ________ ___________________
________________________________ _________ ________ ___________________
________________________________ _________ ________ ___________________
________________________________ _________ ________ ___________________
________________________________ _________ ________ ___________________
Is there any previous medical history that would aff ect your child’s participation in activities? If so,
explain. _________________________________________________________________________________
Does your child have any allergies? If so, to what? Restrictions? __________________________________
_________________________________________________________________________________________
Describe briefl y (favorite toys, eating habits, and daily routines).
________________________________________________________________________________________
________________________________________________________________________________________
Is your child toilet trained? _________________________________________________________________
How did you hear about this program? _______________________________________________________
________________________________________________________________________________________
Why are you interested in enrolling your child at this preschool? __________________________________
________________________________________________________________________________________
The Developing Child: Learning Through Play 19
Name ______________________________________________ Date ________________ Class __________________
Cop
yrig
ht ©
by
the
McG
raw
-Hill
Com
pani
es. A
ll ri
ghts
rese
rved
.Learning Through Play
Child’s name ______________________________________________ Date of birth ___________________
Home address _____________________________________________ Telephone _____________________
Father’s name ____________________________________________________________________________
Daytime address ___________________________________________ Telephone _____________________
Mother’s name ____________________________________________________________________________
Daytime address ___________________________________________ Telephone _____________________
Person responsible for child if parents are unavailable:
Name ____________________________________________________ Relationship ___________________
Address ___________________________________________________ Telephone _____________________
Other person(s) authorized to take child from preschool:
Name ____________________________________________________ Relationship ___________________
Address ___________________________________________________ Telephone _____________________
Please note any family situation that may aff ect who has access to the child and/or information about the child.
________________________________________________________________________________________
________________________________________________________________________________________
Signature of parent or guardian _____________________________________________________________
Physician’s Report
Does this child have any physical condition, including food or other allergies or reactions, that requires special attention in the preschool situation? If so, explain.
________________________________________________________________________________________
________________________________________________________________________________________
Have you any prescribed medication(s) or special routine(s) that should be included in the plans for the child’s activities while attending this preschool? If so, explain.
________________________________________________________________________________________
________________________________________________________________________________________
Date of most recent physical examination ______________________________________________
Physician’s name __________________________________________________________________________
Address ___________________________________________________ Telephone _____________________
Emergency and Health Information Form
The Developing Child: Learning Through Play 20
Name ______________________________________________ Date ________________ Class __________________
(Continued on next page)
Cop
yrig
ht ©
by
the
McG
raw
-Hill
Com
pani
es. A
ll ri
ghts
rese
rved
.Learning Through Play
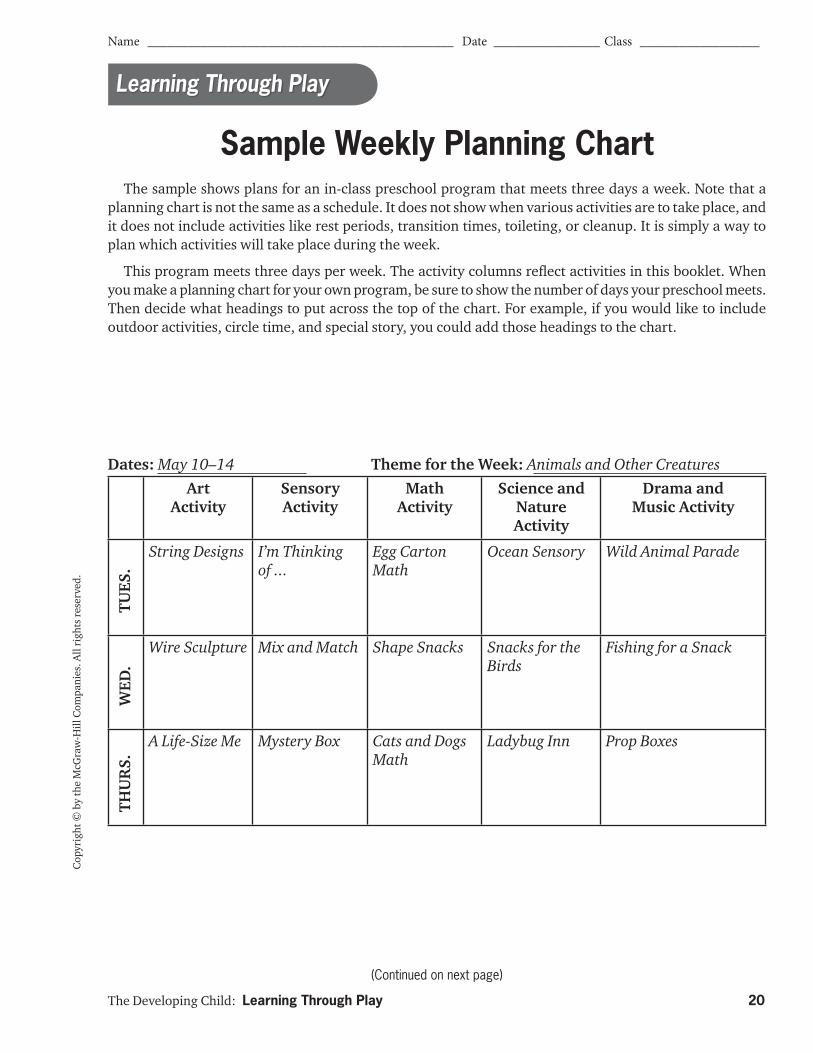
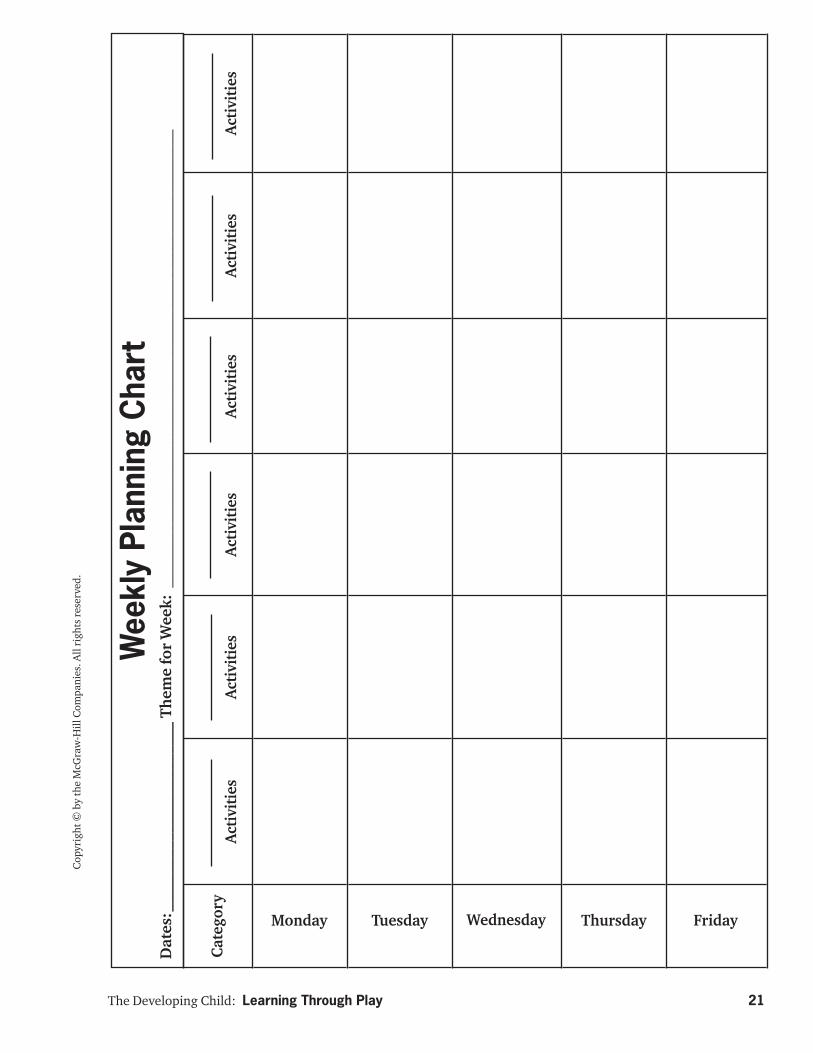
The sample shows plans for an in-class preschool program that meets three days a week. Note that a planning chart is not the same as a schedule. It does not show when various activities are to take place, and it does not include activities like rest periods, transition times, toileting, or cleanup. It is simply a way to plan which activities will take place during the week.
This program meets three days per week. The activity columns refl ect activities in this booklet. When you make a planning chart for your own program, be sure to show the number of days your preschool meets. Then decide what headings to put across the top of the chart. For example, if you would like to include outdoor activities, circle time, and special story, you could add those headings to the chart.
Sample Weekly Planning Chart
ArtActivity
SensoryActivity
MathActivity
Science andNature Activity
Drama andMusic Activity
String Designs I’m Thinking of ...
Egg Carton Math
Ocean Sensory Wild Animal Parade
Wire Sculpture Mix and Match Shape Snacks Snacks for the Birds
Fishing for a Snack
A Life-Size Me Mystery Box Cats and Dogs Math
Ladybug Inn Prop Boxes
TUES
.W
ED.
THU
RS.
Dates: May 10–14 Theme for the Week: Animals and Other Creatures
The Developing Child: Learning Through Play 21
Cop
yrig
ht ©
by
the
McG
raw
-Hill
Com
pani
es. A
ll ri
ghts
rese
rved
.
Cate
gory
Acti
viti
esAc
tivi
ties
Acti
viti
esAc
tivi
ties
Acti
viti
esAc
tivi
ties
Wee
kly
Plan
ning
Cha
rtD
ates
: ___
____
____
____
____
____
_Th
eme
for
Wee
k: _
____
____
____
____
____
____
____
____
____
____
____
____
____
____
_
Monday Tuesday Wednesday Thursday Friday
The Developing Child: Learning Through Play 22
Cop
yrig
ht ©
by
the
McG
raw
-Hill
Com
pani
es. A
ll ri
ghts
rese
rved
.
Teaching Group ____________________________________ Date _______________ Class _________________
Sample Activity Planning SheetTitle of Activity: _______________________________________________________
Size of Group: ______________________ Location: ____________________________
Developmental Goals:
Materials and Equipment Needed:
Preparation:
Group 2 March 23 5th Period
Ocean Sensory
1. Name ocean creatures and plants.
Area: Science concepts
2. Feel the water and ocean items.
Area: Exploring the senses
1. Sensory table or large plastic tub 5. Sand and shells
2. Water 6. Small plastic sea creatures, fi sh, and plants
3. Blue food coloring 7. Ocean pictures
4. Green shredded plastic grass 8. Towels for clean up
1. Gather the equipment and materials. Fill the sensory table or large white plastic tub
with water. Add a few drops of blue food coloring.
2. Find pictures of the ocean environment and prepare for display.
3. Possible problems and solutions:
• Watch children carefully to minimize splashing.
4. Additional questions and information:
• Talk about why we can’t drink the water in the ocean.
• Relate to fi sh tank in room.
3–4 children Sensory Table Area
(Continued on next page)
Cop
yrig
ht ©
by
the
McG
raw
-Hill
Com
pani
es. A
ll ri
ghts
rese
rved
.
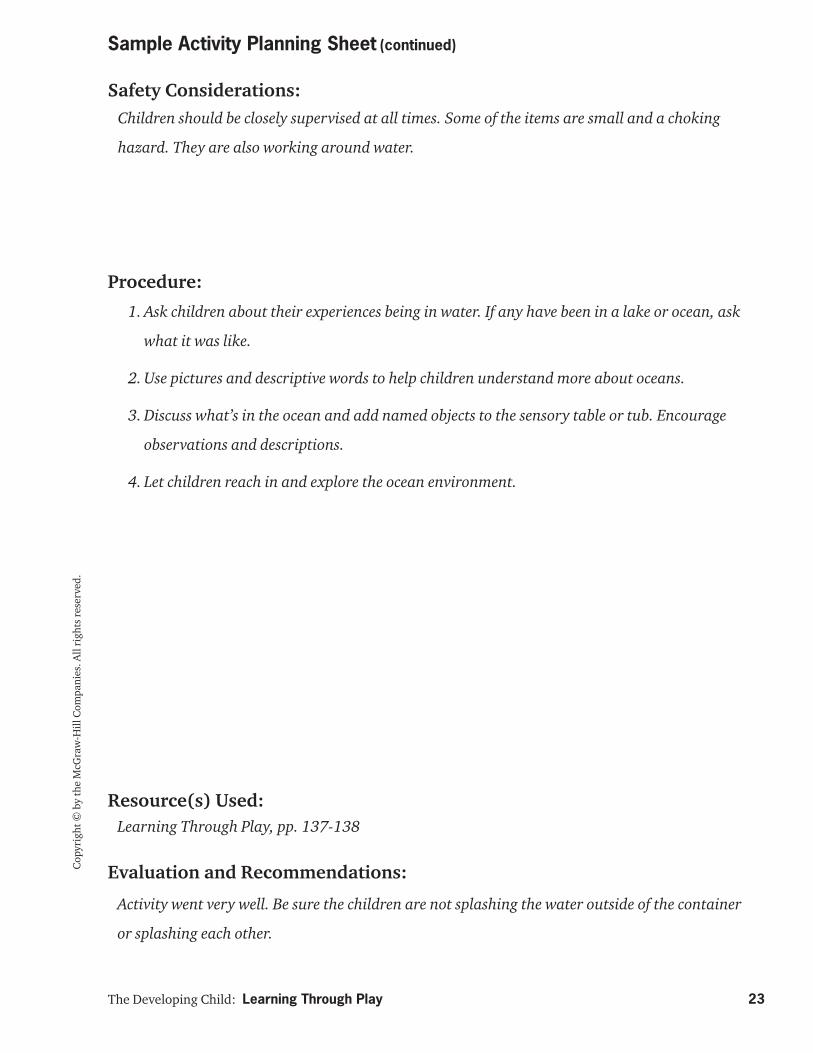
The Developing Child: Learning Through Play 23
Safety Considerations:
Procedure:
Resource(s) Used:
Evaluation and Recommendations:
Sample Activity Planning Sheet (continued)
Children should be closely supervised at all times. Some of the items are small and a choking
hazard. They are also working around water.
1. Ask children about their experiences being in water. If any have been in a lake or ocean, ask
what it was like.
2. Use pictures and descriptive words to help children understand more about oceans.
3. Discuss what’s in the ocean and add named objects to the sensory table or tub. Encourage
observations and descriptions.
4. Let children reach in and explore the ocean environment.
Activity went very well. Be sure the children are not splashing the water outside of the container
or splashing each other.
Learning Through Play, pp. 137-138
The Developing Child: Learning Through Play 24
Cop
yrig
ht ©
by
the
McG
raw
-Hill
Com
pani
es. A
ll ri
ghts
rese
rved
.
Teaching Group ______________________________________ Date ________________ Class __________________
Activity Planning SheetTitle of Activity: _______________________________________________________
Size of Group: ______________________ Location: ____________________________
Developmental Goals:
Materials and Equipment Needed:
Preparation:
(Continued on next page)
Cop
yrig
ht ©
by
the
McG
raw
-Hill
Com
pani
es. A
ll ri
ghts
rese
rved
.
The Developing Child: Learning Through Play 25
Safety Considerations:
Procedure:
Resource(s) Used:
Evaluation and Recommendations:
Activity Planning Sheet (continued)
(Continued on next page)
Cop
yrig
ht ©
by
the
McG
raw
-Hill
Com
pani
es. A
ll ri
ghts
rese
rved
.
The Developing Child: Learning Through Play 26
Name ______________________________________________ Date ________________ Class __________________
Learning Through Play
Here are some suggestions that will help you encourage good behavior. Try them out when you are with young children.
• Be a positive role model. Emphasize the posi-tive, not the negative. Smile and try to fi nd some-thing special to say about each child.
• Use positive language. Avoid “don’t” language. Say, “Sam, throw the ball over here” instead of, “Don’t hit the wall with your ball, Sam.”
• Keep instructions short and simple. Too many words can make your message confusing to young children.
• Off er choices when possible. To a child who likes fruit but does not like to eat breakfast, you might say, “Do you want bananas on your cereal this morning or strawberries?”
• Give choices only when you are willing to accept the child’s decision. If you want the child to wear a hat, do not ask, “Do you want to put on your hat?”
• Set the mood for the group with your voice. If you speak in a quiet, confi dent, assured manner, children will be more relaxed and trusting.
• When speaking to a child, move closer. Get down to the child’s eye level. Use facial expres-sions to help get your message across. Do not shout across the room.
• Encourage independence.When playing with and helping children, give them the minimum help needed. Allow enough time for children to try things on their own.
• Take advantage of a child’s readiness. For instance, if a child is trying to button her coat, encourage her. If another child wants to help “clean,” let him. If ignored when they are inter-ested, children may lose interest when you think the timing is right.
• Watch for situations that may lead to unac-ceptable behavior. For example, children may need help in learning how to take turns and cooperate. You might set a timer for each child’s use of a toy that several children want to use. This helps prevent problem behavior before it starts.
• Know how to handle extreme anger. You may need to physically hold a child who is out of control until he or she begins to calm down. You might use a time-out chair to give children a chance to gain control of their emotions and learn self-control. Stay calm yourself.
• Make desirable tasks interesting and fun. You might encourage cleanup by saying, “Let’s pre-tend the animals are going home now so that we can get ready for our lunch.” Children also enjoy singing as they work.
• Compliment children on their own perfor-mance rather than comparing them with oth-ers. Say things like, “Alexa, I know you can toss the ball in the barrel.” Avoid saying, “Alexa, I bet you can beat Miori by getting your ball in the barrel fi rst.”
• Help children understand what went wrong to promote more acceptable behavior. Avoid using negative labels such as “bad.”
• Success gets results. Find a successful behavior, and praise the child for it. You might say, “I really like the way you are sharing the puzzle today, Emily.”
• Be fl exible, and keep your sense of humor. With children, the unexpected happens all the time. Learn to go with the fl ow and come up with creative solutions.
Promoting Positive Behavior
The Developing Child: Learning Through Play 27
Name ______________________________________________ Date ________________ Class __________________
(Continued on next page)
Cop
yrig
ht ©
by
the
McG
raw
-Hill
Com
pani
es. A
ll ri
ghts
rese
rved
.
Safety and Health ConsiderationsSafety is one of the most important aspects of
any program that involves children. Remember that children of all ages, but especially young chil-dren, have not yet learned how to keep themselves safe. They act upon impulses and are just begin-ning to be able to think ahead to the consequences that their actions may bring. It is the responsibility of the person in charge to think ahead and be pre-pared for any situation. The following safety con-siderations are appropriate for anyone working with young children.
PREVENTIONThe key to keeping children safe is prevention.
By planning ahead and anticipating any dangers that might arise, it is possible to prevent many injuries and dangerous situations from occurring. When children are working with small objects, supervise them very closely to keep them from putting the objects in their mouths. If some of the children are known for doing just that, you may simply need to look for a diff erent activity that does not involve small pieces. If a child in your care should start to choke, be prepared by knowing the appropriate emergency procedure.
Safe Surroundings:
• Safe equipment: Look at the children’s environ-ment with a critical eye. Is there anything that could injure a climbing child? For example, if a shelving unit holds a television and other heavy equipment, it may be necessary to secure it to the wall. If there are freestanding room dividers, make sure it is not possible for them to tip when bumped or climbed.
• Paint hazards. Investigate whether there is lead-based paint in the area. Make certain that paint of any type is not fl aking.
• Electrical hazards. Outlets should be covered. Cords should not be placed where children can trip over them. Appliances, fans, and heaters should be out of children’s reach.
• Visibility. All areas of the room should be clearly visible to the teachers or others in charge.
Safe Activities:
• Safety comes fi rst. It is important to plan cre-ative activities that children will enjoy, but your fi rst concern must always be safety. If an activity includes any risks, you should fi nd a diff erent activity or plan to have an assistant on hand to help supervise.
• Set limits. If, for example, a child wants to bring his dog or cat to show the other children, limit the time the pet will be there. If you allow chil-dren to swim in a shallow pool, limit their time in the sun and water.
• Don’t force participation. A child may not want to put his or her hands in paint in order to fi nger paint, or be blindfolded to sample “mystery” foods. If a child objects to participating, respect his or her wishes. Do not allow others to make fun of the child.
Safety Rules
Most children like to know what is expected of them and do not mind following rules. You will need one set of rules for indoor activities and another set for outside. Common rules for outdoor activities might include:
• Move away from the bottom of the slide when you have taken your turn.
• Do not walk in front of, or close behind, the swings.
Learning Through Play
The Developing Child: Learning Through Play 28
Cop
yrig
ht ©
by
the
McG
raw
-Hill
Com
pani
es. A
ll ri
ghts
rese
rved
.
Safety and Health Considerations (continued)
• Jumping from the jungle gym is not allowed.
• Wear a helmet when riding a bicycle.
• Do not go near the parking lot or street.
• Everybody stays together when taking a walk or going on a fi eld trip.
HEALTH CONSIDERATIONS• Food allergies or sensitivities. You may be in
charge of a child who is allergic to peanuts or sensitive to milk products. If so, it would be nec-essary to avoid treats with peanut butter or cheese for those children. Be aware of any other food allergies or sensitivities, as well. Make sure that all helpers are informed of them too. Learn and understand the treatment that must be administered in the case of an allergic reaction. Some children may require immediate medical attention.
• Other allergies. You should also know if a child is allergic to bee stings or other substances, such as dust or pet dander. When one child is allergic to bee stings, for example, you may want to plan a nature walk for a time when there are relatively few bees, walk beside the child, and carry the child’s antidote.
• Diabetes. Students who have been diagnosed with diabetes require monitoring by the teacher. Often it is a matter of asking “Do you feel low?” and then providing an appropriate snack.
• Other diseases and disabilities. When children have health conditions, their parents may have printed information or know of Web sites that can help your understanding of the health issue. Learning about the disease can help increase your confi dence in caring for the child.
EMERGENCY PROCEDURESEquipment that can help keep children safe
includes a smoke detector, weather radio, and wireless phone. Emergency training is just as important, however. Being trained in cardiopulmo-nary resuscitation (CPR) and the correct procedure for aiding a choking victim is essential.
Staff Preparedness
If you are working in a child care or preschool setting, make sure you know the established emer-gency procedures. Keep a copy of the class list near the door so you can take it with you if an emer-gency strikes and you must leave the building. Stay calm and encourage children to remain calm and to listen to your directions. Identify a meeting place that is away from the building (such as a certain tree or fence) so the children will know where to come together if you are separated as you exit.
Another important safety policy involves pick-up of the children after school. Make sure you know who is allowed to pick up each child. Do not release the child to anyone else.
The Developing Child: Learning Through Play 29
Name ______________________________________________ Date ________________ Class __________________
(Continued on next page)
Cop
yrig
ht ©
by
the
McG
raw
-Hill
Com
pani
es. A
ll ri
ghts
rese
rved
.
Safety Checklist for PreschoolsDirections: Before an area is used for children’s activities, work with a partner to inspect the indoor and outdoor areas that will be used. Check off the items in either the Ready Now or Needs Attention column. If an item needs attention, comment on what needs to be done to correct the condition.
ReadyNow
Needs Attention(Explain)
General
1. Rugs are secure to prevent tripping.
2. Windows and screens are safely secured.
3. Door latches and locks are childproof.
4. Toilet areas can be easily supervised by adults.
5. Electrical outlets are covered.
6. Hot water faucets for use by children are easy to turn on and off , and do not leak. Water is warm, not hot enough to burn children.
7. Electrical appliances are out of reach.
8. Handles and knobs for ranges, cooktops, and microwave ovens are out of children’s reach.
9. Knives and all other sharp instruments are out of children’s reach.
10. Kitchen and cleaning supplies (soap, cleanser, detergent) are out of reach.
11. First-aid equipment is available and up-to-date.
12. There is a fi re extinguisher and it has been inspected recently.
13. The drinking fountain is convenient and clean. (If steps are used by children, they are wide, secure, and strong.)
Learning Through Play
The Developing Child: Learning Through Play 30
Cop
yrig
ht ©
by
the
McG
raw
-Hill
Com
pani
es. A
ll ri
ghts
rese
rved
.
ReadyNow
Needs Attention(Explain)
Furnishings 1. Child-size; easy for child to use.
2. Clean, and in good condition.
3. Nontoxic paint used; no chipping.
4. Sound, sturdy, nontipping.
5. Rounded edges.
Toys and Equipment 1. Storage for blocks, housekeeping equip-
ment, etc., is easy for children to reach.
2. Storage areas are away from traffi c paths.
3. Toys are in safe working condition.
4. Toys are easy for child to operate.
5. Paint (if any) is nontoxic. Paint and other supplies are stored safely.
6. There are no sharp points or edges on toys.
Outdoors 1. Playground equipment has protective sur-
faces below to cushion falls. 2. Equipment is sturdy and stable.
3. Surfaces are free from hazardous objects. (There are no stones on blacktop or cement, no stumps or branches in grassy areas.)
4. Area is enclosed.
5. All areas are easy to supervise.
6. The arrangement of activity areas ensures maximum safety.
7. The lawn is free from holes in the ground.
8. Play sand is covered when not in use.
9. The water area drains easily.
Safety Checklist for Preschools (continued)
31
SENSORY ACTIVITIES
1 Where Does It Belong? Ages 3–4 ..................................................................... 32
2 Mix and Match Ages 3–4 ................................................................................. 33
3 Who’s That? Ages 3–6 ..................................................................................... 34
4 Textured Shape Collage Ages 3–5 ................................................................... 35
5 Mystery Box Ages 3–5 ..................................................................................... 37
6 Marching Band Ages 3–6 ................................................................................. 38
7 Smelly Jars Ages 3–6 ....................................................................................... 39
8 What’s Missing? Ages 3–6 ............................................................................... 41
9 Listen Closely Ages 3–6 ................................................................................... 43
10 Taste Test Ages 3–6.......................................................................................... 44
11 I’m Thinking of … Ages 3–6 ............................................................................ 45
12 Popcorn Predictions Ages 3–6 ......................................................................... 47
13 Texture Rubbings Ages 4–6 ............................................................................. 49
The Developing Child: Learning Through Play 32
Name ______________________________________________ Date ________________ Class __________________
Cop
yrig
ht ©
by
the
McG
raw
-Hill
Com
pani
es. A
ll ri
ghts
rese
rved
.Sensory Activity 1 Ages 3–4
MATERIALS
• Magazines and catalogs• Adult-size scissors• Magnetic sheets, adhesive-
backed (available at craft stores)
• Large metal cookie sheets, two
PREPARATION:1. From catalogs or magazines, cut out a picture of the interior of a
house, plus an outdoor scene. Also cut out pictures of objects that clearly would be used inside or outside (a computer, patio chair, lawn mower, birds, an outdoor grill, a swimming toy, refrigera-tor, vacuum cleaner, bed). Avoid objects that could be used either inside or outside.
2. Attach the pictures to the magnetic sheets and cut them out. Put the picture of the house on one cookie sheet and the picture of the outdoor scene on the other. Prop the “inside and outside” pictures where the children can reach them—on chairs, an easel, or the chalk tray of a chalkboard. Arrange the other pictures on a table next to the two cookie sheet displays.
3. Think through the steps of the activity and try to identify any problems that might arise. Figure out ahead of time how to prevent or handle them. For example, what would you do if the other children laughed and told a child that his or her choice was wrong?
4. Plan additional questions that you could ask or information you could give the children related to this activity. For example, ask: “What are some things in your bedroom that you wouldn’t take outside?” “What are some things outside that you would not bring inside?”
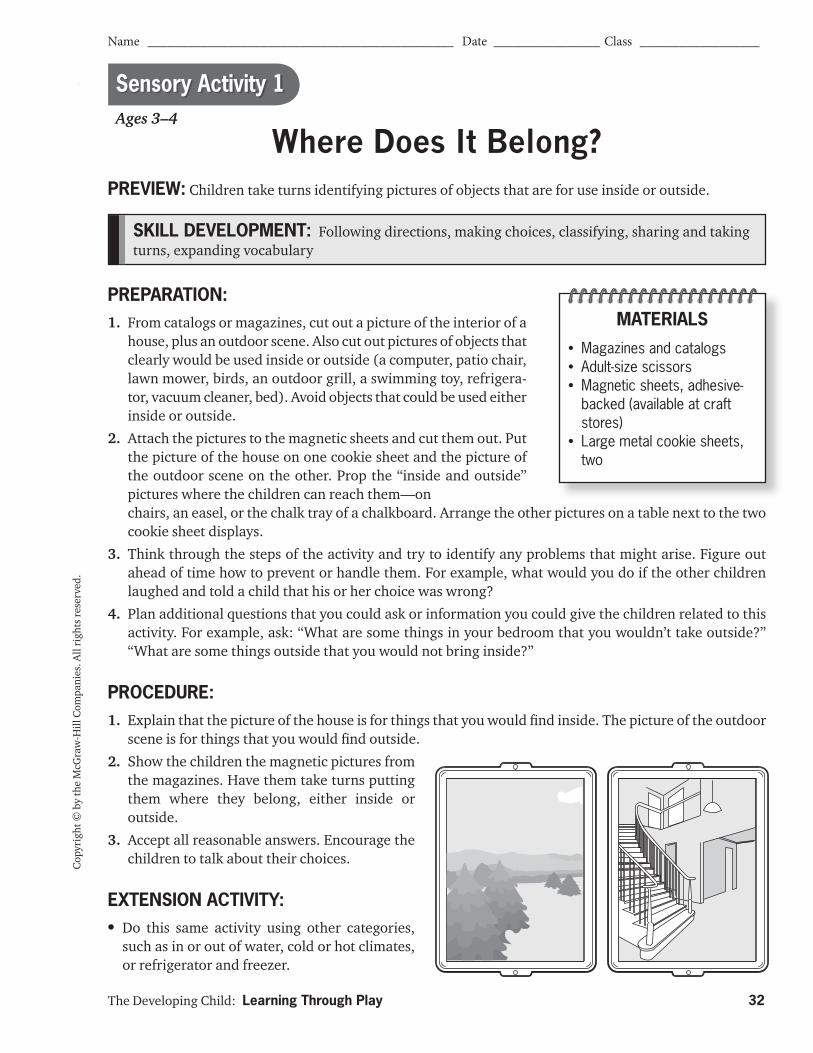
PROCEDURE:1. Explain that the picture of the house is for things that you would fi nd inside. The picture of the outdoor
scene is for things that you would fi nd outside.
2. Show the children the magnetic pictures from the magazines. Have them take turns putting them where they belong, either inside or outside.
3. Accept all reasonable answers. Encourage the children to talk about their choices.
EXTENSION ACTIVITY:• Do this same activity using other categories,
such as in or out of water, cold or hot climates, or refrigerator and freezer.
SKILL DEVELOPMENT: Following directions, making choices, classifying, sharing and taking turns, expanding vocabulary
Where Does It Belong?PREVIEW: Children take turns identifying pictures of objects that are for use inside or outside.

The Developing Child: Learning Through Play 33
Name ______________________________________________ Date ________________ Class __________________
Cop
yrig
ht ©
by
the
McG
raw
-Hill
Com
pani
es. A
ll ri
ghts
rese
rved
.Sensory Activity 2Ages 3–4
Mix and Match
SKILL DEVELOPMENT: Following directions, classifying, making choices, sharing and taking turns, fi ne motor skills
PREVIEW: Children must pay close attention to sort and match an assortment of lids with the containers they go with. Fine motor skills are necessary to remove the lids and put them back on.
PREPARATION:1. Gather an assortment of bottles, jars, and food storage containers
in various sizes and shapes. Check to make sure you have the correct lids for each. Place all the jars and bottles with their lids attached on a table.
2. Plan questions and additional information to extend learning. For example, you might ask children to guess what products came in the various containers. Would smelling the container give them a clue?
PROCEDURE:1. Show the assortment of containers with lids to the children. Demonstrate how each lid fi ts perfectly
onto the container that it belongs with.
2. Have the children help take all the lids off the containers. Scramble the lids, then have the children take turns matching a lid with its container and put the lid back on.
EXTENSION ACTIVITIES:• Have the children sort the lids according to size (small, medium, and large) and then arrange the con-
tainers from smallest to largest.
• With older children, set a timer to see if they can put the lids back on the jars within a set amount of time. See if they can beat their previous time.
MATERIALS
• Plastic bottles with lids• Plastic jars with lids• Food storage containers with
lids
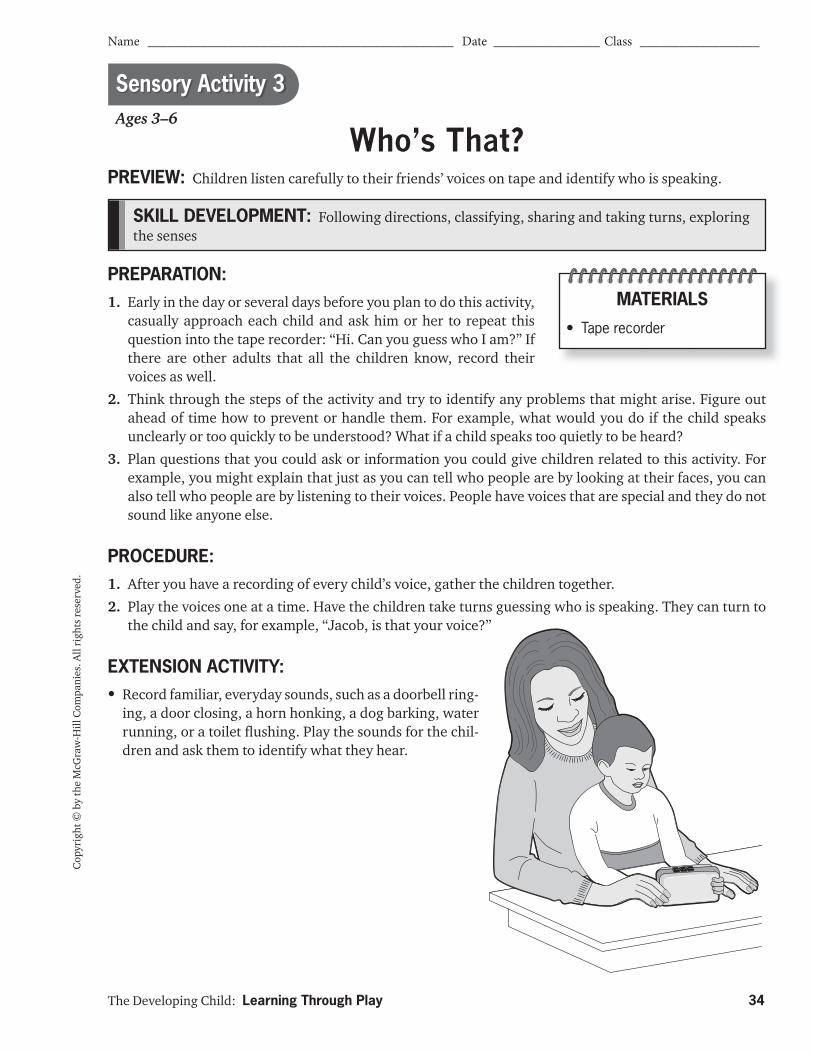
The Developing Child: Learning Through Play 34
Name ______________________________________________ Date ________________ Class __________________
Cop
yrig
ht ©
by
the
McG
raw
-Hill
Com
pani
es. A
ll ri
ghts
rese
rved
.
Ages 3–6
Sensory Activity 3
Who’s That?
SKILL DEVELOPMENT: Following directions, classifying, sharing and taking turns, exploring the senses
PREVIEW: Children listen carefully to their friends’ voices on tape and identify who is speaking.
PREPARATION:1. Early in the day or several days before you plan to do this activity,
casually approach each child and ask him or her to repeat this question into the tape recorder: “Hi. Can you guess who I am?” If there are other adults that all the children know, record their voices as well.
2. Think through the steps of the activity and try to identify any problems that might arise. Figure out ahead of time how to prevent or handle them. For example, what would you do if the child speaks unclearly or too quickly to be understood? What if a child speaks too quietly to be heard?
3. Plan questions that you could ask or information you could give children related to this activity. For example, you might explain that just as you can tell who people are by looking at their faces, you can also tell who people are by listening to their voices. People have voices that are special and they do not sound like anyone else.
PROCEDURE:1. After you have a recording of every child’s voice, gather the children together.
2. Play the voices one at a time. Have the children take turns guessing who is speaking. They can turn to the child and say, for example, “Jacob, is that your voice?”
EXTENSION ACTIVITY:• Record familiar, everyday sounds, such as a doorbell ring-
ing, a door closing, a horn honking, a dog barking, water running, or a toilet fl ushing. Play the sounds for the chil-dren and ask them to identify what they hear.
MATERIALS
• Tape recorder
The Developing Child: Learning Through Play 35
Name ______________________________________________ Date ________________ Class __________________
Cop
yrig
ht ©
by
the
McG
raw
-Hill
Com
pani
es. A
ll ri
ghts
rese
rved
.
SKILL DEVELOPMENT: Following directions, fi ne motor skills, hand-eye coordination, devel-opment of the senses, demonstrating creativity, expanding vocabulary
Sensory Activity 4
Textured Shape CollageAges 3–5
PREVIEW: Through this activity, children create a collage of materials with diff erent textures. This gives them an opportunity to explore a variety of textures and develop texture-related vocabulary.
PREPARATION:1. Gather the supplies needed for the activity. Cut heavier textured
materials, such as fabric and cardboard, into pieces ahead of time, since the children’s scissors cannot cut them.
2. Choose appropriate magazines. For three-year-olds (or if table space is limited), you might cut pages with suitable photos out of the magazines ahead of time.
3. Make a sample texture collage to show the children.
PROCEDURE:1. To introduce the activity, talk with the children about the way
things feel. Ask them for words that tell how things feel (soft, hard, bumpy, smooth, etc.). Ask how they know how something feels. Encourage them to understand that we know both by feeling and by seeing.
2. Show some of the textured items. Let the children guess their texture by sight, and then by feeling. Show an example of texture in a magazine photo and ask how the object would feel.
3. Demonstrate how to cut out a piece of the photo. Show and pass around a fi nished texture collage. Explain that the pieces are glued to a background.
4. Provide children with magazines and texture scraps. Have them cut and choose pieces for their collage.
5. Encourage the children to feel the textures on those tex-tured items. Encourage them to observe the textures visu-ally in the photos. Discuss the textures as they cut out items for their collage.
6. After they have cut a sizeable batch of textured shapes, have them glue the shapes onto the construction paper or back-ground board of choice to form a collage of textures.
MATERIALS
• Textured paper, cardboard, fabric, or other materials cut into pieces
• Magazines with photos that show textured objects (carpets, grainy texture of luggage, bricks on a house or patio fl oor)
• Piece of construction paper, poster board, or cardboard
• Adult-size scissors• Child-size safety scissors• White glue, paste, or glue
stick
(Continued on next page)
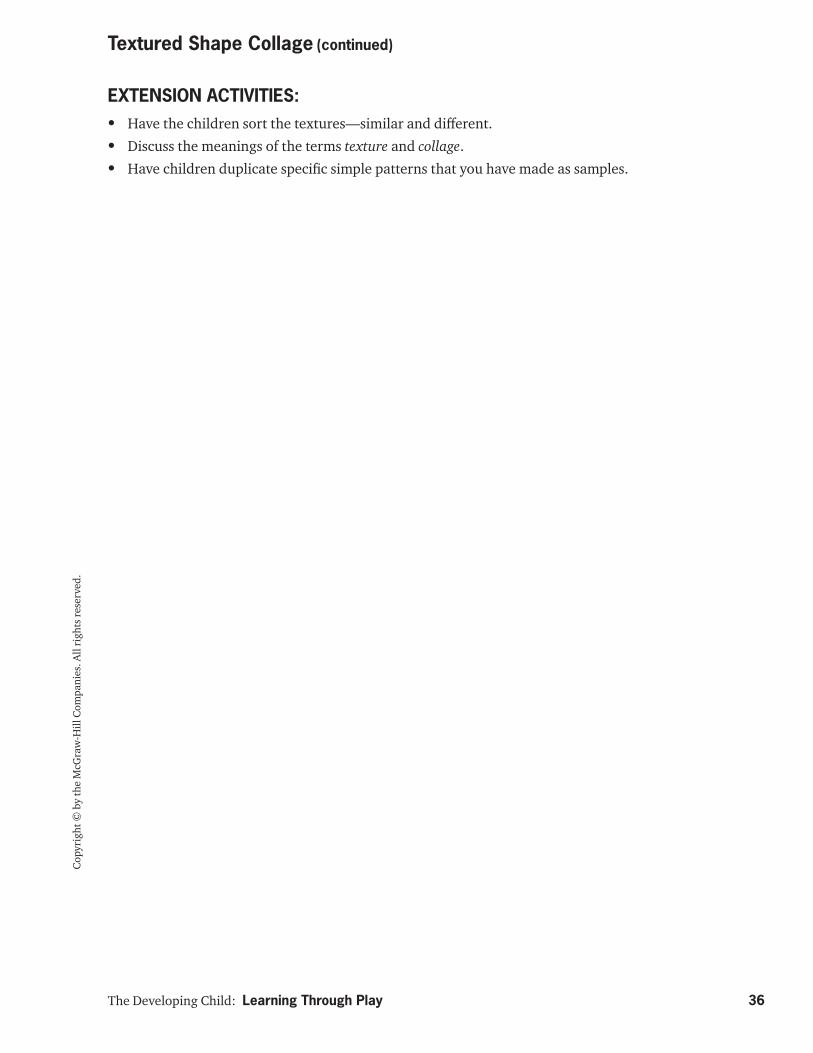
Cop
yrig
ht ©
by
the
McG
raw
-Hill
Com
pani
es. A
ll ri
ghts
rese
rved
.
The Developing Child: Learning Through Play 36
EXTENSION ACTIVITIES:• Have the children sort the textures—similar and diff erent.
• Discuss the meanings of the terms texture and collage.
• Have children duplicate specifi c simple patterns that you have made as samples.
Textured Shape Collage (continued)
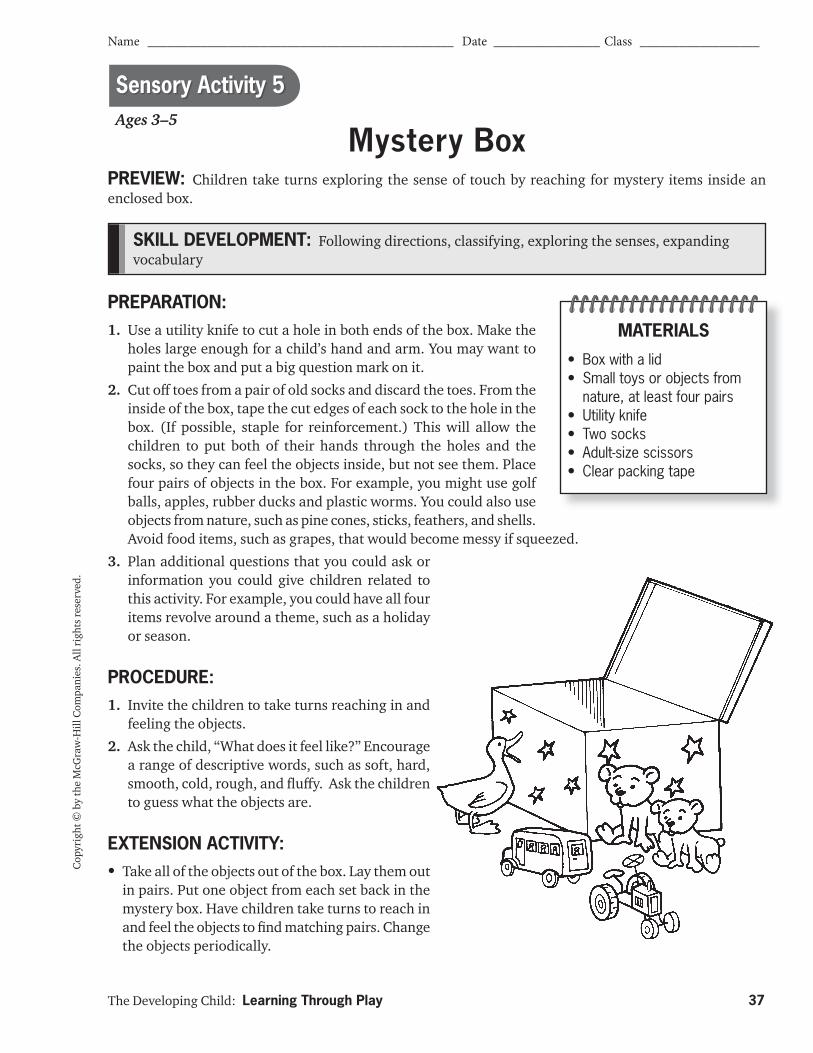
The Developing Child: Learning Through Play 37
Name ______________________________________________ Date ________________ Class __________________
Cop
yrig
ht ©
by
the
McG
raw
-Hill
Com
pani
es. A
ll ri
ghts
rese
rved
.
SKILL DEVELOPMENT: Following directions, classifying, exploring the senses, expanding vocabulary
Ages 3–5
Sensory Activity 5
Mystery BoxPREVIEW: Children take turns exploring the sense of touch by reaching for mystery items inside an enclosed box.
PREPARATION:1. Use a utility knife to cut a hole in both ends of the box. Make the
holes large enough for a child’s hand and arm. You may want to paint the box and put a big question mark on it.
2. Cut off toes from a pair of old socks and discard the toes. From the inside of the box, tape the cut edges of each sock to the hole in the box. (If possible, staple for reinforcement.) This will allow the children to put both of their hands through the holes and the socks, so they can feel the objects inside, but not see them. Place four pairs of objects in the box. For example, you might use golf balls, apples, rubber ducks and plastic worms. You could also use objects from nature, such as pine cones, sticks, feathers, and shells. Avoid food items, such as grapes, that would become messy if squeezed.
3. Plan additional questions that you could ask or information you could give children related to this activity. For example, you could have all four items revolve around a theme, such as a holiday or season.
PROCEDURE:1. Invite the children to take turns reaching in and
feeling the objects.
2. Ask the child, “What does it feel like?” Encourage a range of descriptive words, such as soft, hard, smooth, cold, rough, and fl uff y. Ask the children to guess what the objects are.
EXTENSION ACTIVITY:• Take all of the objects out of the box. Lay them out
in pairs. Put one object from each set back in the mystery box. Have children take turns to reach in and feel the objects to fi nd matching pairs. Change the objects periodically.
MATERIALS
• Box with a lid• Small toys or objects from
nature, at least four pairs• Utility knife• Two socks• Adult-size scissors• Clear packing tape
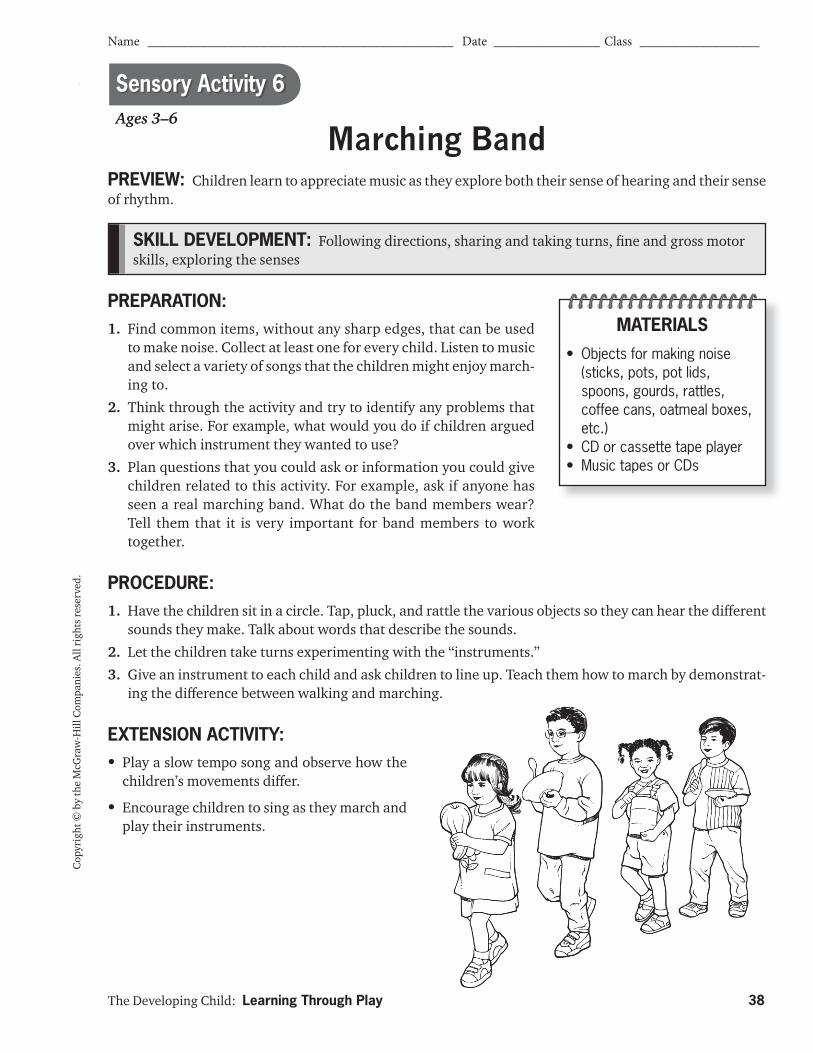
The Developing Child: Learning Through Play 38
Name ______________________________________________ Date ________________ Class __________________
Cop
yrig
ht ©
by
the
McG
raw
-Hill
Com
pani
es. A
ll ri
ghts
rese
rved
.
PREPARATION:1. Find common items, without any sharp edges, that can be used
to make noise. Collect at least one for every child. Listen to music and select a variety of songs that the children might enjoy march-ing to.
2. Think through the activity and try to identify any problems that might arise. For example, what would you do if children argued over which instrument they wanted to use?
3. Plan questions that you could ask or information you could give children related to this activity. For example, ask if anyone has seen a real marching band. What do the band members wear? Tell them that it is very important for band members to work together.
PROCEDURE:1. Have the children sit in a circle. Tap, pluck, and rattle the various objects so they can hear the diff erent
sounds they make. Talk about words that describe the sounds.
2. Let the children take turns experimenting with the “instruments.”
3. Give an instrument to each child and ask children to line up. Teach them how to march by demonstrat-ing the diff erence between walking and marching.
EXTENSION ACTIVITY:• Play a slow tempo song and observe how the
children’s movements diff er.
• Encourage children to sing as they march and play their instruments.
Ages 3–6
Sensory Activity 6
Marching Band
SKILL DEVELOPMENT: Following directions, sharing and taking turns, fi ne and gross motor skills, exploring the senses
PREVIEW: Children learn to appreciate music as they explore both their sense of hearing and their sense of rhythm.
MATERIALS
• Objects for making noise (sticks, pots, pot lids, spoons, gourds, rattles, coffee cans, oatmeal boxes, etc.)
• CD or cassette tape player• Music tapes or CDs
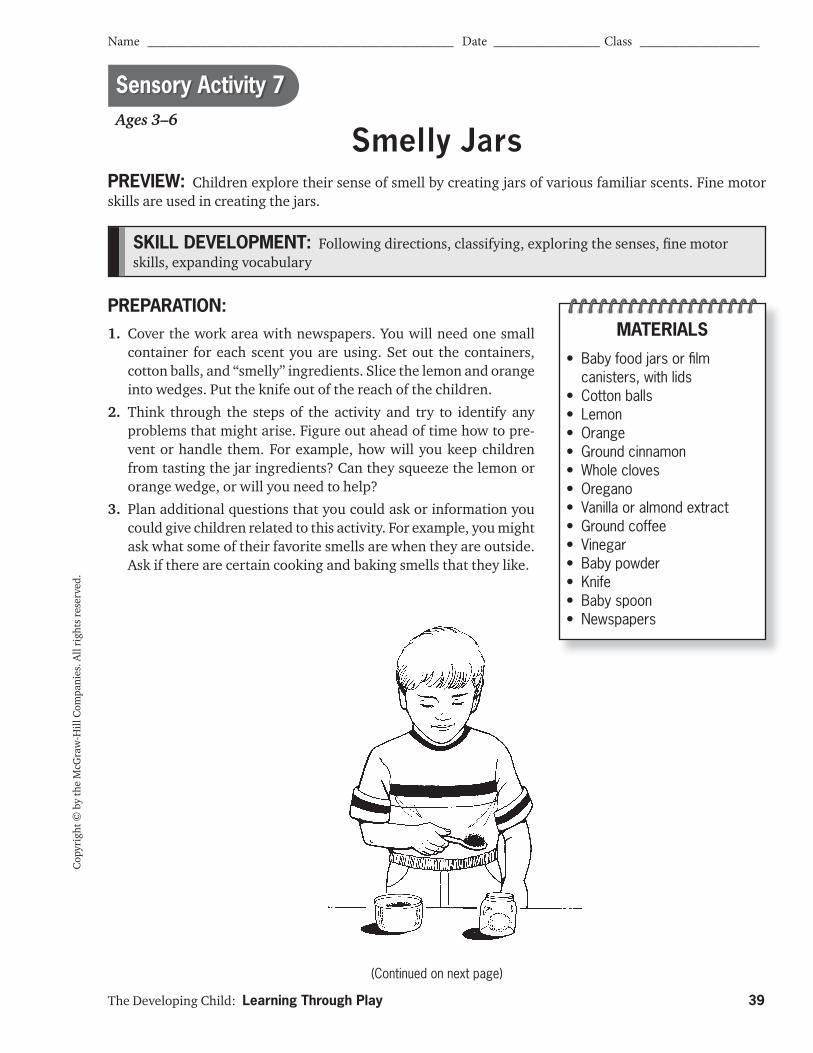
The Developing Child: Learning Through Play 39
Name ______________________________________________ Date ________________ Class __________________
Cop
yrig
ht ©
by
the
McG
raw
-Hill
Com
pani
es. A
ll ri
ghts
rese
rved
.
SKILL DEVELOPMENT: Following directions, classifying, exploring the senses, fi ne motor skills, expanding vocabulary
Smelly JarsAges 3–6
Sensory Activity 7
PREVIEW: Children explore their sense of smell by creating jars of various familiar scents. Fine motor skills are used in creating the jars.
PREPARATION:1. Cover the work area with newspapers. You will need one small
container for each scent you are using. Set out the containers, cotton balls, and “smelly” ingredients. Slice the lemon and orange into wedges. Put the knife out of the reach of the children.
2. Think through the steps of the activity and try to identify any problems that might arise. Figure out ahead of time how to pre-vent or handle them. For example, how will you keep children from tasting the jar ingredients? Can they squeeze the lemon or orange wedge, or will you need to help?
3. Plan additional questions that you could ask or information you could give children related to this activity. For example, you might ask what some of their favorite smells are when they are outside. Ask if there are certain cooking and baking smells that they like.
MATERIALS
• Baby food jars or fi lm canisters, with lids
• Cotton balls• Lemon• Orange• Ground cinnamon• Whole cloves• Oregano• Vanilla or almond extract• Ground coffee• Vinegar• Baby powder• Knife • Baby spoon• Newspapers
(Continued on next page)
Cop
yrig
ht ©
by
the
McG
raw
-Hill
Com
pani
es. A
ll ri
ghts
rese
rved
.
The Developing Child: Learning Through Play 40
Smelly Jars (continued)
PROCEDURE:1. Ask the children to stand where they can see the small jars or fi lm canisters. Tell them you want their
help to make “smelly jars.”
2. Show them how to make a smelly jar: open a baby food jar and drop in a cotton ball. Put a little of one ingredient on the cotton ball. (You might start by squeezing a little lemon juice on the cotton ball.) Close the jar tightly with its lid.
3. Let each child choose an ingredient to put on a cotton ball. Children may need help with some substances, such as spooning or shaking the ground cinnamon from the spice container onto the cotton ball.
4. Talk about each ingredient as it is put on a cotton ball. You might say, “What are coff ee grounds used for? Do you like the way coff ee smells?”
5. When a smelly jar has been made for each substance, ask the children to sit where they can see the jars. Mix them up so it is diffi cult to tell which jar is which.
6. Taking turns, have each child select a jar, open it, and smell it. Ask the children to describe the smell and try to guess what is in the jar. Ask them which jar smells like pizza. Which one smells like a baby? They might need to ask their friends for help.
EXTENSION ACTIVITY:• Ask the children to help you make a chart of smells they like and smells they do not like.
CAUTION: This activity uses edible items. Always check with parents for food sensitivities and allergies before serving food or allowing children to handle food.
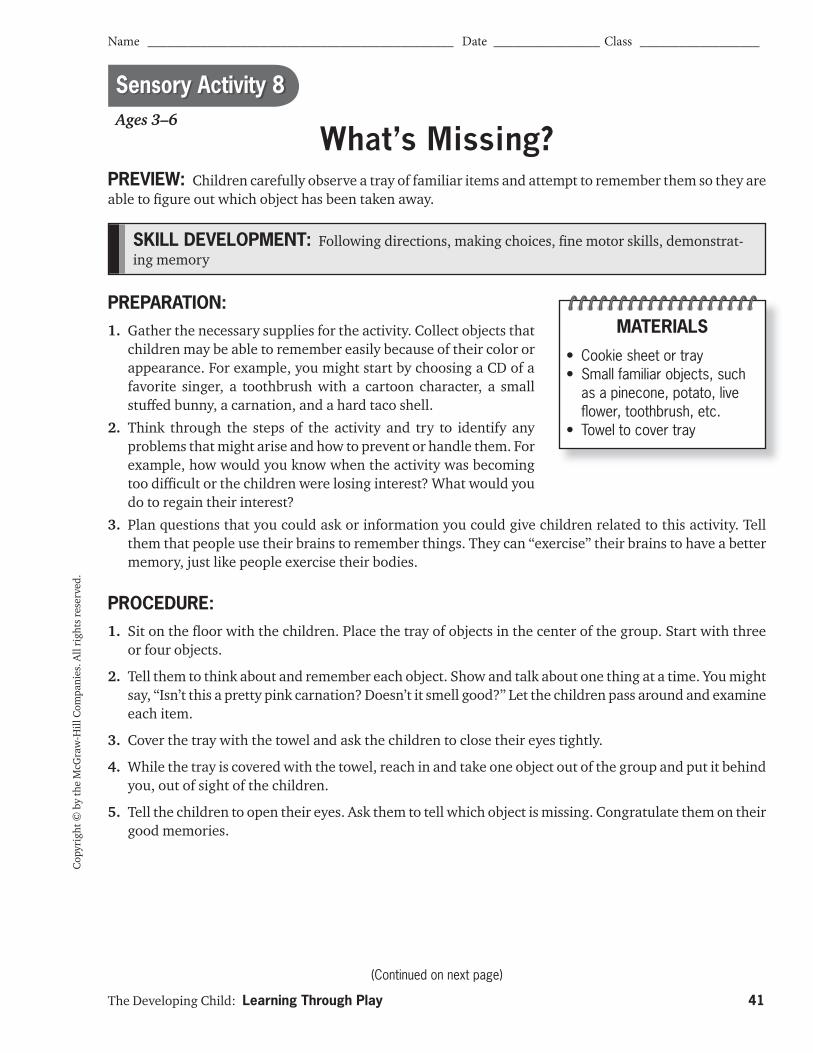
The Developing Child: Learning Through Play 41
Name ______________________________________________ Date ________________ Class __________________
(Continued on next page)
Cop
yrig
ht ©
by
the
McG
raw
-Hill
Com
pani
es. A
ll ri
ghts
rese
rved
.
SKILL DEVELOPMENT: Following directions, making choices, fi ne motor skills, demonstrat-ing memory
Sensory Activity 8Ages 3–6
What’s Missing?
PREPARATION:1. Gather the necessary supplies for the activity. Collect objects that
children may be able to remember easily because of their color or appearance. For example, you might start by choosing a CD of a favorite singer, a toothbrush with a cartoon character, a small stuff ed bunny, a carnation, and a hard taco shell.
2. Think through the steps of the activity and try to identify any problems that might arise and how to prevent or handle them. For example, how would you know when the activity was becoming too diffi cult or the children were losing interest? What would you do to regain their interest?
3. Plan questions that you could ask or information you could give children related to this activity. Tell them that people use their brains to remember things. They can “exercise” their brains to have a better memory, just like people exercise their bodies.
PROCEDURE:1. Sit on the fl oor with the children. Place the tray of objects in the center of the group. Start with three
or four objects.
2. Tell them to think about and remember each object. Show and talk about one thing at a time. You might say, “Isn’t this a pretty pink carnation? Doesn’t it smell good?” Let the children pass around and examine each item.
3. Cover the tray with the towel and ask the children to close their eyes tightly.
4. While the tray is covered with the towel, reach in and take one object out of the group and put it behind you, out of sight of the children.
5. Tell the children to open their eyes. Ask them to tell which object is missing. Congratulate them on their good memories.
PREVIEW: Children carefully observe a tray of familiar items and attempt to remember them so they are able to fi gure out which object has been taken away.
MATERIALS
• Cookie sheet or tray• Small familiar objects, such
as a pinecone, potato, live fl ower, toothbrush, etc.
• Towel to cover tray
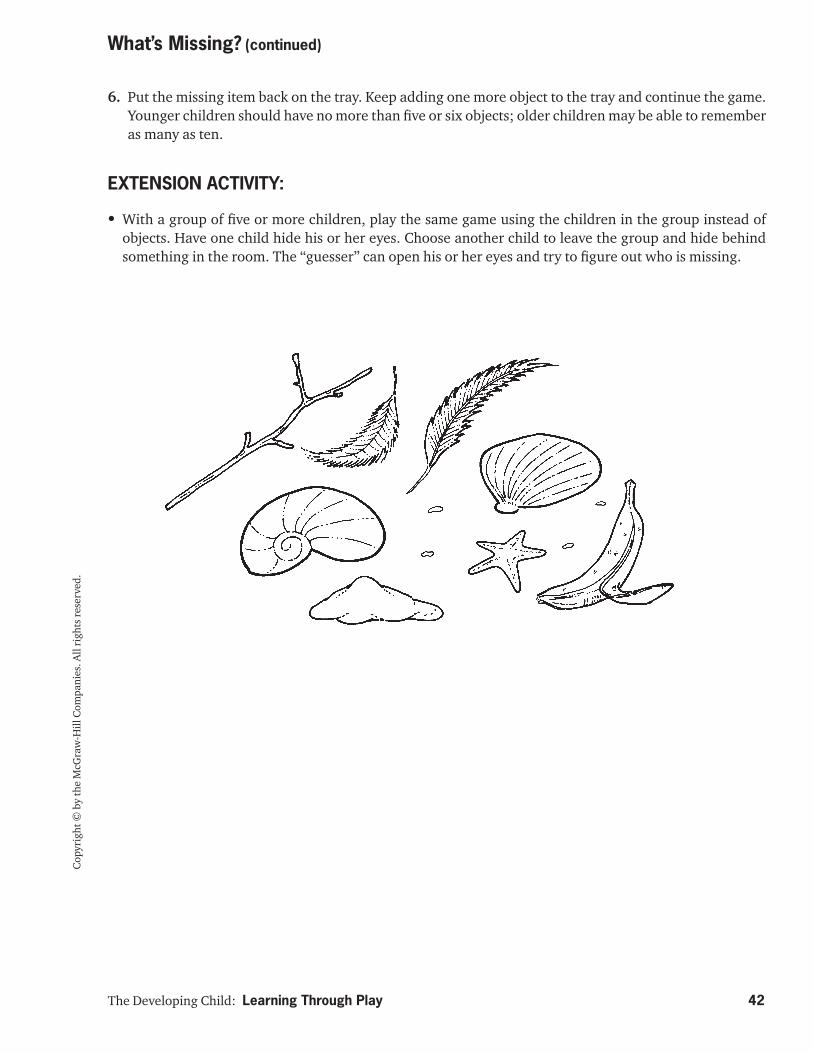
The Developing Child: Learning Through Play 42
Cop
yrig
ht ©
by
the
McG
raw
-Hill
Com
pani
es. A
ll ri
ghts
rese
rved
.
What’s Missing? (continued)
6. Put the missing item back on the tray. Keep adding one more object to the tray and continue the game. Younger children should have no more than fi ve or six objects; older children may be able to remember as many as ten.
EXTENSION ACTIVITY:
• With a group of fi ve or more children, play the same game using the children in the group instead of objects. Have one child hide his or her eyes. Choose another child to leave the group and hide behind something in the room. The “guesser” can open his or her eyes and try to fi gure out who is missing.

The Developing Child: Learning Through Play 43
Name ______________________________________________ Date ________________ Class __________________
Cop
yrig
ht ©
by
the
McG
raw
-Hill
Com
pani
es. A
ll ri
ghts
rese
rved
.
SKILL DEVELOPMENT: Following directions, sharing and taking turns, exploring the senses, expanding vocabulary
Sensory Activity 9Ages 3–6
Listen Closely
PREPARATION:1. Drape a sheet or light blanket across two chairs to create a hidden
area.
2. Gather objects to make noises that children should be able to rec-ognize. Include familiar toys, such as a talking doll or a game that makes noise. Set the items out of sight behind the sheet.
3. Plan additional information you could give the children. You might discuss the importance of listening closely and paying attention when you hear various types of sirens.
PROCEDURE:1. Arrange the noisemakers behind the sheet, and ask a helper to sit
with the materials.
2. Have the children sit several feet away from the covered area. Ask them to point to the parts of their bodies that help them hear. Tell them that someone is behind the sheet, ready to make some noises. Explain that they should listen carefully and then guess what the noise is.
3. Your helper should make one noise at a time. For example, the person can pour water from one glass to the other. Repeat the sound until the children identify it correctly.
EXTENSION ACTIVITY:• Let the children take turns behind the sheet and make noise, with
the items or their own voices. The other children can guess what the noise is or simply describe it. Talk about the various sounds that people make—talking, singing, laughing, crying, clapping their hands, etc.
PREVIEW: Children concentrate and listen closely to sounds in order to identify their origin. The person creating the sounds stays out of the children’s sight.
MATERIALS
• Sheet or light blanket• Two chairs• Items that make noise,
such as: Harmonica Wooden blocks Sandpaper and block of wood Whistle Hand bell Small radio Familiar toys
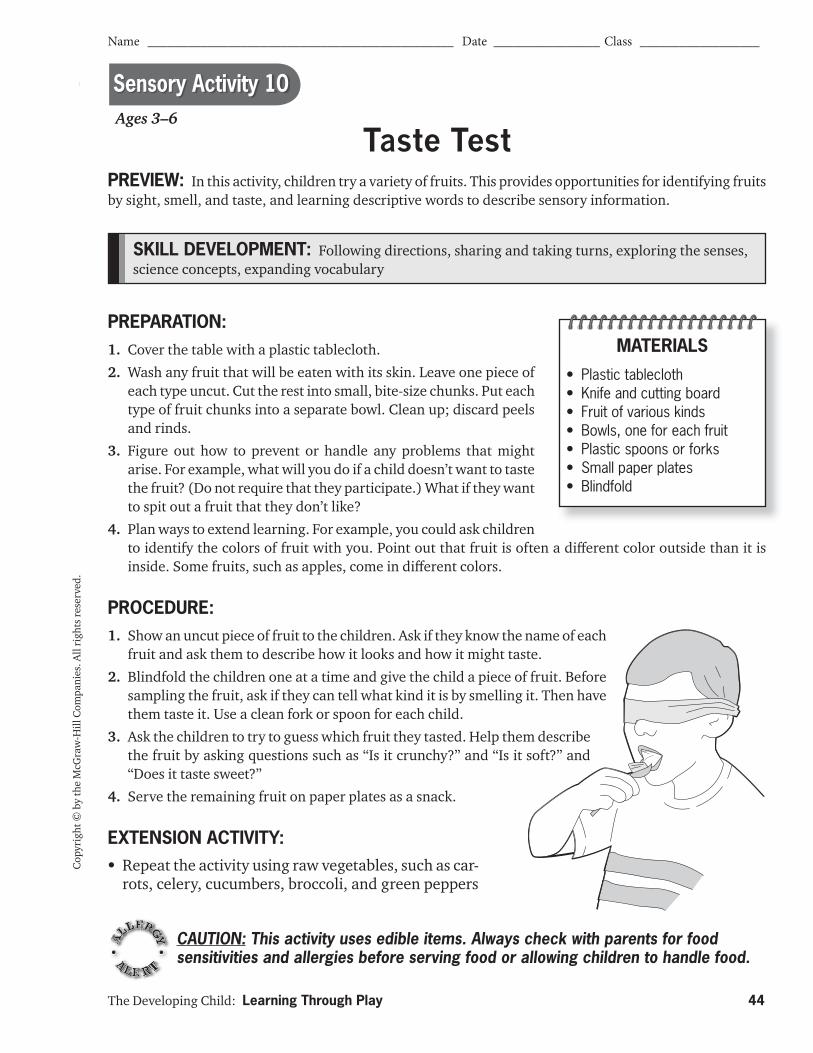
The Developing Child: Learning Through Play 44
Name ______________________________________________ Date ________________ Class __________________
Cop
yrig
ht ©
by
the
McG
raw
-Hill
Com
pani
es. A
ll ri
ghts
rese
rved
.Sensory Activity 10Ages 3–6
Taste Test
SKILL DEVELOPMENT: Following directions, sharing and taking turns, exploring the senses, science concepts, expanding vocabulary
PREPARATION:1. Cover the table with a plastic tablecloth.
2. Wash any fruit that will be eaten with its skin. Leave one piece of each type uncut. Cut the rest into small, bite-size chunks. Put each type of fruit chunks into a separate bowl. Clean up; discard peels and rinds.
3. Figure out how to prevent or handle any problems that might arise. For example, what will you do if a child doesn’t want to taste the fruit? (Do not require that they participate.) What if they want to spit out a fruit that they don’t like?
4. Plan ways to extend learning. For example, you could ask children to identify the colors of fruit with you. Point out that fruit is often a diff erent color outside than it is inside. Some fruits, such as apples, come in diff erent colors.
PROCEDURE:1. Show an uncut piece of fruit to the children. Ask if they know the name of each
fruit and ask them to describe how it looks and how it might taste.
2. Blindfold the children one at a time and give the child a piece of fruit. Before sampling the fruit, ask if they can tell what kind it is by smelling it. Then have them taste it. Use a clean fork or spoon for each child.
3. Ask the children to try to guess which fruit they tasted. Help them describe the fruit by asking questions such as “Is it crunchy?” and “Is it soft?” and “Does it taste sweet?”
4. Serve the remaining fruit on paper plates as a snack.
EXTENSION ACTIVITY:• Repeat the activity using raw vegetables, such as car-
rots, celery, cucumbers, broccoli, and green peppers
PREVIEW: In this activity, children try a variety of fruits. This provides opportunities for identifying fruits by sight, smell, and taste, and learning descriptive words to describe sensory information.
MATERIALS
• Plastic tablecloth• Knife and cutting board• Fruit of various kinds• Bowls, one for each fruit• Plastic spoons or forks• Small paper plates• Blindfold
CAUTION: This activity uses edible items. Always check with parents for food sensitivities and allergies before serving food or allowing children to handle food.
The Developing Child: Learning Through Play 45
Name ______________________________________________ Date ________________ Class __________________
(Continued on next page)
Cop
yrig
ht ©
by
the
McG
raw
-Hill
Com
pani
es. A
ll ri
ghts
rese
rved
.
SKILL DEVELOPMENT: Following directions, expanding vocabulary, sharing and taking turns, exploring the senses
Sensory Activity 11Ages 3–6
I'm Thinking of ...
PREPARATION:1. Gather a variety of illustrations, photos, or drawings. You may fi nd
them in magazines or catalogs, or print them from the Internet. Attach the illustrations to a bulletin board or display board.
2. Think through the steps of the activity and try to identify any problems that might arise. Figure out ahead of time how to pre-vent or handle them. Be prepared to step in with ideas for clues if a child is having diffi culty describing a picture.
3. Plan questions that you could ask or information you could give children related to this activity. For example, tell them there are certain kinds of words that help people describe things. Read examples of “describing words” in a storybook or in a catalog with products that interest children. (Such words might describe size, color, or other traits.)
PROCEDURE:1. Have the children sit in a semicircle so everybody can see the pictures on the board.
2. Tell the children you will give them clues about one of the pictures on the board. Ask them to listen carefully so that they can guess which picture you are describing. Start each description with, “I’m Thinking of …” For example, you might say, “I’m thinking of something that is orange and black. It has stripes. You can see long whiskers near its mouth.”
3. When the children have guessed which picture you have described, let a child have a turn off ering clues until the others guess. Tell the children to be careful not to say the name of the object or animal as they describe it.
4. Each child should have at least one turn giving clues about a picture.
PREVIEW: Children take turns describing pictures so others can guess which picture they are talking about. While using their imaginations, they improve their vocabularies.
MATERIALS
• Pictures, such as wild animals, toys, children doing various activities, things found in a city, items and animals found on a farm
• Bulletin board or display board
• Magnets, tape, or thumb tacks
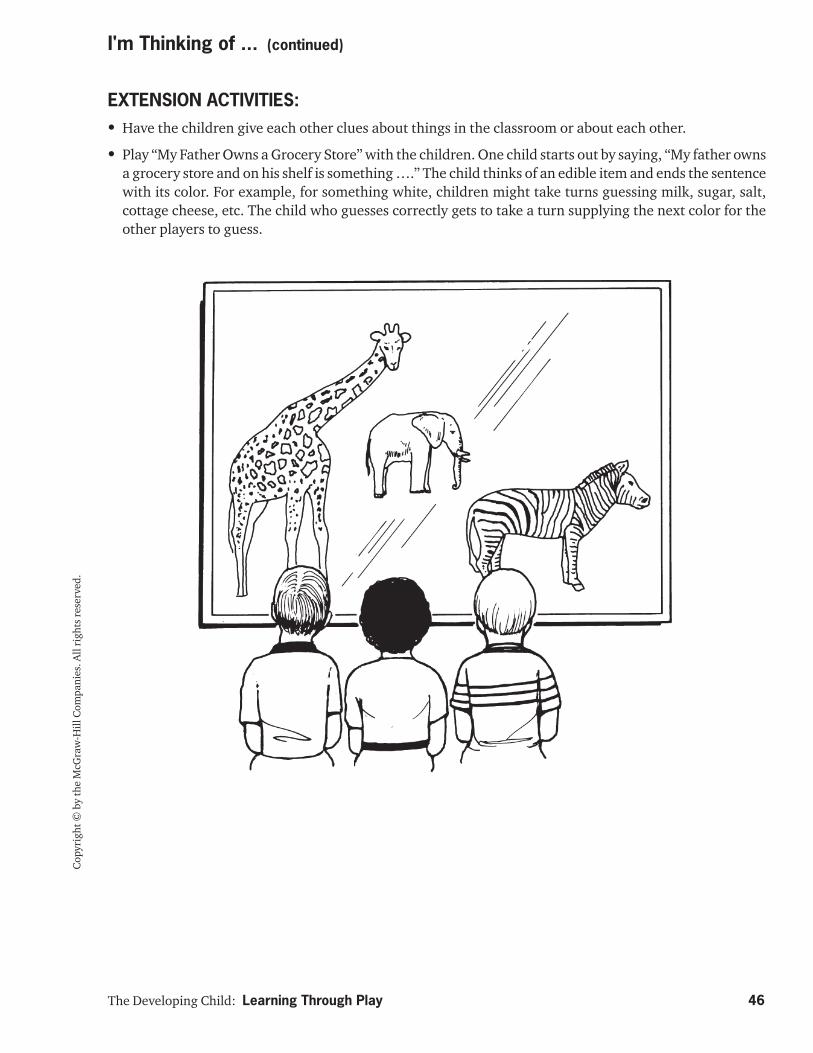
The Developing Child: Learning Through Play 46
Cop
yrig
ht ©
by
the
McG
raw
-Hill
Com
pani
es. A
ll ri
ghts
rese
rved
.
I'm Thinking of ... (continued)
EXTENSION ACTIVITIES:• Have the children give each other clues about things in the classroom or about each other.
• Play “My Father Owns a Grocery Store” with the children. One child starts out by saying, “My father owns a grocery store and on his shelf is something ….” The child thinks of an edible item and ends the sentence with its color. For example, for something white, children might take turns guessing milk, sugar, salt, cottage cheese, etc. The child who guesses correctly gets to take a turn supplying the next color for the other players to guess.
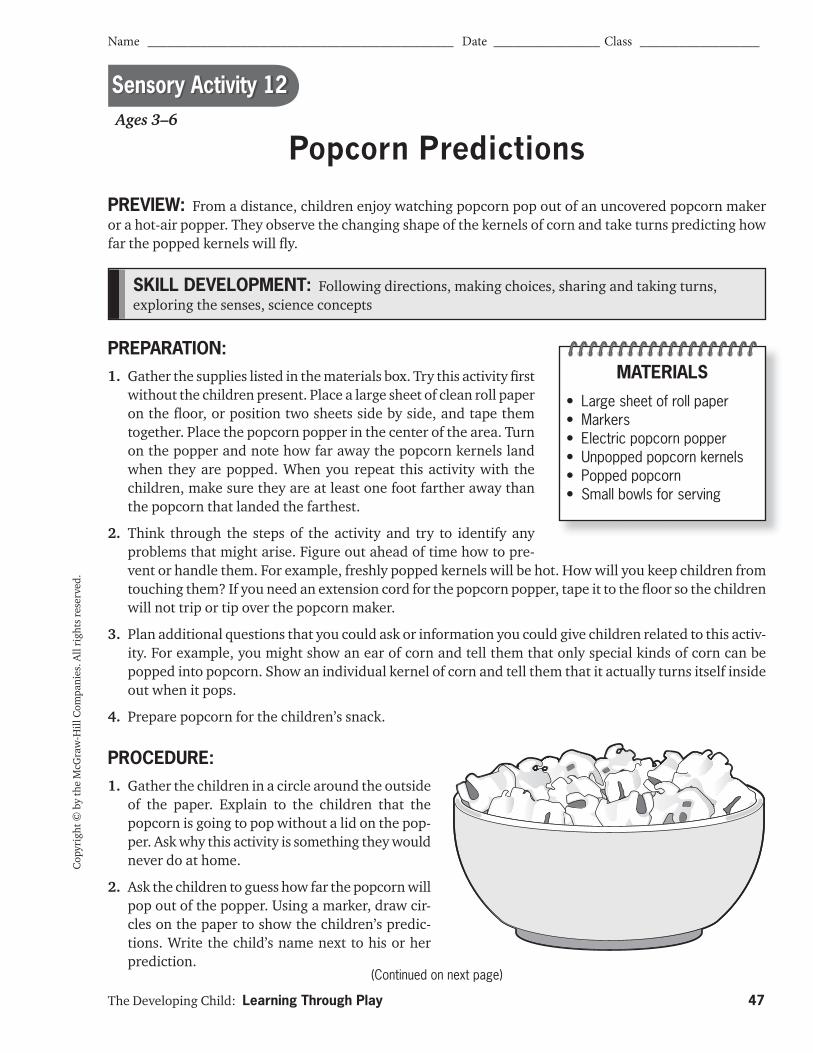
The Developing Child: Learning Through Play 47
Name ______________________________________________ Date ________________ Class __________________
(Continued on next page)
Cop
yrig
ht ©
by
the
McG
raw
-Hill
Com
pani
es. A
ll ri
ghts
rese
rved
.
SKILL DEVELOPMENT: Following directions, making choices, sharing and taking turns, exploring the senses, science concepts
Popcorn PredictionsAges 3–6
Sensory Activity 12
PREVIEW: From a distance, children enjoy watching popcorn pop out of an uncovered popcorn maker or a hot-air popper. They observe the changing shape of the kernels of corn and take turns predicting how far the popped kernels will fl y.
PREPARATION:1. Gather the supplies listed in the materials box. Try this activity fi rst
without the children present. Place a large sheet of clean roll paper on the fl oor, or position two sheets side by side, and tape them together. Place the popcorn popper in the center of the area. Turn on the popper and note how far away the popcorn kernels land when they are popped. When you repeat this activity with the children, make sure they are at least one foot farther away than the popcorn that landed the farthest.
2. Think through the steps of the activity and try to identify any problems that might arise. Figure out ahead of time how to pre-vent or handle them. For example, freshly popped kernels will be hot. How will you keep children from touching them? If you need an extension cord for the popcorn popper, tape it to the fl oor so the children will not trip or tip over the popcorn maker.
3. Plan additional questions that you could ask or information you could give children related to this activ-ity. For example, you might show an ear of corn and tell them that only special kinds of corn can be popped into popcorn. Show an individual kernel of corn and tell them that it actually turns itself inside out when it pops.
4. Prepare popcorn for the children’s snack.
PROCEDURE:1. Gather the children in a circle around the outside
of the paper. Explain to the children that the popcorn is going to pop without a lid on the pop-per. Ask why this activity is something they would never do at home.
2. Ask the children to guess how far the popcorn will pop out of the popper. Using a marker, draw cir-cles on the paper to show the children’s predic-tions. Write the child’s name next to his or her prediction.
MATERIALS
• Large sheet of roll paper• Markers• Electric popcorn popper• Unpopped popcorn kernels• Popped popcorn• Small bowls for serving
The Developing Child: Learning Through Play 48
Cop
yrig
ht ©
by
the
McG
raw
-Hill
Com
pani
es. A
ll ri
ghts
rese
rved
.
3. Explain that the only way popcorn pops is with heat. Warn the children to stay seated while the popcorn is popping because the kernels will be very hot when they pop. Also tell the children not to eat the kernels off the fl oor. Explain that you have extra popcorn for a snack.
4. Turn on the popper, keep the children off the paper, and watch the excitement!
5. After the popping has stopped, ask the children to compare their prediction to where the popcorn actu-ally landed. Use descriptive words such as “farther” and “shorter.” Tell them that all the guesses were good ones.
6. Give children their own small bowl of popcorn you prepared ahead for a snack. Have the children describe what it was like when the popcorn popped. Talk about the way it smelled, sounded, looked, and tasted.
7. Ask them to help you clean up the area. Make sure they throw away the popcorn on the fl oor instead of eating it. Ask why it is important to not eat food that has been on the fl oor.
EXTENSION ACTIVITIES:• Clear a space indoors or go outside. Ask the children to gather in the middle of the space and pretend
that they are tiny unpopped kernels in a popper. They can squat down and cover their heads with their hands. As the popper “heats up,” they will grow bigger and bigger until they start popping and jump-ing!
• Many children will think that popcorn pops only in a microwave oven or at a movie theatre. Demonstrate how popcorn may be popped on a range or portable burner. Heat oil in a heavy pan or skillet, add the popcorn, and cover. Ask the children to count slowly until they hear the fi rst kernels popping. If a timer is available, time how long the process takes.
Popcorn Predictions (continued)
CAUTION: This activity uses edible items. Always check with parents for food sensitivities and allergies before serving food or allowing children to handle food.

(Continued on next page)
Cop
yrig
ht ©
by
the
McG
raw
-Hill
Com
pani
es. A
ll ri
ghts
rese
rved
.
The Developing Child: Learning Through Play 49
Name ______________________________________________ Date ________________ Class __________________
SKILL DEVELOPMENT: Following directions, fi ne motor skills, exploring the senses, science concepts
Sensory Activity 13Ages 4–6
Texture Rubbings
PREPARATION:1. Gather the supplies needed for the activity. Brainstorm what you
could use as textured items for children’s rubbing. If you are unsure how some will work, try them out.
2. Think through the steps of the activity and try to identify any problems that might arise. Figure out how to prevent or handle them. For example, if children have diffi culty keeping the textured item steady under the paper, you can show them how to hold one side down tight as they color.
3. Have the children fi nd a seat at the work table.
PROCEDURE:1. Begin by showing the children the sandpaper, cloth, and glossy
magazine page. Ask them to identify what each is. From looking at them, how do they think each feels? Explain that the way things feel is called their texture. Pass the items around so every child can feel them. Then ask them for additional words describing the texture of each.
2. Ask them to look around the room and fi nd things that have diff erent textures. Ask for a few volunteers to give examples.
3. Explain that you will show them another way to see textures, called rubbings.
4. Demonstrate how to make a rubbing. Put a piece of paper on part of sandpaper, and hold the paper in place with one hand, then rub over the object with the side of a crayon. Repeat with the cloth.The texture and pattern of each will emerge.
5. Give each child a piece of paper and a crayon. Put the textured objects on the table, and let children choose one or more. Help them as needed.
PREVIEW: In this activity, children will learn about the textures of objects by placing them beneath a paper and rubbing over the paper with a crayon. Texture-related words will also be discussed.
MATERIALS
• Sheet of sandpaper• Piece of burlap or heavy,
textured cloth• Glossy magazine page• Flat, textured items (such
as leaves, shapes cut from textured paper or cardboard) for texture rubbings
• Paper (white or construction paper)
• Large fl at crayons (or large crayons with wrappers removed)

The Developing Child: Learning Through Play 50
Cop
yrig
ht ©
by
the
McG
raw
-Hill
Com
pani
es. A
ll ri
ghts
rese
rved
.
EXTENSION ACTIVITIES:• Encourage the children to do rubbings of all sorts of surfaces in the room: the tile fl oor, the carpet, the
bottom of shoes, etc.
• If possible, take the children outdoors and ask them to collect leaves from diff erent trees. Talk about their shapes and qualities and identify which tree each one comes from. Then allow the children to make rubbings of the leaves on paper.
Texture Rubbings (continued)
51
ART ACTIVITIES
1 Gloppy Goo Ages 3–5 .......................................................................................52
2 Sponge Painting Ages 3–5 ................................................................................53
3 Make Your Own Play Dough Ages 3–5 .............................................................55
4 Shaving Cream Delight Ages 3–5 .....................................................................57
5 Wire Sculpture Ages 3–5 ..................................................................................58
6 A Life-Size Me Ages 3–6 ...................................................................................59
7 Designer Toast Ages 3–6 ..................................................................................61
8 Ice Painting Ages 3–6 .......................................................................................63
9 Printmaking Ages 3–6 ......................................................................................65
10 String Designs Ages 4–6 ...................................................................................67
11 Bubble Painting Ages 4–6 .................................................................................69
12 Shake It to Make It Ages 4–6 ............................................................................71
13 Woodworking Ages 4–6 ...................................................................................73
14 Toast Baskets Ages 4-6 .....................................................................................75
15 Bead-It Ages 4-6 ...............................................................................................77
16 Puzzle Challenge Ages 4-6 ...............................................................................79
17 Pop-the-Balloon Balls Ages 5-6 ........................................................................81
18 Recipes for Art Activities .................................................................................83
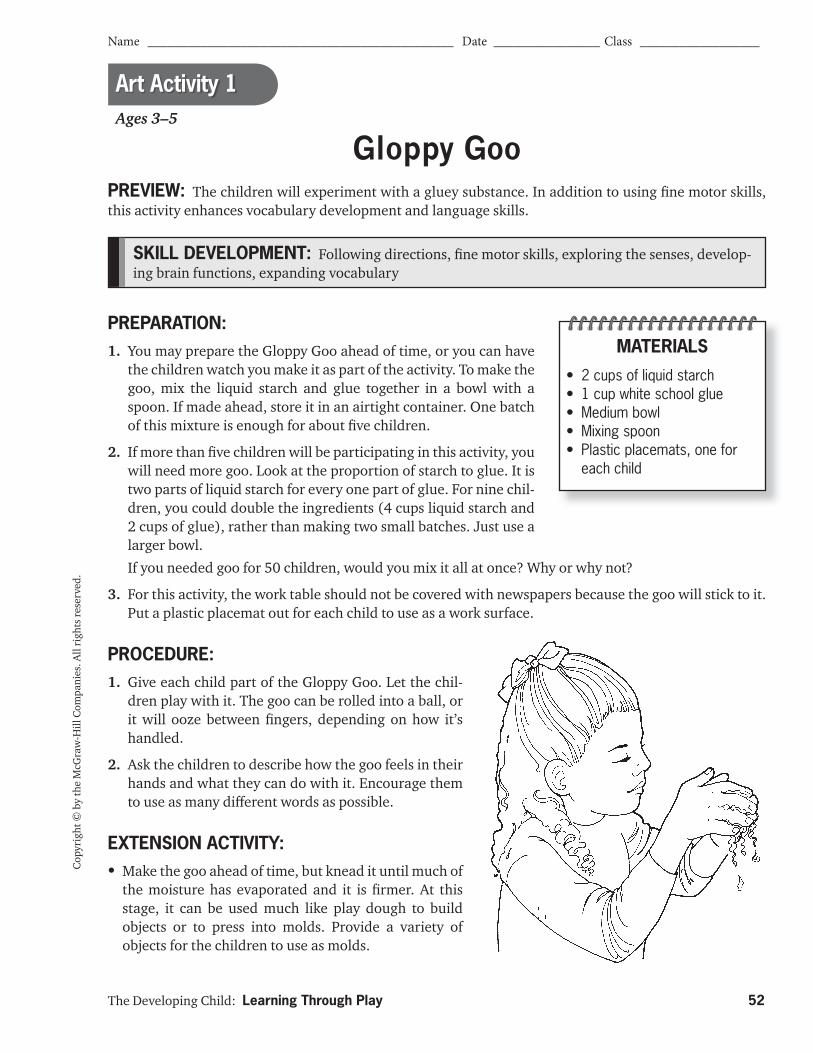
The Developing Child: Learning Through Play 52
Name ______________________________________________ Date ________________ Class __________________
Cop
yrig
ht ©
by
the
McG
raw
-Hill
Com
pani
es. A
ll ri
ghts
rese
rved
.Art Activity 1
Gloppy GooAges 3–5
SKILL DEVELOPMENT: Following directions, fi ne motor skills, exploring the senses, develop-ing brain functions, expanding vocabulary
PREPARATION:1. You may prepare the Gloppy Goo ahead of time, or you can have
the children watch you make it as part of the activity. To make the goo, mix the liquid starch and glue together in a bowl with a spoon. If made ahead, store it in an airtight container. One batch of this mixture is enough for about fi ve children.
2. If more than fi ve children will be participating in this activity, you will need more goo. Look at the proportion of starch to glue. It is two parts of liquid starch for every one part of glue. For nine chil-dren, you could double the ingredients (4 cups liquid starch and 2 cups of glue), rather than making two small batches. Just use a larger bowl.
If you needed goo for 50 children, would you mix it all at once? Why or why not?
3. For this activity, the work table should not be covered with newspapers because the goo will stick to it. Put a plastic placemat out for each child to use as a work surface.
PROCEDURE:1. Give each child part of the Gloppy Goo. Let the chil-
dren play with it. The goo can be rolled into a ball, or it will ooze between fi ngers, depending on how it’s handled.
2. Ask the children to describe how the goo feels in their hands and what they can do with it. Encourage them to use as many diff erent words as possible.
EXTENSION ACTIVITY:• Make the goo ahead of time, but knead it until much of
the moisture has evaporated and it is fi rmer. At this stage, it can be used much like play dough to build objects or to press into molds. Provide a variety of objects for the children to use as molds.
PREVIEW: The children will experiment with a gluey substance. In addition to using fi ne motor skills, this activity enhances vocabulary development and language skills.
MATERIALS
• 2 cups of liquid starch• 1 cup white school glue• Medium bowl• Mixing spoon• Plastic placemats, one for
each child
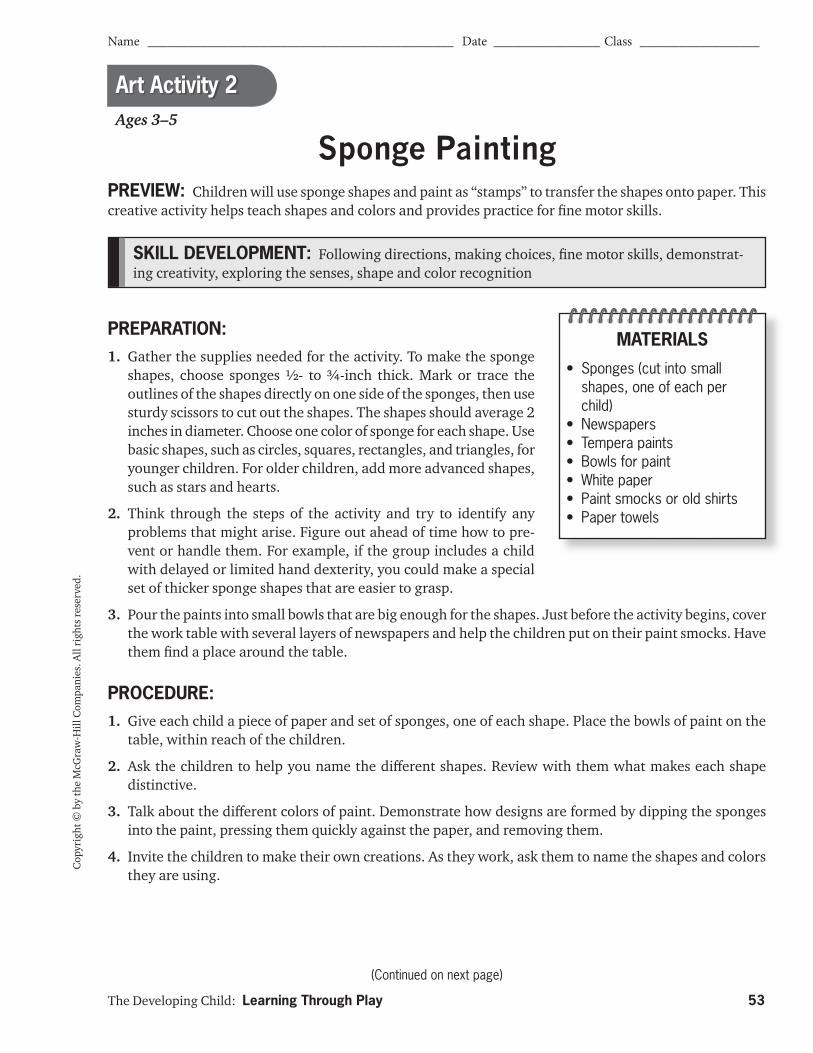
The Developing Child: Learning Through Play 53
Name ______________________________________________ Date ________________ Class __________________
(Continued on next page)
Cop
yrig
ht ©
by
the
McG
raw
-Hill
Com
pani
es. A
ll ri
ghts
rese
rved
.
SKILL DEVELOPMENT: Following directions, making choices, fi ne motor skills, demonstrat-ing creativity, exploring the senses, shape and color recognition
Art Activity 2
Sponge PaintingAges 3–5
PREPARATION:1. Gather the supplies needed for the activity. To make the sponge
shapes, choose sponges ½- to ¾-inch thick. Mark or trace the outlines of the shapes directly on one side of the sponges, then use sturdy scissors to cut out the shapes. The shapes should average 2 inches in diameter. Choose one color of sponge for each shape. Use basic shapes, such as circles, squares, rectangles, and triangles, for younger children. For older children, add more advanced shapes, such as stars and hearts.
2. Think through the steps of the activity and try to identify any problems that might arise. Figure out ahead of time how to pre-vent or handle them. For example, if the group includes a child with delayed or limited hand dexterity, you could make a special set of thicker sponge shapes that are easier to grasp.
3. Pour the paints into small bowls that are big enough for the shapes. Just before the activity begins, cover the work table with several layers of newspapers and help the children put on their paint smocks. Have them fi nd a place around the table.
PROCEDURE:1. Give each child a piece of paper and set of sponges, one of each shape. Place the bowls of paint on the
table, within reach of the children.
2. Ask the children to help you name the diff erent shapes. Review with them what makes each shape distinctive.
3. Talk about the diff erent colors of paint. Demonstrate how designs are formed by dipping the sponges into the paint, pressing them quickly against the paper, and removing them.
4. Invite the children to make their own creations. As they work, ask them to name the shapes and colors they are using.
PREVIEW: Children will use sponge shapes and paint as “stamps” to transfer the shapes onto paper. This creative activity helps teach shapes and colors and provides practice for fi ne motor skills.
MATERIALS
• Sponges (cut into small shapes, one of each per child)
• Newspapers• Tempera paints• Bowls for paint• White paper• Paint smocks or old shirts• Paper towels
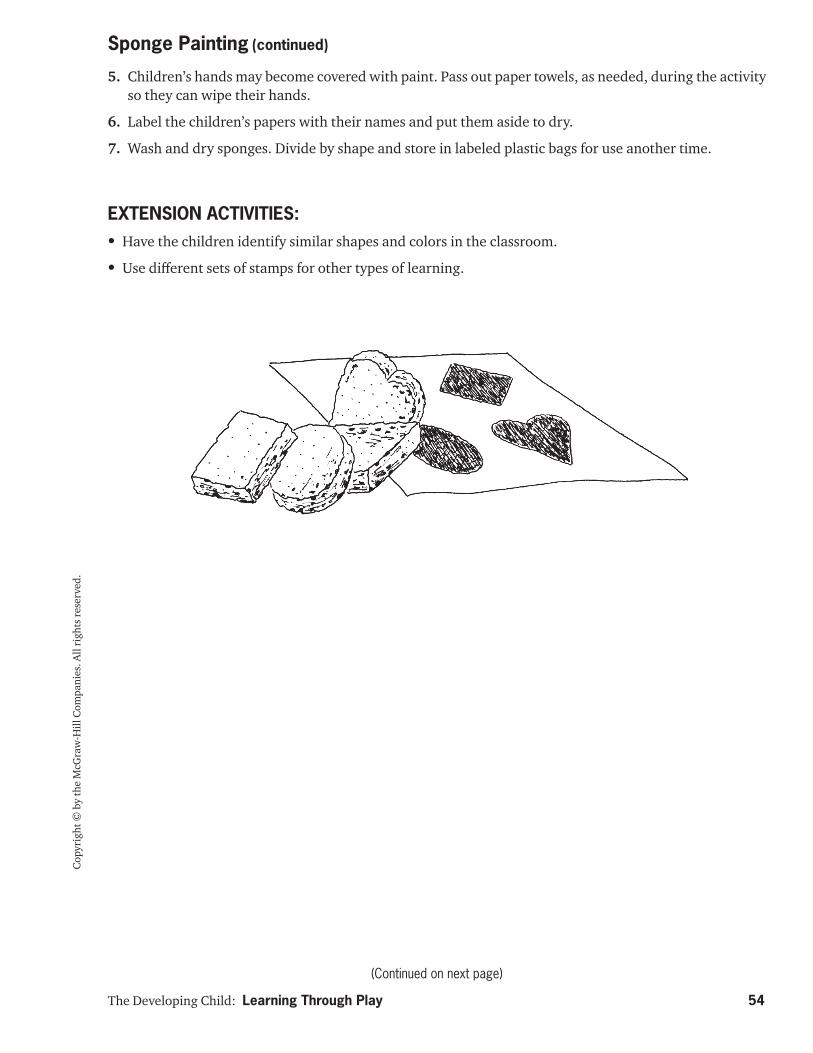
(Continued on next page)
Cop
yrig
ht ©
by
the
McG
raw
-Hill
Com
pani
es. A
ll ri
ghts
rese
rved
.
The Developing Child: Learning Through Play 54
5. Children’s hands may become covered with paint. Pass out paper towels, as needed, during the activity so they can wipe their hands.
6. Label the children’s papers with their names and put them aside to dry.
7. Wash and dry sponges. Divide by shape and store in labeled plastic bags for use another time.
EXTENSION ACTIVITIES:• Have the children identify similar shapes and colors in the classroom.
• Use diff erent sets of stamps for other types of learning.
Sponge Painting (continued)
The Developing Child: Learning Through Play 55
Name ______________________________________________ Date ________________ Class __________________
(Continued on next page)
Cop
yrig
ht ©
by
the
McG
raw
-Hill
Com
pani
es. A
ll ri
ghts
rese
rved
.Art Activity 3Ages 3–5
Make Your Own Play Dough
SKILL DEVELOPMENT: Following directions, sharing and taking turns, fi ne motor skills, demonstrating creativity, exploring the senses, measurements and math concepts
PREPARATION:1. Plan how you will organize this activity. It works best if the chil-
dren are divided into small groups of fi ve or six, with each group making one batch of play dough of a diff erent color. If you make only one batch of dough, you may divide it into several parts and add a diff erent color to each part.
2. Calculate the amount of the ingredients you will need for all the children. What additional equipment will you need if you make more than one batch?
3. Cover the work area with newspapers. Help the children put on the paint smocks or old shirts. Position each group of children around a mixing bowl.
PROCEDURE:1. To begin the activity, ask the children how many of them have ever
helped cook, perhaps making cookies. Remind them that when they cook, just the right amount of each ingredient must be put in the food. If too much of one thing was put in, the food might taste bad or not cook right. Show them the special measuring cups and spoons that are used to make sure just the right amounts go in.
2. Explain that today they will make play dough. Like food, it is made by putting certain amounts of ingredients together. Show them the fl our, salt, water, salad oil, and food coloring that are the ingredi-ents of play dough. Demonstrate how to measure the right amount of ingredients.
3. Assign each child a job as part of the process. For example, two children can each pour a cup of fl our into the mixing bowl, another add a cup of salt, and so on. Stir the mixture until a dough forms. Older children may be able to measure out the ingredients.
PREVIEW: The children will help make play dough that they can then use for a variety of activities. The process includes measuring and opportunities to improve fi ne motor skills.
MATERIALS
• Newspapers or plastic tablecloth
• Paint smocks or old shirts• Mixing bowl• Spoons• Measuring spoons• Measuring cups• Ingredients per batch of play
dough: 2 cups fl our 1 cup salt 1 cup water 2 tablespoons salad oil Food coloring
• Plastic placemats, one for each child
• Tools such as toy rolling pins, cookie cutters, and magnetic letters
• Airtight containers or bags
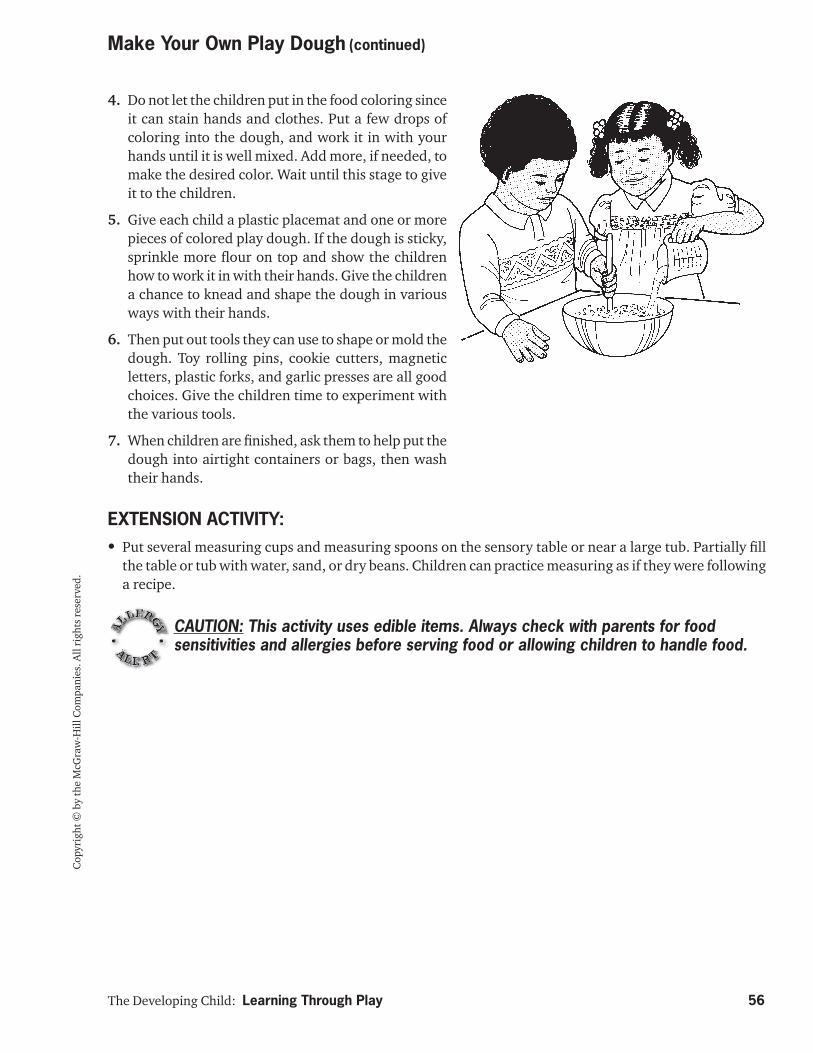
The Developing Child: Learning Through Play 56
Cop
yrig
ht ©
by
the
McG
raw
-Hill
Com
pani
es. A
ll ri
ghts
rese
rved
.
4. Do not let the children put in the food coloring since it can stain hands and clothes. Put a few drops of coloring into the dough, and work it in with your hands until it is well mixed. Add more, if needed, to make the desired color. Wait until this stage to give it to the children.
5. Give each child a plastic placemat and one or more pieces of colored play dough. If the dough is sticky, sprinkle more fl our on top and show the children how to work it in with their hands. Give the children a chance to knead and shape the dough in various ways with their hands.
6. Then put out tools they can use to shape or mold the dough. Toy rolling pins, cookie cutters, magnetic letters, plastic forks, and garlic presses are all good choices. Give the children time to experiment with the various tools.
7. When children are fi nished, ask them to help put the dough into airtight containers or bags, then wash their hands.
EXTENSION ACTIVITY:• Put several measuring cups and measuring spoons on the sensory table or near a large tub. Partially fi ll
the table or tub with water, sand, or dry beans. Children can practice measuring as if they were following a recipe.
Make Your Own Play Dough (continued)
CAUTION: This activity uses edible items. Always check with parents for food sensitivities and allergies before serving food or allowing children to handle food.
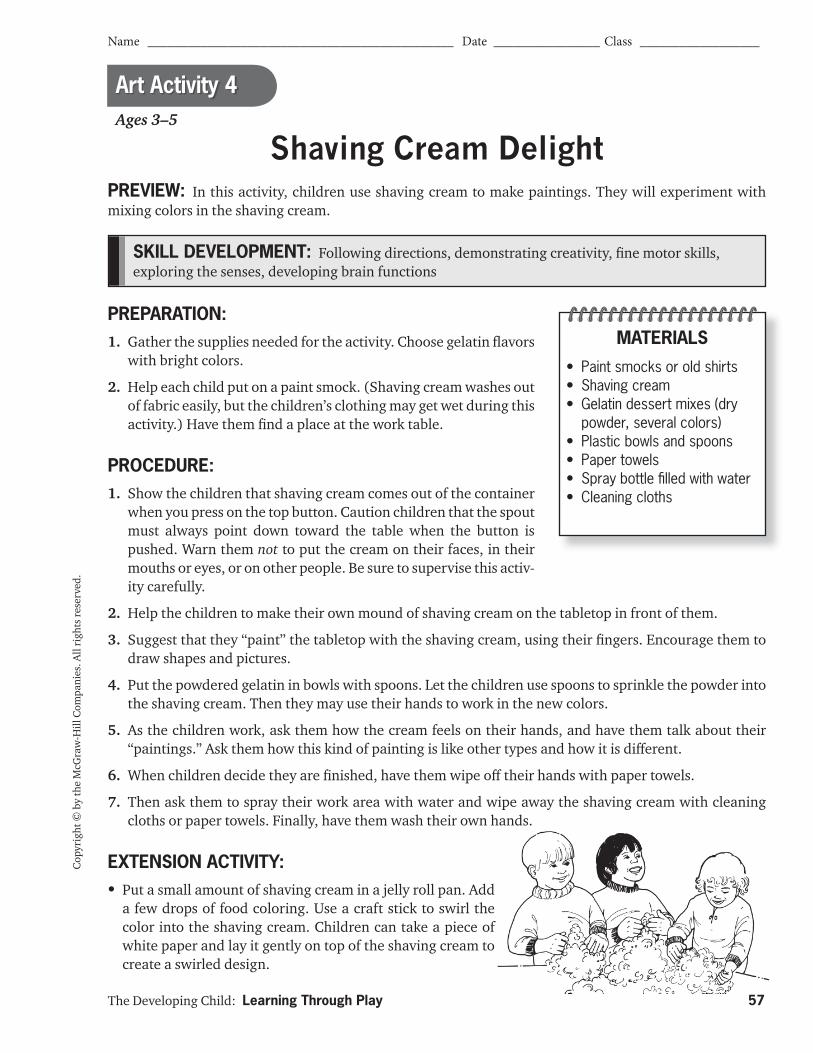
The Developing Child: Learning Through Play 57
Cop
yrig
ht ©
by
the
McG
raw
-Hill
Com
pani
es. A
ll ri
ghts
rese
rved
.
SKILL DEVELOPMENT: Following directions, demonstrating creativity, fi ne motor skills, exploring the senses, developing brain functions
Art Activity 4Ages 3–5
Shaving Cream Delight
PREPARATION:1. Gather the supplies needed for the activity. Choose gelatin fl avors
with bright colors.
2. Help each child put on a paint smock. (Shaving cream washes out of fabric easily, but the children’s clothing may get wet during this activity.) Have them fi nd a place at the work table.
PROCEDURE:1. Show the children that shaving cream comes out of the container
when you press on the top button. Caution children that the spout must always point down toward the table when the button is pushed. Warn them not to put the cream on their faces, in their mouths or eyes, or on other people. Be sure to supervise this activ-ity carefully.
2. Help the children to make their own mound of shaving cream on the tabletop in front of them.
3. Suggest that they “paint” the tabletop with the shaving cream, using their fi ngers. Encourage them to draw shapes and pictures.
4. Put the powdered gelatin in bowls with spoons. Let the children use spoons to sprinkle the powder into the shaving cream. Then they may use their hands to work in the new colors.
5. As the children work, ask them how the cream feels on their hands, and have them talk about their “paintings.” Ask them how this kind of painting is like other types and how it is diff erent.
6. When children decide they are fi nished, have them wipe off their hands with paper towels.
7. Then ask them to spray their work area with water and wipe away the shaving cream with cleaning cloths or paper towels. Finally, have them wash their own hands.
EXTENSION ACTIVITY:• Put a small amount of shaving cream in a jelly roll pan. Add
a few drops of food coloring. Use a craft stick to swirl the color into the shaving cream. Children can take a piece of white paper and lay it gently on top of the shaving cream to create a swirled design.
PREVIEW: In this activity, children use shaving cream to make paintings. They will experiment with mixing colors in the shaving cream.
MATERIALS
• Paint smocks or old shirts• Shaving cream• Gelatin dessert mixes (dry
powder, several colors)• Plastic bowls and spoons• Paper towels• Spray bottle fi lled with water• Cleaning cloths
Name ______________________________________________ Date ________________ Class __________________
The Developing Child: Learning Through Play 58
Name ______________________________________________ Date ________________ Class __________________
Cop
yrig
ht ©
by
the
McG
raw
-Hill
Com
pani
es. A
ll ri
ghts
rese
rved
.Art Activity 5Ages 3–5
SKILL DEVELOPMENT: Following directions, making choices, fi ne motor skills, demonstrat-ing creativity
PREPARATION:1. Gather the supplies needed for the activity. Although pipe cleaners
are an easy type of wire to work with, supplying other types as well helps extend learning.
2. Think through the steps of the activity and try to identify any pos-sible problems. For example, some children, especially younger ones, may fi nd it easier to work the wire into a shape before it is attached to the foam tray.
3. Just before the activity, put a foam tray at each child’s seat along with a variety of pipe cleaners and wires. Have the children fi nd a seat at the table.
PROCEDURE:1. Show the children how to insert both ends of a pipe cleaner or piece of wire into the foam so the wire
stands up. Demonstrate how to bend and loop the fl exible wire.
2. Ask the children to select wires and use them to make shapes and designs.
3. Ask the children to talk about their sculptures. Encourage them to say why they chose particular colors or designs.
EXTENSION ACTIVITY:• Take the children to see three-dimensional
art, or you could show them photos of some three-dimensional art and discuss the mate-rials that were used.
PREVIEW: Children will experiment shaping pipe cleaners and wires to make shapes and designs.
MATERIALS
• Clean foam meat or deli trays
• Pipe cleaners of varying lengths, shapes, and colors
• Color-coded scrap telephone wire or other easily bendable wires
Wire Sculpture
The Developing Child: Learning Through Play 59
Name ______________________________________________ Date ________________ Class __________________
(Continued on next page)
Cop
yrig
ht ©
by
the
McG
raw
-Hill
Com
pani
es. A
ll ri
ghts
rese
rved
.
SKILL DEVELOPMENT: Following directions, making choices, fi ne motor skills, demonstrat-ing creativity, dramatic expression, math concepts
Ages 3–6
PREPARATION:1. Gather the supplies needed for the activity. Cut the roll paper in
sheets that are longer than the children’s bodies. Small pieces of colored paper or other decorations could be used in place of the fabric scraps.
2. Think through where the activity will take place. You will need open space on a hard fl oor surface to trace the children’s bodies plus additional space for them to decorate the tracings. If any furniture and equipment must be moved to clear space, it is best to do this before the children arrive.
3. Think through the steps of the activity and try to identify any problems that might arise. Figure out ahead of time how to pre-vent or handle them. For example, tracing and cutting out the fi gures will be time-consuming. If you have more teaching staff available, use additional people to speed the process. If not, you could let children play until it is their turn.
PROCEDURE:1. Before the activity, discuss how people are diff erent, including diff erent sizes. Stress how diff erences
make the world interesting. Include the idea that older children tend to be bigger. Emphasize that no one size is best.
2. One at a time, ask the children to lie down on a clean sheet of paper. Trace around the child’s body with a marker, being careful not to get the marker on the child’s clothes. Cut around the outline, and write the child’s name on the paper, such as on the back of the foot.
3. Place the paper bodies on the fl oor or on large tables where children can reach all sides.
4. Give the children the markers, and ask them to decorate their paper body. Younger children will put colorful scribbles on the paper, and older children might draw on eyes or clothes.
A Life-Size MePREVIEW: Each child will decorate a life-size paper tracing of his or her body. In doing so, the children will learn about size, while expressing their creativity.
MATERIALS
• Large sheets of roll paper• Adult-size scissors• Washable markers• Small scraps of fabric• Yarn, cut into short lengths• Glue sticks, one for each
child• Cardboard strip with each
child’s name
Art Activity 6
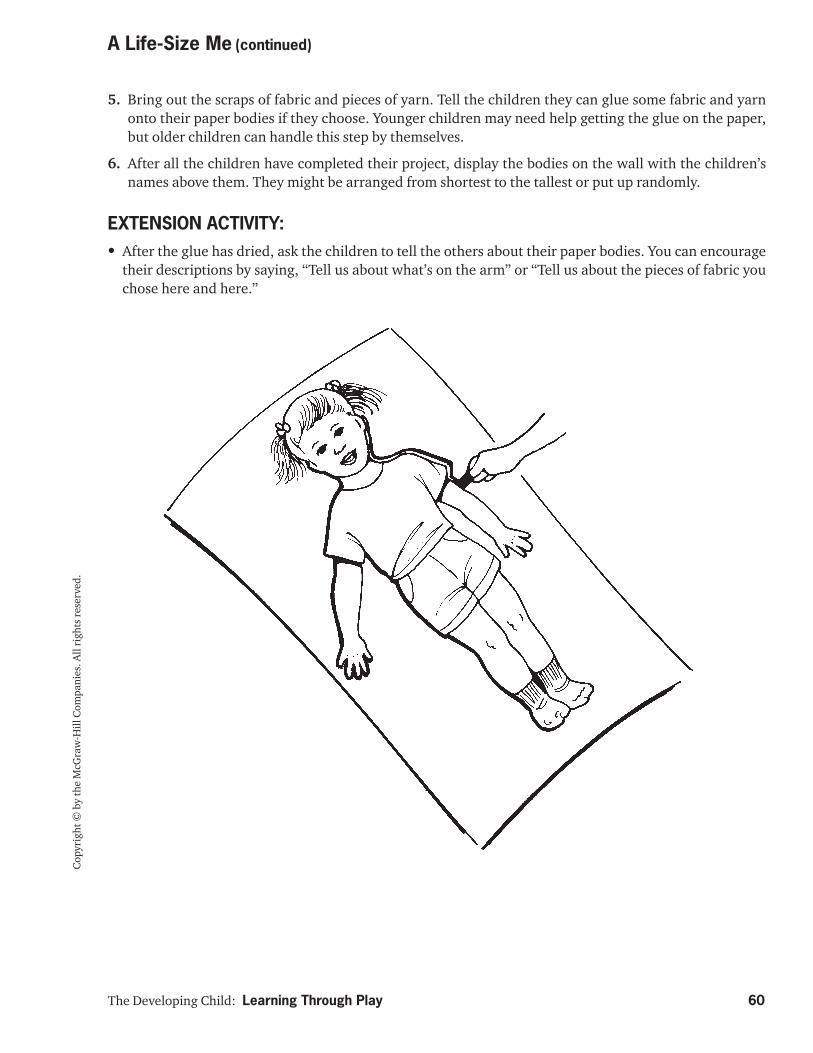
The Developing Child: Learning Through Play 60
Cop
yrig
ht ©
by
the
McG
raw
-Hill
Com
pani
es. A
ll ri
ghts
rese
rved
.
5. Bring out the scraps of fabric and pieces of yarn. Tell the children they can glue some fabric and yarn onto their paper bodies if they choose. Younger children may need help getting the glue on the paper, but older children can handle this step by themselves.
6. After all the children have completed their project, display the bodies on the wall with the children’s names above them. They might be arranged from shortest to the tallest or put up randomly.
EXTENSION ACTIVITY:• After the glue has dried, ask the children to tell the others about their paper bodies. You can encourage
their descriptions by saying, “Tell us about what’s on the arm” or “Tell us about the pieces of fabric you chose here and here.”
A Life-Size Me (continued)
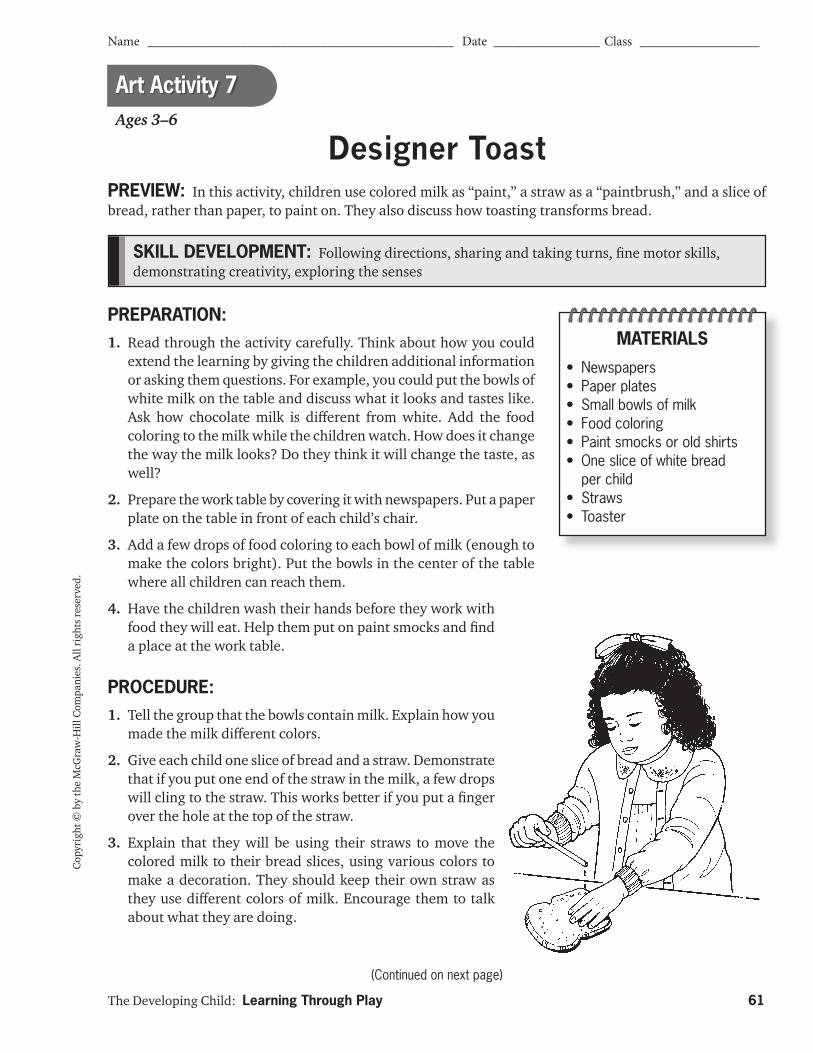
The Developing Child: Learning Through Play 61
Name ______________________________________________ Date ________________ Class __________________
(Continued on next page)
Cop
yrig
ht ©
by
the
McG
raw
-Hill
Com
pani
es. A
ll ri
ghts
rese
rved
.
SKILL DEVELOPMENT: Following directions, sharing and taking turns, fi ne motor skills, demonstrating creativity, exploring the senses
Designer Toast
PREPARATION:1. Read through the activity carefully. Think about how you could
extend the learning by giving the children additional information or asking them questions. For example, you could put the bowls of white milk on the table and discuss what it looks and tastes like. Ask how chocolate milk is diff erent from white. Add the food coloring to the milk while the children watch. How does it change the way the milk looks? Do they think it will change the taste, as well?
2. Prepare the work table by covering it with newspapers. Put a paper plate on the table in front of each child’s chair.
3. Add a few drops of food coloring to each bowl of milk (enough to make the colors bright). Put the bowls in the center of the table where all children can reach them.
4. Have the children wash their hands before they work with food they will eat. Help them put on paint smocks and fi nd a place at the work table.
PROCEDURE:1. Tell the group that the bowls contain milk. Explain how you
made the milk diff erent colors.
2. Give each child one slice of bread and a straw. Demonstrate that if you put one end of the straw in the milk, a few drops will cling to the straw. This works better if you put a fi nger over the hole at the top of the straw.
3. Explain that they will be using their straws to move the colored milk to their bread slices, using various colors to make a decoration. They should keep their own straw as they use diff erent colors of milk. Encourage them to talk about what they are doing.
PREVIEW: In this activity, children use colored milk as “paint,” a straw as a “paintbrush,” and a slice of bread, rather than paper, to paint on. They also discuss how toasting transforms bread.
Ages 3–6
Art Activity 7
MATERIALS
• Newspapers• Paper plates• Small bowls of milk• Food coloring• Paint smocks or old shirts• One slice of white bread
per child• Straws• Toaster

The Developing Child: Learning Through Play 62
Cop
yrig
ht ©
by
the
McG
raw
-Hill
Com
pani
es. A
ll ri
ghts
rese
rved
.
4. When the children are fi nished decorating their bread, toast the slices in the toaster. This will make their designs brighter. (Note each child’s individual design before toasting.)
5. Ask the children how the toaster changes the bread. What words would they use to describe the bread before and after it is toasted? Let the children eat their toast.
EXTENSION ACTIVITY:• If desired, make decorated French toast instead. Dip slices of bread in a mixture of milk and eggs, thor-
oughly blended. Put one piece on each child’s plate. They can decorate the bread with colored milk or use colored sugar. Cook the slices in an electric skillet containing a thin layer of butter or margarine. Flip each slice to brown the other side.
Designer Toast (continued)
CAUTION: This activity uses edible items. Always check with parents for food sensitivities and allergies before serving food or allowing children to handle food.
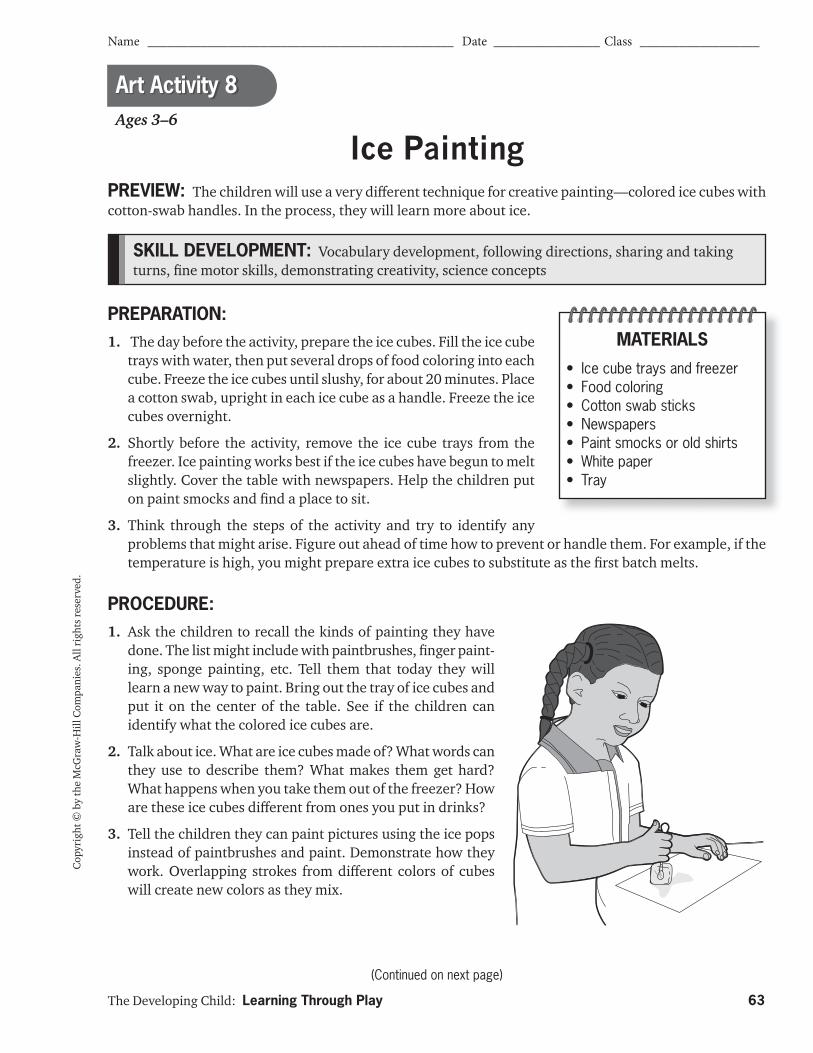
The Developing Child: Learning Through Play 63
Name ______________________________________________ Date ________________ Class __________________
(Continued on next page)
Cop
yrig
ht ©
by
the
McG
raw
-Hill
Com
pani
es. A
ll ri
ghts
rese
rved
.
SKILL DEVELOPMENT: Vocabulary development, following directions, sharing and taking turns, fi ne motor skills, demonstrating creativity, science concepts
Ages 3–6
Ice Painting
PREPARATION:1. The day before the activity, prepare the ice cubes. Fill the ice cube
trays with water, then put several drops of food coloring into each cube. Freeze the ice cubes until slushy, for about 20 minutes. Place a cotton swab, upright in each ice cube as a handle. Freeze the ice cubes overnight.
2. Shortly before the activity, remove the ice cube trays from the freezer. Ice painting works best if the ice cubes have begun to melt slightly. Cover the table with newspapers. Help the children put on paint smocks and fi nd a place to sit.
3. Think through the steps of the activity and try to identify any problems that might arise. Figure out ahead of time how to prevent or handle them. For example, if the temperature is high, you might prepare extra ice cubes to substitute as the fi rst batch melts.
PROCEDURE:1. Ask the children to recall the kinds of painting they have
done. The list might include with paintbrushes, fi nger paint-ing, sponge painting, etc. Tell them that today they will learn a new way to paint. Bring out the tray of ice cubes and put it on the center of the table. See if the children can identify what the colored ice cubes are.
2. Talk about ice. What are ice cubes made of? What words can they use to describe them? What makes them get hard? What happens when you take them out of the freezer? How are these ice cubes diff erent from ones you put in drinks?
3. Tell the children they can paint pictures using the ice pops instead of paintbrushes and paint. Demonstrate how they work. Overlapping strokes from diff erent colors of cubes will create new colors as they mix.
Art Activity 8
PREVIEW: The children will use a very diff erent technique for creative painting—colored ice cubes with cotton-swab handles. In the process, they will learn more about ice.
MATERIALS
• Ice cube trays and freezer• Food coloring• Cotton swab sticks• Newspapers• Paint smocks or old shirts• White paper• Tray
The Developing Child: Learning Through Play 64
Cop
yrig
ht ©
by
the
McG
raw
-Hill
Com
pani
es. A
ll ri
ghts
rese
rved
.
4. Give each child a sheet of white paper. Encourage children to share the ice cubes as they experiment drawing with them. Be prepared to give out additional pieces of paper. Label all paintings with children’s names. Set them aside to dry.
5. After the activity, ask the children how painting with ice was like, and diff erent from, painting with paint.
EXTENSION ACTIVITY:• You could use this as part of a pair of activities. A day or two before the ice painting, have the children
paint a picture of a house, person, or fl ower using tempera paint and a brush. Then have them paint the same thing using the ice pops. Display each child’s pair of paintings and ask the child to talk about the diff erences. Was it easier to use the paintbrush or ice pops to paint? Which method did they like better and why?
Ice Painting (continued)
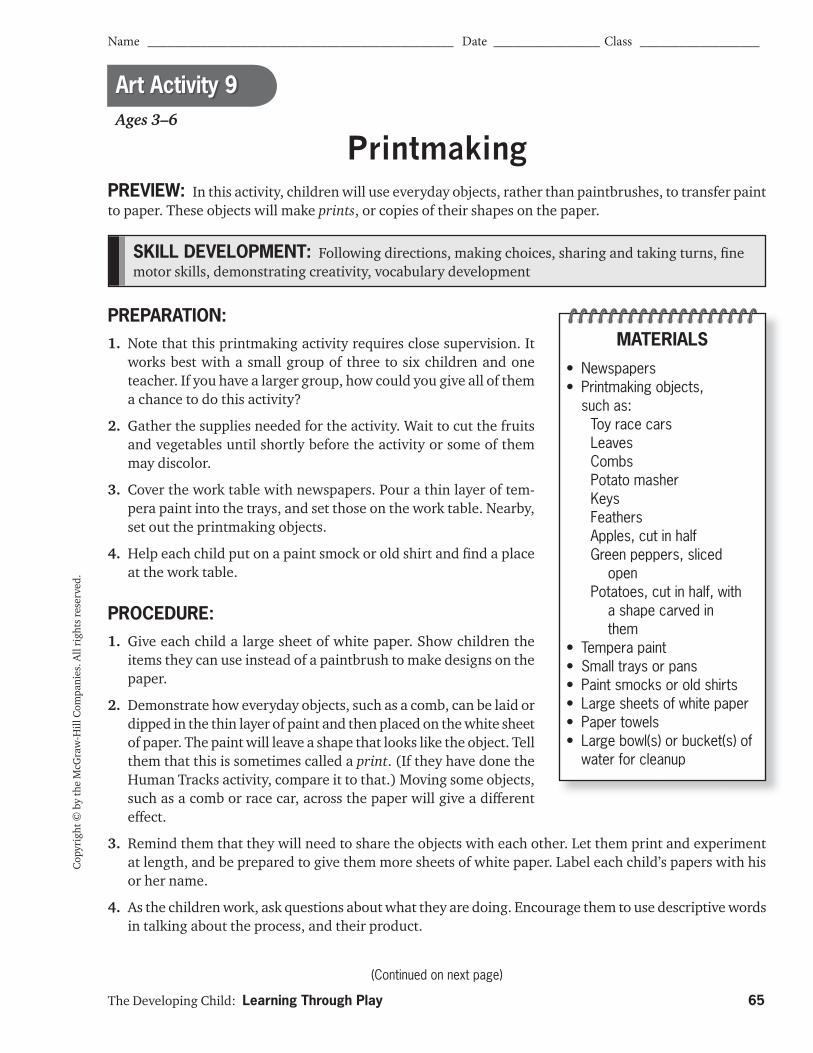
The Developing Child: Learning Through Play 65
Name ______________________________________________ Date ________________ Class __________________
(Continued on next page)
Cop
yrig
ht ©
by
the
McG
raw
-Hill
Com
pani
es. A
ll ri
ghts
rese
rved
.
SKILL DEVELOPMENT: Following directions, making choices, sharing and taking turns, fi ne motor skills, demonstrating creativity, vocabulary development
Art Activity 9Ages 3–6
Printmaking
PREPARATION:1. Note that this printmaking activity requires close supervision. It
works best with a small group of three to six children and one teacher. If you have a larger group, how could you give all of them a chance to do this activity?
2. Gather the supplies needed for the activity. Wait to cut the fruits and vegetables until shortly before the activity or some of them may discolor.
3. Cover the work table with newspapers. Pour a thin layer of tem-pera paint into the trays, and set those on the work table. Nearby, set out the printmaking objects.
4. Help each child put on a paint smock or old shirt and fi nd a place at the work table.
PROCEDURE:1. Give each child a large sheet of white paper. Show children the
items they can use instead of a paintbrush to make designs on the paper.
2. Demonstrate how everyday objects, such as a comb, can be laid or dipped in the thin layer of paint and then placed on the white sheet of paper. The paint will leave a shape that looks like the object. Tell them that this is sometimes called a print. (If they have done the Human Tracks activity, compare it to that.) Moving some objects, such as a comb or race car, across the paper will give a diff erent eff ect.
3. Remind them that they will need to share the objects with each other. Let them print and experiment at length, and be prepared to give them more sheets of white paper. Label each child’s papers with his or her name.
4. As the children work, ask questions about what they are doing. Encourage them to use descriptive words in talking about the process, and their product.
PREVIEW: In this activity, children will use everyday objects, rather than paintbrushes, to transfer paint to paper. These objects will make prints, or copies of their shapes on the paper.
MATERIALS
• Newspapers• Printmaking objects,
such as: Toy race cars Leaves Combs Potato masher Keys Feathers Apples, cut in half Green peppers, sliced open Potatoes, cut in half, with a shape carved in them
• Tempera paint• Small trays or pans• Paint smocks or old shirts • Large sheets of white paper• Paper towels• Large bowl(s) or bucket(s) of
water for cleanup
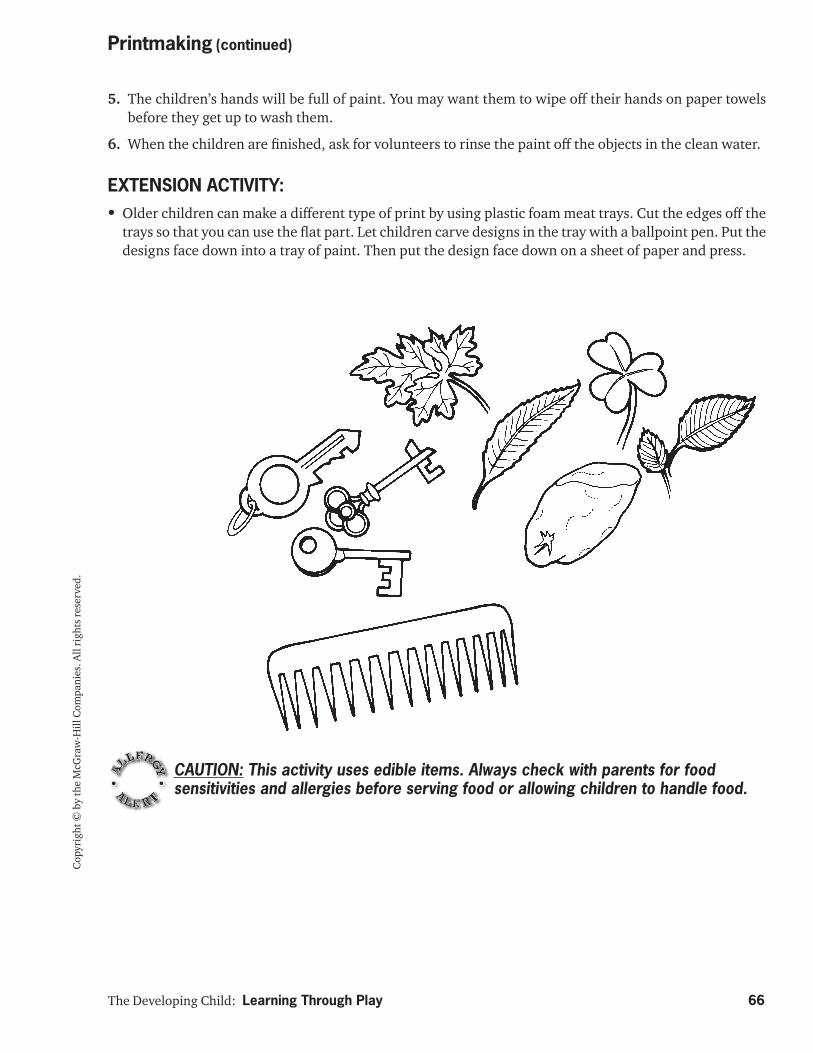
The Developing Child: Learning Through Play 66
Cop
yrig
ht ©
by
the
McG
raw
-Hill
Com
pani
es. A
ll ri
ghts
rese
rved
.
5. The children’s hands will be full of paint. You may want them to wipe off their hands on paper towels before they get up to wash them.
6. When the children are fi nished, ask for volunteers to rinse the paint off the objects in the clean water.
EXTENSION ACTIVITY:• Older children can make a diff erent type of print by using plastic foam meat trays. Cut the edges off the
trays so that you can use the fl at part. Let children carve designs in the tray with a ballpoint pen. Put the designs face down into a tray of paint. Then put the design face down on a sheet of paper and press.
Printmaking (continued)
CAUTION: This activity uses edible items. Always check with parents for food sensitivities and allergies before serving food or allowing children to handle food.
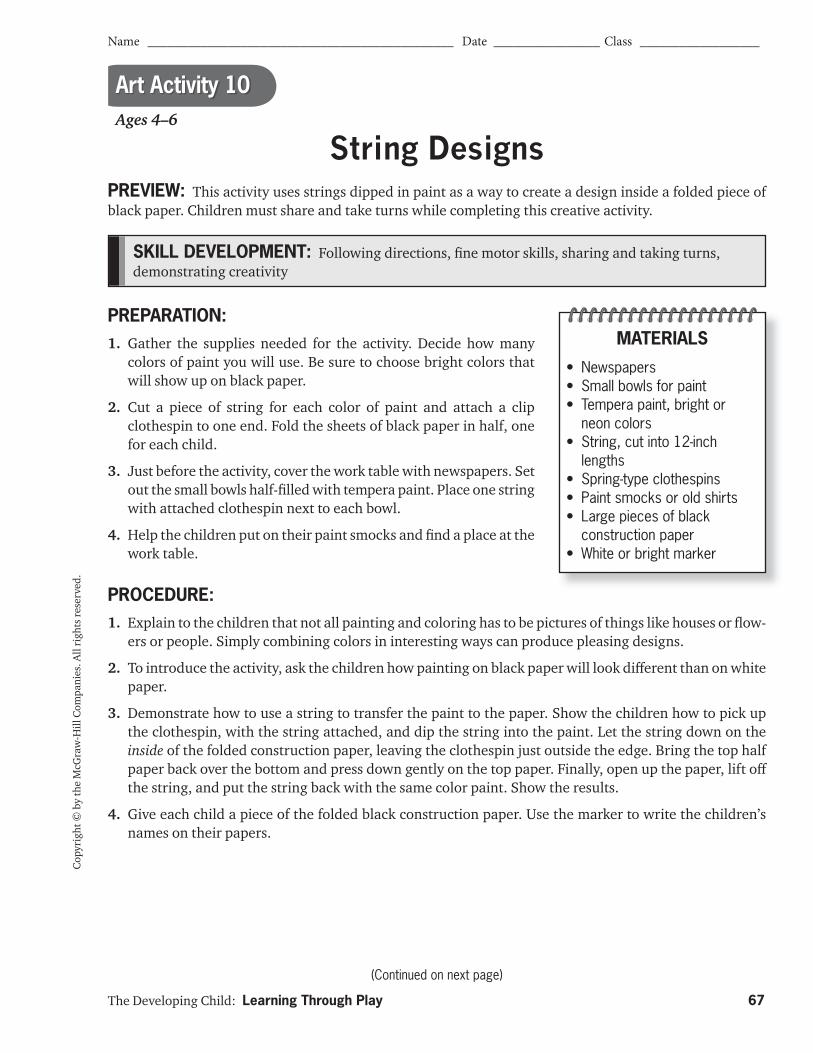
The Developing Child: Learning Through Play 67
Name ______________________________________________ Date ________________ Class __________________
(Continued on next page)
Cop
yrig
ht ©
by
the
McG
raw
-Hill
Com
pani
es. A
ll ri
ghts
rese
rved
.
SKILL DEVELOPMENT: Following directions, fi ne motor skills, sharing and taking turns, demonstrating creativity
Ages 4–6
Art Activity 10
String Designs
PREPARATION:1. Gather the supplies needed for the activity. Decide how many
colors of paint you will use. Be sure to choose bright colors that will show up on black paper.
2. Cut a piece of string for each color of paint and attach a clip clothespin to one end. Fold the sheets of black paper in half, one for each child.
3. Just before the activity, cover the work table with newspapers. Set out the small bowls half-fi lled with tempera paint. Place one string with attached clothespin next to each bowl.
4. Help the children put on their paint smocks and fi nd a place at the work table.
PROCEDURE:1. Explain to the children that not all painting and coloring has to be pictures of things like houses or fl ow-
ers or people. Simply combining colors in interesting ways can produce pleasing designs.
2. To introduce the activity, ask the children how painting on black paper will look diff erent than on white paper.
3. Demonstrate how to use a string to transfer the paint to the paper. Show the children how to pick up the clothespin, with the string attached, and dip the string into the paint. Let the string down on theinside of the folded construction paper, leaving the clothespin just outside the edge. Bring the top half paper back over the bottom and press down gently on the top paper. Finally, open up the paper, lift off the string, and put the string back with the same color paint. Show the results.
4. Give each child a piece of the folded black construction paper. Use the marker to write the children’s names on their papers.
PREVIEW: This activity uses strings dipped in paint as a way to create a design inside a folded piece of black paper. Children must share and take turns while completing this creative activity.
MATERIALS
• Newspapers• Small bowls for paint• Tempera paint, bright or
neon colors• String, cut into 12-inch
lengths• Spring-type clothespins• Paint smocks or old shirts• Large pieces of black
construction paper• White or bright marker

The Developing Child: Learning Through Play 68
Cop
yrig
ht ©
by
the
McG
raw
-Hill
Com
pani
es. A
ll ri
ghts
rese
rved
.
5. Encourage the children to make their own string creations, using as many colors as they like. Remind them that they will need to take turns using the colors of paint.
6. When the children are fi nished painting, they can open the construction paper fl at to reveal the painted design and allow it to dry.
EXTENSION ACTIVITY:• Compare the designs the children have painted to special
creatures. Help anyone who would like to glue plastic eyes on their creature. Encourage the children to tell stories about their creatures. They might include the creature’s name, where it lives, and what it likes to do.
String Designs (continued)

The Developing Child: Learning Through Play 69
Name ______________________________________________ Date ________________ Class __________________
(Continued on next page)
Cop
yrig
ht ©
by
the
McG
raw
-Hill
Com
pani
es. A
ll ri
ghts
rese
rved
.
SKILL DEVELOPMENT: Following directions, sharing and taking turns, fi ne motor skills, demonstrating creativity, science concepts
Art Activity 11Ages 4–6
Bubble Painting
PREPARATION:1. Think through the activity before you start. Where can you put
the paintings to dry where they will not be in the way of other activities?
2. Plan additional questions that you could ask the children or related information you could give them to extend their learning. For example, ask what is inside a bubble and how it gets there. What else do they know about bubbles?
3. Cover the work area with newspapers. Fill each paper cup about half full of water. Add two squirts of dish soap and a tablespoon or squirt of tempera paint.
4. Help the children put on the paint smocks and fi nd a place at the table.
PROCEDURE:1. Explain that they will be painting with bubbles, but fi rst they must practice making bubbles.
2. Give each child a straw. Have them practice blowing out through their straws. Put your hand beneath the straws to be sure you feel air coming out.
3. Tell them that although they usually suck in when using a straw, for this project, they may only blow out, just like when they make bubbles in a glass of milk. Have the children stand where they can see you demonstrate the activity.
4. Blow air through your straw into a cup of paint until bubbles mound up out of the cup. Place a white sheet of paper on top of the paper cup, popping the bubbles. Look at, and talk about, the patterns on the paper. Add diff erent color bubbles to the same paper, either shifting the paper to a diff erent spot for the new color or overlapping the old.
PREVIEW: In this activity, the children blow bubbles and use them to create patterns on paper. While doing so, they discuss some characteristics of bubbles.
MATERIALS
• Newspapers• Water• Paper cups• Dish soap• Liquid tempera paint• Straws• White paper• Paint smocks or old shirts
The Developing Child: Learning Through Play 70
Cop
yrig
ht ©
by
the
McG
raw
-Hill
Com
pani
es. A
ll ri
ghts
rese
rved
.
5. Tell the children they may make their own paintings by blowing bubbles in the paint and popping them with white paper.
6. Remind them to keep their own straw when they move straws from one color of paint to another. Ask them not to share straws with others.
7. When the children are fi nished, write, or have them write, their names on their paintings. Lay the paint-ings on newspapers to dry.
EXTENSION ACTIVITIES:• Let the children make their own bubbles to blow outside. They can squirt dish soap in a paper cup, add
some water, and use a plastic bubble-making tool or let the children experiment.
• Make a larger quantity of bubble solution and put it in a bigger container. Provide a variety of devices with holes for them to try blowing bubbles with. Possible devices include a small strainer or sieve, a slotted spoon, the rubber ring to a canning jar, and rings of various sizes cut from plastic lids. Which work best? Does the size of the bubble diff er with the size of the opening?
Bubble Painting (continued)
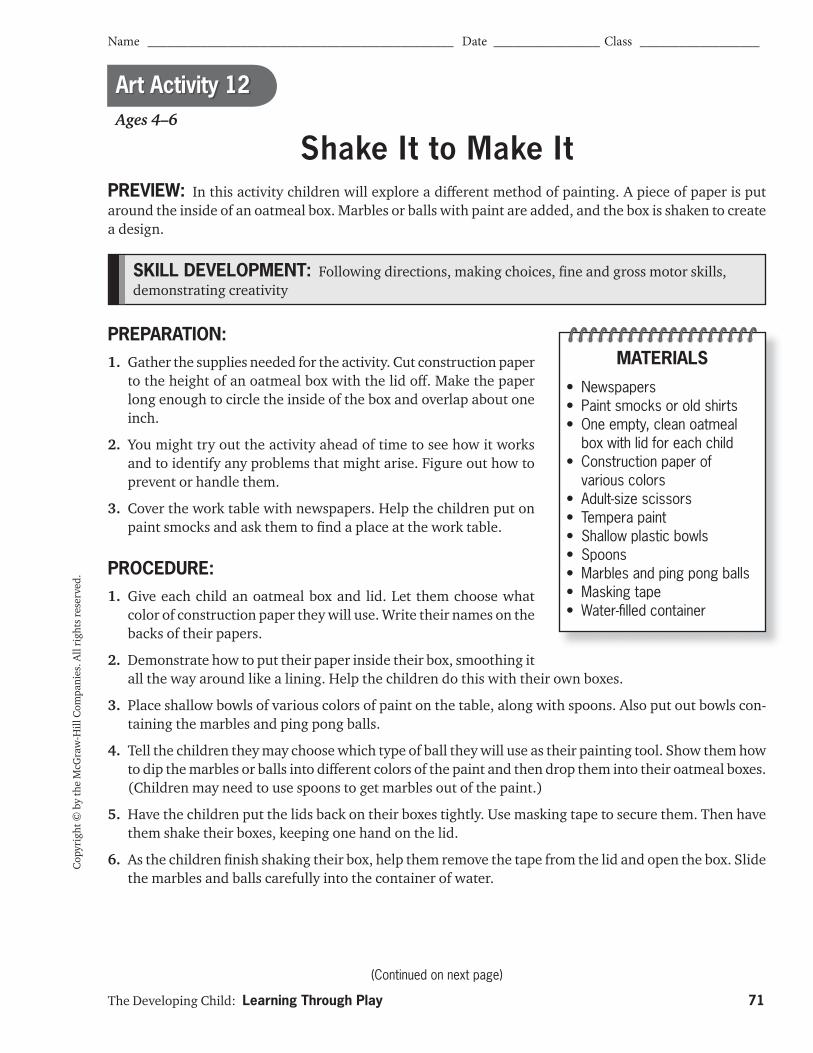
The Developing Child: Learning Through Play 71
Name ______________________________________________ Date ________________ Class __________________
(Continued on next page)
Cop
yrig
ht ©
by
the
McG
raw
-Hill
Com
pani
es. A
ll ri
ghts
rese
rved
.
SKILL DEVELOPMENT: Following directions, making choices, fi ne and gross motor skills, demonstrating creativity
Art Activity 12Ages 4–6
Shake It to Make It
PREPARATION:1. Gather the supplies needed for the activity. Cut construction paper
to the height of an oatmeal box with the lid off . Make the paper long enough to circle the inside of the box and overlap about one inch.
2. You might try out the activity ahead of time to see how it works and to identify any problems that might arise. Figure out how to prevent or handle them.
3. Cover the work table with newspapers. Help the children put on paint smocks and ask them to fi nd a place at the work table.
PROCEDURE:1. Give each child an oatmeal box and lid. Let them choose what
color of construction paper they will use. Write their names on the backs of their papers.
2. Demonstrate how to put their paper inside their box, smoothing it all the way around like a lining. Help the children do this with their own boxes.
3. Place shallow bowls of various colors of paint on the table, along with spoons. Also put out bowls con-taining the marbles and ping pong balls.
4. Tell the children they may choose which type of ball they will use as their painting tool. Show them how to dip the marbles or balls into diff erent colors of the paint and then drop them into their oatmeal boxes. (Children may need to use spoons to get marbles out of the paint.)
5. Have the children put the lids back on their boxes tightly. Use masking tape to secure them. Then have them shake their boxes, keeping one hand on the lid.
6. As the children fi nish shaking their box, help them remove the tape from the lid and open the box. Slide the marbles and balls carefully into the container of water.
PREVIEW: In this activity children will explore a diff erent method of painting. A piece of paper is put around the inside of an oatmeal box. Marbles or balls with paint are added, and the box is shaken to create a design.
MATERIALS
• Newspapers• Paint smocks or old shirts• One empty, clean oatmeal
box with lid for each child• Construction paper of
various colors• Adult-size scissors• Tempera paint• Shallow plastic bowls• Spoons• Marbles and ping pong balls• Masking tape• Water-fi lled container
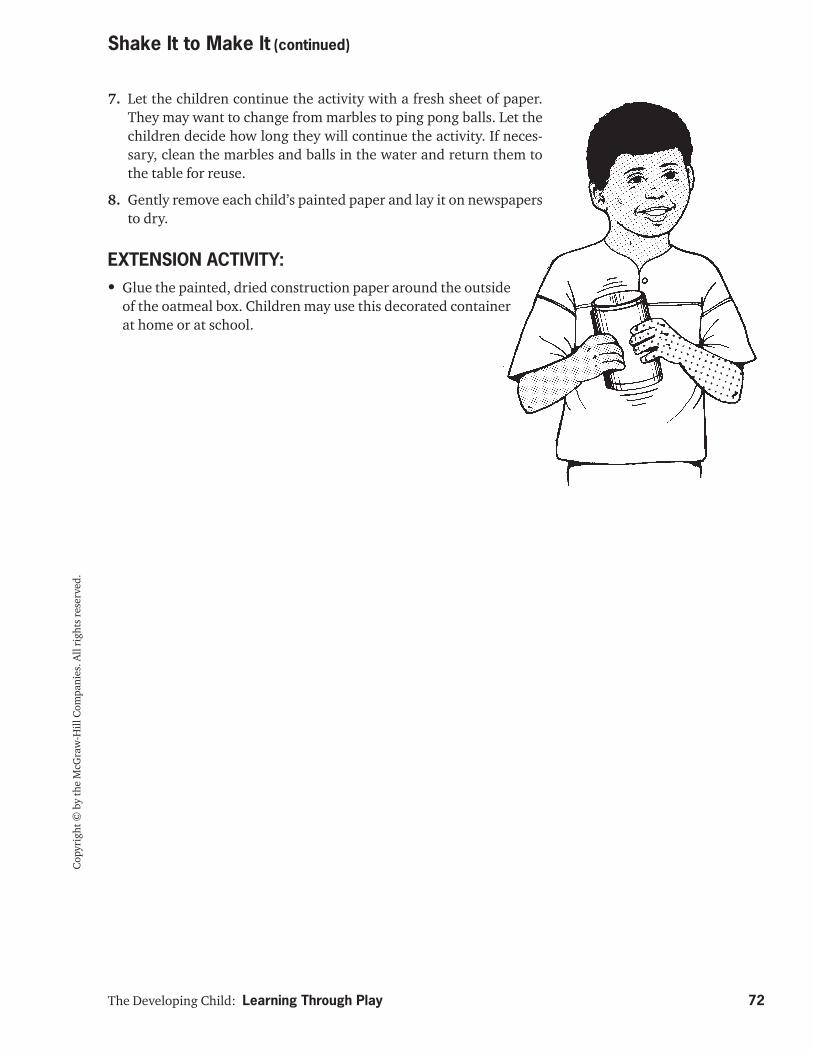
The Developing Child: Learning Through Play 72
Cop
yrig
ht ©
by
the
McG
raw
-Hill
Com
pani
es. A
ll ri
ghts
rese
rved
.
7. Let the children continue the activity with a fresh sheet of paper. They may want to change from marbles to ping pong balls. Let the children decide how long they will continue the activity. If neces-sary, clean the marbles and balls in the water and return them to the table for reuse.
8. Gently remove each child’s painted paper and lay it on newspapers to dry.
EXTENSION ACTIVITY:• Glue the painted, dried construction paper around the outside
of the oatmeal box. Children may use this decorated container at home or at school.
Shake It to Make It (continued)
The Developing Child: Learning Through Play 73
Name ______________________________________________ Date ________________ Class __________________
(Continued on next page)
Cop
yrig
ht ©
by
the
McG
raw
-Hill
Com
pani
es. A
ll ri
ghts
rese
rved
.
SKILL DEVELOPMENT: Fine motor skills, eye-hand coordination, developing creativity, developing vocabulary
Art Activity 13Ages 4–6
Woodworking
PREPARATION:1. Set up a woodworking table away from the main activity areas.
Include child-size tools, nails, and pieces of soft wood. For safety, allow only one or two children to work on this activity at one time. One teacher must supervise this activity at all times.
2. If all materials are not available, fi gure out how you could safely modify the activity. In this way, the children can still participate in this experience. For example, screws and nails could be inserted in foam blocks at a regular table. Have your supervisor approve your plans.
3. Try out the activities you will let the children do. This will help you anticipate any possible problems with the activity and fi gure out how to prevent or handle them. For example, you might predrill some starter holes in the wood to make nailing and screwing easier.
4. Write out a list of safety rules.
5. Review fi rst-aid procedures.
6. Help children put on paint smocks.
PROCEDURE:1. Begin by asking the children what kinds of things are made of wood. Have they ever seen someone saw
or hammer or put in screws?
2. Show the children the tools they will use. Emphasize that these tools can hurt them or other people if they are not used carefully and correctly. Explain the safety rules and help the children put on the safety goggles.
3. Show the children how to hammer nails and screw in screws. Explain that these are ways to put, or fasten, pieces of wood or foam together to make something.
PREVIEW: This activity gives children the opportunity to practice real-life woodworking skills, such as hammering nails, cutting wood, and turning screws.
MATERIALS
• Child-size woodworking table or sturdy child’s table covered with plywood
• Child-size woodworking tools (hammers, short screwdrivers with straight blades)
• Short nails with large heads• Large, short-slotted screws
(not Phillips)• Wood scraps of soft pine• Blocks of foam, such as
packing material• Paint smocks or old shirts• Child-size safety goggles

The Developing Child: Learning Through Play 74
Cop
yrig
ht ©
by
the
McG
raw
-Hill
Com
pani
es. A
ll ri
ghts
rese
rved
.
4. Before they try hammering nails or putting the screws in wood, have them practice in foam. The tips of the nails and screws can be inserted in the foam to make the process easier.
5. Let the children practice putting nails and screws in the soft wood.
EXTENSION ACTIVITY:• Allow children to paint their creations and to tell about what they have made.
Woodworking (continued)
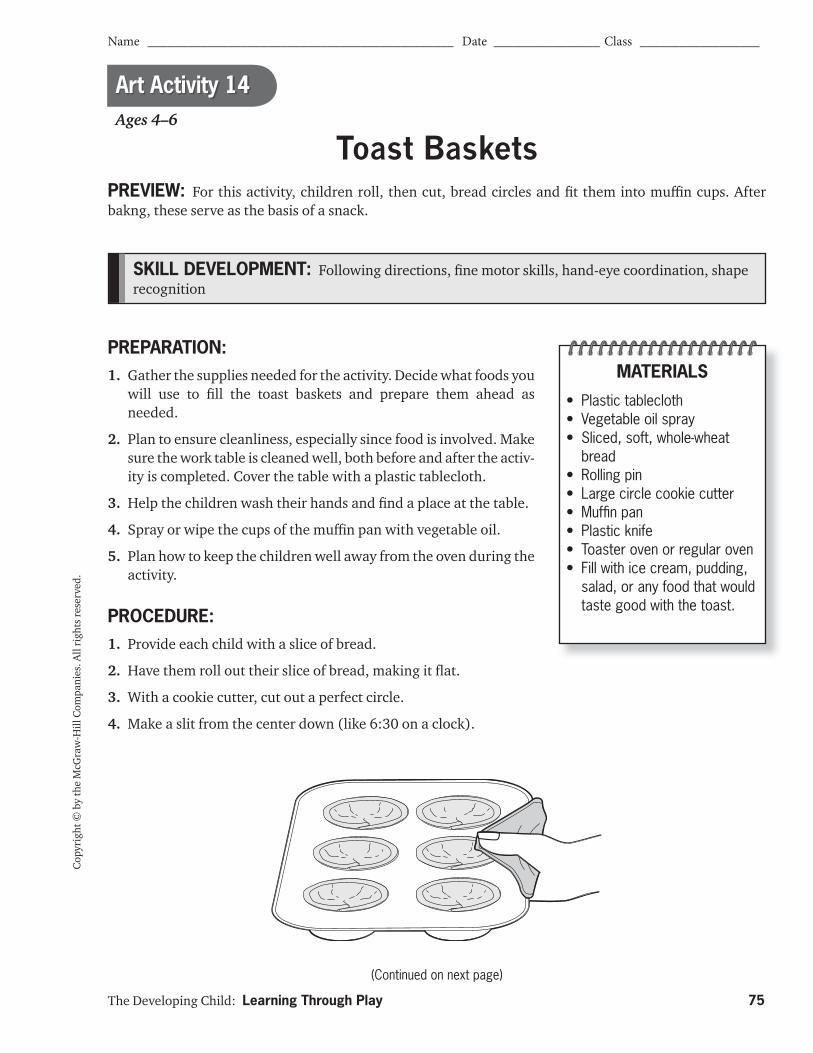
The Developing Child: Learning Through Play 75
Name ______________________________________________ Date ________________ Class __________________
(Continued on next page)
Cop
yrig
ht ©
by
the
McG
raw
-Hill
Com
pani
es. A
ll ri
ghts
rese
rved
.
SKILL DEVELOPMENT: Following directions, fi ne motor skills, hand-eye coordination, shape recognition
Art Activity 14Ages 4–6
Toast Baskets
PREPARATION:1. Gather the supplies needed for the activity. Decide what foods you
will use to fi ll the toast baskets and prepare them ahead as needed.
2. Plan to ensure cleanliness, especially since food is involved. Make sure the work table is cleaned well, both before and after the activ-ity is completed. Cover the table with a plastic tablecloth.
3. Help the children wash their hands and fi nd a place at the table.
4. Spray or wipe the cups of the muffi n pan with vegetable oil.
5. Plan how to keep the children well away from the oven during the activity.
PROCEDURE:1. Provide each child with a slice of bread.
2. Have them roll out their slice of bread, making it fl at.
3. With a cookie cutter, cut out a perfect circle.
4. Make a slit from the center down (like 6:30 on a clock).
PREVIEW: For this activity, children roll, then cut, bread circles and fi t them into muffi n cups. After bakng, these serve as the basis of a snack.
MATERIALS
• Plastic tablecloth• Vegetable oil spray• Sliced, soft, whole-wheat
bread• Rolling pin• Large circle cookie cutter• Muffi n pan• Plastic knife• Toaster oven or regular oven• Fill with ice cream, pudding,
salad, or any food that would taste good with the toast.
The Developing Child: Learning Through Play 76
Cop
yrig
ht ©
by
the
McG
raw
-Hill
Com
pani
es. A
ll ri
ghts
rese
rved
.
5. Gently place each bread circle into the muffi n tin, overlapping the slit of the bread to accommodate the size of the muffi n cup opening.
6. Place the muffi n pan into the oven and bake at 350°F until light golden brown.
7. Fill the individual bread cups with any fi lling.
8. Eat the activity!
EXTENSION ACTIVITIES:• Have students make a simple breakfast or lunch.
• Try diff erent types of bread with the same activity.
• Make free-form shapes with your bread slices.
• Cut out small cookie cutter shapes and bake with some sprinkled Parmesan cheese.
Toast Baskets (continued)
CAUTION: This activity uses edible items. Always check with parents for food sensitivities and allergies before serving food or allowing children to handle food.
The Developing Child: Learning Through Play 77
Name ______________________________________________ Date ________________ Class __________________
(Continued on next page)
Cop
yrig
ht ©
by
the
McG
raw
-Hill
Com
pani
es. A
ll ri
ghts
rese
rved
.
SKILL DEVELOPMENT: Following directions, processing patterns, fi ne motor skills, hand-eye coordination, shape and color recognition
Art Activity 15Ages 4–6
Bead-It
PREPARATION:1. Gather the supplies needed for the activity.
2. Think through the steps of the activity and try to identify any problems that might arise. Figure out ahead of time how to pre-vent and handle them. Make sure cutting tools are safe for children of this age level.
PROCEDURE:1. Either make clay with the children or provide them with clay to
work with. If coloring salt dough, add food coloring before mixing. If food coloring is added, make sure tables are covered with news-print or waxed paper to avoid stains.
2. Supply each child with some clay. Give children the opportunity to play with the clay, get used to its feel, and experiment with how it can be manipulated.
3. Give each child a cup or bowl, labeled with his or her name.
4. Demonstrate how to roll the clay between the hands to form a round bead. Have children insert the small plastic straw or skewer through the bead to make a hole. Have them place each completed bead in their bowls.
5. Air dry or bake the beads (following the manufacturer’s direc-tions if using polymer clay).
6. If the beads have no color, let the children decorate each bead using markers or paint.
PREVIEW: Children will make, design, and string beads. This creative activity provides valuable fi ne motor skill development.
MATERIALS
• Salt dough recipe (and dough), air dry clay, or polymer clay
• Paint, food colorings, or markers for coloring beads. (Polymer clay is already colored.)
• Clay tools, plastic knives (not the serrated type –serrated plastic knives can cause cuts!), varied sizes of plastic straws, bamboo kebab skewers
• Small cup or bowl for each child
• String, rubber cord, or plastic lacing (lanyard plastic)
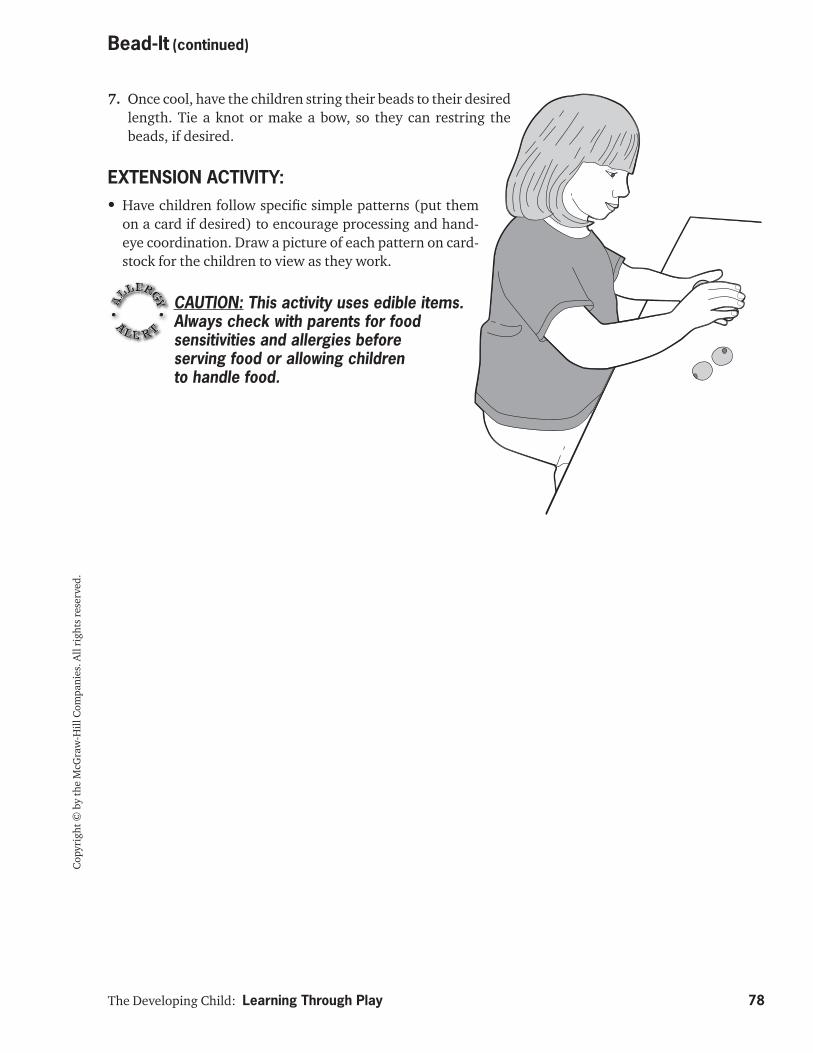
The Developing Child: Learning Through Play 78
Cop
yrig
ht ©
by
the
McG
raw
-Hill
Com
pani
es. A
ll ri
ghts
rese
rved
.
7. Once cool, have the children string their beads to their desired length. Tie a knot or make a bow, so they can restring the beads, if desired.
EXTENSION ACTIVITY:• Have children follow specifi c simple patterns (put them
on a card if desired) to encourage processing and hand-eye coordination. Draw a picture of each pattern on card-stock for the children to view as they work.
Bead-It (continued)
CAUTION: This activity uses edible items. Always check with parents for food sensitivities and allergies before serving food or allowing children to handle food.
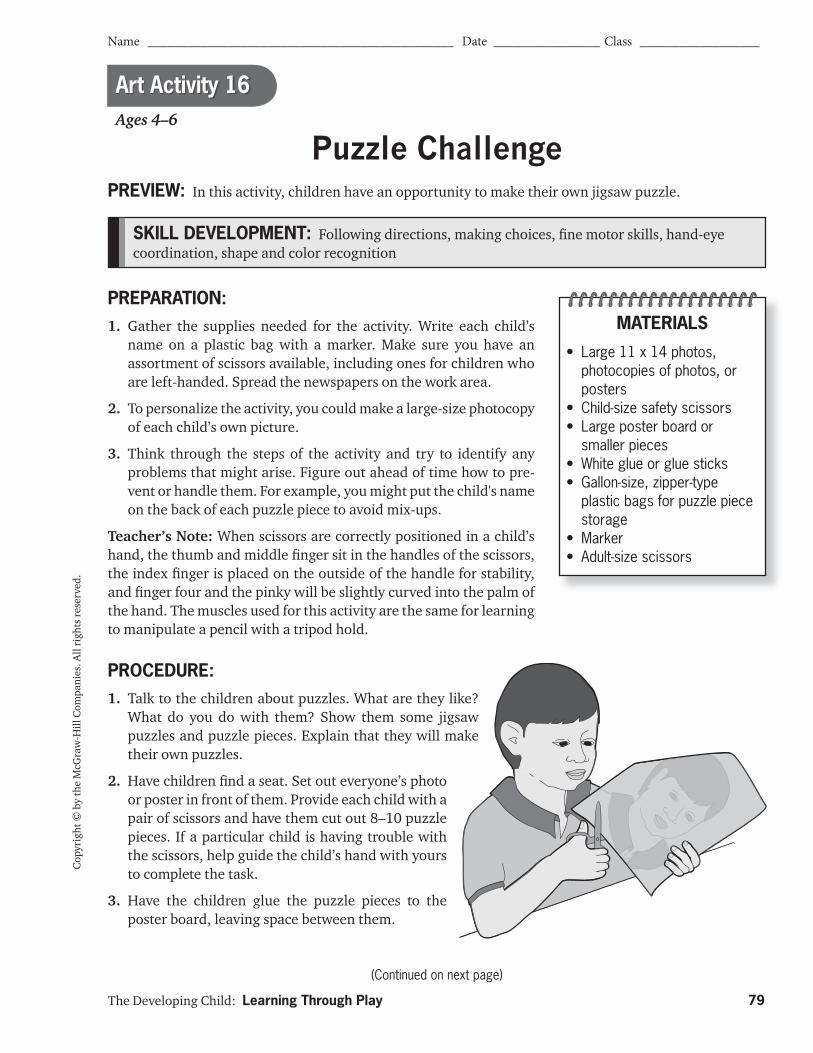
The Developing Child: Learning Through Play 79
Name ______________________________________________ Date ________________ Class __________________
(Continued on next page)
Cop
yrig
ht ©
by
the
McG
raw
-Hill
Com
pani
es. A
ll ri
ghts
rese
rved
.
SKILL DEVELOPMENT: Following directions, making choices, fi ne motor skills, hand-eye coordination, shape and color recognition
Art Activity 16Ages 4–6
Puzzle Challenge
PREPARATION:1. Gather the supplies needed for the activity. Write each child’s
name on a plastic bag with a marker. Make sure you have an assortment of scissors available, including ones for children who are left-handed. Spread the newspapers on the work area.
2. To personalize the activity, you could make a large-size photocopy of each child’s own picture.
3. Think through the steps of the activity and try to identify any problems that might arise. Figure out ahead of time how to pre-vent or handle them. For example, you might put the child's name on the back of each puzzle piece to avoid mix-ups.
Teacher’s Note: When scissors are correctly positioned in a child’s hand, the thumb and middle fi nger sit in the handles of the scissors, the index fi nger is placed on the outside of the handle for stability, and fi nger four and the pinky will be slightly curved into the palm of the hand. The muscles used for this activity are the same for learning to manipulate a pencil with a tripod hold.
PROCEDURE:1. Talk to the children about puzzles. What are they like?
What do you do with them? Show them some jigsaw puzzles and puzzle pieces. Explain that they will make their own puzzles.
2. Have children fi nd a seat. Set out everyone’s photo or poster in front of them. Provide each child with a pair of scissors and have them cut out 8–10 puzzle pieces. If a particular child is having trouble with the scissors, help guide the child’s hand with yours to complete the task.
3. Have the children glue the puzzle pieces to the poster board, leaving space between them.
PREVIEW: In this activity, children have an opportunity to make their own jigsaw puzzle.
MATERIALS
• Large 11 x 14 photos, photocopies of photos, or posters
• Child-size safety scissors• Large poster board or
smaller pieces• White glue or glue sticks• Gallon-size, zipper-type
plastic bags for puzzle piece storage
• Marker• Adult-size scissors
The Developing Child: Learning Through Play 80
Cop
yrig
ht ©
by
the
McG
raw
-Hill
Com
pani
es. A
ll ri
ghts
rese
rved
.
Puzzle Challenge (continued)
4. Once the glue has dried, cut out (or have the children cut out) the pieces. Have them mix up the pieces of their puzzle and put them back together. (Children may not be able to cut through poster board.)
5. Once the activity is over, have the children put their puzzle pieces in the plastic zipper bag with their name on it.
EXTENSION ACTIVITIES:• Have the children work on cutting with scissors by providing them with specifi c shapes to cut out.
• Have children bring in ready-made jigsaw puzzles from home to share with the class. Working with one puzzle at a time, let them show how quickly they can put together their puzzle.
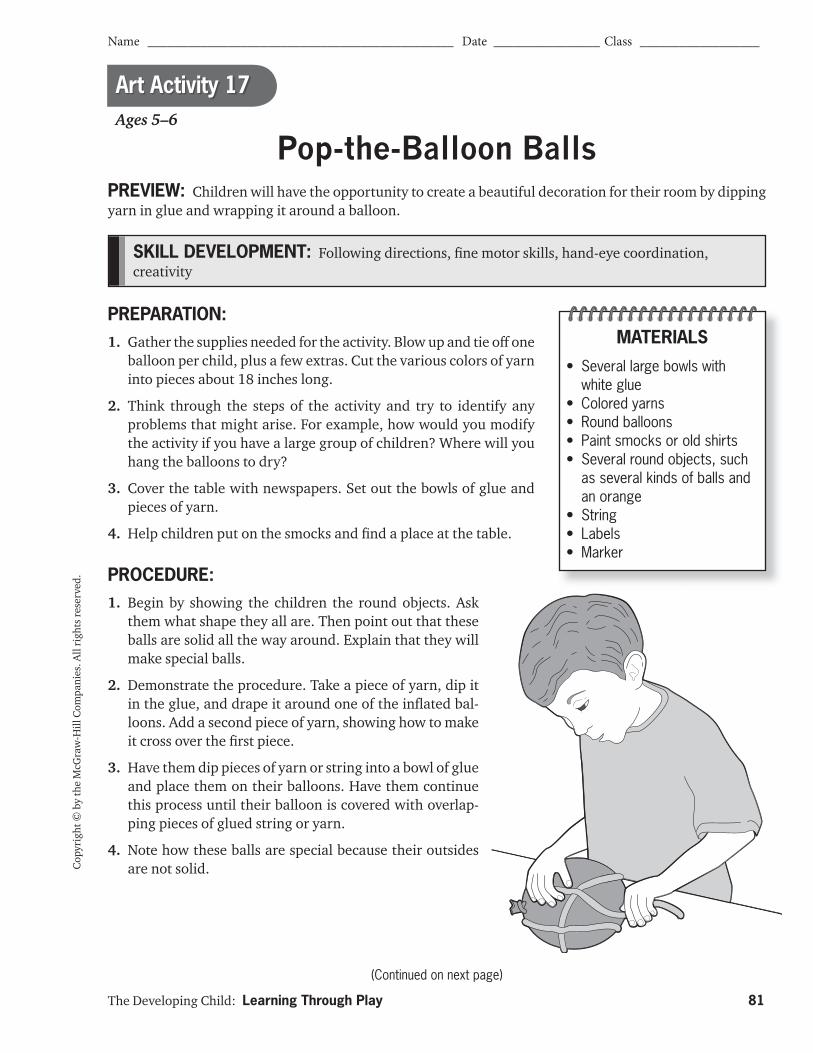
The Developing Child: Learning Through Play 81
Name ______________________________________________ Date ________________ Class __________________
(Continued on next page)
Cop
yrig
ht ©
by
the
McG
raw
-Hill
Com
pani
es. A
ll ri
ghts
rese
rved
.
SKILL DEVELOPMENT: Following directions, fi ne motor skills, hand-eye coordination, creativity
Art Activity 17Ages 5–6
Pop-the-Balloon Balls
PREPARATION:1. Gather the supplies needed for the activity. Blow up and tie off one
balloon per child, plus a few extras. Cut the various colors of yarn into pieces about 18 inches long.
2. Think through the steps of the activity and try to identify any problems that might arise. For example, how would you modify the activity if you have a large group of children? Where will you hang the balloons to dry?
3. Cover the table with newspapers. Set out the bowls of glue and pieces of yarn.
4. Help children put on the smocks and fi nd a place at the table.
PROCEDURE:1. Begin by showing the children the round objects. Ask
them what shape they all are. Then point out that these balls are solid all the way around. Explain that they will make special balls.
2. Demonstrate the procedure. Take a piece of yarn, dip it in the glue, and drape it around one of the infl ated bal-loons. Add a second piece of yarn, showing how to make it cross over the fi rst piece.
3. Have them dip pieces of yarn or string into a bowl of glue and place them on their balloons. Have them continue this process until their balloon is covered with overlap-ping pieces of glued string or yarn.
4. Note how these balls are special because their outsides are not solid.
PREVIEW: Children will have the opportunity to create a beautiful decoration for their room by dipping yarn in glue and wrapping it around a balloon.
MATERIALS
• Several large bowls with white glue
• Colored yarns• Round balloons• Paint smocks or old shirts• Several round objects, such
as several kinds of balls and an orange
• String• Labels• Marker
The Developing Child: Learning Through Play 82
Cop
yrig
ht ©
by
the
McG
raw
-Hill
Com
pani
es. A
ll ri
ghts
rese
rved
.
Pop-the-Balloon Balls (continued)
5. Once complete, attach a string to the tied end of each balloon. Write the child’s name on a label and fold it over the string. Hang them up carefully and let them dry completely. Once they are dry, gather the children. Stand away from the children and use a straight pin to pop the balloons. Then give the balls to the children. The children have lacy balls to hang in their room.
EXTENSION ACTIVITIES:• Have children make diff erent glued-yarn shapes by using diff erent shaped balloons.
• Supply glitter to add to the glue, or purchase glitter glue, and follow the activity as described.
• Provide some decorations for the fi nished projects. Let the children attach sequins, beads, or other decorative elements.
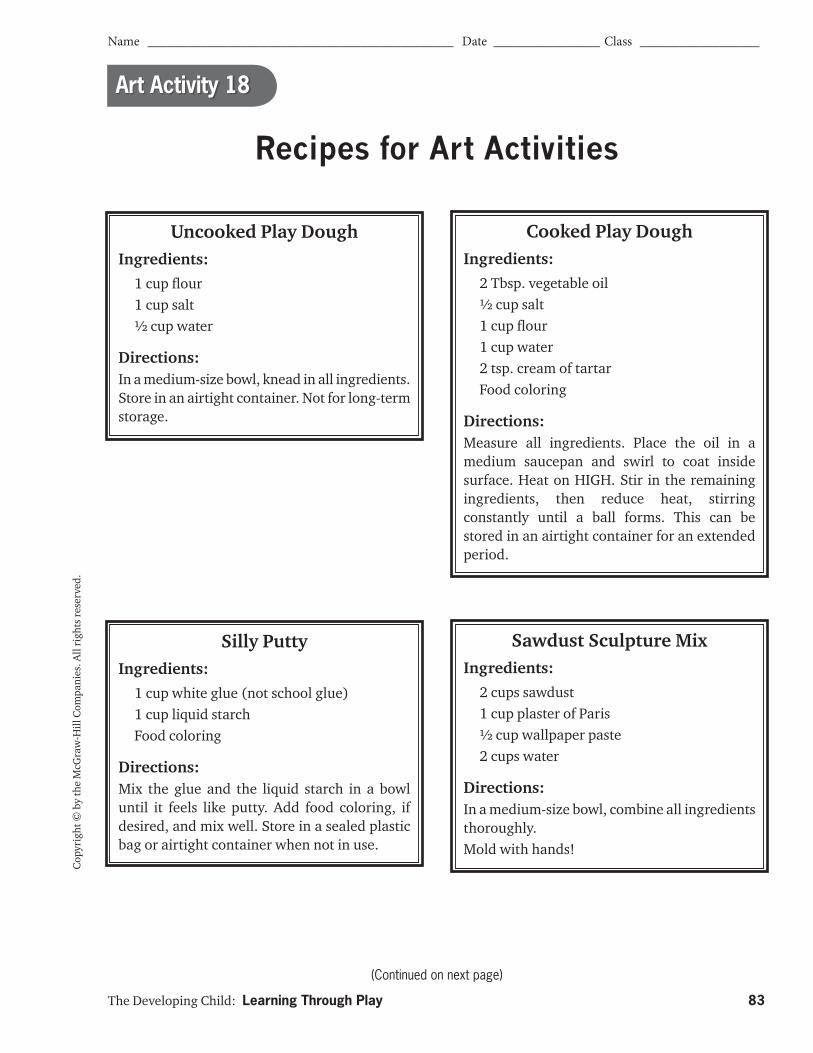
The Developing Child: Learning Through Play 83
Name ______________________________________________ Date ________________ Class __________________
(Continued on next page)
Cop
yrig
ht ©
by
the
McG
raw
-Hill
Com
pani
es. A
ll ri
ghts
rese
rved
.Art Activity 18
Recipes for Art Activities
Uncooked Play DoughIngredients: 1 cup fl our 1 cup salt ½ cup water
Directions:In a medium-size bowl, knead in all ingredients. Store in an airtight container. Not for long-term storage.
Cooked Play DoughIngredients: 2 Tbsp. vegetable oil ½ cup salt 1 cup fl our 1 cup water 2 tsp. cream of tartar Food coloring
Directions:Measure all ingredients. Place the oil in a medium saucepan and swirl to coat inside surface. Heat on HIGH. Stir in the remaining ingredients, then reduce heat, stirring constantly until a ball forms. This can be stored in an airtight container for an extended period.
Silly PuttyIngredients: 1 cup white glue (not school glue) 1 cup liquid starch Food coloring
Directions:Mix the glue and the liquid starch in a bowl until it feels like putty. Add food coloring, if desired, and mix well. Store in a sealed plastic bag or airtight container when not in use.
Sawdust Sculpture MixIngredients: 2 cups sawdust 1 cup plaster of Paris ½ cup wallpaper paste 2 cups water
Directions:In a medium-size bowl, combine all ingredients thoroughly.Mold with hands!
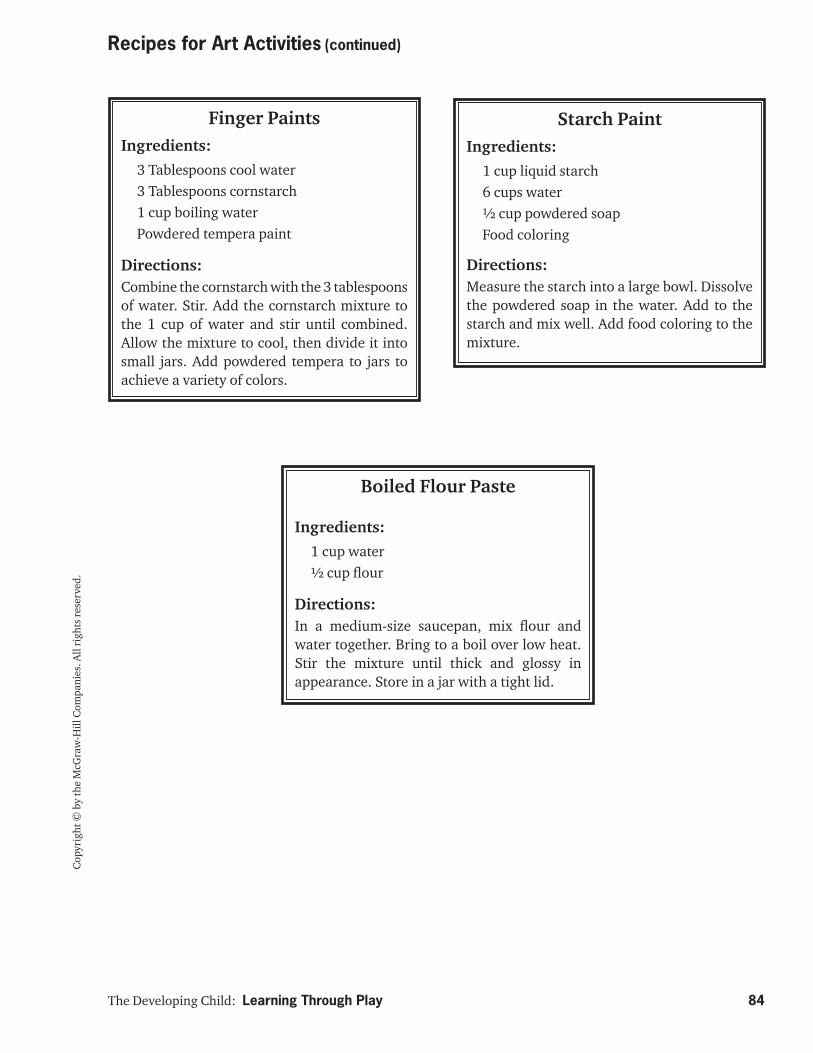
The Developing Child: Learning Through Play 84
Cop
yrig
ht ©
by
the
McG
raw
-Hill
Com
pani
es. A
ll ri
ghts
rese
rved
.
Recipes for Art Activities (continued)
Finger PaintsIngredients: 3 Tablespoons cool water 3 Tablespoons cornstarch 1 cup boiling water Powdered tempera paint
Directions:Combine the cornstarch with the 3 tablespoons of water. Stir. Add the cornstarch mixture to the 1 cup of water and stir until combined. Allow the mixture to cool, then divide it into small jars. Add powdered tempera to jars to achieve a variety of colors.
Starch PaintIngredients: 1 cup liquid starch 6 cups water ½ cup powdered soap Food coloring
Directions:Measure the starch into a large bowl. Dissolve the powdered soap in the water. Add to the starch and mix well. Add food coloring to the mixture.
Boiled Flour Paste
Ingredients: 1 cup water ½ cup fl our
Directions:In a medium-size saucepan, mix fl our and water together. Bring to a boil over low heat. Stir the mixture until thick and glossy in appearance. Store in a jar with a tight lid.
85
DRAMA AND MUSIC ACTIVITIES
1 Fly Away Birds Ages 3–4 .................................................................................. 86
2 Wash the Baby Ages 3–4.................................................................................. 87
3 Music Shakers Ages 3–4 .................................................................................. 89
4 Jump Over the Candlestick Ages 3–5 .............................................................. 91
5 Scarf Dancing Ages 3–5 ................................................................................... 92
6 Jump and Sing Ages 3–5 ................................................................................. 93
7 Wild Animal Parade Ages 3–6 ......................................................................... 95
8 Fishing for a Snack Ages 3–6 ........................................................................... 97
9 Pantomime Time Ages 3–6 .............................................................................. 99
10 Matching Sounds Ages 3–6 ...........................................................................100
11 Same Song, Diff erent Voices Ages 3–6 ..........................................................101
12 Circle Dance Ages 3–6 ...................................................................................102
13 Prop Boxes All ages .......................................................................................103
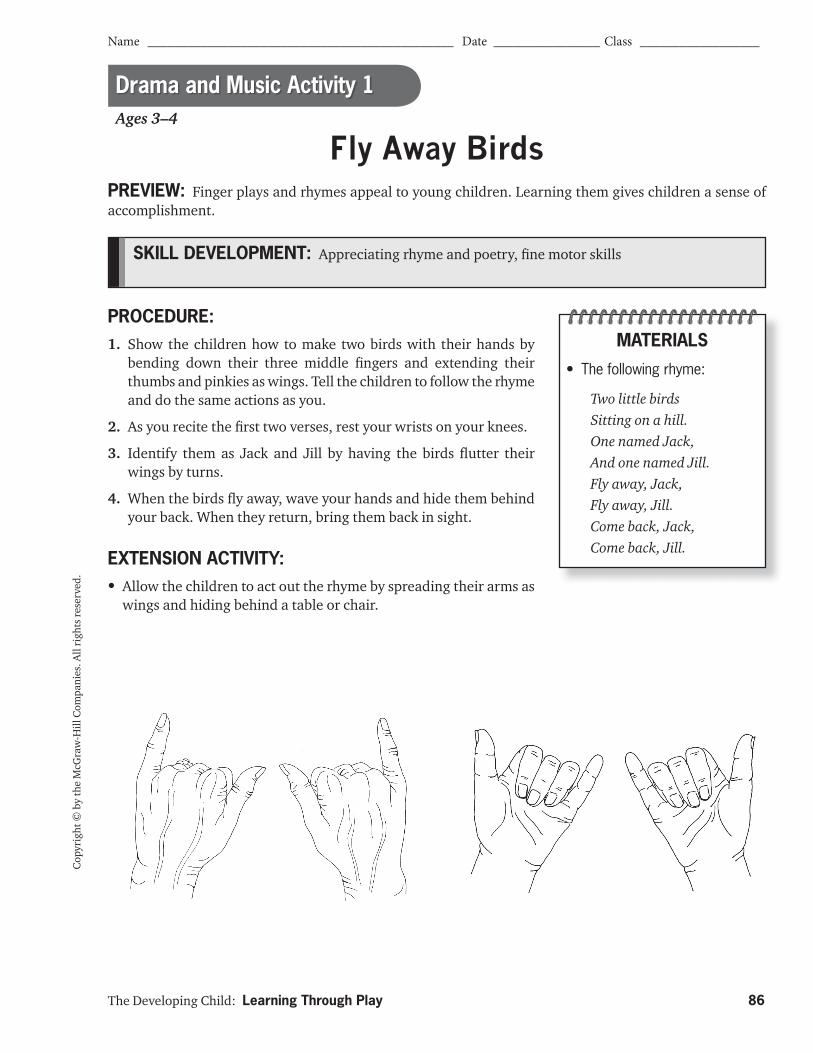
The Developing Child: Learning Through Play 86
Name ______________________________________________ Date ________________ Class __________________
Cop
yrig
ht ©
by
the
McG
raw
-Hill
Com
pani
es. A
ll ri
ghts
rese
rved
.
PROCEDURE:1. Show the children how to make two birds with their hands by
bending down their three middle fi ngers and extending their thumbs and pinkies as wings. Tell the children to follow the rhyme and do the same actions as you.
2. As you recite the fi rst two verses, rest your wrists on your knees.
3. Identify them as Jack and Jill by having the birds fl utter their wings by turns.
4. When the birds fl y away, wave your hands and hide them behind your back. When they return, bring them back in sight.
EXTENSION ACTIVITY:• Allow the children to act out the rhyme by spreading their arms as
wings and hiding behind a table or chair.
Ages 3–4
PREVIEW: Finger plays and rhymes appeal to young children. Learning them gives children a sense of accomplishment.
MATERIALS
• The following rhyme:
Two little birdsSitting on a hill.One named Jack,And one named Jill.Fly away, Jack,Fly away, Jill.Come back, Jack,Come back, Jill.
Fly Away Birds
SKILL DEVELOPMENT: Appreciating rhyme and poetry, fi ne motor skills
Drama and Music Activity 1

The Developing Child: Learning Through Play 87
Name ______________________________________________ Date ________________ Class __________________
(Continued on next page)
Cop
yrig
ht ©
by
the
McG
raw
-Hill
Com
pani
es. A
ll ri
ghts
rese
rved
.
SKILL DEVELOPMENT: Following directions, sharing and taking turns, fi ne motor skills, dramatic expression
PREPARATION:1. Gather the supplies listed in the materials box. Plan where to set
up the washing station(s). Cover the table with a plastic tablecloth and put the dishpan on top. Place the washcloths and a stack of towels near the dishpan. Wait until shortly before the activity begins to get the water. Then use the pitcher to fi ll the dishpan halfway with warm water.
2. Dress the baby dolls so they will be ready for children to undress. If some doll clothes are more diffi cult to remove, plan to give those dolls to the older children to wash. If you do not have enough dolls to go around, fi gure out how to structure the activity so everyone has a chance to participate.
3. Think through the steps of the activity and try to identify any problems that might arise. Figure out ahead of time how to prevent or handle them. For example, what can you do to minimize splashing? What if children become impatient waiting for their turn? (If you have a large group of children, you may want to use two or more dishpans, or divide the children into small groups to take turns with the activity.)
4. Plan additional questions that you could ask or information you could give children related to this activity. For example, you might ask what other items they have helped their parents wash at home. (dishes, laundry) How did they dry the object? (dishtowel, clothes dryer, clothesline)
PROCEDURE:1. Tell children it is time for the babies to have a bath. Have chil-
dren roll up long sleeves if they are wearing them. Show them the baby dolls, and let the children undress the dolls. Tell the children they will take turns carefully washing their babies.
Wash the BabyAges 3–4
PREVIEW: Children role play and practice fi ne motor skills by undressing a baby doll, bathing it in a dishpan of water, drying the doll, and dressing it again.
MATERIALS
• Plastic tablecloth • Plastic dishpan• Plastic pitcher• Lukewarm water• Washcloths (small or baby)• Small towels• Plastic baby dolls with
clothes
Drama and Music Activity 2
The Developing Child: Learning Through Play 88
Cop
yrig
ht ©
by
the
McG
raw
-Hill
Com
pani
es. A
ll ri
ghts
rese
rved
.
2. Show them the washcloths, and tell the children to gently put the dolls in the water and wipe them clean. Talk about body parts. You might say, “Oh, you’re cleaning the baby’s ears,” or “Don’t forget to scrub the baby’s elbows.” Talk about the importance of keeping “soap” out of the baby’s eyes.
3. When children have spent a few minutes washing their dolls, tell them they are clean. Ask the children to wrap the babies in a towel, dry them, and dress them once again. Help them with the clothes, as needed.
4. While the other children take their turns washing and dressing their babies, children may want to sing a lullaby to their babies, preparing them for bed.
EXTENSION ACTIVITY:• Share the nursery rhyme “Three Little Kittens” with the children. Act out the story with them. When it
is time for the kittens to wash their mittens, allow the children to wash real children’s mittens in the dishpan of water. Provide a rack to use for hanging the wet mittens.
Wash the Baby (continued)
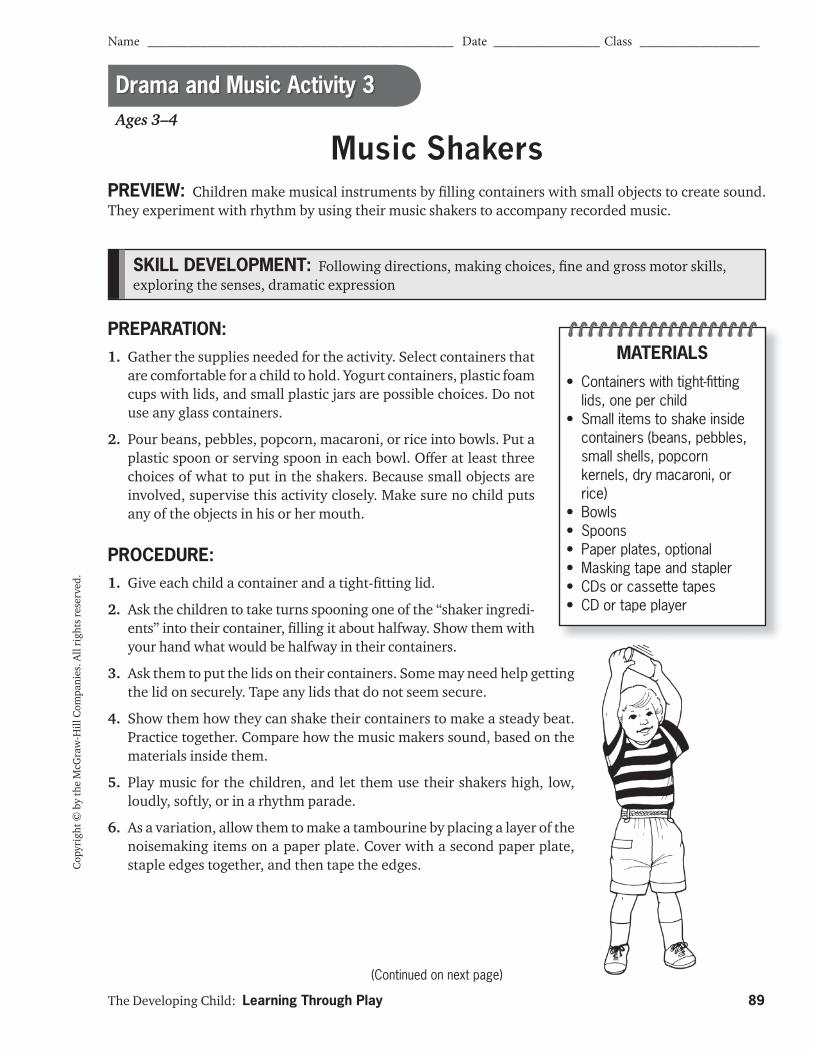
The Developing Child: Learning Through Play 89
Name ______________________________________________ Date ________________ Class __________________
Cop
yrig
ht ©
by
the
McG
raw
-Hill
Com
pani
es. A
ll ri
ghts
rese
rved
.
SKILL DEVELOPMENT: Following directions, making choices, fi ne and gross motor skills, exploring the senses, dramatic expression
Ages 3–4
Music Shakers
PREPARATION:1. Gather the supplies needed for the activity. Select containers that
are comfortable for a child to hold. Yogurt containers, plastic foam cups with lids, and small plastic jars are possible choices. Do not use any glass containers.
2. Pour beans, pebbles, popcorn, macaroni, or rice into bowls. Put a plastic spoon or serving spoon in each bowl. Off er at least three choices of what to put in the shakers. Because small objects are involved, supervise this activity closely. Make sure no child puts any of the objects in his or her mouth.
PROCEDURE:1. Give each child a container and a tight-fi tting lid.
2. Ask the children to take turns spooning one of the “shaker ingredi-ents” into their container, fi lling it about halfway. Show them with your hand what would be halfway in their containers.
3. Ask them to put the lids on their containers. Some may need help getting the lid on securely. Tape any lids that do not seem secure.
4. Show them how they can shake their containers to make a steady beat. Practice together. Compare how the music makers sound, based on the materials inside them.
5. Play music for the children, and let them use their shakers high, low, loudly, softly, or in a rhythm parade.
6. As a variation, allow them to make a tambourine by placing a layer of the noisemaking items on a paper plate. Cover with a second paper plate, staple edges together, and then tape the edges.
PREVIEW: Children make musical instruments by fi lling containers with small objects to create sound. They experiment with rhythm by using their music shakers to accompany recorded music.
MATERIALS
• Containers with tight-fi tting lids, one per child
• Small items to shake inside containers (beans, pebbles, small shells, popcorn kernels, dry macaroni, or rice)
• Bowls• Spoons• Paper plates, optional• Masking tape and stapler• CDs or cassette tapes• CD or tape player
(Continued on next page)
Drama and Music Activity 3
The Developing Child: Learning Through Play 90
Cop
yrig
ht ©
by
the
McG
raw
-Hill
Com
pani
es. A
ll ri
ghts
rese
rved
.
EXTENSION ACTIVITIES• Supply the children with larger items to fi ll their shakers, such as acorns, wooden beads, and
small shells. Ask them to describe the diff erence in the sounds.
• Ask middle school or high school music students to play their musical instruments for the class. Let the children accompany the live music with their music shakers.
Music Shakers (continued)
CAUTION: This activity uses edible items. Always check with parents for food sensitivities and allergies before serving food or allowing children to handle food.
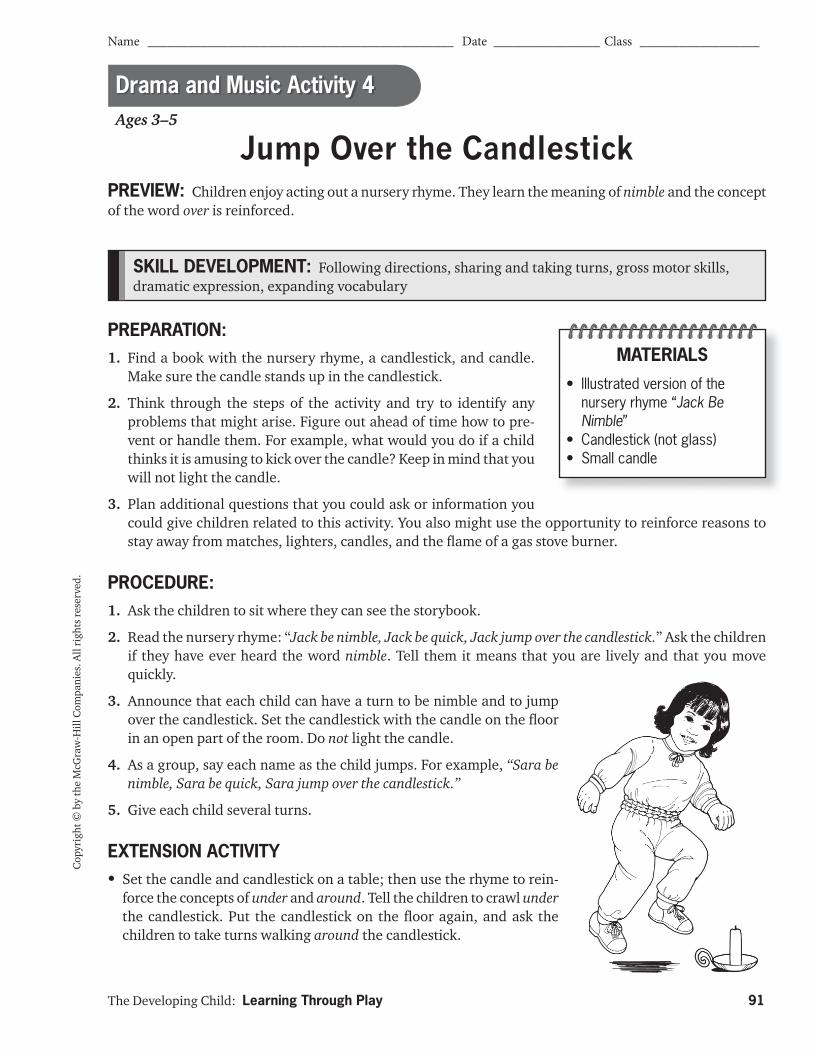
The Developing Child: Learning Through Play 91
Cop
yrig
ht ©
by
the
McG
raw
-Hill
Com
pani
es. A
ll ri
ghts
rese
rved
.
SKILL DEVELOPMENT: Following directions, sharing and taking turns, gross motor skills, dramatic expression, expanding vocabulary
Ages 3–5
Jump Over the Candlestick
PREPARATION:1. Find a book with the nursery rhyme, a candlestick, and candle.
Make sure the candle stands up in the candlestick.
2. Think through the steps of the activity and try to identify any problems that might arise. Figure out ahead of time how to pre-vent or handle them. For example, what would you do if a child thinks it is amusing to kick over the candle? Keep in mind that you will not light the candle.
3. Plan additional questions that you could ask or information you could give children related to this activity. You also might use the opportunity to reinforce reasons to stay away from matches, lighters, candles, and the fl ame of a gas stove burner.
PROCEDURE:1. Ask the children to sit where they can see the storybook.
2. Read the nursery rhyme: “Jack be nimble, Jack be quick, Jack jump over the candlestick.” Ask the children if they have ever heard the word nimble. Tell them it means that you are lively and that you move quickly.
3. Announce that each child can have a turn to be nimble and to jump over the candlestick. Set the candlestick with the candle on the fl oor in an open part of the room. Do not light the candle.
4. As a group, say each name as the child jumps. For example, “Sara be nimble, Sara be quick, Sara jump over the candlestick.”
5. Give each child several turns.
EXTENSION ACTIVITY• Set the candle and candlestick on a table; then use the rhyme to rein-
force the concepts of under and around. Tell the children to crawl under the candlestick. Put the candlestick on the fl oor again, and ask the children to take turns walking around the candlestick.
PREVIEW: Children enjoy acting out a nursery rhyme. They learn the meaning of nimble and the concept of the word over is reinforced.
MATERIALS
• Illustrated version of the nursery rhyme “Jack Be Nimble”
• Candlestick (not glass)• Small candle
Drama and Music Activity 4
Name ______________________________________________ Date ________________ Class __________________
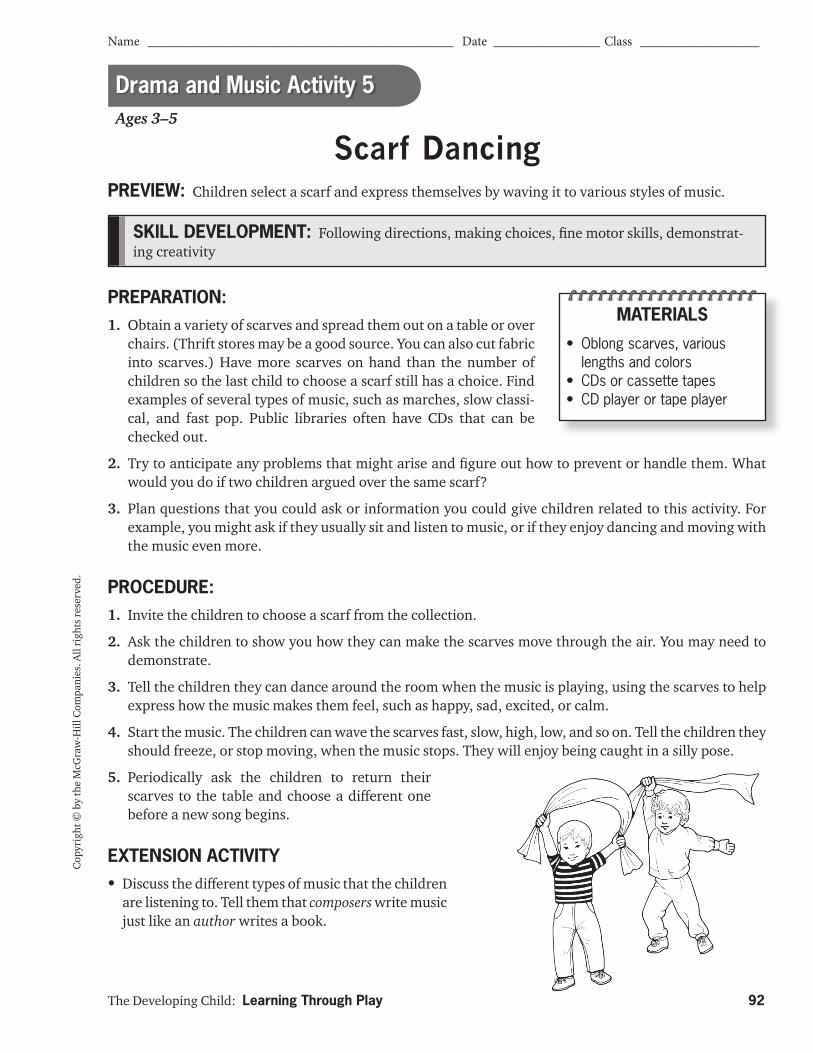
The Developing Child: Learning Through Play 92
Name ______________________________________________ Date ________________ Class __________________
Cop
yrig
ht ©
by
the
McG
raw
-Hill
Com
pani
es. A
ll ri
ghts
rese
rved
.
PREPARATION:1. Obtain a variety of scarves and spread them out on a table or over
chairs. (Thrift stores may be a good source. You can also cut fabric into scarves.) Have more scarves on hand than the number of children so the last child to choose a scarf still has a choice. Find examples of several types of music, such as marches, slow classi-cal, and fast pop. Public libraries often have CDs that can be checked out.
2. Try to anticipate any problems that might arise and fi gure out how to prevent or handle them. What would you do if two children argued over the same scarf?
3. Plan questions that you could ask or information you could give children related to this activity. For example, you might ask if they usually sit and listen to music, or if they enjoy dancing and moving with the music even more.
PROCEDURE:1. Invite the children to choose a scarf from the collection.
2. Ask the children to show you how they can make the scarves move through the air. You may need to demonstrate.
3. Tell the children they can dance around the room when the music is playing, using the scarves to help express how the music makes them feel, such as happy, sad, excited, or calm.
4. Start the music. The children can wave the scarves fast, slow, high, low, and so on. Tell the children they should freeze, or stop moving, when the music stops. They will enjoy being caught in a silly pose.
5. Periodically ask the children to return their scarves to the table and choose a diff erent one before a new song begins.
EXTENSION ACTIVITY• Discuss the diff erent types of music that the children
are listening to. Tell them that composers write music just like an author writes a book.
PREVIEW: Children select a scarf and express themselves by waving it to various styles of music.
MATERIALS
• Oblong scarves, various lengths and colors
• CDs or cassette tapes• CD player or tape player
Ages 3–5
Scarf Dancing
SKILL DEVELOPMENT: Following directions, making choices, fi ne motor skills, demonstrat-ing creativity
Drama and Music Activity 5
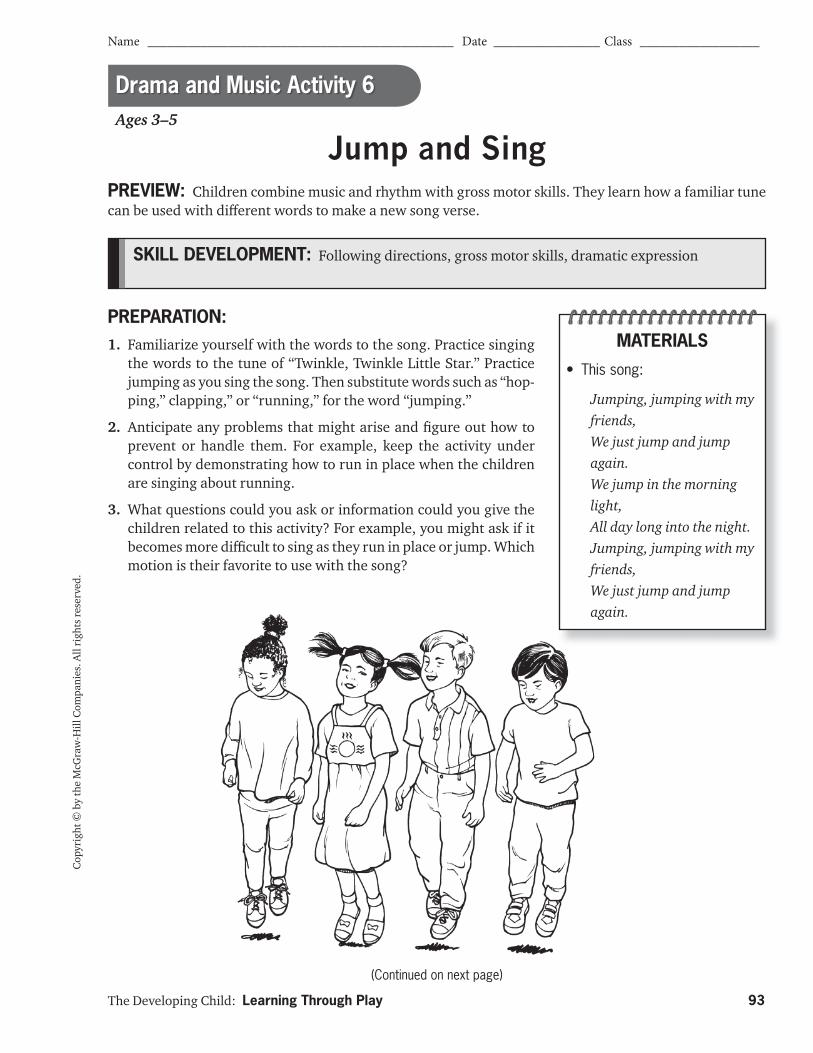
The Developing Child: Learning Through Play 93
Name ______________________________________________ Date ________________ Class __________________
(Continued on next page)
Cop
yrig
ht ©
by
the
McG
raw
-Hill
Com
pani
es. A
ll ri
ghts
rese
rved
.
SKILL DEVELOPMENT: Following directions, gross motor skills, dramatic expression
Ages 3–5
Jump and Sing
PREPARATION:1. Familiarize yourself with the words to the song. Practice singing
the words to the tune of “Twinkle, Twinkle Little Star.” Practice jumping as you sing the song. Then substitute words such as “hop-ping,” clapping,” or “running,” for the word “jumping.”
2. Anticipate any problems that might arise and fi gure out how to prevent or handle them. For example, keep the activity under control by demonstrating how to run in place when the children are singing about running.
3. What questions could you ask or information could you give the children related to this activity? For example, you might ask if it becomes more diffi cult to sing as they run in place or jump. Which motion is their favorite to use with the song?
PREVIEW: Children combine music and rhythm with gross motor skills. They learn how a familiar tune can be used with diff erent words to make a new song verse.
MATERIALS
• This song:
Jumping, jumping with my friends,We just jump and jump again.We jump in the morning light,All day long into the night.Jumping, jumping with my friends,We just jump and jump again.
Drama and Music Activity 6

The Developing Child: Learning Through Play 94
Cop
yrig
ht ©
by
the
McG
raw
-Hill
Com
pani
es. A
ll ri
ghts
rese
rved
.
PROCEDURE:1. Introduce the song by singing it for the children. Then sing it again as you demonstrate how they can
jump during the song.
2. Have the children sing the song with you. You may need to practice it together several times.
3. Demonstrate the other actions to sing with the song—hopping, clapping, and running.
4. Weather permitting, take the children outdoors, so they can sing louder and move around more than they can indoors.
EXTENSION ACTIVITY:• If children know how to snap their fi ngers, practice the song with the word “snapping.” You could give
older children a tennis ball or rubber ball, and practice it with the word “bouncing.” What type of motor skills are reinforced by snapping fi ngers or bouncing a small ball? (Variety of fi ne motor skills.) Explain to the children that the tune of “Twinkle, Twinkle Little Star” is the same as the tunes for “The Alphabet Song” and “Baa, Baa Black Sheep.” Have the children sing “The Alphabet Song” or “Baa, Baa Black Sheep” while performing one of the suggested actions.
Jump and Sing (continued)
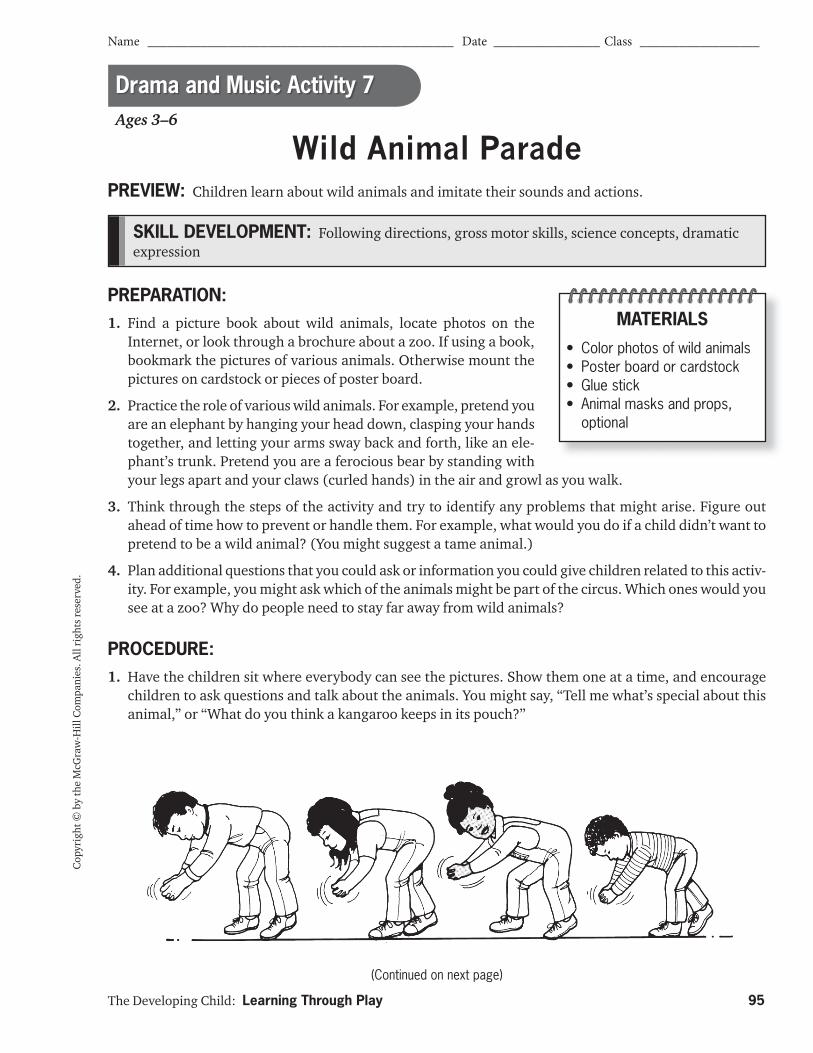
The Developing Child: Learning Through Play 95
Name ______________________________________________ Date ________________ Class __________________
(Continued on next page)
Cop
yrig
ht ©
by
the
McG
raw
-Hill
Com
pani
es. A
ll ri
ghts
rese
rved
.
SKILL DEVELOPMENT: Following directions, gross motor skills, science concepts, dramatic expression
Ages 3–6
Wild Animal Parade
PREPARATION:1. Find a picture book about wild animals, locate photos on the
Internet, or look through a brochure about a zoo. If using a book, bookmark the pictures of various animals. Otherwise mount the pictures on cardstock or pieces of poster board.
2. Practice the role of various wild animals. For example, pretend you are an elephant by hanging your head down, clasping your hands together, and letting your arms sway back and forth, like an ele-phant’s trunk. Pretend you are a ferocious bear by standing with your legs apart and your claws (curled hands) in the air and growl as you walk.
3. Think through the steps of the activity and try to identify any problems that might arise. Figure out ahead of time how to prevent or handle them. For example, what would you do if a child didn’t want to pretend to be a wild animal? (You might suggest a tame animal.)
4. Plan additional questions that you could ask or information you could give children related to this activ-ity. For example, you might ask which of the animals might be part of the circus. Which ones would you see at a zoo? Why do people need to stay far away from wild animals?
PROCEDURE:1. Have the children sit where everybody can see the pictures. Show them one at a time, and encourage
children to ask questions and talk about the animals. You might say, “Tell me what’s special about this animal,” or “What do you think a kangaroo keeps in its pouch?”
PREVIEW: Children learn about wild animals and imitate their sounds and actions.
MATERIALS
• Color photos of wild animals• Poster board or cardstock• Glue stick• Animal masks and props,
optional
Drama and Music Activity 7
The Developing Child: Learning Through Play 96
Cop
yrig
ht ©
by
the
McG
raw
-Hill
Com
pani
es. A
ll ri
ghts
rese
rved
.
2. After looking at the pictures, ask the children to stand. Tell them that you can practice being animals together. Demonstrate the actions that specifi c animals might have.
3. Allow the children to choose which animal they want to be. Form a line and create a wild animal parade. Use costumes, masks, or props, such as animal noses, if they are available. Let the children take turns being the line leader.
EXTENSION ACTIVITIES:• Plan a trip to the zoo or watch a children’s video about animals in the wild.
• Discuss why some animals are “wild” and why some are not. Ask if cats and dogs are considered wild. How about a cow or a pig?
Wild Animal Parade (continued)
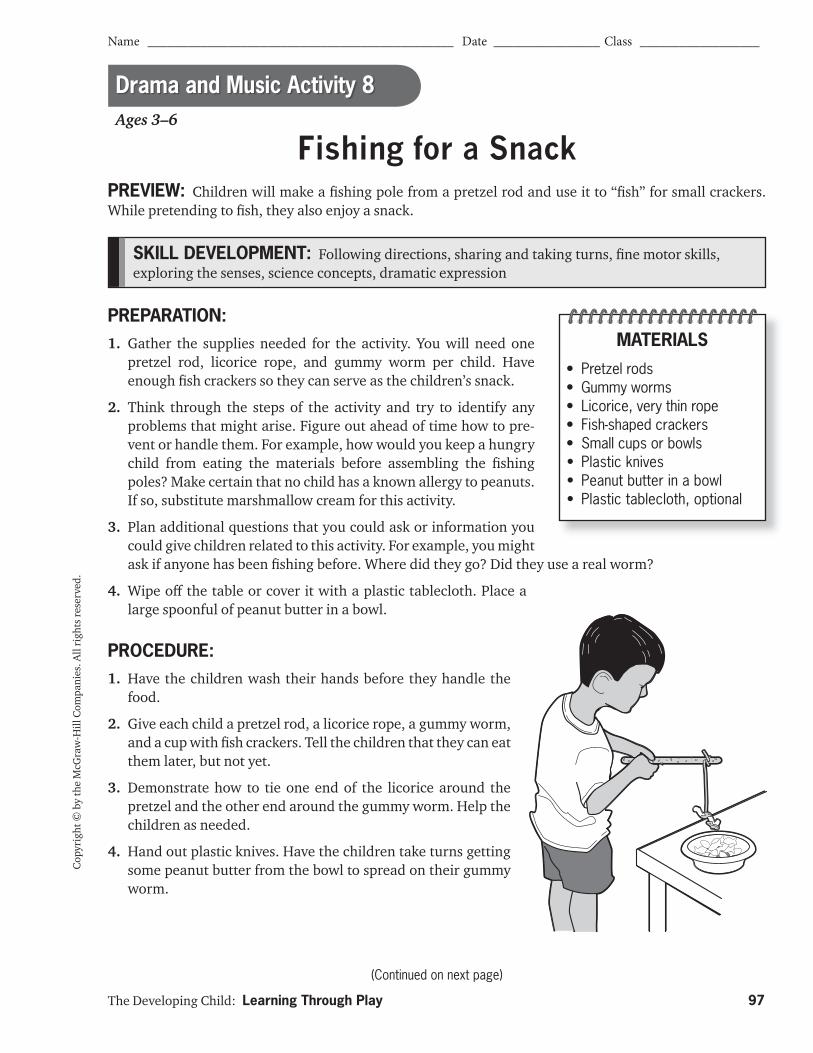
The Developing Child: Learning Through Play 97
Name ______________________________________________ Date ________________ Class __________________
(Continued on next page)
Cop
yrig
ht ©
by
the
McG
raw
-Hill
Com
pani
es. A
ll ri
ghts
rese
rved
.
SKILL DEVELOPMENT: Following directions, sharing and taking turns, fi ne motor skills, exploring the senses, science concepts, dramatic expression
Ages 3–6
PREPARATION:1. Gather the supplies needed for the activity. You will need one
pretzel rod, licorice rope, and gummy worm per child. Have enough fi sh crackers so they can serve as the children’s snack.
2. Think through the steps of the activity and try to identify any problems that might arise. Figure out ahead of time how to pre-vent or handle them. For example, how would you keep a hungry child from eating the materials before assembling the fi shing poles? Make certain that no child has a known allergy to peanuts. If so, substitute marshmallow cream for this activity.
3. Plan additional questions that you could ask or information you could give children related to this activity. For example, you might ask if anyone has been fi shing before. Where did they go? Did they use a real worm?
4. Wipe off the table or cover it with a plastic tablecloth. Place a large spoonful of peanut butter in a bowl.
PROCEDURE:1. Have the children wash their hands before they handle the
food.
2. Give each child a pretzel rod, a licorice rope, a gummy worm, and a cup with fi sh crackers. Tell the children that they can eat them later, but not yet.
3. Demonstrate how to tie one end of the licorice around the pretzel and the other end around the gummy worm. Help the children as needed.
4. Hand out plastic knives. Have the children take turns getting some peanut butter from the bowl to spread on their gummy worm.
PREVIEW: Children will make a fi shing pole from a pretzel rod and use it to “fi sh” for small crackers. While pretending to fi sh, they also enjoy a snack.
Fishing for a Snack
MATERIALS
• Pretzel rods• Gummy worms • Licorice, very thin rope• Fish-shaped crackers• Small cups or bowls• Plastic knives• Peanut butter in a bowl• Plastic tablecloth, optional
Drama and Music Activity 8
The Developing Child: Learning Through Play 98
Cop
yrig
ht ©
by
the
McG
raw
-Hill
Com
pani
es. A
ll ri
ghts
rese
rved
.
5. Demonstrate how to dangle the worm into a cup full of fi sh crackers to go “fi shing for a snack.”
6. Tell the children they can eat the fi sh that they catch. After the activity, they may eat the fi shing pole and line, too, if they wish.
EXTENSION ACTIVITIES• Read a story about fi shing or show a picture book with diff erent kinds of fi sh. Ask the children what kinds
of fi sh they like. Ask questions such as: “Who likes fi sh sticks?” and “Who likes tuna fi sh?” and “Has anybody tried salmon? What color is it?”
• Talk about the fl avors and properties of the food. Which one is crunchy? Sticky? Salty? Sweet? Ask what other kinds of pretzels the children have tried (sticks, rings, mini pretzels, waffl e). Discuss the idea that even though they look diff erent, they all taste like pretzels.
Fishing for a Snack (continued)
CAUTION: This activity uses edible items. Always check with parents for food sensitivities and allergies before serving food or allowing children to handle food.
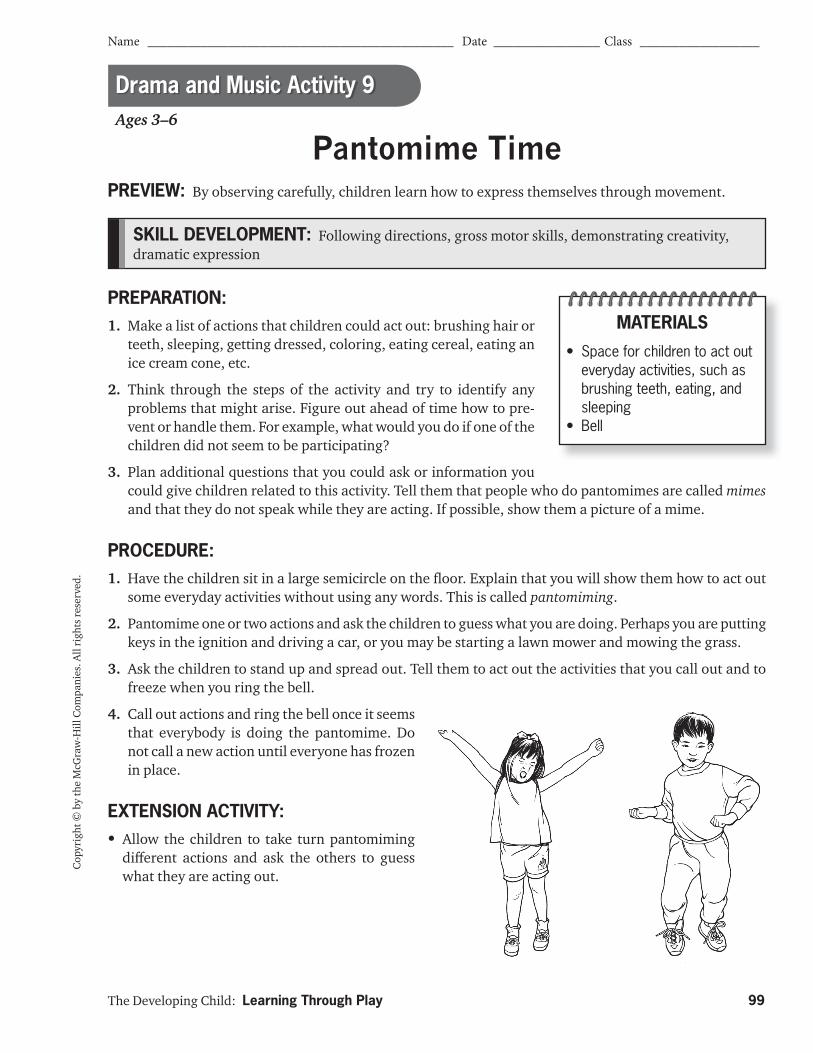
The Developing Child: Learning Through Play 99
Name ______________________________________________ Date ________________ Class __________________
Cop
yrig
ht ©
by
the
McG
raw
-Hill
Com
pani
es. A
ll ri
ghts
rese
rved
.
SKILL DEVELOPMENT: Following directions, gross motor skills, demonstrating creativity, dramatic expression
Ages 3–6
Pantomime Time
PREPARATION:1. Make a list of actions that children could act out: brushing hair or
teeth, sleeping, getting dressed, coloring, eating cereal, eating an ice cream cone, etc.
2. Think through the steps of the activity and try to identify any problems that might arise. Figure out ahead of time how to pre-vent or handle them. For example, what would you do if one of the children did not seem to be participating?
3. Plan additional questions that you could ask or information you could give children related to this activity. Tell them that people who do pantomimes are called mimesand that they do not speak while they are acting. If possible, show them a picture of a mime.
PROCEDURE:1. Have the children sit in a large semicircle on the fl oor. Explain that you will show them how to act out
some everyday activities without using any words. This is called pantomiming.
2. Pantomime one or two actions and ask the children to guess what you are doing. Perhaps you are putting keys in the ignition and driving a car, or you may be starting a lawn mower and mowing the grass.
3. Ask the children to stand up and spread out. Tell them to act out the activities that you call out and to freeze when you ring the bell.
4. Call out actions and ring the bell once it seems that everybody is doing the pantomime. Do not call a new action until everyone has frozen in place.
EXTENSION ACTIVITY:• Allow the children to take turn pantomiming
diff erent actions and ask the others to guess what they are acting out.
PREVIEW: By observing carefully, children learn how to express themselves through movement.
MATERIALS
• Space for children to act out everyday activities, such as brushing teeth, eating, and sleeping
• Bell
Drama and Music Activity 9
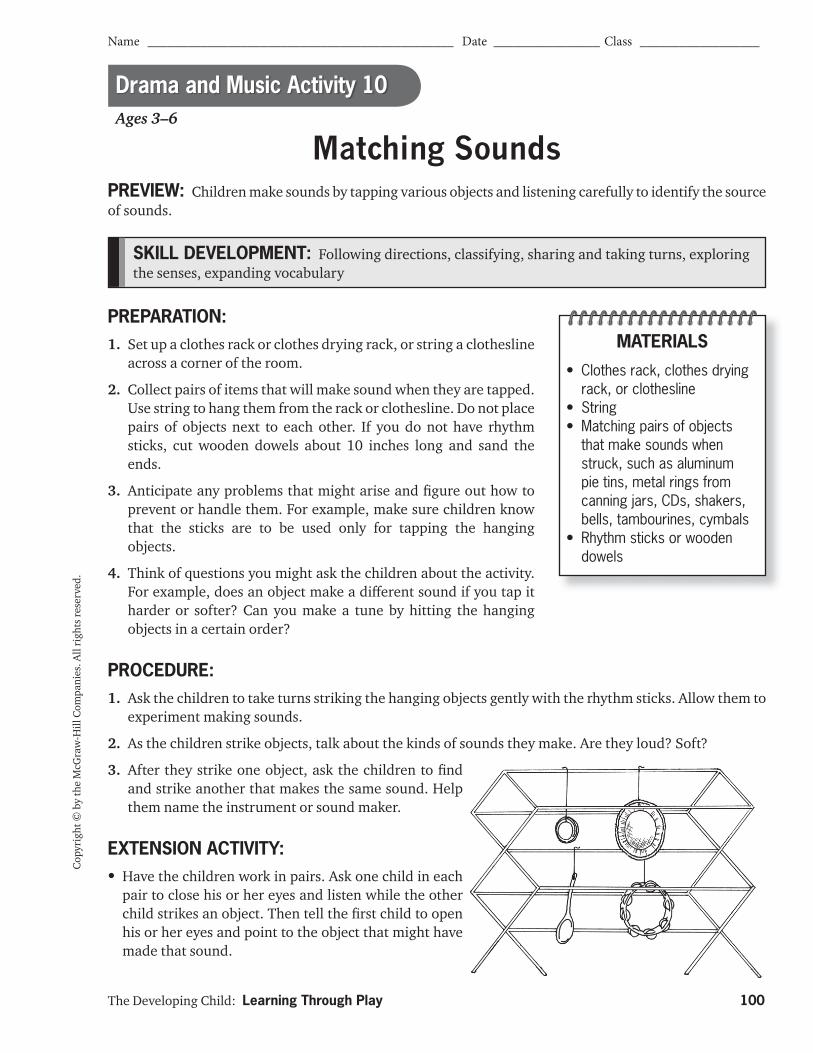
The Developing Child: Learning Through Play 100
Name ______________________________________________ Date ________________ Class __________________
Cop
yrig
ht ©
by
the
McG
raw
-Hill
Com
pani
es. A
ll ri
ghts
rese
rved
.
Ages 3–6
Matching Sounds
PREPARATION:1. Set up a clothes rack or clothes drying rack, or string a clothesline
across a corner of the room.
2. Collect pairs of items that will make sound when they are tapped. Use string to hang them from the rack or clothesline. Do not place pairs of objects next to each other. If you do not have rhythm sticks, cut wooden dowels about 10 inches long and sand the ends.
3. Anticipate any problems that might arise and fi gure out how to prevent or handle them. For example, make sure children know that the sticks are to be used only for tapping the hanging objects.
4. Think of questions you might ask the children about the activity. For example, does an object make a diff erent sound if you tap it harder or softer? Can you make a tune by hitting the hanging objects in a certain order?
PROCEDURE:1. Ask the children to take turns striking the hanging objects gently with the rhythm sticks. Allow them to
experiment making sounds.
2. As the children strike objects, talk about the kinds of sounds they make. Are they loud? Soft?
3. After they strike one object, ask the children to fi nd and strike another that makes the same sound. Help them name the instrument or sound maker.
EXTENSION ACTIVITY:• Have the children work in pairs. Ask one child in each
pair to close his or her eyes and listen while the other child strikes an object. Then tell the fi rst child to open his or her eyes and point to the object that might have made that sound.
SKILL DEVELOPMENT: Following directions, classifying, sharing and taking turns, exploring the senses, expanding vocabulary
PREVIEW: Children make sounds by tapping various objects and listening carefully to identify the source of sounds.
MATERIALS
• Clothes rack, clothes drying rack, or clothesline
• String• Matching pairs of objects
that make sounds when struck, such as aluminum pie tins, metal rings from canning jars, CDs, shakers, bells, tambourines, cymbals
• Rhythm sticks or wooden dowels
Drama and Music Activity 10
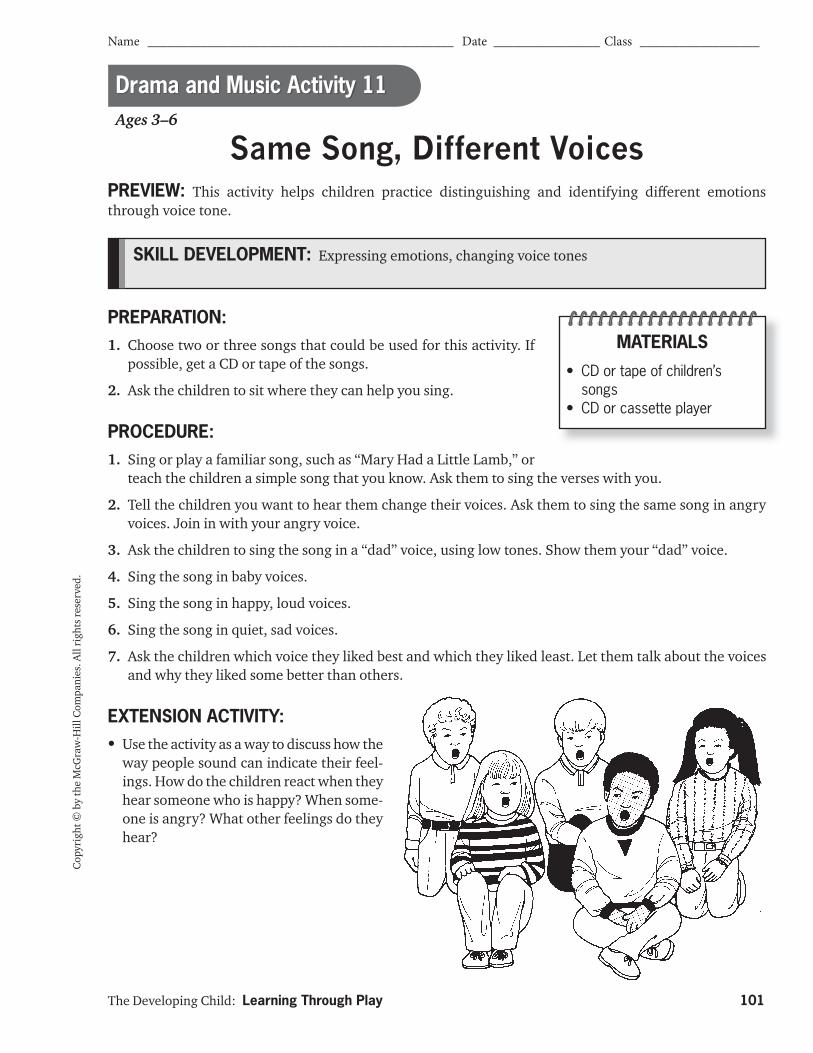
The Developing Child: Learning Through Play 101
Name ______________________________________________ Date ________________ Class __________________
Cop
yrig
ht ©
by
the
McG
raw
-Hill
Com
pani
es. A
ll ri
ghts
rese
rved
.
SKILL DEVELOPMENT: Expressing emotions, changing voice tones
PREPARATION:1. Choose two or three songs that could be used for this activity. If
possible, get a CD or tape of the songs.
2. Ask the children to sit where they can help you sing.
PROCEDURE:1. Sing or play a familiar song, such as “Mary Had a Little Lamb,” or
teach the children a simple song that you know. Ask them to sing the verses with you.
2. Tell the children you want to hear them change their voices. Ask them to sing the same song in angry voices. Join in with your angry voice.
3. Ask the children to sing the song in a “dad” voice, using low tones. Show them your “dad” voice.
4. Sing the song in baby voices.
5. Sing the song in happy, loud voices.
6. Sing the song in quiet, sad voices.
7. Ask the children which voice they liked best and which they liked least. Let them talk about the voices and why they liked some better than others.
EXTENSION ACTIVITY:• Use the activity as a way to discuss how the
way people sound can indicate their feel-ings. How do the children react when they hear someone who is happy? When some-one is angry? What other feelings do they hear?
PREVIEW: This activity helps children practice distinguishing and identifying diff erent emotions through voice tone.
Ages 3–6
Same Song, Different Voices
MATERIALS
• CD or tape of children’s songs
• CD or cassette player
Drama and Music Activity 11
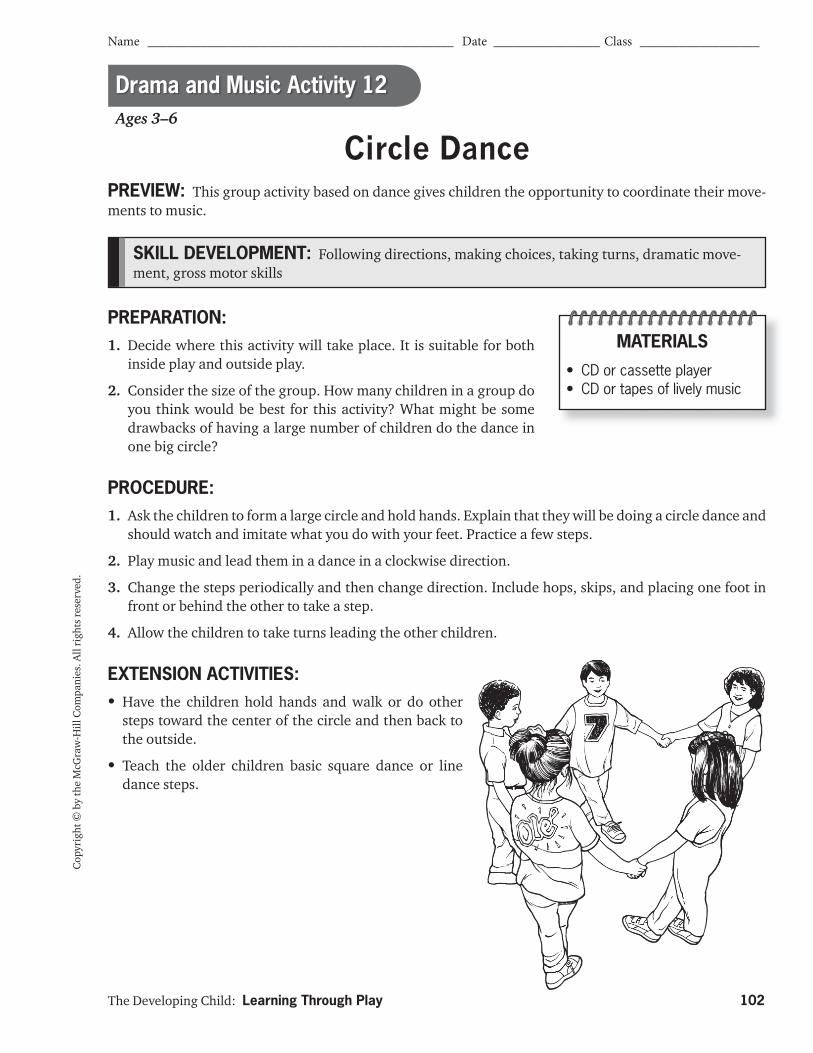
The Developing Child: Learning Through Play 102
Name ______________________________________________ Date ________________ Class __________________
Cop
yrig
ht ©
by
the
McG
raw
-Hill
Com
pani
es. A
ll ri
ghts
rese
rved
.
PREPARATION:1. Decide where this activity will take place. It is suitable for both
inside play and outside play.
2. Consider the size of the group. How many children in a group do you think would be best for this activity? What might be some drawbacks of having a large number of children do the dance in one big circle?
PROCEDURE:1. Ask the children to form a large circle and hold hands. Explain that they will be doing a circle dance and
should watch and imitate what you do with your feet. Practice a few steps.
2. Play music and lead them in a dance in a clockwise direction.
3. Change the steps periodically and then change direction. Include hops, skips, and placing one foot in front or behind the other to take a step.
4. Allow the children to take turns leading the other children.
EXTENSION ACTIVITIES:• Have the children hold hands and walk or do other
steps toward the center of the circle and then back to the outside.
• Teach the older children basic square dance or line dance steps.
MATERIALS
• CD or cassette player• CD or tapes of lively music
Ages 3–6
Circle Dance
SKILL DEVELOPMENT: Following directions, making choices, taking turns, dramatic move-ment, gross motor skills
PREVIEW: This group activity based on dance gives children the opportunity to coordinate their move-ments to music.
Drama and Music Activity 12
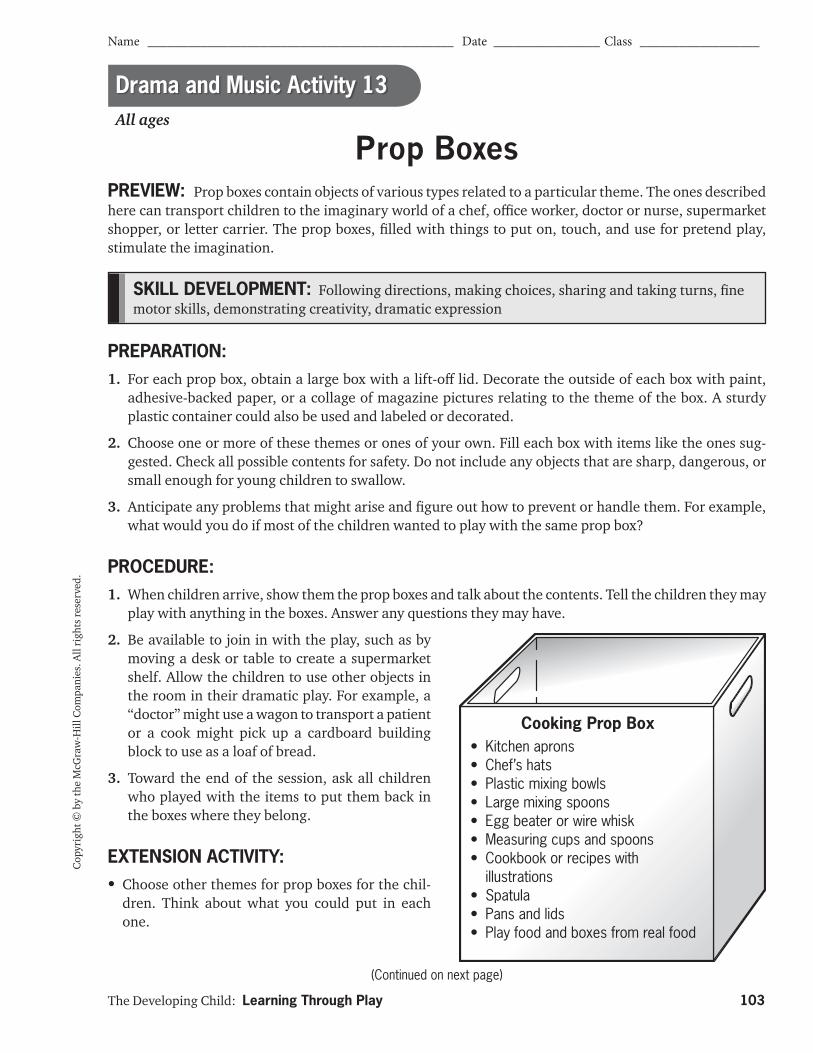
The Developing Child: Learning Through Play 103
Name ______________________________________________ Date ________________ Class __________________
(Continued on next page)
Cop
yrig
ht ©
by
the
McG
raw
-Hill
Com
pani
es. A
ll ri
ghts
rese
rved
.
SKILL DEVELOPMENT: Following directions, making choices, sharing and taking turns, fi ne motor skills, demonstrating creativity, dramatic expression
All ages
Prop Boxes
PREPARATION:1. For each prop box, obtain a large box with a lift-off lid. Decorate the outside of each box with paint,
adhesive-backed paper, or a collage of magazine pictures relating to the theme of the box. A sturdy plastic container could also be used and labeled or decorated.
2. Choose one or more of these themes or ones of your own. Fill each box with items like the ones sug-gested. Check all possible contents for safety. Do not include any objects that are sharp, dangerous, or small enough for young children to swallow.
3. Anticipate any problems that might arise and fi gure out how to prevent or handle them. For example, what would you do if most of the children wanted to play with the same prop box?
PROCEDURE:1. When children arrive, show them the prop boxes and talk about the contents. Tell the children they may
play with anything in the boxes. Answer any questions they may have.
2. Be available to join in with the play, such as by moving a desk or table to create a supermarket shelf. Allow the children to use other objects in the room in their dramatic play. For example, a “doctor” might use a wagon to transport a patient or a cook might pick up a cardboard building block to use as a loaf of bread.
3. Toward the end of the session, ask all children who played with the items to put them back in the boxes where they belong.
EXTENSION ACTIVITY:• Choose other themes for prop boxes for the chil-
dren. Think about what you could put in each one.
PREVIEW: Prop boxes contain objects of various types related to a particular theme. The ones described here can transport children to the imaginary world of a chef, offi ce worker, doctor or nurse, supermarket shopper, or letter carrier. The prop boxes, fi lled with things to put on, touch, and use for pretend play, stimulate the imagination.
Cooking Prop Box• Kitchen aprons• Chef’s hats• Plastic mixing bowls• Large mixing spoons• Egg beater or wire whisk• Measuring cups and spoons• Cookbook or recipes with
illustrations• Spatula• Pans and lids• Play food and boxes from real food
Drama and Music Activity 13
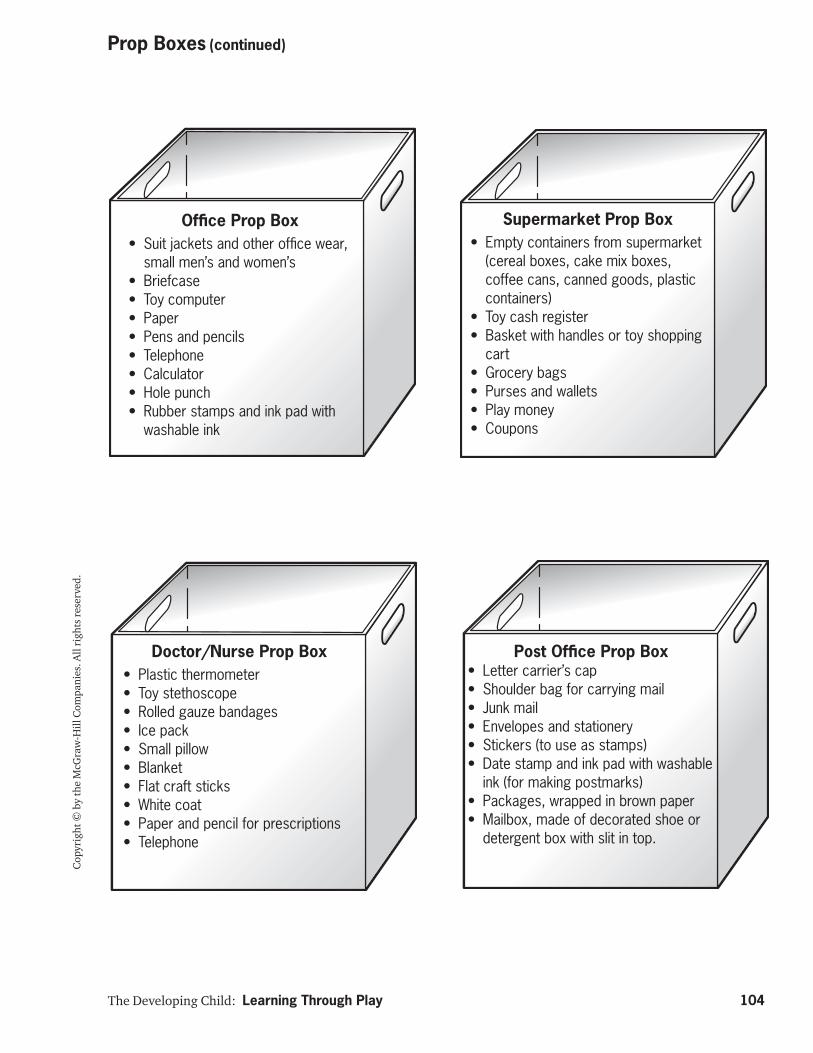
The Developing Child: Learning Through Play 104
Cop
yrig
ht ©
by
the
McG
raw
-Hill
Com
pani
es. A
ll ri
ghts
rese
rved
.
Offi ce Prop Box• Suit jackets and other offi ce wear,
small men’s and women’s• Briefcase• Toy computer• Paper• Pens and pencils• Telephone• Calculator• Hole punch• Rubber stamps and ink pad with
washable ink
Supermarket Prop Box• Empty containers from supermarket
(cereal boxes, cake mix boxes, coffee cans, canned goods, plastic containers)
• Toy cash register• Basket with handles or toy shopping
cart• Grocery bags• Purses and wallets• Play money• Coupons
Post Offi ce Prop Box• Letter carrier’s cap• Shoulder bag for carrying mail• Junk mail• Envelopes and stationery• Stickers (to use as stamps)• Date stamp and ink pad with washable
ink (for making postmarks)• Packages, wrapped in brown paper• Mailbox, made of decorated shoe or
detergent box with slit in top.
Doctor/Nurse Prop Box• Plastic thermometer• Toy stethoscope• Rolled gauze bandages• Ice pack• Small pillow• Blanket• Flat craft sticks• White coat• Paper and pencil for prescriptions• Telephone
Prop Boxes (continued)
105
MATH ACTIVITIES
1 Shapes Bingo Ages 3–5 .................................................................................106
2 Cats and Dogs Math Ages 3–5 .......................................................................107
3 Circle Counting Ages 3–6 ..............................................................................108
4 Shaped Snacks Ages 3–6 ...............................................................................109
5 Egg Carton Math Ages 3–6 ............................................................................110
6 Balancing Buttons Ages 3–6 ..........................................................................111
7 Mitten Match Ages 3–6 ..................................................................................112
8 What’s the Pattern? Ages 3–6 ........................................................................113
9 Name Sort Ages 3–6 ......................................................................................114
10 Fraction Puzzles Ages 3–6 .............................................................................115
11 Estimation Station Ages 3–6 .........................................................................117
12 Shape Stretch Ages 3–6 .................................................................................119
13 Great Graphs Ages 3–6 ..................................................................................120
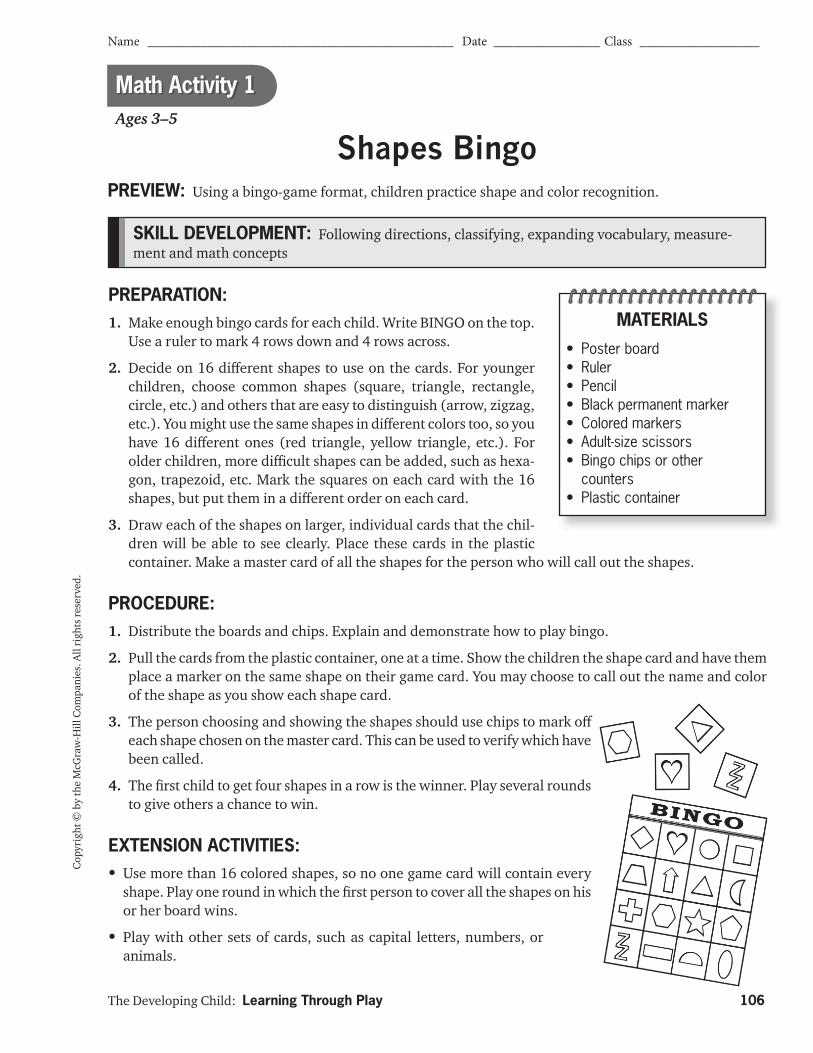
The Developing Child: Learning Through Play 106
Name ______________________________________________ Date ________________ Class __________________
Cop
yrig
ht ©
by
the
McG
raw
-Hill
Com
pani
es. A
ll ri
ghts
rese
rved
.
Ages 3–5
Shapes Bingo
PREPARATION:1. Make enough bingo cards for each child. Write BINGO on the top.
Use a ruler to mark 4 rows down and 4 rows across.
2. Decide on 16 diff erent shapes to use on the cards. For younger children, choose common shapes (square, triangle, rectangle, circle, etc.) and others that are easy to distinguish (arrow, zigzag, etc.). You might use the same shapes in diff erent colors too, so you have 16 diff erent ones (red triangle, yellow triangle, etc.). For older children, more diffi cult shapes can be added, such as hexa-gon, trapezoid, etc. Mark the squares on each card with the 16 shapes, but put them in a diff erent order on each card.
3. Draw each of the shapes on larger, individual cards that the chil-dren will be able to see clearly. Place these cards in the plastic container. Make a master card of all the shapes for the person who will call out the shapes.
PROCEDURE:1. Distribute the boards and chips. Explain and demonstrate how to play bingo.
2. Pull the cards from the plastic container, one at a time. Show the children the shape card and have them place a marker on the same shape on their game card. You may choose to call out the name and color of the shape as you show each shape card.
3. The person choosing and showing the shapes should use chips to mark off each shape chosen on the master card. This can be used to verify which have been called.
4. The fi rst child to get four shapes in a row is the winner. Play several rounds to give others a chance to win.
EXTENSION ACTIVITIES:• Use more than 16 colored shapes, so no one game card will contain every
shape. Play one round in which the fi rst person to cover all the shapes on his or her board wins.
• Play with other sets of cards, such as capital letters, numbers, or animals.
SKILL DEVELOPMENT: Following directions, classifying, expanding vocabulary, measure-ment and math concepts
PREVIEW: Using a bingo-game format, children practice shape and color recognition.
MATERIALS
• Poster board• Ruler• Pencil• Black permanent marker• Colored markers• Adult-size scissors• Bingo chips or other
counters• Plastic container
Math Activity 1
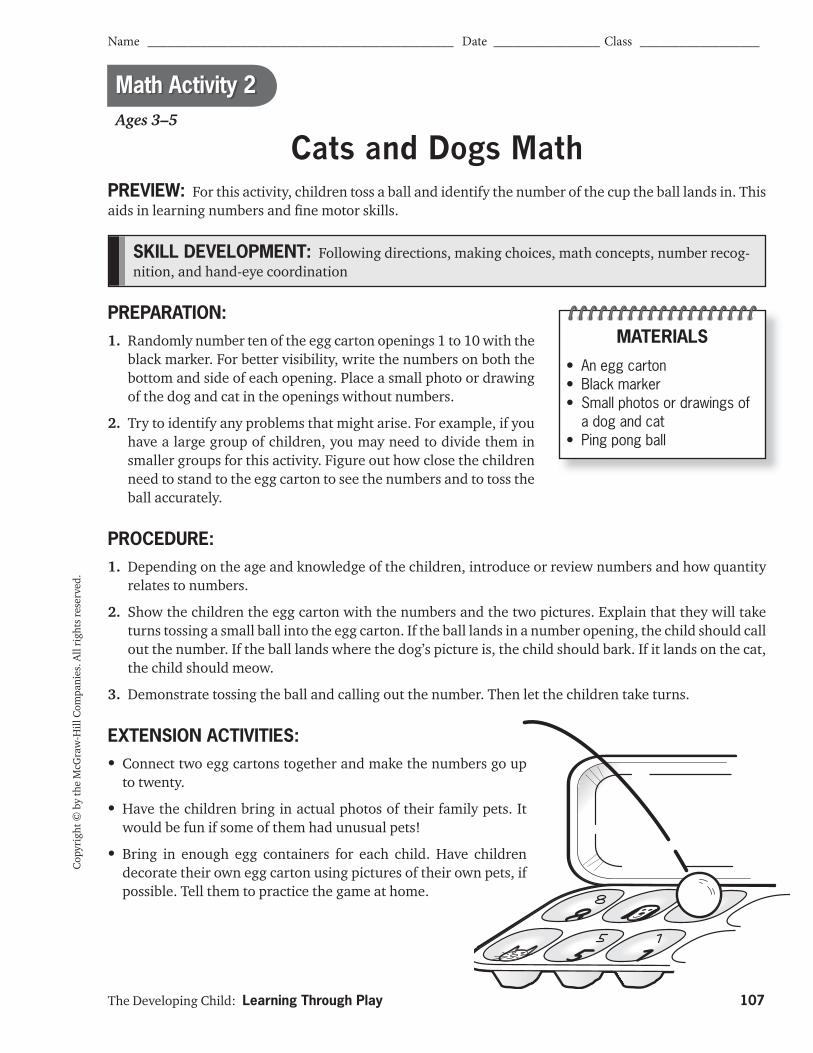
The Developing Child: Learning Through Play 107
Name ______________________________________________ Date ________________ Class __________________
Cop
yrig
ht ©
by
the
McG
raw
-Hill
Com
pani
es. A
ll ri
ghts
rese
rved
.
SKILL DEVELOPMENT: Following directions, making choices, math concepts, number recog-nition, and hand-eye coordination
Ages 3–5
Cats and Dogs Math
PREPARATION:1. Randomly number ten of the egg carton openings 1 to 10 with the
black marker. For better visibility, write the numbers on both the bottom and side of each opening. Place a small photo or drawing of the dog and cat in the openings without numbers.
2. Try to identify any problems that might arise. For example, if you have a large group of children, you may need to divide them in smaller groups for this activity. Figure out how close the children need to stand to the egg carton to see the numbers and to toss the ball accurately.
PROCEDURE:1. Depending on the age and knowledge of the children, introduce or review numbers and how quantity
relates to numbers.
2. Show the children the egg carton with the numbers and the two pictures. Explain that they will take turns tossing a small ball into the egg carton. If the ball lands in a number opening, the child should call out the number. If the ball lands where the dog’s picture is, the child should bark. If it lands on the cat, the child should meow.
3. Demonstrate tossing the ball and calling out the number. Then let the children take turns.
EXTENSION ACTIVITIES:• Connect two egg cartons together and make the numbers go up
to twenty.
• Have the children bring in actual photos of their family pets. It would be fun if some of them had unusual pets!
• Bring in enough egg containers for each child. Have children decorate their own egg carton using pictures of their own pets, if possible. Tell them to practice the game at home.
PREVIEW: For this activity, children toss a ball and identify the number of the cup the ball lands in. This aids in learning numbers and fi ne motor skills.
MATERIALS
• An egg carton• Black marker• Small photos or drawings of
a dog and cat• Ping pong ball
Math Activity 2
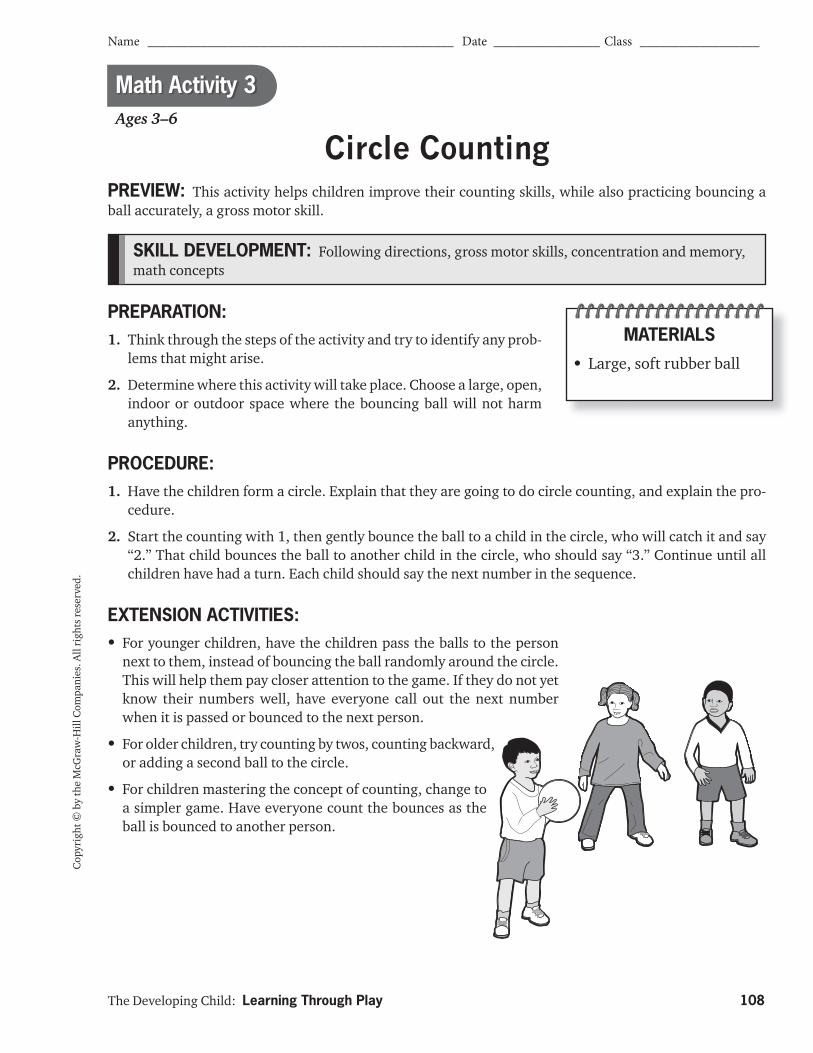
The Developing Child: Learning Through Play 108
Name ______________________________________________ Date ________________ Class __________________
Cop
yrig
ht ©
by
the
McG
raw
-Hill
Com
pani
es. A
ll ri
ghts
rese
rved
.
Ages 3–6
Circle Counting
SKILL DEVELOPMENT: Following directions, gross motor skills, concentration and memory, math concepts
PREPARATION:1. Think through the steps of the activity and try to identify any prob-
lems that might arise.
2. Determine where this activity will take place. Choose a large, open, indoor or outdoor space where the bouncing ball will not harm anything.
PROCEDURE:1. Have the children form a circle. Explain that they are going to do circle counting, and explain the pro-
cedure.
2. Start the counting with 1, then gently bounce the ball to a child in the circle, who will catch it and say “2.” That child bounces the ball to another child in the circle, who should say “3.” Continue until all children have had a turn. Each child should say the next number in the sequence.
EXTENSION ACTIVITIES:• For younger children, have the children pass the balls to the person
next to them, instead of bouncing the ball randomly around the circle. This will help them pay closer attention to the game. If they do not yet know their numbers well, have everyone call out the next number when it is passed or bounced to the next person.
• For older children, try counting by twos, counting backward, or adding a second ball to the circle.
• For children mastering the concept of counting, change to a simpler game. Have everyone count the bounces as the ball is bounced to another person.
PREVIEW: This activity helps children improve their counting skills, while also practicing bouncing a ball accurately, a gross motor skill.
MATERIALS
• Large, soft rubber ball
Math Activity 3
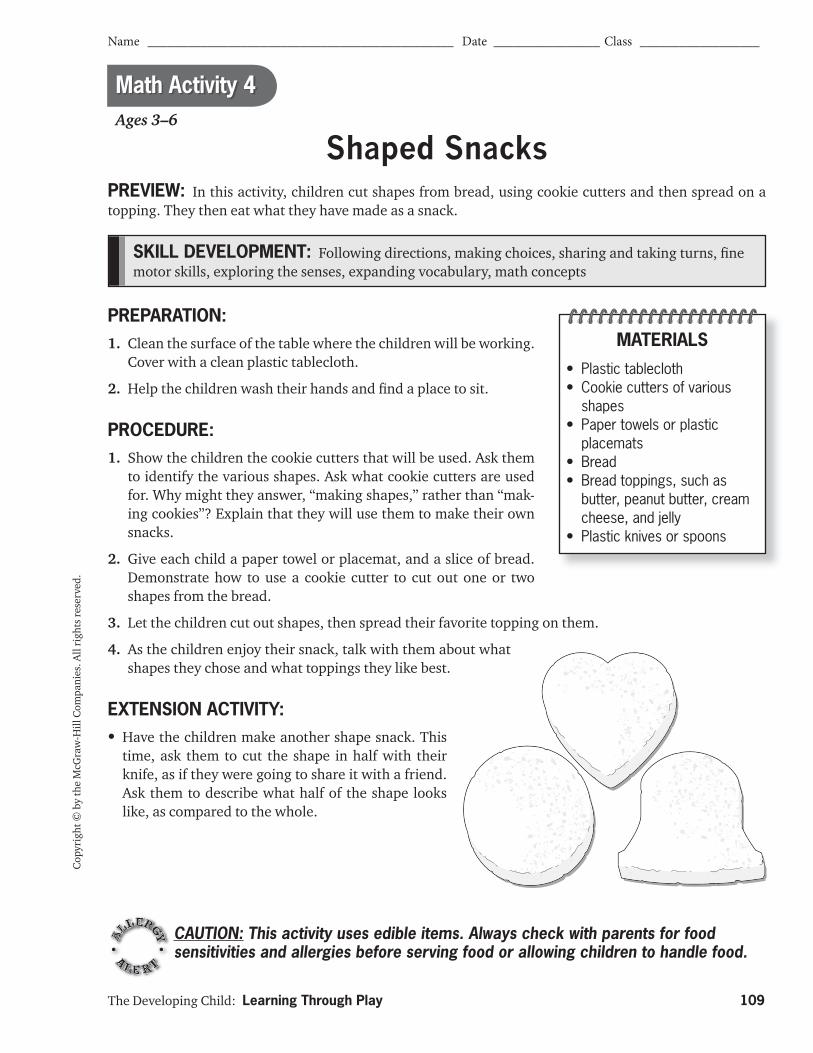
The Developing Child: Learning Through Play 109
Name ______________________________________________ Date ________________ Class __________________
Cop
yrig
ht ©
by
the
McG
raw
-Hill
Com
pani
es. A
ll ri
ghts
rese
rved
.
SKILL DEVELOPMENT: Following directions, making choices, sharing and taking turns, fi ne motor skills, exploring the senses, expanding vocabulary, math concepts
Ages 3–6
Shaped Snacks
PREPARATION:1. Clean the surface of the table where the children will be working.
Cover with a clean plastic tablecloth.
2. Help the children wash their hands and fi nd a place to sit.
PROCEDURE:1. Show the children the cookie cutters that will be used. Ask them
to identify the various shapes. Ask what cookie cutters are used for. Why might they answer, “making shapes,” rather than “mak-ing cookies”? Explain that they will use them to make their own snacks.
2. Give each child a paper towel or placemat, and a slice of bread. Demonstrate how to use a cookie cutter to cut out one or two shapes from the bread.
3. Let the children cut out shapes, then spread their favorite topping on them.
4. As the children enjoy their snack, talk with them about what shapes they chose and what toppings they like best.
EXTENSION ACTIVITY:• Have the children make another shape snack. This
time, ask them to cut the shape in half with their knife, as if they were going to share it with a friend. Ask them to describe what half of the shape looks like, as compared to the whole.
PREVIEW: In this activity, children cut shapes from bread, using cookie cutters and then spread on a topping. They then eat what they have made as a snack.
MATERIALS
• Plastic tablecloth• Cookie cutters of various
shapes• Paper towels or plastic
placemats• Bread• Bread toppings, such as
butter, peanut butter, cream cheese, and jelly
• Plastic knives or spoons
CAUTION: This activity uses edible items. Always check with parents for food sensitivities and allergies before serving food or allowing children to handle food.
Math Activity 4
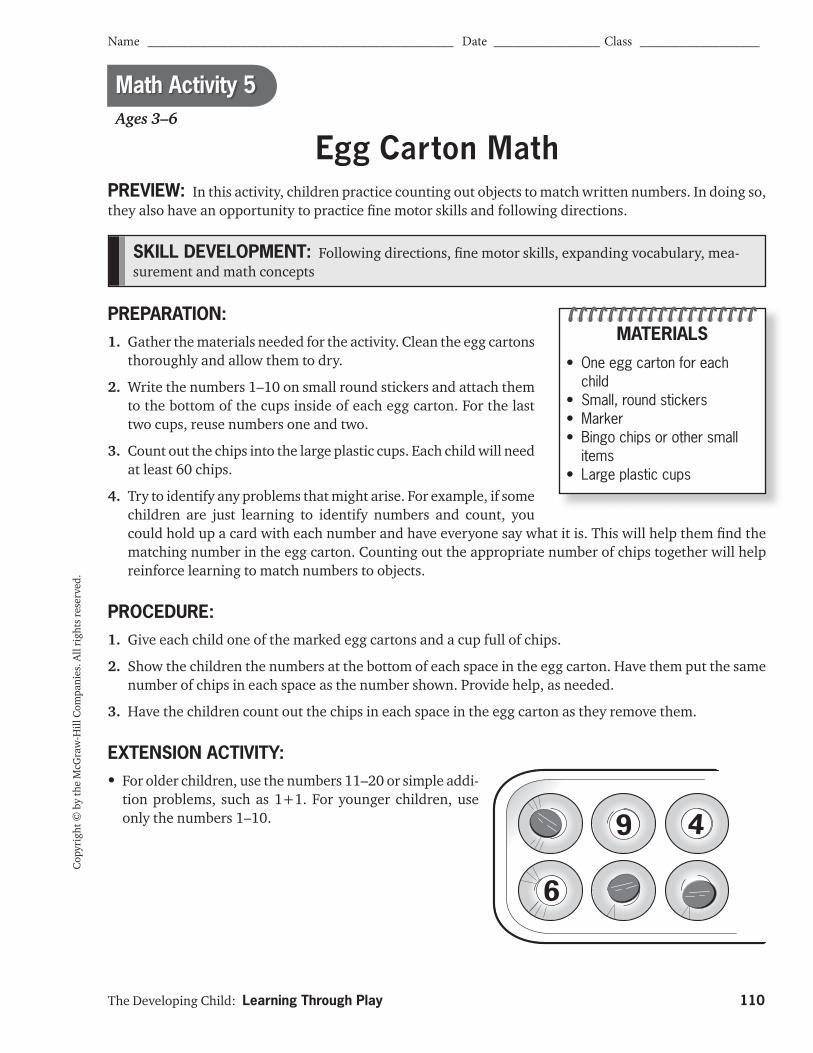
The Developing Child: Learning Through Play 110
Name ______________________________________________ Date ________________ Class __________________
Cop
yrig
ht ©
by
the
McG
raw
-Hill
Com
pani
es. A
ll ri
ghts
rese
rved
.
Ages 3–6
Egg Carton Math
SKILL DEVELOPMENT: Following directions, fi ne motor skills, expanding vocabulary, mea-surement and math concepts
PREPARATION:1. Gather the materials needed for the activity. Clean the egg cartons
thoroughly and allow them to dry.
2. Write the numbers 1–10 on small round stickers and attach them to the bottom of the cups inside of each egg carton. For the last two cups, reuse numbers one and two.
3. Count out the chips into the large plastic cups. Each child will need at least 60 chips.
4. Try to identify any problems that might arise. For example, if some children are just learning to identify numbers and count, you could hold up a card with each number and have everyone say what it is. This will help them fi nd the matching number in the egg carton. Counting out the appropriate number of chips together will help reinforce learning to match numbers to objects.
PROCEDURE:1. Give each child one of the marked egg cartons and a cup full of chips.
2. Show the children the numbers at the bottom of each space in the egg carton. Have them put the same number of chips in each space as the number shown. Provide help, as needed.
3. Have the children count out the chips in each space in the egg carton as they remove them.
EXTENSION ACTIVITY:• For older children, use the numbers 11–20 or simple addi-
tion problems, such as 1+1. For younger children, use only the numbers 1–10.
PREVIEW: In this activity, children practice counting out objects to match written numbers. In doing so, they also have an opportunity to practice fi ne motor skills and following directions.
MATERIALS
• One egg carton for each child
• Small, round stickers• Marker• Bingo chips or other small
items• Large plastic cups
Math Activity 5

The Developing Child: Learning Through Play 111
Name ______________________________________________ Date ________________ Class __________________
Cop
yrig
ht ©
by
the
McG
raw
-Hill
Com
pani
es. A
ll ri
ghts
rese
rved
.
SKILL DEVELOPMENT: Following directions, making choices, sharing and taking turns, fi ne motor skills, expanding vocabulary, measurement and math concepts, developing brain functions
Ages 3–6
Balancing Buttons
PREPARATION:1. Fasten a small paper cup securely to the top of each end of
the rulers with tape or adhesive. Cut cardboard tubes into 2- to 3-inch pieces, one per child.
2. Try out this activity yourself before using with the children to identify any potential problems.
PROCEDURE:1. Ask the children what happens if two people sit, one on each end,
on a teeter-totter. What if only one person sits on it? Talk about how the heaviness or weight of each person determines which end goes down. If two people of the same weight sat on a teeter-totter, what would happen? (Introduce the concept of balance.) Ask the children how they know how much they weigh, to introduce the concept of scales.
2. Explain to the children that they are going to make a scale that looks like a teeter-totter. They will use it to measure how heavy things are.
3. Give each child a ruler with cups taped to the ends, a cardboard tube section, and a handful of buttons. Demonstrate how to balance the ruler on the cardboard tube to make a scale. Put a few buttons in one of the cups and note how that end of the ruler goes down. Add some buttons to the other cup and watch what happens.
4. Allow children to experiment with their own scales and to discover which buttons or groups of buttons weigh more, which weigh less, and which weigh the same.
EXTENSION ACTIVITY:• Have the children weigh other small items
with their scales, such as paper clips, eras-ers, checkers, and so on. Compare the weights of the diff erent items.
PREVIEW: In this activity, children use a simple scale made from a ruler to explore the concepts of weight and balance.
MATERIALS
• One 12-inch ruler for each child
• Two small paper cups for each ruler
• Adult-size scissors• Small cardboard tube (such
as from paper towels) cut into 2- to 3-inch sections, one per child
• Tape or removable tacky adhesive
• Assorted buttons (available at craft stores)
Math Activity 6
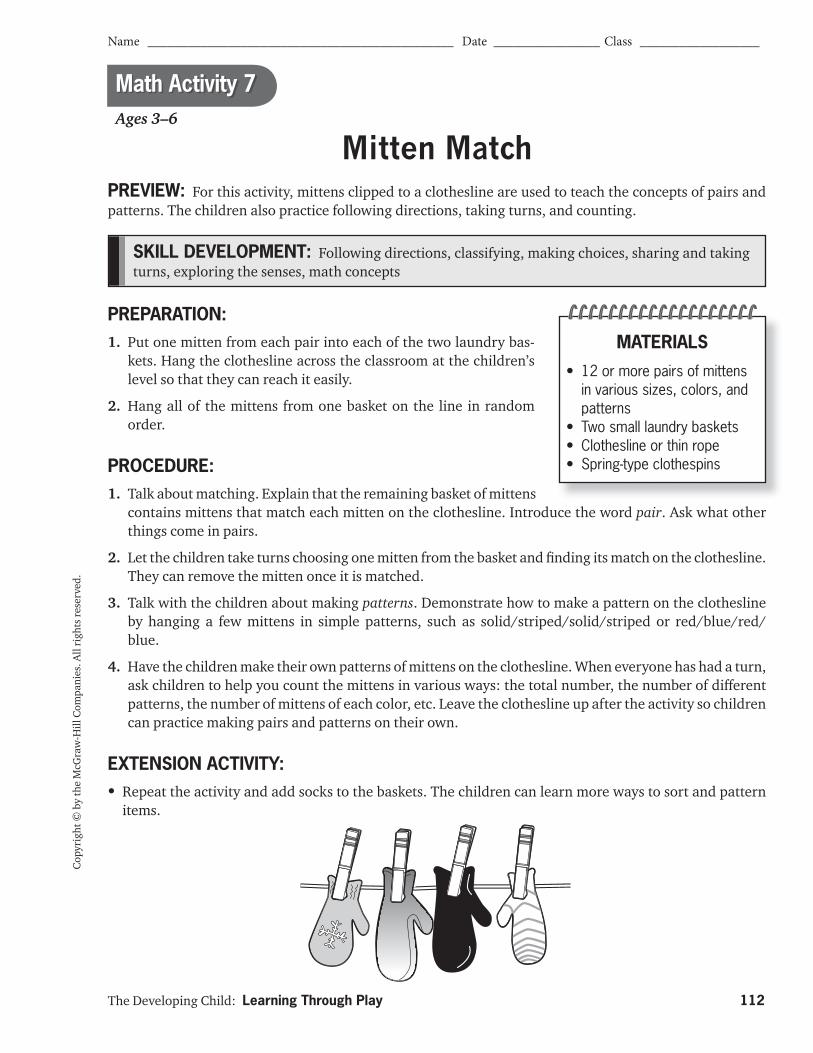
Cop
yrig
ht ©
by
the
McG
raw
-Hill
Com
pani
es. A
ll ri
ghts
rese
rved
.
Name ______________________________________________ Date ________________ Class __________________
Ages 3–6
Math Activity 7
SKILL DEVELOPMENT: Following directions, classifying, making choices, sharing and taking turns, exploring the senses, math concepts
PREPARATION:1. Put one mitten from each pair into each of the two laundry bas-
kets. Hang the clothesline across the classroom at the children’s level so that they can reach it easily.
2. Hang all of the mittens from one basket on the line in random order.
PROCEDURE:1. Talk about matching. Explain that the remaining basket of mittens
contains mittens that match each mitten on the clothesline. Introduce the word pair. Ask what other things come in pairs.
2. Let the children take turns choosing one mitten from the basket and fi nding its match on the clothesline. They can remove the mitten once it is matched.
3. Talk with the children about making patterns. Demonstrate how to make a pattern on the clothesline by hanging a few mittens in simple patterns, such as solid/striped/solid/striped or red/blue/red/blue.
4. Have the children make their own patterns of mittens on the clothesline. When everyone has had a turn, ask children to help you count the mittens in various ways: the total number, the number of diff erent patterns, the number of mittens of each color, etc. Leave the clothesline up after the activity so children can practice making pairs and patterns on their own.
EXTENSION ACTIVITY:• Repeat the activity and add socks to the baskets. The children can learn more ways to sort and pattern
items.
PREVIEW: For this activity, mittens clipped to a clothesline are used to teach the concepts of pairs and patterns. The children also practice following directions, taking turns, and counting.
Mitten Match
MATERIALS
• 12 or more pairs of mittens in various sizes, colors, and patterns
• Two small laundry baskets• Clothesline or thin rope• Spring-type clothespins
The Developing Child: Learning Through Play 112
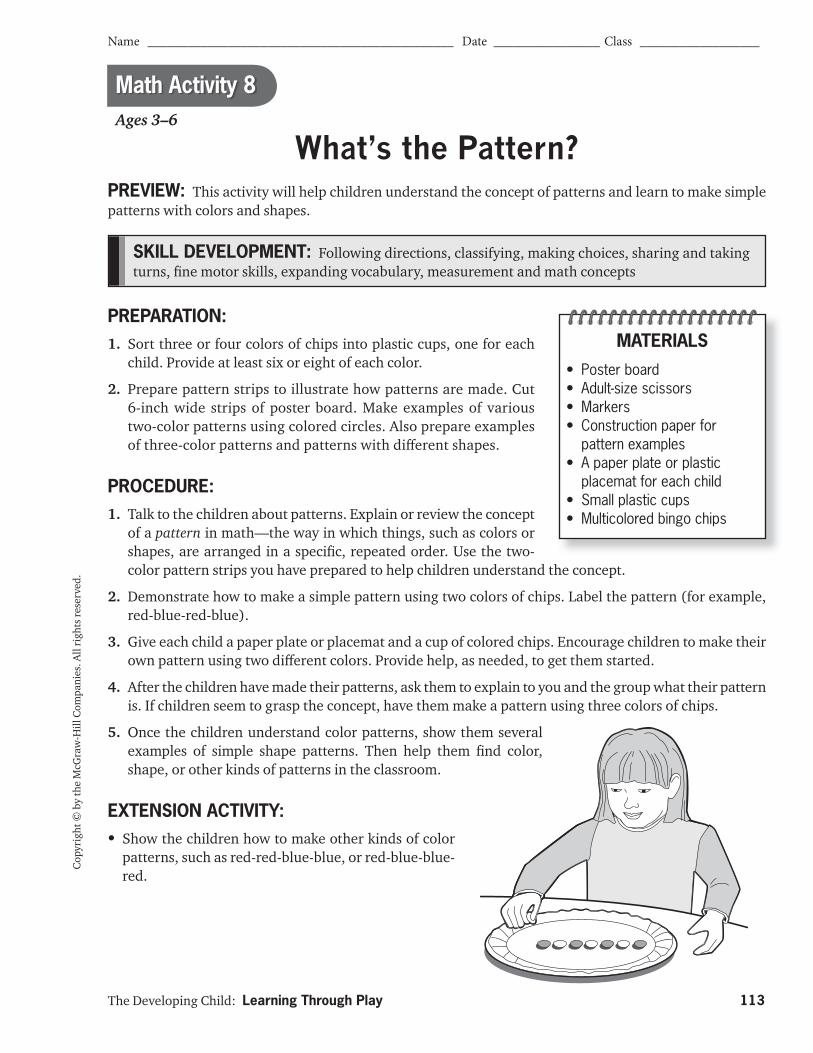
Cop
yrig
ht ©
by
the
McG
raw
-Hill
Com
pani
es. A
ll ri
ghts
rese
rved
.
The Developing Child: Learning Through Play 113
Name ______________________________________________ Date ________________ Class __________________
SKILL DEVELOPMENT: Following directions, classifying, making choices, sharing and taking turns, fi ne motor skills, expanding vocabulary, measurement and math concepts
Ages 3–6
What’s the Pattern?
PREPARATION:1. Sort three or four colors of chips into plastic cups, one for each
child. Provide at least six or eight of each color.
2. Prepare pattern strips to illustrate how patterns are made. Cut 6-inch wide strips of poster board. Make examples of various two-color patterns using colored circles. Also prepare examples of three-color patterns and patterns with diff erent shapes.
PROCEDURE:1. Talk to the children about patterns. Explain or review the concept
of a pattern in math—the way in which things, such as colors or shapes, are arranged in a specifi c, repeated order. Use the two-color pattern strips you have prepared to help children understand the concept.
2. Demonstrate how to make a simple pattern using two colors of chips. Label the pattern (for example, red-blue-red-blue).
3. Give each child a paper plate or placemat and a cup of colored chips. Encourage children to make their own pattern using two diff erent colors. Provide help, as needed, to get them started.
4. After the children have made their patterns, ask them to explain to you and the group what their pattern is. If children seem to grasp the concept, have them make a pattern using three colors of chips.
5. Once the children understand color patterns, show them several examples of simple shape patterns. Then help them fi nd color, shape, or other kinds of patterns in the classroom.
EXTENSION ACTIVITY:• Show the children how to make other kinds of color
patterns, such as red-red-blue-blue, or red-blue-blue-red.
PREVIEW: This activity will help children understand the concept of patterns and learn to make simple patterns with colors and shapes.
MATERIALS
• Poster board• Adult-size scissors• Markers• Construction paper for
pattern examples• A paper plate or plastic
placemat for each child• Small plastic cups• Multicolored bingo chips
Math Activity 8
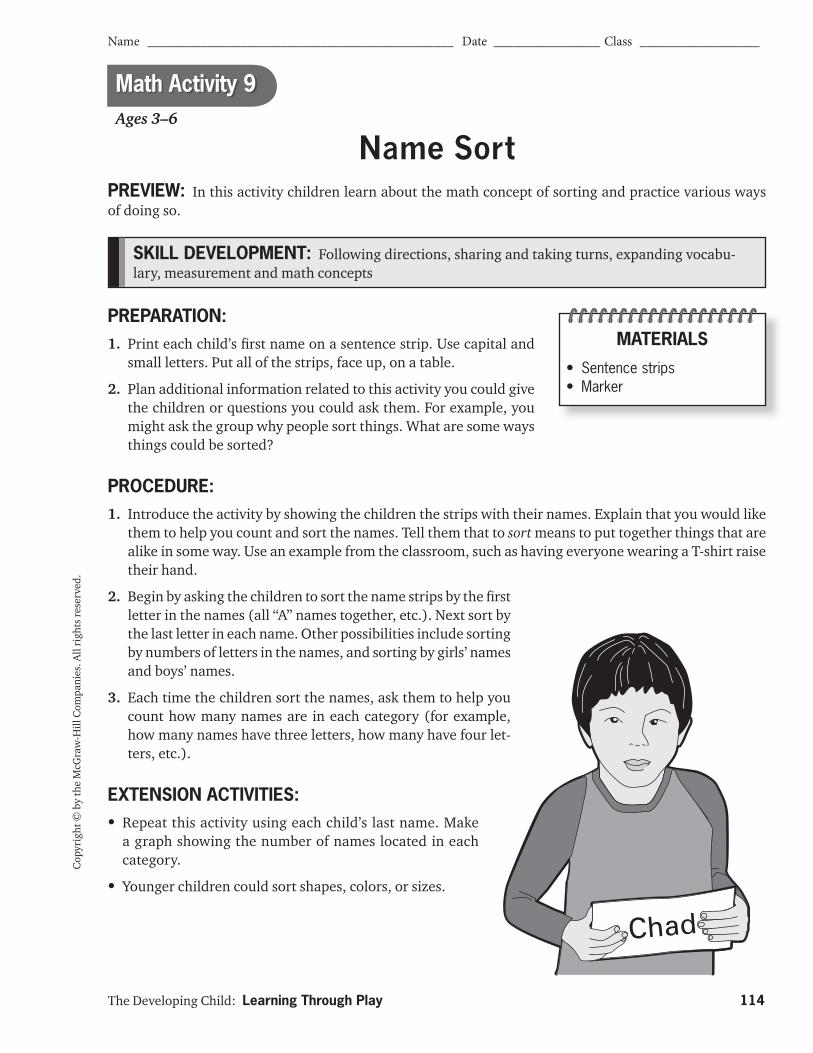
Cop
yrig
ht ©
by
the
McG
raw
-Hill
Com
pani
es. A
ll ri
ghts
rese
rved
.
The Developing Child: Learning Through Play 114
Name ______________________________________________ Date ________________ Class __________________
Math Activity 9Ages 3–6
Name Sort
SKILL DEVELOPMENT: Following directions, sharing and taking turns, expanding vocabu-lary, measurement and math concepts
PREPARATION:1. Print each child’s fi rst name on a sentence strip. Use capital and
small letters. Put all of the strips, face up, on a table.
2. Plan additional information related to this activity you could give the children or questions you could ask them. For example, you might ask the group why people sort things. What are some ways things could be sorted?
PROCEDURE:1. Introduce the activity by showing the children the strips with their names. Explain that you would like
them to help you count and sort the names. Tell them that to sort means to put together things that are alike in some way. Use an example from the classroom, such as having everyone wearing a T-shirt raise their hand.
2. Begin by asking the children to sort the name strips by the fi rst letter in the names (all “A” names together, etc.). Next sort by the last letter in each name. Other possibilities include sorting by numbers of letters in the names, and sorting by girls’ names and boys’ names.
3. Each time the children sort the names, ask them to help you count how many names are in each category (for example, how many names have three letters, how many have four let-ters, etc.).
EXTENSION ACTIVITIES:• Repeat this activity using each child’s last name. Make
a graph showing the number of names located in each category.
• Younger children could sort shapes, colors, or sizes.
PREVIEW: In this activity children learn about the math concept of sorting and practice various ways of doing so.
MATERIALS
• Sentence strips• Marker

(Continued on next page)
Cop
yrig
ht ©
by
the
McG
raw
-Hill
Com
pani
es. A
ll ri
ghts
rese
rved
.
The Developing Child: Learning Through Play 115
Name ______________________________________________ Date ________________ Class __________________
SKILL DEVELOPMENT: Measurement and math concepts, following directions
Math Activity 10Ages 3–6
PREPARATION:1. Before the activity, use the pizza boards or paper plates to make
six diff erent fraction puzzles. You may choose to make each puzzle a diff erent color.
2. Leave the fi rst board or plate as a whole circle. Use the ruler to divide the others into equal parts—one in halves, one in thirds, one in quarters, one in sixths, and the last one in eighths—and cut them apart.
3. Practice Step 2 below so that you can fi nd the best way to hold each puzzle as you take off and replace the fraction pieces. Decide whether you will hold these up to show the children or place them on a fl at surface (work table or fl oor).
PROCEDURE:1. Show the children the uncut pizza board or plate. Ask them what
shape it is. Compare it to a pizza or a pie.
2. Then show each fraction puzzle, one at a time, using the circle that was left whole as a backing behind each puzzle as you show it. Begin with one puzzle with all its pieces in place. Then take the puzzle’s fraction pieces off , one by one. Have the children count each piece as it is removed. Replace each piece to make a whole circle again, counting as you go.
3. Repeat with the other fraction puzzles, asking the children to help remove and put back the pieces.
4. Talk about the process. The pieces are shaped like pieces of pizza or pie. Note that the more pieces the circle is divided into, the smaller each piece is. Then allow the children to play and experi-ment with the puzzles on their own.
PREVIEW: This activity will help children learn the basic concept of fractions—that parts can make up a whole.
Fraction Puzzles
MATERIALS
• Six round, clean cardboard pizza boards (available from local pizza restaurants) or six large paper plates
• Ruler• Pen or pencil• Adult-size scissors
The Developing Child: Learning Through Play 116
Cop
yrig
ht ©
by
the
McG
raw
-Hill
Com
pani
es. A
ll ri
ghts
rese
rved
.
EXTENSION ACTIVITIES:• For younger children, you could make larger fraction puzzles out of poster board to give them so they
can more easily see the pieces and how they are removed.
• With older children, show with a paper plate and ruler how to divide a circle in half, quarters, and eighths. Let them trace puzzle wedges onto their own paper plates or use rulers and pencils to try to divide them evenly. Relate this process to a pizza. If it is not divided into even pieces, some people get bigger pieces than others.
• Have children fi nd pictures of food in magazines and cut them out. Then ask them to cut the food item in half to show how they would share it with a friend.
Fraction Puzzles (continued)
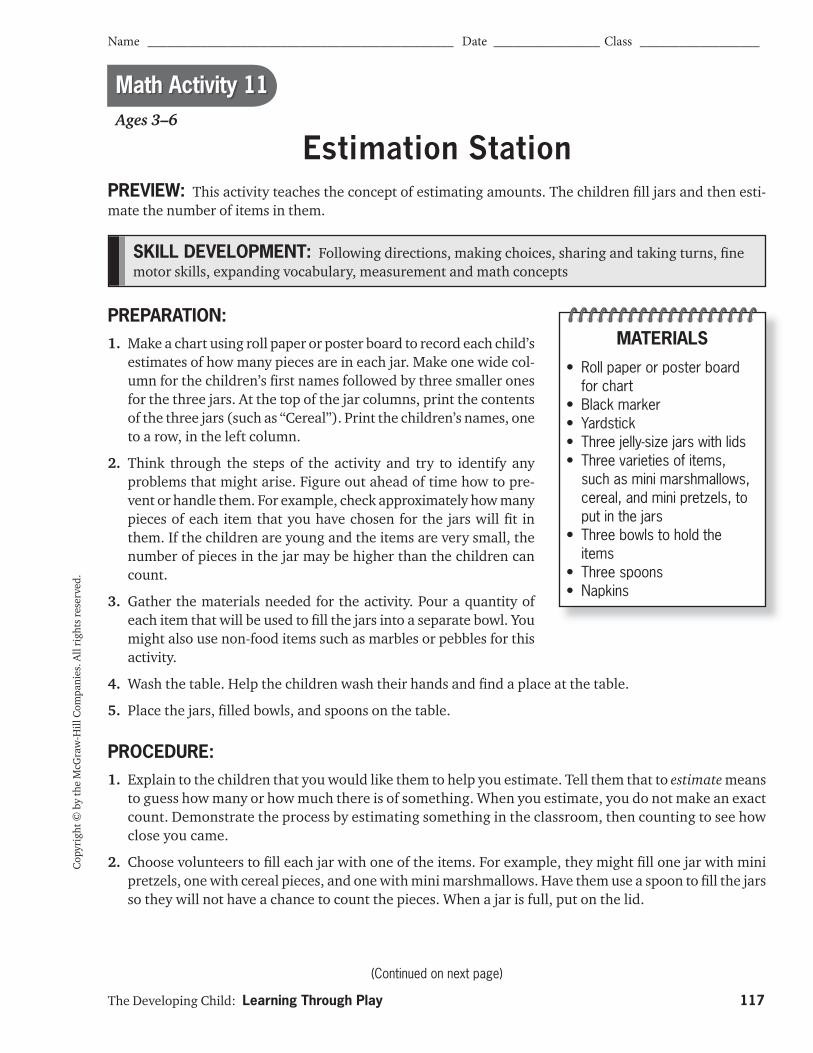
(Continued on next page)
Cop
yrig
ht ©
by
the
McG
raw
-Hill
Com
pani
es. A
ll ri
ghts
rese
rved
.
The Developing Child: Learning Through Play 117
Name ______________________________________________ Date ________________ Class __________________
SKILL DEVELOPMENT: Following directions, making choices, sharing and taking turns, fi ne motor skills, expanding vocabulary, measurement and math concepts
Math Activity 11Ages 3–6
Estimation Station
PREPARATION:1. Make a chart using roll paper or poster board to record each child’s
estimates of how many pieces are in each jar. Make one wide col-umn for the children’s fi rst names followed by three smaller ones for the three jars. At the top of the jar columns, print the contents of the three jars (such as “Cereal”). Print the children’s names, one to a row, in the left column.
2. Think through the steps of the activity and try to identify any problems that might arise. Figure out ahead of time how to pre-vent or handle them. For example, check approximately how many pieces of each item that you have chosen for the jars will fi t in them. If the children are young and the items are very small, the number of pieces in the jar may be higher than the children can count.
3. Gather the materials needed for the activity. Pour a quantity of each item that will be used to fi ll the jars into a separate bowl. You might also use non-food items such as marbles or pebbles for this activity.
4. Wash the table. Help the children wash their hands and fi nd a place at the table.
5. Place the jars, fi lled bowls, and spoons on the table.
PROCEDURE:1. Explain to the children that you would like them to help you estimate. Tell them that to estimate means
to guess how many or how much there is of something. When you estimate, you do not make an exact count. Demonstrate the process by estimating something in the classroom, then counting to see how close you came.
2. Choose volunteers to fi ll each jar with one of the items. For example, they might fi ll one jar with mini pretzels, one with cereal pieces, and one with mini marshmallows. Have them use a spoon to fi ll the jars so they will not have a chance to count the pieces. When a jar is full, put on the lid.
PREVIEW: This activity teaches the concept of estimating amounts. The children fi ll jars and then esti-mate the number of items in them.
MATERIALS
• Roll paper or poster board for chart
• Black marker• Yardstick• Three jelly-size jars with lids• Three varieties of items,
such as mini marshmallows, cereal, and mini pretzels, to put in the jars
• Three bowls to hold the items
• Three spoons• Napkins
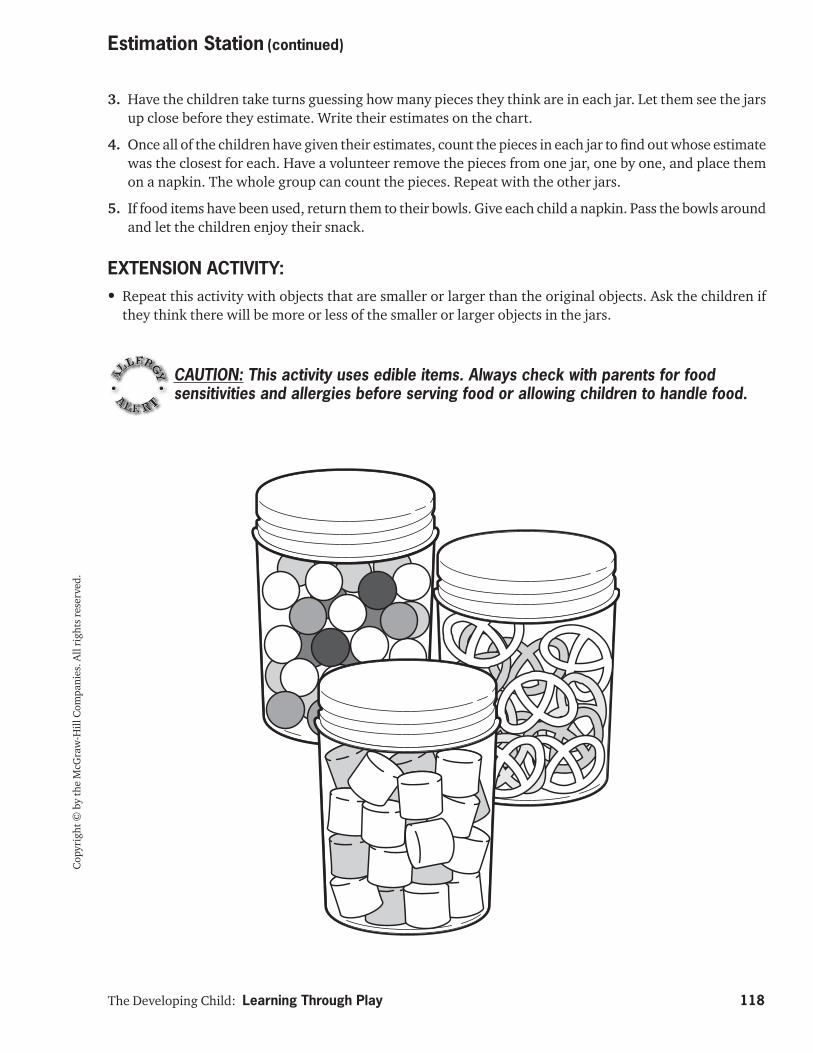
The Developing Child: Learning Through Play 118
Cop
yrig
ht ©
by
the
McG
raw
-Hill
Com
pani
es. A
ll ri
ghts
rese
rved
.
3. Have the children take turns guessing how many pieces they think are in each jar. Let them see the jars up close before they estimate. Write their estimates on the chart.
4. Once all of the children have given their estimates, count the pieces in each jar to fi nd out whose estimate was the closest for each. Have a volunteer remove the pieces from one jar, one by one, and place them on a napkin. The whole group can count the pieces. Repeat with the other jars.
5. If food items have been used, return them to their bowls. Give each child a napkin. Pass the bowls around and let the children enjoy their snack.
EXTENSION ACTIVITY:• Repeat this activity with objects that are smaller or larger than the original objects. Ask the children if
they think there will be more or less of the smaller or larger objects in the jars.
Estimation Station (continued)
CAUTION: This activity uses edible items. Always check with parents for food sensitivities and allergies before serving food or allowing children to handle food.
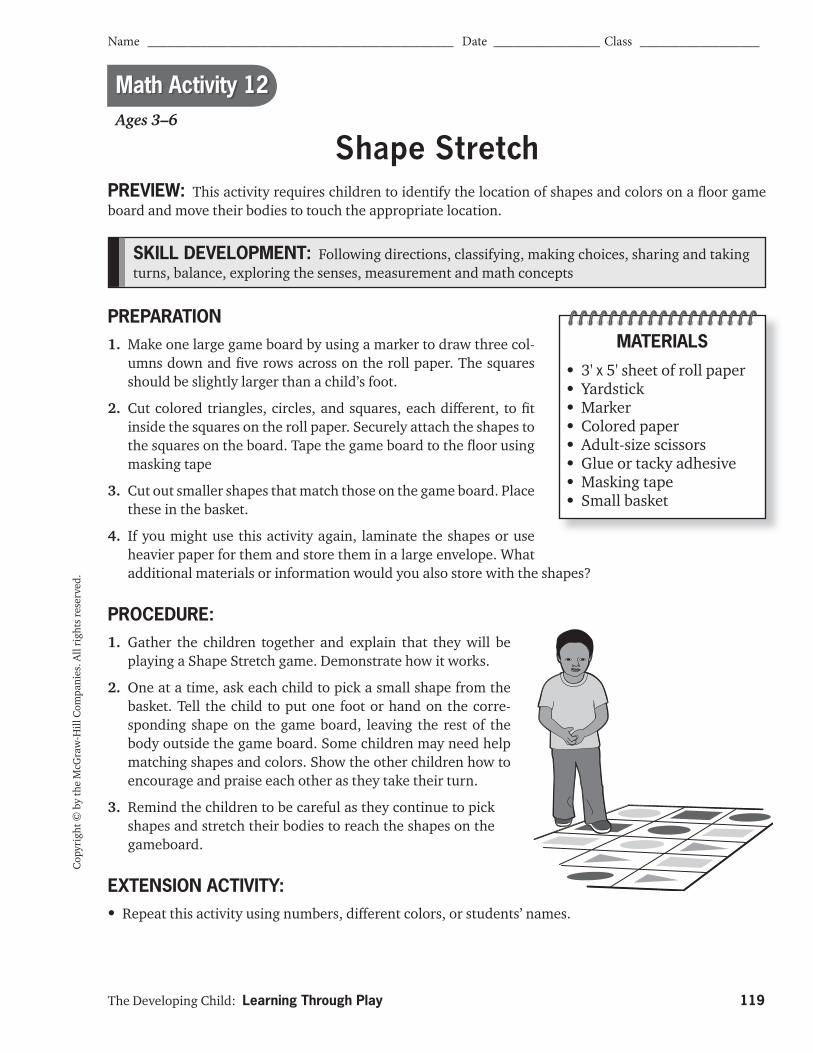
Cop
yrig
ht ©
by
the
McG
raw
-Hill
Com
pani
es. A
ll ri
ghts
rese
rved
.
The Developing Child: Learning Through Play 119
Name ______________________________________________ Date ________________ Class __________________
SKILL DEVELOPMENT: Following directions, classifying, making choices, sharing and taking turns, balance, exploring the senses, measurement and math concepts
Math Activity 12Ages 3–6
Shape Stretch
PREPARATION1. Make one large game board by using a marker to draw three col-
umns down and fi ve rows across on the roll paper. The squares should be slightly larger than a child’s foot.
2. Cut colored triangles, circles, and squares, each diff erent, to fi t inside the squares on the roll paper. Securely attach the shapes to the squares on the board. Tape the game board to the fl oor using masking tape
3. Cut out smaller shapes that match those on the game board. Place these in the basket.
4. If you might use this activity again, laminate the shapes or use heavier paper for them and store them in a large envelope. What additional materials or information would you also store with the shapes?
PROCEDURE:1. Gather the children together and explain that they will be
playing a Shape Stretch game. Demonstrate how it works.
2. One at a time, ask each child to pick a small shape from the basket. Tell the child to put one foot or hand on the corre-sponding shape on the game board, leaving the rest of the body outside the game board. Some children may need help matching shapes and colors. Show the other children how to encourage and praise each other as they take their turn.
3. Remind the children to be careful as they continue to pick shapes and stretch their bodies to reach the shapes on the gameboard.
EXTENSION ACTIVITY:• Repeat this activity using numbers, diff erent colors, or students’ names.
PREVIEW: This activity requires children to identify the location of shapes and colors on a fl oor game board and move their bodies to touch the appropriate location.
MATERIALS
• 3' x 5' sheet of roll paper• Yardstick• Marker• Colored paper• Adult-size scissors• Glue or tacky adhesive• Masking tape• Small basket
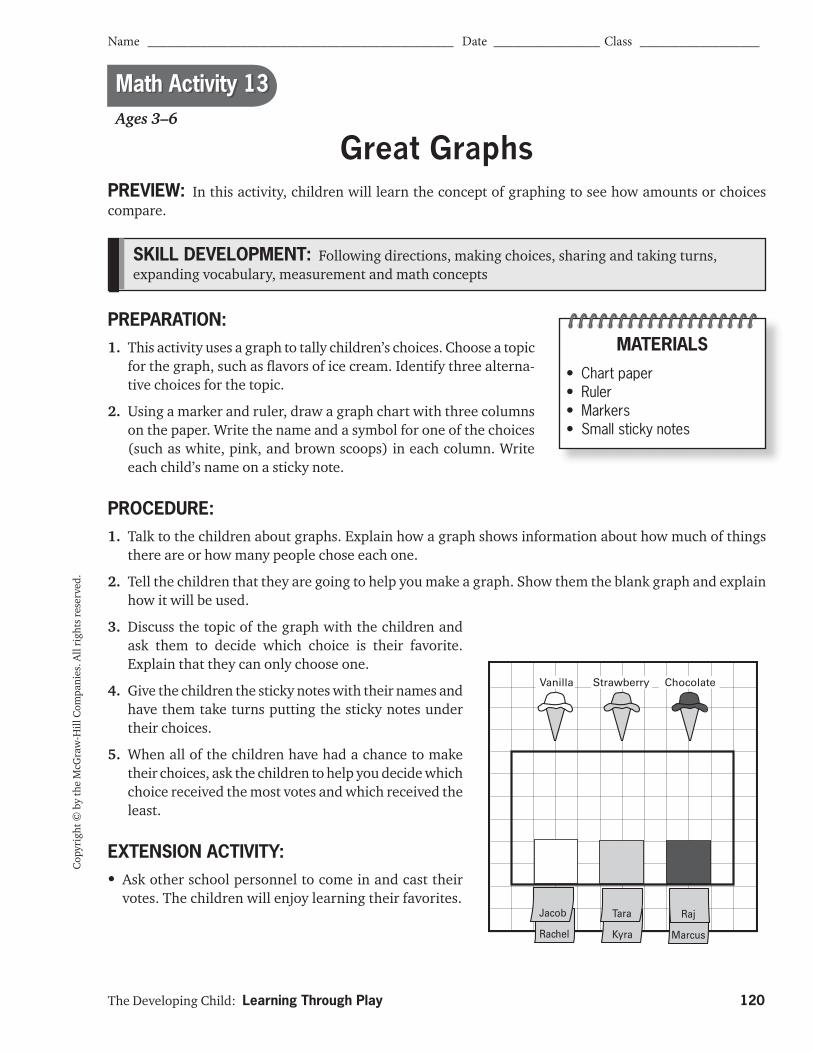
Cop
yrig
ht ©
by
the
McG
raw
-Hill
Com
pani
es. A
ll ri
ghts
rese
rved
.
The Developing Child: Learning Through Play 120
Name ______________________________________________ Date ________________ Class __________________
SKILL DEVELOPMENT: Following directions, making choices, sharing and taking turns, expanding vocabulary, measurement and math concepts
Math Activity 13Ages 3–6
Great Graphs
PREPARATION:1. This activity uses a graph to tally children’s choices. Choose a topic
for the graph, such as fl avors of ice cream. Identify three alterna-tive choices for the topic.
2. Using a marker and ruler, draw a graph chart with three columns on the paper. Write the name and a symbol for one of the choices (such as white, pink, and brown scoops) in each column. Write each child’s name on a sticky note.
PROCEDURE:1. Talk to the children about graphs. Explain how a graph shows information about how much of things
there are or how many people chose each one.
2. Tell the children that they are going to help you make a graph. Show them the blank graph and explain how it will be used.
3. Discuss the topic of the graph with the children and ask them to decide which choice is their favorite. Explain that they can only choose one.
4. Give the children the sticky notes with their names and have them take turns putting the sticky notes under their choices.
5. When all of the children have had a chance to make their choices, ask the children to help you decide which choice received the most votes and which received the least.
EXTENSION ACTIVITY:• Ask other school personnel to come in and cast their
votes. The children will enjoy learning their favorites.
PREVIEW: In this activity, children will learn the concept of graphing to see how amounts or choices compare.
MATERIALS
• Chart paper• Ruler• Markers• Small sticky notes
121
SCIENCE AND NATURE ACTIVITIES
1 That’s Me! Ages 3–5 ......................................................................................122
2 Aquarium in a Bag Ages 3–6..........................................................................123
3 Rain Painting Ages 3–6 .................................................................................125
4 Sink or Float? Ages 3–6 .................................................................................127
5 Going Fishing Ages 3–6 .................................................................................129
6 Fruity Treasure Hunt Ages 3–6 ......................................................................131
7 Human Tracks Ages 3–6 ................................................................................133
8 Magnet Discovery Ages 3–6 ..........................................................................135
9 Ocean Sensory Ages 3–6 ...............................................................................137
10 Ladybug Inn Ages 3–6 ...................................................................................139
11 Snacks for the Birds Ages 3–6 .......................................................................141
12 Interesting Inspections Ages 3–6 ..................................................................143
13 Creating Clouds Ages 4–6 .............................................................................144

The Developing Child: Learning Through Play 122
Name ______________________________________________ Date ________________ Class __________________
Cop
yrig
ht ©
by
the
McG
raw
-Hill
Com
pani
es. A
ll ri
ghts
rese
rved
.
That’s Me!Ages 3–5
PREPARATION:1. Gather the items needed for the activity. In addition to the mirrors,
fi nd at least fi ve objects that children will be able to see themselves in. Place them together on a table.
2. Think through the steps of the activity and try to identify any problems that might arise. For example, you might tell the chil-dren that some of the objects are fragile. Explain that fragile means they can break easily.
3. Plan additional questions that you could ask or information you could give related to this activity. For example, you might talk about places you can see yourself when you are outside.
PROCEDURE:1. Tell the children to look into a mirror. Explain that what they see is called a refl ection. Explain that
refl ections can often be seen when looking at other types of smooth, shiny objects.
2. Show the refl ective objects on the table. Picking them up one by one, ask “Do you think you could see yourself in this?” Have one child at a time come up to look for his or her refl ection.
3. Ask the children what they see refl ected: Themselves? Other objects? Ask them to compare the refl ections they see in the fl at objects with the ones in the curved objects. Can they make their refl ections change size or shape?
EXTENSION ACTIVITY:• Show the children how to hold mirrors to see the refl ec-
tions of objects that are behind them. Show them how to use two mirrors to see the backs of their own heads.
SKILL DEVELOPMENT: Following directions, sharing and taking turns, exploring the senses, expanding vocabulary, science concepts
PREVIEW: Children examine their refl ections in mirrors and in other familiar objects that refl ect images.
MATERIALS
• Small hand mirrors, various sizes
• Objects that refl ect images (such as a CD, spoons, pan lid, coffee pot, shiny cookie sheet, framed picture, refl ective sunglasses)
Science and Nature Activity 1
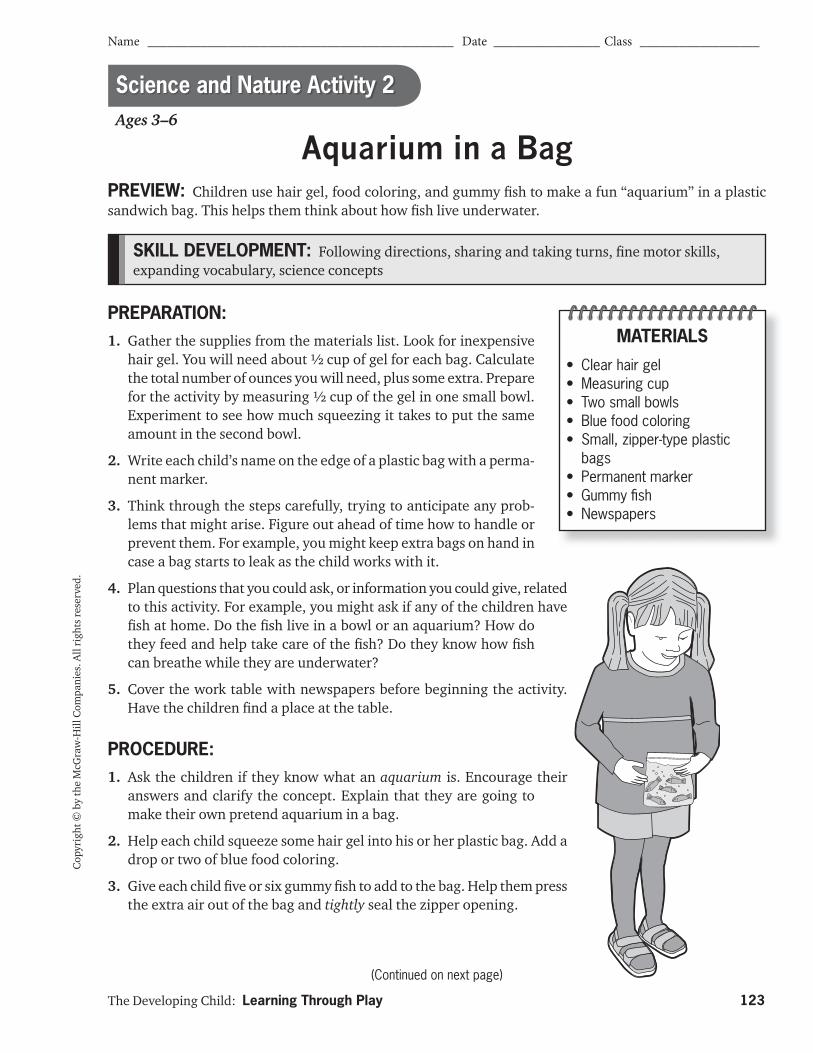
The Developing Child: Learning Through Play 123
Name ______________________________________________ Date ________________ Class __________________
(Continued on next page)
Cop
yrig
ht ©
by
the
McG
raw
-Hill
Com
pani
es. A
ll ri
ghts
rese
rved
.
SKILL DEVELOPMENT: Following directions, sharing and taking turns, fi ne motor skills, expanding vocabulary, science concepts
Ages 3–6
Aquarium in a Bag
PREPARATION:1. Gather the supplies from the materials list. Look for inexpensive
hair gel. You will need about ½ cup of gel for each bag. Calculate the total number of ounces you will need, plus some extra. Prepare for the activity by measuring ½ cup of the gel in one small bowl. Experiment to see how much squeezing it takes to put the same amount in the second bowl.
2. Write each child’s name on the edge of a plastic bag with a perma-nent marker.
3. Think through the steps carefully, trying to anticipate any prob-lems that might arise. Figure out ahead of time how to handle or prevent them. For example, you might keep extra bags on hand in case a bag starts to leak as the child works with it.
4. Plan questions that you could ask, or information you could give, related to this activity. For example, you might ask if any of the children have fi sh at home. Do the fi sh live in a bowl or an aquarium? How do they feed and help take care of the fi sh? Do they know how fi sh can breathe while they are underwater?
5. Cover the work table with newspapers before beginning the activity. Have the children fi nd a place at the table.
PROCEDURE:1. Ask the children if they know what an aquarium is. Encourage their
answers and clarify the concept. Explain that they are going to make their own pretend aquarium in a bag.
2. Help each child squeeze some hair gel into his or her plastic bag. Add a drop or two of blue food coloring.
3. Give each child fi ve or six gummy fi sh to add to the bag. Help them press the extra air out of the bag and tightly seal the zipper opening.
PREVIEW: Children use hair gel, food coloring, and gummy fi sh to make a fun “aquarium” in a plastic sandwich bag. This helps them think about how fi sh live underwater.
MATERIALS
• Clear hair gel• Measuring cup• Two small bowls• Blue food coloring• Small, zipper-type plastic
bags• Permanent marker• Gummy fi sh• Newspapers
Science and Nature Activity 2
The Developing Child: Learning Through Play 124
Cop
yrig
ht ©
by
the
McG
raw
-Hill
Com
pani
es. A
ll ri
ghts
rese
rved
.
4. Tell the children to squeeze the “aquariums” with their fi ngers. They will see the gel turn blue and the fi sh wiggle around, and they can feel the texture of the gel through the bag.
EXTENSION ACTIVITIES:• Ask older children to predict what might happen if you add yellow food coloring to the blue “water.” Add
the yellow food coloring to an extra “aquarium” that you have made. Encourage the children to watch what happens to test their predictions.
• Talk about diff erent places where fi sh live—ponds, lakes, creeks, rivers, the ocean, and, of course, in aquariums.
Aquarium in a Bag (continued)
CAUTION: This activity uses edible items. Always check with parents for food sensitivities and allergies before serving food or allowing children to handle food.

The Developing Child: Learning Through Play 125
Name ______________________________________________ Date ________________ Class __________________
(Continued on next page)
Cop
yrig
ht ©
by
the
McG
raw
-Hill
Com
pani
es. A
ll ri
ghts
rese
rved
.
Ages 3–6
SKILL DEVELOPMENT: Following directions, sharing and taking turns, fi ne motor skills, demonstrating creativity, science concepts
PREPARATION:1. Check the weather forecast. This activity is best done in the rain,
although a hose or lawn sprinkler could be used instead. Ask the children to bring their raincoats on the day of the activity.
2. Gather the supplies needed for the activity. You will be using dry paints in various colors. Transfer the dry tempera to the salt shak-ers with a small funnel.
3. Think through the activity to identify any possible problems. For example, fi gure out how you can keep the papers fl at so the paint crystals do not slip off the papers as they are carried outdoors. If you use a hose or sprinkler instead of rain, consider having the children shake the paint on the paper outdoors.
3. Plan additional questions that you could ask or information you could give children related to this activity. For example, you might tell them that their rain pictures will be abstract paintings because they will not be a picture of a house, person, etc.
PROCEDURE:1. Give children a sheet of paper and put their name on it with a permanent marker. Demonstrate how to
shake the sprinkles of dry tempera paint on paper. Allow them to shake as many diff erent colors of paint as they wish, taking turns with the shakers.
PREVIEW: Children watch as nature helps them out with their art project. Raindrops “paint” a picture by activating the paint crystals the children have sprinkled on sheets of paper.
Rain Painting
MATERIALS
• Construction paper• Permanent markers• Dry tempera paints• Clear plastic salt shakers• Small funnel• Gentle rain or drizzle or
fi ne spray from a hose or sprinkler
• Raincoats or rain ponchos with hoods
• Newspapers• Child-size safety scissors
Science and Nature Activity 3
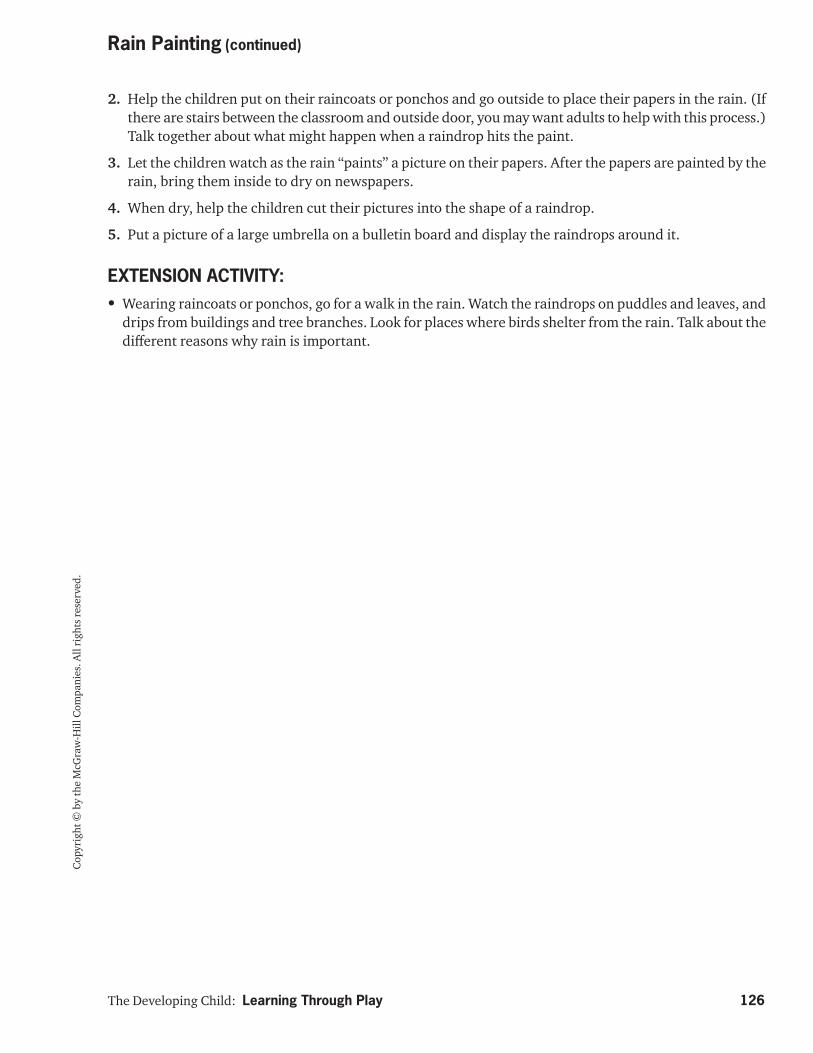
The Developing Child: Learning Through Play 126
Cop
yrig
ht ©
by
the
McG
raw
-Hill
Com
pani
es. A
ll ri
ghts
rese
rved
.
2. Help the children put on their raincoats or ponchos and go outside to place their papers in the rain. (If there are stairs between the classroom and outside door, you may want adults to help with this process.) Talk together about what might happen when a raindrop hits the paint.
3. Let the children watch as the rain “paints” a picture on their papers. After the papers are painted by the rain, bring them inside to dry on newspapers.
4. When dry, help the children cut their pictures into the shape of a raindrop.
5. Put a picture of a large umbrella on a bulletin board and display the raindrops around it.
EXTENSION ACTIVITY:• Wearing raincoats or ponchos, go for a walk in the rain. Watch the raindrops on puddles and leaves, and
drips from buildings and tree branches. Look for places where birds shelter from the rain. Talk about the diff erent reasons why rain is important.
Rain Painting (continued)
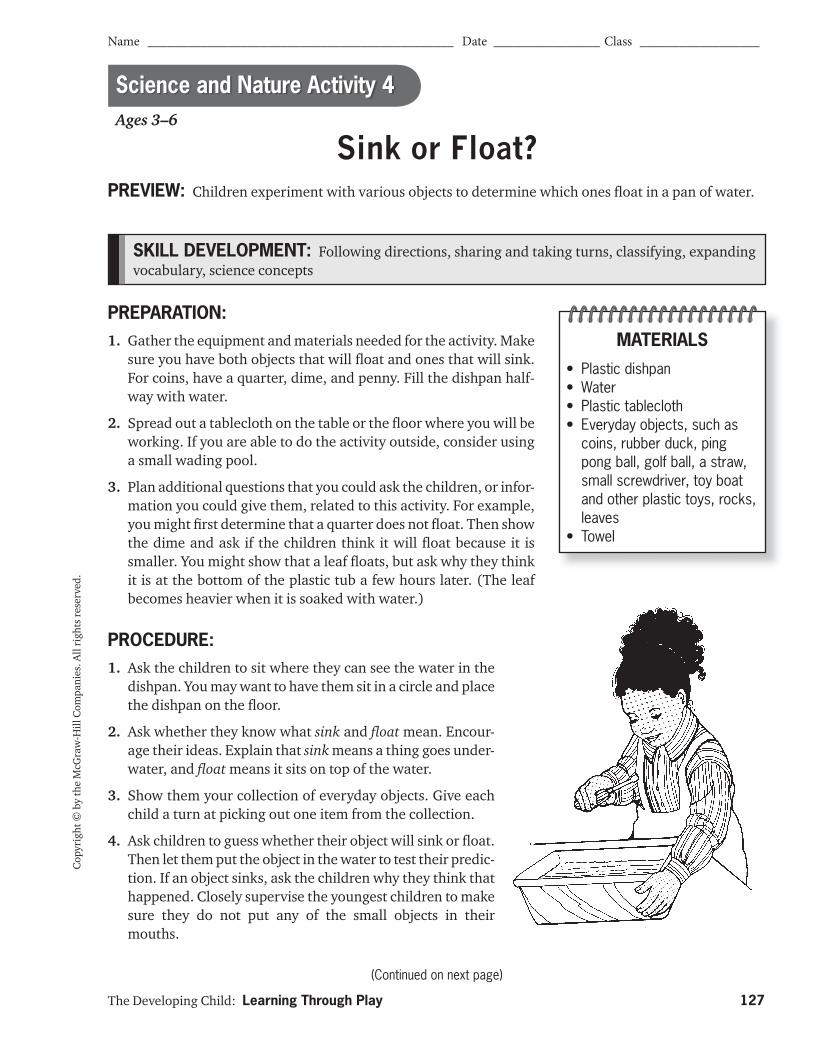
The Developing Child: Learning Through Play 127
Name ______________________________________________ Date ________________ Class __________________
(Continued on next page)
Cop
yrig
ht ©
by
the
McG
raw
-Hill
Com
pani
es. A
ll ri
ghts
rese
rved
.
SKILL DEVELOPMENT: Following directions, sharing and taking turns, classifying, expanding vocabulary, science concepts
Ages 3–6
Sink or Float?
PREPARATION:1. Gather the equipment and materials needed for the activity. Make
sure you have both objects that will fl oat and ones that will sink. For coins, have a quarter, dime, and penny. Fill the dishpan half-way with water.
2. Spread out a tablecloth on the table or the fl oor where you will be working. If you are able to do the activity outside, consider using a small wading pool.
3. Plan additional questions that you could ask the children, or infor-mation you could give them, related to this activity. For example, you might fi rst determine that a quarter does not fl oat. Then show the dime and ask if the children think it will fl oat because it is smaller. You might show that a leaf fl oats, but ask why they think it is at the bottom of the plastic tub a few hours later. (The leaf becomes heavier when it is soaked with water.)
PROCEDURE:1. Ask the children to sit where they can see the water in the
dishpan. You may want to have them sit in a circle and place the dishpan on the fl oor.
2. Ask whether they know what sink and fl oat mean. Encour-age their ideas. Explain that sink means a thing goes under-water, and fl oat means it sits on top of the water.
3. Show them your collection of everyday objects. Give each child a turn at picking out one item from the collection.
4. Ask children to guess whether their object will sink or fl oat. Then let them put the object in the water to test their predic-tion. If an object sinks, ask the children why they think that happened. Closely supervise the youngest children to make sure they do not put any of the small objects in their mouths.
PREVIEW: Children experiment with various objects to determine which ones fl oat in a pan of water.
MATERIALS
• Plastic dishpan• Water• Plastic tablecloth• Everyday objects, such as
coins, rubber duck, ping pong ball, golf ball, a straw, small screwdriver, toy boat and other plastic toys, rocks, leaves
• Towel
Science and Nature Activity 4
The Developing Child: Learning Through Play 128
Cop
yrig
ht ©
by
the
McG
raw
-Hill
Com
pani
es. A
ll ri
ghts
rese
rved
.
5. Continue until each child has had a turn. Ask the children to help you wipe up any spills.
EXTENSION ACTIVITIES:• Ask the children, “What will happen if we make the water red?” Put a few drops of food coloring in the
water; then repeat your experiments. Ask the children whether the color of the water made a diff erence in the activity.
• Ask the children whether people can fl oat in water. Encourage their answers. Show pictures of animals in the water. Discuss the fact that most know how to swim and do not have to be taught.
Sink or Float? (continued)
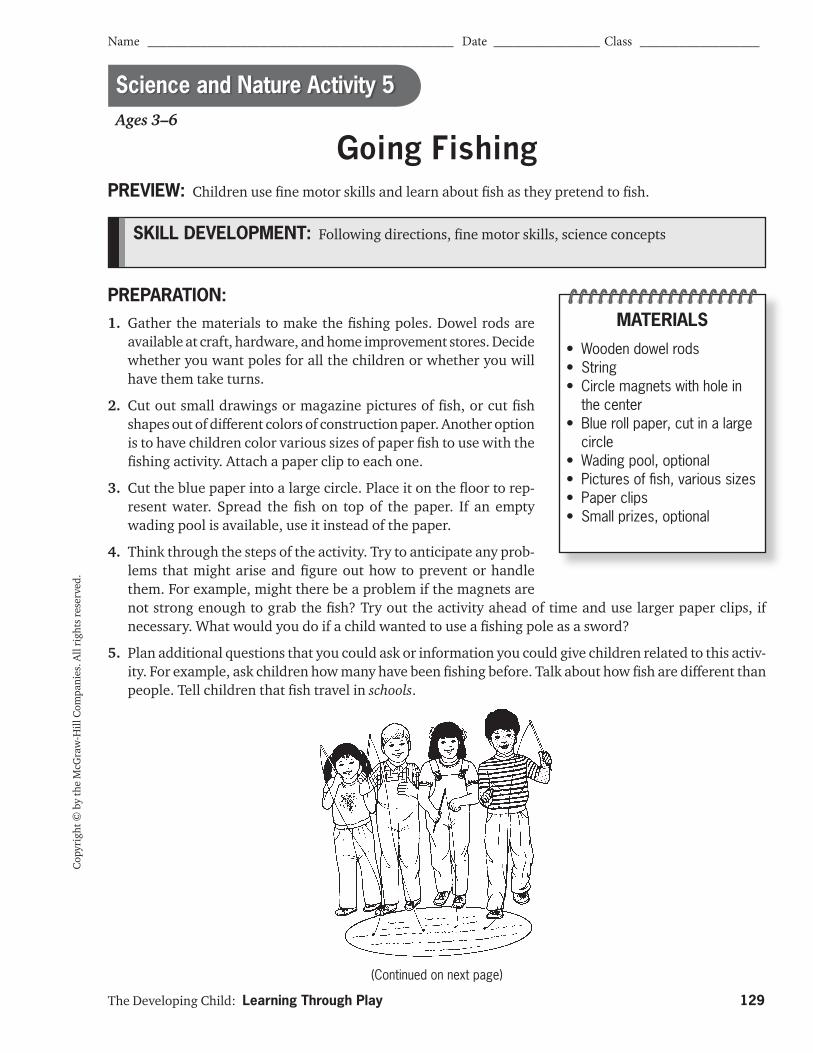
The Developing Child: Learning Through Play 129
Name ______________________________________________ Date ________________ Class __________________
(Continued on next page)
Cop
yrig
ht ©
by
the
McG
raw
-Hill
Com
pani
es. A
ll ri
ghts
rese
rved
.
SKILL DEVELOPMENT: Following directions, fi ne motor skills, science concepts
Ages 3–6
Going Fishing
PREPARATION:1. Gather the materials to make the fi shing poles. Dowel rods are
available at craft, hardware, and home improvement stores. Decide whether you want poles for all the children or whether you will have them take turns.
2. Cut out small drawings or magazine pictures of fi sh, or cut fi sh shapes out of diff erent colors of construction paper. Another option is to have children color various sizes of paper fi sh to use with the fi shing activity. Attach a paper clip to each one.
3. Cut the blue paper into a large circle. Place it on the fl oor to rep-resent water. Spread the fi sh on top of the paper. If an empty wading pool is available, use it instead of the paper.
4. Think through the steps of the activity. Try to anticipate any prob-lems that might arise and fi gure out how to prevent or handle them. For example, might there be a problem if the magnets are not strong enough to grab the fi sh? Try out the activity ahead of time and use larger paper clips, if necessary. What would you do if a child wanted to use a fi shing pole as a sword?
5. Plan additional questions that you could ask or information you could give children related to this activ-ity. For example, ask children how many have been fi shing before. Talk about how fi sh are diff erent than people. Tell children that fi sh travel in schools.
PREVIEW: Children use fi ne motor skills and learn about fi sh as they pretend to fi sh.
MATERIALS
• Wooden dowel rods• String• Circle magnets with hole in
the center• Blue roll paper, cut in a large
circle• Wading pool, optional• Pictures of fi sh, various sizes• Paper clips• Small prizes, optional
Science and Nature Activity 5

The Developing Child: Learning Through Play 130
Cop
yrig
ht ©
by
the
McG
raw
-Hill
Com
pani
es. A
ll ri
ghts
rese
rved
.
PROCEDURE:1. Make fi shing poles by tying one end of a string to a circle magnet and one end around a dowel rod. (For
younger children, keep the string short—about 18 inches. For an older group, the string can be 2 to 3 feet long.) Allow the children to help make the poles.
2. Let the children take turns fi shing at the pond.
3. To make the activity a fi shing derby or contest, place stars or numbers on the backs of several of the fi sh. Award small prizes to the children who catch those fi sh.
EXTENSION ACTIVITY:• Older children can use a ruler to see how big their pretend fi sh are. Fish smaller than a certain size, such
as 5 inches, must be thrown back into the pretend pond. The children may keep fi sh that are bigger. Tell children that real-life fi sh must be measured and those that are too small are returned to the water.
Going Fishing (continued)
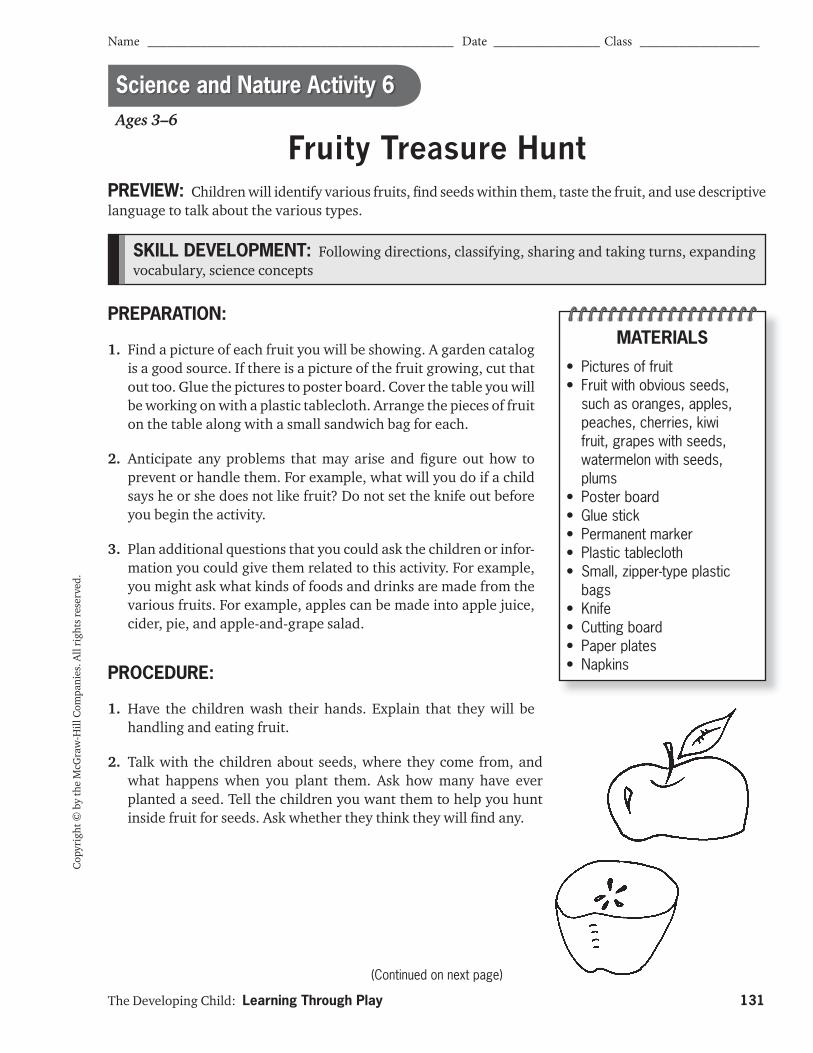
The Developing Child: Learning Through Play 131
Name ______________________________________________ Date ________________ Class __________________
(Continued on next page)
Cop
yrig
ht ©
by
the
McG
raw
-Hill
Com
pani
es. A
ll ri
ghts
rese
rved
.
SKILL DEVELOPMENT: Following directions, classifying, sharing and taking turns, expanding vocabulary, science concepts
Ages 3–6
Fruity Treasure Hunt
PREPARATION:
1. Find a picture of each fruit you will be showing. A garden catalog is a good source. If there is a picture of the fruit growing, cut that out too. Glue the pictures to poster board. Cover the table you will be working on with a plastic tablecloth. Arrange the pieces of fruit on the table along with a small sandwich bag for each.
2. Anticipate any problems that may arise and fi gure out how to prevent or handle them. For example, what will you do if a child says he or she does not like fruit? Do not set the knife out before you begin the activity.
3. Plan additional questions that you could ask the children or infor-mation you could give them related to this activity. For example, you might ask what kinds of foods and drinks are made from the various fruits. For example, apples can be made into apple juice, cider, pie, and apple-and-grape salad.
PROCEDURE:
1. Have the children wash their hands. Explain that they will be handling and eating fruit.
2. Talk with the children about seeds, where they come from, and what happens when you plant them. Ask how many have ever planted a seed. Tell the children you want them to help you hunt inside fruit for seeds. Ask whether they think they will fi nd any.
PREVIEW: Children will identify various fruits, fi nd seeds within them, taste the fruit, and use descriptive language to talk about the various types.
MATERIALS
• Pictures of fruit• Fruit with obvious seeds,
such as oranges, apples, peaches, cherries, kiwi fruit, grapes with seeds, watermelon with seeds, plums
• Poster board• Glue stick• Permanent marker• Plastic tablecloth• Small, zipper-type plastic
bags• Knife• Cutting board• Paper plates• Napkins
Science and Nature Activity 6
The Developing Child: Learning Through Play 132
Cop
yrig
ht ©
by
the
McG
raw
-Hill
Com
pani
es. A
ll ri
ghts
rese
rved
.
3. One at a time, name each fruit and ask the children what it looks like. Encourage descriptive language. Cut the fruit open on the cutting board, keeping the knife away from the children at all times. Show the inside of the fruit and ask the children whether they see any seeds.
4. Set half or part of the fruit aside for later tasting. Taking turns, let the children pick the seeds out of each type of fruit and place the seeds in their own bag. Seal the bags of seeds.
5. After the children have hunted for seeds inside each piece of fruit, show them the poster board. Match each plastic bag of seeds with the correct picture of its fruit. Label the bags with a permanent marker. Draw a picture of the fruit on the bag.
6. Cut slices from the portion of each type of fruit that was set aside. Give each child a paper plate and napkin. Taking one fruit at a time, off er a small slice to each child. What does the fruit look and taste like? Ask children whether they like the taste.
7. After the fruit snack, have students wash their hands again. Talk about how the juice from the fruit has made their hands sticky.
EXTENSION ACTIVITY:
• Let the children sample dried fruit. How does its taste compared to the fresh fruit? How is the texture diff erent? If a dehydrator is available, use various fruits to make fruit roll-ups and dried fruit snacks with the children.
Fruity Treasure Hunt (continued)
CAUTION: This activity uses edible items. Always check with parents for food sensitivities and allergies before serving food or allowing children to handle food.
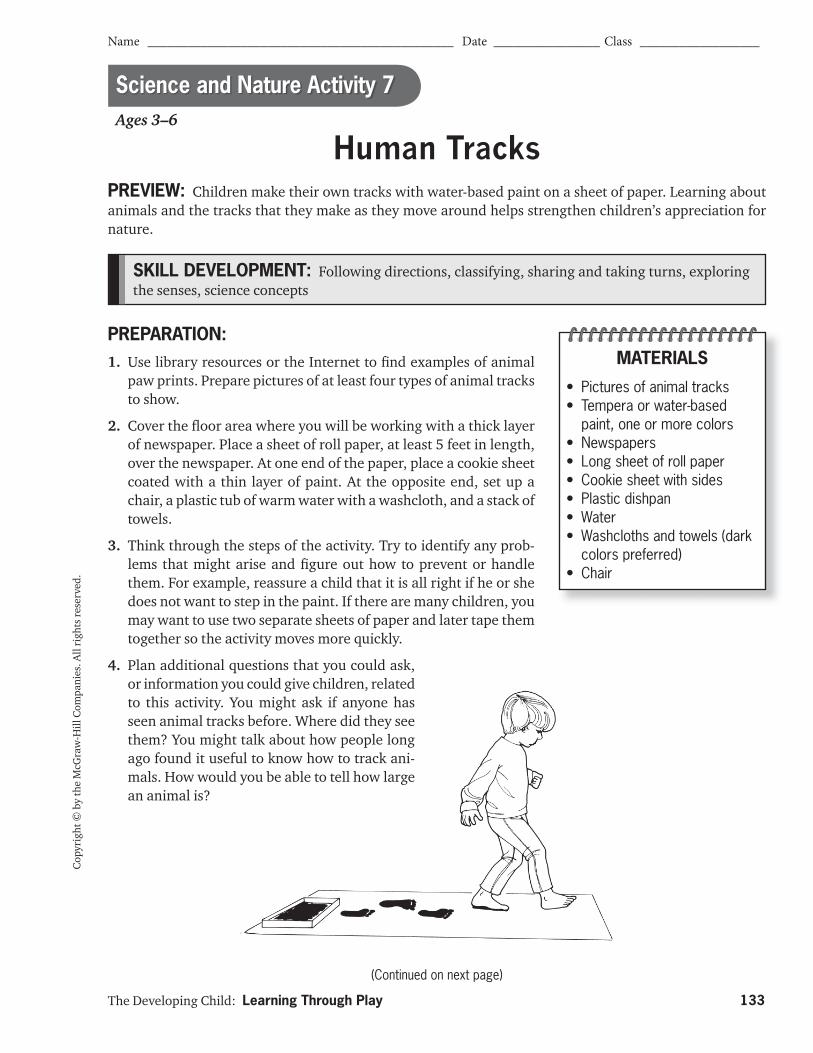
The Developing Child: Learning Through Play 133
Name ______________________________________________ Date ________________ Class __________________
(Continued on next page)
Cop
yrig
ht ©
by
the
McG
raw
-Hill
Com
pani
es. A
ll ri
ghts
rese
rved
.
SKILL DEVELOPMENT: Following directions, classifying, sharing and taking turns, exploring the senses, science concepts
Ages 3–6
Human Tracks
PREPARATION:1. Use library resources or the Internet to fi nd examples of animal
paw prints. Prepare pictures of at least four types of animal tracks to show.
2. Cover the fl oor area where you will be working with a thick layer of newspaper. Place a sheet of roll paper, at least 5 feet in length, over the newspaper. At one end of the paper, place a cookie sheet coated with a thin layer of paint. At the opposite end, set up a chair, a plastic tub of warm water with a washcloth, and a stack of towels.
3. Think through the steps of the activity. Try to identify any prob-lems that might arise and fi gure out how to prevent or handle them. For example, reassure a child that it is all right if he or she does not want to step in the paint. If there are many children, you may want to use two separate sheets of paper and later tape them together so the activity moves more quickly.
4. Plan additional questions that you could ask, or information you could give children, related to this activity. You might ask if anyone has seen animal tracks before. Where did they see them? You might talk about how people long ago found it useful to know how to track ani-mals. How would you be able to tell how large an animal is?
PREVIEW: Children make their own tracks with water-based paint on a sheet of paper. Learning about animals and the tracks that they make as they move around helps strengthen children’s appreciation for nature.
MATERIALS
• Pictures of animal tracks• Tempera or water-based
paint, one or more colors• Newspapers• Long sheet of roll paper• Cookie sheet with sides• Plastic dishpan• Water• Washcloths and towels (dark
colors preferred)• Chair
Science and Nature Activity 7
The Developing Child: Learning Through Play 134
Cop
yrig
ht ©
by
the
McG
raw
-Hill
Com
pani
es. A
ll ri
ghts
rese
rved
.
PROCEDURE:1. Share your pictures of animal tracks with the children. Tell them that animals sometimes leave clues in
the earth, especially in mud and snow, that show they have been there.
2. Ask the children whether they can name some animals that might leave tracks. Let them guess what animal made the tracks in the pictures. Encourage their ideas.
3. Tell the children they will get to leave their own tracks in the classroom. Ask them to take off their shoes and socks, placing socks inside their shoes. Help them roll up long pants.
4. Ask the children, one at a time, to step into the tray of paint, then walk slowly across the long sheet of paper, and then step into the tub of water. You should stand at one end and have an assistant at the other end of the paper. If you wish, use more than one tray and color of paint.
5. Have the children sit in the chair while their feet are thoroughly cleaned. They can then step onto a towel and dry their feet with another towel.
6. Once it has dried, display the fi nished mural. Discuss how the “tracks” are not all the same. Each set has a unique look.
EXTENSION ACTIVITIES:• Request that parents have their children wear boots on a snowy day, or send them to school in old shoes
on a specifi c day after it has rained. Take the children outside and walk through the snow or some fi rm mud. Observe the tracks that the children have made. Look for prints made by animals.
• In addition to making the mural of all the children’s footprints, have each child step onto his or her own sheet of construction paper. To represent four paw prints, have children leave one set of footprints and then place their handprints several inches above the footprints. Label the print with the date, the child’s name, and the title “On the Right Track.”
Human Tracks (continued)
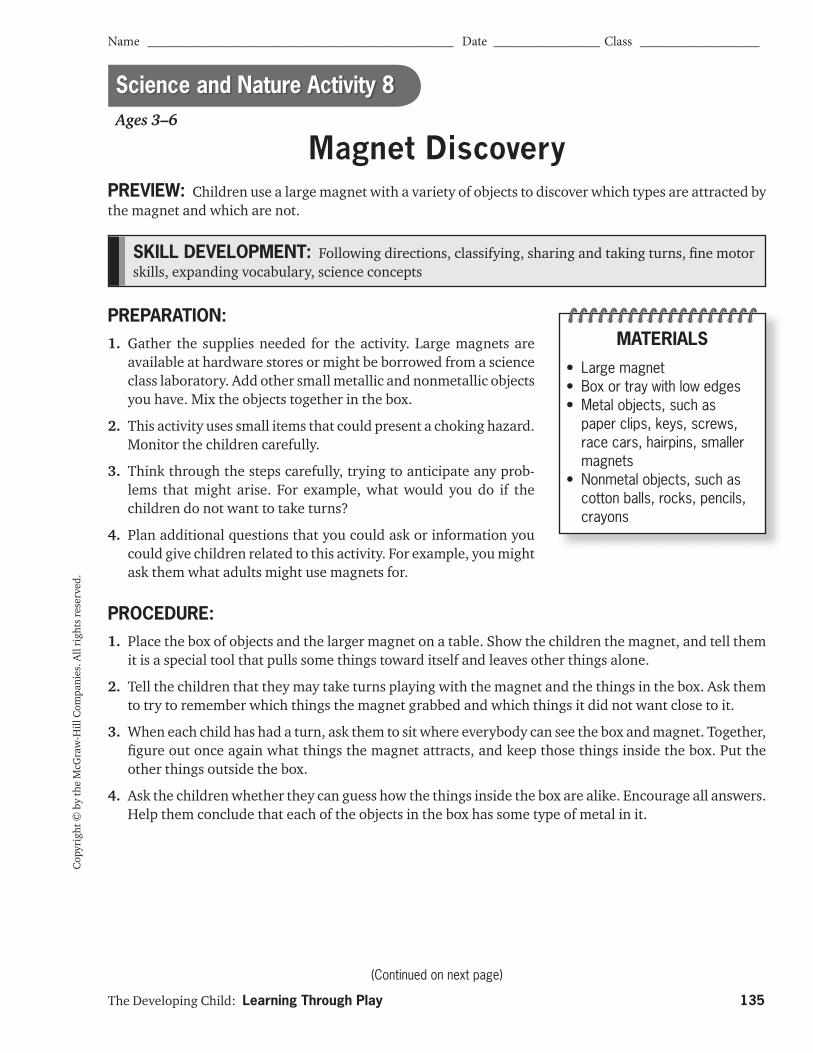
The Developing Child: Learning Through Play 135
Name ______________________________________________ Date ________________ Class __________________
(Continued on next page)
Cop
yrig
ht ©
by
the
McG
raw
-Hill
Com
pani
es. A
ll ri
ghts
rese
rved
.
SKILL DEVELOPMENT: Following directions, classifying, sharing and taking turns, fi ne motor skills, expanding vocabulary, science concepts
PREPARATION:1. Gather the supplies needed for the activity. Large magnets are
available at hardware stores or might be borrowed from a science class laboratory. Add other small metallic and nonmetallic objects you have. Mix the objects together in the box.
2. This activity uses small items that could present a choking hazard. Monitor the children carefully.
3. Think through the steps carefully, trying to anticipate any prob-lems that might arise. For example, what would you do if the children do not want to take turns?
4. Plan additional questions that you could ask or information you could give children related to this activity. For example, you might ask them what adults might use magnets for.
PROCEDURE:1. Place the box of objects and the larger magnet on a table. Show the children the magnet, and tell them
it is a special tool that pulls some things toward itself and leaves other things alone.
2. Tell the children that they may take turns playing with the magnet and the things in the box. Ask them to try to remember which things the magnet grabbed and which things it did not want close to it.
3. When each child has had a turn, ask them to sit where everybody can see the box and magnet. Together, fi gure out once again what things the magnet attracts, and keep those things inside the box. Put the other things outside the box.
4. Ask the children whether they can guess how the things inside the box are alike. Encourage all answers. Help them conclude that each of the objects in the box has some type of metal in it.
Magnet DiscoveryAges 3–6
PREVIEW: Children use a large magnet with a variety of objects to discover which types are attracted by the magnet and which are not.
MATERIALS
• Large magnet • Box or tray with low edges• Metal objects, such as
paper clips, keys, screws, race cars, hairpins, smaller magnets
• Nonmetal objects, such as cotton balls, rocks, pencils, crayons
Science and Nature Activity 8
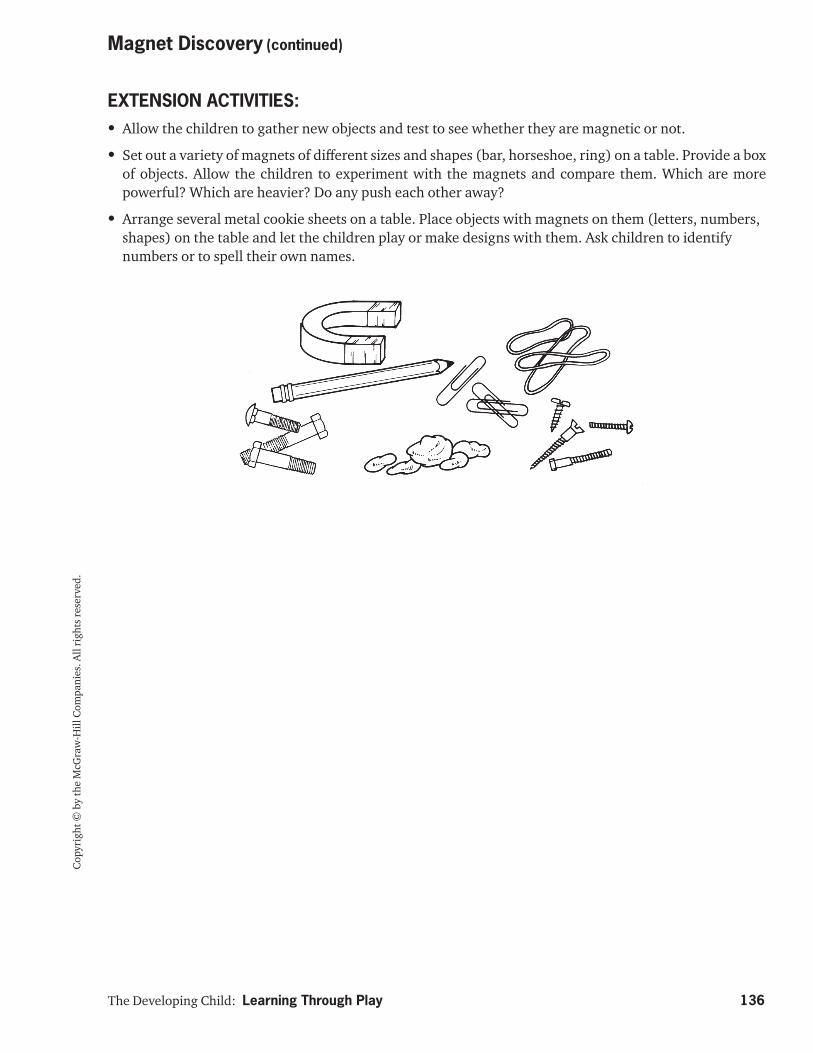
The Developing Child: Learning Through Play 136
Cop
yrig
ht ©
by
the
McG
raw
-Hill
Com
pani
es. A
ll ri
ghts
rese
rved
.
EXTENSION ACTIVITIES:• Allow the children to gather new objects and test to see whether they are magnetic or not.
• Set out a variety of magnets of diff erent sizes and shapes (bar, horseshoe, ring) on a table. Provide a box of objects. Allow the children to experiment with the magnets and compare them. Which are more powerful? Which are heavier? Do any push each other away?
• Arrange several metal cookie sheets on a table. Place objects with magnets on them (letters, numbers, shapes) on the table and let the children play or make designs with them. Ask children to identify numbers or to spell their own names.
Magnet Discovery (continued)
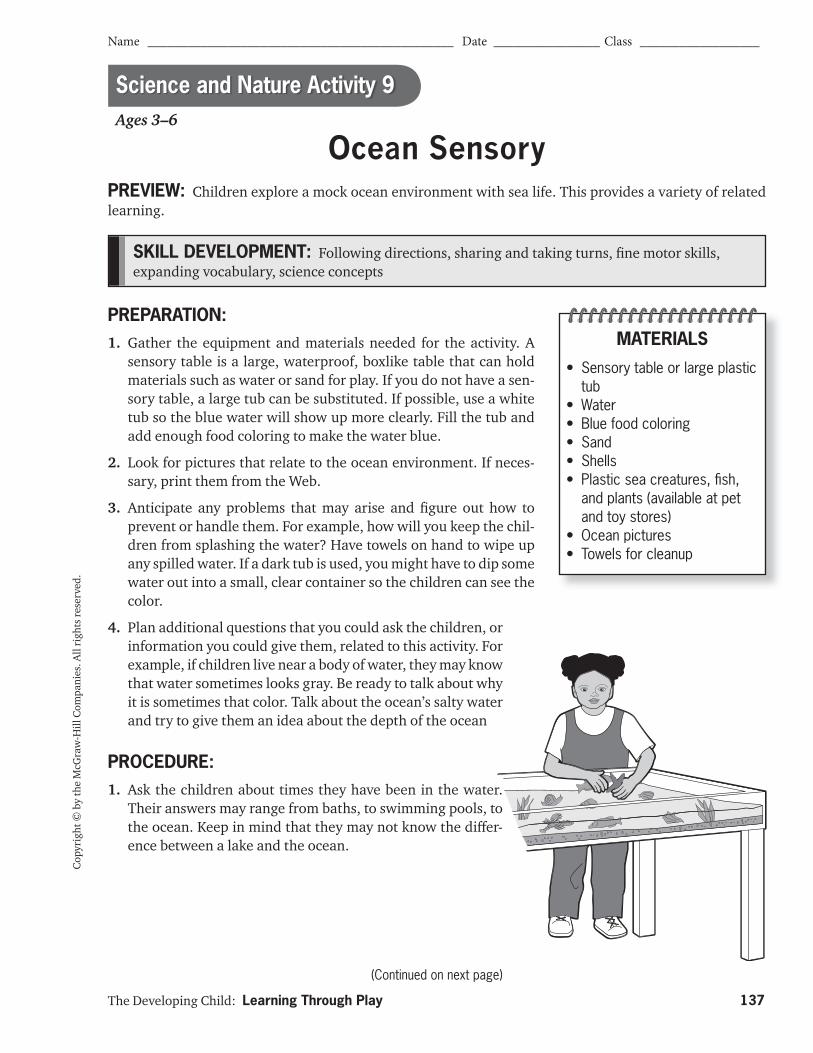
The Developing Child: Learning Through Play 137
Name ______________________________________________ Date ________________ Class __________________
(Continued on next page)
Cop
yrig
ht ©
by
the
McG
raw
-Hill
Com
pani
es. A
ll ri
ghts
rese
rved
.
SKILL DEVELOPMENT: Following directions, sharing and taking turns, fi ne motor skills, expanding vocabulary, science concepts
Ages 3–6
Ocean Sensory
PREPARATION:1. Gather the equipment and materials needed for the activity. A
sensory table is a large, waterproof, boxlike table that can hold materials such as water or sand for play. If you do not have a sen-sory table, a large tub can be substituted. If possible, use a white tub so the blue water will show up more clearly. Fill the tub and add enough food coloring to make the water blue.
2. Look for pictures that relate to the ocean environment. If neces-sary, print them from the Web.
3. Anticipate any problems that may arise and fi gure out how to prevent or handle them. For example, how will you keep the chil-dren from splashing the water? Have towels on hand to wipe up any spilled water. If a dark tub is used, you might have to dip some water out into a small, clear container so the children can see the color.
4. Plan additional questions that you could ask the children, or information you could give them, related to this activity. For example, if children live near a body of water, they may know that water sometimes looks gray. Be ready to talk about why it is sometimes that color. Talk about the ocean’s salty water and try to give them an idea about the depth of the ocean
PROCEDURE:1. Ask the children about times they have been in the water.
Their answers may range from baths, to swimming pools, to the ocean. Keep in mind that they may not know the diff er-ence between a lake and the ocean.
PREVIEW: Children explore a mock ocean environment with sea life. This provides a variety of related learning.
MATERIALS
• Sensory table or large plastic tub
• Water• Blue food coloring• Sand• Shells• Plastic sea creatures, fi sh,
and plants (available at pet and toy stores)
• Ocean pictures• Towels for cleanup
Science and Nature Activity 9

The Developing Child: Learning Through Play 138
Cop
yrig
ht ©
by
the
McG
raw
-Hill
Com
pani
es. A
ll ri
ghts
rese
rved
.
2. With words and pictures, try to convey a sense of the ocean. Discuss with the children the kinds of things they might fi nd in the ocean, such as sea creatures and plants. They may have seen movies with real or imaginary ocean environments.
3. As they mention any of the items you have, add those items to the water. Ask questions and talk about each of them. For example, you could compare the variety of shells and observe how much brighter they are when they are wet. Add green, shredded, plastic grass to act as seaweed and allow the children to discuss how it feels in the water.
4. Allow all the children time to reach in and play in the water under careful supervision.
EXTENSION ACTIVITY:• Ask the children if they have been to a sandy beach. What did the sand feel like on their skin? What can
they do with sand when it is wet? Can they do the same things when it is dry? If a sandbox is available, experiment with this idea. Provide buckets and molds that the children can use with the sand.
Ocean Sensory (continued)
The Developing Child: Learning Through Play 139
Name ______________________________________________ Date ________________ Class __________________
(Continued on next page)
Cop
yrig
ht ©
by
the
McG
raw
-Hill
Com
pani
es. A
ll ri
ghts
rese
rved
.
SKILL DEVELOPMENT: Following directions, sharing and taking turns, fi ne motor skills, expanding vocabulary, science concepts
Ages 3–6
Ladybug Inn
PREPARATION:1. Gather the supplies needed for the activity. Find or draw a picture
of a ladybug. If ladybugs are not plentiful in your area at the time, you can order them online. Just plan and order far enough in advance for the ladybugs to be delivered in time.
2. Carefully poke small air holes in the tops of the deli containers with an ice pick or the tip of scissors. Write each child’s name on the side of a deli container.
3. Soak a few raisins and try cutting them with a plastic knife. Will the children be able to do this easily?
4. Anticipate any possible problems and fi gure out how to prevent or handle them. For example, what would you do if there were no ladybugs around on the day you planned this activity?
5. Plan additional questions and information related to this activity. For example, you could talk about the fact that people, too, need something to eat, something to drink, and a place to sleep.
PROCEDURE:1. Show the children the photo or drawing of a ladybug. Ask how
many have seen ladybugs. Where do they live? See how many parts they can name, such as eyes, wings, and legs.
2. Give children one of the deli containers and explain that they will be creating a place for some ladybugs to stay.
3. Explain that ladybugs like sweet food. Soak the raisins in water for a few minutes. Let children put three raisins on their paper plate or napkin. Ask them to cut these in half with a plastic knife and put the pieces in the bottom of their container. Collect the knives.
PREVIEW: Children make temporary houses for ladybugs, putting in them what the ladybugs need to survive for a short time. This will also give the children an opportunity to observe the ladybugs up close.
MATERIALS
• One deli container with lid for each child (available at supermarkets)
• Ice pick or scissors• Photo or drawing of a
ladybug• Permanent marker• Raisins• Plastic knives, one per child• Small paper plates or
napkins• Shallow container of water• Paper towels cut in quarters• Twigs• Grass• Plastic magnifying glasses• Ladybugs from online
suppliers (if not readily available outside)
Science and Nature Activity 10
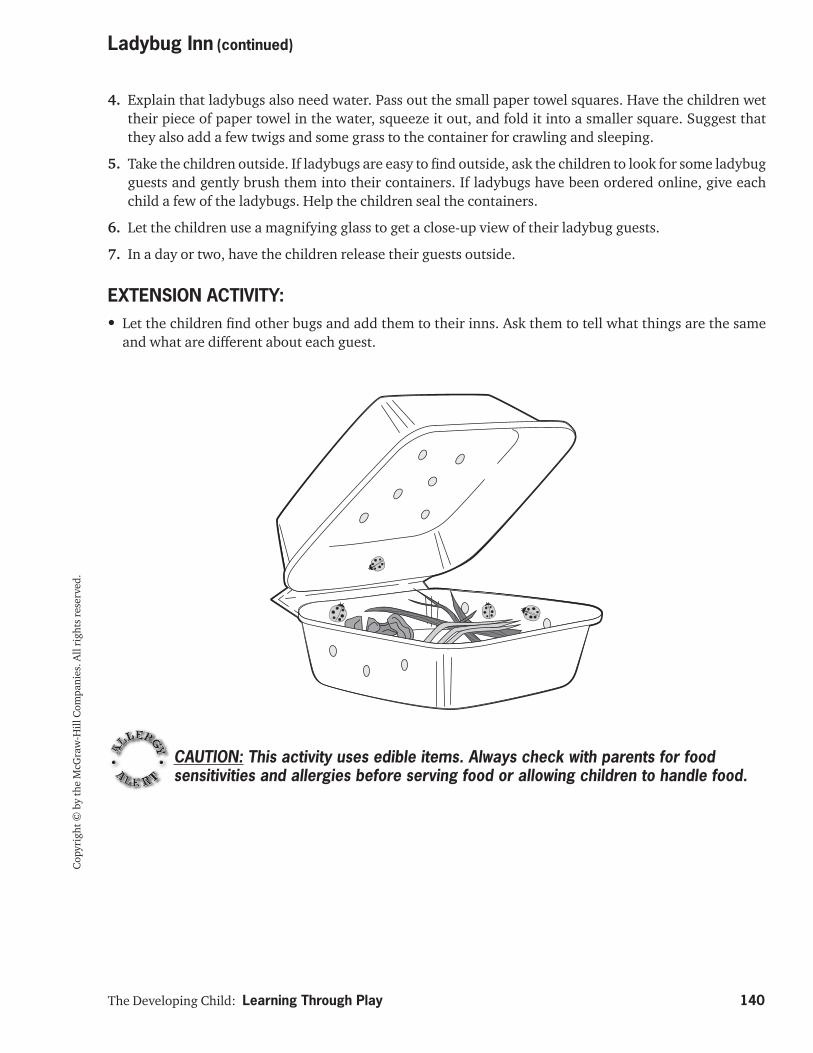
The Developing Child: Learning Through Play 140
Cop
yrig
ht ©
by
the
McG
raw
-Hill
Com
pani
es. A
ll ri
ghts
rese
rved
.
4. Explain that ladybugs also need water. Pass out the small paper towel squares. Have the children wet their piece of paper towel in the water, squeeze it out, and fold it into a smaller square. Suggest that they also add a few twigs and some grass to the container for crawling and sleeping.
5. Take the children outside. If ladybugs are easy to fi nd outside, ask the children to look for some ladybug guests and gently brush them into their containers. If ladybugs have been ordered online, give each child a few of the ladybugs. Help the children seal the containers.
6. Let the children use a magnifying glass to get a close-up view of their ladybug guests.
7. In a day or two, have the children release their guests outside.
EXTENSION ACTIVITY:• Let the children fi nd other bugs and add them to their inns. Ask them to tell what things are the same
and what are diff erent about each guest.
Ladybug Inn (continued)
CAUTION: This activity uses edible items. Always check with parents for food sensitivities and allergies before serving food or allowing children to handle food.
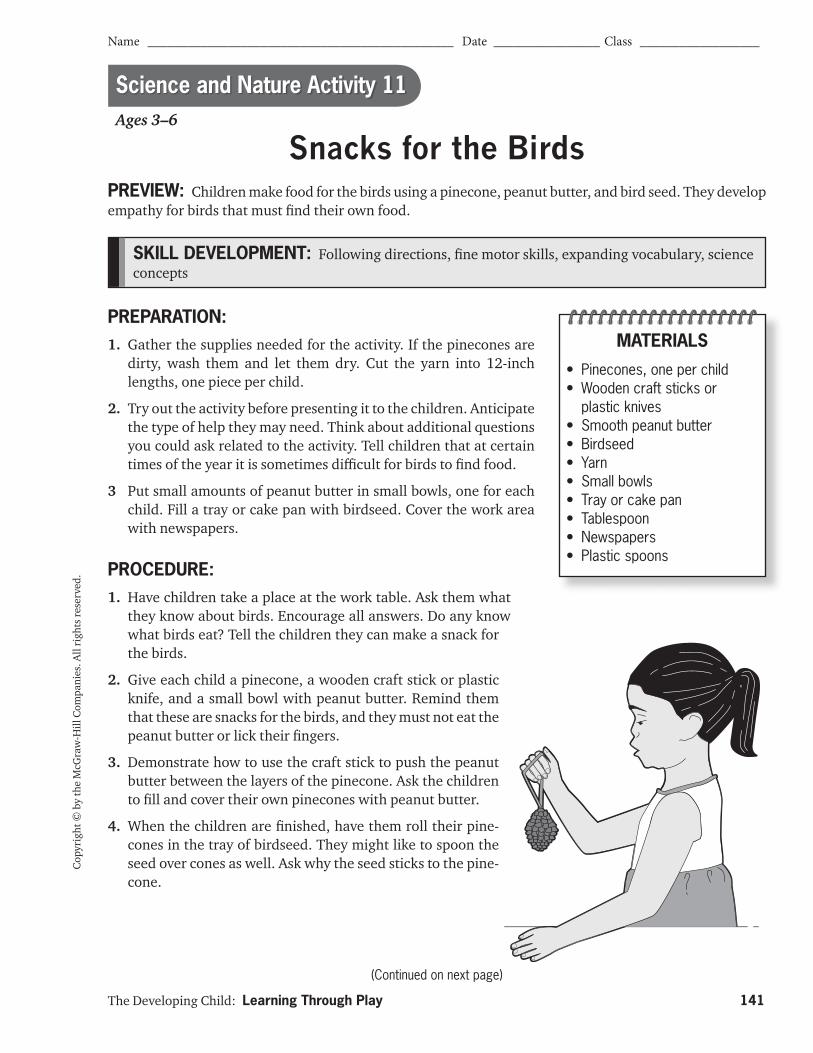
The Developing Child: Learning Through Play 141
Name ______________________________________________ Date ________________ Class __________________
(Continued on next page)
Cop
yrig
ht ©
by
the
McG
raw
-Hill
Com
pani
es. A
ll ri
ghts
rese
rved
.
SKILL DEVELOPMENT: Following directions, fi ne motor skills, expanding vocabulary, science concepts
Ages 3–6
Snacks for the Birds
PREPARATION:1. Gather the supplies needed for the activity. If the pinecones are
dirty, wash them and let them dry. Cut the yarn into 12-inch lengths, one piece per child.
2. Try out the activity before presenting it to the children. Anticipate the type of help they may need. Think about additional questions you could ask related to the activity. Tell children that at certain times of the year it is sometimes diffi cult for birds to fi nd food.
3 Put small amounts of peanut butter in small bowls, one for each child. Fill a tray or cake pan with birdseed. Cover the work area with newspapers.
PROCEDURE:1. Have children take a place at the work table. Ask them what
they know about birds. Encourage all answers. Do any know what birds eat? Tell the children they can make a snack for the birds.
2. Give each child a pinecone, a wooden craft stick or plastic knife, and a small bowl with peanut butter. Remind them that these are snacks for the birds, and they must not eat the peanut butter or lick their fi ngers.
3. Demonstrate how to use the craft stick to push the peanut butter between the layers of the pinecone. Ask the children to fi ll and cover their own pinecones with peanut butter.
4. When the children are fi nished, have them roll their pine-cones in the tray of birdseed. They might like to spoon the seed over cones as well. Ask why the seed sticks to the pine-cone.
PREVIEW: Children make food for the birds using a pinecone, peanut butter, and bird seed. They develop empathy for birds that must fi nd their own food.
MATERIALS
• Pinecones, one per child• Wooden craft sticks or
plastic knives• Smooth peanut butter• Birdseed • Yarn• Small bowls• Tray or cake pan• Tablespoon• Newspapers• Plastic spoons
Science and Nature Activity 11
The Developing Child: Learning Through Play 142
Cop
yrig
ht ©
by
the
McG
raw
-Hill
Com
pani
es. A
ll ri
ghts
rese
rved
.
5. Wrap, or help them wrap, a piece of yarn under one layer of the pinecone; then tie the ends together. Demonstrate how this makes a loop so that they can hang their bird snacks from a low branch of a tree. If possible, hang the pinecones outdoors where the children can see the birds eat from them.
6. Ask the children to help clean up after the activity and wash their hands.
EXTENSION ACTIVITIES:• Share a picture book of birds with the children. Discuss how they make diff erent sounds. Help them
identify birds outside.
• During outside activities, check the hanging snacks from time to time so the children can observe that the birds are eating their snacks.
Snacks for the Birds (continued)
CAUTION: This activity uses edible items. Always check with parents for food sensitivities and allergies before serving food or allowing children to handle food.
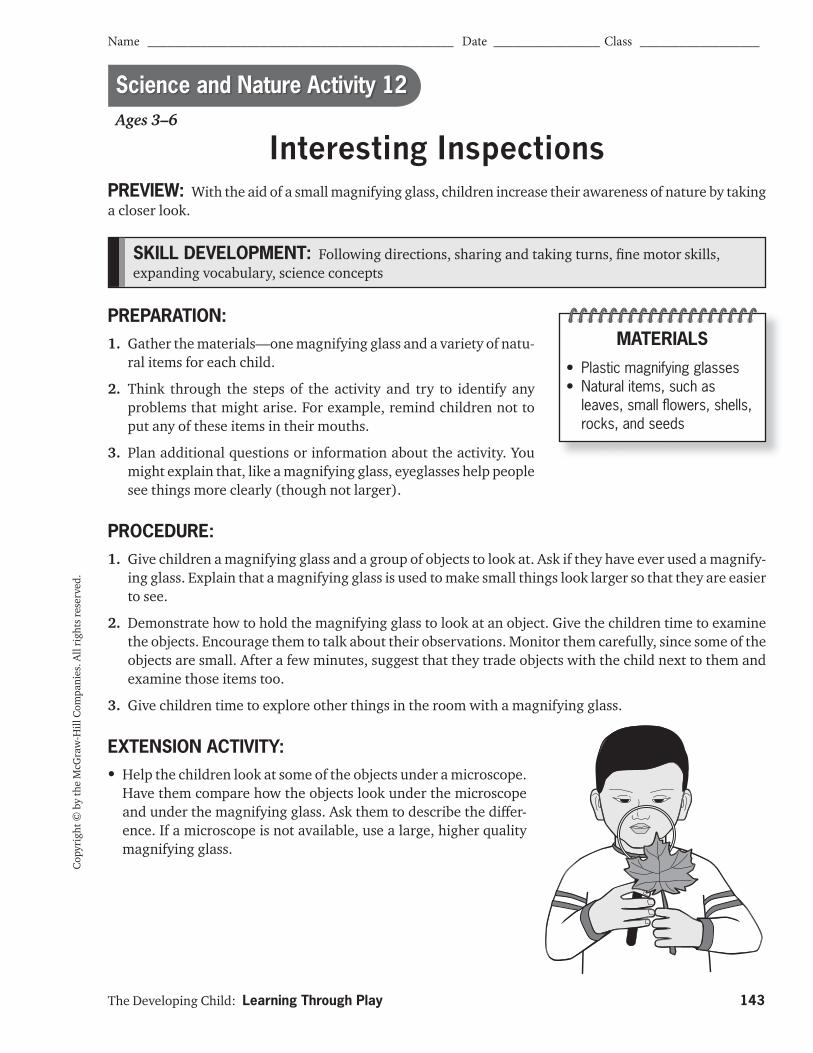
The Developing Child: Learning Through Play 143
Name ______________________________________________ Date ________________ Class __________________
Cop
yrig
ht ©
by
the
McG
raw
-Hill
Com
pani
es. A
ll ri
ghts
rese
rved
.
SKILL DEVELOPMENT: Following directions, sharing and taking turns, fi ne motor skills, expanding vocabulary, science concepts
Ages 3–6
Interesting Inspections
PREPARATION:1. Gather the materials—one magnifying glass and a variety of natu-
ral items for each child.
2. Think through the steps of the activity and try to identify any problems that might arise. For example, remind children not to put any of these items in their mouths.
3. Plan additional questions or information about the activity. You might explain that, like a magnifying glass, eyeglasses help people see things more clearly (though not larger).
PROCEDURE:1. Give children a magnifying glass and a group of objects to look at. Ask if they have ever used a magnify-
ing glass. Explain that a magnifying glass is used to make small things look larger so that they are easier to see.
2. Demonstrate how to hold the magnifying glass to look at an object. Give the children time to examine the objects. Encourage them to talk about their observations. Monitor them carefully, since some of the objects are small. After a few minutes, suggest that they trade objects with the child next to them and examine those items too.
3. Give children time to explore other things in the room with a magnifying glass.
EXTENSION ACTIVITY:• Help the children look at some of the objects under a microscope.
Have them compare how the objects look under the microscope and under the magnifying glass. Ask them to describe the diff er-ence. If a microscope is not available, use a large, higher quality magnifying glass.
PREVIEW: With the aid of a small magnifying glass, children increase their awareness of nature by taking a closer look.
MATERIALS
• Plastic magnifying glasses• Natural items, such as
leaves, small fl owers, shells, rocks, and seeds
Science and Nature Activity 12
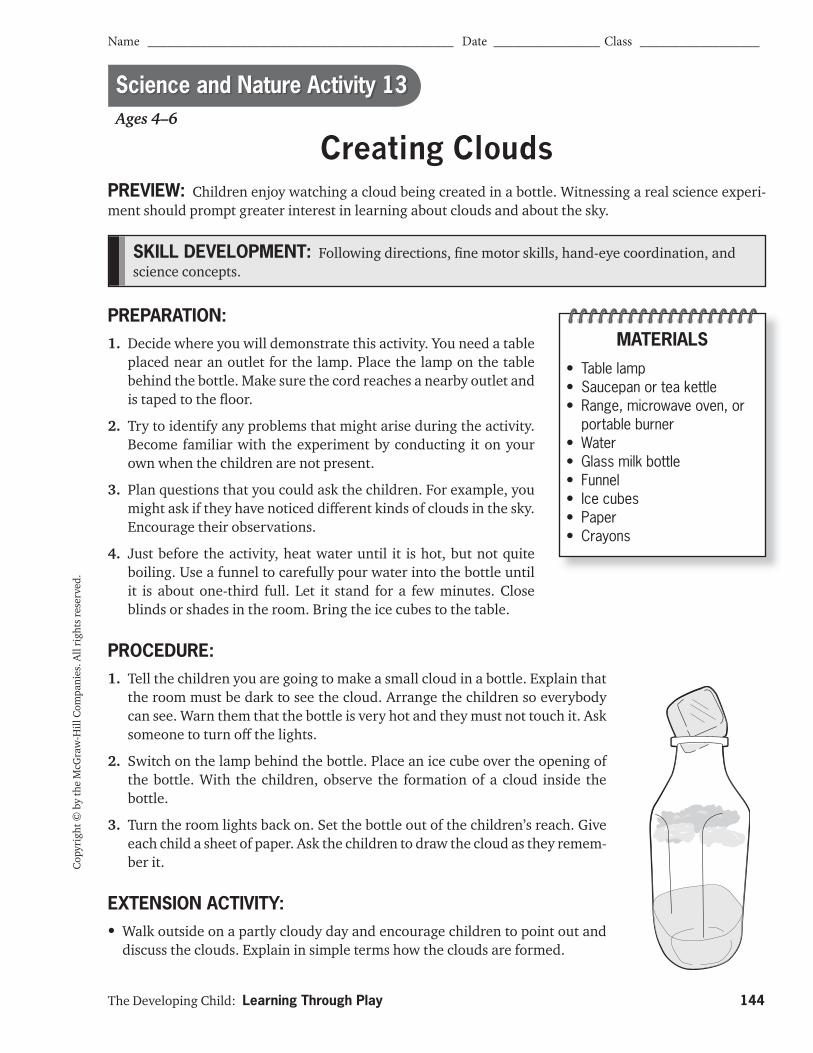
The Developing Child: Learning Through Play 144
Name ______________________________________________ Date ________________ Class __________________
Cop
yrig
ht ©
by
the
McG
raw
-Hill
Com
pani
es. A
ll ri
ghts
rese
rved
.
Ages 4–6
Creating Clouds
SKILL DEVELOPMENT: Following directions, fi ne motor skills, hand-eye coordination, and science concepts.
PREPARATION:1. Decide where you will demonstrate this activity. You need a table
placed near an outlet for the lamp. Place the lamp on the table behind the bottle. Make sure the cord reaches a nearby outlet and is taped to the fl oor.
2. Try to identify any problems that might arise during the activity. Become familiar with the experiment by conducting it on your own when the children are not present.
3. Plan questions that you could ask the children. For example, you might ask if they have noticed diff erent kinds of clouds in the sky. Encourage their observations.
4. Just before the activity, heat water until it is hot, but not quite boiling. Use a funnel to carefully pour water into the bottle until it is about one-third full. Let it stand for a few minutes. Close blinds or shades in the room. Bring the ice cubes to the table.
PROCEDURE:1. Tell the children you are going to make a small cloud in a bottle. Explain that
the room must be dark to see the cloud. Arrange the children so everybody can see. Warn them that the bottle is very hot and they must not touch it. Ask someone to turn off the lights.
2. Switch on the lamp behind the bottle. Place an ice cube over the opening of the bottle. With the children, observe the formation of a cloud inside the bottle.
3. Turn the room lights back on. Set the bottle out of the children’s reach. Give each child a sheet of paper. Ask the children to draw the cloud as they remem-ber it.
EXTENSION ACTIVITY:• Walk outside on a partly cloudy day and encourage children to point out and
discuss the clouds. Explain in simple terms how the clouds are formed.
PREVIEW: Children enjoy watching a cloud being created in a bottle. Witnessing a real science experi-ment should prompt greater interest in learning about clouds and about the sky.
MATERIALS
• Table lamp• Saucepan or tea kettle• Range, microwave oven, or
portable burner• Water• Glass milk bottle• Funnel• Ice cubes• Paper• Crayons
Science and Nature Activity 13