
Lab 1: Import the RAML Definition into Studioworkshop.tools.mulesoft.com/pdf/module3_lab1.pdf ·...
8
Lab 1 Import the RAML Definition into Studio
Transcript of Lab 1: Import the RAML Definition into Studioworkshop.tools.mulesoft.com/pdf/module3_lab1.pdf ·...

Lab 1Import the RAML Definition into Studio

OverviewIn this lab, we will create the skeleton implementation of our Customer API that will processrequests to Salesforce. You will use Anypoint Studio to create a Mule application where there willbe one flow for each method of each resource (i.e. GET customers). Additionally you will use APIKit(as part of your Mule application) to process REST requests, transform them to messages to behandled and processed by each flow.
The implementation will consist of a few steps:
Step 1: Create a new Mule Project andimport RAML DefinitionWe are going to use our API definition to create an implementation of our Customer API. To do thiswe need to import the RAML Specification from the Design Center
1. If it’s not already opened, start Anypoint Studio from the desktop icon and select the sameworkspace you’ve been working (example: C:\workspaces\myworkspace).
2. From Anypoint Studio’s menu, select File > New > Mule Project to create a New Mule project. AWindow will pop-up to define the details of this new application.
3. Give the project the name api-customer
4. Select the Mule Server 4.1.4 EE.
5. Under API Implementation settings, check Specify API definition file location or URL andchoose Design Center… by clicking in the (…) button on the right of the Location textbox.
1
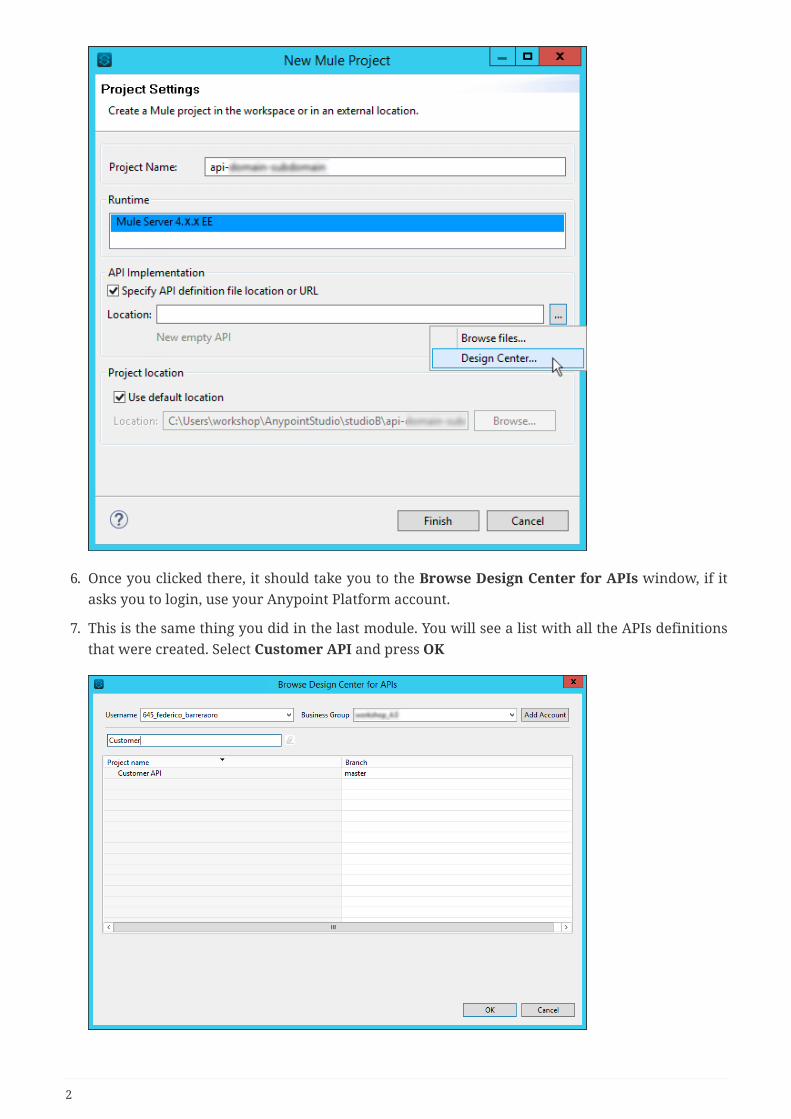
6. Once you clicked there, it should take you to the Browse Design Center for APIs window, if itasks you to login, use your Anypoint Platform account.
7. This is the same thing you did in the last module. You will see a list with all the APIs definitionsthat were created. Select Customer API and press OK
2
WARNINGIf you don’t see the Customer API, press Load more projects. This linkonly appears when there are too many projects on the API Designer.
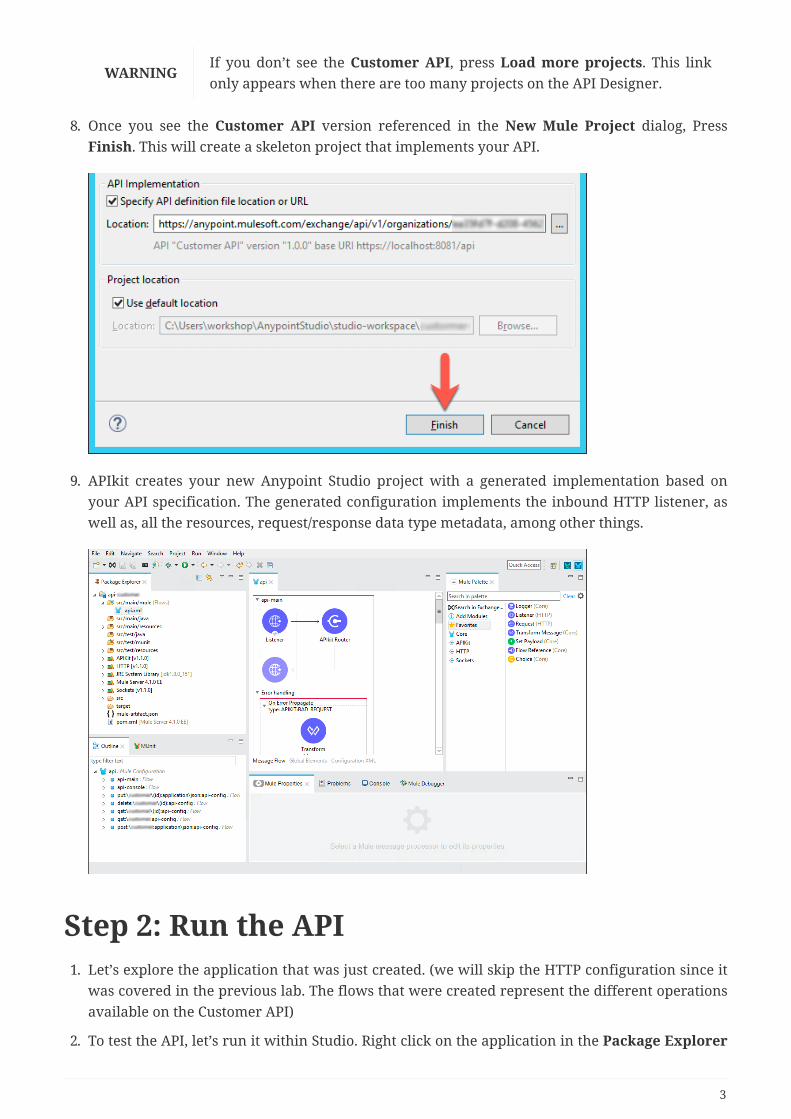
8. Once you see the Customer API version referenced in the New Mule Project dialog, PressFinish. This will create a skeleton project that implements your API.
9. APIkit creates your new Anypoint Studio project with a generated implementation based onyour API specification. The generated configuration implements the inbound HTTP listener, aswell as, all the resources, request/response data type metadata, among other things.
Step 2: Run the API1. Let’s explore the application that was just created. (we will skip the HTTP configuration since it
was covered in the previous lab. The flows that were created represent the different operationsavailable on the Customer API)
2. To test the API, let’s run it within Studio. Right click on the application in the Package Explorer
3
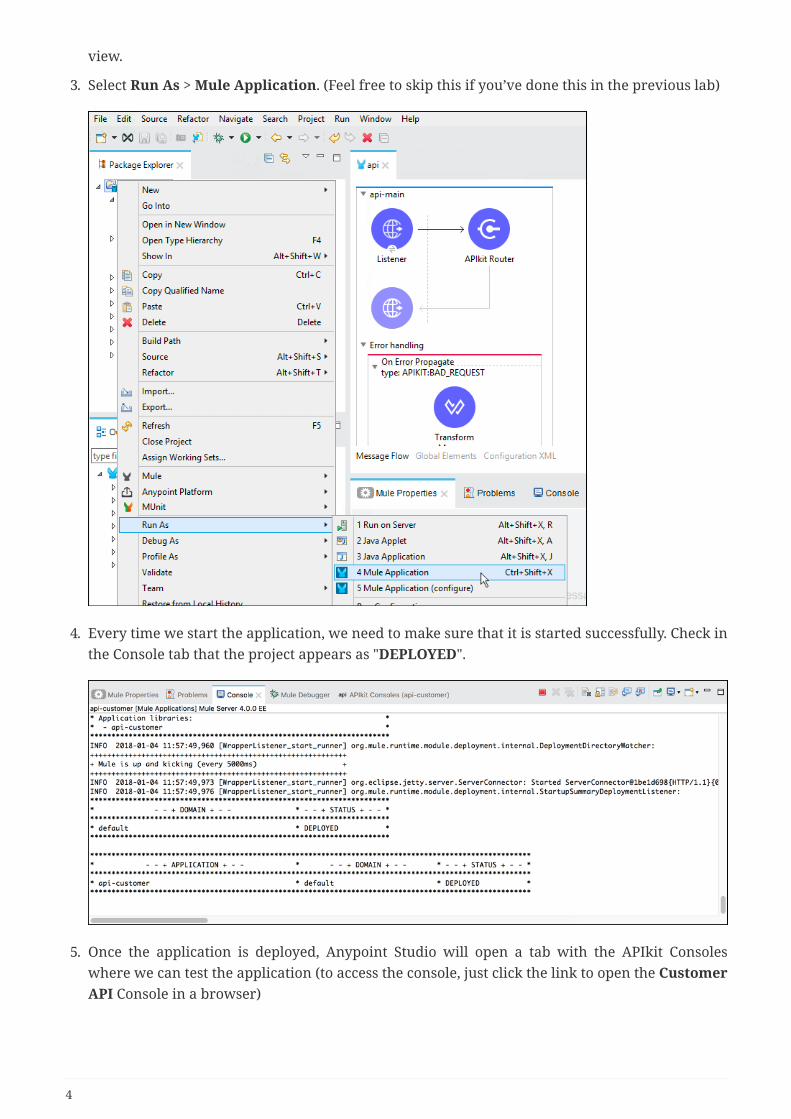
view.
3. Select Run As > Mule Application. (Feel free to skip this if you’ve done this in the previous lab)
4. Every time we start the application, we need to make sure that it is started successfully. Check inthe Console tab that the project appears as "DEPLOYED".
5. Once the application is deployed, Anypoint Studio will open a tab with the APIkit Consoleswhere we can test the application (to access the console, just click the link to open the CustomerAPI Console in a browser)
4
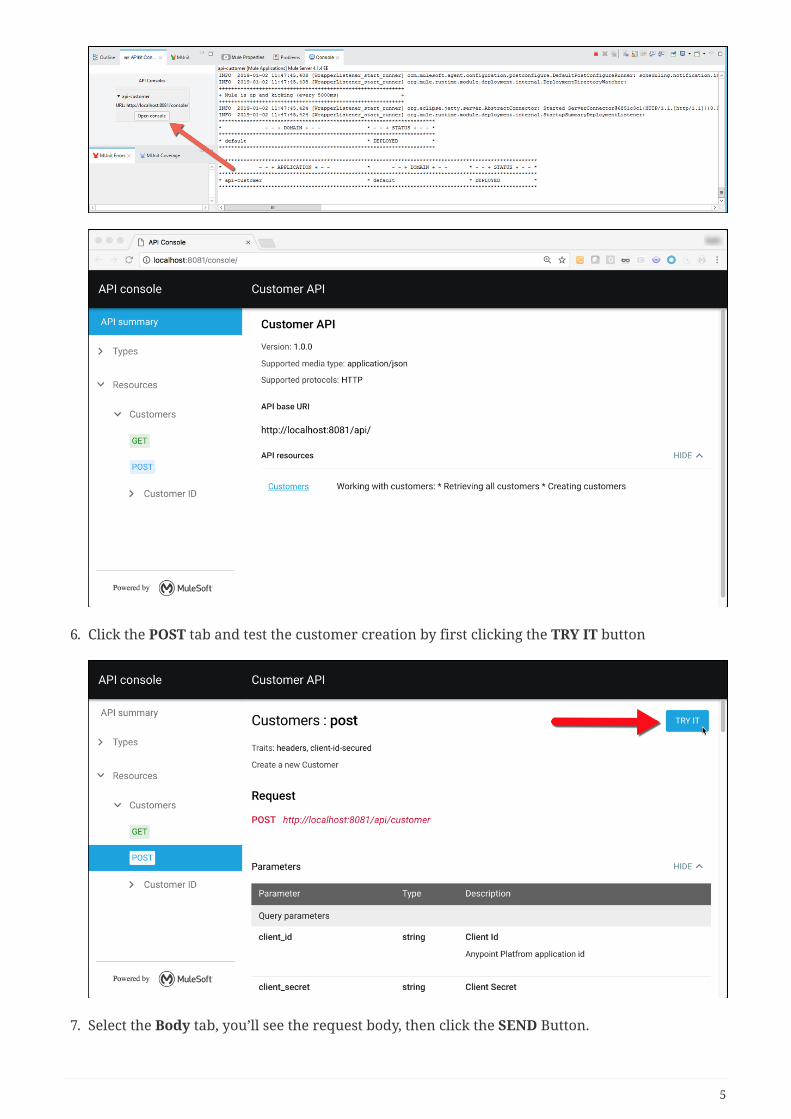
6. Click the POST tab and test the customer creation by first clicking the TRY IT button
7. Select the Body tab, you’ll see the request body, then click the SEND Button.
5
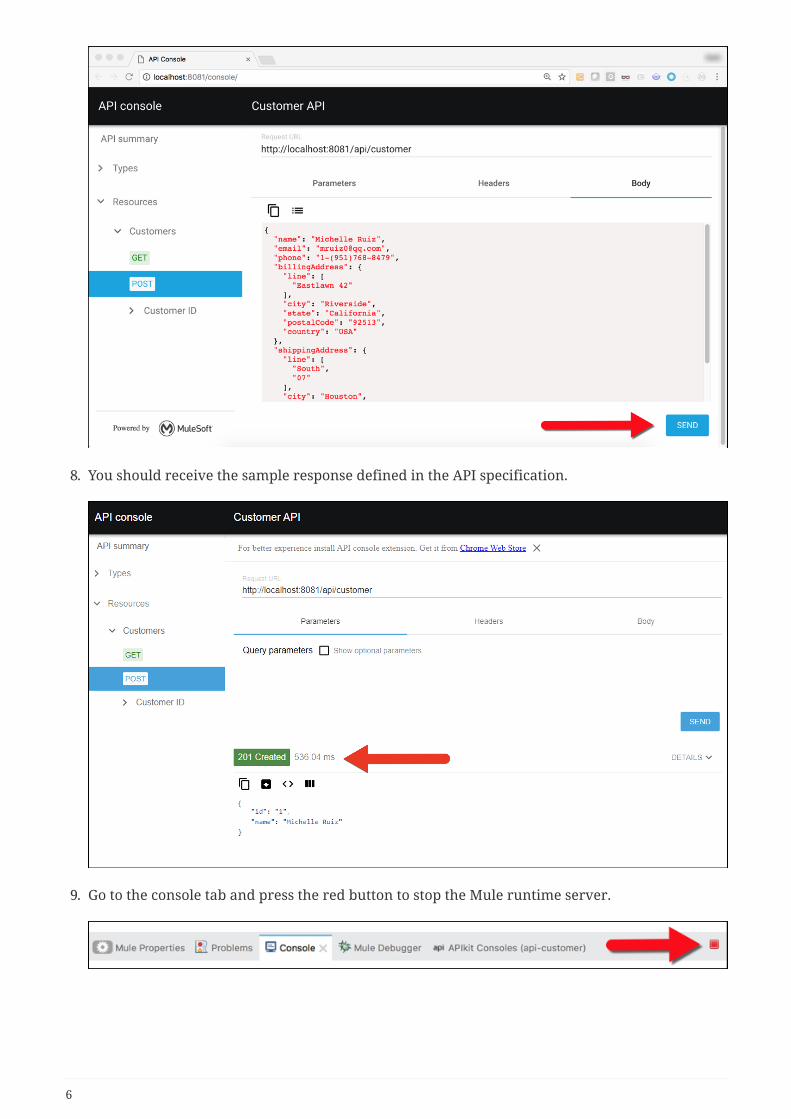
8. You should receive the sample response defined in the API specification.
9. Go to the console tab and press the red button to stop the Mule runtime server.
6
SummaryIn this lab, we
• Import the RAML Definition directly into Anypoint Studio
• Auto-generated a skeleton project to implement the API
• Run the skeleton project and tested it via the API Console
Go Further:
• See the link APIkit doc for more information.
Congratulations! You have completed Lab 1.
Please proceed to Lab 2
Take me to the TOP
7


![Towards a unified view of [.1cm] supervised learning and [.1cm] …rll.berkeley.edu/deeprlcourse/docs/mohammad_lecture.pdf · 2017-04-26 · RAML optimization Training with RAML is](https://static.fdocuments.net/doc/165x107/5ec9807d6ace79356a38ebc2/towards-a-unified-view-of-1cm-supervised-learning-and-1cm-rll-2017-04-26.jpg)
