kusti8’s Notes - Read the Docs · 1 Android Things 1 1.1 Setup ... 2.9 Navigation Button ......
35
kusti8’s Notes Release 1.0.0 Gustav Hansen Sep 23, 2017
Transcript of kusti8’s Notes - Read the Docs · 1 Android Things 1 1.1 Setup ... 2.9 Navigation Button ......

kusti8’s NotesRelease 1.0.0
Gustav Hansen
Sep 23, 2017


Contents:
1 Android Things 11.1 Setup . . . . . . . . . . . . . . . . . . . . . . . . . . . . . . . . . . . . . . . . . . . . . . . . . . . 1
2 React Native - General 32.1 Setup . . . . . . . . . . . . . . . . . . . . . . . . . . . . . . . . . . . . . . . . . . . . . . . . . . . 32.2 Essential Libraries . . . . . . . . . . . . . . . . . . . . . . . . . . . . . . . . . . . . . . . . . . . . 32.3 Android Emulator . . . . . . . . . . . . . . . . . . . . . . . . . . . . . . . . . . . . . . . . . . . . 42.4 Network POST w/ parameters . . . . . . . . . . . . . . . . . . . . . . . . . . . . . . . . . . . . . . 42.5 Install Standalone . . . . . . . . . . . . . . . . . . . . . . . . . . . . . . . . . . . . . . . . . . . . 42.6 Debugging . . . . . . . . . . . . . . . . . . . . . . . . . . . . . . . . . . . . . . . . . . . . . . . . 42.7 React Native Elements Header . . . . . . . . . . . . . . . . . . . . . . . . . . . . . . . . . . . . . . 52.8 FlatList . . . . . . . . . . . . . . . . . . . . . . . . . . . . . . . . . . . . . . . . . . . . . . . . . . 52.9 Navigation Button - Top Right . . . . . . . . . . . . . . . . . . . . . . . . . . . . . . . . . . . . . . 5
3 React Native - Push Notifications 73.1 Install . . . . . . . . . . . . . . . . . . . . . . . . . . . . . . . . . . . . . . . . . . . . . . . . . . . 73.2 Client Side . . . . . . . . . . . . . . . . . . . . . . . . . . . . . . . . . . . . . . . . . . . . . . . . 73.3 Server Side . . . . . . . . . . . . . . . . . . . . . . . . . . . . . . . . . . . . . . . . . . . . . . . . 9
4 Expo - Push Notifications 114.1 Install . . . . . . . . . . . . . . . . . . . . . . . . . . . . . . . . . . . . . . . . . . . . . . . . . . . 114.2 Client Side . . . . . . . . . . . . . . . . . . . . . . . . . . . . . . . . . . . . . . . . . . . . . . . . 114.3 The Server . . . . . . . . . . . . . . . . . . . . . . . . . . . . . . . . . . . . . . . . . . . . . . . . 13
5 React Native - Sidebar 155.1 Install . . . . . . . . . . . . . . . . . . . . . . . . . . . . . . . . . . . . . . . . . . . . . . . . . . . 155.2 Code . . . . . . . . . . . . . . . . . . . . . . . . . . . . . . . . . . . . . . . . . . . . . . . . . . . 15
6 React Native - Image Picker 176.1 Install . . . . . . . . . . . . . . . . . . . . . . . . . . . . . . . . . . . . . . . . . . . . . . . . . . . 176.2 Usage . . . . . . . . . . . . . . . . . . . . . . . . . . . . . . . . . . . . . . . . . . . . . . . . . . . 186.3 Resources . . . . . . . . . . . . . . . . . . . . . . . . . . . . . . . . . . . . . . . . . . . . . . . . . 18
7 React Native - Image Resize 197.1 Install . . . . . . . . . . . . . . . . . . . . . . . . . . . . . . . . . . . . . . . . . . . . . . . . . . . 197.2 Usage . . . . . . . . . . . . . . . . . . . . . . . . . . . . . . . . . . . . . . . . . . . . . . . . . . . 197.3 Example . . . . . . . . . . . . . . . . . . . . . . . . . . . . . . . . . . . . . . . . . . . . . . . . . 20
i

8 React Native - Share Extension 218.1 Install . . . . . . . . . . . . . . . . . . . . . . . . . . . . . . . . . . . . . . . . . . . . . . . . . . . 218.2 Script . . . . . . . . . . . . . . . . . . . . . . . . . . . . . . . . . . . . . . . . . . . . . . . . . . . 21
9 React Native - Ignite Thunk 239.1 Install . . . . . . . . . . . . . . . . . . . . . . . . . . . . . . . . . . . . . . . . . . . . . . . . . . . 239.2 Usage . . . . . . . . . . . . . . . . . . . . . . . . . . . . . . . . . . . . . . . . . . . . . . . . . . . 23
10 Parse Server 2510.1 Install . . . . . . . . . . . . . . . . . . . . . . . . . . . . . . . . . . . . . . . . . . . . . . . . . . . 25
11 MongoDB 2711.1 Install . . . . . . . . . . . . . . . . . . . . . . . . . . . . . . . . . . . . . . . . . . . . . . . . . . . 2711.2 Quickstart . . . . . . . . . . . . . . . . . . . . . . . . . . . . . . . . . . . . . . . . . . . . . . . . 2711.3 Example - Push Notification Tokens . . . . . . . . . . . . . . . . . . . . . . . . . . . . . . . . . . . 28
12 ESP8266 2912.1 URL Encoding . . . . . . . . . . . . . . . . . . . . . . . . . . . . . . . . . . . . . . . . . . . . . . 29
13 Indices and tables 31
ii

CHAPTER 1
Android Things
Setup
Add to build.gradle (Module: app):
dependencies {...provided 'com.google.android.things:androidthings:0.5.1-devpreview'
}
Add to AndroidManifest.xml:
<application ...><uses-library android:name="com.google.android.things"/>...
</application>
Add to AndroidManifest.xml:
<!-- Launch activity automatically on boot --><intent-filter>
<action android:name="android.intent.action.MAIN"/><category android:name="android.intent.category.IOT_LAUNCHER"/><category android:name="android.intent.category.DEFAULT"/>
</intent-filter>
To use Kotlin, go to activity, and Code | Convert Java File to Kotlin File. Make sure the plugin is installed, if not: Goto File | Settings | Plugins | Install JetBrains plugin. . . and then search for and install Kotlin.
1

kusti8’s Notes, Release 1.0.0
2 Chapter 1. Android Things

CHAPTER 2
React Native - General
Setup
Make a project: react-native init <name> and then start editing.
Run ‘‘npm install‘‘
Build by running react-native run-android and react-native start first.
Make sure *.keystore is in your .gitignore!!!
Essential Libraries
Provides side menu, icons, and more: https://react-native-training.github.io/react-native-elements/
Provides share menu: https://github.com/meedan/react-native-share-menu
Provides image and video Modals: https://github.com/tibbus/react-native-fit
Useful imports I’ve used:
import VideoPlayer from 'react-native-video-controls';import Spinner from 'react-native-spinkit';import Izzati from 'react-native-izzati';import RNFetchBlob from 'react-native-fetch-blob';import store from 'react-native-simple-store';import Swipeout from 'react-native-swipeout';import FitVideo from 'react-native-fit/fitVideo';
Usable in Expo
Provides side menu/drawer: https://github.com/root-two/react-native-drawer Usable in Expo
Resizes images: https://github.com/bamlab/react-native-image-resizer
3

kusti8’s Notes, Release 1.0.0
Android Emulator
On Arch: export ANDROID_EMULATOR_USE_SYSTEM_LIBS=1 to .bashrc
Start emulator from /opt/android-sdk with emulator -avd "Pixel_API_23"
Make sure to install from Android Studio with AVD API version 23. Install Android Emulator package in SDKmanager.
Network POST w/ parameters
export function postForm(path, form) {const str = [];for (let p in form) {str.push(encodeURIComponent(p) + "=" + encodeURIComponent(form[p]));
}const body = str.join("&");const req = {method: 'post',headers: {
'Content-Type': 'application/x-www-form-urlencoded'},body
};return fetch(path, req);
}
Install Standalone
React Native
Android: https://facebook.github.io/react-native/docs/signed-apk-android.html iOS: https://facebook.github.io/react-native/docs/running-on-device.html#building-your-app-for-production
Expo
https://docs.expo.io/versions/v18.0.0/guides/building-standalone-apps.html
Debugging
Error when starting package server (react-native start) ENOSPC On Arch to fix:
echo fs.inotify.max_user_watches=524288 | sudo tee -a /etc/sysctl.conf && sudo sysctl→˓-preact-native start
Error when running react-native-image-picker
Right click in Android studio on the module and change API version to 23. After, re-edit gradle file and change gradleversion to 2.2.+ And edit gradle distro URL again also. Put all testCompiles on individual lines in build.gradle(app)
4 Chapter 2. React Native - General
https://facebook.github.io/react-native/docs/running-on-device.html#building-your-app-for-production

kusti8’s Notes, Release 1.0.0
React Native Elements Header
Remember to use position: relative for the header:
<HeadercenterComponent={{ text: 'YTDownload' }}rightComponent={{ icon: 'add', onPress: () => this.addVideo() }}statusBarProps={{ barStyle: 'light-content' }}outerContainerStyles={{ backgroundColor: 'red', zIndex: 1, position: 'relative' }}
→˓ /> // <---------------------
FlatList
<List><FlatList
data={this.state.list}extraData={this.state}renderItem={(item) => {
swipeoutBtns = [{
text: 'Delete',backgroundColor: 'red',onPress: () => {
this.deleteVideo(item.index)}
}]
return (<Swipeout right={swipeoutBtns}>
<ListItemroundAvataravatar={{uri:JSON.parse(this.state.list[item.index]).thumbnail}}title={JSON.parse(this.state.list[item.index]).title}key={JSON.parse(this.state.list[item.index]).thumbnail}onPress={() => {
this.watch(JSON.parse(this.state.list[item.index]))
}}/>
</Swipeout>)}}keyExtractor={(item, index) => index}
/></List>
Navigation Button - Top Right
static navigationOptions = ({navigation}) => ({title: 'YTDownload',headerRight: <Icon name="add" style={{paddingRight: 15}} size={35} onPress={() =>
→˓navigation.navigate('DownloadScreen')} />
2.7. React Native Elements Header 5

kusti8’s Notes, Release 1.0.0
})
6 Chapter 2. React Native - General

CHAPTER 3
React Native - Push Notifications
I’m going to use Batch to make things easier.
Install
npm install --save react-native-push-notificationreact-native linkpip install python-gcm apns
Client Side
Get the ID:
Android
https://developers.google.com/mobile/add
iOS
http://facebook.github.io/react-native/docs/integration-with-existing-apps.html#app-transport-security
sudo gem install fastlanefastlane pem
Add the following to the client:
var PushNotification = require('react-native-push-notification');
// THIS PART GOES OUTSIDE ALL CLASSES !!!!!!!!!!export function postForm(path, form) {const str = [];for (let p in form) {
7

kusti8’s Notes, Release 1.0.0
str.push(encodeURIComponent(p) + "=" + encodeURIComponent(form[p]));}const body = str.join("&");const req = {method: 'post',headers: {
'Content-Type': 'application/x-www-form-urlencoded'},body
};return fetch(path, req);
}
// THIS PART GOES IN constructor(props) !!!!!!!!!!!PushNotification.configure({
// (optional) Called when Token is generated (iOS and Android)onRegister: function(t) {
console.log(t)postForm('http://192.168.0.120:5020/', {token: t.token})
},
// (required) Called when a remote or local notification is opened or receivedonNotification: function(notification) {
console.log( 'NOTIFICATION:', notification );},
// ANDROID ONLY: GCM Sender ID (optional - not required for local notifications,→˓but is need to receive remote push notifications)
senderID: "",
// IOS ONLY (optional): default: all - Permissions to register.permissions: {
alert: true,badge: true,sound: true
},
// Should the initial notification be popped automatically// default: truepopInitialNotification: true,
/*** (optional) default: true
* - Specified if permissions (ios) and token (android and ios) will requested→˓or not,
* - if not, you must call PushNotificationsHandler.requestPermissions() later
*/requestPermissions: true,
});
On Android, add the following to AndroidManifest.xml
<uses-permission android:name="android.permission.WAKE_LOCK" /><permission
android:name="${applicationId}.permission.C2D_MESSAGE"android:protectionLevel="signature" />
<uses-permission android:name="${applicationId}.permission.C2D_MESSAGE" /><uses-permission android:name="android.permission.VIBRATE" />
8 Chapter 3. React Native - Push Notifications
kusti8’s Notes, Release 1.0.0
<uses-permission android:name="android.permission.RECEIVE_BOOT_COMPLETED"/>
And then in the application brackets:
<application ....><receiver
android:name="com.google.android.gms.gcm.GcmReceiver"android:exported="true"android:permission="com.google.android.c2dm.permission.SEND" ><intent-filter>
<action android:name="com.google.android.c2dm.intent.RECEIVE" /><category android:name="${applicationId}" />
</intent-filter></receiver>
<receiver android:name="com.dieam.reactnativepushnotification.modules.→˓RNPushNotificationPublisher" />
<receiver android:name="com.dieam.reactnativepushnotification.modules.→˓RNPushNotificationBootEventReceiver">
<intent-filter><action android:name="android.intent.action.BOOT_COMPLETED" />
</intent-filter></receiver><service android:name="com.dieam.reactnativepushnotification.modules.
→˓RNPushNotificationRegistrationService"/><service
android:name="com.dieam.reactnativepushnotification.modules.→˓RNPushNotificationListenerService"
android:exported="false" ><intent-filter>
<action android:name="com.google.android.c2dm.intent.RECEIVE" /></intent-filter>
</service>
Server Side
That’s it for the client side. Now for the server side:
from gcm import *from time import sleep#from apns import APNs, Frame, Payloadfrom izzati import Backend
gcm = GCM("AIzaSyBUXAxT9Nynnx6ZbQfjnZL9-Ep3d37wBxY")#apns = APNs(use_sandbox=True, cert_file='cert.pem')
tokens = []
def callback(data, files):global gcm, tokensprint(data)token = data['token']tokens.append(token)tokens = list(set(tokens))data = {'title': 'Test Notifications', 'message': 'Hello!'}
3.3. Server Side 9

kusti8’s Notes, Release 1.0.0
#payload = Payload(alert="Hello World!", sound="default", badge=1, mutable_→˓content=True)
#apns.gateway_server.send_notification(token, payload)gcm.plaintext_request(registration_id=token, data=data)sleep(10)gcm.plaintext_request(registration_id=token, data=data)
b = Backend(callback)b.run()
For more info on the data input:
https://developers.google.com/cloud-messaging/http-server-ref#notification-payload-support
That’s it!
10 Chapter 3. React Native - Push Notifications

CHAPTER 4
Expo - Push Notifications
Install
Install Expo as you usually would.
This will only work on a non-ejected Expo project!!!
Install the Python server side.
sudo pip install exponent_server_sdk izzati
https://docs.expo.io/versions/v18.0.0/guides/push-notifications.html
Client Side
import Expo from 'expo';import React from 'react';import { StyleSheet, Text, View } from 'react-native';import { Permissions, Notifications } from 'expo';
const PUSH_ENDPOINT = 'http://192.168.0.120:5020/';
export function postForm(path, form) {const str = [];for (let p in form) {str.push(encodeURIComponent(p) + "=" + encodeURIComponent(form[p]));
}const body = str.join("&");const req = {method: 'post',headers: {
'Content-Type': 'application/x-www-form-urlencoded'},
11
kusti8’s Notes, Release 1.0.0
body};return fetch(path, req);
}
async function registerForPushNotificationsAsync() {const { existingStatus } = await Permissions.getAsync(Permissions.REMOTE_
→˓NOTIFICATIONS);let finalStatus = existingStatus;
// only ask if permissions have not already been determined, because// iOS won't necessarily prompt the user a second time.if (existingStatus !== 'granted') {// Android remote notification permissions are granted during the app// install, so this will only ask on iOSconst { status } = await Permissions.askAsync(Permissions.REMOTE_NOTIFICATIONS);finalStatus = status;
}
// Stop here if the user did not grant permissionsif (finalStatus !== 'granted') {return;
}
// Get the token that uniquely identifies this devicelet t = await Notifications.getExponentPushTokenAsync();
// POST the token to our backend so we can use it to send pushes from therereturn postForm(PUSH_ENDPOINT, {token: t})
}
class App extends React.Component {state = {
notification: {},};
componentWillMount() {registerForPushNotificationsAsync();
// Handle notifications that are received or selected while the app// is open. If the app was closed and then opened by tapping the// notification (rather than just tapping the app icon to open it),// this function will fire on the next tick after the app starts// with the notification data.this._notificationSubscription = Notifications.addListener(this._
→˓handleNotification);}
_handleNotification = (notification) => {this.setState({notification: notification});
};
render() {return (
<View style={{flex: 1, justifyContent: 'center', alignItems: 'center'}}><Text>Origin: {this.state.notification.origin}</Text><Text>Data: {JSON.stringify(this.state.notification.data)}</Text>
</View>
12 Chapter 4. Expo - Push Notifications

kusti8’s Notes, Release 1.0.0
);}
}
The Server
from exponent_server_sdk import DeviceNotRegisteredErrorfrom exponent_server_sdk import PushClientfrom exponent_server_sdk import PushMessagefrom exponent_server_sdk import PushResponseErrorfrom exponent_server_sdk import PushServerErrorfrom requests.exceptions import ConnectionErrorfrom requests.exceptions import HTTPError
from izzati import Backendfrom time import sleep
# Basic arguments. You should extend this function with the push features you# want to use, or simply pass in a `PushMessage` object.# https://docs.expo.io/versions/v18.0.0/guides/push-notifications.html#http-2-apitokens = []
def send_push_message(token, message, extra=None):try:
response = PushClient().publish(PushMessage(to=token,
body=message,data=extra))
except PushServerError as exc:# Encountered some likely formatting/validation error.raise
except (ConnectionError, HTTPError) as exc:# Encountered some Connection or HTTP error - retry a few times in# case it is transient.raise self.retry(exc=exc)
try:# We got a response back, but we don't know whether it's an error yet.# This call raises errors so we can handle them with normal exception# flows.response.validate_response()
except DeviceNotRegisteredError:# Mark the push token as inactivefrom notifications.models import PushTokenPushToken.objects.filter(token=token).update(active=False)
except PushResponseError as exc:raise self.retry(exc=exc)
def register_token(data, files):global tokensprint(data)tokens.append(data['token'])sleep(10)send_push_message(data['token'], "hello")
4.3. The Server 13

kusti8’s Notes, Release 1.0.0
b = Backend(register_token)b.run()
14 Chapter 4. Expo - Push Notifications

CHAPTER 5
React Native - Sidebar
Install
npm install --save react-native-drawer
Code
https://github.com/root-two/react-native-drawer
import React, { Component } from 'react';import {
AppRegistry,StyleSheet,Text,View,Button
} from 'react-native';import Drawer from 'react-native-drawer'
class ControlPanel extends Component {render() {
return (<View>
<Text>Hi</Text><Button onPress={this.props.close} title="Close" />
</View>)
}}
export default class Navigation extends Component {closeControlPanel = () => {
this._drawer.close()
15

kusti8’s Notes, Release 1.0.0
};openControlPanel = () => {
this._drawer.open()};
render () {return (
<Drawerref={(ref) => this._drawer = ref}openDrawerOffset={0.6}type={"overlay"}content={<ControlPanel close={this.closeControlPanel}/>}>
<View style={{backgroundColor: 'red'}}><Text>Hello</Text><Button onPress={this.openControlPanel} title="Test" />
</View></Drawer>
)}
}
AppRegistry.registerComponent('Navigation', () => Navigation);
16 Chapter 5. React Native - Sidebar

CHAPTER 6
React Native - Image Picker
Install
npm install react-native-image-picker@latest --savereact-native link
iOS
1. For iOS 10+, Add the NSPhotoLibraryUsageDescription, NSCameraUsageDescription, andNSMicrophoneUsageDescription (if allowing video) keys to your Info.plist with strings describing whyyour app needs these permissions.
Android
1. Update android/build.gradle
buildscript {...dependencies {
classpath 'com.android.tools.build:gradle:2.2.+' // <- USE 2.2.+ version}...
}...
2. Update URL in android/gradle/wrapper/gradle-wrapper.properties todistributionUrl=https\://services.gradle.org/distributions/gradle-2.14.1-all.zip
3. Add permissions to AndroidManifest.xml
<uses-permission android:name="android.permission.CAMERA" /><uses-permission android:name="android.permission.WRITE_EXTERNAL_STORAGE"/>
17
kusti8’s Notes, Release 1.0.0
Usage
import ImagePicker from 'react-native-image-picker';
let options = {title: 'Select Image',storageOptions: {
skipBackup: true,path: 'images'
}};
ImagePicker.showImagePicker(options, (response) => {console.log('Response = ', response);
if (response.didCancel) {console.log('User cancelled image picker');
}else if (response.error) {console.log('ImagePicker Error: ', response.error);
}else if (response.customButton) {console.log('User tapped custom button: ', response.customButton);
}else {let source = { uri: response.uri };
// You can also display the image using data:// let source = { uri: 'data:image/jpeg;base64,' + response.data };
this.setState({avatarSource: source
});}
});
Resources
• https://github.com/react-community/react-native-image-picker
• https://github.com/ivpusic/react-native-image-crop-picker
18 Chapter 6. React Native - Image Picker

CHAPTER 7
React Native - Image Resize
Install
npm install --save react-native-image-resizerreact-native link react-native-image-resizer
Note: on latest versions of React Native, you may have an error during the Gradle build on Android (com.android.dex.DexException: Multiple dex files define Landroid/support/v7/appcompat/R$anim). Run cd android && ./gradlew clean to fix this.
Usage
import ImageResizer from 'react-native-image-resizer';
let compressFormat = 'JPEG' // or 'PNG'let quality = 80 // out of 100
ImageResizer.createResizedImage(imageUri, newWidth, newHeight, compressFormat,→˓quality).then((resizedImageUri) => {// resizeImageUri is the URI of the new image that can now be displayed, uploaded...
}).catch((err) => {// Oops, something went wrong. Check that the filename is correct and// inspect err to get more details.
});
WARNING: On Android, file: will be prepended to the returned string. This allows it to be displayed as animage, but it also means you won’t be able to access the file directly when using a utility like fs. To do so, youcan simply use rawPath = originalPath.replace('file:', '') to get the raw path.
19

kusti8’s Notes, Release 1.0.0
Option Descriptionpath Path of image file, or a base64 encoded image string prefixed with
‘data:image/imagetype;base64,’ where imagetype is jpeg or png.maxWidth Image max width (ratio is preserved)max-Height
Image max height (ratio is preserved)
com-pressFor-mat
JPEG, PNG, or WEBP (Android only)
quality A number between 0 and 100 used for JPEG compressionrotation Rotation to apply to the image, in degrees, for android. On iOS, rotation is limited (and
rounded) to multiples of 90 degrees.output-Path
The resized image path. If null, resized image will be stored in cache folder. To set outputPathmake sure to add option for rotation too (if no rotation is needed, just set it to 0).
Example
ImageResizer.createResizedImage(datauri, 640, 480, 'JPEG', 80).then((resizedImageUri)→˓=> {
let i = new Izzati("http://192.168.1.17:5020/")i.send({text: {hello: 'me'}, file: {uri: resizedImageUri, filename: 'photo.jpg'},
→˓response: {base64: false}}, (out) => {this.setState(previous => {
return {uri: i.prefixPath(out.path)}})
})}).catch((err) => {
console.log(err)})
20 Chapter 7. React Native - Image Resize
CHAPTER 8
React Native - Share Extension
Install
Follow this for Android: https://github.com/meedan/react-native-share-menu
And this for iOS: https://github.com/alinz/react-native-share-extension # Really hard to get working.
Remember to link libReactNativeShareExtension.a to the main target in iOS.
Script
// share.ios.js
import React, { Component } from 'react';import ShareExtension from 'react-native-share-extension';
export default class Share {static getSharedText(callback) {
ShareExtension.data().then((type, value) => {callback(value)
})}static clearSharedText() {}
}
// share.android.js
import React, { Component } from 'react';import ShareMenu from 'react-native-share-menu';
export default class Share {static getSharedText(callback) {
21

kusti8’s Notes, Release 1.0.0
ShareMenu.getSharedText(callback)}static clearSharedText() {
ShareMenu.clearSharedText()}
}
22 Chapter 8. React Native - Share Extension

CHAPTER 9
React Native - Ignite Thunk
Install
ignite add redux-thunk
Usage
// --------------Main Screen----------------------import MainActions, {send} from '../Redux/MainRedux'
// --------------Main Redux------------------------export const send = (params) => {
return (dispatch) => {console.log(params)dispatch(Creators.mainRequest(params))let i = new Izzati("http://192.168.100.113:5020/")return i.send({text: JSON.parse(params), response: {base64: true} }).then(out => {dispatch(Creators.mainSuccess(i.prefixJpg(out.base64)))
}).catch(err => {dispatch(Creators.mainFailure())console.log(err)
})}
}
23

kusti8’s Notes, Release 1.0.0
24 Chapter 9. React Native - Ignite Thunk

CHAPTER 10
Parse Server
Install
sudo npm install -g parse-server mongodb-runnermongodb-runner startparse-server --appId appid --masterKey masterkey --databaseURI mongodb://localhost/→˓test
25

kusti8’s Notes, Release 1.0.0
26 Chapter 10. Parse Server
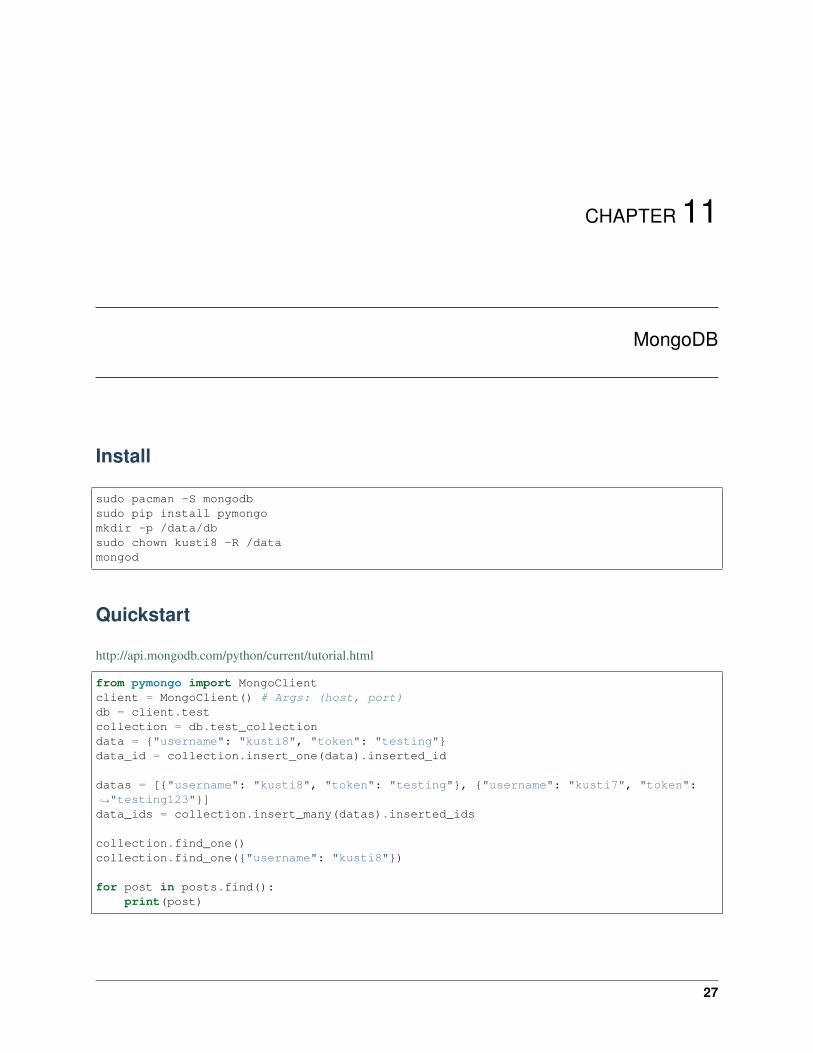
CHAPTER 11
MongoDB
Install
sudo pacman -S mongodbsudo pip install pymongomkdir -p /data/dbsudo chown kusti8 -R /datamongod
Quickstart
http://api.mongodb.com/python/current/tutorial.html
from pymongo import MongoClientclient = MongoClient() # Args: (host, port)db = client.testcollection = db.test_collectiondata = {"username": "kusti8", "token": "testing"}data_id = collection.insert_one(data).inserted_id
datas = [{"username": "kusti8", "token": "testing"}, {"username": "kusti7", "token":→˓"testing123"}]data_ids = collection.insert_many(datas).inserted_ids
collection.find_one()collection.find_one({"username": "kusti8"})
for post in posts.find():print(post)
27

kusti8’s Notes, Release 1.0.0
Example - Push Notification Tokens
from gcm import *from time import sleep#from apns import APNs, Frame, Payloadfrom izzati import Backendfrom pymongo import MongoClient
gcm = GCM("AIzaSyBUXAxT9Nynnx6ZbQfjnZL9-Ep3d37wBxY")#apns = APNs(use_sandbox=True, cert_file='cert.pem')
client = MongoClient()db = client.pushapptokens = db.tokens
def callback(data, files):global gcm, tokensprint(data)token = {'token': data['token']}tokens.update_one(token, token, upsert=True) # Makes sure they are uniquedata = {'title': 'Test Notifications', 'message': 'Hello!'}#payload = Payload(alert="Hello World!", sound="default", badge=1, mutable_
→˓content=True)
#apns.gateway_server.send_notification(token, payload)gcm.plaintext_request(registration_id=token, data=data)sleep(10)gcm.plaintext_request(registration_id=token, data=data)
b = Backend(callback)b.run()
28 Chapter 11. MongoDB

CHAPTER 12
ESP8266
URL Encoding
String urldecode(String str){
String encodedString="";char c;char code0;char code1;for (int i =0; i < str.length(); i++){
c=str.charAt(i);if (c == '+'){
encodedString+=' ';}else if (c == '%') {
i++;code0=str.charAt(i);i++;code1=str.charAt(i);c = (h2int(code0) << 4) | h2int(code1);encodedString+=c;
} else{
encodedString+=c;}
yield();}
return encodedString;}
String urlencode(String str){
29

kusti8’s Notes, Release 1.0.0
String encodedString="";char c;char code0;char code1;char code2;for (int i =0; i < str.length(); i++){c=str.charAt(i);if (c == ' '){
encodedString+= '+';} else if (isalnum(c)){
encodedString+=c;} else{
code1=(c & 0xf)+'0';if ((c & 0xf) >9){
code1=(c & 0xf) - 10 + 'A';}c=(c>>4)&0xf;code0=c+'0';if (c > 9){
code0=c - 10 + 'A';}code2='\0';encodedString+='%';encodedString+=code0;encodedString+=code1;//encodedString+=code2;
}yield();}return encodedString;
}
unsigned char h2int(char c){
if (c >= '0' && c <='9'){return((unsigned char)c - '0');
}if (c >= 'a' && c <='f'){
return((unsigned char)c - 'a' + 10);}if (c >= 'A' && c <='F'){
return((unsigned char)c - 'A' + 10);}return(0);
}
30 Chapter 12. ESP8266

CHAPTER 13
Indices and tables
• genindex
• modindex
• search
31