Kleemann Differential Installation Manual · Due to the extensive list of different final drives...
5
Kleemann Differential Installation Manual Rev 280213
Transcript of Kleemann Differential Installation Manual · Due to the extensive list of different final drives...

Kleemann Differential Installation Manual
Rev 280213

Due to the extensive list of different final drives installed, particularly across different countries, there may be instances where the Kleemann differential offered differs dimensionally with the differential installed in the vehicle concerned. It makes good sense, therefore, to check the gear set installed in the car at the earliest possible time. In most cases, it is possible to remove the rear cover of the final drive to check the critical dimensions before committing to the conversion.The critical dimension is the crown wheel to bearing dimension, marked L4. This can be checked visually by offering the Kleemann differential up to the existing open differential. If there is doubt about the configuration, then check the differential number as below.
Kleemann A/S Rugmarken 27B DK-3520 Farum Denmark !phone +45 70 109 109 fax +45 70 109 108 [email protected]
Kleemann USA Inc. 3455 Fillmore Ridge Heights Colorado Springs , CO 80907 USA !phone +1 719 473 6441 fax +1 719 578 0345 [email protected] !!
Installation Manual for Kleemann Differential
2
Rev. A/09/2014
Part References, Location on Differentials
These numbers are the only absolute reference that can enable a match to a Kleemann Differential. In most cases these numbers can be observed by removal of the rear cover. In some cases, however, it may be necessary to remove the entire final drive.
If in doubt, please contact your supplier, with the following information;
Chassis/VIN
Transmission Type (Manual/Auto/SMG)
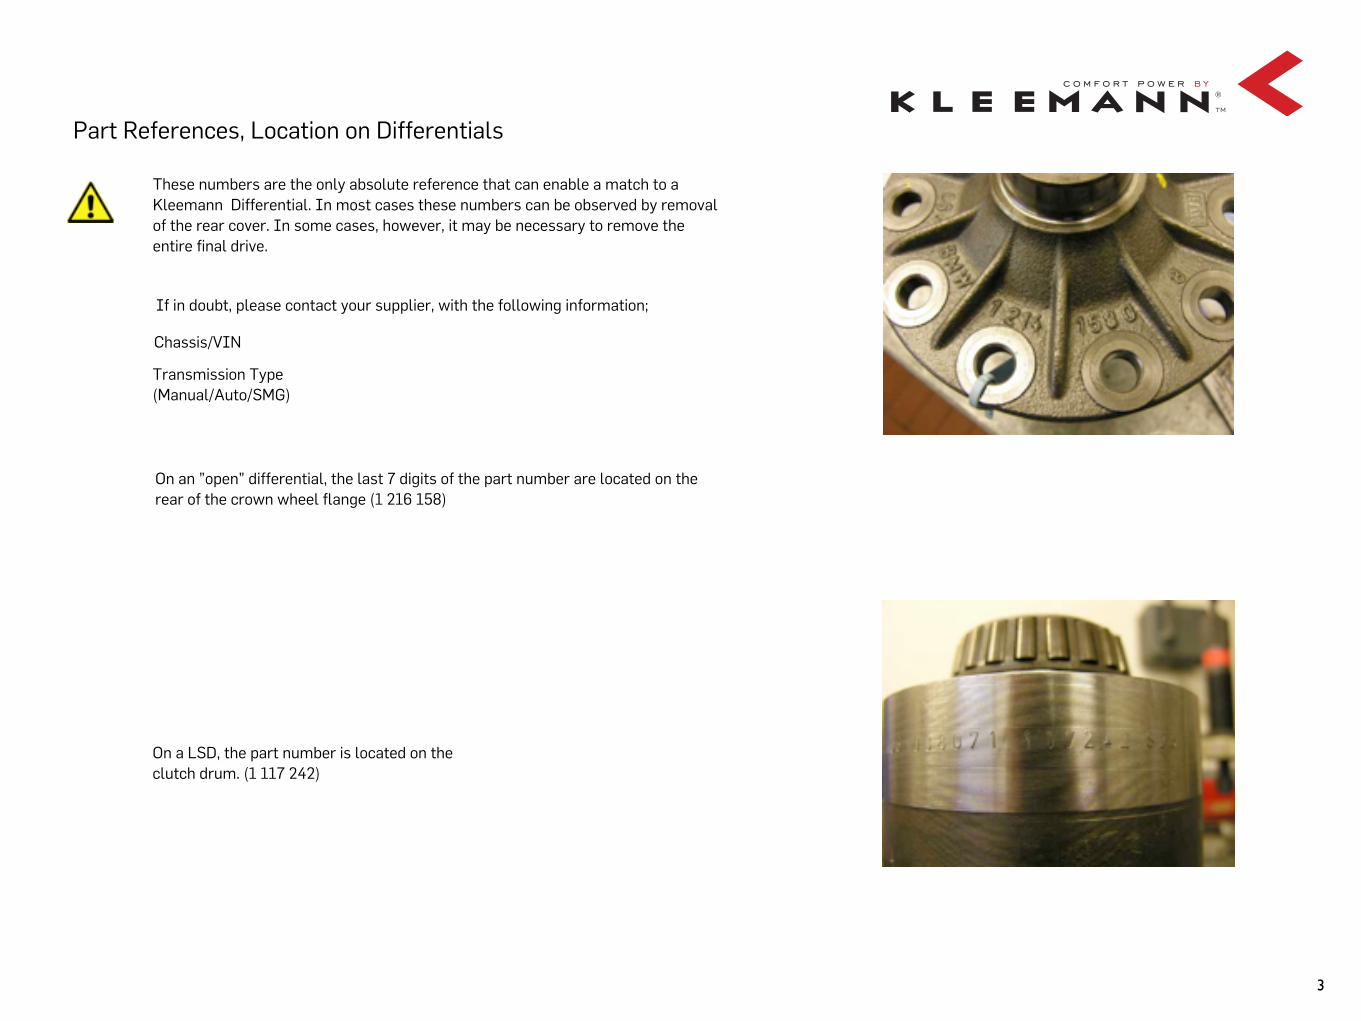
On a LSD, the part number is located on the clutch drum. (1 117 242)
On an ”open” differential, the last 7 digits of the part number are located on the rear of the crown wheel flange (1 216 158)
3
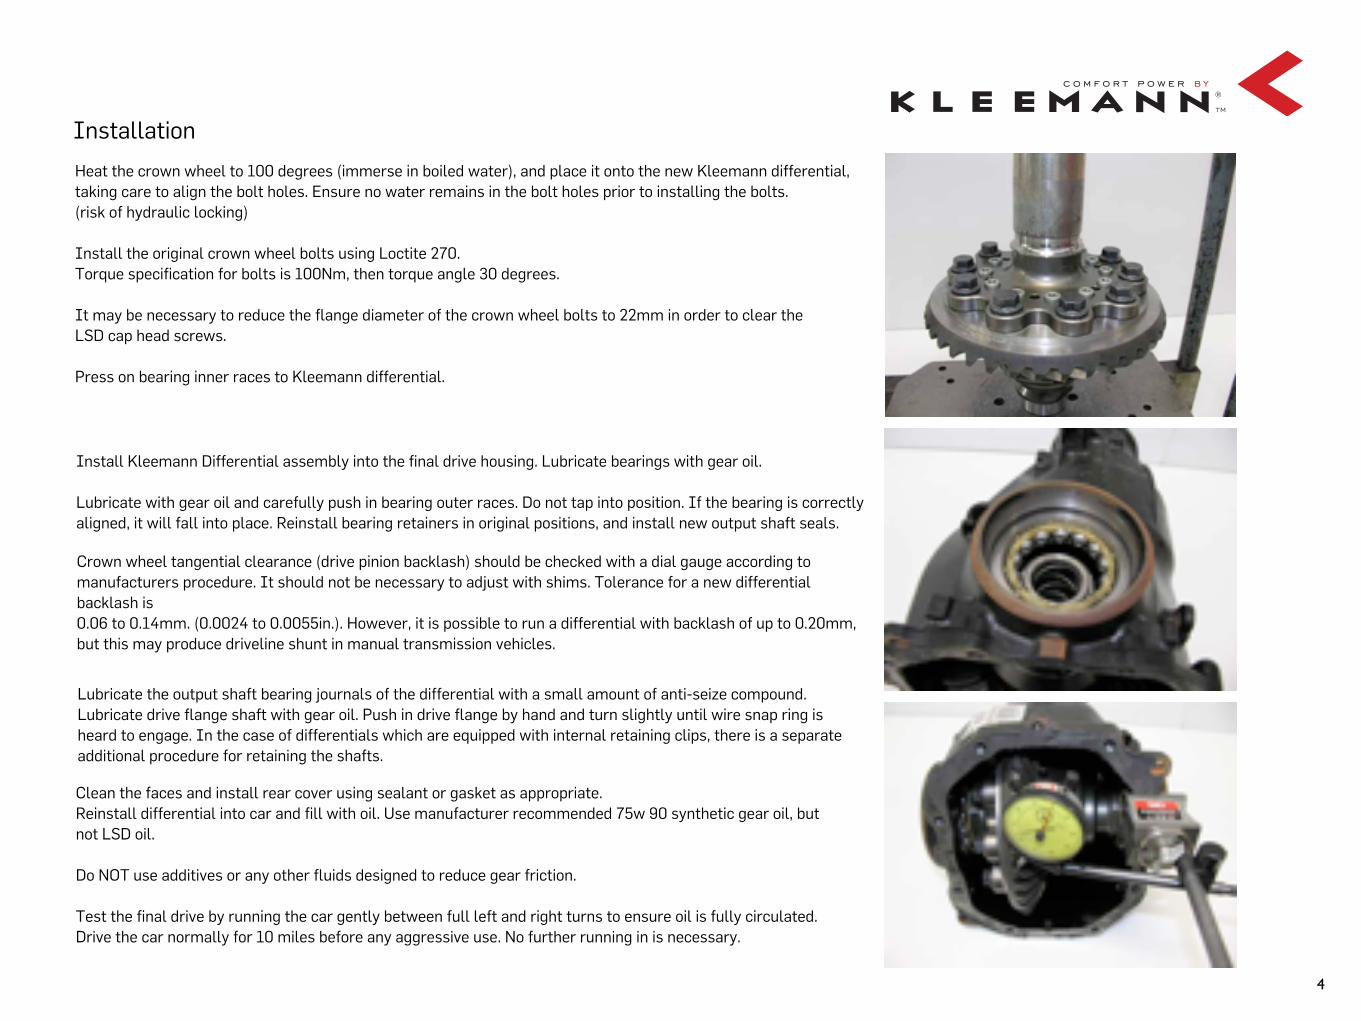
Heat the crown wheel to 100 degrees (immerse in boiled water), and place it onto the new Kleemann differential, taking care to align the bolt holes. Ensure no water remains in the bolt holes prior to installing the bolts. (risk of hydraulic locking) !Install the original crown wheel bolts using Loctite 270. Torque specification for bolts is 100Nm, then torque angle 30 degrees. !It may be necessary to reduce the flange diameter of the crown wheel bolts to 22mm in order to clear the LSD cap head screws. !Press on bearing inner races to Kleemann differential.
Installation
!Install Kleemann Differential assembly into the final drive housing. Lubricate bearings with gear oil.Lubricate with gear oil and carefully push in bearing outer races. Do not tap into position. If the bearing is correctly aligned, it will fall into place. Reinstall bearing retainers in original positions, and install new output shaft seals.
Crown wheel tangential clearance (drive pinion backlash) should be checked with a dial gauge according to manufacturers procedure. It should not be necessary to adjust with shims. Tolerance for a new differential backlash is 0.06 to 0.14mm. (0.0024 to 0.0055in.). However, it is possible to run a differential with backlash of up to 0.20mm, but this may produce driveline shunt in manual transmission vehicles.
Lubricate the output shaft bearing journals of the differential with a small amount of anti-seize compound. Lubricate drive flange shaft with gear oil. Push in drive flange by hand and turn slightly until wire snap ring is heard to engage. In the case of differentials which are equipped with internal retaining clips, there is a separate additional procedure for retaining the shafts.
Clean the faces and install rear cover using sealant or gasket as appropriate. Reinstall differential into car and fill with oil. Use manufacturer recommended 75w 90 synthetic gear oil, but not LSD oil. Do NOT use additives or any other fluids designed to reduce gear friction. Test the final drive by running the car gently between full left and right turns to ensure oil is fully circulated. Drive the car normally for 10 miles before any aggressive use. No further running in is necessary.
4

Replacing the Differential in Final Drive
Drain off fluid !Always work in clean conditions. Do not allow dirt to enter the final drive casing, the bearings or any other parts. Remove rear cover and remove both drive flanges. !Remove output shafts seals and bearing retainers. !
Remove complete differentials from casing. !Press off bearing inner races. Ensure that the bearing inner races are retained with the matching outer races. If the vehicle has covered more than 50,000 miles, the might require replacement. Press or tap off crown wheel (cold).
Caution! !Do not mix up bearing races and circlips or shims. Changing the total thickness of these will change the bearings, the backlash and tooth contact pattern will not have to be adjusted again provided the circlips and bearings races are reinstalled in their original positions and the pinion assembly is not disassembled. !!!
5