
KIT TO ISS INSTRUCTIONS.docx · Web viewMOUNTING RACK - With suspension installed attach front of...
7
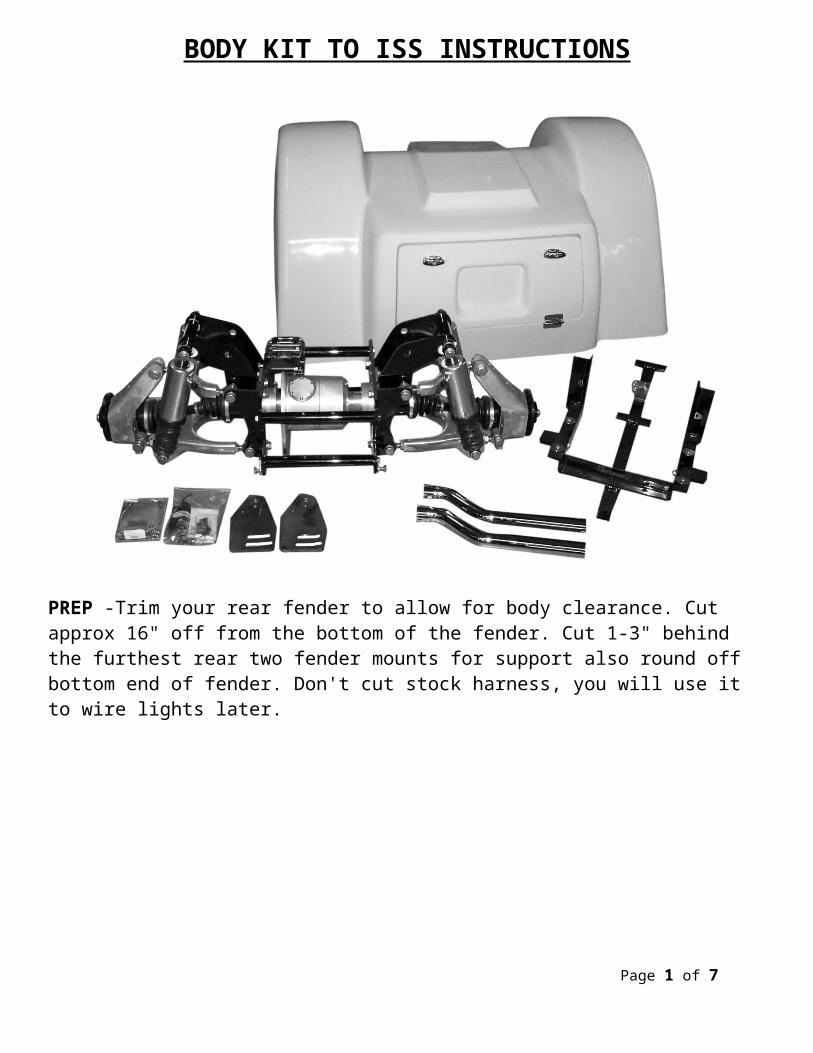
BODY KIT TO ISS INSTRUCTIONS PREP -Trim your rear fender to allow for body clearance. Cut approx 16" off from the bottom of the fender. Cut 1-3" behind the furthest rear two fender mounts for support also round off bottom end of fender. Don't cut stock harness, you will use it to wire lights later. Page 1 of 7
Transcript of KIT TO ISS INSTRUCTIONS.docx · Web viewMOUNTING RACK - With suspension installed attach front of...
BODY KIT TO ISS INSTRUCTIONS
PREP -Trim your rear fender to allow for body clearance. Cut approx 16" off from the bottom of the fender. Cut 1-3" behind the furthest rear two fender mounts for support also round off bottom end of fender. Don't cut stock harness, you will use it to wire lights later.
Page 1 of 5
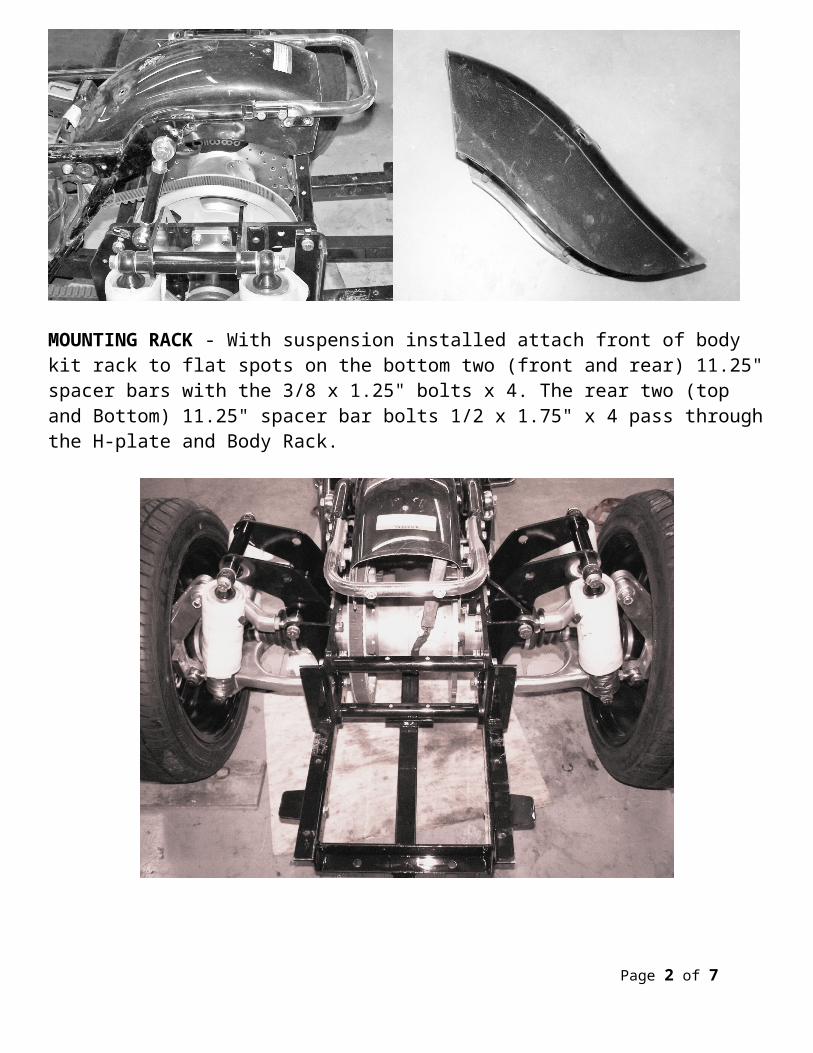
MOUNTING RACK - With suspension installed attach front of body kit rack to flat spots on the bottom two (front and rear) 11.25" spacer bars with the 3/8 x 1.25" bolts x 4. The rear two (top and Bottom) 11.25" spacer bar bolts 1/2 x 1.75" x 4 pass through the H-plate and Body Rack.
ALIGNMENT -To align the body there are several factors to consider. The body needs to be centered over the tires as well as centered in the wheel cut out and straight with the bike. -The height of the rubber mount struts/swingarm struts and overall ride height of the bike will dictate how the body sits as well as how the exhaust will work. Adding space to the struts will raise the body off the bike frame and space suspension further from the frame. Shorter struts will make the body sit lower on the bike and will make the frame sit lower to the ground.
CUTTING BODY -Set body on suspension to get an idea of where to cut out for seat/tour pack mount area, side covers area and exhaust clearance. If using a tour pack use the bikes stock mounting brackets to install the tour pack, leave room for clearance. If you are cutting the body for a seat and no tour pack then you will need to cut less out. You want to leave 1/2" - 1" of clearance around the seat or other cut out areas. Be aware that bikes with rubber mounted motors will move between the frame and suspension and needs to have more clearance.-The side covers will need to be able to be remove with the body kit installed so leave enough clearance to easily remove covers. Side covers may need to be modified to work with the J-Brackets depending on where they are located.
Page 2 of 5
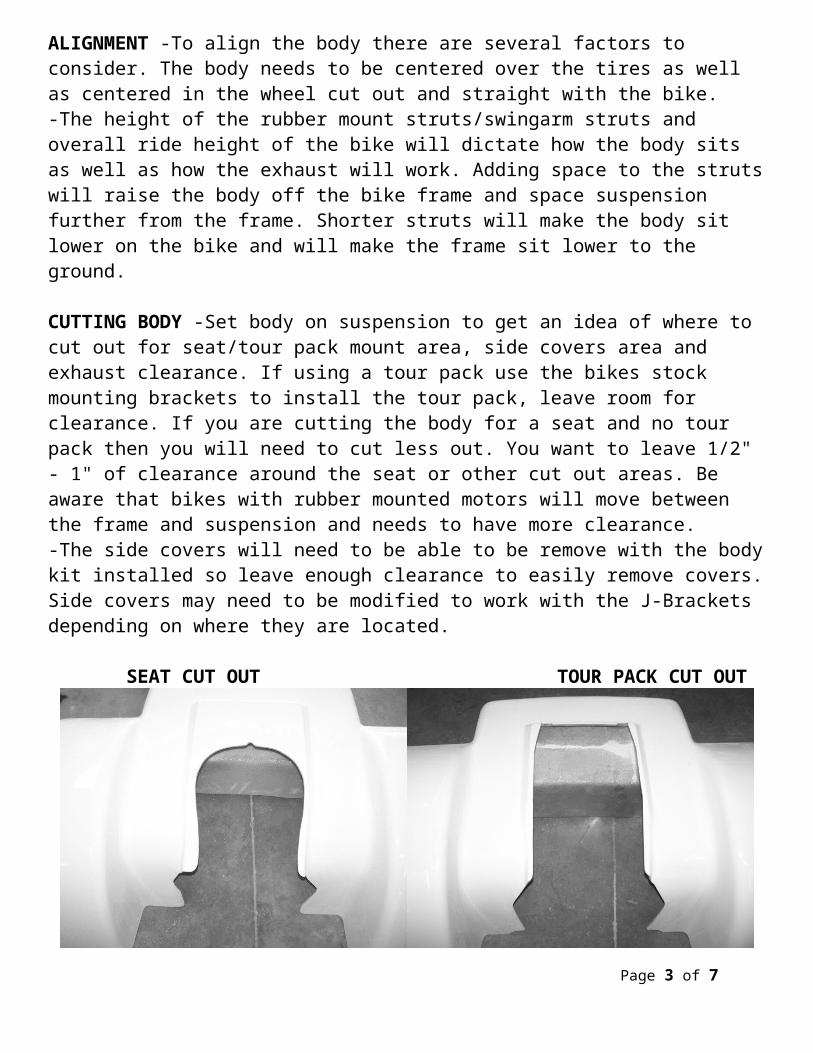
SEAT CUT OUT TOUR PACK CUT OUT
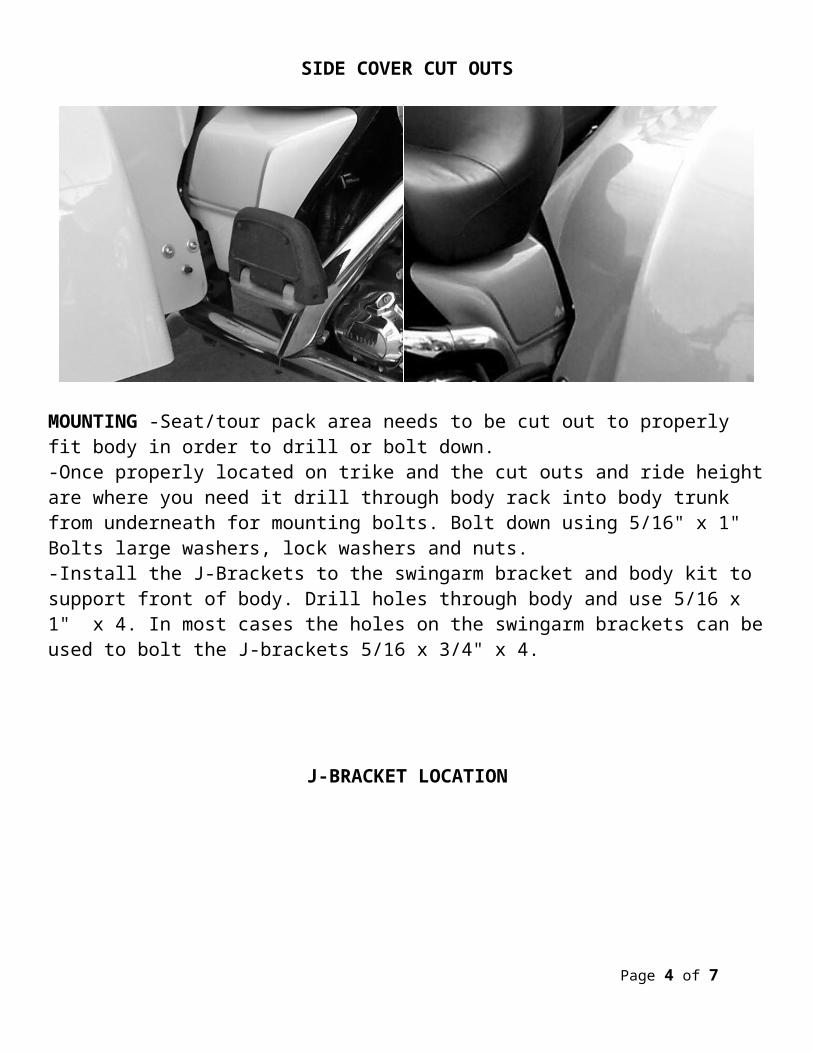
SIDE COVER CUT OUTS
MOUNTING -Seat/tour pack area needs to be cut out to properly fit body in order to drill or bolt down.-Once properly located on trike and the cut outs and ride height are where you need it drill through body rack into body trunk from underneath for mounting bolts. Bolt down using 5/16" x 1" Bolts large washers, lock washers and nuts.-Install the J-Brackets to the swingarm bracket and body kit to support front of body. Drill holes through body and use 5/16 x 1" x 4. In most cases the holes on the swingarm brackets can be used to bolt the J-brackets 5/16 x 3/4" x 4.
Page 3 of 5
J-BRACKET LOCATION
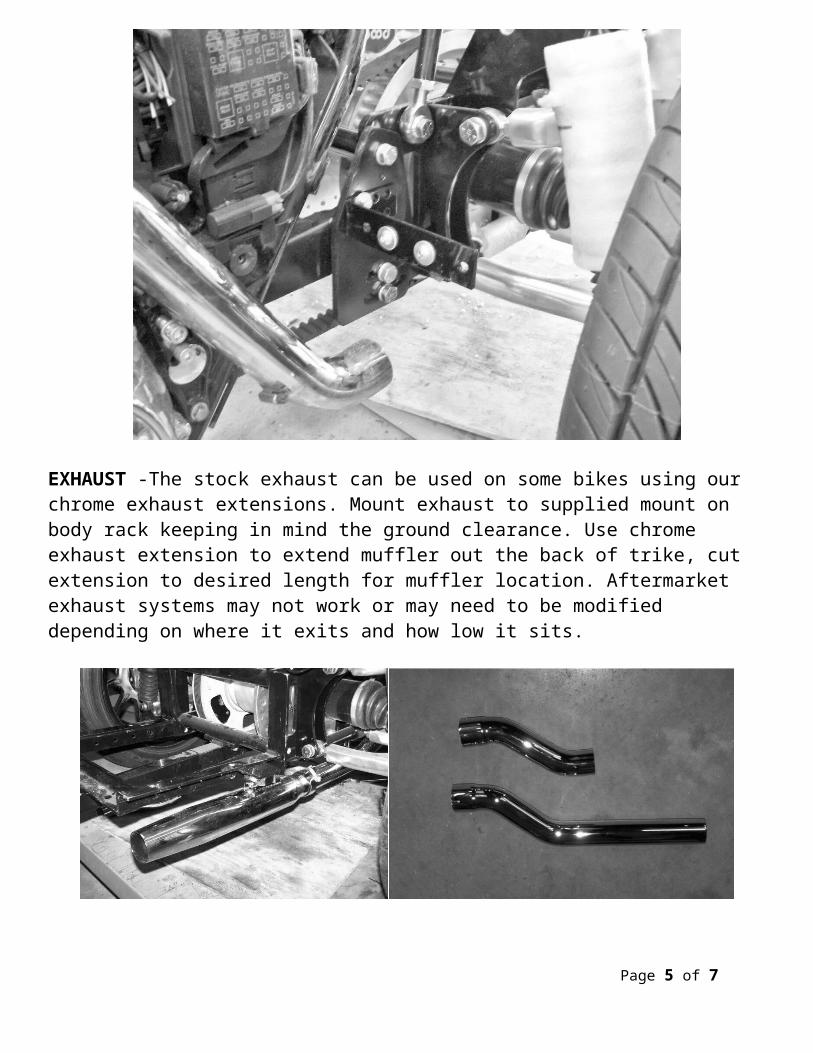
EXHAUST -The stock exhaust can be used on some bikes using our chrome exhaust extensions. Mount exhaust to supplied mount on body rack keeping in mind the ground clearance. Use chrome exhaust extension to extend muffler out the back of trike, cut extension to desired length for muffler location. Aftermarket exhaust systems may not work or may need to be modified depending on where it exits and how low it sits.
Page 4 of 5
LIGHTING -In order to wire the rear lights you will need a turn/stop/running module (Harley # 69467-06C 8-way / 69468-06A 6-way) to use the LED lights we provide with the kit. Use the stock harness from the rear fender, splice the harness wires together with the LED wires. The Cobra LED lights are wired slightly different than the Conventional LED lights.-The Beehive (Cobra) tail lights will have the top lights as the brake lights and the bottom lights will be the running and turn. The Oval (Conventional Body) tail lights will be the turn/brake and running lights. -Tie up wires so that they will not interfere with suspension and will stay clear of wheels. The Cobra body LED wires should be routed through the trunk by drilling holes. The Conventional body LED wires can be routed under body kit. -The Cobra LED lights holes will be pre drilled unless otherwise noted-The Conventional LED lights holes will have to be located and cut by customer using template
Page 5 of 5


