Kindergarten Teacher · PDF fileKindergarten Teacher ... Writer's Workshop Notebooks ... By...
141
Jessica Meacham www.jmeacham.com 1 Mrs. Meacham's Classroom Snap Shots Mini Lessons Mini Lessons Mini Lessons Mini Lessons Writing Mini Lessons for Primary Grades Jessica Meacham Jessica Meacham Jessica Meacham Jessica Meacham Kindergarten Teacher www.jmeacham.com [email protected]
Transcript of Kindergarten Teacher · PDF fileKindergarten Teacher ... Writer's Workshop Notebooks ... By...

Jessica Meacham www.jmeacham.com 1
Mrs. Meacham's Classroom Snap Shots
Mini LessonsMini LessonsMini LessonsMini Lessons
Writing Mini Lessons for Primary Grades
Jessica MeachamJessica MeachamJessica MeachamJessica Meacham
Kindergarten Teacher
www.jmeacham.com

Jessica Meacham www.jmeacham.com 2
Writer's Workshop Notebooks
Mini Lesson for Introducing and Managing Writer's Workshop Notebooks
Mini Lessons Resources
1 Your Notebook Belongs to You Have students sit around the carpet area. Share with students that everyday, they will participate in something called Writer's Workshop. Share, that during Writer's Workshop, they will be drawing and writing stories. Say, "Today I'm going to give you a special notebook. This notebook is where we will do our writing and drawing." Distribute notebooks. Tell students to keep the notebook on the ground in front of them. Hands are not to be touching it. Say, "When I say 'bananarama' [or some other signal word], I want you to look inside of the notebook." Allow students to look inside of the notebook. Call students to attention and ask them to put the notebooks back on the ground in front of them - - no hands touching. Ask, "What did you notice/see?" Allow time for students to share. Ask, "Did anyone find their name in or on the notebook?" Say, "Well that's a problem; these notebooks are YOURS; we'll need to know which one belongs to you!" Show student the name labels that you've already preprogrammed with names [printer or marker]. Model how to put the label on the front of the notebook [near the top]. Ask students to return their notebook to you after they have put their name label on it.
Jessica Meacham www.jmeacham.com 3
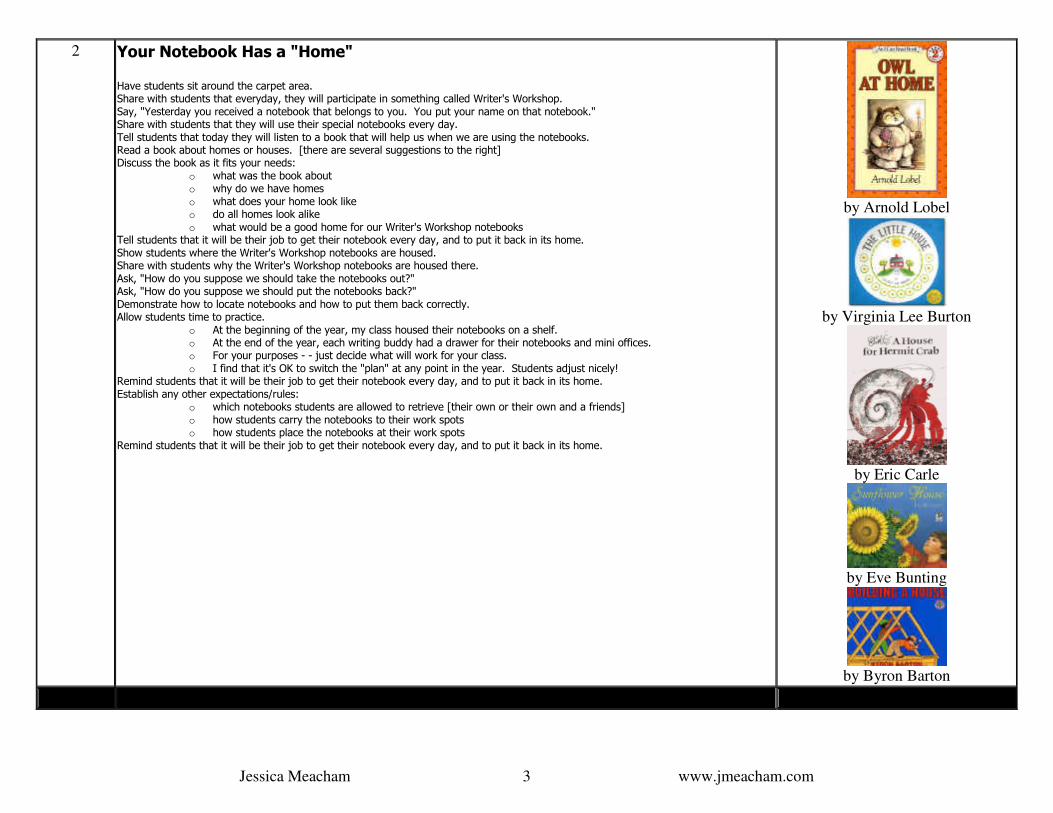
2 Your Notebook Has a "Home" Have students sit around the carpet area. Share with students that everyday, they will participate in something called Writer's Workshop. Say, "Yesterday you received a notebook that belongs to you. You put your name on that notebook." Share with students that they will use their special notebooks every day. Tell students that today they will listen to a book that will help us when we are using the notebooks. Read a book about homes or houses. [there are several suggestions to the right] Discuss the book as it fits your needs:
o what was the book about o why do we have homes o what does your home look like
o do all homes look alike
o what would be a good home for our Writer's Workshop notebooks Tell students that it will be their job to get their notebook every day, and to put it back in its home. Show students where the Writer's Workshop notebooks are housed. Share with students why the Writer's Workshop notebooks are housed there. Ask, "How do you suppose we should take the notebooks out?" Ask, "How do you suppose we should put the notebooks back?" Demonstrate how to locate notebooks and how to put them back correctly. Allow students time to practice.
o At the beginning of the year, my class housed their notebooks on a shelf. o At the end of the year, each writing buddy had a drawer for their notebooks and mini offices. o For your purposes - - just decide what will work for your class. o I find that it's OK to switch the "plan" at any point in the year. Students adjust nicely!
Remind students that it will be their job to get their notebook every day, and to put it back in its home. Establish any other expectations/rules:
o which notebooks students are allowed to retrieve [their own or their own and a friends] o how students carry the notebooks to their work spots o how students place the notebooks at their work spots
Remind students that it will be their job to get their notebook every day, and to put it back in its home.
by Arnold Lobel
by Virginia Lee Burton
by Eric Carle
by Eve Bunting
by Byron Barton

Jessica Meacham www.jmeacham.com 4
3 Your Notebook Has Parts Have students sit around the carpet area. Share with students that everyday, they will participate in something called Writer's Workshop. Say, "Yesterday you received a notebook that belongs to you. You put your name on that notebook." Share with students that they will use their special notebooks every day. Tell students that today they will listen to a book that will help us when we are using the notebooks. Read a book about body parts. [there are several suggestions to the right] Discuss the book as it fits your needs:
o body part names o body part functions o using body parts correctly o using body parts incorrectly
Hold up a Writer's Workshop notebook. Ask students to tell you about the notebook.
Facilitate discussion: o it's a notebook o it is (color) o it is for writing o it is big/small/thin/fat o it has pages o etc.
Say, "You are right! This notebook does have ______ and is _______." Say, "There are other things that we need to know about this notebook. Today, we will talk about those
things!"
• The front, the back, the spine, and the paper
Ask students how they know the difference between the front and the back. Ask students to put their picture (label or paper) on the front cover, in the middle of the cover. Ask students to share what they know about our spinal cord. Discuss the similarities/differences between our spinal cord and a notebook's spine. Discuss how paper is made. Discuss the purpose of paper. Etc.
Here are My Hands
by Bill Martin & John Archambault
5
Me and My Amazing Body
by Joan Sweeney
by Ted Arnold
Inside Your Outside
by Tish Rabe

Jessica Meacham www.jmeacham.com 5
• turning pages
Ask students how book pages should be turned. Discuss the benefits of turning pages carefully. Discuss the repercussions of turning pages carelessly. Ask students to practice turning pages. Use a musical instrument to cue them to turn a page.
Quick! Turn the Page!
by James Stevenson
Monster at the End of this Book
by Jon Stone
• first and last page
Ask students how they know the difference between the first and last page. Ask students to turn to the first page. Distribute name plates and have students write their FIRST name on the first page. Ask students to turn to the last page. Distribute name plates and have students write their LAST name on the last page. Ask students to put a green dot sticker on the first page. Ask students to put a red dot sticker on the last page.
Henry the Fourth
by Stuart Murphy
• left and right page
Tell students that you want them to find the next double-page spread. Have students put both hands on the pages (one hand on each). Share with students that one hand is called the left hand, and the other is called the right hand. Tell students that they should trace their right hand onto the right hand page [model this]. Assist as necessary. Tell students that they should trace their left hand onto the left hand page [model this process]. Assist as necessary. Label each hand with an "L" for left and and "R" for right.
Left Hand, Right Hand
by Janet Allison Brown

Jessica Meacham www.jmeacham.com 6
• top and bottom of page
Tell students that you want them to find the next double-page spread. Ask students to use their paintbrush/pencil/popsicle stick and to point to the top, bottom on cue. Practice pointing to the top and bottom of their bodies (head, feet = top, bottom). Practice pointing to the top and bottom of their papers. Ask students to draw a picture of their house. Ask students to add a sun and clouds on the top, and grass and flowers on the bottom.
Tops and Bottoms
by Janet Stevens
• double page spread
Ask students how they know the difference between a single/double cheeseburger. Ask students how they know the difference between a single page and a double-page spread. Ask students to find the first page in their notebook. Tell students that you want them to find the next page (a double-page spread). Have students put both hands on the pages (one hand on each). Tell students that they have their hands on a "double-page" spread. Tell students that every day, they will open their notebooks to a new "double-page" spread.
Double the Ducks
by Stuart Murphy

Jessica Meacham www.jmeacham.com 7
Read Aloud Resources about Journals/Diaries/Notebooks:
by Doreen Cronin
by Doreen Cronin
by Jackie French
by Marc Brown
by Marissa Moss
by Marissa Moss
by Marissa Moss
by Marissa Moss
by Paula Graham
by Marissa Moss
by Marissa Moss
by Marissa Moss
Jessica Meacham www.jmeacham.com 8
Writing Tools
Mini Lesson for Introducing Writing Tools
Mini Lessons
1
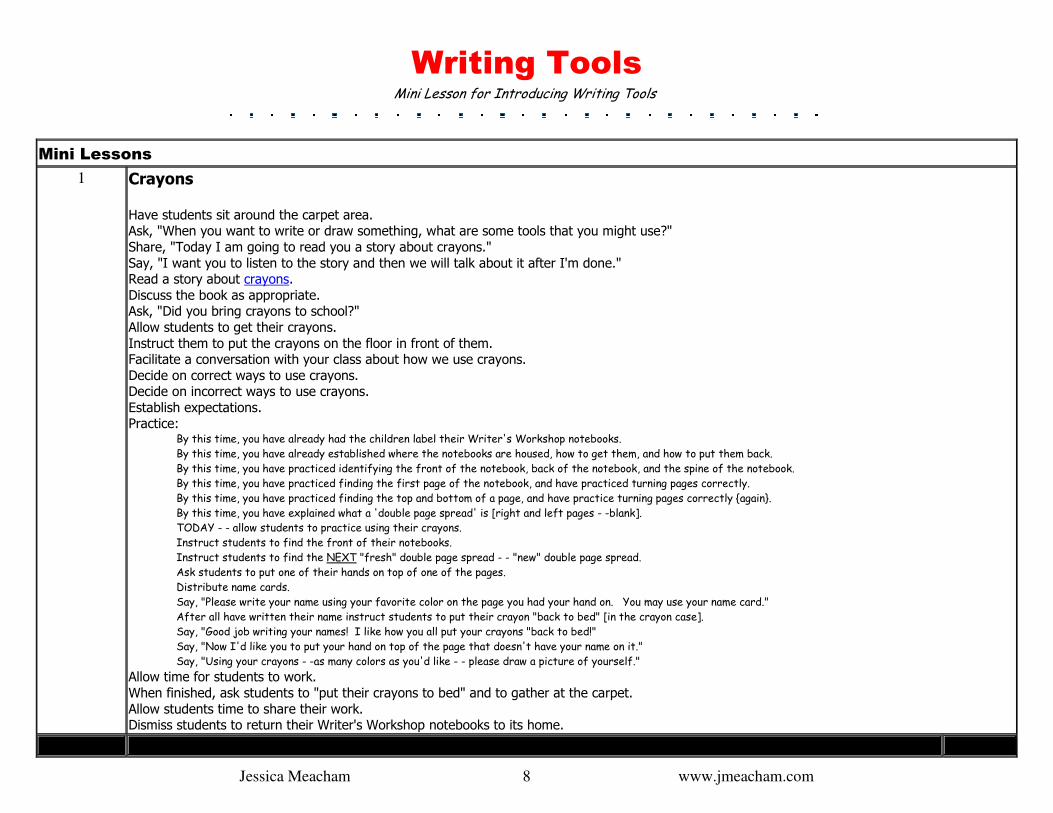
Crayons Have students sit around the carpet area. Ask, "When you want to write or draw something, what are some tools that you might use?" Share, "Today I am going to read you a story about crayons." Say, "I want you to listen to the story and then we will talk about it after I'm done." Read a story about crayons. Discuss the book as appropriate. Ask, "Did you bring crayons to school?" Allow students to get their crayons. Instruct them to put the crayons on the floor in front of them. Facilitate a conversation with your class about how we use crayons. Decide on correct ways to use crayons. Decide on incorrect ways to use crayons. Establish expectations. Practice:
By this time, you have already had the children label their Writer's Workshop notebooks.
By this time, you have already established where the notebooks are housed, how to get them, and how to put them back.
By this time, you have practiced identifying the front of the notebook, back of the notebook, and the spine of the notebook.
By this time, you have practiced finding the first page of the notebook, and have practiced turning pages correctly.
By this time, you have practiced finding the top and bottom of a page, and have practice turning pages correctly {again}.
By this time, you have explained what a 'double page spread' is [right and left pages - -blank]. TODAY - - allow students to practice using their crayons.
Instruct students to find the front of their notebooks.
Instruct students to find the NEXT "fresh" double page spread - - "new" double page spread. Ask students to put one of their hands on top of one of the pages.
Distribute name cards.
Say, "Please write your name using your favorite color on the page you had your hand on. You may use your name card."
After all have written their name instruct students to put their crayon "back to bed" [in the crayon case].
Say, "Good job writing your names! I like how you all put your crayons "back to bed!"
Say, "Now I'd like you to put your hand on top of the page that doesn't have your name on it."
Say, "Using your crayons - -as many colors as you'd like - - please draw a picture of yourself."
Allow time for students to work. When finished, ask students to "put their crayons to bed" and to gather at the carpet. Allow students time to share their work. Dismiss students to return their Writer's Workshop notebooks to its home.

Jessica Meacham www.jmeacham.com 9
2
This lesson could be
done on the 3rd day of school. I
wouldn't combine it
with the "Crayons"
or "Colored Pencils"
mini lessons - -
instead, spread them
out over the day. Students will be
eager to use them
all!
Markers Have students sit around the carpet area. Ask, "When you want to write or draw something, what are some tools that you might use?" Share, "Today I am going to read you a story about markers." Say, "I want you to listen to the story and then we will talk about it after I'm done." Read a story about markers. Discuss the book as appropriate. Ask, "Did you bring markers to school?" Allow students to get their markers. Instruct them to put the crayons on the floor in front of them. Facilitate a conversation with your class about how we use markers. Decide on correct ways to use markers. Decide on incorrect ways to use markers. Establish expectations. Practice:
By this time, you have already had the children label their Writer's Workshop notebooks.
By this time, you have already established where the notebooks are housed, how to get them, and how to put them back.
By this time, you have practiced identifying the front of the notebook, back of the notebook, and the spine of the notebook.
By this time, you have practiced finding the first page of the notebook, and have practiced turning pages correctly. By this time, you have practiced finding the top and bottom of a page, and have practice turning pages correctly {again}.
By this time, you have explained what a 'double page spread' is [right and left pages - -blank].
TODAY - - allow students to practice using their markers.
Instruct students to find the front of their notebooks.
Instruct students to find the NEXT "fresh" double page spread - - "new" double page spread. Ask students to put one of their hands on top of one of the pages.
Distribute name cards.
Say, "Please write your name using your favorite color on the page you had your hand on. You may use your name card."
After all have written their name instruct students to put their marker "back to bed" [in the marker box].
Say, "Good job writing your names! I like how you all put your marker "back to bed!"
Say, "Now I'd like you to put your hand on top of the page that doesn't have your name on it." Say, "Using your markers - -as many colors as you'd like - - please draw a picture of your mom and/or dad."
Allow time for students to work. When finished, ask students to "put their markers to bed" and to gather at the carpet. Allow students time to share their work. Dismiss students to return their Writer's Workshop notebooks to its home.

Jessica Meacham www.jmeacham.com 10
3
This lesson could be
done on the 3rd day of school. I
wouldn't combine it
with the "Crayons"
or "Markers" mini
lessons - - instead,
spread them out over
the day. Students will be eager to use
them all!
Colored Pencils Have students sit around the carpet area. Ask, "When you want to write or draw something, what are some tools that you might use?" Share, "Today I am going to read you a story about colored pencils." Say, "I want you to listen to the story and then we will talk about it after I'm done." Read a story about colored pencils. Discuss the book as appropriate. Ask, "Did you bring colored pencils to school?" Allow students to get their colored pencils. Instruct them to put the colored pencils on the floor in front of them. Facilitate a conversation with your class about how we use colored pencils. Decide on correct ways to use colored pencils. Decide on incorrect ways to use colored pencils. Establish expectations. Practice:
By this time, you have already had the children label their Writer's Workshop notebooks.
By this time, you have already established where the notebooks are housed, how to get them, and how to put them back.
By this time, you have practiced identifying the front of the notebook, back of the notebook, and the spine of the notebook.
By this time, you have practiced finding the first page of the notebook, and have practiced turning pages correctly. By this time, you have practiced finding the top and bottom of a page, and have practice turning pages correctly {again}.
By this time, you have explained what a 'double page spread' is [right and left pages - -blank].
TODAY - - allow students to practice using their markers.
Instruct students to find the front of their notebooks.
Instruct students to find the NEXT "fresh" double page spread - - "new" double page spread. Ask students to to put one of their hands on top of one of the pages.
Distribute name cards.
Say, "Please write your name using your favorite color on the page you had your hand on. You may use your name card."
After all have written their name instruct students to put their colored pencil "back to bed" [in the colored pencil box].
Say, "Good job writing your names! I like how you all put your colored pencil "back to bed!"
Say, "Now I'd like you to put your hand on top of the page that doesn't have your name on it." Say, "Using your colored pencil - -as many colors as you'd like - - please draw a picture of your teacher/pet/friend."
Allow time for students to work. When finished, ask students to "put their colored pencils to bed" and to gather at the carpet. Allow students time to share their work. Dismiss students to return their Writer's Workshop notebooks to its home.

Jessica Meacham www.jmeacham.com 11
Read Aloud Resources about Crayons/Markers/Color Pencils:
by Crocket Johnson
by Shane Derolf
by Patricia Hubbard
by Chris Van Allsburg
by Ray Gibson
by Inez Snyder
by Michael H. Forman
by Robin Nelson
by Samuel G. Woods
by Judith Heide Gilliland
by Juanita Harvill
by Nancy Carlson
by Janie Spaht Gill
by Grace Tai
Any other suggestions?
I'm looking for more!
Email Me!1

Jessica Meacham www.jmeacham.com 12
Writer's Workshop Meeting Place
Mini Lessons for Teaching Where to Gather for Writer's Workshop Mini Lessons
Mini Lessons Resources
1
We Begin Writer's Workshop at our Share Carpet Read a book about carpets, a magic carpet ride, or some other type of story involving rugs/carpets. After reading the book, draw students' attention to the classroom carpet. Ask them simple questions about it:
what color is it how big is it does it bite - - it's OK to be funny! :-) how does it feel why do we have a carpet
Tell students that there are many reasons why we have a classroom carpet: Helps us know where to sit when we meet as a group Helps keep our clothes clean so we don't have to sit on the floor Looks nice in our classroom etc
Tell students that everyday they will have Writer's Workshop, and that we will be using our carpet. Tell students that at the start of Writer's Workshop, the class will always meet at the Share Carpet. Share that during this time, our carpet will help us to know where to sit. Share that our carpet will helps us to remember that we are going to have special conversation. Share that these conversations are a time to share our ideas and learn new things. Say, "But you know what, class? We need to talk about how to sit at the carpet - - how to use the carpet."
should we sit on our friends should we stand on our heads should we sit and swing our arms around should we put our feet in the air - - in our ears - - mouths AGAIN - - It's OK to be Funny!!!
Ask for suggestions from the children about how the class should/can sit at the carpet. Decide on the expectations/rules and then practice them. Take pictures of students sitting correctly at the carpet. Create an ANCHOR CHART for the routine, and add information and a picture about the day's lesson.
by Pat Brisson
by John Woodward
by Charles Blood
by Allan Say
The Front Hall Carpet
by Nicholas Heller
Rugs Have Naps, But Never Take Them
by Charles Klasky

Jessica Meacham www.jmeacham.com 13
We Learn by Watching and Listening
Mini Lessons for Encouraging Listening and Watching during Writer's Workshop Mini Lessons
Mini Lessons Resources
1 We Use our Eyes and Ears to Watch Mrs. Meacham As students come to the carpet, congratulate them on sitting appropriately. Emphasize the importance if sitting at/around the carpet {reiterate yesterday's mini lesson}. Say, "Now that you are at the carpet, I want to share a special book with you." Tell the children that at the start of most Writer's Workshops we will begin by reading a book. Say, "We will read books, because when we read them, books help us to learn something new." Tell the children that today's book will help us to learn that looking is very important - when we look, we learn. Ask the children to show you what body part they use when they are LOOKING. Affirm their answer - - and add that today they will learn how to LOOK with more than one part of their body! Show the front cover of the book, Look! Look! Look! by Nancy Elizabeth Wallace. Ask students to LOOK with their eyes and share what they see. Read Look! Look! Look! by Nancy Elizabeth Wallace. After reading the book, draw students attention to the "moral" of the story:
"This adorable and informative look at a mouse family that borrows a postcard depicting a famous painting is a winning choice. The mice carefully
study the portrait, examining each part and analyzing what they see–patterns, colors, lines, shapes, etc. They not only enjoy and appreciate what
they learn, but they also individually and collectively decide that they can compose their very own pictures as they now know so much about these
artistic elements. This delightful lesson comes to a rather abrupt finale when the humans return home. Wallace and Friedlaender have assembled a
charming foray into the world of art, complete with a helpful glossary and lessons on how to make a self-portrait. This is not only an amusing,
creative story, but also an adventure into art that encourages originality while inspiring creativity."
Share with students that the mice in the book learned lots by LOOKING. Ask the class what new things they learned after they LOOKED at the postcard. Say, "You know what? This book reminds me that when I look at you, I learn lots and lots of new things." Ask the class if they learn new things by watching/looking at others. Allow time for sharing. Say, "I'd like you to be just like these mice during Writer's Workshop. I'd like you to Look! Look! Look!" Say, "If I am reading or writing - - and we are at the carpet - - how we can/could/should watch/look at me?
□ should you watch with your thumbs - - toes - - shoes (laughter releases fidgetiness and stress!) □ should you watch with you eyes - - ears
Remind students that we can watch [or listen] with our eyes and ears. Share that we can also watch and listen with our hands, feet, and voices. Ask the children how they [hands, feet, voices] help us to watch and listen. Remind students that when they are listening and watching very carefully, they will learn something new. Encourage students to practice listening and watching carefully as you write a journal entry. Take pictures of students watching and listening carefully [during the teacher writing/modeling]. Create an ANCHOR CHART for the routine, and add information and a picture about the day's lesson.
by Nancy Elizabeth Wallace
by Meiners
Jessica Meacham www.jmeacham.com 14
Interactive Writer's Workshop
Mini Lessons for Teaching Students that They May Help with the Teacher's Story
Mini Lessons Resources
1
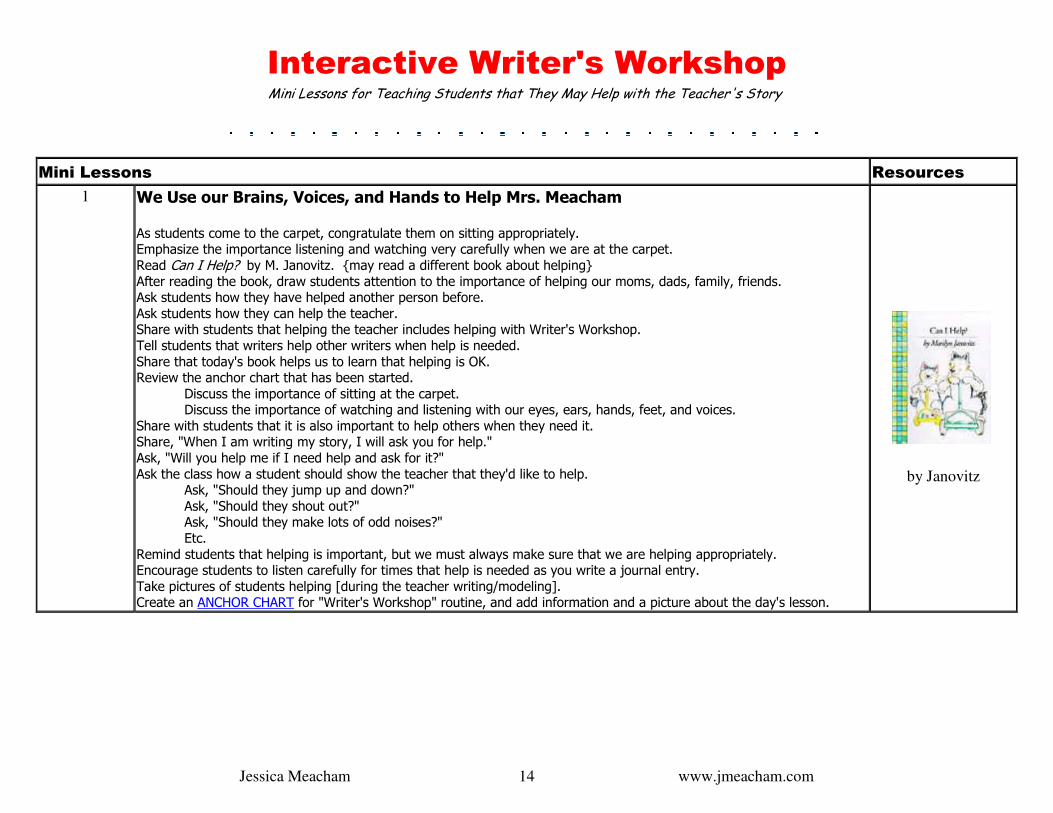
We Use our Brains, Voices, and Hands to Help Mrs. Meacham As students come to the carpet, congratulate them on sitting appropriately. Emphasize the importance listening and watching very carefully when we are at the carpet. Read Can I Help? by M. Janovitz. {may read a different book about helping} After reading the book, draw students attention to the importance of helping our moms, dads, family, friends. Ask students how they have helped another person before. Ask students how they can help the teacher. Share with students that helping the teacher includes helping with Writer's Workshop. Tell students that writers help other writers when help is needed. Share that today's book helps us to learn that helping is OK. Review the anchor chart that has been started.
Discuss the importance of sitting at the carpet. Discuss the importance of watching and listening with our eyes, ears, hands, feet, and voices.
Share with students that it is also important to help others when they need it. Share, "When I am writing my story, I will ask you for help." Ask, "Will you help me if I need help and ask for it?" Ask the class how a student should show the teacher that they'd like to help.
Ask, "Should they jump up and down?" Ask, "Should they shout out?" Ask, "Should they make lots of odd noises?" Etc.
Remind students that helping is important, but we must always make sure that we are helping appropriately. Encourage students to listen carefully for times that help is needed as you write a journal entry. Take pictures of students helping [during the teacher writing/modeling]. Create an ANCHOR CHART for "Writer's Workshop" routine, and add information and a picture about the day's lesson.
by Janovitz

Jessica Meacham www.jmeacham.com 15
Writing Partners
Mini Lessons for Teaching how to utilize Writing Partnerships
Mini Lessons Resources
1
We Sit With our Writing Buddies During Writer's Workshop Review the anchor chart that has been started.
Discuss the importance of sitting at the carpet.
Discuss the importance of watching and listening with our eyes, ears, hands, feet, and voices.
Discuss the importance of helping other writers when they need help.
Read a chapter from Cowgirl Kate and Cocoa: Partners by E. Silverman. {may read a different book about partners} After reading the book, facilitate a discussion about how Cowgirl Kate and Cocoa helped one another. Lead students to the understanding that partnerships are beneficial - we need partnerships. Throughout the week, continue reading from the book Cowgirl Kate and Cocoa: Partners. Ask students how having a writing partner can be helpful to them. Discuss good ways of helping and improper ways of helping. Share with students that during Writer's Workshop, they will be sitting next to a writing buddy [partner]. Share that writing buddies help one another in good ways. Share that if help is needed, students should ask their writing buddy for help. Ask, "What are some ways we need help during Writer's Workshop?" {crayon color, spelling, pencil, mini office} Ask, "If your writing buddy doesn't know how to help you, or can't, what could you do next?"
• ask a teacher • ask a nearby neighbor [stay in seat] • ask the teacher
Encourage students to be your writing buddy while you write a journal entry. Take pictures of students being writing buddies [during independent work time]. Create an ANCHOR CHART for "Writer's Workshop" routine, and add information and a picture about the day's lesson.
by Erica Silverman

Jessica Meacham www.jmeacham.com 16
Writing the Date on our Work
Mini Lessons for Teaching how to Date our Work
Mini Lessons Resources
1 We Add the Code Date to our Stories Review the ANCHOR CHART that has been started.
Discuss the importance of sitting at the carpet. Discuss the importance of watching and listening with our eyes, ears, hands, feet, and voices. Discuss the importance of helping other writers when they need help. Discuss the importance of sitting with and having writing buddies/partners.
Read Pepper's Journal: A Kitten's First Year by S. Murphy. {may read a different book that features "the day's date"} After reading the book, facilitate a discussion about why Lisa wrote the date for every time she wrote about Pepper. Share with students that it is important to add the day's date to our writing. Ask students for reasons for why this is important. Write the day's date [using the format you prefer students to write it in] on the board. Tell students that this is the date for today. Tell students that we call this the "code" date. Share that later on in the year, we can read the date to determine what day it was that we wrote the story. Model how to add the code date to the top of a story. Encourage students to add the code date to the top of their stories every single day. Take pictures of students being writing the code date [during independent work time]. Create an ANCHOR CHART for "Writer's Workshop" routine, and add information and a picture about the day's lesson.
by Stuart
Murphy

Jessica Meacham www.jmeacham.com 17
Not so Noisy!
Mini Lessons for Teaching about Appropriate Noise Levels during Writer's Workshop
Mini Lessons Resources
1 How to Handle Noisy Neighbors
Gather students around the carpet. Say, "I've been noticing something about our writing time lately, and I think that today's book will help us a lot!" Say, "As I read this book, try to think about what problem we are having during Writer's Workshop time." Say, "If you think you know what the problem is, keep the idea in your head until after we finish the book." Read Too Much Noise by Ann McGovern. Facilitate discussion about the book - -
• who were the characters • what was the problem • what was the solution
Ask, "Does anyone know why I choose this book to read today? What problem are we having during writing time?" Say, "Yes, it sometimes gets too noisy during Writer's Workshop time." Say, "You know, this book reminds me about Writer's Workshop." Create a simple T-Chart on the board with the headings - - loud and soft Say, "Let's create a T-Chart of noises that we make during writing time. We will then decide if it is a soft or loud noise." When finished, discuss as appropriate...
• why are the loud noises loud • why are the soft noises soft • should we make loud noises • should we make soft noises • how can we make loud noises soft
Ask, "What kind of noises should be made during Writer's Workshop?" Say, "Yes, we should only make soft noises." Ask, "Why is it important to make soft noises during writing time?" Allow time for discussion (brief). Come to the conclusion that it is appropriate to talk during Writer's Workshop, but talking should be kept to a whisper. Say, "When you are writing today, think about how you can make soft noises." Dismiss for Writer's Workshop.
Too Much
Noise
by Ann
McGovern
Jessica Meacham www.jmeacham.com 18
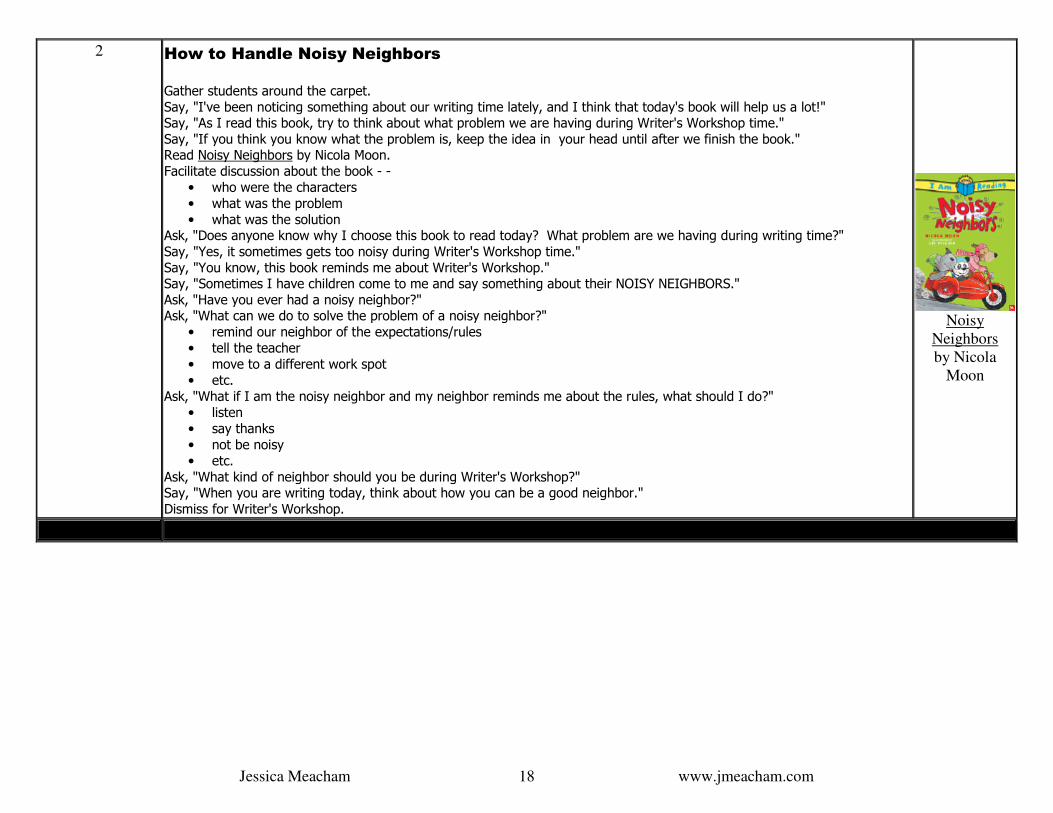
2 How to Handle Noisy Neighbors
Gather students around the carpet. Say, "I've been noticing something about our writing time lately, and I think that today's book will help us a lot!" Say, "As I read this book, try to think about what problem we are having during Writer's Workshop time." Say, "If you think you know what the problem is, keep the idea in your head until after we finish the book." Read Noisy Neighbors by Nicola Moon. Facilitate discussion about the book - -
• who were the characters • what was the problem • what was the solution
Ask, "Does anyone know why I choose this book to read today? What problem are we having during writing time?" Say, "Yes, it sometimes gets too noisy during Writer's Workshop time." Say, "You know, this book reminds me about Writer's Workshop." Say, "Sometimes I have children come to me and say something about their NOISY NEIGHBORS." Ask, "Have you ever had a noisy neighbor?" Ask, "What can we do to solve the problem of a noisy neighbor?"
• remind our neighbor of the expectations/rules • tell the teacher • move to a different work spot • etc.
Ask, "What if I am the noisy neighbor and my neighbor reminds me about the rules, what should I do?" • listen • say thanks • not be noisy • etc.
Ask, "What kind of neighbor should you be during Writer's Workshop?" Say, "When you are writing today, think about how you can be a good neighbor." Dismiss for Writer's Workshop.
Noisy
Neighbors
by Nicola
Moon

Jessica Meacham www.jmeacham.com 19
Everyone Has a Story
Mini Lessons for Encouraging Students to "Find their Own Stories" Within
Mini Lessons Resources
1 We Love Stories
Gather students around the carpet. Ask, "Has your mother or father ever told you a story?" Ask, "Have you ever told someone else a story?" Say, "Today we will read a book about a mother who tells her little girl stories about when she was young." Read Tell Me a Story, Mama by Angela Johnson. Facilitate discussion...
• what stories did the mother tell • did the little girl want to hear stories • why did the little girl want to hear stories • did the mother enjoy sharing her stories
Say, "We all have stories. Every day we have stories that we can share." Say, "Maybe some of you even share stories about your school day when you get home." Ask, "What kinds of stories might you be able to share with us, your friends, your families, etc?"
• sports game • school day • birthday party • vacation • car ride • day at the park • day at the beach • new pet • new brother or sister
Say, "Yes! All of those are possible stories that you could share." Say, "Just like the little girl in this book, who loved to hear stories, we love to hear stories." Say, "Just like the mother in this book, who loved to tell stories, we love to tell stories." Say, "I KNOW you love to tell stories because most of you come into the classroom in the morning ready to tell me a story!" Say, "And I enjoy listening to those stories!" Come to the conclusion that - -
• we all have stories to share • we all enjoy sharing our stories with our friends and family
Dismiss for Writer's Workshop.
Tell Me a
Story, Mama
by Angela
Johnson

Jessica Meacham www.jmeacham.com 20
What is Near and Dear to your Heart
Mini Lessons for Encouraging Students to Identify Topics Near and Dear to their Very Own Hearts
Mini Lessons Resources
1 What do you love, like?
Gather students around the carpet. Ask, "Class, what is a treasure?" Allow time for brief discussion...
• something pirates bury • something that you find with a map • something that is buried • something that is valuable • something that people look for
Say, "Today's book is about a treasure." Read The Treasure by Uri Shulevitz. Discuss - -
• who was looking for a treasure • where did he look • what did he learn about the treasure • where did he find the treasure
Bring a heart box to the carpet area - - that contains something "near and dear" to your heart. Say, "Class, I have a heart box here, and inside is something that I treasure very much." Say, "Inside this heart box, is something that is very "near and dear" to my heart - - [hold hand over heart]." Ask, What does it mean when I say...
• 'near and dear to my heart' • 'something that I treasure'
Say, "Before you go home today, I will give you a special heart bag." Say, "I want you to bring it home and find something to put into the bag. Say, "It should be something that you treasure, something that is near and dear to your heart." Say, "I'm going to write about my treasure tomorrow, and you will write about your treasure tomorrow." [hold up heart box] Say, "Today, I'd like for you to try to write about something that is 'near and dear' to your own heart." Dismiss for Writer's Workshop.
The Treasure
by Uri Shulevitz

Jessica Meacham www.jmeacham.com 21
Read Aloud Resources about Heart Treasures:
Simon Finds a Treasure
by Gilles Tibo
Treasures of the Heart
by Alice Ann Miller
Small Treasures
by Akimi Gibson
Our National Treasures
by Kate Torpie
What a Treasure
by Jane Hillenbrand
2 What do you love, like?
Gather students around the carpet. Ask, What does it mean when I say...
• 'near and dear to my heart' • 'something that I treasure'
Say, "I'm going to write about my treasure today, and you will write about your treasure too." [hold up heart box] Open the heart box to reveal the treasure. Briefly share why the item is 'near and dear' to your heart - - why you treasure it. Quickly write about your treasure. Say, "Today, I'd like for you to try to write about what is 'near and dear' to your own heart." Say, "You may use what you brought in your heart bag." Dismiss for Writer's Workshop.
1
Jessica Meacham www.jmeacham.com 22
Telling Stories Using Oral Language
Mini Lessons for Learning about Oral Language Storytelling
Mini Lessons Resources
1 We Tell Stories With our Words
Gather the class at the carpet area. Say, "Today I'd like to talk about telling stories." Ask, "Do any of you like to tell stories to your parents, family, and/or friends?" Say, "I like to tell stories, too." Say, "One of my favorite stories to tell is about the time that I learned how to drive a car." Briefly share the story with the class. Ask,
• Who did I tell my story to? • How did I tell my story? - {using my mouth/words} • What did I do to tell my story? - {went in my head to remember the story}
Ask, "What kinds of stories do you like to share?" Briefly allow for a few students to share topics of stories (not the actual stories themselves...!). Come to the conclusion that people tell stories using their words/mouths [oral language]. Dismiss for Writer's Workshop.
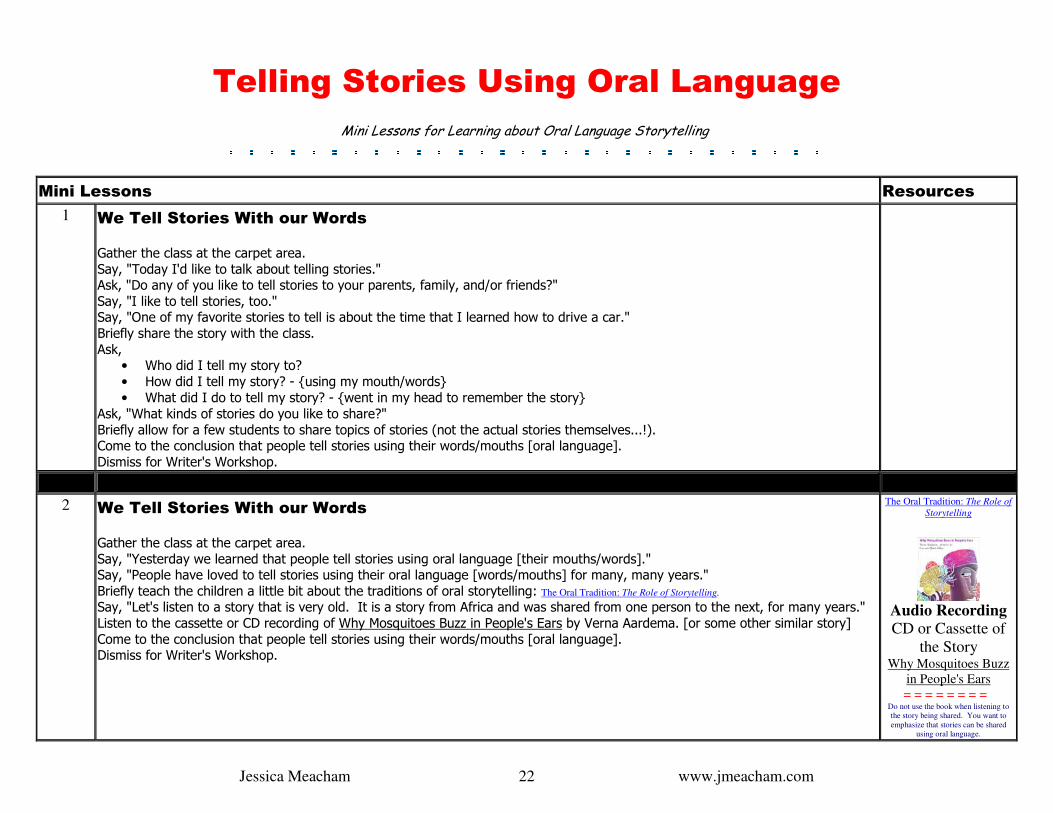
2 We Tell Stories With our Words
Gather the class at the carpet area. Say, "Yesterday we learned that people tell stories using oral language [their mouths/words]." Say, "People have loved to tell stories using their oral language [words/mouths] for many, many years." Briefly teach the children a little bit about the traditions of oral storytelling: The Oral Tradition: The Role of Storytelling. Say, "Let's listen to a story that is very old. It is a story from Africa and was shared from one person to the next, for many years." Listen to the cassette or CD recording of Why Mosquitoes Buzz in People's Ears by Verna Aardema. [or some other similar story] Come to the conclusion that people tell stories using their words/mouths [oral language]. Dismiss for Writer's Workshop.
The Oral Tradition: The Role of
Storytelling
Audio Recording CD or Cassette of
the Story Why Mosquitoes Buzz
in People's Ears = = = = = = = =
Do not use the book when listening to
the story being shared. You want to
emphasize that stories can be shared
using oral language.

Jessica Meacham www.jmeacham.com 23
3 We Tell Stories With our Words
Gather the class at the carpet area. Briefly review the facts...
• stories can be told using our oral language (words) • stories have been told for many, many years (oral story telling) • stories that are told orally are told from one person to another • stories can be passed on from one person to another • we can tell stories using our oral language • we enjoy telling stories using our oral language
Say, "I have several a few books about two brothers named Julian and Huey." Say, "Julian and Huey love to tell stories." Say, "Sometimes the stories they tell are true, and sometimes they are not true." Say, "I'm going to start reading one of the books, but because it is a chapter book, we'll have to finish it later." Start reading from The Stories Julian Tells Ann Cameron. Read one chapter. Ask the class if the story that Julian told was true or not true. Remind the class that we can tell stories just like Julian did. Discuss the book as appropriate. Come to the conclusion that people tell stories using their words/mouths [oral language]. Dismiss for Writer's Workshop. NOTE - - These books are great read aloud books, and can be used during the next few days of Writer's Workshop to continue reinforcing
that people tell stories using oral language, or they may be read during chapter book read aloud time.

Jessica Meacham www.jmeacham.com 24
Telling Stories Using Pictures
Mini Lessons for Learning about Telling Stories using Pictures
Mini Lessons Resources
1 Pictures Tell Stories
Gather around the carpet. Say, "We've been learning about the different ways that we can tell stories. Say, "We've learned that everyone has stories to share and that they enjoy sharing their stories." Say, "We've talked about telling stories orally [with our voices]." Say, "Today, we are going to learn about a new way to tells stories - - using pictures!" Ask, "Have you ever picked up a book and noticed that on the inside, there wasn't any writing - - there were pictures only?" Discuss experiences with wordless books, as appropriate. Say, "These books are called Wordless Books. That means that they have pictures only, and don't have any words in them." Ask, "How are we supposed to read Wordless Books?" Come to the conclusion that Wordless Books are read
• by looking at the pictures carefully • by making up the story in your head based on what the pictures are showing
Say, "Let's practice doing those things, right now, with this Wordless Book. Read Pancakes for Breakfast by Tomie dePaola [or any other wordless book - - preferably a BIG book version]. Discuss...
• how we knew what the story was about • how the author shared the story using pictures • how detailed the illustrations/pictures were
Say, "Just like __________________, we too can share our stories using pictures." Say, "Today, when you are writing, use pictures to share your story!" Dismiss for Writer's Workshop.
Pancakes for
Breakfast
by Tomie dePaola

Jessica Meacham www.jmeacham.com 25
2 Pictures Tell Stories
Gather around the carpet. Say, "We've been learning about the different ways that we can tell stories.
Say, "We've learned that everyone has stories to share and that they enjoy sharing their stories." Say, "We've talked about telling stories orally [with our voices]." Say, "Yesterday we talked about a new way to tells stories - - using pictures!" Ask, "Have any of you ever been to a museum?" Ask, "If I we were to go to you homes right now, would we find art work/pictures on the walls of your home?" Ask, "What kinds of pictures/artwork did you see at the museum, or have in your homes?" Discuss experiences as appropriate. Say, "I have a book about a very famous artist whose name is Norman Rockwell." Say, "Many people enjoy looking at his pictures that he painted because even though he didn't use words, he is still telling a story." Say, "Let's look at this book about his artwork and try to decide what kinds of stories he told." Browse through Norman Rockwell: Storyteller with a Brush by Beverly Gherman. Discuss...
• how we knew what the story was about • how the author shared the story using pictures • how detailed the illustrations/pictures were
Say, "Just like Norman Rockwell, we too can share our stories using pictures." Say, "Today, when you are writing, use pictures to share your story!" Dismiss for Writer's Workshop.
Norman Rockwell: Storyteller
with a Brush by Beverley Gherman
Jessica Meacham www.jmeacham.com 26
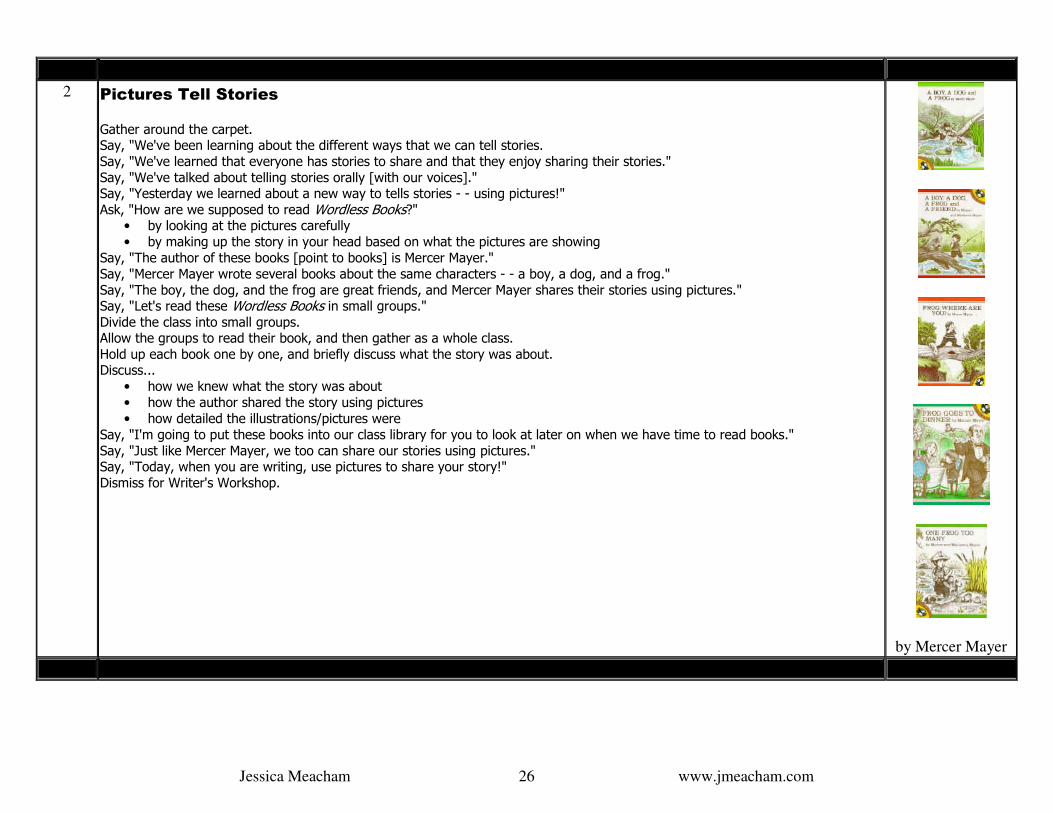
2 Pictures Tell Stories
Gather around the carpet. Say, "We've been learning about the different ways that we can tell stories.
Say, "We've learned that everyone has stories to share and that they enjoy sharing their stories." Say, "We've talked about telling stories orally [with our voices]." Say, "Yesterday we learned about a new way to tells stories - - using pictures!" Ask, "How are we supposed to read Wordless Books?"
• by looking at the pictures carefully • by making up the story in your head based on what the pictures are showing
Say, "The author of these books [point to books] is Mercer Mayer." Say, "Mercer Mayer wrote several books about the same characters - - a boy, a dog, and a frog." Say, "The boy, the dog, and the frog are great friends, and Mercer Mayer shares their stories using pictures." Say, "Let's read these Wordless Books in small groups." Divide the class into small groups. Allow the groups to read their book, and then gather as a whole class. Hold up each book one by one, and briefly discuss what the story was about. Discuss...
• how we knew what the story was about • how the author shared the story using pictures • how detailed the illustrations/pictures were
Say, "I'm going to put these books into our class library for you to look at later on when we have time to read books." Say, "Just like Mercer Mayer, we too can share our stories using pictures." Say, "Today, when you are writing, use pictures to share your story!" Dismiss for Writer's Workshop.
by Mercer Mayer

Jessica Meacham www.jmeacham.com 27
50 Wordless Picture Books
Abstract Alphabet (Chronicle, 2001) Illus. by Paul Cox. ISBN 0-8118-2940-5
Anno's Journey (Philomel, 1978) Illus. by Anno. ISBN 0-399-20762-7
Anno's Spain (Philomel, 2004) Illus. by Anno. ISBN 0-399-24238-4
The Boy, The Bear, The Baron, The Bard (Roaring Brook, 2004) Illus. by Gregory Rogers. ISBN 1596430095
Changes, Changes (Macmillan, 1971) Illus. by Pat Hutchins. ISBN 0-02-745870-9
Clementina's Cactus (Viking, 1999) Illus. by Ezra Jack Keats. ISBN 0-670-88545-2
Clown (Holt, 1996) Illus. by Quentin Blake. ISBN 0-805-04399-3
A Day, A Dog (Front Street, 2000) Illus. by Gabrielle Vincent. ISBN 1-886910-51-0
Deep in the Forest (Dutton, 1976) Illus. by Brinton Turkle. ISBN 0-525-28617-9
Dinosaur! (HarperCollins, 2000) Illus. by Peter Sís. ISBN 0-688-17049-8
Do You Want to be My Friend? (Philomel, 1988) Illus. by Eric Carle. ISBN 0-399-21598-0
Follow Carl! (Farrar, Straus & Giroux, 1998) Illus. by Alexandra Day. ISBN 0-374-34380-2
The Forty-Six Little Men (HarperCollins, 1991) Illus. by Jan Mogensen. ISBN 0-688-09283-7
Four Hungry Kittens (Dial, 1996) Illus. by Emily Arnold McCully. ISBN 0-8037-2505-1
Free Fall (Lothrop, Lee & Shepard Books, 1988) Illus. by David Wiesner. ISBN 0-688-05583-4
Freight Train (Morrow, 1978) Illus. by Donald Crews. ISBN 0-688-80165-X
Good Dog, Carl (Simon & Schuster, 1985) Illus. by Alexandra Day. ISBN 0-671-75204-9
Good Night, Garden Gnome (Dial, 2001) Illus. by Jamichael Henterly. ISBN 0-8037-2531-0
The Grey Lady and the Strawberry Snatcher (Simon & Schuster, 1980) Illus. by Molly Bang. ISBN 0-02-708140-0
Home (Greenwillow, 2004) Illus. by Jeannie Baker ISBN 0-06-623935-4
Island Dog (Two Dog Press, 1999) Illus. by Rebecca Goodale. ISBN 1-89109-003-8
Little Star (Hyperion, 2003) Illus. by Antonin Louchard. ISBN 0-7868-1939-1
Magpie Magic: A Tale of Colorful Mischief (Putnam, 1999) Illus. by April Wilson. ISBN 0-8037-2354-7
Midnight Adventures of Kelly, Dot, and Esmeralda (McElderry, 1999) Illus. by John S. Goodall. ISBN 0-689-82564-1
Mouse Letters: A Very First Alphabet Book (Houghton Mifflin, 1999) Illus. by Jim Arnosky. ISBN 0-395-55386-5
Mouse Numbers: A Very First Counting Book (Houghton Mifflin, 1999) Illus. by Jim Arnosky. ISBN 0-395-55006-8
Mysteries of Harris Burdick (Houghton Mifflin, 1984) Illus. by Chris Van Allsburg
An Ocean World (HarperCollins, 1992) Illus. by Peter Sis. ISBN 0-688-09067-2
Oh! (Abrams, 2000) Illus. by Josse Goffin. ISBN 0-810-93660-7
Pancakes for Breakfast (Harcourt Brace, 1990) Illus. by Tomie de Paola. ISBN 0-15-259455-8

Jessica Meacham www.jmeacham.com 28
Peep! (Peachtree, 2003) Illus. by Kevin Luthardt. ISBN 1-56145-046-4
Rain (Doubleday, 1982) Illus. by Peter Spier. ISBN 0-385-15484-4
Re-Zoom (Viking, 1995) Illus. by Istvan Banyai. ISBN 0-670-86392-0
The Red Book (Houghton Mifflin, 2004) Conceived and illus. by Barbara Lehman. ISBN 0-618-42858-5
The Ring (HarperCollins, 1996) Illus. by Lisa Maizlish. ISBN 0-688-14217-6
Sector 7 (Houghton Mifflin, 1999) Illus. by David Wiesner. ISBN 0-395-74656-6
Silent Night (Antheneum, 2001) Illus. by Sandy Turner. ISBN 0-689-84156-6
Sidewalk Circus (Candlewick Press, 2004) Presented by Paul Fleischman and Kevin Hawkes. ISBN 0-7636-1107-7
A Small Miracle (Random House, 1997) Illus. by Peter Collington. ISBN 0-679-88725-3
The Snowman (Random House, 1986) Illus. by Raymond Briggs. ISBN 0-394-93973-5
Tabby: A Story in Pictures (HarperCollins, 1995) Illus. by Aliki. ISBN 0-06-024915-3
Time Flies (Random House, 1994) Illus. by Eric Rohmann. ISBN 0-517-59598-2
The Tooth Fairy (Alfred A (Knopf, 1995) Illus. by Peter Collington. ISBN 0-679-97168-8
Tuba Lessons (Creative Editions, 1997) Illus. by Monique Felix. ISBN 0-152-01643-0
Tuesday (Clarion, 1991) Illus. by David Wiesner. ISBN 0-395-55113-7
Window (Greenwillow, 1991) Illus. by by Jeannie Baker. ISBN 0-688-08918-6
Why? (North-South, 1996)
Illus. by Nikolai Popov. ISBN 1-55858-534-6
The Yellow Balloon (Front Street, 2003) Illus. by Charlotte Dematons. ISBN 1-932425-01-2
Yellow Umbrella (Kane/Miller, 2002) Illus. by Jae-Soo Lui. ISBN 1-929132-36-0
Zoom (Viking, 1995) Illus. by Istvan Banyai. ISBN 0-670-85804-8

Jessica Meacham www.jmeacham.com 29
Telling Stories Using Written Words
Mini Lessons for Learning about Written Storytelling
Mini Lessons Resources
1 Gather students around the carpet. Say, "We've been learning about the different ways that we can tell stories.
Say, "We've learned that everyone has stories to share and that they enjoy sharing their stories." Say, "We've talked about telling stories orally." Say, "We've talked about telling stories using pictures." Say, "Today we will learn about a new way to tells stories - - using writing!" Say, "The author of this book, Dr. Seuss, wrote about being a writer." Say, "In his book, he tells us that we can all be writers, and share our stories using words." Read I Can Write! by Theo LeSieg (Dr. Seuss). Discuss as appropriate..
• what was the book about • what did we learn about being a writer • what kinds of stories can writers tell
Say, "We will be learning more about writing stories using words." Say, "Today, when you are writing, try to use pictures to share your story!" At this point, the children have not yet been introduced to utilizing environmental print to aid in writing words. Don't push them to write words unless they are ready. Stress telling stories using pictures at this point in the year. Dismiss for Writer's Workshop.
I Can Write!
by Theo LeSieg
Jessica Meacham www.jmeacham.com 30
Being Authors and Illustrators
Mini Lessons for Teaching about Authors and Illustrators
Mini Lessons Resources
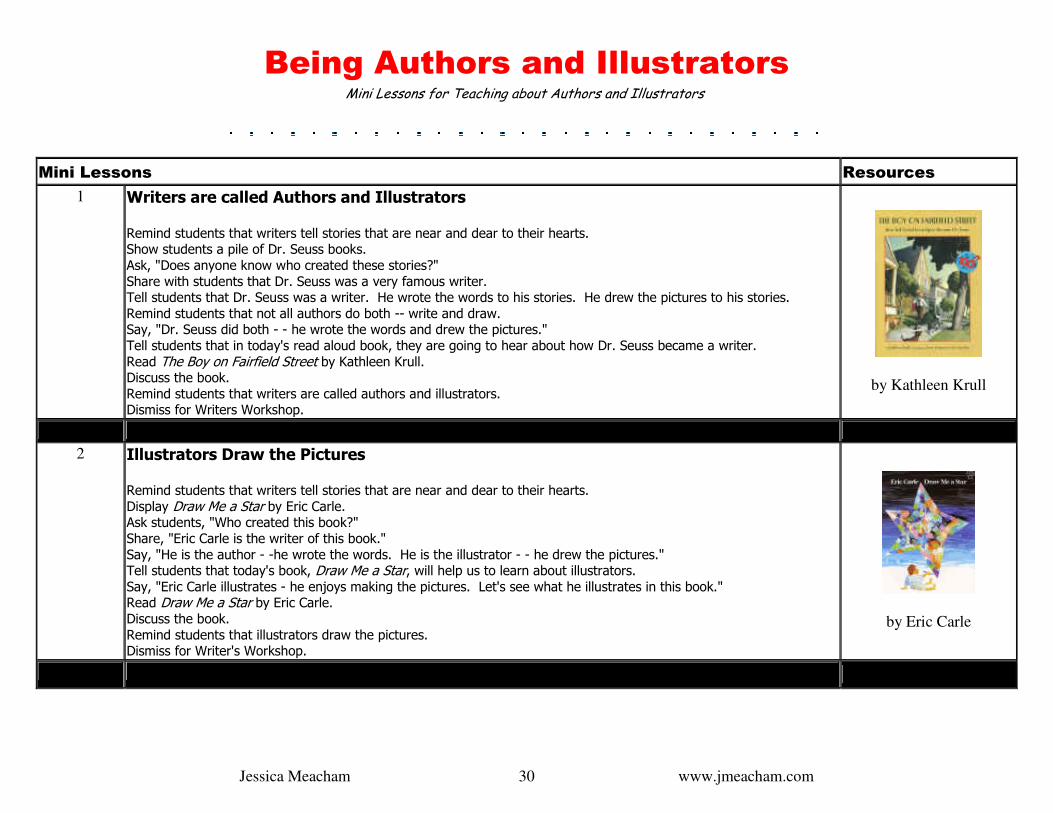
1 Writers are called Authors and Illustrators Remind students that writers tell stories that are near and dear to their hearts. Show students a pile of Dr. Seuss books. Ask, "Does anyone know who created these stories?" Share with students that Dr. Seuss was a very famous writer. Tell students that Dr. Seuss was a writer. He wrote the words to his stories. He drew the pictures to his stories. Remind students that not all authors do both -- write and draw. Say, "Dr. Seuss did both - - he wrote the words and drew the pictures." Tell students that in today's read aloud book, they are going to hear about how Dr. Seuss became a writer. Read The Boy on Fairfield Street by Kathleen Krull. Discuss the book. Remind students that writers are called authors and illustrators. Dismiss for Writers Workshop.
by Kathleen Krull
2 Illustrators Draw the Pictures Remind students that writers tell stories that are near and dear to their hearts. Display Draw Me a Star by Eric Carle. Ask students, "Who created this book?" Share, "Eric Carle is the writer of this book." Say, "He is the author - -he wrote the words. He is the illustrator - - he drew the pictures." Tell students that today's book, Draw Me a Star, will help us to learn about illustrators. Say, "Eric Carle illustrates - he enjoys making the pictures. Let's see what he illustrates in this book." Read Draw Me a Star by Eric Carle. Discuss the book. Remind students that illustrators draw the pictures. Dismiss for Writer's Workshop.
by Eric Carle
Jessica Meacham www.jmeacham.com 31
3 You are an Illustrator Review the ANCHOR CHART that has been started.
Discuss the importance of sitting at the carpet. Discuss the importance of watching and listening with our eyes, ears, hands, feet, and voices. Discuss the importance of helping other writers when they need help. Discuss the importance of sitting with and having writing buddies/partners. Discuss the importance of writing the code date on our stories.
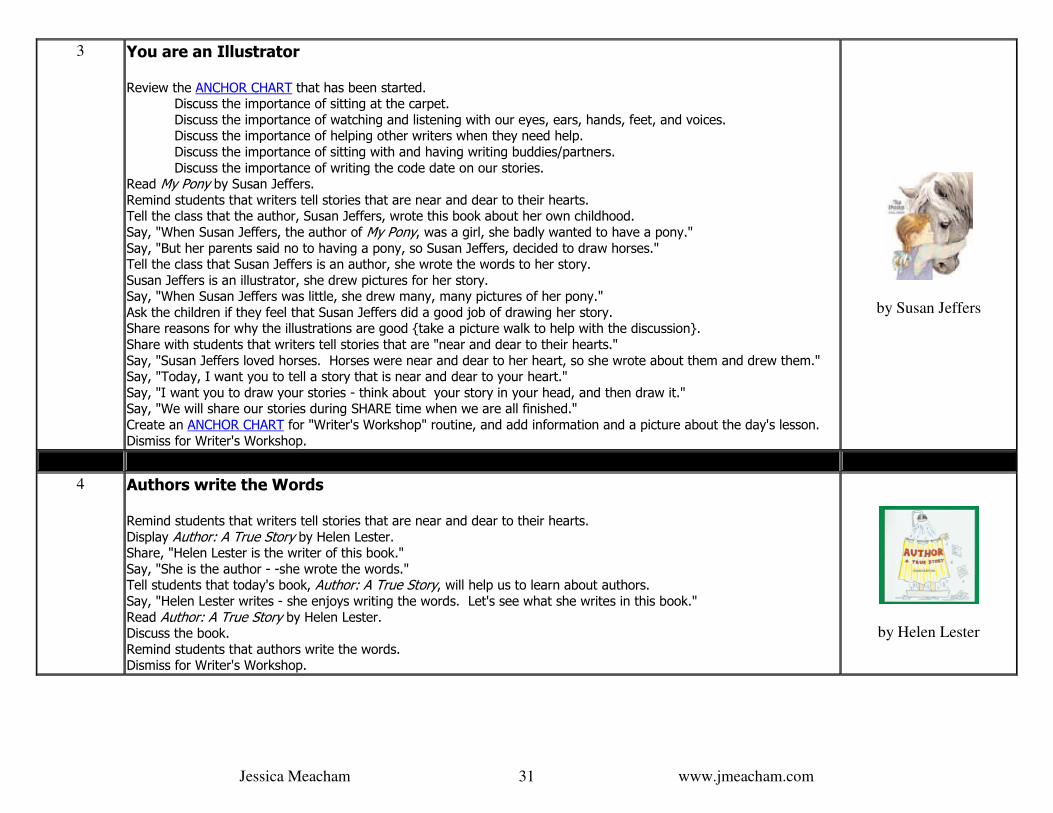
Read My Pony by Susan Jeffers. Remind students that writers tell stories that are near and dear to their hearts. Tell the class that the author, Susan Jeffers, wrote this book about her own childhood. Say, "When Susan Jeffers, the author of My Pony, was a girl, she badly wanted to have a pony." Say, "But her parents said no to having a pony, so Susan Jeffers, decided to draw horses." Tell the class that Susan Jeffers is an author, she wrote the words to her story. Susan Jeffers is an illustrator, she drew pictures for her story. Say, "When Susan Jeffers was little, she drew many, many pictures of her pony." Ask the children if they feel that Susan Jeffers did a good job of drawing her story. Share reasons for why the illustrations are good {take a picture walk to help with the discussion}. Share with students that writers tell stories that are "near and dear to their hearts." Say, "Susan Jeffers loved horses. Horses were near and dear to her heart, so she wrote about them and drew them." Say, "Today, I want you to tell a story that is near and dear to your heart." Say, "I want you to draw your stories - think about your story in your head, and then draw it." Say, "We will share our stories during SHARE time when we are all finished." Create an ANCHOR CHART for "Writer's Workshop" routine, and add information and a picture about the day's lesson. Dismiss for Writer's Workshop.
by Susan Jeffers
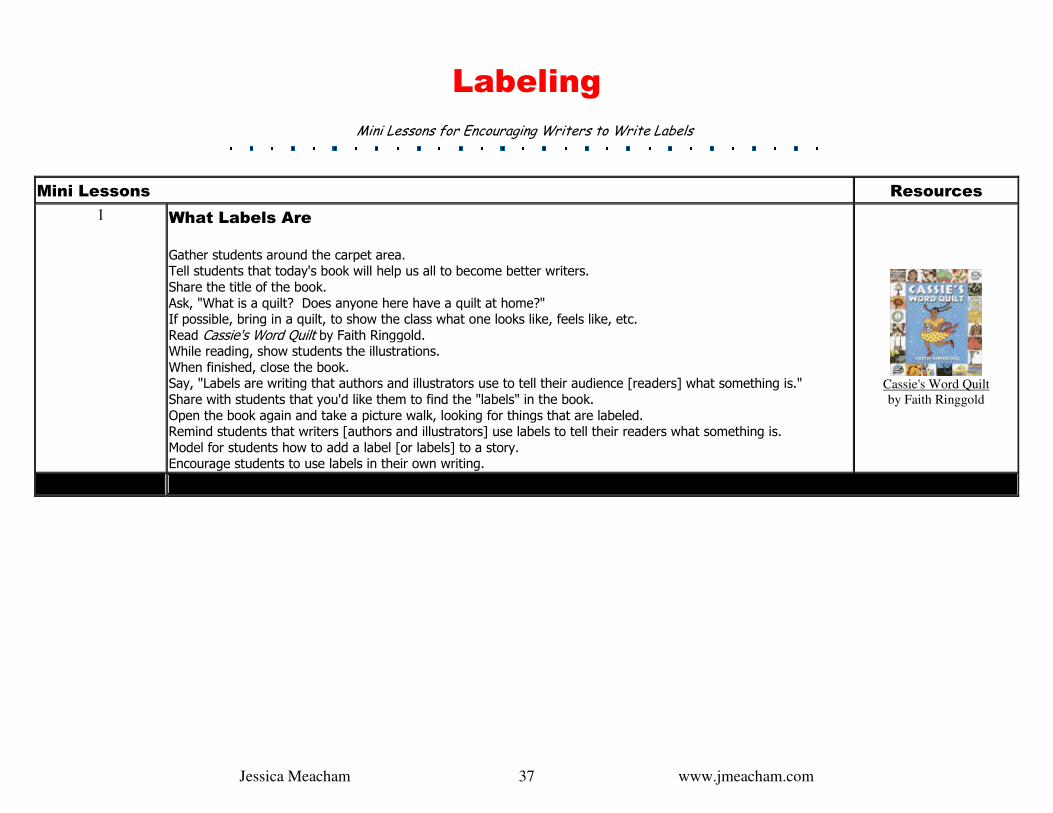
4 Authors write the Words Remind students that writers tell stories that are near and dear to their hearts. Display Author: A True Story by Helen Lester. Share, "Helen Lester is the writer of this book." Say, "She is the author - -she wrote the words." Tell students that today's book, Author: A True Story, will help us to learn about authors. Say, "Helen Lester writes - she enjoys writing the words. Let's see what she writes in this book." Read Author: A True Story by Helen Lester. Discuss the book. Remind students that authors write the words. Dismiss for Writer's Workshop.
by Helen Lester

Jessica Meacham www.jmeacham.com 32
5 You are an Author Remind students that writers tell stories that are near and dear to their hearts. Say, "You have stories that are near and dear to your hearts, and I've enjoyed listening to them." Share that today we are all going to be authors, just like Helen Lester and we are going to write. Share that today we are going to tell a story that is near and dear to our hearts by writing about it. Model how to tell a story by illustrating it [first]. Think out loud as you illustrate. When finished, share the story with the class. Say, "This story is near and dear to my heart. I'm glad I was able to share it with you." Say, "But - -I want to also write about my story. Not just illustrate it. I'm going to use words, too." Say, "I will help you write the words. Soon you'll be writing your own words, but for today, I'll help." Say, "I've already illustrated my story, now I'm going to tell "the teacher" what to write." Pretend to be the teacher and student - - switching roles:
• I pretend to put on student/teacher suits by swooping my hands from my head to my shoes. • This gives students the idea that you are role playing student/teacher
When role playing: 1. student: I'm done, and I'm ready to write my story
2. teacher: Great, tell me your story
3. student: {shares story}
4. teacher: {scribes story} Remind the class that they can also write stories that are near and dear to their hearts. Encourage students to think of a story, and to illustrate it and then ask for help for the writing part. Dismiss for Writer's Workshop.
4

Jessica Meacham www.jmeacham.com 33
Other Books about being an AUTHOR and/or ILLUSTRATOR:
by Patrick MacDonnell
by Peter Reynolds
by Peter Reynolds
by Roni Schotter
by Joan Lowry Nixon
by Eileen Christelow
by Eileen Christelow
by Janet Stevens
by Kate Duke
by Anthony Browne
Point of View
by Loreen Leedy
by Janet S. Wong
by Josephine Nobisso
by Lee Hopkins
by ALIKI
by Regina Moss
by Diane Walkstein
by Kathy Mallat
by Marc Brown
1

Jessica Meacham www.jmeacham.com 34
Writer's Workshop Conferences
Mini Lessons for Teaching the Writer's Workshop Conference Routine
Mini Lessons Resources
1 We Talk with Mrs. Meacham Review the ANCHOR CHART that has been started. Discuss the importance of sitting at the carpet. Discuss the importance of watching and listening with our eyes, ears, hands, feet, and voices. Discuss the importance of helping other writers when they need help. Discuss the importance of sitting with and having writing buddies/partners. Discuss the importance of writing the code date on our stories. Discuss the importance of illustrating our stories. Share with students how proud you are of their stories. Say, "I've enjoyed seeing your stories. Your illustrations are getting better and better each day." Say, "Today I'd like to read a book to you about a boy. In this book, the boy has a problem. He likes the teacher." Say, "He finds out that his classmates like the teacher too, and need her help a lot, just like he does." Say, "The book will help us, and after we read the book, I'll tell you how it will help us become better writers." Read It's Hard to Share My Teacher by Joan Prestine. After reading discuss...
□ what was the boy's problem
□ what did he do to solve the problem
□ did his solution work
□ why is it important to take turns □ why is it important to "share" the teacher
Say, "By taking turns [or sharing the teacher], Writer's Workshop will go a lot more smoothly!" Say, "Let's practice taking turns and sharing the teacher(s) today." Ask, "How will we take turns and share the teacher(s)?"
□ will we follow the teacher like we are their shadow
□ will we tug at their shirt sleeves □ will we poke them like our finger is a stick □ will we play with their hair □ will we hug them
□ will we run up to them and say "tag - you're it!"
Determine as a class how students will let you know they need help. Determine as a class what to do when you are busy helping another classmate. {continue illustrating, begin another} Say, "By taking turns [or sharing the teacher], Writer's Workshop will go a lot more smoothly!" Say, "Let's practice taking turns and sharing the teacher(s) today." Create an ANCHOR CHART for "Writer's Workshop" routine, and add information and a picture about the day's lesson. Dismiss for Writer's Workshop.
by Joan Prestine
by Meiners
by Kevin Henkes
by Leo Lionni
by M. Willis

Jessica Meacham www.jmeacham.com 35
Utilizing the ABC Chart
Mini Lessons for Encouraging Students to Utilize the ABC Chart for Letter ID and Letter Formation
Mini Lessons Resources
1 Knowing the Letters of the Alphabet can Help us When we Write Gather students around the carpet. Say, "Today we are going to read a story about a mystery." Ask, "Class, does anyone know what at 'mystery' is?" Allow for brief speculation. Say, "Today's mystery is about the letters of the alphabet." Ask, "What do you know about letters boys and girls?" Note - - at this point in the year, students will have varied experiences with letters and letter knowledge. Allow for a few students to share their knowledge of letters. Say, "It will be very important for us to learn about letters this year as we become better readers and writers." Say, "Let's read the book to find out what the mystery is about." Read alphabet mystery by Audrey Wood. Discuss the book:
• which letter disappeared
• who went searching/looking for him
• what did the letters learn [that they were useful]
• how/why are letters useful
• what do we use letters for
Ask, "Boys and girls, if you look around the room, you might find letters.’ Ask, "Can you tell me where you find letters in our room?" Allow for answers. Be sure that the ABC chart is mentioned among the possible answers. Draw attention to the ABC chart. Share with students it's name and purpose...
• this is the ABC chart • we have an ABC chart in our room to help us with letter names, sounds, and formation • we will use the ABC chart when we are writing
Hold up miniature/small ABC charts that students will use during Writer's Workshop. Say, "In our book the letters were scattered all over the place, and one letter was very hard to find." Say, "We won't have to worry about not being able to find a letter when we need to, because they'll be on the chart." Come to the conclusion that letters can be found in many different places. Come to the conclusion that we use ABC charts when we write. Dismiss for Writer's Workshop.

Jessica Meacham www.jmeacham.com 36
2 Knowing the Letters of the Alphabet can Help us When we Write Gather students around the carpet. Say, "Yesterday we learned about ABC charts." Ask, "What is an ABC chart? Why do we have one? What do we use it for?" Allow for brief discussion. Hold up miniature/small ABC charts that students will use during Writer's Workshop. Say, "When you write, you can use the ABC chart on our wall or you may use one of these smaller ABC charts." NOTE - -the children should be familiar with the ABC chart - -as they 'chant' the ABC Chant every morning. Say, "The ABC chart is a tool. It 'holds' or 'keeps' all the letters in one place for when we need to use them." Say, "In yesterday's book the letters were scattered all over the place, and one letter was very hard to find." Say, "We won't have to worry about not being able to find a letter when we need to, because they'll be on the chart." Illustrate a simple picture [cat]. Say, "I drew a picture of a cat for my story, because I like cats, and my cat is special to me." Say, "I want to use my ABC chart to help me write my story." Ask, "If I wanted to write the word 'cat' - - what could I do class?" NOTE - - at this point in the year, the class hasn't had exposure to adding labels to their pictures. Keep it simple! Say, "If I wanted to write 'cat', I need to think about what letter sounds I hear in the word 'cat' and write them. Demonstrate how to say the word 'cat' slowly and use the ABC chart to find the letter sound you hear - - letter "Cc." Write the letter C under the picture of your cat. NOTE - -at this point you could continue, if you wish, and spell the rest of the word. I don't. Say, "When we write stories/words, we can use an ABC chart to help us find letters." Dismiss for Writer's Workshop.
Jessica Meacham www.jmeacham.com 37
Labeling
Mini Lessons for Encouraging Writers to Write Labels
Mini Lessons Resources
1 What Labels Are
Gather students around the carpet area. Tell students that today's book will help us all to become better writers. Share the title of the book. Ask, "What is a quilt? Does anyone here have a quilt at home?" If possible, bring in a quilt, to show the class what one looks like, feels like, etc. Read Cassie's Word Quilt by Faith Ringgold. While reading, show students the illustrations. When finished, close the book. Say, "Labels are writing that authors and illustrators use to tell their audience [readers] what something is." Share with students that you'd like them to find the "labels" in the book. Open the book again and take a picture walk, looking for things that are labeled. Remind students that writers [authors and illustrators] use labels to tell their readers what something is. Model for students how to add a label [or labels] to a story. Encourage students to use labels in their own writing.
Cassie's Word Quilt by Faith Ringgold

Jessica Meacham www.jmeacham.com 38
2 Purpose of Labels
Gather students around the carpet area. Tell students that today's book will help us all to become better writers. Ask, "Yesterday we read a book that told us about labels - - what are labels?" Facilitate discussion:
• what do they look like • who uses them • what are they for • what do they tell us
Say, "Today's book also has labels in it, just like yesterday's book. It will help us to become better writers." Share the title of the book. Ask, "Have you ever eaten the alphabet? What do you suppose this book will be about?" Bring in a variety of fruits and veggies. Read Eating the Alphabet by Lois Ehlert. While reading, show students the illustrations. When finished, close the book. Say, "Labels are writing that authors and illustrators use to tell their audience [readers] what something is." Share with students that you'd like them to find the "labels" in the book. Open the book again and take a picture walk, looking for things that are labeled. Remind students that writers [authors and illustrators] use labels to tell their readers what something is. Ask, "Why was it important for Lois Ehlert, the author and illustrator of this book, to add labels to her book?" Facilitate Discussion:
• the labels told us what the name of the fruits and vegetables were • the labels helped us know what the names were, because some of us might not have known them
Remind students that writers [authors and illustrators] use labels to tell their readers what something is. Model for students how to add a label [or labels] to a story - - using the fruits and veggies you brought in. Encourage students to use labels in their own writing.
Eating the Alphabet
by Lois Ehlert

Jessica Meacham www.jmeacham.com 39
3 What Labels Look Like
Gather students around the carpet area. Tell students that today's book will help us all to become better writers. Ask, "The last two days we read books that told us about labels - - what are labels?" Facilitate discussion:
• what do they look like • who uses them • what are they for • what do they tell us
Say, "Today's book also has labels in it, just like the other books. It will help us to become better writers." Share the title of the book. Ask, "Have you ever eaten vegetable soup? Have you ever grown it?" Bring in a can of vegetable soup. Read Growing Vegetable Soup by Lois Ehlert. While reading, show students the illustrations. When finished, close the book. Say, "Labels are writing that authors and illustrators use to tell their audience [readers] what something is." Share with students that writers often make the labels look different than the words in the story. Open the book again and take a picture walk, observing how the labels look different than the text. Remind students that writers [authors and illustrators] use labels to tell their readers what something is. Ask, "Why was it important for Lois Ehlert, the author and illustrator of this book, to add labels to her book?" Facilitate Discussion. Remind students that writers [authors and illustrators] use labels to tell their readers what something is. Model for students how to add a label [or labels] to a story:
• write a simple sentence such as "I like vegetable soup." • draw a bowl of vegetable soup (or tape the label to your journal) • talk about what vegetables are in the soup (look on the label) • draw simple illustrations depicting the veggies that are in the soup • label the veggies
Encourage students to use labels in their own writing.
Growing Vegetable Soup
by Lois Ehlert

Jessica Meacham www.jmeacham.com 40
4 What We Can Label
Gather students around the carpet area. Tell students that today's book will help us all to become better writers. Ask, "We've been talking and learning about labels - - what are labels?" Facilitate discussion:
• what do they look like • who uses them • what are they for • what do they tell us
Say, "Today's book will also help us learn more about labels and how to write them." Share the title of the book. Ask, "Do you think you can help me read this book?" Read Of Colors and Things by Tana Hoban. While reading, show students the illustrations, and allow them to help read the book (missing words). Open the book again and take a picture walk, observing how adding labels will help us to read the book better. Remind students that writers [authors and illustrators] use labels to tell their readers what something is. Ask, "What labels could Tana Hoban have added to her book?" Facilitate Discussion. Say, "Lets add labels to Tana Hoban's book. We will use post it notes, so we don't make marks in the book." Remind students that writers [authors and illustrators] use labels to tell their readers what something is. Page by page, work with students to add labels to the book. Encourage students to use labels in their own writing.
Of Colors and Things
by Tana Hoban
Jessica Meacham www.jmeacham.com 41
5 What We Can Label
Gather students around the carpet area. Tell students that today's book will help us all to become better writers. Ask, "We've been talking and learning about labels - - what are labels?" Facilitate discussion:
• what do they look like • who uses them • what are they for • what do they tell us
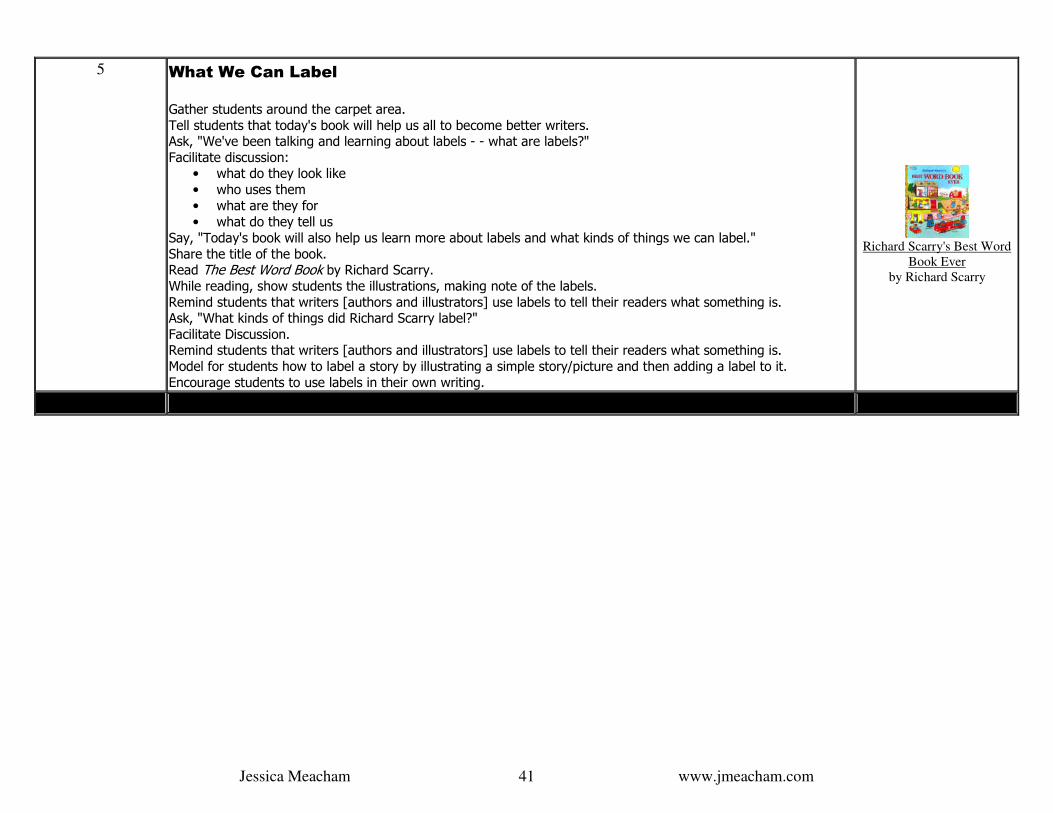
Say, "Today's book will also help us learn more about labels and what kinds of things we can label." Share the title of the book. Read The Best Word Book by Richard Scarry. While reading, show students the illustrations, making note of the labels. Remind students that writers [authors and illustrators] use labels to tell their readers what something is. Ask, "What kinds of things did Richard Scarry label?" Facilitate Discussion. Remind students that writers [authors and illustrators] use labels to tell their readers what something is. Model for students how to label a story by illustrating a simple story/picture and then adding a label to it. Encourage students to use labels in their own writing.
Richard Scarry's Best Word
Book Ever by Richard Scarry

Jessica Meacham www.jmeacham.com 42
6 What We Can Label in our Classroom
Gather students around the carpet area. Ask, "We've been talking and learning about labels - - what are labels?" Facilitate discussion:
• what do they look like • who uses them • what are they for • what do they tell us
Say, "Today we are going to work together to label our room!" Ask, "What kinds of things could we label in our room?" Facilitate Discussion. Using blank, unlined index cards (4x6), work together to label items in the classroom - - ideas to follow:
• clock • table • desk • lamp • plant • trash • recycle • computer • books • literacy corners (reading, writing, magnets, names, words, pocket chart, felt, listening, fine motor, abc) • easel • chair • calendar • overhead • rug • Mrs. Muncher • etc
Remind students that writers [authors and illustrators] use labels to tell their readers what something is. Encourage students to use labels in their own writing.
Jessica Meacham www.jmeacham.com 43
Beyond Labels
Mini Lessons for Moving Beyond Labels
Mini Lessons Resources
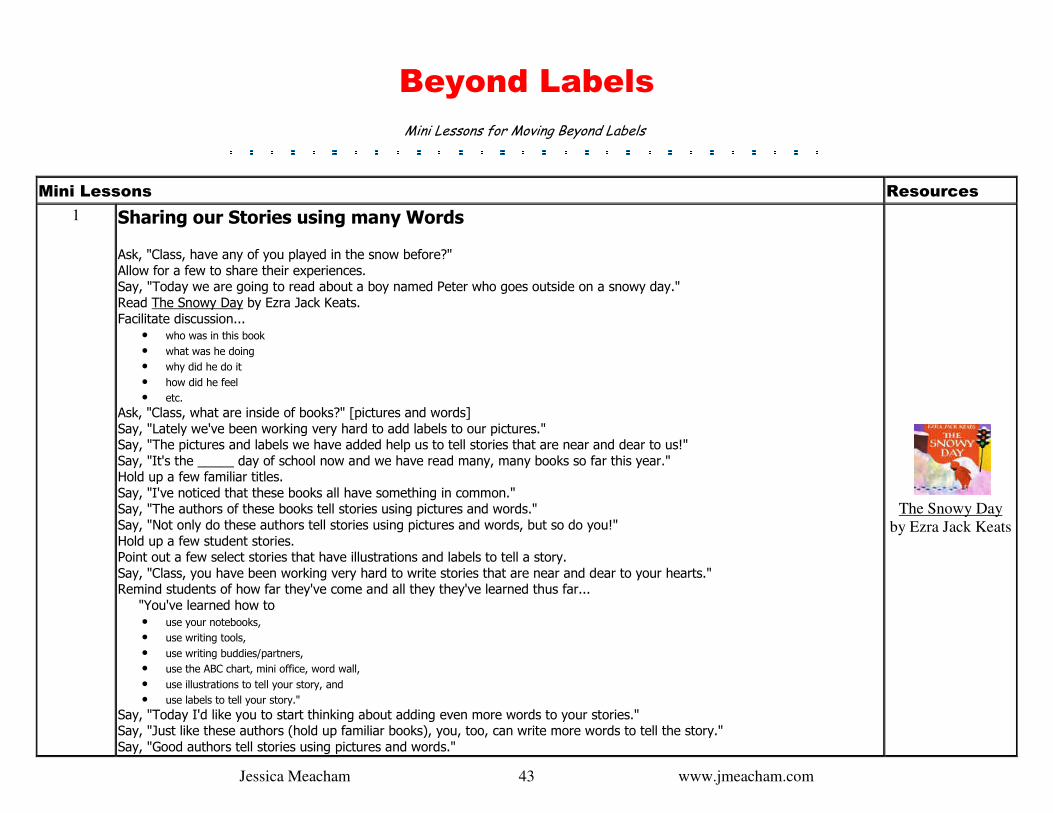
1 Sharing our Stories using many Words Ask, "Class, have any of you played in the snow before?" Allow for a few to share their experiences. Say, "Today we are going to read about a boy named Peter who goes outside on a snowy day." Read The Snowy Day by Ezra Jack Keats. Facilitate discussion...
• who was in this book
• what was he doing
• why did he do it
• how did he feel
• etc.
Ask, "Class, what are inside of books?" [pictures and words] Say, "Lately we've been working very hard to add labels to our pictures." Say, "The pictures and labels we have added help us to tell stories that are near and dear to us!" Say, "It's the _____ day of school now and we have read many, many books so far this year." Hold up a few familiar titles. Say, "I've noticed that these books all have something in common." Say, "The authors of these books tell stories using pictures and words." Say, "Not only do these authors tell stories using pictures and words, but so do you!" Hold up a few student stories. Point out a few select stories that have illustrations and labels to tell a story. Say, "Class, you have been working very hard to write stories that are near and dear to your hearts." Remind students of how far they've come and all they they've learned thus far... "You've learned how to
• use your notebooks,
• use writing tools,
• use writing buddies/partners,
• use the ABC chart, mini office, word wall,
• use illustrations to tell your story, and
• use labels to tell your story."
Say, "Today I'd like you to start thinking about adding even more words to your stories." Say, "Just like these authors (hold up familiar books), you, too, can write more words to tell the story." Say, "Good authors tell stories using pictures and words."
The Snowy Day
by Ezra Jack Keats

Jessica Meacham www.jmeacham.com 44
Refer back to The Snowy Day and take a walk through the book, making observations about Peter's story: • "Peter story is told using pictures and words.
• Take a look at this page!
• On this page, the picture could have the label _______________ under it,
• but instead, the author writes ______________________________.
• That's detail! It's the words and the picture that help us to know Peter's story better!"
Have a brief discussion about how the story, The Snowy Day, would be different if it had only labels... • we wouldn't know as much about Peter
• we would have to guess how he felt
• we would have to guess what he did
• we would have to make up the story in our own heads
Come to the conclusion that writers share stories that have details. Come to the conclusion that a detailed story has more words than one that has labels. Dismiss for Writer's Workshop.

Jessica Meacham www.jmeacham.com 45
2 Sharing our Stories using many Words Ask, "Class, have any of you ever seen an owl moon before?" Allow for a few to share their experiences. Say, "Today we are going to read about a girl who looks for an owl moon with her father." Read Owl Moon by Jane Yolen. Facilitate discussion...
• who was in this book • what were they doing • why did they do it • how did they feel • etc.
Ask, "What are inside of books?" [pictures and words] Say, "Yesterday we started talking about adding more words to our stories, to help us tell more detailed stories." Say, "I'd like you to start thinking about adding even more words to your stories." Say, "Just like these authors (hold up familiar books), you, too, can write more words to tell the story." Say, "Good authors tell stories using pictures and words." Refer back to Owl Moon and take a walk through the book, making observations about the girl's story:
• "The girl's story is told using pictures and words. • Take a look at this page! • On this page, the picture could have the label _______________ under it, • but instead, the author writes ______________________________. • That's detail! It's the words and the picture that help us to know the girl's story better!"
Have a brief discussion about how the story, Owl Moon, would be different if it had only labels... • we wouldn't know as much about peter • we would have to guess how he felt • we would have to guess what he did • we would have to make up the story in our own heads
Come to the conclusion that writers share stories that have details. Come to the conclusion that a detailed story has more words than one that has labels. Dismiss for Writer's Workshop.
Owl Moon
by Jane Yolen

Jessica Meacham www.jmeacham.com 46
3 Sharing our Stories using many Words Ask, "Class, have any of you had a chance to catch a firefly?" Allow for a few to share their experiences. Say, "Today we are going to read about a boy who catches a jar full of fireflies." Read Fireflies by Julie Brinckloe. Facilitate discussion...
• who was in this book • what was he doing • why did he do it • how did he feel • etc.
Ask, "What are inside of books?" [pictures and words] Say, "We have started talking about adding more words to our stories, to help us tell more detailed stories." Say, "I'd like you to start thinking about adding even more words to your stories." Say, "Just like these authors (hold up familiar books), you, too, can write more words to tell the story." Say, "Good authors tell stories using pictures and words." Refer back to Fireflies and take a walk through the book, making observations about the boy's story:
• "The boy's story is told using pictures and words. • Take a look at this page! • On this page, the picture could have the label _______________ under it, • but instead, the author writes ______________________________. • That's detail! It's the words and the picture that help us to know the boy's story better!"
Have a brief discussion about how the story, Fireflies, would be different if it had only labels... • we wouldn't know as much about peter • we would have to guess how he felt • we would have to guess what he did • we would have to make up the story in our own heads
Come to the conclusion that writers share stories that have details. Come to the conclusion that a detailed story has more words than one that has labels. Dismiss for Writer's Workshop.
Fireflies!
by Julie Brinckloe

Jessica Meacham www.jmeacham.com 47
3 Sharing our Stories using many Words Display the three books from the previous three days of mini lessons (above). Say, "I really like how the authors of these books shared stories using pictures and words." Say, "I like to draw pictures of my stories (point to sample journal entry)." Say, "I also like to tell more about my story by adding a label to it (point to label)." Ask, "But, if I wanted to tell more about my story, class, what could I do?"
• tell us • draw another picture • write more labels • add more words to tell the detail
Say, "Good writer's tell stories that are near and dear to their hearts." Say, "Good writers tell stories using pictures and words, just like these three authors did." Say, "I want to tell my story using pictures and words, just like them." Say, " I want to tell you more details about my story so I will add more words to my story." On a new piece of chart paper, continue sharing details about your story using many words. Be sure to point out how you incorporate the use of the ABC chart and mini office and word wall. Come to the conclusion that writers share stories that have details. Come to the conclusion that a detailed story has more words than one that has labels. Dismiss for Writer's Workshop.
Previous Story
Written by Teacher
that Contains an
Illustration and a
Label
Additional books that could be utilized for additional mini lessons...
Joshua by the Sea
by Angela Johnson
Joshua's Night Whispers
by Angela Johnson
Rain Feet
by Angela Johnson
The Leaving Morning
by Angela Johnson

Jessica Meacham www.jmeacham.com 48
Letters, Words, and Sentences
Mini Lessons for Teaching How Letters work together to make Words, and how Words work together to make Sentences.
Mini Lessons Resources
1 What Letters Are
Gather students around the carpet area. By this point in the year, the class should be familiar with ABC books, the alphabet chart, and ABC songs. Ask, "What do you know about the alphabet [abc's]?" Facilitate conversation. Say, "Today we are going to talk about the letters of the alphabet." Say, "The book we read today will help us notice things about the alphabet." Select an ABC book to read. Read the book. Discuss the book:
• what is the alphabet • where can we find the alphabet • why do we have an alphabet • how many letters are in the alphabet • what are some of the letters in the alphabet • what can we do with the alphabet • how does the alphabet help us • what do the letters sound like • how many letters are in your name • how many letters are in my name • where do we find letters • what do we do with letters • etc.
Say, "You know a lot about letters! That's very good, because we will use letters a lot this year!" Say, "We are going to talk about letters some more during the next few days." Remind students that the alphabet has 26 letters in it. Remind students that we find letters in stores, in words, in our homes, on things, etc. Dismiss students for Writer's Workshop.
Farm Alphabet Book
by Jane Miller
Eating the Alphabet
by Lois Ehlert
Albert's Alphabet
by Leslie Tryon
The Human Alphabet
by Pilobolus
B is for Badger: A Wisconsin Alphabet
by Kathy Jo Wargin
Shiver Me Letters
by June Sobel

Jessica Meacham www.jmeacham.com 49
2 What Letters Are
Gather students around the carpet area. Read Chicka Chicka Boom Boom by Bill Martin Jr. Generate discussion about how the letters of the alphabet are similar and different. Ask, "Why do we have little and big [uppercase and lowercase] letters in our alphabet?" Discuss as needed. Play an alphabet matching game where students are asked to find each letter's match (upper/lowercase matches). Return to the text and ask students to help you find all the lowercase letters in the book. Mark them with highlighter tape or transparent post it notes. Return to the text and ask students to help you find all the uppercase letters in the book. Mark them with highlighter tape or transparent post it notes. Come to the conclusion that letters are either called uppercase or lowercase letters. Dismiss for Writer's Workshop.
Chicka Chicka Boom
Boom
by Bill Martin Jr

Jessica Meacham www.jmeacham.com 50
2 Which Letters are Uppercase and Which are Lowercase
Gather students around the carpet area. Tell students that today's book will help us all to become better writers. Say, "We've been leaning about finding problems, and today's book will help us with finding problems in our writing." Select one of the following books to read {or choose another book about "opposites" - - same, but different"}
• Big David, Little David • Big Pig and Little Pig • The Little Cowboy and the Big Cowboy • Big Wolf and Little Wolf • Little Wolf Big Wolf
Read the book. Facilitate discussion about how the characters were similar and different. Generate discussion about how the letters of the alphabet are similar and different. Ask, "Why do we have little and big [uppercase and lowercase] letters in our alphabet? Say, "Just as the characters in our book were similar and different, the big and little letters in our alphabet are
different." Say, "We use uppercase and lowercase letters in our writing all the time." Say, "Sometimes we use an uppercase letter and often we use lowercase letters." Ask, "Do writers use more uppercase or lowercase letters in their writing?" Facilitate discussion. Say, "Let's investigate, to see if writers use more uppercase or lowercase." Divide class into teams or partnerships. Distribute one BIG book per team or partnership. Ask students to look for uppercase and lowercase letters in their BIG book. Ask students to count the uppercase letters and write the number on a yellow post it note. Ask students to count the lowercase letters and write the number on a blue post it note. Gather as a class. Allow groups to share their findings. Display post it notes on board under the headings UPPERCASE and lowercase. Come to the conclusion that writers use more lowercase letters than uppercase letters. Dismiss students for Writer's Workshop.
Big David, Little David
by S.E. Hinton
Big Pig and Little Pig
By David McPhail
The Little Cowboy and the Big Cowboy
by Margaret Hillert
Big Wolf and Little Wolf
by Sharon Phillips
Denslow
Little Wolf Big Wolf
by Matt Novak

Jessica Meacham www.jmeacham.com 51
3 When to use Uppercase Letters Gather students around the carpet area. Tell students that today's book will help us all to become better writers. Say, "We've been leaning about finding problems, and today's book will help us with finding problems in our writing." Select a previously read BIG book and read it to the class. Say, "I'd like you to help me find all the UPPERCASE letters in this book." Take a "walk" through the book (page by page) and identify uppercase letters. Cover the uppercase letters with yellow transparent post it notes or yellow highlighter tape. Say, "Now, I'd like you to help me find all the periods, exclamation points, and question marks." Take a "walk" through the book and identify the punctuation marks. Cover the periods, exclamation points, and question marks with red transparent post it notes or red highlighter tape. Ask, "What do you notice about when and why the writer used uppercase letters?" Facilitate discussion. Come to the conclusion that the writer ONLY used uppercase letters for....
• beginning of a sentence • cities • months • days of week • names • states • places
Say, "Sometimes we use an uppercase letter and often we use lowercase letters." Ask, "Do writers use more uppercase or lowercase letters in their writing?" Say, "Yes, writers use more lowercase letters than uppercase letters." Ask, "When do writers use uppercase letters?" Remind students that writers use uppercase letters for special words...
• beginning of a sentence • cities • months • days of week • names • states • places
Remind students that good writers start their sentences with a capital letter. Dismiss students for Writer's Workshop. NOTE - - - - You could continue with the concept of capitalization of these special words by utilizing the following books by
teaching mini lessons [in subsequent days] about when to capitalize words:
Previously Read BIG Book
Capital Letters
by Pam Scheunemann
by Pam Scheunemann

Jessica Meacham www.jmeacham.com 52
4 Difference between Vowels and Consonants Gather students around the carpet area. Say, "We've been learning about the alphabet." Ask, "What do we know about the alphabet?" Facilitate the discussion - - make sure the following points are understood"
• the alphabet has letters in it
• there are 26 letters in the alphabet
• each letter has an uppercase and lowercase
• letters have/make sounds
• there are letters in our names
• there are letters on things
• etc.
Say, "You know a lot about letters! I'm glad you remembered all of those things about the alphabet letters." Say, "Today we will talk even more about letters." Ask, "Does anyone know what vowels and consonants are?" Allow for students to speculate. Say," Well, those are very good guesses. In today's book we will meet FIVE vowels and TWENTY-ONE consonants." Say, "Vowels and consonants are letters. A letter is either a vowel or a consonant." Say, "The words 'vowel' and 'consonant' are two special words that describe what a letters is." Say, "Let's read our book to find out why the vowels and consonants were arguing." Read The War Between the Vowels and the Consonants by Pricilla Turner. Discuss the book. As you read the book, have 52 letter pair magnets/cards/tiles/etc up on the board/pocket chart. As you read the book, sort the 52 letters based on whether they are a VOWEL or CONSONANT. When finished reading the book, count how many vowels are in the alphabet, and count how many consonants. Ask, "In our book, why were the vowels and consonants fighting?" Ask, "Did the vowels and consonants fight forever? Why did they stop?" Ask, "What lesson did the vowels and consonants learn?" [they need each other - - together they make words] Practice identifying vowels with any or all of the following activities:
• Play A-E-I-O-You! Each child says these five vowels and points to another child on the word "you." After everyone has had a turn, everyone says the vowels in unison and all point to the person of their choice
on the word "you."
• Examine the vowels in children's names. Have students trace their vowels with a contrasting color or highlighter.
• Compare and contrast student vowels in their names (long and short vowel sounds].
• Examine word wall words. Trace the vowels with a contrasting color or highlighter.
• Compare objects and animals in alphabet books for the vowel letters [long and short vowel sounds].
• Play a round of "Bag full of Vowel Sounds: - - use a bag filled with objects that have names beginning with short and long vowels sounds. Display the objects one at a time, asking students to identify the
beginning sound and letter of each object.
Come to the conclusions that: • there are 26 letters in the alphabet
• there is a special group of letters in the alphabet that are called vowels
• a, e, i, o, u [and sometimes y] are vowels
• the rest of the letters are called consonant
• letters work together to make words
• with the exception of the words "a" and "I" all words have more than one letter
• words need vowels
Dismiss for Writer's Workshop.
The War Between the
Vowels and the Consonants
by Pricilla Turner

Jessica Meacham www.jmeacham.com 53
5 When Letters Work Together Gather students around the carpet area. Say, "We've been learning about the alphabet." Ask, "What do we know about the alphabet?" Facilitate the discussion - - make sure the following points are understood...
• the alphabet has letters in it • there are 26 letters in the alphabet • each letter has an uppercase and lowercase • letters have/make sounds • there are letters in our names • there are letters on things • there are 26 letters in the alphabet • there is a special group of letters in the alphabet that are called vowels • a, e, i, o, u [and sometimes y] are vowels • the rest of the letters are called consonant • letters work together to make words • with the exception of the words "a" and "I" all words have more than one letter • words need vowels • ect.
Say, "You know a lot about letters! I'm glad you remembered all of those things about the alphabet." Say, "Today we will talk even more about letters." Ask, "Does anyone know how to spell the word 'cat' or 'dog'?" Allow for students to speculate. Continue with other simple words. Record all responses on the board. Say, "I noticed when you were spelling these words that you used more than on letter?" Ask, "Why did you use more than one letter to spell these words?" Allow for discussion. Come to the conclusion that words are spelled with more than one letter (except the words 'a' and 'I'). Say, "I also noticed that all of the words we spelled have at least one vowel in them?" Ask, "Why do they have at least one vowel in them?" Allow for discussion. Come to the conclusion that all words must have at least one vowel in them. Say, "Today's book will help us to better understand how vowels and consonants work together." Read one of the books listed to the right, under "resources" about letters working together to form/make words. Discuss the book. Ask, "In this book, what did we learn about letters?" Allow for discussion. Come to the conclusion that letters work together to make/spell/form words. Practice making words using the following letter magnets/cards/tiles/etc: w, a, t, e, r [feel free to choose another word]
The Alphabet Keeper
by Mary Murphy
Word Wizard
by Cathryn Falwell
Alphabet Soup
by Kate Banks

Jessica Meacham www.jmeacham.com 54
• eat • wet • at • rat • wear • tear • water
Remind students that:
• the alphabet has letters in it • there are 26 letters in the alphabet • each letter has an uppercase and lowercase • letters have/make sounds • there are letters in our names • there are letters on things • there are 26 letters in the alphabet • there is a special group of letters in the alphabet that are called vowels • a, e, i, o, u [and sometimes y] are vowels • the rest of the letters are called consonant • letters work together to make words • with the exception of the words "a" and "I" all words have more than one letter • words need vowels • ect.
Dismiss for Writer's Workshop.

Jessica Meacham www.jmeacham.com 55
6 When Letters and Words Work Together Gather students around the carpet area. Say, "We've been learning about the alphabet." Ask, "What do we know about the alphabet?" Facilitate the discussion - - make sure the following points are understood...
• the alphabet has letters in it • there are 26 letters in the alphabet • each letter has an uppercase and lowercase • letters have/make sounds • there are letters in our names • there are letters on things • there are 26 letters in the alphabet • there is a special group of letters in the alphabet that are called vowels • a, e, i, o, u [and sometimes y] are vowels • the rest of the letters are called consonant • letters work together to make words • with the exception of the words "a" and "I" all words have more than one letter • words need vowels • ect.
Say, "Today we will talk about letters and words." Ask, "When letters work together, what do they do?" Say, "Yes, when letters work together they make words. Today we are going to learn about words working together." Read the alphabet tree by Leo Lionni. Discuss the book. Ask, "In this book, what did we learn about letters?" Ask, "In this book, what did we learn about words?" Allow for discussion. Come to the conclusion that letters work together to spell words. Come to the conclusion that words work together to make sentences. Model how to write a multiple word sentence. Remind students that letters work together and that words work together. Dismiss for Writer's Workshop.
the alphabet tree
by Leo Lionni

Jessica Meacham www.jmeacham.com 56
Top to Bottom
&
Left to Right
Mini Lessons for Teaching about the Movement of Print on a Page
Mini Lessons Resources
1 Gather students at the carpet for a read aloud. Say, "I'm going to write a story today, and I want you to pay close attention to where I start on my page." Write a short story - - making sure that you clearly start at the TOP of the page. When finished, ask students to show you where you started writing on the page. Ask,
• did I start at the bottom • did I start in the middle
Say, "You are right! I started writing at the TOP of the page!" Hold up both the green and the red stickers. Ask, "Which sticker should we put at the top of the page to show where I started my writing? Say, "Yes, let's use the green - - green means start/go/begin." Have a student volunteer put the green sticker at the TOP of the page. Now ask students to show you where you stopped writing on the page. Ask,
• did I stop at the top • did I stop at the middle
Say, "You are right, I stopped at the bottom of the page." Hold up both a green and red sticker. Ask, "Which sticker should we put at the bottom of the page to show where I stopped my writing?" Say, "Yes, let's use the red - - red means stop/end." Have a student volunteer put the red sticker at the BOTTOM of the page. EXTENSIONS - - you may...
1. read Red Light, Green Light by Anastasia Suen 2. play a game of "red light, green light"
.......to reiterate the red means stop and green means go. Remind students that good writer's write from TOP to BOTTOM on a page. Dismiss for Writer's Workshop.
Red Light, Green Light
by Anastasia Suen
Chart Paper
Markers
GREEN dot Stickers
RED dot Stickers

Jessica Meacham www.jmeacham.com 57
2 Gather students at the carpet for a read aloud. Say, "I'm going to write a story today, and I want you to pay close attention to where I start on my page." Write a short story - - making sure that you clearly start on the RIGHT side of the page. When finished, ask students to show you where you started writing on the page. Ask,
• did I start in the middle [point to middle] • did I start on the left hand side [point to left hand side of page]
Say, "You are right! I started writing on the LEFT hand side of the page!" [point to LEFT hand side of page] Hold up both the green and the red stickers. Ask, "Which sticker should we put LEFT hand side of the page to show where I started my writing?
Say, "Yes, let's use the green - - green means start/go/begin." Have a student volunteer put the green sticker at the TOP of the page. Now ask students to show you which direction you wrote after you started on the LEFT hand side of the page. Ask,
• did I start writing downwards (motion with hands) • did I start writing upwards (motion with hands)
Say, "You are right, I wrote across the page - towards the RIGHT side of the page!" Hold up both a green and red sticker. Ask, "Which sticker should we put at the RIGHT side of the page to show where I continued writing after I started?" Say, "Yes, let's use the red - - red means stop/end." Have a student volunteer put the red sticker at the RIGHT hand side of the page. EXTENSIONS - - you may...
1. read Red Light, Green Light by Margaret Wise Brown 2. play a game of "red light, green light"
.......to reiterate that red means stop and green means go. Remind students that good writer's start writing on the LEFT hand side of the page and continue writing to the RIGHT. Dismiss for Writer's Workshop.
Red Light, Green Light
by Margaret Wise Brown
Chart Paper
Markers
GREEN dot Stickers
RED dot Stickers

Jessica Meacham www.jmeacham.com 58
Writer's Workshop Routine
Mini Lessons for Teaching the Writer's Workshop Routine
Mini Lessons Resources
1 We Draw Road Maps for our Words and Write our Words Review the ANCHOR CHART that has been started.
□ Discuss the importance of sitting at the carpet. □ Discuss the importance of watching and listening with our eyes, ears, hands, feet, and voices. □ Discuss the importance of helping other writers when they need help.
□ Discuss the importance of sitting with and having writing buddies/partners. □ Discuss the importance of writing the code date on our stories. □ Discuss the importance of illustrating our stories.
Share with students how proud you are of their illustrations. Say, "I've enjoyed seeing your stories. Your illustrations are getting better and better each day." Say, "Today I'd like to read a book to you about a toad. In this book, Toad has a house, but needs a road for it." Say, "The book will help us, and after we read the book, I'll tell you how it will help us become better writers." Read Toad Makes a Road by Phil Roxbee. After reading discuss...
□ what was Toad's problem
□ what did he do to solve the problem
□ did his solution work
□ why are roads important
Say, "Toad made a road for people and vehicles to travel on so that they could get to his home." Say, "Today, we are going to learn how to make roads, but they will be a different kind of road. They are road maps." Ask students to watch you as you share your story. Draw your illustration - - talk out loud as you do. When finished, ask the class what should be done next. {add the written words} Say, "Now normally I or another adult helper would come and help you by "adult writing" your words for you." Share that, "Today, I would like you to try something new. I would like you to draw a road map for your "Kidwriting." Demonstrate how to draw a road map for words by using your journal entry for the day. Road Maps:
1. Say the words out loud. [ie - "I like frogs."] 2. Say the words out loud and put one finger up for each word said. [ie - "I (1) like (2) frogs (3)."]
3. Count the number of fingers that are up. ["three"] 4. Say the words out loud and draw three lines. [ie. "I" ___ "like" ______ "frogs" _______.] 5. Say the words one at a time, and spell [write] them. [use abc chart to help with letter ID/formation/sounds]
6. Re-read your sentence. 7. Stop your sentence with punctuation.
Say, "Now normally I or another adult helper would come and help you by "adult writing" your words for you." Share that, "Today, I would like you to try something new. I would like you to draw a road map for your "Kidwriting." Continue the previously started ANCHOR CHART for "Writer's Workshop" routine. Add information and a picture about the day's lesson. Dismiss students for Writer's Workshop.
by Phil Roxbee
by Gail Gibbons
by B. G. Hennessey
by Barbara Shook Hazen
by Susan Schade

Jessica Meacham www.jmeacham.com 59
Finger Spaces
Mini Lesson for Encouraging Writer's to use Finger Spaces between Words
Mini Lessons Resources
1 Gather students around the carpet area. Ask, "Class, I wonder what our classroom would be like if we added Mrs. ______'s class to ours." Discuss possibilities...
• we'd have fun
• we'd have to share
• there'd be a lot of kids in here
• we wouldn't be able to fit
• etc.
Say, "I think you are all right, it might be fun at first, but in the end, we'd be too crowded." Say, "The space in our room wouldn't be enough room for two classes of students!" Say, "We'd soon realize that it won't work to have a room full of crowded kids!" Say, "If we had two classes of children, we wouldn't have enough space to move around and work." Ask, "Do you enjoy having a nice classroom such as ours and having nice space to move around in?" Allow time for a brief discussion about needing space to move and work in. Say, "Well today, I'd like to read a book to you about not enough space and being too crowded." Select one of the following books to read {or choose another book about overcrowding}
• No Room to Swing a Cat
• A Crowded Ride in the Countryside
• The Kid with Too Many Pets
• Too Many Chickens
• Not Enough Room
Facilitate discussion about how and why the characters were overcrowded. Say, "You know, this book (hold book up) reminds me about my writing!" Say, "You see, sometimes, if I am in a hurry, the letters and words in my writing get overcrowded." Say, "I was looking at the story I wrote this morning." Show students the story. Say, "I'm going to read this story and I'd like you to tell me if I crowded my letters/words anywhere." Read the pre-written story. Guide students as they locate overcrowded letters and words. Note overcrowding with a post it note or highlighter tape. Say, "You are very good at noticing those problems." Say, "I did overcrowd my letters and words in those places. Good job finding them!" Ask, "How could I fix these problems?" At this point just discuss how it might be possible to fix the problem. Conclude that spaces should be put between letters and words. Say, "We will continue learning about crowded letters and words tomorrow." Dismiss students for Writer's Workshop.
No Room to Swing a Cat
by Ralph Steadman
A Crowded Ride in the
Countryside
by Frank B. Edwards
The Kid with Too Many Pets
by Harland Williams
Too Many Chickens
by Paulette Bourgeois
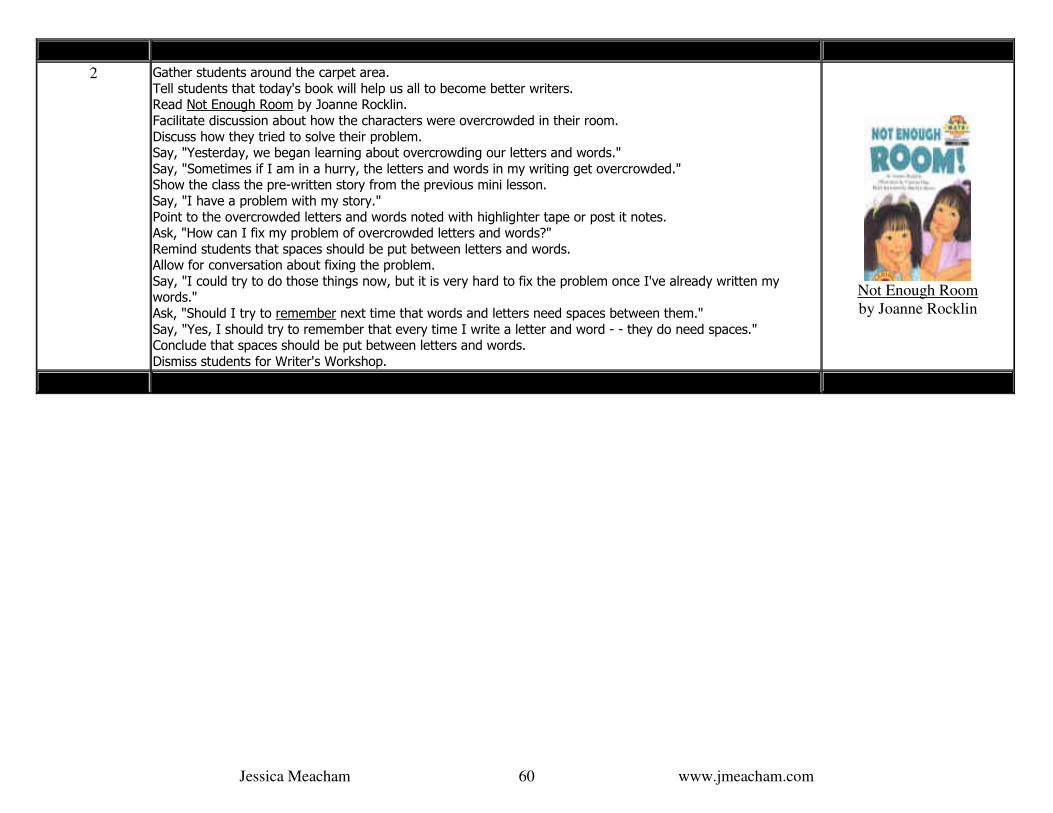
Jessica Meacham www.jmeacham.com 60
2 Gather students around the carpet area. Tell students that today's book will help us all to become better writers. Read Not Enough Room by Joanne Rocklin. Facilitate discussion about how the characters were overcrowded in their room. Discuss how they tried to solve their problem. Say, "Yesterday, we began learning about overcrowding our letters and words." Say, "Sometimes if I am in a hurry, the letters and words in my writing get overcrowded." Show the class the pre-written story from the previous mini lesson. Say, "I have a problem with my story." Point to the overcrowded letters and words noted with highlighter tape or post it notes. Ask, "How can I fix my problem of overcrowded letters and words?" Remind students that spaces should be put between letters and words. Allow for conversation about fixing the problem. Say, "I could try to do those things now, but it is very hard to fix the problem once I've already written my words." Ask, "Should I try to remember next time that words and letters need spaces between them." Say, "Yes, I should try to remember that every time I write a letter and word - - they do need spaces." Conclude that spaces should be put between letters and words. Dismiss students for Writer's Workshop.
Not Enough Room
by Joanne Rocklin

Jessica Meacham www.jmeacham.com 61
3 Gather students around the carpet area. Tell students that today's book will help us all to become better writers. Read Spaghetti and Meatballs for All by Marylyn Burns. Ask, "What was this book about?" Say, "Yes, it was about spaghetti and meatballs!" Say, "When I read this book, I had an idea that would helps us to become better writers." Ask, "Do you think that the SIZE of the spaces between words is the same as the SIZE of the spaces between letters?" Allow for student speculation. Say, "Well today you are going to be detectives." Say, "You are going to work with SPAGHETTI and MEATBALLS to decide if the SIZE of the spaces are the same or different." Divide students into partnerships or teams. Distribute the SPAGHETTI and MEATBALLS and BIG BOOKS.
• pipe cleaners = spaghetti noodles • pom pons = meatballs • big books should be familiar text for the children
Demonstrate how to find find spaghetti noodle SIZE spaces and how to find meatball SIZE spaces between
words/letters. Allow student partnerships to investigate. When finished, gather as a class and discuss the differences between spaces between words and letters. Conclude that:
• letters are separated by spaghetti noodle SIZE spaces • words are separated by meatball SIZE spaces
Remind students that spaces should be put between letters and words. Ask, "Should we try to remember next time that words and letters need spaces between them." Say, "Yes, we should try to remember that every time we write a letter and word - - they do need spaces." Conclude that spaces should be put between letters and words. Dismiss students for Writer's Workshop.
Spaghetti and Meatballs for All
by Marylyn Burns

Jessica Meacham www.jmeacham.com 62
4 Gather students around the carpet area. Tell students that today's book will help us all to become better writers. Read I Love to Finger Paint by Lipsey Edwards. Ask, "What was this book about?" Say, "Yes, it was about finger painting!" Say, "When I read this book, I had an idea that would helps us to become better writers." Say, "Yesterday, we used pipe cleaners and pretended that they were spaghetti noodles." Say, "We thought that the spaghetti noodles were perfect for showing the SIZE of the spaces between letters." Demonstrate using pipe cleaners [spaghetti noodle] and a page on a BIG book. Say, "Yesterday, we used pom pons and pretended that they were meatballs." Say, "We thought that the meatballs were perfect for showing the SIZE of the spaces between words." Demonstrate using pom pons [meatball] and a page on a BIG book Say, "We KNOW that it is important to leave the right size spaces between words and letters." Ask, "But, do you think that it would be a good idea to always use spaghetti and meatballs as our measuring tools?" Ask, "Do you think that when I write, I should use these tools [hold them up] to help me measure the spaces I need?" Demonstrate how silly this would look and be. Ask, "Why not?" Say, "Well, when we read this book today, about finger painting, it gave me an idea!" Say, "I was thinking that we could use our fingers for spaces between words." Ask, "Do you think that your finger would be a good size meatball space?" Ask, "Could our fingers help us with spaces between words?" Demonstrate how to write a journal entry leaving good SIZE spaces between words, using finger spaces. Remind students that spaces should be put between letters and words. Dismiss students for Writer's Workshop.
I Love to Finger Paint!
by Lipsey Edwards
OR
I Can Fingerpaint
by Usborne Playtime

Jessica Meacham www.jmeacham.com 63
5 Gather students around the carpet area. Tell students that today's book will help us all to become better writers. Read one of the following books about astronauts:
• Man on the Moon • I Want to be an Astronaut • Astronauts • I Am An Astronaut
Ask, "What was this book about?" Say, "Yes, it was about astronauts!" Say, "When I read this book, I had an idea that would helps us to become better writers." Say, "Yesterday I was thinking that we could use our pointer fingers as a tool." Say, "I think that fingers are a good tool to use, but today I thought of a different tool we could use." Say, "We are going to make Space Pals, and our Space Pals will help us to leave good spaces between our words." Distribute Supplies:
• Jumbo Craft Sticks and Spaceman Labels from Sandy Elasser - about 3/4 of the way down the page! • "Look at Me" craft sticks from Oriental Trading and markers or other craft supplies for decorating the
stick.
Allow students time to create their Space Pals. Remind students that spaces should be put between letters and words. Conclude that when we are leaving spaces between words, a good tool to use is our pointer finger or our Space
Pal. Dismiss students for Writer's Workshop.
Man on the Moon
by Anastasia Suen
I Want to Be an Astronaut
by Byron Barton
Astronauts
by Tami Deedrick
I Am An Astronaut
by Cynthia Benjamin

Jessica Meacham www.jmeacham.com 64
Utilizing Word Walls
Mini Lessons for Encouraging Students to Utilize Word Walls when Writing Stories
Mini Lessons Resources
1 Gather students around the carpet. Say, "Today we are going to read a story about a boy who loved to collect something." Ask, "Class, does anyone know what it means to collect something?" Allow for brief speculation. Ask, "What do you collect?" Allow for brief sharing. Say, "Let's read the book to discover what Max loved to collect. Read Max's Words by Kate Banks. Discuss the book:
• what was Max's problem • what did his brothers collect • what did he start to collect • how is it that his collection grew to be larger than his brothers' collections • what could Max do with his collection
Ask, "Boys and girls, if you look around the room, you might find words on the walls and things in our room." Ask, "Can you tell me where you find words in our room?" Allow for answers. Be sure that the Word Wall(s) is/are mentioned among the possible answers. Draw attention to the Word Wall(s) in your room. Share with students it's name and purpose...
• this is the Word Wall • we have a Word Wall in our room to help us when we spell words that we use a lot • we will use the Word Wall when we are writing
Come to the conclusion that words can be found in many different places (walls, books, signs, and word walls). Come to the conclusion that we use Word Walls when we write. Dismiss for Writer's Workshop.
Max's Words
by Kate Banks
The Boy Who Loved Words
by Schotter
[alternate read aloud option]

Jessica Meacham www.jmeacham.com 65
2 Gather students around the carpet. Say, "Yesterday we learned about Word Walls." Ask, "What is a Word Wall? Why do we have one? What do we use it for?" Allow for brief discussion. Say, "When you write, you can use the Word Wall on our wall." Say, "The Word Wall chart is a tool. It 'holds' or 'keeps' all the words in one place for when we need to use
them." Refer the the previous story where you drew a picture of a simple picture [cat]. Say, "I drew a picture of a cat for my story, because I like cats, and my cat is special to me." Say, "I want to use the Word Wall to help me write my story." Ask, "If I wanted to write the words 'my cat' - - what could I do class?" NOTE - - at this point in the year, the class hasn't had exposure to adding labels to their pictures. Keep it
simple! Say, "If I wanted to write 'my cat', I need to think about what where I can find the word 'my' in the classroom. Say, "I already wrote the word 'cat' and I need to write the word 'my' in front of cat so that it says 'my cat'. Demonstrate how to find the word 'my' on the word wall, and write it in front of the word 'cat' on your journal. Demonstrate how to read the story when finished, pointing to each word. Say, "When we write stories/words, we can use the Word Wall to help us find star words." NOTE - -this is something that should be emphasized just about every time you model how to write. NOTE - -mini offices mini lessons come next and will give students more environmental print resources. Dismiss for Writer's Workshop.

Jessica Meacham www.jmeacham.com 66
Mini Offices
Mini Lessons for Utilizing Mini Offices
Mini Lessons Resources
1 Writing is like Working in an Office
Gather students around the carpet. Ask, "What do your moms and dads do for their jobs?? Facilitate discussion:
• discuss job names
• discuss where the jobs are (outside, inside, office, store, warehouse, etc).
• discuss whether students have been able to go to work with their mom/dad Say, "Today we are going to read a book about a girl named Emily." Say, "Emily's mom works in an office." Ask, "What does working in an office mean? What might an office look like?" Read Mommy's Office by Barbara Shook Hazen. Discuss the book afterward:
• what did Emily do • where did her mom work • what did the office look like • what did her mother do in the office • did Emily help • what did her mom's office remind her of • why did her mom's office remind her of school
Say, "I think Emily was right in this book. An office does kind of remind me of school." Ask, "How is our classroom like an office?" Facilitate conversation:
• we work hard • we have pencils, pens, paper, computers, staplers, paper clips, white out, scissors, etc • we do work here • we write • we talk • we work on projects • etc.
Say, "Tomorrow, we will start working with a new Writer's Workshop 'tool' called a mini office." Remind students that while they work, they could think of themselves working in an office, writing their stories. Dismiss for Writer's Workshop.
Mommy's Office
by Barbara Shook Hazen
Daddy Goes to Work
by Jabari Asim
Frida’s Office Day
by Thomas Lewis
Lyle at the Office
by Bernard Waber
Viciting my Mom’s Offic
by Sheila Sweeney
Jessica Meacham www.jmeacham.com 67
2 Mini Office: ABC Chart and Word Wall
Gather students around the carpet. Say, "We've been learning about ABC charts and Word Walls. We've also learned about offices." Show the class the BLANK mini office. Say, "During the next few days, I'm going to build/make my mini office and show you how I use it." Say, "After I am finished, I'll give you your mini offices {already created} to use during Writer's Workshop." Remind students of the purpose of having and using an ABC Chart...
• we have an ABC chart in our room to help us with letter names, sounds, and formation • we will use the ABC chart when we are writing
Show students the sample ABC chart. Say, "I'm going to add the ABC chart to this Mini Office." Say, "I want my mini office to have an ABC chart because I'll use it when I need to know what a letter looks like." Tape the ABC chart to the predetermined spot on the mini office. Remind students of the purpose of having and using a Word Wall...
• we have a Word Wall in our room to help us when we spell words that we use a lot • we will use the Word Wall when we are writing
Show students the sample Word Wall. Say, "I'm going to add the Word Wall to this Mini Office." Say, "I want my mini office to have a Word Wall because I'll use it when I need to know how to spell a star word." Tape the Word Wall to the predetermined spot on the mini office. Demonstrate how to use these two new components. Draw a simple illustration and label your drawing with a simple phrase - - ie: I like hats. Say, "Tomorrow we will add two more things to the mini office." Dismiss for Writer's Workshop.
Jessica Meacham www.jmeacham.com 68
3 Mini Office: Classmate Names and Family Words
Gather students around the carpet. Say, "We've been learning about ABC charts and Word Walls. We've also learned about offices." Show the class the already started mini office. Say, "Today we will add two more 'tools' to the mini office." Say, "Sometimes I want to know how to spell a friends name that is in our class." Ask, "Where could I look to find out how to spell that friend's name?" Say, "Yes, we could look on the name plates, their storage box, or even ask them." Show students the sample Names chart. Say, "I'm going to add the Names chart to this Mini Office." Say, "I want my mini office to have a Names chart because I'll use it when I need to know how to spell a name." Tape the Names chart to the predetermined spot on the mini office. Say, "Sometimes I want to know how to spell one of my family member's names." Show students the sample Family Words chart. Say, "I'm going to add the Family Words chart to this Mini Office." Say, "I want my mini office to have a Family Words chart because I'll use it when I need to know how to spell them." Tape the Family Words chart to the predetermined spot on the mini office. Demonstrate how to use these two new components. Draw a simple illustration and label your drawing with a simple phrase - - ie: I like Jason. Say, "Tomorrow we will add two more things to the mini office." Dismiss for Writer's Workshop.

Jessica Meacham www.jmeacham.com 69
4 Mini Office: Color Words and Shape Words
Gather students around the carpet. Show the class the already started mini office. Say, "So far we have added the ABC chart, Word Wall Words, Family Words Chart, and Names Chart to our mini offices." Say, "Today we will add two more 'tools' to the mini office." Say, "Sometimes I want to know how to spell a color word for my story." Ask, "Where could I look to find out how to spell that friend's name?" Say, "Yes, we could look on our classroom wall - -at the Color Story we wrote earlier this year." Show students the sample Color Words chart. Say, "I'm going to add the Color Words chart to this Mini Office." Say, "I want my mini office to have a Color Words chart because I'll use it when I need to know how to spell a color." Tape the Color Words chart to the predetermined spot on the mini office. Say, "Sometimes I want to know how to spell a shape word." Show students the sample Shape Words chart. Say, "I'm going to add the Shape Words chart to this Mini Office." Say, "I want my mini office to have a Shape Words chart because I'll use it when I need to know how to spell them." Tape the Shape Words chart to the predetermined spot on the mini office. Demonstrate how to use these two new components. Draw a simple illustration and label your drawing with a simple phrase - - ie: Red Star Say, "Tomorrow we will add two more things to the mini office." Dismiss for Writer's Workshop.
Jessica Meacham www.jmeacham.com 70
5 Mini Office: Number Line, Number Words, and Numbers
Gather students around the carpet. Show the class the already started mini office. Say, "So far we have added several 'tools' to our mini offices." Say, "Today we will add two more 'tools' to the mini office." Say, "Sometimes I want to know how to write a number for my story." Ask, "Where could I look to find out how to correctly write a number?" Say, "Yes, we could look on our classroom wall - -at the Number Story we wrote earlier this year." Show students the sample Number line. Say, "I'm going to add the Number line to this Mini Office." Say, "I want my mini office to have a Number line because I'll use it when I need to know how to write a number." Add the Number line to the predetermined spot on the mini office. Say, "Sometimes I want to know how to spell a number word." Show students the sample Number Words chart. Say, "I'm going to add the Number Words chart to this Mini Office." Say, "I want my mini office to have a Number Words chart because I'll use it when I need to know how to spell them." Tape the Number Words chart to the predetermined spot on the mini office. Demonstrate how to use these two new components. Draw a simple illustration and label your drawing with a simple phrase - - ie: 5 apples Say, "Tomorrow we will add two more things to the mini office." Dismiss for Writer's Workshop.

Jessica Meacham www.jmeacham.com 71
6 Mini Office: Months of the Year and Days of the Week
Gather students around the carpet. Show the class the already started mini office. Say, "So far we have added several 'tools' to our mini offices." Say, "Today we will add two more 'tools' to the mini office." Say, "Sometimes I want to know how to write a day of the week for my story." Ask, "Where could I look to find out how to correctly write a day of the week?" Say, "Yes, we could look on our classroom calendar wall in order to spell Sunday, Monday, Tuesday, and so on." Show students the sample Day of the Week sheet. Say, "I'm going to add the Day of the Week sheet to this Mini Office." Say, "I want my mini office to have a Day of the Week sheet because I'll use it when I write a day of the week." Add the Day of the Week sheet to the predetermined spot on the mini office. Say, "Sometimes I want to know how to spell a certain month of the year - -like if its my birthday." Show students the sample month of the year sheet. Say, "I'm going to add the month of the year sheet to this Mini Office." Say, "I want my mini office to have a month of the year sheet because I'll use it when I spell them." Tape the month of the year sheet to the predetermined spot on the mini office. Demonstrate how to use these two new components. Draw a simple illustration and label your drawing with a simple phrase - - ie: I like March. Say, "Tomorrow we will add the remaining 'tools' to the mini office." Dismiss for Writer's Workshop.

Jessica Meacham www.jmeacham.com 72
7 Mini Office: ...and the rest... Gather students around the carpet. Show the class the already started mini office. Say, "So far we have added several 'tools' to our mini offices." Say, "Today we will add the rest of the things to our mini offices." Add
• the left and right hands • USA cut out • EARTH cut out • coin stickers • handwriting desk tape guideline tape • 100s chart • etc (and any other things you put on your mini offices)
Discuss how to use each tool. Model how to utilize the mini office one more time. Distribute the mini offices. Encourage students to use them as they write their stories. Dismiss for Writer's Workshop.

Jessica Meacham www.jmeacham.com 73
Spelling Strategies
Mini Lessons for Stretching Words
Mini Lessons Resources
1 Rubber Band Spelling
Share with students that when spelling, it is important to get as many sounds down on paper as possible. Share that one way to do this
is to use a rubber band. Tell students that the rubber band stretches, and we can use the rubber band to help us spell. Model how to hold the rubber band between two fingers (thumb and pointer). Demonstrate how to spell a simple c-v-c word for students, using the rubber band as a tool. Spell additional words volunteered by students (write them on the board). Share with students that initially a real rubber band can be used to help stretch sounds out of words; however as they get better at
stretching words, a rubber band won't be necessary, they can just pretend to have a rubber band around their thumb and pointer.
How Far Will a Rubber Band
Stretch?
By Mike Thaler

Jessica Meacham www.jmeacham.com 74
2
Arm Spelling Share with students that when spelling, it is important to get as many sounds down on paper as possible. Share that one way to do this
is to use our arms and pointer finger from the opposite arm/hand. Model how to hold your non-dominant hand out and point to your shoulder with your pointer finger. Demonstrate how to spell a simple c-v-c word for students, using your arm:
• Start at shoulder with pointer finger and say the first sound: /c/. Then write the sound. • Start at the shoulder again with pointer finger, and then move down your arm until you hear the next new sound: /c/ /a/. Then
write the new sound heard. • Start at the shoulder again with pointer finger, and then move down your arm until you hear the next new sound: /c/ /a/ /t/.
Then write the new sound heard. • For longer words, this process is repeated until the last (ending) sound is heard.
Remind students they they can use their arms when spelling. During writing conferences, if assisting with spelling/stretching, the teacher can model how to do this, by stretching the word for the
student (out loud) and using the student's arm (modeling how it's done). This has worked wonders for my class!
Arms, Elbows, Hands,
and Fingers
by Lola Shaefer
Arms, Legs, and Other
Limbs
by Allan Fowler
Jessica Meacham www.jmeacham.com 75
3 Bubble Gum Spelling Share with students that when spelling, it is important to get as many sounds down on paper as possible. Share that one way to do this
is to pretend that you have a piece of gum in your mouth. Tell students that when we pretend to stretch the gum from our mouth, the motion helps us spell. Model how to pretend pull gum from your mouth (pinch gum between teeth, pull gum with fingers outward. Demonstrate how to spell a simple c-v-c word for students, using the "gum" as a tool. Spell additional words volunteered by students (write them on the board). Share with students that they can pretend to stretch gum from their mouths when spelling words.
Bubble Gum, Bubble
Gum
by Lisa Wheeler
Double Bubble Trouble
by Judy Bradbury

Jessica Meacham www.jmeacham.com 76
Sentence Stoppers
Mini Lessons for Teaching Writers about adding Punctuation to the end of their Sentences
Mini Lessons Resources
1 What are the names of the Sentence Stoppers?
Gather students at the carpet. Say, "Today's book is going to help us to become better writers." Say, "Many of you are beginning to write stories that are longer than one sentence." Say, "Writers use PUNCTUATION MARKS so that their stories are easier to read." Say, "There are three punctuation marks that we will learn about today, and during the next few days." Hold up the book Perfect Punctuation by Kate Petty (or some other book about punctuation). Take a picture walk. By this time of the year, the class will have already been exposed to the terms period, exclamation point, & question mark. Say, "When we read our Morning Message, we look for and find all of the 'sentence stoppers'." Say, "Sentence stoppers are a part of the PUNCTUATION FAMILY." Say, "Repeat after me - - 'PUNCTUATION'." Ask, "What are the punctuation marks [or sentence stoppers] that we look for?"
• periods, exclamation points, and question marks Say, "Great, I'm glad you remembered those names." Read Perfect Punctuation by Kate Petty (or some other book about punctuation). Begin creating the PUNCTUATION MARKS anchor chart. Put up the period, exclamation point, and question mark pictures. Don't add anything else to the chart, as of yet - - that will come in days to come. Come to the conclusion that there are three ways to end a sentence: periods, exclamation points, and question marks. Dismiss for Writer's Workshop.
The Perfect Pop-Up
Punctuation Book by Kate Petty
Punctuation Pals
by Dr. Hope

Jessica Meacham www.jmeacham.com 77
2 Sentence Stoppers are Like Signs Gather students at the carpet. Say, "Today's book is going to help us to become better writers." Say, "Yesterday we learned that writers use PUNCTUATION MARKS so that their stories are easier to read." Say, "We also learned that there are three punctuation marks and we learned what they looked like and what they do." Hold up the book Punctuation by Ann Heinrichs (or some other book about punctuation). By this time of the year, the class will have already been exposed to the terms period, exclamation point, & question mark. Say, "Punctuation marks are a lot like signs you see on the roads." Say, "Punctuation marks are very important." Ask, "Who can remember the names of these punctuation marks? {point to the signs on the anchor chart from yesterday."
• periods, exclamation points, and question marks Say, "Great, I'm glad you remembered those names." Read Punctuation by Ann Heinrichs (or some other book about punctuation). Continue creating the PUNCTUATION MARKS anchor chart. Add names to pictures of the period, exclamation point, and question mark pictures. Don't add anything else to the chart, as of yet - - that will come in days to come. Come to the conclusion that there are three ways to end a sentence: periods, exclamation points, and question marks. Dismiss for Writer's Workshop.
Punctuation
by Ann Heinrichs

Jessica Meacham www.jmeacham.com 78
3 Periods Gather students at the carpet. Say, "Today's book is going to help us to become better writers." Say, "We've been learning that good writers use PUNCTUATION MARKS so that their stories are easier to read." Say, "We also learned that there are three punctuation marks and we learned what they looked like and what they do." Hold up the book A Monster Sandwich by Joy Cowley (or some other familiar BIG book that has periods in it). Say, "We've already read this book before, and we are going to read it together today and then play a game of I SPY." Choral read the book, A Monster Sandwich by Joy Cowley. Turn to each page of the book one page at a time, each time... Asking, "Who can find the punctuation mark on this page?" Say, "Great, that is a punctuation mark!. Ask, "What is its name?"
• period Highlight the periods. Ask, "What do periods do?"
• they stop a TELLING sentence Continue creating the PUNCTUATION MARKS anchor chart. Add a sample sentence to the picture of the period. Have the class dictate a TELLING sentence....
• ie - - Mrs. Meacham's class likes to read. Don't add anything else to the chart, as of yet - - that will come in days to come. Come to the conclusion that there are three ways to end a sentence: periods, exclamation points, and question marks. Dismiss for Writer's Workshop.
Period
by Mary Elizabeth
Salzmann
Peter Period
A Monster Sandwich
by Joy Cowley

Jessica Meacham www.jmeacham.com 79
4 Question Marks Gather students at the carpet. Say, "Today's book is going to help us to become better writers." Say, "We've been learning that good writers use PUNCTUATION MARKS so that their stories are easier to read." Say, "We also learned that there are three punctuation marks and we learned what they looked like and what they do." Hold up the book How Many Snails by Paul Giganti (or some other familiar BIG book that has question marks in it). Say, "We've already read this book before, and we are going to read it together today and then play a game of I SPY." Choral read the book, How Many Snails by Paul Giganti. Turn to each page of the book one page at a time, each time... Asking, "Who can find the punctuation mark on this page?" Say, "Great, that is a punctuation mark!. Ask, "What is its name?"
• question mark Highlight the question marks. Ask, "What do question marks do?"
• they stop an ASKING sentence Continue creating the PUNCTUATION MARKS anchor chart. Add a sample sentence to the picture of the question mark. Have the class dictate an ASKING sentence....
• ie - - Do you like green eggs and ham? Don't add anything else to the chart, as of yet - - that will come in days to come. Come to the conclusion that there are three ways to end a sentence: periods, exclamation points, and question marks. Dismiss for Writer's Workshop.
Question Mark
by Mary Elizabeth
Salzmann
Quincy Question Mark
How Many Snails?
by Paul Giganti

Jessica Meacham www.jmeacham.com 80
5 Exclamation Points Gather students at the carpet. Say, "Today's book is going to help us to become better writers." Say, "We've been learning that good writers use PUNCTUATION MARKS so that their stories are easier to read." Say, "We also learned that there are three punctuation marks and we learned what they looked like and what they do." Hold up the book The Farm Concert by Joy Cowley (or some other familiar BIG book that has exclamation points in it). Say, "We've already read this book before, and we are going to read it together today and then play a game of I SPY." Choral read the book, The Farm Concert by Joy Cowley. Turn to each page of the book one page at a time, each time... Asking, "Who can find the punctuation mark on this page?" Say, "Great, that is a punctuation mark!. Ask, "What is its name?"
• exclamation point Highlight the exclamation points. Ask, "What do exclamation points do?"
• they stop an EMOTION sentence Finish creating the PUNCTUATION MARKS anchor chart. Add a sample sentence to the picture of the exclamation point. Have the class dictate an EMOTION sentence....
• ie - - Be QUIET! Come to the conclusion that there are three ways to end a sentence: periods, exclamation points, and question marks. Dismiss for Writer's Workshop.
Exclamation Point
by Mary Elizabeth
Salzmann
Emma Exclamation Point
The Farm Concert
by Joy Cowley

Jessica Meacham www.jmeacham.com 81
5 Will the Real Punctuation Mark Please Stand?
Lesson Plan: http://www.educationstation.ca/greatideas/PunctuationMarks.php
Additional Books for Teaching Punctuation:
Yo! Yes?
by Chris Rashka
Punctuation Takes a Vacation
by Robin Pulver
Safari Punctuation
by Mario Risso
The Punctuation Pals Go To The Baseball Park
by Constance Olker
The Punctuation Pals Go to the Moon
by Constance Olker
The Punctuation Pal Got to the Beach
by Constance Olker
The Punctuation Pals Go Snow Skiing
by Constance Olker
The Punctuation Pals Meet at School
by Constance Olker
The Puncs: An Introduction to the Story of Punctuation
by Barbara Cooper
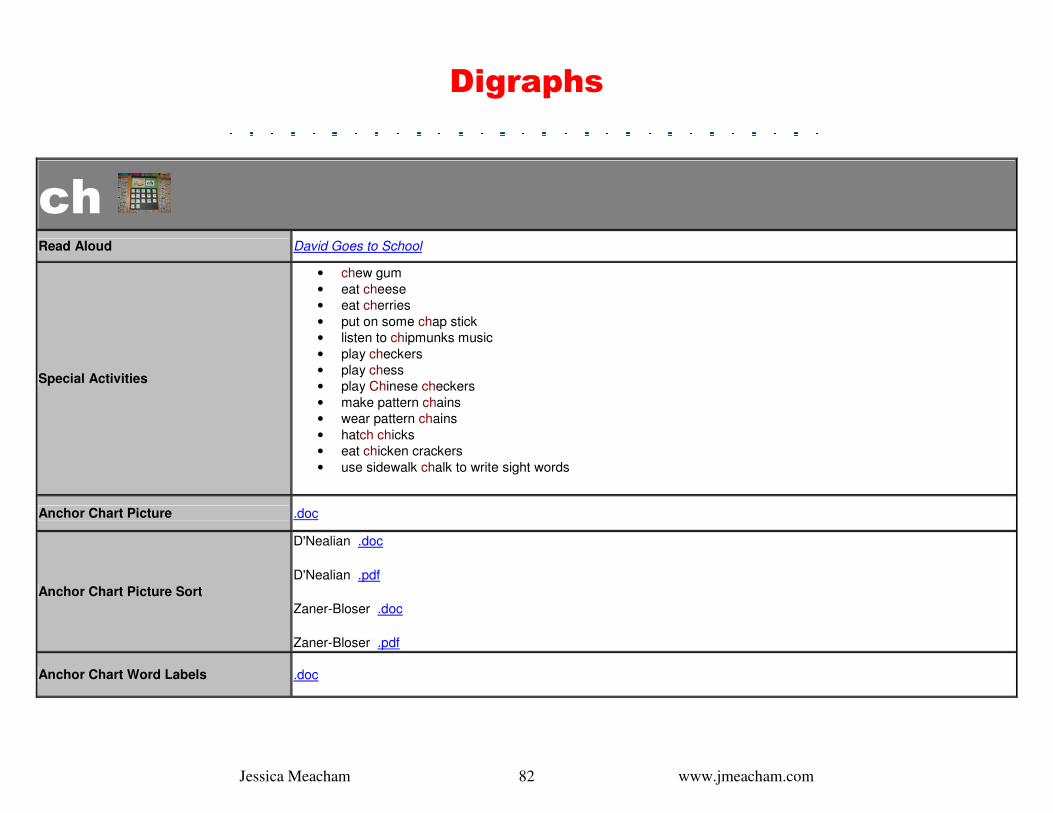
Jessica Meacham www.jmeacham.com 82
Digraphs
ch
Read Aloud David Goes to School
Special Activities
• chew gum • eat cheese • eat cherries • put on some chap stick • listen to chipmunks music • play checkers • play chess • play Chinese checkers • make pattern chains • wear pattern chains • hatch chicks • eat chicken crackers • use sidewalk chalk to write sight words
Anchor Chart Picture .doc
Anchor Chart Picture Sort
D'Nealian .doc
D'Nealian .pdf
Zaner-Bloser .doc
Zaner-Bloser .pdf
Anchor Chart Word Labels .doc

Jessica Meacham www.jmeacham.com 83
th
Read Aloud Little Thumb
Special Activities
• eat thumbprint cookies • make thumbprint art • thread a needle • think of a new name for yourself • practice writing the numbers thirteen, three, and thirty • say "thank you" • twiddle your thumbs • practice reading a thermometer • write list telling what you did on Thursday • clear your throat • find out who lines up third • learn about Thanksgiving
Anchor Chart Picture .doc
Anchor Chart Picture Sort
D'Nealian .doc
D'Nealian .pdf
Zaner-Bloser .doc
Zaner-Bloser .pdf
Anchor Chart Word Labels .doc

Jessica Meacham www.jmeacham.com 84
wh
Read Aloud Whistle for Willie
Special Activities
• listen to whistling songs (song list ideas) • whisk up some eggs • write words in white, then paint with watercolors • have a wheelbarrow race • eat whoppers (candy) • play a whisper game • practice whistling • read about the White House • talk to someone who uses a wheelchair • investigate what wheat is used to make
Anchor Chart Picture .doc
Anchor Chart Picture Sort
D'Nealian .doc
D'Nealian .pdf
Zaner-Bloser .doc
Zaner-Bloser .pdf
Anchor Chart Word Labels .doc

Jessica Meacham www.jmeacham.com 85
sh
Read Aloud Shoes from Grandpa
Special Activities
• take off shoes • make shoeprints • eat shark gummy snacks • make shadow puppets • make shape art • shrug shoulders • rub shoulders • dust shelves • listen to sea shells • wear shorts • wear t-shirts
Anchor Chart Picture .doc
Anchor Chart Picture Sort
D'Nealian .doc
D'Nealian .pdf
Zaner-Bloser .doc
Zaner-Bloser .pdf
Anchor Chart Word Labels .doc

Jessica Meacham www.jmeacham.com 86
Illustration Details Help Tell the Story
Mini Lessons for Adding Creating Detailed Illustrations
Mini Lessons Resources
1 Detail to Color Gather students at the carpet. Say, "The book I will read to you today is about a mouse, a strawberry, and a bear." Say, "Today's book will helps us to become better illustrators." Ask, "What does an illustrator do?"
• draws/makes/takes the pictures Read The Little Mouse, the Red Ripe Strawberry, and THE BIG HUNGRY BEAR by D. and A. Wood. Say, "This book is written by Audrey and Don Wood."
Say, "This book is illustrated by Don Wood." Say, "Don and Audrey Wood are partners - - they write and illustrate books together." Say, "When Don illustrated this book, he used wonderful colors." Say, "Don Wood tried to use colors that would help tell the story." Ask, "Can you help me find pages where the colors helped tell the story?" Take a picture walk - - page by page - - and discuss how the colors help tell the story.
• the strawberry is bright red to show that it is ripe • the mouse looks just right because he has pink ears, gray fur, and a white tummy • the leaves on the bush are green and the leaves are lots of different shades of green • the colors he uses are true to the colors we would see in real life (strawberry, leaves, mouse, bear, etc) • ect.
Come to the conclusion that • colors show the reader what is happening • colors give the picture more detail • colors should be real to life (closely match what color the object is in real life)
Encourage students to use colors that closely match what color the object is in real life. Dismiss for Writer's Workshop.
The Little Mouse, The Red Ripe Strawberry, and
THE BIG HUNGRY BEAR by Don and Audrey Wood
[BIG book]

Jessica Meacham www.jmeacham.com 87
2 Detail to Shape
Gather students at the carpet. Say, "We are going to take a closer look at Don and Audrey's book today." Say, "This book will helps us to become better illustrators." Ask, "What does an illustrator do?"
• draws/makes/takes the pictures Ask, "What did we learn about using colors help tell the story?"
• colors show the reader what is happening • colors give the picture more detail • colors should be real to life (closely match what color the object is in real life)
Re-read The Little Mouse, the Red Ripe Strawberry, and THE BIG HUNGRY BEAR by D. and A. Wood. Say, "This book is written by Audrey and Don Wood." Say, "This book is illustrated by Don Wood." Say, "When Don illustrated this book, he wanted to make sure that he used wonderful shapes." Say, "Don Wood tried to use shapes that would help tell the story." Ask, "Can you help me find pages where the shapes helped tell the story?" Take a picture walk - - page by page - - and discuss how the shapes help tell the story.
• the strawberry looks like a strawberry - - it doesn't look like a banana or an apple • the mouse looks like a mouse - -has a long, thin tail and whiskers, and skinny legs and arms, and big ears • the leaves are shaped like leaves you would see on a real tree - - there are different leaf shapes • etc.
Come to the conclusion that • shapes [circle, triangle, rectangle, square, etc] help us to draw • shapes give the picture more detail • our pictures should be true to shape (closely match what shape the object is in real life)
Encourage students to use shapes that closely match what shape the object is in real life. Dismiss for Writer's Workshop.
The Little Mouse, The Red Ripe Strawberry, and
THE BIG HUNGRY BEAR by Don and Audrey Wood
[BIG book]

Jessica Meacham www.jmeacham.com 88
3 Detail to Space
Gather students at the carpet. Say, "We are going to take a closer look at Don and Audrey's book today." Say, "This book will helps us to become better illustrators." Ask, "What does an illustrator do?"
• draws/makes/takes the pictures Ask, "What did we learn about using colors help tell the story?"
• colors show the reader what is happening • colors give the picture more detail • colors should be real to life (closely match what color the object is in real life)
Ask, "What did we learn about using shapes help tell the story?" • shapes [circle, triangle, rectangle, square, etc] help us to draw • shapes give the picture more detail • our pictures should be true to shape (closely match what shape the object is in real life)
Re-read The Little Mouse, the Red Ripe Strawberry, and THE BIG HUNGRY BEAR by D. and A. Wood. Say, "This book is written by Audrey and Don Wood."
Say, "This book is illustrated by Don Wood." Say, "When Don illustrated this book, he used good spacing for his illustrations." Say, "Don Wood tried to use good spacing to help tell the story." Ask, "Can you help me find pages where Don Wood uses good spacing to help tell the story?" Take a picture walk - - page by page - - and discuss how good spacing help tell the story.
• the strawberry is connected to the leaves, like it really should be - -like it is in real life • the leaves on the bush take up lots of space on the page - - they "go off" the edge of the page • the mouse is on the ladder - - we can tell because his feet touch the ladder - - like they would in real life • etc.
Come to the conclusion that • illustrations can take up the whole page • illustration spacing should be true to life (closely match what it might look like in real life)
Encourage students to use good spacing that closely matches what it might look like in real life. Dismiss for Writer's Workshop.
The Little Mouse, The Red Ripe Strawberry, and
THE BIG HUNGRY BEAR by Don and Audrey Wood
[BIG book]

Jessica Meacham www.jmeacham.com 89
4 Detail to Size
Gather students at the carpet. Say, "We are going to take a closer look at Don and Audrey's book today." Say, "This book will helps us to become better illustrators." Ask, "What does an illustrator do?"
• draws/makes/takes the pictures Ask, "What did we learn about using colors help tell the story?"
• colors show the reader what is happening • colors give the picture more detail • colors should be real to life (closely match what color the object is in real life)
Ask, "What did we learn about using shapes help tell the story?" • shapes [circle, triangle, rectangle, square, etc] help us to draw • shapes give the picture more detail • our pictures should be true to shape (closely match what shape the object is in real life)
Ask, "What did we learn about using good spacing help tell the story?" • illustrations can take up the whole page and give the reader more information • illustration spacing should be true to life (closely match what it might look like in real life)
Re-read The Little Mouse, the Red Ripe Strawberry, and THE BIG HUNGRY BEAR by D. and A. Wood. Say, "This book is written by Audrey and Don Wood." Say, "This book is illustrated by Don Wood." Say, "When Don illustrated this book, he wanted to make sure that he used all the space on the page." Say, "Don Wood paid close attention to the size of his illustrations." Ask, "Can you help me find pages where Don Wood used good sizing for his illustration?" Take a picture walk - - page by page - - and discuss how the size of the illustrations help tell the story.
• the strawberry is supposed to be big - - he drew the strawberry bigger than the mouse - - it's big and plump • the leaves should be bigger than the mouse and they are, there should be lots of leaves and there are • the bear should be really big, like the words are in the title, and he drew the bear BIG!!
Come to the conclusion that • illustration sizes are not always the same (objects are all different sizes to show detail) • sizes should be real to life (closely match what size the object is in real life)
Encourage students to draw objects using good sizing that closely matches what size the object is in real life. Dismiss for Writer's Workshop.
The Little Mouse, The Red Ripe Strawberry, and
THE BIG HUNGRY BEAR by Don and Audrey Wood
[BIG book]

Jessica Meacham www.jmeacham.com 90
5 Illustrations Help Tell the Story
Gather students at the carpet. Say, "Today's book will help us to become better illustrators." Say, "This book is illustrated by Alison Jay." Say, "Alison Jay also wrote the book, she is the author." Say, "There are not many words in this book, in fact Alison Jay wants the reader to pay close attention to the pictures." Say, "Alison Jay drew pictures that are very detailed." Say, "The illustrations [pictures] help tell the story." Read Picture This... by Alison Jay. After reading the book discuss the following...
• what illustration details are included on each page • why Alison Jay added those details • how the details help tell the story • how Alison Jay used colors, shapes, space, and size to help tell the story
Come to the conclusion that good illustrators • think about their illustrations before drawing them • draw illustrations that are detailed • use colors, shapes, space, and size to help tell the story • take their time
Encourage students to take their time when they draw their story. Encourage students to draw illustrations that are detailed. Dismiss for Writer's Workshop.
Picture This...
by Alison Jay

Jessica Meacham www.jmeacham.com 91
6 Illustrations Help Tell the Story
Gather students at the carpet. Say, "Today's book will help us to become better illustrators." Say, "This book is illustrated by James Mayhew." Say, "James Mayhew also wrote the book, he is the author." Say, "This is a book about a girl named Katie. Katie visits the museum in this book {discuss what a museum is}." Say, "When Katie visits the museum, she sees lots of pictures/art work." Say, "When she sees the pictures, something interesting happens to Katie." Say, "Let's read the book to find out what happened when Katie saw pictures in the museum." Read Katie's Picture Show by James Mayhew. After reading the book discuss the following...
• what pictures Katie saw • what happened when Katie saw them • why Katie "became a part" of the pictures • how illustrations/pictures help tell stories
Come to the conclusion that good illustrators • think about their illustrations before drawing them • draw illustrations that are detailed • use colors, shapes, space, and size to help tell the story • take their time
Encourage students to take their time when they draw their story. Encourage students to draw illustrations that are detailed. Dismiss for Writer's Workshop.
Katie's Picture Show
by James Mayhew

Jessica Meacham www.jmeacham.com 92
7 Illustrations Help Tell the Story
Gather students at the carpet. It would be very helpful to have posters of the pictures or of some of the pictures that are featured in the book. Say, "Today's book will help us to become better illustrators." Say, "This book is illustrated by Sally Swain." Say, "Sally Swain also wrote the book, she is the author." Say, "This is a book about different paintings from very famous artists." Have several posters posted on the wall (that are featured in the book). Say, "The author of this book, looked at these posters and used her imagination to create stories about each one." Point to each sample poster you have posted, and briefly predict what stories could surround each one...
• STARRY NIGHT - - looking up at stars from a hill • THE UMBRELLAS - - playing football in a park full of ladies carrying umbrellas • TIGER IN A TROPICAL STORM - - exploring the rain forest
Say, "Let's read the book to find out what stories the author thought of for each picture." Read Once Upon a Picture by Sally Swain. After reading the book discuss the following...
• what pictures were in the book • what stories the author created for each picture • how illustrations/pictures help tell stories
Come to the conclusion that good illustrators • think about their illustrations before drawing them • draw illustrations that are detailed • use colors, shapes, space, and size to help tell the story • take their time
Encourage students to take their time when they draw their story. Encourage students to draw illustrations that are detailed. Dismiss for Writer's Workshop.
Once Upon a Picture
by Sally Swain

Jessica Meacham www.jmeacham.com 93
Utilizing Drawing Books
Mini Lessons for Teaching Illustrators how to Utilize Drawing Books
Mini Lessons
1 Introducing Drawing Books Have students sit around the carpet area. Once students are settled, display "How To" drawing books [one by one] along the wall or chalkboard ledge. Affirm student excitement. Say, "Yes, this is very exciting. I've worked very hard to find books that will help us to become better illustrators." Say, "I want you to be able to see what's inside of these books, so I'm going to give each writing partnership 1 or 2 books to look at." Say, "When you get your books, bring them to a spot in the room, and look through them." Say, "When we gather again, you will share your book with the class, and tell us all about it." Distribute books to partnerships. Allow time for students to browse their books. Gather the class together around the carpet area. Call partners up to share their book. Facilitate conversation:
• what is your book about • what will we find inside the book • how many different drawings are in the book • which is your favorite drawing
All all groups to share. Once finished, tell the students that in a few days, we will be able to start using the books, after we learn how to care for the books, and how to
use the books. Dismiss for Writers' Workshop.

Jessica Meacham www.jmeacham.com 94
2 Caring for a Drawing Book Have students sit around the carpet area. Once students are settled, display "How To" drawing books. Say, "Yesterday we learned about these books." Ask, "What are some of the things that we know about now that we've had a chance to look inside of these books?" Say, "These books belong to the library, and we must definitely take very good care of them!" Ask, "How should we take care of these books?"
• should we step on them • should we use them as a fan • should we build a fort with them • should we tear out the pages so we can trace them better • should we color the pictures
Tell students just as with any book in the classroom, or in our school library, these books are to be used in appropriate ways. Tell students that how we use the books will determine how long the books last. If we use them poorly, they won't last a long time. Decide as a class what the rules are for
• picking a book out to use • caring for a book while using it • returning a book when finished with it
Tell the students that in a couple of days, we will be able to start using the books, after we learn how to use the books. Dismiss for Writers' Workshop.

Jessica Meacham www.jmeacham.com 95
3 Tracing a Drawing Book Have students sit around the carpet area. Once students are settled, display "How To" drawing books. Say, "Yesterday we learned about these books." Ask, "What are some of the things that we know about now that we've had a chance to look inside of these books?" Ask, "How do we care for these books?" Say, "These books belong to the library, and we must definitely take very good care of them!" Tell the children that today they will learn how to use the books. Say, "There are two different ways to use this book. Today we will learn about one of those ways." Share that these books are helpful when artists/illustrators are learning how to draw. Say, "One way to use these books is to TRACE the picture." Say, "To TRACE the picture you need three things: (1) a pencil (2) paper (3) a picture to trace." Gather these three things and show the class the items that are needed. Demonstrate how to place the paper (or notebook) over the picture. Tell students that they will need to make sure that the paper covers the entire picture. Demonstrate how to TRACE the picture. Think out loud while you TRACE the picture. Discuss:
• how to re-align the paper if it shifts • what to do if pencil marks get on the book
Once you are finished, ask students, "Now that I'm finished, what should I do now?" Demonstrate how to trace the pencil marks with a black marker (thin), and then how to color nicely inside the lines with marker/crayon/color
pencil. Tell the students that after tomorrow, we will be able to start using the books, after we learn how to use the books in a different way. Dismiss for Writers' Workshop.

Jessica Meacham www.jmeacham.com 96
4 Copying A Drawing Book Have students sit around the carpet area. Once students are settled, display "How To" drawing books. Say, "The past three days we learned about these books." Ask, "What are some of the things that we know about now that we've had a chance to look inside of these books?" Ask, "How do we care for these books?" Say, "These books belong to the library, and we must definitely take very good care of them!" Tell the children that today they will learn how to use the books. Say, "There are two different ways to use this book. We learned one of the ways yesterday, and today we will learn about the other way." Share that these books are helpful when artists/illustrators are learning how to draw. Say, "One way to use these books is to COPY the picture." Say, "To COPY the picture you need three things: (1) a pencil (2) paper (3) a picture to trace." Gather these three things and show the class the items that are needed. Demonstrate how to place the paper (or notebook) next to the picture. Tell students that they will need to look at the picture very carefully and notice:
• what shapes are used • how big the shapes are • how the shapes connect • where the shapes are on the page • how the shapes fit together to make the picture
Demonstrate how to COPY the picture. Think out loud while you COPY the picture. Once you are finished, ask students, "Now that I'm finished, what should I do now?" Demonstrate how to trace the pencil marks with a black marker (thin), and then how to color nicely inside the lines with marker/crayon/color
pencil. Tell the students that tomorrow, we will be able to start using the books! Dismiss for Writers' Workshop.

Jessica Meacham www.jmeacham.com 97
5 Using A Drawing Book Have students sit around the carpet area. Once students are settled, display "How To" drawing books. Say, "The past four days we learned about these books." Ask, "What are some of the things that we know about now that we've had a chance to look inside of these books?" Ask, "How do we care for these books?" Say, "These books belong to the library, and we must definitely take very good care of them!" Say, "There are two different ways to use this book." Ask, "What are the two different ways that we can use these books?" Take time to briefly discuss each way. Share that these books are helpful when artists/illustrators are learning how to draw. Say, "Today you will be able to pick out a book to use." Allow students to select a book {I choose quietest first}. Say, "We've learned a lot about these books. We've learned what's inside of them, how to care for them, and how to use them." Say, "When you are using these books, please remember all that you've learned. Have fun, and I can't wait to see hear your stories and see your
illustrations!" Dismiss students for Writer's Workshop.

Jessica Meacham www.jmeacham.com 98
Resources:
There are a lot of good "How To Draw" books out there. My favorites are by Philippe Legendre. I wanted to purchase the whole set {Kids Can
Draw}, however they are hard to find - - but you can find some of them used [online]! My public library system had them, so I just checked them out
and continued to "renew" them as long as I could. A website visitor friend located several other great resources that I've just added (the Watch Me Draw
Series and the Draw and Color Series). You'll find links below to sites that carry all of these "How To Draw" book resources.
Usborne Series
1 1
What Shall I Draw I Can Draw Animals I Can Draw People 1 1
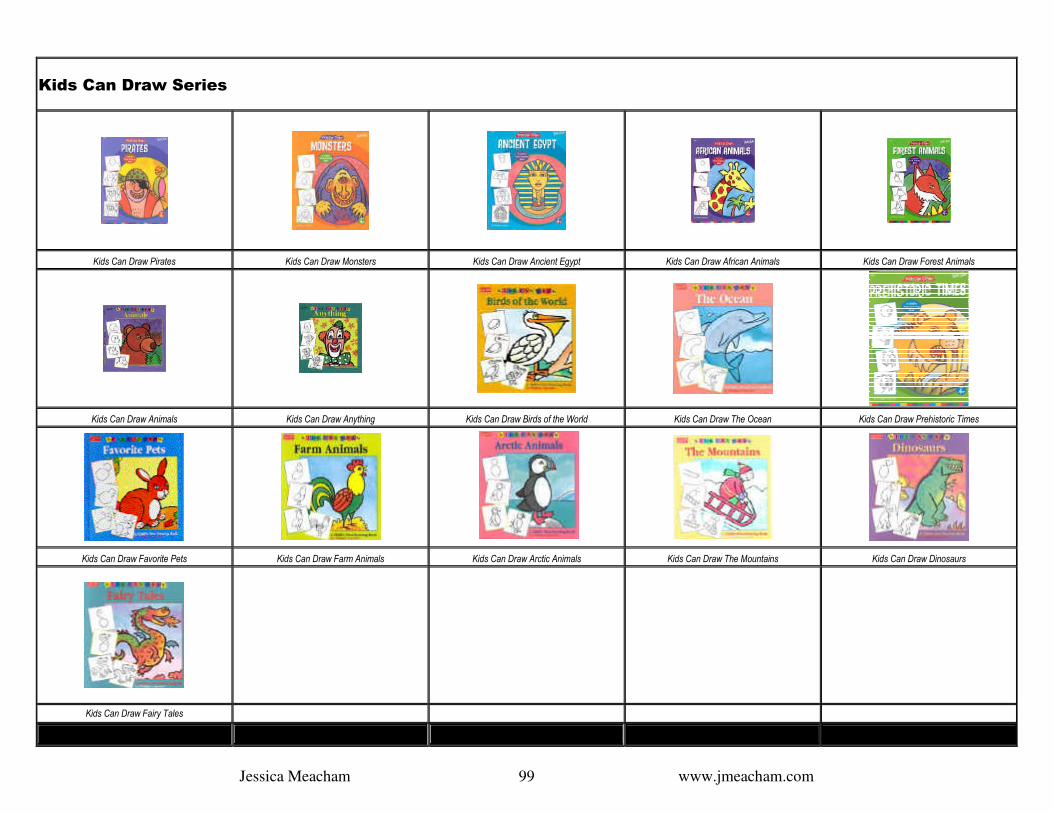
Jessica Meacham www.jmeacham.com 99
Kids Can Draw Series
Kids Can Draw Pirates Kids Can Draw Monsters Kids Can Draw Ancient Egypt Kids Can Draw African Animals Kids Can Draw Forest Animals
Kids Can Draw Animals Kids Can Draw Anything Kids Can Draw Birds of the World Kids Can Draw The Ocean Kids Can Draw Prehistoric Times
Kids Can Draw Favorite Pets Kids Can Draw Farm Animals Kids Can Draw Arctic Animals Kids Can Draw The Mountains Kids Can Draw Dinosaurs
1 1 1 1
Kids Can Draw Fairy Tales 1 1 1 1
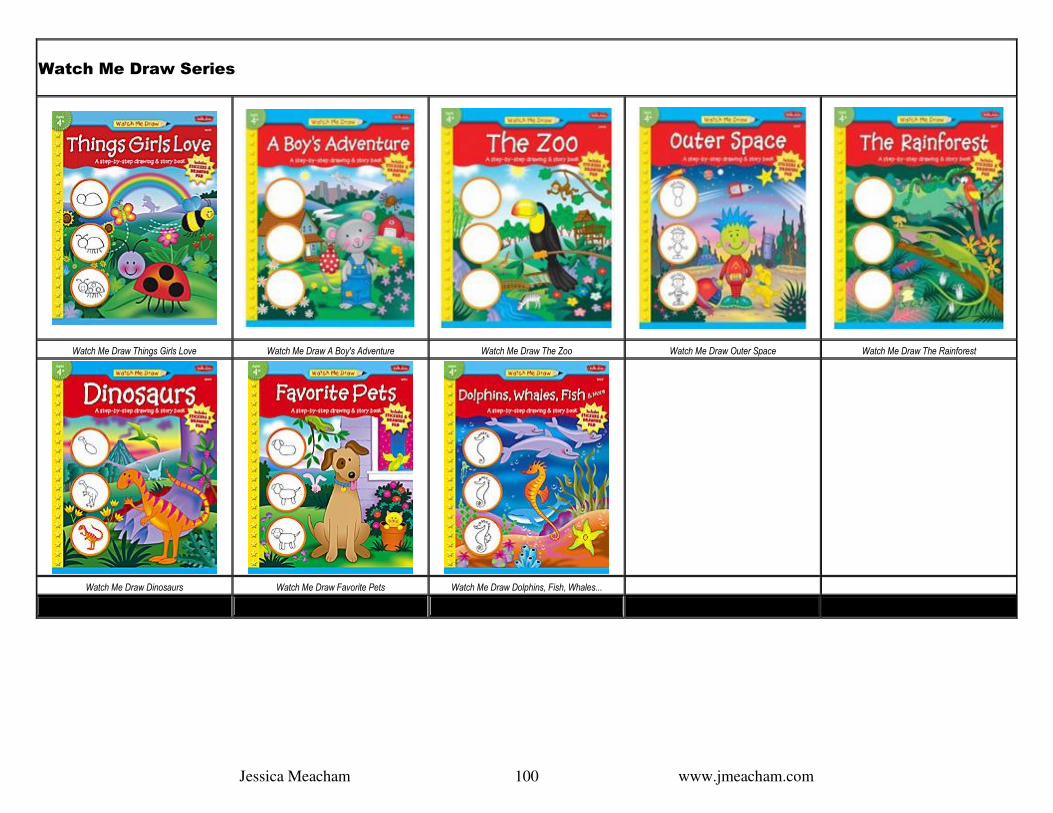
Jessica Meacham www.jmeacham.com 100
Watch Me Draw Series
Watch Me Draw Things Girls Love Watch Me Draw A Boy's Adventure Watch Me Draw The Zoo Watch Me Draw Outer Space Watch Me Draw The Rainforest
1 1
Watch Me Draw Dinosaurs Watch Me Draw Favorite Pets Watch Me Draw Dolphins, Fish, Whales... 1 1

Jessica Meacham www.jmeacham.com 101
Draw and Color Series
Draw and Color Cats and Kittens Draw and Color Dogs and Puppies Draw and Color Dinosaurs Draw and Color Horses and Ponies Draw and Color Pets
11
Draw and Color Sea Creatures Draw and Color Animals Draw and Color Cars and Trucks Draw and Color Reptiles and Amphibians 1

Jessica Meacham www.jmeacham.com 102
1 2 3 Draw Series
1 2 3 Draw Ocean Life 1 2 3 Draw Horses 1 2 3 Draw Pets and Farm Animals 1 2 3 Draw Mythical Creatures 1 2 3 Draw Wild Animals
1 2 3 Draw Knights, Castles, and Dragons 1 2 3 Draw Cars, Trucks, and Other Vehicles 1 2 3 Draw Dinosaurs and Other Prehistoric
Animals 1 2 3 Draw Cartoon Cars 1 2 3 Cartoon Trucks and Motorcycles
1 2 3 Cartoon Aircraft 1 2 3 Cartoon Monsters 1 2 3 Cartoon Faces 1 2 3 Cartoon People 1 2 3 Cartoon Animals
1
1 2 3 Cartoon Wildlife 1 2 3 Cartoon Aliens and Space Stuff 1 2 3 Cartoon Sea Creatures 1 2 3 Cool Cartoon Stuff 1

Jessica Meacham www.jmeacham.com 103
Where to Find:
Watch Me Draw Series
Draw and Color Series Kids Can Draw Series 1 2 3 Draw Series
http://www.teachercreated.com/ http://www.teachercreated.com/ 1 1 1 1
http://www.walterfoster.com/ http://www.walterfoster.com/ 1 1 1 1
www.amazon.com www.amazon.com 1www.amazon.com www.amazon.com 1 1
1 11 http://www.powells.com/ 1 1 1
11 1 1 http://www.peelbooks.com/index.html 1 1

Jessica Meacham www.jmeacham.com 104
Transitioning to Pens and PencilsTransitioning to Pens and PencilsTransitioning to Pens and PencilsTransitioning to Pens and Pencils
Using writing tools that allow us to write more on a page.
Mini Lessons
1 Ask students to give examples of writing tools that we can use to write with. Show examples of each. Make marks on a white piece of paper with each writing tool, then compare and contrast the marks. Classify each mark as thin or thick. Make the connection between tools that leave thick marks versus thin marks. Share, "I've been noticing a lot of great things about your writing lately class. In fact, I've been thinking a lot about it! I have noticed that you are writing
neater letters. I have noticed that you are writing smaller letters. I've also noticed that you are writing more words and sentences to share details about your
stories. All of these things are great, and I have decided to give you a gift that will help you to continue doing such great things!" Share, "Before I give you your gift, I want you to help me notice something. Will you help? You see, I think that if we write with a tool that makes thin marks,
we will be able to write neater letters. If we write with a tool that makes thin marks, our letters will be smaller, easier to read, and we will be able to write more
words and sentences. This will then give our readers more information about our story. What do you think? Let's try writing a story. We will write it two
times. Once with a tool that writes thick lines, and once with a tool that writes thin lines. Then we will compare the two stories." After writing the first story (thick lines), count the number of sentences written. Do the same for the second story. Compare and contrast. Decide which one is better. Remind students, before dismissing them for Writer's Workshop, that they too can use writing tools that leave thin marks. Give students their "gift" [a mechanical pencil, gel pen, thematic pencil/pen, etc].
2 Ask students to identify writing tools that write thick and thin lines. Ask students to share the benefits of writing with tools that leave thin lines.

Jessica Meacham www.jmeacham.com 105
Divide "teacher journal" [chart paper] into a t-chart. On one side, write your story using a thick writing tool. On the other side, re-write your story using a thin tool. Ask students to make observations about the two. ["we have more room to write more details/information"] Count the number of sentences on each side. Remind students, before dismissing them for Writer's Workshop, that they too can use writing tools that leave thin marks.

Jessica Meacham www.jmeacham.com 106
Writers Write about Their Lives
Mini Lessons for Encouraging Writers to Write about Themselves
Mini Lessons
1
Tell students that today they will listen to a story written by ________________________. Share that ______________ usually writes stories that are fiction - - not true, make believe, but in this book, the author shares a story from their childhood. Read the book [or excerpt, or chapter] to the class. Ask the class to recall events from the story, excerpt, or chapter. Ask the class to determine how the author felt. Remind the class that authors sometimes choose to write about themselves - - things that happened in their lives. Encourage the class to write about something that happened to them - - something that's true.
Autobiographical Books Written by Familiar Authors:
1
Cynthia Rylant Eric Carle Cynthia Rylant Roald Dahl 1
Tomie dePaola Tomie dePaola Tomie dePaola Tomie dePaola Tomie dePaola

Jessica Meacham www.jmeacham.com 107
Tomie dePaola Tomie dePaola Tomie dePaola Tomie dePaola Tomie dePaola
Patricia Polacco Patricia Polacco Patricia Polacco Patricia Polacco Patricia Polacco
Patricia Polacco Patricia Polacco Patricia Polacco Patricia Polacco Patricia Polacco
2
Display several Henry and Mudge books, as well as When I Was Young in the Mountains by Cynthia Rylant. The class should be familiar with Henry and Mudge books. Ask them what they are about. Ask the children if Henry and Mudge books are fiction or nonfiction. Remind students that sometimes authors write books that fiction. They make the stories up. Compare the Henry and Mudge books with Cynthia Rylant's book When I Was Young in the Mountains. Remind students that sometimes authors write books that are true. They write about their childhood. Tell the class that Cynthia Rylant wrote many books about Henry and Mudge and they are fiction - - not true. Tell the class that Cynthia Rylant also sometimes writes about her childhood, as she did in When I Was Young in the Mountains. Model for the class how to write an "autobiographical incident" - something that happened in your own life that's true. When finished, compare to a previously written piece (fiction) - - ask the class the difference between the two. Encourage the class to write about something that happened to them - - something that's true.

Jessica Meacham www.jmeacham.com 108
Writing Detailed Stories: Moving Beyond "I like ____. I love ____."
Mini Lessons for Writing Fictional Stories or Personal Narratives that Move Beyond "I Like" and "I Love"
Mini Lessons Resources
1
Why don't authors and illustrators use "I like ____. I love ____."? To help my students see that authors generally don't write "I like ____. I love ____." stories, I select a non-fiction book about frogs and a fiction book about frogs from my classroom library. You, of course, could select a different topic for your books, but it helps to
have a non-fiction and fiction book about the same topic. DAY #1 I hold up both books and ask the class what they think each book is about. They undoubtedly come to the consensus that each book is about frogs. I quickly share each book's title and author/illustrator
information. I share that one book is fiction (not true) and one book is non-fiction (true). I challenge them to identify the non-fiction and fiction book (we discuss why each is labeled as such). I read the non-fiction book about frogs first. I then ask the class if the
author wrote an "I like ____. I love ____." story. I then ask them why they didn't write "I like ____. I love ____." in their text. If they aren't sure, I tell them why...
Say, "Authors, like David Badger [point to author's name on front cover], know that they don't have to tell their audience/readers that they love frogs because if they are writing about frogs, we can assume that they love and like frogs, and that they think they are pretty/cute/fun/[or any other frequently, easy to write description your Kid Writers use too often]. So, instead of writing, "I like FROGS. I love FROGS. FROGS are cute. FROGS are nice." The author, David Badger [point to author's name on front cover], shared detailed information about real frogs." Before dismissing for Writer's Workshop, remind the class that they too don't have to write "I
like ____. I love ____. " stories, and that they can write detailed stories instead, like this book's author, David Badger. DAY #2 I hold up both books and ask the class what each book is about. I then ask them to remind me which book is non-fiction and which is fiction. I hold up the non-fiction book from yesterday's lesson and ask the class why the author, David Badger, didn't write an "I like
frogs. I love frogs. Frogs are cute. Frogs are nice." story. Conclude that authors don't write "I like _____. I love _____. stories because there are many other details that need to be shared and they don't need to waste their time on those words because we (the
readers) already KNOW that the author likes and loves frogs because he choose to write about them. I then hold up the second book about frogs (fiction). I read the fiction book about frogs. I then ask the class if the author wrote an "I like ____. I love ____."
story. I then ask them why they didn't write "I like ____. I love ____." in their text. If they aren't sure, I tell them why... Say, "Authors, like Robert Kaplan [point to author's name on front cover], know that they don't have to tell their audience/readers that they love frogs because if they are writing about frogs, we can assume that they love and like frogs, and that they think they are pretty/cute/fun/[or any other frequently, easy to write description your Kid Writers use too often]. So, instead of writing, "I like FROGS. I love FROGS. FROGS are cute. FROGS are nice." The author, Robert Kaplan [point to author's name on front cover], shared detailed information in his story about a frog that escapes by jumping to safety." Before dismissing for Writer's Workshop, remind the class that they too don't have to write "I like ____. I love ____. " stories, and that they can write detailed stories instead,
like this book's author, Robert Kaplan. Note - - this mini lesson can be taught over and over whenever needed. There are many fiction and nonfiction books out there about the same topic. I've found that the mini lesson really hits home and students eventually begin to let the concepts sink in and begin writing detailed stories that move beyond the "safe" I like ____ and I love ____ stories.
Jump, Frog,
Jump
by Robert
Kaplan
Frogs
by David
Badger

Jessica Meacham www.jmeacham.com 109
2
Student Stories To help my students see that authors generally don't write "I like ____. I love ____." stories, I model storywriting using student characters. Each day I draw a detailed illustration ahead of time, prior to Writer's Workshop. After the children have gathered around the teaching easel, I display my illustration. I then draw a hand [glove] on the whiteboard next to my illustration/journal. I write the 5Ws + 1H inside the fingers of the glove/hand. I then select a student from the class and they help (along with other classmate suggestions) write a story based on the illustration. We label any characters in the illustration. As the story is written, we refer to the 5Ws + 1H hand/glove illustration as a point of reference. I tell the class that the 5Ws + 1H help authors write stories that are detailed and full of information. We check off the fingers as we add those parts to the story. We talk about how illustrations sometimes answer the 5Ws + 1H questions and so we can check them off based on if the answer is nicely detailed/given in our illustration. It takes several days/weeks to get through all of the children in my class. I make it a point to write a story for each child. They really enjoy this, and it begins to sink in that stories are much more than "I like ______." and "I love ________."
3
Writer's Use Detail When Storytelling: 5Ws + 1H
Listen to a detailed read aloud, such as Bear Snores On by Karma Wilson. NOTE - - We are studying BEARS at the time of the year when I teach this mini lesson, so I pick a fiction book about bears. Draw a hand [glove] on the whiteboard. Write the 5Ws + 1H inside the fingers of the glove/hand. Hold up the book and/or put it on the ledge next to your drawing of the 5Ws + 1H glove/hand. Ask, "What does this detailed story tell us? Which questions (point to them as you read them) does it answer?" Orally share answers, and check off the questions that are answered in the text and/or illustrations. Point to the 5 Ws + 1H story telling glove/anchor and then hold up the book. Share that, "Good writers write lots of details." Say, "Good writers don't just write 'I love...' and 'I like....' stories. They move beyond those words." Remind students that authors don't need to write "I like" and "I love" in their stories because we already know they do if they are
writing about the topic. Share that, "The 5 Ws + 1H help writers write detailed stories." Distribute student copies of 5 Ws story telling hand/glove. Share, “We can use the glove as a tool when writing!”
Storytelling
Question Hand
.doc
Storytelling
Question Hand
Storytelling
Question Gloves

Jessica Meacham www.jmeacham.com 110
Stories Have Titles
Mini Lessons for Encouraging Writers to Add a Title to Their Story
Mini Lessons
1
Display The Very Hungry Caterpillar by Eric Carle; however, cover the title of the book. Ask the children what the book was about. Challenge them to recall the title of the book. Reveal the title of the book, to check if their guess was correct. Ask the children why they think the author choose to name the book (write a title for it)? Ask them if they think that this title, The Very Hungry Caterpillar, is a good title for the book. Why? Why not? Share with the class that when authors are deciding what to name their book, they make sure that the title matches
the story. Ask the class if Eric Carle did a good job of matching his title to his story. Challenge them to brainstorm several other possible titles for the book. Encourage the class to add a title to their stories. Remind them that titles "match" the story - - they give clues about what the story is about.
2
Display Denise Fleming's books, In the Small, Small Pond and In the Tall, Tall Grass - - with titles covered. Ask the children what the books are about (must have previously read them). Challenge them to recall the titles of the books. Reveal the titles of the books, to check if their guesses were correct. Ask the children why they think the author choose to name the books (write a title for it)? Share with students that authors name their books (write titles) so that we know what the story is called. Share with students that titles give a clue as to what the book will be about. Ask them if they think that this title, In the Small, Small Pond, is a good title for the book. Why? Why not? Ask them if they think that this title, In the Tall, Tall Grass, is a good title for the book. Why? Why not? Share with the class that when authors are deciding what to name their book, they make sure that the title matches
the story. Ask the class if Denise Fleming did a good job of matching her titles to her stories. Challenge the class to brainstorm several other possible titles for the books. Encourage the class to add a title to their stories. Remind them that titles "match" the story - - they give clues about what the story is about.

Jessica Meacham www.jmeacham.com 111
3
Gather several BIG BOOKS (already been read) and display them. Tell the children that they will be working in partnerships. Challenge the partners to find one story (from the BIG BOOKS) to share with the class. Their goal is to find a
book that has a title that matches the books story. They must be prepared to share how the title matches the story. Allow time for partners to work. Gather as a class, and allow groups to share their BIG Book find - - name of book and why it's a good title. Encourage the class to add a title to their stories. Remind them that titles "match" the story - - they give clues about what the story is about.
4
Display a story you've previously written - - one without a title. Re-read the story to the class. Ask the class what could be added to the top of the story to make it even better for the reader. Divide the class into four groups. Give them a copy of your story. Challenge the groups to come up with a title for the story. Remind them that stories have titles, and that the titles must "match" the story. Allow time for the groups to work. Regroup and allow each group to share their title. Display the titles on the board/wall/chalkboard/whiteboard/etc. Encourage the class to add a title to their stories. Remind them that titles "match" the story - - they give clues about what the story is about.

Jessica Meacham www.jmeacham.com 112
Self-Checking or Editing
Mini Lessons for Checking a Writing Piece for Capitalization, Punctuation, Spacing, Illustrations, Etc.
Mini Lessons Resources
1 We Can Fix our Writing so it is Better Determining WHAT the problem is. Gather students around the carpet area. Ask, "Class, have you ever found something that needed to be fixed?" Facilitate discussion - allow students to share their experiences with finding broken things and fixing broken things. Tell students that today's book will help us all to become better writers. Read Fix-It by David McPhail. Facilitate discussion about WHAT needed fixing, WHY it needed to be fixed, WHO fixed it, and HOW it was fixed. Say, "When I have written a story, I always read it out loud when I am finished." Say, "Is it a good thing to read what I wrote when I finish?" Say, "Yes, you are right, good writers read what they wrote when they are done. They even share it with others." Say, "Sometimes when I read what I wrote, I see or hear problems." Say, "Let me show you what I mean." Say, "I am going to read to you what I wrote this morning. I want you to listen and look for any problems that I might
have." SAMPLE problems:
• capitalization
• spacing
• punctuation
• spelling
• repeated words
• etc.
Read pre-written story to the class. When finished, guide the class in determining WHAT needed to be fixed. Say, "Now I'd like you to pretend that your eyes and ears are like binoculars." Say, "Use your eyes and ears to decide WHAT needs to be fixed in my story." Use highlighter tape to mark where fixing needs to occur. Commend students on their ability to listen for and look for problems. Share, "Tomorrow we will continue working with this story. We will talk about WHY these problems need to be fixed." Remind students that good writers read their writing when they are finished. Remind students that good writers listen and look for problems as they read their writing. Encourage students to read their writing and listen and identify WHAT problems need to be fixed. Dismiss students for Writer's Workshop.
Fix It
by David McPhail
The Fixits
by Anne Mazer

Jessica Meacham www.jmeacham.com 113
2 We Can Fix our Writing so it is Better Determining WHY there is a problem. Gather students around the carpet area. Briefly discuss what was learned yesterday - Good readers read their writing to find WHAT problems need to be fixed. Tell students that today's book will help us all to become better writers. Read Fix-It Duck by Jez Alborough. Facilitate discussion about WHAT needed fixing, WHY it needed to be fixed, WHO fixed it, and HOW it was fixed. Say, "I am going to read to you what I wrote yesterday." Read pre-written story to the class. When finished, guide the class in remembering WHAT needed to be fixed. Say, "We highlighted problems that we found in my story." Say, "You were very good detectives and you found WHAT the problems were." Say, "Today, let's talk about WHY these are problems." Discuss problems marked by the highlighter tape. SAMPLE problems:
• capitalization • spacing • punctuation • spelling • repeated words • etc.
Talk about why it would be a problem to leave each mistake in the story. Commend students on their ability to determine WHAT are problems. Commend students on their ability to know WHY they are problems. Share, "Tomorrow we will continue working with this story. We will talk about WHO can fix these problems." Remind students that good writers read their writing when they are finished. Remind students that good writers listen and look for problems as they read their writing. Remind students that good writers think about why the problems need to be fixed. Encourage students to read their writing and listen and identify problems that need to be fixed.. Encourage students to think about WHY the problems need to be fixed. Dismiss students for Writer's Workshop.
Fix it Duck
by Jez Alborough
Jessica Meacham www.jmeacham.com 114
3 We Can Fix our Writing so it is Better Determining WHO can fix the problem. Gather students around the carpet area. Briefly discuss what was learned yesterday - Good readers read their writing to find WHAT problems there are. Good readers read think about WHY the problems need to be fixed. Tell students that today's book will help us all to become better writers. Read Who Can Fix It? by Leslie Ann MacKeen. Facilitate discussion about WHAT needed fixing, WHY it needed to be fixed, WHO fixed it, and HOW it was fixed. Say, "I am going to read what to you what I wrote a few days ago." Read pre-written story to the class. When finished, guide the class in remembering WHAT needed to be fixed and WHY it needed to be fixed. SAMPLE problems:
• capitalization • spacing • punctuation • spelling • repeated words • etc.
Say, "You were very good detectives and you found WHAT the problems in my story were." Say, "You also were able to think about WHY the problems needed to be fixed." Say, "Today, let's talk about WHO will be able to fix these problems." Review problems marked by the highlighter tape. Commend students on their ability to determine WHAT are problems. Commend students on their ability to know WHY they are problems. Say, "We know we can't leave these problems in the story. They are problems that need to be fixed." Ask, "WHO could fix these problems?" Say, "Yes we could fix our own problems. Writers do fix their own problems that they find." Ask, "What about if an author [writer] feels that they can't fix the problem, WHO else could they get to help?" Commend students on their ability to determine WHO is able to fix problems in writing. Share, "Tomorrow we will continue working with this story. We will talk about HOW problems can be fixed." Remind students that good writers read their writing when they are finished. Remind students that good writers identify WHAT the problems are as they read their writing. Remind students that good writers think about WHY the problems need to be fixed. Reminds students that good writers determine WHO can fix the problems. Encourage students to read their writing and listen and identify WHAT the problem are that need to be fixed. Encourage students to think about WHY the problems need to be fixed. Encourage students to determine WHO could fix the problems. Dismiss students for Writer's Workshop.
Who Can Fix It?
by Leslie Ann MacKeen
Turtle and Snake Fix It
by Kate Spohn
Jessica Meacham www.jmeacham.com 115
4 We Can Fix our Writing so it is Better Determining HOW the problem can be fixed. Gather students around the carpet area.
Briefly discuss what was learned yesterday - Good readers read their writing to find WHAT problems there are. Good readers read think about WHY the problems need to be fixed. Good readers determine WHO could fix the problems that need to be fixed. Tell students that today's book will help us all to become better writers. Read Mr. Fix It by Joy Cowley. Facilitate discussion about WHAT needed fixing, WHY it needed to be fixed, WHO fixed it, and HOW it was fixed. Say,
"I am going to read to you what I wrote a few days ago." Read pre-written story to the class. Guide the class in remembering WHAT needed to be fixed and WHY it needed to be fixed and WHO could fix it.
Say, "You were very good detectives and you found WHAT the problems in my story were." Say, "You also were able to think about WHY the problems needed to be fixed."
Say, "And yesterday, you helped me to determine WHO could fix these problems." Say, "Today, let's talk about HOW to fix the problems."
Review problems marked by the highlighter tape.
Commend students on their ability to determine WHAT are problems, to know WHY they are problem, and to decide WHO could fix the problems. Say, "We know we can't leave these problems in the story. They are problems that need to be fixed."
Ask, "WHO could fix these problems?" Ask, "HOW could these problems be fixed? Let's start with the first one. We will fix these problems together."
Work with children to fix the problems:
• capitalization
• spacing
• punctuation
• spelling
• repeated words
• etc.
Commend students on their ability to determine HOW problems can be fixed. Say:
• "Finding WHAT the problems are,
• knowing WHY they are problems,
• deciding WHO will fix them, and
• knowing HOW to fix them is very important."
Say, "There is a special word that I want you to know about." Write the word "Editing" on the board. Share with the class that what we have been working on the past few days is called "Editing" - -
• finding WHAT the problems are
• knowing WHY they are problems
• deciding WHO will fix the problems
• knowing HOW to fix the problems
Share, "Tomorrow we will all get a new writing tool that will help us when we are editing our stories." Remind students that good writers
• read their writing when they are finished
• identify WHAT the problems are
• think about WHY their problems need to be fixed
• determine WHO can fix the problems
• decide HOW the problems will be fixed
Encourage students to read their writing and listen and identify WHAT the problem areas that need to be fixed.
Encourage students to think about WHY the problems need to be fixed. Encourage students to determine WHO could fix the problems. Encourage students to decide HOW the problems will be fixed.
Dismiss students for Writer's Workshop.
Toolbox Twins
by Lola M.
Schaefer
Mr. Fix It
by Joy Cowley
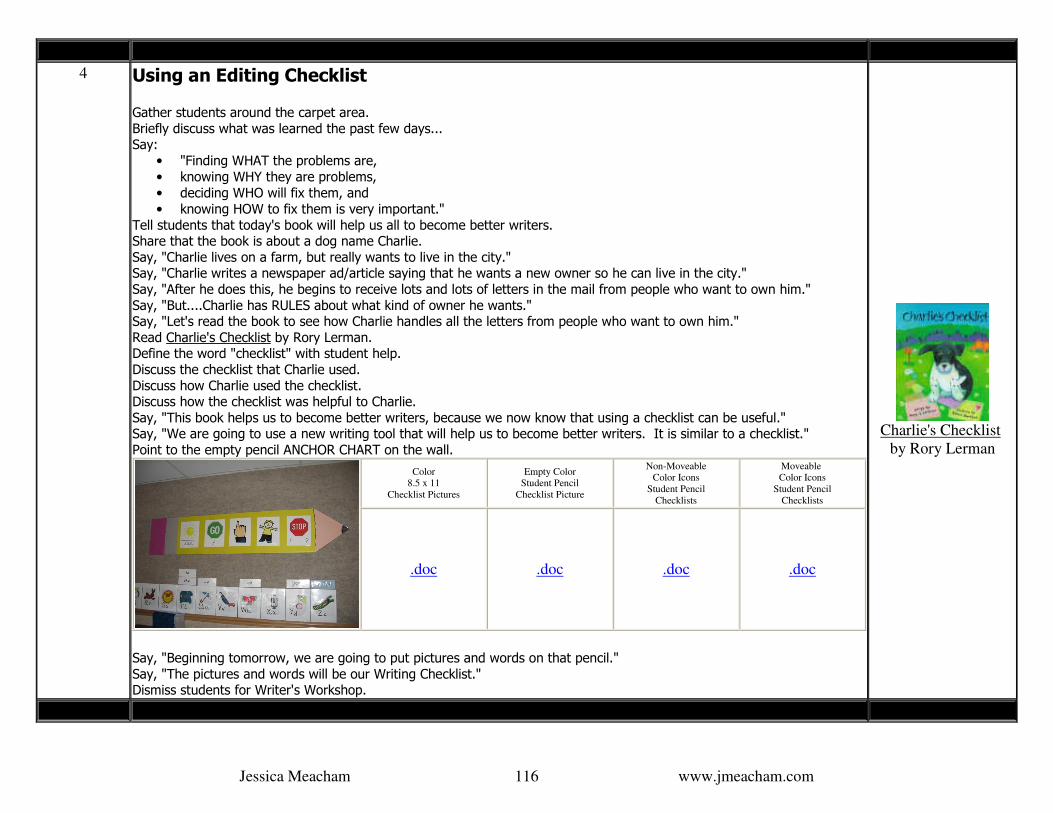
Jessica Meacham www.jmeacham.com 116
4 Using an Editing Checklist Gather students around the carpet area. Briefly discuss what was learned the past few days... Say:
• "Finding WHAT the problems are, • knowing WHY they are problems, • deciding WHO will fix them, and • knowing HOW to fix them is very important."
Tell students that today's book will help us all to become better writers. Share that the book is about a dog name Charlie. Say, "Charlie lives on a farm, but really wants to live in the city." Say, "Charlie writes a newspaper ad/article saying that he wants a new owner so he can live in the city." Say, "After he does this, he begins to receive lots and lots of letters in the mail from people who want to own him." Say, "But....Charlie has RULES about what kind of owner he wants." Say, "Let's read the book to see how Charlie handles all the letters from people who want to own him." Read Charlie's Checklist by Rory Lerman. Define the word "checklist" with student help. Discuss the checklist that Charlie used. Discuss how Charlie used the checklist. Discuss how the checklist was helpful to Charlie. Say, "This book helps us to become better writers, because we now know that using a checklist can be useful." Say, "We are going to use a new writing tool that will help us to become better writers. It is similar to a checklist." Point to the empty pencil ANCHOR CHART on the wall.
Color 8.5 x 11
Checklist Pictures
Empty Color Student Pencil
Checklist Picture
Non-Moveable Color Icons
Student Pencil Checklists
Moveable Color Icons
Student Pencil Checklists
.doc .doc .doc .doc
Say, "Beginning tomorrow, we are going to put pictures and words on that pencil." Say, "The pictures and words will be our Writing Checklist." Dismiss students for Writer's Workshop.
Charlie's Checklist
by Rory Lerman

Jessica Meacham www.jmeacham.com 117
5 Asking, "Do my words match my illustration?" Wear mismatched socks and inappropriate shoes [for a teaching job] to the mini lesson; However, do not draw attention to them! Gather students around the carpet area.
Briefly discuss what was learned the past few days... Say:
• "Finding WHAT the problems are,
• knowing WHY they are problems,
• deciding WHO will fix them, and
• knowing HOW to fix them is very important."
Tell students that today's books will help us all to become better writers. Say, "We've been leaning about finding problems, and today's books will help us with finding problems in our writing."
Share that the first book is about shoes. Read Shoes Shoes Shoes by Ann Morris.
By this time, students will have likely noticed your inappropriate shoes [not appropriate for the job/time of year]. Ask, "What's my problem?" Facilitate discussion about why having the "right" shoes is important for getting the job done.
Refer to book to support the discussion. Pull off the inappropriate shoes, to reveal the socks, but don't draw attention to them at this point.
Share that the second book is about socks. Read A Pair of Socks by Stuart Murphy. By this time, students will have likely noticed your mismatched socks. Ask, "What's my problem?" Facilitate discussion about why matching socks are important. Refer to the book to support the discussion.
Ask, "How can I fix my problem?"
Discuss possible solutions and then fix the problem by pulling off one sock and pulling on a matching pair of socks. Say, "When I don't have the 'right' shoes on for my job, I can't do my job correctly. I need my shoes to match my job.
Say, "When my socks don't match, I have a problem. I need my socks to match each other." Say, "Having shoes that match my job, and having socks that match each other, reminds me of my writing." Ask, "What do books have in them?" [words & pictures] Say, "Good writer's make sure that their pictures match their words!"
Ask, "Did Ann Morris do a good job of matching her words to her pictures in this story [show book]?" Ask, "Did Stuart Murphy do a good job of matching his words to his pictures in this story [show book]?"
Say, "Good writer's make sure that their pictures match their words!"
Show the class the first picture for the ANCHOR CHART. Ask, "What does this paper show us and say?" Say, "Yes, it is a picture of a sun, and it has the word 'sun' under the picture of the sun."
Ask, "Does this picture match this word?" Remind students that good writers make sure that their pictures match their words.
Say, "We can use this picture of a sun, with the word 'sun' under it to help us remember what good writers do. Point to the empty pencil ANCHOR CHART on the wall.
Say, "Let's glue this onto our pencil checklist to help us remember what good writers do." Glue the picture to the pencil. Remind students that the pencil can be used like a checklist.
Say, "Today we learned about making sure that our words match our text."
Say, "If our words don't match our text, that is a problem and we can fix the problem." Say, "We can use this picture to remind ourselves that we need to make sure our words match our text."
Ask, "What could we do if they don't match?" Conclude that if the picture doesn't match the words, the picture has to change or the words have to change.
Refer to the ANCHOR chart again. Say, "We are going to be adding more pictures to this pencil checklist."
Say, "The pictures and words will be our Writing Checklist." Dismiss students for Writer's Workshop.
Shoes, Shoes, Shoes
by Ann Morris
AND
A Pair of Socks
by Stuart Murphy

Jessica Meacham www.jmeacham.com 118
5 Asking, "Did I start my sentences with a capital letter?" Gather students around the carpet area. Briefly discuss what was learned the past few days... Say:
• "Finding WHAT the problems are, • knowing WHY they are problems, • deciding WHO will fix them, and • knowing HOW to fix them is very important."
Point to the pencil ANCHOR CHART on the wall. Say, "Yesterday we learned about making sure that our words match our text." Say, "If our words don't match our text, that is a problem and we can fix the problem." Tell students that today's book will help us all to become better writers. Say, "We've been leaning about making our writing even better." Say, "Today we are going to start learning about a new problem to look for when we check our writing." Read The Big and Little ABC by Sandra Ure Griffin. Generate discussion about how the letters of the alphabet are similar and different. Ask, "Why do we have little and big [uppercase and lowercase] letters in our alphabet?" Discuss as needed. Do a whole class ABC sort. Display the letter tiles, magnets, cards, etc. on the board, pocket chart, etc. Display the category cards - - uppercase and lowercase. Allow students to sort letters according to two traits: UPPERCASE and lowercase. Come to the conclusion that letters are either written in UPPERCASE or lowercase format. Come to the conclusion that we need both upper and lower case letters. Point to the pencil ANCHOR CHART on the wall. Say, "We learned about making sure that our words match our text." Say, "Now we are ready to add another picture to the pencil." Show picture of the 'GO' sign with the uppercase 'A' underneath. Ask, "What does this paper show us and say?" Say, "Yes, it is a picture of a GO sign, and it has an uppercase 'A' under it." Say, "The 'GO' sign reminds us that we always start our sentences with a capital letter [uppercase letter]." Glue the second sign to the pencil ANCHOR chart. Remind students that good writers make sure that their pictures match their words. Say, "We can use this picture of a sun, with the word 'sun' under it to help us remember what good writers do." Remind students that good writers start their sentences with a capital letter. Say, "We can use this picture of a GO sign, with the capital 'A' under it to help us to remember what good writers do." Dismiss for Writer's Workshop.
The Big and Little ABC
by Sandra Ure Griffin

Jessica Meacham www.jmeacham.com 119
7 Asking, "Did I use finger spaces?" Gather students around the carpet area. Briefly discuss what was learned the past few days... Point to the pencil ANCHOR CHART on the wall.
Color 8.5 x 11
Checklist Pictures
Empty Color Student Pencil
Checklist Picture
Non-Moveable Color Icons
Student Pencil Checklists
Moveable Color Icons
Student Pencil Checklists
.doc .doc .doc .doc
Say, "We learned about making sure that our words match our text." Say, "If our words don't match our text, that is a problem and we can fix the problem." Say, "We learned that we start our sentences with a capital letter." Say, "If we didn't start our sentence with a capital letter, that is a problem, and we can fix the problem." Tell students that today's book will help us all to become better writers. Say, "We've been leaning about finding problems, and today's book will help us with finding problems in our writing." Select one of the following books to read {or choose another book about overcrowding}
• No Room to Swing a Cat • A Crowded Ride in the Countryside • The Kid with Too Many Pets • Too Many Chickens • Not Enough Room
Read the book. Facilitate discussion about how the characters were overcrowded. Say, "Sometimes if I am in a hurry, the letters and words in my writing get overcrowded." The writers, at this time in the year, will have had previous mini lessons about finger spaces. Point to the pencil ANCHOR CHART on the wall.
Color 8.5 x 11
Checklist Pictures
Empty Color Student Pencil
Checklist Picture
Non-Moveable Color Icons
Student Pencil Checklists
Moveable Color Icons
Student Pencil Checklists
.doc .doc .doc .doc
Glue the POINTING finger sign up on the editing pencil ANCHOR CHART checklist. Remind students that good writers make sure that their pictures match their words. Say, "We can use this picture of a sun, with the word 'sun' under it to help us remember what good writers do." Remind students that good writers start their sentences with a capital letter. Say, "We can use this picture of a GO sign, with the capital 'A' under it to help us to remember what good writers do." Remind students that good writers leave spaces between their words. Say, "We can use this picture of a pointing finger to help us to remember what good writers do." Conclude that spaces should be put between letters and words. Dismiss students for Writer's Workshop.
No Room to Swing a
Cat
by Ralph Steadman
A Crowded Ride in the
Countryside
by Frank B. Edwards
The Kid with Too
Many Pets
by Harland Williams
Too Many Chickens
by Paulette
Bourgeois

Jessica Meacham www.jmeacham.com 120
8 Asking, "Did I stretch my words?" Gather students around the carpet area. Point to the pencil ANCHOR CHART on the wall. Remind students that good writers make sure that their pictures match their words. Say, "We can use this picture of a sun, with the word 'sun' under it to help us remember what good writers do." Remind students that good writers start their sentences with a capital letter. Say, "We can use this picture of a GO sign, with the capital 'A' under it to help us to remember what good writers do." Remind students that good writers leave spaces between their words. Say, "We can use this picture of a pointing finger to help us to remember what good writers do." Say, "We've been leaning about how to make our writing better." By this time of year, students should have already participated in mini lessons about stretching out words. Revisit the books you shared during those mini lessons:
• How Far will a Rubber Band Stretch
• Bubble Gum, Bubble Gum
• Double Bubble Trouble
• Arms, Elbows, Hands and Fingers
• Arms and Legs and other Limbs Show your arm, a piece of gum, and a rubber band. Ask, "How do these things help us to spell better?" Facilitate discussion...
• we can use them to help us stretch out words • they are tools to help us remember to stretch out words • etc.
Show the class the fourth picture for the ANCHOR CHART. Ask, "What does this paper show us?" Say, "Yes, it is a picture of a boy with his arms stretched to his sides." Ask, "What do you think this picture will help us to remember about spelling words?" Remind students that good writers stretch out their words to hear as many sounds in the word as possible. Say, "We can use this picture of the boy with stretched out arms, to help us remember that." Point to the pencil ANCHOR CHART on the wall. Say, "Let's glue this onto our pencil checklist to help us remember what good writers do." Glue the picture to the pencil. Remind students that the pencil can be used like a checklist. Say, "Today we learned about making sure that we stretch out our words as much as possible." Say, "If we stretch out our words, and listen very carefully for all the sounds in the words, we will be better writers." Say, "We can use this picture to remind ourselves that we need to stretch out our words." Dismiss students for Writer's Workshop.
How Far Will a Rubber
Band Stretch?
By Mike Thaler
Bubble Gum, Bubble
Gum
by Lisa Wheeler
Double Bubble Trouble
by Judy Bradbury
Arms, Elbows, Hands,
and Fingers
by Lola Shaefer
Arms, Legs, and Other
Limbs
by Allan Fowler
Jessica Meacham www.jmeacham.com 121
9 Asking, "Did I use punctuation [sentence stoppers]?" Gather students around the carpet area. Point to the pencil ANCHOR CHART on the wall. Remind students that good writers make sure that their pictures match their words. Say, "We can use this picture of a sun, with the word 'sun' under it to help us remember what good writers do." Remind students that good writers start their sentences with a capital letter. Say, "We can use this picture of a GO sign, with the capital 'A' under it to help us to remember what good writers do." Remind students that good writers leave spaces between their words. Say, "We can use this picture of a pointing finger to help us to remember what good writers do." Remind students that good writers stretch out their words to hear as many sounds in the word as possible. Say, "We can use this picture of the boy with stretched out arms, to help us remember what good writers do." Say, "We've been leaning about how to make our writing better." By this time of year, students should have already participated in mini lessons about adding sentence stoppers. Revisit the books you shared during those mini lessons:
• Stop, Train, Stop!
• City Signs
• I Read Signs
• Signs on the Road
• Signsin our world
• Mr.Pines Mixed-up Signs
Ask, "Why do writers use periods, question marks, and exclamation points?" Facilitate discussion...
• to stop a sentence
• to ask a question
• to show emotion (excitement, sadness, anger, etc).
• etc.
Show the class the fifth picture for the ANCHOR CHART. Ask, "What does this paper show us?" Say, "Yes, it is a picture of a stop sign with the word 'stop' underneath the stop sign." Ask, "What do you think this picture will help us to remember when we are writing?" Remind students that good writers stop their sentences with a period, question mark, or exclamation point. Say, "We can use this picture of stop sign with the word 'stop' underneath the stop sign, to help us remember that." Point to the pencil ANCHOR CHART on the wall. Say, "Let's glue this onto our pencil checklist to help us remember what good writers do." Glue the picture to the pencil. Remind students that the pencil can be used like a checklist. Say, "Today we learned about stopping sentences with a period, exclamation point, or question mark." Ask, "When I'm done writing, and I read my story, what should I do if I notice that I didn't use any sentence stoppers?" Say, "If we forgot to use sentence stoppers, we should go back and add them." Demonstrate how to do this on a sample piece of writing. Say, good writers put periods, question marks, or exclamation points at the ends of sentences." Say, "We can use this picture to remind ourselves that we need to make sure we have sentence stoppers in our writing." Dismiss students for Writer's Workshop.
Stop, Train, Stop!
by W. Rev Awdry
City Signs
Zoran Milich
I Read Signs
by Tana Hoban
Signs on the Road
by Mary Hill
Signs in our World
by DK Publishing
Mr. Pine's Mixed Up Signs
by Leonard Kessler

Jessica Meacham www.jmeacham.com 122
Writing Non-Fiction
Mini Lessons for Writing Detailed Non-Fiction Pieces
Mini Lessons Resources
1
Hold up the Community Vehicles book series by Marcia S. Freeman. Ask the class what they think these books are about. Say, "The author, Marcia Freeman, KNOWS a lot about community vehicles." Say, "The author, Marcia Freeman, KNOWS so much about them that she decided to write four stories about them." Before reading the book, ask the class, "Do you KNOW anything about community vehicles?" Allow them to share a few facts that the KNOW. Display the "KNOW" card on the teaching easel. Say, "Let's read the books to discover what Marcia Freeman KNOWS [point to sign] about community vehicles." Read the books. Ask, "Did the author write 'I like..., I love..., ...is cool, ...is nice' stories?" Say, "No. She didn't write those kinds of sentences." Say, "She didn't have to, because we already know she likes, loves, and thinks they are nice, cool because she wrote about them." Say, "I read these books this morning before you came to school, and they reminded me that I KNOW a lot, too." Say, "I am going to write a non-fiction story today about computers, because I KNOW [point to "know" card/sign] a lot about
computers." Display your journal for the class [at this point in the year, I always illustrate ahead of time, to save time]. Write a non-fiction piece about computers, thinking aloud as you do. Accept student help for word spelling sight words, and encourage students to "stretch" unknown words with you. When finished, say "I'm glad that I can write about things that I KNOW [point to "know" card/sign] about." By this time, students may have made the connection between "no" and "know." Talk about the "KN" in know. Discuss the differences between know and no. Add "KNOW" to the word wall. Remind students that they can use it to remind them that they can write about things that they KNOW about.
Community Vehicles
by Marcia S.
Freeman
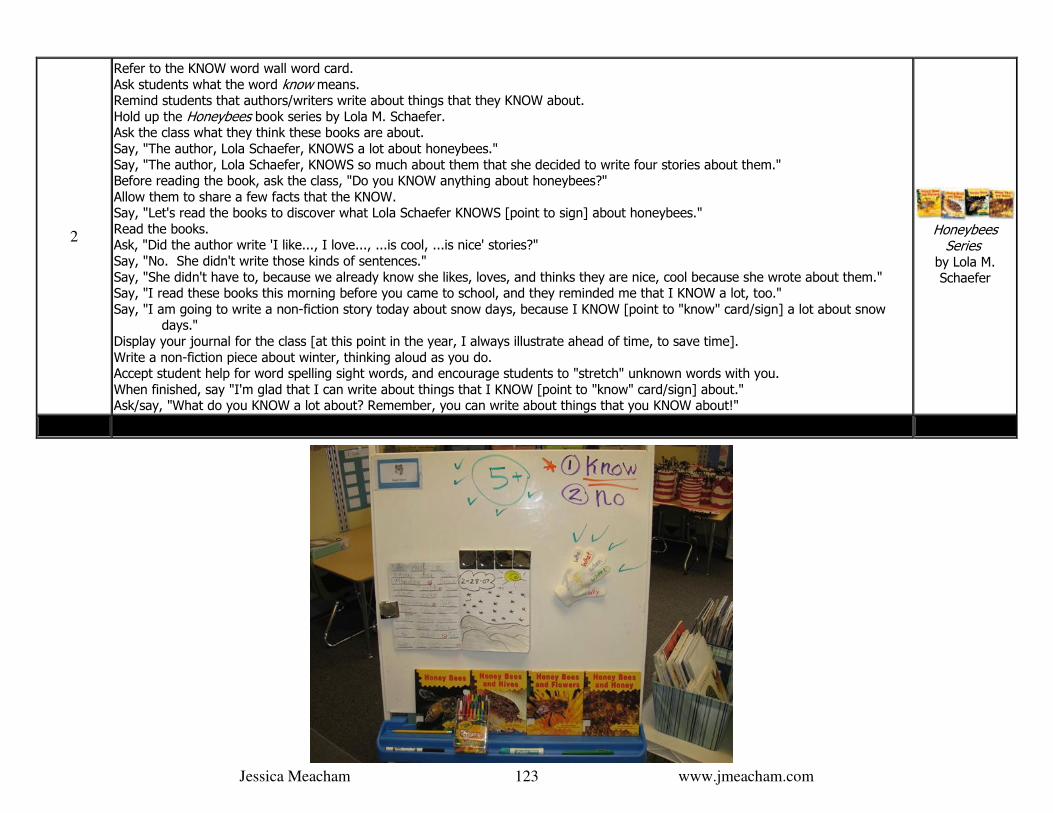
Jessica Meacham www.jmeacham.com 123
2
Refer to the KNOW word wall word card. Ask students what the word know means. Remind students that authors/writers write about things that they KNOW about. Hold up the Honeybees book series by Lola M. Schaefer. Ask the class what they think these books are about. Say, "The author, Lola Schaefer, KNOWS a lot about honeybees." Say, "The author, Lola Schaefer, KNOWS so much about them that she decided to write four stories about them." Before reading the book, ask the class, "Do you KNOW anything about honeybees?" Allow them to share a few facts that the KNOW. Say, "Let's read the books to discover what Lola Schaefer KNOWS [point to sign] about honeybees." Read the books. Ask, "Did the author write 'I like..., I love..., ...is cool, ...is nice' stories?" Say, "No. She didn't write those kinds of sentences." Say, "She didn't have to, because we already know she likes, loves, and thinks they are nice, cool because she wrote about them." Say, "I read these books this morning before you came to school, and they reminded me that I KNOW a lot, too." Say, "I am going to write a non-fiction story today about snow days, because I KNOW [point to "know" card/sign] a lot about snow
days." Display your journal for the class [at this point in the year, I always illustrate ahead of time, to save time]. Write a non-fiction piece about winter, thinking aloud as you do. Accept student help for word spelling sight words, and encourage students to "stretch" unknown words with you. When finished, say "I'm glad that I can write about things that I KNOW [point to "know" card/sign] about." Ask/say, "What do you KNOW a lot about? Remember, you can write about things that you KNOW about!"
Honeybees Series
by Lola M. Schaefer

Jessica Meacham www.jmeacham.com 124
3
Refer to the KNOW word wall word card. Ask students what the word know means. Remind students that authors/writers write about things that they KNOW about. Hold up the Growing Flowers book series by Gail Saunders-Smith. Ask the class what they think these books are about. Say, "The author, Gail Saunders-Smith, KNOWS a lot about growing flowers." Say, "The author, Gail Saunders-Smith, KNOWS so much about them that she decided to write four stories about them." Before reading the book, ask the class, "Do you KNOW anything about growing flowers?" Allow them to share a few facts that the KNOW. Say, "Let's read the books to discover what Gail Saunders-Smith KNOWS [point to sign] about growing flowers." Read the books. Ask, "Did the author write 'I like..., I love..., ...is cool, ...is nice' stories?" Say, "No. She didn't write those kinds of sentences." Say, "She didn't have to, because we already know she likes, loves, and thinks they are nice, cool because she wrote about them." Say, "I read these books this morning before you came to school, and they reminded me that I KNOW a lot, too." Say, "I am going to write a non-fiction story today about cats, because I KNOW [point to "know" card/sign] a lot about cats." Display your journal for the class [at this point in the year, I always illustrate ahead of time, to save time]. Write a non-fiction piece about winter, thinking aloud as you do. Accept student help for word spelling sight words, and encourage students to "stretch" unknown words with you. When finished, say "I'm glad that I can write about things that I KNOW [point to "know" card/sign] about." Ask/say, "What do you KNOW a lot about? Remember, you can write about things that you KNOW about!"
Growing Flowers
Series by Gail
Saunders-Smith

Jessica Meacham www.jmeacham.com 125
4
Refer to the KNOW word wall word card. Ask students what the word know means. Remind students that authors/writers write about things that they KNOW about. Hold up the Butterflies book series by Helen Frost. Ask the class what they think these books are about. Say, "The author, Helen Frost, KNOWS a lot about butterflies." Say, "The author, Helen Frost, KNOWS so much about them that she decided to write four stories about them." Before reading the book, ask the class, "Do you KNOW anything about butterflies?" Allow them to share a few facts that the KNOW. Say, "Let's read the books to discover what Helen Frost KNOWS [point to sign] about butterflies." Read the books. Ask, "Did the author write 'I like..., I love..., ...is cool, ...is nice' stories?" Say, "No. She didn't write those kinds of sentences." Say, "She didn't have to, because we already know she likes, loves, and thinks they are nice, cool because she wrote about them." Say, "I read these books this morning before you came to school, and they reminded me that I KNOW a lot, too." Say, "I am going to write a non-fiction story today about telephones, because I KNOW [point to "know" card/sign] a lot about
telephones." Display your journal for the class [at this point in the year, I always illustrate ahead of time, to save time]. Write a non-fiction piece about winter, thinking aloud as you do. Accept student help for word spelling sight words, and encourage students to "stretch" unknown words with you. When finished, say "I'm glad that I can write about things that I KNOW [point to "know" card/sign] about." Ask/say, "What do you KNOW a lot about? Remember, you can write about things that you KNOW about!"
Butterflies Series
by Helen Frost

Jessica Meacham www.jmeacham.com 126
4
Refer to the KNOW word wall word card. Ask students what the word know means. Remind students that authors/writers write about things that they KNOW about. Hold up the Out in Space book series by Martha Rustad. Ask the class what they think these books are about. Say, "The author, Martha Rustad, KNOWS a lot about space." Say, "The author, Martha Rustad, KNOWS so much about it that she decided to write four stories about it." Before reading the book, ask the class, "Do you KNOW anything about space?" Allow them to share a few facts that the KNOW. Say, "Let's read the books to discover what Martha Rustad KNOWS [point to sign] about space." Read the books. Ask, "Did the author write 'I like..., I love..., ...is cool, ...is nice' stories?" Say, "No. She didn't write those kinds of sentences." Say, "She didn't have to, because we already know she likes, loves, and thinks they are nice, cool because she wrote about them." Say, "I read these books this morning before you came to school, and they reminded me that I KNOW a lot, too." Say, "I am going to write a non-fiction story today about dogs, because I KNOW [point to "know" card/sign] a lot about dogs." Display your journal for the class [at this point in the year, I always illustrate ahead of time, to save time]. Write a non-fiction piece about winter, thinking aloud as you do. Accept student help for word spelling sight words, and encourage students to "stretch" unknown words with you. When finished, say "I'm glad that I can write about things that I KNOW [point to "know" card/sign] about." Ask/say, "What do you KNOW a lot about? Remember, you can write about things that you KNOW about!"
Out in Space Series
by Martha E. H.
Rustad

Jessica Meacham www.jmeacham.com 127
Non-Fiction Text Conventions
Mini Lessons for Adding Special Touches to Non-Fiction Pieces
Mini Lessons
1
Remind students that authors often write about the things they know the most about. Share that, "Today, I'd like to share this big book with you. It's called ____ and it is written by ____." Share that, "The author _____, knows a lot about ______. Let's read the book to discover what they shared." Read the book. After reading the book, ask students to share some information from the book that the author wrote about. Tell students that you've enjoyed reading their own non-fiction stories. Remind students that authors often write about the things they know the most about. Share with students that you've enjoyed hearing their non-fiction pieces, about the things they know about. Share a few pieces that students have written, drawing attention to the detailed information. Say, "There are a few special things that many authors add to their non-fiction pieces." Say, "Let's revisit the story we read today and look for some of these special things." As you take another picture walk, point out captions, titles, pictures, etc. As you dismiss students, remind them that they, too, can add those special things to their own writing.
2
Read a non-fiction book that has the non-fiction text conventions you've been talking about. After reading, remind students that many authors add special features to their non-fiction pieces. Ask students to name/identify these features (use the book as a reference). Tell students that they, "Will be going on a non-fiction text convention HUNT." Let students know that they will be using classroom books (non-fiction) to find these special features. Divide students into pairs. Before dismissing, go through a BIG BOOK non-fiction book that contains these special features. Remind students what they are looking for. Their task is to find an example of each special feature for share time. Allow time to work (hunt). Bring the class back together for a share time. Allow groups to share their examples of non-fiction text features. Remind students that when they write, they can write about things they KNOW about. Remind students that authors often add special features to their non-fiction pieces. As you dismiss students, remind them that they, too, can add those special things to their own writing.
3
Read a non-fiction book that has the non-fiction text conventions you've been talking about. After reading, remind students that many authors add special features to their non-fiction pieces. Ask students to name/identify these features (use the book as a reference). Show students your prepared non-fiction piece. It should not have any of the special features (yet). Read the piece, and ask for feedback from the class. "How could I make this even better?" Add captions, a title, and pictures as appropriate. As you dismiss students, remind them that they, too, can add those special things to their own writing.

Jessica Meacham www.jmeacham.com 128
Writing Lists
Mini Lessons for Encouraging Writers to Write Lists
Mini Lessons Resources
1 What a List Is
Gather students around the carpet area. Tell students that today we will be talking about a different kind of writing. Tell students that this kind of writing is not the kind of writing where we tell stories. Tell students that this kind of writing is not the kind of writing where we tell about what happened to us. Ask, "Have you ever seen your mom or dad write down what they are going to buy at the store?" Facilitate discussion:
• what kinds of things did they write • why did they write • what did they write on • did they bring it with them
Say, "Today's book will teach us about lists and also help us to become better writers." Share the title of the book. Read Oliver's Must Do List by Susan Taylor Brown. When finished, discuss the book with the class. Say, "A list is a tool that people use to help them remember something." Share examples of lists that you've pre-created and put into the "Our Book of Lists" class book. Share with students that you'd like them to create lists to add to the class book. NOTE - - at this point don't REQUIRE students to create lists...they will begin to do so when they are ready... Remind students that writers use lists as a tool help them remember something. Ask, "Why might someone write a list?" Facilitate Discussion:
• packing • shopping • Etc
Remind students that writing lists is a way to help us remember something. Model for students how to write a list {see suggested lists under "resources"}. Illustrate the list you wrote by adding simple pictures and add it to the class book. Encourage students to write their own list during independent writing time. NOTE - - at this point don't REQUIRE students to create lists...they will begin to do so when they are ready...
Oliver's Must Do List
by Susan Taylor Brown __________________________
Our Book of Lists Class Names List
Grocery List Vacation List
Telephone Number List Lunch Menu List Word Wall List
Colors List Numbers List Shapes List
Pets List Zoo Animal List
Ocean Animal List Picnic List Beach List
School Supply List Christmas List
Fruits List Vegetables List
Favorite Songs List Etc.

Jessica Meacham www.jmeacham.com 129
2 Why We Make Lists
Gather students around the carpet area. Tell students that we will be talking about a different kind of writing, just like yesterday. Tell students that this kind of writing is not the kind of writing where we tell stories. Tell students that this kind of writing is not the kind of writing where we tell about what happened to us. Ask, "What could I write if I wanted to remember what to buy at the store? What things would I write
on it?" Facilitate discussion:
• milk • bread • cheese • ect.
Say, "Today's book will teach us about lists and also help us to become better writers." Share the title of the book. Read Bunny Cakes by Rosemary Wells. When finished, discuss the book with the class. Ask, "What did Max need to write before making the cake? What was on his list that he wrote?" Say, "A list is a tool that people use to help them remember something." Ask, "Why might someone write a list?" Facilitate Discussion:
• packing • shopping • Etc
Share examples of lists that you've pre-created and put into the "Our Book of Lists" class book. Share with students that you'd like them to create lists to add to the class book. NOTE - - at this point don't REQUIRE students to create lists...they will begin to do so when they are ready... Remind students that writers use lists as a tool help them remember something. Remind students that writing lists is a way to help us remember something. Model for students how to write a list. Illustrate the list you wrote by adding simple pictures and add it to the class book. Encourage students to write their own list during independent writing time.
1 Bunny Cakes
by Rosemary Wells

Jessica Meacham www.jmeacham.com 130
3 What Lists Look Like
Gather students around the carpet area. Ask, "What could I write if I wanted to remember what to bring to the beach? What things would I write on it?" Facilitate discussion:
• towel • water • sunscreen • ect.
Say, "Today's book will teach us about lists and also help us to become better writers." Share the title of the book. Read Wallace's Lists by Barbara Bottner. When finished, discuss the book with the class. Ask, "Why did Wallace write lists? What kinds of lists did Wallace write?" Say, "A list is a tool that people use to help them remember something." Ask, "What does a list look like?" Facilitate Discussion:
• words • phrases • bullets/numbers to separate ideas • Etc.
Share examples of lists that you've pre-created and put into the "Our Book of Lists" class book. Share with students that you'd like them to create lists to add to the class book. NOTE - - at this point don't REQUIRE students to create lists...they will begin to do so when they are ready... Remind students that writers use lists as a tool help them remember something. Remind students that writing lists is a way to help us remember something. Model for students how to write a list. Illustrate the list you wrote by adding simple pictures and add it to the class book. Encourage students to write their own list during independent writing time.
Wallace's Lists
by Barbara Bottner

Jessica Meacham www.jmeacham.com 131
4 Lists Have Titles
Gather students around the carpet area. Ask, "What could I write if I wanted to remember what supplies I needed for school? What things would I write on it?" Facilitate discussion:
• markers • crayons • glue • ect.
Say, "Today's book will teach us about lists and also help us to become better writers." Share the title of the book. Read a few pre-selected excerpts from Very Silly Lists by Tony Bradman. When finished, discuss the book with the class. Ask, "Why were some of the different kinds of lists in this book?" Say, "A list is a tool that people use to help them remember something." Ask, "What does a list look like?" Facilitate Discussion:
• words • phrases • bullets/numbers to separate ideas • Etc.
Say, "Those are all very good observations. You are right, lists do look like that." Say, "There is one other thing that a list has. It has a title!" Revisit several of the lists from the book and notice the titles of the lists. Revisit several of the lists in the "Our Book of Lists" class book - - talk about what titles could be added. Add titles to the lists. Share with students that you'd like them to create lists to add to the class book. NOTE - - at this point don't REQUIRE students to create lists...they will begin to do so when they are ready... Remind students that writers use lists as a tool help them remember something. Remind students that writing lists is a way to help us remember something. Remind students of what lists look like, and that they have titles. Model for students how to write a list, and add a title to it. Illustrate the list you wrote by adding simple pictures and add it to the class book. Encourage students to write their own list during independent writing time.
Very Silly Lists
by Tony Bradman

Jessica Meacham www.jmeacham.com 132
5
When We Make Lists
Gather students around the carpet area. Ask, "What could I write if I wanted to remember what to bring on a picnic? What things would I write on it?" Facilitate discussion:
• food • drink • plates • ect.
Say, "Today's book will teach us about lists and also help us to become better writers." Share the title of the book. Say, "This book is about Santa Claus and his son, Peter." Say, "What kinds of lists might Santa write? Why would Santa need to write a list?" Read Peter Claus and the Naughty List by Lawrence David. When finished, discuss the book with the class. Ask, "What list was Peter Claus on? Did he want to be on the list?" Say, "A list is a tool that people use to help them remember something." Ask, "What does a list look like?" Facilitate Discussion:
• words • phrases • bullets/numbers to separate ideas • title • Etc.
Say, "Those are all very good observations. You are right, lists do look like that." Ask, "Do your parents ever make lists?" Discuss reasons why parents [families] make lists. Take time to share "Family Lists" that the children brought in. Add the lists to "Our Family Lists" class book. NOTE - - assign families "homework" {create a family list} before teaching this mini lesson. Ideas are listed under resources. Share with students that you'd like them to create lists to add to the class book, Our Book of Lists. NOTE - - at this point don't REQUIRE students to create lists...they will begin to do so when they are ready... Remind students that writers use lists as a tool help them remember something. Remind students that writing lists is a way to help us remember something. Remind students of what lists look like, and that they have titles. Model for students how to write a list, and add a title to it. Illustrate the list you wrote by adding simple pictures and add it to the class book. Encourage students to write their own list during independent writing time.
Peter Claus and the Naughty List
by Lawrence David
____________________________
Possible Family Lists Things in our Refrigerator Things in our Bathroom Things in our Kitchen Things in our Garage Things in our Garden
Toys in our House Cars in our Driveway Children in our House
Pets in our House What we Ate for Dinner
What we Ate for Breakfast Names of our Neighbors
Names of our Friends Names of our Family Members
Favorite Places to Eat Favorite Places to Visit
Favorite Songs to Listen To Favorite Colors
Favorite Numbers Favorite Shapes Favorite Foods
Favorite Desserts Favorite Animals
Favorite Bugs Favorite Movies
Favorite TV Shows Colors in our House
Etc.
Jessica Meacham www.jmeacham.com 133
6
How We Use Lists
Gather students around the carpet area. Ask, "What could I write if I wanted to remember what I saw at the zoo? What things would I write on it?" Facilitate discussion:
• elephants • zebras • tigers • ect.
Share that we've learned about what lists are, why we write them, what lists can be written, and what what lists look like. Say, "Today we are going to learn how to USE lists." Say, "I have several lists in my hands." Say, "You are going to work with a partner today and use the lists to find things in the classroom." Read through the list titles to see what kinds of lists children will be working with. Say, "When you are working with your partner, you'll be looking for things in the classroom." Ask, "Do you think it will be easy to find the things on the lists?" Ask, "What do you think we should do when we find something that is on the list?" Facilitate discussion:
• cross it off • highlight it • circle it • check it • scribble it • etc.
Remind students that they are going to work with a partner today and using a list to find things in the classroom. Establish partnerships. Distribute lists. Distribute clipboards. Make highlighters, pens, pencils, markers, and other writing tools available. Remind students to work neatly, quietly, and cooperativiely. Allow students time to work. Gather as a class, when all groups are finished, or just about finished. Allow partnerships to share their lists, and the things they were able to find on the lists. Remind students:
• that writers use lists as a tool help them remember something • that writing lists is a way to help us remember something • of what lists look like • that they have titles • of when we might want to make lists • how we use lists
Encourage students to write their own list during independent writing time. NOTE - - at this point don't REQUIRE students to create lists...they will begin to do so when they are ready...
Possible Classroom Lists Things that are Circle Shaped Things that are Square Shaped
Things that are Rectangle Shaped Things that are Triangle Shaped
Furniture in our Room Sight Words in our Room
Books in our Room Writing Tools in our Room
Things that are Red Things that are Orange Things that are Yellow Things that are Green Things that are Blue
Things that are Purple Things that are White Things that are Brown Things that are Black Things that are Gray
Things that Make Noise Numbers in our Room
[i.e.. 2 plants, 3 computers, 4 rugs, 5 windows, etc] Etc.

Jessica Meacham www.jmeacham.com 134
Additional Read Alouds Featuring Lists or List Making:
Marti and the Mango
by Daniel Morton
Nate the Great and the Lost List
by Marjorie Sharmat
The Boy's Book of Lists
by David Langston
Amelia Bedelia and the Christmas List
by Herman Parish
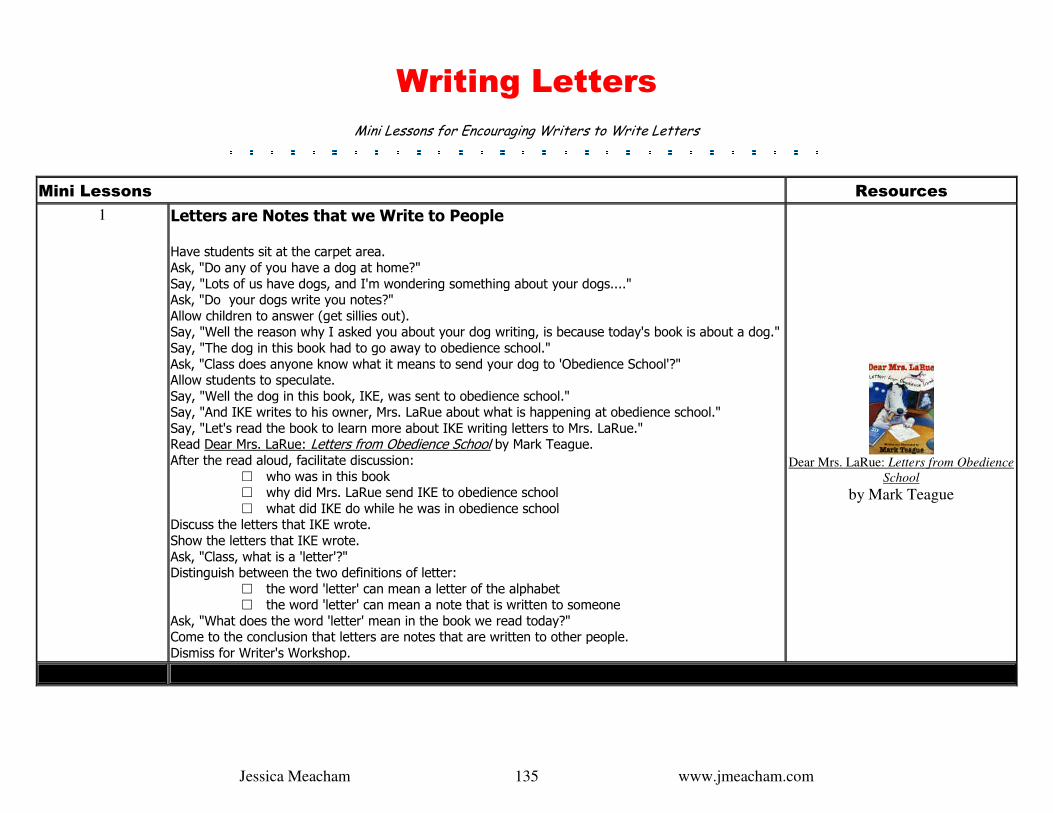
Jessica Meacham www.jmeacham.com 135
Writing Letters
Mini Lessons for Encouraging Writers to Write Letters
Mini Lessons Resources
1 Letters are Notes that we Write to People Have students sit at the carpet area. Ask, "Do any of you have a dog at home?" Say, "Lots of us have dogs, and I'm wondering something about your dogs...." Ask, "Do your dogs write you notes?" Allow children to answer (get sillies out). Say, "Well the reason why I asked you about your dog writing, is because today's book is about a dog." Say, "The dog in this book had to go away to obedience school." Ask, "Class does anyone know what it means to send your dog to 'Obedience School'?" Allow students to speculate. Say, "Well the dog in this book, IKE, was sent to obedience school." Say, "And IKE writes to his owner, Mrs. LaRue about what is happening at obedience school." Say, "Let's read the book to learn more about IKE writing letters to Mrs. LaRue." Read Dear Mrs. LaRue: Letters from Obedience School by Mark Teague. After the read aloud, facilitate discussion:
□ who was in this book □ why did Mrs. LaRue send IKE to obedience school □ what did IKE do while he was in obedience school
Discuss the letters that IKE wrote. Show the letters that IKE wrote. Ask, "Class, what is a 'letter'?" Distinguish between the two definitions of letter:
□ the word 'letter' can mean a letter of the alphabet □ the word 'letter' can mean a note that is written to someone
Ask, "What does the word 'letter' mean in the book we read today?" Come to the conclusion that letters are notes that are written to other people. Dismiss for Writer's Workshop.
Dear Mrs. LaRue: Letters from Obedience
School by Mark Teague

Jessica Meacham www.jmeacham.com 136
2 Letters can be Written by Anyone Have students sit at the carpet area. Ask, "Have any of your parents asked you to 'go get the mail'?" Allow for discussion (brief!). Ask, "Who is the person called that delivers the mail to the mailboxes?" Say, "Today's book is about a dog named Mitchell, and Mitchell is a mail carrier." Read No Mail for Mitchell by Catherine Siracusa. Facilitate discussion;
□ who was Mitchell □ what did he do □ what was his problem □ how was the problem solved
Ask, "How did Mitchell feel when he at first didn't get any mail?" Ask, "How did Mitchell feel when he finally did get some mail?" Say, "Let's create a chart to show who sent Mitchell mail." Create a simple chart on the board to show who sent Mitchell mail and what the letter was about. Ask, "Who can send letters in the mail, class?" Come to the conclusion that anyone can write a letter and mail it. Dismiss for Writer's Workshop.
No Mail for Mitchell
by Catherine Siracusa
3 Letters can be Written to Anyone Have students sit at the carpet area. Ask, "Have any of you ever received a letter?" Allow for discussion (brief!). Say, "Today's book is about a some cows that decide to write letters to the farmer." Ask, "What do you think the cows might say in their letters to the farmer?" Read Click, Clack, Moo, Cows that Type by Doreen Cronin. Facilitate discussion;
□ who wrote letters □ who were the letters to □ what were the letters about
Say, "Let's create a chart to show who sent Mitchell mail." Create a simple chart on the board to show who sent Mitchell mail and what the letter was about. Ask, "Who can send letters in the mail, class?" Come to the conclusion that anyone can write a letter and mail it. Dismiss for Writer's Workshop.
Click, Clack, Moo Cows That
Type
by Doreen Cronin

Jessica Meacham www.jmeacham.com 137
4 Letters are Written for Reasons Have students sit at the carpet area. Ask, "Have you ever seen your mom or dad write a letter to someone?" Ask, "Why would someone write a letter?" Say, "Our book today is about a postman who delivers lots of letters." Say, "Let's read the book to find out who writes letters and why they are writing letters." Read The Jolly Postman: Or Other People's Letters by Janet and Allen Ahlberg. When finished, create a simple T-Chart that shows who wrote letters and why they wrote letters. Continue the chart with reasons for who in the class could write letters and why they'd write a letter...
□ ____ could write a letter to ____ asking her over for a sleepover □ ____ could write a letter to ____ telling him "Happy Birthday" □ ____ could write a letter to her mom telling her that he lovers her □ ____ could write a letter to her dad telling him that she had fun at the park with him last
night □ ect.
Come to the conclusion that letters are written by someone to give to another person. Come to the conclusion that letters are written for different reasons:
□ share news □ congratulate □ invite □ say thanks
Dismiss for Writer's Workshop.
The Jolly Postman: or Other People's
Letters by Janet and Allan Ahlberg

Jessica Meacham www.jmeacham.com 138
5 Letters look a Certain Way Have students sit at the carpet area. Quickly review the past few mini lesson about letters:
□ Letters are notes that we write □ Letters are written to other people □ Letters are written for different reasons
Ask, "Does anyone know what a letter looks like?" Allow for conversation. Bring out a MORNING MESSAGE letter that you have previously written, maybe even the day's M.M. Say, "Every morning I write you a letter!" Show the Morning Message letter, and then ask, "What does a letter look like?" Facilitate conversation:
□ they have words □ they have sentences □ they have a date □ they have "Love" written on the bottom □ they have your name after "Love" □ etc.
Say, "Today's book will give us more clues about what letters look like." Read Dear Mr. Blueberry by Simon Jakes. Discuss what letters look like:
□ date □ heading □ closing □ signature □ etc.
Come to the conclusion that... □ Letters are notes that we write □ Writers write letters to people they know □ Writers write letters for different reasons (share news, congratulate, invite, say thanks,
etc) □ Writers write the date on their letter □ Writers write the person's name who they are writing to on the letter □ Writers say good bye at the end of the letter □ Writers sign their name on the bottom of the letter □ etc
Dismiss for Writer's Workshop.
Dear Mr. Blueberry
by Simon Jakes

Jessica Meacham www.jmeacham.com 139
6 Letters can be Written by YOU Have students sit at the carpet area. Ask,
□ what is a letter □ who writes letters □ why do people writer letters □ what does a letter look like
Ask, "Can you write letters?" Say, "Yes, you are writers, and you can write letters!" Say, "Today's book is about a boy named Peter and he wants to write a letter to his friend, Amy." Read A Letter to Amy by Ezra Jack Keats. Discuss the book...
□ who wrote a letter □ who was the letter for □ why did he write a letter □ what did the letter look like
Remind students that... □ Letters are notes that we write □ Writers write letters to people they know □ Writers write letters for different reasons (share news, congratulate, invite, say thanks,
etc) □ Writers write the date on their letter □ Writers write the person's name who they are writing to on the letter □ Writers say good bye at the end of the letter □ Writers sign their name on the bottom of the letter
Encourage students to write letters. Say, "You can write a letter to someone else, too, just like Peter did in this book!" Say, "You can write a letter to someone to tell them something." Say, "You can write a letter to someone to invite them to something or somewhere." Say, "You can write a letter to someone to say thank you or to congratulate them on a job well done." Encourage students to write letters. Dismiss for Writer's Workshop.
A Letter to Amy
by Ezra Jack Keats

Jessica Meacham www.jmeacham.com 140
Read Alouds Featuring Lists or Letter Writing:
Primary and Intermediate Read Alouds
Dear Peter Rabbit
by Alma Flor Ada
Yours Truly, Goldilocks
by Alma Flor Ada
With Love, Little Red Hen
by Alma Flor Ada
The Dove's Letter
by Keith Baker
First Year Letters
by Julie Danneburg
Letter to the Lake
by Susan Marie Swanson
Messagesin the Mailbox:How to Write a Letter
LoreenLeedy
The Long, Long Letter
by Elizabeth Spurr
Dear Annie
by Judith Casely
Hello Muddah, Hello Faddah! - A Letter from
Camp
by Allan Sherman
Night Letters
by Palmyra LoMonaco
Detective LaRue: Letters from the Investigation
by Mark Teague
Dear Santa: The Letters of James B Dobbins
by Bill Harley
Corduroy Writes a Letter
by Alison Inches
Max's Letter
by Ken Wilson-Max

Jessica Meacham www.jmeacham.com 141
Intermediate Read Alouds
Regarding the Fountain
by Kate Klise
Letters from Camp
by Kate Klise
Trial by Journal
by Kate Klise
Regarding the Sink
by Kate Klise
Regarding the Trees
by Kate Klise
Love Letters
by Arnold Adoff
Letters from Rifka
by Karen Hess
Love, From Your Friend, Hannah
by Mindy Warshaw Skolsky
Dear Mr. Henshaw
by Beverely Cleary