KEY STAGE 3 DESIGN & TECHNOLOGY - Light Stitches
53
Book 1 - Electronic Textiles Teacher’s Resources KEY STAGE 3 DESIGN & TECHNOLOGY Light Stitches www.lightstitches.co.uk
Transcript of KEY STAGE 3 DESIGN & TECHNOLOGY - Light Stitches

Book 1 - Electronic Textiles Teacher’s Resources
KEY STAGE 3 DESIGN & TECHNOLOGY
Light Stitches www.lightstitches.co.uk
Teacher Resources Light Stitches Book 1 E-Textiles
www.lightstitches.co.uk
1
Contents
Introduction 2
Conductive thread 3
Conductive hook and loop 4
Scheme of work 5
Lesson plans – weeks 1 to 10 15
Project booklet 28
Worksheet - Design Brief 29
Threads worksheet 30
My design specification 31
Research 32
My design sheet 35
Product analysis 36
Powerpoint slide view 38
E-Textile word search 41
Circuit example –Bracelet/Wristband Circuit 42
Process planning 43
Sewing practise sheets 46
Advertising my product 47
Worksheet – Learning pyramid 49
Student records 50

Teacher Resources Light Stitches Book 1 E-Textiles
www.lightstitches.co.uk
2
Introduction This project Light Stitches Book 1 E-Textiles Teacher’s Resources has been designed and aimed specifically at year 9’s as an introduction to product design to encourage the mixing of different D&T elements. It could however also be used quite successfully in primary schools with suitable resources or for older students as well. The contents of this book are intended for teacher’s planning for e-textiles. The information and resources are designed for you to choose some or the entire scheme and projects. There is a separate e-textiles project book for the students or as another reference for the teacher. This project would be ideal as a starter project going into GCSE work. In these days of tight budgets these items could also be made by a class as group work. By dividing the class into 3 groups and each one working on each design and its development as a group with a presentation to the rest of the class at the end, this way only 3 items are made instead of over 20 thus reducing costs. The ‘electronic textiles projects’ are ideal for producing a realistic design and to make it suitable for a retail market. They become unique smart projects by their inclusion of LEDs and the use of conductive thread and switches. Any specialised components you may require such as LEDs, battery holders and conductive thread are available from Light Stitches or Rapid electronics. There are also some ready made kits available. Please see our website for the latest projects. We hope you find all the information and resources useful and that the students find this to be an enjoyable scheme of work. There is also a Power Point Presentation available and videos with each product found on our YouTube channel Light Stitches. If you have any problems, please do not hesitate to contact us at [email protected].

Teacher Resources Light Stitches Book 1 E-Textiles
www.lightstitches.co.uk
3
Conductive Thread The mixed properties of electronics and textiles was unheard of until a few years ago. With technology moving as fast as it has in recent years, the possibilities of clothing and accessories with visual and audio effects by the use of flashing lights and sensors has now been made much easier in a domestic situation with the availability of conductive thread. Conductive thread is similar in properties to ordinary sewing thread but, it also has the ability to conduct a small amount of voltage through it. It can do this as it has metal incorporated into it (usually silver, nickel, tin or copper) with a core of normally cotton or polyester. The thread is not insulated and therefore attaching it to a metal component within a circuit in place of the usual wires means the circuit is much more flexible allowing you to maintain many of the original properties of the material such as drape and feel. As it is a thread it also allows you to sew by hand or machine and even embroider designs into textiles. Its resistance properties are 4Ω per 100mm. When using by machine it is not necessary for the second thread to be conductive thread top just the spool for the side of the design you wish to have the circuit on. The conductive thread used by Light Stitches is a medium weight and comes on a bobbin of approximately 6M or 150M reel. The thread is much stronger than domestic poly/cotton thread, and somewhat thicker. If using on a machine you may wish to try a larger needle to help with threading up and less chance of fraying by being caught on the point of the needle. Conductive thread has medical uses (silver has antiseptic qualities) and is used to create ‘soft’ circuits. An example of one of its uses is a fencing jacket. The jacket is made with conductive material scoring areas which can become extremely worn with time. The jackets are expensive, and fencers usually try to get them repaired by darning the worn areas. Conductive thread can be used for this quite successfully and also sewn into the fabric of a jacket where the conductivity of the material has been lost over time.

Teacher Resources Light Stitches Book 1 E-Textiles
www.lightstitches.co.uk
4
Conductive Hook & Loop Hook and loop has been around for decades, it is used in various applications and designs which are always evolving. It is often described as “Velcro” but this is a trade name so we will call it conductive hook and loop. The hook and loop is spray coating with liquid silver. Silver is used because it possesses the highest electrical conductivity of any element. It also has the highest thermal conductivity of any metal. Electrical conductivity measures an object’s ability to accommodate the transport of an electric charge. Electrically conductive hook and loop is used in all sorts of projects regarding radio frequency or electromagnetic interference. Essentially, it can protect equipment or people from high-intensity electromagnetic fields. It can also prevent the escape of signals from secure facilities. This makes it especially useful in the military, government buildings, hospitals, and private or classified organizations. The resistance of electrically conductive hook and loop has a maximum of 1.8 ohms per square inch on the hook, and 1.4 ohms per square inch on the loop. The closure combines for 0.8 ohms through resistance and has a cycle life of around 5,000 closures.
For E- Textile project usually a 10cm long strip of conductive hook & loop is used. This conductive strip is used where you need to make a complete circuit by simply forming a connection between the hook and loop pieces. You can use this hoop and loop to light LEDs with a simple on/off switch. Hook & Loop strips are extremely versatile touch fasteners.
Hook and Loop fasteners are Ideal for making many projects including light up dog collar or other wearable projects including a reflective jacket. It is used in the same way you would use conductive thread.

Teacher Resources Light Stitches Book 1 E-Textiles
www.lightstitches.co.uk
5
DESIGN AND TECHNOLOGY SCHEME OF WORK KS 3
DESIGN AND MAKE
PROJECT TITLE: LIGHT STITCHES (1) E-textiles Teacher’s Resources
10 x 1 HOUR SESSIONS
WEEK
LEARNING OBJECTIVES
TEACHING ACTIVITIES
LEARNING
OUTCOMES Students
should:
ASSESSMENT
HOMEWORK
1
To understand the design
brief.
To gain an understanding of
conductive thread.
To understand the
assessment booklet and their
interactive role in it.
Start introduction with
demonstration of the e
textile product
Distribute and talk through
the design brief sheet
Use Power Point
presentation (PPP) to
discuss thread and how it
differs from sewing thread.
Students to complete
Thread worksheet.
Distribute and explain the
assessment booklets.
Understand the
goal of the design
brief.
Understand the
different
properties in
conductive
thread compared
to sewing thread.
Understand the
benefits of
assessment
Completion of –
What am I being
asked to make?
Threads worksheet
Research – collect
pictures of textiles
which are designed with
road safety in mind.
Teacher Resources Light Stitches Book 1 E-Textiles
www.lightstitches.co.uk
6
WEEK
LEARNING OBJECTIVES
TEACHING ACTIVITIES
LEARNING
OUTCOMES Students
should:
ASSESSMENT
HOMEWORK
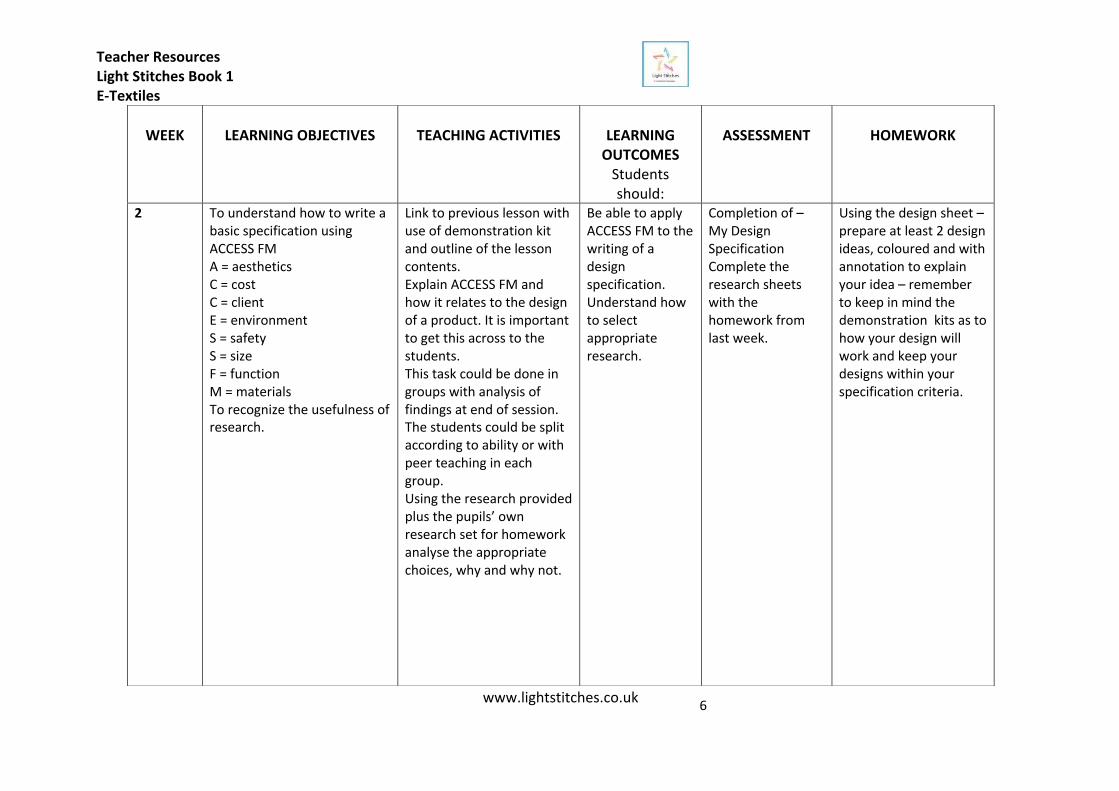
2 To understand how to write a
basic specification using
ACCESS FM
A = aesthetics
C = cost
C = client
E = environment
S = safety
S = size
F = function
M = materials
To recognize the usefulness of
research.
Link to previous lesson with
use of demonstration kit
and outline of the lesson
contents.
Explain ACCESS FM and
how it relates to the design
of a product. It is important
to get this across to the
students.
This task could be done in
groups with analysis of
findings at end of session.
The students could be split
according to ability or with
peer teaching in each
group.
Using the research provided
plus the pupils’ own
research set for homework
analyse the appropriate
choices, why and why not.
Be able to apply
ACCESS FM to the
writing of a
design
specification.
Understand how
to select
appropriate
research.
Completion of – My Design
Specification Complete the
research sheets
with the
homework from
last week.
Using the design sheet –
prepare at least 2 design
ideas, coloured and with
annotation to explain
your idea – remember
to keep in mind the
demonstration kits as to
how your design will
work and keep your
designs within your
specification criteria.

Teacher Resources Light Stitches Book 1 E-Textiles
www.lightstitches.co.uk
7
WEEK
LEARNING OBJECTIVES
TEACHING ACTIVITIES
LEARNING
OUTCOMES Students
should:
ASSESSMENT
HOMEWORK
3 To appreciate other people’s
designs and be able to analyse
their appropriateness.
Links to previous lessons by
demonstrating the original
model again. Using the
product analysis
photographs and the
worksheet pupils (working
in groups) analyse the
products
Understand
designers’
thoughts when
designing and
how to analyse
their function and
appropriateness
in design
Completion of –
product analysis
sheets
Presentation of
results
E- textile products
mood board – Produce a
mood board of any
suitable e-textile
products.
Use a range of resources
Internet
Papers
Magazines
Catalogues
Leaflets

Teacher Resources Light Stitches Book 1 E-Textiles
www.lightstitches.co.uk
8
WEEK
4
LEARNING OBJECTIVES
To understand circuits
To appreciate the difference
between the different
switches.
TEACHING ACTIVITIES
Link to previous lessons by
the demonstration kit again
but this time concentrating
on the design of the light
pattern and how the circuit
works. Use the power point
to help demonstrate how
the circuit works.
Understand the different
switches and which would
be the most appropriate for
the design ideas.
Using their previous
homework pupils will
analyse their two initial
ideas in their groups using
the star diagram to help
them choose the best
design.
LEARNING OUTCOMES
Students
should:
Students will
create a small
circuit to light
one LED using a
switch and
conductive
thread.
They will
understand the
difference
between
batteries holders
with switches,
without switches
and soft switches
. Also, which is
most appropriate
battery holder to
use and when.
To analyse their
designs and
choose the best
one based on
results.
ASSESSMENT
To complete the
tasks on the
worksheets with
experiments and
tasks –
differentiation can
be shown by
success of ideas
and experiments,
also the diversity
of their design
work
Alternatively, with
group work a small
analysis of the
learning achieved.
HOMEWORK
To choose the best of
their design ideas and
develop it using the
knowledge learnt today
about circuits and
battery holders. Produce
an A4 drawing with
colour and annotation in
readiness for next
lesson. Use the
exemplar work provided
to show what is
expected.
Extension work word
search available – look
at different designs that
use different switches.

Teacher Resources Light Stitches Book 1 E-Textiles
www.lightstitches.co.uk
9
WEEK
LEARNING OBJECTIVES
TEACHING ACTIVITIES
LEARNING
OUTCOMES Students should:
ASSESSMENT
HOMEWORK
5
To interpret their design and
suggest a process plan for
making their design, changing
where necessary.
Teacher to demonstrate a
process plan and link to the
industry a one off batch, mass
and continuous.
Students to continue with
making a process plan and
finalise their design whilst
assessment takes place.
Will understand the
importance of
considering the
making process.
Will understand
where they are with
their understanding
of the project and
what they need to
do to achieve more.
Assessment lesson
where each
student discusses
their design with
the teacher and
receives progress
with this project.
Assessment sheet
completed up to
the design stage
with explanation
given as to what is
required from the
student in order to
achieve more.
Grade achieved on
success of circuit.
To write five rules of
safety in the textiles
workshop based on
their previous
knowledge. This will
form part of their
contract to be able to
work safely in a
workshop environment
and will be signed by
the student after
checking by the
teacher next week
prior to starting any
work.
Extension task – what
could have been done
to improve on the
designs i.e. quality,
finishing etc.
Teacher Resources Light Stitches Book 1 E-Textiles
www.lightstitches.co.uk
10
WEEK
LEARNING OBJECTIVES
TEACHING ACTIVITIES
LEARNING
OUTCOMES Students
should:
ASSESSMENT
HOMEWORK
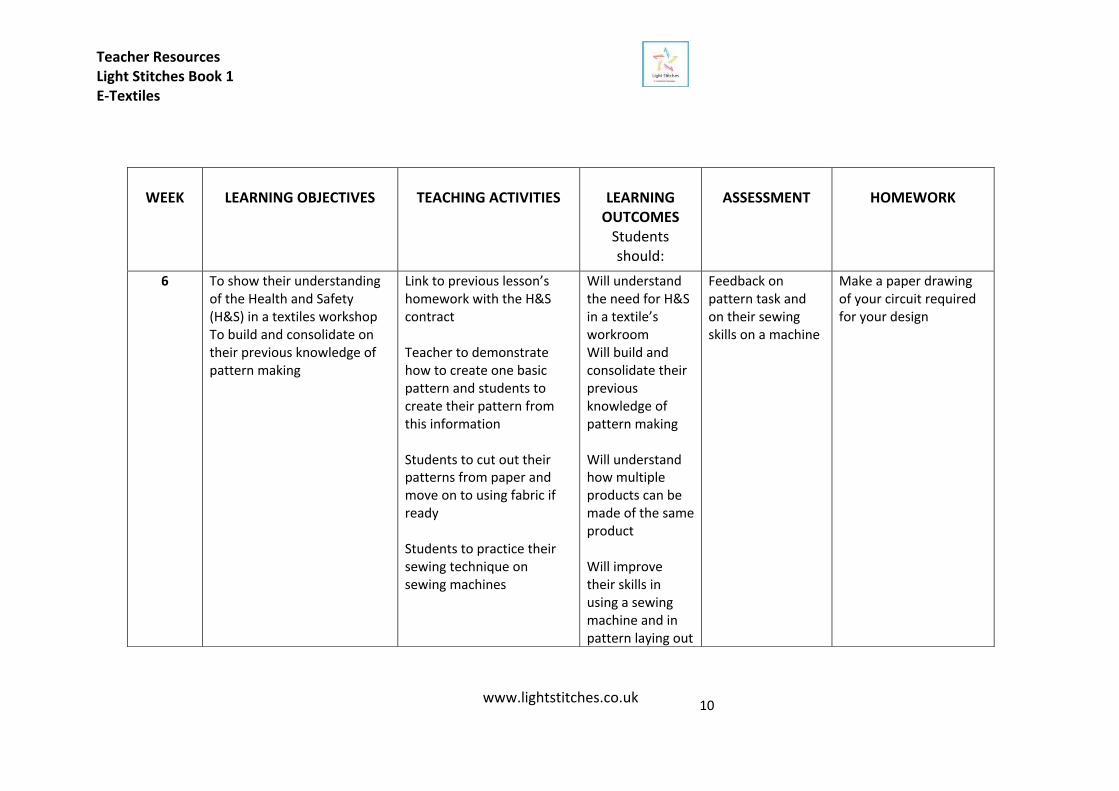
6 To show their understanding
of the Health and Safety
(H&S) in a textiles workshop
To build and consolidate on
their previous knowledge of
pattern making
Link to previous lesson’s
homework with the H&S
contract
Teacher to demonstrate
how to create one basic
pattern and students to
create their pattern from
this information
Students to cut out their
patterns from paper and
move on to using fabric if
ready
Students to practice their
sewing technique on
sewing machines
Will understand
the need for H&S
in a textile’s
workroom
Will build and
consolidate their
previous
knowledge of
pattern making
Will understand
how multiple
products can be
made of the same
product
Will improve
their skills in
using a sewing
machine and in
pattern laying out
Feedback on
pattern task and
on their sewing
skills on a machine
Make a paper drawing
of your circuit required
for your design

Teacher Resources Light Stitches Book 1 E-Textiles
www.lightstitches.co.uk
11
WEEK
7
LEARNING OBJECTIVES
To create the pattern pieces
To consolidate their previous
knowledge and accurately cut
out the pattern pieces
To understand how multiple
copies can be made of the
same product
TEACHING ACTIVITIES
Students to practice their
sewing machine technique
on the practice sheets.
Students to cut out their
patterns and then their
fabric.
LEARNING OUTCOMES
Students
should:
Students will
learn how to sew
with more
accuracy on a
machine.
Students will
learn how to use
a pattern and
how multiple
items can be
made.
ASSESSMENT
Individualised
attention around
the classroom,
providing one-to-
one feedback
formatively.
HOMEWORK
To write a record of
what they have done up
to now. Where did their
design come from, what
influenced them, what
process did they use to
get where they are up to
now, how difficult did
they find using the tools,
was their process plan
correct or has it been
modified.
This information can
help later in their
evaluation.

Teacher Resources Light Stitches Book 1 E-Textiles
www.lightstitches.co.uk
12
WEEK
8
LEARNING OBJECTIVES
To understand how to stitch
their e-textile product
To understand how to
assemble the product
TEACHER ACTIVITIES
Teacher to demonstrate
how to use hand stitching
in the design to cover the
circuit if needed.
Lesson is broken down into
small demo pieces to
explain how to assemble.
The Power Point can help
with the circuit sewing
again.
LEARNING OUTCOMES
Students
should:
Students will
stitch their
battery cover and
sew their circuit.
ASSESSMENT
Individualised
attention around
the workroom
providing one-to-
one feedback
formatively.
HOMEWORK
Design a name for your
product. Draw in full
colour a ‘flyer’ which
could be given to
potential customers to
explain the functions of
your product.
Worksheet – advertising
my product .

Teacher Resources Light Stitches Book 1 E-Textiles
www.lightstitches.co.uk
13
WEEK
9
LEARNING OBJECTIVES
To appreciate the quality
finish of a product
To accomplish completion of
project including any missed
paperwork
TEACHER ACTIVITIES
Teacher to demonstrate the
final product and how to
combine the components
along with the last minute
jobs.
Emphasise the quality of
the finished product and
expectations.
LEARNING OUTCOMES
Students
should:
Students will
appreciate the
quality of a
finished piece
and take on
responsibility for
their own
learning
ASSESSMENT
Assessment based
on the quality and
success of the final
outcome.
HOMEWORK
Record of completed
worksheets obtaining
any missed sheets and
completing for
homework – What I’ve
done up to now
worksheet
Extension task – How
could I improve the
original design i.e.
quality, finishing, etc

Teacher Resources Light Stitches Book 1 E-Textiles
www.lightstitches.co.uk
14
WEEK
10
LEARNING OBJECTIVES
To understand the purpose of
evaluating and the benefits of
same
To comprehend how well they
achieved throughout the
project and how they could
achieve more next time by
assessment tutorial
TEACHER ACTIVITIES
Teacher to explain the
purpose of evaluation and
the lessons to be learnt for
future tasks.
All students to complete
the evaluation sheets in full
sentences
Working in small groups
they can evaluate their
peers work and relate it
back to the design
specification, how well it
meets the specification.
LEARNING OUTCOMES
Students
should:
Understand the
importance of
evaluating their
own product and
each other’s
work.
ASSESSMENT
Assessment
marking sheet to
be completed
based on final
product,
completed
paperwork,
evaluation and
discussion with
student.
HOMEWORK
None

Teacher Resources Light Stitches Book 1 E-Textiles
www.lightstitches.co.uk
15
Lesson Plans – week one
SUBJECT/CLASS CODE DATE PERIOD MALES FEMALES TOTAL UNIT/MODULE LIGHT STITCHES (1) E-textiles Teacher’s Resources
AIMS/OBJECTIVES (e.g. to know, to understand, to apply): To understand the design brief. To gain an understanding of Conductive thread. To understand the assessment booklet and their interactive role within it.
LESSON TITLE 1. Understanding the design brief
RESOURCES: Demonstration products, The Design Brief – Worksheet, Threads worksheet, Assessment booklets. Samples of wire and threads are also useful. Small pieces of thread and needles. CROSS-CURRICULAR LINKS (e.g. Lit/Num/ICT/CEG/Citizenship) Environmental issues
L E S S O N S E Q U E N C E For coursework/project lessons individual assessment sheets should be used to monitor progress regularly
TIME
INTRODUCTION (link to previous lesson or new unit of work): Introduce the design brief with a demonstration of the e-textile products. Explain their functions and show how the product lights up.
MAIN ACTIVITIES (include timings, starter activity, differentiation, activities, group/pair work etc): Explain and discuss design brief. Using the power point to help, explain the difference between normal sewing thread; wire and conductive thread. (Use of samples are useful, maybe with a piece of wire sewn onto a piece of fabric by over sewing it down. Show how it affects the properties of the fabric i.e. drape.) Take feedback Students complete individual work sheets. The worksheet needs small pieces of thread and a needle to allow the students to untwist the thread and see how it is made up. Discussion and explanation of assessment for learning booklet and role the student plays in self- assessment along with the advantages for them.
PLENARY (include assessment of learning outcomes) : Completion of what am I being asked to make worksheet and setting of homework
HOMEWORK: Homework – research – collect pictures of e-textile work. Learning Outcomes : By the end of the lesson: Most students will be able to: Understand the goal of the design brief and understand the basics of the difference between, thread, wire and conductive thread. Some students will be able to: Explain how thread is made, how wire is made and the advantages of conductive thread Some students will have progressed even further and will be able to : Be able to see other applications for the use of conductive thread Link to next lesson: Writing a product specification Role of Classroom Assistant (if applicable) Notes

Teacher Resources Light Stitches Book 1 E-Textiles
www.lightstitches.co.uk
16
Lesson Plans – week two
SUBJECT/CLASS CODE DATE PERIOD MALES FEMALES TOTAL UNIT/MODULE LIGHT STITCHES (1) E-textiles Teacher’s Resources
AIMS/OBJECTIVES (e.g. to know, to understand, to apply) : To understand how to write a basic specification using ACCESS FM To recognise the usefulness of research
LESSON TITLE 2. Writing a product specification RESOURCES: Demonstration products, My Design specification worksheets, research sheets, Design sheets. CROSS-CURRICULAR LINKS (e.g. Lit/Num/ICT/CEG/Citizenship) Environmental issues
L E S S O N S E Q U E N C E For coursework/project lessons individual assessment sheets should be used to monitor progress regularly
TIME
INTRODUCTION (link to previous lesson or new unit of work): Link to previous lesson with use of demonstration products and précis of lesson contents
MAIN ACTIVITIES (include timings, starter activity, differentiation, activities, group/pair work etc): Explain ACCESS FM and how it relates to the design of a product. Students to complete – My Design Specification This task could be done in groups with analysis of findings at end of session as plenary. The groups could be split according to ability of with peer teaching in each group. Using the research provided plus the pupils’ own research set for homework last week, analyse the appropriate choices, why and why not.
PLENARY (include assessment of learning outcomes) :
Completion of what am I being asked to make worksheet, word searches and setting of homework
HOMEWORK: Homework – using the design sheet – prepare at least 2 design ideas, coloured and with annotation to explain your idea – remember to keep in mind the demonstration products as to how your design will work and keep your designs within your specification criteria. Learning Outcomes : By the end of the lesson: Most students will be able to: Apply ACCESS FM to the writing of a design specification. Some students will be able to: Apply ACCESS FM to the writing of a design specification and how to select appropriate research Some students will have progressed even further and will be able to : Analyse others information and choose appropriate research, suggesting improvements Link to next lesson: Product analysis Role of Classroom Assistant (if applicable) Notes

Teacher Resources Light Stitches Book 1 E-Textiles
www.lightstitches.co.uk
17
Lesson plans – week three
SUBJECT/CLASS CODE DATE PERIOD MALES FEMALES TOTAL UNIT/MODULE LIGHT STITCHES (1) E-textiles Teacher’s Resources
AIMS/OBJECTIVES (e.g. to know, to understand, to apply) : Appreciate other people’s designs and be able to analyse their appropriateness LESSON TITLE
3. Product Analysis RESOURCES: Demonstration products, Product Analysis worksheets CROSS-CURRICULAR LINKS (e.g. Lit/Num/ICT/CEG/Citizenship) Environmental issues
L E S S O N S E Q U E N C E For coursework/project lessons individual assessment sheets should be used to monitor progress regularly
TIME
INTRODUCTION (link to previous lesson or new unit of work): Link to previous lesson with use of demonstration products, division of class into groups and reminder of group working rules. (If none available the class could be asked to set up 5 rules as a starter)
MAIN ACTIVITIES (include timings, starter activity, differentiation, activities, group/pair work etc): Using the product analysis photographs and the worksheet, pupils (working in groups) analyse the products. (Set a time limit) Each group to present their findings to the rest of the class
PLENARY (include assessment of learning outcomes) : Discussion of purpose of a mood board.
HOMEWORK: Homework – using previous discussion to help – produce a mood board of any suitable e-textile products. Learning Outcomes : By the end of the lesson: Most students will be able to: Understand a designer’s thoughts when designing and how to analyse their function and appropriateness in design. Some students will be able to: Use another designer’s thoughts to help in designing their product and apply improvements highlighted from the product analysis presentations Some students will have progressed even further and will be able to : Use the product analysis to create a totally unique product Link to next lesson: Understanding of a basic circuits. Role of Classroom Assistant (if applicable) Notes Design a poster showing the group work rules for display in the classroom

Teacher Resources Light Stitches Book 1 E-Textiles
www.lightstitches.co.uk
18
Lesson plans – week four
SUBJECT/CLASS CODE DATE PERIOD MALES FEMALES TOTAL UNIT/MODULE LIGHT STITCHES (1) E-textiles Teacher’s Resources
AIMS/OBJECTIVES (e.g. to know, to understand, to apply) : Will understand the difference between using different materials to use in e-textiles Will consolidate previous knowledge of materials Will understand how to complete a circuit
LESSON TITLE 4. Understanding circuits and the different battery holders RESOURCES: Demonstration products, Power point, word search, conductive thread, circuit boards, one led per student, Exemplar examples of final designs CROSS-CURRICULAR LINKS (e.g. Lit/Num/ICT/CEG/Citizenship) Environmental issues
L E S S O N S E Q U E N C E For coursework/project lessons individual assessment sheets should be used to monitor progress regularly
TIME
INTRODUCTION (link to previous lesson or new unit of work): Link to previous lesson with use of demonstration product, concentrating on the design of the light pattern, how circuits work and the different battery holders Use the power point to help
MAIN ACTIVITIES (include timings, starter activity, differentiation, activities, group/pair work etc): Students to complete a one led circuit using the circuit board and the conductive thread. Needles can help to attach thread to board but not really necessary as to knot thread from positive terminal to positive leg on led is all they need to do and the same for the negative terminal and leg on led. Using the power point to help. Students to analysis the different battery holders they could use in their design. Students to complete worksheets.
PLENARY (include assessment of learning outcomes) : Quick fire questions on learning for today. Setting of homework
HOMEWORK: Homework – Choose the best of their design ideas and develop it using the knowledge learnt today. Produce an A4 drawing in colour and with annotation ready for next lesson. Show exemplar work Learning Outcomes : By the end of the lesson: Most students will be able to: Understand the difference between the different battery holders and how to complete a circuit Some students will be able to: Design with confidence using the felt materials and be able to include an electronic circuit for lights within their design with a battery holder. Some students will have progressed even further and will be able to : Design their own complete circuit pattern to achieve their unique design Link to next lesson: Process planning and assessment Role of Classroom Assistant (if applicable) Notes: Word search

Teacher Resources Light Stitches Book 1 E-Textiles
www.lightstitches.co.uk
19
Lesson plans – week five
SUBJECT/CLASS CODE DATE PERIOD MALES FEMALES TOTAL UNIT/MODULE LIGHT STITCHES (1) E-textiles Teacher’s Resources
AIMS/OBJECTIVES (e.g. to know, to understand, to apply) : Will understand the importance of considering the making process Will understand where they are with their understanding of the project and what they need to do to achieve more
LESSON TITLE 5. Process planning and assessment
RESOURCES: Demonstration models, process plans, assessment booklets CROSS-CURRICULAR LINKS (e.g. Lit/Num/ICT/CEG/Citizenship) Environmental issues
L E S S O N S E Q U E N C E For coursework/project lessons individual assessment sheets should be used to monitor progress regularly
TIME
INTRODUCTION (link to previous lesson or new unit of work): Display of design art work set as homework. Discuss each other’s ideas
MAIN ACTIVITIES (include timings, starter activity, differentiation, activities, group/pair work etc): Teacher to demonstrate a process plan and link to industry, one off; batch; mass & continuous. Students to continue with making a process plan and finalise their design whilst assessment takes place. Assessment lesson where each student discusses their design with the teacher and Receives feedback on their progress within this project Assessment sheet completed up to the design stage with explanations given as to what is required from the student in order to reach target level.
PLENARY (include assessment of learning outcomes) : 5 minute quick fire questions on talk given at beginning of lesson based on process plans and the links to industry.
HOMEWORK: Homework – To write 5 rules of safety in the textiles workshop based on their previous knowledge. This will form part of their contract to be able to work safely in a workshop environment and will be signed by the student after checking by teacher next week prior to starting any DMA. Learning Outcomes : By the end of the lesson: Most students will be able to: understand the importance of considering the making process and where they are with their understanding of the project Some students will be able to: Link their process to industry processes and identify how they can improve their performance to meet their target grade Some students will have progressed even further and will be able to : explain how it would be made in industry Link to next lesson: H&S and pattern making Role of Classroom Assistant (if applicable) Notes What could be done to improve on the design here; i.e. quality, finishing, etc.

Teacher Resources Light Stitches Book 1 E-Textiles
www.lightstitches.co.uk
20
Lesson plans – week six
SUBJECT/CLASS CODE DATE PERIOD MALES FEMALES TOTAL UNIT/MODULE LIGHT STITCHES (1) E-textiles Teacher’s Resources
AIMS/OBJECTIVES (e.g. to know, to understand, to apply) : Will understand the need for H&S in a textile workroom Will build and consolidate their previous knowledge of pattern making Will understand how multiple products can be made of the same product Will improve their skills in using a sewing machine and in pattern laying out
LESSON TITLE 6. H&S and pattern making
RESOURCES: Demonstration products, 2 basic designs patterns, machine sewing practice sheets CROSS-CURRICULAR LINKS (e.g. Lit/Num/ICT/CEG/Citizenship) Environmental issues
L E S S O N S E Q U E N C E For coursework/project lessons individual assessment sheets should be used to monitor progress regularly
TIME
INTRODUCTION (link to previous lesson or new unit of work): Link to previous lesson’s homework with the H&S contract.
MAIN ACTIVITIES (include timings, starter activity, differentiation, activities, group/pair work etc): Teacher to demonstrate how to create one basic pattern and students to create their pattern from this information Students to cut out their patterns from paper and move on to using fabric if ready Students to practice their sewing technique on sewing machines
PLENARY (include assessment of learning outcomes) : On the demonstration pattern – draw in the circuit. Set homework
HOMEWORK: Homework – create a drawing of your circuit needed to fit into your pattern pieces Learning Outcomes : By the end of the lesson: Most students will be able to: Create their own pattern for their fabric and their circuit Some students will be able to: Suggest improvements to their design through modelling in paper Some students will have progressed even further and will be able to : To describe how multiple copies of their product could be made in detail Link to next lesson: Cutting out fabric and sewing Role of Classroom Assistant (if applicable) Notes: What could be done to improve on the design here; i.e. quality, finishing, etc.

Teacher Resources Light Stitches Book 1 E-Textiles
www.lightstitches.co.uk
21
Lesson plans – week seven
SUBJECT/CLASS CODE DATE PERIOD MALES FEMALES TOTAL UNIT/MODULE LIGHT STITCHES (1) E-textiles Teacher’s Resources
AIMS/OBJECTIVES (e.g. to know, to understand, to apply) : Will understand the need quality in sewing their product Will build and consolidate their previous knowledge of sewing Will understand to use press studs, conductive thread and battery holders and how to attach them to fabric
LESSON TITLE 7. Cutting out fabric and sewing
RESOURCES: Demonstration models, 3 basic designs patterns, machine sewing practice sheets CROSS-CURRICULAR LINKS (e.g. Lit/Num/ICT/CEG/Citizenship) Environmental issues
L E S S O N S E Q U E N C E For coursework/project lessons individual assessment sheets should be used to monitor progress regularly
TIME
INTRODUCTION (link to previous lesson or new unit of work): Link to previous lesson’s homework with demonstration of how their circuit will lie on the fabric and where the battery holder will need to go
MAIN ACTIVITIES (include timings, starter activity, differentiation, activities, group/pair work etc): Teacher to demonstrate pattern laying and how not to waste fabric Students to cut out their patterns from fabric if not already done so. Demonstration of marking on fabric, i.e. chalk, fabric pens, Students to mark on fabric where the circuit will go Teacher to demonstrate how to place circuit in the fabric Students to students to check their circuit drawing
PLENARY (include assessment of learning outcomes) : Using their homework from previous week, use chalk to mark on fabric where circuit will go. If possible, use 2 different colours of chalk to highlight positive and negative.
HOMEWORK: Homework – write a record of what they have done up to now. Where did their design come from, what influenced them, what process did they use to get where they are up to now, how difficult did they find using the tools, was their process plan correct or has it been changed? Etc. Learning Outcomes : By the end of the lesson: Most students will be able to: Cut out their pattern pieces and place eyelets in correct places Some students will be able to: Confidently mark their fabric in the best way for the job they wish to do Some students will have progressed even further and will be able to : consider different battery holders for holding the LEDS Link to next lesson: Stitching circuits and adding a battery holder and cover if needed. Role of Classroom Assistant (if applicable) Notes What could be done to improve on the design here; i.e. quality, finishing, etc.

Teacher Resources Light Stitches Book 1 E-Textiles
www.lightstitches.co.uk
22
Lesson plans – week eight
SUBJECT/CLASS CODE DATE PERIOD MALES FEMALES TOTAL UNIT/MODULE LIGHT STITCHES (1) E-textiles Teacher’s Resources
AIMS/OBJECTIVES (e.g. to know, to understand, to apply): Will understand how to assemble their product Will build and consolidate their previous knowledge of sewing their circuit and complete and test
LESSON TITLE 8. Stitching circuits and assembling battery holder and adding a cover if needed into the design RESOURCES: Demonstration models, conductive thread & conductive hook and loop, battery holders with switch, press studs, LEDs, long nose pliers, hook and loop tape, Power Point, advertising my product worksheet CROSS-CURRICULAR LINKS (e.g. Lit/Num/ICT/CEG/Citizenship) Environmental issues
L E S S O N S E Q U E N C E For coursework/project lessons individual assessment sheets should be used to monitor progress regularly
TIME
INTRODUCTION (link to previous lesson or new unit of work): Link to previous lesson’s homework with demonstration where the circuit will need to go and how to create an accessible battery cover if needed.
MAIN ACTIVITIES (include timings, starter activity, differentiation, activities, group/pair work etc): Some students to be using machines and assembling the battery covers whilst other students will hand stitch the circuit in place. The Power Point can help with the circuit sewing again This continues on a rolling programme until all have done both tasks. Students who manage both tasks in the lesson can then move on to assembly of the final product.
PLENARY (include assessment of learning outcomes) : Gather circuits around a table for each to show how theirs works. If it doesn’t work, some students will be able to suggest what is required to help the others.
HOMEWORK: Homework – design a name for your product. Draw in full colour a ‘flyer’ which could be given to potential customers to explain the functions of your product. For those with access to IT, this could be done on a PC as opposed to hand drawn. Learning Outcomes : By the end of the lesson: Most students will be able to: Produce a successful circuit with battery holder and cover if appropriate Some students will be able to: Recognise how this design could be utilised in lots of different textile products Some students will have progressed even further and will be able to : Consider other ways to ‘hide’ the battery but still have accessibility and to help their peers troubleshoot Link to next lesson: Final stitching, assembly and testing Role of Classroom Assistant (if applicable) Notes What could be done to improve on the design here; i.e. quality, finishing, etc.

Teacher Resources Light Stitches Book 1 E-Textiles
www.lightstitches.co.uk
23
Lesson plans – week nine
SUBJECT/CLASS CODE DATE PERIOD MALES FEMALES TOTAL UNIT/MODULE LIGHT STITCHES (1) E-textiles Teacher’s Resources
AIMS/OBJECTIVES (e.g. to know, to understand, to apply): Will appreciate the quality of a finished piece and take on responsibility for their own learning
LESSON TITLE 9. Final stitching, assembly and testing RESOURCES: Demonstration products, conductive thread, battery holders with switch or without switch, press studs, LEDs, long nose pliers, hook and loop tape, Power Point. What I’ve done up to now worksheets CROSS-CURRICULAR LINKS (e.g. Lit/Num/ICT/CEG/Citizenship) Environmental issues
L E S S O N S E Q U E N C E For coursework/project lessons individual assessment sheets should be used to monitor progress regularly
TIME
INTRODUCTION (link to previous lesson or new unit of work): Brief discussion of coming towards end of project and how important this lesson is as they all aim for a finished product
MAIN ACTIVITIES (include timings, starter activity, differentiation, VAK activities, group/pair work etc): Demonstrate the final product and how to combine the components along with the last minute jobs. Students to take into account the quality of their finished items as they finish off the final jobs to end up with a completed project
PLENARY (include assessment of learning outcomes) : Group discussion on the project, preparing for next week’s evaluation lesson. Discussion of each other’s product names and display of advertising flyers
HOMEWORK: Homework – From assessment booklet check out any worksheets not completed. Ensure these are done over the next week as non-completion will affect mark achieved over entire project Learning Outcomes : By the end of the lesson: Most students will be able to: Produce a successful completed product Some students will be able to: Suggest ways to improve on the quality of theirs and others finished products Some students will have progressed even further and will be able to : Take on responsibility for their own learning and check out what they need to do in order to ensure themselves of the best mark Link to next lesson: Evaluation and assessment Role of Classroom Assistant (if applicable) Notes What could be done to improve on the design here; i.e. quality, finishing, etc. How could I improve the original design i.e. quality, finishing, etc

Teacher Resources Light Stitches Book 1 E-Textiles
www.lightstitches.co.uk
24
Lesson plans – week ten
SUBJECT/CLASS CODE DATE PERIOD MALES FEMALES TOTAL UNIT/MODULE LIGHT STITCHES (1) E-textiles Teacher’s Resources
AIMS/OBJECTIVES (e.g. to know, to understand, to apply): Will understand the importance of evaluating their own product and each other’s work
LESSON TITLE 10. Evaluation and assessment RESOURCES: Assessment books, evaluation sheets CROSS-CURRICULAR LINKS (e.g. Lit/Num/ICT/CEG/Citizenship) Environmental issues
L E S S O N S E Q U E N C E For coursework/project lessons individual assessment sheets should be used to monitor progress regularly
TIME
INTRODUCTION (link to previous lesson or new unit of work): Explain the purpose of evaluation and the lessons to be learnt for future tasks
MAIN ACTIVITIES (include timings, starter activity, differentiation, VAK activities, group/pair work etc): All students to complete the evaluation sheets in full sentences Working in small group they can evaluate their peers work and relate it back to the design specification, how well it meets the specifications, etc. Teacher to assess each student utilising the assessment marking sheet based on final product, completed paperwork, evaluation and discussion with student.
PLENARY (include assessment of learning outcomes) : Group discussion on the project, how did they feel about the project; what skills did they learn; etc
HOMEWORK: None Learning Outcomes : By the end of the lesson: Most students will be able to: Understand the importance of evaluating their own product and each other’s work Some students will be able to: Critically evaluate their own and other’s products Some students will have progressed even further and will be able to : Will be able to suggest what they can do in the future to improve their mark plus suggest how they can help others to improve Link to next lesson: Role of Classroom Assistant (if applicable) Notes

Teacher Resources Light Stitches Book 1 E-Textiles
www.lightstitches.co.uk
25
LEVEL 4 TICK
BOX LEVEL 5 TICK
BOX LEVEL 6 TICK
BOX I collected ideas from more than one place i.e. the internet
I collected ideas from various sources, e.g. catalogues, the internet, the library, etc.
I explained how my research was useful in my design ideas
I asked other people what they thought about me designs
I discussed my ideas with my teacher and other students
I made models to check my idea would work and also used CAD e.g. Pro Desktop where appropriate
I produced a process plan before I started
I wrote about my ideas and used drawing and modelling to check they would work
I discussed designs and ideas with fellow pupils and teacher, critically analysing which would function
I labelled my ideas explaining how they would work
I analysed other people’s products and ideas which helped me with my design
I produced detailed planning, e.g. flowcharts, sequence drawings to ensure I understood my making process
My project solved the original problem
I drew a detailed process plan for making and evaluated how accurate it was at the end
I compared my final design to my specification, ensuring I met the requirements of the design brief
My project looks like I wanted it to My project looks like I wanted it to after making improvements as I went along
I worked with a range of tools, equipment, materials, components and processes
I paid attention to the quality/presentation of my finished product
I paid attention to the finish/quality/presentation of my finished project
I checked my process plan as my project developed and changed it as I went along
I thought about improvements as I went along
I tested my final project myself and with others
I analysed my designs against the set criteria and selected the best design
I used a range of tools/equipment correctly
I evaluated my project identifying improvements and explained how cost restraints may affect these
I explained any alterations, modifications and improvements and why I did these
I evaluated my project identifying what was good and bad, how well it worked and how it could be improved
I described how my product could be made in multiple copies
I evaluated the way I have used sources of information and identified ways of improving the final product as it was being used
HOMEWORK DATE TEACHER DATE TEACHER Research
Paper drawing of circuit
Design Ideas
What I have done up to now
Mood Board
Adverting my product
Final Idea Drawing Record of paperwork and complete if necessary
5 rules of H&S
No homework set

Teacher Resources Light Stitches Book 1 E-Textiles
www.lightstitches.co.uk
26
LEVEL 7 TICK BOX
LEVEL 8 TICK BOX
EXCEPTIONAL PERFORMANCE TICK BOX
I used a wide range of sources of information to develop ideas and explained how they helped to develop my ideas
I used a range of strategies to fully develop and model appropriate ideas
I sought out information to help my design thinking
I looked at different shapes and investigated the form and function before communicating ideas
I identified conflicting demands on my product
I recognised how products contribute to lifestyle and choices of a variety of client groups as my ideas developed
I recognised the needs of different users and developed realistic designs
I responded creatively to the brief, suggesting ways forward and explaining how my ideas addressed the demands
I responded creatively to the design brief and was discriminating in my selection and use of information sources to support my work
I produced detailed planning, e.g. with realistic timescales
I used my knowledge of materials to choose the best material based on its properties and characteristics for my design
I interpreted and applied my knowledge and understanding creatively in new design contexts and communicated my ideas in new or unexpected ways
I adapted my methods of manufacture as changes developed
I used my understanding of others’ designing by reinterpreting and applying learning in new contexts
I used my understanding of others’ designing in innovative ways
I worked with a range of tools, equipment, materials, components and processes taking full account of the material and tools characteristics
I organised my work, creating a Gantt chart with timescales which I stuck to and amended as necessary
I used a wide range of tools, equipment, materials, ingredients and components with a high degree of precision
I explained any changes I made giving sound reasons
I used a wide range of tools, equipment, materials, ingredients and components with precision
My product is reliable and robust and fully meets the quality requirements given in the design proposal
I used appropriate testing to evaluate my product
I used accurate testing to inform my developmental work to solve technical problems
Throughout the process I reflected critically and effectively
I modified my product in the light of the evaluation to improve its performance
I evaluated my project I evaluated my project clearly identifying my findings and relating them to environmental, ethical and social and cultural dimensions
I produced a clear evaluation with sound, innovative testing, utilising my findings to produce ways forward which related to the environment, ethical and social and cultural dimensions
ASSESSMENTS SHEETS DATE TEACHER DATE TEACHER The Design Brief Word search
Threads Process plan
My Design Specification Sewing machine practice sheet
Research Advertising my product
Product analysis What I’ve done up to now
Star Diagram Learning pyramid
My Design Sheet Record of completed worksheets

Teacher Resources Light Stitches Book 1 E-Textiles
www.lightstitches.co.uk
27
Project:
INTERIM ASSESSMENT Student’s comments WWW (what went well) – EBI (even better if) –
INTERIM ASSESSMENT Teacher’s comments including steps which will help to improve your learning
FINAL ASSESSMENT Student’s comments WWW (what went well) – EBI (even better if) –
Target grade
NC LEVEL ACHIEVED EFFORT
SIGNATURE OF TEACHER
DATE
SIGNATURE OF STUDENT

Teacher Resources Light Stitches Book 1 E-Textiles
www.lightstitches.co.uk
28
Name:
Project:

Teacher Resources Light Stitches Book 1 E-Textiles
www.lightstitches.co.uk
29
Worksheet - Design Brief Name ________________________ The Design Brief A major high street retailer wants to introduce a range of new products into their shops. They will be ‘must have’ accessories, made from felt with flashing lights. They want you to design either a purse, bracelet/wristband or a pencil case with at least one flashing LED in its design. The design cannot exceed 200mm in width or 150mm in depth and should be appropriate for young teenagers. There must be no more than 3 colours or tones of a colour in your design. 1. What am I being asked to make and what are all the components involved?
(battery holders etc.)
2. What materials will I be using and why are these suitable? (cotton, felt etc.)

Teacher Resources Light Stitches Book 1 E-Textiles
www.lightstitches.co.uk
30
Worksheet - Threads Name________________________ Threads Using the sample piece of thread, you have been given and a needle, lie the thread on a piece of paper. Hold one end so that it cannot move and use the needle fray out the edges.
1. Place your piece of thread into this box with a small piece of self-adhesive
tape.
2. Describe what you have found.

Teacher Resources Light Stitches Book 1 E-Textiles
www.lightstitches.co.uk
31
Worksheet – My Design Specification Name ______________________ Designers use a specification when designing. This helps to guide your thinking and also gives you a set of criteria to judge your design against. Using ACCESS FM to help you start, fill in each box with the information you know about the criteria your design must meet.
What to think about My design must…….. Aesthetics Appearance. Use of colour,
lettering, images, style.
Cost Value for money. Expensive or cheap to make?
Client The customer. How well does the product suit the client it is aimed at?
Environment Is the product environmentally friendly? Is it recyclable or refillable?
Safety Is the product safe to use? Are there any sharp edges or loose parts?
Size Is the product a good size?
Function Job. How well does the product do its job?
Materials Is the product made out of suitable materials?

Teacher Resources Light Stitches Book 1 E-Textiles
www.lightstitches.co.uk
32
Worksheet – Research – higher ability Name ______________________ Read your design brief and then using different types of research, i.e. books; the internet; photographs; catalogues; visiting shops, etc. search for ideas for a purse, pencil case or wristband. Place your information here. Use extra sheets if necessary. You should use at least three different sources. Using the information provided by your teacher, annotate (write at the side and around it, using arrows to point to where you mean) with information about how this product meets or does not meet your specification.

Teacher Resources Light Stitches Book 1 E-Textiles
www.lightstitches.co.uk
33
Worksheet – Research – Middle ability Name______________________ Read your design brief and then using different types of research, i.e. books; the internet; photographs; catalogues; visiting shops, etc. search for ideas for a purse, pencil case or wristband. Place your information here. Use extra sheets if necessary. Use at least three different sources. You should answer these questions for each item you choose to go into your research. Q1. Is this a suitable design? Q2. Why is it a suitable design? Q3. What is its function? Q4. Is the product made out of suitable material?
Teacher Resources Light Stitches Book 1 E-Textiles
www.lightstitches.co.uk
34
Worksheet – Research – Lower ability Name______________________ Read your design brief and then using different types of research, i.e. books; the internet; photographs; catalogues; visiting shops, etc. search for ideas for a purse, pencil case or wristband. Place your information here. Use extra sheets if necessary. Use at least three different sources. You should complete these statements for each item you choose to go into your research. A. The design used is.................... B. This is good because.............................................. C The function is the ...........................................................

Teacher Resources Light Stitches Book 1 E-Textiles
www.lightstitches.co.uk
35
Worksheet – My Design Sheet Name______________________ Draw 2 different designs which meet with your design specification. They should be coloured and annotated to explain your idea. Remember to keep in mind the demonstration products you have seen and how your designs will work. (Use more plain sheets of paper if necessary)

Teacher Resources Light Stitches Book 1 E-Textiles
www.lightstitches.co.uk
36
Worksheet - Product Analysis Teacher notes The score card can be used to help analyse either real products which you have brought in or use the following page to use as product analysis. This score sheet can also be used towards the end of the design and make to help evaluate the finished products.
Teacher notes The above score card can be used to help analyse either real products which you have brought in or from previous classes or to analyse photographs of appropriate products brought in for research. The following pages have some good products to use and can simply be laminated for use in more than one lesson. Small groups work well for this exercise with a nominated spokesperson. This score sheet can also be used towards the end of the design and make to help evaluate the finished products.
aesthetics
cost
client
environment
safety
size
function
materials
1
0.5
0
Product:__________________
Product Analysis
What are the strengths of this product?
__________________________________________________________ _____________________________ What are the weaknesses of the product?
__________________________________________________________ _____________________________ How can the product be improved? __________________________________________________________ _____________________________
1
2
3

Teacher Resources Light Stitches Book 1 E-Textiles
www.lightstitches.co.uk
37
Product analysis photographs – a selection of e-textile products from Light Stitches that use different switches and LED’s.
Teacher Resources Light Stitches Book 1 E-Textiles
www.lightstitches.co.uk
38
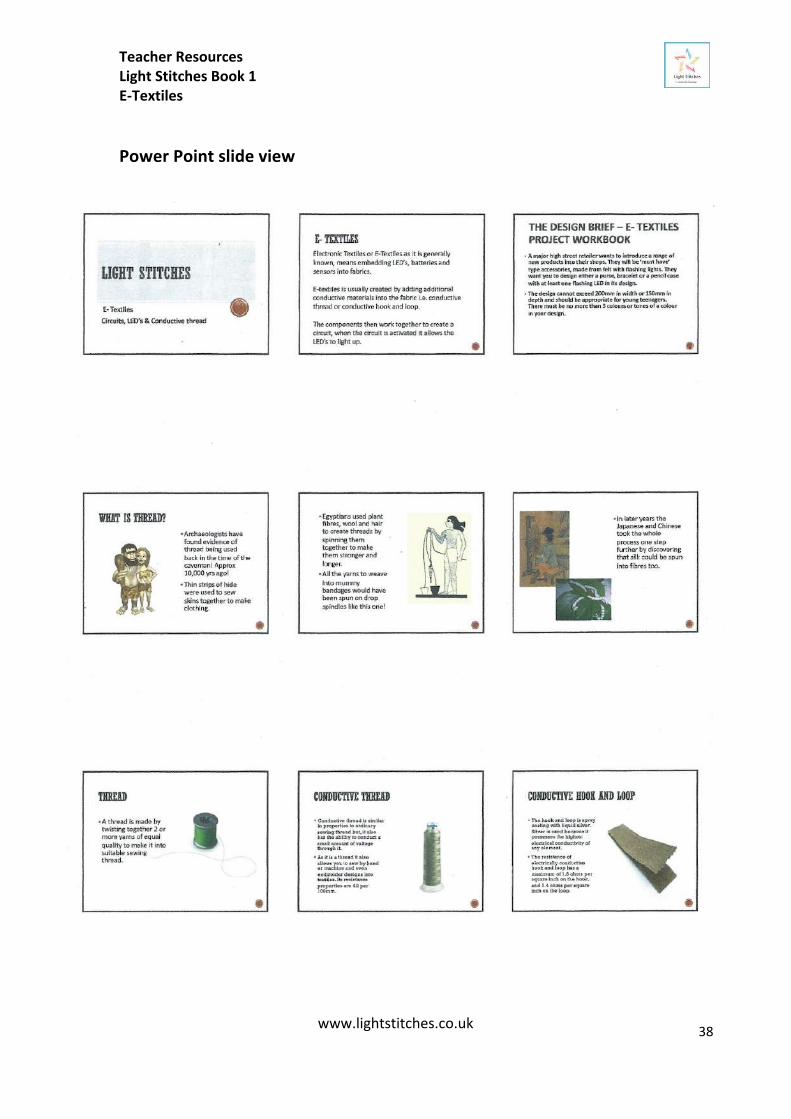
Power Point slide view

Teacher Resources Light Stitches Book 1 E-Textiles
www.lightstitches.co.uk
39
Power Point slide view

Teacher Resources Light Stitches Book 1 E-Textiles
www.lightstitches.co.uk
40
Power Point slide view

Teacher Resources Light Stitches Book 1 E-Textiles
www.lightstitches.co.uk
41
Word search – E-Textiles Words used – find the words listed below on this e-textile word search.
G V B U C Q V D H Q L O B Y M E O L F X Y N X E V N A B U Z Y S E G Y M L V F S T W B Y D H L A P R O D U C T I L X D U T Y U C M S P B E E M G X J T X V S S L V E R N A R O N Y S G W P Z V I Y L M Y J R H K S U K O M F H C T I W S T F O S J D J R O V J N B S G P M F E L J P L X K I J E N Y U O K R Q W D W H R W S I P L R L F P D E I W B I U R P Q L S X U N R R W I E J Y C C W Q E U U P C Q S P Y E T X W B U M X U Q M V K S K O V I L C N K X V A
Battery holder, design, felt, key ring, pencil case, press stud, product, purse, soft switch
Teacher Resources Light Stitches Book 1 E-Textiles
www.lightstitches.co.uk
42
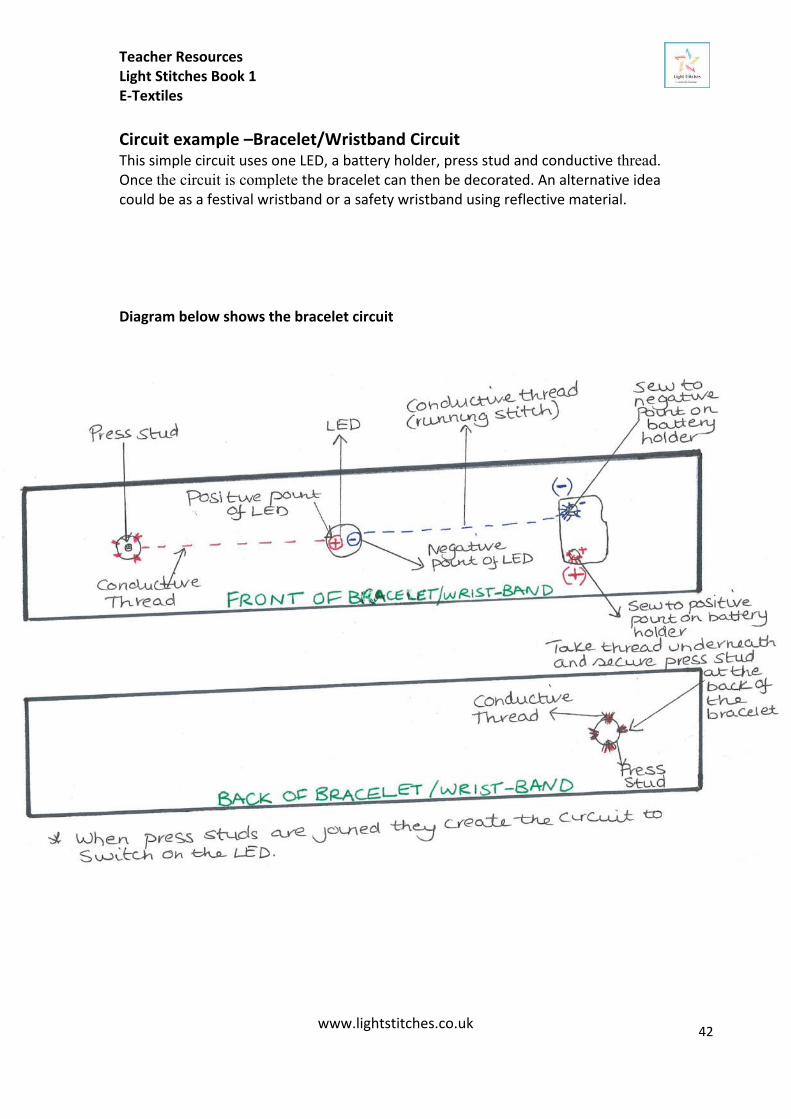
Circuit example –Bracelet/Wristband Circuit This simple circuit uses one LED, a battery holder, press stud and conductive thread. Once the circuit is complete the bracelet can then be decorated. An alternative idea could be as a festival wristband or a safety wristband using reflective material. Diagram below shows the bracelet circuit

Teacher Resources Light Stitches Book 1 E-Textiles
www.lightstitches.co.uk
43
Worksheet – Process planning (higher ability) Name ______________________ Create a process plan of your design. For example: the first task you think might be first could be ‘machine all pieces’? You could use a diagram or chart to show this.

Teacher Resources Light Stitches Book 1 E-Textiles
www.lightstitches.co.uk
44
Worksheet – Process planning (middle ability) Name ______________________ Create a process plan of your design. For example: the first task you think might be first could be ‘machine all the pieces’?
1 2
3 4
5 6

Teacher Resources Light Stitches Book 1 E-Textiles
www.lightstitches.co.uk
45
Worksheet – Process planning (lower ability) Name ________________________ Sort the following statements into the order you will use to make your product.
• Attach pieces to blanket • Sew on machine • Sew in the components by hand • Sew the pocket/flap for the circuit board • Mark the fabric lining for where my electronic components need
to be • Cut out pattern pieces
1 2
3 4
5 6
Teacher Resources Light Stitches Book 1 E-Textiles
www.lightstitches.co.uk
46
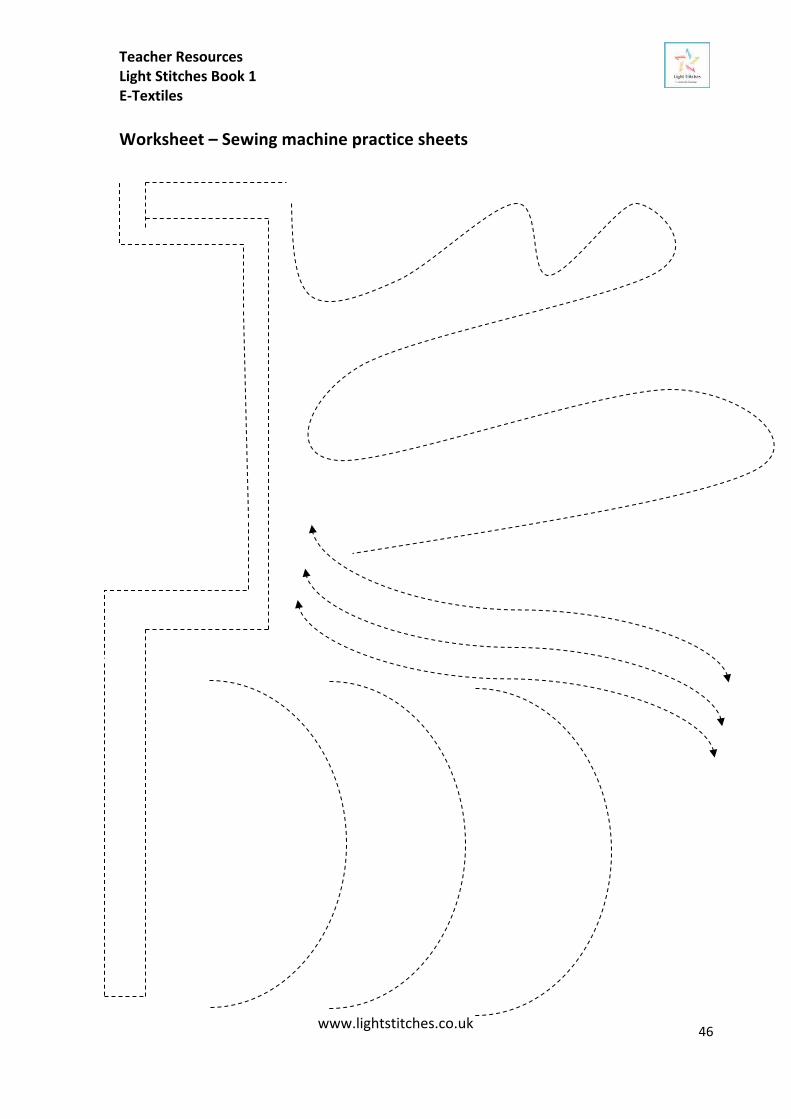
Worksheet – Sewing machine practice sheets

Teacher Resources Light Stitches Book 1 E-Textiles
www.lightstitches.co.uk
47
Worksheet – Advertising my product Name _____________________ You are to design a small flyer for distribution to potential customers in the local shopping centre. Think about what information would persuade someone to buy your product. It should be brightly coloured and informative, advertising the different functions of your design.
Worksheet – What I’ve done up to now

Teacher Resources Light Stitches Book 1 E-Textiles
www.lightstitches.co.uk
48
What I’ve done up to now Name _____________________ Write in the box below what you have done up to now. For instance: Where did your design come from, what influenced you, what process did you use to get where you are up to now, how difficult have you found using the tools, was your process plan correct or has it been changed? You may add other information to this list. This information will help at the end of the project when you have to evaluate your product.

Teacher Resources Light Stitches Book 1 E-Textiles
www.lightstitches.co.uk
49
Worksheet – Learning pyramid Name _______________________
Write 1 question you would like to ask about the project
Name 2 ways you have been a good learner today
Name 3 skills you have learnt from scratch or that have improved whilst doing this project

Teacher Resources Light Stitches Book 1 E-Textiles
www.lightstitches.co.uk
50
Worksheet – Record of completed worksheets Name _______________________ Tick each one of the worksheet titles that are in your folder. If they are not there you will need to do them to get the best possible mark. Ask the teacher for another copy
TITLE OF WORKSHEET/BOOKLET RAG
Assessment booklet
The Design Brief
Threads
My Design Specification
Research
My Design Sheet
Product Analysis
Star Diagram
E- Textile word search
Process Planning
Sewing machine practice sheets
Advertising my product
What I’ve done up to now
Learning Pyramid
My Evaluation
Have I brought my assessment booklet up – to – date?

Teacher Resources Light Stitches Book 1 E-Textiles
www.lightstitches.co.uk
51
Worksheet – Evaluation Name _______________________ Answer the following questions in full sentences and as honestly as you can. 1. How well have you met the needs of the design brief? 2. Was your product successful or unsuccessful? Explain why. 3. What improvements could you make to your design?

Teacher Resources Light Stitches Book 1 E-Textiles
www.lightstitches.co.uk
52
4. What did you find difficult about the designing or the making? 5. Explain why you are satisfied or unsatisfied with your final piece. 5. Explain why you are satisfied or unsatisfied with your final piece. 6. What went well (WWW) and what would be even better (EBI)?
WWW –
EBI –