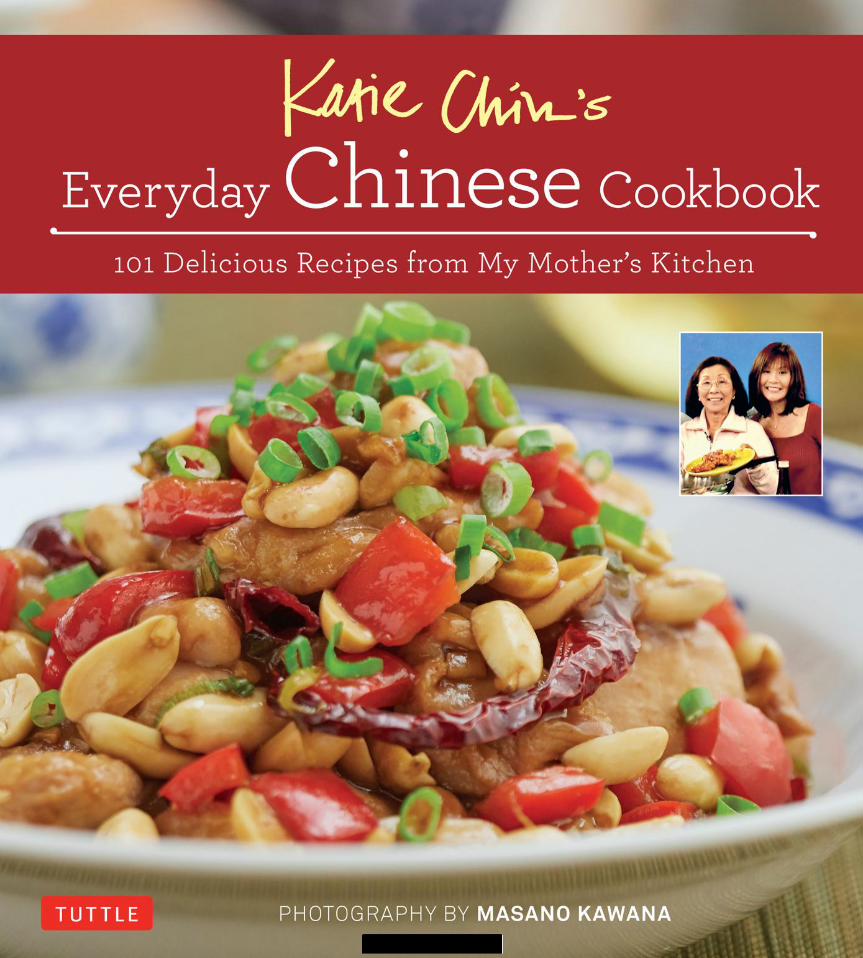
Katie Chin`s Everyday Chinese Cookbook - 101 Delicious Recipes from My Mother`s Kitchen (2016)
163
-
Upload
download-warez -
Category
Food
-
view
531 -
download
2
Transcript of Katie Chin`s Everyday Chinese Cookbook - 101 Delicious Recipes from My Mother`s Kitchen (2016)

ECC_full layout.indd 1ECC_full layout.indd 1 30/9/15 7:44 PM30/9/15 7:44 PM
ECC_full layout.indd 2ECC_full layout.indd 2 30/9/15 7:44 PM30/9/15 7:44 PM
KATIE CHINForeword by Raghavan Iyer
Photography by Masano Kawana
TUT TLE Publishing
Tokyo Rutland, Vermont Singapore
Everyday Chinese Cookbook101 Delicious Recipes from My Mother’s Kitchen
’S
ECC_full layout.indd 3ECC_full layout.indd 3 30/9/15 7:44 PM30/9/15 7:44 PM
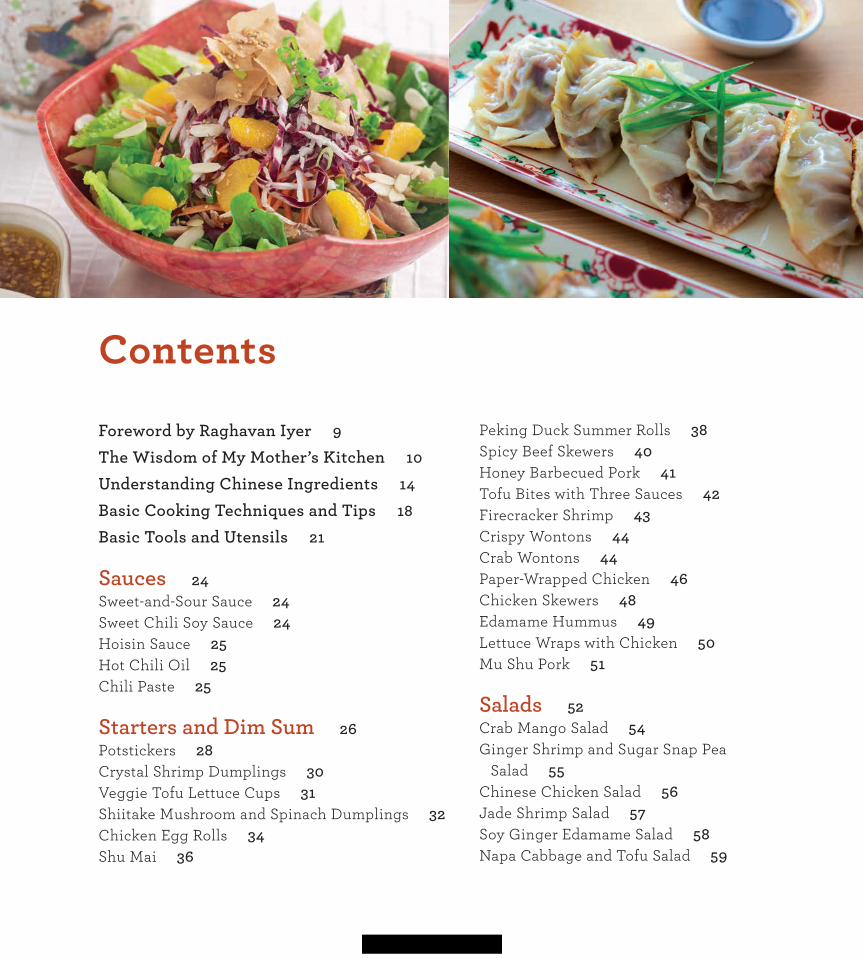
Foreword by Raghavan Iyer 9
The Wisdom of My Mother’s Kitchen 10
Understanding Chinese Ingredients 14
Basic Cooking Techniques and Tips 18
Basic Tools and Utensils 21
Sauces 24Sweet-and-Sour Sauce 24Sweet Chili Soy Sauce 24Hoisin Sauce 25Hot Chili Oil 25Chili Paste 25
Starters and Dim Sum 26Potstickers 28 Crystal Shrimp Dumplings 30Veggie Tofu Lettuce Cups 31 Shiitake Mushroom and Spinach Dumplings 32 Chicken Egg Rolls 34 Shu Mai 36
Contents
Peking Duck Summer Rolls 38 Spicy Beef Skewers 40 Honey Barbecued Pork 41Tofu Bites with Three Sauces 42 Firecracker Shrimp 43 Crispy Wontons 44 Crab Wontons 44 Paper-Wrapped Chicken 46 Chicken Skewers 48Edamame Hummus 49 Lettuce Wraps with Chicken 50 Mu Shu Pork 51
Salads 52Crab Mango Salad 54 Ginger Shrimp and Sugar Snap Pea
Salad 55 Chinese Chicken Salad 56Jade Shrimp Salad 57Soy Ginger Edamame Salad 58Napa Cabbage and Tofu Salad 59
ECC_full layout.indd 4ECC_full layout.indd 4 2/10/15 11:51 AM2/10/15 11:51 AM

Beef, Pork and Lamb 84Sweet-and-Sour Pork 86 Hong Kong Steak 88 Hoisin Lacquered Ribs 89 Sichuan Beef 90Stir-Fried Beef with Tomato 91Tangerine Beef 92 Stir-Fried Beef with Broccoli 93Stir-Fried Beef with Asparagus and
Wild Mushrooms 94 Pepper Steak 95 Mongolian Lamb 96 Mapo Tofu 97 Stir-Fried Beef with Snow Peas and
Red Bell Pepper 98Stir-Fried Pork with Zucchini 100 Pork Tenderloin with Wild Mushrooms 100Stir-Fried Pork with Asian Eggplant 101
Soups 60Basic Chicken Stock 62Basic Fish Stock 62Beef with Rice Stick Noodle Soup 63Egg Drop Soup 64Hot-and-Sour Soup 65 Chicken, Bok Choy and Clam Soup 66Velvet Chicken Corn Soup 67 Tofu Tomato Soup 68 Spicy Pork Noodle Soup 69Wor Wonton Soup 70 Vegetable, Egg and Ramen Soup 71
Poultry 72Orange Chicken 74Cashew Chicken 76 Lemon Chicken 77 Kung Pao Chicken 78 General Tso’s Chicken 79 Diced Chicken with Vegetables 80Chicken with Salted Black Beans, Tomatoes
and Green Peppers 81Chicken with Shiitake Mushrooms and
Snow Peas 82Stir-Fried Chicken with Bok Choy 83
ECC_full layout.indd 5ECC_full layout.indd 5 30/9/15 7:44 PM30/9/15 7:44 PM

Seafood 102Clams in Black Bean Sauce 104 Chinese Glazed Salmon 105 Shrimp with Lobster Sauce 106 Lobster with Ginger and Scallions 107 Jade Shrimp with Fragrant Vegetables 108 Braided Fish Steamed with Ginger and
Green Onions 110 Stir-Fried Fish Fillet and Chinese Broccoli 112 Chinese-Style Parchment Fish 113 Walnut Shrimp 114 Sesame Scallops 115 Crispy Fish with Ginger-Scallion
Sauce 116Tea-Smoked Sea Bass 118Steamed Cantonese Whole Fish 119
Vegetables and Tofu 120Asparagus with Wild Mushrooms 122 Chinese Long Beans with Cashews 123 Harvest Delight 124 Stir-Fried Kale and Broccoli 125 Sichuan Tofu with Broccoli 126 Spicy-Garlicky Asian Eggplant 127 Stir-Fried Spinach with Garlic 128 Baby Bok Choy with Ginger and
Garlic 129 Eight-Vegetable Tofu 130 JJ’s Spicy-Crispy Tofu with
Green Beans 131
ECC_full layout.indd 6ECC_full layout.indd 6 2/10/15 11:51 AM2/10/15 11:51 AM
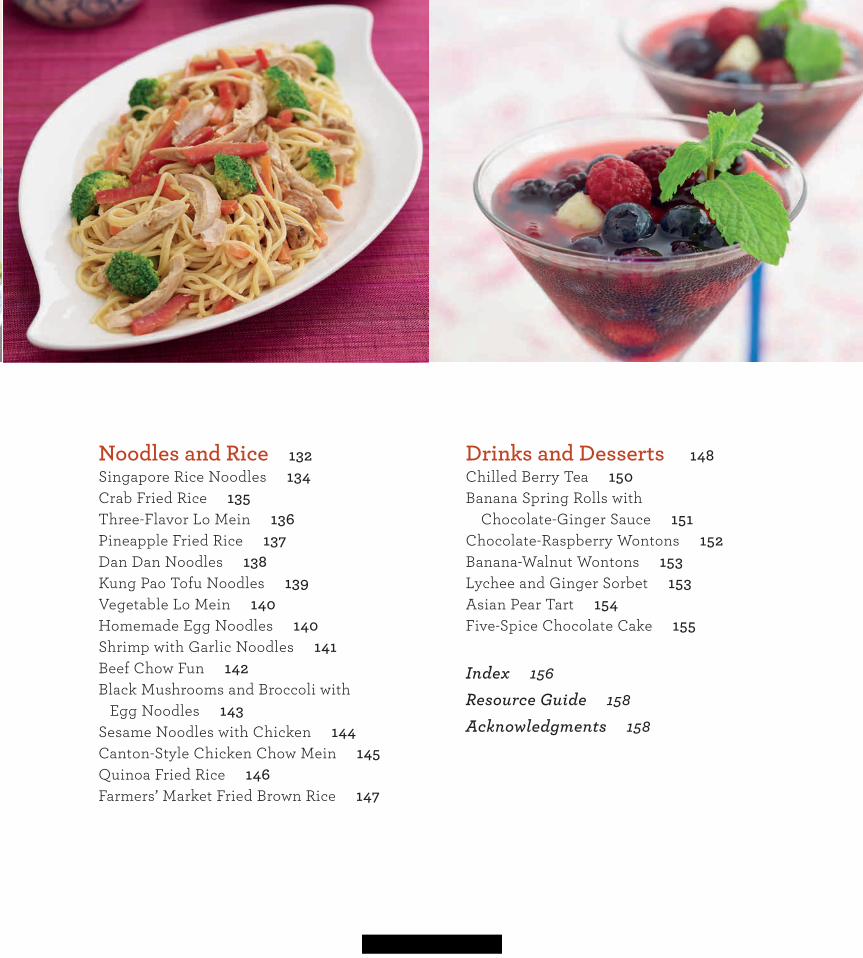
Noodles and Rice 132Singapore Rice Noodles 134 Crab Fried Rice 135 Three-Flavor Lo Mein 136 Pineapple Fried Rice 137 Dan Dan Noodles 138 Kung Pao Tofu Noodles 139 Vegetable Lo Mein 140 Homemade Egg Noodles 140 Shrimp with Garlic Noodles 141 Beef Chow Fun 142Black Mushrooms and Broccoli with
Egg Noodles 143Sesame Noodles with Chicken 144 Canton-Style Chicken Chow Mein 145Quinoa Fried Rice 146Farmers’ Market Fried Brown Rice 147
Drinks and Desserts 148Chilled Berry Tea 150Banana Spring Rolls with
Chocolate-Ginger Sauce 151 Chocolate-Raspberry Wontons 152 Banana-Walnut Wontons 153Lychee and Ginger Sorbet 153 Asian Pear Tart 154Five-Spice Chocolate Cake 155
Index 156
Resource Guide 158
Acknowledgments 158
ECC_full layout.indd 7ECC_full layout.indd 7 2/10/15 11:52 AM2/10/15 11:52 AM
8 KATIE CHIN’S EVERYDAY CHINESE COOKBOOK
ECC_full layout.indd 8ECC_full layout.indd 8 30/9/15 7:44 PM30/9/15 7:44 PM
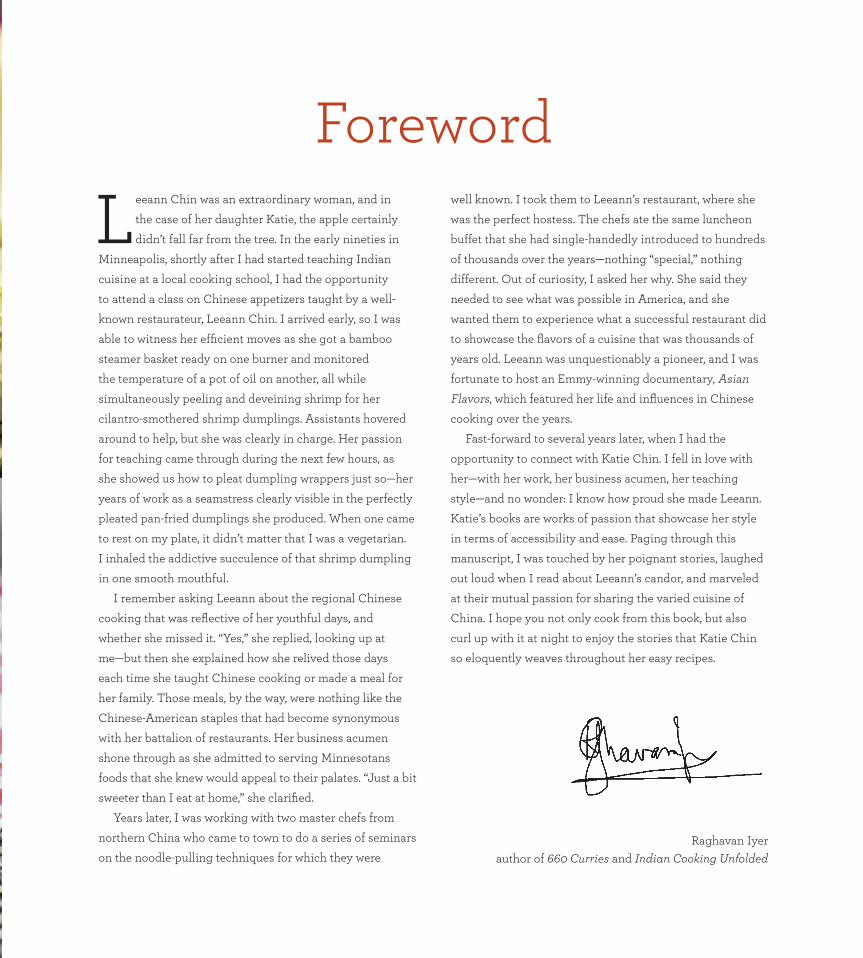
Foreword
L eeann Chin was an extraordinary woman, and in
the case of her daughter Katie, the apple certainly
didn’t fall far from the tree. In the early nineties in
Minneapolis, shortly after I had started teaching Indian
cuisine at a local cooking school, I had the opportunity
to attend a class on Chinese appetizers taught by a well-
known restaurateur, Leeann Chin. I arrived early, so I was
able to witness her effi cient moves as she got a bamboo
steamer basket ready on one burner and monitored
the temperature of a pot of oil on another, all while
simultaneously peeling and deveining shrimp for her
cilantro-smothered shrimp dumplings. Assistants hovered
around to help, but she was clearly in charge. Her passion
for teaching came through during the next few hours, as
she showed us how to pleat dumpling wrappers just so—her
years of work as a seamstress clearly visible in the perfectly
pleated pan-fried dumplings she produced. When one came
to rest on my plate, it didn’t matter that I was a vegetarian.
I inhaled the addictive succulence of that shrimp dumpling
in one smooth mouthful.
I remember asking Leeann about the regional Chinese
cooking that was refl ective of her youthful days, and
whether she missed it. “Yes,” she replied, looking up at
me—but then she explained how she relived those days
each time she taught Chinese cooking or made a meal for
her family. Those meals, by the way, were nothing like the
Chinese-American staples that had become synonymous
with her battalion of restaurants. Her business acumen
shone through as she admitted to serving Minnesotans
foods that she knew would appeal to their palates. “Just a bit
sweeter than I eat at home,” she clarifi ed.
Years later, I was working with two master chefs from
northern China who came to town to do a series of seminars
on the noodle-pulling techniques for which they were Raghavan Iyer
author of 660 Curries and Indian Cooking Unfolded
well known. I took them to Leeann’s restaurant, where she
was the perfect hostess. The chefs ate the same luncheon
buffet that she had single-handedly introduced to hundreds
of thousands over the years—nothing “special,” nothing
different. Out of curiosity, I asked her why. She said they
needed to see what was possible in America, and she
wanted them to experience what a successful restaurant did
to showcase the fl avors of a cuisine that was thousands of
years old. Leeann was unquestionably a pioneer, and I was
fortunate to host an Emmy-winning documentary, Asian
Flavors, which featured her life and infl uences in Chinese
cooking over the years.
Fast-forward to several years later, when I had the
opportunity to connect with Katie Chin. I fell in love with
her—with her work, her business acumen, her teaching
style—and no wonder: I know how proud she made Leeann.
Katie’s books are works of passion that showcase her style
in terms of accessibility and ease. Paging through this
manuscript, I was touched by her poignant stories, laughed
out loud when I read about Leeann’s candor, and marveled
at their mutual passion for sharing the varied cuisine of
China. I hope you not only cook from this book, but also
curl up with it at night to enjoy the stories that Katie Chin
so eloquently weaves throughout her easy recipes.
ECC_full layout.indd 9ECC_full layout.indd 9 30/9/15 7:44 PM30/9/15 7:44 PM
10 KATIE CHIN’S EVERYDAY CHINESE COOKBOOK
M y mother, Leeann
Chin, was born in
Guangzhou, China,
in 1933. She demonstrated a keen
knack for numbers, mastering the
abacus at the tender age of twelve.
She’d draw crowds to her father’s
grocery store, where onlookers
would admire her quick fi ngers ma-
nipulating the beads of the abacus.
A tomboy, she soon was delivering
fi fty-pound bags of rice on the back of her bike, riding up to
ninety miles a day.
As a child, my mother was curious about food and cooking,
but her mother didn’t want her to learn how to cook—that
was a job for the hired help. My mother would sneak into the
kitchen and follow the family cook around with wide-eyed
fascination. She’d watch as the cook’s cleaver danced across
the wooden chopping block, gracefully mincing garlic; she
enjoyed the sight of smoking ginger-infused peanut oil with
green onion threads being poured over a freshly steamed sea
bass, and the sizzling sound the oil made as it hit the fi sh.
At the age of seventeen, she escaped the Cultural Rev-
olution and moved to Hong Kong, where a matchmaker
paired her with my father, Tony. My parents and my paternal
grandmother lived in a modest apartment where my mother
adjusted to the bustling streets and bright lights of the city.
Although she had followed the family cook around, she had
The Wisdom of My Mother’s Kitchen
little experience actually cooking on
her own; however, she was expected
to prepare my father’s favorite dishes
immediately upon becoming his
bride. She started experimenting
with the succulent seafood and
plump ducks that Hong Kong had
to offer, and her love affair with
cooking began.
In 1956, my parents and grand-
mother were given the opportunity to immigrate to
Minneapolis, Minnesota, where my aunt “Goo Ma” and uncle
“Bue Jang” operated the Kwong Tong Noodle Company. It
was a culture and climate shock. My mother did her best to
cook her favorite Cantonese dishes, but it was diffi cult for
her to even fi nd fresh ginger at the grocery store. She learned
to improvise, and started growing bok choy, Chinese long
beans and Asian eggplant in our tiny garden.
In addition to my two sisters who immigrated with my
parents from Hong Kong, my mother gave birth to my
brother and my other sisters in the mid-1950s through the
mid-‘60s. Knowing it was hard for her children to assimilate
as Chinese-Americans, my mother did everything she could
to help us fi t in, like bringing us to Sons of Norway events,
but every night she made us Chinese food. We didn’t fully
appreciate the gourmet Chinese meals we were served, and
secretly wished we were eating Hamburger Helper like all
the other kids. Foolish, I know.
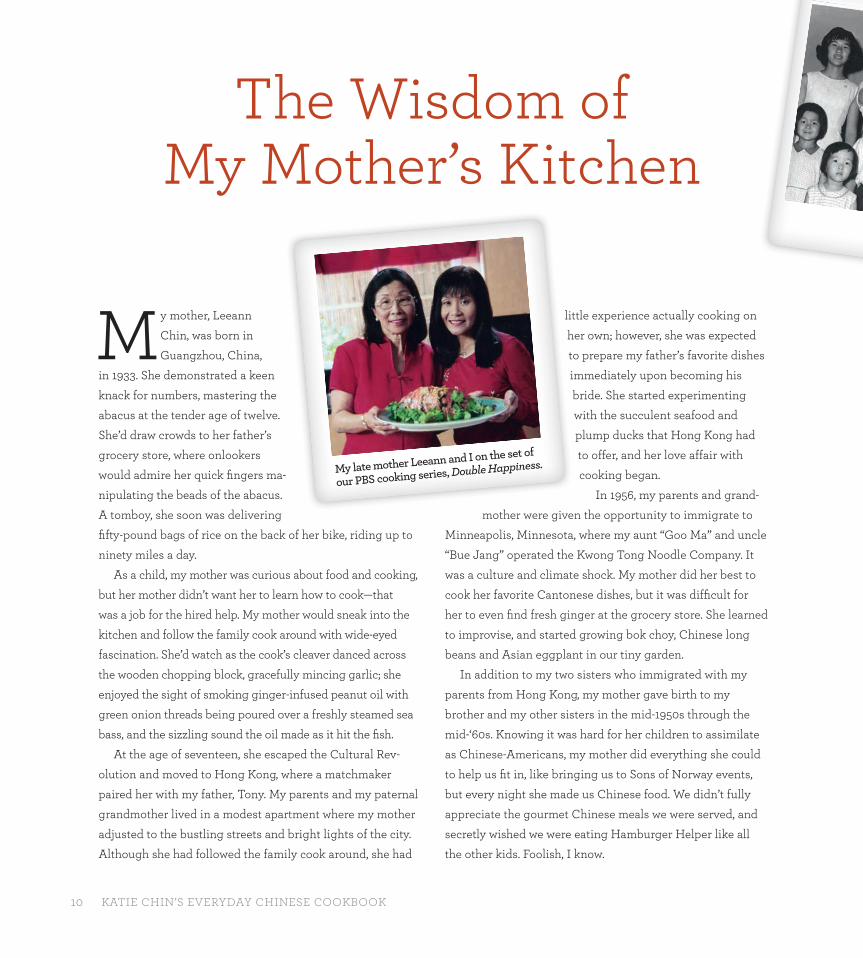
My late mother Leeann and I on the set of
our PBS cooking series, Double Happiness.
ECC_full layout.indd 10ECC_full layout.indd 10 30/9/15 7:44 PM30/9/15 7:44 PM

The Wisdom of My Mother’s Kitchen 11
My mother had a talent for sewing (which explains her ex-
pert dumpling pleating), and became a seamstress, making
fi fty cents an hour. A few years on, my mother threw a thank-
you luncheon for her sewing clients, thoughtfully crafting
a menu of crispy Cantonese egg rolls, silky egg-drop soup,
lemon chicken and three-fl avor lo mein with homemade egg
noodles. As always when she was cooking, she put her affec-
tion and gratitude into the food she made. Her customers
had never tasted anything like it in their lives, and they en-
couraged her to start teaching classes and catering.
In those early days, my mother couldn’t drive a car, much
less afford one, so she had to take the bus to her cooking
classes. She couldn’t carry everything at once, so she’d leave
some of the groceries at the bus stop, get to her destination
and turn around and take another bus back to pick up the
remaining groceries. And she did this in the wintertime,
too! No wonder she gave us that puzzled look whenever any
of us complained about anything.
By the mid-1970s, our basement had become a bustling
catering kitchen producing tray after tray of shu mai, crab
wontons, sesame noodles and sweet-and-sour pork. In the
Chinese-American tradition of child labor, we’d come home
from school, put down our backpacks and start frying.
While other kids were ice skating or hanging out at the
mall, we were usually making wontons or stringing snow
peas, but we didn’t mind. We sensed that our mother was
serving a greater purpose, and we felt like we were assisting
a master performing magic in our kitchen.
One day, she had the opportunity to cater a party at-
tended by Sean Connery and Robert Redford—famous
movie stars! We all knew something special was happening
to our mother. Soon after, she was given a chance to open
her fi rst restaurant. The deal was clinched once investors,
including Sean Connery (he was hooked after tasting her
food), came on board, and the restaurant was an immediate
success. She had introduced authentic Chinese cooking to
Minnesotans and they couldn’t get enough. Before long,
more restaurants followed.
Although she sold the chain to General Mills at one
point, she ended up buying it back a few years later.
While building her empire, she was full of surprises at
every turn. My sister Laura, who worked for the company,
told me how my mother would make a calculation in
her head and come out with it before the bankers could
pull out their calculators; once they checked, they’d say,
“Wow, she’s right.”
At the height of her career, when she was running more
than thirty restaurants, she remained focused on the quality
of the food. I remember one of her managers telling me
about the time she came in after a board meeting during
the lunch rush. She saw the kitchen was overwhelmed, so
she rolled up the sleeves of her Chanel bouclé jacket and
started stir-frying. As much as she was a mother to us, she
had over a thousand employees who also considered her to
be their mother, with her strict, yet nurturing, style of train-
ing and management.
Me as a spiky-haired baby with my family. My mom with Hillary Clinton. My mom with her “bestie,” Martin Yan. My mom teaching Chinese cooking
classes in the 1970s.
ECC_full layout.indd 11ECC_full layout.indd 11 30/9/15 7:45 PM30/9/15 7:45 PM

12 KATIE CHIN’S EVERYDAY CHINESE COOKBOOK
My mother left the company in the late 1990s, but the
Leeann Chin restaurant chain is still alive and well, with over
forty-fi ve locations spread across the Twin Cities area.
This is where I come in.
About fi fteen years ago, I was in living in Los Angeles
working as a fi lm and television marketing executive, and
I had completely forgotten how to cook (I could still make
5,000 pieces of shrimp toast, no problem, but a dinner party
was something else entirely). My favorite thing to make for
dinner was reservations. I was so busy trying to make my
mother proud by succeeding in my marketing career that I
had actually done the opposite by forgetting how to cook.
I invited some clients over for dinner, and had a panic
attack because I didn’t know what I was doing. I called my
mother for advice, and instead of telling me what to do
she jumped on a plane with a box of frozen lemon chicken
on dry ice. Once she arrived on my doorstep, she not only
cooked the entire dinner, but kept everyone believing that I
had cooked the whole thing by myself. That’s just the kind of
mom she was. But when she opened my refrigerator to fi nd
only champagne and yogurt, she was mortifi ed, and set out
to teach me how to cook again.
Through a series of dinner parties for my friends, my
passion for Asian cooking was reignited. People told me,
“You really make Chinese cooking look easy, like I could
do it myself.” Feeling inspired and glad to be back in touch
with my culinary roots, I quit my job, and my mother and I
co-authored a Chinese cookbook together. From there, we
started a Pan-Asian catering business called Double Happi-
ness Catering.
In between our catering gigs, we were lucky enough to
travel to China together to co-host a Food Network special
called My Country, My Kitchen, as well as to New York for
numerous appearances together on the Today show. The
next natural step was to do a cooking show: we co-hosted
the national PBS cooking series Double Happiness, a moth-
er-daughter Chinese cooking show shot in Hawaii.
My mother was the toughest boss I’ve ever had (and be-
lieve me, I had some tough ones working in Hollywood all
those years). She set the same standards for me as she did
for herself, and I never felt like I was living up to her expec-
tations. She would reprimand me, “Your egg rolls are not
wrapped fi rmly enough”; “You should make double the pleats
on that shu mai.” One time, on our cooking show, I said, “If
you don’t have Asian hot sauce, you can use Mexican hot
sauce instead. Right, mom?” Her deadpan response on cam-
era was, “No.” I recognize now that she just wanted me to be
the best I could be.
With my mother as commander-in-chief, and me as
her willing apprentice, our catering business took off and
we were soon doing star-studded parties and high-fash-
ion events. She realized I would never learn to handle the
cooking alone if she was always there to lead me, so she
announced one day out of the blue that she was going to Eu-
rope for three months with a friend. I was left to my own de-
vices and a deep fryer and was forced to fi gure things out on
The basic stir-fry technique
demonstrated on page 18.Td
My mom, me and my sister Jeannie preparing for Chinese New Year celebration.
My mom with Robert Redford at her restaurant in Minnetonka, Minnesota. My mom at one of her restaurants
helming the stir-fry line.
ECC_full layout.indd 12ECC_full layout.indd 12 30/9/15 7:45 PM30/9/15 7:45 PM
The Wisdom of My Mother’s Kitchen 13
my own. That summer, I fi nally sprouted my culinary wings
and fl ew from her bird’s nest soup.
I retired from catering when I became pregnant with
our own Double Happiness, twins Dylan and Becca, and
focused my energy on my blog and cookbooks. Although
she only knew them as toddlers, my mother left an indeli-
ble mark on my twins. To this day, their favorite foods are
dumplings and noodles; instead of baking cookies, they’d
rather be folding potstickers.
My mother passed away in 2010. She spent the last few
years of her life visiting her son, her daughters and her
grandchildren. She cooked her way across the country, fi ll-
ing our freezers with stir-fries and soups. To the end, food
was the focus of my mother’s life. My sister Jeannie told me
about my mom being taken away by an ambulance a few
months before her passing. As they were lifting her into the
ambulance, she called out to my sister, “Don’t forget to eat
the spicy ground pork noodles I left in the fridge!”
Out of our amazing culinary journey, I treasure the times
we spent alone together in the kitchen the most. In those
quiet moments, rolling out dough for dumplings or gently
simmering sauces for a whole fi sh, she’d open up and tell me
about her life. She revealed sometimes diffi cult memories,
from her childhood in China to assimilating as an immigrant
to the challenges of being a wife and a mother, as well as a
minority businesswoman—all things she didn’t want to bur-
den us with as children. I realized she used cooking as an
escape from her many struggles, and that’s where she found
joy. Cooking was a kind of alchemy for her. This, and so much
more about life, I learned in the kitchen from my mother.
I hope you enjoy this collection of Chin family recipes.
Some are taken from my mother’s personal vault, like the
time-honored classics she learned how to make in China,
while others refl ect our Chinese-American childhood. I’ve
also included recipes that my mother and I developed to-
gether for our catering business, as well as some that I’ve
developed more recently, inspired by her teachings. I’ve also
woven personal recollections and anecdotes throughout
this book. I wanted to share the inspiration behind some of
the recipes, as well as fun memories from our childhood and
later years of cooking and eating with our mother.
My pioneering mother instilled a passion for Chinese
cooking in me, and I am so honored to carry on her legacy.
She was revered for her ability to demystify Chinese cook-
ing and simplify it for the everyday home cook. Carrying
her torch, I hope I can show you how easy Chinese cooking
can truly be. If I can do it, you can do it.
Thank you for keeping her memory alive by making the
recipes in this book. I hope they bring some wisdom to your
kitchen, joy to your taste buds and gratifi cation to your bellies.
Happy cooking!
Katie Chinauthor of Everyday Thai Cooking
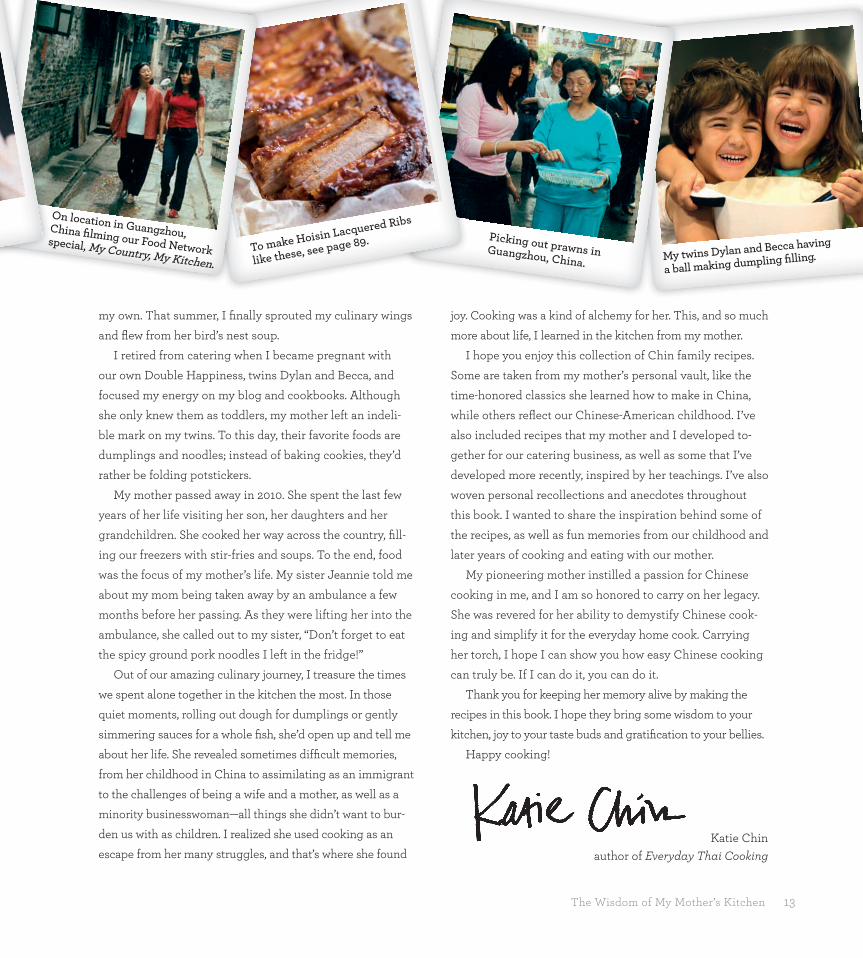
My twins Dylan and Becca having
a ball making dumpling fi lling.To make Hoisin Lacquered Ribs
like these, see page 89.
On location in Guangzhou, China fi lming our Food Network special, My Country, My Kitchen.
Picking out prawns in Guangzhou, China.
ECC_full layout.indd 13ECC_full layout.indd 13 30/9/15 7:45 PM30/9/15 7:45 PM
14 KATIE CHIN’S EVERYDAY CHINESE COOKBOOK
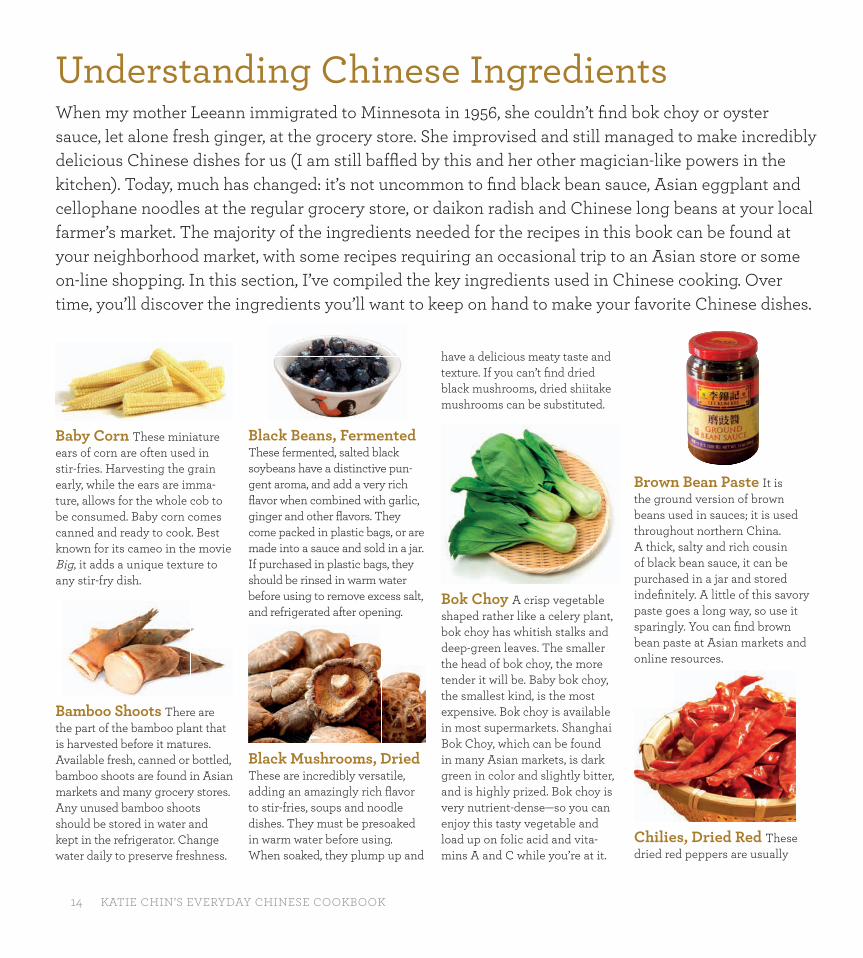
Baby Corn These miniature ears of corn are often used in stir-fries. Harvesting the grain early, while the ears are imma-ture, allows for the whole cob to be consumed. Baby corn comes canned and ready to cook. Best known for its cameo in the movie Big, it adds a unique texture to any stir-fry dish.
Bamboo Shoots There are the part of the bamboo plant that is harvested before it matures. Available fresh, canned or bottled, bamboo shoots are found in Asian markets and many grocery stores. Any unused bamboo shoots should be stored in water and kept in the refrigerator. Change water daily to preserve freshness.
Understanding Chinese IngredientsWhen my mother Leeann immigrated to Minnesota in 1956, she couldn’t fi nd bok choy or oyster sauce, let alone fresh ginger, at the grocery store. She improvised and still managed to make incredibly delicious Chinese dishes for us (I am still baffl ed by this and her other magician-like powers in the kitchen). Today, much has changed: it’s not uncommon to fi nd black bean sauce, Asian eggplant and cellophane noodles at the regular grocery store, or daikon radish and Chinese long beans at your local farmer’s market. The majority of the ingredients needed for the recipes in this book can be found at your neighborhood market, with some recipes requiring an occasional trip to an Asian store or some on-line shopping. In this section, I’ve compiled the key ingredients used in Chinese cooking. Over time, you’ll discover the ingredients you’ll want to keep on hand to make your favorite Chinese dishes.
Black Beans, FermentedThese fermented, salted black soybeans have a distinctive pun-gent aroma, and add a very rich fl avor when combined with garlic, ginger and other fl avors. They come packed in plastic bags, or are made into a sauce and sold in a jar. If purchased in plastic bags, they should be rinsed in warm water before using to remove excess salt, and refrigerated after opening.
Black Mushrooms, Dried These are incredibly versatile, adding an amazingly rich fl avor to stir-fries, soups and noodle dishes. They must be presoaked in warm water before using. When soaked, they plump up and
have a delicious meaty taste and texture. If you can’t fi nd dried black mushrooms, dried shiitake mushrooms can be substituted.
Bok Choy A crisp vegetable shaped rather like a celery plant, bok choy has whitish stalks and deep-green leaves. The smaller the head of bok choy, the more tender it will be. Baby bok choy, the smallest kind, is the most expensive. Bok choy is available in most supermarkets. Shanghai Bok Choy, which can be found in many Asian markets, is dark green in color and slightly bitter, and is highly prized. Bok choy is very nutrient-dense—so you can enjoy this tasty vegetable and load up on folic acid and vita-mins A and C while you’re at it.
Brown Bean Paste It is the ground version of brown beans used in sauces; it is used throughout northern China. A thick, salty and rich cousin of black bean sauce, it can be purchased in a jar and stored indefi nitely. A little of this savory paste goes a long way, so use it sparingly. You can fi nd brown bean paste at Asian markets and online resources.
Chilies, Dried Red These dried red peppers are usually
ECC_full layout.indd 14ECC_full layout.indd 14 14/10/15 10:00 AM14/10/15 10:00 AM
Understanding Chinese Ingredients 15
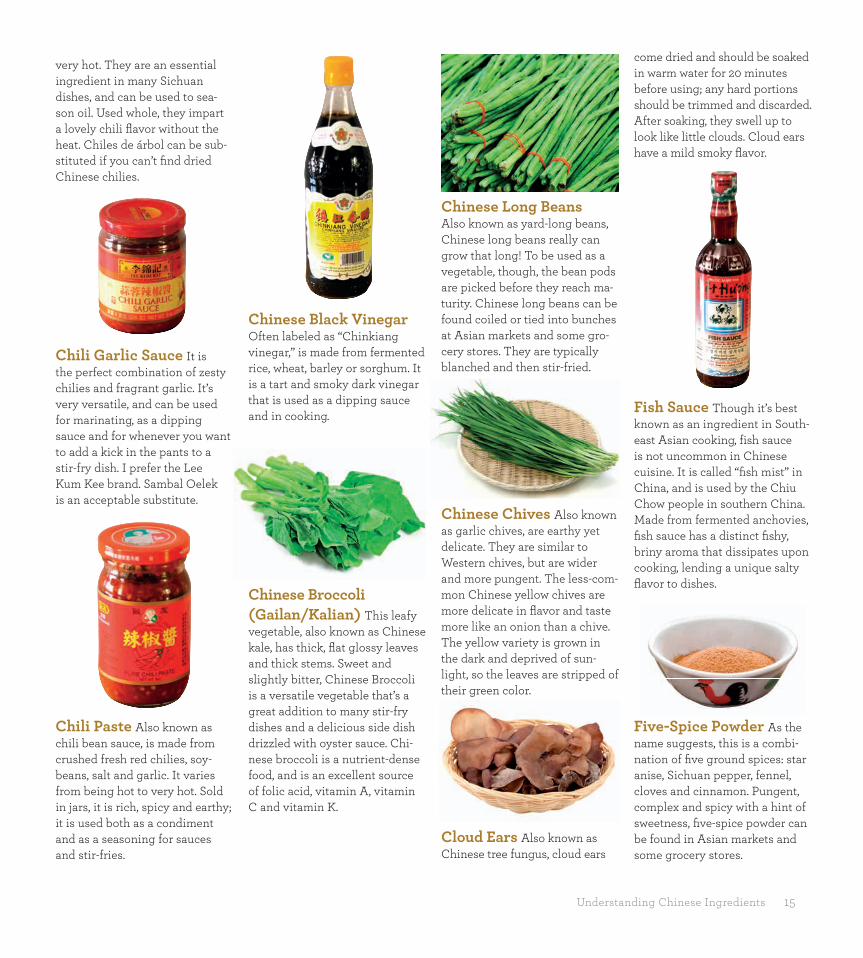
very hot. They are an essential ingredient in many Sichuan dishes, and can be used to sea-son oil. Used whole, they impart a lovely chili fl avor without the heat. Chiles de árbol can be sub-stituted if you can’t fi nd dried Chinese chilies.
Chili Garlic Sauce It is the perfect combination of zesty chilies and fragrant garlic. It’s very versatile, and can be used for marinating, as a dipping sauce and for whenever you want to add a kick in the pants to a stir-fry dish. I prefer the Lee Kum Kee brand. Sambal Oelek is an acceptable substitute.
Chili Paste Also known as chili bean sauce, is made from crushed fresh red chilies, soy-beans, salt and garlic. It varies from being hot to very hot. Sold in jars, it is rich, spicy and earthy; it is used both as a condiment and as a seasoning for sauces and stir-fries.
Chinese Black Vinegar Often labeled as “Chinkiang vinegar,” is made from fermented rice, wheat, barley or sorghum. It is a tart and smoky dark vinegar that is used as a dipping sauce and in cooking.
Chinese Broccoli (Gailan/Kalian) This leafy vegetable, also known as Chinese kale, has thick, fl at glossy leaves and thick stems. Sweet and slightly bitter, Chinese Broccoli is a versatile vegetable that’s a great addition to many stir-fry dishes and a delicious side dish drizzled with oyster sauce. Chi-nese broccoli is a nutrient-dense food, and is an excellent source of folic acid, vitamin A, vitamin C and vitamin K.
Chinese Long Beans Also known as yard-long beans, Chinese long beans really can grow that long! To be used as a vegetable, though, the bean pods are picked before they reach ma-turity. Chinese long beans can be found coiled or tied into bunches at Asian markets and some gro-cery stores. They are typically blanched and then stir-fried.
Chinese Chives Also known as garlic chives, are earthy yet delicate. They are similar to Western chives, but are wider and more pungent. The less-com-mon Chinese yellow chives are more delicate in fl avor and taste more like an onion than a chive. The yellow variety is grown in the dark and deprived of sun-light, so the leaves are stripped of their green color.
Cloud Ears Also known as Chinese tree fungus, cloud ears
come dried and should be soaked in warm water for 20 minutes before using; any hard portions should be trimmed and discarded. After soaking, they swell up to look like little clouds. Cloud ears have a mild smoky fl avor.
Fish Sauce Though it’s best known as an ingredient in South-east Asian cooking, fish sauce is not uncommon in Chinese cuisine. It is called “fi sh mist” in China, and is used by the Chiu Chow people in southern China. Made from fermented anchovies, fi sh sauce has a distinct fi shy, briny aroma that dissipates upon cooking, lending a unique salty fl avor to dishes.
Five-Spice Powder As the name suggests, this is a combi-nation of fi ve ground spices: star anise, Sichuan pepper, fennel, cloves and cinnamon. Pungent, complex and spicy with a hint of sweetness, fi ve-spice powder can be found in Asian markets and some grocery stores.
ECC_full layout.indd 15ECC_full layout.indd 15 14/10/15 10:02 AM14/10/15 10:02 AM
16 KATIE CHIN’S EVERYDAY CHINESE COOKBOOK
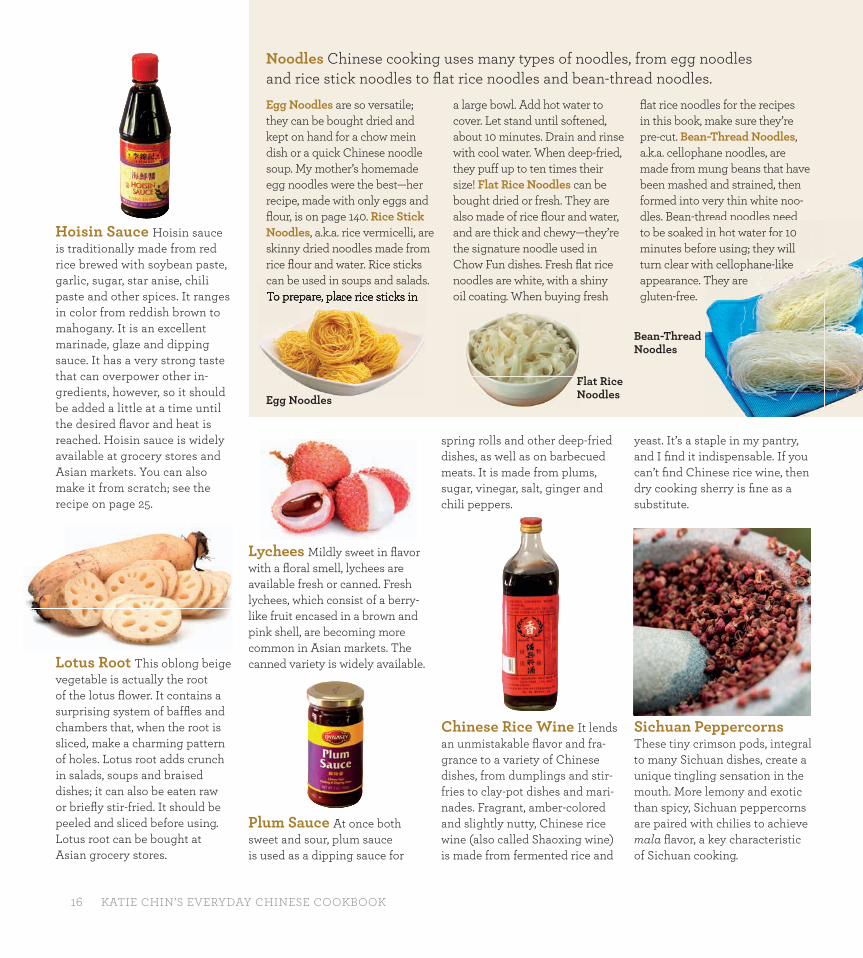
Hoisin Sauce Hoisin sauce is traditionally made from red rice brewed with soybean paste, garlic, sugar, star anise, chili paste and other spices. It ranges in color from reddish brown to mahogany. It is an excellent marinade, glaze and dipping sauce. It has a very strong taste that can overpower other in-gredients, however, so it should be added a little at a time until the desired fl avor and heat is reached. Hoisin sauce is widely available at grocery stores and Asian markets. You can also make it from scratch; see the recipe on page 25.
Lotus Root This oblong beige vegetable is actually the root of the lotus fl ower. It contains a surprising system of baffl es and chambers that, when the root is sliced, make a charming pattern of holes. Lotus root adds crunch in salads, soups and braised dishes; it can also be eaten raw or briefl y stir-fried. It should be peeled and sliced before using. Lotus root can be bought at Asian grocery stores.
Egg Noodles are so versatile; they can be bought dried and kept on hand for a chow mein dish or a quick Chinese noodle soup. My mother’s homemade egg noodles were the best—her recipe, made with only eggs and fl our, is on page 140. Rice Stick Noodles, a.k.a. rice vermicelli, are skinny dried noodles made from rice fl our and water. Rice sticks can be used in soups and salads. To prepare, place rice sticks in
a large bowl. Add hot water to cover. Let stand until softened, about 10 minutes. Drain and rinse with cool water. When deep-fried, they puff up to ten times their size! Flat Rice Noodles can be bought dried or fresh. They are also made of rice fl our and water, and are thick and chewy—they’re the signature noodle used in Chow Fun dishes. Fresh fl at rice noodles are white, with a shiny oil coating. When buying fresh
fl at rice noodles for the recipes in this book, make sure they’re pre-cut. Bean-Thread Noodles, a.k.a. cellophane noodles, are made from mung beans that have been mashed and strained, then formed into very thin white noo-dles. Bean-thread noodles need to be soaked in hot water for 10 minutes before using; they will turn clear with cellophane-like appearance. They are gluten-free.
Noodles Chinese cooking uses many types of noodles, from egg noodles and rice stick noodles to fl at rice noodles and bean-thread noodles.
Lychees Mildly sweet in fl avor with a fl oral smell, lychees are available fresh or canned. Fresh lychees, which consist of a berry-like fruit encased in a brown and pink shell, are becoming more common in Asian markets. The canned variety is widely available.
Plum Sauce At once both sweet and sour, plum sauce is used as a dipping sauce for
spring rolls and other deep-fried dishes, as well as on barbecued meats. It is made from plums, sugar, vinegar, salt, ginger and chili peppers.
Chinese Rice Wine It lends an unmistakable fl avor and fra-grance to a variety of Chinese dishes, from dumplings and stir-fries to clay-pot dishes and mari-nades. Fragrant, amber-colored and slightly nutty, Chinese rice wine (also called Shaoxing wine) is made from fermented rice and
yeast. It’s a staple in my pantry, and I fi nd it indispensable. If you can’t fi nd Chinese rice wine, then dry cooking sherry is fi ne as a substitute.
Sichuan Peppercorns These tiny crimson pods, integral to many Sichuan dishes, create a unique tingling sensation in the mouth. More lemony and exotic than spicy, Sichuan peppercorns are paired with chilies to achieve mala fl avor, a key characteristic of Sichuan cooking.
Egg Noodles
Flat Rice Noodles
Bean-Thread Noodles
ead ood es eedin hot water for 10
ore using; they will th cellophane-likeThey are p
E N dl
FN
ECC_full layout.indd 16ECC_full layout.indd 16 14/10/15 10:03 AM14/10/15 10:03 AM
Understanding Chinese Ingredients 17
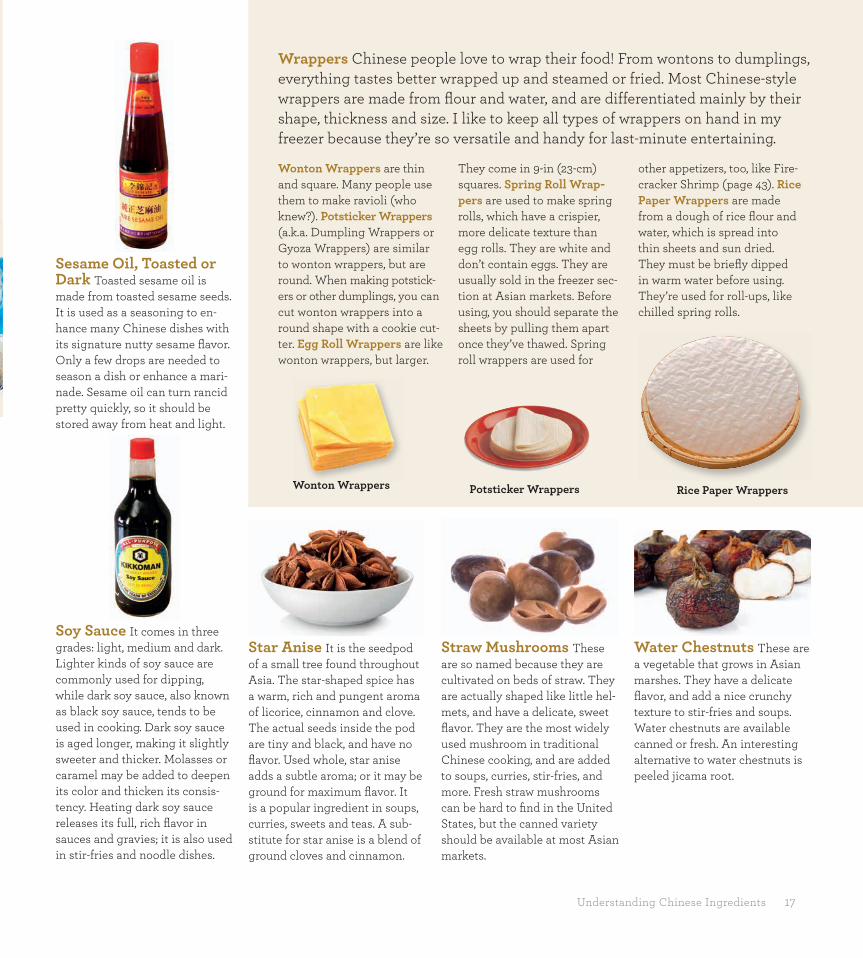
Sesame Oil, Toasted or Dark Toasted sesame oil is made from toasted sesame seeds. It is used as a seasoning to en-hance many Chinese dishes with its signature nutty sesame fl avor. Only a few drops are needed to season a dish or enhance a mari-nade. Sesame oil can turn rancid pretty quickly, so it should be stored away from heat and light.
Soy Sauce It comes in three grades: light, medium and dark. Lighter kinds of soy sauce are commonly used for dipping, while dark soy sauce, also known as black soy sauce, tends to be used in cooking. Dark soy sauce is aged longer, making it slightly sweeter and thicker. Molasses or caramel may be added to deepen its color and thicken its consis-tency. Heating dark soy sauce releases its full, rich fl avor in sauces and gravies; it is also used in stir-fries and noodle dishes.
Wrappers Chinese people love to wrap their food! From wontons to dumplings, everything tastes better wrapped up and steamed or fried. Most Chinese-style wrappers are made from fl our and water, and are differentiated mainly by their shape, thickness and size. I like to keep all types of wrappers on hand in my freezer because they’re so versatile and handy for last-minute entertaining.
Wonton Wrappers are thin and square. Many people use them to make ravioli (who knew?). Potsticker Wrappers (a.k.a. Dumpling Wrappers or Gyoza Wrappers) are similar to wonton wrappers, but are round. When making potstick-ers or other dumplings, you can cut wonton wrappers into a round shape with a cookie cut-ter. Egg Roll Wrappers are like wonton wrappers, but larger.
They come in 9-in (23-cm) squares. Spring Roll Wrap-pers are used to make spring rolls, which have a crispier, more delicate texture than egg rolls. They are white and don’t contain eggs. They are usually sold in the freezer sec-tion at Asian markets. Before using, you should separate the sheets by pulling them apart once they’ve thawed. Spring roll wrappers are used for
other appetizers, too, like Fire-cracker Shrimp (page 43). Rice Paper Wrappers are made from a dough of rice fl our and water, which is spread into thin sheets and sun dried. They must be briefl y dipped in warm water before using. They’re used for roll-ups, like chilled spring rolls.
Star Anise It is the seedpod of a small tree found throughout Asia. The star-shaped spice has a warm, rich and pungent aroma of licorice, cinnamon and clove. The actual seeds inside the pod are tiny and black, and have no fl avor. Used whole, star anise adds a subtle aroma; or it may be ground for maximum fl avor. It is a popular ingredient in soups, curries, sweets and teas. A sub-stitute for star anise is a blend of ground cloves and cinnamon.
Straw Mushrooms These are so named because they are cultivated on beds of straw. They are actually shaped like little hel-mets, and have a delicate, sweet fl avor. They are the most widely used mushroom in traditional Chinese cooking, and are added to soups, curries, stir-fries, and more. Fresh straw mushrooms can be hard to fi nd in the United States, but the canned variety should be available at most Asian markets.
Wonton WrappersW t W Rice Paper WrappersPotsticker Wrappers
Water Chestnuts These are a vegetable that grows in Asian marshes. They have a delicate fl avor, and add a nice crunchy texture to stir-fries and soups. Water chestnuts are available canned or fresh. An interesting alternative to water chestnuts is peeled jicama root.
ECC_full layout.indd 17ECC_full layout.indd 17 14/10/15 10:04 AM14/10/15 10:04 AM
18 KATIE CHIN’S EVERYDAY CHINESE COOKBOOK
Seasoning a WokI’ve been asked if seasoning a wok involves spices! In actuality, seasoning a wok is a process that makes it rust-resistant while creating a natural nonstick fi nish at the same time. It also improves the fl avor of stir-fried dishes. Only iron, cast-iron, steel and carbon-steel woks require seasoning, because these are porous materials prone to rust. You don’t need to season a nonstick wok.
The process of seasoning creates layers and layers of burnt oil coatings on the surface of the metals, which covers the pores and protects them from rusting or corroding upon exposure to water or acids.
Here’s How to Season Your Wok1 If your wok is new, it will have a thin factory coating that must be removed before the fi rst use. To do this, wash the wok inside and out with a stainless-steel scrubber, dish soap, and hot water. Rinse and dry it over low heat.2 To begin the seasoning process, place the wok over high heat. Tilt and turn the wok as it heats until it becomes a yellowish-blueish color. Remove from heat.
3 Using a paper towel, wipe the inside of the wok with a small amount of vegetable oil. 4 Turn heat to medium-low. Place wok on burner for 10 minutes.5 Wipe with a fresh paper towel. There will be black residue on the paper towel. Repeat steps 3 and 4 about three times, adding small amounts of oil, until there is no longer black residue on the paper towel when wiped. 6 Ta-da! You have seasoned your wok and are now ready to stir-fry.
Cleaning Your Seasoned WokNow that you’ve created a beautiful nonstick coating on your wok, you’ll want to protect it. Don’t use abrasive materials like steel wool when cleaning, and never use soap on your wok. Just run it under hot water and use a soft cleaning brush or sponge to remove food particles. You may need to soak it in hot water for few minutes to remove stubborn bits.
The best way to dry a wok after it’s been cleaned is to place it on low heat until all the water evaporates. If you put your wok away before it’s completely dry, it will develop rust spots.
Mastering Chinese Stir-FryingChinese stir-frying is all about the preparation. Once you have all your stir-fry ingredients cleaned, cut and ready to go, the rest should be easy-peasy and super-duper fast. I mean really, really fast. The key to great stir-frying is heating your wok or skillet up very hot so the proteins are nicely seared and the veggies are tender but crisp. You want to keep things moving. The term stir-frying is a bit of a misnomer because the action is more about tossing and fl ipping than it is about stirring.
It’s important to read each recipe carefully so you’ll see whether a certain vegetable should be blanched before it gets added to the wok or pan. For blanching, certain vegetables, like broccoli or snow peas, are dropped in boiling water for a minute or two and then placed into an ice-water bath. Blanching preserves the vibrant color of vegetables, cuts down on cooking time and ensures a tender-crisp result. Some vegetables take longer than others, so be sure to read the entire recipe carefully before you begin.
Basic Cooking Techniques and TipsMany people’s attitude toward Chinese cooking is the same as their relationship status on Facebook: “It’s complicated.” A lot of people are intimidated by Chinese cooking because it seems so involved. The truth is, if you have the right tools on hand and learn the basic time-honored Chinese cooking techniques (which are used over and over again in this book), it isn’t complicated at all. In fact, you can make most of these recipes with the pots and pans you have in your kitchen right now. I actually just taught a Chinese cooking class for six twelve-year-old boys, and they couldn’t believe how easy it was to make Chinese food (I heard a lot of “Oh, so that’s how you do it…cool!”). They practically jumped for joy when they got to make their own dumplings. One mother was astounded when her son ate a dumpling fi lled with tofu and veggies; she called later that day to report that he had made the recipe again for his whole family! No matter whether you’re steaming, deep-frying or stir-frying, you’ll be able to master everything from Orange Chicken to Steamed Cantonese Whole Fish in no time if you use this section as your guide.
ECC_full layout.indd 18ECC_full layout.indd 18 30/9/15 7:47 PM30/9/15 7:47 PM
Basic Cooking Techniques and Tips 19
To save time, I often purchase my stir-fry veggies from the salad bar at the local grocery store. Not only is everything is clean and pre-cut, but it also cuts down on waste, especially when you’re cooking for one or two, because you only buy what you need.
I like to arrange all of my ingredients on a sheet pan in the order they’ll be added to the wok or skillet. This is really helpful, especially when you’re making multiple courses. If you’re really organized, like my nephew Logan, you can number the ingredients in the order they should be placed in your wok or skillet if you want—toddler fl ash cards come in handy for this. Also, have all your tools ready to go, arranged in the order you’ll be using them.
It’s also important to allow the wok or skillet to heat up before adding the oil; you then swirl the pan to coat the surface. The wok or pan is ready when a drop of water sizzles and evaporates right away. Ensure that your skillet has high enough walls so the ingredients don’t fl y out as you’re turning them.
I also like to use a fi rm spatula, not a fl imsy one. A sturdy spatula helps you take control of your stir-frying and allows you to get underneath the ingredients so you can lift them and fl ip them as they cook. After all, stir-frying is not about stirring; rather, you continuously toss and fl ip the ingredients so they are all evenly cooked.
Cooking a Perfect Pot of Rice I’m going to let you in on a little secret: white rice needs to be washed before you steam it. This has been a life-altering discovery for some of my friends. When you wash your rice, you eliminate the excess starch that gets released into the water and reabsorbed during cooking, resulting in mushy rice. Once you get rid of that excess starch you will enjoy the lightest, fl uffi est rice ever. (You can thank me later.) In many Chinese
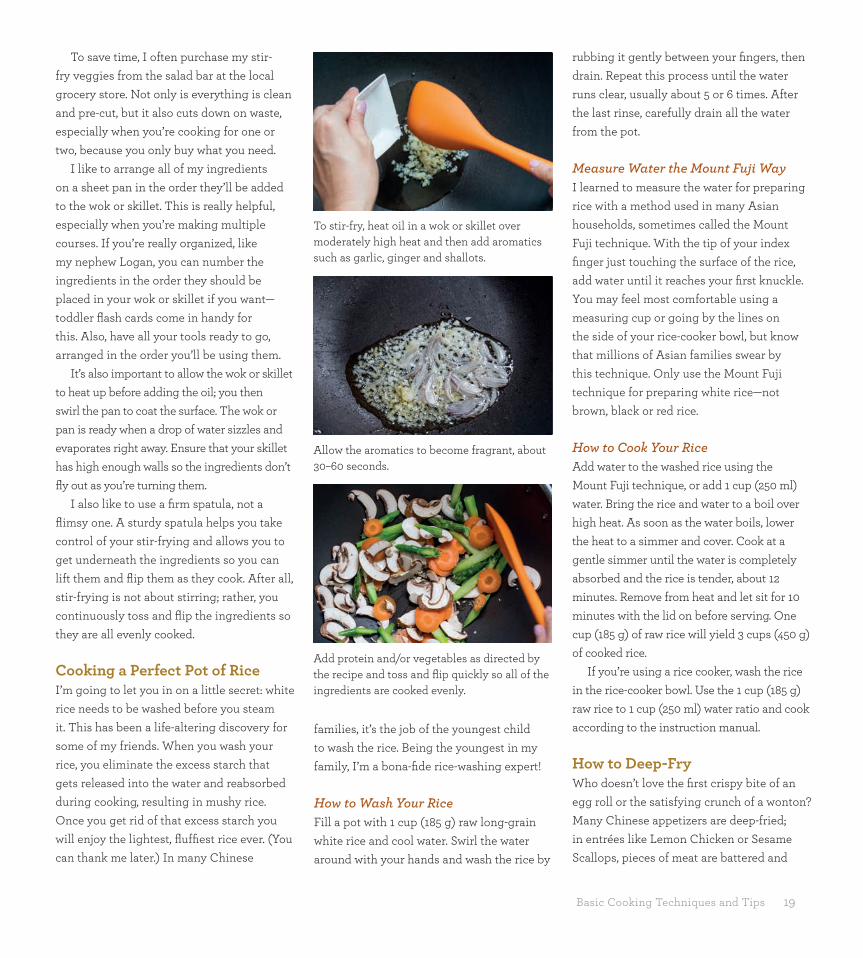
Allow the aromatics to become fragrant, about 30–60 seconds.
To stir-fry, heat oil in a wok or skillet over moderately high heat and then add aromatics such as garlic, ginger and shallots.
Add protein and/or vegetables as directed by the recipe and toss and fl ip quickly so all of the ingredients are cooked evenly.
families, it’s the job of the youngest child to wash the rice. Being the youngest in my family, I’m a bona-fi de rice-washing expert!
How to Wash Your RiceFill a pot with 1 cup (185 g) raw long-grain white rice and cool water. Swirl the water around with your hands and wash the rice by
rubbing it gently between your fi ngers, then drain. Repeat this process until the water runs clear, usually about 5 or 6 times. After the last rinse, carefully drain all the water from the pot.
Measure Water the Mount Fuji WayI learned to measure the water for preparing rice with a method used in many Asian households, sometimes called the Mount Fuji technique. With the tip of your index fi nger just touching the surface of the rice, add water until it reaches your fi rst knuckle. You may feel most comfortable using a measuring cup or going by the lines on the side of your rice-cooker bowl, but know that millions of Asian families swear by this technique. Only use the Mount Fuji technique for preparing white rice—not brown, black or red rice.
How to Cook Your RiceAdd water to the washed rice using the Mount Fuji technique, or add 1 cup (250 ml) water. Bring the rice and water to a boil over high heat. As soon as the water boils, lower the heat to a simmer and cover. Cook at a gentle simmer until the water is completely absorbed and the rice is tender, about 12 minutes. Remove from heat and let sit for 10 minutes with the lid on before serving. One cup (185 g) of raw rice will yield 3 cups (450 g) of cooked rice.
If you’re using a rice cooker, wash the rice in the rice-cooker bowl. Use the 1 cup (185 g) raw rice to 1 cup (250 ml) water ratio and cook according to the instruction manual.
How to Deep-FryWho doesn’t love the fi rst crispy bite of an egg roll or the satisfying crunch of a wonton? Many Chinese appetizers are deep-fried; in entrées like Lemon Chicken or Sesame Scallops, pieces of meat are battered and
ECC_full layout.indd 19ECC_full layout.indd 19 2/10/15 4:12 PM2/10/15 4:12 PM

20 KATIE CHIN’S EVERYDAY CHINESE COOKBOOK
dropped into a hot oil bath until they achieve the ultimate golden, crunchy goodness.
Many people are scared to deep-fry. They think that oil will inevitably splatter all over the place, and that the food usually turns out soggy. Well, I’m here to debunk those deep-frying myths. First of all, you need to use a pan that’s deep enough to eliminate the splatter factor. It’s not necessary to use a wok when deep-frying, but you must always use a pan deep enough to adequately cover the item you are frying. For example, if you are using 2 inches (5 cm) of oil, you must leave 6 inches (15 cm) of space above the oil.
Secondly, deep-frying requires very high heat levels (350°F to 375°F / 175°C to 190°C). Use a deep-frying thermometer to monitor the temperature. If you don’t have one, you can determine when the oil is ready by dropping a 1-inch (2.5-cm) cube
The oil is hot enough when a 1-inch (2.5-cm) cube of white bread fl oats to the top immedi-ately and browns within 60 seconds.
Turn the items to brown evenly.
Place the item(s) in the oil. Make sure you don’t fry too many pieces at once or the temperature will drop, resulting in sogginess.
Line a baking sheet with a paper towel in advance so you can remove browned items from the oil promptly to drain and cool.
of white bread into the oil. If it browns in 60 seconds, you’re ready to proceed. Make sure the oil isn’t too hot, as that will result in food that’s overcooked on the outside and undercooked on the inside. If the oil begins to smoke, immediately turn off the heat for a few minutes and let the oil return to 350°F (175°C). Always heat oil uncovered to prevent overheating.
If the temperature is too low, the food will soak up too much oil. Adding too many pieces of food to the oil at once will cause the oil temperature to drop, so just cook a few items at a time. It’s also important to dry the food completely before deep-frying, especially before you dip it into batter or marinade.
I recommend using vegetable oil or corn oil for deep-frying. These oils have a high “smoke point,” meaning they don’t break
down at high temperatures. Oils with a low smoke point, like olive oil, should not be used for deep-frying.
Lastly, always have a paper-towel-lined sheet pan ready to place your items on after they’ve been fried.
Steaming SuccessfullySteaming is the healthiest method in Chinese cooking. When steaming, make sure to bring water to a rolling boil and maintain the heat level while cooking. It’s important to ensure there is enough water so it doesn’t evaporate and leave you with a scorched pot. If you don’t have a steamer, you can use your own stockpot and a heat-safe plate or platter to steam. Simply set two empty cans (such as empty tuna fi sh cans) in the pot to raise the plate 2 inches above the water. When steaming dumplings, you can place sliced carrots under the dumplings to prevent them from sticking, or set them on parchment paper with holes cut in it. Whether you use a wok, stockpot or traditional steamer, make sure the items are raised above the water and that the lid fi ts securely.
Eliminating Shrimp’s “Fishy” Taste Ever wonder why the shrimp in Chinese dishes tastes so fresh? Well, my mother taught me a little secret: soak your shrimp in salt water before you cook it. The salt eliminates any fi shiness, making shrimp dishes come alive with freshness and letting the shrimp’s naturally sweet and delicate fl avor shine through.
Brine the ShrimpFor every 1 lb (500 g) of shrimp, place 2 cups (500 ml) water and 1 teaspoon of salt in a bowl. Stir to dissolve. Place the shrimp in the salt water for 5 minutes. Rinse with cold water and drain. Pat dry with a paper towel, and the shrimp are ready to cook!
ECC_full layout.indd 20ECC_full layout.indd 20 9/10/15 10:14 AM9/10/15 10:14 AM

Basic Tools and Utensils 21
Basic Tools and Utensils
Wok or Skillet The wok was invented in China over a
thousand years ago. It is central to Chinese
cooking and other Asian cuisines because of
its unique concave shape and ability to heat
up quickly. And let’s face it, a billion Chinese
people can’t be wrong. The wok is incredibly
versatile, used for everything from stir-frying
and deep-frying to steaming and braising.
My mom even fried hamburgers and popped
popcorn in her wok when we were little!
The most common types of wok are cast
iron and carbon steel. I recommend carbon
steel because it heats up quickly and retains
heat well. The most user-friendly size is 14
inches (29 cm). Larger woks can become
unwieldy. Look for a wok with sturdy handles
and a lid. I use both a cast-iron wok and a
carbon-steel wok in my kitchen. Some wok
purists turn their nose up at nonstick woks,
but I say go with whatever works for you. If
you’re going to use nonstick, I recommend
a premium brand like Calphalon, Circulon
or All-Clad. Carbon-steel and cast-iron
woks need to be seasoned. See page 18 for
instructions on how to season your wok.
A fl at-bottomed wok is the best shape for
an American stovetop. If you have a powerful
range, like Viking or Wolf, then you can get
away with a round bottomed wok with a
stand, as these stoves produce enough heat
to thoroughly heat a round bottom.
I have friends who suffer from wok
anxiety. They just don’t feel comfortable
using one, or the one they have is lost
somewhere in the attic. If you can relate,
you are not alone. Rest assured that you can
make everything in this book in a frying
pan or skillet, as modern stoves deliver
high enough heat levels to achieve the even
distribution required for Chinese cooking.
Just make sure you use a skillet with high
enough edges, or else the ingredients will
fl y out of your pan. When deep-frying,
make sure to use a deep skillet (see pages
19–20 for more information). I like to use a
nonstick skillet, because less oil is needed
and meat won’t stick as much. Look for
nonstick pans which are PFOA-, lead- and
cadmium-free. I prefer ceramic nonstick
pans. Just make sure to use a spatula
that’s safe for nonstick surfaces to avoid
scratching the pan.
For deep-frying and steaming, I like to
use an electric wok that I can place in a
separate area of my kitchen. This provides
extra space if I’m also stir-frying or braising
a separate dish on my stovetop.
KnivesChinese food is all about the prep, as
everything generally cooks quickly—
especially stir-fry dishes. Preparation
involves lots of mincing, chopping and
dicing, so invest in quality knives and keep
them sharp. A standard 8-inch (20-cm) chef’s
knife should do the trick, along with some
good paring knives.
ECC_full layout.indd 21ECC_full layout.indd 21 2/10/15 11:52 AM2/10/15 11:52 AM

22 KATIE CHIN’S EVERYDAY CHINESE COOKBOOK
My mother always used a Chinese cleaver,
and you may want to consider picking one
up in Chinatown or online. Like woks,
Chinese cleavers are extremely versatile.
You can chop, dice, shred, slice and even
hack chicken bones to pieces. Plus, you’ll
look pretty fi erce wielding one! Make sure
to purchase a cleaver that fi ts comfortably
in your hand and isn’t too heavy for you to
handle.
Rice CookerIf there’s one thing you should invest in
when it comes to Chinese cooking, it’s a
rice cooker. Who doesn’t need a device
that can do the thinking for you? A rice
cooker has an internal temperature sensor
that can sense when all the water has been
absorbed by the rice or grains in the pot.
It then miraculously switches to a setting
that keeps the rice warm, so you don’t have
to do a thing and you don’t have to worry
about your rice burning. This is especially
great when you’re entertaining and trying to
juggle a few recipes at once.
There are several models available,
ranging in price from $10 to more than
$500. The higher-priced models have
fuzzy-logic technology, which means they
contain a computer chip that can calibrate
the temperature and water quantity for a
superior end product. I recommend Zojirushi
and Cuisinart fuzzy-logic rice cookers.
For the recipes in this book, you can use
any type of rice cooker. I have to say that
fuzzy-logic models produce perfect fl uffy
rice every time (although the run-of-the-mill
budget-priced rice cooker that I grew up with
served our family just fi ne).
Clay PotA clay pot is another versatile tool to have
in the Chinese kitchen. You can roast and
braise with it and make soups and stews in
it. Clay pots are most often used for braising
and stewing in Chinese cooking because
they retain heat so well.
Clay is a porous material which, when
soaked in water and heated in the oven,
provides slow evaporation of steam from
the pores. This moist cooking environment
results in incredibly fl avorful and tender
meats. It’s super healthy, too, because
you’re not cooking with a lot of oil. Another
wonderful thing about a clay pot is that it
can go straight from oven to table. Not only
is it a terrifi c cooking vessel, it’s a unique
and tasteful serving piece. I guarantee at
least one “Ahhh” and maybe one “Ooh!”
when you set it on the table at your next
dinner party. You can fi nd clay pots at Asian
markets or online. Clay pots should simply
be washed with hot water. The use of soap
isn’t recommended.
Bamboo SteamersI stock up on all different sizes of bamboo
steamers because I steam so many different
things in them, from dumplings to whole
fi sh, and because they’re so pretty and fun to
use when I entertain. (I guess you could call
me a “basket” case.) For everyday cooking,
one large bamboo steamer with a lid should
be adequate. If you like to entertain, buy
a stackable set, which usually comes with
ECC_full layout.indd 22ECC_full layout.indd 22 1/10/15 9:26 AM1/10/15 9:26 AM
Basic Tools and Utensils 23
three baskets. Make sure your basket fi ts
properly in your wok or pan; the pan should
be about 3 inches (7.5 cm) wider than the
basket. Always make certain you have
enough boiling water in the pan, and be sure
that the basket sits about 2 inches (5 cm)
above the water. Cover tightly with the lid
before steaming.
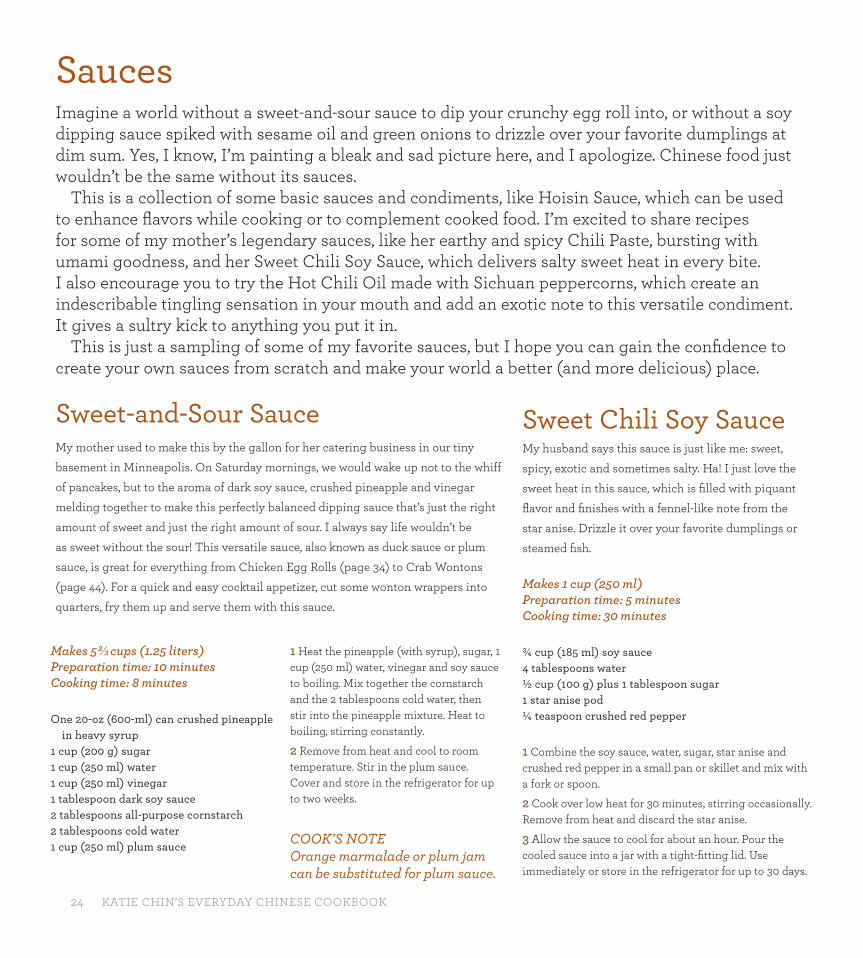
Strainer or Slotted SpoonI recommend a traditional Chinese-style
strainer with a long bamboo handle (often
called a “spider”). I’m not sure why, but
this utensil sometimes makes me feel like
a superhero, especially when I’m trying to
fry egg rolls for a hundred guests. It’s made
out of wire mesh and is great for removing
deep-fried foods from oil as well as removing
blanched foods from boiling water. You can
fi nd this type of strainer at an Asian market
or specialty gourmet store. I fi nd it to be an
indispensable tool in my kitchen. You can
also use a wide, Western-style slotted spoon
in place of a Chinese-style strainer, but don’t
use it for deep-frying if it’s made of plastic.
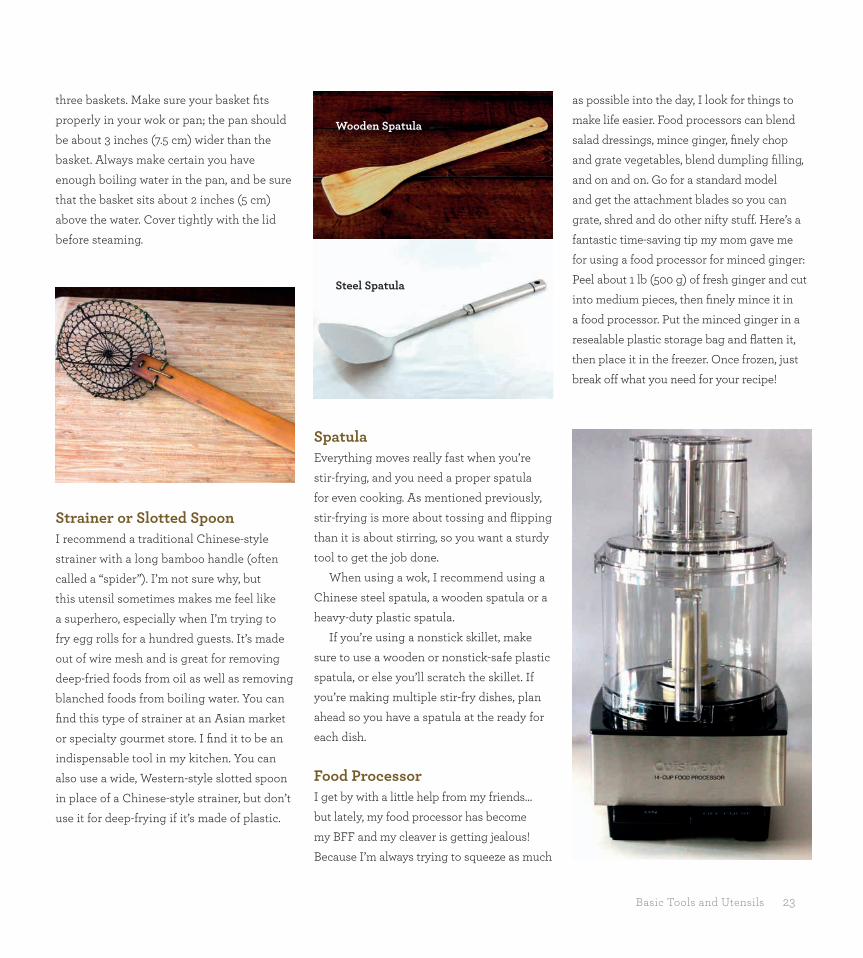
Wooden Spatula
Steel Spatula
SpatulaEverything moves really fast when you’re
stir-frying, and you need a proper spatula
for even cooking. As mentioned previously,
stir-frying is more about tossing and fl ipping
than it is about stirring, so you want a sturdy
tool to get the job done.
When using a wok, I recommend using a
Chinese steel spatula, a wooden spatula or a
heavy-duty plastic spatula.
If you’re using a nonstick skillet, make
sure to use a wooden or nonstick-safe plastic
spatula, or else you’ll scratch the skillet. If
you’re making multiple stir-fry dishes, plan
ahead so you have a spatula at the ready for
each dish.
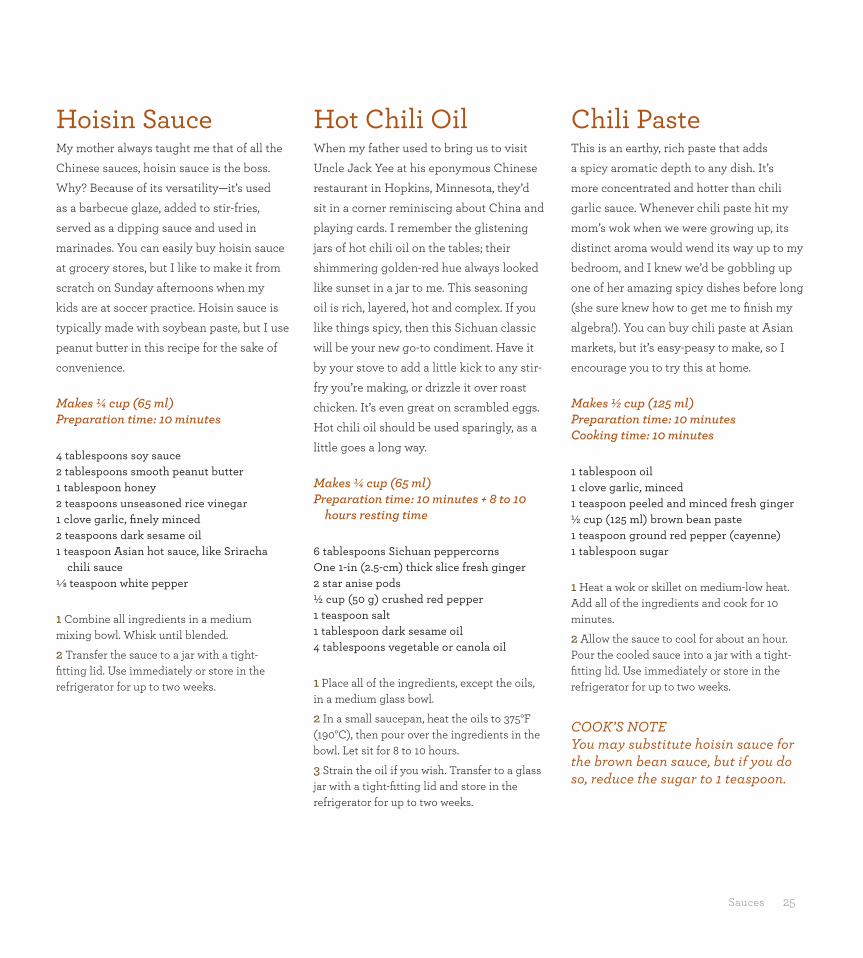
Food Processor I get by with a little help from my friends…
but lately, my food processor has become
my BFF and my cleaver is getting jealous!
Because I’m always trying to squeeze as much
as possible into the day, I look for things to
make life easier. Food processors can blend
salad dressings, mince ginger, fi nely chop
and grate vegetables, blend dumpling fi lling,
and on and on. Go for a standard model
and get the attachment blades so you can
grate, shred and do other nifty stuff. Here’s a
fantastic time-saving tip my mom gave me
for using a food processor for minced ginger:
Peel about 1 lb (500 g) of fresh ginger and cut
into medium pieces, then fi nely mince it in
a food processor. Put the minced ginger in a
resealable plastic storage bag and fl atten it,
then place it in the freezer. Once frozen, just
break off what you need for your recipe!
ECC_full layout.indd 23ECC_full layout.indd 23 1/10/15 9:26 AM1/10/15 9:26 AM
24 KATIE CHIN’S EVERYDAY CHINESE COOKBOOK
My mother used to make this by the gallon for her catering business in our tiny
basement in Minneapolis. On Saturday mornings, we would wake up not to the whiff
of pancakes, but to the aroma of dark soy sauce, crushed pineapple and vinegar
melding together to make this perfectly balanced dipping sauce that’s just the right
amount of sweet and just the right amount of sour. I always say life wouldn’t be
as sweet without the sour! This versatile sauce, also known as duck sauce or plum
sauce, is great for everything from Chicken Egg Rolls (page 34) to Crab Wontons
(page 44). For a quick and easy cocktail appetizer, cut some wonton wrappers into
quarters, fry them up and serve them with this sauce.
SaucesImagine a world without a sweet-and-sour sauce to dip your crunchy egg roll into, or without a soy dipping sauce spiked with sesame oil and green onions to drizzle over your favorite dumplings at dim sum. Yes, I know, I’m painting a bleak and sad picture here, and I apologize. Chinese food just wouldn’t be the same without its sauces.
This is a collection of some basic sauces and condiments, like Hoisin Sauce, which can be used to enhance fl avors while cooking or to complement cooked food. I’m excited to share recipes for some of my mother’s legendary sauces, like her earthy and spicy Chili Paste, bursting with umami goodness, and her Sweet Chili Soy Sauce, which delivers salty sweet heat in every bite. I also encourage you to try the Hot Chili Oil made with Sichuan peppercorns, which create an indescribable tingling sensation in your mouth and add an exotic note to this versatile condiment. It gives a sultry kick to anything you put it in.
This is just a sampling of some of my favorite sauces, but I hope you can gain the confi dence to create your own sauces from scratch and make your world a better (and more delicious) place.
Sweet Chili Soy Sauce My husband says this sauce is just like me: sweet,
spicy, exotic and sometimes salty. Ha! I just love the
sweet heat in this sauce, which is fi lled with piquant
fl avor and fi nishes with a fennel-like note from the
star anise. Drizzle it over your favorite dumplings or
steamed fi sh.
Makes 1 cup (250 ml)Preparation time: 5 minutesCooking time: 30 minutes
¾ cup (185 ml) soy sauce 4 tablespoons water½ cup (100 g) plus 1 tablespoon sugar 1 star anise pod ¼ teaspoon crushed red pepper
1 Combine the soy sauce, water, sugar, star anise and crushed red pepper in a small pan or skillet and mix with a fork or spoon.
2 Cook over low heat for 30 minutes, stirring occasionally. Remove from heat and discard the star anise.
3 Allow the sauce to cool for about an hour. Pour the cooled sauce into a jar with a tight-fi tting lid. Use immediately or store in the refrigerator for up to 30 days.
Sweet-and-Sour Sauce
Makes 5²⁄³ cups (1.25 liters)Preparation time: 10 minutesCooking time: 8 minutes
One 20-oz (600-ml) can crushed pineapple in heavy syrup
1 cup (200 g) sugar1 cup (250 ml) water1 cup (250 ml) vinegar1 tablespoon dark soy sauce2 tablespoons all-purpose cornstarch2 tablespoons cold water1 cup (250 ml) plum sauce
1 Heat the pineapple (with syrup), sugar, 1 cup (250 ml) water, vinegar and soy sauce to boiling. Mix together the cornstarch and the 2 tablespoons cold water, then stir into the pineapple mixture. Heat to boiling, stirring constantly.
2 Remove from heat and cool to room temperature. Stir in the plum sauce. Cover and store in the refrigerator for up to two weeks.
COOK’S NOTEOrange marmalade or plum jam can be substituted for plum sauce.
ECC_full layout.indd 24ECC_full layout.indd 24 1/10/15 9:26 AM1/10/15 9:26 AM
Sauces 25
Hoisin SauceMy mother always taught me that of all the
Chinese sauces, hoisin sauce is the boss.
Why? Because of its versatility—it’s used
as a barbecue glaze, added to stir-fries,
served as a dipping sauce and used in
marinades. You can easily buy hoisin sauce
at grocery stores, but I like to make it from
scratch on Sunday afternoons when my
kids are at soccer practice. Hoisin sauce is
typically made with soybean paste, but I use
peanut butter in this recipe for the sake of
convenience.
Makes ¼ cup (65 ml)Preparation time: 10 minutes
4 tablespoons soy sauce2 tablespoons smooth peanut butter1 tablespoon honey2 teaspoons unseasoned rice vinegar1 clove garlic, fi nely minced2 teaspoons dark sesame oil1 teaspoon Asian hot sauce, like Sriracha
chili sauce
¹⁄8 teaspoon white pepper
1 Combine all ingredients in a medium mixing bowl. Whisk until blended.
2 Transfer the sauce to a jar with a tight-fi tting lid. Use immediately or store in the refrigerator for up to two weeks.
Hot Chili Oil When my father used to bring us to visit
Uncle Jack Yee at his eponymous Chinese
restaurant in Hopkins, Minnesota, they’d
sit in a corner reminiscing about China and
playing cards. I remember the glistening
jars of hot chili oil on the tables; their
shimmering golden-red hue always looked
like sunset in a jar to me. This seasoning
oil is rich, layered, hot and complex. If you
like things spicy, then this Sichuan classic
will be your new go-to condiment. Have it
by your stove to add a little kick to any stir-
fry you’re making, or drizzle it over roast
chicken. It’s even great on scrambled eggs.
Hot chili oil should be used sparingly, as a
little goes a long way.
Makes ¼ cup (65 ml)Preparation time: 10 minutes + 8 to 10
hours resting time
6 tablespoons Sichuan peppercornsOne 1-in (2.5-cm) thick slice fresh ginger2 star anise pods ½ cup (50 g) crushed red pepper 1 teaspoon salt1 tablespoon dark sesame oil 4 tablespoons vegetable or canola oil
1 Place all of the ingredients, except the oils, in a medium glass bowl.
2 In a small saucepan, heat the oils to 375°F (190°C), then pour over the ingredients in the bowl. Let sit for 8 to 10 hours.
3 Strain the oil if you wish. Transfer to a glass jar with a tight-fi tting lid and store in the refrigerator for up to two weeks.
Chili PasteThis is an earthy, rich paste that adds
a spicy aromatic depth to any dish. It’s
more concentrated and hotter than chili
garlic sauce. Whenever chili paste hit my
mom’s wok when we were growing up, its
distinct aroma would wend its way up to my
bedroom, and I knew we’d be gobbling up
one of her amazing spicy dishes before long
(she sure knew how to get me to fi nish my
algebra!). You can buy chili paste at Asian
markets, but it’s easy-peasy to make, so I
encourage you to try this at home.
Makes ½ cup (125 ml)Preparation time: 10 minutesCooking time: 10 minutes
1 tablespoon oil1 clove garlic, minced 1 teaspoon peeled and minced fresh ginger ½ cup (125 ml) brown bean paste1 teaspoon ground red pepper (cayenne)1 tablespoon sugar
1 Heat a wok or skillet on medium-low heat. Add all of the ingredients and cook for 10 minutes.
2 Allow the sauce to cool for about an hour. Pour the cooled sauce into a jar with a tight-fi tting lid. Use immediately or store in the refrigerator for up to two weeks.
COOK’S NOTEYou may substitute hoisin sauce for the brown bean sauce, but if you do so, reduce the sugar to 1 teaspoon.
ECC_full layout.indd 25ECC_full layout.indd 25 1/10/15 9:26 AM1/10/15 9:26 AM
26 KATIE CHIN’S EVERYDAY CHINESE COOKBOOK
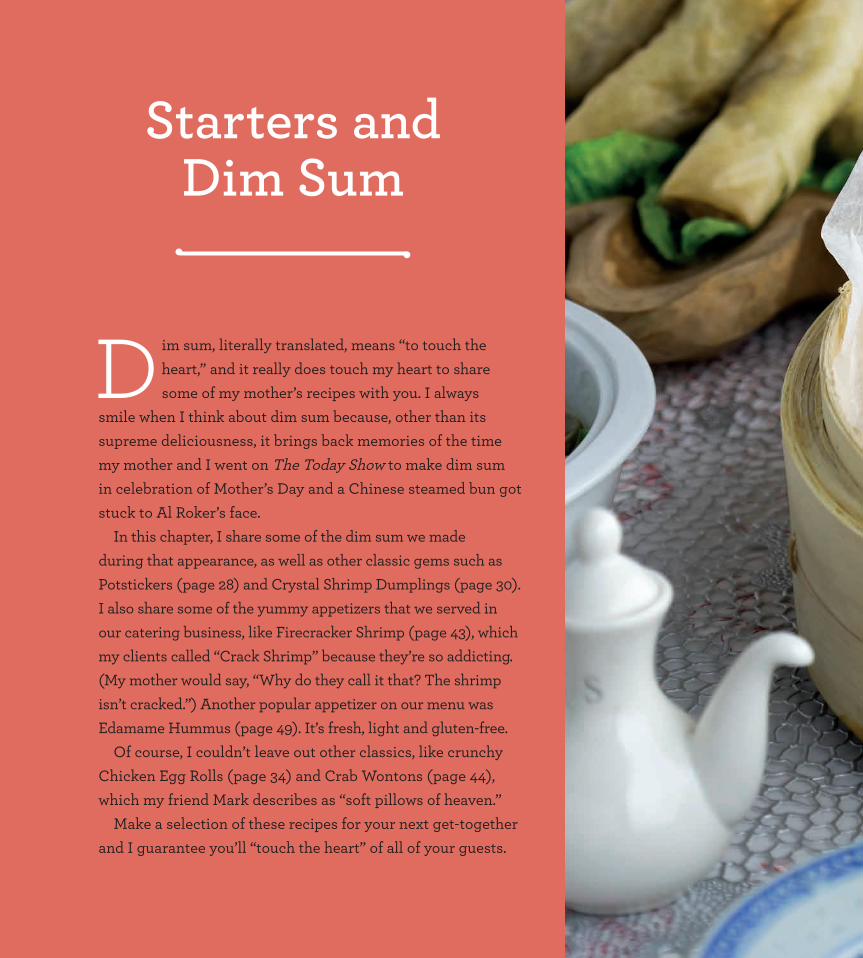
Starters and Dim Sum
D im sum, literally translated, means “to touch the heart,” and it really does touch my heart to share some of my mother’s recipes with you. I always
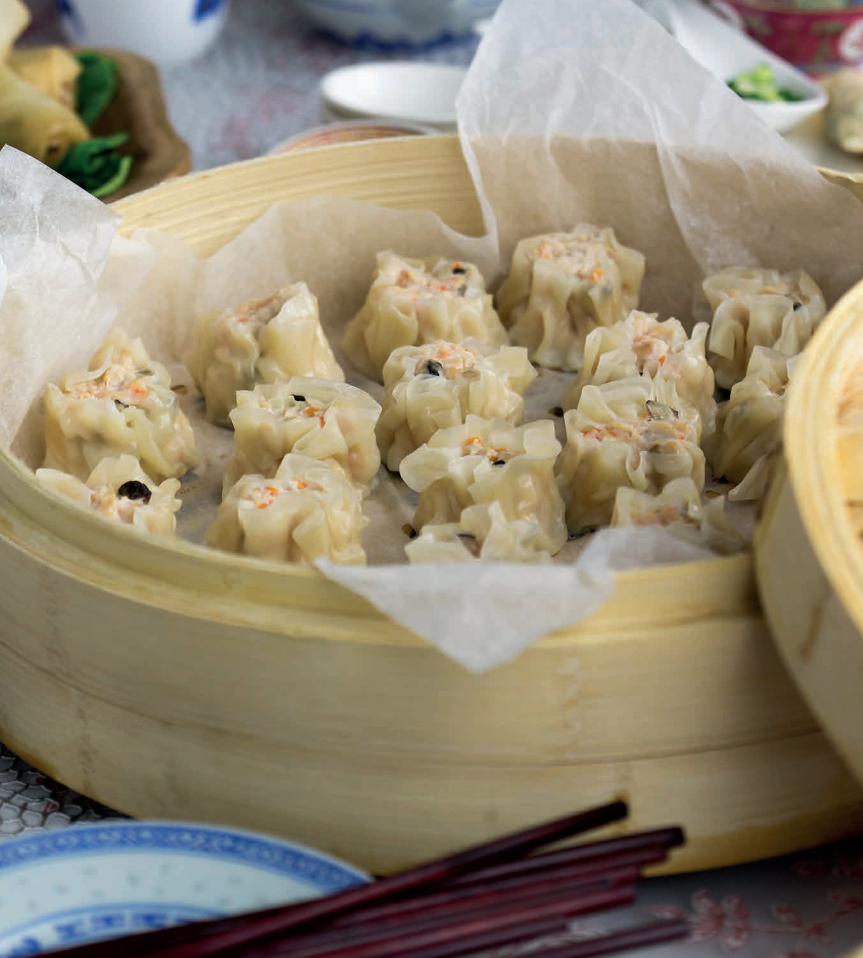
smile when I think about dim sum because, other than its supreme deliciousness, it brings back memories of the time my mother and I went on The Today Show to make dim sum in celebration of Mother’s Day and a Chinese steamed bun got stuck to Al Roker’s face.
In this chapter, I share some of the dim sum we made during that appearance, as well as other classic gems such as Potstickers (page 28) and Crystal Shrimp Dumplings (page 30). I also share some of the yummy appetizers that we served in
our catering business, like Firecracker Shrimp (page 43), which my clients called “Crack Shrimp” because they’re so addicting. (My mother would say, “Why do they call it that? The shrimp isn’t cracked.”) Another popular appetizer on our menu was Edamame Hummus (page 49). It’s fresh, light and gluten-free.
Of course, I couldn’t leave out other classics, like crunchy Chicken Egg Rolls (page 34) and Crab Wontons (page 44), which my friend Mark describes as “soft pillows of heaven.”
Make a selection of these recipes for your next get-together and I guarantee you’ll “touch the heart” of all of your guests.
ECC_full layout.indd 26ECC_full layout.indd 26 1/10/15 9:26 AM1/10/15 9:26 AM
The Wisdom of My Mother’s Kitchen 27
ECC_full layout.indd 27ECC_full layout.indd 27 1/10/15 9:26 AM1/10/15 9:26 AM
28 KATIE CHIN’S EVERYDAY CHINESE COOKBOOK
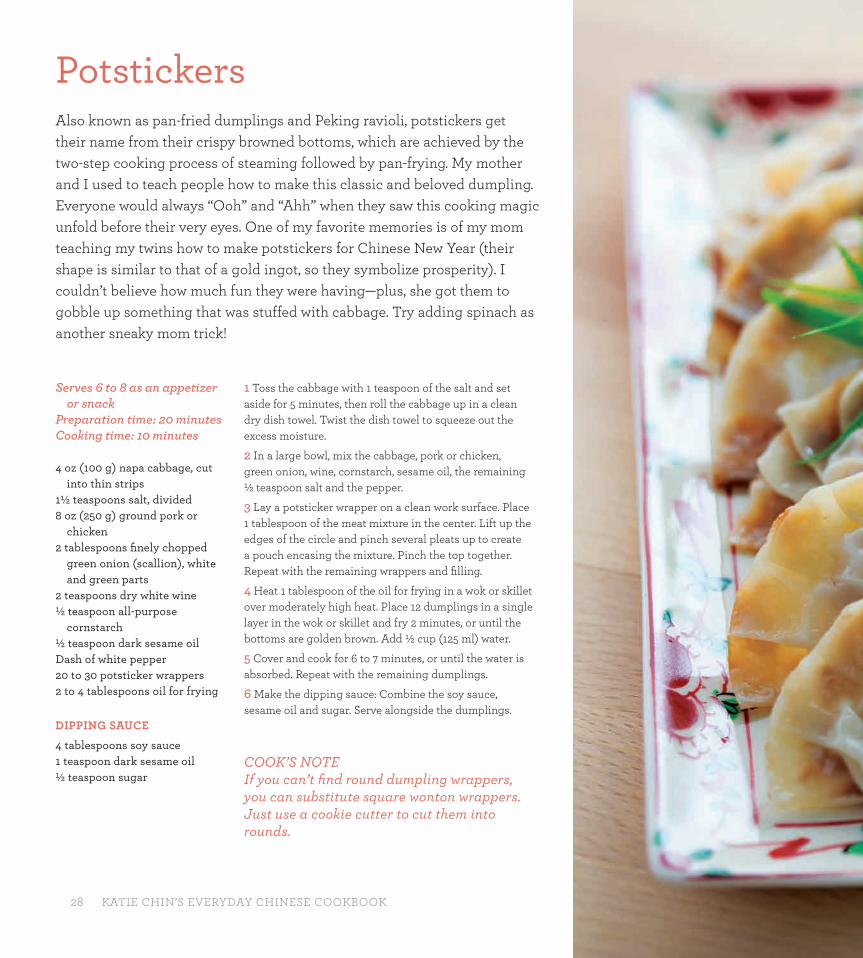
PotstickersAlso known as pan-fried dumplings and Peking ravioli, potstickers get their name from their crispy browned bottoms, which are achieved by the two-step cooking process of steaming followed by pan-frying. My mother and I used to teach people how to make this classic and beloved dumpling. Everyone would always “Ooh” and “Ahh” when they saw this cooking magic unfold before their very eyes. One of my favorite memories is of my mom teaching my twins how to make potstickers for Chinese New Year (their shape is similar to that of a gold ingot, so they symbolize prosperity). I couldn’t believe how much fun they were having—plus, she got them to gobble up something that was stuffed with cabbage. Try adding spinach as another sneaky mom trick!
Serves 6 to 8 as an appetizer or snack
Preparation time: 20 minutesCooking time: 10 minutes
4 oz (100 g) napa cabbage, cut into thin strips
1½ teaspoons salt, divided 8 oz (250 g) ground pork or
chicken 2 tablespoons fi nely chopped
green onion (scallion), white and green parts
2 teaspoons dry white wine ½ teaspoon all-purpose
cornstarch ½ teaspoon dark sesame oil Dash of white pepper 20 to 30 potsticker wrappers2 to 4 tablespoons oil for frying
DIPPING SAUCE
4 tablespoons soy sauce 1 teaspoon dark sesame oil½ teaspoon sugar
1 Toss the cabbage with 1 teaspoon of the salt and set aside for 5 minutes, then roll the cabbage up in a clean dry dish towel. Twist the dish towel to squeeze out the excess moisture.
2 In a large bowl, mix the cabbage, pork or chicken, green onion, wine, cornstarch, sesame oil, the remaining ½ teaspoon salt and the pepper.
3 Lay a potsticker wrapper on a clean work surface. Place 1 tablespoon of the meat mixture in the center. Lift up the edges of the circle and pinch several pleats up to create a pouch encasing the mixture. Pinch the top together. Repeat with the remaining wrappers and fi lling.
4 Heat 1 tablespoon of the oil for frying in a wok or skillet over moderately high heat. Place 12 dumplings in a single layer in the wok or skillet and fry 2 minutes, or until the bottoms are golden brown. Add ½ cup (125 ml) water.
5 Cover and cook for 6 to 7 minutes, or until the water is absorbed. Repeat with the remaining dumplings.
6 Make the dipping sauce: Combine the soy sauce, sesame oil and sugar. Serve alongside the dumplings.
COOK’S NOTE If you can’t fi nd round dumpling wrappers, you can substitute square wonton wrappers. Just use a cookie cutter to cut them into rounds.
ECC_full layout.indd 28ECC_full layout.indd 28 1/10/15 9:26 AM1/10/15 9:26 AM

Starters and Dim Sum 29
Mix the dumpling ingredients together in a bowl.
Place 1 tablespoon of the meat mixture in the center of a dumpling wrapper.
Toss the cabbage with 1 teaspoon of salt and set aside for 5 minutes.
Roll the cabbage up in a clean dry dish towel. Twist the towel to squeeze out the excess moisture.
Repeat with the remaining wrappers and fi lling.
Lift the edges and pinch several pleats to create a pouch for the mixture. Pinch the top together.
Add ½ cup (125 ml) of water. Cover and cook 6 to 7 minutes or until the water is absorbed. Repeat with the remaining dumplings.
Heat oil in a wok or skillet. Place 12 dumplings in a single layer and fry for 2 minutes, or until the bottoms are golden brown.
ECC_full layout.indd 29ECC_full layout.indd 29 1/10/15 9:26 AM1/10/15 9:26 AM
30 KATIE CHIN’S EVERYDAY CHINESE COOKBOOK
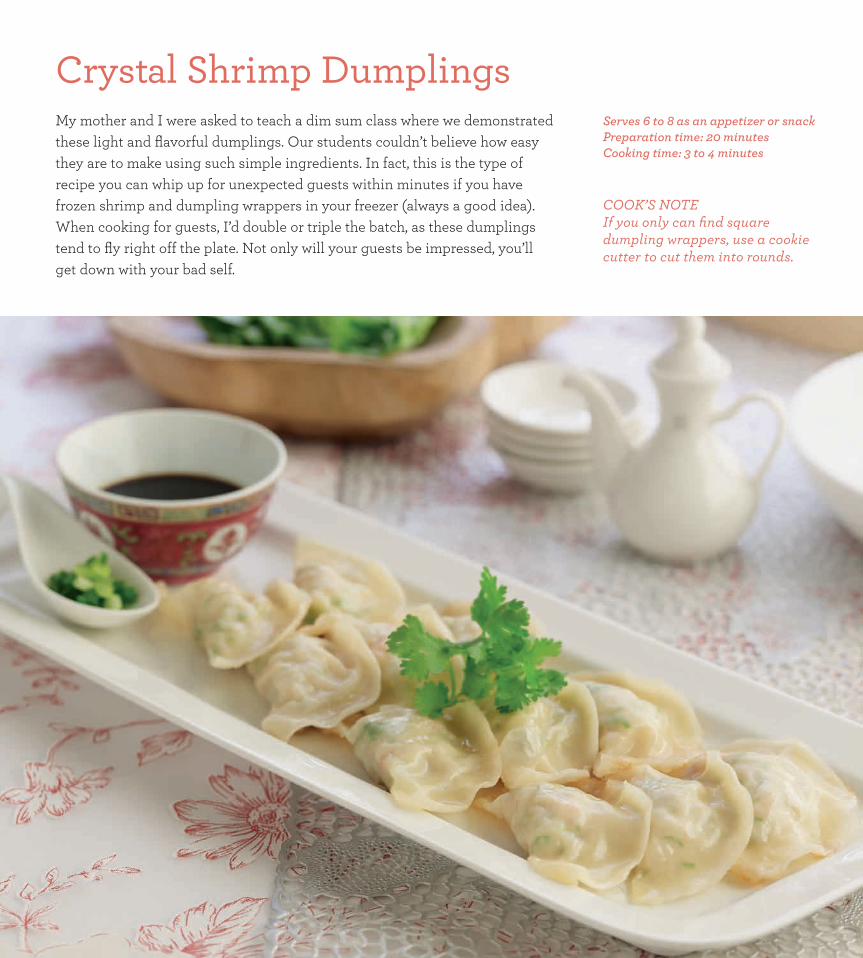
Crystal Shrimp DumplingsMy mother and I were asked to teach a dim sum class where we demonstrated these light and fl avorful dumplings. Our students couldn’t believe how easy they are to make using such simple ingredients. In fact, this is the type of recipe you can whip up for unexpected guests within minutes if you have frozen shrimp and dumpling wrappers in your freezer (always a good idea). When cooking for guests, I’d double or triple the batch, as these dumplings tend to fl y right off the plate. Not only will your guests be impressed, you’ll get down with your bad self.
Serves 6 to 8 as an appetizer or snackPreparation time: 20 minutesCooking time: 3 to 4 minutes
COOK’S NOTE If you only can fi nd square dumpling wrappers, use a cookie cutter to cut them into rounds.
ECC_full layout.indd 30ECC_full layout.indd 30 1/10/15 9:26 AM1/10/15 9:26 AM

Starters and Dim Sum 31
8 oz (250 g) shelled and deveined medium-sized raw shrimp
¼ teaspoon salt½ teaspoon sugarDash of white pepper½ teaspoon dark sesame oil1 teaspoon all-purpose cornstarch1 egg white, divided in two portions4 tablespoons fi nely chopped fresh coriander
leaves (cilantro) 20 store-bought round dumpling wrappers1 tablespoon oil½ cup (125 ml) water
DIPPING SAUCE
2 tablespoons soy sauce2 tablespoons balsamic vinegar1 tablespoon chopped green
onion (scallion), white and green parts
1 Follow the directions for “Eliminating Shrimp’s ‘Fishy’ Taste” on page 20. (This step is optional.)
2 To make the fi lling, fi rst chop the shrimp into a paste with a knife or a food processor.
3 In a medium bowl, combine the shrimp, salt, sugar, pepper, sesame oil, cornstarch, ½ egg white and cilantro.
4 In a separate small bowl, beat the remaining ½ egg white with 1 tablespoon water for sealing the dumplings.
5 Make the dipping sauce: Mix the soy sauce, balsamic vinegar and green onion. Set aside.
6 Place 2 teaspoons of the fi lling in the center of each dumpling wrapper. Brush with the egg mixture along the edge. Fold over to form a half-circle.
7 Heat the oil in a wok or skillet over medium-high heat. Add all of the dumplings and pan-fry for 1 minute.
8 Add the water. Cover and cook for 1 minute, then remove the cover and continue to cook until the water is completely gone, about 2 minutes. Serve immediately with the dipping sauce.
Serves 6 to 8 as an appetizer or snackPreparation time: 20 minutes + draining and marinating timeCooking time: 45 minutes
One 16-oz (500 g) block fi rm tofu, drained
MARINADE
¹⁄³ cup (80 ml) soy sauce ¾ cup (185 ml) water 1 tablespoon peeled and minced
fresh ginger 3 cloves garlic, minced1½ tablespoons dark sesame oil
2 tablespoons oil1 tablespoon fi nely chopped shallot 1 tablespoon peeled and minced
fresh ginger 1 fresh hot red chili (deseeded if you
prefer less heat) 4 tablespoons water chestnuts,
fi nely chopped2½ cups (250 g) fresh shiitake
mushrooms, chopped 4 tablespoons green onion
(scallion), fi nely chopped (green and white parts)
4 tablespoons Chinese rice wine or sherry
1 tablespoon dark soy sauce 1 tablespoon hoisin sauce, homemade
(page 25) or store-boughtLeaves of 1 head butter lettuce,
washed and dried
1 Preheat oven to 400°F (200°C).
2 Wrap tofu block snugly in 4 or 5 layers of paper towels and place on a plate. Cover with a second plate and balance a heavy can or two on top to weigh down the plate and press down on the tofu. Set aside to let drain for 30 minutes. Remove and discard paper towels, then replace with dry paper towels and repeat the process a second time. Cut the pressed tofu into 1-inch (2.5 cm) cubes.
3 Whisk marinade ingredients together in a medium bowl. Add the tofu cubes and gently toss to coat. Cover and place in refrigerator for 30 minutes.
4 Arrange tofu cubes in a single layer on a large sheet pan lined with parchment paper. Lightly spray tofu all over with cooking spray and bake, fl ipping halfway through, until golden brown and just crisp, about 40 minutes total.
5 Heat the oil in a wok or skillet over medium-high heat. Add the shallot, ginger and chili and stir-fry until fragrant. Add the water chestnuts, shiitake mushrooms and green onions and stir-fry for 2 minutes. Add the tofu and stir-fry for 1 minute, then pour in the soy sauce, rice wine or sherry and hoisin sauce and stir-fry for another minute.
6 Transfer to a serving bowl. Place the lettuce leaves on a plate or platter alongside the tofu fi lling so guests can make their own wraps.
Veggie Tofu Lettuce Cups When my friend Stacy tried this recipe, she couldn’t believe her teenage daughters, Brianna and McKenna, were devouring tofu and liking it. It takes a little extra time to prepare and bake the tofu, but it’s totally worth it. I love the combination of textures that the water chestnuts and shiitake mushrooms contribute, but the sauce, which is rich and layered from the dark soy sauce, hoisin sauce and rice wine, is the best part. This is a great appetizer for “Meatless Mondays”—it’s even hearty enough for dinner with a side of Egg Drop Soup (page 64).
Starters and Dim Sum 31
ECC_full layout.indd 31ECC_full layout.indd 31 1/10/15 9:56 AM1/10/15 9:56 AM
32 KATIE CHIN’S EVERYDAY CHINESE COOKBOOK
Serves 8 as an appetizer or snackPreparation time: 25 minutesCooking time: 4 minutes
8 oz (250 g) fi rm tofu 2 egg whites, divided 2 teaspoons peeled and minced fresh ginger 1 clove garlic, minced 2 tablespoons fi nely chopped green onion (scallion),
white and green parts 1 tablespoon soy sauce ½ teaspoon dark sesame oil 1 teaspoon all-purpose cornstarch 2 tablespoons fi nely chopped fresh coriander leaves
(cilantro) ½ cup (50 g) stemmed and fi nely chopped fresh
shiitake mushrooms 4 tablespoons thawed frozen spinach, squeezed dry
and fi nely chopped 30 store-bought round potsticker wrappers3 tablespoons oil, divided, for fryingWater, for cooking
DIPPING SAUCE
2 tablespoons soy sauce2 tablespoons balsamic vinegar 1 teaspoon green onion (scallion), fi nely chopped
(green and white parts)
1 Drain the tofu and pat dry, then dice fi nely.
2 In a large bowl, combine one of the egg whites, the ginger, garlic, green onion, soy sauce, sesame oil, cornstarch, coriander leaves, mushrooms and spinach until blended. Add the tofu and toss gently into mixture.
3 Make the dipping sauce: Combine the soy sauce and balsamic vinegar in a small bowl. Sprinkle green onion on top and set aside.
4 Beat the remaining egg white with 2 teaspoons water. Lay one potsticker wrapper on a clean work surface, and place 2 teaspoons of the fi lling in the center of the circle. Brush egg white mixture along the edge of the wrapper, then fold over to form a half-circle and seal the dumpling shut. Repeat with remaining ingredients.
5 Heat a large skillet over high heat. Add 1 tablespoon of the oil and reduce the heat to medium. Add 10 dumplings and pan-fry for 1 minute. Add 4 tablespoons water, then cover and cook for 1 minute more.
6 Remove the cover and continue to cook until the water is gone, about 2 minutes. Repeat the process until all the dumplings are cooked. Serve immediately with the dipping sauce alongside.
COOK’S NOTEIf you only can fi nd square dumpling wrappers, use a cookie cutter to cut them into rounds.
Shiitake Mushroom and Spinach DumplingsWhen I brought my vegetarian friend Dave to dim sum for the fi rst time, he was pleasantly surprised to see the array of meatless dumpling options going around in the carts. All of my non-Chinese friends make me do the ordering at dim sum (even though I can’t even speak Chinese!), and I load up on as many veggie dumplings as I do the meat or seafood kind, because they’re so healthy, fresh and fl avorful. This recipe, loaded with umami fl avor from the shiitakes, is inspired by one of my favorite veggie dumplings at my go-to dim sum restaurant, Ocean Seafood, in Los Angeles’ Chinatown.
ECC_full layout.indd 32ECC_full layout.indd 32 1/10/15 9:37 AM1/10/15 9:37 AM
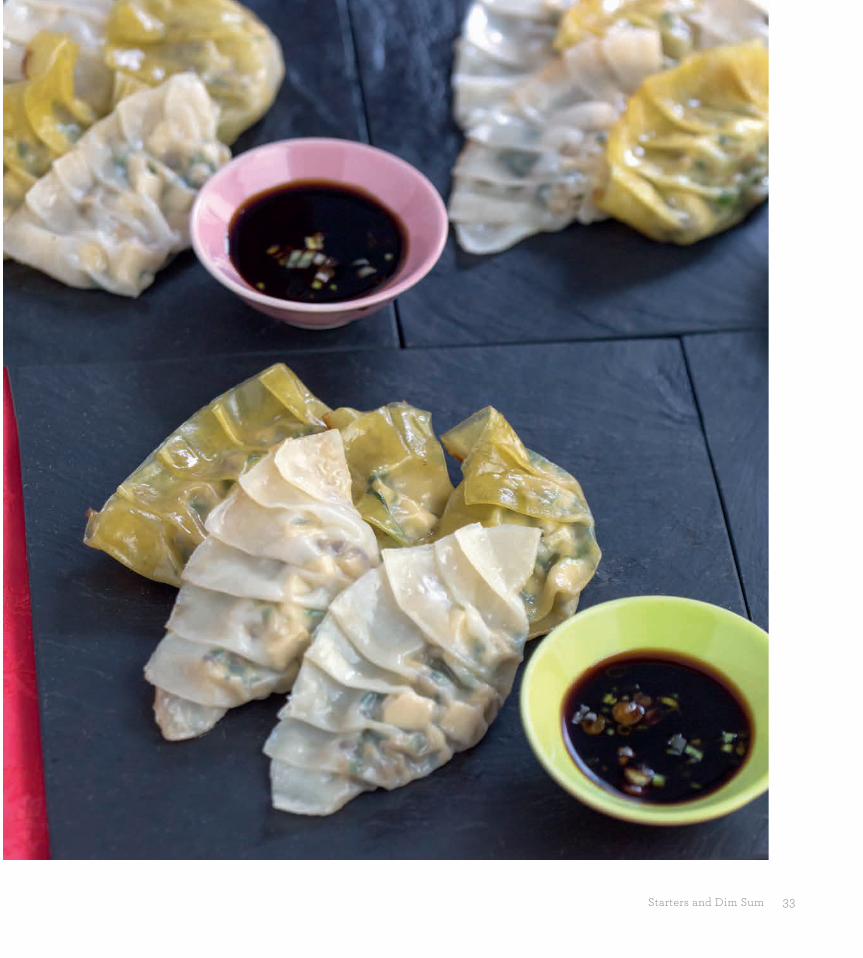
Starters and Dim Sum 33
ECC_full layout.indd 33ECC_full layout.indd 33 1/10/15 9:37 AM1/10/15 9:37 AM
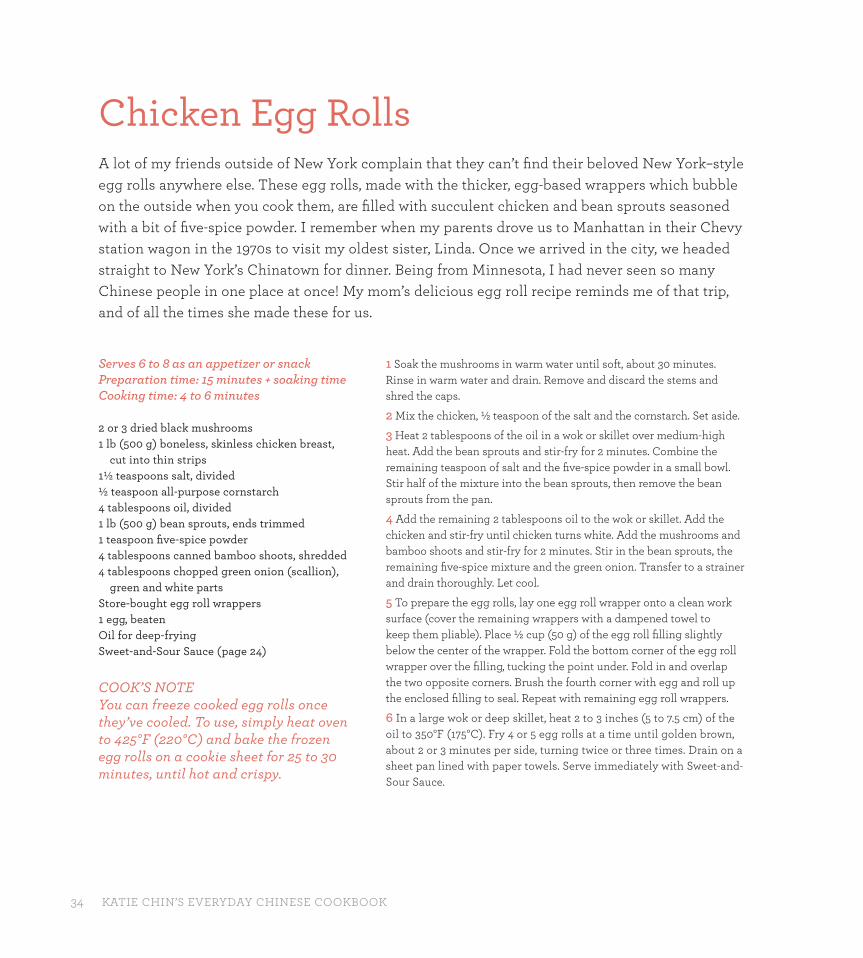
34 KATIE CHIN’S EVERYDAY CHINESE COOKBOOK
1 Soak the mushrooms in warm water until soft, about 30 minutes. Rinse in warm water and drain. Remove and discard the stems and shred the caps.
2 Mix the chicken, ½ teaspoon of the salt and the cornstarch. Set aside.
3 Heat 2 tablespoons of the oil in a wok or skillet over medium-high heat. Add the bean sprouts and stir-fry for 2 minutes. Combine the remaining teaspoon of salt and the fi ve-spice powder in a small bowl. Stir half of the mixture into the bean sprouts, then remove the bean sprouts from the pan.
4 Add the remaining 2 tablespoons oil to the wok or skillet. Add the chicken and stir-fry until chicken turns white. Add the mushrooms and bamboo shoots and stir-fry for 2 minutes. Stir in the bean sprouts, the remaining fi ve-spice mixture and the green onion. Transfer to a strainer and drain thoroughly. Let cool.
5 To prepare the egg rolls, lay one egg roll wrapper onto a clean work surface (cover the remaining wrappers with a dampened towel to keep them pliable). Place ½ cup (50 g) of the egg roll fi lling slightly below the center of the wrapper. Fold the bottom corner of the egg roll wrapper over the fi lling, tucking the point under. Fold in and overlap the two opposite corners. Brush the fourth corner with egg and roll up the enclosed fi lling to seal. Repeat with remaining egg roll wrappers.
6 In a large wok or deep skillet, heat 2 to 3 inches (5 to 7.5 cm) of the oil to 350°F (175°C). Fry 4 or 5 egg rolls at a time until golden brown, about 2 or 3 minutes per side, turning twice or three times. Drain on a sheet pan lined with paper towels. Serve immediately with Sweet-and-Sour Sauce.
Serves 6 to 8 as an appetizer or snackPreparation time: 15 minutes + soaking timeCooking time: 4 to 6 minutes
2 or 3 dried black mushrooms1 lb (500 g) boneless, skinless chicken breast,
cut into thin strips1½ teaspoons salt, divided½ teaspoon all-purpose cornstarch4 tablespoons oil, divided1 lb (500 g) bean sprouts, ends trimmed1 teaspoon fi ve-spice powder4 tablespoons canned bamboo shoots, shredded4 tablespoons chopped green onion (scallion),
green and white partsStore-bought egg roll wrappers1 egg, beatenOil for deep-fryingSweet-and-Sour Sauce (page 24)
COOK’S NOTEYou can freeze cooked egg rolls once they’ve cooled. To use, simply heat oven to 425°F (220°C) and bake the frozen egg rolls on a cookie sheet for 25 to 30 minutes, until hot and crispy.
Chicken Egg Rolls A lot of my friends outside of New York complain that they can’t fi nd their beloved New York–style egg rolls anywhere else. These egg rolls, made with the thicker, egg-based wrappers which bubble on the outside when you cook them, are fi lled with succulent chicken and bean sprouts seasoned with a bit of fi ve-spice powder. I remember when my parents drove us to Manhattan in their Chevy station wagon in the 1970s to visit my oldest sister, Linda. Once we arrived in the city, we headed straight to New York’s Chinatown for dinner. Being from Minnesota, I had never seen so many Chinese people in one place at once! My mom’s delicious egg roll recipe reminds me of that trip, and of all the times she made these for us.
ECC_full layout.indd 34ECC_full layout.indd 34 1/10/15 9:37 AM1/10/15 9:37 AM

Starters and Dim Sum 35
ECC_full layout.indd 35ECC_full layout.indd 35 1/10/15 9:37 AM1/10/15 9:37 AM

36 KATIE CHIN’S EVERYDAY CHINESE COOKBOOK
Serves 6 to 8 as an appetizer or snackPreparation time: 15 minutes + mushroom soaking timeCooking time: 12 minutes
4 medium dried black mushrooms8 oz (250 g) shelled and deveined medium-sized raw shrimp¹⁄8 teaspoon white pepper½ teaspoon dark sesame oil½ egg white1 tablespoon all-purpose cornstarch2 teaspoons oil½ teaspoon salt1 teaspoon peeled and minced fresh ginger2 tablespoons fi nely chopped carrot4 tablespoons fi nely chopped onion10 oz (330 g) ground chicken breast18 round dumpling wrappers
DIPPING SAUCE
3 tablespoons soy sauce½ teaspoon sugar1 tablespoon water1 tablespoon chopped green onion (scallion), white and
green parts
1 Soak the mushrooms in hot water for 15 to 20 minutes, or until soft. Rinse them in cold water and drain. Squeeze out any excess water. Remove and discard the stems and cut the mushrooms into ¼ inch (6 mm) pieces.
2 Follow the directions for “Eliminating Shrimp’s ‘Fishy’ Taste” on page 20. (This step is optional.) Chop the shrimp fi nely.
3 In a medium bowl, combine the pepper, sesame oil, egg white, cornstarch, oil, salt, ginger, carrot and onion. Add the chicken, shrimp and mushrooms; mix very well and set aside.
4 Make the dipping sauce: In a small bowl, whisk together the soy sauce, sugar, water and chopped green onion. Set aside.
5 Lay a dumpling wrapper on a clean work surface. Place 1 tablespoon of the chicken and shrimp mixture in the center of a wrapper. Bring the edges up around the fi lling, pinching and pleating as you go, leaving the top open. Repeat with the remaining wrappers.
6 Place the dumplings in a single layer on a rack in a steamer. Cover and steam over boiling water for 12 minutes. (Add additional boiling water during steaming if necessary.)
COOK’S NOTE To freeze Shu Mai, steam them and let them cool completely. Place the dumplings in a large resealable food storage bag for freezing. To use, let them thaw and then steam them for 6 minutes, or pop them in the microwave for 4 to 5 minutes.
Shu Mai Oh my, Shu Mai! This is my favorite dim sum dumpling because it’s so yummy, healthy (it’s steamed) and cute. My mother was an incredible seamstress, on top of being a master chef, so she made the pleating on her shu mai look effortless. It has taken me, however, several years to perfect my shu mai pleating. In fact, my mother once asked me, “Why are you so slow?” on camera while I was making shu mai for a Food Network special in China. She was hard on me, but it was always out of love. Anyway, practice makes perfect—and the great thing about Chinese dumplings is that no matter how they look, they always taste delicious! Filled with tender chicken and shrimp, with little bursts of ginger and onion, this open-faced steamed dumpling is a family favorite.
Whisk together the dipping sauce ingredients in a small bowl.
Combine the shu mai fi lling ingredients in a medium bowl.
Place 1 tablespoon of the chicken and shrimp mixture in the center of a wrapper.
Bring the edges up around the fi lling, pinching and pleating as you go, leaving the top open.
ECC_full layout.indd 36ECC_full layout.indd 36 2/10/15 4:15 PM2/10/15 4:15 PM
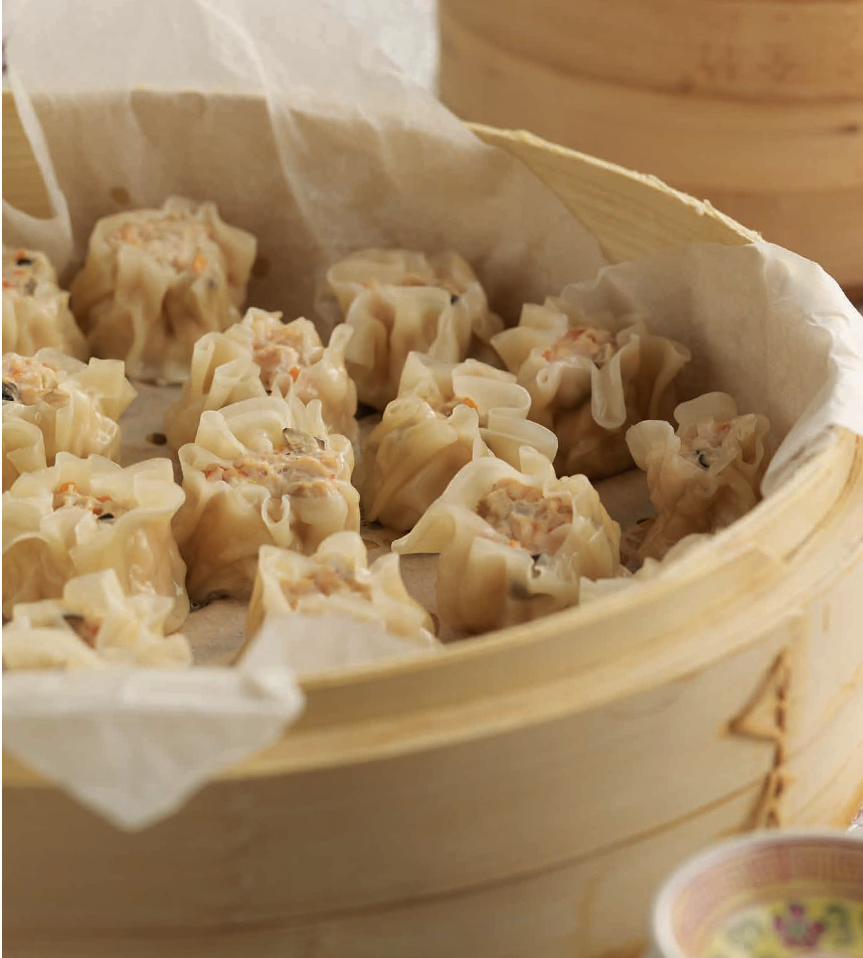
Starters and Dim Sum 37
ECC_full layout.indd 37ECC_full layout.indd 37 1/10/15 9:38 AM1/10/15 9:38 AM
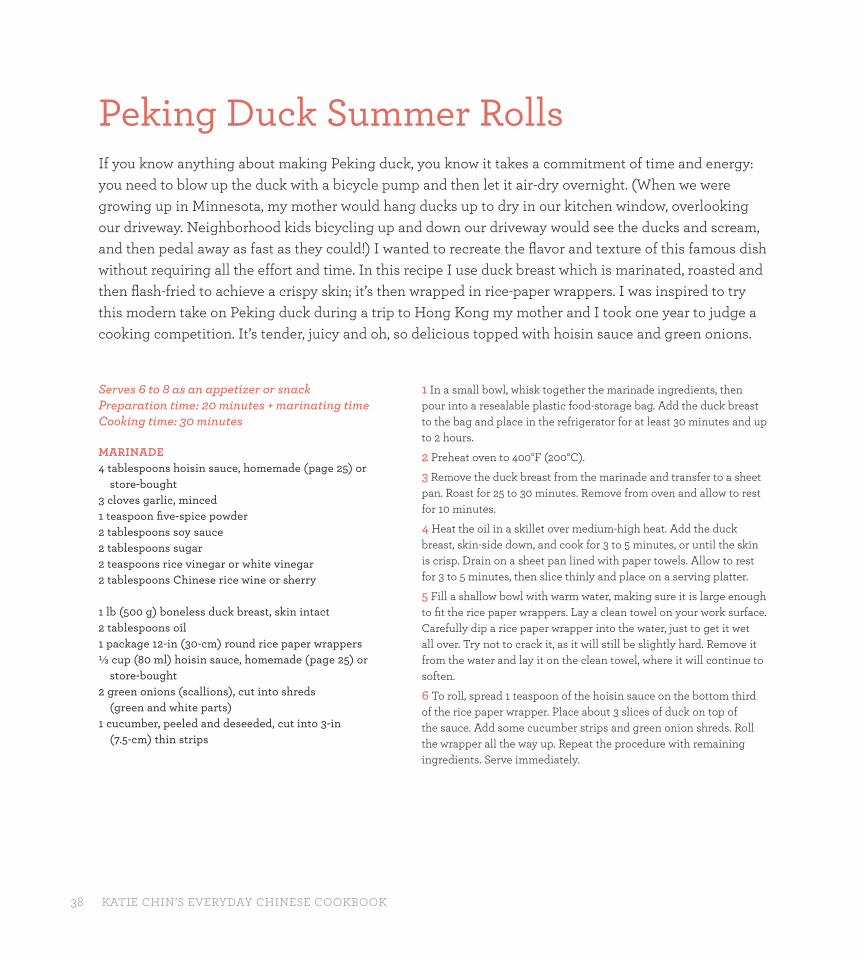
38 KATIE CHIN’S EVERYDAY CHINESE COOKBOOK
Serves 6 to 8 as an appetizer or snackPreparation time: 20 minutes + marinating timeCooking time: 30 minutes
MARINADE4 tablespoons hoisin sauce, homemade (page 25) or
store-bought3 cloves garlic, minced 1 teaspoon fi ve-spice powder2 tablespoons soy sauce2 tablespoons sugar2 teaspoons rice vinegar or white vinegar2 tablespoons Chinese rice wine or sherry
1 lb (500 g) boneless duck breast, skin intact 2 tablespoons oil 1 package 12-in (30-cm) round rice paper wrappers ¹⁄³ cup (80 ml) hoisin sauce, homemade (page 25) or
store-bought 2 green onions (scallions), cut into shreds
(green and white parts)1 cucumber, peeled and deseeded, cut into 3-in
(7.5-cm) thin strips
1 In a small bowl, whisk together the marinade ingredients, then pour into a resealable plastic food-storage bag. Add the duck breast to the bag and place in the refrigerator for at least 30 minutes and up to 2 hours.
2 Preheat oven to 400°F (200°C).
3 Remove the duck breast from the marinade and transfer to a sheet pan. Roast for 25 to 30 minutes. Remove from oven and allow to rest for 10 minutes.
4 Heat the oil in a skillet over medium-high heat. Add the duck breast, skin-side down, and cook for 3 to 5 minutes, or until the skin is crisp. Drain on a sheet pan lined with paper towels. Allow to rest for 3 to 5 minutes, then slice thinly and place on a serving platter.
5 Fill a shallow bowl with warm water, making sure it is large enough to fi t the rice paper wrappers. Lay a clean towel on your work surface. Carefully dip a rice paper wrapper into the water, just to get it wet all over. Try not to crack it, as it will still be slightly hard. Remove it from the water and lay it on the clean towel, where it will continue to soften.
6 To roll, spread 1 teaspoon of the hoisin sauce on the bottom third of the rice paper wrapper. Place about 3 slices of duck on top of the sauce. Add some cucumber strips and green onion shreds. Roll the wrapper all the way up. Repeat the procedure with remaining ingredients. Serve immediately.
Peking Duck Summer Rolls If you know anything about making Peking duck, you know it takes a commitment of time and energy: you need to blow up the duck with a bicycle pump and then let it air-dry overnight. (When we were growing up in Minnesota, my mother would hang ducks up to dry in our kitchen window, overlooking our driveway. Neighborhood kids bicycling up and down our driveway would see the ducks and scream, and then pedal away as fast as they could!) I wanted to recreate the fl avor and texture of this famous dish without requiring all the effort and time. In this recipe I use duck breast which is marinated, roasted and then fl ash-fried to achieve a crispy skin; it’s then wrapped in rice-paper wrappers. I was inspired to try this modern take on Peking duck during a trip to Hong Kong my mother and I took one year to judge a cooking competition. It’s tender, juicy and oh, so delicious topped with hoisin sauce and green onions.
ECC_full layout.indd 38ECC_full layout.indd 38 1/10/15 9:38 AM1/10/15 9:38 AM
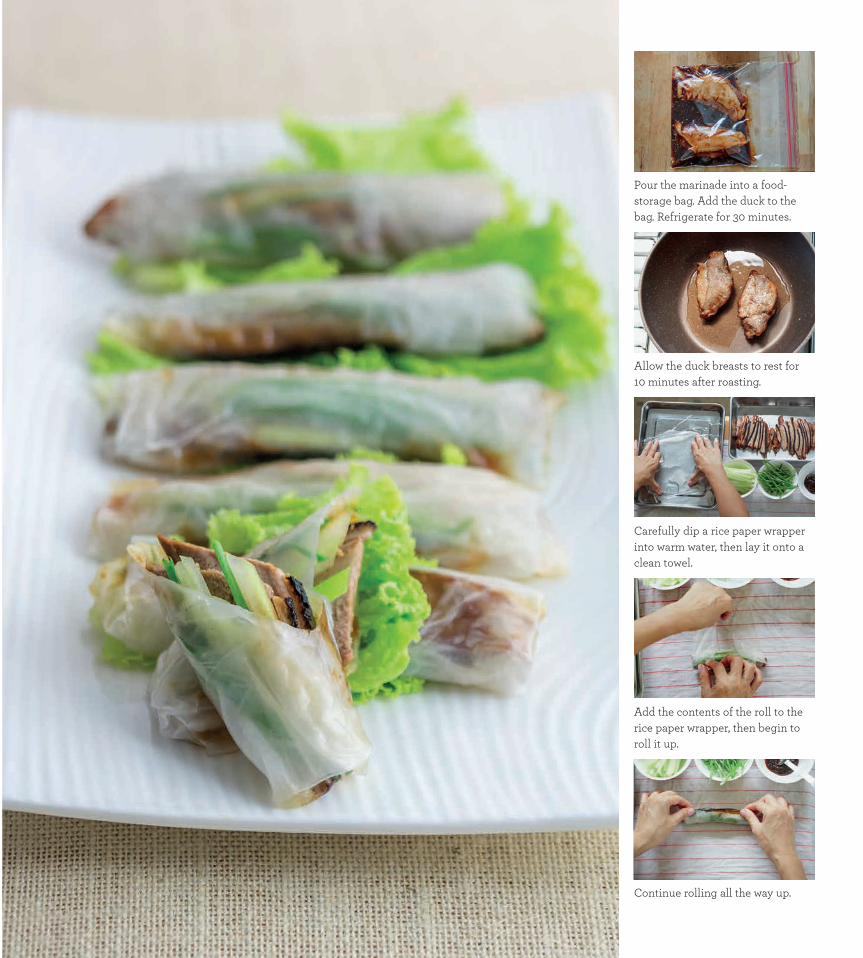
Pour the marinade into a food-storage bag. Add the duck to the bag. Refrigerate for 30 minutes.
Allow the duck breasts to rest for 10 minutes after roasting.
Carefully dip a rice paper wrapper into warm water, then lay it onto a clean towel.
Add the contents of the roll to the rice paper wrapper, then begin to roll it up.
Continue rolling all the way up.
ECC_full layout.indd 39ECC_full layout.indd 39 1/10/15 9:38 AM1/10/15 9:38 AM
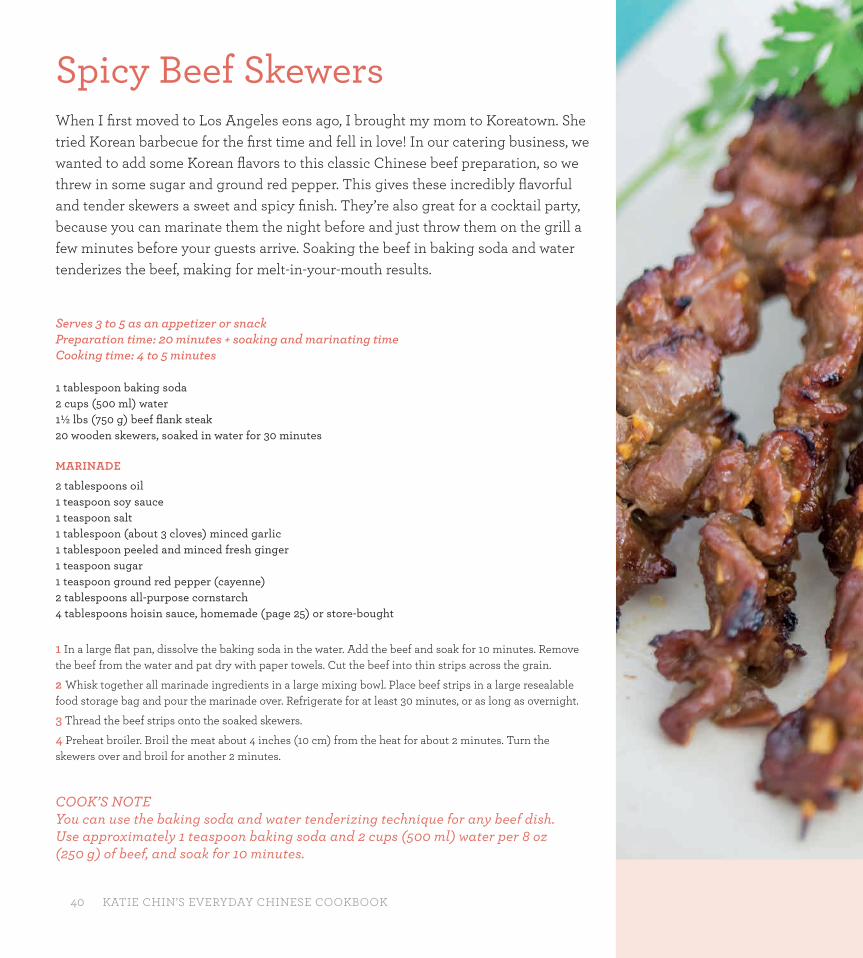
40 KATIE CHIN’S EVERYDAY CHINESE COOKBOOK
Serves 3 to 5 as an appetizer or snackPreparation time: 20 minutes + soaking and marinating timeCooking time: 4 to 5 minutes
1 tablespoon baking soda2 cups (500 ml) water 1½ lbs (750 g) beef fl ank steak20 wooden skewers, soaked in water for 30 minutes
MARINADE
2 tablespoons oil1 teaspoon soy sauce1 teaspoon salt1 tablespoon (about 3 cloves) minced garlic1 tablespoon peeled and minced fresh ginger1 teaspoon sugar1 teaspoon ground red pepper (cayenne)2 tablespoons all-purpose cornstarch4 tablespoons hoisin sauce, homemade (page 25) or store-bought
1 In a large fl at pan, dissolve the baking soda in the water. Add the beef and soak for 10 minutes. Remove the beef from the water and pat dry with paper towels. Cut the beef into thin strips across the grain.
2 Whisk together all marinade ingredients in a large mixing bowl. Place beef strips in a large resealable food storage bag and pour the marinade over. Refrigerate for at least 30 minutes, or as long as overnight.
3 Thread the beef strips onto the soaked skewers.
4 Preheat broiler. Broil the meat about 4 inches (10 cm) from the heat for about 2 minutes. Turn the skewers over and broil for another 2 minutes.
COOK’S NOTEYou can use the baking soda and water tenderizing technique for any beef dish. Use approximately 1 teaspoon baking soda and 2 cups (500 ml) water per 8 oz (250 g) of beef, and soak for 10 minutes.
Spicy Beef Skewers When I fi rst moved to Los Angeles eons ago, I brought my mom to Koreatown. She tried Korean barbecue for the fi rst time and fell in love! In our catering business, we wanted to add some Korean fl avors to this classic Chinese beef preparation, so we threw in some sugar and ground red pepper. This gives these incredibly fl avorful and tender skewers a sweet and spicy fi nish. They’re also great for a cocktail party, because you can marinate them the night before and just throw them on the grill a few minutes before your guests arrive. Soaking the beef in baking soda and water tenderizes the beef, making for melt-in-your-mouth results.
ECC_full layout.indd 40ECC_full layout.indd 40 1/10/15 9:56 AM1/10/15 9:56 AM
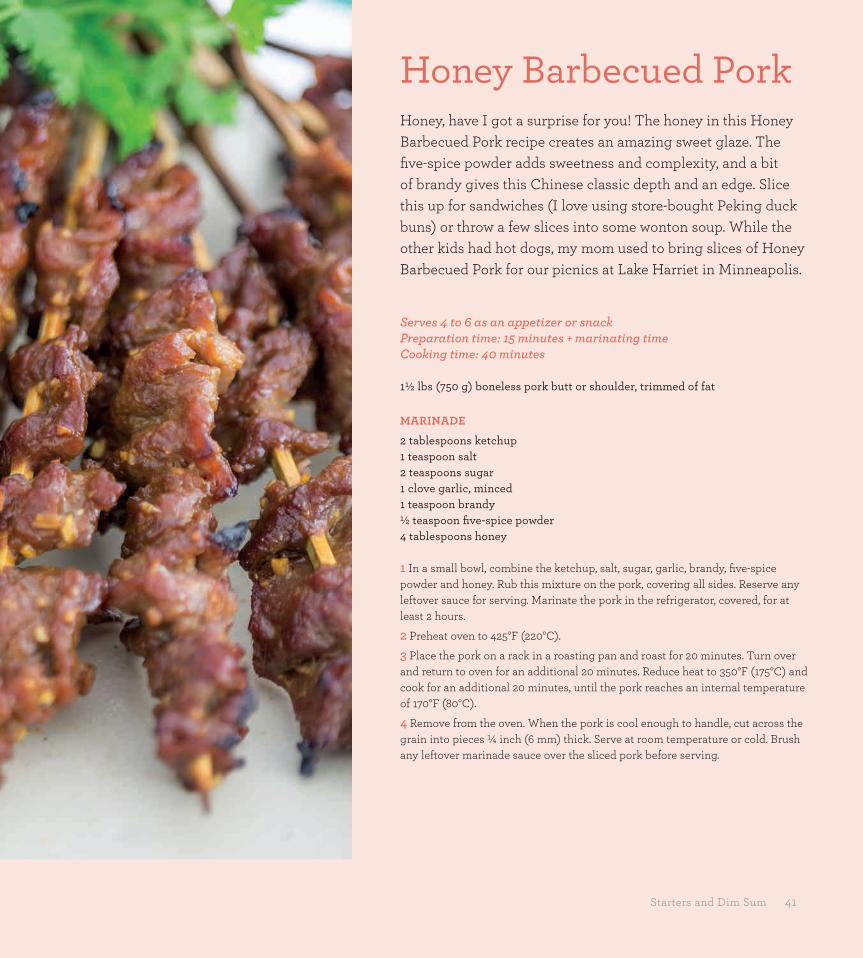
Starters and Dim Sum 41
Serves 4 to 6 as an appetizer or snackPreparation time: 15 minutes + marinating timeCooking time: 40 minutes
1½ lbs (750 g) boneless pork butt or shoulder, trimmed of fat
MARINADE
2 tablespoons ketchup1 teaspoon salt2 teaspoons sugar1 clove garlic, minced1 teaspoon brandy½ teaspoon fi ve-spice powder4 tablespoons honey
1 In a small bowl, combine the ketchup, salt, sugar, garlic, brandy, fi ve-spice powder and honey. Rub this mixture on the pork, covering all sides. Reserve any leftover sauce for serving. Marinate the pork in the refrigerator, covered, for at least 2 hours.
2 Preheat oven to 425°F (220°C).
3 Place the pork on a rack in a roasting pan and roast for 20 minutes. Turn over and return to oven for an additional 20 minutes. Reduce heat to 350°F (175°C) and cook for an additional 20 minutes, until the pork reaches an internal temperature of 170°F (80°C).
4 Remove from the oven. When the pork is cool enough to handle, cut across the grain into pieces ¼ inch (6 mm) thick. Serve at room temperature or cold. Brush any leftover marinade sauce over the sliced pork before serving.
Honey Barbecued Pork Honey, have I got a surprise for you! The honey in this Honey Barbecued Pork recipe creates an amazing sweet glaze. The fi ve-spice powder adds sweetness and complexity, and a bit of brandy gives this Chinese classic depth and an edge. Slice this up for sandwiches (I love using store-bought Peking duck buns) or throw a few slices into some wonton soup. While the other kids had hot dogs, my mom used to bring slices of Honey Barbecued Pork for our picnics at Lake Harriet in Minneapolis.
Starters and Dim Sum 41
ECC_full layout.indd 41ECC_full layout.indd 41 30/9/15 7:36 PM30/9/15 7:36 PM

42 KATIE CHIN’S EVERYDAY CHINESE COOKBOOK
Serves 6 to 8 as an appetizer or snackPreparation time: 45 minutesCooking time: 10 minutes
SRIRACHA-MAYO SAUCE
½ cup (120 g) mayonnaise 1 tablespoon Sriracha chili sauce½ teaspoon freshly squeezed lime juice
SOY-BALSAMIC SAUCE
2 tablespoons soy sauce 2 tablespoons balsamic vinegar 1 teaspoon green onion (scallion),
fi nely chopped
HOISIN-PEANUT SAUCE
½ cup (125 ml) hoisin sauce, homemade (page 25) or store-bought
2 tablespoons smooth peanut butter 2 tablespoons water 1 tablespoon rice vinegar or white vinegar Crushed roasted peanuts for garnish
2 tablespoons fl our2 tablespoons all-purpose cornstarch1 teaspoon fi ve-spice powder½ teaspoon salt8 oz (225 g) fi rm tofu, drained, patted dry
and cut into cubesOil for deep-frying
1 Make the Sriracha-Mayo Sauce: Mix the mayonnaise, Sriracha and lime juice together in a small bowl until blended. Set aside.
2 Make the Soy-Balsamic Sauce: Mix the soy sauce and balsamic vinegar in a small bowl until blended and garnish with green onion. Set aside.
3 Make the Hoisin-Peanut Sauce: Bring the hoisin sauce, peanut butter, water and vinegar to a boil in a saucepan over moderately high heat. Immediately remove from the heat and transfer to a small serving bowl. Garnish with crushed peanuts. Set aside.
4 Combine the fl our, cornstarch, fi ve-spice powder and salt in a bowl. Toss the tofu pieces in the fl our mixture.
5 In a large wok or deep skillet, heat 2 to 3 inches (5 to 7.5 cm) of the oil to 350°F (175°C). Fry the tofu for 3 to 4 minutes. Turn and fry for another 3 to 4 minutes, until golden brown all over. Drain on a sheet pan lined with paper towels. Transfer to a platter and serve immediately with dipping sauces.
Tofu Bites with Three Sauces Three is a luckier number in Chinese than four. Four is unlucky, which is why you typically never see four items in a steamer basket at a dim sum restaurant (check this out the next time you go for dim sum). When I was developing this recipe a few months ago, I started with four sauces, but then I heard my mother’s voice in my head about the number four: “Don’t rent that #4 apartment!” I hope these crispy tofu nuggets—crunchy on the outside, but soft and creamy on the inside—bring you luck with their three delicious dipping sauces. The Sriracha Mayo delivers a creamy heat, while the Soy Balsamic is sweet-tart and salty, and the Hoisin Peanut is rich and nutty. This appetizer is also a vegetarian delight!
42 KATIE CHIN’S EVERYDAY CHINESE COOKBOOK
ECC_full layout.indd 42ECC_full layout.indd 42 30/9/15 7:36 PM30/9/15 7:36 PM
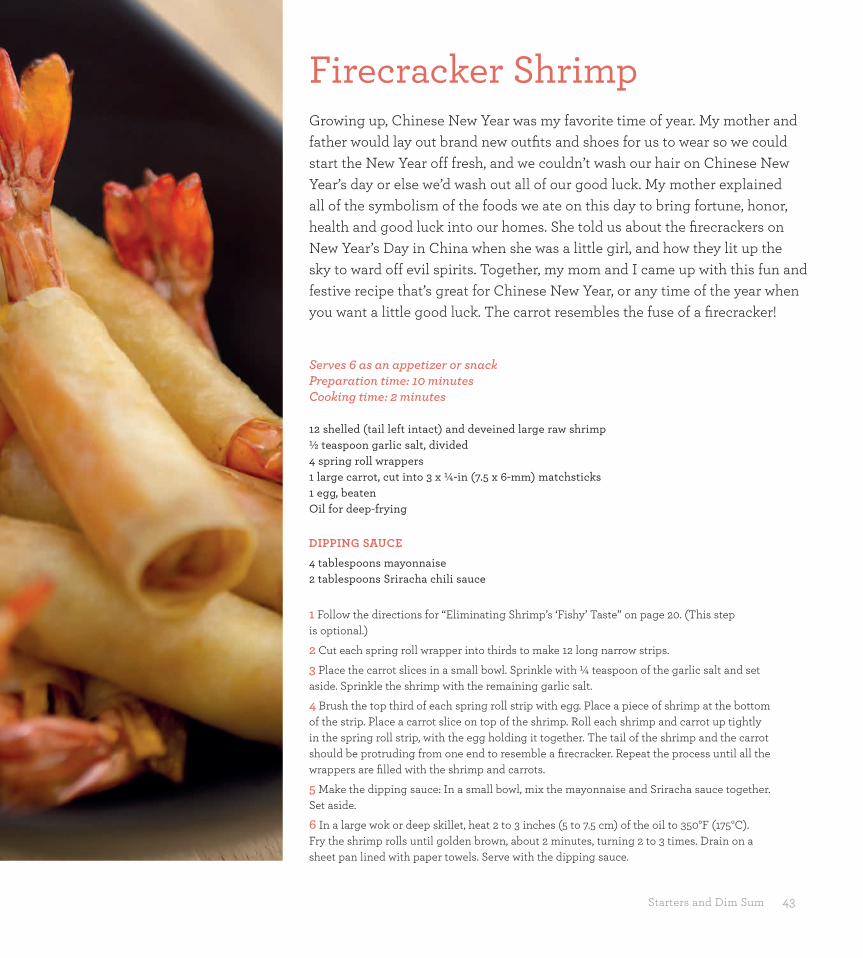
Starters and Dim Sum 43
Firecracker Shrimp Growing up, Chinese New Year was my favorite time of year. My mother and father would lay out brand new outfi ts and shoes for us to wear so we could start the New Year off fresh, and we couldn’t wash our hair on Chinese New Year’s day or else we’d wash out all of our good luck. My mother explained all of the symbolism of the foods we ate on this day to bring fortune, honor, health and good luck into our homes. She told us about the fi recrackers on New Year’s Day in China when she was a little girl, and how they lit up the sky to ward off evil spirits. Together, my mom and I came up with this fun and festive recipe that’s great for Chinese New Year, or any time of the year when you want a little good luck. The carrot resembles the fuse of a fi recracker!
Serves 6 as an appetizer or snackPreparation time: 10 minutesCooking time: 2 minutes
12 shelled (tail left intact) and deveined large raw shrimp½ teaspoon garlic salt, divided 4 spring roll wrappers 1 large carrot, cut into 3 x ¼-in (7.5 x 6-mm) matchsticks1 egg, beaten Oil for deep-frying
DIPPING SAUCE
4 tablespoons mayonnaise 2 tablespoons Sriracha chili sauce
1 Follow the directions for “Eliminating Shrimp’s ‘Fishy’ Taste” on page 20. (This step is optional.)
2 Cut each spring roll wrapper into thirds to make 12 long narrow strips.
3 Place the carrot slices in a small bowl. Sprinkle with ¼ teaspoon of the garlic salt and set aside. Sprinkle the shrimp with the remaining garlic salt.
4 Brush the top third of each spring roll strip with egg. Place a piece of shrimp at the bottom of the strip. Place a carrot slice on top of the shrimp. Roll each shrimp and carrot up tightly in the spring roll strip, with the egg holding it together. The tail of the shrimp and the carrot should be protruding from one end to resemble a fi recracker. Repeat the process until all the wrappers are fi lled with the shrimp and carrots.
5 Make the dipping sauce: In a small bowl, mix the mayonnaise and Sriracha sauce together. Set aside.
6 In a large wok or deep skillet, heat 2 to 3 inches (5 to 7.5 cm) of the oil to 350°F (175°C). Fry the shrimp rolls until golden brown, about 2 minutes, turning 2 to 3 times. Drain on a sheet pan lined with paper towels. Serve with the dipping sauce.
ECC_full layout.indd 43ECC_full layout.indd 43 30/9/15 7:36 PM30/9/15 7:36 PM

44 KATIE CHIN’S EVERYDAY CHINESE COOKBOOK
Crab Wontons No one knows the exact origin of these Crab Wontons, otherwise known as Crab Rangoon or Crab Puffs, but they were popularized by Polynesian restaurants. All I know is that when my mother introduced these pillows of creamy crabmeat heaven in her restaurants, people went wild—so wild, in fact, that she eventually took out the crab and just made them with cream cheese!
Serves 6 to 8 as an appetizer or snack
Preparation time: 20 minutesCooking time: 3 to 4 minutes
8 oz (250 g) shelled and deveined medium-size shrimp, fi nely chopped
4 oz (100 g) ground chicken or pork 6 canned water chestnuts, fi nely
chopped 4 tablespoons fi nely chopped green
onion (scallion), white and green parts
1 teaspoon all-purpose cornstarch 1 teaspoon salt ¹⁄8 teaspoon dark sesame oil Dash of white pepper 20 Wonton wrappers 1 large egg, slightly beaten Oil for frying Sweet-and-Sour Sauce (page 24)
1 Follow the directions for “Eliminating Shrimp’s ‘Fishy’ Taste” on page 20. (This step is optional).
2 In a medium bowl, combine the shrimp, chicken or pork, water chestnuts, green onion, cornstarch, salt, sesame oil and white pepper.
3 Lay a wonton wrapper on a clean work surface (cover remaining wrappers with plastic wrap to keep them pliable). Place ½ teaspoon of the shrimp mixture in the center. Fold the wonton wrapper over the fi lling to form a triangle, then turn the top of the triangle over to meet the folded edge. Turn over; moisten one corner with beaten egg. Overlap the two corners so that the moistened side is between them and press together fi rmly. Repeat with the remaining wrappers.
4 In a large wok or deep skillet, heat 2 to 3 inches (5 to 7.5 cm) of the oil to 350°F (175°C). Fry 8 to 10 wontons at a time, turning 2 or 3 times, until golden brown, about 3 minutes. Drain on a sheet pan lined with paper towels. Serve immediately, accompanied by Sweet-and-Sour Sauce.
COOK’S NOTEYou can fi nd wonton wrappers at an Asian market, as well as in the produce or fresh pasta section of most large grocery stores.
Crispy Wontons When my mother began making a name for herself as a caterer in the late 1970s, she met Sean Connery, who became an investor in her fi rst restaurant. Sean brought Robert Redford to a party she was catering. I was a server at the party (my mother believed in Chinese child labor) and in all my preteen awkwardness and braces, I walked up to him with a platter of my mother’s delicious wontons. Knees buckling, I said, “Would you like a Chinese wonton, Mr. Redford?” He couldn’t have been kinder or handsomer. After biting into one of my mother’s tender, juicy wontons fi lled with chicken and water chestnuts, he said, “Delish,” and gave me wink.
44 KATIE CHIN’S EVERYDAY CHINESE COOKBOOK
ECC_full layout.indd 44ECC_full layout.indd 44 30/9/15 7:36 PM30/9/15 7:36 PM
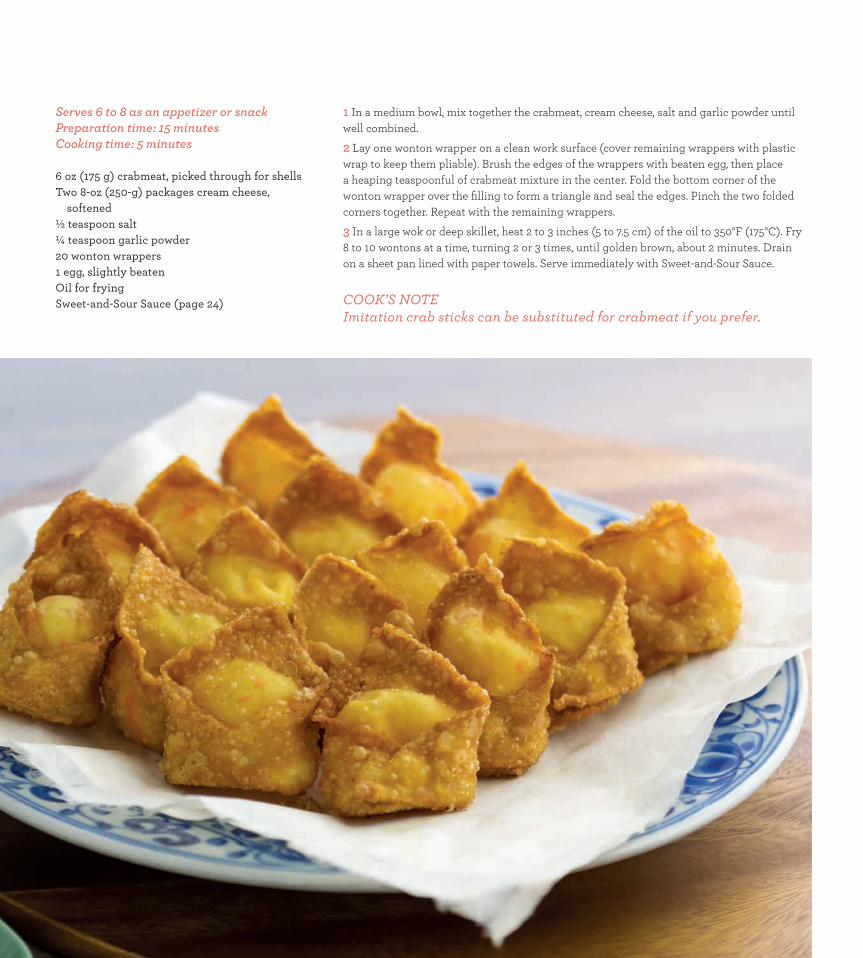
Starters and Dim Sum 45
Serves 6 to 8 as an appetizer or snackPreparation time: 15 minutesCooking time: 5 minutes
6 oz (175 g) crabmeat, picked through for shells Two 8-oz (250-g) packages cream cheese,
softened½ teaspoon salt¼ teaspoon garlic powder20 wonton wrappers 1 egg, slightly beatenOil for fryingSweet-and-Sour Sauce (page 24)
1 In a medium bowl, mix together the crabmeat, cream cheese, salt and garlic powder until well combined.
2 Lay one wonton wrapper on a clean work surface (cover remaining wrappers with plastic wrap to keep them pliable). Brush the edges of the wrappers with beaten egg, then place a heaping teaspoonful of crabmeat mixture in the center. Fold the bottom corner of the wonton wrapper over the fi lling to form a triangle and seal the edges. Pinch the two folded corners together. Repeat with the remaining wrappers.
3 In a large wok or deep skillet, heat 2 to 3 inches (5 to 7.5 cm) of the oil to 350°F (175°C). Fry 8 to 10 wontons at a time, turning 2 or 3 times, until golden brown, about 2 minutes. Drain on a sheet pan lined with paper towels. Serve immediately with Sweet-and-Sour Sauce.
COOK’S NOTE Imitation crab sticks can be substituted for crabmeat if you prefer.
ECC_full layout.indd 45ECC_full layout.indd 45 30/9/15 7:36 PM30/9/15 7:36 PM
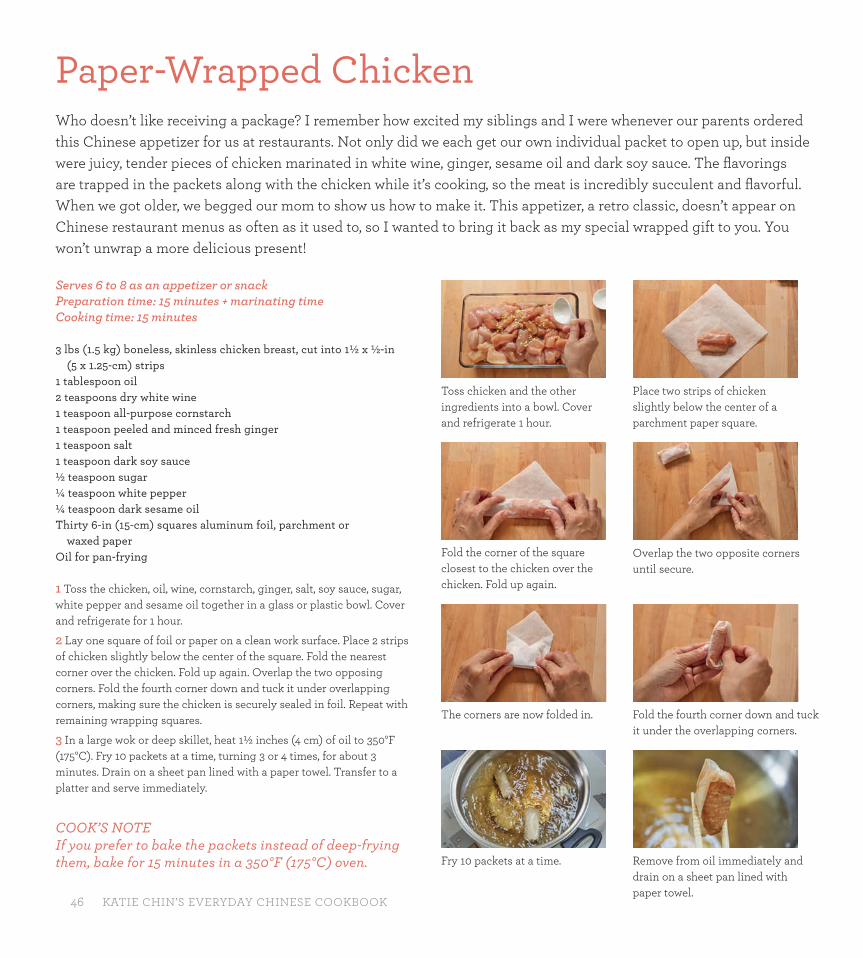
46 KATIE CHIN’S EVERYDAY CHINESE COOKBOOK
Serves 6 to 8 as an appetizer or snackPreparation time: 15 minutes + marinating timeCooking time: 15 minutes
3 lbs (1.5 kg) boneless, skinless chicken breast, cut into 1½ x ½-in (5 x 1.25-cm) strips
1 tablespoon oil2 teaspoons dry white wine1 teaspoon all-purpose cornstarch1 teaspoon peeled and minced fresh ginger1 teaspoon salt1 teaspoon dark soy sauce½ teaspoon sugar¼ teaspoon white pepper¼ teaspoon dark sesame oilThirty 6-in (15-cm) squares aluminum foil, parchment or
waxed paperOil for pan-frying
1 Toss the chicken, oil, wine, cornstarch, ginger, salt, soy sauce, sugar, white pepper and sesame oil together in a glass or plastic bowl. Cover and refrigerate for 1 hour.
2 Lay one square of foil or paper on a clean work surface. Place 2 strips of chicken slightly below the center of the square. Fold the nearest corner over the chicken. Fold up again. Overlap the two opposing corners. Fold the fourth corner down and tuck it under overlapping corners, making sure the chicken is securely sealed in foil. Repeat with remaining wrapping squares.
3 In a large wok or deep skillet, heat 1½ inches (4 cm) of oil to 350°F (175°C). Fry 10 packets at a time, turning 3 or 4 times, for about 3 minutes. Drain on a sheet pan lined with a paper towel. Transfer to a platter and serve immediately.
COOK’S NOTEIf you prefer to bake the packets instead of deep-frying them, bake for 15 minutes in a 350°F (175°C) oven.
Paper-Wrapped Chicken Who doesn’t like receiving a package? I remember how excited my siblings and I were whenever our parents ordered this Chinese appetizer for us at restaurants. Not only did we each get our own individual packet to open up, but inside were juicy, tender pieces of chicken marinated in white wine, ginger, sesame oil and dark soy sauce. The fl avorings are trapped in the packets along with the chicken while it’s cooking, so the meat is incredibly succulent and fl avorful. When we got older, we begged our mom to show us how to make it. This appetizer, a retro classic, doesn’t appear on Chinese restaurant menus as often as it used to, so I wanted to bring it back as my special wrapped gift to you. You won’t unwrap a more delicious present!
Toss chicken and the other ingredients into a bowl. Cover and refrigerate 1 hour.
Fold the corner of the square closest to the chicken over the chicken. Fold up again.
The corners are now folded in.
Fry 10 packets at a time.
Place two strips of chicken slightly below the center of a parchment paper square.
Overlap the two opposite corners until secure.
Fold the fourth corner down and tuck it under the overlapping corners.
Remove from oil immediately and drain on a sheet pan lined with paper towel.
ECC_full layout.indd 46ECC_full layout.indd 46 30/9/15 7:36 PM30/9/15 7:36 PM
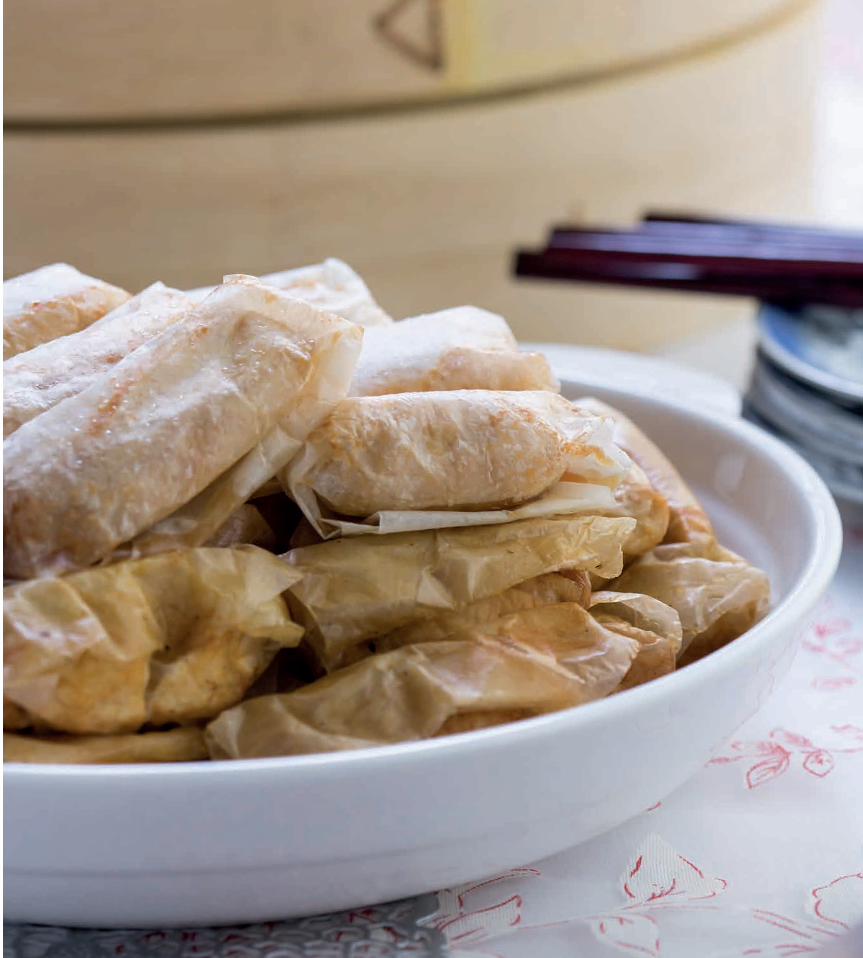
Starters and Dim Sum 47
ECC_full layout.indd 47ECC_full layout.indd 47 30/9/15 7:37 PM30/9/15 7:37 PM
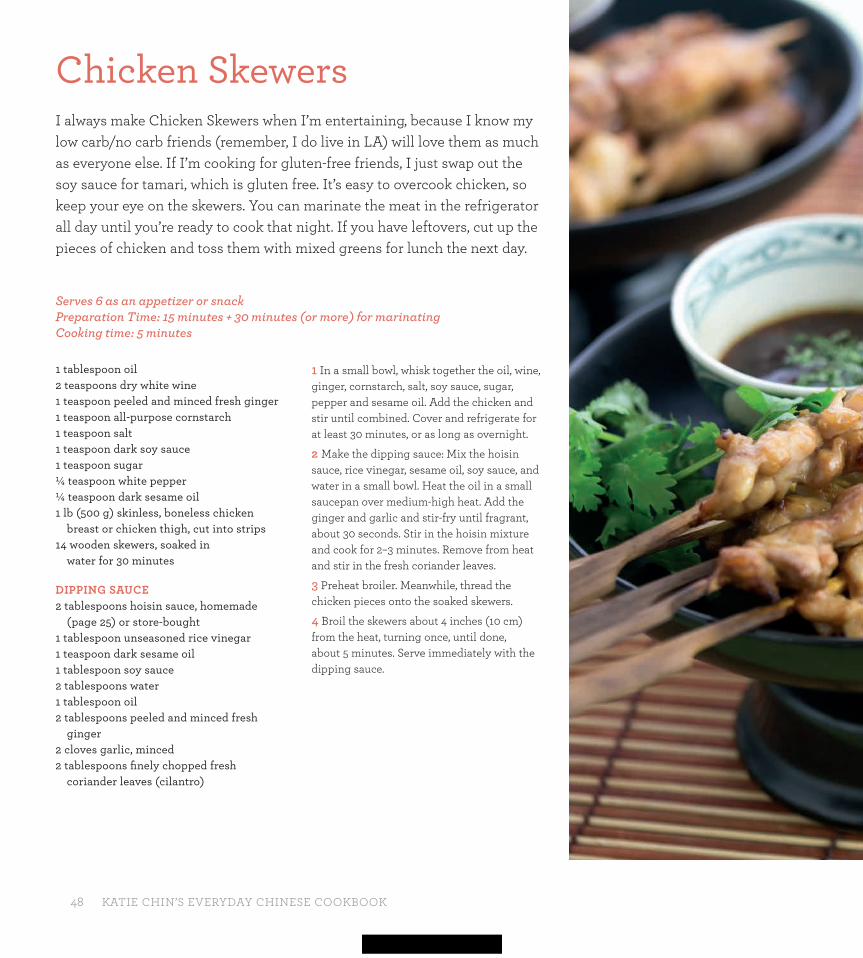
48 KATIE CHIN’S EVERYDAY CHINESE COOKBOOK
Chicken Skewers I always make Chicken Skewers when I’m entertaining, because I know my low carb/no carb friends (remember, I do live in LA) will love them as much as everyone else. If I’m cooking for gluten-free friends, I just swap out the soy sauce for tamari, which is gluten free. It’s easy to overcook chicken, so keep your eye on the skewers. You can marinate the meat in the refrigerator all day until you’re ready to cook that night. If you have leftovers, cut up the pieces of chicken and toss them with mixed greens for lunch the next day.
1 tablespoon oil2 teaspoons dry white wine1 teaspoon peeled and minced fresh ginger1 teaspoon all-purpose cornstarch1 teaspoon salt1 teaspoon dark soy sauce1 teaspoon sugar¼ teaspoon white pepper¼ teaspoon dark sesame oil1 lb (500 g) skinless, boneless chicken
breast or chicken thigh, cut into strips14 wooden skewers, soaked in
water for 30 minutes
DIPPING SAUCE2 tablespoons hoisin sauce, homemade
(page 25) or store-bought1 tablespoon unseasoned rice vinegar 1 teaspoon dark sesame oil 1 tablespoon soy sauce2 tablespoons water1 tablespoon oil2 tablespoons peeled and minced fresh
ginger2 cloves garlic, minced 2 tablespoons fi nely chopped fresh
coriander leaves (cilantro)
1 In a small bowl, whisk together the oil, wine, ginger, cornstarch, salt, soy sauce, sugar, pepper and sesame oil. Add the chicken and stir until combined. Cover and refrigerate for at least 30 minutes, or as long as overnight.
2 Make the dipping sauce: Mix the hoisin sauce, rice vinegar, sesame oil, soy sauce, and water in a small bowl. Heat the oil in a small saucepan over medium-high heat. Add the ginger and garlic and stir-fry until fragrant, about 30 seconds. Stir in the hoisin mixture and cook for 2–3 minutes. Remove from heat and stir in the fresh coriander leaves.
3 Preheat broiler. Meanwhile, thread the chicken pieces onto the soaked skewers.
4 Broil the skewers about 4 inches (10 cm) from the heat, turning once, until done, about 5 minutes. Serve immediately with the dipping sauce.
Serves 6 as an appetizer or snackPreparation Time: 15 minutes + 30 minutes (or more) for marinatingCooking time: 5 minutes
ECC_full layout.indd 48ECC_full layout.indd 48 2/10/15 11:52 AM2/10/15 11:52 AM

Starters and Dim Sum 49
Serves 8 to 10 as an appetizer or snackPreparation time: 20 minutes
8 oz (250 g, about 1½ cups) frozen shelled edamame (green soybeans) 2 tablespoons sesame seed paste or 4 tablespoons tahini 4 tablespoons water ½ teaspoon freshly grated lemon zest 3 tablespoons freshly squeezed lemon juice 1 clove garlic, smashed ¾ teaspoon kosher salt ½ teaspoon ground cumin ¼ teaspoon ground coriander 3 tablespoons extra-virgin olive oil
1 Cook the edamame according to package directions. Drain and rinse.
2 In a food processor, purée the edamame, sesame seed paste, water, lemon zest and juice, garlic, salt, cumin and coriander until smooth. With the motor running, slowly drizzle in the olive oil and mix until blended. Serve immediately with wonton chips, pita chips and cut up veggies.
Edamame Hummus In the midst of running our catering business together, my mother announced she was going to Europe with a friend for three months. I was terrifi ed at the prospect of having to do all of the cooking by myself. I didn’t think I could handle it. As a savvy parent of fi ve, though, my mom knew leaving was the only way I’d learn to do it myself. Left to my own devices (namely my Cuisinart) and with a little trial and error, I eventually fi gured things out on my own. I even developed some new recipes for our catering menu, like this Edamame Hummus recipe, which uses edamame (fresh green soybeans) instead of garbanzo beans. It’s refreshing, bright and packed with soy protein. Served on a wonton chip, it’ll be a huge hit at any party.
Starters and Dim Sum 49
ECC_full layout.indd 49ECC_full layout.indd 49 30/9/15 7:37 PM30/9/15 7:37 PM
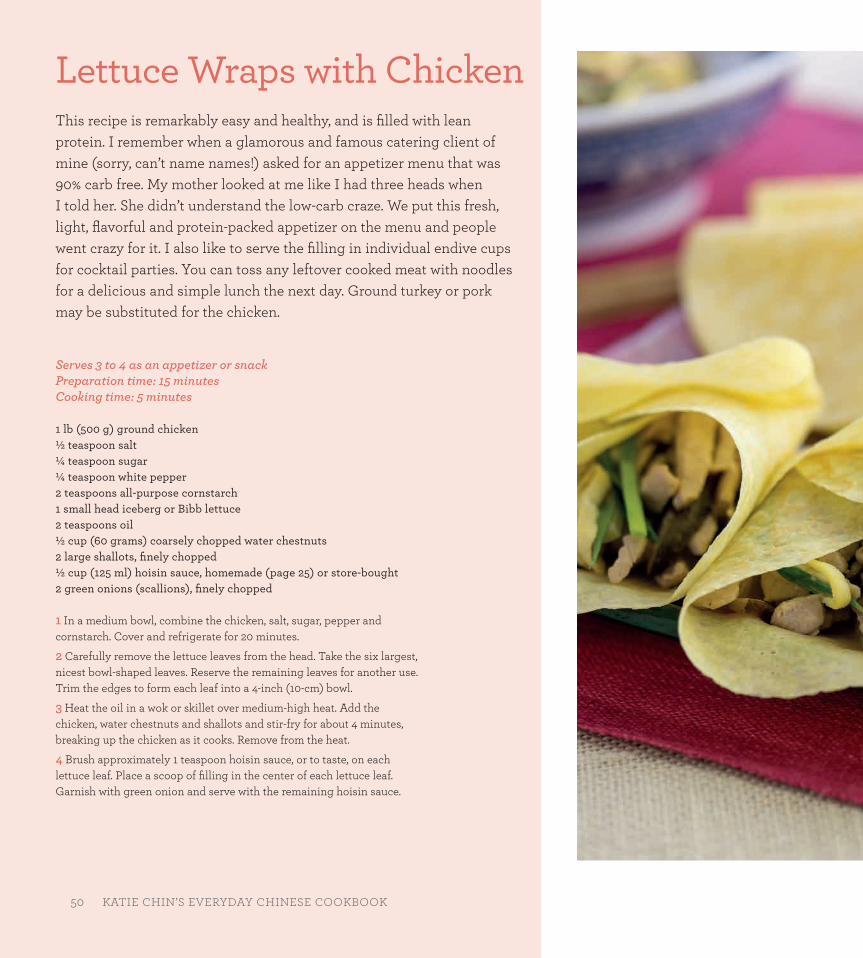
50 KATIE CHIN’S EVERYDAY CHINESE COOKBOOK
Serves 3 to 4 as an appetizer or snackPreparation time: 15 minutesCooking time: 5 minutes
1 lb (500 g) ground chicken½ teaspoon salt¼ teaspoon sugar¼ teaspoon white pepper2 teaspoons all-purpose cornstarch1 small head iceberg or Bibb lettuce2 teaspoons oil½ cup (60 grams) coarsely chopped water chestnuts2 large shallots, fi nely chopped½ cup (125 ml) hoisin sauce, homemade (page 25) or store-bought2 green onions (scallions), fi nely chopped
1 In a medium bowl, combine the chicken, salt, sugar, pepper and cornstarch. Cover and refrigerate for 20 minutes.
2 Carefully remove the lettuce leaves from the head. Take the six largest, nicest bowl-shaped leaves. Reserve the remaining leaves for another use. Trim the edges to form each leaf into a 4-inch (10-cm) bowl.
3 Heat the oil in a wok or skillet over medium-high heat. Add the chicken, water chestnuts and shallots and stir-fry for about 4 minutes, breaking up the chicken as it cooks. Remove from the heat.
4 Brush approximately 1 teaspoon hoisin sauce, or to taste, on each lettuce leaf. Place a scoop of fi lling in the center of each lettuce leaf. Garnish with green onion and serve with the remaining hoisin sauce.
Lettuce Wraps with Chicken This recipe is remarkably easy and healthy, and is fi lled with lean protein. I remember when a glamorous and famous catering client of mine (sorry, can’t name names!) asked for an appetizer menu that was 90% carb free. My mother looked at me like I had three heads when I told her. She didn’t understand the low-carb craze. We put this fresh, light, fl avorful and protein-packed appetizer on the menu and people went crazy for it. I also like to serve the fi lling in individual endive cups for cocktail parties. You can toss any leftover cooked meat with noodles for a delicious and simple lunch the next day. Ground turkey or pork may be substituted for the chicken.
50 KATIE CHIN’S EVERYDAY CHINESE COOKBOOK
ECC_full layout.indd 50ECC_full layout.indd 50 30/9/15 7:37 PM30/9/15 7:37 PM
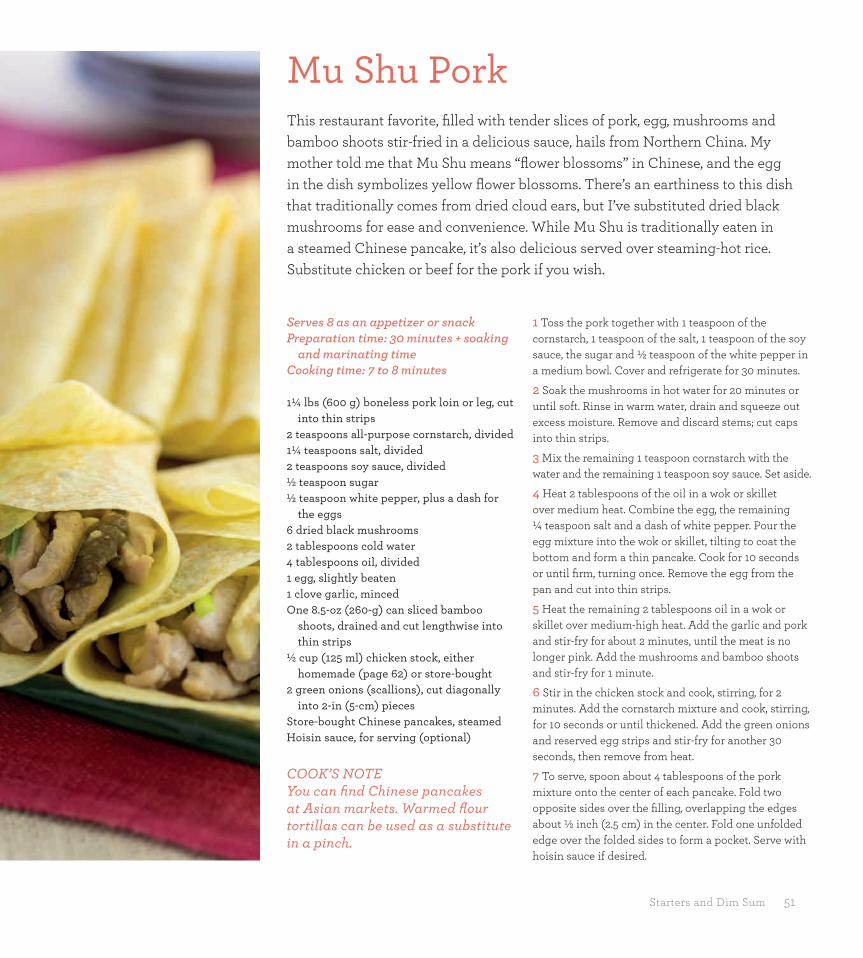
Starters and Dim Sum 51
Serves 8 as an appetizer or snackPreparation time: 30 minutes + soaking
and marinating timeCooking time: 7 to 8 minutes
1¼ lbs (600 g) boneless pork loin or leg, cut into thin strips
2 teaspoons all-purpose cornstarch, divided1¼ teaspoons salt, divided2 teaspoons soy sauce, divided½ teaspoon sugar½ teaspoon white pepper, plus a dash for
the eggs6 dried black mushrooms2 tablespoons cold water4 tablespoons oil, divided 1 egg, slightly beaten1 clove garlic, minced One 8.5-oz (260-g) can sliced bamboo
shoots, drained and cut lengthwise into thin strips
½ cup (125 ml) chicken stock, either homemade (page 62) or store-bought
2 green onions (scallions), cut diagonally into 2-in (5-cm) pieces
Store-bought Chinese pancakes, steamedHoisin sauce, for serving (optional)
COOK’S NOTEYou can fi nd Chinese pancakes at Asian markets. Warmed fl our tortillas can be used as a substitute in a pinch.
1 Toss the pork together with 1 teaspoon of the cornstarch, 1 teaspoon of the salt, 1 teaspoon of the soy sauce, the sugar and ½ teaspoon of the white pepper in a medium bowl. Cover and refrigerate for 30 minutes.
2 Soak the mushrooms in hot water for 20 minutes or until soft. Rinse in warm water, drain and squeeze out excess moisture. Remove and discard stems; cut caps into thin strips.
3 Mix the remaining 1 teaspoon cornstarch with the water and the remaining 1 teaspoon soy sauce. Set aside.
4 Heat 2 tablespoons of the oil in a wok or skillet over medium heat. Combine the egg, the remaining ¼ teaspoon salt and a dash of white pepper. Pour the egg mixture into the wok or skillet, tilting to coat the bottom and form a thin pancake. Cook for 10 seconds or until fi rm, turning once. Remove the egg from the pan and cut into thin strips.
5 Heat the remaining 2 tablespoons oil in a wok or skillet over medium-high heat. Add the garlic and pork and stir-fry for about 2 minutes, until the meat is no longer pink. Add the mushrooms and bamboo shoots and stir-fry for 1 minute.
6 Stir in the chicken stock and cook, stirring, for 2 minutes. Add the cornstarch mixture and cook, stirring, for 10 seconds or until thickened. Add the green onions and reserved egg strips and stir-fry for another 30 seconds, then remove from heat.
7 To serve, spoon about 4 tablespoons of the pork mixture onto the center of each pancake. Fold two opposite sides over the fi lling, overlapping the edges about ½ inch (2.5 cm) in the center. Fold one unfolded edge over the folded sides to form a pocket. Serve with hoisin sauce if desired.
Mu Shu Pork This restaurant favorite, fi lled with tender slices of pork, egg, mushrooms and bamboo shoots stir-fried in a delicious sauce, hails from Northern China. My mother told me that Mu Shu means “fl ower blossoms” in Chinese, and the egg in the dish symbolizes yellow fl ower blossoms. There’s an earthiness to this dish that traditionally comes from dried cloud ears, but I’ve substituted dried black mushrooms for ease and convenience. While Mu Shu is traditionally eaten in a steamed Chinese pancake, it’s also delicious served over steaming-hot rice. Substitute chicken or beef for the pork if you wish.
ECC_full layout.indd 51ECC_full layout.indd 51 30/9/15 7:37 PM30/9/15 7:37 PM
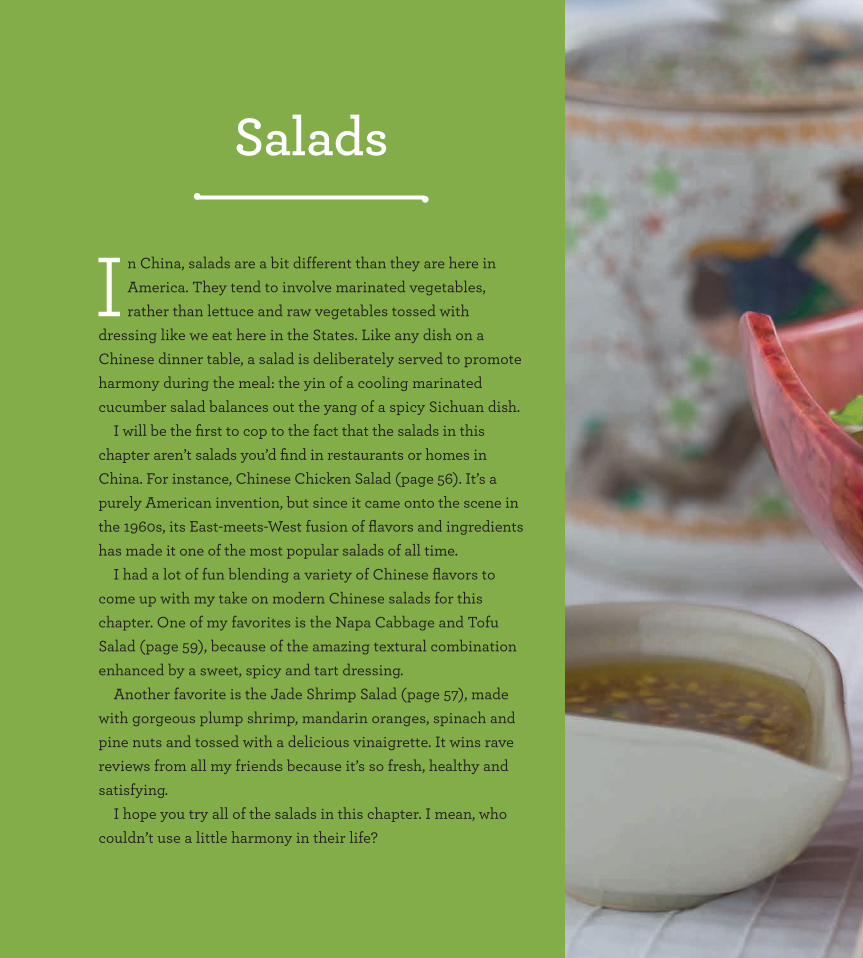
52 KATIE CHIN’S EVERYDAY CHINESE COOKBOOK
In China, salads are a bit different than they are here in America. They tend to involve marinated vegetables, rather than lettuce and raw vegetables tossed with
dressing like we eat here in the States. Like any dish on a Chinese dinner table, a salad is deliberately served to promote harmony during the meal: the yin of a cooling marinated cucumber salad balances out the yang of a spicy Sichuan dish.
I will be the fi rst to cop to the fact that the salads in this chapter aren’t salads you’d fi nd in restaurants or homes in China. For instance, Chinese Chicken Salad (page 56). It’s a purely American invention, but since it came onto the scene in the 1960s, its East-meets-West fusion of fl avors and ingredients has made it one of the most popular salads of all time.
I had a lot of fun blending a variety of Chinese fl avors to come up with my take on modern Chinese salads for this chapter. One of my favorites is the Napa Cabbage and Tofu Salad (page 59), because of the amazing textural combination enhanced by a sweet, spicy and tart dressing.
Another favorite is the Jade Shrimp Salad (page 57), made with gorgeous plump shrimp, mandarin oranges, spinach and pine nuts and tossed with a delicious vinaigrette. It wins rave reviews from all my friends because it’s so fresh, healthy and satisfying.
I hope you try all of the salads in this chapter. I mean, who couldn’t use a little harmony in their life?
Salads
ECC_full layout.indd 52ECC_full layout.indd 52 30/9/15 7:37 PM30/9/15 7:37 PM
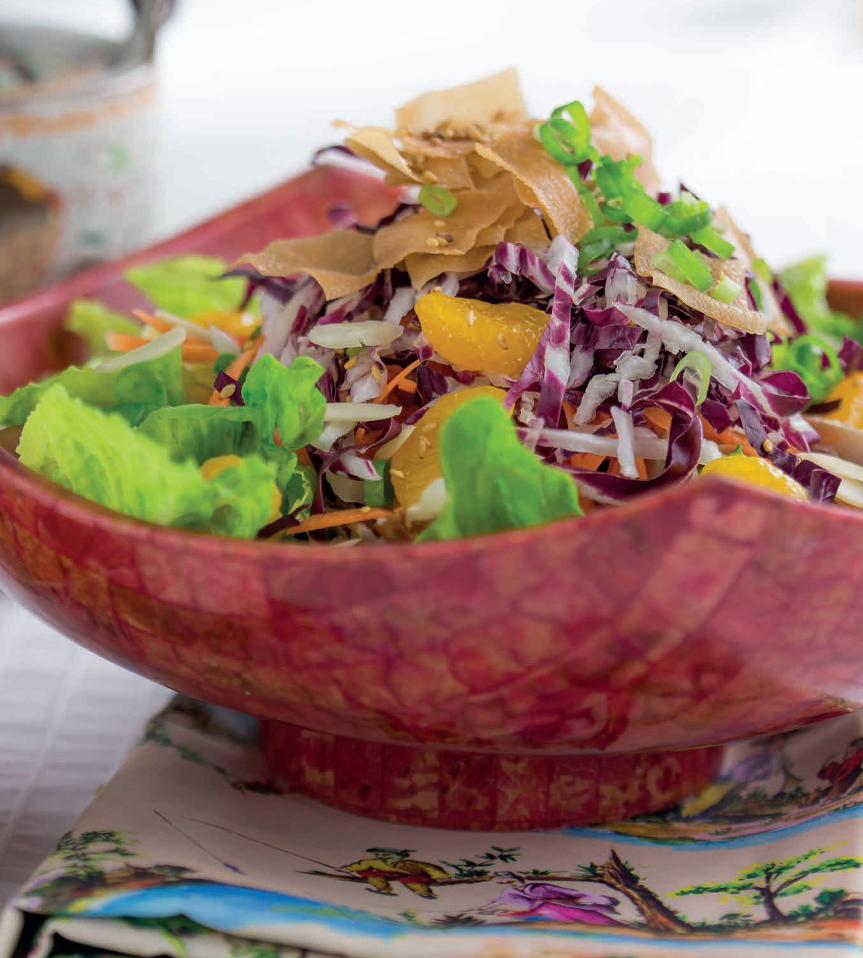
The Wisdom of My Mother’s Kitchen 53
ECC_full layout.indd 53ECC_full layout.indd 53 30/9/15 7:37 PM30/9/15 7:37 PM

54 KATIE CHIN’S EVERYDAY CHINESE COOKBOOK
Serves 4 as part of a multi-course meal or for lunchPreparation time: 25 minutes
DRESSING4 tablespoons freshly squeezed lime juice 1 tablespoon honey 1 tablespoon soy sauce 1 teaspoon peeled and minced fresh ginger ½ teaspoon chili garlic sauce or sambal oelek 1 tablespoon dark sesame oil
12 oz (350 g) lump crabmeat, picked over for shells 1 cup (165 g) diced fresh mango ½ cup (50 g) peeled and seeded diced cucumber ½ cup (45 g) diced red bell pepper 4 cups (350 g) mixed baby greens
1 In a small bowl, whisk together all dressing ingredients except the sesame oil. Lastly, gradually whisk in the sesame oil until well blended.
2 In a large bowl, combine the crab, mango, cucumber, bell pepper and baby greens. Add the dressing and toss to combine. Serve immediately.
Crab Mango SaladSeafood is abundant is Guangzhou, China, where my family is from. I felt inspired to create this salad after a recent visit. Healthy, colorful and refreshing, this salad combines juicy ripe mango, lump crabmeat, cucumbers, red bell peppers and mixed baby greens in a bright lime-ginger dressing. I just served this at a ladies’ lunch and everyone went wild for it. It’s not fussy, yet it is luxurious—and that’s how we all deserve to feel at times, right? Pair it with champagne and your friends will fl ip.
ECC_full layout.indd 54ECC_full layout.indd 54 1/10/15 9:57 AM1/10/15 9:57 AM
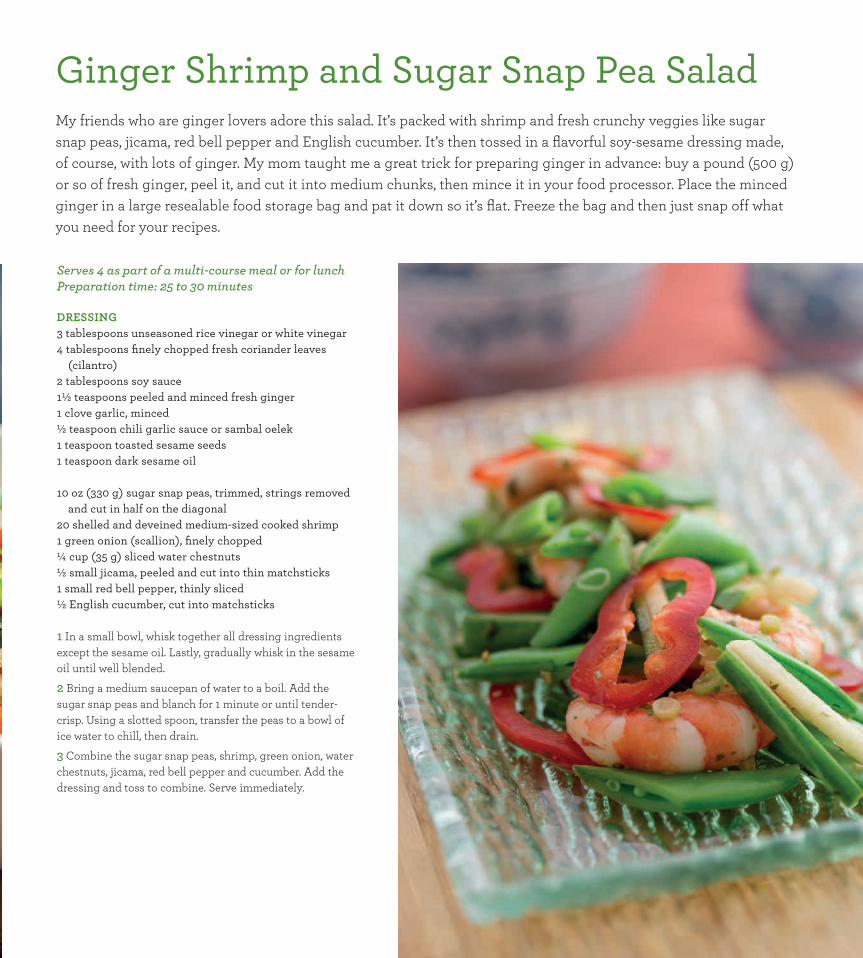
The Wisdom of My Mother’s Kitchen 55
Ginger Shrimp and Sugar Snap Pea SaladMy friends who are ginger lovers adore this salad. It’s packed with shrimp and fresh crunchy veggies like sugar snap peas, jicama, red bell pepper and English cucumber. It’s then tossed in a fl avorful soy-sesame dressing made, of course, with lots of ginger. My mom taught me a great trick for preparing ginger in advance: buy a pound (500 g) or so of fresh ginger, peel it, and cut it into medium chunks, then mince it in your food processor. Place the minced ginger in a large resealable food storage bag and pat it down so it’s fl at. Freeze the bag and then just snap off what you need for your recipes.
Serves 4 as part of a multi-course meal or for lunchPreparation time: 25 to 30 minutes
DRESSING3 tablespoons unseasoned rice vinegar or white vinegar 4 tablespoons fi nely chopped fresh coriander leaves
(cilantro) 2 tablespoons soy sauce 1½ teaspoons peeled and minced fresh ginger 1 clove garlic, minced ½ teaspoon chili garlic sauce or sambal oelek 1 teaspoon toasted sesame seeds 1 teaspoon dark sesame oil 10 oz (330 g) sugar snap peas, trimmed, strings removed
and cut in half on the diagonal20 shelled and deveined medium-sized cooked shrimp 1 green onion (scallion), fi nely chopped ¼ cup (35 g) sliced water chestnuts ½ small jicama, peeled and cut into thin matchsticks 1 small red bell pepper, thinly sliced ½ English cucumber, cut into matchsticks 1 In a small bowl, whisk together all dressing ingredients except the sesame oil. Lastly, gradually whisk in the sesame oil until well blended.
2 Bring a medium saucepan of water to a boil. Add the sugar snap peas and blanch for 1 minute or until tender-crisp. Using a slotted spoon, transfer the peas to a bowl of ice water to chill, then drain.
3 Combine the sugar snap peas, shrimp, green onion, water chestnuts, jicama, red bell pepper and cucumber. Add the dressing and toss to combine. Serve immediately.
ECC_full layout.indd 55ECC_full layout.indd 55 30/9/15 7:37 PM30/9/15 7:37 PM
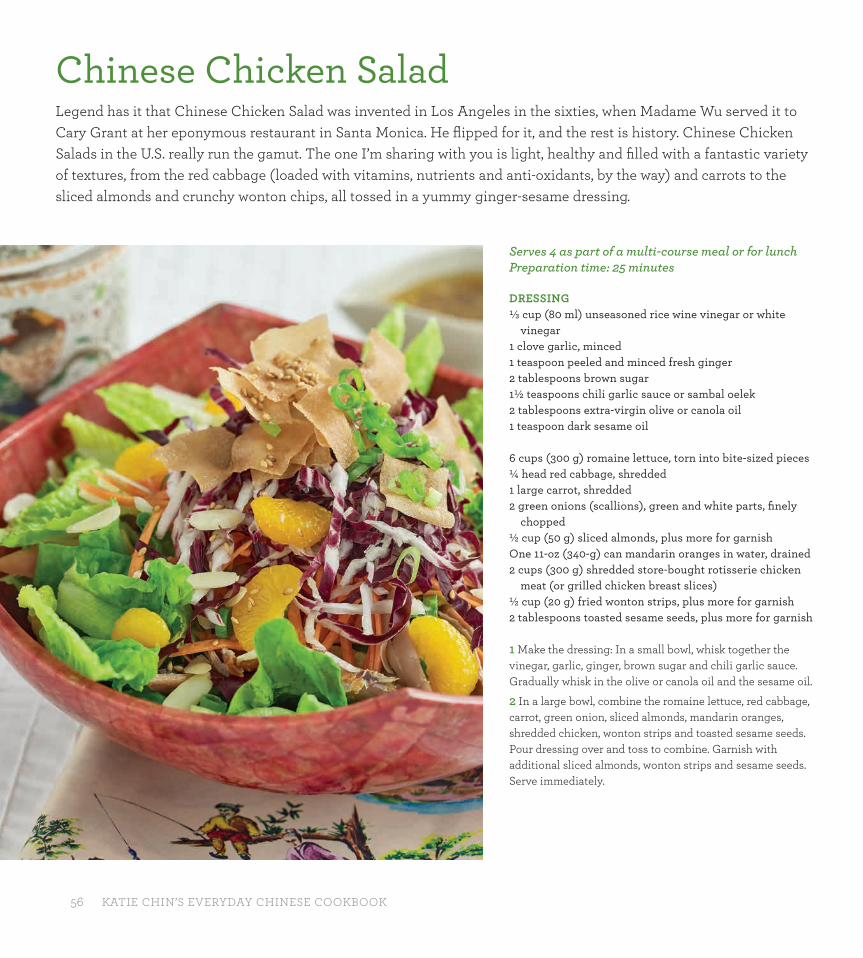
56 KATIE CHIN’S EVERYDAY CHINESE COOKBOOK
Chinese Chicken SaladLegend has it that Chinese Chicken Salad was invented in Los Angeles in the sixties, when Madame Wu served it to Cary Grant at her eponymous restaurant in Santa Monica. He fl ipped for it, and the rest is history. Chinese Chicken Salads in the U.S. really run the gamut. The one I’m sharing with you is light, healthy and fi lled with a fantastic variety of textures, from the red cabbage (loaded with vitamins, nutrients and anti-oxidants, by the way) and carrots to the sliced almonds and crunchy wonton chips, all tossed in a yummy ginger-sesame dressing.
Serves 4 as part of a multi-course meal or for lunchPreparation time: 25 minutes
DRESSING¹⁄³ cup (80 ml) unseasoned rice wine vinegar or white
vinegar1 clove garlic, minced 1 teaspoon peeled and minced fresh ginger2 tablespoons brown sugar1½ teaspoons chili garlic sauce or sambal oelek2 tablespoons extra-virgin olive or canola oil1 teaspoon dark sesame oil
6 cups (300 g) romaine lettuce, torn into bite-sized pieces¼ head red cabbage, shredded 1 large carrot, shredded 2 green onions (scallions), green and white parts, fi nely
chopped½ cup (50 g) sliced almonds, plus more for garnishOne 11-oz (340-g) can mandarin oranges in water, drained2 cups (300 g) shredded store-bought rotisserie chicken
meat (or grilled chicken breast slices)½ cup (20 g) fried wonton strips, plus more for garnish2 tablespoons toasted sesame seeds, plus more for garnish
1 Make the dressing: In a small bowl, whisk together the vinegar, garlic, ginger, brown sugar and chili garlic sauce. Gradually whisk in the olive or canola oil and the sesame oil.
2 In a large bowl, combine the romaine lettuce, red cabbage, carrot, green onion, sliced almonds, mandarin oranges, shredded chicken, wonton strips and toasted sesame seeds. Pour dressing over and toss to combine. Garnish with additional sliced almonds, wonton strips and sesame seeds. Serve immediately.
ECC_full layout.indd 56ECC_full layout.indd 56 30/9/15 7:37 PM30/9/15 7:37 PM
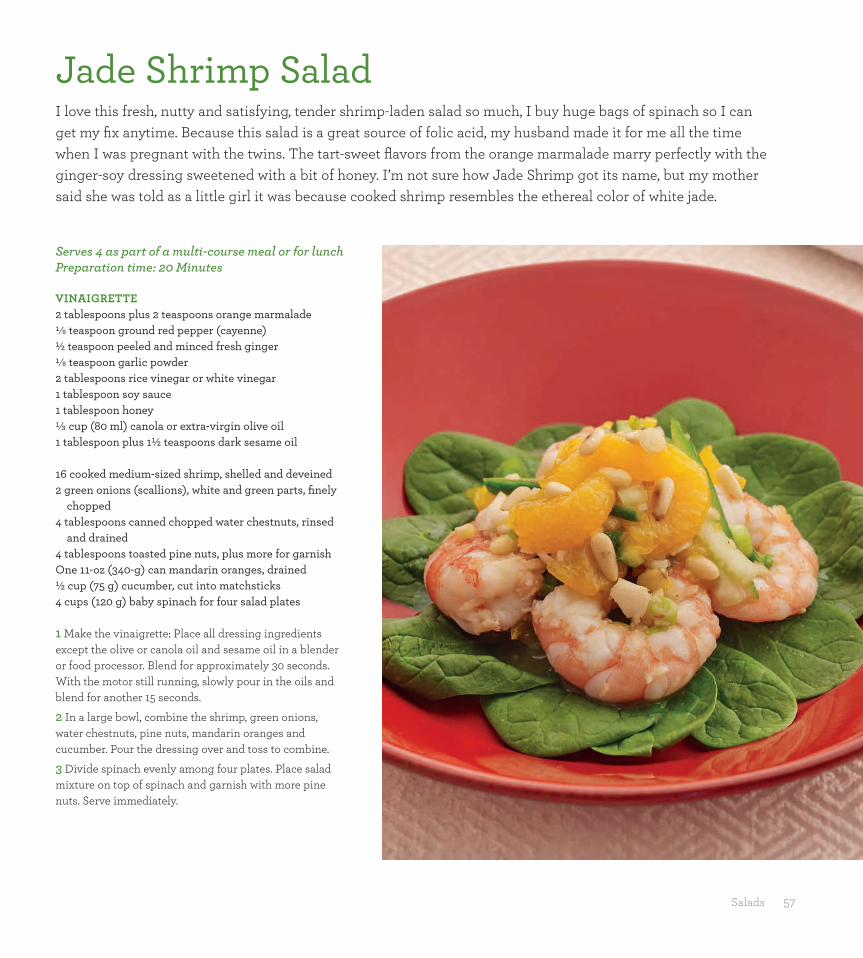
Salads 57
Serves 4 as part of a multi-course meal or for lunchPreparation time: 20 Minutes
VINAIGRETTE2 tablespoons plus 2 teaspoons orange marmalade¹⁄8 teaspoon ground red pepper (cayenne)½ teaspoon peeled and minced fresh ginger¹⁄8 teaspoon garlic powder2 tablespoons rice vinegar or white vinegar1 tablespoon soy sauce 1 tablespoon honey¹⁄³ cup (80 ml) canola or extra-virgin olive oil 1 tablespoon plus 1½ teaspoons dark sesame oil
16 cooked medium-sized shrimp, shelled and deveined2 green onions (scallions), white and green parts, fi nely
chopped4 tablespoons canned chopped water chestnuts, rinsed
and drained4 tablespoons toasted pine nuts, plus more for garnishOne 11-oz (340-g) can mandarin oranges, drained½ cup (75 g) cucumber, cut into matchsticks 4 cups (120 g) baby spinach for four salad plates
1 Make the vinaigrette: Place all dressing ingredients except the olive or canola oil and sesame oil in a blender or food processor. Blend for approximately 30 seconds. With the motor still running, slowly pour in the oils and blend for another 15 seconds.
2 In a large bowl, combine the shrimp, green onions, water chestnuts, pine nuts, mandarin oranges and cucumber. Pour the dressing over and toss to combine.
3 Divide spinach evenly among four plates. Place salad mixture on top of spinach and garnish with more pine nuts. Serve immediately.
Jade Shrimp SaladI love this fresh, nutty and satisfying, tender shrimp-laden salad so much, I buy huge bags of spinach so I can get my fi x anytime. Because this salad is a great source of folic acid, my husband made it for me all the time when I was pregnant with the twins. The tart-sweet fl avors from the orange marmalade marry perfectly with the ginger-soy dressing sweetened with a bit of honey. I’m not sure how Jade Shrimp got its name, but my mother said she was told as a little girl it was because cooked shrimp resembles the ethereal color of white jade.
ECC_full layout.indd 57ECC_full layout.indd 57 30/9/15 7:37 PM30/9/15 7:37 PM
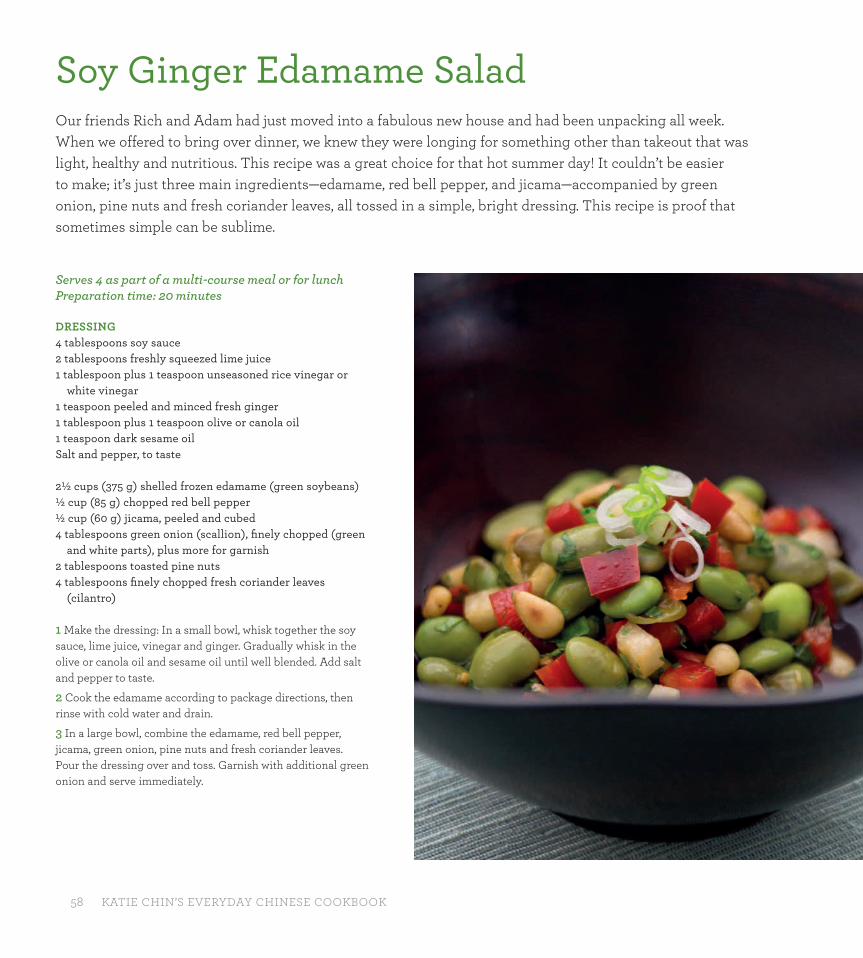
58 KATIE CHIN’S EVERYDAY CHINESE COOKBOOK
Soy Ginger Edamame Salad Our friends Rich and Adam had just moved into a fabulous new house and had been unpacking all week. When we offered to bring over dinner, we knew they were longing for something other than takeout that was light, healthy and nutritious. This recipe was a great choice for that hot summer day! It couldn’t be easier to make; it’s just three main ingredients—edamame, red bell pepper, and jicama—accompanied by green onion, pine nuts and fresh coriander leaves, all tossed in a simple, bright dressing. This recipe is proof that sometimes simple can be sublime.
Serves 4 as part of a multi-course meal or for lunchPreparation time: 20 minutes
DRESSING4 tablespoons soy sauce2 tablespoons freshly squeezed lime juice 1 tablespoon plus 1 teaspoon unseasoned rice vinegar or
white vinegar 1 teaspoon peeled and minced fresh ginger 1 tablespoon plus 1 teaspoon olive or canola oil 1 teaspoon dark sesame oil Salt and pepper, to taste
2½ cups (375 g) shelled frozen edamame (green soybeans) ½ cup (85 g) chopped red bell pepper ½ cup (60 g) jicama, peeled and cubed 4 tablespoons green onion (scallion), fi nely chopped (green
and white parts), plus more for garnish 2 tablespoons toasted pine nuts 4 tablespoons fi nely chopped fresh coriander leaves
(cilantro)
1 Make the dressing: In a small bowl, whisk together the soy sauce, lime juice, vinegar and ginger. Gradually whisk in the olive or canola oil and sesame oil until well blended. Add salt and pepper to taste.
2 Cook the edamame according to package directions, then rinse with cold water and drain.
3 In a large bowl, combine the edamame, red bell pepper, jicama, green onion, pine nuts and fresh coriander leaves. Pour the dressing over and toss. Garnish with additional green onion and serve immediately.
ECC_full layout.indd 58ECC_full layout.indd 58 30/9/15 7:37 PM30/9/15 7:37 PM
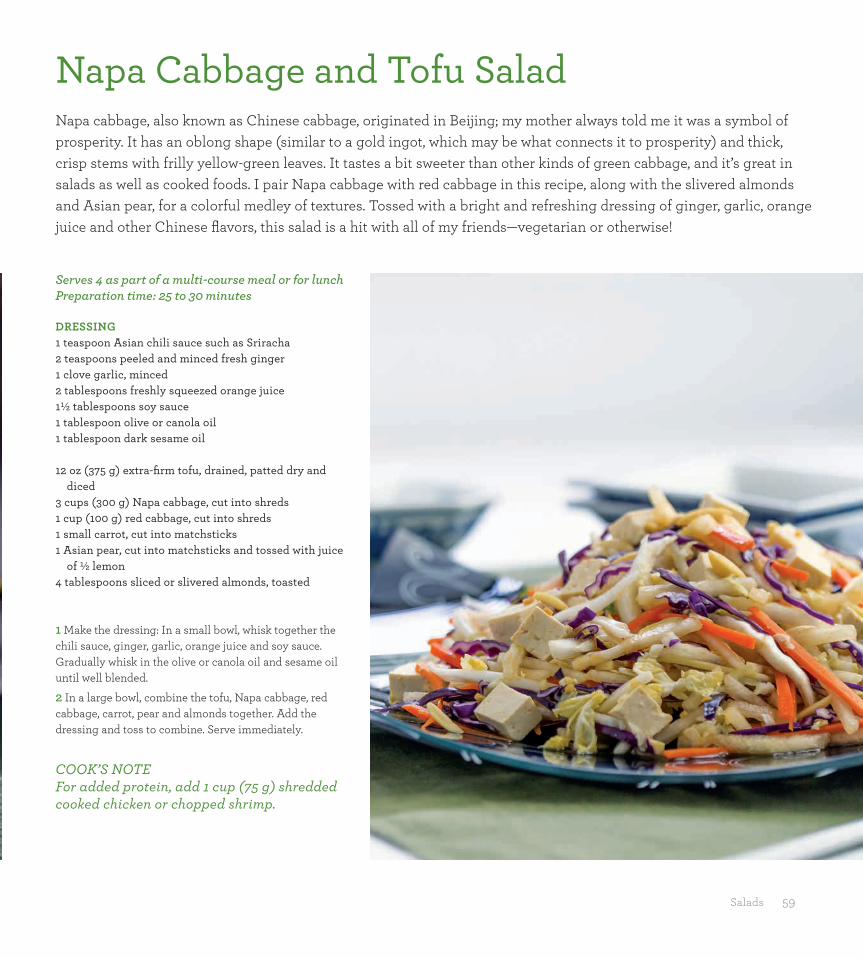
Salads 59
Napa Cabbage and Tofu Salad Napa cabbage, also known as Chinese cabbage, originated in Beijing; my mother always told me it was a symbol of prosperity. It has an oblong shape (similar to a gold ingot, which may be what connects it to prosperity) and thick, crisp stems with frilly yellow-green leaves. It tastes a bit sweeter than other kinds of green cabbage, and it’s great in salads as well as cooked foods. I pair Napa cabbage with red cabbage in this recipe, along with the slivered almonds and Asian pear, for a colorful medley of textures. Tossed with a bright and refreshing dressing of ginger, garlic, orange juice and other Chinese fl avors, this salad is a hit with all of my friends—vegetarian or otherwise!
Serves 4 as part of a multi-course meal or for lunchPreparation time: 25 to 30 minutes
DRESSING1 teaspoon Asian chili sauce such as Sriracha 2 teaspoons peeled and minced fresh ginger1 clove garlic, minced2 tablespoons freshly squeezed orange juice1½ tablespoons soy sauce1 tablespoon olive or canola oil 1 tablespoon dark sesame oil
12 oz (375 g) extra-fi rm tofu, drained, patted dry and diced
3 cups (300 g) Napa cabbage, cut into shreds1 cup (100 g) red cabbage, cut into shreds1 small carrot, cut into matchsticks1 Asian pear, cut into matchsticks and tossed with juice
of ½ lemon4 tablespoons sliced or slivered almonds, toasted
1 Make the dressing: In a small bowl, whisk together the chili sauce, ginger, garlic, orange juice and soy sauce. Gradually whisk in the olive or canola oil and sesame oil until well blended.
2 In a large bowl, combine the tofu, Napa cabbage, red cabbage, carrot, pear and almonds together. Add the dressing and toss to combine. Serve immediately.
COOK’S NOTEFor added protein, add 1 cup (75 g) shredded cooked chicken or chopped shrimp.
ECC_full layout.indd 59ECC_full layout.indd 59 2/10/15 3:27 PM2/10/15 3:27 PM

60 KATIE CHIN’S EVERYDAY CHINESE COOKBOOK
Soups have played an important role in Chinese cuisine for centuries. From the decadent shark’s-fi n soup served to emperors at dynastic banquets to the simple clear
broths with a few vegetables enjoyed by villagers, soups are revered in China for their healing and soothing qualities. You’ll always fi nd soup on a Chinese dinner table instead of water, as the Chinese believe it’s unhealthy to drink cool beverages. Soups are enjoyed as a way to hydrate the body, and are sipped between mouthfuls of other dishes.
Luckily for all of us, with so much attention paid toward soup in Chinese history, we have a bounty of delicious, healthy and easy soups to choose from that can be made with everyday ingredients. For this section, I’ve put together a selection of the soups my mother made for us growing up, like hearty Beef with Rice Stick Noodle Soup (page 63) and light and healthy Tofu Tomato Soup (page 68), as well as all-time Chinese restaurant favorites like sweet and soothing Velvet Chicken Corn Soup (page 67) and the Sichuan classic Hot-and-Sour Soup (page 65).
I’ve also included recipes for basic stocks. A good chicken stock (page 62) simmered with ginger is the foundation of Cantonese cooking, resulting in sumptuous soups and velvety stir-fry gravies. Of course, it’s absolutely fi ne to use store-bought stock in your soups, but if you have some time on a lazy Sunday afternoon, it’s totally worth it to boil up a big pot of homemade stock. Try it and you’ll see what I mean.
Soups
ECC_full layout.indd 60ECC_full layout.indd 60 30/9/15 7:37 PM30/9/15 7:37 PM
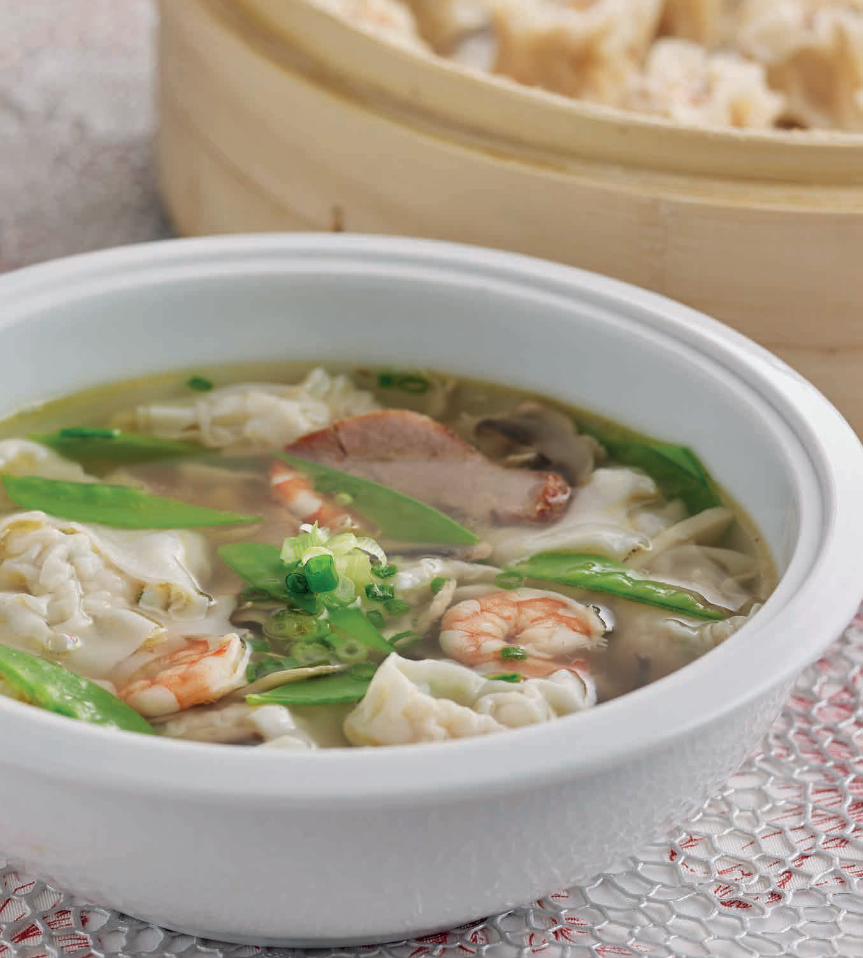
The Wisdom of My Mother’s Kitchen 61
ECC_full layout.indd 61ECC_full layout.indd 61 30/9/15 7:52 PM30/9/15 7:52 PM
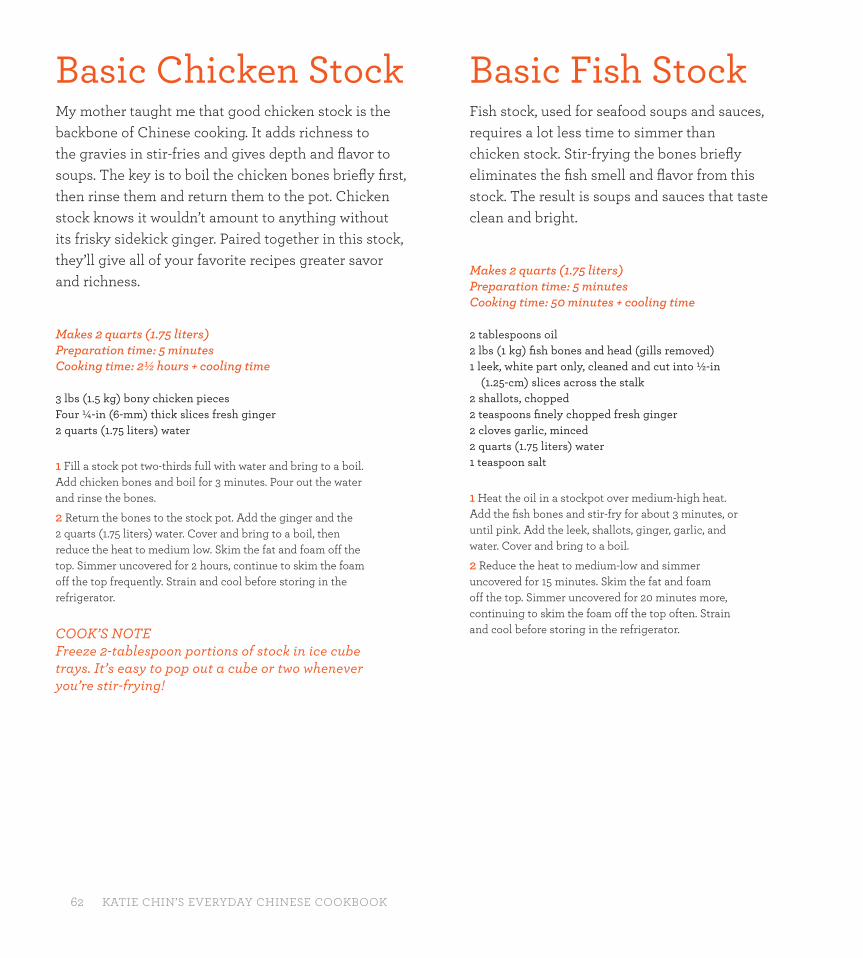
62 KATIE CHIN’S EVERYDAY CHINESE COOKBOOK
Basic Fish StockFish stock, used for seafood soups and sauces, requires a lot less time to simmer than chicken stock. Stir-frying the bones briefl y eliminates the fi sh smell and fl avor from this stock. The result is soups and sauces that taste clean and bright.
Makes 2 quarts (1.75 liters)Preparation time: 5 minutesCooking time: 50 minutes + cooling time
2 tablespoons oil2 lbs (1 kg) fi sh bones and head (gills removed)1 leek, white part only, cleaned and cut into ½-in
(1.25-cm) slices across the stalk2 shallots, chopped2 teaspoons fi nely chopped fresh ginger2 cloves garlic, minced2 quarts (1.75 liters) water1 teaspoon salt
1 Heat the oil in a stockpot over medium-high heat. Add the fi sh bones and stir-fry for about 3 minutes, or until pink. Add the leek, shallots, ginger, garlic, and water. Cover and bring to a boil.
2 Reduce the heat to medium-low and simmer uncovered for 15 minutes. Skim the fat and foam off the top. Simmer uncovered for 20 minutes more, continuing to skim the foam off the top often. Strain and cool before storing in the refrigerator.
Makes 2 quarts (1.75 liters)Preparation time: 5 minutesCooking time: 2½ hours + cooling time
3 lbs (1.5 kg) bony chicken piecesFour ¼-in (6-mm) thick slices fresh ginger2 quarts (1.75 liters) water
1 Fill a stock pot two-thirds full with water and bring to a boil. Add chicken bones and boil for 3 minutes. Pour out the water and rinse the bones.
2 Return the bones to the stock pot. Add the ginger and the 2 quarts (1.75 liters) water. Cover and bring to a boil, then reduce the heat to medium low. Skim the fat and foam off the top. Simmer uncovered for 2 hours, continue to skim the foam off the top frequently. Strain and cool before storing in the refrigerator.
COOK’S NOTEFreeze 2-tablespoon portions of stock in ice cube trays. It’s easy to pop out a cube or two whenever you’re stir-frying!
Basic Chicken StockMy mother taught me that good chicken stock is the backbone of Chinese cooking. It adds richness to the gravies in stir-fries and gives depth and fl avor to soups. The key is to boil the chicken bones briefl y fi rst, then rinse them and return them to the pot. Chicken stock knows it wouldn’t amount to anything without its frisky sidekick ginger. Paired together in this stock, they’ll give all of your favorite recipes greater savor and richness.
ECC_full layout.indd 62ECC_full layout.indd 62 30/9/15 7:52 PM30/9/15 7:52 PM

Soups 63
Beef with Rice Stick Noodle SoupMy kids are always on the run, so when I need to entice them into sitting down for fi ve minutes to eat, it has to be something that’s yummy fi rst and nutritious second. In my house, noodles always do the trick. Whenever I make this soup, they sit down for an average of ten (not fi ve) minutes, and instead of talking, all I hear is slurping. I know the beef in this soup will give them energy for the rest of the day. This rich, soothing and hearty soup is perfect on a chilly day or anytime you want a light, yet fi lling lunch.
Serves 2 to 3 as part of a multi-course meal or for lunch
Preparation time: 10 minutesCooking time: 20 minutes
5 oz (150 g) dried rice stick noodles¼ teaspoon salt¹⁄8 teaspoon white pepper1 teaspoon peeled and minced fresh ginger½ teaspoon all-purpose cornstarch4 cups (1 liter) beef or chicken stock, homemade
(opposite) or store-bought4 oz (100 g) beef sirloin or fl ank steak, cut across the
grain into thin slices1 tablespoon fi sh sauce½ teaspoon dark sesame oil2 tablespoons fi nely chopped fresh coriander (cilantro)
leaves
1 Bring a large pot of water to a boil. Remove from the heat. Immerse the noodles in the hot water and let stand, stirring occasionally, for 10 minutes or until the noodles are soft, yet fi rm. Drain well and rinse with cool water.
2 Combine the salt, pepper, ginger and cornstarch in a small bowl. Set aside.
3 Bring 8 cups (1.75 liters) water to a boil in a large pot. Add the reserved noodles and boil for 30 seconds. Drain well and place the noodles in serving bowls.
4 Bring the stock to a boil in a large pot. Stir in the beef, fi sh sauce, and sesame oil. Return to boiling and add the cornstarch mixture and cook for 20 seconds while stirring. Turn off the heat. Pour the beef soup over the noodles and garnish with the cilantro leaves.
ECC_full layout.indd 63ECC_full layout.indd 63 30/9/15 7:52 PM30/9/15 7:52 PM

64 KATIE CHIN’S EVERYDAY CHINESE COOKBOOK
Serves 4 as part of a multi-course mealPreparation time: 5 minutesCooking time: 10 minutes
4 cups (1 liter) chicken stock, homemade (page 62) or store-bought
1 teaspoon saltDash of white pepper1 green onion (scallion), white and green parts, fi nely chopped2 large eggs, slightly beaten
1 Bring the chicken stock, salt and white pepper to a rolling boil in a medium pot.
2 Stir the green onion into the eggs. Pour the egg mixture slowly into the stock, stirring constantly with fork, until it forms into strands. Remove from the heat and serve immediately.
COOK’S NOTEThe stock must come be at a rolling boil, or the egg won’t form into strands when it is added.
Egg Drop SoupThis humble and tasty soup, known for its silky egg fi nish, is a Chinese classic, even though it’s among the simplest soups in the world to make. My mother told me its Chinese name means “Egg Flowers Soup.” She ate this soup as a little girl growing up; their family cook would serve a huge bowl of it for the family meal, made with homemade chicken stock, fresh eggs from the family farm and green onions from their garden. The only trick is to be sure the stock is at a full, rolling boil as you stir in the beaten eggs. This ensures that the soup’s signature thin strands of cooked egg fl oat throughout.
64 KATIE CHIN’S EVERYDAY CHINESE COOKBOOK
ECC_full layout.indd 64ECC_full layout.indd 64 30/9/15 7:52 PM30/9/15 7:52 PM
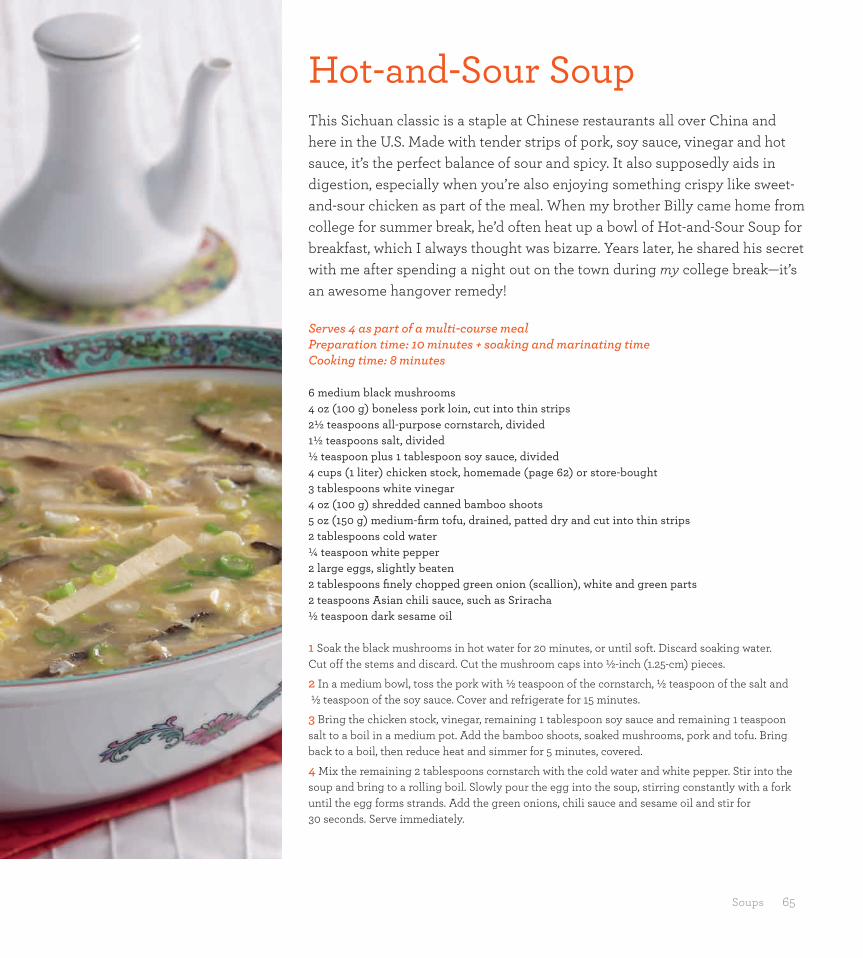
Soups 65
Serves 4 as part of a multi-course mealPreparation time: 10 minutes + soaking and marinating timeCooking time: 8 minutes
6 medium black mushrooms4 oz (100 g) boneless pork loin, cut into thin strips2½ teaspoons all-purpose cornstarch, divided1½ teaspoons salt, divided½ teaspoon plus 1 tablespoon soy sauce, divided4 cups (1 liter) chicken stock, homemade (page 62) or store-bought3 tablespoons white vinegar4 oz (100 g) shredded canned bamboo shoots5 oz (150 g) medium-fi rm tofu, drained, patted dry and cut into thin strips2 tablespoons cold water¼ teaspoon white pepper2 large eggs, slightly beaten2 tablespoons fi nely chopped green onion (scallion), white and green parts2 teaspoons Asian chili sauce, such as Sriracha½ teaspoon dark sesame oil
1 Soak the black mushrooms in hot water for 20 minutes, or until soft. Discard soaking water. Cut off the stems and discard. Cut the mushroom caps into ½-inch (1.25-cm) pieces.
2 In a medium bowl, toss the pork with ½ teaspoon of the cornstarch, ½ teaspoon of the salt and ½ teaspoon of the soy sauce. Cover and refrigerate for 15 minutes.
3 Bring the chicken stock, vinegar, remaining 1 tablespoon soy sauce and remaining 1 teaspoon salt to a boil in a medium pot. Add the bamboo shoots, soaked mushrooms, pork and tofu. Bring back to a boil, then reduce heat and simmer for 5 minutes, covered.
4 Mix the remaining 2 tablespoons cornstarch with the cold water and white pepper. Stir into the soup and bring to a rolling boil. Slowly pour the egg into the soup, stirring constantly with a fork until the egg forms strands. Add the green onions, chili sauce and sesame oil and stir for 30 seconds. Serve immediately.
Hot-and-Sour SoupThis Sichuan classic is a staple at Chinese restaurants all over China and here in the U.S. Made with tender strips of pork, soy sauce, vinegar and hot sauce, it’s the perfect balance of sour and spicy. It also supposedly aids in digestion, especially when you’re also enjoying something crispy like sweet-and-sour chicken as part of the meal. When my brother Billy came home from college for summer break, he’d often heat up a bowl of Hot-and-Sour Soup for breakfast, which I always thought was bizarre. Years later, he shared his secret with me after spending a night out on the town during my college break—it’s an awesome hangover remedy!
ECC_full layout.indd 65ECC_full layout.indd 65 30/9/15 7:52 PM30/9/15 7:52 PM
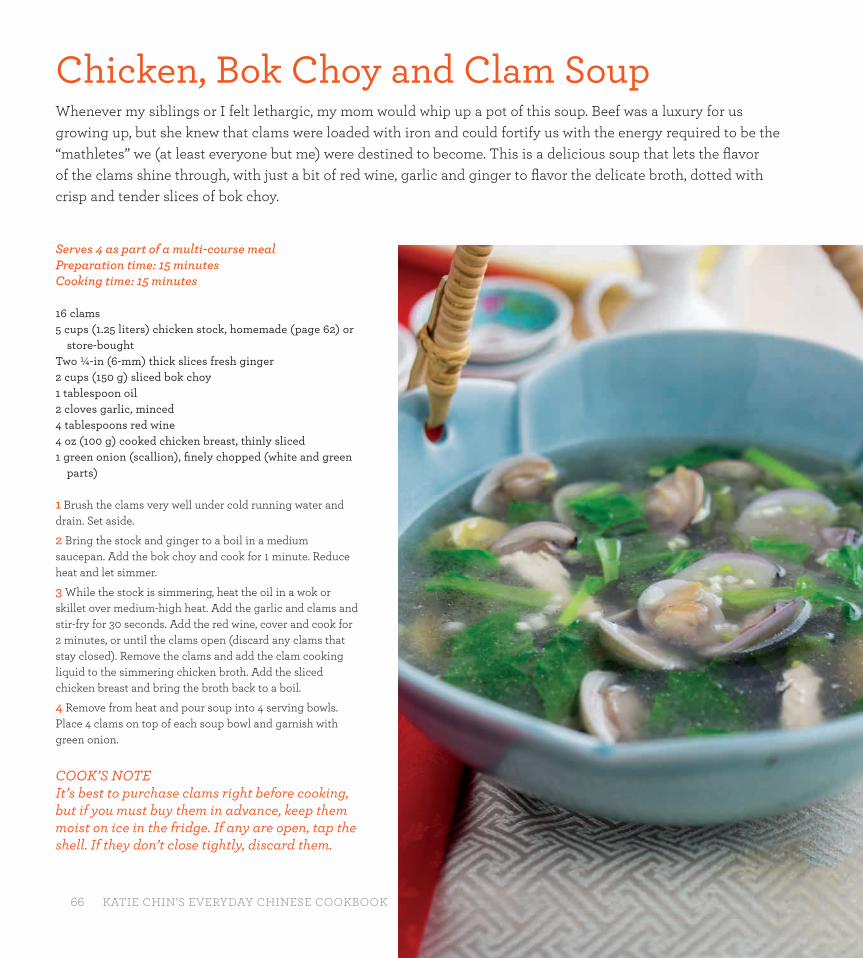
66 KATIE CHIN’S EVERYDAY CHINESE COOKBOOK
Chicken, Bok Choy and Clam Soup Whenever my siblings or I felt lethargic, my mom would whip up a pot of this soup. Beef was a luxury for us growing up, but she knew that clams were loaded with iron and could fortify us with the energy required to be the “mathletes” we (at least everyone but me) were destined to become. This is a delicious soup that lets the fl avor of the clams shine through, with just a bit of red wine, garlic and ginger to fl avor the delicate broth, dotted with crisp and tender slices of bok choy.
Serves 4 as part of a multi-course mealPreparation time: 15 minutesCooking time: 15 minutes
16 clams5 cups (1.25 liters) chicken stock, homemade (page 62) or
store-boughtTwo ¼-in (6-mm) thick slices fresh ginger2 cups (150 g) sliced bok choy1 tablespoon oil2 cloves garlic, minced4 tablespoons red wine4 oz (100 g) cooked chicken breast, thinly sliced 1 green onion (scallion), fi nely chopped (white and green
parts)
1 Brush the clams very well under cold running water and drain. Set aside.
2 Bring the stock and ginger to a boil in a medium saucepan. Add the bok choy and cook for 1 minute. Reduce heat and let simmer.
3 While the stock is simmering, heat the oil in a wok or skillet over medium-high heat. Add the garlic and clams and stir-fry for 30 seconds. Add the red wine, cover and cook for 2 minutes, or until the clams open (discard any clams that stay closed). Remove the clams and add the clam cooking liquid to the simmering chicken broth. Add the sliced chicken breast and bring the broth back to a boil.
4 Remove from heat and pour soup into 4 serving bowls. Place 4 clams on top of each soup bowl and garnish with green onion.
COOK’S NOTEIt’s best to purchase clams right before cooking, but if you must buy them in advance, keep them moist on ice in the fridge. If any are open, tap the shell. If they don’t close tightly, discard them.
ECC_full layout.indd 66ECC_full layout.indd 66 30/9/15 7:52 PM30/9/15 7:52 PM

Soups 67
Serves 4 as part of a multi-course mealPreparation time: 10 minutesCooking time: 10 minutes
4 oz (100 g) ground chicken2 egg whites½ teaspoon dark sesame oil¼ teaspoon salt¹⁄8 teaspoon white pepper1 teaspoon peeled and minced fresh ginger2 tablespoons all-purpose cornstarch4 cups (1 liter) chicken stock, homemade (page
62) or store-bought¾ cup (130 g) fresh or thawed frozen corn kernels1 tablespoon chopped green onion (scallion),
white and green parts or chopped fresh coriander, for garnish
1 In a large bowl, combine the chicken, egg whites, sesame oil, salt, pepper, ginger and cornstarch.
2 Bring the chicken stock to a boil in a medium pot. Slowly add the chicken mixture and the corn to the broth, stirring constantly, and bring back to a boil. Turn off the heat. Garnish with the green onion or coriander to serve.
Velvet Chicken Corn SoupThis gentle, soothing soup is fl ecked with tiny, tender bits of chicken, strands of egg white and juicy kernels of corn. The velvetiness of the eggs makes it seem like it has cream in it, but it’s completely dairy-free. My mother fed us a lot of soups when we were babies because of the high calcium content in her homemade chicken stock. I have a fond memory of her giving small spoonfuls of this soup to my son Dylan when he was just a year old. He started kicking his feet because it was so delicious, and from that day on he became known in our household as the “Corn Master.”
ECC_full layout.indd 67ECC_full layout.indd 67 30/9/15 7:52 PM30/9/15 7:52 PM

68 KATIE CHIN’S EVERYDAY CHINESE COOKBOOK
Tofu Tomato Soup We call my husband Matthew the “Tomato Whisperer” because he grows the most amazing tomatoes. They’re coveted by our neighbors far and wide. When my mother was living with us, she was constantly coming up with new ways to cook with her son-in-law’s bounty. One of my favorites is this simple and delicious Tofu Tomato Soup. Bursting with fresh tomatoes, it’s a healthy, protein-packed soup with an earthy umami punch from the black mushrooms.
Serves 4 as part of a multi-course mealPreparation time: 10 minutes + soaking timeCooking time: 18 minutes
3 dried black mushrooms2 large eggs½ teaspoon saltPinch white pepper2 teaspoons all-purpose cornstarch2 teaspoons water4 cups (1 liter) chicken stock, homemade (page 62) or store-bought10 oz (330 g) fi rm tofu, drained, patted dry and diced1 large tomato, diced½ cup (70 g) fresh or frozen peas
1 Soak the black mushrooms in hot water for 20 minutes, or until soft. Discard soaking water. Cut off the stems and discard. Cut the mushroom caps into ½-inch (1.25-cm) pieces.
2 In a medium bowl, whisk together the eggs, salt and pepper.
3 In a small bowl, mix the cornstarch with the water.
4 Combine the mushrooms and the chicken stock in a medium pot and bring to a boil. Cook for 5 minutes, then add the tofu, tomato and peas and return to a boil.
5 Lower the heat, stir in the cornstarch mixture and return to high heat. When the soup comes to a rolling boil, pour in a spoonful of the egg mixture, stirring in a circular motion. When the egg forms into thin strands, continue to add spoonfuls of the egg to the boiling soup, stirring constantly with a fork until all the egg has formed strands, about 30 seconds. Serve immediately.
68 KATIE CHIN’S EVERYDAY CHINESE COOKBOOK
ECC_full layout.indd 68ECC_full layout.indd 68 30/9/15 7:52 PM30/9/15 7:52 PM
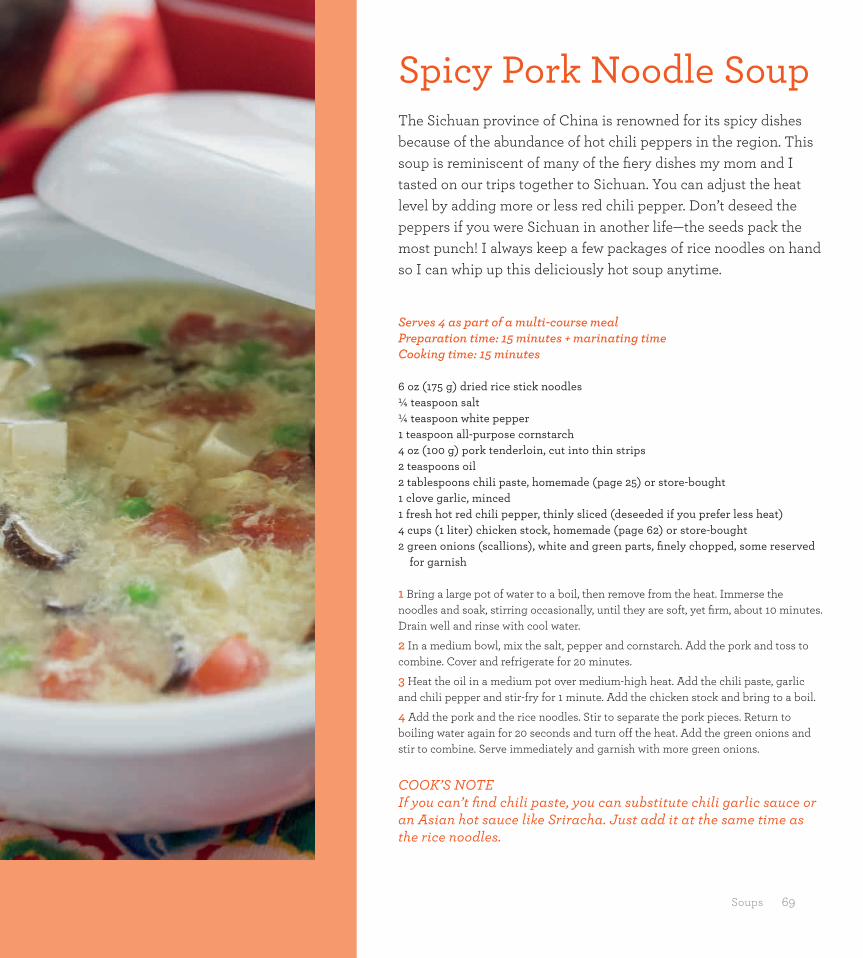
Soups 69
Spicy Pork Noodle Soup The Sichuan province of China is renowned for its spicy dishes because of the abundance of hot chili peppers in the region. This soup is reminiscent of many of the fi ery dishes my mom and I tasted on our trips together to Sichuan. You can adjust the heat level by adding more or less red chili pepper. Don’t deseed the peppers if you were Sichuan in another life—the seeds pack the most punch! I always keep a few packages of rice noodles on hand so I can whip up this deliciously hot soup anytime.
Serves 4 as part of a multi-course mealPreparation time: 15 minutes + marinating timeCooking time: 15 minutes
6 oz (175 g) dried rice stick noodles ¼ teaspoon salt¼ teaspoon white pepper1 teaspoon all-purpose cornstarch4 oz (100 g) pork tenderloin, cut into thin strips2 teaspoons oil2 tablespoons chili paste, homemade (page 25) or store-bought1 clove garlic, minced1 fresh hot red chili pepper, thinly sliced (deseeded if you prefer less heat)4 cups (1 liter) chicken stock, homemade (page 62) or store-bought2 green onions (scallions), white and green parts, fi nely chopped, some reserved
for garnish
1 Bring a large pot of water to a boil, then remove from the heat. Immerse the noodles and soak, stirring occasionally, until they are soft, yet fi rm, about 10 minutes. Drain well and rinse with cool water.
2 In a medium bowl, mix the salt, pepper and cornstarch. Add the pork and toss to combine. Cover and refrigerate for 20 minutes.
3 Heat the oil in a medium pot over medium-high heat. Add the chili paste, garlic and chili pepper and stir-fry for 1 minute. Add the chicken stock and bring to a boil.
4 Add the pork and the rice noodles. Stir to separate the pork pieces. Return to boiling water again for 20 seconds and turn off the heat. Add the green onions and stir to combine. Serve immediately and garnish with more green onions.
COOK’S NOTE If you can’t fi nd chili paste, you can substitute chili garlic sauce or an Asian hot sauce like Sriracha. Just add it at the same time as the rice noodles.
ECC_full layout.indd 69ECC_full layout.indd 69 30/9/15 7:52 PM30/9/15 7:52 PM

70 KATIE CHIN’S EVERYDAY CHINESE COOKBOOK
Serves 4 as part of a multi-course mealPreparation time: 30 minutesCooking time: 12 minutes
WONTON FILLING8 shelled and deveined medium-sized raw shrimp 1 oz (25 g) ground pork or chicken 2 canned water chestnuts, fi nely chopped 1 green onion (scallion), fi nely chopped ½ teaspoon all-purpose cornstarch ¼ teaspoon salt ¹⁄8 teaspoon toasted sesame oil Dash of white pepper
Wor Wonton SoupWor in Chinese means “everything,” so basically anything and everything can go into this soup. My mother and father never wasted food. In fact, we couldn’t leave the table growing up unless we ate every single solitary grain of rice in our bowls. Needless to say, we ate a lot of this soup, because it’s perfect for leftovers. My mom would add morsels of delicious barbecued pork or slices of roast duck from our dinner the night before into this rich and fl avorful broth. This recipe calls for cooked chicken, barbecued pork and shrimp, but feel free to experiment with whatever meat, seafood or veggies you may have on hand.
ECC_full layout.indd 70ECC_full layout.indd 70 30/9/15 7:52 PM30/9/15 7:52 PM
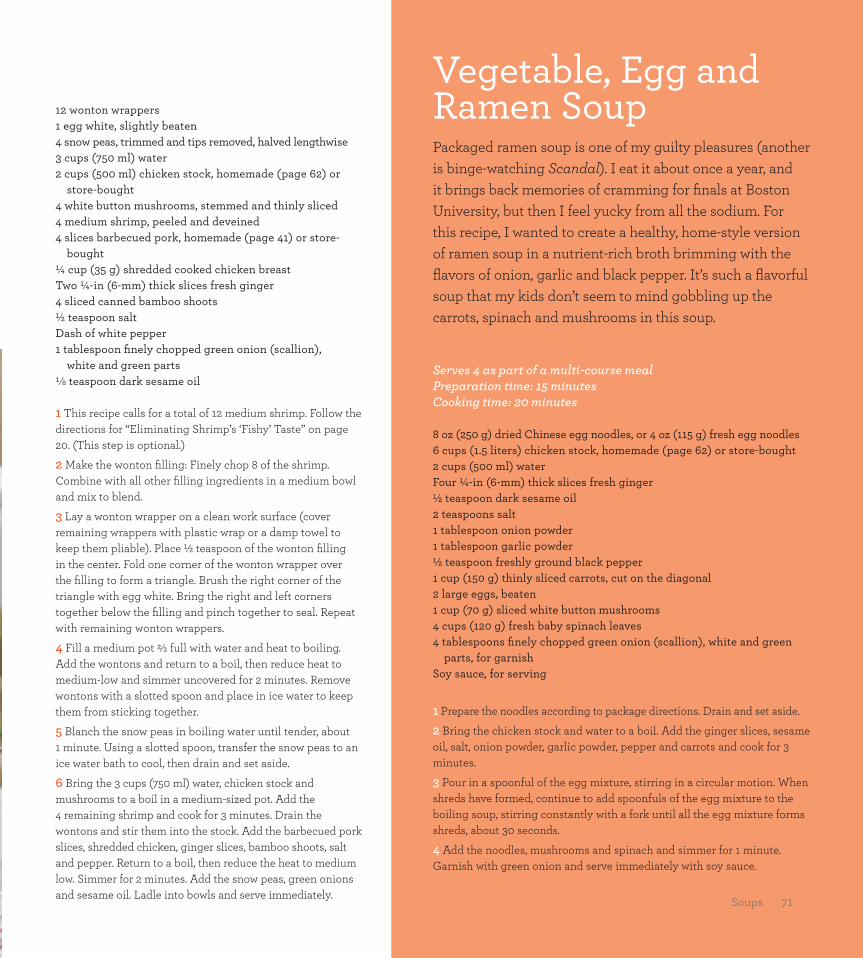
Soups 71
12 wonton wrappers 1 egg white, slightly beaten 4 snow peas, trimmed and tips removed, halved lengthwise 3 cups (750 ml) water 2 cups (500 ml) chicken stock, homemade (page 62) or
store-bought 4 white button mushrooms, stemmed and thinly sliced 4 medium shrimp, peeled and deveined4 slices barbecued pork, homemade (page 41) or store-
bought¼ cup (35 g) shredded cooked chicken breastTwo ¼-in (6-mm) thick slices fresh ginger4 sliced canned bamboo shoots ½ teaspoon salt Dash of white pepper 1 tablespoon fi nely chopped green onion (scallion),
white and green parts¹⁄8 teaspoon dark sesame oil
1 This recipe calls for a total of 12 medium shrimp. Follow the directions for “Eliminating Shrimp’s ‘Fishy’ Taste” on page 20. (This step is optional.)
2 Make the wonton fi lling: Finely chop 8 of the shrimp. Combine with all other fi lling ingredients in a medium bowl and mix to blend.
3 Lay a wonton wrapper on a clean work surface (cover remaining wrappers with plastic wrap or a damp towel to keep them pliable). Place ½ teaspoon of the wonton fi lling in the center. Fold one corner of the wonton wrapper over the fi lling to form a triangle. Brush the right corner of the triangle with egg white. Bring the right and left corners together below the fi lling and pinch together to seal. Repeat with remaining wonton wrappers.
4 Fill a medium pot ²⁄³ full with water and heat to boiling. Add the wontons and return to a boil, then reduce heat to medium-low and simmer uncovered for 2 minutes. Remove wontons with a slotted spoon and place in ice water to keep them from sticking together.
5 Blanch the snow peas in boiling water until tender, about 1 minute. Using a slotted spoon, transfer the snow peas to an ice water bath to cool, then drain and set aside.
6 Bring the 3 cups (750 ml) water, chicken stock and mushrooms to a boil in a medium-sized pot. Add the 4 remaining shrimp and cook for 3 minutes. Drain the wontons and stir them into the stock. Add the barbecued pork slices, shredded chicken, ginger slices, bamboo shoots, salt and pepper. Return to a boil, then reduce the heat to medium low. Simmer for 2 minutes. Add the snow peas, green onions and sesame oil. Ladle into bowls and serve immediately.
Serves 4 as part of a multi-course mealPreparation time: 15 minutesCooking time: 20 minutes
8 oz (250 g) dried Chinese egg noodles, or 4 oz (115 g) fresh egg noodles 6 cups (1.5 liters) chicken stock, homemade (page 62) or store-bought 2 cups (500 ml) water Four ¼-in (6-mm) thick slices fresh ginger ½ teaspoon dark sesame oil 2 teaspoons salt 1 tablespoon onion powder 1 tablespoon garlic powder ½ teaspoon freshly ground black pepper 1 cup (150 g) thinly sliced carrots, cut on the diagonal 2 large eggs, beaten 1 cup (70 g) sliced white button mushrooms 4 cups (120 g) fresh baby spinach leaves 4 tablespoons fi nely chopped green onion (scallion), white and green
parts, for garnish Soy sauce, for serving
1 Prepare the noodles according to package directions. Drain and set aside.
2 Bring the chicken stock and water to a boil. Add the ginger slices, sesame oil, salt, onion powder, garlic powder, pepper and carrots and cook for 3 minutes.
3 Pour in a spoonful of the egg mixture, stirring in a circular motion. When shreds have formed, continue to add spoonfuls of the egg mixture to the boiling soup, stirring constantly with a fork until all the egg mixture forms shreds, about 30 seconds.
4 Add the noodles, mushrooms and spinach and simmer for 1 minute. Garnish with green onion and serve immediately with soy sauce.
Vegetable, Egg and Ramen SoupPackaged ramen soup is one of my guilty pleasures (another is binge-watching Scandal). I eat it about once a year, and it brings back memories of cramming for fi nals at Boston University, but then I feel yucky from all the sodium. For this recipe, I wanted to create a healthy, home-style version of ramen soup in a nutrient-rich broth brimming with the fl avors of onion, garlic and black pepper. It’s such a fl avorful soup that my kids don’t seem to mind gobbling up the carrots, spinach and mushrooms in this soup.
Soups 71
ECC_full layout.indd 71ECC_full layout.indd 71 30/9/15 7:52 PM30/9/15 7:52 PM
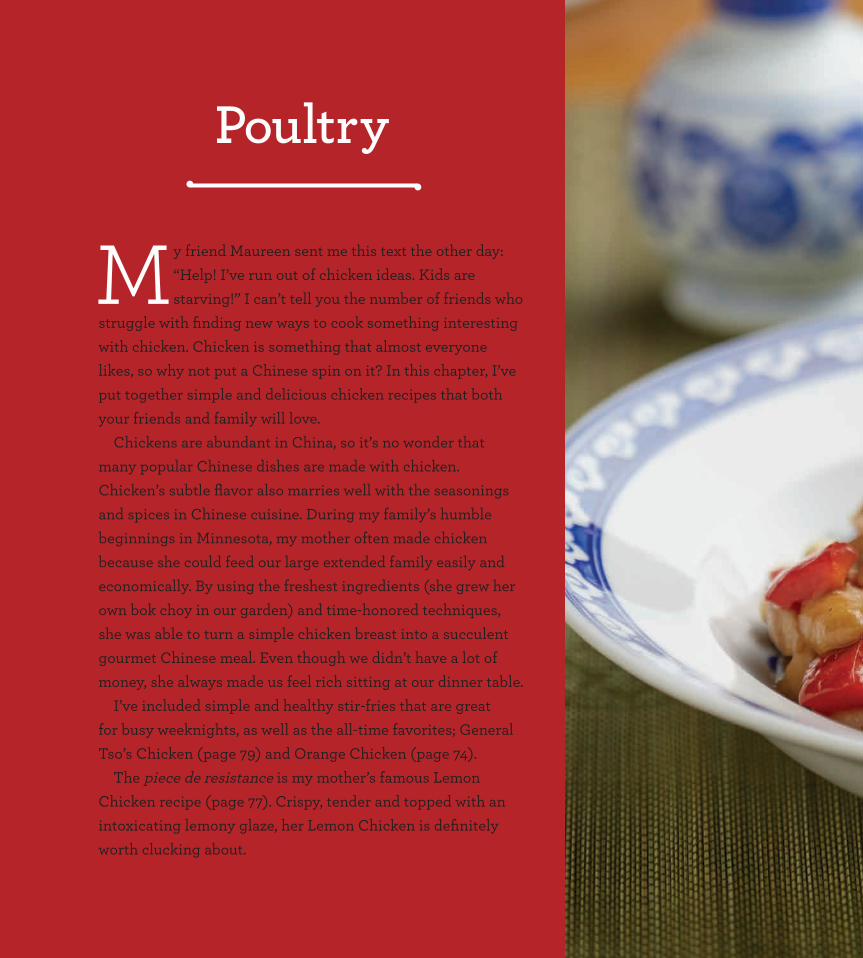
72 KATIE CHIN’S EVERYDAY CHINESE COOKBOOK
M y friend Maureen sent me this text the other day: “Help! I’ve run out of chicken ideas. Kids are starving!” I can’t tell you the number of friends who
struggle with fi nding new ways to cook something interesting with chicken. Chicken is something that almost everyone likes, so why not put a Chinese spin on it? In this chapter, I’ve put together simple and delicious chicken recipes that both your friends and family will love.
Chickens are abundant in China, so it’s no wonder that many popular Chinese dishes are made with chicken. Chicken’s subtle fl avor also marries well with the seasonings and spices in Chinese cuisine. During my family’s humble beginnings in Minnesota, my mother often made chicken because she could feed our large extended family easily and economically. By using the freshest ingredients (she grew her own bok choy in our garden) and time-honored techniques, she was able to turn a simple chicken breast into a succulent gourmet Chinese meal. Even though we didn’t have a lot of money, she always made us feel rich sitting at our dinner table.
I’ve included simple and healthy stir-fries that are great for busy weeknights, as well as the all-time favorites; General Tso’s Chicken (page 79) and Orange Chicken (page 74).
The piece de resistance is my mother’s famous Lemon Chicken recipe (page 77). Crispy, tender and topped with an intoxicating lemony glaze, her Lemon Chicken is defi nitely worth clucking about.
Poultry
ECC_full layout.indd 72ECC_full layout.indd 72 30/9/15 7:52 PM30/9/15 7:52 PM
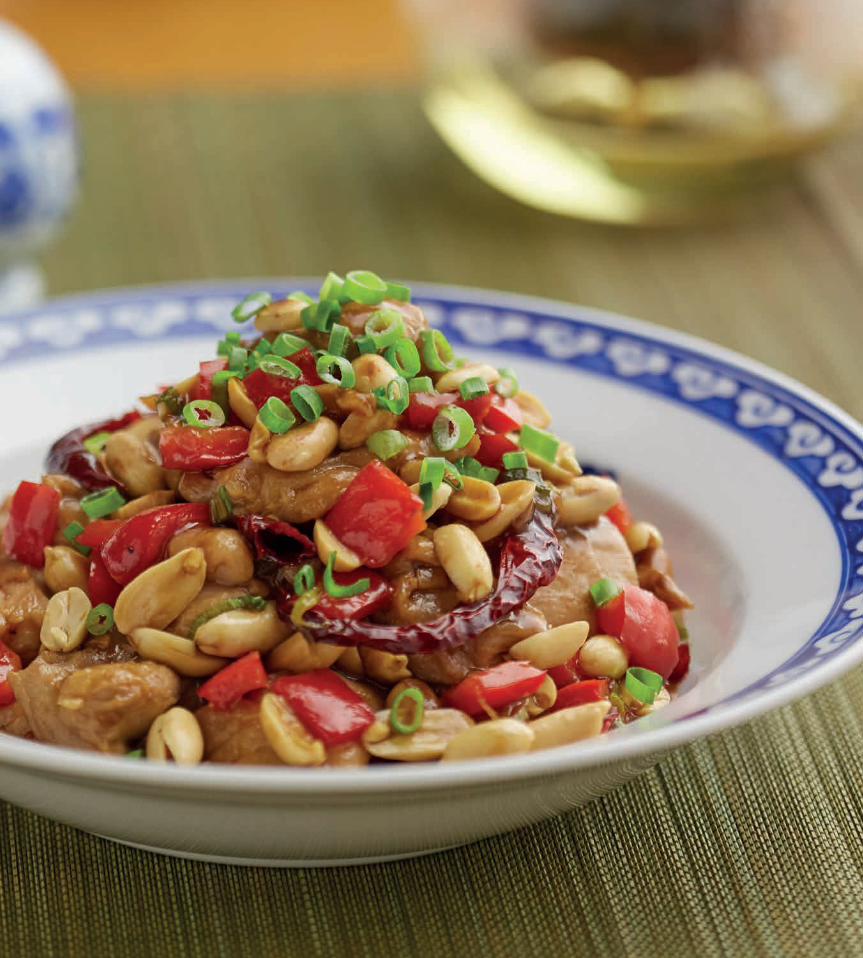
The Wisdom of My Mother’s Kitchen 73
ECC_full layout.indd 73ECC_full layout.indd 73 30/9/15 7:52 PM30/9/15 7:52 PM

74 KATIE CHIN’S EVERYDAY CHINESE COOKBOOK
Serves 4 to 6 as part of a multi-course mealPreparation time: 20 minutes + marinating timeCooking time: 25 minutes
MARINADE1 large egg, slightly beaten ½ tablespoon all-purpose cornstarch 1 teaspoon soy sauce ½ teaspoon salt Dash of white pepper
ORANGE SAUCE 2 tablespoons all-purpose cornstarch 2 tablespoons water ¾ cups (150 g) sugar ½ cup (125 ml) chicken stock, homemade (page 62) or store-
bought2 tablespoons orange juice concentrate 6 tablespoons unseasoned rice vinegar or white vinegar 2 teaspoons oil 2 teaspoons dark soy sauce ¼ teaspoon salt 1 clove garlic, minced ¼ teaspoon crushed red pepper ¼ teaspoon orange zest
BATTER¼ cup (30 g) all-purpose fl our 4 tablespoons water 2 tablespoons all-purpose cornstarch 2 teaspoons oil ¼ teaspoon salt ¼ teaspoon baking soda
1 lb (500 g) boneless, skinless or breast or thigh, cut into 1-in (2.5-cm) cubes
Oil for frying Orange slices for garnish
1 Make the marinade: In a medium bowl, combine the egg, cornstarch, soy sauce, salt and pepper. Add the chicken pieces and toss to coat. Cover and refrigerate for 20 minutes. Remove the chicken, reserving the marinade.
2 Make the orange sauce: Combine the cornstarch and water in a small bowl and set aside. Combine the sugar, chicken stock, orange juice concentrate, vinegar, oil, soy sauce, salt, garlic, crushed red pepper and orange zest in a medium saucepan and bring to a boil. Add the cornstarch mixture to the sauce and cook, stirring continuously, until the sauce thickens, about 10 seconds. Remove from heat and set aside.
3 Make the batter: Combine all batter ingredients and mix to blend. Stir in the chicken pieces and reserved marinade into the batter until the meat is well coated.
4 In a wok or skillet, heat 2 to 3 inches (5 to 7.5 cm) of frying oil to 350°F (175°C). Fry about 15 chicken pieces at a time, turning frequently, until lightly browned, about 3 minutes. Drain on a paper-towel-lined sheet pan.
5 Increase oil temperature to 375°F (190°C). Re-fry all the chicken pieces at once for 1 minute. Drain on a paper-towel-lined sheet pan. Transfer the chicken pieces to a serving platter.
6 Reheat the sauce over medium-high heat and pour over the chicken. Garnish with orange slices and serve immediately with steaming-hot rice.
COOK’S NOTE Leave out the crushed red pepper if you’re cooking for young children.
Orange ChickenIf you love orange chicken at restaurants, you’ll be thrilled to master this dish at home, which has a much lighter batter and sauce compared to the thick, heavy affair you sometimes fi nd at Chinese restaurants and the mall food court. Tender pieces of chicken are marinated, lightly fried in a simple batter and then quickly fried again (this is my mother’s secret deep-frying technique, which I like to call the “Chinese Two-Step”). The sauce is sweet, sour and slightly spicy, and when poured over the most crispety-crunchety chicken you’ll ever have, the result is mouthwatering, crispy, juicy and delicious!
ECC_full layout.indd 74ECC_full layout.indd 74 30/9/15 7:53 PM30/9/15 7:53 PM

75
Bring the sauce ingredients to a boil before adding the cornstarch mixture to the sauce.
Stir reserved marinade into the batter.
Add the marinated chicken pieces to the batter and combine until coated evenly.
Fry about 15 battered chicken pieces at a time in a wok or skillet.
Reheat the sauce over medium-high heat and pour over the chicken.
ECC_full layout.indd 75ECC_full layout.indd 75 2/10/15 11:52 AM2/10/15 11:52 AM
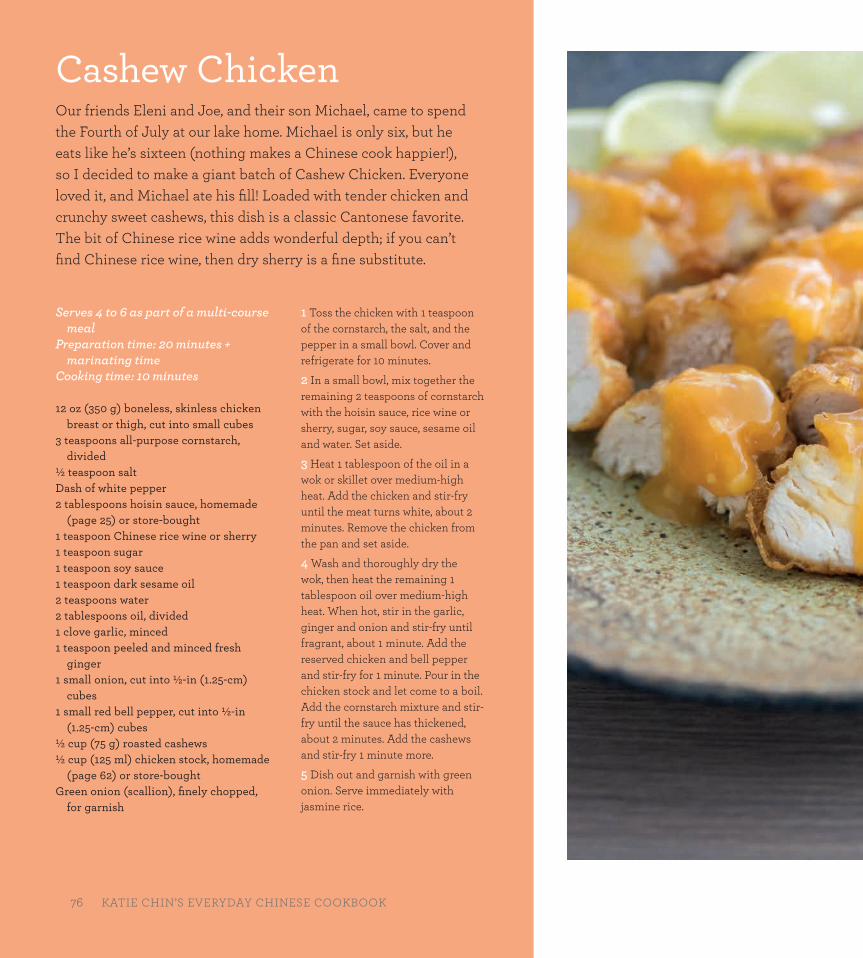
76 KATIE CHIN’S EVERYDAY CHINESE COOKBOOK
Serves 4 to 6 as part of a multi-course meal
Preparation time: 20 minutes + marinating time
Cooking time: 10 minutes
12 oz (350 g) boneless, skinless chicken breast or thigh, cut into small cubes
3 teaspoons all-purpose cornstarch, divided
½ teaspoon saltDash of white pepper2 tablespoons hoisin sauce, homemade
(page 25) or store-bought 1 teaspoon Chinese rice wine or sherry1 teaspoon sugar1 teaspoon soy sauce 1 teaspoon dark sesame oil2 teaspoons water2 tablespoons oil, divided 1 clove garlic, minced 1 teaspoon peeled and minced fresh
ginger 1 small onion, cut into ½-in (1.25-cm)
cubes 1 small red bell pepper, cut into ½-in
(1.25-cm) cubes ½ cup (75 g) roasted cashews½ cup (125 ml) chicken stock, homemade
(page 62) or store-boughtGreen onion (scallion), fi nely chopped,
for garnish
Cashew ChickenOur friends Eleni and Joe, and their son Michael, came to spend the Fourth of July at our lake home. Michael is only six, but he eats like he’s sixteen (nothing makes a Chinese cook happier!), so I decided to make a giant batch of Cashew Chicken. Everyone loved it, and Michael ate his fi ll! Loaded with tender chicken and crunchy sweet cashews, this dish is a classic Cantonese favorite. The bit of Chinese rice wine adds wonderful depth; if you can’t fi nd Chinese rice wine, then dry sherry is a fi ne substitute.
1 Toss the chicken with 1 teaspoon of the cornstarch, the salt, and the pepper in a small bowl. Cover and refrigerate for 10 minutes.
2 In a small bowl, mix together the remaining 2 teaspoons of cornstarch with the hoisin sauce, rice wine or sherry, sugar, soy sauce, sesame oil and water. Set aside.
3 Heat 1 tablespoon of the oil in a wok or skillet over medium-high heat. Add the chicken and stir-fry until the meat turns white, about 2 minutes. Remove the chicken from the pan and set aside.
4 Wash and thoroughly dry the wok, then heat the remaining 1 tablespoon oil over medium-high heat. When hot, stir in the garlic, ginger and onion and stir-fry until fragrant, about 1 minute. Add the reserved chicken and bell pepper and stir-fry for 1 minute. Pour in the chicken stock and let come to a boil. Add the cornstarch mixture and stir-fry until the sauce has thickened, about 2 minutes. Add the cashews and stir-fry 1 minute more.
5 Dish out and garnish with green onion. Serve immediately with jasmine rice.
76 KATIE CHIN’S EVERYDAY CHINESE COOKBOOK
ECC_full layout.indd 76ECC_full layout.indd 76 30/9/15 7:53 PM30/9/15 7:53 PM
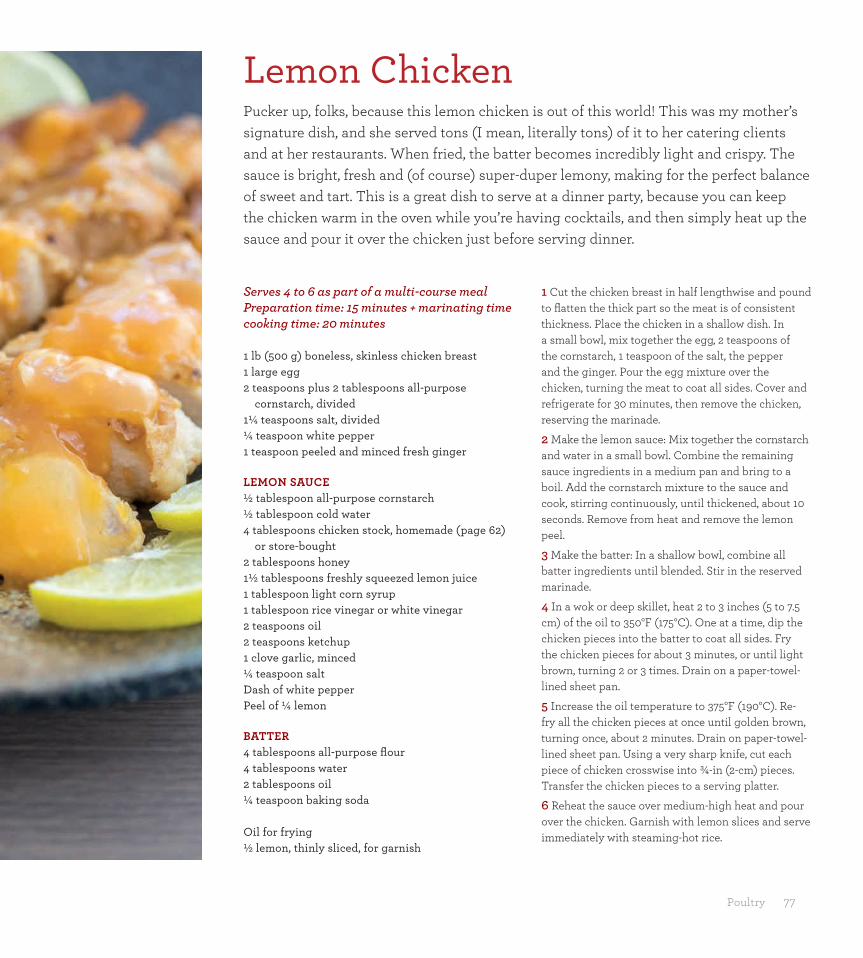
Poultry 77
Serves 4 to 6 as part of a multi-course mealPreparation time: 15 minutes + marinating timecooking time: 20 minutes
1 lb (500 g) boneless, skinless chicken breast1 large egg2 teaspoons plus 2 tablespoons all-purpose
cornstarch, divided1¼ teaspoons salt, divided¼ teaspoon white pepper1 teaspoon peeled and minced fresh ginger
LEMON SAUCE½ tablespoon all-purpose cornstarch½ tablespoon cold water4 tablespoons chicken stock, homemade (page 62)
or store-bought2 tablespoons honey1½ tablespoons freshly squeezed lemon juice1 tablespoon light corn syrup1 tablespoon rice vinegar or white vinegar2 teaspoons oil2 teaspoons ketchup1 clove garlic, minced¼ teaspoon saltDash of white pepperPeel of ¼ lemon
BATTER4 tablespoons all-purpose fl our4 tablespoons water2 tablespoons oil¼ teaspoon baking soda
Oil for frying½ lemon, thinly sliced, for garnish
Lemon ChickenPucker up, folks, because this lemon chicken is out of this world! This was my mother’s signature dish, and she served tons (I mean, literally tons) of it to her catering clients and at her restaurants. When fried, the batter becomes incredibly light and crispy. The sauce is bright, fresh and (of course) super-duper lemony, making for the perfect balance of sweet and tart. This is a great dish to serve at a dinner party, because you can keep the chicken warm in the oven while you’re having cocktails, and then simply heat up the sauce and pour it over the chicken just before serving dinner.
1 Cut the chicken breast in half lengthwise and pound to fl atten the thick part so the meat is of consistent thickness. Place the chicken in a shallow dish. In a small bowl, mix together the egg, 2 teaspoons of the cornstarch, 1 teaspoon of the salt, the pepper and the ginger. Pour the egg mixture over the chicken, turning the meat to coat all sides. Cover and refrigerate for 30 minutes, then remove the chicken, reserving the marinade.
2 Make the lemon sauce: Mix together the cornstarch and water in a small bowl. Combine the remaining sauce ingredients in a medium pan and bring to a boil. Add the cornstarch mixture to the sauce and cook, stirring continuously, until thickened, about 10 seconds. Remove from heat and remove the lemon peel.
3 Make the batter: In a shallow bowl, combine all batter ingredients until blended. Stir in the reserved marinade.
4 In a wok or deep skillet, heat 2 to 3 inches (5 to 7.5 cm) of the oil to 350°F (175°C). One at a time, dip the chicken pieces into the batter to coat all sides. Fry the chicken pieces for about 3 minutes, or until light brown, turning 2 or 3 times. Drain on a paper-towel-lined sheet pan.
5 Increase the oil temperature to 375°F (190°C). Re-fry all the chicken pieces at once until golden brown, turning once, about 2 minutes. Drain on paper-towel-lined sheet pan. Using a very sharp knife, cut each piece of chicken crosswise into ¾-in (2-cm) pieces. Transfer the chicken pieces to a serving platter.
6 Reheat the sauce over medium-high heat and pour over the chicken. Garnish with lemon slices and serve immediately with steaming-hot rice.
ECC_full layout.indd 77ECC_full layout.indd 77 30/9/15 7:53 PM30/9/15 7:53 PM
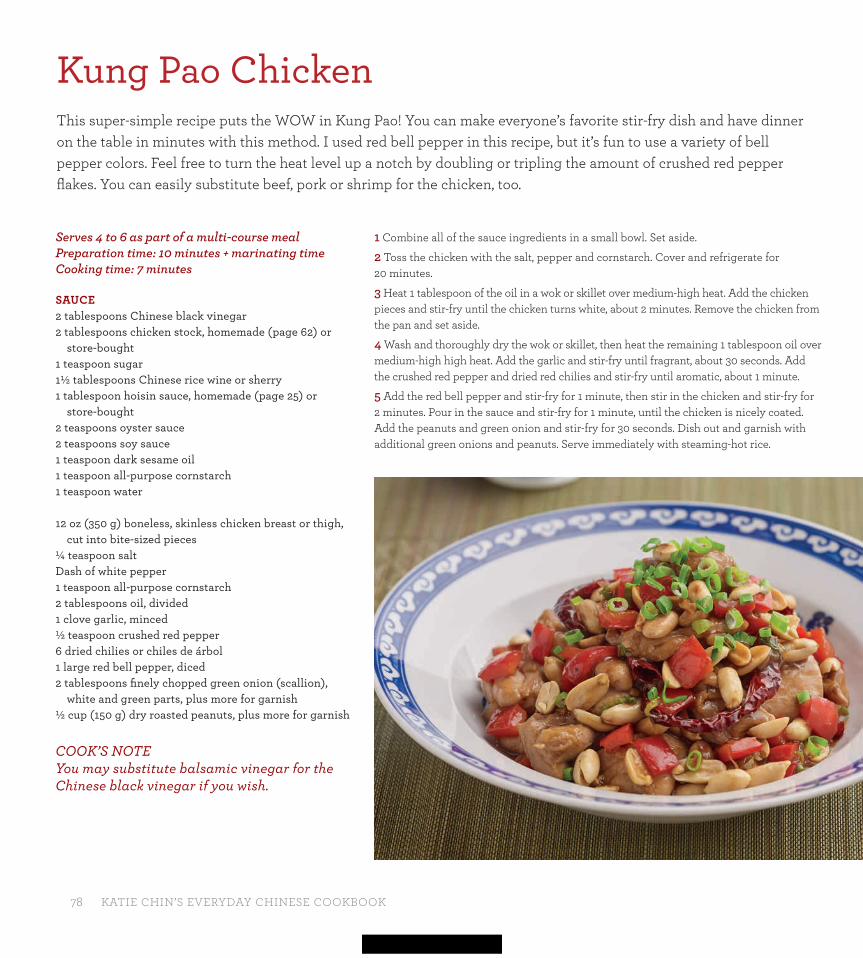
78 KATIE CHIN’S EVERYDAY CHINESE COOKBOOK
Kung Pao Chicken This super-simple recipe puts the WOW in Kung Pao! You can make everyone’s favorite stir-fry dish and have dinner on the table in minutes with this method. I used red bell pepper in this recipe, but it’s fun to use a variety of bell pepper colors. Feel free to turn the heat level up a notch by doubling or tripling the amount of crushed red pepper fl akes. You can easily substitute beef, pork or shrimp for the chicken, too.
Serves 4 to 6 as part of a multi-course mealPreparation time: 10 minutes + marinating timeCooking time: 7 minutes
SAUCE2 tablespoons Chinese black vinegar 2 tablespoons chicken stock, homemade (page 62) or
store-bought1 teaspoon sugar1½ tablespoons Chinese rice wine or sherry1 tablespoon hoisin sauce, homemade (page 25) or
store-bought2 teaspoons oyster sauce2 teaspoons soy sauce1 teaspoon dark sesame oil1 teaspoon all-purpose cornstarch1 teaspoon water
12 oz (350 g) boneless, skinless chicken breast or thigh, cut into bite-sized pieces
¼ teaspoon salt Dash of white pepper 1 teaspoon all-purpose cornstarch2 tablespoons oil, divided1 clove garlic, minced ½ teaspoon crushed red pepper6 dried chilies or chiles de árbol 1 large red bell pepper, diced 2 tablespoons fi nely chopped green onion (scallion),
white and green parts, plus more for garnish ½ cup (150 g) dry roasted peanuts, plus more for garnish
COOK’S NOTE You may substitute balsamic vinegar for the Chinese black vinegar if you wish.
1 Combine all of the sauce ingredients in a small bowl. Set aside.
2 Toss the chicken with the salt, pepper and cornstarch. Cover and refrigerate for 20 minutes.
3 Heat 1 tablespoon of the oil in a wok or skillet over medium-high heat. Add the chicken pieces and stir-fry until the chicken turns white, about 2 minutes. Remove the chicken from the pan and set aside.
4 Wash and thoroughly dry the wok or skillet, then heat the remaining 1 tablespoon oil over medium-high high heat. Add the garlic and stir-fry until fragrant, about 30 seconds. Add the crushed red pepper and dried red chilies and stir-fry until aromatic, about 1 minute.
5 Add the red bell pepper and stir-fry for 1 minute, then stir in the chicken and stir-fry for 2 minutes. Pour in the sauce and stir-fry for 1 minute, until the chicken is nicely coated. Add the peanuts and green onion and stir-fry for 30 seconds. Dish out and garnish with additional green onions and peanuts. Serve immediately with steaming-hot rice.
ECC_full layout.indd 78ECC_full layout.indd 78 30/9/15 7:53 PM30/9/15 7:53 PM

Poultry 79
Serves 2 as a main dish with rice or 4 as part of a multi-course meal
Preparation time: 10 minutesCooking time: 6 to 7 minutes
2 teaspoons Chinese rice wine or sherry 2 teaspoons soy sauce 1 egg, lightly beaten Dash of white pepper 2 tablespoons plus 2 teaspoons all-purpose cornstarch 8 oz (250 g) boneless, skinless chicken breast or thigh,
cut into bite-sized pieces
SAUCE 1 tablespoon dark soy sauce ½ tablespoon rice vinegar or white vinegar1 teaspoon Chinese rice wine or sherry ½ tablespoon sugar 1½ tablespoons chicken stock, homemade (page 62) or
store-bought 2 teaspoons peeled and minced fresh ginger 1 clove garlic, minced 1 teaspoon all-purpose cornstarch
Oil for deep-frying, plus 1 tablespoon for stir-frying1 clove garlic, minced4 tablespoons fi nely chopped green onion (scallion),
green and white parts, plus more for garnish4 to 6 dried red chilies or chiles de árbol
COOK’S NOTE You can substitute for dark soy sauce by combining 1 part soy sauce mixed with 2 parts brown sugar. Boil and let cool before using.
General Tso’s ChickenLegend has it that this popular sweet and slightly spicy chicken dish was named after a general and st atesman from the Qing Dynasty named General Tso Tsung-tang. The reality is that this dish was invented by Chinese chefs who had immigrated to America; it was fi rst introduced to New York City in the ’70s. Whether or not you choose to believe the legend, everyone can agree that this dish has legendary fl avor. In my mother’s delicious recipe, the chicken is fl ash-fried, resulting in tender, juicy pieces which are then tossed in an addictive sauce made of soy sauce, rice vinegar, Chinese rice wine, garlic and ginger. This dish takes a bit more time than a simple stir-fry, but the results are totally worth it.
1 In a small bowl, mix together the rice wine or sherry, soy sauce, egg, white pepper and cornstarch. Add the chicken pieces and toss to coat.
2 Mix all sauce ingredients together in a small bowl. Set aside.
3 In a wok or deep skillet, heat 2 to 3 inches (5 to 7.5 cm) of the oil to 350°F (175°C). Fry the chicken pieces (4 to 5 at a time) for about 3 minutes, then transfer to a paper-towel-lined sheet pan.
4 Heat the remaining 1 tablespoon oil over medium-high heat. Add the garlic, green onion and dried chilies and stir-fry until fragrant, about 1 minute. Stir in the fried chicken and stir-fry for 1 minute more. Pour in the sauce and stir-fry until the chicken pieces are nicely coated, about 1 minute. Dish out and garnish with green onions. Serve immediately with steaming-hot rice.
ECC_full layout.indd 79ECC_full layout.indd 79 30/9/15 7:53 PM30/9/15 7:53 PM
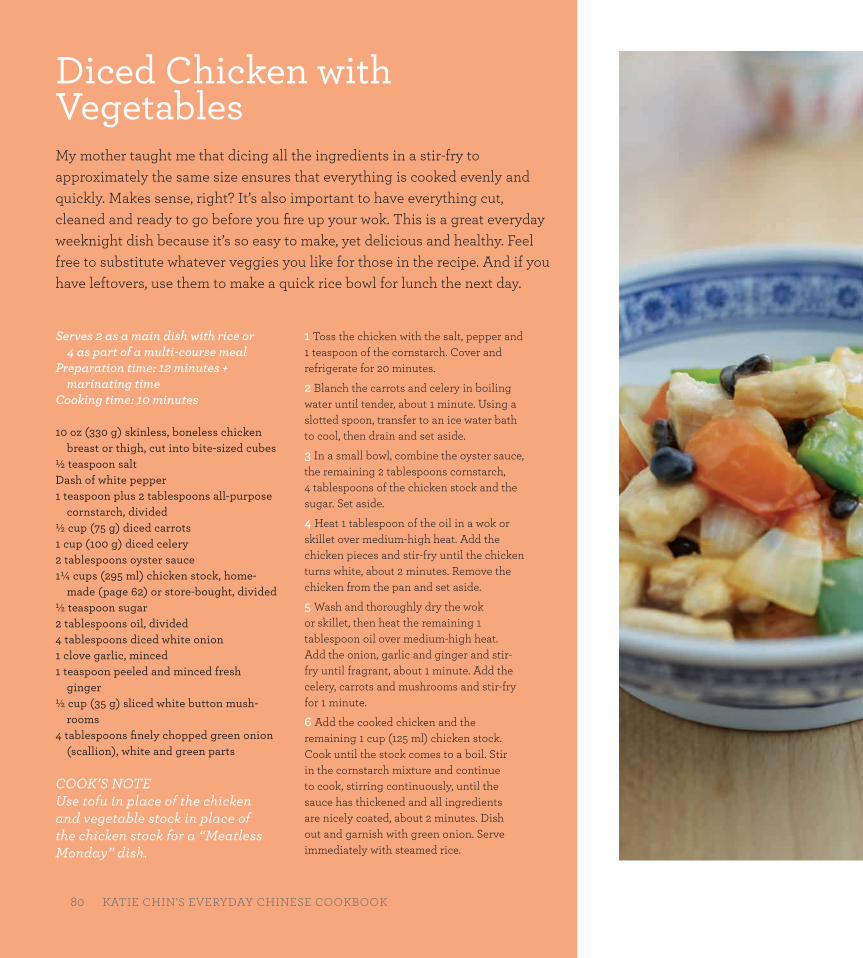
80 KATIE CHIN’S EVERYDAY CHINESE COOKBOOK
Serves 2 as a main dish with rice or 4 as part of a multi-course meal
Preparation time: 12 minutes + marinating time
Cooking time: 10 minutes
10 oz (330 g) skinless, boneless chicken breast or thigh, cut into bite-sized cubes
½ teaspoon saltDash of white pepper1 teaspoon plus 2 tablespoons all-purpose
cornstarch, divided½ cup (75 g) diced carrots1 cup (100 g) diced celery 2 tablespoons oyster sauce1¼ cups (295 ml) chicken stock, home-
made (page 62) or store-bought, divided½ teaspoon sugar2 tablespoons oil, divided4 tablespoons diced white onion1 clove garlic, minced1 teaspoon peeled and minced fresh
ginger½ cup (35 g) sliced white button mush-
rooms4 tablespoons fi nely chopped green onion
(scallion), white and green parts
COOK’S NOTEUse tofu in place of the chicken and vegetable stock in place of the chicken stock for a “Meatless Monday” dish.
1 Toss the chicken with the salt, pepper and 1 teaspoon of the cornstarch. Cover and refrigerate for 20 minutes.
2 Blanch the carrots and celery in boiling water until tender, about 1 minute. Using a slotted spoon, transfer to an ice water bath to cool, then drain and set aside.
3 In a small bowl, combine the oyster sauce, the remaining 2 tablespoons cornstarch, 4 tablespoons of the chicken stock and the sugar. Set aside.
4 Heat 1 tablespoon of the oil in a wok or skillet over medium-high heat. Add the chicken pieces and stir-fry until the chicken turns white, about 2 minutes. Remove the chicken from the pan and set aside.
5 Wash and thoroughly dry the wok or skillet, then heat the remaining 1 tablespoon oil over medium-high heat. Add the onion, garlic and ginger and stir-fry until fragrant, about 1 minute. Add the celery, carrots and mushrooms and stir-fry for 1 minute.
6 Add the cooked chicken and the remaining 1 cup (125 ml) chicken stock. Cook until the stock comes to a boil. Stir in the cornstarch mixture and continue to cook, stirring continuously, until the sauce has thickened and all ingredients are nicely coated, about 2 minutes. Dish out and garnish with green onion. Serve immediately with steamed rice.
Diced Chicken with VegetablesMy mother taught me that dicing all the ingredients in a stir-fry to approximately the same size ensures that everything is cooked evenly and quickly. Makes sense, right? It’s also important to have everything cut, cleaned and ready to go before you fi re up your wok. This is a great everyday weeknight dish because it’s so easy to make, yet delicious and healthy. Feel free to substitute whatever veggies you like for those in the recipe. And if you have leftovers, use them to make a quick rice bowl for lunch the next day.
80 KATIE CHIN’S EVERYDAY CHINESE COOKBOOK
ECC_full layout.indd 80ECC_full layout.indd 80 30/9/15 7:53 PM30/9/15 7:53 PM
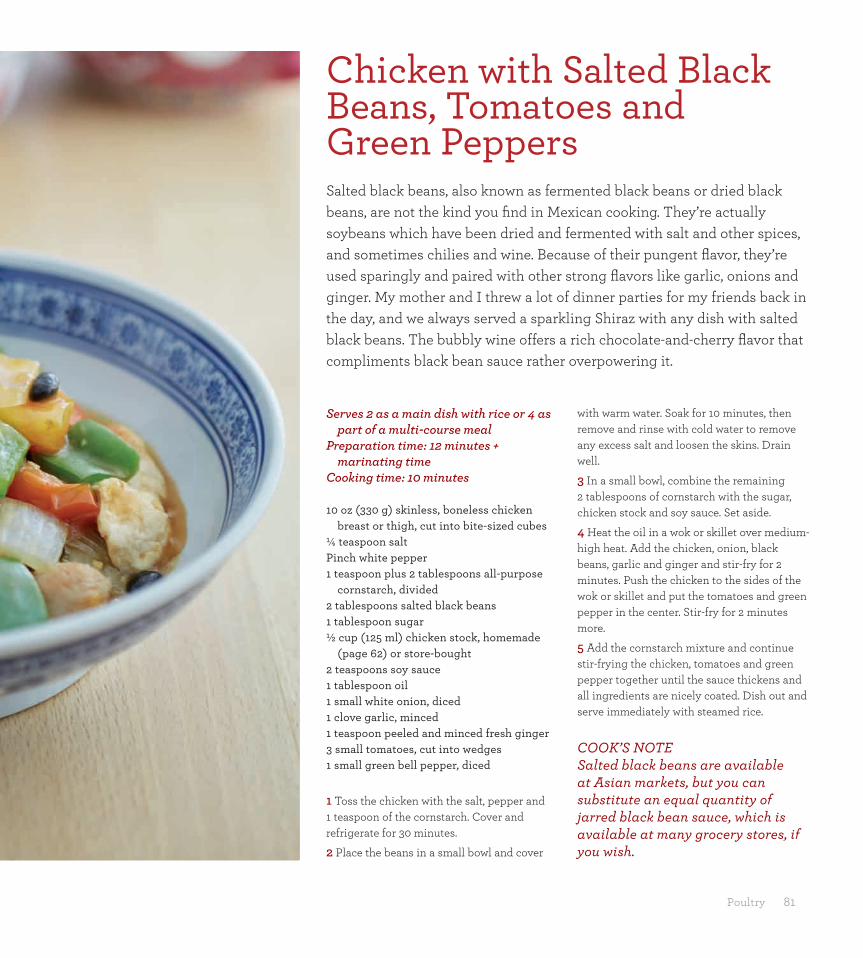
Poultry 81
Serves 2 as a main dish with rice or 4 as part of a multi-course meal
Preparation time: 12 minutes + marinating time
Cooking time: 10 minutes
10 oz (330 g) skinless, boneless chicken breast or thigh, cut into bite-sized cubes
¼ teaspoon saltPinch white pepper1 teaspoon plus 2 tablespoons all-purpose
cornstarch, divided2 tablespoons salted black beans1 tablespoon sugar½ cup (125 ml) chicken stock, homemade
(page 62) or store-bought2 teaspoons soy sauce1 tablespoon oil1 small white onion, diced1 clove garlic, minced1 teaspoon peeled and minced fresh ginger3 small tomatoes, cut into wedges1 small green bell pepper, diced
1 Toss the chicken with the salt, pepper and 1 teaspoon of the cornstarch. Cover and refrigerate for 30 minutes.
2 Place the beans in a small bowl and cover
with warm water. Soak for 10 minutes, then remove and rinse with cold water to remove any excess salt and loosen the skins. Drain well.
3 In a small bowl, combine the remaining 2 tablespoons of cornstarch with the sugar, chicken stock and soy sauce. Set aside.
4 Heat the oil in a wok or skillet over medium-high heat. Add the chicken, onion, black beans, garlic and ginger and stir-fry for 2 minutes. Push the chicken to the sides of the wok or skillet and put the tomatoes and green pepper in the center. Stir-fry for 2 minutes more.
5 Add the cornstarch mixture and continue stir-frying the chicken, tomatoes and green pepper together until the sauce thickens and all ingredients are nicely coated. Dish out and serve immediately with steamed rice.
COOK’S NOTESalted black beans are available at Asian markets, but you can substitute an equal quantity of jarred black bean sauce, which is available at many grocery stores, if you wish.
Chicken with Salted Black Beans, Tomatoes and Green PeppersSalted black beans, also known as fermented black beans or dried black beans, are not the kind you fi nd in Mexican cooking. They’re actually soybeans which have been dried and fermented with salt and other spices, and sometimes chilies and wine. Because of their pungent fl avor, they’re used sparingly and paired with other strong fl avors like garlic, onions and ginger. My mother and I threw a lot of dinner parties for my friends back in the day, and we always served a sparkling Shiraz with any dish with salted black beans. The bubbly wine offers a rich chocolate-and-cherry fl avor that compliments black bean sauce rather overpowering it.
ECC_full layout.indd 81ECC_full layout.indd 81 30/9/15 7:54 PM30/9/15 7:54 PM
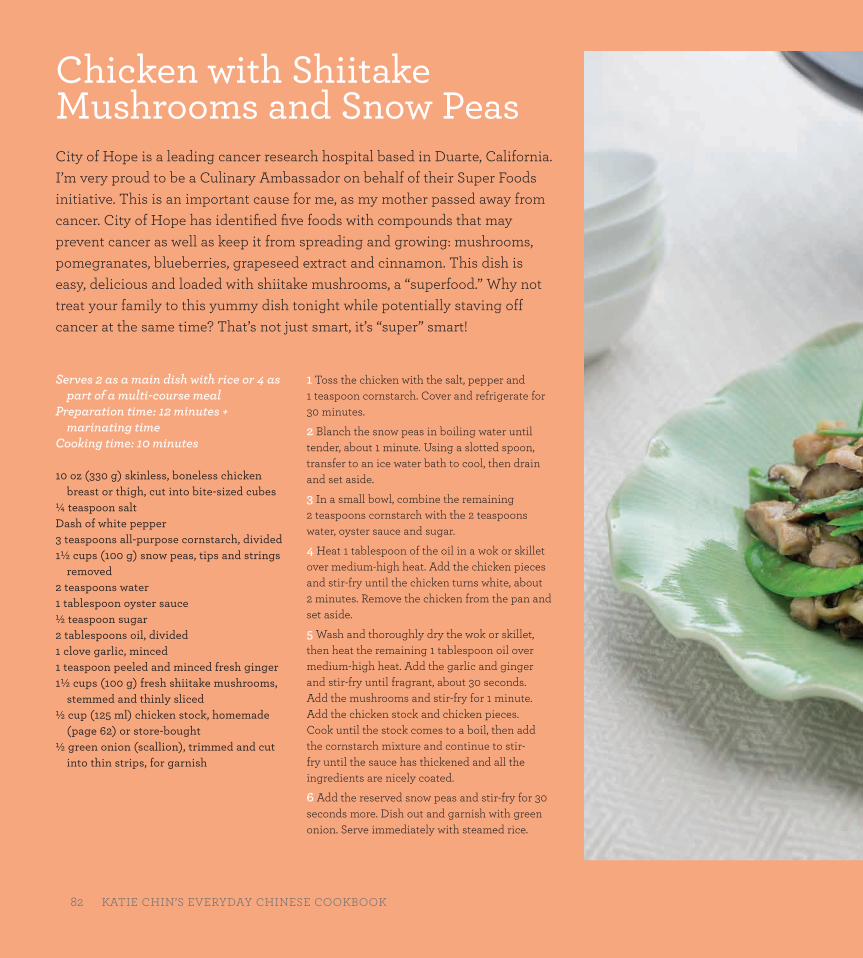
82 KATIE CHIN’S EVERYDAY CHINESE COOKBOOK
Chicken with Shiitake Mushrooms and Snow Peas City of Hope is a leading cancer research hospital based in Duarte, California. I’m very proud to be a Culinary Ambassador on behalf of their Super Foods initiative. This is an important cause for me, as my mother passed away from cancer. City of Hope has identifi ed fi ve foods with compounds that may prevent cancer as well as keep it from spreading and growing: mushrooms, pomegranates, blueberries, grapeseed extract and cinnamon. This dish is easy, delicious and loaded with shiitake mushrooms, a “superfood.” Why not treat your family to this yummy dish tonight while potentially staving off cancer at the same time? That’s not just smart, it’s “super” smart!
Serves 2 as a main dish with rice or 4 as part of a multi-course meal
Preparation time: 12 minutes + marinating time
Cooking time: 10 minutes
10 oz (330 g) skinless, boneless chicken breast or thigh, cut into bite-sized cubes
¼ teaspoon saltDash of white pepper3 teaspoons all-purpose cornstarch, divided1½ cups (100 g) snow peas, tips and strings
removed2 teaspoons water1 tablespoon oyster sauce½ teaspoon sugar2 tablespoons oil, divided1 clove garlic, minced 1 teaspoon peeled and minced fresh ginger1½ cups (100 g) fresh shiitake mushrooms,
stemmed and thinly sliced½ cup (125 ml) chicken stock, homemade
(page 62) or store-bought½ green onion (scallion), trimmed and cut
into thin strips, for garnish
82 KATIE CHIN’S EVERYDAY CHINESE COOKBOOK
1 Toss the chicken with the salt, pepper and 1 teaspoon cornstarch. Cover and refrigerate for 30 minutes.
2 Blanch the snow peas in boiling water until tender, about 1 minute. Using a slotted spoon, transfer to an ice water bath to cool, then drain and set aside.
3 In a small bowl, combine the remaining 2 teaspoons cornstarch with the 2 teaspoons water, oyster sauce and sugar.
4 Heat 1 tablespoon of the oil in a wok or skillet over medium-high heat. Add the chicken pieces and stir-fry until the chicken turns white, about 2 minutes. Remove the chicken from the pan and set aside.
5 Wash and thoroughly dry the wok or skillet, then heat the remaining 1 tablespoon oil over medium-high heat. Add the garlic and ginger and stir-fry until fragrant, about 30 seconds. Add the mushrooms and stir-fry for 1 minute. Add the chicken stock and chicken pieces. Cook until the stock comes to a boil, then add the cornstarch mixture and continue to stir-fry until the sauce has thickened and all the ingredients are nicely coated.
6 Add the reserved snow peas and stir-fry for 30 seconds more. Dish out and garnish with green onion. Serve immediately with steamed rice.
ECC_full layout.indd 82ECC_full layout.indd 82 30/9/15 7:54 PM30/9/15 7:54 PM
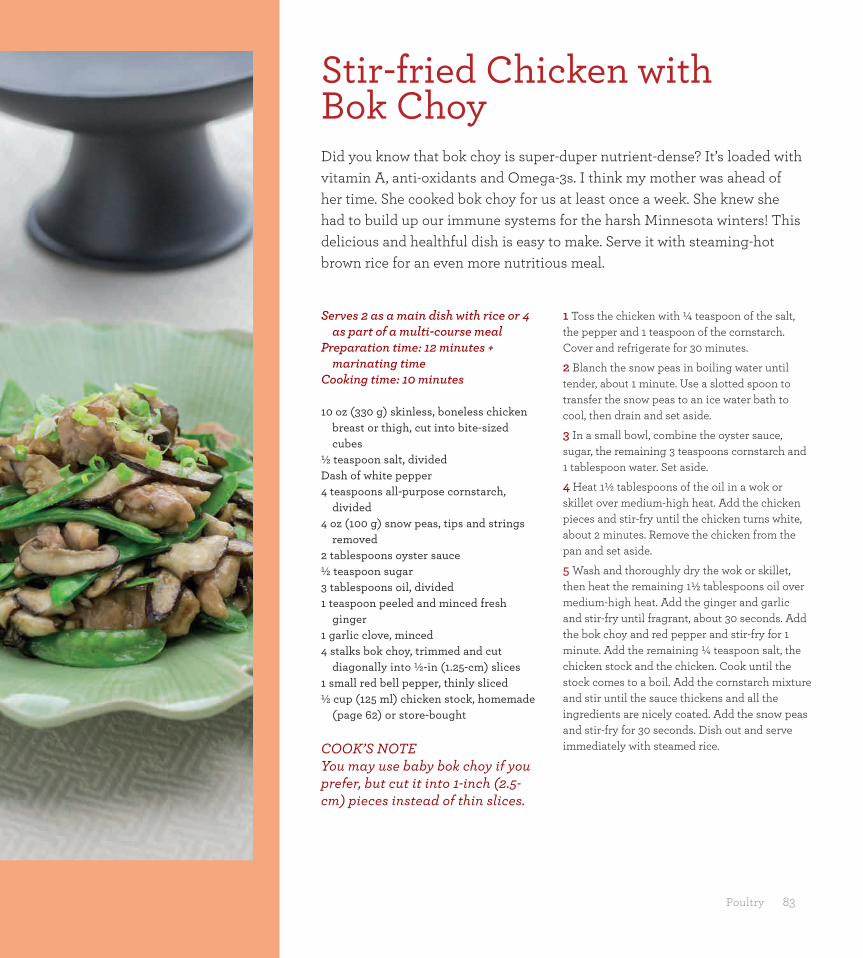
Poultry 83
1 Toss the chicken with ¼ teaspoon of the salt, the pepper and 1 teaspoon of the cornstarch. Cover and refrigerate for 30 minutes.
2 Blanch the snow peas in boiling water until tender, about 1 minute. Use a slotted spoon to transfer the snow peas to an ice water bath to cool, then drain and set aside.
3 In a small bowl, combine the oyster sauce, sugar, the remaining 3 teaspoons cornstarch and 1 tablespoon water. Set aside.
4 Heat 1½ tablespoons of the oil in a wok or skillet over medium-high heat. Add the chicken pieces and stir-fry until the chicken turns white, about 2 minutes. Remove the chicken from the pan and set aside.
5 Wash and thoroughly dry the wok or skillet, then heat the remaining 1½ tablespoons oil over medium-high heat. Add the ginger and garlic and stir-fry until fragrant, about 30 seconds. Add the bok choy and red pepper and stir-fry for 1 minute. Add the remaining ¼ teaspoon salt, the chicken stock and the chicken. Cook until the stock comes to a boil. Add the cornstarch mixture and stir until the sauce thickens and all the ingredients are nicely coated. Add the snow peas and stir-fry for 30 seconds. Dish out and serve immediately with steamed rice.
Stir-fried Chicken with Bok Choy Did you know that bok choy is super-duper nutrient-dense? It’s loaded with vitamin A, anti-oxidants and Omega-3s. I think my mother was ahead of her time. She cooked bok choy for us at least once a week. She knew she had to build up our immune systems for the harsh Minnesota winters! This delicious and healthful dish is easy to make. Serve it with steaming-hot brown rice for an even more nutritious meal.
Serves 2 as a main dish with rice or 4 as part of a multi-course meal
Preparation time: 12 minutes + marinating time
Cooking time: 10 minutes
10 oz (330 g) skinless, boneless chicken breast or thigh, cut into bite-sized cubes
½ teaspoon salt, dividedDash of white pepper4 teaspoons all-purpose cornstarch,
divided4 oz (100 g) snow peas, tips and strings
removed2 tablespoons oyster sauce½ teaspoon sugar3 tablespoons oil, divided1 teaspoon peeled and minced fresh
ginger1 garlic clove, minced4 stalks bok choy, trimmed and cut
diagonally into ½-in (1.25-cm) slices1 small red bell pepper, thinly sliced½ cup (125 ml) chicken stock, homemade
(page 62) or store-bought
COOK’S NOTE You may use baby bok choy if you prefer, but cut it into 1-inch (2.5-cm) pieces instead of thin slices.
ECC_full layout.indd 83ECC_full layout.indd 83 30/9/15 7:54 PM30/9/15 7:54 PM

84 KATIE CHIN’S EVERYDAY CHINESE COOKBOOK
My mother always made a special beef dish when any of my siblings came home from college. It was her way of saying “I love you” or “Good job on your
straight As, Jeanie.” (That was for my sister—when I came home with straight B’s, she made squab.) Beef was a luxury in our home, and my mother had rarely eaten it when she was growing up in China because it was scarce. The beef dishes she made always melted in our mouths; she chose fi ne cuts and always cut across the grain. Once she opened her fi rst restaurant, my mother went wild creating beef dishes, as there are so many delicious ways to prepare beef in Chinese cuisine. I’ve included some of my mother’s legendary beef recipes, like the tender and succulent Stir-Fried Beef with Asparagus and Wild Mushrooms (page 94) and the spicy Sichuan Beef (page 90).
Pork, on the other hand, we ate all the time: it’s a healthy lean protein and its rich taste goes really well with Chinese fl avors. In fact, “pork” is literally synonymous with “meat” in Chinese, and it’s ubiquitous in China, much more so than beef. It’s always eaten on Chinese New Year because its richness symbolizes prosperity. Pork can be prepared in so many ways—steamed, braised, fried, roasted and baked—and it’s incredibly versatile, from the crispy and tender Sweet-and-Sour Pork (page 86) to the classic Chinese comfort food, Mapo Tofu (page 97).
Finally, I just had to include one of my mom’s favorite lamb dishes in this section. Her Mongolian Lamb (page 96) is warming and savory, and will satisfy any warrior-sized appetite.
Beef, Pork and Lamb
ECC_full layout.indd 84ECC_full layout.indd 84 30/9/15 7:54 PM30/9/15 7:54 PM
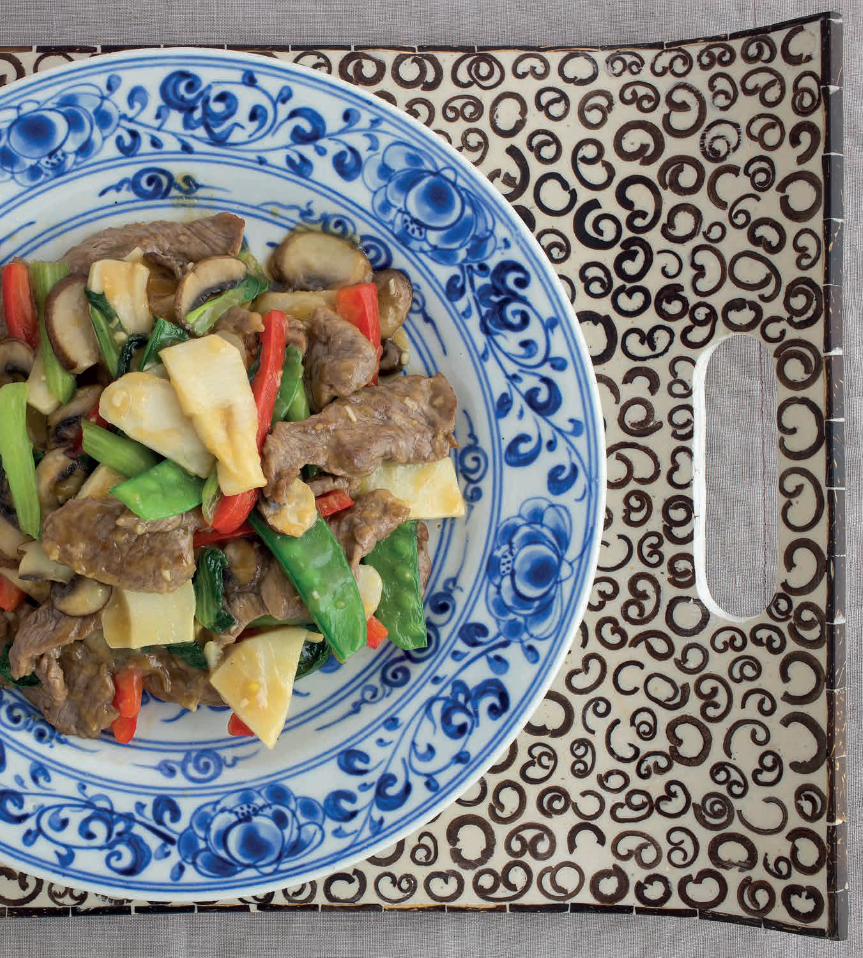
The Wisdom of My Mother’s Kitchen 85
ECC_full layout.indd 85ECC_full layout.indd 85 30/9/15 7:54 PM30/9/15 7:54 PM
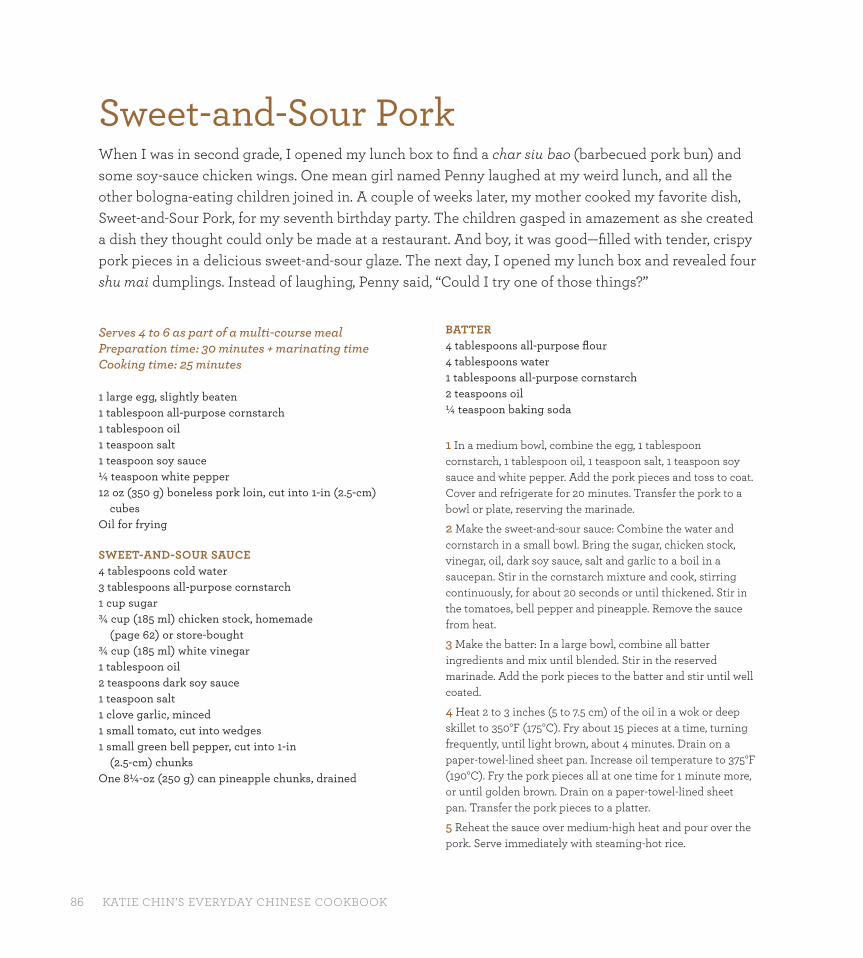
86 KATIE CHIN’S EVERYDAY CHINESE COOKBOOK
Serves 4 to 6 as part of a multi-course mealPreparation time: 30 minutes + marinating timeCooking time: 25 minutes
1 large egg, slightly beaten 1 tablespoon all-purpose cornstarch 1 tablespoon oil 1 teaspoon salt1 teaspoon soy sauce ¼ teaspoon white pepper12 oz (350 g) boneless pork loin, cut into 1-in (2.5-cm)
cubesOil for frying
SWEET-AND-SOUR SAUCE4 tablespoons cold water3 tablespoons all-purpose cornstarch1 cup sugar¾ cup (185 ml) chicken stock, homemade
(page 62) or store-bought¾ cup (185 ml) white vinegar1 tablespoon oil2 teaspoons dark soy sauce1 teaspoon salt1 clove garlic, minced1 small tomato, cut into wedges1 small green bell pepper, cut into 1-in
(2.5-cm) chunksOne 8¼-oz (250 g) can pineapple chunks, drained
BATTER4 tablespoons all-purpose fl our4 tablespoons water1 tablespoons all-purpose cornstarch2 teaspoons oil¼ teaspoon baking soda
1 In a medium bowl, combine the egg, 1 tablespoon cornstarch, 1 tablespoon oil, 1 teaspoon salt, 1 teaspoon soy sauce and white pepper. Add the pork pieces and toss to coat. Cover and refrigerate for 20 minutes. Transfer the pork to a bowl or plate, reserving the marinade.
2 Make the sweet-and-sour sauce: Combine the water and cornstarch in a small bowl. Bring the sugar, chicken stock, vinegar, oil, dark soy sauce, salt and garlic to a boil in a saucepan. Stir in the cornstarch mixture and cook, stirring continuously, for about 20 seconds or until thickened. Stir in the tomatoes, bell pepper and pineapple. Remove the sauce from heat.
3 Make the batter: In a large bowl, combine all batter ingredients and mix until blended. Stir in the reserved marinade. Add the pork pieces to the batter and stir until well coated.
4 Heat 2 to 3 inches (5 to 7.5 cm) of the oil in a wok or deep skillet to 350°F (175°C). Fry about 15 pieces at a time, turning frequently, until light brown, about 4 minutes. Drain on a paper-towel-lined sheet pan. Increase oil temperature to 375°F (190°C). Fry the pork pieces all at one time for 1 minute more, or until golden brown. Drain on a paper-towel-lined sheet pan. Transfer the pork pieces to a platter.
5 Reheat the sauce over medium-high heat and pour over the pork. Serve immediately with steaming-hot rice.
Sweet-and-Sour PorkWhen I was in second grade, I opened my lunch box to fi nd a char siu bao (barbecued pork bun) and some soy-sauce chicken wings. One mean girl named Penny laughed at my weird lunch, and all the other bologna-eating children joined in. A couple of weeks later, my mother cooked my favorite dish, Sweet-and-Sour Pork, for my seventh birthday party. The children gasped in amazement as she created a dish they thought could only be made at a restaurant. And boy, it was good—fi lled with tender, crispy pork pieces in a delicious sweet-and-sour glaze. The next day, I opened my lunch box and revealed four shu mai dumplings. Instead of laughing, Penny said, “Could I try one of those things?”
ECC_full layout.indd 86ECC_full layout.indd 86 30/9/15 7:54 PM30/9/15 7:54 PM
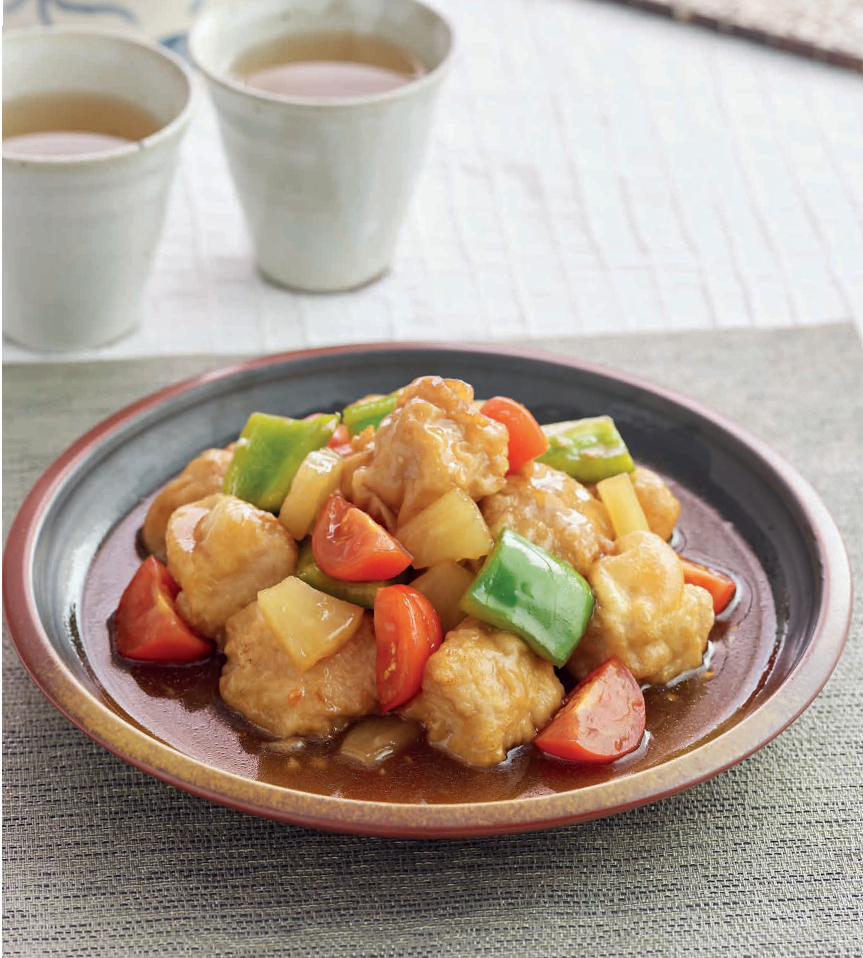
The Wisdom of My Mother’s Kitchen 87EVERYDAY CHINESE COOKING 87
ECC_full layout.indd 87ECC_full layout.indd 87 30/9/15 7:54 PM30/9/15 7:54 PM

88 KATIE CHIN’S EVERYDAY CHINESE COOKBOOK
Serves 6 as part of a multi-course mealPreparation time: 15 minutes +
marinating timeCooking time: 15 to 25 minutes,
depending on steak thickness
1½ lbs (750 g) beef tenderloin 2 tablespoons oil 1 teaspoon soy sauce 1 teaspoon salt 3 cloves garlic, minced 1 tablespoon peeled and minced fresh ginger 1 teaspoon sugar 1 teaspoon ground red pepper (cayenne)4 tablespoons hoisin sauce, homemade
(page 25) or store-bought
1 Place the beef in a large resealable plastic food storage bag. Combine all remaining ingredients in a small bowl and whisk to blend. Pour over the beef, seal the bag, and place it in the refrigerator for at least 30 minutes or as long as overnight.
2 Preheat a grill to high heat and brush with oil. Remove the beef from the marinade and grill to desired doneness, about 4 to 5 minutes per side for medium-rare, depending on thickness. Let rest for 10 minutes.
3 Slice beef thinly and serve immediately.
Hong Kong SteakWhen my mother moved to Hong Kong to be married to my father through the services of a matchmaker, she was thrust into a new life in a cosmopolitan city with someone she had literally just met, not to mention a mother-in-law who tagged along for the ride. Living in their new apartment, my mother threw herself into cooking, coming up with dishes she hoped her new husband and mother-in-law would approve of. She told me she’d serve Hong Kong Steak to the unexpected dinner guests my father would frequently bring home; it was quick to make and unfailingly delicious. Whether you’re cooking for your family or unexpected guests, this succulent and tender dish is sure to get rave reviews.
ECC_full layout.indd 88ECC_full layout.indd 88 30/9/15 7:54 PM30/9/15 7:54 PM
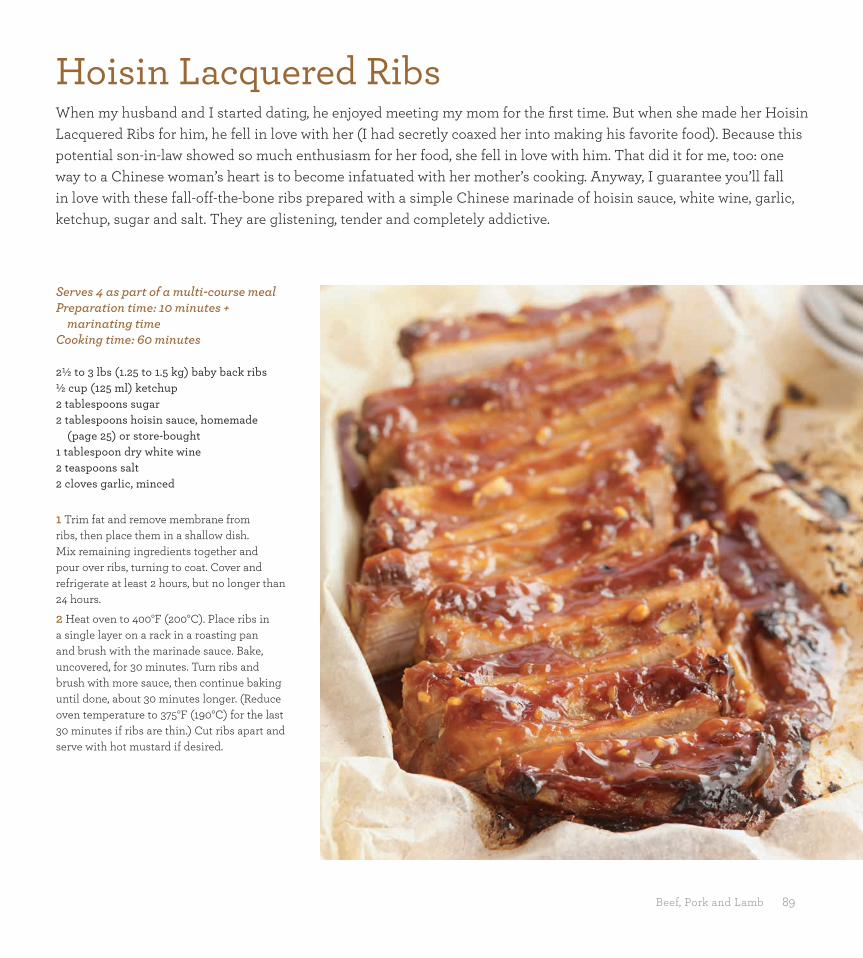
Beef, Pork and Lamb 89
Serves 4 as part of a multi-course mealPreparation time: 10 minutes +
marinating timeCooking time: 60 minutes
2½ to 3 lbs (1.25 to 1.5 kg) baby back ribs½ cup (125 ml) ketchup2 tablespoons sugar2 tablespoons hoisin sauce, homemade
(page 25) or store-bought1 tablespoon dry white wine2 teaspoons salt2 cloves garlic, minced
1 Trim fat and remove membrane from ribs, then place them in a shallow dish. Mix remaining ingredients together and pour over ribs, turning to coat. Cover and refrigerate at least 2 hours, but no longer than 24 hours.
2 Heat oven to 400°F (200°C). Place ribs in a single layer on a rack in a roasting pan and brush with the marinade sauce. Bake, uncovered, for 30 minutes. Turn ribs and brush with more sauce, then continue baking until done, about 30 minutes longer. (Reduce oven temperature to 375°F (190°C) for the last 30 minutes if ribs are thin.) Cut ribs apart and serve with hot mustard if desired.
Hoisin Lacquered RibsWhen my husband and I started dating, he enjoyed meeting my mom for the fi rst time. But when she made her Hoisin Lacquered Ribs for him, he fell in love with her (I had secretly coaxed her into making his favorite food). Because this potential son-in-law showed so much enthusiasm for her food, she fell in love with him. That did it for me, too: one way to a Chinese woman’s heart is to become infatuated with her mother’s cooking. Anyway, I guarantee you’ll fall in love with these fall-off-the-bone ribs prepared with a simple Chinese marinade of hoisin sauce, white wine, garlic, ketchup, sugar and salt. They are glistening, tender and completely addictive.
ECC_full layout.indd 89ECC_full layout.indd 89 30/9/15 7:54 PM30/9/15 7:54 PM
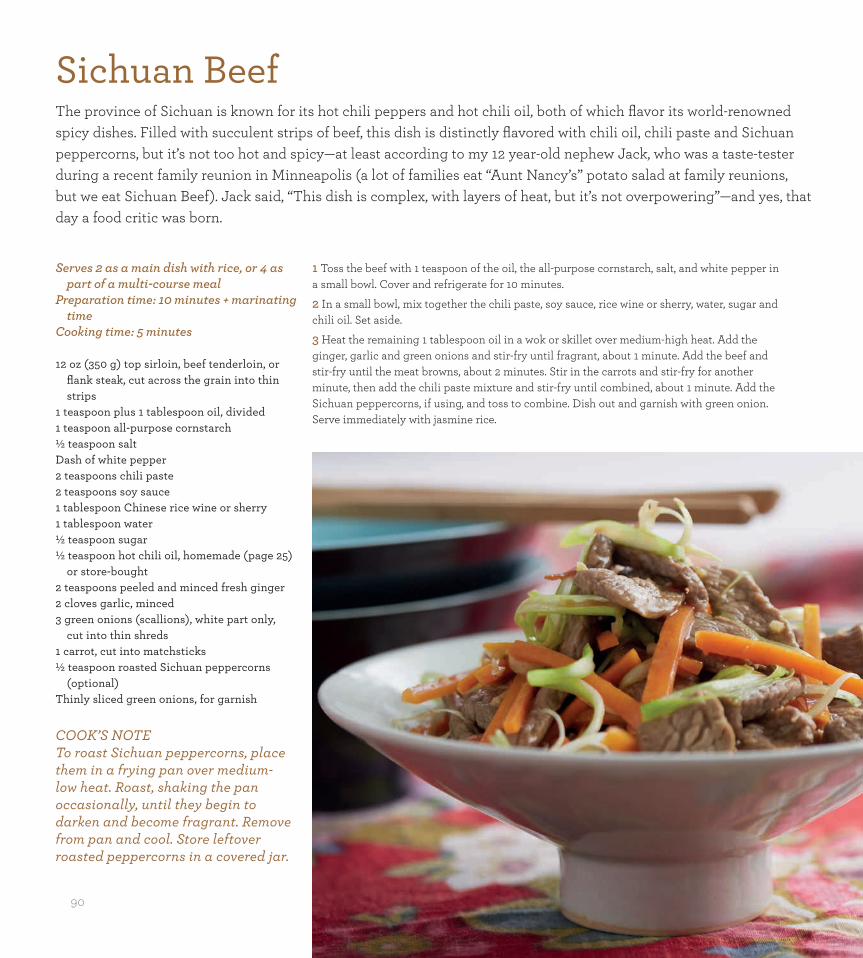
90
Serves 2 as a main dish with rice, or 4 as part of a multi-course meal
Preparation time: 10 minutes + marinating time
Cooking time: 5 minutes
12 oz (350 g) top sirloin, beef tenderloin, or fl ank steak, cut across the grain into thin strips
1 teaspoon plus 1 tablespoon oil, divided 1 teaspoon all-purpose cornstarch ½ teaspoon salt Dash of white pepper 2 teaspoons chili paste 2 teaspoons soy sauce 1 tablespoon Chinese rice wine or sherry 1 tablespoon water ½ teaspoon sugar ½ teaspoon hot chili oil, homemade (page 25)
or store-bought 2 teaspoons peeled and minced fresh ginger 2 cloves garlic, minced 3 green onions (scallions), white part only,
cut into thin shreds 1 carrot, cut into matchsticks ½ teaspoon roasted Sichuan peppercorns
(optional)Thinly sliced green onions, for garnish
COOK’S NOTETo roast Sichuan peppercorns, place them in a frying pan over medium-low heat. Roast, shaking the pan occasionally, until they begin to darken and become fragrant. Remove from pan and cool. Store leftover roasted peppercorns in a covered jar.
1 Toss the beef with 1 teaspoon of the oil, the all-purpose cornstarch, salt, and white pepper in a small bowl. Cover and refrigerate for 10 minutes.
2 In a small bowl, mix together the chili paste, soy sauce, rice wine or sherry, water, sugar and chili oil. Set aside.
3 Heat the remaining 1 tablespoon oil in a wok or skillet over medium-high heat. Add the ginger, garlic and green onions and stir-fry until fragrant, about 1 minute. Add the beef and stir-fry until the meat browns, about 2 minutes. Stir in the carrots and stir-fry for another minute, then add the chili paste mixture and stir-fry until combined, about 1 minute. Add the Sichuan peppercorns, if using, and toss to combine. Dish out and garnish with green onion. Serve immediately with jasmine rice.
Sichuan BeefThe province of Sichuan is known for its hot chili peppers and hot chili oil, both of which fl avor its world-renowned spicy dishes. Filled with succulent strips of beef, this dish is distinctly fl avored with chili oil, chili paste and Sichuan peppercorns, but it’s not too hot and spicy—at least according to my 12 year-old nephew Jack, who was a taste-tester during a recent family reunion in Minneapolis (a lot of families eat “Aunt Nancy’s” potato salad at family reunions, but we eat Sichuan Beef). Jack said, “This dish is complex, with layers of heat, but it’s not overpowering”—and yes, that day a food critic was born.
ECC_full layout.indd 90ECC_full layout.indd 90 30/9/15 7:54 PM30/9/15 7:54 PM
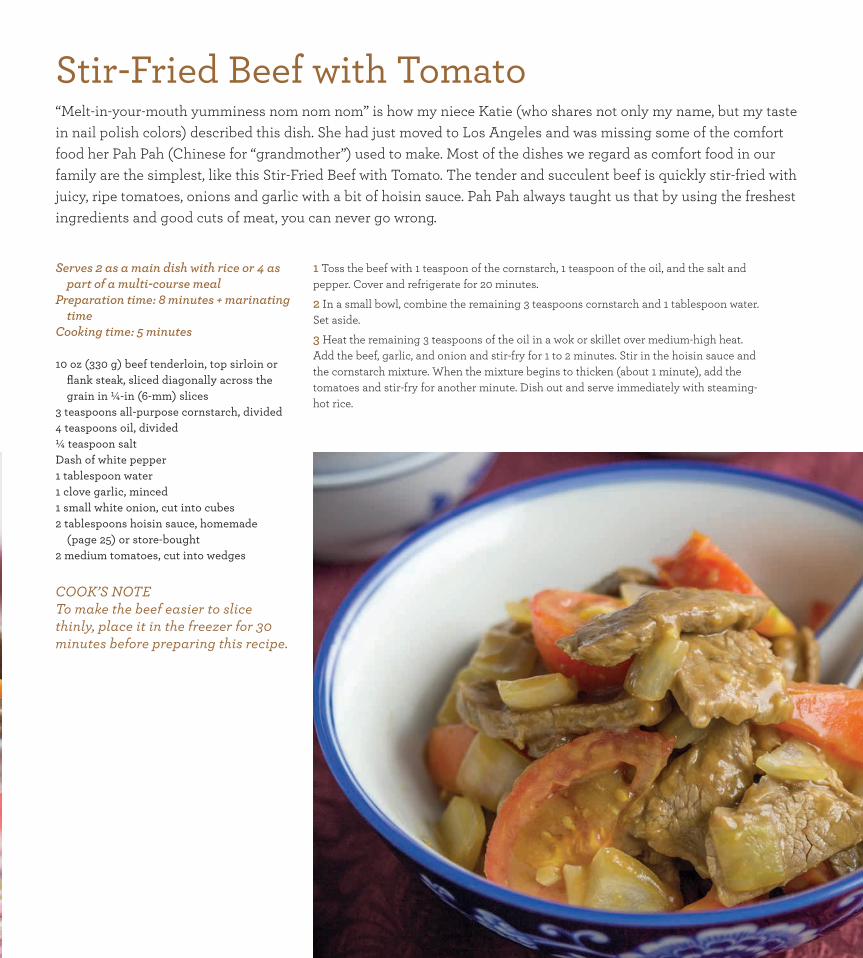
Beef, Pork and Lamb 91
Serves 2 as a main dish with rice or 4 as part of a multi-course meal
Preparation time: 8 minutes + marinating time
Cooking time: 5 minutes
10 oz (330 g) beef tenderloin, top sirloin or fl ank steak, sliced diagonally across the grain in ¼-in (6-mm) slices
3 teaspoons all-purpose cornstarch, divided4 teaspoons oil, divided¼ teaspoon saltDash of white pepper1 tablespoon water1 clove garlic, minced1 small white onion, cut into cubes2 tablespoons hoisin sauce, homemade
(page 25) or store-bought2 medium tomatoes, cut into wedges
COOK’S NOTETo make the beef easier to slice thinly, place it in the freezer for 30 minutes before preparing this recipe.
1 Toss the beef with 1 teaspoon of the cornstarch, 1 teaspoon of the oil, and the salt and pepper. Cover and refrigerate for 20 minutes.
2 In a small bowl, combine the remaining 3 teaspoons cornstarch and 1 tablespoon water. Set aside.
3 Heat the remaining 3 teaspoons of the oil in a wok or skillet over medium-high heat. Add the beef, garlic, and onion and stir-fry for 1 to 2 minutes. Stir in the hoisin sauce and the cornstarch mixture. When the mixture begins to thicken (about 1 minute), add the tomatoes and stir-fry for another minute. Dish out and serve immediately with steaming-hot rice.
Stir-Fried Beef with Tomato“Melt-in-your-mouth yumminess nom nom nom” is how my niece Katie (who shares not only my name, but my taste in nail polish colors) described this dish. She had just moved to Los Angeles and was missing some of the comfort food her Pah Pah (Chinese for “grandmother”) used to make. Most of the dishes we regard as comfort food in our family are the simplest, like this Stir-Fried Beef with Tomato. The tender and succulent beef is quickly stir-fried with juicy, ripe tomatoes, onions and garlic with a bit of hoisin sauce. Pah Pah always taught us that by using the freshest ingredients and good cuts of meat, you can never go wrong.
EVERYDAY CHINESE COOKING 91
ECC_full layout.indd 91ECC_full layout.indd 91 30/9/15 7:54 PM30/9/15 7:54 PM

92 KATIE CHIN’S EVERYDAY CHINESE COOKBOOK
Serves 4 to 6 as part of a multi-course meal
Preparation time: 10 minutes + soaking marinating time
Cooking time: 6 minutes
Three 2 x 1.5-in (5 x 3.75-cm) pieces dried tangerine peel, cut into ½-in (1.25-cm) matchsticks
12 oz (350 g) beef tenderloin, top sirloin or fl ank steak, thinly sliced across the grain
1 teaspoon plus 2 tablespoons oil, divided 3 teaspoons all-purpose cornstarch,
divided ½ teaspoon salt Dash of white pepper 2 teaspoons hoisin sauce, homemade
(page 25) or store-bought 4 tablespoons freshly squeezed tangerine
juice or orange juice 1 tablespoon soy sauce 1 tablespoon Chinese rice wine or sherry 1 teaspoon sugar 2 teaspoons chili garlic sauce 2 tablespoons oil, divided 6 dried chilies or chiles de árbol 1 clove garlic, minced 1 teaspoon peeled and minced fresh
ginger 1 small onion, cut into 1-in (2.5-cm) cubes ½ teaspoon roasted Sichuan peppercorns
(optional) ½ cup (50 g) fi nely chopped green onion
(scallion), white and green parts Orange slices for garnish
Tangerine BeefWhen I was growing up, I remember my mother scattering tangerine peels on our kitchen windowsill so they’d dry out in the sun. You can dry tangerine peels yourself—just take off any stickers and remove the pith from the peels, then set them out on a sheet pan for several days until they’re crisp and dry. Of course, it may be easier and more convenient to buy dried tangerine peel from your nearest Asian market. I love the complex layered fl avors that the rice wine, Sichuan peppercorns and dried chilies contribute to this dish, with the sweet-tart fl avors of the tangerine juice and peel mingling together with tender, juicy slices of beef.
ECC_full layout.indd 92ECC_full layout.indd 92 30/9/15 7:54 PM30/9/15 7:54 PM
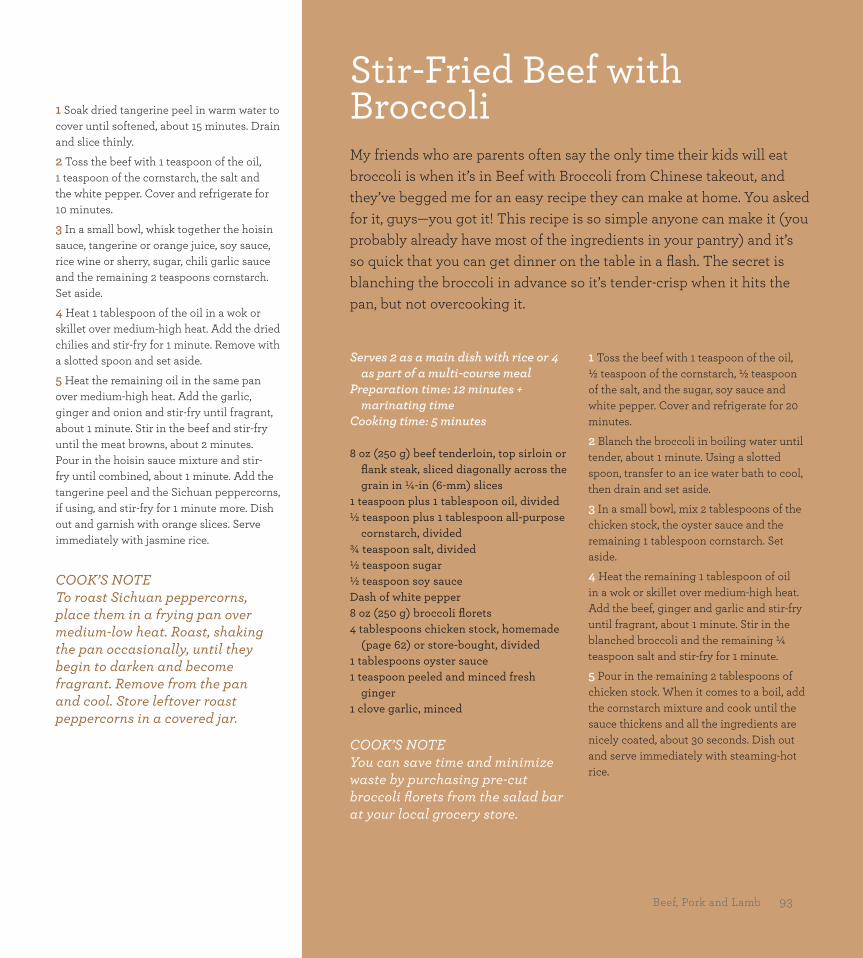
Beef, Pork and Lamb 93
Serves 2 as a main dish with rice or 4 as part of a multi-course meal
Preparation time: 12 minutes + marinating time
Cooking time: 5 minutes
8 oz (250 g) beef tenderloin, top sirloin or fl ank steak, sliced diagonally across the grain in ¼-in (6-mm) slices
1 teaspoon plus 1 tablespoon oil, divided½ teaspoon plus 1 tablespoon all-purpose
cornstarch, divided¾ teaspoon salt, divided½ teaspoon sugar½ teaspoon soy sauceDash of white pepper8 oz (250 g) broccoli fl orets 4 tablespoons chicken stock, homemade
(page 62) or store-bought, divided 1 tablespoons oyster sauce 1 teaspoon peeled and minced fresh
ginger 1 clove garlic, minced
COOK’S NOTEYou can save time and minimize waste by purchasing pre-cut broccoli fl orets from the salad bar at your local grocery store.
1 Soak dried tangerine peel in warm water to cover until softened, about 15 minutes. Drain and slice thinly.
2 Toss the beef with 1 teaspoon of the oil, 1 teaspoon of the cornstarch, the salt and the white pepper. Cover and refrigerate for 10 minutes.
3 In a small bowl, whisk together the hoisin sauce, tangerine or orange juice, soy sauce, rice wine or sherry, sugar, chili garlic sauce and the remaining 2 teaspoons cornstarch. Set aside.
4 Heat 1 tablespoon of the oil in a wok or skillet over medium-high heat. Add the dried chilies and stir-fry for 1 minute. Remove with a slotted spoon and set aside.
5 Heat the remaining oil in the same pan over medium-high heat. Add the garlic, ginger and onion and stir-fry until fragrant, about 1 minute. Stir in the beef and stir-fry until the meat browns, about 2 minutes. Pour in the hoisin sauce mixture and stir-fry until combined, about 1 minute. Add the tangerine peel and the Sichuan peppercorns, if using, and stir-fry for 1 minute more. Dish out and garnish with orange slices. Serve immediately with jasmine rice.
COOK’S NOTETo roast Sichuan peppercorns, place them in a frying pan over medium-low heat. Roast, shaking the pan occasionally, until they begin to darken and become fragrant. Remove from the pan and cool. Store leftover roast peppercorns in a covered jar.
1 Toss the beef with 1 teaspoon of the oil, ½ teaspoon of the cornstarch, ½ teaspoon of the salt, and the sugar, soy sauce and white pepper. Cover and refrigerate for 20 minutes.
2 Blanch the broccoli in boiling water until tender, about 1 minute. Using a slotted spoon, transfer to an ice water bath to cool, then drain and set aside.
3 In a small bowl, mix 2 tablespoons of the chicken stock, the oyster sauce and the remaining 1 tablespoon cornstarch. Set aside.
4 Heat the remaining 1 tablespoon of oil in a wok or skillet over medium-high heat. Add the beef, ginger and garlic and stir-fry until fragrant, about 1 minute. Stir in the blanched broccoli and the remaining ¼ teaspoon salt and stir-fry for 1 minute.
5 Pour in the remaining 2 tablespoons of chicken stock. When it comes to a boil, add the cornstarch mixture and cook until the sauce thickens and all the ingredients are nicely coated, about 30 seconds. Dish out and serve immediately with steaming-hot rice.
Stir-Fried Beef with BroccoliMy friends who are parents often say the only time their kids will eat broccoli is when it’s in Beef with Broccoli from Chinese takeout, and they’ve begged me for an easy recipe they can make at home. You asked for it, guys—you got it! This recipe is so simple anyone can make it (you probably already have most of the ingredients in your pantry) and it’s so quick that you can get dinner on the table in a fl ash. The secret is blanching the broccoli in advance so it’s tender-crisp when it hits the pan, but not overcooking it.
Beef, Pork and Lamb 93
ECC_full layout.indd 93ECC_full layout.indd 93 30/9/15 7:54 PM30/9/15 7:54 PM
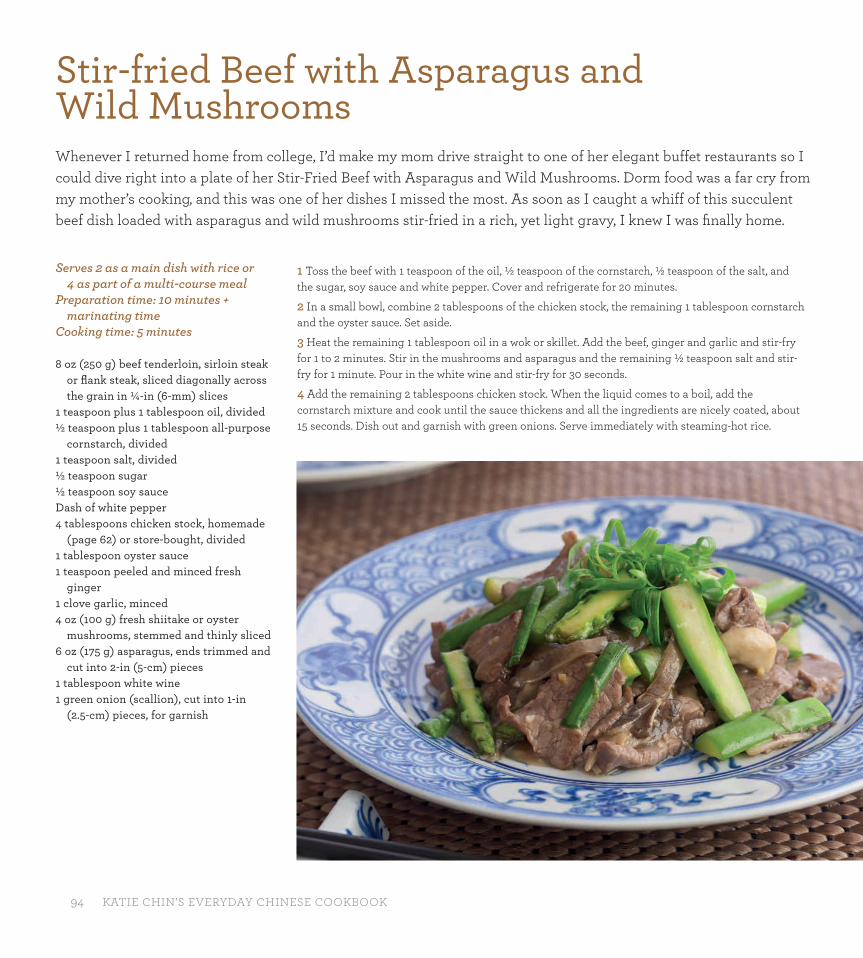
94 KATIE CHIN’S EVERYDAY CHINESE COOKBOOK
Serves 2 as a main dish with rice or 4 as part of a multi-course meal
Preparation time: 10 minutes + marinating time
Cooking time: 5 minutes
8 oz (250 g) beef tenderloin, sirloin steak or fl ank steak, sliced diagonally across the grain in ¼-in (6-mm) slices
1 teaspoon plus 1 tablespoon oil, divided½ teaspoon plus 1 tablespoon all-purpose
cornstarch, divided1 teaspoon salt, divided½ teaspoon sugar½ teaspoon soy sauceDash of white pepper4 tablespoons chicken stock, homemade
(page 62) or store-bought, divided1 tablespoon oyster sauce1 teaspoon peeled and minced fresh
ginger1 clove garlic, minced4 oz (100 g) fresh shiitake or oyster
mushrooms, stemmed and thinly sliced6 oz (175 g) asparagus, ends trimmed and
cut into 2-in (5-cm) pieces1 tablespoon white wine1 green onion (scallion), cut into 1-in
(2.5-cm) pieces, for garnish
1 Toss the beef with 1 teaspoon of the oil, ½ teaspoon of the cornstarch, ½ teaspoon of the salt, and the sugar, soy sauce and white pepper. Cover and refrigerate for 20 minutes.
2 In a small bowl, combine 2 tablespoons of the chicken stock, the remaining 1 tablespoon cornstarch and the oyster sauce. Set aside.
3 Heat the remaining 1 tablespoon oil in a wok or skillet. Add the beef, ginger and garlic and stir-fry for 1 to 2 minutes. Stir in the mushrooms and asparagus and the remaining ½ teaspoon salt and stir-fry for 1 minute. Pour in the white wine and stir-fry for 30 seconds.
4 Add the remaining 2 tablespoons chicken stock. When the liquid comes to a boil, add the cornstarch mixture and cook until the sauce thickens and all the ingredients are nicely coated, about 15 seconds. Dish out and garnish with green onions. Serve immediately with steaming-hot rice.
Stir-fried Beef with Asparagus and Wild MushroomsWhenever I returned home from college, I’d make my mom drive straight to one of her elegant buffet restaurants so I could dive right into a plate of her Stir-Fried Beef with Asparagus and Wild Mushrooms. Dorm food was a far cry from my mother’s cooking, and this was one of her dishes I missed the most. As soon as I caught a whiff of this succulent beef dish loaded with asparagus and wild mushrooms stir-fried in a rich, yet light gravy, I knew I was fi nally home.
ECC_full layout.indd 94ECC_full layout.indd 94 2/10/15 11:52 AM2/10/15 11:52 AM
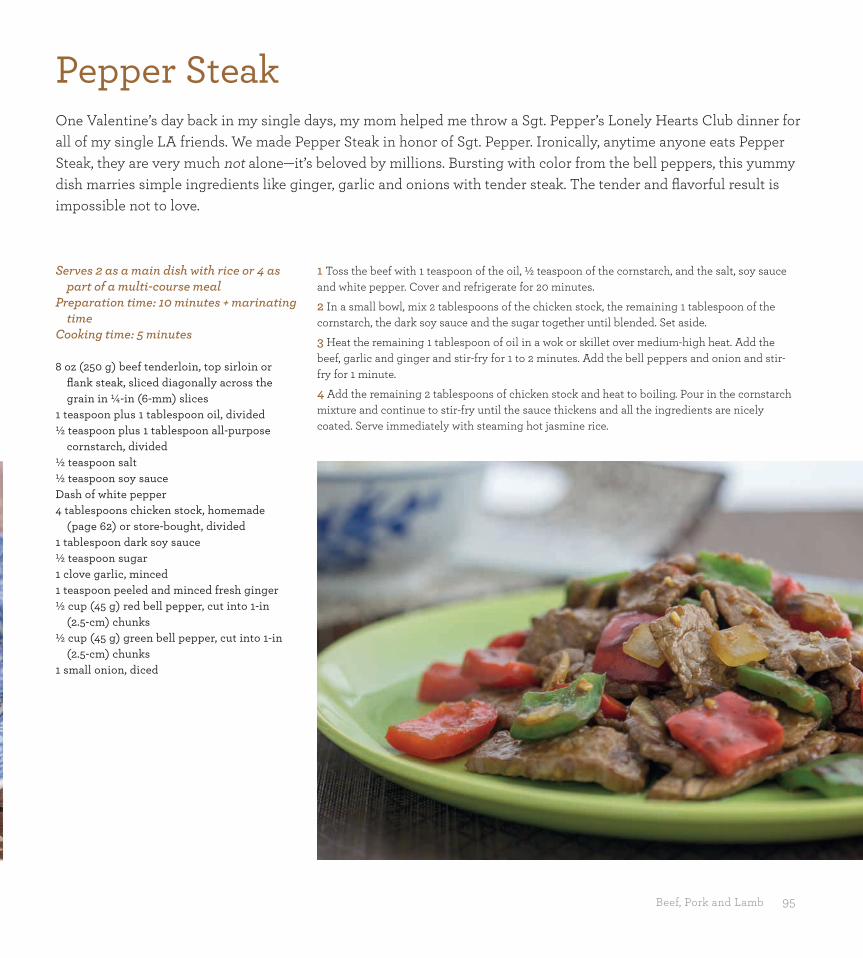
Beef, Pork and Lamb 95
Serves 2 as a main dish with rice or 4 as part of a multi-course meal
Preparation time: 10 minutes + marinating time
Cooking time: 5 minutes
8 oz (250 g) beef tenderloin, top sirloin or fl ank steak, sliced diagonally across the grain in ¼-in (6-mm) slices
1 teaspoon plus 1 tablespoon oil, divided½ teaspoon plus 1 tablespoon all-purpose
cornstarch, divided½ teaspoon salt ½ teaspoon soy sauce Dash of white pepper 4 tablespoons chicken stock, homemade
(page 62) or store-bought, divided1 tablespoon dark soy sauce ½ teaspoon sugar 1 clove garlic, minced 1 teaspoon peeled and minced fresh ginger½ cup (45 g) red bell pepper, cut into 1-in
(2.5-cm) chunks½ cup (45 g) green bell pepper, cut into 1-in
(2.5-cm) chunks1 small onion, diced
1 Toss the beef with 1 teaspoon of the oil, ½ teaspoon of the cornstarch, and the salt, soy sauce and white pepper. Cover and refrigerate for 20 minutes.
2 In a small bowl, mix 2 tablespoons of the chicken stock, the remaining 1 tablespoon of the cornstarch, the dark soy sauce and the sugar together until blended. Set aside.
3 Heat the remaining 1 tablespoon of oil in a wok or skillet over medium-high heat. Add the beef, garlic and ginger and stir-fry for 1 to 2 minutes. Add the bell peppers and onion and stir-fry for 1 minute.
4 Add the remaining 2 tablespoons of chicken stock and heat to boiling. Pour in the cornstarch mixture and continue to stir-fry until the sauce thickens and all the ingredients are nicely coated. Serve immediately with steaming hot jasmine rice.
Pepper SteakOne Valentine’s day back in my single days, my mom helped me throw a Sgt. Pepper’s Lonely Hearts Club dinner for all of my single LA friends. We made Pepper Steak in honor of Sgt. Pepper. Ironically, anytime anyone eats Pepper Steak, they are very much not alone—it’s beloved by millions. Bursting with color from the bell peppers, this yummy dish marries simple ingredients like ginger, garlic and onions with tender steak. The tender and fl avorful result is impossible not to love.
ECC_full layout.indd 95ECC_full layout.indd 95 30/9/15 7:54 PM30/9/15 7:54 PM
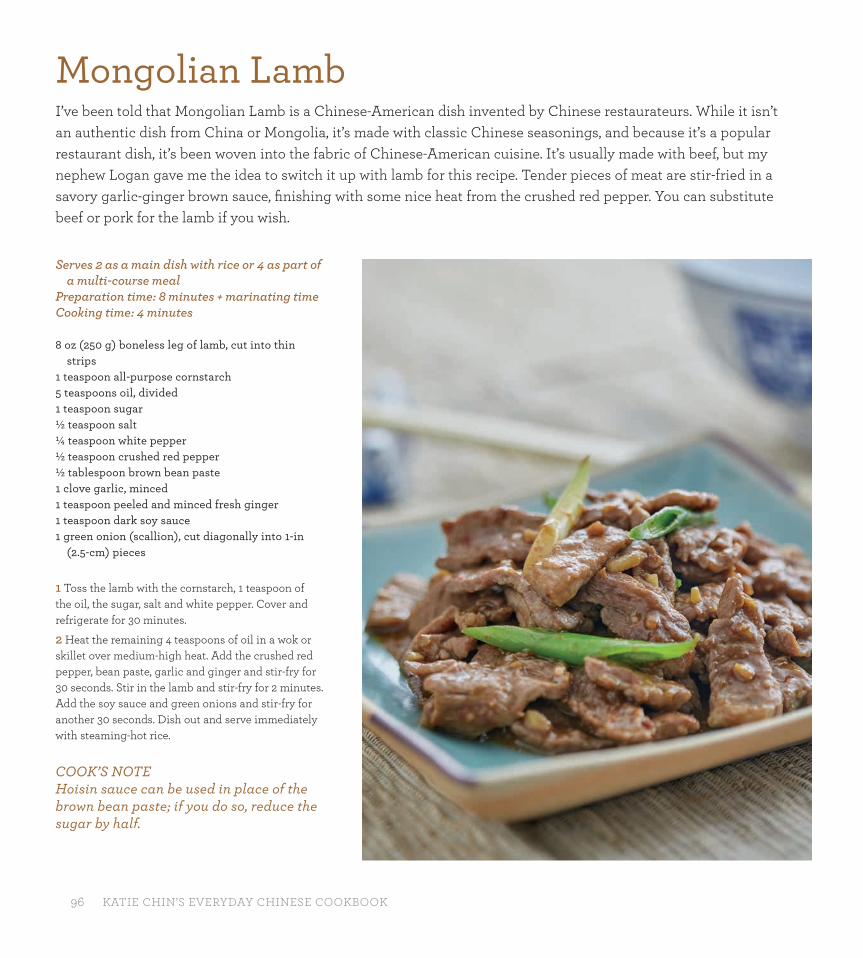
96 KATIE CHIN’S EVERYDAY CHINESE COOKBOOK
Serves 2 as a main dish with rice or 4 as part of a multi-course meal
Preparation time: 8 minutes + marinating timeCooking time: 4 minutes
8 oz (250 g) boneless leg of lamb, cut into thin strips
1 teaspoon all-purpose cornstarch5 teaspoons oil, divided 1 teaspoon sugar½ teaspoon salt¼ teaspoon white pepper½ teaspoon crushed red pepper ½ tablespoon brown bean paste1 clove garlic, minced 1 teaspoon peeled and minced fresh ginger1 teaspoon dark soy sauce1 green onion (scallion), cut diagonally into 1-in
(2.5-cm) pieces
1 Toss the lamb with the cornstarch, 1 teaspoon of the oil, the sugar, salt and white pepper. Cover and refrigerate for 30 minutes.
2 Heat the remaining 4 teaspoons of oil in a wok or skillet over medium-high heat. Add the crushed red pepper, bean paste, garlic and ginger and stir-fry for 30 seconds. Stir in the lamb and stir-fry for 2 minutes. Add the soy sauce and green onions and stir-fry for another 30 seconds. Dish out and serve immediately with steaming-hot rice.
COOK’S NOTEHoisin sauce can be used in place of the brown bean paste; if you do so, reduce the sugar by half.
Mongolian LambI’ve been told that Mongolian Lamb is a Chinese-American dish invented by Chinese restaurateurs. While it isn’t an authentic dish from China or Mongolia, it’s made with classic Chinese seasonings, and because it’s a popular restaurant dish, it’s been woven into the fabric of Chinese-American cuisine. It’s usually made with beef, but my nephew Logan gave me the idea to switch it up with lamb for this recipe. Tender pieces of meat are stir-fried in a savory garlic-ginger brown sauce, fi nishing with some nice heat from the crushed red pepper. You can substitute beef or pork for the lamb if you wish.
ECC_full layout.indd 96ECC_full layout.indd 96 2/10/15 11:52 AM2/10/15 11:52 AM
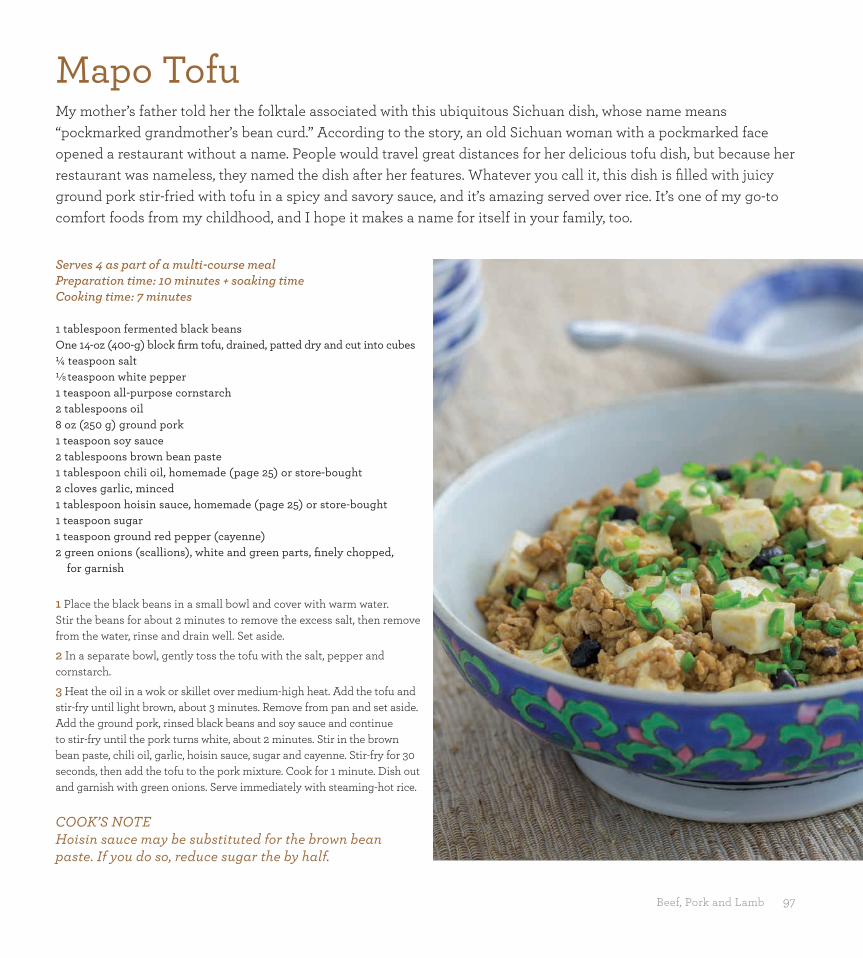
Beef, Pork and Lamb 97
Serves 4 as part of a multi-course mealPreparation time: 10 minutes + soaking timeCooking time: 7 minutes
1 tablespoon fermented black beansOne 14-oz (400-g) block fi rm tofu, drained, patted dry and cut into cubes¼ teaspoon salt¹⁄8 teaspoon white pepper1 teaspoon all-purpose cornstarch2 tablespoons oil8 oz (250 g) ground pork1 teaspoon soy sauce2 tablespoons brown bean paste1 tablespoon chili oil, homemade (page 25) or store-bought 2 cloves garlic, minced 1 tablespoon hoisin sauce, homemade (page 25) or store-bought1 teaspoon sugar1 teaspoon ground red pepper (cayenne)2 green onions (scallions), white and green parts, fi nely chopped,
for garnish
1 Place the black beans in a small bowl and cover with warm water. Stir the beans for about 2 minutes to remove the excess salt, then remove from the water, rinse and drain well. Set aside.
2 In a separate bowl, gently toss the tofu with the salt, pepper and cornstarch.
3 Heat the oil in a wok or skillet over medium-high heat. Add the tofu and stir-fry until light brown, about 3 minutes. Remove from pan and set aside. Add the ground pork, rinsed black beans and soy sauce and continue to stir-fry until the pork turns white, about 2 minutes. Stir in the brown bean paste, chili oil, garlic, hoisin sauce, sugar and cayenne. Stir-fry for 30 seconds, then add the tofu to the pork mixture. Cook for 1 minute. Dish out and garnish with green onions. Serve immediately with steaming-hot rice.
COOK’S NOTEHoisin sauce may be substituted for the brown bean paste. If you do so, reduce sugar the by half.
Mapo TofuMy mother’s father told her the folktale associated with this ubiquitous Sichuan dish, whose name means “pockmarked grandmother’s bean curd.” According to the story, an old Sichuan woman with a pockmarked face opened a restaurant without a name. People would travel great distances for her delicious tofu dish, but because her restaurant was nameless, they named the dish after her features. Whatever you call it, this dish is fi lled with juicy ground pork stir-fried with tofu in a spicy and savory sauce, and it’s amazing served over rice. It’s one of my go-to comfort foods from my childhood, and I hope it makes a name for itself in your family, too.
ECC_full layout.indd 97ECC_full layout.indd 97 2/10/15 11:52 AM2/10/15 11:52 AM

98 KATIE CHIN’S EVERYDAY CHINESE COOKBOOK
Serves 2 as a main dish with rice or 4 as part of a multi-course meal
Preparation time: 12 minutes + marinating timeCooking time: 5 minutes
8 oz (250 g) beef tenderloin or boneless sirloin steak, sliced diagonally across the grain in ¼-in (6-mm) slices
1 teaspoon plus 1 tablespoon oil, divided ½ teaspoon plus 1 tablespoon all-purpose cornstarch,
divided1 teaspoon salt, divided1 teaspoon sugar, divided½ teaspoon soy sauceDash of white pepper2 oz (50 g) snow peas, tips and strings removed4 tablespoons chicken stock, homemade (page 62) or
store-bought, divided1 tablespoon oyster sauce1 teaspoon peeled and minced fresh ginger1 clove garlic, minced½ cup (40 g) sliced mushrooms2 stalks bok choy, trimmed and cut diagonally into ½-in
(1.25-cm) slices½ cup (85 g) thinly sliced red bell pepper2 oz (50 g) sliced canned water chestnuts2 oz (50 g) sliced canned bamboo shoots1 teaspoon dry white wine
1 Toss the beef with 1 teaspoon of the oil, ½ teaspoon of the cornstarch, ½ teaspoon of the salt, ½ teaspoon of the sugar, the soy sauce and the white pepper. Cover and refrigerate for 20 minutes.
2 Blanch the snow peas in boiling water until tender, about 1 minute. Using a slotted spoon, transfer the snow peas to an ice water bath to cool, then drain and set aside.
3 In a small bowl, combine 2 tablespoons of the chicken stock, the remaining 1 tablespoon cornstarch, oyster sauce and the remaining ½ teaspoon sugar. Set aside.
4 Heat the remaining 1 tablespoon of oil in a wok or skillet over medium-high heat. Add the beef, ginger and garlic and stir-fry for 2 minutes. Stir in the mushrooms, bok choy, red bell pepper, water chestnuts, bamboo shoots and the remaining ½ teaspoon salt and stir-fry for 1 to 2 minutes more.
5 Add the white wine and stir-fry for 30 seconds, then pour in the remaining 2 tablespoons chicken stock. When the stock comes to a boil, pour in the cornstarch mixture and cook until the sauce thickens and all the ingredients are nicely coated, about 15 seconds. Dish out and serve immediately with steaming-hot rice.
COOK’S NOTETo make the beef easier to slice thinly, place it in the freezer for 30 minutes before preparing the recipe.
Stir-Fried Beef with Snow Peas and Red Bell PepperWhen my sister Jeanie was in medical school, she barely got any sleep and was working crazy hours. She had lost weight and looked tired, and my mother was determined to get her back on track with protein- and iron-rich stir-fries. One of her favorites was this Stir-Fried Beef with Snow Peas and Red Bell Pepper. It’s healthy and delicious, fi lled with tender-crisp snow peas, crunchy red bell pepper and succulent beef. My mother would invite my sister over for dinner and insist on picking her up and driving her home. She’d keep offering Jeanie seconds and thirds (which no dutiful daughter would dream of turning down) until she felt satisfi ed that Jeanie had eaten enough, at which point she’d fi nally drive her home.
ECC_full layout.indd 98ECC_full layout.indd 98 30/9/15 7:54 PM30/9/15 7:54 PM

Beef, Pork and Lamb 99EVERYDAY CHINESE COOKING 99
ECC_full layout.indd 99ECC_full layout.indd 99 30/9/15 7:54 PM30/9/15 7:54 PM
100
10 oz (330 g) pork tenderloin, cut into ½-in (1.25-cm) pieces1 teaspoon salt, divided¼ teaspoon white pepper2 tablespoons all-purpose cornstarch3 tablespoons oil, divided1 clove garlic, minced3 to 4 celery stalks, cut into ¼-in (6-mm) diagonal slices4 tablespoons chicken stock, homemade (page 62) or store-bought2 oz (50 g) shiitake mushrooms2 oz (50 g) oyster mushrooms2 tablespoons oyster sauce3 green onions (scallions), chopped (white and green parts)
1 Sprinkle ½ teaspoon of the salt and the pepper over the pork pieces. Place them on a plate or wax paper. Dip each piece of tenderloin in cornstarch to coat.
2 Heat 2 tablespoons of the oil in a wok or skillet over medium-high heat. Place the pork slices in the pan in a single layer, not overlapping. (If the pan is not large enough, cook the pork in batches.) Fry until golden brown, then turn over and brown the other side, about 2 minutes per side. Reduce the heat and remove the pork from the skillet. Add the garlic, celery and the remaining ½ teaspoon salt to the skillet and stir-fry for 30 seconds. Add the chicken stock and cook for 3 minutes (the celery should absorb the stock). Add the mushrooms and the remaining 1 tablespoon oil and stir-fry for 1 minute. Add the oyster sauce, pork and green onions and carefully stir for about 30 seconds. Dish out and serve immediately.
COOK’S NOTEYou can experiment with different kinds of mushrooms for this dish, and add other vegetables such as asparagus if you wish.
Pork Tenderloin with Wild MushroomsIf you love mushrooms, this is for you. It’s different than the usual stir-fry, as the pork medallions are dusted with cornstarch and pan-fried a bit before the other ingredients are added. I love the slightly crisp texture of the pork mixed with the sumptuous and tender shiitake and oyster mushrooms in the velvety gravy. When I made this, I heard my six year-old daughter Becca say, “Umami,” which made me so proud, but my husband later told me she actually said, “Oooh, mommy!”
Stir-Fried Pork with Zucchini File this one under “Easy-peasy.” My mother always had zucchini on hand for stir-fries. Because of its delicate fl avor, it pairs well with almost any protein. It cooks quickly, so there’s no blanching required, making it a snap for a busy weeknight. I like to combine yellow and green zucchini for a colorful dish.
Serves 2 as a main dish with rice or 4 as part of a multi-course meal
Preparation time: 10 minutes + marinating and soaking time
Cooking time: 5 minutes
Serves 2 as a main dish with rice or 4 as part of a multi-course mealPreparation time: 15 minutes + marinating timeCooking time: 10 minutes
8 oz (250 g) pork loin or pork tenderloin, cut into ½-in (1.25-cm) pieces
¼ teaspoon saltDash of white pepper½ teaspoon plus 2
teaspoons all-purpose cornstarch, divided
4 dried black mushrooms2 teaspoons water1 tablespoon oyster sauce¼ teaspoon sugar1 tablespoon oil1 clove garlic, minced2 to 3 small zucchini, sliced
diagonally into ¼-in (6-mm) slices
4 tablespoons chicken stock, homemade (page 62) or store-bought
1 Toss the pork with the salt, pepper and ½ teaspoon of the cornstarch. Cover and refrigerate for 20 minutes.
2 Soak the black mushrooms in hot water for
20 minutes, or until soft. Cut off the stems and discard. Cut the mushroom caps into ½-inch (1.25-cm) pieces.
3 In a small bowl, combine the remaining 2 teaspoons of the cornstarch with the water, oyster sauce and sugar. Set aside.
4 Heat the oil in a wok or skillet over medium-high heat. Add the pork and garlic and stir-fry for 2 minutes. Stir in the zucchini and black mushrooms and stir-fry for 2 minutes.
5 Pour in the chicken stock and cook until the stock comes to a boil. Add the cornstarch mixture and cook for about 30 seconds more, until the sauce thickens and all the ingredients are nicely coated. Dish out and serve immediately with steaming-hot rice.
ECC_full layout.indd 100ECC_full layout.indd 100 30/9/15 7:54 PM30/9/15 7:54 PM
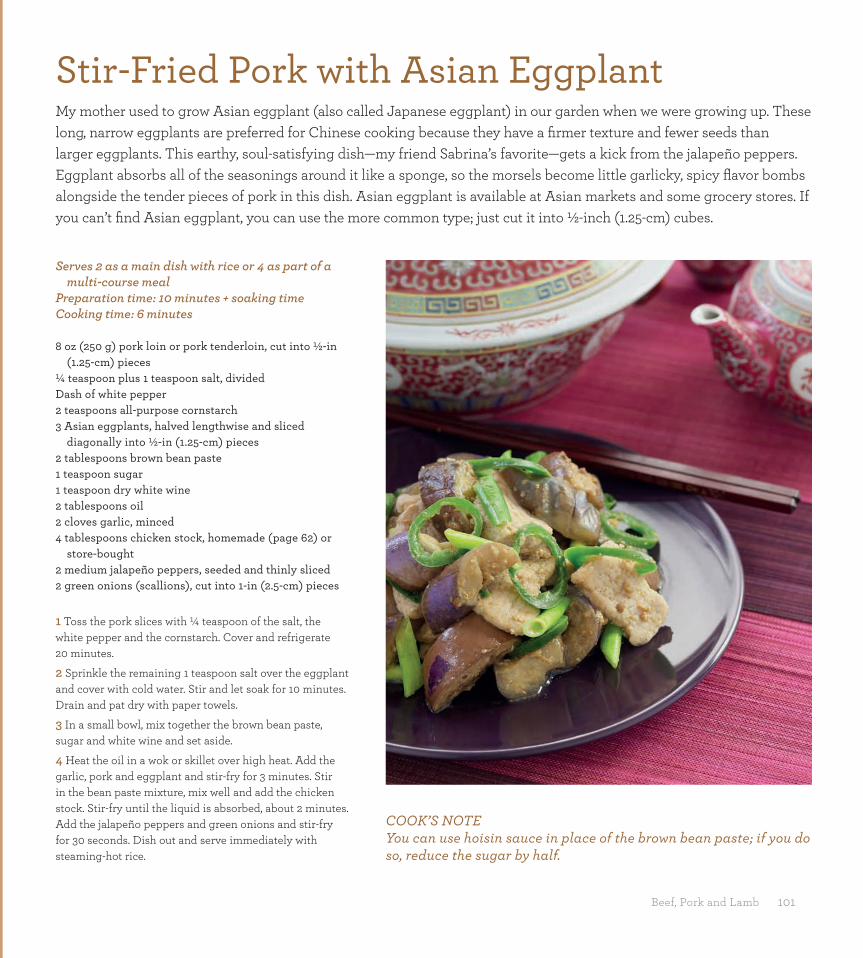
Beef, Pork and Lamb 101
Serves 2 as a main dish with rice or 4 as part of a multi-course meal
Preparation time: 10 minutes + soaking timeCooking time: 6 minutes
8 oz (250 g) pork loin or pork tenderloin, cut into ½-in (1.25-cm) pieces
¼ teaspoon plus 1 teaspoon salt, dividedDash of white pepper2 teaspoons all-purpose cornstarch3 Asian eggplants, halved lengthwise and sliced
diagonally into ½-in (1.25-cm) pieces2 tablespoons brown bean paste1 teaspoon sugar1 teaspoon dry white wine2 tablespoons oil2 cloves garlic, minced4 tablespoons chicken stock, homemade (page 62) or
store-bought2 medium jalapeño peppers, seeded and thinly sliced2 green onions (scallions), cut into 1-in (2.5-cm) pieces
1 Toss the pork slices with ¼ teaspoon of the salt, the white pepper and the cornstarch. Cover and refrigerate 20 minutes.
2 Sprinkle the remaining 1 teaspoon salt over the eggplant and cover with cold water. Stir and let soak for 10 minutes. Drain and pat dry with paper towels.
3 In a small bowl, mix together the brown bean paste, sugar and white wine and set aside.
4 Heat the oil in a wok or skillet over high heat. Add the garlic, pork and eggplant and stir-fry for 3 minutes. Stir in the bean paste mixture, mix well and add the chicken stock. Stir-fry until the liquid is absorbed, about 2 minutes. Add the jalapeño peppers and green onions and stir-fry for 30 seconds. Dish out and serve immediately with steaming-hot rice.
Stir-Fried Pork with Asian EggplantMy mother used to grow Asian eggplant (also called Japanese eggplant) in our garden when we were growing up. These long, narrow eggplants are preferred for Chinese cooking because they have a fi rmer texture and fewer seeds than larger eggplants. This earthy, soul-satisfying dish—my friend Sabrina’s favorite—gets a kick from the jalapeño peppers. Eggplant absorbs all of the seasonings around it like a sponge, so the morsels become little garlicky, spicy fl avor bombs alongside the tender pieces of pork in this dish. Asian eggplant is available at Asian markets and some grocery stores. If you can’t fi nd Asian eggplant, you can use the more common type; just cut it into ½-inch (1.25-cm) cubes.
COOK’S NOTEYou can use hoisin sauce in place of the brown bean paste; if you do so, reduce the sugar by half.
ECC_full layout.indd 101ECC_full layout.indd 101 1/10/15 9:57 AM1/10/15 9:57 AM

102 KATIE CHIN’S EVERYDAY CHINESE COOKBOOK
I’ m of Cantonese descent, but I’m not bragging when I say the Cantonese preparation of seafood is regarded as the fi nest and most inventive in all of China. Guangzhou
(formerly known as Canton) is located along the southern coast of China, so seafood features prominently in its cuisine.
In China, seafood is mainly sold live in tanks. Many people go out on a daily basis to pick out a fresh whole fi sh to be steamed for dinner that night, or to buy a basketful of clams to be tossed in a pungent black bean sauce as soon as they get home. I remember shooting a Food Network special in Guangzhou with my mother. They had us pick out some live prawns from a market stall. We then walked across the street and handed them to a Chinese chef who tossed them in his wok with some garlic and green onions. Within minutes, we were sitting down to lunch. You can’t get any fresher than that!
Many Chinese fi sh preparations are simple and elegant, letting the sweet and delicate fl avor of the fi sh stand out. Fish is typically steamed with green onions, ginger and oil, as in the recipe for Braided Fish Steamed with Ginger and Green Onions (page 110) or Steamed Cantonese Whole Fish (page 119). Shrimp is always served at celebratory occasions in China, because the word for shrimp, har, sounds like laughter. I’ve included some of my favorite shrimp dishes from our family celebrations like the sweet, decadent Walnut Shrimp (page 114) and the healthy and light Jade Shrimp with Fragrant Vegetables (page 108).
Seafood
ECC_full layout.indd 102ECC_full layout.indd 102 2/10/15 11:52 AM2/10/15 11:52 AM

The Wisdom of My Mother’s Kitchen 103
ECC_full layout.indd 103ECC_full layout.indd 103 30/9/15 7:57 PM30/9/15 7:57 PM

104 KATIE CHIN’S EVERYDAY CHINESE COOKBOOK
COOK’S NOTEIf any clams are open before cooking, tap the shell. If they don’t close tightly, discard them.
Clams in Black Bean SauceThis is an earthy dish; the pungent fl avor of fermented black beans mingles with the briny taste of the clams, punctuated with ginger and dried chilies in a rich, savory sauce. I didn’t appreciate this dish as a child, but when I went away for college my palate expanded (to also include coffee, clove cigarettes and red wine). In Boston, I got my weekly Clams in Black Bean Sauce fi x at my favorite Chinatown dive, the Lucky Dragon. My mother always taught me to buy clams right before you cook them, but if you can’t, keep them moist on ice in the fridge before cooking.
Serves 4 as part of a multi-course mealPreparation time: 15 minutes + soaking timeCooking time: 8 minutes
2 tablespoons fermented black beans 1 tablespoon all-purpose cornstarch 1 teaspoon sugar 1 tablespoon water 36 littleneck clams 3 cups (750 ml) cold water 3 tablespoons white vinegar 1 cup (250 ml) boiling water 3 tablespoons oil 6 dried red chilies or chiles de árbol 2 teaspoons peeled and minced fresh ginger 2 cloves garlic, minced1 green onion (scallion), fi nely chopped, for garnish
1 Place the black beans in a small bowl and cover with warm water. Stir for about 2 minutes to remove the excess salt. Remove the beans from the water, rinse and drain well.
2 Combine the cornstarch, sugar and 1 tablespoon water in a small bowl. Set aside.
3 Discard any broken or open clams and place the rest in a large bowl. Mix the 3 cups (750 ml) water with the vinegar and pour over the clams. Let stand 30 minutes.
4 Scrub the clams under running cold water, then place in a steamer over 1 cup (150 ml) boiling water. Steam for 5 minutes, or until clams open at least 1 inch (2.5 cm). Remove the clams as they open, discarding any that remain closed, and keep them warm. Strain the steaming liquid through double-thickness cheesecloth, reserving ½ cup (125 ml) of the liquid.
5 Heat the oil in a wok or skillet over medium-high heat. Add the strained black beans, chilies, garlic and ginger; stir-fry for 1 minute. Add the reserved steaming liquid and heat to boiling. Pour in the cornstarch mixture and stir for 1 minute or until the sauce thickens. Add the reserved clams and toss until nicely coated. Dish out and garnish with green onions. Serve immediately with steaming-hot rice.
ECC_full layout.indd 104ECC_full layout.indd 104 2/10/15 11:52 AM2/10/15 11:52 AM

Seafood 105
Chinese Glazed SalmonI’m always trying to get my kids to eat more fi sh for the omega-3 oils, but it isn’t always easy. I was riffi ng on one of my mom’s salmon recipes to make it more kid-friendly when my niece Griffi n was visiting from Minneapolis. She took one bite and said, “OMG…salmon is my new jam.” What I love about this recipe is that it’s incredibly easy, and the marinade of soy sauce, ginger, lime juice, garlic and brown sugar makes it incredibly fl avorful. My favorite part is the sweet, spicy and sticky glaze that’s brushed over the salmon right before you serve it. When all the little kids saw Griffi n devouring her salmon, they decided to try it, and before I knew it the entire platter was empty. My six year-old daughter Becca asked later, “Why does Griffi n like salmon jam?”
Serves 6 as part of a multi-course mealPreparation time: 10 minutes + marinating timeCooking time: 14 minutes
MARINADE½ cup (85 g) brown sugar¹⁄³ cup (80 ml) soy sauce2 tablespoons hoisin sauce, homemade (page 25) or store-bought2 tablespoons peeled and minced fresh ginger¹⁄8 teaspoon crushed red pepper 1 clove garlic, minced1 tablespoon freshly squeezed lime juice1 teaspoon dark sesame oil
1½ lbs (750 g) salmon fi llet
1 Make the marinade: Whisk the marinade ingredients in a small bowl until blended. Pour half of the marinade over the salmon, turning the fi llet over to coat thoroughly. Cover and refrigerate for 20 minutes.
2 Place the remaining marinade in a small saucepan over medium-high heat. Bring to a boil, then reduce heat to medium-low and simmer for about 14 minutes, or until the marinade forms a glaze.
3 Preheat broiler and place the marinated salmon on a broiler pan. Broil salmon until cooked through, about 8 minutes.
4 Remove salmon from the broiler. Transfer to a platter and brush the glaze over. Serve immediately with steaming-hot rice.
ECC_full layout.indd 105ECC_full layout.indd 105 30/9/15 7:57 PM30/9/15 7:57 PM
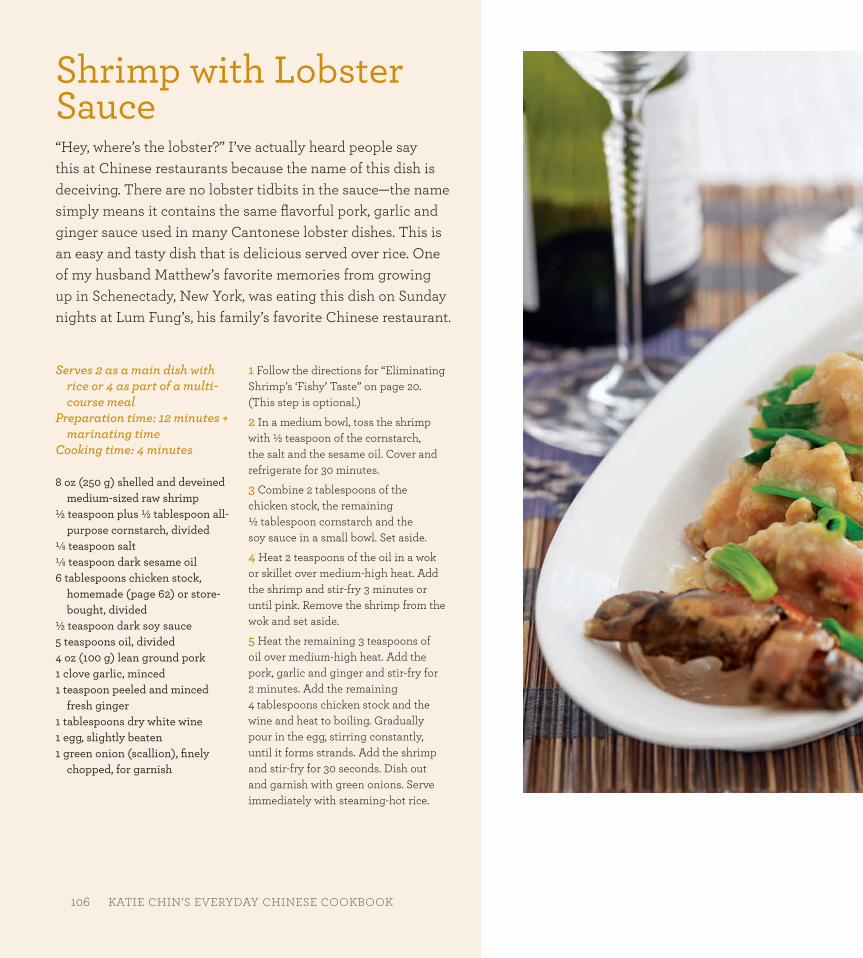
106 KATIE CHIN’S EVERYDAY CHINESE COOKBOOK
Serves 2 as a main dish with rice or 4 as part of a multi-course meal
Preparation time: 12 minutes + marinating time
Cooking time: 4 minutes
8 oz (250 g) shelled and deveined medium-sized raw shrimp
½ teaspoon plus ½ tablespoon all-purpose cornstarch, divided
¹⁄8 teaspoon salt¹⁄8 teaspoon dark sesame oil6 tablespoons chicken stock,
homemade (page 62) or store-bought, divided
½ teaspoon dark soy sauce5 teaspoons oil, divided4 oz (100 g) lean ground pork1 clove garlic, minced1 teaspoon peeled and minced
fresh ginger1 tablespoons dry white wine1 egg, slightly beaten1 green onion (scallion), fi nely
chopped, for garnish
Shrimp with Lobster Sauce “Hey, where’s the lobster?” I’ve actually heard people say this at Chinese restaurants because the name of this dish is deceiving. There are no lobster tidbits in the sauce—the name simply means it contains the same fl avorful pork, garlic and ginger sauce used in many Cantonese lobster dishes. This is an easy and tasty dish that is delicious served over rice. One of my husband Matthew’s favorite memories from growing up in Schenectady, New York, was eating this dish on Sunday nights at Lum Fung’s, his family’s favorite Chinese restaurant.
106 KATIE CHIN’S EVERYDAY CHINESE COOKBOOK
1 Follow the directions for “Eliminating Shrimp’s ‘Fishy’ Taste” on page 20. (This step is optional.)
2 In a medium bowl, toss the shrimp with ½ teaspoon of the cornstarch, the salt and the sesame oil. Cover and refrigerate for 30 minutes.
3 Combine 2 tablespoons of the chicken stock, the remaining ½ tablespoon cornstarch and the soy sauce in a small bowl. Set aside.
4 Heat 2 teaspoons of the oil in a wok or skillet over medium-high heat. Add the shrimp and stir-fry 3 minutes or until pink. Remove the shrimp from the wok and set aside.
5 Heat the remaining 3 teaspoons of oil over medium-high heat. Add the pork, garlic and ginger and stir-fry for 2 minutes. Add the remaining 4 tablespoons chicken stock and the wine and heat to boiling. Gradually pour in the egg, stirring constantly, until it forms strands. Add the shrimp and stir-fry for 30 seconds. Dish out and garnish with green onions. Serve immediately with steaming-hot rice.
ECC_full layout.indd 106ECC_full layout.indd 106 30/9/15 7:57 PM30/9/15 7:57 PM

Seafood 107
Serves 4 as part of a multi-course mealPreparation time: 20 minutesCooking time: 8 minutes
½ teaspoon salt¼ teaspoon white pepper½ cup (65 g) plus 1 tablespoon all-purpose
cornstarch, divided1 tablespoon water1 live lobster (about 2 lbs/1 kg)Oil for frying2 tablespoons oil4 tablespoons peeled and minced fresh
ginger6 green onions (scallions); cut four of them
into 1-in (2.5-cm) pieces, and trim and cut the other two into thin strips for garnish
1 cup (250 ml) chicken stock, homemade (page 62) or store-bought
COOK’S NOTEYou can actually deep-fry the lobster in advance and freeze it. When you want to serve it, simply reheat the lobster in the oven, prepare the sauce, and stir-fry them together. You can also use 5 to 6 frozen lobster tails in place of a whole lobster (ask the butcher to chop each tail into 6 pieces).
1 Combine the salt, pepper and ½ cup (65 g) cornstarch in a bowl. In a separate bowl, combine the remaining 1 tablespoon cornstarch and 1 tablespoon water. Set aside.
2 Place the lobster in a large pot and cover with cold water (water should be 1 inch/2.5 cm above the lobster). Remove the lobster and bring the water to a boil. Submerge the lobster in the boiling water and cook for 3 minutes, then remove.
3 Twist off the head and cut off the end of the tail (clean the inside of the head and save it, along with the tail, for garnish). Twist off and discard the legs. Cutting through the shell, slice the tail in half lengthwise, then cut twice crosswise to make 6 pieces. Cut the claws in half or use a hammer to crack them open. The lobster meat should remain in the shells. Coat all exposed lobster meat, including the claws, with the dry cornstarch mixture.
4 Heat 3 to 4 inches (7.5 cm to 10 cm) of the oil in a wok or deep skillet to 350°F (175°C). Deep-fry the lobster for 1 minute, then transfer to a paper-towel-lined sheet pan to drain. Pour out the oil (discard or save for another time).
5 Wash and thoroughly dry the wok or skillet, then heat the 2 tablespoons oil over medium-high heat. Add the ginger, the 1-inch (2.5-cm) green onion pieces and the lobster. Stir-fry for 1 minute, then add the chicken stock and bring to a boil. Pour in the cornstarch and water mixture and continue stirring until the sauce thickens, about 30 seconds.
6 Place on a serving platter and garnish with the green onion strips. Place the cleaned lobster head at the top of the platter and the tail at the opposite end for garnish. Serve immediately with steaming-hot rice.
Lobster with Ginger and ScallionsThis dish reminds me of all the Chinese banquets our parents would drag us to while we were growing up. It’s a blur of round tables, “lazy Susans,” lots of yelling in Chinese and the clinking of glasses. As kids, we did a lot of kicking each other under the table out of boredom until the food fi nally came—a glorious parade of celebratory dishes. We always hoped that Lobster with Ginger and Scallions would make an appearance, and if it did, we’d give each other a knowing smile that our patience was rewarded. In my mother’s wonderful version of this recipe, whole lobster is boiled, then fl ash-fried and tossed in a delicious ginger and scallion sauce.
ECC_full layout.indd 107ECC_full layout.indd 107 1/10/15 9:57 AM1/10/15 9:57 AM
108 KATIE CHIN’S EVERYDAY CHINESE COOKBOOK
Serves 2 as a main dish with rice or 4 as part of a multi-course meal
Preparation time: 12 minutes + marinating time
Cooking time: 5 minutes
8 oz (250 g) shelled and deveined large-sized raw shrimp
2 teaspoons all-purpose cornstarch, dividedDash of white pepper¼ teaspoon dark sesame oil8 oz (250 g) broccoli fl orets2 oz (50 g) snow peas, tips and strings removed1 tablespoon water1 tablespoon oyster sauce2 tablespoons oil, divided1 clove garlic, minced1 small white onion, thinly sliced 4 tablespoons chicken stock, homemade (page 62)
or store-bought2 oz (50 g) canned baby corn¹⁄8 teaspoon salt2 tablespoons fresh coriander leaves (cilantro), for
garnish
1 Follow directions for “Eliminating Shrimp’s ‘Fishy’ Taste” on page 20. (This step is optional.)
2 In a medium bowl, toss the shrimp with 1 teaspoon of the cornstarch, the pepper and the sesame oil. Cover and refrigerate for 30 minutes.
3 Blanch the snow peas and broccoli fl orets in boiling water until tender, about 1 minute. Using a slotted spoon, transfer the vegetables to an ice water bath to cool, then drain and set aside.
4 In a small bowl, mix 1 tablespoon water, the remaining 1 tablespoon cornstarch and the oyster sauce. Set aside.
5 Heat 1 tablespoon of the oil in a wok or skillet over medium-high heat. Add the shrimp and stir-fry for 2 minutes, or until they turn pink. Remove from the pan and set aside.
6 Wash and thoroughly dry the wok or skillet, then heat the remaining 1 tablespoon oil over high heat. Add the garlic and onion and stir-fry until fragrant, about 1 minute. Pour in the chicken stock and heat to boiling. Cover and cook for 1 minute, then stir in the cornstarch mixture and cook until the sauce thickens, about 1 minute.
7 Add the baby corn and salt and stir-fry for 1 minute. Stir in the reserved shrimp, snow peas and broccoli and cook, stirring constantly for 1 minute, until the shrimp are hot. Dish out and garnish with the coriander leaves. Serve immediately with steaming-hot rice.
Jade Shrimp with Fragrant Vegetables As mentioned previously, shrimp is often served at celebratory occasions in China. My mother would always serve a shrimp dish like Jade Shrimp with Fragrant Vegetables at birthday parties—and, as I recall, when my brother Billy fi nished his Ph.D. (My parents celebrated the Ph.D., but not the pierced ear he’d acquired while studying abroad!) Despite the ongoing culture clash in our home, we always found ourselves laughing at the dinner table. This easy and healthy dish is loaded with bright pink shrimp and toothsome snow peas and broccoli. The garlic infused in the sauce is what gives the vegetables their fabulous fragrance.
ECC_full layout.indd 108ECC_full layout.indd 108 30/9/15 7:57 PM30/9/15 7:57 PM

Seafood 109EVERYDAY CHINESE COOKING 109
ECC_full layout.indd 109ECC_full layout.indd 109 30/9/15 7:57 PM30/9/15 7:57 PM
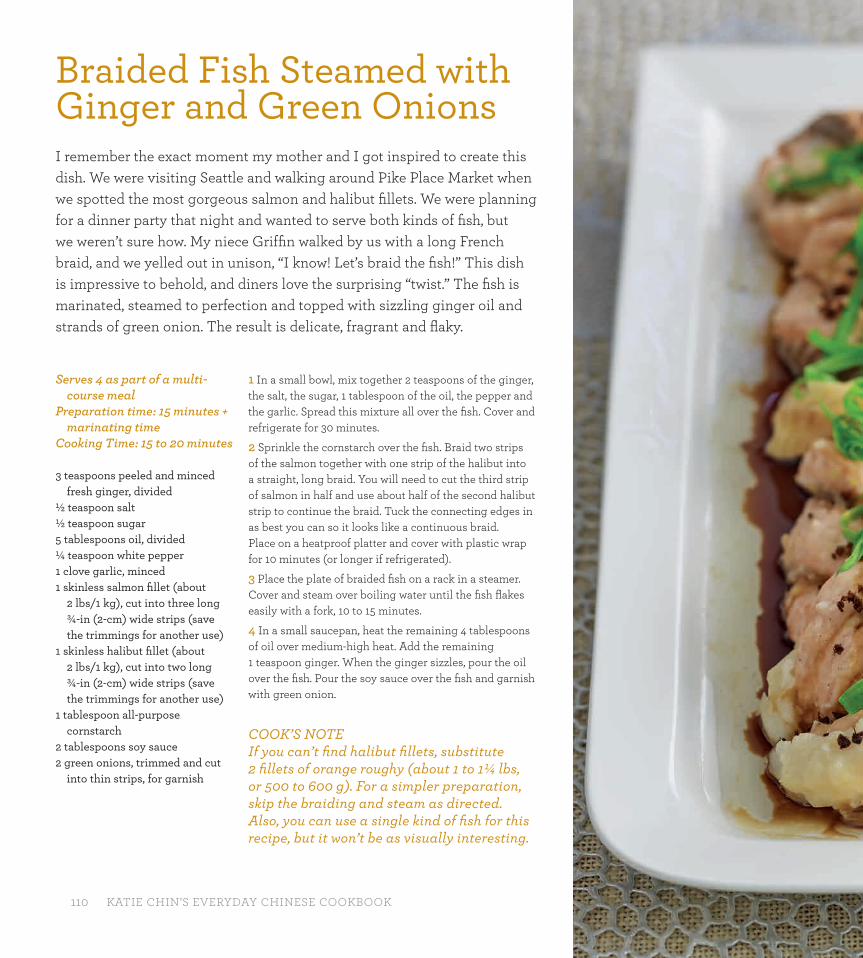
110 KATIE CHIN’S EVERYDAY CHINESE COOKBOOK
Serves 4 as part of a multi-course meal
Preparation time: 15 minutes + marinating time
Cooking Time: 15 to 20 minutes
3 teaspoons peeled and minced fresh ginger, divided
½ teaspoon salt½ teaspoon sugar5 tablespoons oil, divided¼ teaspoon white pepper1 clove garlic, minced1 skinless salmon fi llet (about
2 lbs/1 kg), cut into three long ¾-in (2-cm) wide strips (save the trimmings for another use)
1 skinless halibut fi llet (about 2 lbs/1 kg), cut into two long ¾-in (2-cm) wide strips (save the trimmings for another use)
1 tablespoon all-purpose cornstarch
2 tablespoons soy sauce2 green onions, trimmed and cut
into thin strips, for garnish
1 In a small bowl, mix together 2 teaspoons of the ginger, the salt, the sugar, 1 tablespoon of the oil, the pepper and the garlic. Spread this mixture all over the fi sh. Cover and refrigerate for 30 minutes.
2 Sprinkle the cornstarch over the fi sh. Braid two strips of the salmon together with one strip of the halibut into a straight, long braid. You will need to cut the third strip of salmon in half and use about half of the second halibut strip to continue the braid. Tuck the connecting edges in as best you can so it looks like a continuous braid. Place on a heatproof platter and cover with plastic wrap for 10 minutes (or longer if refrigerated).
3 Place the plate of braided fi sh on a rack in a steamer. Cover and steam over boiling water until the fi sh fl akes easily with a fork, 10 to 15 minutes.
4 In a small saucepan, heat the remaining 4 tablespoons of oil over medium-high heat. Add the remaining 1 teaspoon ginger. When the ginger sizzles, pour the oil over the fi sh. Pour the soy sauce over the fi sh and garnish with green onion.
COOK’S NOTEIf you can’t fi nd halibut fi llets, substitute 2 fi llets of orange roughy (about 1 to 1¼ lbs, or 500 to 600 g). For a simpler preparation, skip the braiding and steam as directed. Also, you can use a single kind of fi sh for this recipe, but it won’t be as visually interesting.
Braided Fish Steamed with Ginger and Green Onions I remember the exact moment my mother and I got inspired to create this dish. We were visiting Seattle and walking around Pike Place Market when we spotted the most gorgeous salmon and halibut fi llets. We were planning for a dinner party that night and wanted to serve both kinds of fi sh, but we weren’t sure how. My niece Griffi n walked by us with a long French braid, and we yelled out in unison, “I know! Let’s braid the fi sh!” This dish is impressive to behold, and diners love the surprising “twist.” The fi sh is marinated, steamed to perfection and topped with sizzling ginger oil and strands of green onion. The result is delicate, fragrant and fl aky.
ECC_full layout.indd 110ECC_full layout.indd 110 30/9/15 7:57 PM30/9/15 7:57 PM

Seafood 111
Combine marinade ingredients and spread mixture over the fi sh. Cover and refrigerate.
Lay down 2 strips of salmon and 1 strip of halibut.
Braid into a straight, long braid.
Place the plate in a steamer. Cover and steam over boiling water until the fi sh fl akes easily.
Sprinkle the cornstarch over the fi sh.
Pour the soy sauce over the fi sh and garnish with green onion.
Tuck the connecting edges in. Place on a heat proof plate, cover with plastic wrap and allow to rest.
Heat the remaining oil in a small saucepan. Add the ginger and once it sizzles, pour over the fi sh.
ECC_full layout.indd 111ECC_full layout.indd 111 12/10/15 2:45 PM12/10/15 2:45 PM
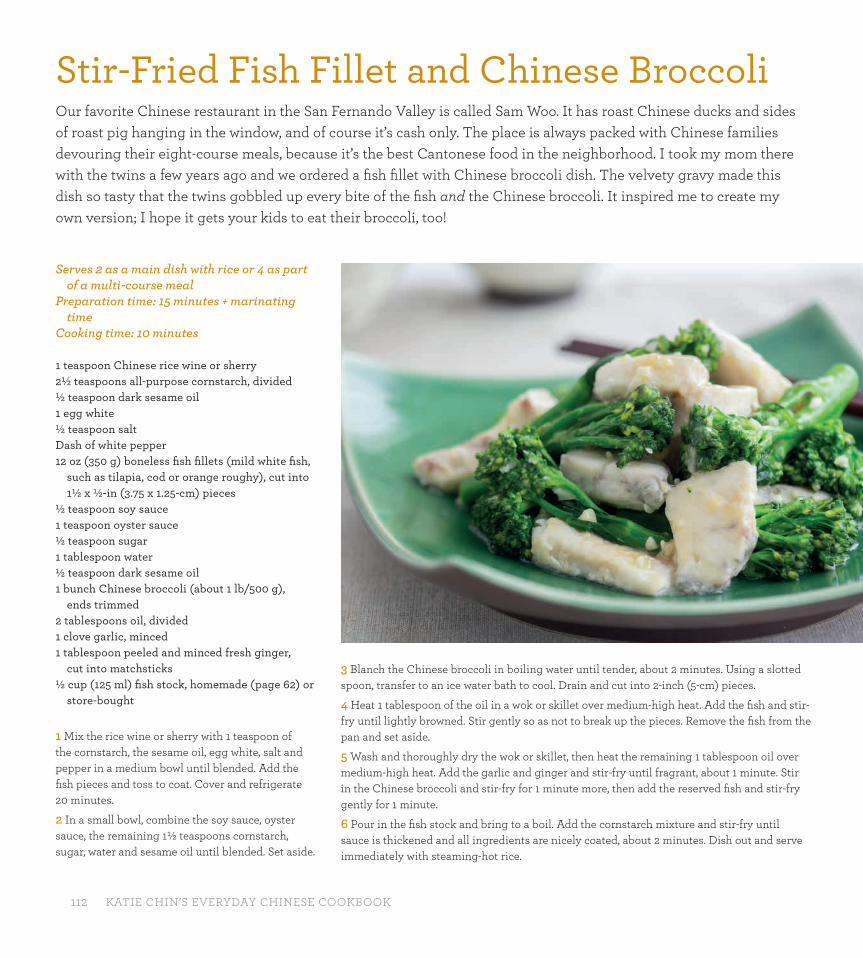
112 KATIE CHIN’S EVERYDAY CHINESE COOKBOOK
Serves 2 as a main dish with rice or 4 as part of a multi-course meal
Preparation time: 15 minutes + marinating time
Cooking time: 10 minutes
1 teaspoon Chinese rice wine or sherry2½ teaspoons all-purpose cornstarch, divided½ teaspoon dark sesame oil1 egg white½ teaspoon saltDash of white pepper12 oz (350 g) boneless fi sh fi llets (mild white fi sh,
such as tilapia, cod or orange roughy), cut into 1½ x ½-in (3.75 x 1.25-cm) pieces
½ teaspoon soy sauce1 teaspoon oyster sauce½ teaspoon sugar1 tablespoon water½ teaspoon dark sesame oil1 bunch Chinese broccoli (about 1 lb/500 g),
ends trimmed2 tablespoons oil, divided1 clove garlic, minced1 tablespoon peeled and minced fresh ginger,
cut into matchsticks½ cup (125 ml) fi sh stock, homemade (page 62) or
store-bought
1 Mix the rice wine or sherry with 1 teaspoon of the cornstarch, the sesame oil, egg white, salt and pepper in a medium bowl until blended. Add the fi sh pieces and toss to coat. Cover and refrigerate 20 minutes.
2 In a small bowl, combine the soy sauce, oyster sauce, the remaining 1½ teaspoons cornstarch, sugar, water and sesame oil until blended. Set aside.
3 Blanch the Chinese broccoli in boiling water until tender, about 2 minutes. Using a slotted spoon, transfer to an ice water bath to cool. Drain and cut into 2-inch (5-cm) pieces.
4 Heat 1 tablespoon of the oil in a wok or skillet over medium-high heat. Add the fi sh and stir-fry until lightly browned. Stir gently so as not to break up the pieces. Remove the fi sh from the pan and set aside.
5 Wash and thoroughly dry the wok or skillet, then heat the remaining 1 tablespoon oil over medium-high heat. Add the garlic and ginger and stir-fry until fragrant, about 1 minute. Stir in the Chinese broccoli and stir-fry for 1 minute more, then add the reserved fi sh and stir-fry gently for 1 minute.
6 Pour in the fi sh stock and bring to a boil. Add the cornstarch mixture and stir-fry until sauce is thickened and all ingredients are nicely coated, about 2 minutes. Dish out and serve immediately with steaming-hot rice.
Stir-Fried Fish Fillet and Chinese Broccoli Our favorite Chinese restaurant in the San Fernando Valley is called Sam Woo. It has roast Chinese ducks and sides of roast pig hanging in the window, and of course it’s cash only. The place is always packed with Chinese families devouring their eight-course meals, because it’s the best Cantonese food in the neighborhood. I took my mom there with the twins a few years ago and we ordered a fi sh fi llet with Chinese broccoli dish. The velvety gravy made this dish so tasty that the twins gobbled up every bite of the fi sh and the Chinese broccoli. It inspired me to create my own version; I hope it gets your kids to eat their broccoli, too!
ECC_full layout.indd 112ECC_full layout.indd 112 2/10/15 11:52 AM2/10/15 11:52 AM
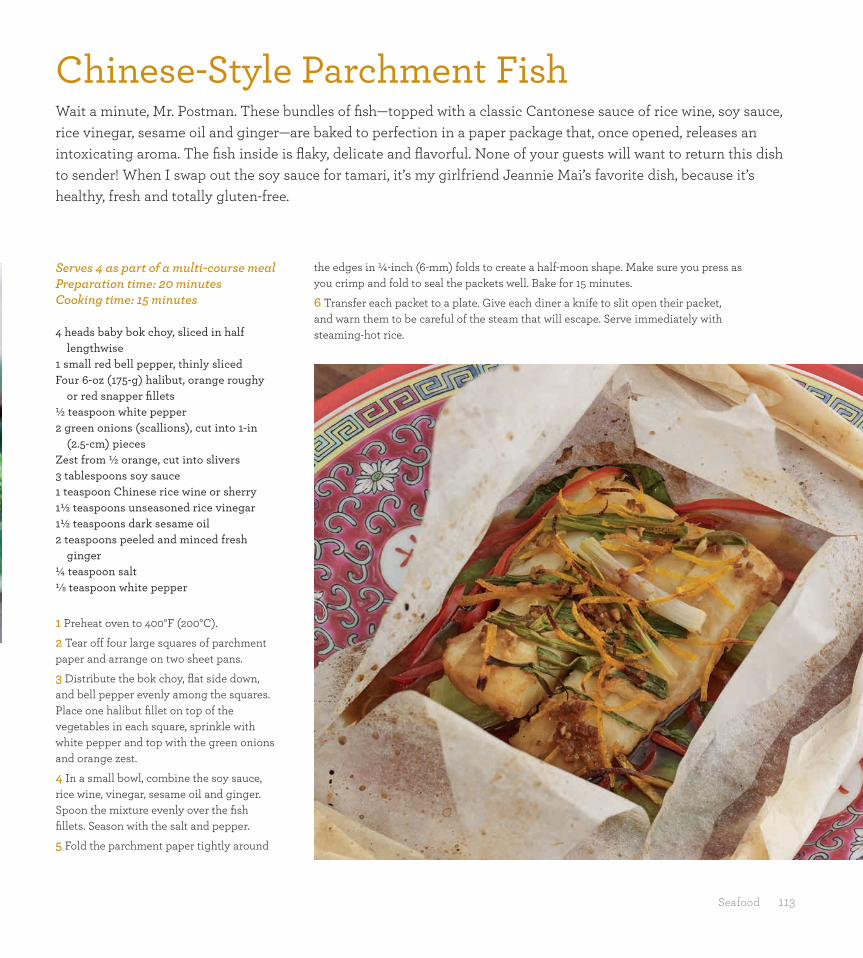
Seafood 113
Serves 4 as part of a multi-course mealPreparation time: 20 minutesCooking time: 15 minutes
4 heads baby bok choy, sliced in half lengthwise
1 small red bell pepper, thinly slicedFour 6-oz (175-g) halibut, orange roughy
or red snapper fi llets ½ teaspoon white pepper2 green onions (scallions), cut into 1-in
(2.5-cm) piecesZest from ½ orange, cut into slivers 3 tablespoons soy sauce1 teaspoon Chinese rice wine or sherry 1½ teaspoons unseasoned rice vinegar 1½ teaspoons dark sesame oil 2 teaspoons peeled and minced fresh
ginger ¼ teaspoon salt¹⁄8 teaspoon white pepper
1 Preheat oven to 400°F (200°C).
2 Tear off four large squares of parchment paper and arrange on two sheet pans.
3 Distribute the bok choy, fl at side down, and bell pepper evenly among the squares. Place one halibut fi llet on top of the vegetables in each square, sprinkle with white pepper and top with the green onions and orange zest.
4 In a small bowl, combine the soy sauce, rice wine, vinegar, sesame oil and ginger. Spoon the mixture evenly over the fi sh fi llets. Season with the salt and pepper.
5 Fold the parchment paper tightly around
the edges in ¼-inch (6-mm) folds to create a half-moon shape. Make sure you press as you crimp and fold to seal the packets well. Bake for 15 minutes.
6 Transfer each packet to a plate. Give each diner a knife to slit open their packet, and warn them to be careful of the steam that will escape. Serve immediately with steaming-hot rice.
Chinese-Style Parchment FishWait a minute, Mr. Postman. These bundles of fi sh—topped with a classic Cantonese sauce of rice wine, soy sauce, rice vinegar, sesame oil and ginger—are baked to perfection in a paper package that, once opened, releases an intoxicating aroma. The fi sh inside is fl aky, delicate and fl avorful. None of your guests will want to return this dish to sender! When I swap out the soy sauce for tamari, it’s my girlfriend Jeannie Mai’s favorite dish, because it’s healthy, fresh and totally gluten-free.
ECC_full layout.indd 113ECC_full layout.indd 113 30/9/15 7:58 PM30/9/15 7:58 PM
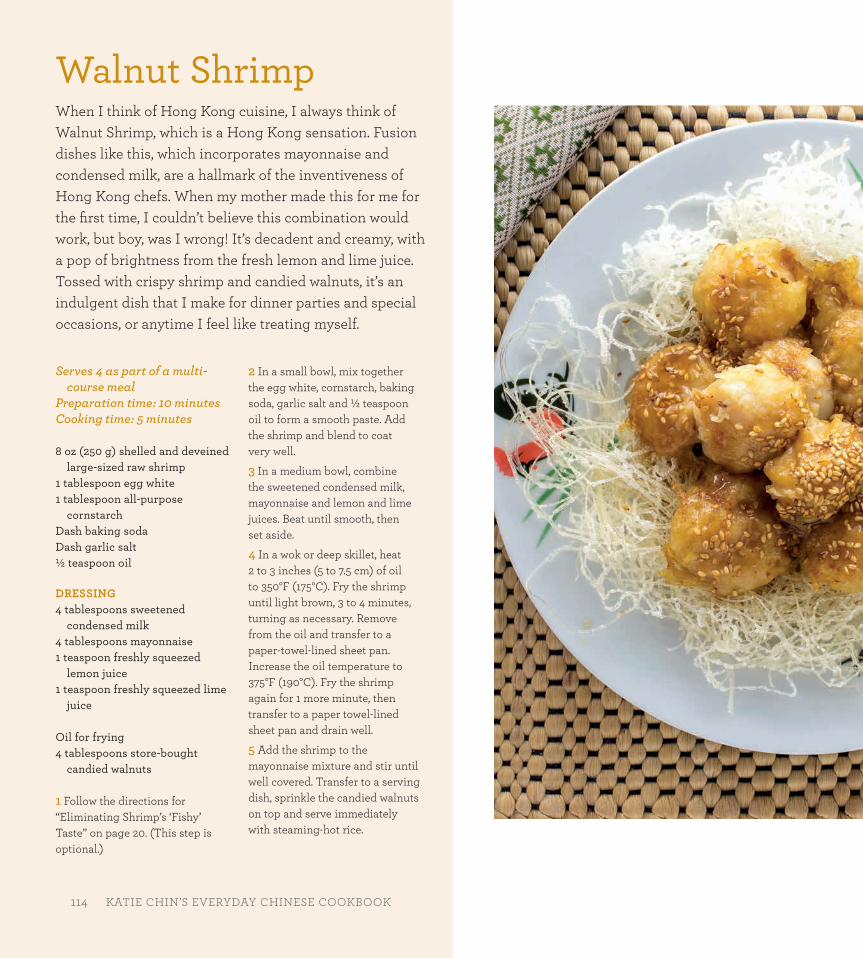
114 KATIE CHIN’S EVERYDAY CHINESE COOKBOOK
Serves 4 as part of a multi-course meal
Preparation time: 10 minutesCooking time: 5 minutes
8 oz (250 g) shelled and deveined large-sized raw shrimp
1 tablespoon egg white 1 tablespoon all-purpose
cornstarch Dash baking soda Dash garlic salt ½ teaspoon oil
DRESSING4 tablespoons sweetened
condensed milk 4 tablespoons mayonnaise 1 teaspoon freshly squeezed
lemon juice 1 teaspoon freshly squeezed lime
juice
Oil for frying4 tablespoons store-bought
candied walnuts
1 Follow the directions for “Eliminating Shrimp’s ‘Fishy’ Taste” on page 20. (This step is optional.)
2 In a small bowl, mix together the egg white, cornstarch, baking soda, garlic salt and ½ teaspoon oil to form a smooth paste. Add the shrimp and blend to coat very well.
3 In a medium bowl, combine the sweetened condensed milk, mayonnaise and lemon and lime juices. Beat until smooth, then set aside.
4 In a wok or deep skillet, heat 2 to 3 inches (5 to 7.5 cm) of oil to 350°F (175°C). Fry the shrimp until light brown, 3 to 4 minutes, turning as necessary. Remove from the oil and transfer to a paper-towel-lined sheet pan. Increase the oil temperature to 375°F (190°C). Fry the shrimp again for 1 more minute, then transfer to a paper towel-lined sheet pan and drain well.
5 Add the shrimp to the mayonnaise mixture and stir until well covered. Transfer to a serving dish, sprinkle the candied walnuts on top and serve immediately with steaming-hot rice.
Walnut ShrimpWhen I think of Hong Kong cuisine, I always think of Walnut Shrimp, which is a Hong Kong sensation. Fusion dishes like this, which incorporates mayonnaise and condensed milk, are a hallmark of the inventiveness of Hong Kong chefs. When my mother made this for me for the fi rst time, I couldn’t believe this combination would work, but boy, was I wrong! It’s decadent and creamy, with a pop of brightness from the fresh lemon and lime juice. Tossed with crispy shrimp and candied walnuts, it’s an indulgent dish that I make for dinner parties and special occasions, or anytime I feel like treating myself.
114 KATIE CHIN’S EVERYDAY CHINESE COOKBOOK
ECC_full layout.indd 114ECC_full layout.indd 114 30/9/15 7:58 PM30/9/15 7:58 PM
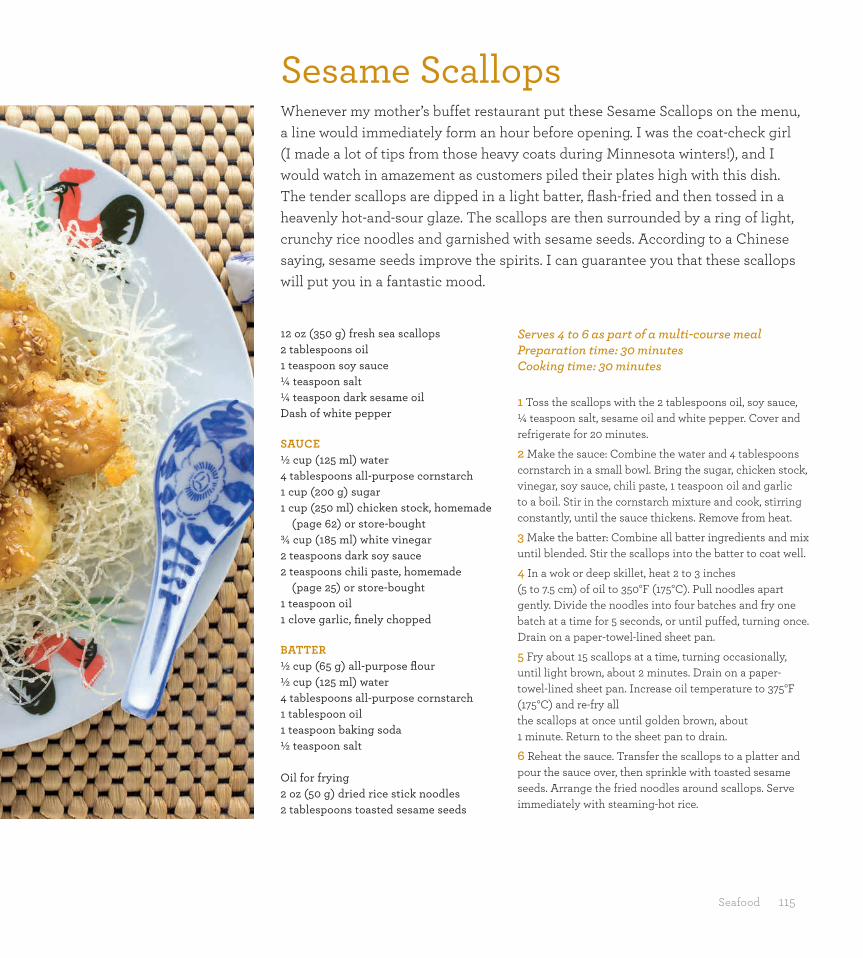
Seafood 115
12 oz (350 g) fresh sea scallops2 tablespoons oil1 teaspoon soy sauce¼ teaspoon salt¼ teaspoon dark sesame oilDash of white pepper
SAUCE½ cup (125 ml) water4 tablespoons all-purpose cornstarch1 cup (200 g) sugar1 cup (250 ml) chicken stock, homemade
(page 62) or store-bought¾ cup (185 ml) white vinegar2 teaspoons dark soy sauce2 teaspoons chili paste, homemade
(page 25) or store-bought1 teaspoon oil1 clove garlic, fi nely chopped
BATTER½ cup (65 g) all-purpose fl our½ cup (125 ml) water4 tablespoons all-purpose cornstarch1 tablespoon oil1 teaspoon baking soda½ teaspoon salt
Oil for frying2 oz (50 g) dried rice stick noodles2 tablespoons toasted sesame seeds
Serves 4 to 6 as part of a multi-course mealPreparation time: 30 minutesCooking time: 30 minutes
1 Toss the scallops with the 2 tablespoons oil, soy sauce, ¼ teaspoon salt, sesame oil and white pepper. Cover and refrigerate for 20 minutes.
2 Make the sauce: Combine the water and 4 tablespoons cornstarch in a small bowl. Bring the sugar, chicken stock, vinegar, soy sauce, chili paste, 1 teaspoon oil and garlic to a boil. Stir in the cornstarch mixture and cook, stirring constantly, until the sauce thickens. Remove from heat.
3 Make the batter: Combine all batter ingredients and mix until blended. Stir the scallops into the batter to coat well.
4 In a wok or deep skillet, heat 2 to 3 inches (5 to 7.5 cm) of oil to 350°F (175°C). Pull noodles apart gently. Divide the noodles into four batches and fry one batch at a time for 5 seconds, or until puffed, turning once. Drain on a paper-towel-lined sheet pan.
5 Fry about 15 scallops at a time, turning occasionally, until light brown, about 2 minutes. Drain on a paper-towel-lined sheet pan. Increase oil temperature to 375°F (175°C) and re-fry all the scallops at once until golden brown, about 1 minute. Return to the sheet pan to drain.
6 Reheat the sauce. Transfer the scallops to a platter and pour the sauce over, then sprinkle with toasted sesame seeds. Arrange the fried noodles around scallops. Serve immediately with steaming-hot rice.
Sesame ScallopsWhenever my mother’s buffet restaurant put these Sesame Scallops on the menu, a line would immediately form an hour before opening. I was the coat-check girl (I made a lot of tips from those heavy coats during Minnesota winters!), and I would watch in amazement as customers piled their plates high with this dish. The tender scallops are dipped in a light batter, fl ash-fried and then tossed in a heavenly hot-and-sour glaze. The scallops are then surrounded by a ring of light, crunchy rice noodles and garnished with sesame seeds. According to a Chinese saying, sesame seeds improve the spirits. I can guarantee you that these scallops will put you in a fantastic mood.
ECC_full layout.indd 115ECC_full layout.indd 115 30/9/15 7:58 PM30/9/15 7:58 PM

116 KATIE CHIN’S EVERYDAY CHINESE COOKBOOK
Serves 4 as part of a multi-course mealPreparation time: 30 minutes Cooking time: 15 minutes
GINGER-SCALLION SAUCE2 tablespoons oil2 teaspoons peeled and minced fresh
ginger2 cloves garlic, minced½ cup (125 ml) chicken stock, homemade
(page 62) or store-bought4 tablespoons white vinegar4 tablespoons soy sauce1 tablespoon sugar1 fi nely chopped green onion (scallion)
1½ lbs (750 g) whole tilapia, catfi sh or red snapper, well cleaned
2¹⁄8 teaspoons salt, divided2 teaspoons peeled and minced fresh
ginger¹⁄8 teaspoon sugar2 teaspoons dark sesame oil2 green onions (scallions), cut into 2-in
(5-cm) pieces4 tablespoons all-purpose fl our2 tablespoons all-purpose cornstarch¼ teaspoon baking soda4 tablespoons water½ tablespoon oil Oil for frying
1 Make the sauce: Heat 2 tablespoons of oil in a small saucepan over medium-high heat. Add the ginger and the garlic and stir-fry for 1 minute. Add the chicken stock, vinegar, soy sauce and sugar and bring to a boil. Remove from the heat and allow to cool.
2 Make 3 cuts across the fi sh, almost down to the bone. In a small bowl, combine 2 teaspoons of the salt with the ginger, sugar and sesame oil and rub the inside and outside of the fi sh. Marinate for 20 minutes (if longer, cover and refrigerate). Stuff the fi sh cavity with the green onion pieces and place on a platter.
3 In a small bowl, combine the fl our, cornstarch, baking soda, water, oil and the remaining ¹⁄8 teaspoon salt. Mix into a smooth batter and brush over the fi sh.
4 Heat 2 to 3 inches (5 to 7.5 cm) of the oil in a wok or pot to 350°F (175°C). Deep-fry the fi sh for 6 to 7 minutes, then turn it over and fry for another 6 to 7 minutes, or until golden brown. Drain well on a paper-towel-lined sheet pan. Transfer to a platter. Serve with the ginger-scallion sauce on the side. Add the chopped green onions to the sauce just before serving.
Crispy Fish with Ginger-Scallion Sauce My mother always prepared Crispy Fish with Ginger-Scallion Sauce on the day of the Chinese New Year. The Chinese word for fi sh, yu, sounds the same as the word for abundance, so we eat this for good luck and prosperity. When my mother and I made this dish on our PBS Show, I talked about this symbolism, as well as that of the lotus root, which represents fertility. My mother’s on-camera response to me was, “You better hurry up,” a not-so subtle way of letting me know she wanted more grandkids, and soon. (I did take her advice—the twins were born a couple years later!) In this dish, the entire fi sh is marinated in sesame oil and then fl ash-fried in a smooth batter, resulting in a supremely tender and fl aky fi sh. Topped with a sizzling ginger-scallion sauce, it’s delicious any time of year.
Make 3 cuts across the fi sh. Rub the inside and outside of the fi sh with the marinade.
Stuff the fi sh cavity with the sliced green onions.
Combine the batter ingredients and brush over the fi sh.
Deep-fry the fi sh for 6 to 7 minutes. Drain well on a paper towel-lined sheet pan.
ECC_full layout.indd 116ECC_full layout.indd 116 30/9/15 7:58 PM30/9/15 7:58 PM
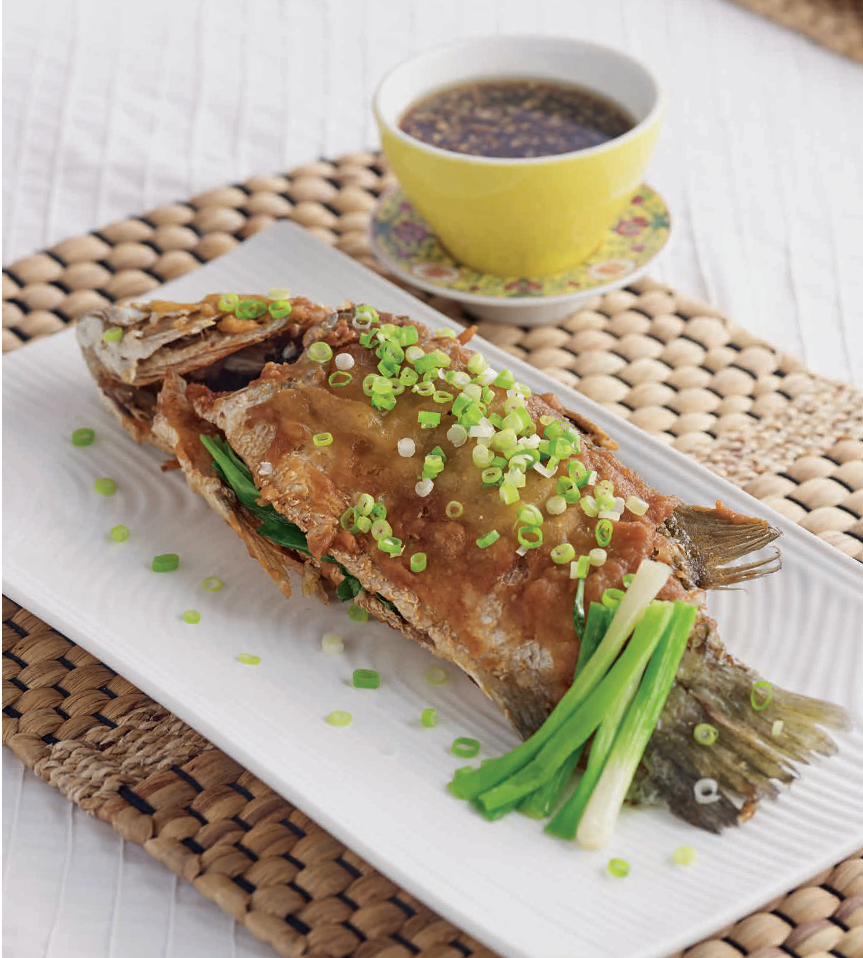
Seafood 117EVERYDAY CHINESE COOKING 117
ECC_full layout.indd 117ECC_full layout.indd 117 30/9/15 7:58 PM30/9/15 7:58 PM

118 KATIE CHIN’S EVERYDAY CHINESE COOKBOOK
Serves 6 as part of a multi-course meal
Preparation time: 15 minutes + soaking and marinating time
Cooking time: 15 minutes
1½ lbs (750 g) skinless sea bass fi llets, cut into 4 or 5 pieces total
1½ teaspoons salt, divided1 teaspoon peeled and minced fresh
ginger1 tablespoon oil¹⁄8 teaspoon white pepper2 teaspoons soy sauce1 tablespoon white vinegar2 teaspoons sugar2 teaspoons dark sesame oil1 English cucumber, cut into very thin
slices2 tablespoons oolong or jasmine tea
leaves1 cup (200 g) brown sugar4 tablespoons uncooked rice
1 Wipe the sea bass pieces dry with paper towel.
2 Make the marinade: In a small bowl, combine 1 teaspoon of the salt with the ginger, oil, pepper and soy sauce. Rub all sides of the fi sh with the marinade and place in the refrigerator for 30 minutes or longer.
3 Preheat oven to 500°F (260°C).
4 In a medium bowl, blend the vinegar, sugar, sesame oil and the remaining ½ teaspoon salt. Add the cucumber and toss. Let stand for 10 minutes. Discard the excess dressing and place the cucumber slices in an overlapping pattern around the edge of a serving platter.
5 Completely line the inside surface of a large covered Dutch oven or wok with heavy foil. Combine the tea leaves, brown sugar and rice in the foil-lined pan and spread out evenly. Place a metal steam rack in the pan, making sure it stands at least 1 inch (2.5 cm) above the tea leaves. Place the marinated fi sh on the rack.
6 Cover the pan tightly—this is important, because the smoke must be contained in the pan for the fi sh to smoke properly. Place in the preheated oven and bake for 15 minutes. Remove from the oven and let sit, covered, for 5 minutes. Carefully open the lid. Using a spatula, carefully transfer the fi sh to the cucumber-lined platter. Serve immediately with steaming-hot rice.
COOK’S NOTEIf your pan cover doesn’t fi t tightly enough, place foil around the outside of the cover and pan so the smoke doesn’t escape.
Tea-Smoked Sea BassMy friend Lisa Boalt Richardson is a tea expert and the author of numerous books on tea. She was fascinated when I told her about my mother’s technique for tea-smoking sea bass, and sent me a tin of her favorite jasmine tea to use in this recipe. The technique used here allows you to create an authentic smoky Asian fl avor in a conventional oven. After the fi sh is marinated, it’s smoked in the oven over a mixture of brown sugar, tea leaves and rice. The smoking effect is incredible, as every fl aky and delicate bite is imbued with sweet and smoky jasmine tea fl avor.
118 KATIE CHIN’S EVERYDAY CHINESE COOKBOOK
ECC_full layout.indd 118ECC_full layout.indd 118 30/9/15 7:58 PM30/9/15 7:58 PM

Seafood 119
Serves 4 as part of a multi-course mealPreparation time: 10 minutes + soaking
and marinating timeCooking time: 10 minutes
2 tablespoons fermented black beans2 green onions (scallions), trimmed and cut
into thin strips, divided1½ lbs (750 g) whole sea bass, striped bass,
or red snapper, well cleaned 1 teaspoon peeled and minced fresh ginger4 tablespoons oil, divided1 clove garlic, minced½ teaspoon salt¼ teaspoon sugar1 teaspoon soy sauce¼ teaspoon dark sesame oilOne 2-in (5-cm) piece fresh ginger, peeled
and slivered
1 Place the black beans in a small bowl and cover with warm water. Stir for about 2 minutes to remove the excess salt. Remove the beans from the water, rinse and drain well.
2 Place the green onions strips in a bowl with ice water to cover. Let stand 10 minutes, or until the strips curl.
3 Slash the fi sh crosswise 3 times on each side. In a small bowl, mix the ginger, 2 tablespoons of the oil, the drained black beans, and the garlic, salt, sugar, soy sauce and sesame oil. Rub the cavity and outside of the fi sh with the mixture. Cover and refrigerate for 30 minutes or longer.
4 Place the fi sh on a heatproof plate. Place the plate on a rack in a steamer, cover and steam over boiling water until the fi sh fl akes easily with a fork, about 10 minutes. (Add more boiling water if necessary.)
5 In a small saucepan, heat the remaining 2 tablespoons oil over medium-high heat until it smokes. Add the ginger slivers and half of the green onions. Pour the hot oil over the fi sh (you’ll hear sizzling).
6 Garnish with the remaining green onions. Serve immediately with steaming-hot rice.
COOK’S NOTEThis dish can be cooked in the microwave. Place the fi sh on a microwave-safe plate, cover with plastic wrap and cook for 3 minutes on high. Let stand for 2 minutes, then rotate the dish and cook on high for an additional 2 minutes.
Steamed Cantonese Whole FishWhen I taught a class at the Gourmandise School in Santa Monica recently, I decided to teach my students how to make my mother’s Steamed Cantonese Whole Fish recipe. Whole sea bass or red snapper is marinated in fermented black beans and classic Chinese seasonings and then steamed to perfection. Steaming is the purest way to cook fresh fi sh—and after making it, you’ll see why. It turns out tender and fl aky, and the sweet and delicate fl avor of the fi sh shines through. In fact, one student declared, “That is the best fi sh I’ve ever eaten!” The key is timing. You don’t want to overcook it, so be sure you have your timer close by.
ECC_full layout.indd 119ECC_full layout.indd 119 30/9/15 7:58 PM30/9/15 7:58 PM
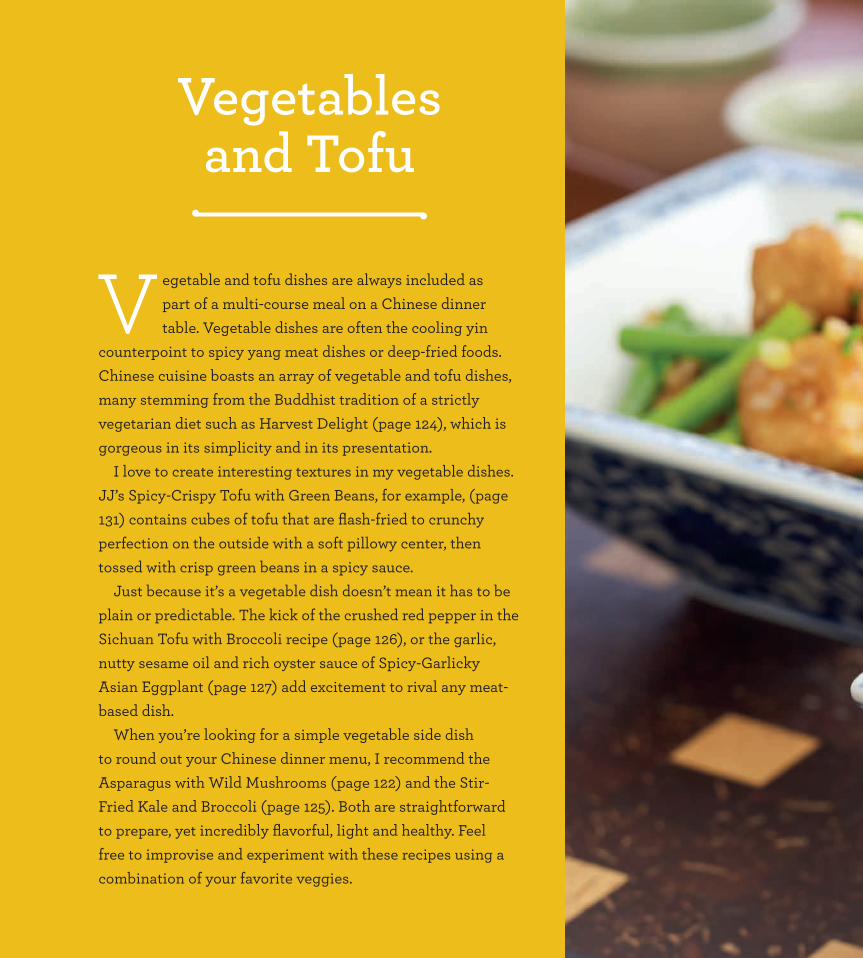
120 KATIE CHIN’S EVERYDAY CHINESE COOKBOOK
V egetable and tofu dishes are always included as part of a multi-course meal on a Chinese dinner table. Vegetable dishes are often the cooling yin
counterpoint to spicy yang meat dishes or deep-fried foods. Chinese cuisine boasts an array of vegetable and tofu dishes, many stemming from the Buddhist tradition of a strictly vegetarian diet such as Harvest Delight (page 124), which is gorgeous in its simplicity and in its presentation.
I love to create interesting textures in my vegetable dishes. JJ’s Spicy-Crispy Tofu with Green Beans, for example, (page 131) contains cubes of tofu that are fl ash-fried to crunchy perfection on the outside with a soft pillowy center, then tossed with crisp green beans in a spicy sauce.
Just because it’s a vegetable dish doesn’t mean it has to be plain or predictable. The kick of the crushed red pepper in the Sichuan Tofu with Broccoli recipe (page 126), or the garlic, nutty sesame oil and rich oyster sauce of Spicy-Garlicky Asian Eggplant (page 127) add excitement to rival any meat-based dish.
When you’re looking for a simple vegetable side dish to round out your Chinese dinner menu, I recommend the Asparagus with Wild Mushrooms (page 122) and the Stir-Fried Kale and Broccoli (page 125). Both are straightforward to prepare, yet incredibly fl avorful, light and healthy. Feel free to improvise and experiment with these recipes using a combination of your favorite veggies.
Vegetables and Tofu
ECC_full layout.indd 120ECC_full layout.indd 120 1/10/15 7:27 PM1/10/15 7:27 PM
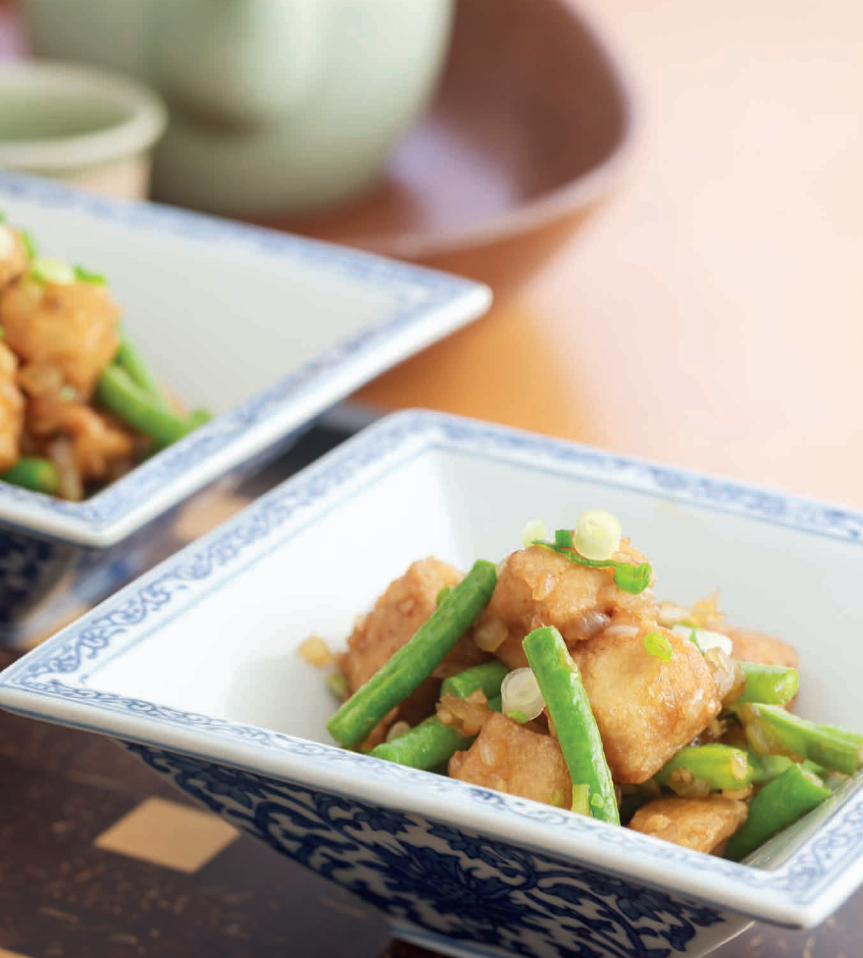
The Wisdom of My Mother’s Kitchen 121
ECC_full layout.indd 121ECC_full layout.indd 121 1/10/15 7:27 PM1/10/15 7:27 PM
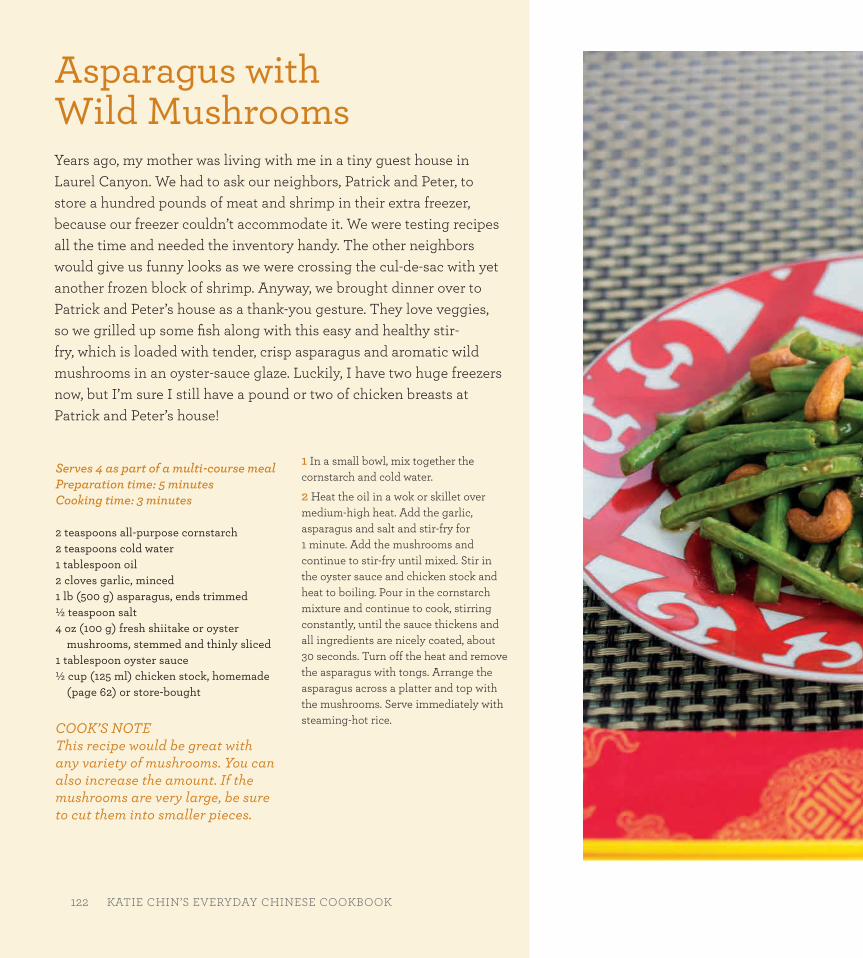
122 KATIE CHIN’S EVERYDAY CHINESE COOKBOOK
Serves 4 as part of a multi-course mealPreparation time: 5 minutesCooking time: 3 minutes
2 teaspoons all-purpose cornstarch2 teaspoons cold water1 tablespoon oil2 cloves garlic, minced1 lb (500 g) asparagus, ends trimmed ½ teaspoon salt4 oz (100 g) fresh shiitake or oyster
mushrooms, stemmed and thinly sliced1 tablespoon oyster sauce½ cup (125 ml) chicken stock, homemade
(page 62) or store-bought
COOK’S NOTEThis recipe would be great with any variety of mushrooms. You can also increase the amount. If the mushrooms are very large, be sure to cut them into smaller pieces.
1 In a small bowl, mix together the cornstarch and cold water.
2 Heat the oil in a wok or skillet over medium-high heat. Add the garlic, asparagus and salt and stir-fry for 1 minute. Add the mushrooms and continue to stir-fry until mixed. Stir in the oyster sauce and chicken stock and heat to boiling. Pour in the cornstarch mixture and continue to cook, stirring constantly, until the sauce thickens and all ingredients are nicely coated, about 30 seconds. Turn off the heat and remove the asparagus with tongs. Arrange the asparagus across a platter and top with the mushrooms. Serve immediately with steaming-hot rice.
Asparagus with Wild MushroomsYears ago, my mother was living with me in a tiny guest house in Laurel Canyon. We had to ask our neighbors, Patrick and Peter, to store a hundred pounds of meat and shrimp in their extra freezer, because our freezer couldn’t accommodate it. We were testing recipes all the time and needed the inventory handy. The other neighbors would give us funny looks as we were crossing the cul-de-sac with yet another frozen block of shrimp. Anyway, we brought dinner over to Patrick and Peter’s house as a thank-you gesture. They love veggies, so we grilled up some fi sh along with this easy and healthy stir-fry, which is loaded with tender, crisp asparagus and aromatic wild mushrooms in an oyster-sauce glaze. Luckily, I have two huge freezers now, but I’m sure I still have a pound or two of chicken breasts at Patrick and Peter’s house!
122 KATIE CHIN’S EVERYDAY CHINESE COOKBOOK
ECC_full layout.indd 122ECC_full layout.indd 122 1/10/15 7:27 PM1/10/15 7:27 PM
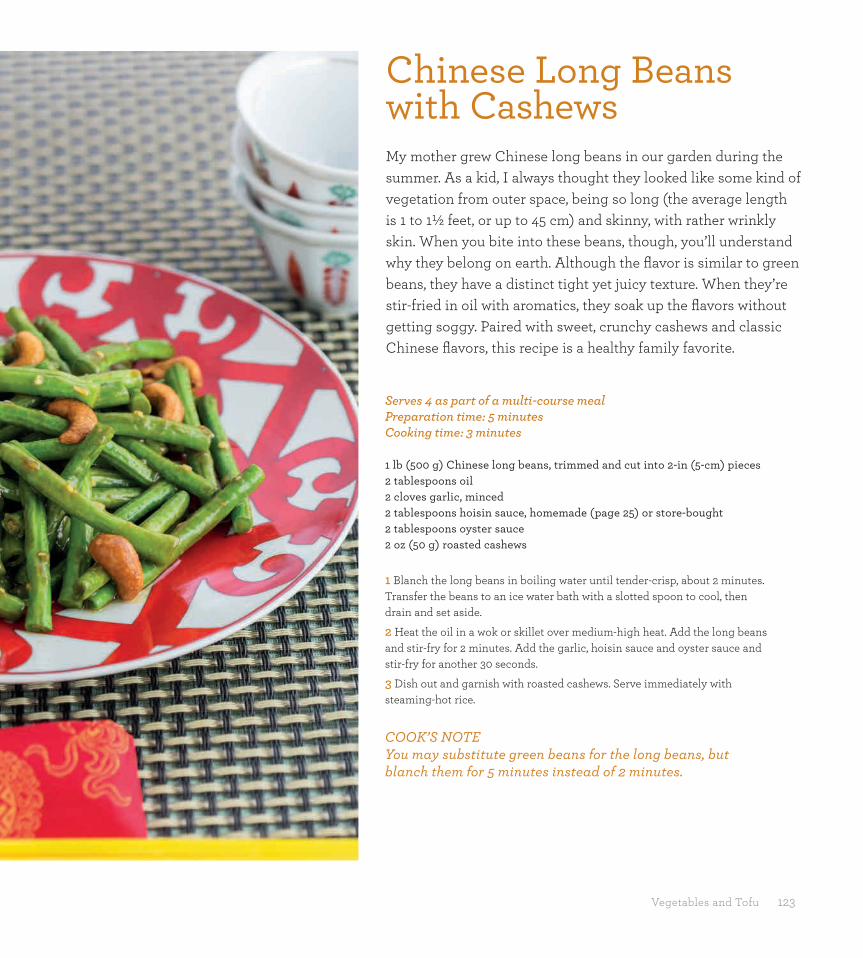
Vegetables and Tofu 123
Serves 4 as part of a multi-course mealPreparation time: 5 minutesCooking time: 3 minutes
1 lb (500 g) Chinese long beans, trimmed and cut into 2-in (5-cm) pieces2 tablespoons oil2 cloves garlic, minced2 tablespoons hoisin sauce, homemade (page 25) or store-bought2 tablespoons oyster sauce2 oz (50 g) roasted cashews
1 Blanch the long beans in boiling water until tender-crisp, about 2 minutes. Transfer the beans to an ice water bath with a slotted spoon to cool, then drain and set aside.
2 Heat the oil in a wok or skillet over medium-high heat. Add the long beans and stir-fry for 2 minutes. Add the garlic, hoisin sauce and oyster sauce and stir-fry for another 30 seconds.
3 Dish out and garnish with roasted cashews. Serve immediately with steaming-hot rice.
COOK’S NOTEYou may substitute green beans for the long beans, but blanch them for 5 minutes instead of 2 minutes.
Chinese Long Beans with CashewsMy mother grew Chinese long beans in our garden during the summer. As a kid, I always thought they looked like some kind of vegetation from outer space, being so long (the average length is 1 to 1½ feet, or up to 45 cm) and skinny, with rather wrinkly skin. When you bite into these beans, though, you’ll understand why they belong on earth. Although the fl avor is similar to green beans, they have a distinct tight yet juicy texture. When they’re stir-fried in oil with aromatics, they soak up the fl avors without getting soggy. Paired with sweet, crunchy cashews and classic Chinese fl avors, this recipe is a healthy family favorite.
ECC_full layout.indd 123ECC_full layout.indd 123 1/10/15 7:27 PM1/10/15 7:27 PM

124 KATIE CHIN’S EVERYDAY CHINESE COOKBOOK
Serves 4 as part of a multi-course mealPreparation time: 6 minutesCooking time: 6 minutes
8 oz (250 g) bok choy, trimmed and cut diagonally into ½-in (1.25-cm) slices
1 red bell pepper, thinly sliced 4 oz (100 g) snow peas, tips and strings removed 5 teaspoons oil, divided1 teaspoon salt, divided1 clove garlic, minced
1 Heat 2 teaspoons of the oil in wok or a skillet over medium-high heat. Add the bok choy, ½ teaspoon of the salt and the garlic and stir-fry for 3 minutes. Remove the bok choy and place in the center of a serving platter in a long row, with the slices overlapping.
2 Clean and thoroughly dry the wok or skillet, then heat 2 more teaspoons oil over medium-high heat. Add the bell pepper and the remaining ½ teaspoon salt and stir-fry for 2 minutes. Remove the peppers from the wok and place at the top of the serving platter, above the bok choy.
3 Add 2 cups (500 ml) water to the wok or skillet and bring to a boil. Add the snow peas and cook over high heat until the water returns to boiling. Add the remaining 1 teaspoon oil and cook for 30 seconds more. Drain the snow peas and place at the bottom of the serving platter. Serve immediately alongside steaming-hot rice.
Harvest Delight In early fall, Chinese people celebrate the gathering of the harvest during the Autumn Moon Festival. Families come together and eat round-shaped foods, like moon cakes, to symbolize familial harmony and unity. This Harvest Delight vegetable dish is something my mother would serve as part of our Autumn Moon Festival banquet. This is a simple, pure and clean dish that honors the vegetables with its beautiful plating. Because it’s so easy and healthy, I now make it year-round.
ECC_full layout.indd 124ECC_full layout.indd 124 1/10/15 7:27 PM1/10/15 7:27 PM

Vegetables and Tofu 125
Serves 4 as part of a multi-course mealPreparation time: 10 minutesCooking time: 4 minutes
4 cups (200 g) curly kale, stemmed and torn into chunks
2 cups (350 g) broccoli fl orets 2 teaspoons all-purpose cornstarch 2 teaspoons cold water 1 tablespoon soy sauce 1 teaspoon dark sesame oil ¼ teaspoon sugar 1 tablespoon Chinese rice wine or sherry 1 tablespoon oil 3 cloves garlic, minced 1 tablespoon peeled and minced fresh
ginger 1 small red bell pepper, thinly sliced 1 small yellow bell pepper, thinly sliced ½ teaspoon salt ½ cup (125 ml) vegetable stock or chicken
stock, homemade (page 62) or store-bought
Stir-Fried Kale and Broccoli In case you didn’t get the memo, kale is taking the world by storm as one of the healthiest, most nutrient-dense foods on the planet. Loaded with Vitamins A, K and C, it also contains tons of minerals, anti-oxidants and omega-3s. My brother-in-law David is a huge fan of kale and was looking for new ways to prepare it, so I suggested this simple recipe. It’s a classic Chinese vegetable stir-fry preparation with kale as a wonderful complement. Here’s to your health—enjoy!
Vegetables and Tofu 125
1 Blanch the kale and broccoli in boiling water until bright green, about 1 minute. Using a slotted spoon, transfer to an ice water bath to cool, then drain and set aside.
2 Mix together the cornstarch and 2 teaspoons cold water in a small bowl. Set aside.
3 In a separate bowl, combine the soy sauce, sesame oil, sugar and rice wine or sherry and whisk to blend. Set aside.
4 Heat 1 tablespoon of oil over medium-high heat in a wok or skillet. Add the garlic and ginger and stir-fry until fragrant, about 30 seconds. Add the red and yellow bell pepper and stir-fry for 1 minute. Add the drained kale and broccoli and the salt; stir-fry for 30 seconds. Pour in the soy sauce mixture and stir-fry for 30 seconds.
5 Add the vegetable or chicken stock and heat to boiling, then pour in the cornstarch mixture. Continue to cook, stirring constantly, until the sauce thickens, about 30 seconds. Dish out and serve immediately with steaming-hot rice.
ECC_full layout.indd 125ECC_full layout.indd 125 1/10/15 7:27 PM1/10/15 7:27 PM

Serves 4 as part of a multi-course mealPreparation time: 5 minutesCooking time: 10 minutes
4 cups (700 g) broccoli fl orets 2 tablespoons oil, divided One 16-oz (500-g) block fi rm tofu, drained,
patted dry and cut into cubes 2 cloves garlic, minced 1 tablespoon peeled and minced fresh
ginger 1 tablespoon Chinese rice wine or sherry 2 tablespoons soy sauce 1 tablespoon oyster sauce ½ teaspoon crushed red pepper
1 Blanch the broccoli in boiling water until tender-crisp, about 1 minute. Using a slotted spoon, transfer to an ice water bath to cool, then drain and set aside.
2 Heat 1 tablespoon of the oil in the wok or skillet over medium-high heat. Add the tofu pieces and fry until brown, about 2 minutes. Turn the pieces over and cook for about 3 more minutes. Remove from the pan and set aside.
3 Heat the remaining 1 tablespoon oil in the wok or skillet over medium-high heat. Add the garlic and ginger and stir-fry until fragrant, about 30 seconds. Add the broccoli and stir-fry for 1 minute. Add the reserved tofu, rice wine or sherry, soy sauce, oyster sauce and crushed red pepper; stir-fry for 2 minutes. Dish out and serve immediately with steaming-hot rice.
Sichuan Tofu with Broccoli My friend Mary was trying to do Meatless Mondays, but she found it a struggle. “Okay,” she told me, “this is getting really boring. I don’t know what else to do with tofu. I have a block of it staring at me from my counter. Help!” Well, I’m here to say that tofu doesn’t have to be boring; in fact, it can be scintillating, sexy, spicy and sublime! As my mother taught me, tofu soaks up all of the fl avors around it. As long as you’ve got the right stuff—like the garlic, ginger, rice wine, soy sauce, oyster sauce and crushed red pepper in this recipe—your tofu will come alive and knock your socks off.
126
ECC_full layout.indd 126ECC_full layout.indd 126 1/10/15 7:27 PM1/10/15 7:27 PM

Vegetables and Tofu 127
Serves 4 as part of a multi-course mealPreparation time: 5 minutes + soaking timeCooking time: 5 minutes
4 Asian eggplants, cut in half lengthwise then diagonally into ½-in (1.25-cm) slices
2 teaspoons salt1 tablespoon oyster sauce1 teaspoon sugar1 teaspoon dark sesame oil2 tablespoons oil2 cloves garlic, minced 2 hot red chili peppers, seeded and thinly
sliced2 tablespoons water
1 Cover the eggplants with water. Add the salt and stir to dissolve. Let stand for 5 minutes, then drain well.
2 Mix together the oyster sauce, sugar and sesame oil in a small bowl. Set aside.
3 Heat the oil in a wok or skillet over medium-high heat. Add the garlic, chili peppers and eggplant and stir-fry for 2 minutes. Add the 2 tablespoons water and continue stir-frying for 2 more minutes. Pour in the oyster sauce mixture and stir well to mix. Dish out and serve immediately with steaming-hot rice.
COOK’S NOTEAsian eggplant (also known as Japanese eggplant) is available at many Asian markets. You can substitute regular eggplant; just cut it lengthwise into 4 to 6 strips before slicing.
Spicy-Garlicky Asian EggplantAsian eggplants are long and narrow in shape, with thinner skin and a sweeter taste than larger American eggplants. They absorb all the fl avors around them, so if you love garlic you’ll love this recipe. The eggplant is soaked in salt water to remove the bitter taste; this also makes it absorb less oil when it’s cooked. I was planning to cook this for my husband when we were fi rst dating, but my mother said, “Will he want to kiss you after all that garlic?” I decided to wait and save this recipe for our six-month anniversary.
ECC_full layout.indd 127ECC_full layout.indd 127 1/10/15 7:27 PM1/10/15 7:27 PM
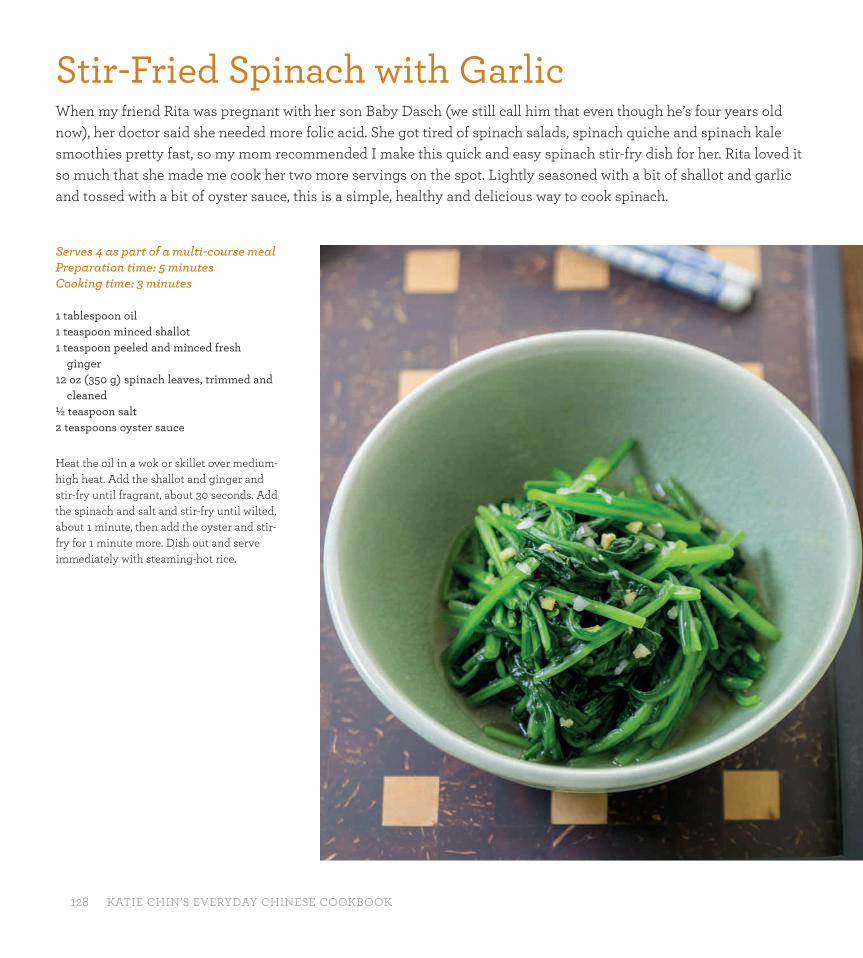
128 KATIE CHIN’S EVERYDAY CHINESE COOKBOOK
Serves 4 as part of a multi-course mealPreparation time: 5 minutesCooking time: 3 minutes
1 tablespoon oil1 teaspoon minced shallot1 teaspoon peeled and minced fresh
ginger12 oz (350 g) spinach leaves, trimmed and
cleaned½ teaspoon salt2 teaspoons oyster sauce
Heat the oil in a wok or skillet over medium-high heat. Add the shallot and ginger and stir-fry until fragrant, about 30 seconds. Add the spinach and salt and stir-fry until wilted, about 1 minute, then add the oyster and stir-fry for 1 minute more. Dish out and serve immediately with steaming-hot rice.
Stir-Fried Spinach with Garlic When my friend Rita was pregnant with her son Baby Dasch (we still call him that even though he’s four years old now), her doctor said she needed more folic acid. She got tired of spinach salads, spinach quiche and spinach kale smoothies pretty fast, so my mom recommended I make this quick and easy spinach stir-fry dish for her. Rita loved it so much that she made me cook her two more servings on the spot. Lightly seasoned with a bit of shallot and garlic and tossed with a bit of oyster sauce, this is a simple, healthy and delicious way to cook spinach.
ECC_full layout.indd 128ECC_full layout.indd 128 1/10/15 7:27 PM1/10/15 7:27 PM
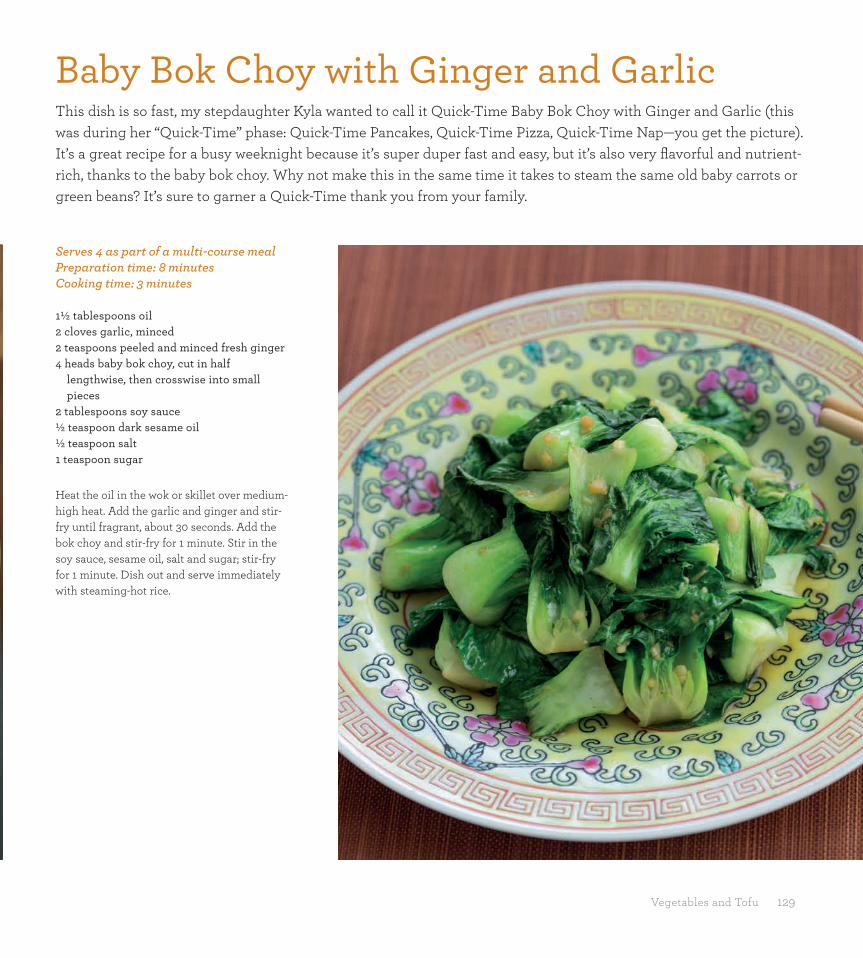
Vegetables and Tofu 129
Serves 4 as part of a multi-course mealPreparation time: 8 minutesCooking time: 3 minutes
1½ tablespoons oil2 cloves garlic, minced 2 teaspoons peeled and minced fresh ginger 4 heads baby bok choy, cut in half
lengthwise, then crosswise into small pieces
2 tablespoons soy sauce ½ teaspoon dark sesame oil½ teaspoon salt1 teaspoon sugar
Heat the oil in the wok or skillet over medium-high heat. Add the garlic and ginger and stir-fry until fragrant, about 30 seconds. Add the bok choy and stir-fry for 1 minute. Stir in the soy sauce, sesame oil, salt and sugar; stir-fry for 1 minute. Dish out and serve immediately with steaming-hot rice.
Baby Bok Choy with Ginger and Garlic This dish is so fast, my stepdaughter Kyla wanted to call it Quick-Time Baby Bok Choy with Ginger and Garlic (this was during her “Quick-Time” phase: Quick-Time Pancakes, Quick-Time Pizza, Quick-Time Nap—you get the picture). It’s a great recipe for a busy weeknight because it’s super duper fast and easy, but it’s also very fl avorful and nutrient-rich, thanks to the baby bok choy. Why not make this in the same time it takes to steam the same old baby carrots or green beans? It’s sure to garner a Quick-Time thank you from your family.
ECC_full layout.indd 129ECC_full layout.indd 129 1/10/15 7:27 PM1/10/15 7:27 PM

130 KATIE CHIN’S EVERYDAY CHINESE COOKBOOK
Serves 4 as part of a multi-course mealPreparation time: 30 minutesCooking time: 10 minutes
2 oz (50 g) snow peas, tips and strings removed, cut on the diagonal into 1-in (2.5-cm) pieces
2 oz (50 g) broccoli fl orets 2 teaspoons all-purpose cornstarch 2 teaspoons cold water 2 tablespoons oil, divided One 16-oz (500-g) block fi rm tofu, drained,
patted dry and cut into cubes 2 cloves garlic, minced 1 teaspoon peeled and minced fresh ginger 2 oz (50 g) sliced carrots 4 asparagus spears, trimmed and thinly
sliced diagonally 2 oz (50 g) stemmed and sliced fresh
mushrooms 2 oz (50 g) thinly sliced red bell pepper 4 heads baby bok choy, quartered
lengthwise 2 oz (50 g) canned baby corn, drained,
rinsed and sliced lengthwise ½ teaspoon salt ¹⁄8 teaspoon white pepper 2 tablespoons oyster sauce ½ cup (125 ml) chicken stock, homemade
(page 62) or store-bought
1 Blanch the snow peas and broccoli in boiling water until tender-crisp, about 1 minute. Using a slotted spoon, transfer the broccoli to an ice water bath to cool, then drain and set aside.
2 In a small bowl, mix together the cornstarch and 2 teaspoons cold water. Set aside.
3 Heat 1 tablespoon of the oil in a wok or skillet over medium-high heat. Add the tofu pieces and fry until brown, about 2 minutes. Flip the pieces over and fry for about 2 more minutes, then remove from the pan and set aside.
4 Heat the remaining tablespoon of oil over medium-high heat in a wok or skillet. Add the garlic and ginger and stir-fry until fragrant, about 30 seconds. Stir in the carrot, asparagus and mushrooms and stir-fry for 3 minutes. Add the red bell pepper and bok choy and stir-fry for 1 minute. Mix in the reserved snow peas, broccoli, baby corn, salt and white pepper; stir-fry for 1 minute. Add the reserved tofu and oyster sauce and gently stir-fry for 30 seconds more.
5 Pour in the chicken stock and heat to boiling. Add the cornstarch mixture and cook, stirring continuously, until the sauce thickens, about 30 seconds. Dish out and serve immediately with steaming-hot rice.
Eight-Vegetable Tofu While one is the loneliest number that you’ll ever do, eight is the luckiest number in all of China. The reason the number eight is considered lucky is because in Chinese the sound of the word eight (ba) is similar to the sound for the word “prosperity” (fa). That’s why the Beijing Olympics began on 08/08/08. Get it? My mother and I came up with this colorful and healthy dish celebrating the number eight to bring good luck, joy and harmony to your dinner table. Filled with soy protein and oodles of fresh veggies, this is a gorgeous and nourishing one-pot dish.
ECC_full layout.indd 130ECC_full layout.indd 130 2/10/15 11:52 AM2/10/15 11:52 AM
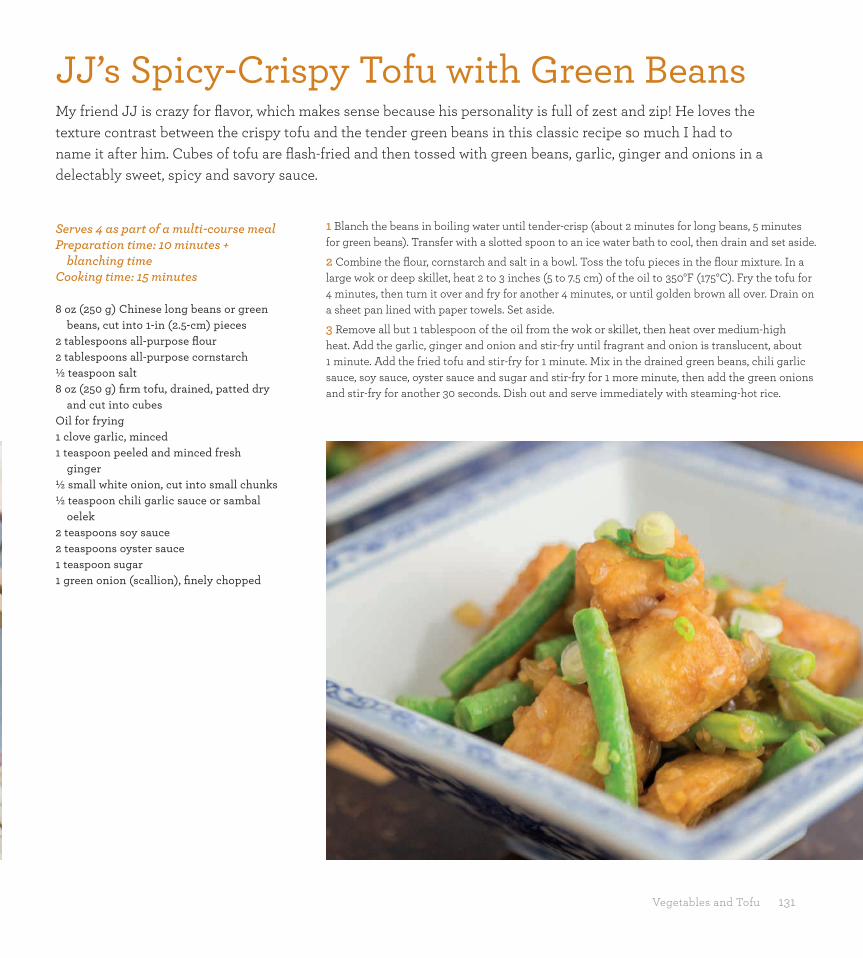
Vegetables and Tofu 131
Serves 4 as part of a multi-course mealPreparation time: 10 minutes +
blanching timeCooking time: 15 minutes
8 oz (250 g) Chinese long beans or green beans, cut into 1-in (2.5-cm) pieces
2 tablespoons all-purpose fl our2 tablespoons all-purpose cornstarch½ teaspoon salt8 oz (250 g) fi rm tofu, drained, patted dry
and cut into cubesOil for frying1 clove garlic, minced1 teaspoon peeled and minced fresh
ginger½ small white onion, cut into small chunks½ teaspoon chili garlic sauce or sambal
oelek2 teaspoons soy sauce2 teaspoons oyster sauce 1 teaspoon sugar1 green onion (scallion), fi nely chopped
1 Blanch the beans in boiling water until tender-crisp (about 2 minutes for long beans, 5 minutes for green beans). Transfer with a slotted spoon to an ice water bath to cool, then drain and set aside.
2 Combine the fl our, cornstarch and salt in a bowl. Toss the tofu pieces in the fl our mixture. In a large wok or deep skillet, heat 2 to 3 inches (5 to 7.5 cm) of the oil to 350°F (175°C). Fry the tofu for 4 minutes, then turn it over and fry for another 4 minutes, or until golden brown all over. Drain on a sheet pan lined with paper towels. Set aside.
3 Remove all but 1 tablespoon of the oil from the wok or skillet, then heat over medium-high heat. Add the garlic, ginger and onion and stir-fry until fragrant and onion is translucent, about 1 minute. Add the fried tofu and stir-fry for 1 minute. Mix in the drained green beans, chili garlic sauce, soy sauce, oyster sauce and sugar and stir-fry for 1 more minute, then add the green onions and stir-fry for another 30 seconds. Dish out and serve immediately with steaming-hot rice.
JJ’s Spicy-Crispy Tofu with Green BeansMy friend JJ is crazy for fl avor, which makes sense because his personality is full of zest and zip! He loves the texture contrast between the crispy tofu and the tender green beans in this classic recipe so much I had to name it after him. Cubes of tofu are fl ash-fried and then tossed with green beans, garlic, ginger and onions in a delectably sweet, spicy and savory sauce.
ECC_full layout.indd 131ECC_full layout.indd 131 1/10/15 7:27 PM1/10/15 7:27 PM

132 KATIE CHIN’S EVERYDAY CHINESE COOKBOOK
Noodles have been around in China since the Han Dynasty (206 BCE–220 CE), and their longstanding prominence in the cuisine makes it clear that the
Chinese love their noodles! Luckily, Marco Polo brought noodles to the West after his historic voyage to China.
Slurped, twirled or sipped, noodles are enjoyed morning, noon and night in China. They symbolize longevity: Long-Life Noodles, served on birthdays and the Chinese New Year, are never cut (the longer the noodle, the longer the life). Some of my favorite childhood memories are of gobbling up steaming bowls of my mother’s delicious Canton-Style Chicken Chow Mein (page 145) or Three-Flavor Lo Mein (page 136) on a cold day.
Rice is woven into the fabric of life for Chinese people. The grain is so revered that people greet each on the street by saying, “Have you eaten rice yet?” Rice is the core of virtually every Chinese meal and holds a place of honor at the table. Long-grain white rice is the standard in Chinese cuisine, but feel free to experiment with brown rice, jasmine rice or even quinoa.
I think plain, steaming-hot white rice accompanying my meat and vegetable dishes is sublime (see page 19 to learn how to make a perfect pot), but there is a rich tradition of other rice dishes in China, especially fried rice. My favorite fried-rice dishes include the juicy, bright and fl avorful Pineapple Fried Rice (page 137) and the Farmers’ Market Fried Brown Rice (page 147). And how could I forget the luxurious Crab Fried Rice (page 135) my mom used to make for us on special occasions?
Noodles and Rice
ECC_full layout.indd 132ECC_full layout.indd 132 2/10/15 1:17 PM2/10/15 1:17 PM
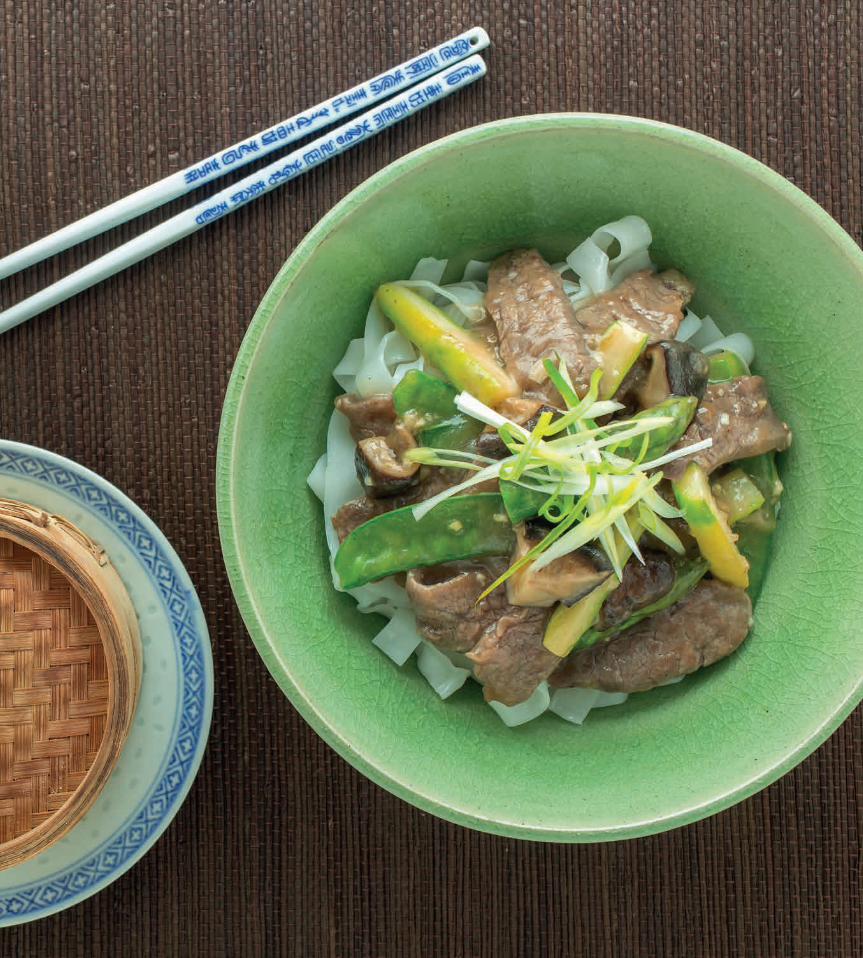
The Wisdom of My Mother’s Kitchen 133
ECC_full layout.indd 133ECC_full layout.indd 133 2/10/15 1:17 PM2/10/15 1:17 PM
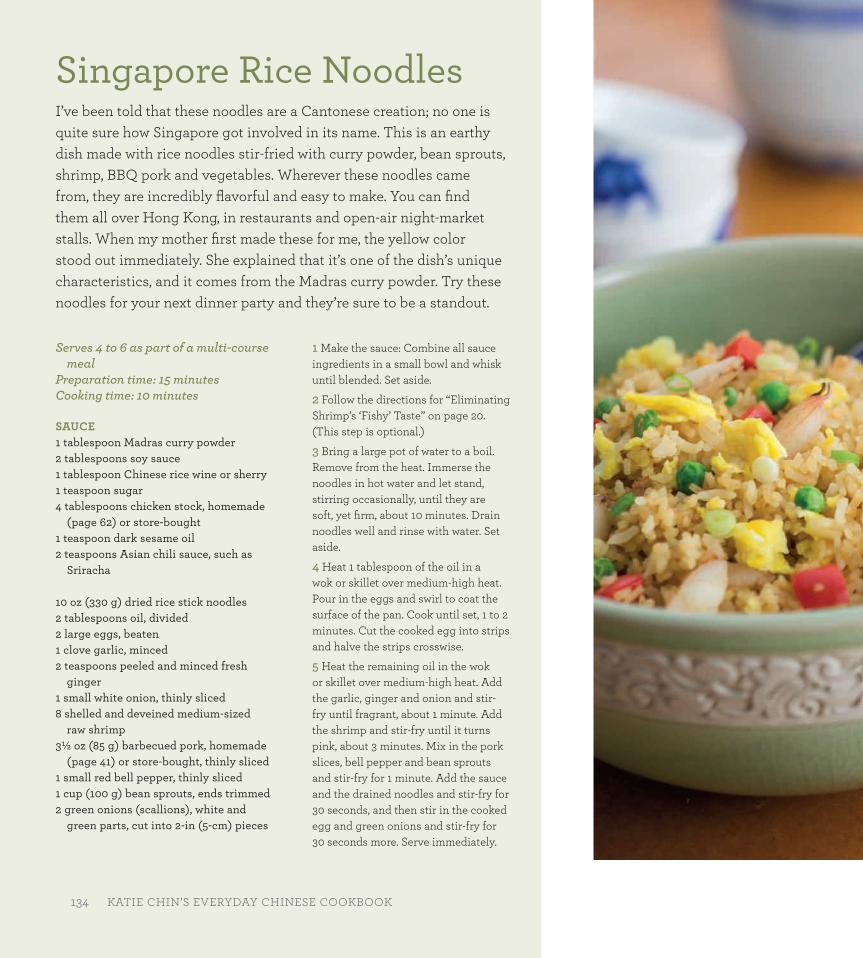
134 KATIE CHIN’S EVERYDAY CHINESE COOKBOOK
Serves 4 to 6 as part of a multi-course meal
Preparation time: 15 minutes Cooking time: 10 minutes
SAUCE1 tablespoon Madras curry powder2 tablespoons soy sauce1 tablespoon Chinese rice wine or sherry1 teaspoon sugar4 tablespoons chicken stock, homemade
(page 62) or store-bought1 teaspoon dark sesame oil2 teaspoons Asian chili sauce, such as
Sriracha
10 oz (330 g) dried rice stick noodles2 tablespoons oil, divided2 large eggs, beaten1 clove garlic, minced2 teaspoons peeled and minced fresh
ginger1 small white onion, thinly sliced8 shelled and deveined medium-sized
raw shrimp3½ oz (85 g) barbecued pork, homemade
(page 41) or store-bought, thinly sliced1 small red bell pepper, thinly sliced1 cup (100 g) bean sprouts, ends trimmed2 green onions (scallions), white and
green parts, cut into 2-in (5-cm) pieces
1 Make the sauce: Combine all sauce ingredients in a small bowl and whisk until blended. Set aside.
2 Follow the directions for “Eliminating Shrimp’s ‘Fishy’ Taste” on page 20. (This step is optional.)
3 Bring a large pot of water to a boil. Remove from the heat. Immerse the noodles in hot water and let stand, stirring occasionally, until they are soft, yet fi rm, about 10 minutes. Drain noodles well and rinse with water. Set aside.
4 Heat 1 tablespoon of the oil in a wok or skillet over medium-high heat. Pour in the eggs and swirl to coat the surface of the pan. Cook until set, 1 to 2 minutes. Cut the cooked egg into strips and halve the strips crosswise.
5 Heat the remaining oil in the wok or skillet over medium-high heat. Add the garlic, ginger and onion and stir-fry until fragrant, about 1 minute. Add the shrimp and stir-fry until it turns pink, about 3 minutes. Mix in the pork slices, bell pepper and bean sprouts and stir-fry for 1 minute. Add the sauce and the drained noodles and stir-fry for 30 seconds, and then stir in the cooked egg and green onions and stir-fry for 30 seconds more. Serve immediately.
Singapore Rice Noodles I’ve been told that these noodles are a Cantonese creation; no one is quite sure how Singapore got involved in its name. This is an earthy dish made with rice noodles stir-fried with curry powder, bean sprouts, shrimp, BBQ pork and vegetables. Wherever these noodles came from, they are incredibly fl avorful and easy to make. You can fi nd them all over Hong Kong, in restaurants and open-air night-market stalls. When my mother fi rst made these for me, the yellow color stood out immediately. She explained that it’s one of the dish’s unique characteristics, and it comes from the Madras curry powder. Try these noodles for your next dinner party and they’re sure to be a standout.
134 KATIE CHIN’S EVERYDAY CHINESE COOKBOOK
ECC_full layout.indd 134ECC_full layout.indd 134 2/10/15 1:17 PM2/10/15 1:17 PM
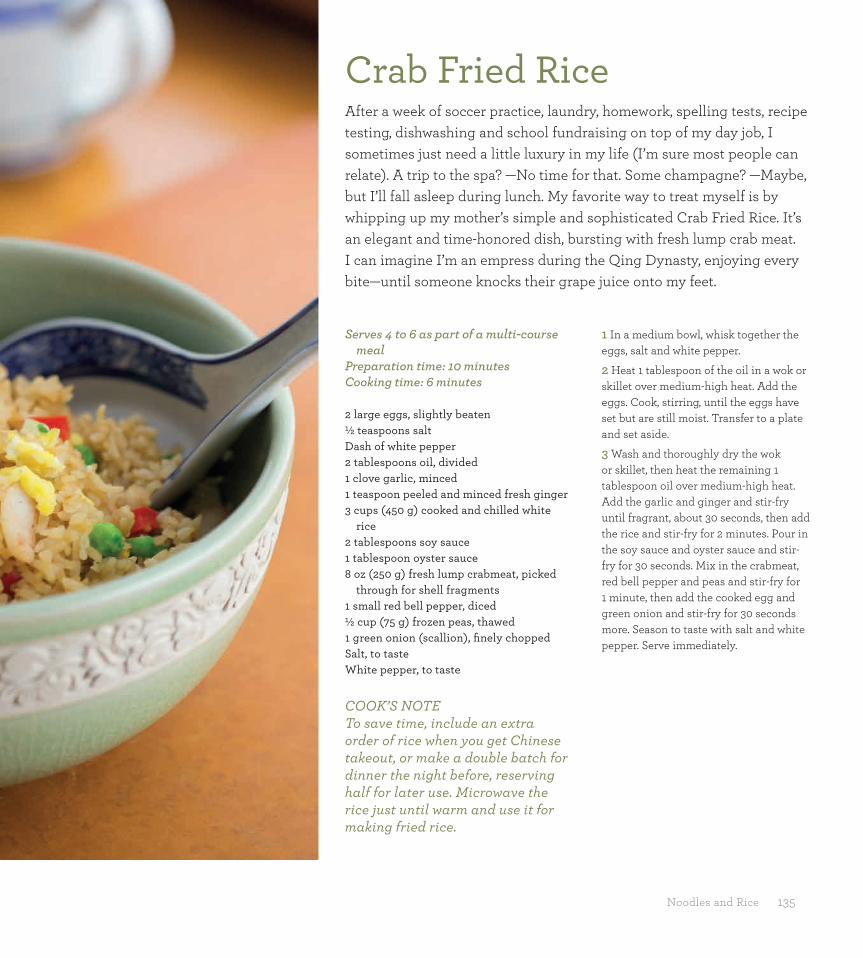
Noodles and Rice 135
Serves 4 to 6 as part of a multi-course meal
Preparation time: 10 minutesCooking time: 6 minutes
2 large eggs, slightly beaten ½ teaspoons salt Dash of white pepper 2 tablespoons oil, divided 1 clove garlic, minced 1 teaspoon peeled and minced fresh ginger 3 cups (450 g) cooked and chilled white
rice 2 tablespoons soy sauce 1 tablespoon oyster sauce 8 oz (250 g) fresh lump crabmeat, picked
through for shell fragments 1 small red bell pepper, diced ½ cup (75 g) frozen peas, thawed 1 green onion (scallion), fi nely chopped Salt, to tasteWhite pepper, to taste
COOK’S NOTETo save time, include an extra order of rice when you get Chinese takeout, or make a double batch for dinner the night before, reserving half for later use. Microwave the rice just until warm and use it for making fried rice.
1 In a medium bowl, whisk together the eggs, salt and white pepper.
2 Heat 1 tablespoon of the oil in a wok or skillet over medium-high heat. Add the eggs. Cook, stirring, until the eggs have set but are still moist. Transfer to a plate and set aside.
3 Wash and thoroughly dry the wok or skillet, then heat the remaining 1 tablespoon oil over medium-high heat. Add the garlic and ginger and stir-fry until fragrant, about 30 seconds, then add the rice and stir-fry for 2 minutes. Pour in the soy sauce and oyster sauce and stir-fry for 30 seconds. Mix in the crabmeat, red bell pepper and peas and stir-fry for 1 minute, then add the cooked egg and green onion and stir-fry for 30 seconds more. Season to taste with salt and white pepper. Serve immediately.
Crab Fried RiceAfter a week of soccer practice, laundry, homework, spelling tests, recipe testing, dishwashing and school fundraising on top of my day job, I sometimes just need a little luxury in my life (I’m sure most people can relate). A trip to the spa? —No time for that. Some champagne? —Maybe, but I’ll fall asleep during lunch. My favorite way to treat myself is by whipping up my mother’s simple and sophisticated Crab Fried Rice. It’s an elegant and time-honored dish, bursting with fresh lump crab meat. I can imagine I’m an empress during the Qing Dynasty, enjoying every bite—until someone knocks their grape juice onto my feet.
ECC_full layout.indd 135ECC_full layout.indd 135 2/10/15 1:17 PM2/10/15 1:17 PM
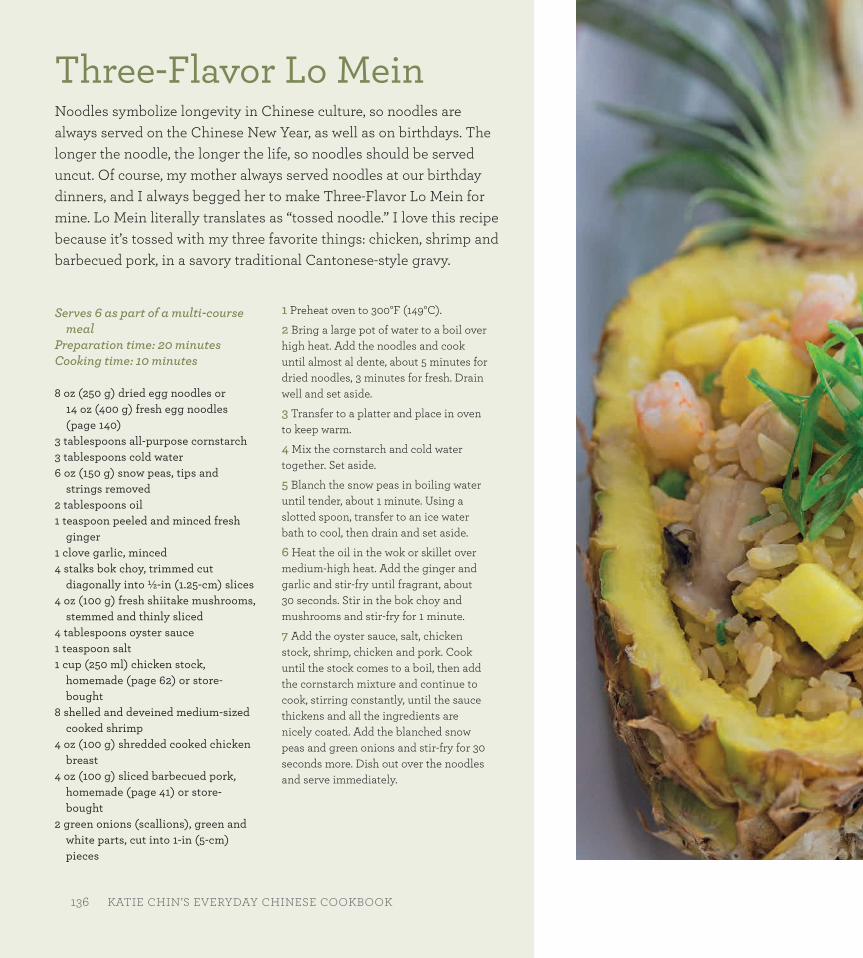
136 KATIE CHIN’S EVERYDAY CHINESE COOKBOOK
Serves 6 as part of a multi-course meal
Preparation time: 20 minutes Cooking time: 10 minutes
8 oz (250 g) dried egg noodles or 14 oz (400 g) fresh egg noodles (page 140)
3 tablespoons all-purpose cornstarch3 tablespoons cold water6 oz (150 g) snow peas, tips and
strings removed2 tablespoons oil1 teaspoon peeled and minced fresh
ginger1 clove garlic, minced 4 stalks bok choy, trimmed cut
diagonally into ½-in (1.25-cm) slices4 oz (100 g) fresh shiitake mushrooms,
stemmed and thinly sliced4 tablespoons oyster sauce1 teaspoon salt1 cup (250 ml) chicken stock,
homemade (page 62) or store-bought
8 shelled and deveined medium-sized cooked shrimp
4 oz (100 g) shredded cooked chicken breast
4 oz (100 g) sliced barbecued pork, homemade (page 41) or store-bought
2 green onions (scallions), green and white parts, cut into 1-in (5-cm) pieces
1 Preheat oven to 300°F (149°C).
2 Bring a large pot of water to a boil over high heat. Add the noodles and cook until almost al dente, about 5 minutes for dried noodles, 3 minutes for fresh. Drain well and set aside.
3 Transfer to a platter and place in oven to keep warm.
4 Mix the cornstarch and cold water together. Set aside.
5 Blanch the snow peas in boiling water until tender, about 1 minute. Using a slotted spoon, transfer to an ice water bath to cool, then drain and set aside.
6 Heat the oil in the wok or skillet over medium-high heat. Add the ginger and garlic and stir-fry until fragrant, about 30 seconds. Stir in the bok choy and mushrooms and stir-fry for 1 minute.
7 Add the oyster sauce, salt, chicken stock, shrimp, chicken and pork. Cook until the stock comes to a boil, then add the cornstarch mixture and continue to cook, stirring constantly, until the sauce thickens and all the ingredients are nicely coated. Add the blanched snow peas and green onions and stir-fry for 30 seconds more. Dish out over the noodles and serve immediately.
Three-Flavor Lo Mein Noodles symbolize longevity in Chinese culture, so noodles are always served on the Chinese New Year, as well as on birthdays. The longer the noodle, the longer the life, so noodles should be served uncut. Of course, my mother always served noodles at our birthday dinners, and I always begged her to make Three-Flavor Lo Mein for mine. Lo Mein literally translates as “tossed noodle.” I love this recipe because it’s tossed with my three favorite things: chicken, shrimp and barbecued pork, in a savory traditional Cantonese-style gravy.
136 KATIE CHIN’S EVERYDAY CHINESE COOKBOOK
ECC_full layout.indd 136ECC_full layout.indd 136 2/10/15 1:17 PM2/10/15 1:17 PM
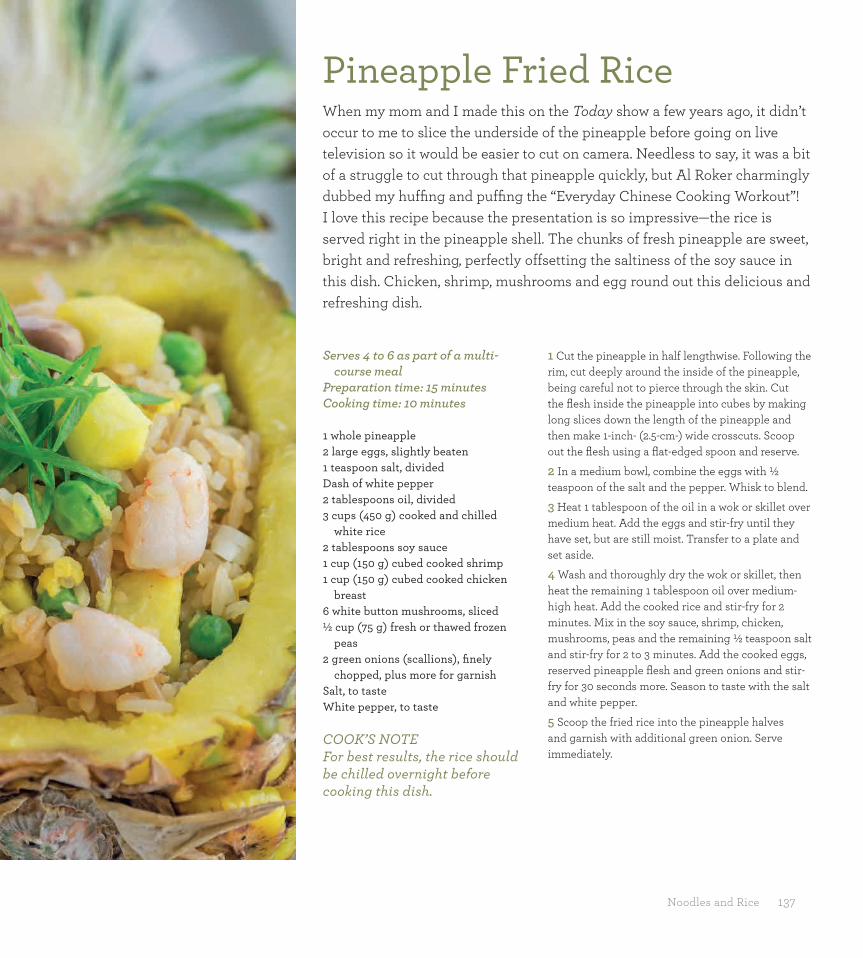
Noodles and Rice 137
Serves 4 to 6 as part of a multi-course meal
Preparation time: 15 minutes Cooking time: 10 minutes
1 whole pineapple2 large eggs, slightly beaten1 teaspoon salt, dividedDash of white pepper2 tablespoons oil, divided3 cups (450 g) cooked and chilled
white rice2 tablespoons soy sauce1 cup (150 g) cubed cooked shrimp1 cup (150 g) cubed cooked chicken
breast6 white button mushrooms, sliced½ cup (75 g) fresh or thawed frozen
peas2 green onions (scallions), fi nely
chopped, plus more for garnishSalt, to taste White pepper, to taste
COOK’S NOTEFor best results, the rice should be chilled overnight before cooking this dish.
1 Cut the pineapple in half lengthwise. Following the rim, cut deeply around the inside of the pineapple, being careful not to pierce through the skin. Cut the fl esh inside the pineapple into cubes by making long slices down the length of the pineapple and then make 1-inch- (2.5-cm-) wide crosscuts. Scoop out the fl esh using a fl at-edged spoon and reserve.
2 In a medium bowl, combine the eggs with ½ teaspoon of the salt and the pepper. Whisk to blend.
3 Heat 1 tablespoon of the oil in a wok or skillet over medium heat. Add the eggs and stir-fry until they have set, but are still moist. Transfer to a plate and set aside.
4 Wash and thoroughly dry the wok or skillet, then heat the remaining 1 tablespoon oil over medium-high heat. Add the cooked rice and stir-fry for 2 minutes. Mix in the soy sauce, shrimp, chicken, mushrooms, peas and the remaining ½ teaspoon salt and stir-fry for 2 to 3 minutes. Add the cooked eggs, reserved pineapple fl esh and green onions and stir-fry for 30 seconds more. Season to taste with the salt and white pepper.
5 Scoop the fried rice into the pineapple halves and garnish with additional green onion. Serve immediately.
Pineapple Fried Rice When my mom and I made this on the Today show a few years ago, it didn’t occur to me to slice the underside of the pineapple before going on live television so it would be easier to cut on camera. Needless to say, it was a bit of a struggle to cut through that pineapple quickly, but Al Roker charmingly dubbed my huffi ng and puffi ng the “Everyday Chinese Cooking Workout”! I love this recipe because the presentation is so impressive—the rice is served right in the pineapple shell. The chunks of fresh pineapple are sweet, bright and refreshing, perfectly offsetting the saltiness of the soy sauce in this dish. Chicken, shrimp, mushrooms and egg round out this delicious and refreshing dish.
ECC_full layout.indd 137ECC_full layout.indd 137 2/10/15 1:17 PM2/10/15 1:17 PM
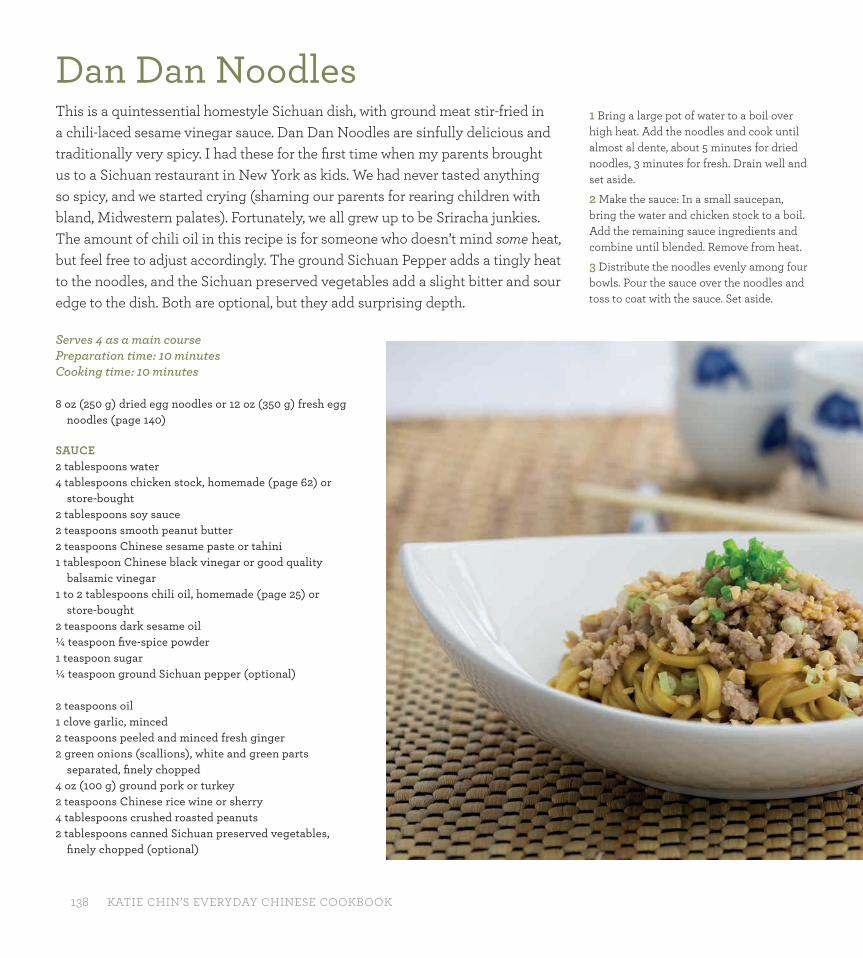
138 KATIE CHIN’S EVERYDAY CHINESE COOKBOOK
Serves 4 as a main coursePreparation time: 10 minutes Cooking time: 10 minutes
8 oz (250 g) dried egg noodles or 12 oz (350 g) fresh egg noodles (page 140)
SAUCE 2 tablespoons water 4 tablespoons chicken stock, homemade (page 62) or
store-bought2 tablespoons soy sauce 2 teaspoons smooth peanut butter 2 teaspoons Chinese sesame paste or tahini 1 tablespoon Chinese black vinegar or good quality
balsamic vinegar 1 to 2 tablespoons chili oil, homemade (page 25) or
store-bought 2 teaspoons dark sesame oil ¼ teaspoon fi ve-spice powder 1 teaspoon sugar ¼ teaspoon ground Sichuan pepper (optional)
2 teaspoons oil1 clove garlic, minced 2 teaspoons peeled and minced fresh ginger2 green onions (scallions), white and green parts
separated, fi nely chopped4 oz (100 g) ground pork or turkey2 teaspoons Chinese rice wine or sherry4 tablespoons crushed roasted peanuts2 tablespoons canned Sichuan preserved vegetables,
fi nely chopped (optional)
Dan Dan Noodles This is a quintessential homestyle Sichuan dish, with ground meat stir-fried in a chili-laced sesame vinegar sauce. Dan Dan Noodles are sinfully delicious and traditionally very spicy. I had these for the fi rst time when my parents brought us to a Sichuan restaurant in New York as kids. We had never tasted anything so spicy, and we started crying (shaming our parents for rearing children with bland, Midwestern palates). Fortunately, we all grew up to be Sriracha junkies. The amount of chili oil in this recipe is for someone who doesn’t mind some heat, but feel free to adjust accordingly. The ground Sichuan Pepper adds a tingly heat to the noodles, and the Sichuan preserved vegetables add a slight bitter and sour edge to the dish. Both are optional, but they add surprising depth.
1 Bring a large pot of water to a boil over high heat. Add the noodles and cook until almost al dente, about 5 minutes for dried noodles, 3 minutes for fresh. Drain well and set aside.
2 Make the sauce: In a small saucepan, bring the water and chicken stock to a boil. Add the remaining sauce ingredients and combine until blended. Remove from heat.
3 Distribute the noodles evenly among four bowls. Pour the sauce over the noodles and toss to coat with the sauce. Set aside.
ECC_full layout.indd 138ECC_full layout.indd 138 2/10/15 1:17 PM2/10/15 1:17 PM
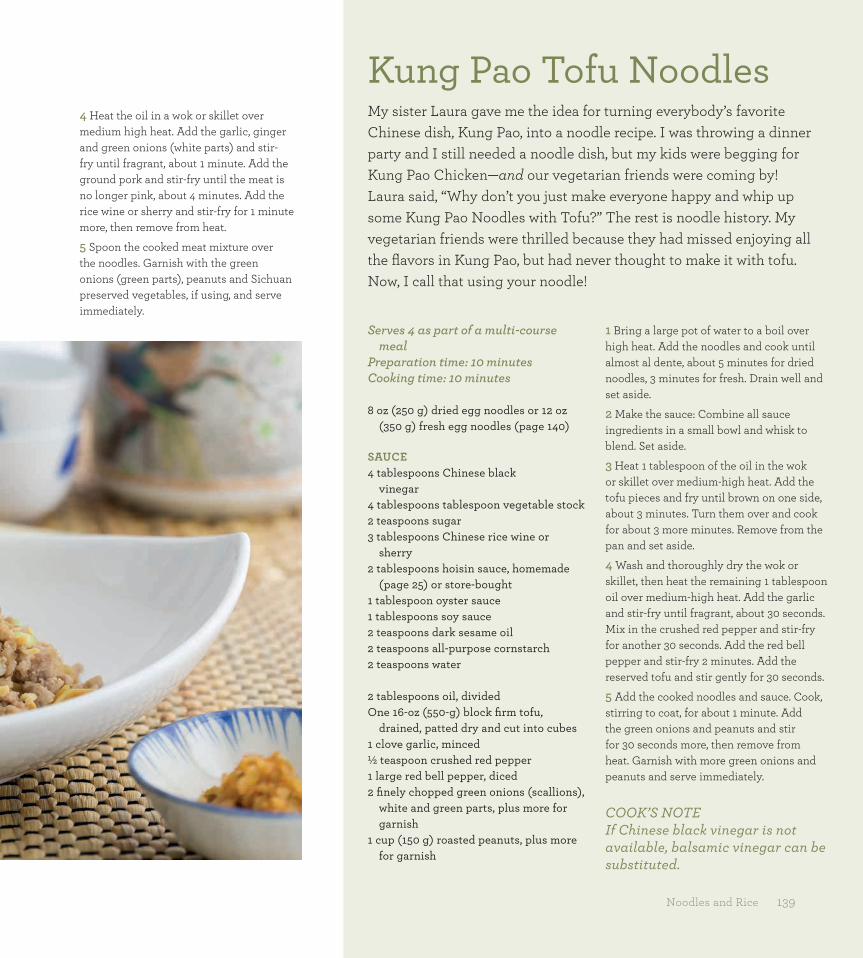
Noodles and Rice 139
Serves 4 as part of a multi-course meal
Preparation time: 10 minutesCooking time: 10 minutes
8 oz (250 g) dried egg noodles or 12 oz (350 g) fresh egg noodles (page 140)
SAUCE4 tablespoons Chinese black
vinegar 4 tablespoons tablespoon vegetable stock2 teaspoons sugar3 tablespoons Chinese rice wine or
sherry2 tablespoons hoisin sauce, homemade
(page 25) or store-bought1 tablespoon oyster sauce1 tablespoons soy sauce2 teaspoons dark sesame oil2 teaspoons all-purpose cornstarch2 teaspoons water
2 tablespoons oil, dividedOne 16-oz (550-g) block fi rm tofu,
drained, patted dry and cut into cubes1 clove garlic, minced½ teaspoon crushed red pepper 1 large red bell pepper, diced2 fi nely chopped green onions (scallions),
white and green parts, plus more for garnish
1 cup (150 g) roasted peanuts, plus more for garnish
1 Bring a large pot of water to a boil over high heat. Add the noodles and cook until almost al dente, about 5 minutes for dried noodles, 3 minutes for fresh. Drain well and set aside.
2 Make the sauce: Combine all sauce ingredients in a small bowl and whisk to blend. Set aside.
3 Heat 1 tablespoon of the oil in the wok or skillet over medium-high heat. Add the tofu pieces and fry until brown on one side, about 3 minutes. Turn them over and cook for about 3 more minutes. Remove from the pan and set aside.
4 Wash and thoroughly dry the wok or skillet, then heat the remaining 1 tablespoon oil over medium-high heat. Add the garlic and stir-fry until fragrant, about 30 seconds. Mix in the crushed red pepper and stir-fry for another 30 seconds. Add the red bell pepper and stir-fry 2 minutes. Add the reserved tofu and stir gently for 30 seconds.
5 Add the cooked noodles and sauce. Cook, stirring to coat, for about 1 minute. Add the green onions and peanuts and stir for 30 seconds more, then remove from heat. Garnish with more green onions and peanuts and serve immediately.
COOK’S NOTEIf Chinese black vinegar is not available, balsamic vinegar can be substituted.
Kung Pao Tofu NoodlesMy sister Laura gave me the idea for turning everybody’s favorite Chinese dish, Kung Pao, into a noodle recipe. I was throwing a dinner party and I still needed a noodle dish, but my kids were begging for Kung Pao Chicken—and our vegetarian friends were coming by! Laura said, “Why don’t you just make everyone happy and whip up some Kung Pao Noodles with Tofu?” The rest is noodle history. My vegetarian friends were thrilled because they had missed enjoying all the fl avors in Kung Pao, but had never thought to make it with tofu. Now, I call that using your noodle!
4 Heat the oil in a wok or skillet over medium high heat. Add the garlic, ginger and green onions (white parts) and stir-fry until fragrant, about 1 minute. Add the ground pork and stir-fry until the meat is no longer pink, about 4 minutes. Add the rice wine or sherry and stir-fry for 1 minute more, then remove from heat.
5 Spoon the cooked meat mixture over the noodles. Garnish with the green onions (green parts), peanuts and Sichuan preserved vegetables, if using, and serve immediately.
ECC_full layout.indd 139ECC_full layout.indd 139 2/10/15 1:17 PM2/10/15 1:17 PM

140 KATIE CHIN’S EVERYDAY CHINESE COOKBOOK
Serves 4 as part of a multi-course meal
Preparation time: 20 minutes Cooking time: 10 minutes
8 oz (250 g) dried egg noodles or 14 oz (400 g) fresh egg noodles (page 140)
2 oz (50 g) snow peas, tips and strings removed
2 oz (50 g) broccoli fl orets 3 tablespoons all-purpose cornstarch3 tablespoons cold water2 tablespoons oil1 teaspoon peeled and minced fresh
ginger1 clove garlic, minced 2 oz (50 g) sliced carrots2 oz (50 g) fresh shiitake mushrooms,
stemmed and thinly sliced2 oz (50 g) thinly sliced red bell
pepper2 oz (50 g) canned baby corn, drained,
rinsed and sliced lengthwise4 tablespoons oyster sauce1 cup (250 ml) vegetable stock or
chicken stock, homemade (page 62) or store-bought
1 teaspoon salt2 green onions (scallions), green and
white parts, cut into 1-in (2.5-cm) pieces
1 Preheat oven to 300°F (149°C).
2 Bring a large pot of water to a boil over high heat. Add the noodles and cook until almost al dente, about 5 minutes for dried noodles, 3 minutes for fresh. Drain well and set aside.
3 Blanch the snow peas and broccoli fl orets in boiling water until tender, about 1 minute. Using a slotted spoon, transfer to an ice water bath to cool, then drain and set aside.
4 Mix the cornstarch and the cold water together and set aside.
5 Heat the oil in the wok or skillet over medium-high heat. Add the ginger and garlic and stir-fry until fragrant, about 30 seconds. Mix in the carrots and mushrooms and stir-fry for 3 minutes. Add the red bell pepper and baby corn and stir-fry for 1 minute.
6 Pour in the oyster sauce, vegetable or chicken stock and the salt. Cook until the stock comes to a boil, then add the cornstarch mixture and stir until the sauce thickens and all the ingredients are nicely coated. Add the drained snow peas and broccoli and the green onions and stir-fry for 30 seconds. Dish out over the noodles and serve immediately.
COOK’S NOTETo save time and minimize waste, you can buy pre-cut and washed vegetables at the grocery store salad bar.
Vegetable Lo MeinMy friend Karen, a working mom who doesn’t have much time to cook, tried these noodles at my house. She was amazed at how tender-crisp the vegetables were and how fresh and delicious everything tasted. She didn’t believe she could make it herself until I had her over for a cooking lesson, along with our friend Rebecca. Armed with spatulas and glasses of pinot grigio, they fi nished the recipe and said, “Wow, did we really just do that?” My mother always taught me that Chinese cooking is all about the prep, so if you have all of the ingredients cut, cleaned and ready to go, you too will master this dish in no time. Cheers to that!
Makes about 1 lb (450 g)Preparation time: 20 minutes
1¼ cups (125 g) all-purpose fl our or semolina fl our2 large eggs
1 In a medium bowl, mix together the fl our and eggs to make a dough. Knead the dough on a lightly fl oured surface until elastic. Add a bit of water if necessary. Form into a ball and let rest for 15 minutes.
2 With a rolling pin, roll the dough into an oval sheet, rolling the dough from the center outward, until very thin. Place the dough on a lightly fl oured cloth so that one-third of it is on the cloth and two-thirds of it hangs off the edge of the table or counter. Using gravity to help, carefully stretch the dough out further.
3 Lightly fl our the sheet of dough and roll it into a tube about 3 inches (7.5 cm) in diameter. Flatten the tube and use a sharp knife to slice the dough crosswise into very thin noodles. Separate the noodles and form them into a nest.
COOK’S NOTEYou can freeze homemade noodles for up to 3 months, or keep them for up to 2 days in the refrigerator.
Homemade Egg Noodles Making noodles is a fun rainy-day project for the whole family. These egg noodles are extremely versatile and can be used in a variety of soups and stir-fries, as well as any noodle recipe. You can boil them in chicken stock to make soup, or pan-fry them in oil and garlic and drizzle soy sauce over them, or top them with any stir-fry combination. They’ll be delicious and satisfying no matter how you choose to prepare them!
ECC_full layout.indd 140ECC_full layout.indd 140 12/10/15 3:00 PM12/10/15 3:00 PM
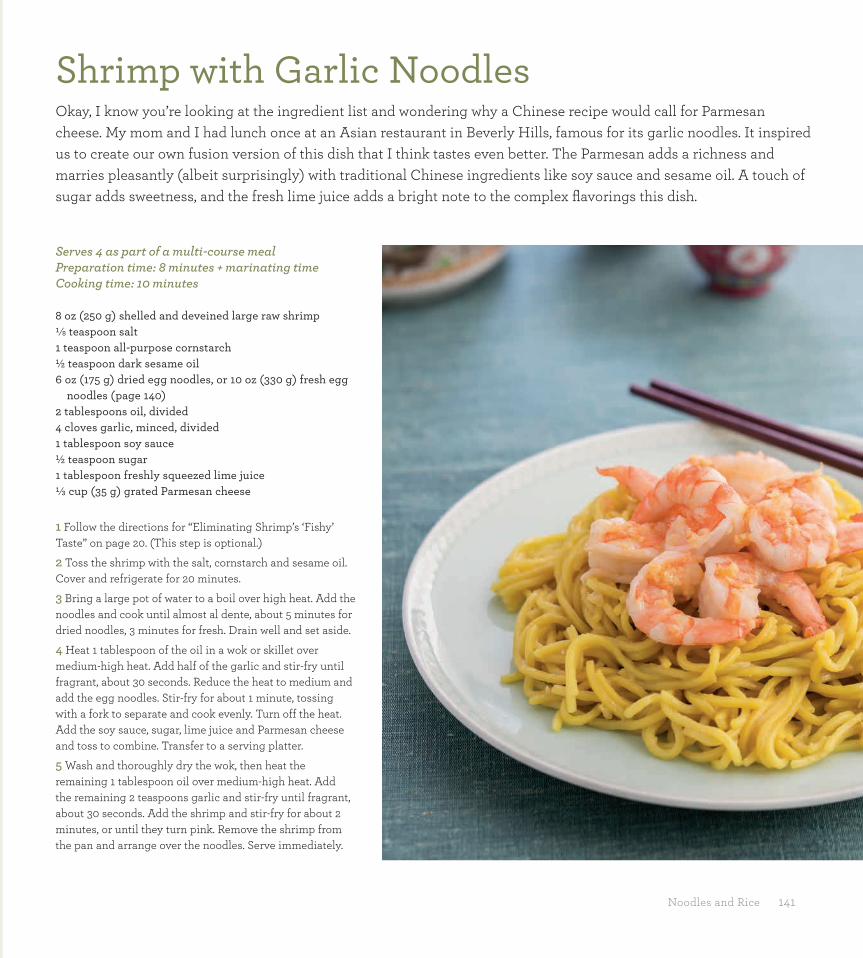
Noodles and Rice 141
Serves 4 as part of a multi-course mealPreparation time: 8 minutes + marinating timeCooking time: 10 minutes
8 oz (250 g) shelled and deveined large raw shrimp¹⁄8 teaspoon salt1 teaspoon all-purpose cornstarch½ teaspoon dark sesame oil6 oz (175 g) dried egg noodles, or 10 oz (330 g) fresh egg
noodles (page 140)2 tablespoons oil, divided4 cloves garlic, minced, divided1 tablespoon soy sauce½ teaspoon sugar1 tablespoon freshly squeezed lime juice¹⁄³ cup (35 g) grated Parmesan cheese
1 Follow the directions for “Eliminating Shrimp’s ‘Fishy’ Taste” on page 20. (This step is optional.)
2 Toss the shrimp with the salt, cornstarch and sesame oil. Cover and refrigerate for 20 minutes.
3 Bring a large pot of water to a boil over high heat. Add the noodles and cook until almost al dente, about 5 minutes for dried noodles, 3 minutes for fresh. Drain well and set aside.
4 Heat 1 tablespoon of the oil in a wok or skillet over medium-high heat. Add half of the garlic and stir-fry until fragrant, about 30 seconds. Reduce the heat to medium and add the egg noodles. Stir-fry for about 1 minute, tossing with a fork to separate and cook evenly. Turn off the heat. Add the soy sauce, sugar, lime juice and Parmesan cheese and toss to combine. Transfer to a serving platter.
5 Wash and thoroughly dry the wok, then heat the remaining 1 tablespoon oil over medium-high heat. Add the remaining 2 teaspoons garlic and stir-fry until fragrant, about 30 seconds. Add the shrimp and stir-fry for about 2 minutes, or until they turn pink. Remove the shrimp from the pan and arrange over the noodles. Serve immediately.
Shrimp with Garlic NoodlesOkay, I know you’re looking at the ingredient list and wondering why a Chinese recipe would call for Parmesan cheese. My mom and I had lunch once at an Asian restaurant in Beverly Hills, famous for its garlic noodles. It inspired us to create our own fusion version of this dish that I think tastes even better. The Parmesan adds a richness and marries pleasantly (albeit surprisingly) with traditional Chinese ingredients like soy sauce and sesame oil. A touch of sugar adds sweetness, and the fresh lime juice adds a bright note to the complex fl avorings this dish.
ECC_full layout.indd 141ECC_full layout.indd 141 2/10/15 1:17 PM2/10/15 1:17 PM

142 KATIE CHIN’S EVERYDAY CHINESE COOKBOOK
Serves 2 to 3 as a main dishPreparation time: 10 minutes + soaking and marinating time Cooking time: 7 minutes
10 oz (330 g) fresh fl at rice noodles (for dry noodles, see the Cook’s Note following the method)
1 teaspoon dark sesame oil3 medium dried black mushrooms8 oz (250 g) beef tenderloin, sirloin steak or fl ank steak, sliced
diagonally across the grain in ¼-in (6-mm) slices1 teaspoon plus 2 tablespoons all-purpose cornstarch, divided1¼ teaspoons salt, divided2 teaspoons sugar, dividedDash of white pepper2 oz (50 g) snow peas, tips and strings removed8 oz (250 g) asparagus, ends trimmed and cut into 2-in (5-cm) pieces¾ cup (185 ml) chicken stock, homemade (page 62) or store-bought,
divided2 tablespoons oyster sauce3 tablespoons oil, divided1 teaspoon peeled and minced fresh ginger1 clove garlic, minced2 green onions (scallions), green and white parts, cut into 2-in (5-cm)
pieces and then sliced lengthwise into thin strips, for garnish
1 Toss the noodles with the sesame oil. Divide the noodles evenly among 2 or 3 bowls (depending on the number of diners) and set aside.
2 Soak the mushrooms in hot water until soft, about 20 minutes, and drain. Remove and discard the stems and cut the caps into ½-inch (1.25-cm) pieces.
3 In a bowl, toss the beef, 1 teaspoon of the cornstarch, 1 teaspoon of the salt, 1 teaspoon of the sugar and the pepper. Cover and refrigerate for 20 minutes.
4 Bring a small saucepan of water to a boil. Add the snow peas and blanch for 1 minute or until tender-crisp. Using a slotted spoon, transfer the snow peas to a bowl of ice water and let cool completely. Drain and set aside.
Beef Chow Fun Fun means “wide rice noodle” in Chinese. The difference between this noodle dish and, say, chow mein or lo mein is that Chow Fun is made with fl at, wide rice noodles which are chewy and fresh and soak up the fl avor of the surrounding sauce. This is one of my favorite noodle dishes. It reminds of me of family lunches at our favorite yum cha (a restaurant that serves dim sum and literally means “drink tea”) joints in Minneapolis that we went to after we got out of Chinese school (we frequently played hooky, which is why neither I nor my siblings can speak Chinese). Beef Chow Fun is a staple on yum cha menus. Loaded with lean beef, sweet asparagus and tender snow peas, it’s a hearty, healthy one-dish meal.
142 KATIE CHIN’S EVERYDAY CHINESE COOKBOOK
ECC_full layout.indd 142ECC_full layout.indd 142 2/10/15 1:18 PM2/10/15 1:18 PM
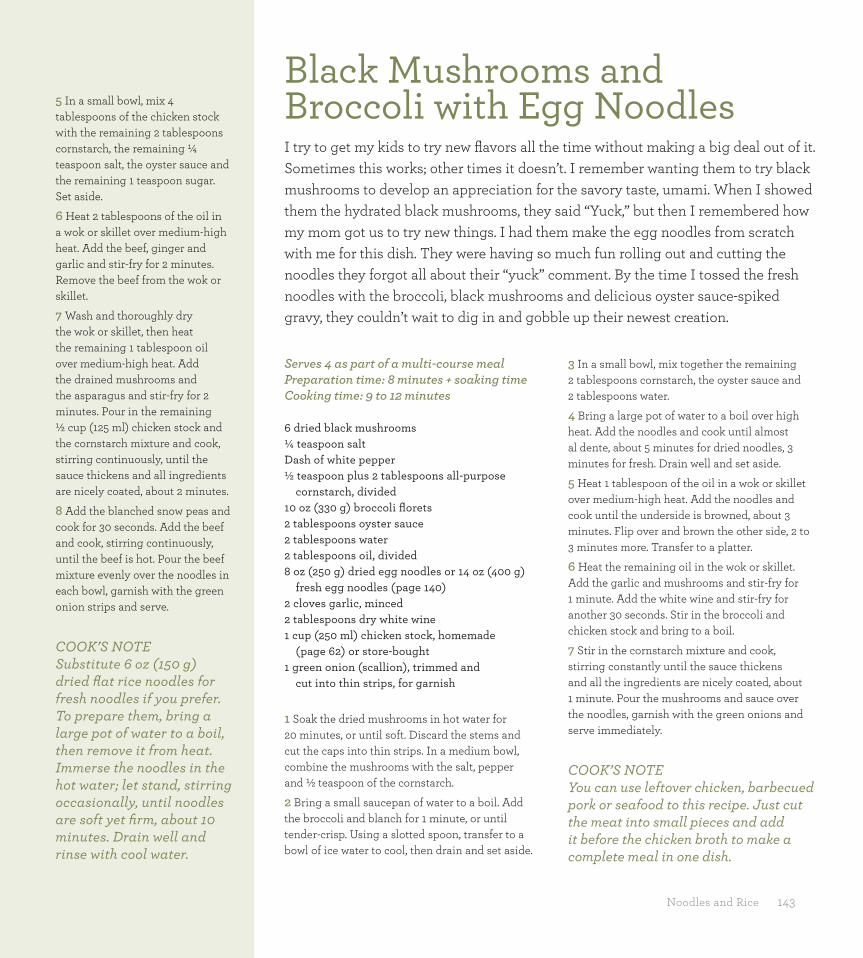
Noodles and Rice 143
Serves 4 as part of a multi-course mealPreparation time: 8 minutes + soaking time Cooking time: 9 to 12 minutes
6 dried black mushrooms¼ teaspoon saltDash of white pepper½ teaspoon plus 2 tablespoons all-purpose
cornstarch, divided10 oz (330 g) broccoli fl orets2 tablespoons oyster sauce2 tablespoons water2 tablespoons oil, divided 8 oz (250 g) dried egg noodles or 14 oz (400 g)
fresh egg noodles (page 140)2 cloves garlic, minced2 tablespoons dry white wine1 cup (250 ml) chicken stock, homemade
(page 62) or store-bought1 green onion (scallion), trimmed and
cut into thin strips, for garnish
1 Soak the dried mushrooms in hot water for 20 minutes, or until soft. Discard the stems and cut the caps into thin strips. In a medium bowl, combine the mushrooms with the salt, pepper and ½ teaspoon of the cornstarch.
2 Bring a small saucepan of water to a boil. Add the broccoli and blanch for 1 minute, or until tender-crisp. Using a slotted spoon, transfer to a bowl of ice water to cool, then drain and set aside.
3 In a small bowl, mix together the remaining 2 tablespoons cornstarch, the oyster sauce and 2 tablespoons water.
4 Bring a large pot of water to a boil over high heat. Add the noodles and cook until almost al dente, about 5 minutes for dried noodles, 3 minutes for fresh. Drain well and set aside.
5 Heat 1 tablespoon of the oil in a wok or skillet over medium-high heat. Add the noodles and cook until the underside is browned, about 3 minutes. Flip over and brown the other side, 2 to 3 minutes more. Transfer to a platter.
6 Heat the remaining oil in the wok or skillet. Add the garlic and mushrooms and stir-fry for 1 minute. Add the white wine and stir-fry for another 30 seconds. Stir in the broccoli and chicken stock and bring to a boil.
7 Stir in the cornstarch mixture and cook, stirring constantly until the sauce thickens and all the ingredients are nicely coated, about 1 minute. Pour the mushrooms and sauce over the noodles, garnish with the green onions and serve immediately.
COOK’S NOTEYou can use leftover chicken, barbecued pork or seafood to this recipe. Just cut the meat into small pieces and add it before the chicken broth to make a complete meal in one dish.
Black Mushrooms and Broccoli with Egg Noodles I try to get my kids to try new fl avors all the time without making a big deal out of it. Sometimes this works; other times it doesn’t. I remember wanting them to try black mushrooms to develop an appreciation for the savory taste, umami. When I showed them the hydrated black mushrooms, they said “Yuck,” but then I remembered how my mom got us to try new things. I had them make the egg noodles from scratch with me for this dish. They were having so much fun rolling out and cutting the noodles they forgot all about their “yuck” comment. By the time I tossed the fresh noodles with the broccoli, black mushrooms and delicious oyster sauce-spiked gravy, they couldn’t wait to dig in and gobble up their newest creation.
5 In a small bowl, mix 4 tablespoons of the chicken stock with the remaining 2 tablespoons cornstarch, the remaining ¼ teaspoon salt, the oyster sauce and the remaining 1 teaspoon sugar. Set aside.
6 Heat 2 tablespoons of the oil in a wok or skillet over medium-high heat. Add the beef, ginger and garlic and stir-fry for 2 minutes. Remove the beef from the wok or skillet.
7 Wash and thoroughly dry the wok or skillet, then heat the remaining 1 tablespoon oil over medium-high heat. Add the drained mushrooms and the asparagus and stir-fry for 2 minutes. Pour in the remaining ½ cup (125 ml) chicken stock and the cornstarch mixture and cook, stirring continuously, until the sauce thickens and all ingredients are nicely coated, about 2 minutes.
8 Add the blanched snow peas and cook for 30 seconds. Add the beef and cook, stirring continuously, until the beef is hot. Pour the beef mixture evenly over the noodles in each bowl, garnish with the green onion strips and serve.
COOK’S NOTESubstitute 6 oz (150 g) dried fl at rice noodles for fresh noodles if you prefer. To prepare them, bring a large pot of water to a boil, then remove it from heat. Immerse the noodles in the hot water; let stand, stirring occasionally, until noodles are soft yet fi rm, about 10 minutes. Drain well and rinse with cool water.
ECC_full layout.indd 143ECC_full layout.indd 143 2/10/15 1:18 PM2/10/15 1:18 PM

144 KATIE CHIN’S EVERYDAY CHINESE COOKBOOK
Sesame Noodles with Chicken Who doesn’t love noodles, especially when they’re tossed with peanut butter, sesame oil, soy sauce, garlic, ginger and some chili garlic sauce? This recipe is sweet and nutty with a nice spicy kick. It’s super easy for a weeknight—all you need to do is toss in some shredded rotisserie chicken with whatever veggies you may have on hand. I like the texture of crunchy peanut butter, but feel free to use smooth peanut butter if that’s what you prefer.
Serves 4 as part of a multi-course meal or for lunchPreparation time: 25 minutesCooking time: 8 to 13 minutes
8 oz (250 g) dried Chinese egg noodles or spaghetti 5 oz (150 g) broccoli fl orets½ cup (125 g) crunchy peanut butter¾ cup (185 ml) chicken stock, homemade (page 62) or
store-bought1 teaspoon dark sesame oil2 tablespoons soy sauce2 cloves garlic, minced1 tablespoon chili garlic sauce2 teaspoons peeled and minced fresh ginger5 oz (150 g) red bell pepper, thinly sliced5 oz (150 g) carrots, cut into matchsticks2 cups (300 g) shredded rotisserie chicken
1 Cook the noodles according to package directions. Drain well and rinse with cool water.
2 Blanch the broccoli fl orets in boiling water until tender, about 1 minute. Using a slotted spoon, transfer the broccoli to an ice water bath to cool, then drain and set aside.
3 Whisk the peanut butter, chicken stock, sesame oil, soy sauce, garlic, chili garlic sauce and ginger together in a large bowl.
4 Add the noodles, vegetables and shredded chicken to the sauce and toss to combine all ingredients. Serve warm or chilled.
COOK’S NOTEYou can save time by purchasing prewashed, precut veggies from the salad bar at your local grocery store.
ECC_full layout.indd 144ECC_full layout.indd 144 2/10/15 1:18 PM2/10/15 1:18 PM

Noodles and Rice 145
Serves 4 as part of a multi-course meal
Preparation time: 20 minutesCooking time: 10 minutes
8 oz (250 g) boneless, skinless chicken breast or thigh, cut into thin strips
¼ teaspoon salt¹⁄8 teaspoon white pepper1 teaspoon peeled and minced fresh
ginger1 teaspoon plus 2 tablespoons all-
purpose cornstarch, divided4 oz (100 g) snow peas, tips and strings
removed2 tablespoons oyster sauce¼ teaspoon sugar6 oz (175 g) dried egg noodles or 10 oz
(330 g) fresh egg noodles (page 140)4 tablespoons oil, divided1 clove garlic, minced2 oz (50 g) fresh shiitake mushrooms,
stemmed and thinly sliced 6 oz (150 g) bean sprouts, ends
trimmed1 cup (250 ml) chicken stock,
homemade (page 62) or store-bought
1 Toss the chicken with the salt, pepper, ginger and 1 teaspoon of the cornstarch. Cover and refrigerate for 20 minutes.
2 Blanch the snow peas in boiling water
until tender, about 1 minute. Using a slotted spoon, transfer to an ice water bath to cool, then drain and set aside.
3 In a small bowl, combine the oyster sauce with the remaining 2 tablespoons cornstarch and the sugar.
4 Bring a large pot of water to a boil over high heat. Add the noodles and cook until almost al dente, about 5 minutes for dried noodles, 3 minutes for fresh. Drain well and set aside.
5 Heat 2 tablespoons of the oil in a wok or skillet over medium-high heat. Add the noodles and separate to cover the bottom of the pan, forming a large pancake. Fry until brown, about 3 minutes, and turn over. Brown the other side for 3 minutes, then transfer to a platter.
6 Heat the remaining 2 tablespoons oil in the wok or skillet over medium-high heat. Add the chicken and garlic and stir-fry for 1 minute. Stir in the mushrooms and bean sprouts and stir-fry for 2 minutes.
7 Pour in the chicken stock and heat until boiling. Add the cornstarch mixture and cook, stirring constantly, until the sauce thickens and all the ingredients are nicely coated. Add the drained snow peas and stir-fry for 30 seconds more. Dish out and serve immediately.
Canton-Style Chicken Chow MeinTo me, this is the ultimate Chinese comfort food. When we were young, my mom worked sixty to seventy hours a week, earning fi fty cents an hour as a seamstress, so she had hardly any leisure time. On those rare Saturdays when she had some time off, she’d make big steaming bowls of her delicious chow mein for lunch. This dish showcases Cantonese noodles at their best. The egg noodles are pan-fried on both sides so they’re crispy on the outside, but still soft and tender on the inside. The noodles are then topped with stir-fried chicken, garlic, ginger, bean sprouts, shiitake mushrooms and snow peas in a smooth and savory gravy. Okay, just writing this is making me ravenous and I’m off (to make some chow mein)!
ECC_full layout.indd 145ECC_full layout.indd 145 2/10/15 1:18 PM2/10/15 1:18 PM
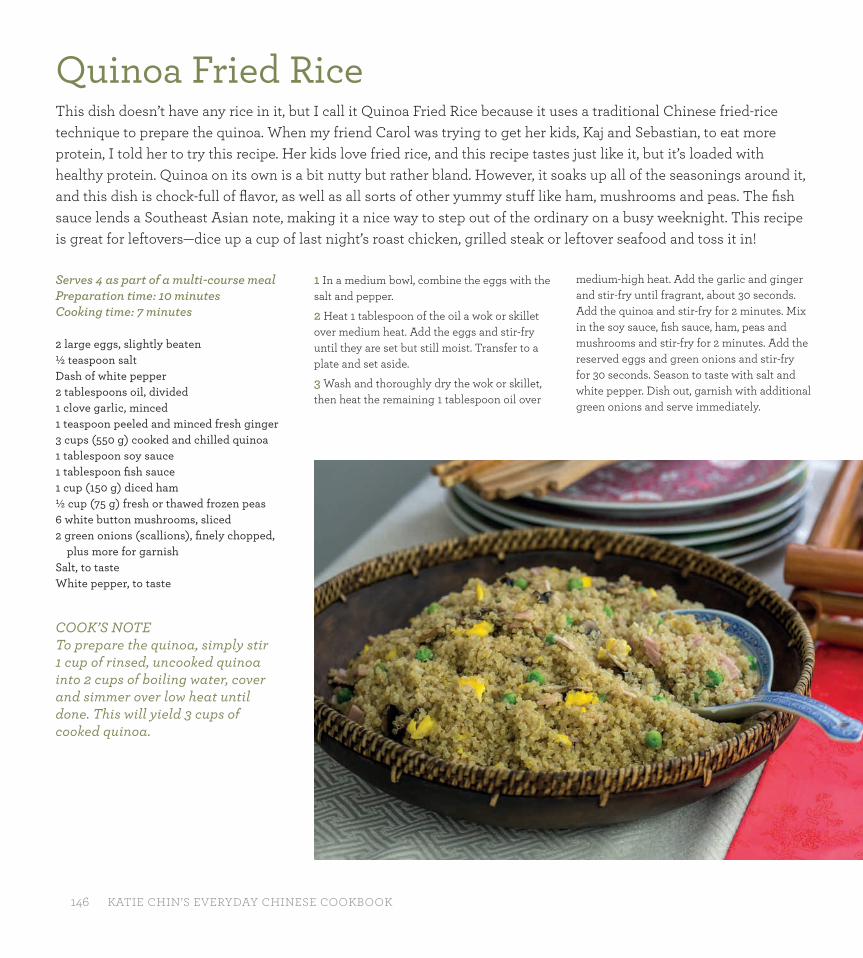
146 KATIE CHIN’S EVERYDAY CHINESE COOKBOOK
Serves 4 as part of a multi-course mealPreparation time: 10 minutes Cooking time: 7 minutes
2 large eggs, slightly beaten½ teaspoon saltDash of white pepper2 tablespoons oil, divided1 clove garlic, minced1 teaspoon peeled and minced fresh ginger3 cups (550 g) cooked and chilled quinoa1 tablespoon soy sauce1 tablespoon fi sh sauce1 cup (150 g) diced ham½ cup (75 g) fresh or thawed frozen peas6 white button mushrooms, sliced2 green onions (scallions), fi nely chopped,
plus more for garnishSalt, to tasteWhite pepper, to taste
Quinoa Fried Rice This dish doesn’t have any rice in it, but I call it Quinoa Fried Rice because it uses a traditional Chinese fried-rice technique to prepare the quinoa. When my friend Carol was trying to get her kids, Kaj and Sebastian, to eat more protein, I told her to try this recipe. Her kids love fried rice, and this recipe tastes just like it, but it’s loaded with healthy protein. Quinoa on its own is a bit nutty but rather bland. However, it soaks up all of the seasonings around it, and this dish is chock-full of fl avor, as well as all sorts of other yummy stuff like ham, mushrooms and peas. The fi sh sauce lends a Southeast Asian note, making it a nice way to step out of the ordinary on a busy weeknight. This recipe is great for leftovers—dice up a cup of last night’s roast chicken, grilled steak or leftover seafood and toss it in!
1 In a medium bowl, combine the eggs with the salt and pepper.
2 Heat 1 tablespoon of the oil a wok or skillet over medium heat. Add the eggs and stir-fry until they are set but still moist. Transfer to a plate and set aside.
3 Wash and thoroughly dry the wok or skillet, then heat the remaining 1 tablespoon oil over
medium-high heat. Add the garlic and ginger and stir-fry until fragrant, about 30 seconds. Add the quinoa and stir-fry for 2 minutes. Mix in the soy sauce, fi sh sauce, ham, peas and mushrooms and stir-fry for 2 minutes. Add the reserved eggs and green onions and stir-fry for 30 seconds. Season to taste with salt and white pepper. Dish out, garnish with additional green onions and serve immediately.
COOK’S NOTETo prepare the quinoa, simply stir 1 cup of rinsed, uncooked quinoa into 2 cups of boiling water, cover and simmer over low heat until done. This will yield 3 cups of cooked quinoa.
ECC_full layout.indd 146ECC_full layout.indd 146 2/10/15 1:18 PM2/10/15 1:18 PM

Noodles and Rice 147
Serves 4 to 6 as part of a multi-course meal
Preparation time: 25 minutesCooking time: 10 minutes
3 large egg whites½ teaspoon salt Dash of white pepper 3 tablespoons oil, divided 1 small shallot, minced 1 teaspoon peeled and minced fresh ginger 4 oz (100 g) carrots, sliced thinly on a
diagonal 1 small red bell pepper, diced 4 oz (100 g) asparagus spears, trimmed and
fi nely chopped 4 oz (100 g) thinly sliced white button
mushrooms 4 oz (100 g) sugar snap peas 3 cups (450 g) cooked and chilled brown rice 1 teaspoon dark sesame oil 4 teaspoons soy sauce 1 tablespoon unseasoned rice vinegar or white
vinegar 4 tablespoons green onions (scallions), fi nely
chopped (white and green parts)Salt, to tasteWhite pepper, to taste
1 In a small bowl, combine the egg whites with the salt and white pepper. Whisk to blend.
2 Heat 1 tablespoon of the oil in a wok or skillet over medium-high heat. Add the egg whites. Stir-fry until the egg whites are set but still
Farmers’ Market Fried Brown RiceMy mother was an early proponent of the farm-to-fork (whoops, I mean chopstick) philosophy. Raised by eating off the land—i.e., her family’s vegetable garden—she always believed that the freshest food is the best food. With the proliferation of farmer’s markets and CSAs, it’s easier than ever to support local agriculture and buy the freshest produce possible. Farmers’ Market Fried Brown Rice celebrates the variety of vegetables available at farmers’ markets. The colors and textures from the array of vegetables in this dish make for a beautiful presentation. Feel free to experiment with your favorite veggies from your local farmers’ market. Let’s eat the rainbow!
moist. Transfer to a plate and set aside.
3 Blanch the sugar snap peas in boiling water until tender, about 1 minute. Using a slotted spoon, transfer to an ice water bath to cool, then drain and set aside.
4 Wash and thoroughly dry the wok or skillet, then heat the remaining 2 tablespoons oil over medium-high heat. Add the shallots and ginger and stir-fry until fragrant, about 30 seconds.
Add the carrots and stir-fry for 1 minute, then stir in the red bell pepper, asparagus and mushrooms and stir-fry for 2 minutes. Add the sugar snap peas and stir-fry for 30 seconds.
5 Mix in the rice and stir-fry for 2 minutes, then pour in the sesame oil, soy sauce, rice vinegar and green onions and stir-fry for 30 seconds more. Season to taste with salt and white pepper. Serve immediately.
ECC_full layout.indd 147ECC_full layout.indd 147 2/10/15 3:33 PM2/10/15 3:33 PM

148 KATIE CHIN’S EVERYDAY CHINESE COOKBOOK
Growing up in America, we rebelled against the traditional Chinese desserts our parents tried to serve us, like red bean soup or almond tofu pudding. These
fl avors and textures just didn’t appeal to our Americanized palates. In my mother’s China, there was no ice cream, strawberry short cake, chocolate chip cookies or banana cream pies. Frustrated, she’d put down a plate of sliced oranges—another traditional way to end a Chinese meal—shrug her shoulders and walk away. We were the product of 1970s America, and we wanted Jell-O parfaits!
Over time, my mother adapted and created Asian fusion desserts for her catering clients, and we became her willing guinea pigs. We’d help her dip fortune cookies in chocolate and stuff them with personalized fortunes—often in Hebrew—for her Bar and Bat Mitzvah gigs. When she and I started our catering business together, we collaborated on new dessert creations. I’m excited to share recipes like Chilled Berry Tea (page 150), a light, refreshing berry concoction laced with passion fruit tea and star anise, and Banana-Walnut Wontons (page 153)—my twins, Becca and Dylan’s favorite, especially when they’re served over French vanilla ice cream. Finally, I’m thrilled to share the recipe for Five-Spice Chocolate Cake (page 155) from my friend Theresa, a pastry chef. It’s rich, exotic and absolutely scrumptious.
Drinks and Desserts
ECC_full layout.indd 148ECC_full layout.indd 148 30/9/15 8:01 PM30/9/15 8:01 PM

The Wisdom of My Mother’s Kitchen 149
ECC_full layout.indd 149ECC_full layout.indd 149 30/9/15 8:01 PM30/9/15 8:01 PM
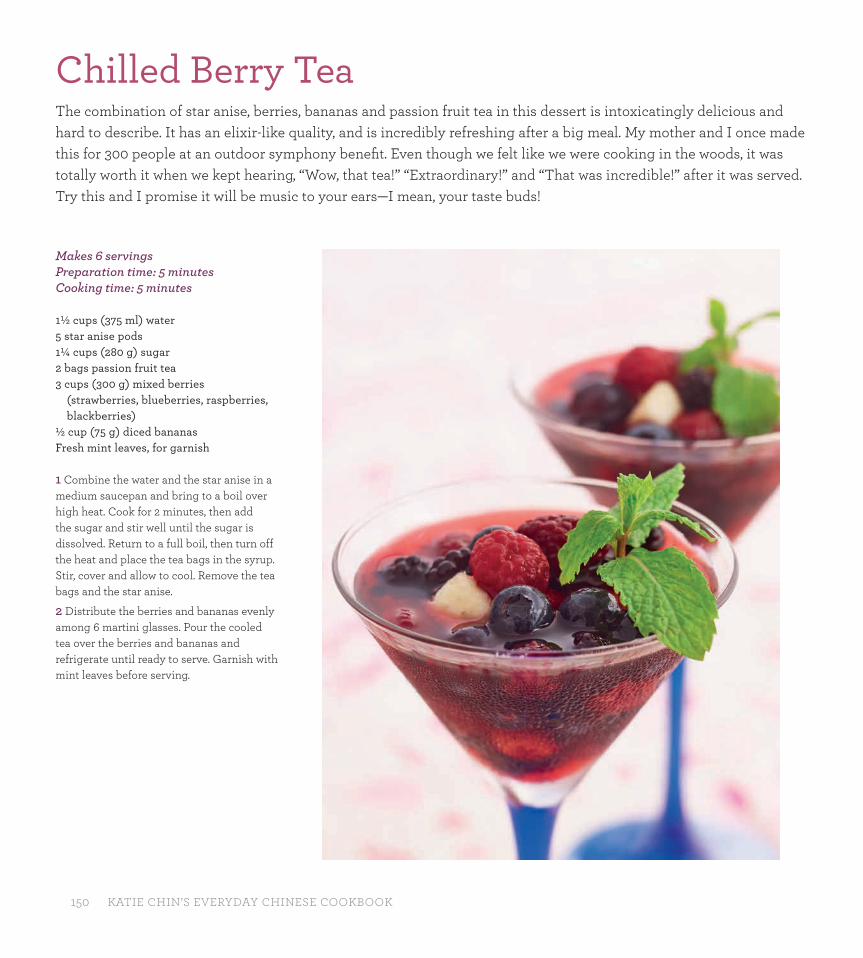
150 KATIE CHIN’S EVERYDAY CHINESE COOKBOOK
Makes 6 servingsPreparation time: 5 minutes Cooking time: 5 minutes
1½ cups (375 ml) water5 star anise pods 1¼ cups (280 g) sugar2 bags passion fruit tea 3 cups (300 g) mixed berries
(strawberries, blueberries, raspberries, blackberries)
½ cup (75 g) diced bananasFresh mint leaves, for garnish
1 Combine the water and the star anise in a medium saucepan and bring to a boil over high heat. Cook for 2 minutes, then add the sugar and stir well until the sugar is dissolved. Return to a full boil, then turn off the heat and place the tea bags in the syrup. Stir, cover and allow to cool. Remove the tea bags and the star anise.
2 Distribute the berries and bananas evenly among 6 martini glasses. Pour the cooled tea over the berries and bananas and refrigerate until ready to serve. Garnish with mint leaves before serving.
Chilled Berry Tea The combination of star anise, berries, bananas and passion fruit tea in this dessert is intoxicatingly delicious and hard to describe. It has an elixir-like quality, and is incredibly refreshing after a big meal. My mother and I once made this for 300 people at an outdoor symphony benefi t. Even though we felt like we were cooking in the woods, it was totally worth it when we kept hearing, “Wow, that tea!” “Extraordinary!” and “That was incredible!” after it was served. Try this and I promise it will be music to your ears—I mean, your taste buds!
ECC_full layout.indd 150ECC_full layout.indd 150 30/9/15 8:01 PM30/9/15 8:01 PM

Drinks and Desserts 151
Serves 4 Preparation time: 10 minutes Cooking time: 22 minutes
CHOCOLATE-GINGER SAUCE1 cup (250 ml) heavy cream3 tablespoons brown sugar4 tablespoons peeled and minced fresh
ginger6 oz (175 g) semisweet chocolate chips or
semisweet chocolate, chopped or grated
4 spring roll wrappers4 ripe bananas, sliced crosswise into thirds2 teaspoons freshly squeezed lemon juiceWaterOil for fryingPowdered sugar for dustingFresh mint leaves for garnish
1 Make the sauce: Bring the heavy cream, brown sugar and ginger to a gentle boil in a small saucepan over medium heat, stirring to dissolve the brown sugar. Reduce the heat to medium-low and simmer, covered, for 15 minutes, stirring occasionally.
2 Strain the mixture through a fi ne-mesh sieve, then return it to the saucepan and stir in the chocolate. Bring to a simmer over medium-low heat, stirring continuously, until the chocolate melts. Remove from the heat.
3 Sprinkle the banana pieces with lemon juice to prevent browning. Separate the spring roll wrappers and place them under a damp towel. Lay one spring roll wrapper out on a clean work surface. Place 3 banana pieces in a straight line across the bottom third of the wrapper. Start rolling the wrapper tightly, folding in the edges as you go along, to form a uniform cylinder. Seal the last tip with a little water. Repeat with the remaining bananas. Place in a covered container in the refrigerator until ready to cook.
4 In a wok or deep skillet, heat 2 to 3 inches (5 to 7.5 cm) oil to 350°F (175°C). Deep-fry the spring rolls until golden brown, from 1 to 2 minutes, turning frequently. Place on a wire rack to cool. Warm the sauce over medium-low heat, if necessary. Cut each spring roll in half at an angle, arrange on a plate and dust with powdered sugar. Drizzle with the warm chocolate-ginger sauce and garnish with mint leaves. Serve immediately.
Banana Spring Rolls with Chocolate-Ginger Sauce This crisp, light and sweet dessert is easy to make and always goes over well at dinner parties. I love the zing of ginger in the chocolate sauce. My mom taught me how to cut the spring roll wrappers into fourths to make miniature cigar-shaped banana spring rolls, which are great for the little ones because they fi t neatly in their hands. Unfortunately for me (and fortunately for them), my six year-old twins were the guinea pigs, and they drove me bananas with requests for more!
ECC_full layout.indd 151ECC_full layout.indd 151 30/9/15 8:01 PM30/9/15 8:01 PM

152 KATIE CHIN’S EVERYDAY CHINESE COOKBOOK
Serves 8Preparation time: 25 minutesCooking time: 8 to 10 minutes
RASPBERRY SAUCE4 cups (500 g) fresh raspberries½ cup (125 ml) water ¾ cup (185 ml) sugar 2 tablespoons all-purpose cornstarch
¹⁄³ cup (40 g) chopped fresh raspberries²⁄³ cup (200 g) chocolate-hazelnut spread such as Nutella16 round dumpling wrappers 1 egg, lightly beatenOil for fryingConfectioner’s sugar for garnishMint leaves for garnish
1 Make the sauce: Place the 4 cups (500 g) raspberries in a small saucepan. Crush the berries and add the water. Stir in the sugar and cornstarch and bring to a boil over medium heat, stirring constantly. Remove from heat and press through a strainer. Set the sauce aside.
2 Fold the ¹⁄³ cup chopped raspberries into the chocolate-hazelnut spread until combined. Lay a dumpling wrapper on a clean work surface and brush the edges with egg. Place 1 scant tablespoon of chocolate-hazelnut raspberry mixture in the center, then fold the wrapper in half over and the fi lling, pressing the edges fi rmly to seal. Repeat with remaining wrappers and fi lling.
3 In a wok or deep skillet heat 2 to 3 inches (5 to 7.5 cm) of the oil to 350°F (175°C). Deep-fry the wontons until golden brown, 1 to 2 minutes, turning occasionally. Place on a paper-towel-lined sheet pan to drain. Transfer to a platter and dust with confectioner’s sugar, then drizzle with raspberry sauce. Garnish with mint leaves and serve immediately.
COOK’S NOTEIf you only can fi nd square wonton wrappers, use a cookie cutter to cut them into rounds.
Chocolate-Raspberry WontonsAh, Nutella. How do I love thee? Let me count the ways…. Number one, you make a fantastic fi lling for Chocolate-Raspberry Wontons. Raspberries and chocolate-hazelnut spread go together like Sonny and Cher, and they make beautiful music together in this luscious dessert. When my friend Christos threw a launch party for his new clothing line, we served Chocolate-Raspberry Wontons, and his fans went wild. Every bite of these creamy, chocolaty wonton pillows is insanely delicious; when topped with the raspberry sauce, they’re out of this world.
ECC_full layout.indd 152ECC_full layout.indd 152 30/9/15 8:01 PM30/9/15 8:01 PM

Drinks and Desserts 153
Makes 6 to 8 servingsPreparation time: 10 minutesCooking time: 2 minutes
2 ripe bananas, diced2 tablespoons sugar4 tablespoons candied or glazed walnuts, roughly
chopped1 large egg, slightly beaten20 wonton wrappersOil for frying2 tablespoons cinnamon sugar, for toppingStore-bought chocolate sauce, for topping
1 Toss the bananas with the sugar and the candied walnuts.
2 Lay a wonton wrapper on a clean work surface and brush the edges with beaten egg. Place 2 teaspoons of the banana mixture in the center of the wrapper. Pull the four corners together and pinch fi rmly to make a pouch, making sure all the edges are sealed. Repeat with all the wonton wrappers and fi lling.
3 In a wok or deep skillet, heat 2 to 3 inches (5 to 7.5 cm) of the oil to 350°F (175°C). Fry 6 wontons at a time until golden brown, about 2 or 3 minutes. Remove from the oil and transfer to a paper-towel-lined sheet pan. Repeat with the remaining wontons. Sprinkle with cinnamon sugar and drizzle with chocolate sauce before serving.
Banana-Walnut WontonsA client asked us to make an Asian-inspired dessert as a birthday surprise for his wife, using her favorite ingredients; bananas and walnuts. We scratched our heads for a while until my mother said, “I know! Let’s make Banana-Walnut Wontons.” Using store-bought candied walnuts makes this dessert super easy, even though it’s divinely decadent. We served the wontons in individual martini glasses that night over French vanilla ice cream drizzled with chocolate sauce.
Serves 6Preparation time: 10 minutes +
refrigerating and freezing time
One 20-oz (560-g) can lychees 1 tablespoon freshly squeezed lime juice1 teaspoon fi nely grated fresh gingerFresh mint leaves for garnish
1 Combine the lychees and their syrup with the lime juice and ginger in a food processor and process until smooth.
Transfer to a bowl and refrigerate for 2 hours to chill and allow the fl avors to mingle.
2 Place in the freezer for 2 hours. Loosen up the mixture with a fork and return to the freezer. Freeze until solid, at least 4 more hours and up to overnight.
3 Remove from the freezer 10 minutes before serving to allow the mixture to soften. Scoop into glasses and garnish with mint leaves. Serve immediately.
Lychee and Ginger SorbetMy mother used to tell me about eating lychee nuts with her friends on hot summer days when she was growing up in China. I’ll always have a fondness for lychees because they make me think of Mom being young and carefree. Although this dessert is easy, it takes a little time. Trust me, though: it’s worth it. It’s a refi ned and refreshing fi nish to a heavy Chinese meal, and your guests will “Ooh” and “Ahhh” at your magical sorbet-making talents.
ECC_full layout.indd 153ECC_full layout.indd 153 30/9/15 8:01 PM30/9/15 8:01 PM
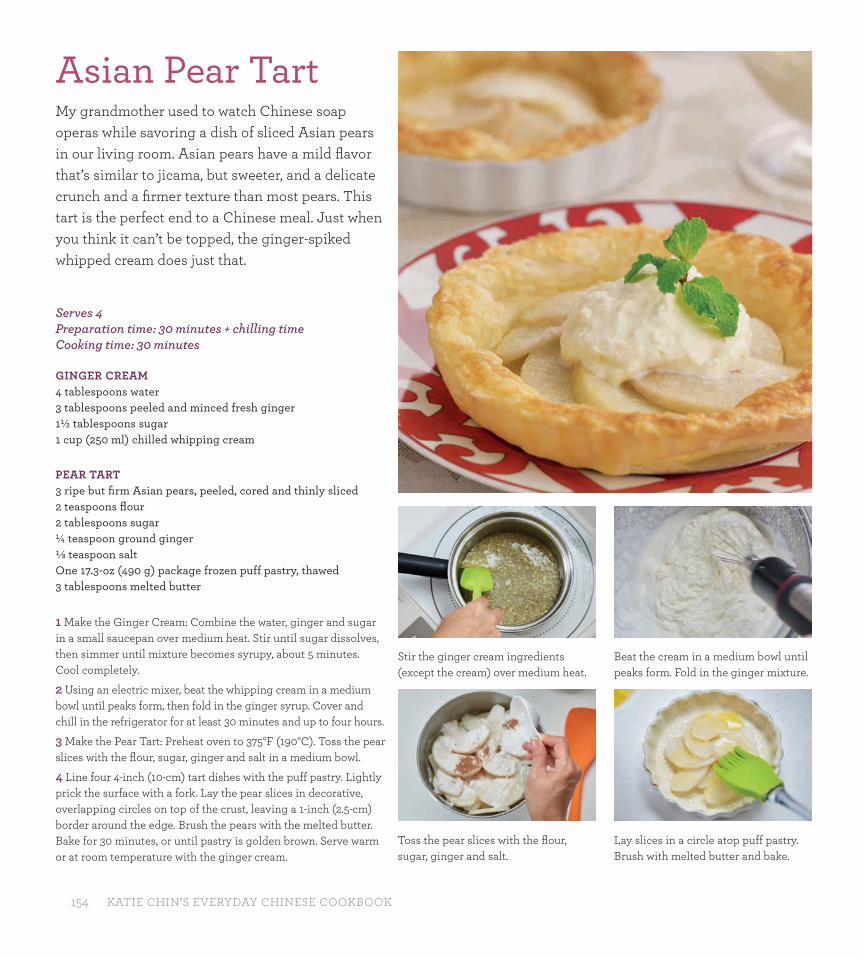
154 KATIE CHIN’S EVERYDAY CHINESE COOKBOOK
Serves 4Preparation time: 30 minutes + chilling timeCooking time: 30 minutes
GINGER CREAM4 tablespoons water 3 tablespoons peeled and minced fresh ginger 1½ tablespoons sugar 1 cup (250 ml) chilled whipping cream
PEAR TART3 ripe but fi rm Asian pears, peeled, cored and thinly sliced 2 teaspoons fl our2 tablespoons sugar¼ teaspoon ground ginger¹⁄8 teaspoon saltOne 17.3-oz (490 g) package frozen puff pastry, thawed3 tablespoons melted butter
1 Make the Ginger Cream: Combine the water, ginger and sugar in a small saucepan over medium heat. Stir until sugar dissolves, then simmer until mixture becomes syrupy, about 5 minutes. Cool completely.
2 Using an electric mixer, beat the whipping cream in a medium bowl until peaks form, then fold in the ginger syrup. Cover and chill in the refrigerator for at least 30 minutes and up to four hours.
3 Make the Pear Tart: Preheat oven to 375°F (190°C). Toss the pear slices with the fl our, sugar, ginger and salt in a medium bowl.
4 Line four 4-inch (10-cm) tart dishes with the puff pastry. Lightly prick the surface with a fork. Lay the pear slices in decorative, overlapping circles on top of the crust, leaving a 1-inch (2.5-cm) border around the edge. Brush the pears with the melted butter. Bake for 30 minutes, or until pastry is golden brown. Serve warm or at room temperature with the ginger cream.
Asian Pear Tart My grandmother used to watch Chinese soap operas while savoring a dish of sliced Asian pears in our living room. Asian pears have a mild fl avor that’s similar to jicama, but sweeter, and a delicate crunch and a fi rmer texture than most pears. This tart is the perfect end to a Chinese meal. Just when you think it can’t be topped, the ginger-spiked whipped cream does just that.
Stir the ginger cream ingredients (except the cream) over medium heat.
Toss the pear slices with the fl our, sugar, ginger and salt.
Beat the cream in a medium bowl until peaks form. Fold in the ginger mixture.
Lay slices in a circle atop puff pastry. Brush with melted butter and bake.
ECC_full layout.indd 154ECC_full layout.indd 154 1/10/15 9:57 AM1/10/15 9:57 AM
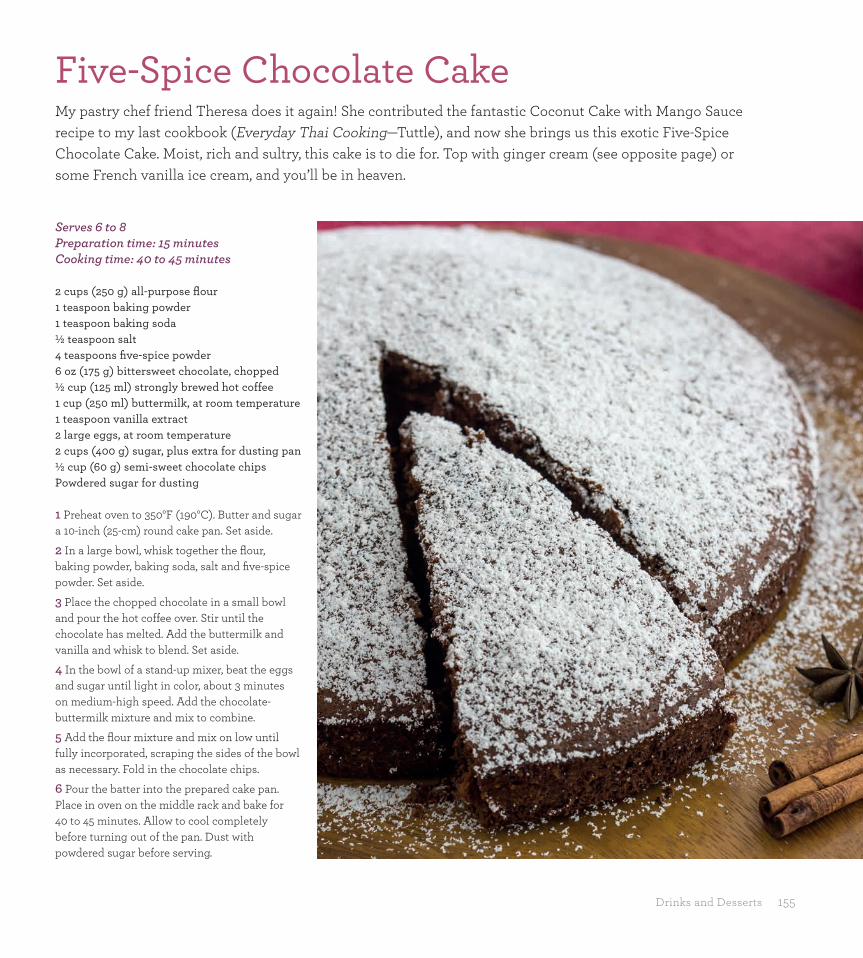
Drinks and Desserts 155
Serves 6 to 8Preparation time: 15 minutes Cooking time: 40 to 45 minutes
2 cups (250 g) all-purpose fl our1 teaspoon baking powder1 teaspoon baking soda½ teaspoon salt4 teaspoons fi ve-spice powder6 oz (175 g) bittersweet chocolate, chopped½ cup (125 ml) strongly brewed hot coffee1 cup (250 ml) buttermilk, at room temperature1 teaspoon vanilla extract2 large eggs, at room temperature2 cups (400 g) sugar, plus extra for dusting pan½ cup (60 g) semi-sweet chocolate chips Powdered sugar for dusting
1 Preheat oven to 350°F (190°C). Butter and sugar a 10-inch (25-cm) round cake pan. Set aside.
2 In a large bowl, whisk together the fl our, baking powder, baking soda, salt and fi ve-spice powder. Set aside.
3 Place the chopped chocolate in a small bowl and pour the hot coffee over. Stir until the chocolate has melted. Add the buttermilk and vanilla and whisk to blend. Set aside.
4 In the bowl of a stand-up mixer, beat the eggs and sugar until light in color, about 3 minutes on medium-high speed. Add the chocolate-buttermilk mixture and mix to combine.
5 Add the fl our mixture and mix on low until fully incorporated, scraping the sides of the bowl as necessary. Fold in the chocolate chips.
6 Pour the batter into the prepared cake pan. Place in oven on the middle rack and bake for 40 to 45 minutes. Allow to cool completely before turning out of the pan. Dust with powdered sugar before serving.
Five-Spice Chocolate Cake My pastry chef friend Theresa does it again! She contributed the fantastic Coconut Cake with Mango Sauce recipe to my last cookbook (Everyday Thai Cooking—Tuttle), and now she brings us this exotic Five-Spice Chocolate Cake. Moist, rich and sultry, this cake is to die for. Top with ginger cream (see opposite page) or some French vanilla ice cream, and you’ll be in heaven.
ECC_full layout.indd 155ECC_full layout.indd 155 30/9/15 8:02 PM30/9/15 8:02 PM
156 KATIE CHIN’S EVERYDAY CHINESE COOKBOOK
almonds, sliced 56, 59Asian hot sauce 12, 25, 42–43, 59, 65,
69, 134, 138Asian pear 59, 154Asian Pear Tart 154asparagus 84, 94, 100, 120, 122, 130,
142–143, 147Asparagus with Wild Mushrooms 122
Baby Bok Choy with Ginger and Garlic 129
baby corn 14, 108, 130, 140balsamic vinegar 31–32, 42, 78,
138–139bamboo shoots 14, 34, 51, 65, 71, 98bamboo steamer, about 22–23banana 150–151, 153Banana Spring Rolls with Choco-
late-Ginger Sauce 151Banana-Walnut Wontons 153Basic Chicken Stock 50, 62–69, 71,
74, 76–83, 86, 93–95, 98, 100–101, 106–108, 115–116, 122, 125, 130, 134, 138, 140, 142–145
Basic Fish Stock 62, 112bean sprouts 34, 134, 145Beef Chow Fun 142Beef with Rice Stick Noodle Soup 63beef, fl ank steak 40, 63, 90–95, 142beef, sirloin 63, 90–95, 98, 142beef, tenderloin 69, 88, 90–95, 98,
100–101, 142berries, mixed 150black beans, fermented (salted) 14,
81, 97, 104, 119Black Mushrooms and Broccoli with
Egg Noodles 143bok choy 10, 14, 66, 72, 98, 124, 136bok choy, baby 14, 83, 113, 129, 130Braided Fish Steamed with Ginger and
Green Onions 110broccoli fl orets 93, 108, 125–126,
130, 140, 143–144 brown bean paste 14, 25, 96–97, 101butt er 154–155butt ermilk 155
cabbage, napa 28, 59cabbage, red 56, 59Canton-Style Chicken Chow Mein 145carrot 20, 36, 43, 56, 59, 71, 80, 90,
Index 129–130, 140, 144, 147Cashew Chicken 76cashews, roasted 76, 123, catfi sh 116celery 80, 100chicken breast or thigh, raw 34, 46, 48,
72, 74, 76–83, 145chicken breast, cooked 66, 71,
136–137, 143, 144, 146Chicken Egg Rolls 34chicken meat, cooked rotisserie 56, 144Chicken Skewers 48chicken stock 51, 60, 62–69, 71, 74,
76–83, 83, 86, 93–95, 98, 100–101, 106–108, 115–116, 122, 125, 130, 134, 136, 138, 140, 142–145
Chicken with Salted Black Beans, Tomatoes and Green Peppers 81
Chicken with Shiitake Mushrooms and Snow Peas 82
Chicken, Bok Choy and Clam Soup 66chicken, bones 22, 62chicken, ground 36, 44, 50, 67chili garlic sauce 54–56, 69, 92–93,
131, 144chili paste 15–16, 25, 69, 90, 115chili pepper, fresh hot 69, 127chilies, dried red 14, 78–79, 104Chilled Berry Tea 150Chinese black vinegar 15, 78,
138–139Chinese broccoli 15, 112Chinese Chicken Salad 56Chinese chives 15Chinese Glazed Salmon 105Chinese long beans 15, 123, 131Chinese Long Beans with Cashews 123Chinese pancakes, store-bought 51Chinese rice wine 16, 31, 38, 76,
78–79, 90, 92, 112–113, 125–126, 134, 138–139
Chinese-Style Parchment Fish 113Chocolate Raspberry Wontons 152chocolate sauce 151, 153chocolate-hazelnut spread 152chocolate, bitt ersweet 155chocolate, semisweet 151cinnamon sugar 153Clams in Black Bean Sauce 104clams, fresh 66, 104clams, litt leneck 104clay pot, about 22cloud ears 15, 50coff ee 155condensed milk, sweetened 114
coriander leaves, fresh 31–32, 48, 54, 58, 63, 67, 108
corn syrup 77corn, frozen kernels 67Crab Fried Rice 135Crab Mango Salad 54Crab Wontons 44crabmeat 44–45, 54, 135cream cheese 44–45cream, heavy 151cream, whipping 154Crispy Fish with Ginger-Scallion
Sauce 116Crispy Wontons 44Crystal Shrimp Dumplings 30cucumber 38, 52, 54, 57cucumber, English 55, 118curry powder, Madras 134 Dan Dan Noodles 138deep-frying, about 19–20Diced Chicken with Vegetables 80duck, boneless breast 38
edamame (green soybeans) 49, 58Edamame Hummus 49Egg Drop Soup 31, 64egg roll wrappers 17, 34egg whites 31–32, 36, 67, 71, 79, 112,
114, 147eggplant, Asian 101, 127eggs 31–32, 34, 36, 43–45, 51, 64–65,
67–68, 71, 74, 77, 79, 86, 106, 112, 114, 134–135, 137, 140, 146–147, 152–153, 155
Eight-Vegetable Tofu 130
Farmers’ Market Fried Brown Rice 147Firecracker Shrimp 43fi sh sauce 15, 63, 146fi sh stock 62, 112fi sh, bones and head 62Five-Spice Chocolate Cake 155fi ve-spice powder 15, 34, 38, 41–42,
138, 155
General Tso’s Chicken 79Ginger Shrimp and Sugar Snap Pea
Salad 55ginger, fresh 23, 25, 31–32, 36, 40, 46,
48, 54–59, 62–63, 66–67, 71, 76–77, 79–83, 88, 90, 92–96, 98, 104–107, 110–113, 116, 118–119, 125–126, 128–131, 134–136, 138–139, 140, 142–147, 151, 153–155
green beans 123, 131greens, mixed 48
halibut, fi llet 110–111, 113ham, diced 146Harvest Delight 124Hoisin Lacquered Ribs 89Hoisin Peanut Sauce 42hoisin sauce 16, 25, 31, 38, 40, 42, 48,
50–51, 76, 78, 88–89, 91–93, 96–97, 101, 105, 123, 139
Homemade Egg Noodles 140honey 25, 41, 54, 57, 77Honey Barbecued Pork 41Hong Kong Steak 88hot chili oil 24, 25, 90Hot-and-Sour Soup 65
Jade Shrimp Salad 57Jade Shrimp with Fragrant Vegetables
108jicama 17, 55, 58JJ’s Spicy Crispy Tofu with Green
Beans 131
kale, curly 125ketchup 41, 77, 89knives, about 21–22Kung Pao Chicken 78, 139Kung Pao Tofu Noodles 139
lamb, boneless leg of 96leek 62Lemon Chicken 77lemon juice, freshly squeezed 49, 77,
114, 151Lett uce Wraps with Chicken 50lett uce, butt er 31lett uce, iceberg or Bibb 50lett uce, romaine 56lime juice, freshly squeezed 42, 54, 58,
105, 114, 141, 153Lobster with Ginger and Scallions 107lobster, whole live 107lotus root 16, 116Lychee and Ginger Sorbet 153lychees 16, 153
mango 54Mapo Tofu 97mayonnaise 42–43, 114mint leaves, fresh 150–153Mongolian Lamb 96Mu Shu Pork 50mushrooms, black 14, 34, 36, 51, 65,
ECC_full layout.indd 156ECC_full layout.indd 156 1/10/15 9:58 AM1/10/15 9:58 AM
Index 157
68, 100, 142–143mushrooms, oyster 94, 100, 122mushrooms, shiitake 14, 31, 32, 82,
94, 100, 122, 138, 140, 145mushrooms, straw 17mushrooms, white butt on 71, 80, 137,
146–147
Napa Cabbage and Tofu Salad 59noodles, bean-thread 16noodles, egg 16, 71, 136, 138–141,
143–145 noodles, fl at rice 16, 142–143 noodles, rice stick 16, 63, 69, 115, 134
onion, green (scallion) 28, 31–32, 34, 36, 38, 42, 44, 50–51, 55–58, 64–67, 69–71, 76, 78–80, 82, 90, 92, 94, 96–97, 100–101, 104, 106–107, 110–111, 116, 119, 131, 134–140, 142–143, 146–147
onion, white 80–81, 91, 108, 131, 134Orange Chicken 74orange juice, concentrate 74orange juice, freshly squeezed 59, 74,
92–93orange marmalade 24, 57orange roughy 110, 112–113oranges, mandarin, canned in water
56–57oyster sauce 15, 78, 80, 82–83, 93–94,
98, 100, 108, 112, 122–123, 126–128, 130–131, 135–136, 139–140, 142–143, 145
Paper-Wrapped Chicken 46Parmesan cheese 141peanut butt er 25, 42, 138, 144peanuts, roasted 42, 78, 138–139 peas, green, fresh or frozen 68, 135,
137, 146peas, snow 18, 71, 82–83, 98, 108,
130, 136, 140, 142–143, 145peas, sugar snap 55, 147Peking Duck Summer Rolls 38Pepper Steak 95pepper, green bell 81, 86pepper, jalapeño 101pepper, red bell 54–55, 58, 76, 78, 83,
95, 98, 113, 124–125, 130, 134–135, 139–140, 144, 147
pine nuts, toasted 57–58Pineapple Fried Rice 137pineapple, chunks, canned 86pineapple, crushed, canned in syrup 24
pineapple, fresh whole 137plum sauce 16, 24Pork Tenderloin with Wild Mush-
rooms 100pork, barbecued 41, 70–71, 134, 136,
143, pork, boneless butt or shoulder 41pork, boneless loin or leg 51, 65,
100–101pork, boneless tenderloin 69,
100–101pork, ground 28, 71, 97, 106, 138–139potsticker (dumpling) wrappers 17,
24, 28–32, 36, 152Potstickers 17, 28–29puff pastry, frozen 154
quinoa Fried Rice 146quinoa, cooked 146
raspberries, fresh 150, 152red pepper, crushed 24, 25, 74, 78, 96,
104, 126, 139red pepper, ground (cayenne) 40, 57,
88, 97red snapper 113, 116, 119ribs, baby back 89rice cooker, about 22rice paper wrappers 17, 38–39rice, brown, cooked 83, 147rice, how to cook 19rice, white, cooked 135, 137
salmon, fi llet 105, 110sambal oelek 15, 54–57scallion: see onion, greenscallops, fresh 115sea bass 118–119Sesame Noodles with Chicken 144sesame oil, toasted 17, 70Sesame Scallops 115sesame seed paste 49sesame seeds, toasted 17, 55–56, 115shallots 50, 62, 147Shiitake Mushroom and Spinach
Dumplings 32Shrimp with Garlic Noodles 141Shrimp with Lobster Sauce 106shrimp, cooked 55, 57, 136–137 shrimp, eliminating “fi shy” taste from
20shrimp, whole raw 31, 36, 43, 70, 106,
108, 114, 134, 141Shu Mai 36Sichuan Beef 90
Sichuan pepper, ground 15, 93, 138Sichuan peppercorns 16, 25, 90, 92Sichuan preserved vegetables, canned
138–139Sichuan Tofu with Broccoli 126Singapore Rice Noodles 134Soy Balsamic Sauce 42Soy Ginger Edamame Salad 58soy sauce 17, 24–25, 28, 31–32, 36,
38, 40, 42, 48, 51, 54–55, 57–59, 65, 71, 74, 76, 78–79, 81, 86, 88, 90, 92–95, 97–98, 105, 110, 112–113, 115–116, 118–119, 125–126, 129, 131, 134–135, 137–139, 141, 144, 146–147
soy sauce, dark 17, 24, 31, 46, 48, 74, 79, 86, 95–96, 106, 115
spaghett i 144Spicy Beef Skewers 40Spicy Garlicky Asian Eggplant 127Spicy Pork Noodle Soup 69spinach, fresh 57, 71, 128spinach, frozen 32spring roll wrappers 17, 43, 151Sriracha chili sauce 25, 42–43, 59, 65,
69, 134Sriracha Mayo Sauce 42star anise 15–17, 24–25, 150Steamed Cantonese Whole Fish 119steaming, about 20Stir-Fried Beef with Asparagus and
Wild Mushrooms 94Stir-Fried Beef with Broccoli 93Stir-Fried Beef with Snow Peas and
Red Bell Pepper 98Stir-Fried Beef with Tomato 91Stir-Fried Chicken with Bok Choy 83Stir-Fried Fish Fillet and Chinese
Broccoli 112Stir-Fried Kale and Broccoli 125Stir-Fried Pork with Asian Eggplant 101Stir-Fried Pork with Zucchini 100Stir-Fried Spinach with Garlic 128stir-frying, about 18–19striped bass 119Sweet Chili Soy Sauce 24Sweet-and-Sour Pork 86Sweet-and-Sour Sauce 24, 34, 44–45,
86
tahini 49, 138Tangerine Beef 92tangerine juice, freshly squeezed
92–93tangerine peel 92–93
tea leaves, oolong or jasmine 118Tea-Smoked Sea Bass 118tea, passion fruit 150Th ree-Flavor Lo Mein 136tilapia 112, 116tofu 31–32, 42, 59, 65, 68, 80, 97, 126,
130–131, 139Tofu Bites with Th ree Sauces 42Tofu Tomato Soup 68tomato, fresh 68, 81, 86, 91turkey, ground 50, 138
Vegetable Lo Mein 140vegetable stock 80, 125, 139–140Vegetable, Egg and Ramen Soup 71Veggie Tofu Lett uce Cups 31Velvet Chicken Corn Soup 67vinegar, rice 25, 38, 42, 48, 55, 57–58,
74, 77, 79, 113, 147vinegar, white 38, 42, 55–58, 65, 74,
77, 79, 86, 104, 115–116, 118, 147
Walnut Shrimp 114walnuts, candied 114, 153water chestnuts 17, 31, 44, 50, 55, 57,
70, 98wine, dry white 28, 46, 48, 89, 94, 98,
101, 106, 143wok, about 21wok, how to season 18wonton wrappers 24, 28, 44–45, 71,
152–153Wor Wonton Soup 70
zucchini 100
ECC_full layout.indd 157ECC_full layout.indd 157 2/10/15 9:46 AM2/10/15 9:46 AM
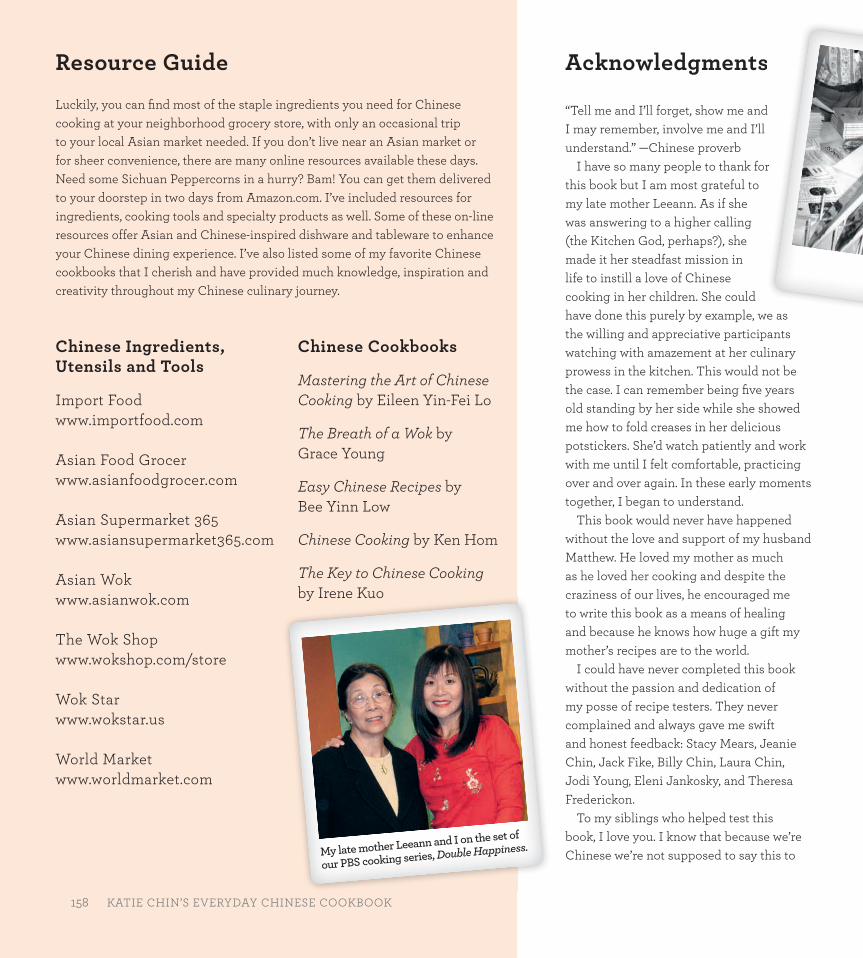
158 KATIE CHIN’S EVERYDAY CHINESE COOKBOOK
“Tell me and I’ll forget, show me and I may remember, involve me and I’ll understand.” —Chinese proverb
I have so many people to thank for this book but I am most grateful to my late mother Leeann. As if she was answering to a higher calling (the Kitchen God, perhaps?), she made it her steadfast mission in life to instill a love of Chinese cooking in her children. She could have done this purely by example, we as the willing and appreciative participants watching with amazement at her culinary prowess in the kitchen. This would not be the case. I can remember being fi ve years old standing by her side while she showed me how to fold creases in her delicious potstickers. She’d watch patiently and work with me until I felt comfortable, practicing over and over again. In these early moments together, I began to understand.
This book would never have happened without the love and support of my husband Matthew. He loved my mother as much as he loved her cooking and despite the craziness of our lives, he encouraged me to write this book as a means of healing and because he knows how huge a gift my mother’s recipes are to the world.
I could have never completed this book without the passion and dedication of my posse of recipe testers. They never complained and always gave me swift and honest feedback: Stacy Mears, Jeanie Chin, Jack Fike, Billy Chin, Laura Chin, Jodi Young, Eleni Jankosky, and Theresa Frederickon.
To my siblings who helped test this book, I love you. I know that because we’re Chinese we’re not supposed to say this to
AcknowledgmentsResource Guide
Luckily, you can fi nd most of the staple ingredients you need for Chinese cooking at your neighborhood grocery store, with only an occasional trip to your local Asian market needed. If you don’t live near an Asian market or for sheer convenience, there are many online resources available these days. Need some Sichuan Peppercorns in a hurry? Bam! You can get them delivered to your doorstep in two days from Amazon.com. I’ve included resources for ingredients, cooking tools and specialty products as well. Some of these on-line resources offer Asian and Chinese-inspired dishware and tableware to enhance your Chinese dining experience. I’ve also listed some of my favorite Chinese cookbooks that I cherish and have provided much knowledge, inspiration and creativity throughout my Chinese culinary journey.
Chinese Ingredients, Utensils and Tools
Import Foodwww.importfood.com
Asian Food Grocerwww.asianfoodgrocer.com
Asian Supermarket 365www.asiansupermarket365.com
Asian Wokwww.asianwok.com
The Wok Shopwww.wokshop.com/store
Wok Starwww.wokstar.us
World Marketwww.worldmarket.com
Chinese Cookbooks
Mastering the Art of Chinese Cooking by Eileen Yin-Fei Lo
The Breath of a Wok by Grace Young
Easy Chinese Recipes by Bee Yinn Low
Chinese Cooking by Ken Hom
The Key to Chinese Cooking by Irene Kuoby Irene Kuo
d
r
e as
My late mother Leeann and I on the set of
our PBS cooking series, Double Happiness.
158 KATIE CHIN’S EVERYDAY CHINESE COOKBOOK
ECC_full layout.indd 158ECC_full layout.indd 158 30/9/15 8:02 PM30/9/15 8:02 PM

Acknowledgments 159
one another, but I did anyway. So there! Special props to my former sous chef Stacy who moved last year to Austin, TX. Despite the geographical distance, her encouragement via Skype and email helped me overcome any obstacles that stood in my way.
I am indebted to Michele Speigel who worked tirelessly to edit and organize this book and make sense of my jumbled notes.
To Raghavan Iyer, thank you for your touching Foreword, and also for talking me off the ledge in the fi nal stretch of writing this book. Having known my mother, you knew how emotional this process was for me and got me through it with warmth and humor.
Many people ask me how I get it all done. I’m no different than any other working mom, but I’d never survive without my A team. By “A team,” I mean our kick-ass housekeeper, Delfi na Garcia, who spent hours cleaning up after my testing sessions and keeping our lives in order. I’d also like to thank our au pair, Claudia Solano Vargas, who cared for our kids—especially as I burned the midnight
oil. To all the Hesby moms and dads: Thanks for all the carpooling, play dates and sleepovers!
I’d like to thank my children: Kyla, Dylan and Becca. Your love and support mean the world to me and I appreciate your patience after eating twenty stir-fries in a row.
Many thanks to all of my dear friends who lift me up and support me no matter what: Sophie Ali, Kimberly Barth, Nicole Behne, Pamela Brown, Alex Chen, Logan Chin, Traci Ching, Diana Choi, Michael Dagnery, Wendy Diamond, Joan Donatelle, Rita Drucker, Marissa Durazzo, Greg Economos, Leslie Fram, Christos Garkinos, Christopher Gordon, Paul Hemstreet, Devery Holmes, Sabrina Ironside, Brad Jamison, Eleni Jankowsky, Scott Joyce, Laura Keller, Erika Penzer Kerekes, Fumi Kitahara, Stacie Krajchir, George Leon, Rob Levine, Heather Reid Liebo, Frank Lomento, Jeannie Mai, Dave Marchi, Patrick Martin, Carol Cheng Mayer, JJ McKay, Carla Moreira, Carol Morejon, Neil Newman, Kristin Nicholas, Jen Nolander, Michael Now, Harry Parrish, Steve Patscheck, Peter Petraglia, Hugo
Rojas, Susie Romano, Rich Ross, Mary Sadeghy, Susan Safi er, Adam Sanderson, Elayne Sawaya, Robert Schuller, Nicole Hirsty Seine, Valerie Shavers, Dennis Shortt, Mimi Slavin, Pam Slay, Terry Stanley, Andrea Stein, Michael Stone, Cynthia Sutter, Marianne Szymanski, Laura Takaragawa, Rosemary Tarquinio, Bil Tocantins, Trish Vogel, Mary Wagstaff, Katie Workman and Greg Yale.
Finally, I’d like to thank the team at Tuttle Publishing who made this dream become a reality in such a gorgeous and meaningful way. Thank you to my editors, Jon Steever and Katherine Heins, and also Christopher Johns, June Chong, Irene Ho, Anna Perotti, Brandon Suyeoka, Stanti Schönbächler, Brandy LaMotte, photographer Masano Kawana, and food stylist Toshiko Kawana.
If I’ve left anyone out, I apologize for the omission.
For those of you who knew my mother, I hope you can relive some of the wonderful memories we all shared cooking, eating and laughing together as you fl ip through this book.
Much love and Happy Cooking!
My mom signing one of her cookbooks.
My mom and I teaching a dim sum
class at my house in Los Angeles.
My elegant mom at one of her
buffet restaurants.
On the set of one of my Chef Katie Chin Youtube shoots.
ECC_full layout.indd 159ECC_full layout.indd 159 30/9/15 8:02 PM30/9/15 8:02 PM

160 KATIE CHIN’S EVERYDAY CHINESE COOKBOOK
About Tuttle:“Books to Span the
East and West”
Our core mission at Tuttle Publishing is to create books which bring people together one page at a time. Tuttle was founded in 1832 in the small New England town of Rutland, Vermont (USA). Our fundamental values remain as strong today as they were then—to publish best-in-class books informing the English-speaking world about the countries and peoples of Asia. The world has become a smaller place to-day and Asia’s economic, cultural and political influence has expanded, yet the need for meaningful dialogue and information about this diverse region has never been greater. Since 1948, Tuttle has been a leader in publishing books on the cultures, arts, cuisines, languages and literatures of Asia. Our authors and photographers have won numerous awards and Tuttle has pub-lished thousands of books on subjects ranging from martial arts to paper crafts. We welcome you to explore the wealth of information available on Asia at www.tuttlepublishing.com.
Published by Tutt le Publishing, an imprint of Periplus Editions (HK) Ltd.
www.tutt lepublishing.com
Copyright © 2016 Katie Chin
All rights reserved. No part of this publication may be reproduced or utilized in any form or by any means, electronic or mechanical, including photocopying, recording, or by any information storage and retrieval system, without prior writt en permission from the publisher.
Library of Congress Cataloging-in-Publication Data
Chin, Katie. Katie Chin’s everyday Chinese cookbook : 101 delicious recipes from my mother’s kitchen / Katie Chin. pages cm Includes index. ISBN 978-0-8048-4522-9 (hardcover); ISBN 978-1-4629-1834-8 (ebook) 1. Cooking, Chinese. I. Title. II. Title: Everyday Chinese cooking. TX724.5.C5C56114 2016 641.5951--dc23
2015017810ISBN: 978-0-8048-4522-9
DISTRIBUTED BYNorth America, Latin America & EuropeTutt le Publishing364 Innovation DriveNorth Clarendon, VT 05759-9436 U.S.A.Tel: (802) 773-8930Fax: (802) 773-6993info@tutt lepublishing.comwww.tutt lepublishing.com
JapanTutt le PublishingYaekari Building, 3rd Floor5-4-12 Osaki, Shinagawa-kuTokyo 141 0032Tel: (81) 3 5437-0171Fax: (81) 3 5437-0755sales@tutt le.co.jpwww.tutt le.co.jp
Asia Pacifi cBerkeley Books Pte. Ltd.61 Tai Seng Avenue #02-12Singapore 534167Tel: (65) 6280-1330Fax: (65) [email protected]
20 19 18 17 16 5 4 3 2 1Printed in Singapore 1511CP
TUTT LE PUBLISHING® is a registered trademark of Tutt le Publishing, a division of Periplus Editions (HK) Ltd.
ECC_full layout.indd 160ECC_full layout.indd 160 2/10/15 11:53 AM2/10/15 11:53 AM