KAHTP20BLKA 2000W Black Glass Portable Electric Panel ...
8
1500W Black Glass Portable Electric Panel Heater KAHTP15BLKA
Transcript of KAHTP20BLKA 2000W Black Glass Portable Electric Panel ...
1500W Black GlassPortable Electric Panel Heater
KAHTP15BLKA

Attention
Please handle this product with care and inspect it regularly to ensure it is in good working order.
If the product, power supply cord or plug shows any signs of damage: stop use, unplug and contact Kogan.com support.
Table of ContentsGeneral Safety Warnings............................................................................................................................................. 2Technical Specifications.................................................................................................................................................3Product Layout............................................................................................................................................................... 3Assembly.......................................................................................................................................................................... 3
Free Standing............................................................................................................................................................ 3Wall Mounting............................................................................................................................................................ 3
Operation.......................................................................................................................................................................... 5Setting Temperature................................................................................................................................................ 5Timer Setting............................................................................................................................................................. 5
Maintenance..................................................................................................................................................................... 6Overheating Safety Device................................................................................................................................... 6Storing.......................................................................................................................................................................... 6Recycling..................................................................................................................................................................... 6
1
General Safety Warnings• Read all instructions carefully before use.• Make sure the voltage supplied matches the requirements indicated on the rating plate of
the heater.• Do not operate this appliance if the cable or plug has become damaged.• Keep the appliance and cable away from other sources of heat, sharp objects or anything
else that may cause damage.• If the cord is damaged, it must be replaced by Kogan.com in order to avoid a hazard.• Ensure the appliance is switched off before connecting to the mains power supply.• Switch off the power supply at the switch and remove the plug from the outlet when the
heater is not in use, is being cleaned or undergoing any other maintenance.• To disconnect to heaters, switch it off, then remove the plug from the outlet. Do not pull
on the cord to disconnect the plug.• The heater must not be located immediately below it's power socket.• Do not operate in areas where fuel, paint or any other flammable liquids are used or
stored.• This heater is for indoor use only.• In order to avoid overheating, do not cover the heater.• To prevent a possible fire, never block the air intakes or exhaust vents in any manner.• Do not touch the hot surfaces directly.• Do not insert or allow foreign objects to enter into any ventilation or exhaust openings, as
this may cause electric shock, fire or damage to the appliance.• Always ensure that your hands are dry before operating or adjusting any switches on the
product, or touching the plug and socket-outlet.• This appliance is not intended for use by persons (including children) with reduced
physical, sensory or mental capabilities, or lack of experience and knowledge, unless theyhave been given supervision or instruction concerning use of the appliance by a personresponsible for their safety.
• Children should be supervised to ensure that they do not play with the heater.• Do not leave the heater unattended when it’s in use.• The most common cause of overheating is deposits of dust or fluff in the appliance.
Ensure these deposits are removed regularly by disconnecting the appliance from thepower supply, then vacuum cleaning the air vents and grilles.
• Do not place the heater on carpet and don’t place the cable under carpets. Arrange thecord away from traffic areas so that it will not be tripped over.
• Do not use this heater in the immediate surroundings of a bath, a shower or aswimming pool.
• Do not store away until the heater cools down, store the heater in cool dry location whennot in use.
• The heater must not be used if the glass panel is damaged.
2
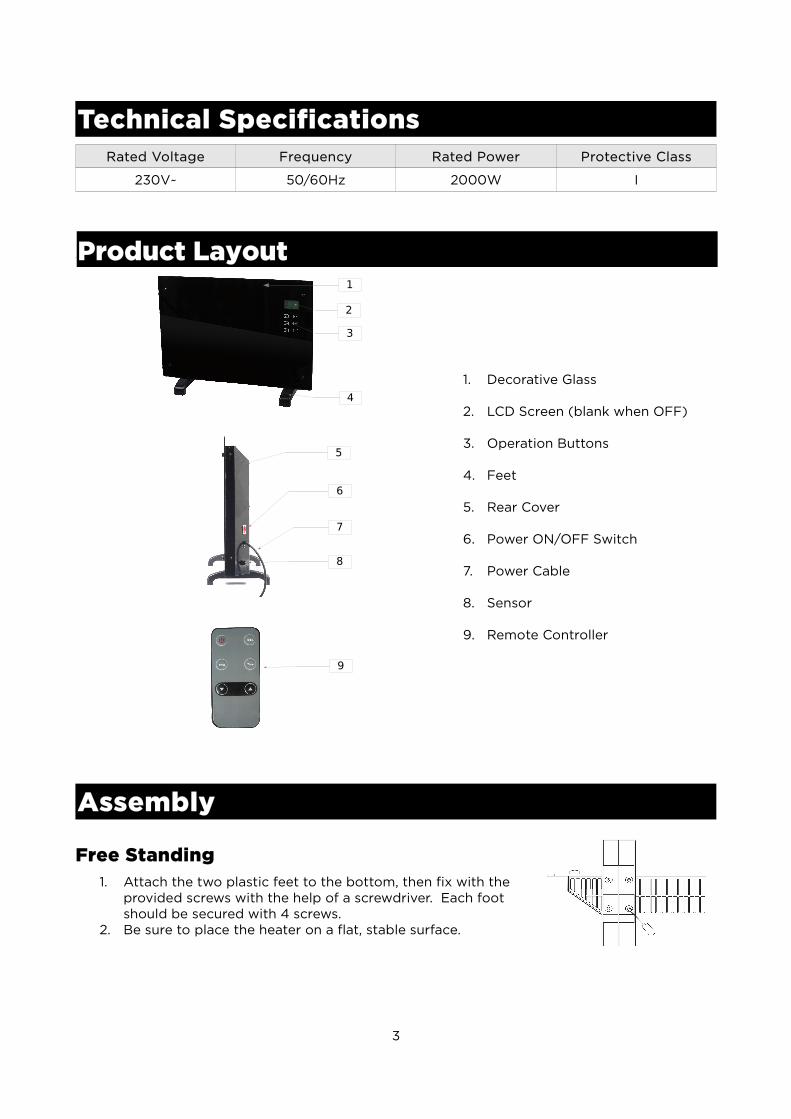
1. Decorative Glass
2. LCD Screen (blank when OFF)
3. Operation Buttons
4. Feet
5. Rear Cover
6. Power ON/OFF Switch
7. Power Cable
8. Sensor
9. Remote Controller
Assembly
Free Standing1. Attach the two plastic feet to the bottom, then fix with the
provided screws with the help of a screwdriver. Each footshould be secured with 4 screws.
2. Be sure to place the heater on a flat, stable surface.
3
1
2
3
4
6
5
7
8
9
Product Layout
Technical SpecificationsRated Voltage Frequency Rated Power Protective Class
230V~ 50/60Hz 2000W I
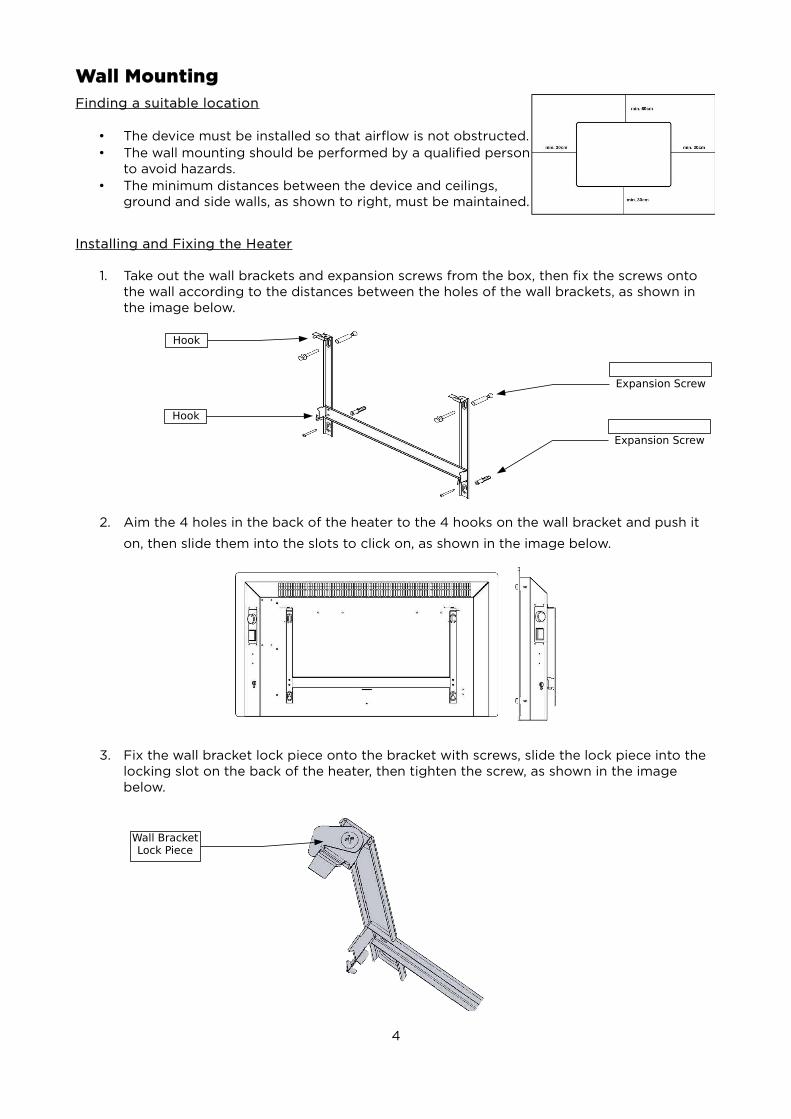
Installing and Fixing the Heater
1. Take out the wall brackets and expansion screws from the box, then fix the screws ontothe wall according to the distances between the holes of the wall brackets, as shown inthe image below.
2. Aim the 4 holes in the back of the heater to the 4 hooks on the wall bracket and push it
on, then slide them into the slots to click on, as shown in the image below.
3. Fix the wall bracket lock piece onto the bracket with screws, slide the lock piece into thelocking slot on the back of the heater, then tighten the screw, as shown in the imagebelow.
4
Expansion Screw
Expansion Screw
Hook
Hook
Wall Bracket Lock Piece
Wall MountingFinding a suitable location
• The device must be installed so that airflow is not obstructed.• The wall mounting should be performed by a qualified person
to avoid hazards.• The minimum distances between the device and ceilings,
ground and side walls, as shown to right, must be maintained.
Operation1. Connect the heater to a power socket, then switch the ON/OFF switch on the side panel.2. Press the buttons on the operation panel or remote control to set the heating.3. Press the button on the heater, and the machine will go into Standby Mode and Frost-
Free mode.
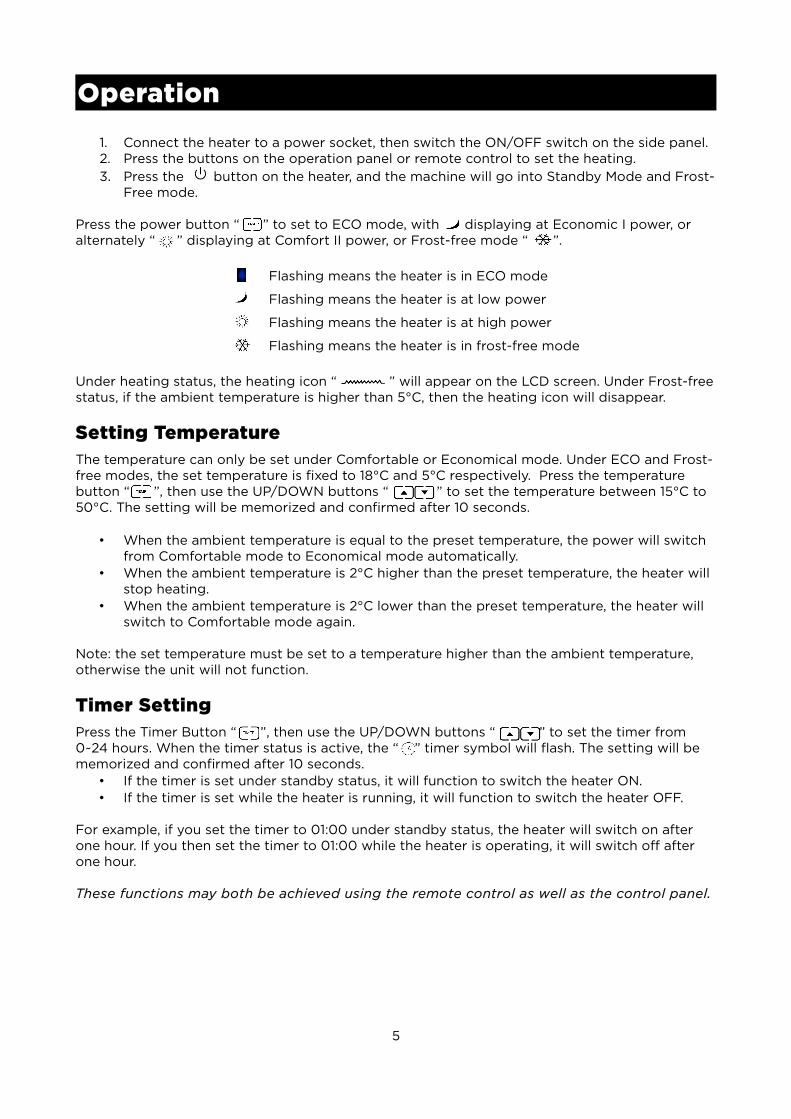
Press the power button “ ” to set to ECO mode, with displaying at Economic I power, or alternately “ ” displaying at Comfort II power, or Frost-free mode “ ”.
Flashing means the heater is in ECO mode
Flashing means the heater is at low power
Flashing means the heater is at high power
Flashing means the heater is in frost-free mode
Under heating status, the heating icon “ ” will appear on the LCD screen. Under Frost-freestatus, if the ambient temperature is higher than 5°C, then the heating icon will disappear.
Setting TemperatureThe temperature can only be set under Comfortable or Economical mode. Under ECO and Frost-free modes, the set temperature is fixed to 18°C and 5°C respectively. Press the temperature button “ ”, then use the UP/DOWN buttons “ ” to set the temperature between 15°C to 50°C. The setting will be memorized and confirmed after 10 seconds.
• When the ambient temperature is equal to the preset temperature, the power will switchfrom Comfortable mode to Economical mode automatically.
• When the ambient temperature is 2°C higher than the preset temperature, the heater willstop heating.
• When the ambient temperature is 2°C lower than the preset temperature, the heater willswitch to Comfortable mode again.
Note: the set temperature must be set to a temperature higher than the ambient temperature, otherwise the unit will not function.
Timer SettingPress the Timer Button “ ”, then use the UP/DOWN buttons “ ” to set the timer from 0~24 hours. When the timer status is active, the “ ” timer symbol will flash. The setting will be memorized and confirmed after 10 seconds.
• If the timer is set under standby status, it will function to switch the heater ON.• If the timer is set while the heater is running, it will function to switch the heater OFF.
For example, if you set the timer to 01:00 under standby status, the heater will switch on after one hour. If you then set the timer to 01:00 while the heater is operating, it will switch off after one hour.
These functions may both be achieved using the remote control as well as the control panel.
5
Maintenance1. Always disconnect the heater and let it cool down completely before any maintenance.2. Use a vacuum cleaner to remove dust and fluff from the grilles.3. Clean the outside of the unit with a soft damp cloth, then dry it with a dry cloth. Never
immerse the unit in water, nor let water drip into the unit.
Overheating Safety DeviceThe heater is fitted with a safety device to switch it off in the event of overheating. If the safetydevice has been triggered, please turn the heater off, unplug it and let it cool completely. Inspect for blockages of the air inlets or outlets, attempting to restart the heater after.If the heater fails to operate or the safety device switches the heater off again, contact the Kogan.com customer support team for further information.
Storing1. Always disconnect the heater, allow it to cool and then clean it before storing it.2. If you are not going to use the heater for an extended period of time, put the unit back
into its original carton and store it in a dry, well ventilated location.3. Do not place heavy items on top of the carton during storage as this may damage the
unit.
RecyclingWaste electrical products should never be disposed of with household waste. At the end of the products useful life cycle, please recycle where such facilities exist.Check with your local authority for recycling advice.
6