Juniper M-series Device Support Guide - docs.oracle.com · Juniper M-series Device Support Guide...
154
Juniper M-series Device Support Guide Third Edition December 2008 Oracle Communications IP Service Activator™ Version 5.2.4
Transcript of Juniper M-series Device Support Guide - docs.oracle.com · Juniper M-series Device Support Guide...

Juniper M-series DeviceSupport Guide
Third EditionDecember 2008
Oracle Communications IP Service Activator™ Version 5.2.4

Copyright © 1997, 2008, Oracle. All rights reserved.
The Programs (which include both the software and documentation) contain proprietary information; they are provided under a license agreement containing restrictions on use and disclosure and are also protected by copyright, patent, and other intellectual and industrial property laws. Reverse engineering, disassembly, or decompilation of the Programs, except to the extent required to obtain interoperability with other independently created software or as specified by law, is prohibited.
The information contained in this document is subject to change without notice. If you find any problems in the documentation, please report them to us in writing. This document is not warranted to be error-free. Except as may be expressly permitted in your license agreement for these Programs, no part of these Programs may be reproduced or transmitted in any form or by any means, electronic or mechanical, for any purpose.
If the programs are delivered to the United States Government or anyone licensing or using the Programs on behalf of the United States Government, the following notice is applicable:
U.S. GOVERNMENT RIGHTS Programs, software, databases, and related documentation and technical data delivered to U.S. Government customers are "commercial computer software" or "commercial technical data" pursuant to the applicable Federal Acquisition Regulation and agency-specific supplemental regulations. As such, use, duplication, disclosure, modification, and adaptation of the Programs, including documentation and technical data, shall be subject to the licensing restrictions set forth in the applicable Oracle license agreement, and, to the extent applicable, the additional rights set forth in FAR 52.227-19, Commercial Computer Software--Restricted Rights (June 1987). Oracle USA, Inc., 500 Oracle Parkway, Redwood City, CA 94065.
The Programs are not intended for use in any nuclear, aviation, mass transit, medical, or other inherently dangerous applications. It shall be the licensee’s responsibility to take all appropriate fail-safe, backup, redundancy and other measures to ensure the safe use of such applications if the Programs are used for such purposes, and we disclaim liability for any damages caused by such use of the Programs.
The Programs may provide links to Web sites and access to content, products, and services from third parties. Oracle is not responsible for the availability of, or any content provided on, third-party Web sites. You bear all risks associated with the use of such content. If you choose to purchase any products or services from a third party, the relationship is directly between you and the third party. Oracle is not responsible for: (a) the quality of third-party products or services; or (b) fulfilling any of the terms of the agreement with the third party, including delivery of products or services and warranty obligations related to purchased products or services. Oracle is not responsible for any loss or damage of any sort that you may incur from dealing with any third party.
Oracle, JD Edwards, and PeopleSoft are registered trademarks of Oracle Corporation and/or its affiliates. Other names may be trademarks of their respective owners.

Juniper M-series Device Support Guide – Third Edition Contents
Contents
Preface ............................................................................................ ix
About this document ................................................................................. ix
Before contacting Oracle Global Customer Support (GCS) ............................... x
Contacting Oracle Global Customer Support (GCS) ........................................ x
Downloading products and documentation ................................................... xi
Downloading a media pack ................................................................... xi
Service Activator publications .................................................................... xi
Chapter 1 Summary of Features Supported ...................................... 1
Supported Service Activator features ...........................................................1
QoS and access control support .............................................................2
MPLS VPN support ...............................................................................4
CCC and Layer 2 Martini VPN support .....................................................6
MPLS Label Switched Path (LSP) Support .................................................7
Supported Juniper M-series and T-series hardware and software .....................7
Supported devices .....................................................................................7
Supported JUNOS versions ....................................................................7
Juniper-supported interface types ...........................................................8
Chapter 2 Installation and Set-up Notes ........................................... 9
Installation Notes .................................................................................... 10
Setting command-line parameters on Solaris ......................................... 12
Exporting routes between routing instances in overlapping MPLS VPNs ...... 12
Chapter 3 Discovery and Configuration ........................................... 13
JUNOS configuration files ......................................................................... 14
The configuration hierarchy ................................................................. 14
Configuration groups .......................................................................... 15
Service Activator 5.2.4 iii

Contents Juniper M-series Device Support Guide – Third Edition
Activating a configuration .................................................................... 16
Communication and authentication ............................................................ 17
Obtaining device capabilities ..................................................................... 19
Applying Service Activator configuration ..................................................... 20
Check and force consistency ................................................................ 20
Maintaining synchronization between Routing Engines ............................. 21
Off-line configuration ............................................................................... 21
To implement off-line configuration ....................................................... 21
Command-line parameters .................................................................. 22
Important configuration notes ................................................................... 23
Chapter 4 Manual Pre-configuration ............................................... 25
Configuring SNMP ................................................................................... 26
Configuring user access privileges ............................................................. 26
Enabling SSH and Telnet .......................................................................... 27
Using SSH authentication .................................................................... 27
About pre-existing system and groups configurations ................................... 28
Mandatory manual configuration for MPLS VPNs .......................................... 28
PE routers ......................................................................................... 28
P routers ........................................................................................... 30
CE routers ......................................................................................... 30
Optional manual configuration for MPLS VPNs ............................................. 30
Pre-defined export maps ..................................................................... 30
Pre-defined route list filters ................................................................. 31
Pre-defined filtering policies for route redistribution ................................ 35
MPLS tunneling CCCs ............................................................................... 36
Configuring RSVP ............................................................................... 36
Manually pre-configured BGP peering .................................................... 37
Mandatory manual configuration for Layer 2 Martini VPNs ............................. 39
Chapter 5 Configuration of MPLS VPNs ........................................... 41
Pre-requisites ......................................................................................... 42
Pre-configuration of routers ................................................................. 42
Domain-level parameters .................................................................... 42
iv Service Activator 5.2.4

Juniper M-series Device Support Guide – Third Edition Contents
Discovery and role assignment ............................................................. 44
Routing tables and route targets ............................................................... 45
VRF tables ......................................................................................... 45
Route distinguishers ........................................................................... 47
RD number per VPN ............................................................................ 48
VPN topology and route targets ............................................................ 49
VRF import and export policies ............................................................. 51
Exporting routes between routing instances in overlapping VPNs - auto-export vs. RIB groups ................................................................................... 55
VRF re-use/reduction .......................................................................... 55
Previously defined export maps ............................................................ 56
Configuring PE-PE peering ........................................................................ 57
Configuring iBGP ................................................................................ 57
Co-existence with previously configured iBGP ......................................... 58
Configuring MD5 authentication ............................................................ 58
Configuring MPLS on interfaces (access only) ......................................... 59
Interface IP address ........................................................................... 59
PE-CE communication using eBGP ............................................................. 60
Basic Juniper commands ..................................................................... 61
EBGP-to-CEs ...................................................................................... 61
Allow AS in ........................................................................................ 62
AS override ....................................................................................... 63
Local preference ................................................................................. 63
Authentication ................................................................................... 64
Route prefix filters .............................................................................. 64
Prefix limit ........................................................................................ 64
Site of origin ...................................................................................... 65
eBGP load sharing .............................................................................. 67
Route dampening ............................................................................... 67
PE-CE communication using RIP ................................................................ 69
PE-CE communication using OSPF ............................................................. 69
OSPF Domain Tag .............................................................................. 70
PE-CE communication using static routes .................................................... 71
Service Activator 5.2.4 v

Contents Juniper M-series Device Support Guide – Third Edition
Specifying the location of the next-hop address ...................................... 72
Specifying that a route is permanent .................................................... 72
Route redistribution ................................................................................. 72
Chapter 6 Configuring Circuit Cross Connects ................................. 77
Overview ............................................................................................... 77
Protocols used ................................................................................... 78
Layer 2 switching CCCs ............................................................................ 78
Juniper commands ............................................................................. 79
Implementation ................................................................................. 82
MPLS LSP tunneling CCCs ......................................................................... 82
Juniper commands ............................................................................. 83
Implementation ................................................................................. 85
Chapter 7 Configuring Layer 2 Martini VPNs ................................... 87
Overview ............................................................................................... 87
Technical description of Layer 2 Martini VPNs ......................................... 88
Protocols used ................................................................................... 90
Base configuration .............................................................................. 90
Setting up Layer 2 Martini VPNs ........................................................... 90
Provisioning sub-interfaces for a Layer 2 Martini connection ..................... 91
Deleting provisioned sub-interfaces ...................................................... 92
MPLS Requirements ............................................................................ 93
OSPF requirements ............................................................................. 93
LDP requirements ............................................................................... 94
Implementation ................................................................................. 95
Juniper commands ............................................................................. 95
Chapter 8 Configuring QoS and Access Control Features ............... 101
Juniper QoS features ............................................................................. 102
FPC structure ................................................................................... 102
Juniper CoS overview ........................................................................ 103
Firewall filters .................................................................................. 103
Classification of packets and queue selection ........................................ 105
vi Service Activator 5.2.4

Juniper M-series Device Support Guide – Third Edition Contents
Access rules ......................................................................................... 106
Implementation ............................................................................... 106
Features supported by access rules ..................................................... 107
Example configuration ...................................................................... 109
Rate limiting ......................................................................................... 110
Juniper commands ........................................................................... 110
Implementation ............................................................................... 111
Example configuration ...................................................................... 112
Weighted Round Robin queuing mechanism .............................................. 114
Juniper commands ........................................................................... 116
Implementation ............................................................................... 118
Juniper.policy file with example Juniper MPLS PHB Group-WRR ............... 119
Chapter 9 Troubleshooting ............................................................ 123
Checking the Juniper M-series device logs ................................................ 124
Discovering Juniper M-series devices ....................................................... 124
Communication problems ....................................................................... 124
Commit errors ...................................................................................... 125
Inheritance Groups ................................................................................ 125
Useful JUNOS commands ....................................................................... 125
General configuration ........................................................................ 125
Monitoring and troubleshooting .......................................................... 126
Chapter 10 Useful References ....................................................... 127
Juniper website ..................................................................................... 128
Juniper M-series technical documentation ................................................. 129
Appendix A MPLS-VPN Device Configuration ................................. 131
Sample network .................................................................................... 132
Index ........................................................................................... 135
Service Activator 5.2.4 vii

Contents Juniper M-series Device Support Guide – Third Edition
viii Service Activator 5.2.4

Juniper M-series Device Support Guide – Third Edition Preface
Preface
About this documentThe Juniper M-series Device Support Guide provides detailed technical information about the Juniper M-series Device Driver, including supported features, configuration requirements and detailed examples. It is intended for network managers responsible for implementing Service Activator within a network using Juniper M-series and T-series routers.
It consists of the following chapters:
Chapter 1: Summary of Features Supported explains the devices, operating system versions and Service Activator features that are supported by the Juniper M-series Device Driver.
Chapter 2: Installation and Set-up Notes explains installation issues and details the device driver command-line parameters.
Chapter 3: Discovery and Configuration explains the way in which Service Activator discovers and configures devices and ensures consistency.
Chapter 4: Manual Pre-configuration details the prerequisites for running Service Activator including setting up routers for MPLS VPNs and Circuit Cross Connects (CCCs)
Chapter 5: Configuration of MPLS VPNs explains how MPLS-based VPNs are implemented, including details of commands configured.
Chapter 6: Configuring Circuit Cross Connects provides overview information about CCCs and explains how they are configured by Service Activator.
Chapter 7: Configuring Layer 2 Martini VPNs provides overview information about Layer 2 Martini VPNs and explains how they are configured by Service Activator.
Chapter 8: Configuring QoS and Access Control Features explains how the device driver sets up QoS and access control features, including examples of commands configured.
Chapter 9: Troubleshooting includes hints and tips for diagnosing and fixing problems.
Chapter 10: Useful References includes useful links to the Juniper website and suggestions for further reading.
Service Activator 5.2.4 ix

Before contacting Oracle Global Customer Support (GCS) Juniper M-series Device Support Guide – Third
Appendix A: MPLS-VPN Device Configuration provides example configurations of routers in management and customer MPLS VPNs.
Before contacting Oracle Global Customer Support (GCS)
If you have an issue or question, Oracle recommends reviewing the product documentation and articles on MetaLink in the Top Technical Documents section to see if you can find a solution. MetaLink is located at http://metalink.oracle.com.
In addition to MetaLink, product documentation can also be found on the product CDs and in the product set on Oracle E-Delivery.
Within the product documentation, the following publications may contain problem resolutions, work-arounds and troubleshooting information:
— Release Notes
— Oracle Installation and User's Guide
— README files
Contacting Oracle Global Customer Support (GCS)You can submit, update, and review service requests (SRs) of all severities on MetaLink, which is available 24 hours a day, 7 days a week. For technical issues of an urgent nature, you may call Oracle Global Customer Support (GCS) directly.
Oracle prefers that you use MetaLink to log your SR electronically, but if you need to contact GCS by telephone regarding a new SR, a support engineer will take down the information about your technical issue and then assign the SR to a technical engineer. A technical support representative for the Oracle and/or former MetaSolv products will then contact you.
Note that logging a new SR in a language other than English is only supported during your local country business hours. Outside of your local country business hours, technical issues are supported in English only. All SRs not logged in English outside of your local country business hours will be received the next business day. In order to obtain the broadest access to skilled technical support, Oracle advises you to log new SRs in English.
Oracle GCS can be reached locally in each country. Refer to the Oracle website for the support contact information in your country. The Oracle support website is located at http://www.oracle.com/support/contact.html.
x Service Activator 5.2.4

Juniper M-series Device Support Guide – Third Edition Downloading products and documentation
Downloading products and documentationTo download the Oracle and/or former MetaSolv products and documentation, go to the Oracle E-Delivery site, located at http://edelivery.oracle.com.
You can purchase a hard copy of Oracle product documentation on the Oracle store site, located at http://oraclestore.oracle.com.
For a complete selection of Oracle documentation, go to the Oracle documentation site, located at http://www.oracle.com/technology/documentation.
Downloading a media pack
To download a media pack from Oracle E-Delivery
1. Go to http://edelivery.oracle.com.
2. Select the appropriate language and click Continue.
3. Enter the appropriate Export Validation information, accept the license agreements and click Continue.
4. For Product Pack, select Oracle Communications Applications.
5. For Platform, select the appropriate platform for your installation.
6. Click Go.
7. Select the appropriate media pack and click Continue.
8. Click Download for the items you wish to download.
9. Follow the installation documentation for each component you wish to install.
Service Activator publicationsThe Service Activator documentation suite includes a full range of publications. Refer to the Service Activator Release Notes for more information.
Service Activator 5.2.4 xi

Service Activator publications Juniper M-series Device Support Guide – Third Edition
xii Service Activator 5.2.4

Juniper M-series Device Support Guide – Third Edition Summary of Features Supported
Chapter 1
Summary of Features Supported
This chapter provides an overview of Service Activator’s support for Juniper M-series and T-series devices. It includes the following:
Details of the Service Activator features that are supported by the Juniper M-series Device Driver.
Details of the Juniper M-series and T-series hardware and software supported by Service Activator
Information on devices, operating system versions and interface types supported by the Juniper M-series Device Driver
References
Supported Service Activator featuresThis section provides an overview of how the various features and configurations modelled in Service Activator are mapped to and supported on Juniper hardware.
Service Activator supports the provisioning of a rich set of advanced features on Juniper hardware including QoS, a wide range of tunnelling protocols (MPLS VPNs, Layer 2 Martini VPNs, MPLS LSPs and CCCs), and routing protocols including eBGP, OSPF, RIP and static routing.
The provisioning and configuration features supported by Service Activator require the Internet Processor II ASIC. This is standard on all Juniper models except early versions of M20 and M40 devices, where it is optional.
Service Activator 5.2.4 1

Summary of Features Supported Juniper M-series Device Support Guide – Third Edition
QoS and access control support
The Juniper M-series Device Driver also supports:
the Configuration Template Module which helps you to streamline the activation of services on network objects through the use of pre-defined or customized templates. For details, see the Configuration Template Module Online Help.
Service Activator featureInternet
Processor II
Policy rules Access rules
Classification rules x
Policing rules x
Marking DiffServ codepoints (0-63) x
IPv4 Precedence field x
IPv4 ToS bits x
MPLS experimental bits x
MPLS Topmost experimental bits x
2 Service Activator 5.2.4

Juniper M-series Device Support Guide – Third Edition Summary of Features Supported
For full details of features supported and the way they are implemented, see Configuring QoS and Access Control Features on page 101.
Traffic classification IP Address (source/destination)
IP Port (source/destination)
IP Protocol
Packet marking traffic type
URL traffic type x
MIME traffic type x
Application protocol traffic type x
Domain Name traffic type x
PHB groups Rate Limiting
WRED x
WFQ x
WRR
Priority Queuing x
ATM Traffic Shaping x
FRTS Traffic Shaping x
MQC x
Service Activator featureInternet
Processor II
Service Activator 5.2.4 3

Summary of Features Supported Juniper M-series Device Support Guide – Third Edition
MPLS VPN support
Service Activator feature Internet Processor II
VRF table User-defined VRF table name
VRF re-use/reduction
User-defined RD numbers
User-defined RT numbers
RDs per VPN
VRF route limit (max routes)
Co-existence with pre-defined VRFs
Pre-defined export maps
PE-PE peering (iBGP) iBGP peering optional
Maximum paths
Extended/standard community attributes *
x
PE-PE MD5 authentication
PE to CE connectivity eBGP
OSPF
RIP
Static routing
4 Service Activator 5.2.4

Juniper M-series Device Support Guide – Third Edition Summary of Features Supported
* This feature is not available on Juniper M-series or T-series devices.
For full details of features supported and the way they are implemented, see Configuration of MPLS VPNs on page 41.
eBGP configuration AS override
Allow AS in
Extended/standard community attributes *
x
Local preference
PE-CE authentication
Prefix filters
Prefix limit
Site of origin
Multi-path load sharing
Route dampening
Route redistribution into eBGP
OSPF Route redistribution into OSPF
Domain Tag
RIP Route redistribution into RIP
Static configuration Global routes
Permanent routes
Service Activator feature Internet Processor II
Service Activator 5.2.4 5

Summary of Features Supported Juniper M-series Device Support Guide – Third Edition
CCC and Layer 2 Martini VPN support
For full details of features supported and the way they are implemented, see Configuring Circuit Cross Connects on page 77 and Configuring Layer 2 Martini VPNs on page 87.
Service Activator feature Internet Processor II
CCCs Layer 2 switching CCC
MPLS tunneling CCC
Layer 2 Martini VPN Layer 2 Martini VPN
Provisioned sub-interfaces
Virtual Circuit ID
Provisioned sub-interfaces
Encapsulation Frame Relay ATM AAL5
Frame Relay ATM Cell
Frame Relay
Ethernet
Ethernet VLAN
6 Service Activator 5.2.4

Juniper M-series Device Support Guide – Third Edition Summary of Features Supported
MPLS Label Switched Path (LSP) Support
Supported Juniper M-series and T-series hardware and software
The Juniper M-series Device Driver is effectively capable of configuring any JUNOS-based device. The exact capabilities that can be supported by Service Activator depend on the device model, the operating system that it is running and the interface.
If you are using, or wish to use, different hardware or software from that defined here, please contact Global Customer Care.
Supported devicesThe Juniper M-series Device Driver supports Junos-based M- and T-series devices.
Supported JUNOS versionsRefer to the Release Notes for your Service Activator software release for support information for the specific releases of the JUNOS operating system.
Service Activator feature Internet Processor II
Tunnel Hold & Setup Priority
Admin Groups (Coloring)
IGP Metric
LDP
Protection Fast Re-Route
Node & Link Protection
Paths Primary & Secondary Paths
Next Hop Lists
Exclude Address Lists
Dynamic & Explicit Paths
Service Activator 5.2.4 7

Summary of Features Supported Juniper M-series Device Support Guide – Third Edition
Juniper-supported interface typesJuniper devices support a wide range of interfaces. The Juniper device driver supports a subset of these interfaces. Consult the Juniper website for information on Juniper interface types available.
The table below summarizes support for interface types on those Juniper M-series and T-series devices that are supported by Service Activator.
SupportedJuniper Interface
ConfigurationPrefix Physical Interface
ae aggregated Ethernet
as aggregated Sonet/SDH
at ATM
ds DS0
e1 E1
e3 E3
fe Fast Ethernet
fx management and internal ethernet interfaces
ge Gigabit Ethernet
gr Generic Route Encapsulation (GRE) tunnel
ip IP-over-IP encapsulation tunnel
lo Loopback
ml Multilink
mt Multicast tunnel
so SONET/SDH
t1 T1
t3 T3
vt Virtual loopback tunnel
8 Service Activator 5.2.4

Juniper M-series Device Support Guide – Third Edition Installation and Set-up Notes
Chapter 2
Installation and Set-up Notes
For full details on installing Service Activator including the Juniper M-series Device Driver refer to the Setup Guide.
This chapter contains important notes on setting up the Juniper M-series driver. It includes the following:
Installation Notes
Details of the command line parameters that can be used when setting up the Juniper M-series Device Driver
Service Activator 5.2.4 9

Installation and Set-up Notes Juniper M-series Device Support Guide – Third Edition
Installation NotesThe Juniper M-series Device Driver is a separate executable component called juniper_device_driver.
The Juniper M-series Device Driver is installed by default when you select the Proxy Agent component for installation.
Command-line parameters
The following table summarizes available command-line parameters.
Parameter Description
-ComponentName name Specifies the name of the Juniper M-series Device Driver component as displayed in the user interface.
-ComponentLocation hostname Specifies the hostname on which the Juniper M-series Device Driver component is installed.
-ConnectTimeout n Socket connection timeout, where n is an integer specifying the number of seconds. Default is 30 seconds.
-LineDelay milliseconds Amount of time, in milliseconds, that Service Activator waits between delivering lines of configuration to the device.
Note: This parameter is only applicable if you access the device through telnet, and not SSH.
-NoSystemGroupAddresses If this flag is specified, VPN site addresses are specified in the orchestream configuration group instead of the system configuration group.
Use this option if you need to manually provision additional addresses on an interface that will co-exist with IP Service Activator managed addresses on that interface.
Note: Ensure that manually configured addresses in the system group do not conflict with IP Service Activator configured addresses in the orchestream group.
10 Service Activator 5.2.4

Juniper M-series Device Support Guide – Third Edition Installation and Set-up Notes
For more details of the options for off-line configuration, see Off-line configuration on page 21.
-OverwriteInterfaceDescription The interface description configured in the Site Properties dialog is enabled only when the device driver is started with this option.
-ReadTimeout n Socket read timeout in seconds, where n is an integer specifying number of seconds. Default is 30 seconds.
-UseRIBGroup Use rib-group definitions statements when provisioning routing instances in MPLS VPNs. This overrides the use of policy-based mechanisms (i.e. the auto-export JUNOS command).
-WriteTimeout n Socket write timeout in seconds, where n is an integer specifying number of seconds. Default is 30 seconds.
Note: For delivery of configuration to file instead of the device, the three commands below (-FileConfigDelivery, -FileConfigDeliveryDir, and -NoDeviceComm) must all be configured.
-FileConfigDelivery With this command enabled the device driver does not attempt to enter configure mode on the device and does not apply any changes to the FileInterface file.
Instead, all configuration commands are delivered to a file named orchestream-config-<device_name>-<time>-<date>.txt. This file is created in a directory specified by -FileConfigDeliveryDir
-FileConfigDeliveryDir name Specifies the location of the orchestream-config-device_name-time-date.txt file.
-NoDeviceComm If this flag is specified, both CLI and SNMP connections are disabled, preventing the device driver connecting to the device.
Parameter Description
Service Activator 5.2.4 11

Installation and Set-up Notes Juniper M-series Device Support Guide – Third Edition
Note that there are also command-line parameters that control debugging logs for all Service Activator components. These are described in full in the Administrator’s Guide.
The device driver must be restarted for any changes to these command-line parameters to take effect.
Setting command-line parameters on SolarisCommand-line options are specified in the cman.cfg file which is in the /opt/OracleCommunications/Service Activator/config directory.
Using a text editor such as vi, edit the juniper entry in the cman.cfg file with the relevant option.
Exporting routes between routing instances in overlapping MPLS VPNs
Starting with Service Activator version 4.2, the JUNOS auto-export command is used by default to implement policy-based export of routes between routing instances in overlapping MPLS VPNs. This greatly simplifies the device configuration required to set up overlapping VPNs.
How the Juniper device driver handles existing rib-group statements
If you have upgraded to Service Activator version 4.2 or higher and your devices have RIB groups defined, or if you have been using the -UseRIBGroup command-line parameter (see Command-line parameters on page 10) and have removed it, the Juniper device driver handles existing configuration in the following way. It will:
Delete rib-group definition statements inside group orchestream
For each routing instance inside group orchestream:
— Change the routing-options to auto-export
— delete the interface-routes sections which defines the RIB group
Delete the definition of the family inet which refers to the RIB group, inside the protocols definition
Because of these changes, a simple upgrade procedure is recommended. See below.
Upgrading devices from using RIB groups to using auto-export
If you have upgraded to Service Activator version 4.2 or higher and your devices have RIB groups defined, or if you have been using the -UseRIBGroup command-line parameter and are removing it, use the following upgrade procedure.
1. Un-manage affected devices.
12 Service Activator 5.2.4

Juniper M-series Device Support Guide – Third Edition Installation and Set-up Notes
2. Perform the upgrade (or de-implement the -UseRIBGroup command-line parameter).
3. Restart Service Activator.
4. Manage the affected devices.
When the devices are re-managed, the new configuration using the auto-export command is pushed.
Over-riding the auto-export command with -UseRIBGroup
To configure the Juniper device driver to use RIB groups instead of the auto-export command to export routes in MPLS VPNS, use the -UseRIBGroup command-line parameter. This mimics the handling of export routes in versions of Service Activator prior to version 4.2. See Setting command-line parameters on Solaris on page 12.
Service Activator 5.2.4 13

Installation and Set-up Notes Juniper M-series Device Support Guide – Third Edition
14 Service Activator 5.2.4

Juniper M-series Device Support Guide – Third Edition Discovery and Configuration
Chapter 3
Discovery and Configuration
This chapter provides some basic information on JUNOS configuration files before describing how the Juniper M-series Device Driver configures devices. It covers the following areas:
JUNOS configuration files, the configuration hierarchy and configuration groups
How the device driver communicates and authenticates with devices
The discovery of Juniper M-series and T-series devices, including obtaining capabilities
How the device driver models and applies device configuration and ensures consistency of configuration
Features and restrictions of the device driver
Service Activator 5.2.4 13

Discovery and Configuration Juniper M-series Device Support Guide – Third Edition
JUNOS configuration filesThere are two types of statement in a JUNOS configuration file:
Container statements – hold a collection of statements
Leaf statements – sit within a container statement
Container statements may be nested.
The configuration hierarchyThe container and leaf statements that are entered in the configuration file make up a configuration hierarchy. Most top-level statements are container statements that hold other container statements that form the tree branches. The leaf statements are the leaves of the hierarchy tree. The following diagram shows the top-level statements in the Juniper configuration hierarchy.
Within the configuration file, statements are indented to show their relative position in the hierarchy. For example:
firewall {
family inet {
accounting-options
apply-groups
chassis
class-of-service
firewall
groups
interfaces
policy-options
protocols
routing-instances
routing-options
snmp
system
forwarding-options
14 Service Activator 5.2.4

Juniper M-series Device Support Guide – Third Edition Discovery and Configuration
filter InFilter--at-0-0-0-1 {
term OrchFilterTerm--4688 {
from {
precedence flash-override;
source-address 150.150.150.0/24;
destination-address 10.50.0.7/32;
}
then {
accept;
}
}
}
}
}
An individual hierarchy of statements, starting at the base of the hierarchy, is referred to as a statement path. For example, the statement path for the above example is expressed as [edit firewall].
Configuration groupsStatements within the JUNOS configuration file may be collected in a named group that can be applied to the rest of the configuration. Any number of groups may be defined. A group, or selected sections of the group, can be applied to different sections of the configuration file.
Configuration groups are defined at the top level of the configuration hierarchy. Within each group, the same configuration hierarchy exists as at the top level. This is shown below.
Service Activator 5.2.4 15

Discovery and Configuration Juniper M-series Device Support Guide – Third Edition
The Juniper M-series Device Driver uses the configuration groups feature to aid separation of Service Activator-generated configuration. Any configuration that is placed on the device is defined within the orchestream configuration group. The following example shows the opening lines of the group definition:
groups {
orchestream {
interfaces {
at-1/0/0 {
…
This group is then applied to the main configuration by the apply-groups command.
Activating a configurationJUNOS holds ten versions of the configuration file, one of which is the currently running configuration. In Juniper terminology, this is the active configuration. This
When configuring an MPLS VPN, if the IP address specified for an interface through Service Activator differs from the currently-configured values on the device, Service Activator changes the address within the main configuration. The change is commented. This change is made in the main configuration because any interface addresses defined in the orchestream group are merged with those in the main configuration.
accounting-options
apply-groups
chassis
class-of-service
firewall
groups
example_group
16 Service Activator 5.2.4

Juniper M-series Device Support Guide – Third Edition Discovery and Configuration
configuration may be edited to produce a new configuration which is referred to as the candidate configuration.
When a JUNOS commit command is run, the candidate configuration becomes the active configuration (configuration file 0). The active configuration becomes the first backup (configuration file 1), and so on.
The Juniper M-series Device Driver uses the commit command when pushing new configuration to the device.
Communication and authenticationThe Juniper M-series Device Driver accesses devices via the command-line interface (CLI). Access is authenticated via Tacacs+, Telnet (Named User) or SSH/RSA with password authentication. You must ensure that the authentication methods are correctly set up for all Juniper devices in your network. You can set the authentication on the Security page in the Discovery dialog box to ensure that it applies to all devices, or set it for individual devices.
Note that the Juniper M-series Device Driver requires SNMP to be enabled on devices for the Service Activator discovery process to work and so that the capabilities of Juniper routers can be obtained. Therefore you need to ensure that SNMP is set up correctly. For more information, see Configuring SNMP on page 26.
If the device driver configured for no commit, it uses commit confirm and if successful, it saves the configuration on the device with the name orchestream_new_config.txt. You may then apply this configuration manually if you choose.
If the driver is configured for normal operation, it uses commit confirmed 1. In this case, device commits the configuration and then waits for the Juniper Device Driver to send a “Y” one second later. If the device does not receive the “Y” response, it assumes that connectivity to the management station has been lost and rolls back the configuration. This is very useful to ensure that you are not locked out of the device by an errant configuration.
The user specified on the Security page must have the appropriate privilege level on each PE device to be managed. For more information, see Configuring user access privileges on page 26.
Service Activator 5.2.4 17

Discovery and Configuration Juniper M-series Device Support Guide – Third Edition
Configuring SSH authentication keys
To support SSH with password authentication on Juniper M-series devices, perform the following steps when the new Service Activator build is installed:
1. Enable ssh service on the devices.
2. On the Service Activator installation machine, ensure that the directory <ipsaadmin_home_directory>/.ssh is empty. (Note that the default <ipsaadmin_home_directory> directory is /export/home/ipsaadmin.)
3. On a clean install, you must generate a new key pair for the Service Activator install. This can be done using the key generator in the /opt/OracleCommunications/ServiceActivator/ssh/bin directory.On a new Service Activator installation, you must generate a new SSH key pair.
To do this, use the key generator in the <IPSA Install>/ssh/bin directory (typically /opt/OracleCommunications/ServiceActivator/ssh/bin) using the following command:
ssh-keygen -f id_rsa -t rsa -b 1024
When prompted for a key password by the key generator, leave the passphrase blank.
Two files are generated:
id_rsa
id_rsa.pub
4. Copy the id_rsa and id_rsa.pub files to the <ipsaadmin_home_directory>/.ssh directory.
5. Set the protections of the files using the command:
chmod 600 id_*
When setting the security preferences for the device/domain, select SSH with password authentication and enter the valid username and password for the router.
Note: The keyed authentication option is not supported.
18 Service Activator 5.2.4

Juniper M-series Device Support Guide – Third Edition Discovery and Configuration
Obtaining device capabilitiesThe features supported on each device are dependent on the hardware and software combination and are indicated by a list of capabilities returned from each device. You should always check capabilities before configuring network devices. Note that the Juniper M-series Device Driver does not need correct security settings in order to obtain capabilities.
The Juniper device driver uses SNMP to retrieve the device capabilities.
Capabilities are obtained at two levels:
At device level, the capabilities specify the device’s support for SLA measurement techniques, Transparent LAN Services and VLANs. These features are not currently supported by Service Activator on Juniper M-series or T-series devices
At interface, sub-interface (unit) and VC endpoint level, the capabilities indicate the QoS, MPLS, and Layer 2 Martini VPN features that can be configured on that interface
The device driver attempts to obtain the capabilities automatically at the end of the discovery process. If this fails you can initiate the process to fetch capabilities manually.
If Service Activator is unable to discover capabilities during the discovery process – you can request the capabilities at a later point.
In addition, if the device capabilities have changed – for example, as a result of an operating system upgrade – you can reset and re-fetch capabilities, after ensuring the device is unmanaged.
There may be inconsistencies discovering pre-configured DLCIs, VLANs and VCs. See Working with pre-existing VLAN, DLCI and VC endpoints on page 98 for details.
For more details on the discovery process, see the Network Discovery and Basic Setup guide.
The provisioning and configuration features supported by Service Activator require the Internet Processor II ASIC. The Juniper M-series Device Driver is optimized to correctly report capabilities from Juniper devices with this version of the ASIC. With earlier ASIC versions, support for rate limiting and access rules is incorrectly reported.
Service Activator 5.2.4 19

Discovery and Configuration Juniper M-series Device Support Guide – Third Edition
Applying Service Activator configurationThe M-series device driver maintains a virtual version of the device state, consisting of the rules, PHB groups, and so on that have been defined in the Service Activator-generated configuration group. The device maintains the real state in the active configuration.
When configuration is pushed to the device, the Juniper device driver performs the following steps:
1. The driver logs into the device and obtains the current configuration.
2. The driver enters configuration mode by running the edit exclusive command.
3. If another entity is editing the configuration, no new Service Activator configuration is installed on the device. An error message is logged and displayed in the Service Activator user interface.
4. If no entities are editing the configuration, the driver edits the candidate configuration. The configuration file is locked to all other entities. When configuration is complete, the commit check command is run and JUNOS verifies the candidate configuration:
— If the command succeeds, the candidate configuration is made active by sending a commit command.
— If JUNOS finds an error, an error is raised against the device. No new Service Activator configuration is installed. The device driver saves the failed configuration to a file named last_failed_orchestream_config on the Juniper device. This log file contains details about the error and can be reloaded in order to diagnose and correct the problem.
Check and force consistencyA check and force consistency process ensures that the configuration of each device always matches the virtual device state. A device may lose its configuration if it goes down. The process works as follows:
1. The proxy agent regularly polls the UpTime MIB objects which represent the devices that the driver controls. If it finds that the device was down (that is, it has re-booted since the last time it was checked), the proxy agent tells the driver to check the consistency of the device configuration.
2. The driver initiates the sequence outlined in Applying Service Activator configuration on page 20.
20 Service Activator 5.2.4

Juniper M-series Device Support Guide – Third Edition Discovery and Configuration
Maintaining synchronization between Routing EnginesWhen Routing Engine redundancy is implemented, the configuration pushed to the device by Service Activator will only be updated on the Master Routing Engine. The Backup Routing Engine will not be updated with the configuration. As a result, the Backup Routing Engine will not be correct if there is a need to switch over to this engine.
A script is available which maintains synchronization between the command caches of both engines. This script will issue a commit synchronize command to update the Backup Routing Engine and synchronize with the Master Routing Engine after every successful configuration change.
The script file can be found at the following location:
/opt/OracleCommunications/Service Activator/DriverScripts/juniper/CommitSynchronize.py
See the Service Activator Online Help for information on how to import a driver script file.
Off-line configurationYou can save the configuration output from the device driver to a file instead of a device. The following options are available:
Output the orchestream configuration group to a file named device-ip-address, local to the Juniper device driver. Output is in XML format, with the output configuration enclosed by markup tags.
Output the orchestream configuration group to a file named orchestream-config-devicename-time-date-.txt, local to the Juniper device driver. The output file includes a replace: tag, enabling you to load the file’s configuration group into the active configuration.
Output the orchestream configuration group to a file named orchestream_new_config.txt in the user’s home directory on the device.
Disable communication with the device via the CLI and SNMP when outputting configuration to the orchestream-config-devicename-time-date.txt file.
We recommend you use file output only if it is necessary for your environment.
To implement off-line configuration1. Update the juniper entry in the cman.cfg file by inserting the following options:
- FileConfigDelivery
Service Activator 5.2.4 21

Discovery and Configuration Juniper M-series Device Support Guide – Third Edition
- FileConfigDeliveryDir /opt/OracleCommunications/ServiceActivator/WorkingData
- NoDeviceComm
2. Restart the component manager:
(ipsacm start)
3. Run device discovery and subsequently manage your device(s).
4. Create provisioning data and commit a transaction. For each subsequent commited transaction that would otherwise write directly to the device, a ready-to-load file is created in /opt/OracleCommunications/ServiceActivator/WorkingData directory. The file name format is:
Orchestream_config_DeviceName_time_date.txt
Command-line parametersThe following command-line parameters are used to control off-line configuration. They must be used together for off-line configuration to work.
-FileConfigDelivery, -FileConfigDeliveryDir
If the -FileConfigDelivery flag is specified, the driver does not attempt to enter configure mode on the device and does not apply any changes to the FileInterface file. Instead, a file named orchestream-config-device_name-time-date.txt is created in a directory specified by -FileConfigDeliveryDir. You must also use the -NoDeviceComm flag in conjunction with these flags.
It is necessary to restart the component manager before the flags become effective.
The file created contains the replacement orchestream configuration group with a replace: flag appearing just before the group and interface statements.
Command Name Type Purpose
-FileConfigDelivery Flag Do not push config onto the device.
-FileConfigDeliveryDir String Specifies the folder where the files are located to which configuration will be written.
-NoDeviceComm Flag Do not contact the device to perform show run or show vers commands, or SNMP polls)
22 Service Activator 5.2.4

Juniper M-series Device Support Guide – Third Edition Discovery and Configuration
You can load the orchestream-config-device_name-time-date.txt file by running the JUNOS load replace command. For example:
[edit]
user@host# load replace orchestream-config-zeus-14.58.17-2001-10-04.txt
This overwrites the existing orchestream configuration group with the file’s content without affecting any other areas of the router configuration.
After loading the file, you must ensure that the apply-groups orchestream statement still exists in the router configuration. You must apply this statement with a set command. For example:
[edit]
user@host# set apply-groups orchestream
[edit]
-NoDeviceComm
If the -NoDeviceComm flag is specified, both CLI and SNMP connections are disabled, preventing the device driver connecting to the device. If the capabilities of the device are unknown, an over-estimation of the capabilities is performed. SNMP requests are still allowed to be performed by the rest of the system. If this flag is used with -FileConfigDelivery, a good estimation of the configuration changes required are written to the local file. See the example above or Activating a configuration on page 16 for more details.
Important configuration notesChanging any of the off-line configuration parameters while a device is managed can cause commit failure errors.
The value set in the Manual config field on the Domain and Device property pages, including Warn and Delete, is ignored for Juniper M-series devices. The Juniper M-series Device Driver cannot be set up to monitor for or warn when changes to device configuration are made by other users. However, Service Activator can co-exist with manually applied configuration.
Note that IP address changes that may be required when configuring MPLS VPNs must be applied to the main router configuration and not in the orchestream configuration group.
Service Activator 5.2.4 23

Discovery and Configuration Juniper M-series Device Support Guide – Third Edition
24 Service Activator 5.2.4

Juniper M-series Device Support Guide – Third Edition Manual Pre-configuration
Chapter 4
Manual Pre-configuration
In order for Service Activator to correctly manage Juniper devices through the Juniper M-series Device Driver and to configure features on them, various values must be pre-configured on the devices . This chapter describes the manual Juniper device pre-configuration steps that are required. It covers:
Configuring SNMP and user access privileges
Pre-requisite manual pre-configuration for MPLS VPNs
How Service Activator can co-exist with manually configured MPLS VPN features
Manual pre-configuration for MPLS tunneling CCCs
Manual pre-configuration for Layer 2 Martini VPNs
Service Activator 5.2.4 25

Manual Pre-configuration Juniper M-series Device Support Guide – Third Edition
Configuring SNMPSNMP must be enabled on all Juniper M-series routers for the Service Activator discovery process to work and so that the capabilities of Juniper routers can be obtained. Ensure the following statement is included in the configuration:
[edit]
snmp;
Note that Service Activator’s network discovery process uses a default community of public; you must amend the appropriate SNMP parameter on the user interface’s Discovery dialog box if you set a different read community on the devices.
To configure the community string:
[edit snmp]
community <community-string> {
authorization read-only;
clients {
default restrict;
<address>;
}
}
where:
Configuring user access privilegesFor the Juniper M-series Device Driver to configure a device, the user specified in Service Activator’s device security settings must have access privileges that permit interface configuration, routing configuration, firewall, and firewall-control permissions.
Users are assigned access privileges via login classes. To assign the appropriate privileges to a user:
Create a login class with the appropriate access level
Associate the class with the relevant user
community-string The community string.
authorization The access authorization level.
address An SNMP client that is authorized to access the router.
26 Service Activator 5.2.4

Juniper M-series Device Support Guide – Third Edition Manual Pre-configuration
The class must have the following access privileges:
[configure edit interface interface-control routing routing-control maintenance view firewall firewall-control]
Login classes are defined at the [edit system login] level:
class <class-name> {
permissions [ access-privileges ];
}
Users are associated with login classes at the [edit system login user] level:
user <user-name> {
full-name <full-name>;
uid <user-id>;
class <class-name>;
Enabling SSH and TelnetAccess to a device can be authenticated via Telnet or SSH. The commands to enable Telnet and SSH login are defined at the [edit services] level:
services {
ssh;
telnet;
}
Using SSH authenticationWhen using SSH, or other non-Telnet authentication, configurations are sent to the device using the set command. Using this notation generates a syntax error when applying communities to the import and export policy statements. Specifically, the string ‘community[‘ (without a space between ‘community’ and ‘[‘) will fail the VPN configuration.
Also, comment delimiters of ‘/* */’ and ‘#’ are not accepted.
In both cases, comment commands must done with the CLI annotate command. The annotate command is explained in the JUNOS CLI User Guide (v7.6 to v8.3).
Service Activator 5.2.4 27

Manual Pre-configuration Juniper M-series Device Support Guide – Third Edition
About pre-existing system and groups configurationsRouter configurations generated by the Juniper Device Driver may fail or be inactive when interfaces on the device are already configured by other users at the master system or group configuration hierarchies.
To prevent this situation, at the system or (active) groups configuration hierarchy level, check for existing configuration operating on interfaces where policy is to be applied that might potentially conflict with the planned Service Activator provisioning commands. In particular, check that there are no input or output firewall filters, VRFs, l2circuits, cross-connects and/or PHB Groups already configured on those interfaces.
Mandatory manual configuration for MPLS VPNsBefore using Service Activator to set up VPNs, some manual configuration of routers is required.
The following pre-configuration is required for each device role.
PE routersOn all PE (gateway) routers in the core VPN, the following manual configuration is required:
Core interfaces must be configured to carry IP and MPLS traffic
IP addresses must be correctly assigned
A loopback interface must be set up
An IGP (such as OSPF or IS-IS) must be implemented in order to distribute IP routes
LSPs must be configured between the loopback addresses of all PE devices
IBGP sessions between PE peers must be configured
The Juniper M-series Device Driver assigns IP addresses and enables MPLS only on access interfaces.
28 Service Activator 5.2.4

Juniper M-series Device Support Guide – Third Edition Manual Pre-configuration
Configure IP and MPLS on core interfaces
The command to configure IP on an interface is:
<interface-name> {
unit <logical-interface-number> {
family inet {
address <IP-address>;
}
}
The command to enable MPLS is:
protocols {
mpls {
interface {<interface-name> | all };
}
}
Configure the loopback interface
The command to configure a loopback interface is:
interfaces {
lo0 {
unit 0 {
family inet {
<loopback-address>;
}
}
}
}
Enable LSPs
We recommend that you allow LSPs to be set up as required, by enabling LDP on all PE and P routers.
The command to configure LDP is made at the [edit protocols] level:
ldp {
interface {<interface-name> | all };
}
Service Activator 5.2.4 29

Manual Pre-configuration Juniper M-series Device Support Guide – Third Edition
P routersOn all P (core) routers the following manual configuration is required:
Core interfaces must be configured to carry IP and MPLS traffic (see Configure IP and MPLS on core interfaces on page 29)
IP addresses must be correctly assigned
The protocol used to setup LSPs must be running (see Enable LSPs on page 29)
An IGP (such as OSPF or IS-IS) must be implemented in order to distribute IP routes.
CE routersThe CE (access) routers at customer sites are not configured to control routing by Service Activator, since they may not be under the control of the network service provider. Therefore they need to be manually configured. You need to ensure the following is set up:
BGP, RIP, OSPF or static routing must be configured in order to advertise reachability information between the CE and the PE.
It is recommended that a loopback interface is set up on each CE router (see Configure IP and MPLS on core interfaces on page 29 and Configure the loopback interface on page 29).
Optional manual configuration for MPLS VPNsYou can manually pre-configure routers with data which provide specific operational requirements for your MPLS VPNs. Service Activator is able to incorporate the following pre-configured data into the device configuration.
Pre-defined export mapsYou can manually pre-define an export policy on a PE router and assign it to a VRF table in the Advanced VPN property page of the Site dialog box. The export policy only allows those routes in the VRF table whose route prefixes match those specified in the export policy to be advertised to other PE routers. The exported routes are tagged with an RT value specified by the export map.
Using a manually pre-defined export policy enables you to control the redistribution of routing information into iBGP without affecting route redistribution into eBGP. This is in contrast to the route redistribution feature, where route redistribution parameters affect both eBGP and iBGP.
You can configure an export policy to specify any of the following options:
30 Service Activator 5.2.4

Juniper M-series Device Support Guide – Third Edition Manual Pre-configuration
To reject routes that match those in the export policy (route is not exported)
To accept routes that match those in the export policy (the route is exported without evaluating the Service Activator defined export policy)
To neither reject or accept routes (the Service Activator defined export policy only applies)
In all cases other policy actions, such as modifying or adding route targets, will be applied to routes.
You configure a community to associate with exported routes using the commands described in VPN topology and route targets on page 49.
Pre-defined route list filtersThe number of routes that are received from, or sent to, a CE router can be selectively reduced using a manually pre-defined route list filter installed on the neighboring PE router. Routes whose prefixes match the condition specified by the route list filter will either be accepted or rejected by the PE router depending on the action specified by the filter. You also need to specify in the user interface that the route list filter is to filter routes that are either incoming (CE-PE) or outgoing (PE-CE).
Another method for selectively reducing the number of routes that are received from, or sent to, a CE router is to use a prefix list filter installed on the neighboring PE router. A prefix list filter exactly matches the prefixes that are listed in the prefix list, whereas a route list filter supports a range of matching conditions which can apply to specific and/or a range of routes.
Configuring a route list filter
The name of the pre-configured route list filter must be specified in a policy-statement. You apply the route list filter to a site by entering the name of the policy-statement in the Prefix filters In or Out fields on the Site properties, EBGP Advanced page.
You configure a route list filter on the PE device in router configuration mode at the [edit routing-options policy-options] level:
policy-statement <policy-name> {
term <term-name> {
from {
The user-defined export policy must be defined in the main configuration and not within the orchestream configuration group.
Service Activator 5.2.4 31

Manual Pre-configuration Juniper M-series Device Support Guide – Third Edition
route-filter <destination-prefix> <match-type actions>;
source-address-filter <destination-prefix> <match-type>
<actions>;
}
then <actions>;
}
}
}
where:
Match types
route-filter Match outgoing prefixes (PE-CE).
source-address-filter
Match incoming prefixes (CE-PE).
destination-prefix IPv4 prefix in the format prefix/prefix-length. If prefix-length is not entered, the default is /32.
match-type Type of match applied to the destination-prefix. See Match types on page 32.
<actions> Optional. Action taken if destination-prefix matches; can be one or several actions listed in Actions on page 33. If not specified, actions in the then statement is used when a match occurs.
actions Action taken if destination-prefix matches and <actions> is not specified in the route-filter or source-address-filter option; can be one or several actions listed in Actions on page 33.
exact The destination-prefix prefix (specified by the prefix-length) and prefix-length match the route’s prefix and prefix length.
longer The destination-prefix prefix (specified by the prefix-length) matches the route’s prefix and its prefix-length is greater than the route’s prefix length.
orlonger The destination-prefix prefix (specified by the prefix-length) matches the route’s prefix and its prefix-length is equal to, or greater than the route’s prefix length.
prefix-length-rangeprefix-length-value1prefix-length-value2
The destination-prefix prefix (specified by the prefix-length) matches the route’s prefix and the route’s prefix length is within value1 and value2.
32 Service Activator 5.2.4

Juniper M-series Device Support Guide – Third Edition Manual Pre-configuration
Actions
The policy statement is referenced at the [edit routing-instances VRF-table-name protocols bgp group neighbor] level. For more information, see Allow AS in on page 62.
Configuring a prefix list filter
Another method for selectively reducing the number of routes that are received from, or sent to, a CE router is to use a prefix list filter installed on the neighboring PE router. The IP address prefixes of routes that you want to filter are listed in a prefix-list. Routes whose IP address prefixes match those in the prefix-list will either be allowed or rejected by the PE router depending on the action specified in the route list filter. The route list filter has to specify that the prefix-list is required to only filter routes that are either incoming (CE - PE) or outgoing (PE - CE).
first-destination-prefix through last-destination-prefix
Matches all of the following:
The first-destination-prefix prefix (specified by the prefix-length) matches the first route’s prefix.
The last-destination-prefix prefix (specified by the prefix-length) matches the last route’s prefix.
The number of bits in the first route’s prefix is less than, or equal to, the number of bits in the last route’s prefix.
upto prefix-length-value2
The destination-prefix prefix (specified by the prefix-length) matches the route’s prefix and the route’s prefix length is within destination-prefix prefix-length and prefix-length-value2.
accept Accepts the route. After a route is accepted, no other terms in the routing policy and no other routing policies are evaluated.
reject Rejects the route. After a route is rejected, no other terms in the routing policy and no other routing policies are evaluated.
next term Skips to and evaluates the next term in the same routing policy. Any accept or reject action specified in the then statement is skipped.
This is the default action if no action is specified.
next policy Skips to and evaluates the next routing policy. Any accept or reject action specified in the then statement is skipped.
Service Activator 5.2.4 33

Manual Pre-configuration Juniper M-series Device Support Guide – Third Edition
The name of the prefix-list must be specified in a policy-statement. Both the prefix-list and the policy-statement must be pre-configured on the PE device. You apply a pre-configured prefix list filter to a site by entering the name of the policy-statement in the Prefix filters In or Out fields on the Site properties, EBGP Advanced page.
You define a prefix-list at the [edit routing-options] level:
prefix-list <name> {
<ip-addresses>;
}
You can list any number of ip-addresses.
You define a policy-statement which defines the prefix list filter and specifies the prefix-list at the [edit routing-options policy-options] level.
To define the policy-statement for outgoing (export) routes, use prefix-list name in the from statement. Use either accept or reject in the then actions statement to accept or reject prefixes:
policy-statement <policy-name> {
term <term-name> {
from {
<match-conditions>;prefix-list <name>;
}
to {
<match-conditions>;neighbor <address>;
}
then <actions>;accept;reject;
}}
To define the policy-statement for incoming (import) routes, use prefix-list name in the to statement. Use either accept or reject in the then actions statement to accept or reject prefixes:
policy-statement <policy-name> {
term <term-name> {
from {
34 Service Activator 5.2.4

Juniper M-series Device Support Guide – Third Edition Manual Pre-configuration
<match-conditions>;neighbor address;
}
to {
<match-conditions>;prefix-list <name.;
}
then actions;accept;reject;}
}
A policy-statement policy-name is added at the [edit routing-instances VRF-table-name protocols bgp group neighbor] level. For more information, see Allow AS in on page 62.
Pre-defined filtering policies for route redistribution You can specify a manually pre-configured policy statement to filter routes redistributed from the site’s VRF table into BGP and routes received from other sites via BGP. A different policy can be specified for the protocol used for PE-CE connectivity, connected routes and static routes. By applying a policy to redistributed routes you can eliminate the routing loops and convergence problems that can potentially result from route redistribution.
Users apply filters to a site by specifying the name of a policy-statement in the BGP Policy and/or ProtocolName Policy field on the Site’s Redist property page.
You configure a filter on the PE device in router configuration mode at the [edit routing-options policy-options] level:
policy-statement <forwarding-policy> {
term <one> {
from {
protocol <protocol-name>;
route-filter <destination-prefix> <match-type actions>;
}
then {
<actions>;
}
}
Service Activator 5.2.4 35

Manual Pre-configuration Juniper M-series Device Support Guide – Third Edition
term <x> {
…
}
}
where:
If the policy is applied to routes distributed into iBGP, Service Activator applies the policy statement to the export policy for the relevant VRF table. For more information, see Exporting routes between routing instances in overlapping VPNs - auto-export vs. RIB groups on page 55.
If the policy is applied to routes distributed into the protocol used for PE-CE connectivity, Service Activator applies the policy statement to the PE-CE export policy. For more information, see Specifying metrics for route redistribution on page 74.
MPLS tunneling CCCs
Preconfiguration for CCCs on Ethernet interfaces
For 802.1Q VLANs and/or VLAN-based CCCs ensure that vlan-tagging is enabled on physical interfaces and that each logical subinterface has a VLAN ID configured.
For physical Ethernet interfaces to be used in port-based CCCs, ensure that there is no vlan-tagging and only unit 0, or none of logical subinterfaces, are present.
For more information, refer to the JUNOS Internet Software MPLS Applications Configuration Guide.
Configuring RSVPThe command to configure RSVP is:
protocols {
rsvp {
interface {<interface-name> | all };
}
}
destination-prefix The IP route prefix to match.
match-type The type of match – see Match types on page 32.
actions The action to take if destination-prefix matches – see Actions on page 33.
36 Service Activator 5.2.4

Juniper M-series Device Support Guide – Third Edition Manual Pre-configuration
We recommend you enable RSVP on all core router interfaces except for those on the Autonomous System (AS) border.
Manually pre-configured BGP peering
PE routers in the same AS
iBGP peering must be manually pre-configured between PE routers that reside in the same AS.
For example:
protocols {
bgp {
group VPN-IBGP-Peers {
type internal;
local-as <global-asn>;
family inet-vpn {
unicast;
}
neighbor <peer-loopback-address> {
local-address <local-loopback-address>;
}
neighbor <peer-loopback-address> {
local-address <local-loopback-address>;
}
<more neighbours...>
}
}
}
RSVP must be manually configured on all routers.
Service Activator 5.2.4 37

Manual Pre-configuration Juniper M-series Device Support Guide – Third Edition
Inter-AS PE routers
You can use Service Activator to manage manually pre-configured multi-AS VPNs.
eBGP peering must be manually pre-configured between PE routers where each PE router resides in a different AS. The type is external, the update source must be explicitly set to the loopback address. The multihop option is likely required.
For example:
group VPN-EBGP-Peers {
type external;
family inet-vpn {
unicast;
}
local-as 2;
neighbor 1.1.1.1 {
multihop;
local-address 2.2.2.2;
peer-as 12345;
}
}
When managing multi-AS VPNs with Service Activator, the domain-level property Configure iBGP Peering must be de-selected in the user interface. For more information, see the Configuring VPN Services guide.
Service Activator will detect incompatibilities in the physical interface encapsulation pre-existing on the router when the device driver creates a new configuration for CCCs and/or l2circuits. When this occurs, an error is flagged in the user interface. You are then given the option to manually correct the interface encapsulation. In order to expedite the configuration process, ensure that proper interface encapsulations are provisioned as per the Junos documentation and this Guide.
38 Service Activator 5.2.4
Juniper M-series Device Support Guide – Third Edition Manual Pre-configuration
For MPLS tunneling CCCs, the nodes between the endpoints must have MPLS enabled manually. RSVP must be configured on all routers, including the LSP’s ingress and egress routers. For information on enabling MPLS, see Configure IP and MPLS on core interfaces on page 29.
A loopback interface must also be configured on the LSP’s ingress and egress devices to provide termination points for the CCC. For information on configuring the loopback interface, see Configure the loopback interface on page 29.Manual
Mandatory manual configuration for Layer 2 Martini VPNs
Before using Service Activator to set up Layer 2 Martini VPNs, some manual configuration of routers is required. Since Martini tunnels use MPLS label switched paths, much of the necessary setup is the same as that which is required to support MPLS VPNs.
Core routers on the path to the neighbor PE, and core interfaces must have the following manual configuration items:
MPLS support must be enabled on all appropriate interfaces
The command to enable MPLS is:
The device driver configures MPLS on the CCC’s ingress and egress routers. MPLS must be manually configured on all intervening routers.
In MPLS tunneling CCCs, the LSP is dynamic and packet routing may change if the network topology is changed. We therefore recommend that you configure MPLS and RSVP on all devices that may potentially be used in the LSP.
Service Activator will detect incompatibilities in the physical interface encapsulation pre-existing on the router when the device driver creates a new configuration for CCCs and/or l2circuits. When this occurs, an error is flagged in the user interface. You are then given the option to manually correct the interface encapsulation. In order to expedite the configuration process, ensure that proper interface encapsulations are provisioned as per the Junos documentation and this Guide.
Service Activator 5.2.4 39

Manual Pre-configuration Juniper M-series Device Support Guide – Third Edition
protocols {
mpls {
interface {<interface-name> | all };
}
}
OSPF (or another IGP) must be configured
protocols {
ospf {
traffic-engineering
area <address> {
interface <interface-id>
interface <loopback-id>
}
}
}
LDP must be configured. On PE devices LSPs must be configured between the loopback addresses of all PE and P devices.
protocols {
ldp {
interface <interface-id>
interface <loopback-id>
}
}
Manual preconfiguration for Martini circuits on Ethernet interfaces
For 802.1Q VLANs and/or VLAN-based l2circuits ensure that vlan-tagging is enabled on physical interfaces and that each logical subinterface has a VLAN ID configured.
For physical Ethernet interfaces to be used in port-based Martini circuits, ensure that there is no vlan-tagging and only unit 0, or none of logical subinterfaces, are present.
For more information, refer to the JUNOS Internet Software MPLS Applications Configuration Guide.
40 Service Activator 5.2.4

Juniper M-series Device Support Guide – Third Edition Configuration of MPLS VPNs
Chapter 5
Configuration of MPLS VPNs
This chapter describes how Service Activator configures MPLS VPNs on Juniper M-series devices. It includes the following:
A summary of the pre-requisites for configuring MPLS VPNs
Routing tables maintained by JUNOS with detailed information on the VRF table.
Configuring VRF tables and route targets
Configuring PE-PE peering
Configuring PE-CE routing using eBGP, OSPF, RIP and static routing
Service Activator 5.2.4 41

Configuration of MPLS VPNs Juniper M-series Device Support Guide – Third Edition
Pre-requisitesThe Juniper M-series Device Driver configures the PE routers that define the membership of a VPN. The information set up on each PE router defines the VPNs to which connected sites belong and the routes to and from these sites that are to be distributed throughout the VPN.
Service Activator does not configure the CE routers or the provider core routers.
Before setting up VPNs you should ensure the following:
All routers are appropriately configured
Domain-level parameters are appropriately set
All routers and their interfaces within the VPN are correctly assigned roles
Pre-configuration of routersSome pre-configuration of PE and P routers is required. For example, MPLS must be enabled. For full details of the pre-configuration required, see Manual Pre-configuration on page 25.
Domain-level parametersA number of BGP parameters may be set up at domain level on the VPN BGP, ASN and VPN MPLS property pages of the Domain dialog box:
You can specify whether you want Service Activator to set up iBGP peering on the PE devices. See Co-existence with previously configured iBGP on page 58.
The default is for Service Activator not to configure iBGP peering. If you leave this setting off, iBGP peering must already be configured correctly on your devices.
If Route Reflectors are used, iBGP peering must be deselected.
If Service Activator is to manage multi-AS VPNs, iBGP and eBGP peering must be configured on devices and Service Activator’s configure iBGP peering capability must remain deselected. See Manually pre-configured BGP peering on page 37.
42 Service Activator 5.2.4

Juniper M-series Device Support Guide – Third Edition Configuration of MPLS VPNs
You need to set up the ASN for the domain (set on the ASN property page of the Domain dialog box).
You can enable Allow AS in which allows PE devices to re-advertise route prefixes containing one or more instances of the same ASN in the AS_PATH attribute. You specify the maximum number of instances allowed for an incoming prefix to be permitted by the PE device. The PE device denies incoming prefixes having more than the number of instances specified. See Allow AS in on page 62.
You can specify whether a Global ASN applies to sites within VPNs, or whether the ASN is Set at site. If a global ASN applies, you can also enable AS Override which allows PE devices receiving route prefixes from the core, whose AS_PATH attributes have ASNs matching the ASN of their neighboring CEs, to substitute those ASN instances with the ASN of the service provider network. Prefixes with the substituted ASNs are then re-advertised to neighboring CEs. This is enabled by default. For more information, see AS override on page 63.
You can enable load-balancing between eBGP peers by setting a value for Maximum Paths. This controls the number of alternative routes to a given prefix that are maintained in a device’s routing table. By default, this option is disabled and no alternatives are held. To enable load-balancing, you specify the number of routes that are maintained. The global setting can be overridden by a site-specific value on the Site dialog box. For more information, see eBGP load sharing on page 67.
You can specify that the identity of iBGP peers and the integrity of data exchanged during iBGP sessions is to be verified using MD5 Authentication. See Configuring MD5 authentication on page 58.
For full information, see the Configuring VPN Services guide.
If there is no ASN already configured on the device, Service Activator configures the device with the ASN specified in the user interface. If an ASN is already configured on the device, Service Activator ignores the ASN specified in the user interface and uses the one found in the configuration instead. This enables Service Activator to support multi-AS VPNs.
Note that the Send Communities and the Loopback ID options (selected on the VPN BGP property page of the Domain dialog box) are not valid on Juniper M-series devices. If any of these values are set, they are ignored.
Service Activator 5.2.4 43

Configuration of MPLS VPNs Juniper M-series Device Support Guide – Third Edition
Discovery and role assignmentIn an MPLS domain, the core provider network is assumed to use public addresses. All CE routers are assumed to use private addresses. An IP address or DNS name must be specified in order to discover all devices in the domain.
All devices within the network must be assigned the correct system-defined roles (that is, PE routers must be classified as Gateway devices, P routers as Core devices and CE routers as Access devices). Interfaces to be configured must also be assigned the correct roles. You can assign user-defined roles as well as the system-defined roles. The recommended way of assigning roles is by means of role assignment rules, which automatically assign roles during device discovery.
For full information on role assignment rules, see the Network Discovery and Basic Setup guide.
Role assignment rules do not function correctly for gigabitEthernet interfaces on Juniper devices. These interfaces are discovered with the media type ethernet-csmacd(6) rather than gigabitEthernet(117).
A workaround is to use the media type ethernet-csmacd(6) when creating role assignment rules for gigabitEthernet interfaces. Note that this impacts the media type granularity of the role assignment rules.
44 Service Activator 5.2.4

Juniper M-series Device Support Guide – Third Edition Configuration of MPLS VPNs
Routing tables and route targetsJuniper devices maintain a number of routing tables that relate to VPN configuration:
bgp.l3vpn.0 – stores VPN-IPv4 unicast routes received from other PE routers via iBGP. This is where a route received from another PE router is initially placed, and resolved using the inet.3 routing table.
routing-instance.inet.0 – the VRF table. Holds routing information for one or more access interfaces associated with a VPN (see VRF tables below).
inet.3 – stores MPLS routes learned from LDP and RSVP signaling for VPN traffic. Used by the PE device to resolve routes received from PE peers in VPN-IPv4 format. For VPN routes to be resolved properly, this table must contain routes to all the PE routers in the VPN.
inet.0 – global routing table. Stores IPv4 routes learned by BGP sessions between peer devices.
mpls.0 – MPLS path routing table, maintained by MPLS. The table contains a list of the next label-switched router in each LSP. Used on transit routers to switch packets to the next router along an LSP.
VRF tablesFor each interface that participates in a VPN, the PE device stores associated VPN routing information in a VRF table. The table stores the following routes:
All unicast IPv4 routes received from directly-connected CE devices
All explicitly configured static routes
Routes learnt from PE peers that match the VRF table’s import policy
Every VRF table has an import and an export policy associated with it that specifies which routes are imported into and exported from the table:
Routes learned via iBGP from other PE peers are imported into the VRF table (from the bgp.l3vpn.0 table) if the route matches the VRF import policy.
Routes learned from directly-connected CE devices are stored in the VRF table and exported into BGP for distribution to other PE devices if they pass the VRF export policy. On export, the PE device tags a route with one or more route targets. For information on route targets, see VPN topology and route targets on page 49.
You also have the option of applying a user-defined export map to the export policy configured by Service Activator. See Previously defined export maps on page 56.
Service Activator 5.2.4 45

Configuration of MPLS VPNs Juniper M-series Device Support Guide – Third Edition
The VRF table is defined at the [edit routing-instances] level.
<vrf-table-name> {
instance-type vrf;
interface <logical-interface-name>;
route-distinguisher <RD-number>;
vrf-import <import-policy>;
vrf-export <export-policy>;
protocols {
<protocol-configuration>
}
}
where:
By default, Service Activator generates VRF table names of the form Orch_RD-number. However, you can define specific names for VRF tables on selected interfaces if you do not want to use the system-calculated ones. You must ensure that the name you enter does not match any user-defined VRF tables that may exist on the device if you want those VRF tables to be preserved. (See Co-existence with previously configured iBGP on page 58).
If a user-defined VRF table name begins with a digit, Service Activator prepends a ‘_’ character to the name.
vrf-table-name An identifier for the VRF table.
logical-interface-name Name of the logical interface.
RD-number Route distinguisher.
import-policy Name of the import policy to be applied to routes received from PE peers via iBGP.
export-policy Name of the export policy to be applied to routes exported into BGP.
protocol-configuration Protocol configuration details – RIP, OSPF or eBGP.
If static routes are selected for PE-CE connectivity or if Service Activator has configured rib groups, an additional routing-options clause is included within the VRF definition. For more information, see PE-CE communication using static routes on page 71 and Exporting routes between routing instances in overlapping VPNs - auto-export vs. RIB groups on page 55.
46 Service Activator 5.2.4

Juniper M-series Device Support Guide – Third Edition Configuration of MPLS VPNs
By default, Service Activator automatically generates a specific VRF table name for each interface that participates in a VPN. However, if you wish to apply the same RD number to all interfaces that participate in the VPN, the same VRF name will also apply (auto-generated or user-defined). See RD number per VPN on page 48.
Support for vrf-table-label keyword
Service Activator now supports the vrf-table-label configuration keyword on Juniper equipment. On an MPLS VPN, this feature causes the inner (VPN) label of a packet to be popped off as the packet arrives at a VRF so that it can be processed based on the contents of its IP header. Without this feature, incoming packets are mapped directly onto an outgoing (CE-facing) interface based on the inner VPN label.
Support for the Juniper vrf-table-label setting is configured in two places - for the VPN itself (on the VPN dialog box, VRF property page) and for the site (on the Site dialog box, on the VRF property page).
On the VPN dialog, VRF property page:
To enable vrf-table-label support, check the VRF label field.
To clear vrf-table-label support, clear the VRF label field.
On the Site dialog box, VRF property page:
To enable vrf-table-label support, check the VRF label field.
To clear vrf-table-label support, clear the VRF label field.
Route distinguishersCustomer networks typically use private addresses. Addressing overlaps between customers may occur when they connect to the public Internet or to the provider’s NOC. To avoid this problem, iBGP prefixes a site identifier, known as a route distinguisher or RD number, to each route associated with a particular site. This ensures that VPN routes are unique within the Internet.
Do not modify VRF parameters of an unmanaged device as this is not supported by Service Activator.
Service Activator may get out of sync with a device if VRF parameters are changed while a device is unmanaged, and the device is then managed. In this case, the device may not have correct VRF configuration.
If this happens, manually remove the incorrect VRF configuration from the device.
Service Activator 5.2.4 47

Configuration of MPLS VPNs Juniper M-series Device Support Guide – Third Edition
The new route is part of the VPN-IPv4 address family – a BGP address family added as an extension to the BGP protocol.
The RD number consists of two integers separated by a colon. It can be in either of the following formats:
32-bit IP address:16-bit number
16-bit ASN number:32-bit number
Service Activator normally generates RD numbers automatically, using the ASN for the high-order-no and the unique system ID of the Site object for the low-order-no. For example:
1:3125
However, you can override these defaults and specify your own RD numbers if you wish.
The following command is configured at the [edit routing-instances <vrf-table-name>] level.
route-distinguisher <high-order>;<low-order>.
Note that, the interface description of a VPN Site, entered in the Site Properties - Addressing dialog, is enabled as the interface description only if the -OverwriteInterfaceDescription parameter is present on the JDD command line. For more information on this parameter please refer to Command-line parameters on page 10.
RD number per VPNBy default, Service Activator automatically generates a site-specific VRF table name and RD number for each site that participates in a VPN.
However, you can override the Service Activator default by specifying at the VPN level that the same VRF table name and RD number is applied to all sites that participate in the VPN. You can choose whether to use Service Activator-generated values or specify your own VRF table name and/or RD number.
On the user interface, these settings are is specified on the VRF page of the VPN property dialog box.
Service Activator checks that system-generated RD numbers are unique but no check for uniqueness is made on user-defined RD numbers.
48 Service Activator 5.2.4

Juniper M-series Device Support Guide – Third Edition Configuration of MPLS VPNs
In addition, you can override the name generation rules so that if a site is part of only one VPN, the VRF table name and RD are derived from the VPN. If a site is part of multiple VPNs, the VRF table name and RD are derived from the site.
If a single RD number/VRF table name is set per VPN, the settings for VRF re-use/reduction must also be set at VPN level. See VRF re-use/reduction on page 55.
VPN topology and route targetsThe connectivity of the VPN can be one of the following:
Mesh – all sites have connectivity to all other sites
Hub and Spoke – one or more hub sites has access to all other sites; spoke sites can access the hub only
Management – works in the same way as hub and spoke, but is used when setting up QoS to ensure connectivity to CE devices
When setting up a VPN, you have to set its connectivity, and for a hub and spoke or management VPN, select the hub site(s).
To create a fully-meshed VPN, each site’s VRF table imports and exports the same routes. In a hub and spoke or management VPN the VRF table at the hub site imports routes from all other hub sites and all spoke sites, and exports routes to other hub sites and to the spoke sites. VRF tables at spoke sites export routes only to the hub site and import routes only from the hub site.
A route target (RT) identifies a set of sites within a VPN to which a PE device distributes routes.
Route targets are used to create the VPN topology. Each VPN must have a unique route target number. The RT is implemented as a BGP extended community. A BGP community groups a set of destinations that share a common property – in this case, a set of routes that are to be distributed to a set of CE sites. The RT is added to the route by the ingress PE device and used by the egress PE device to determine whether a received route is destined for a VPN that the PE services.
Service Activator creates one or more BGP communities per VPN, depending on the VPN topology:
If the VPN is fully-meshed, Service Activator creates one community – every site receives routing information from all other sites
Using a single RD number for all sites in a VPN is suitable only where a site belongs to one intranet VPN. If the site may become a member of an extranet VPN in the future, this method is not recommended.
Service Activator 5.2.4 49

Configuration of MPLS VPNs Juniper M-series Device Support Guide – Third Edition
If the VPN is a hub and spoke or management VPN, Service Activator creates two communities
In a hub and spoke topology, there are effectively two ‘sets’ of devices – one set that consists of the hub site or sites and another set consisting of the spoke sites. By default, routes from the spoke sites are only distributed to the hub site(s), routes from the hub site(s) are distributed to all spoke sites and any other hub sites.
The RT number consists of two integers separated by a colon. It can be in one of two alternative formats:
32-bit IP address:16-bit number
16-bit ASN number:32-bit number
Service Activator normally generates RT numbers automatically, using the ASN for the high order number and the unique system ID of the VPN for the low order number. For example:
20:4926
In a hub and spoke VPN topology, Service Activator generates two RT numbers – one for the hub site(s), generated as indicated above, and one for all spoke sites, generated by incrementing the hub low order number by 1.
If you wish, you can specify your own RT numbers for hub, spoke or fully-meshed sites within a VPN if you do not want to use the system-generated default values. You can easily reassign RT numbers to sites within a VPN, if for example, it has been imported from a different system or it is to be exported to a different system.
You can specify any number of RT values per VPN and specify whether a value is used for VRF import, VRF export, or neither, for hub, spoke and fully-meshed behaviors. On the user interface, these settings are on the MPLS property page of the VPN dialog box.
The community is configured at the [edit groups orchestream policy-options] level.
community <community-name> members target:<route-target-value>;
Service Activator checks that system-generated RT numbers are unique but no check for uniqueness is made on user-defined RT numbers.
50 Service Activator 5.2.4

Juniper M-series Device Support Guide – Third Edition Configuration of MPLS VPNs
where:
By default, in a hub and spoke VPN, hub sites are members of community _0 and _1, and spoke sites are members of community _1:
community VPN-name_0 members target:<route-target-value>
community VPN-name_1 members target:<route-target-value>
For each new user-defined route target, Service Activator allocates a community value that is incremented by 1, for example, if another route target is added to a VPN with the above route targets, it will be allocated to community _2.
A community is referenced within the policy-statement for each VRF table’s import and export policy.
VRF import and export policiesThe VRF import and export policies define which routes are imported into and exported from the VRF table.
For information on the PE-CE export policy, see Route redistribution on page 72.
Export policy
The VRF export policy specifies whether a route received from a directly-connected CE device is advertised by the PE device to other peer PE devices. There is one export policy per VRF table.
Routes received by the PE device from a directly-connected CE device are placed in the VRF table. The device checks the received route against the VRF export policy for that interface. The policy consists of three terms:
The first term specifies the community to be added to the route on export
The second term specifies from which protocol routes must be received for the policy to be applied
If the VRF table belongs to an interface whose VPN membership overlaps with that of another interface on the PE device, an extra interface clause is defined in
community-name An identifier for the community.
route-target-value Identifies the route target, in the format:
AS-no | IPAddress:ID
where AS-no is the domain AS number, IPAddress is an IP address and ID is an identifier based on the site’s object ID number within Service Activator.
Service Activator 5.2.4 51

Configuration of MPLS VPNs Juniper M-series Device Support Guide – Third Edition
the term. For more information, see Exporting routes between routing instances in overlapping VPNs - auto-export vs. RIB groups on page 55.
The final term rejects any routes that do not meet the protocol criteria
If a route passes the VRF export policy criteria:
A route target is added to the route – several route targets may be added if an interface is associated with multiple VPNs
The route is converted to VPN-IPv4 format
The route is advertised through iBGP to peer PE devices within the VPN
By default, the VRF export policy for hub sites specifies community_0, and for spoke sites, community_1.
Service Activator names the VRF export policy in the following format:
Orch_RD-number-export-to-PEs
where RD-number is the route distinguisher associated with a site. For information about route distinguishers, see Exporting routes between routing instances in overlapping VPNs - auto-export vs. RIB groups on page 55.
If users have specified metrics for route redistribution from the PE to CE protocol into BGP, a policy statement is configured and referenced in the VRF export policy. For more information, see Exporting routes between routing instances in overlapping VPNs - auto-export vs. RIB groups on page 55. It is also possible to manually pre-configure a policy statement to apply to redistributed routes. For more information, see Pre-defined filtering policies for route redistribution on page 35.
The VRF export policy is applied to a VRF by the vrf-export statement. For information, see VRF tables on page 45.
The VRF export policy is configured at the [edit groups orchestream policy-options] level:
policy-statement <vrf-export-policy-name> {
term add_communities {
then {
community add <export-community-name>;
}
}
term export {
from {
protocol [ protocol-list ];
}
52 Service Activator 5.2.4

Juniper M-series Device Support Guide – Third Edition Configuration of MPLS VPNs
then accept;
}
term reject-others {
then reject;
}
}
where:
If an interface is associated with multiple VPNs, a community add statement is defined for each VPN. For example:
term add_communities {
then {
community add France;
community add Europe;
}
}
where France and Europe are VPN names.
Import policy
The import policy defines whether a route advertised by a peer PE device is imported into a VRF table. There is one VRF import policy per VRF table.
The policy consists of two terms:
The first term accepts routes received via iBGP from other PE devices that are tagged with the specified route targets
The second term rejects any routes that are not accepted by the first term
If a route passes the import criteria, it is added to the VRF table.
By default, the VRF import policy for hub sites specifies community_0 community_1, and for spoke sites, community_1.
vrf-export-policy-name Identifier for the VRF export policy definition:
Orch_RD-number-export-to-PEs
export-community-name The community name (route target) to be added to exported routes.
protocol-list List of protocols used for PE to CE connectivity within a VPN.
Service Activator 5.2.4 53

Configuration of MPLS VPNs Juniper M-series Device Support Guide – Third Edition
Service Activator names the VRF import policy in the following format:
Orch_RD-number-import-from-PEs
where RD-number is the route distinguisher associated with a site. For information about route distinguishers, see Exporting routes between routing instances in overlapping VPNs - auto-export vs. RIB groups on page 55.
The VRF import policy is referenced at the [edit routing-instances vrf-table-name protocols] level and configured at the [edit groups orchestream policy-options] level:
policy-statement <vrf-import-policy-name> {
term import {
from {
protocol bgp;
community [ <community-list> ];
}
then accept;
}
term reject-others {
then reject;
}
}
where:
vrf-import-policy-name Identifier for the VRF import policy definition:
Orch_RD-no-import-from-PEs
community-list One or more communities, depending on how many VPNs the interface is associated with.
54 Service Activator 5.2.4

Juniper M-series Device Support Guide – Third Edition Configuration of MPLS VPNs
Exporting routes between routing instances in overlapping VPNs - auto-export vs. RIB groups
Starting with Service Activator version 4.2, the JUNOS auto-export command is used by default to implement policy-based export of routes between routing instances in overlapping MPLS VPNs. This greatly simplifies the device configuration required to set up overlapping VPNs.
If you want to override the use of the auto-export command and continue to use RIB groups, use the -UseRIBGroup command line parameter. See Exporting routes between routing instances in overlapping MPLS VPNs on page 12.
The auto-export command comes into play when:
Two or more PE interfaces are associated with some, but not all, of the same VPNs
Two or more PE interfaces are associated with the same VPNs, but at least one interface has been given ownership of its VRF table to prevent VRF re-use optimization being performed by Service Activator. For more information, see VRF tables on page 45 and VRF re-use/reduction on page 55.
In these instances, routing information is not exchanged by iBGP, as the exchange is between VRF tables located on the same PE device. Auto-export enables routing information to be exchanged between VRF tables that are located on the same PE device.
For more information, see PE-CE communication using eBGP on page 60.
VRF re-use/reductionA VRF table is set up on the device for each PE interface that is a member of a VPN. However, by default, if multiple VRF tables contain exactly the same routes (for example, if one site connects to two interfaces, or there are two sites that are members of the same VPN) Service Activator normally reduces them to just one, in order to minimize resource usage. This is known as VRF re-use.
In some cases automatic VRF re-use may not be required. For example, you may want to provision dual links to customer sites in order to implement load balancing, requiring a separate VRF table for each connecting interface, or to reduce the impact of future re-configuration. In this case you can override VRF re-use by specifying that particular interfaces are always to have their own VRF table, and by specifying that other VRF tables are allowed to be merged with this VRF table by selecting the Shareable option.
On the user interface, the Force Install and Shareable options can be selected per interface on the VRF property page of the Site dialog box.
Service Activator 5.2.4 55

Configuration of MPLS VPNs Juniper M-series Device Support Guide – Third Edition
Note that if you are setting up a single VRF table name/RD number per VPN, settings for VRF re-use are made at the VPN level. In this case it is not possible to select Force Install. See RD number per VPN on page 48.
Previously defined export mapsThe Export map name option allows you to specify the name of a manually pre-configured export policy to be applied to routes exported to PE peers. The policy is associated with the VRF table for the selected interface. The user-defined export policy is referenced in the VRF table’s export policy. This allows greater flexibility for determining which routes are exported. You can assign the same user-defined export policy to several VRFs.
For information on setting up an export map, see Pre-defined export maps on page 30.
Specifying a user-defined VRF table name affects how Service Activator performs VRF reduction. Where system-defined VRF table names are used, VRF reduction is based on the site’s RD number and a site with a lower RD number takes precedence over a site with a higher RD number. Where user-defined VRF table names are used, Service Activator performs VRF reduction based on table names.
56 Service Activator 5.2.4

Juniper M-series Device Support Guide – Third Edition Configuration of MPLS VPNs
Configuring PE-PE peeringIn order to exchange information throughout the VPN, each PE router needs to run an iBGP session with each other PE router connected to a site within the same VPN.
By default, this configuration is set up automatically.
Configuring iBGPiBGP is the protocol used for communication of VPN routes between PE devices in an MPLS VPN. In order for devices to exchange routing information, an iBGP session must be configured between the PE devices that comprise the VPN.
If the domain-level parameter Configure IBGP Peering is selected on the VPN BGP property page of the Domain dialog box, Service Activator configures adjacencies between PE devices depending on the VPN’s topology:
For fully-meshed VPNs, Service Activator creates a full mesh of iBGP adjacencies
For hub and spoke or management VPNs, Service Activator configures iBGP peering between each spoke and the hub site(s)
iBGP peering is defined at the [edit protocols] level. Service Activator creates a group named IBGP-PE-Peers which contains:
The type internal directive – specifies that all peers are in an internal BGP group, that is, they are in the same Autonomous System (AS)
The local loopback address
A statement to enable Multiprotocol BGP (MBGP)
The local AS number
A neighbor statement for each of the PE devices that comprise the VPN
Each neighbor statement specifies the loopback address of the neighbor router, the loopback address of the local router and the family inet and family inet-vpn address families.
The following configuration is added to each PE device:
bgp {
group IBGP-PE-Peers {
type internal;
local-address <local-loopback-address>;
family inet-vpn {
unicast;
}
Service Activator 5.2.4 57

Configuration of MPLS VPNs Juniper M-series Device Support Guide – Third Edition
local-as <global-asn>;
neighbor <peer-loopback-address>;
neighbor <peer-loopback-address>;
…
}
}
where:
If PE-PE MD5 Authentication is enabled, the key is also specified within the neighbor statement. See Configuring MD5 authentication on page 58.
Co-existence with previously configured iBGPIf iBGP peering is already installed on PE routers, for example, if Route Reflectors are used, the existing configuration can be preserved. On the Service Activator user interface, this is controlled by deselecting the Configure IBGP Peering option at the domain level.
Configuring MD5 authenticationThe identity of iBGP peers and the integrity of data exchanged during iBGP sessions is verified using MD5 authentication, a digital signature algorithm. Users specify a key of up to 255 characters to generate a checksum of the iBGP data that is to be sent from a PE device to its peer. The iBGP data and its checksum are then sent to the peer device using TCP. The recipient device uses MD5 and the same key used by the sender to generate a checksum of the received iBGP data. If both checksums match, the identity of the sender and the integrity of the received iBGP data is verified.
On the Service Activator user interface, this is controlled by the domain-level parameter MD5 Authentication. If this option is selected, Service Activator configures an MD5 authentication key on each iBGP peer.
global-asn The local Autonomous System number.
peer-loopback-address Loopback address of a peer neighbor.
local-loopback-address IP address of the local end of a BGP session. This address is used to accept incoming connections to the peer and to establish connections to the remote peer.
Note that if Configure iBGP Peering is deselected, the system will leave all iBGP configuration on the device untouched. Service Activator will not configure any iBGP commands, so you should ensure all configuration is correct.
58 Service Activator 5.2.4

Juniper M-series Device Support Guide – Third Edition Configuration of MPLS VPNs
Service Activator configures the MD5 authentication key at the [edit protocols bgp group group-name neighbor address] level:
authentication-key <key>;
where key is the authentication password. The password can be up to 255 characters and can comprise any ASCII strings.
Configuring MPLS on interfaces (access only)Service Activator configures MPLS on logical interfaces associated with a VPN.
MPLS is enabled on an interface at the [edit interfaces] level and the [edit protocols] level.
The following configuration is added to the PE device:
interfaces {
<vpn-access-interface> {
unit <unit-number> {
family mpls;
}
}
}
protocols {
mpls {
interface <logical-interface-name>;
}
}
where:
Interface IP addressIf the IP address specified for an interface through Service Activator differs from the currently-configured values on the device, Service Activator changes the address within the main configuration. Note that the change is commented:
vpn-access-interface The name of the logical interface’s parent interface
unit-number The number of the logical interface
logical-interface-name The name of the logical interface
Service Activator 5.2.4 59

Configuration of MPLS VPNs Juniper M-series Device Support Guide – Third Edition
interfaces {
<vpn-access-interface> {
unit <unit-number> {
family inet {
/* Orchestream has changed this address */
address <public-or-private-ip-address>;
}
}
}
}
This change is made in the main configuration because any interface addresses defined in the orchestream group are merged with those in the main configuration.
PE-CE communication using eBGPIn order to exchange information to and from customer sites in the VPN, each PE router also needs to communicate with each of its external neighbors – the CE routers to which it is connected.
The effect is to advertise network reachability information between the CE and the PE, which in turn converts IPv4 addresses to VPN-IPv4 addresses for traffic passing from the CE to the PE and vice versa.
The details here explain the configuration of the PE routers using eBGP. The corresponding configuration of the CE routers is not performed by Service Activator. See CE routers on page 30.
If eBGP is used, you need to specify:
The ASN of the site
The IP address of the corresponding interface on the CE router
You can optionally specify:
The number of times the same ASN can appear in an incoming prefix for it to be accepted by the site PE or all PEs in the domain
As well as eBGP, Service Activator supports RIP and OSPF routing protocols. Static routes can also be defined (either alone or in conjunction with another protocol).
60 Service Activator 5.2.4

Juniper M-series Device Support Guide – Third Edition Configuration of MPLS VPNs
AS Override for the site
Authentication for a PE-CE session
Basic Juniper commandseBGP is configured at the [edit routing-instances vrf-table-name protocols] level.
bgp {
group EBGP-to-CEs {
type external;
export <CE-export-policy>;
local-as <local-AS-number>;
neighbor <CE-address> {
description "EBGP to site: site-name";
local-address <VPN-interface-address>;
peer-as <AS-no>;
}
}
where:
The following sections describe options which can be defined within the neighbor definition.
EBGP-to-CEsIf eBGP is selected as the routing protocol, Service Activator creates a BGP group named EBGP-to-CEs which contains:
CE-export-policy The name of the export policy to be applied to routes being exported into BGP.
local-AS-number The local AS number.
CE-address The IP address of a CE peer.
site-name The name of the site, as defined in the user interface.
VPN-interface-address
Address of the access interface on the gateway device. This address is used to accept incoming connections to the PE device and to establish connections to the CE device.
AS-no The AS number of the site.
Service Activator 5.2.4 61

Configuration of MPLS VPNs Juniper M-series Device Support Guide – Third Edition
The type external directive – specifies that all peers are in an external BGP group, that is, they are in different Autonomous Systems
The PE-CE export policy
The local AS number
A neighbor statement for each of the CE devices with which the PE device communicates. Each neighbor statement specifies:
— The address of the local end of the BGP session
— The peer system’s AS number
Allow AS inSome topologies require the core network AS number to occur several times in the AS_PATH attribute of a route prefix advertised to the PE device. For example, if two CE devices are connected to each other via BGP, and each belongs to a different VPN, routes advertised by the PE to one of the CEs are also advertised to its CE neighbor who advertises the routes back to the core network. This means that the PE receives routes that have its AS number. Normally, this indicates that a routing loop has occurred, and the PE denies these routes. However, to allow VPN configurations to work, the PEs have to accept these routes.
The maximum number of times the same ASN is allowed in an incoming route for it to be accepted by the PE device is enabled using the loops option when configuring the ASN at the [edit routing-instances <vrf-table-name> routing-options] level.
autonomous-system <AS-no> loops <loops-no>;
The value of loops-no can be from 1 to 10 inclusive; the default is 0 (unconfigured).
The loops option applies to the entire VRF table and therefore to all the neighbor PE devices that the VRF connects to. This may cause undesirable behavior if VRF tables using iBGP which have different loop values are allowed to merge. A condition has been added to Service Activator’s VRF table reduction logic to prevent this.
Because of a JUNOS restriction, when setting the AS number, the same value must be used for the loops parameter of all sites in the VPN rather than independently per BGP neighbor. Ensure that the same value is set in Service Activator, or set values globally per device outside Service Activator. On the user interface, this is set on the Allow AS in: Use parameter on the EBGP page of the Site dialog box.
62 Service Activator 5.2.4

Juniper M-series Device Support Guide – Third Edition Configuration of MPLS VPNs
AS overrideYou can specify that the ASN of a provider is used to override the ASN of a site. When AS override is turned on, a PE device that receives route prefixes whose AS_PATH attributes have one or more ASNs matching the ASN of its neighboring CE devices, substitute those ASN instances with the ASN of the service provider network. Prefixes with the substituted ASNs are then re-advertised to neighboring CE devices. The PE device also adds its ASN to routes before exporting them to the CE device.
This allows CE devices to accept routes that have been re-advertised by devices having the same ASN, and which would otherwise be rejected. Normally, a CE device rejects routes whose AS_PATH attribute contains ASNs matching its own ASN, to prevent routing loops.
Within Service Activator, AS override can be specified at domain level, to apply to all sites, or set up for individual sites.
If this option is selected, the following command is configured:
as-override;
Local preferenceWhere multiple PE interfaces are associated with a site, the local preference for an interface can be set. The preference value may be between 1-4294967295, and the higher the value the higher the priority. The default is Router Default (100). Local preference is configured by means of a route map, which can include other conditions.
In the Service Activator user interface, the local preferences parameter is set on the EBGP page of the Site dialog box.
If this option is selected, the following command is configured
local-preference value;
where value is in the range 0 to 4 294 967 295.
Because of a JUNOS restriction, only the values 0 and 1 are accepted for Allow AS in. On the Juniper device, Allow AS in configures the autonomous-system loop attribute at the routing-instance routing-options CLI level.
Service Activator 5.2.4 63

Configuration of MPLS VPNs Juniper M-series Device Support Guide – Third Edition
AuthenticationThe identity of eBGP peers and the integrity of data exchanged during eBGP sessions can be verified using Authentication. If this option is selected, the following command is configured:
authentication-key "<private-key>";
Route prefix filtersYou can configure a route list filter which filters incoming (CE-PE) and or outgoing (PE-CE) routes. The route list filter must be manually configured on the device as a policy-statement. Alternatively, you can specify an import and/or an export policy-statement which specifies a prefix list for filtering either incoming (CE-PE) or outgoing (PE-CE) routes. The prefix list must be manually configured on the device. The policy-statement and the specified prefix list must both exist on the device before the policy-statement can be implemented by Service Activator.
You apply a route list filter or a prefix list filter to a site by entering the name of its policy-statement in the Prefix filters In or Out fields on the Site properties, EBGP Advanced page:
import policy-statement <policy-name>;
export policy-statement <policy-name>;
where policy-statement policy-name is the policy-statement defining the routing policy using a predefined prefix-list.
If you add the policy statement to the device after it is provisioned by Service Activator, you must either manually add the appropriate import and/or export policy statement(s) to the relevant group in the Service Activator configuration, or allow Service Activator to re-propagate the configuration to the device.
For information about configuring a route list filter, see Configuring a route list filter on page 31. For more information about configuring a prefix list filter, see Configuring a prefix list filter on page 33.
Prefix limitYou can specify the maximum number of eBGP IP address prefixes that the PE device is allowed to receive from a CE device. You can also allow a warning message to be generated in the device log either when the prefix limit is reached or when a percentage of the prefix limit value is reached. The maximum value you can specify is 4 294 967 296:
family inet {
unicast {
prefix-limit {
64 Service Activator 5.2.4

Juniper M-series Device Support Guide – Third Edition Configuration of MPLS VPNs
maximum <prefix-limit-value>;
teardown <percentage-value>;
where:
If a warning only is specified, the teardown percentage-value line does not appear.
Site of originIf a site is multi-homed – that is, there are multiple links to a site – it is possible for routing loops to occur (i.e. routes learned from a site are advertised back to that site).
To prevent routing loops from occurring, when using eBGP, Service Activator automatically configures Site of Origin (SOO):
An additional BGP extended community is applied to routes learned from the CE device and imported into the relevant interface’s VRF table
An additional import policy is defined to tag routes with the BGP extended community
An additional export policy is defined that rejects routes tagged with the BGP extended community. This prevents the route being advertised back to the CE device from which it originated.
AS override is configured by default so that the site’s AS number is substituted with the AS number of the service provider. This ensures that routes are not rejected by sites that share the same AS number. However, AS override can be disabled if required. For more information, see AS override on page 63.
The Site of Origin is defined as follows:
origin:SOO;
where SOO is an extended community comprising the site’s ASN and internal object ID number.
Service Activator uses the following naming convention for the import policy:
Orch-site-name-add-SOO
Service Activator uses the following naming convention for the export policy:
Orch-site-name-deny-SOO
maximum Specifies the maximum allowed number of prefixes (prefix-limit-value)
teardown Specifies a device log warning message is generated at a percentage of the prefix-limit-value.
Service Activator 5.2.4 65

Configuration of MPLS VPNs Juniper M-series Device Support Guide – Third Edition
The following configuration is added at the [edit groups orchestream policy-options] level:
policy-statement <SOO-import-policy> {
then {
community add <SOO-community-name>;
}
policy-statement <SOO-export-policy> {
from community <SOO-community-name>;
then reject;
}
community <SOO-community-name> members <SOO-community-value>;
}
where:
The import and export policies are referenced within the eBGP protocol configuration, at the [edit routing-instances vrf-table-name protocols bgp group neighbor] level:
import <SOO-import-policy>;
export [ <SOO-export-policy> <CE-export-policy> ];
Note that the CE export policy is repeated at this level as the export statement defined at the neighbor level overrides the group level export statement.
AS override is configured at the [edit routing-instances <vrf-table-name> protocols bgp group neighbor] level for relevant sites:
as-override;
SOO-import-policy The name of the routing policy that is to be applied to routes being into the interface’s VRF routing table from BGP.
SOO-community-name The community name:
Orch-Site-name-SOO
SOO-export-policy The name of the routing policy that is to be applied to routes being exported from the interface’s VRF routing table.
SOO-community-value The community definition.
66 Service Activator 5.2.4

Juniper M-series Device Support Guide – Third Edition Configuration of MPLS VPNs
eBGP load sharingYou can enable load-balancing between eBGP peers. This allows BGP to select more than one eBGP path to a given prefix over which traffic can be shared. Routes for each path are maintained in a PE device’s routing table. By default, this option is disabled and no alternative routes are held.
In the Service Activator user interface, the eBGP maximum paths parameter is set at global level on the VPN BGP page of the Domain dialog box and overridden for specific devices by a setting on the EBGP Adv. page of the Site dialog box.
Note that JUNOS does not apply the Maximum Paths value, it only enables multiple paths to be configured and maintained if a value greater than 1 is specified.
Load-balancing is configured at the [edit routing-instances <routing-instance-name> protocols bgp group <group-name>] hierarchy level by the statement:
multipath;
Route dampeningRoute dampening is a mechanism that attempts to minimize network instability by suppressing the advertisement of poorly-behaved routes. Penalties are applied when a route is withdrawn, readvertised or changed. When a predefined penalty limit is reached, further advertisement of the route is suppressed. The penalty is reduced according to a defined “half-life” setting, and once the penalty decreases below a limit, the route can be readvertised.
On the Service Activator user interface, route dampening is set up on the EBGP Damp. property page of the Site dialog box.
If this option is selected, the following commands are configured at the [edit policy-options] level:
damping <dampingName> {
disable;
half-life <minutes>;
reuse <number>;
suppress <number>;
max-suppress <minutes>;
}
Service Activator 5.2.4 67

Configuration of MPLS VPNs Juniper M-series Device Support Guide – Third Edition
where:
Damping is applied by a policy statement which is configured at the [edit policy-options] level.
policy-statement <PolicyName> {
then damping <DampingName>;
}
where:
The policy statement may be applied to all eBGP peers and/or to a specific eBGP neighbor, depending on the parameters configured in the user interface. Damping is applied to all eBGP peers at the [edit routing-instances <vrf-table-name> protocols bgp group] level:
import <PolicyName>;
Damping is applied to a specific eBGP neighbor at the [edit routing-instances <vrf-table-name> protocols bgp group neighbor] level:
import <PolicyName>;
dampingName Identifier for the group of damping parameters. Service Activator generates names in the following format:
Orch_RD-no
half-life minutes Time, in minutes, at which a penalty applying to a route is decreased by half. Range is 1-45.
reuse number When the penalty applying to a route falls below this value, the route is unsuppressed. Range is 1-20000.
suppress number A route is suppressed when its penalty exceeds this limit. Range is 1-20000.
max-suppress minutes The maximum time, in minutes, that a route can be suppressed. Range is 1-720.
PolicyName Identifier for the group of damping parameters. Service Activator generates names in the following format:
Orch_RD-no-EBGP-damper
where RD-no is the RT number.
DampingName Identifier for the group of damping parameters.
68 Service Activator 5.2.4
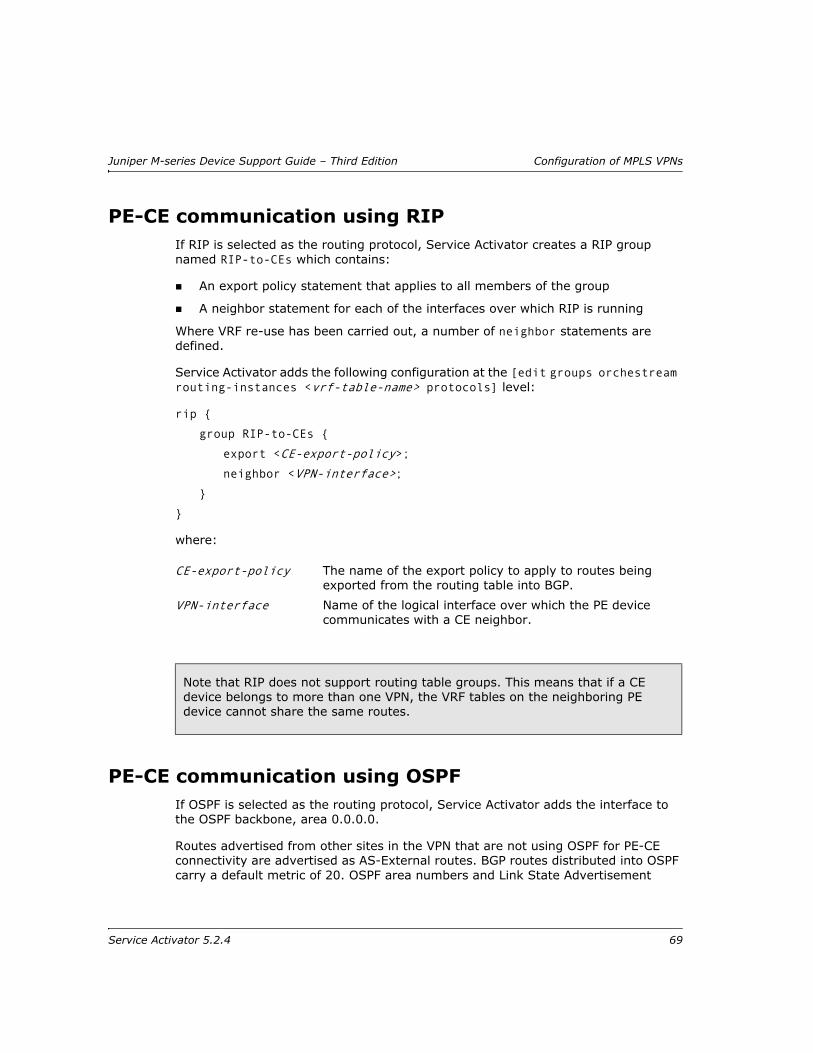
Juniper M-series Device Support Guide – Third Edition Configuration of MPLS VPNs
PE-CE communication using RIPIf RIP is selected as the routing protocol, Service Activator creates a RIP group named RIP-to-CEs which contains:
An export policy statement that applies to all members of the group
A neighbor statement for each of the interfaces over which RIP is running
Where VRF re-use has been carried out, a number of neighbor statements are defined.
Service Activator adds the following configuration at the [edit groups orchestream routing-instances <vrf-table-name> protocols] level:
rip {
group RIP-to-CEs {
export <CE-export-policy>;
neighbor <VPN-interface>;
}
}
where:
PE-CE communication using OSPFIf OSPF is selected as the routing protocol, Service Activator adds the interface to the OSPF backbone, area 0.0.0.0.
Routes advertised from other sites in the VPN that are not using OSPF for PE-CE connectivity are advertised as AS-External routes. BGP routes distributed into OSPF carry a default metric of 20. OSPF area numbers and Link State Advertisement
CE-export-policy The name of the export policy to apply to routes being exported from the routing table into BGP.
VPN-interface Name of the logical interface over which the PE device communicates with a CE neighbor.
Note that RIP does not support routing table groups. This means that if a CE device belongs to more than one VPN, the VRF tables on the neighboring PE device cannot share the same routes.
Service Activator 5.2.4 69
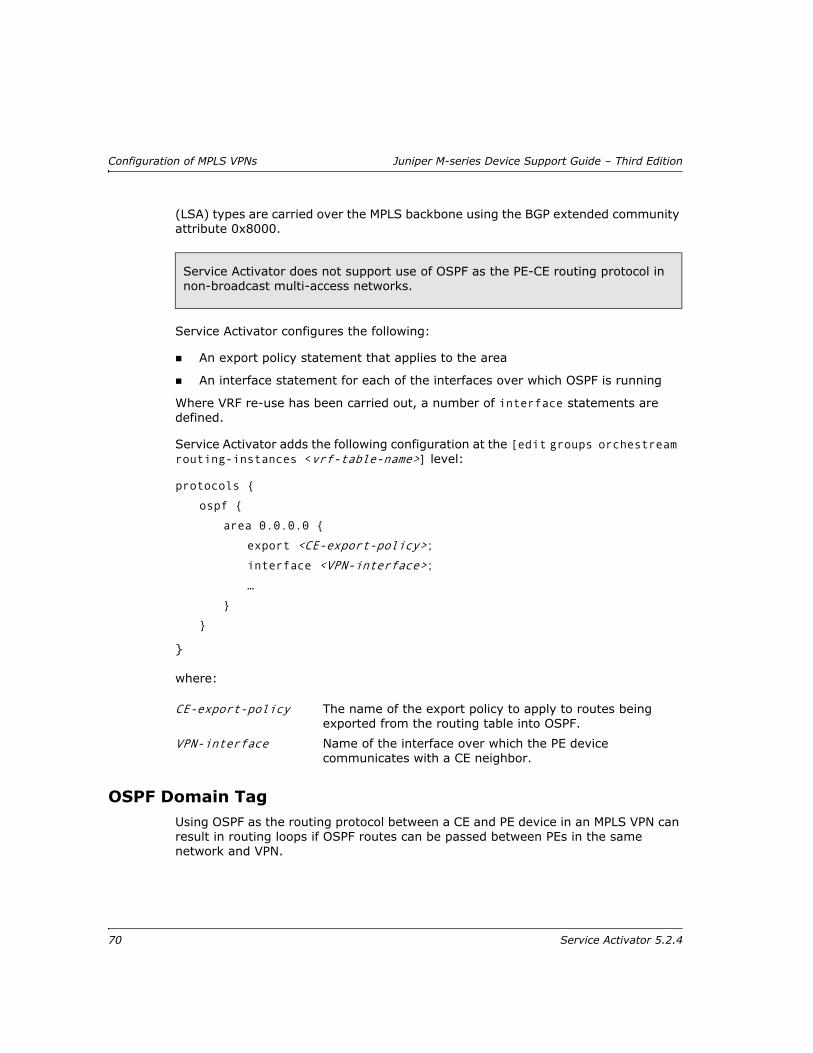
Configuration of MPLS VPNs Juniper M-series Device Support Guide – Third Edition
(LSA) types are carried over the MPLS backbone using the BGP extended community attribute 0x8000.
Service Activator configures the following:
An export policy statement that applies to the area
An interface statement for each of the interfaces over which OSPF is running
Where VRF re-use has been carried out, a number of interface statements are defined.
Service Activator adds the following configuration at the [edit groups orchestream routing-instances <vrf-table-name>] level:
protocols {
ospf {
area 0.0.0.0 {
export <CE-export-policy>;
interface <VPN-interface>;
…
}
}
}
where:
OSPF Domain TagUsing OSPF as the routing protocol between a CE and PE device in an MPLS VPN can result in routing loops if OSPF routes can be passed between PEs in the same network and VPN.
Service Activator does not support use of OSPF as the PE-CE routing protocol in non-broadcast multi-access networks.
CE-export-policy The name of the export policy to apply to routes being exported from the routing table into OSPF.
VPN-interface Name of the interface over which the PE device communicates with a CE neighbor.
70 Service Activator 5.2.4

Juniper M-series Device Support Guide – Third Edition Configuration of MPLS VPNs
Service Activator supports VPN Route tags when OSPF is selected as a routing protocol. The VPN Route tag is one mechanism that can be used to prevent routing loops in multi-homed VPNs.
The Domain Tag field appears on the Site Properties dialog, Connectivity page.
When the Domain Tag field is selected, a tag value must be specified. This causes a VPN Route tag ( domain-vpn-tag in Juniper devices) to be configured. In this case, the PE includes the tag in all LSA-5 advertisements sent to attached CE devices. The tag value must be distinct from any OSPF VPN Route Tag being used in the OSPF domain.
Using a different VPN Route tag causes the advertisement not to be distributed through the OSPF area to another connected domain.
PE-CE communication using static routesIf static routing is selected, Service Activator configures a static route between the PE and CE devices. The following statement is added at the [edit groups orchestream routing-instances <vrf-table-name>] level.
routing-options {
static {
route <destination-prefix>/<prefix-length> next-hop <address>;
}
}
where:
destination-prefix The network portion of the destination IP address
prefix-length The destination prefix length/subnet mask
next-hop The IP address or interface name for the next-hop router.
Note that routing table groups are not supported by static routing on some versions of JUNOS. Where VRF tables with overlapping VPN membership use static routes, Service Activator configures additional static routes in place of those that would have been exchanged by routing table groups.
Service Activator 5.2.4 71

Configuration of MPLS VPNs Juniper M-series Device Support Guide – Third Edition
Specifying the location of the next-hop addressUsers can specify that the next-hop address is in the default routing table and not the VRF table by selecting the Global option on a site’s Static Routing page. Service Activator adds this information to the static route at the [edit routing-instances <VRF-name> routing-options static route] level.
next-table inet.0;
Specifying that a route is permanentUsers can specify that a static route is maintained in the VRF table when the protocol process shuts down by selecting the Permanent option on a site’s Static Routing page.
Service Activator adds this information to the static route at the [edit routing-instances <VRF-name> routing-options static route] level.
retain;
Route redistributionBy default, most dynamic routing protocols only distribute routes that have been learned via the same protocol. The PE-CE export policy ensures the exchange of routing information between CE devices and PE peers within the same VPN no matter what routing protocol or method is used for PE-CE connectivity.
The following routes can be distributed to all CE devices within the same VPN:
Routes received via iBGP from other PE devices
Routes from all interfaces in the VRF
Routes learnt via rib groups from interfaces in other VRF tables
Static routes
Connected routes
The PE-CE export policy includes one or more terms, depending on the options selected in the user interface. A term is always configured for BGP.
If you configure a VPN which includes sites whose interfaces are on devices running different versions of JUNOS, there can be redistribution issues. This incompatibility occurs between Junos 6.0 and releases earlier than Junos 5.71.
72 Service Activator 5.2.4

Juniper M-series Device Support Guide – Third Edition Configuration of MPLS VPNs
Service Activator applies the following default metrics to redistributed routes:
EBGP:
— A metric of 0 is applied to connected and static routes distributed into BGP
RIP:
— A metric of 0 is applied to connected and static routes and RIP routes distributed into BGP
— A metric of 0 is applied to connected and static routes distributed into RIP
— A metric of 1 is applied to BGP routes distributed into RIP
OSPF:
— A metric of 0 is applied to connected and static routes and OSPF routes distributed into BGP
— A metric of 20 is applied to connected and static routes and BGP routes distributed into OSPF
You can specify the metric to associate with routes distributed from the selected PE-CE routing protocol into other Internal Gateway Protocols (IGPs) and BGP, and vice versa and associate a manually pre-configured policy statement to routes to filter their redistribution.
The PE-CE export policy is configured at the [edit policy-options] level:
policy-statement <PE-CE-export-policy> {
…
}
where:
The PE-CE export policy consists of one or more term statements that define the protocols from which routes must be redistributed into the protocol used for PE-CE connectivity. The format of a statement depends on whether a metric applies to the redistributed routes.
PE-CE-export-policy Identifier for the PE-CE export policy definition in the form:
Orch_RD-number-redistribute-protocol
where RD-number is the route distinguisher of the site and protocol is the name of the protocol used for PE-CE connectivity.
Service Activator 5.2.4 73

Configuration of MPLS VPNs Juniper M-series Device Support Guide – Third Edition
If a metric applies to routes redistributed from a protocol, the term statement is configured as follows:
term export-protocol {
from protocol <protocol>;
then {
metric value;
accept;
}
}
where:
If a metric does not apply to routes redistributed from a protocol, the term statement is configured as follows:
term export {
from protocol [<export-list>];
}
where:
The CE-PE export policy always contains a term statement that defines how routes that do not match any other term are treated:
term reject-others {
then reject;
}
Specifying metrics for route redistribution
You can specify the metric to associate with routes distributed from BGP into the routing protocol used for PE-CE connectivity. You can also filter and refine the redistribution of routes by associating a manually pre-configured policy statement with redistributed routes.
protocol Name of the source protocol from which routes are redistributed.
value Metric to be applied when redistributing routes into the PE-CE protocol.
export-list List of source protocols from which routes are redistributed. The list contains only those protocols with which no metric is associated.
74 Service Activator 5.2.4

Juniper M-series Device Support Guide – Third Edition Configuration of MPLS VPNs
If a metric has been defined for routes redistributed into the protocol used for PE-CE connectivity, the term statement at the [edit policy-options policy-statement <PE-CE-export-policy>] level is configured as follows:
term export-protocol {
from protocol <protocol>;
then {
metric <value>;
accept;
}
}
where:
If a manually pre-configured policy statement has been associated with the routes redistributed from a protocol, the term statement contains an extract from clause:
term export-protocol {
from {
protocol <protocol>;
policy <PolicyStatement>;
}
…
}
where:
Note that the user interface allows users to define parameters for distribution of routes from all protocols potentially used by sites within the VPN into the PE-CE protocol. In general, however, only the value entered for BGP affects device configuration. A value specified for redistribution from any other protocol affects configuration only where two or more interfaces on the PE device participate in the same VPN, use different protocols for PE-CE connectivity and share the same VRF table.
protocol Name of the source protocol from which routes are redistributed.
value Metric to be applied when redistributing routes into the PE-CE protocol.
Service Activator 5.2.4 75

Configuration of MPLS VPNs Juniper M-series Device Support Guide – Third Edition
protocol Name of the source protocol from which routes are redistributed.
PolicyStatement Name of the manually pre-configured policy statement to associate with redistributed routes.
76 Service Activator 5.2.4

Juniper M-series Device Support Guide – Third Edition Configuring Circuit Cross Connects
Chapter 6
Configuring Circuit Cross Connects
This chapter describes how Service Activator configures Circuit Cross Connects (CCCs) on Juniper M-series devices. It includes:
Overview information about CCCs
Details of the implementation and configuration of Layer 2 switching CCCs
Details of the implementation and configuration of MPLS tunnelling CCCs
OverviewCircuit cross-connect (CCC) is a proprietary Juniper feature that allows you to configure transparent connections between two Layer 2 circuits. A circuit can be any of the following:
Frame Relay DLCI
ATM VC
Point to Point Protocol (PPP) interface
Cisco High-level Data Link Control (HDLC) interface
Virtual Local Area Network (VLAN)
Using CCC, packets from one circuit are forwarded to another at Layer 2 with only the Layer 2 address changed.
Juniper devices support three types of CCCs:
Layer 2 switching – essentially provide Layer 2 switching between two logical interfaces of the same type on the same device
MPLS tunneling – connects two distant interface circuits of the same type by creating MPLS tunnels that use LSPs as the channel
LSP stitching – stitches together two LSPs
Service Activator 5.2.4 77

Configuring Circuit Cross Connects Juniper M-series Device Support Guide – Third Edition
Service Activator supports Layer 2 switching and MPLS tunneling CCCs.
For detailed information on CCCs see the JUNOS Internet Software Configuration Guide: MPLS Applications.
There may be issues discovering pre-configured DLCIs, VLANs and VCs. See Working with pre-existing VLAN, DLCI and VC endpoints on page 98 for details.
Protocols usedBoth Layer 2 switching and MPLS tunneling CCCs use MPLS. MPLS tunneling CCCs also use RSVP with extensions for RSVP tunnels. This incorporates a number of IETF-approved extensions to standard RSVP that allow RSVP to be used as a signaling protocol within an MPLS network. It supports the establishment of LSPs across service provider networks, performs label distribution, supports resource reservations or class of service along an LSP, and delivers information about the physical route traversed by an LSP.
Layer 2 switching CCCsA Layer 2 switching CCC enables you to join two circuits, effectively configuring the router as a switch.
For example, in the following diagram, a CCC connects two Frame Relay circuits. Router B acts as the Frame Relay switch, transparently switching packets between Router A and Router C. The only processing performed by Router B is to translate DLCI 600 to 750.
Layer 2 switching CCCs are bidirectional.
To create a layer 2 switching CCC, the following elements must be configured on the router that is acting as the switch:
Some manual pre-configuration is required when configuring MPLS tunneling CCCs. For more information see MPLS tunneling CCCs on page 36.
CCC
Frame RelayFrame Relay
A B C
DLCI 600 DLCI 750
78 Service Activator 5.2.4

Juniper M-series Device Support Guide – Third Edition Configuring Circuit Cross Connects
The encapsulation details for packets entering the CCC
Details of the connection between the two circuits
MPLS must be enabled
Juniper commands
Define the encapsulation
The command to configure encapsulation depends on the circuit type.
Serial interfaces (PPP or Cisco HDLC)
The encapsulation command configures the entire physical interface. For these circuits to work, a logical interface unit 0 must be configured. If unit 0 is already configured, Service Activator uses that unit. If no unit 0 is configured, Service Activator configures one:
interfaces {
<name> {
encapsulation cisco-hdlc-ccc;
unit 0;
}
}
where name is the name of the interface. The interface name is made up of elements that indicate the interface’s media type, the logical interface number and, for channelized interfaces, the channel identifier. If the interface is a PPP, ppp-ccc replaces cisco-hdlc-ccc.
ATM interfaces
The encapsulation is defined within the Virtual Circuit (VC) configuration:
interfaces {
<name> {
atm-options {
vpi vpi-value maximum-vcs <maximum-vcs>;
}
Any logical interface that you intend to use in a CCC must not have any protocol family information configured on it – that is, it must not have an IP address configured.
Service Activator 5.2.4 79

Configuring Circuit Cross Connects Juniper M-series Device Support Guide – Third Edition
unit <logical-unit-number> {
point-to-point; # Default interface type
encapsulation atm-ccc-vc-mux;
vci <vpi-value>.<vci-value>;
}
}
}
where:
Frame Relay interfaces
The encapsulation type and parameters are specified for both the physical interface and the logical interface:
interfaces {
encapsulation frame-relay-ccc;
name {
unit <logical-unit-number> {
point-to-point; # Default interface type
encapsulation frame-relay-ccc;
dlci <dlci-value>;
}
}
}
where:
vpi-value The virtual path identifier in the range 0 to 255
maximum-vcs The maximum number of virtual circuits on a virtual path in the range 1 to 4089
logical-unit-number The number of the logical interface
vci-value The virtual circuit identifier in the range 512 to 4090
logical-unit-number The number of the logical interface
dlci-value The Data Link Connection Identifier in the range 512 to 1022
80 Service Activator 5.2.4

Juniper M-series Device Support Guide – Third Edition Configuring Circuit Cross Connects
VLAN interfaces
The encapsulation type and parameters are specified for both the physical interface and the logical interface:
interfaces <name> {
vlan-tagging;
encapsulation vlan-ccc;
unit 0 {
encapsulation vlan-ccc;
vlan-id <id-number>;
}
}
where:
Define the connection
The command to define the connection between the two circuits is:
[edit]
protocols {
connections {
interface-switch <connection-name> {
interface <interface-name.unit-number>;
interface <interface-name.unit-number>;
}
Note that encapsulation is defined at the interface and unit level on Frame Relay interfaces. If any logical interfaces are being used without encapsulation prior to configuring a CCC with Service Activator, then the configuration may fail to commit.
id-number The VLAN identifier in the range 512 to 4095
Note that encapsulation is defined at the interface level and unit level on VLAN interfaces. If any logical interfaces are being used without encapsulation prior to configuring a CCC with Service Activator, then the configuration may fail to commit.
Service Activator 5.2.4 81

Configuring Circuit Cross Connects Juniper M-series Device Support Guide – Third Edition
}
}
where:
Configure MPLS
The command to configure MPLS on all interfaces is made at the [edit protocols] hierarchy level:
mpls {
interface all;
}
ImplementationService Activator creates a Layer 2 Switching CCC when you add interfaces that reside on the same device to a CCC object.
MPLS LSP tunneling CCCsMPLS tunneling CCCs connect two distant interface circuits of the same type. This creates an MPLS tunnel that uses an LSP as the conduit.
For example, in the following diagram, a CCC connects two ATM access networks through an IP backbone. CCC establishes an LSP tunnel between the two domains. ATM traffic from one network is tunneled across a backbone to the second network using an MPLS LSP.
connection-name The name of the CCC
interface-name The name of the interface
unit-number The number of the logical interface
82 Service Activator 5.2.4

Juniper M-series Device Support Guide – Third Edition Configuring Circuit Cross Connects
MPLS tunneling CCCs are bidirectional but the LSPs are unidirectional.
To create an MPLS tunneling CCC, the following elements must be configured:
The encapsulation details for packets entering the LSPs on the CCC’s ingress and egress routers
The CCC connection for LSP tunnel cross connects on the LSP’s ingress and egress routers
A loopback interface on the LSP’s ingress and egress devices to provide termination points for the CCC
The LSPs
MPLS on all routers on the LSP
RSVP on all routers on the LSP
Juniper commandsThis section discusses Juniper commands for CCCs.
Service Activator automatically configures MPLS on the LSP’s ingress and egress routers. However, RSVP must be manually configured on these routers. Both MPLS and RSVP must be manually configured on all intervening routers. For configuration details, see MPLS tunneling CCCs on page 36.
The LSP is dynamic and packet routing may change depending on traffic congestion. We therefore recommend that you configure MPLS and RSVP on all devices that may potentially be used in the LSP.
CCC
LSP
LSP
ATM ATM
Service Activator 5.2.4 83

Configuring Circuit Cross Connects Juniper M-series Device Support Guide – Third Edition
Define the encapsulation
The Juniper command to configure encapsulation depends on the circuit type. The commands are the same as for Layer 2 switching CCCs, described in Define the encapsulation on page 79.
Define the connection
The Juniper command to define the CCC connection for an LSP tunnel cross connect is:
[edit]
protocols {
connections {
remote-interface-switch <connection-name> {
interface <interface-name.unit-number>;
transmit-lsp <label-switched-path1>;
receive-lsp <label-switched-path2>;
}
}
}
where
Define the LSP
The command to define the LSP is:
protocols {
mpls {
label-switched-path <path-name> {
to <destination-loopback-address>;
}
interface <interface-name>;
connection-name The name of the CCC
interface-name The name of the interface
unit-number The number of the logical interface
label-switched-path1 The name of the LSP from the connection’s source
label-switched-path2 The name of the LSP to the connection’s destination
84 Service Activator 5.2.4

Juniper M-series Device Support Guide – Third Edition Configuring Circuit Cross Connects
}
}
where:
For an example configuration, see MPLS LSP tunneling CCCs on page 82.
Configure MPLS
The command to configure MPLS on all interfaces is made at the [edit protocols] hierarchy level:
mpls {
interface all;
}
ImplementationService Activator creates an MPLS tunneling CCC when you add interfaces from two remote devices to a CCC object.
When an MPLS tunneling CCC is created through the Service Activator user interface, the system provisions the LSPs. As CCCs are duplex but LSPs are simplex, the system creates two LSPs, one for traffic in each direction.
The base name of the LSP may be specified by the user up to a maximum of 11 characters. The system appends the character ‘1’ or ‘2’ to the base name to create two distinct names, one for each LSP. If no base name is specified, the system automatically generates a base name as follows:
OCH<hex_id><1|2>
where hex_id is a 7-character hexadecimal string. For example, if OCHFF0AD8E1 is the name of the LSP in one direction, the corresponding LSP in the other direction will be named OCHFF0AD8E2.
When MPLS tunneling CCCs are created, CCC configuration is pushed to the LSP’s ingress and egress routers.
path-name The name that identifies the LSP. The name must be unique on the ingress router.
destination-loopback-address The loopback address of the egress router.
interface-name The name of the interface.
Service Activator 5.2.4 85

Configuring Circuit Cross Connects Juniper M-series Device Support Guide – Third Edition
86 Service Activator 5.2.4

Juniper M-series Device Support Guide – Third Edition Configuring Layer 2 Martini VPNs
Chapter 7
Configuring Layer 2 Martini VPNs
This chapter describes how Service Activator configures Layer 2 Martini VPNs on Juniper M-series devices. It includes:
Overview information about Layer 2 Martini VPNs
Details of the implementation and configuration of Martini tunnels
OverviewService Activator supports the configuration and management of Layer 2 Martini VPNs.
A Layer 2 Martini point-to-point connection is a pseudo-wire (or tunnel) configured between two endpoints across an IP network.
The connection uses MPLS labels to encapsulate and transport various Layer 2 data formats, including VLAN to VLAN, Ethernet, Frame Relay, ATM Cell and ATM AAL5, across an IP network. The tunnel provides a transparent connection, so users see no change in their Layer 2 data. (Note that the tunnel does not aim to meet QoS aspects of the connection, particularly in the ATM case.) The Martini endpoints can be interfaces, sub-interfaces, or other endpoint identifiers (VCI/VPI on ATM, DLCI on Frame Relay, or VLAN ID on Ethernet.
A Layer 2 Martini VPN is an association of Layer 2 Martini point-to-point connections.
Service Activator 5.2.4 87

Configuring Layer 2 Martini VPNs Juniper M-series Device Support Guide – Third Edition
Figure 1 - Martini point-to-point links
The following data types can be encapsulated on Layer 2 Martini VPNs on Juniper devices.
Technical description of Layer 2 Martini VPNsThe Martini draft describes a mechanism that creates a bidirectional point-to-point connection between two PE routers. This connection is called a Pseudo-Wire (PW) or a virtual circuit - label-switched path (VC-LSP), and consists of two unidirectional LSPs.
Encapsulated data Endpoints Comments
Ethernet (Port-based)
Main interface none
Ethernet (VLAN-based)
Sub-interface with VC identifier
Created via Provision sub-interface
ATM Cell Sub-interface with VC identifier
Created via Provision sub-interface
ATM AAL5 Sub-interface with VC identifier
Created via Provision sub-interface
Frame Relay Sub-interface with VC identifier
Created via Provision sub-interface
88 Service Activator 5.2.4

Juniper M-series Device Support Guide – Third Edition Configuring Layer 2 Martini VPNs
Creating a PW (see Figure 1) is a 2-step process. The first step requires a Label Distribution Protocol (LDP) targeted-peering relationship to be established between the PE routers. Since routers can only exchange labels with their LDP peers, this step is required so that the typically non-adjacent PE routers can exchange labels.
The second step is to request a label for the layer-2 connection using an extension to the basic LDP signalling. A Layer-2 Forwarding Equivalence Class (FEC) is included in the label request that describes the circuit being connected together over the MPLS core. The returned label is mapped to the circuit described by the Layer 2 FEC and pushed on the bottom of the label-stack for each of the frames that traverses the network. The PE at either end of the PW repeats this process of label requesting.
A PW is identified by a combination of its VC-ID and a Group-ID. The idea is that the Group-ID acts as a VC-LSP grouping mechanism (e.g. to identify a virtual interface value); the VC-ID then identifies the PW within the particular group. The Group ID can be seen to equate to the Layer 2 VPN identifier, though its use depends on the specific implementation.
Each Layer 2 frame or other data unit that arrives at the CE-facing interface of the PE is forwarded across the MPLS network with the label negotiated for the PW used to demultiplex it at the destination PE. Since each PE sent the label in response to the Layer 2 FEC, there is a unique mapping.
In addition to the PW-label, there is also a control word added to each incoming frame. This includes control flags and a sequence number, used to maintain the frame sequence in order-sensitive traffic.
The full processing of a frame includes:
A frame arrives at the PE; its preamble and Frame Check Sequence (FCS) is removed.
The control word is added to the front of the frame.
The PW-label is added as the bottom-most label in the stack.
The PE performs a lookup against the IP address for the destination PE and a transport label that reaches the destination PE is pushed onto the top of the stack - this may be either an RSVP tunnel or LDP LSP.
The Transport label is swapped as the frame traverses the network and will be (in most cases) penultimate-hop-popped before reaching the destination PE.
The destination PE will use the exposed PW label to determine the PW of the frame and from that determine the egress port - it is likely that will be a single step lookup in the label table.
The control word may be used at this point to check the stream order and other relevant administrative functions.
Service Activator 5.2.4 89

Configuring Layer 2 Martini VPNs Juniper M-series Device Support Guide – Third Edition
The FCS and preamble will be reformed and the frame transmitted on the CE-facing interface.
The exact processing varies according to the Layer 2 traffic type being supported.
A Layer 2 VPN can be constructed by associating a number of Pseudo-wires. The regular Martini service permits the user to connect together PE devices in any arbitrary topology. In practice, when used as a service, Martini is frequently used to connect users to a server or other data centre in a hub and spoke topology. In the 3G wireless world, this hub and spoke topology is also employed since the logical topology of such networks tends to fan out leaving a classic tree and branch graph topology with each vertex in the graph as a 3G network element.
There are fewer requirements to support a full-mesh topology due to the extra configuration the PE device needs to support in this case, however there are instances where this may be needed.
Protocols usedLayer 2 Martini VPNs use MPLS, particularly to create the LSPs over which encapsulated data travels. The encapsulation protocols are described in various IETF drafts including draft-martini-l2circuit-encap-mpls, draft-martini-l2circuit-trans-mpls, draft-martini-ethernet-encap-mpls and draft-martini-atm-encap-mpls. See Martini Drafts on page 128 for details.
Base configurationNote that some manual pre-configuration of devices is required to support the configuration of Layer 2 Martini VPNs in Service Activator.
Core routers on the path to the neighbor PE, and core interfaces, must run MPLS, an IGP such as OSPF, and LDP.
Setting up Layer 2 Martini VPNsIn order to set up a Layer 2 Martini connection, you perform pre-configuration tasks, create the endpoints (either sub-interfaces or VC interfaces), create the Layer 2 Martini tunnel object, set the appropriate options, and finally, assign the relevant endpoints to the tunnel.
Setting up the Base Configuration Before actually provisioning the Layer 2 Martini tunnel, certain pre-configuration tasks must be performed.
Creating the endpoints (provisioning sub-interfaces) To create the Martini connection object, first create its endpoints, which are interfaces or sub-interfaces supporting the required type of data encapsulation.
90 Service Activator 5.2.4

Juniper M-series Device Support Guide – Third Edition Configuring Layer 2 Martini VPNs
Creating the VPN Add the Layer 2 Martini connection by right-clicking on the Point-to-Points for the customer and selecting Add L2 Martini-Pt-Pt. Complete the specifications in the dialog box, and then add the endpoints to the new Layer 2 Martini tunnel.
Checking the configuration Optionally, check the configuration using telnet to directly access the running configuration on the devices.
Provisioning sub-interfaces for a Layer 2 Martini connectionLayer 2 Martini VPNs provide a tunnel between two endpoints which carries encapsulated data. The encapsulation is done at the endpoints, or sub-interfaces. The sub-interfaces provisioned to support the Layer 2 Martini tunnel must support the desired type of data encapsulation.
Note: See Layer 2 Martini VPN devices and data types for details on the different hardware devices and data encapsulations supported by Service Activator for Layer 2 Martini VPNS, and the specific details for VPN types in which there are variations from the typical configuration.
To create a sub-interface for a Layer 2 Martini VPN
1. In the hierarchical tree, expand the device on which you are provisioning the sub-interface. Alternatively, double click the device and the interface in the topology map.
2. Double click on the interface to display the Details window.
3. Right click in the Details window and select the Add provisioned sub-interface option from the pop-up menu. Alternatively, right click on the interface itself and select the Add provisioned sub-interface option from the pop-up menu.
The Provisioned sub-interface dialog box opens.
Enter identifying details of the sub-interface, including the Sub-interface no, Encapsulation (choose the appropriate encapsulation type), VPI and VCI. The State information is read-only.
4. Click Apply or OK to create the sub-interface.
5. Commit the transaction to send the configuration to the device.
The sub-interface is created. It is in a 'Not yet discovered' state and attributes such as the sub-interface number and media type are not yet set. As well, the capabilities for the sub-interface are not yet specified.
6. Rediscover the device by right clicking on it in the hierarchical tree and selecting Discover. The sub-interface is now discovered and its attributes set.
Note: This step is not required, but is advised.
Service Activator 5.2.4 91

Configuring Layer 2 Martini VPNs Juniper M-series Device Support Guide – Third Edition
To check the configuration added to the device
To manually check the configuration added to the device, access it through a telnet session. The sub-interface configuration is added in its own group, called orchestream.
To display the sub-interface configuration, issue the command:
show groups orchestream
Hints and tips
Until you commit your transactions, the created sub-interfaces are not configured on the device. However, you can still use these sub-interfaces in the provisioning of the Layer 2 Martini VPN service. They will be configured, as will the Martini tunnel, when the transactions are committed.
To confirm that the parent interface is capable of supporting the sub-interface you wish to provision, right-click on the parent interface and select Properties
On the Interface dialog box, select the Capabilities property page.
Under Outbound Properties, expand Interface Creation Support.
Confirm that the type of sub-interface you wish to create to support the Layer 2 Martini VPN is shown.
Devices used in Layer 2 Martini VPNs should be configured to use the Gateway role. Interfaces and sub-interfaces used as endpoints should be configured to use the Access role.
Deleting provisioned sub-interfacesNote: Service Activator does not allow the deletion of a sub-interface if it is part of an existing Layer 2 Martini VPN or is otherwise still in use.
You should not delete sub-interfaces that were created manually (outside of Service Activator).
After creating a numbered sub-interface under an interface [in the Orchestream group] on a Juniper router, you can also manually create a same-numbered sub-interface [under the actual interface] on the Juniper router. However, these two sub-interfaces could have different DLCI values.
You should use Service Activator to create the provisioned sub-interface. This creates a sub-interface number and a DLCI. If you manually create the same-numbered sub-interface on the Juniper router, remember that the DLCI number must be the same as the DLCI for the sub-interface created by Service Activator to discover it properly.
92 Service Activator 5.2.4

Juniper M-series Device Support Guide – Third Edition Configuring Layer 2 Martini VPNs
To delete a provisioned sub-interface:
To delete a provisioned sub-interface, navigate to its object in the GUI and remove it. Service Activator then removes the configured sub-interface from the device. Follow these steps to accomplish this:
1. On the Topology tab, open the relevant device, and double click on the parent interface for the sub-interface to be deleted.
The Details window displays the interface.
2. On the Details window, select the Provisioned Topology tab.
3. Perform one of the following:
Right click on the sub-interface in the Provisioned Topology window, then choose Delete from the pop-up menu.
Choose Delete from the Edit menu.
Click on the Delete button on the toolbar.
Hints and tips
To remove a sub-interface that was created directly on a device (rather than provisioned using the Service Activator GUI), first log into the device and remove the sub-interface. Then remove the sub-interface from the Service Activator GUI. If you do not first remove the sub-interface from the device, it will re-appear in the Service Activator GUI the next time the device is discovered.
Provisioned sub-interfaces can only be deleted from the Provisioned Topology window as described. The delete button is disabled if trying to delete from another location, for example the hierarchical tree. When you right click a provisioned sub-interface in the hierarchical tree, “Delete” does not appear in the pop-up menu.
MPLS RequirementsMPLS support must be enabled on all appropriate interfaces.
The command to configure MPLS on all interfaces is made at the [edit protocols] hierarchy level:
mpls {
interface {<interface-name> | all };
}
OSPF requirementsOSPF (or another IGP) must be configured to support Layer 2 Martini VPNs.
Service Activator 5.2.4 93

Configuring Layer 2 Martini VPNs Juniper M-series Device Support Guide – Third Edition
The command to configure OSPF on all interfaces is made at the [edit protocols] hierarchy level:
protocols {
ospf {
traffic-engineering
area <address> {
interface <interface-id>
interface <loopback-id>
}
}
}
where:
LDP requirementsLDP must be configured to support Layer 2 Martini VPNs. On PE devices LSPs must be configured between the loopback addresses of all PE and P devices.
The command to configure LDP is made at the [edit protocols] hierarchy level:
protocols {
ldp {
interface <interface-id>
interface <loopback-id>
}
}
where:
address The address of the area
interface-id The interface
loopback-id The loopback interface
interface-id The interface
loopback-id The loopback interface
94 Service Activator 5.2.4

Juniper M-series Device Support Guide – Third Edition Configuring Layer 2 Martini VPNs
ImplementationService Activator creates a Layer 2 Martini VPN when you create a Martini VPN object, and then apply two endpoints (which appropriately encapsulate the same data type) to it.
Juniper commandsThis section discusses Juniper commands for Layer 2 Martini VPNs.
Defining endpoints for data encapsulation
The commands to configure endpoints depend on the type of data encapsulation in the Layer 2 Martini VPN.
Ethernet endpoints
Endpoints for Layer 2 Martini VPNs encapsulating Ethernet data are the main interfaces themselves. Therefore, no specific configuration is applied to the device.
Ethernet VLAN data endpoints
The commands to configure sub-interfaces for Layer 2 Martini VPNs encapsulating Ethernet VLAN data are made at the [edit interfaces] hierarchy level:
interfaces {
name {
description “<description>”
vlan-tagging;
encapsulation vlan-ccc;
unit <unit-number> {
encapsulation vlan-ccc;
vlan-id <vlan-id>;
}
}
}
where:
name The name of the interface
description The text description of the interface
unit-number The sub-interface number
vlan-id The vlan identifier
Service Activator 5.2.4 95

Configuring Layer 2 Martini VPNs Juniper M-series Device Support Guide – Third Edition
ATM Cell endpoints
The commands to configure endpoints for Layer 2 Martini VPNs encapsulating ATM Cell / ATM AAL5 data are made at the [edit interfaces] and the [edit chassis] hierarchy level.
At the [edit interfaces] hierarchy level:
interfaces {
<name> {
<description>
encapsulation atm-ccc-cell-relay;
atm-options {
pic-type <atm1 | atm2>;
vpi <vpi-id>;
}
unit <unit-number> {
encapsulation atm-vc-mux;
vci <vci-id>;
}
}
}
where:
name The name of the interface
description The text description of the interface
atm1 | atm2 The type of PIC card
vpi-id The virtual path identifier
unit-number The sub-interface number
vci-id The virtual channel identifier
96 Service Activator 5.2.4

Juniper M-series Device Support Guide – Third Edition Configuring Layer 2 Martini VPNs
At the [edit chassis] hierarchy level:
chassis {
fpc <fpc-id> {
pic <pic-id> {
<atm-l2circuit-mode cell | atm-l2circuit-mode aal5>;
}
}
}
where:
Frame Relay interfaces
The commands to configure endpoints for Layer 2 Martini VPNs encapsulating Frame Relay data are:
interfaces {
<name> {
<description>
encapsulation frame-relay-ccc;
unit <unit-number> {
encapsulation frame-relay-ccc;
dlci <dlci-id>;
}
}
}
where:
fpc-id The funtional processor card
pic-id The processor interface card identifier
atm-l2circuit-mode cell | atm-l2circuit-mode aal5
The type of ATM encapsulation — either ATM Cell or ATM AAL5
name The name of the interface
description The text description of the interface
unit-number The sub-interface number
dlci The data link connection identifier
Service Activator 5.2.4 97

Configuring Layer 2 Martini VPNs Juniper M-series Device Support Guide – Third Edition
Modifying a sub-interface’s DLCI number
When a sub-interface is part of a Layer 2 Martini connection over frame relay, the DLCI number cannot be modified through the properties dialog box for the sub-interface.
To modify the DLCI number of a sub-interface assigned to a Layer 2 Martini connection:
1. Unlink the sub-interface from the Layer 2 Martini connection by right-clicking on the sub-interface and selecting Unlink from the pop-up menu.
2. Click the Provisioned Topology tab in the Details window
3. Click the sub-interface to be changed.
4. Right-click and select Properties from the pop-up menu.
5. Change the DLCI number of the sub-interface.
6. Apply the changes by committing pending transactions.
7. Re-discover the device. The DLCI number is refreshed in the Details window.
8. Drag the sub-interface back to the Layer 2 Martini connection object in order to re-link it to the Martini tunnel.
Working with pre-existing VLAN, DLCI and VC endpoints
In some situations, manually configured VLANs and DLCIs are discovered with the IDs of their parent's logical unit ID rather than with their own ID. This leads to misrepresentation in the user interface of DLCIs and VLANs IDs when the parent logical unit is provisioned with a different ID than the DLCI/VLAN ID.
For example, a DLCI with ID 567 on logical unit 10 will be discovered as a DLCI with ID 10. When manually provisioning router subinterfaces and virtual circuits, if possible, use matching IDs for logical units and DLCIs/VLANs. For example, for logical unit 567 use a matching DLCI value of 567.
When provisioning Martini circuits (or CCCs) it is possible, that the device driver will generate incorrect router configuration due to issues discovering DLCIs/VLANs. Use the Add Provisioned Sub-interface dialog in Service Activator to create subinterfaces with proper encapsulations and DLCIs/VLANs ID values suitable for planned Martini circuits. Use those subinterfaces as Martini or CCC endpoints rather than manually configured sub-nterfaces to avoid any conflicts.
Modifying endpoint values
If you change the VLAN/DLCI/VC ID for an endpoint in a Layer 2 Martini VPN, you should re-discover the device in Service Activator.
98 Service Activator 5.2.4

Juniper M-series Device Support Guide – Third Edition Configuring Layer 2 Martini VPNs
Define the Martini tunnel
The command to define the connection between the endpoints in a Layer 2 Martini VPN is:
protocols {
l2circuit {
neighbor <address> {
<description>
interface <name> {
virtual-circuit-id <virtual-circuit>;
}
}
}
}
where:
address The address of the neighbor
description The text description of the Layer 2 Martini VPN
name The name of the interface
virtual-circuit The identifier for the Layer 2 Martini VPN
Service Activator 5.2.4 99

Configuring Layer 2 Martini VPNs Juniper M-series Device Support Guide – Third Edition
100 Service Activator 5.2.4

Juniper M-series Device Support Guide – Third Edition Configuring QoS and Access Control Features
Chapter 8
Configuring QoS and Access Control Features
This chapter provides detailed information on the QoS and access control features configured by Service Activator. It includes:
The JUNOS firewall feature which is used to implement Service Activator’s access rules and rate limiting and to classify traffic for Weighted Round Robin (WRR)
A summary of the Juniper M-series features that affect how QoS is configured, including an explanation of firewall filters and the allocation of traffic to transmission queues
How access rules, rate limiting and WRR are configured by Service Activator including examples of the configuration applied
Service Activator 5.2.4 101

Configuring QoS and Access Control Features Juniper M-series Device Support Guide – Third Edition
Juniper QoS features
FPC structureThe Flexible PIC Concentrator (FPC) is a card that slots into the router. FPCs connect the Physical Interface Cards (PICs) to the rest of the router so that incoming packets are forwarded across the midplane to the appropriate destination port. Each FPC holds up to a maximum number of four PICs.
This structure is shown in the following diagram:
This hardware feature is reflected in the commands that are used to configure the device so that some commands are applied on a per-FPC basis.
For detailed information about the FPC consult the appropriate M-series Hardware Guide.
Juniper device
FPC FPC FPC FPC
PIC PIC PIC PIC
102 Service Activator 5.2.4

Juniper M-series Device Support Guide – Third Edition Configuring QoS and Access Control Features
Juniper CoS overviewThe following diagram illustrates the packet flow through the router:
On ingress, the inbound packet is classified and policers and firewall filters may be run to amend the forwarding class and the loss priority. Firewall filters may also direct the forwarding of the packet to an alternative routing instance or interface.
On egress, firewall filters and policers may again be run to modify the forwarding class and the loss priority. The outbound packet is queued according to the forwarding class and scheduling/dropping is applied.
For detailed information on Juniper QoS features, see the JUNOS Internet Software Configuration Guide: Interfaces and Class of Service.
Firewall filtersA firewall filter classifies packets based on their content and may subsequently perform some action on the classified packets. Each filter comprises one or more filter terms. Each term consists of one or more conditions that define the filtering criteria and the action to take if a match occurs. The ordering of terms within the filter is significant. Packets are tested against each term until a match is found and the associated action is taken. If a packet does not match any of the filter conditions it is silently discarded. It is possible to define a large number of filters without affecting the speed of the interface.
Firewall filters can be applied to inbound or outbound traffic to restrict the packets passing in to or out of the device. Filters can be applied to one, more than one or all interfaces and the same filter can be applied to multiple interfaces.
Classifiers Policer/firewall filter
Forwardingpolicy
Rewrite/marker
Scheduler/Shaper/RED
Policer/firewall filter
inbound
outbound
Filtering is performed within the hardware by the Internet Processor II ASIC. This ASIC is standard on M5, M10, M20, M40 and M160 routers. It can be installed as an upgrade to early versions of M20 and M40 devices which do not have this ASIC.
Service Activator 5.2.4 103

Configuring QoS and Access Control Features Juniper M-series Device Support Guide – Third Edition
Filter match conditions may be based on:
Numeric range – such as source or destination port number or IP precedence value
Addresses – source or destination IP address
Bit field values – matches can be made on IP options, TCP flags and IP fragmentation fields
Firewall filters are used by Service Activator to implement access rules and rate limiting and to classify traffic for WRR.
The command to configure a firewall filter is made at the [edit firewall family inet] hierarchy level:
filter <filter-name> {
term <term-name> {
from {
<match-conditions>;
}
then {
<action>;
}
}
}
InputFPC
OutputFPC
Internet ProcessorII ASIC
Deny traffic(inbound, outbound
or both)Permit traffic
(inbound, outboundor both)
Actionseither:
Source port number
IP address
IP precedence
Conditionsmatch traffic against:
Destination port number
....
104 Service Activator 5.2.4

Juniper M-series Device Support Guide – Third Edition Configuring QoS and Access Control Features
where:
Firewall filters are applied to an interface by including the filter statement at the [edit interfaces <interface-name> unit <logical-unit-number> family inet] hierarchy level:
interfaces {
<interface-name> {
unit <logical-unit-number> {
family inet {
filter {
input <filter-name>;
output <filter-name>;
}
}
}
}
}
where:
For more information see the JUNOS Internet Software Configuration Guide: Interfaces and Class of Service.
Classification of packets and queue selectionOn Juniper devices, traffic is classified and enqueued on input to the device. For IP traffic, Juniper devices map incoming traffic to output transmission queues according to the value of the packet header’s IP precedence bits or DiffServ codepoint setting. By default, packets are placed in queue 0 with the exception of
filter-name The name of the filter
term-name The name of the filter term
match-conditions The condition that incoming packets must match for the action to be applied
action The steps to take for packets that match the filter condition
interface-name The name of the interface
logical-unit-number The number of the logical interface
filter-name The name of the filter to be applied
Service Activator 5.2.4 105

Configuring QoS and Access Control Features Juniper M-series Device Support Guide – Third Edition
routing protocol traffic which is placed in queue 3. In Service Activator, mapping of an IP precedence bit value to an output queue is indirectly configured when you apply a WRR PHB group.
Access rulesIn Service Activator, access rules are used to permit and deny access to identified traffic on a particular interface.
ImplementationAccess rules are implemented on Juniper devices by firewall filters. Each access rule translates directly to a filter that comprises a single filter term. If an access rule applies to both inbound and outbound traffic, two filters are generated. The generated filters are referenced in the configuration for the interfaces affected by the access rule. Access rules can be applied inbound and outbound.
For firewall filter syntax details, see Firewall filters on page 103.
The filter name is generated automatically and is in the following format:
<InFilter|OutFilter>--<interface_name>
where interface_name is the name of the interface.
The filter term name is generated automatically and is in the following format:
OrchFilterTerm--<rule_id>
where rule_id is the object ID of the rule allocated by Service Activator.
When access rules are implemented, as well as the specific permit or deny filters, additional filter terms are added to explicitly permit SNMP, Telnet and SSH traffic both inbound and outbound between the device and the device driver. These terms are always added at the start of the list, and minimize the chance of locking out network control traffic inadvertently.
Starting with version 4.0, Service Activator no longer configures an explicit ‘accept’ term to allow any IP traffic not directly matched. The Juniper implicit discard action denies traffic that does not match any of the preceding terms.
Be aware that, depending on your network architecture and use of management interfaces, you may need to appropriately add 'accept any any' access rules to avoid being locked out of your devices. One approach is to add an accept access rule to devices which is then inherited by the devices' interfaces used for management connectivity.
106 Service Activator 5.2.4

Juniper M-series Device Support Guide – Third Edition Configuring QoS and Access Control Features
Features supported by access rulesAccess rules may be applied to traffic identified by any of the following methods:
Source and/or destination IP address
Source and/or destination port number
TCP control bits
IP protocol
IP precedence value/DiffServ codepoint
In addition, header logging is supported in access rules via the log command. See below.
Header logging configuration details
Header logging is enabled in the Access Rule property page of the Access Rule dialog box.
The configuration sent to the device if header logging is enabled is:
filter <name> {
term <term name> {
from {
<other ACL options>;
}
then {
log;
{accept|discard};
}
}
}
Rate limiting (see Rate limiting on page 110) and WRR classification (see Weighted Round Robin queuing mechanism on page 114) are also implemented by firewall filters. If more than one feature is implemented on one interface, terms are automatically ordered so that they have the expected behavior. The order in which they are evaluated is WRR classification terms, followed by rate limiting terms followed by access rule terms.
Service Activator 5.2.4 107

Configuring QoS and Access Control Features Juniper M-series Device Support Guide – Third Edition
About TCP control bit filtering in access rules
On Juniper devices, the tcp-established keyword is used only when established is the only option used.
If other control bits of the TCP header are selected in the access rule, the CLI line is:
tcp-flags <other TCP control bits> & (ack|rst)
This is because tcp-established is an alias for tcp-flags ack|rst and tcp-flags commands cannot be repeated in the same filter term.
If TCP options are enabled, the configuration has the following format:
filter <name> {
term <term name> {
from {
<other ACL options>;
[tcp-established;] |
[tcp-flags <boolean combinations of
urgent|ack|push|rst|syn|fin>;]
}
then {
[log;]
{accept|discard};
}
}
}
108 Service Activator 5.2.4

Juniper M-series Device Support Guide – Third Edition Configuring QoS and Access Control Features
Example configurationThis example shows an access rule that has been applied to an access interface with the following configuration:
Action: Permit
Direction: In
Traffic Type: aol-3-c
Source: Subnet 10.50.0.5
Destination: Subnet 10.50.0.6
The resulting configuration of the access router is shown below.
groups {
orchestream {
firewall {
family inet {
filter InFilter--fe-0-1-3-0 {
term OrchFilterTerm--3932 {
from {
protocol 6;
source-port 5193;
source-address 10.50.0.5/32;
destination-address 10.50.0.6/32;
}
then {
accept;
}
}
}
}
}
}
interfaces {
fe-0/1/3 {
unit 0 {
family inet {
Service Activator 5.2.4 109

Configuring QoS and Access Control Features Juniper M-series Device Support Guide – Third Edition
filter {
input InFilter--fe-0-1-3-0;
}
}
}
}
}
}
}
Rate limitingRate limiting enables you to limit the amount of traffic passing in to or out of an interface. It can be used to control access to the core network by constraining specific outbound traffic to a particular bandwidth. Rate limiting is implemented on Juniper routers by a specialized firewall filter.
Rate limiting allows a certain amount of bursty traffic before it starts discarding packets. It applies the following rate limits to traffic that enters an interface:
Bandwidth – the number of permitted bits per second
Maximum burst size – the maximum burst size, defined in bytes, for traffic that exceeds the maximum bandwidth
Rate limiting is set up within PHB groups.
Rate limiting is implemented on Juniper devices by a specialized firewall filter. The filter features a policer that filters traffic based on bandwidth and burst size limits and specifies the action to take for traffic exceeding those conditions. Rate limiting is always applied to the outbound interface.
Juniper commandsThe Juniper command to define a policer is:
policer <policer_name> {
Rate limiting cannot be applied to MPLS traffic.
Rate limiting can only be applied to routers that have the Internet Processor II ASIC.
110 Service Activator 5.2.4

Juniper M-series Device Support Guide – Third Edition Configuring QoS and Access Control Features
if-exceeding {
bandwidth-limit <rate>;
burst-size-limit <bytes>;
}
then {
discard;
}
}
where:
For information on general firewall filter syntax, see Firewall filters on page 103.
ImplementationTraffic within a particular class of service is identified by IP precedence bit.
Values input to the user interface are as follows:
Average rate – the average transmission rate in Kbits/s for the class of service
Burst rate – the burst rate in Kbits/s for the class of service
Burst interval – the interval, in seconds, over which traffic in the selected class of service is allowed to maintain its maximum burst rate
The values required for the rate limiting policer statement are:
Bandwidth limit – the average number of bits permitted per second
Burst size limit – the total number of bytes per second in excess of the bandwidth limit allowed in a burst
Note that JUNOS devices calculate burst based on the maximum number of bytes permitted in the burst, rather than the duration of the burst. The Juniper device driver calculates the required values from those input through the user interface as follows:
Bandwidth limit (in Kbits/s) = average rate
rate The maximum burst rate in bits per second
bytes The maximum number of bytes to be transmitted, in bytes per second
Service Activator 5.2.4 111

Configuring QoS and Access Control Features Juniper M-series Device Support Guide – Third Edition
Burst size limit (in Kbytes/s) = (burst rate - average rate) * burst interval / 8
Example configurationThis example shows a PHB group that has been configured from the user interface with the following details:
The resulting configuration is as follows:
groups {
orchestream {
firewall {
family inet {
filter OutFilter--fe-0-1-3-0 {
policer policer1 {
if-exceeding {
bandwidth-limit 2000000;
burst-size-limit 625;
}
then {
discard;
}
}
policer policer2 {
if-exceeding {
bandwidth-limit 3000000;
burst-size-limit 625;
}
Note that the burst rate and average rate must not be set to equal values.
Class of service Average Burst Rate Interval
Gold (5) 4000 4500 10
Silver (3) 3000 3500 10
Bronze (0) 2000 2500 10
112 Service Activator 5.2.4

Juniper M-series Device Support Guide – Third Edition Configuring QoS and Access Control Features
then {
discard;
}
}
policer policer3 {
if-exceeding {
bandwidth-limit 4000000;
burst-size-limit 625;
}
then {
discard;
}
}
term OrchFilterTerm--policer1 {
from {
dscp af33;
}
then {
policer policer1;
accept;
}
}
term OrchFilterTerm--policer2 {
from {
precedence critical-ecp;
}
then {
policer policer2;
accept;
}
}
term OrchFilterTerm--policer3 {
from {
precedence internet-control;
}
Service Activator 5.2.4 113

Configuring QoS and Access Control Features Juniper M-series Device Support Guide – Third Edition
then {
policer policer3;
accept;
}
}
}
}
interfaces {
fe-0/1/3 {
unit 0 {
family inet {
filter {
output OutFilter--fe-0-1-3-0;
}
}
}
}
}
}
}
Weighted Round Robin queuing mechanismWeighted Round Robin (WRR) allows you to specify the percentage of bandwidth allocated to each queue. A greater number of packets is dequeued from a queue with a higher bandwidth percentage than one with a lower percentage whenever the queue is serviced.
Weights are assigned per queue for each interface within an FPC. Up to four transmission queues can be configured for each output link. The weight is defined as a percentage of the total link transmission bandwidth.
114 Service Activator 5.2.4

Juniper M-series Device Support Guide – Third Edition Configuring QoS and Access Control Features
Only queues containing packets are serviced according to the configured weighting – empty queues are not serviced. This means that a congested queue can borrow buffer space and bandwidth from an under-utilized queue.
It is also possible to configure the memory allocation used by each queue on an interface.
WRR is implemented within Service Activator by PHB groups.
For information on traffic classification and allocation of output queues on Juniper devices see Classification of packets and queue selection on page 105.
Incoming packets areclassified by IP
precedence/MPLS exp.and mapped to
appropriate queues
OutputFPC
PIC
PIC
PIC
PIC
Outgoing packets
Each queue isserviced in turn.The number ofpackets sent
depends on thequeue weight
10%
25%
10%
55%
Service Activator 5.2.4 115

Configuring QoS and Access Control Features Juniper M-series Device Support Guide – Third Edition
Juniper commandsJuniper implements WRR as follows:
Firewall filters are used to map the traffic to the appropriate forwarding classes
Scheduling policy maps are used to configure the forwarding classes that represent packet queues and associate them with physical interfaces.
WRR is always applied to outbound traffic.
Classification via firewall filters
An outbound firewall filter is used to apply the default mapping from IP precedence to forwarding class.
The format and syntax of the firewall filter command is as described in Firewall filters on page 103.
Scheduling policy maps
A scheduler configuration block is used to specify the bandwidth for a queue. The following Juniper command is configured by Service Activator at the [edit class-of-service] hierarchy level:
schedulers {
<scheduler-name> {
transmit-rate percent <percentage>;
}
}
where:
The following command is used to map a specified forwarding class to a scheduler configuration:
scheduler-maps {
<map-name> {
forwarding-class <class-name> scheduler <scheduler-name>;
}
}
scheduler-name A name allocated by Service Activator in the form Orch-Scheduler- interface name
percentage The calculated percentage bandwidth to be allocated to this queue
116 Service Activator 5.2.4

Juniper M-series Device Support Guide – Third Edition Configuring QoS and Access Control Features
where:
The scheduler map is then associated with an output interface:
interfaces {
<interface-name> {
scheduler-map <map-name>;
}
}
map-name A name allocated by Service Activator in the form Orch-Scheduler-Map-interface name
class-name The name of the forwarding-class, i.e. best-effort, expedited-forwarding, assured-forwarding or network-control
scheduler-name The name of the associated scheduler
Service Activator 5.2.4 117

Configuring QoS and Access Control Features Juniper M-series Device Support Guide – Third Edition
ImplementationTraffic within a particular class of service is identified by the value of the IP precedence bits in the packet header or the experimental bits in the MPLS label.
WRR is implemented in Service Activator by means of a PHB group.
For each class of service, a Weight can be specified, which is converted to a percentage of the available bandwidth.
The device driver interprets each value as a ratio from which it calculates the bandwidth percentage. Each percentage value is rounded down to the nearest whole number. For example, if the weights allocated are 3, 6, 10, 1, the driver allocates the following bandwidth percentages: 15%, 30%, 50% and 5%. If the percentage
The Packet Limit value is not used. Any value specified is ignored.
118 Service Activator 5.2.4

Juniper M-series Device Support Guide – Third Edition Configuring QoS and Access Control Features
values add up to less than 100% any excess bandwidth is distributed across all queues.
Juniper.policy file with example Juniper MPLS PHB Group-WRRTo support the application of WRR PHBs, Service Activator includes a juniper.policy file that contains an example Juniper MPLS PHB Group-WRR. This PHB Group lets you define WRR schedulers for four classes of service:
Juniper-MPLS-best-effort (uses packet marking precedence [0, 1])
Juniper-MPLS-expedited-forwarding (uses packet marking precedence [2, 3])
Juniper-MPLS-assured-forwarding (uses packet marking precedence [4, 5])
Juniper-MPLS-network-control (uses packet marking precedence [6, 7])
The WRR schedulers are applied at the outbound (transmit) direction of the interface and assigned a percentage of interface bandwidth according to configured relative weights. The packet filters of the example Juniper MPLS PHB Group-WRR are implemented as firewall filters and use IP Precedence packet marking to assign packets to one of the 4 forwarding classes:
precedence [0, 1] (mapped to forwarding-class best-effort)
precedence [2, 3] (mapped to forwarding-class expedited-forwarding)
precedence [4, 5] (mapped to forwarding-class assured-forwarding)
precedence [6, 7] (mapped to forwarding-class network-control)
Note: A limitation of the example Juniper MPLS PHB Group-WRR is that exactly four classes of service as defined in the juniper.policy file must be used and these CoSs cannot be modified. Also, the Default CoS visible in the GUI is ignored by the device driver and can be safely de-selected.
We recommend that routing protocol traffic (IP Precedence 6 and 7 or DiffServ codepoints 48 and 56) is always allocated at least 5% of the available bandwidth.
By default, IP traffic is placed in output transmission queue 0 and network control traffic in queue 3. Queue 0 is assigned 95% of the bandwidth, queue 3 is assigned 5%. If a WRR PHB group is not applied to an interface, this default configuration applies.
Service Activator 5.2.4 119

Configuring QoS and Access Control Features Juniper M-series Device Support Guide – Third Edition
Example configuration for the Example Juniper MPLS PHB Group-WRR
This example shows the example Juniper MPLS PHB Group-WRR configured from the user interface with the following parameters:
The resulting router configuration is:
orchestream {
interfaces {
ge-1/0/0 {
unit 1 {
family inet {
filter {
output OutFilter-ge-1-0-0-1;
}
}
}
class-of-service {
interfaces {
ge-1/0/0 {
scheduler-map Orch-Scheduler-Map-ge-1-0-0;
}
}
scheduler-maps {
Orch-Scheduler-Map-ge-1-0-0 {
forwarding-class best-effort scheduler Orch-Scheduler-ge-1-0-0-be;
Class of service Equivalent Packet Marking Weight
Juniper-MPLS-best-effort IP Precedence 0 and 1 25
Juniper-MPLS-expedited-forwarding
IP Precedence 2 and 3 40
Juniper-MPLS-assured-forwarding
IP Precedence 4 and 5 30
Juniper-MPLS-network-control
IP Precedence 6 and 7 5
120 Service Activator 5.2.4

Juniper M-series Device Support Guide – Third Edition Configuring QoS and Access Control Features
forwarding-class expedited-forwarding scheduler Orch-Scheduler-ge-1-0-0-ef;
forwarding-class assured-forwarding scheduler Orch-Scheduler-ge-1-0-0-af;
forwarding-class network-control scheduler Orch-Scheduler-ge-1-0-0-nc;
}
}
schedulers {
Orch-Scheduler-ge-1-0-0-be {
transmit-rate percent 25;
}
Orch-Scheduler-ge-1-0-0-ef {
transmit-rate percent 40;
}
Orch-Scheduler-ge-1-0-0-af {
transmit-rate percent 30;
}
Orch-Scheduler-ge-1-0-0-nc {
transmit-rate percent 5;
}
}
}
firewall {
family inet {
filter OutFilter-ge-1-0-0-1 {
term OrchFilter-term-classifier-0 {
from {
precedence [ 0 1 ];
}
then {
forwarding-class best-effort;
next term;
}
}
Service Activator 5.2.4 121

Configuring QoS and Access Control Features Juniper M-series Device Support Guide – Third Edition
term OrchFilter-term-classifier-1 {
from {
precedence [ 2 3 ];
}
then {
forwarding-class expedited-forwarding;
next term;
}
}
term OrchFilter-term-classifier-2 {
from {
precedence [ 4 5 ];
}
then {
forwarding-class assured-forwarding;
next term;
}
}
term OrchFilter-term-classifier-3 {
from {
precedence [ 6 7 ];
}
then forwarding-class network-control;
}
}
122 Service Activator 5.2.4

Juniper M-series Device Support Guide – Third Edition Troubleshooting
Chapter 9
Troubleshooting
This chapter provides troubleshooting guidelines for configuring Juniper M-series devices with Service Activator.
Service Activator 5.2.4 123

Troubleshooting Juniper M-series Device Support Guide – Third Edition
Checking the Juniper M-series device logsThe Juniper device driver records all device configuration changes that it makes in an audit log file. You can check these log files to see if configuration is being successfully applied to a device.
A new log file is created following the first transaction after midnight. The same log file is used if a device driver is stopped and started within a 24-hour period.
The log files are created in /opt/OracleCommunications/ServiceActivator/AuditTrails.
Each file is named <day>.juniper.audit.log, e.g. Tue.juniper.audit.log. After a week, the log files are automatically overwritten, so you should archive them within this period if you want to keep them.
Log files are text files, recording the date, time and details of each configuration change made to the devices controlled by the device driver.
Discovering Juniper M-series devicesIt is possible to discover devices in Service Activator by specifying an IP address and hop count to discover connected devices within a certain number of hops from the specified device.
The ability to discover devices using this method is dependent on each device’s routing information being available in SNMP, the protocol used by Service Activator to interrogate routers and network segments. Juniper devices do not provide access to their routing tables via SNMP. Specifying a hop count other than zero therefore does not affect the number of devices discovered.
Communication problemsEnsure that an SNMP Read community is set up on the device, e.g. the following command is included with a suitable community string:
[edit snmp]
community public {
authorization read-only;
}
We recommend that you set the Discovery Method to Segment scan in the Discovery dialog box if the devices are known to have large routing tables.
124 Service Activator 5.2.4

Juniper M-series Device Support Guide – Third Edition Troubleshooting
Commit errorsErrors or conflicts in the configuration sent to the device are detected by JUNOS when the device driver runs the commit check command. The device driver saves the failed configuration to a file named orchestream_last_failed_config.txt in the /var/home/user_name directory on the Juniper device.
You can investigate the cause of the failure by entering configuration mode, loading the orchestream_last_failed_config.txt file and running the commit check command:
hostname> configure
hostname# load override orchestream_last_failed_config.txt
hostname# commit check
JUNOS checks the configuration file and displays a message indicating the cause of the error. For example:
[edit policy-options community Orch-jm10_2_fe_0_0_1-SOO members origin:0:0]
invalid autonomous system value at '0' not in range 1 to 65535
error: configuration check-out failed
Inheritance GroupsItems in the Base configuration group are inherited from the Orchestream configuration group. However, where there are like-named items found in both groups, the item in the Base configuration takes priority. If configuration you have set up in Service Activator is not being activated, you may have a naming collision between the two groups.
Useful JUNOS commandsThere are a number of commands that can be useful in checking device configuration. For full details of the command syntax and an explanation of the reported information, see the Juniper documentation.
General configurationshow configuration
Displays the configuration that is currently running on the device.
show chassis hardware
Service Activator 5.2.4 125

Troubleshooting Juniper M-series Device Support Guide – Third Edition
Indicates whether a device has an Internet Processor or an Internet Processor II ASIC.
Monitoring and troubleshootingThe following commands can be used to display information and statistics about the software and test network connectivity.
clear <option>
Clears information from various router and protocol databases.
commit check
Verifies the syntax of a configuration but does not activate it.
monitor (start | stop | list) <interface traffic>
Performs real-time debugging of various software components, including the routing protocols and interfaces.
ping
Determines the reachability of a remote network host.
show <option>
Displays the current configuration and information about interfaces, routing protocols, routing tables, routing policy filters, and the chassis.
test <option>
Tests the configuration and application of policy filters and AS path regular expressions.
traceroute
Traces the route to a remote network host.
For detailed information on using these commands see the JUNOS Internet Software Operational Mode Command Reference.
126 Service Activator 5.2.4

Juniper M-series Device Support Guide – Third Edition Useful References
Chapter 10
Useful References
This chapter provides links to useful pages on the Juniper website and suggestions for further reading.
Service Activator 5.2.4 127

Useful References Juniper M-series Device Support Guide – Third Edition
Juniper websiteFull information about Juniper hardware and software is available from the Juniper website, www.juniper.net. The following URLs are particularly useful.
Index to Juniper publications
www.juniper.net/techpubs/index.html
MPLS Applications PDF (including an overview of CCCs) (PDF, JUNOS 6.0)
http://www.juniper.net/techpubs/software/junos/junos60/swconfig60-mpls-apps/download/swconfig60-mpls-apps.pdf
Overview of QoS features (PDF, JUNOS 6.0)
http://www.juniper.net/techpubs/software/junos/junos60/swconfig60-interfaces/download/swconfig60-interfaces.pdf
Overview of firewall features (PDF, JUNOS 6.0)
http://www.juniper.net/techpubs/software/junos/junos60/swconfig60-policy/download/swconfig60-policy.pdf
Overview of MPLS VPNs (PDF, JUNOS 6.0)
http://www.juniper.net/techpubs/software/junos/junos60/swconfig60-vpns/download/swconfig60-vpns.pdf
Martini Drafts
Current versions of the draft documents describing the Martini protocols implemented in the Juniper M-series Device Driver are available here:
http://www.ietf.org/internet-drafts/?C=S&O=D
The versions specified may not be the latest available at the above link.
Martini, L., et al., “Encapsulation Methods for Transport of Layer 2 Frames Over IP and MPLS Networks”, IETF Internet Draft, draft-martini-l2circuit-encap-mpls-04.txt, work-in-progress.
Martini, L., et al., “Transport of Layer 2 Frames Over MPLS”, IETF Internet Draft, draft-martini-l2circuit-trans-mpls-08.txt, work-in-progress.
Martini, L., et al., “Encapsulation Methods for Transport of Ethernet Frames Over IP and MPLS Networks” IETF Internet Draft, draft-martini-ethernet-encap-mpls-01.txt, work-in-progress.
Martini, L., et al., “Encapsulation Methods for Transport of ATM Cells/Frame Over IP and MPLS Networks”, IETF Internet Draft, draft-martini-atm-encap-mpls-01.txt, work-in-progress.
128 Service Activator 5.2.4

Juniper M-series Device Support Guide – Third Edition Useful References
Juniper M-series technical documentationThe following guides are particularly useful:
JUNOS Internet Software Configuration Guide: MPLS Applications
Provides overview and configuration information for MPLS applications, including CCCs
JUNOS Internet Software Configuration Guide: VPNs
Provides an overview of Layer 2 and Layer 3 Virtual Private Networks (VPNs), describes how to configure VPNs, and provides configuration examples.
JUNOS Internet Software Configuration Guide: Policy Framework
Provides an overview of policy concepts and describes how to configure routing policy, firewall filters, and forwarding options.
JUNOS Internet Software Configuration Guide: Interfaces and Class of Service
Provides an overview of the interface and class-of-service functions and describes how to configure the interfaces on the router.
Service Activator 5.2.4 129

Useful References Juniper M-series Device Support Guide – Third Edition
130 Service Activator 5.2.4

Juniper M-series Device Support Guide – Third Edition MPLS-VPN Device Configuration
Appendix A
MPLS-VPN Device Configuration
This appendix provides example configuration of the routers involved in an MPLS-VPN. The following examples are given:
The initial configuration of PE and CE devices before the VPN is set up, showing the necessary manual preconfiguration.
The configuration of PE devices after a management VPN has been set up.
The configuration of PE devices after both management and customer VPNs have been created.
Service Activator 5.2.4 131

MPLS-VPN Device Configuration Juniper M-series Device Support Guide – Third Edition
Sample networkThe network associated with the sample configuration files is as follows:
A management VPN is set up comprising the Management site and all other sites. With Service Activator running at the management site, all CE routers can be managed.
Customer VPN 1 comprises sites 1, 2 and 4.
Customer VPN 2 comprises sites 1, 3 and 5.
Note that in order to configure the management VPN, two links are required between the management site and the core network, one to provide VPN connectivity and one to provide routes to the Service Provider backbone IGP.
PE2
CE3
CE
CE
CE
CE
CE
CE
PE PE
PE1
mgmtCE
CE2
CE1
CE5
CE4
Service Provider CoreNetwork
Management Site
Site 1
Site 2
Site 3
Site 4
Site 5
OSPF
EBGP
EBGP
RIP
Staticroutes
EBGP
AS1
at-0/0/2
at-0/0/1 fe-1/0/0 fe-1/0/0
at-0/0/0
at-0/0/1
at-0/0/2
132 Service Activator 5.2.4

Juniper M-series Device Support Guide – Third Edition MPLS-VPN Device Configuration
Note that the interfaces at both ends of the ATM 0.1 link between PE1 and mgmtCE, i.e. the link that is not to be used for the VPN connection, must be assigned a role of Disabled within Service Activator to prevent them being configured into a VPN.
For details of the steps required to set up management and customer VPNs, see the Configuring VPN Services guide.
PE1
mgmtCE
Management Site runningService Activator
AT-0/0/0.2 172.16.12.29/30
AT-0/0/0.1 172.16.12.25/30
AT-0/0/0.2 172.16.12.30/30
AT-0/0/0.1 172.16.12.26/30
CE
PE
Service Activator 5.2.4 133

MPLS-VPN Device Configuration Juniper M-series Device Support Guide – Third Edition
134 Service Activator 5.2.4

Juniper M-series Device Support Guide – Third Edition Index
Index
AAccess privileges, configure user 26Access rules
example configuration 109implemented by firewall filters 106
Allow AS in 43Alternative routes, maintain in routing
table 67AS override 63ASIC versions 19ASN
allow in AS_PATH 43, 62override in AS_PATH 43, 63, 65, 66
Authentication 17
BBGP
autonomous systems 42communities 49domain-level parameters 42
BGP, eBGP for PE-CE communication 61bgp.l3vpn.0 routing table 45
CCapabilities, obtaining 19, 20CCC
Layer 2 switching see Layer 2 switching CCCmanual pre-configuration 39MPLS tunneling see MPLS tunneling CCCoverview 77protocols used in 78
CE devicesmanual configuration 30
Check and force consistency 20Checking Service Activator device logs 124Circuit cross connect see CCCclear command 126
Command-line parameters-FileConfigDelivery 22-FileConfigDeliveryDir 22for off-line configuration 22-NoDeviceComms 23on Solaris 12
Commandsclear 126commit check 126monitor 126ping 126show 126test 126traceroute 126
Commands, troubleshooting 125commit check command 126Commit errors, troubleshooting 125Communication problems,
troubleshooting 124Configuration
activating 16applying Service Activator 20
Configuration fileshierarchy in 14overview of 14
Configuration groups, overview of 15Configuring
IP 29LDP 29loopback interface 29, 39MPLS 29, 39RSVP 36SNMP 26
CoSoverview 103
customer support x
Service Activator 5.2.4 135

Juniper M-series Device Support Guide – Third Edition Index
Ddamping command 67Denying traffic with filters 103Device capabilities 19Device capabilities, obtaining 19, 20Device logs, checking 124Device roles 44
MPLS VPNs 44Devices, supported 7Discovering Juniper devices 124Discovery, and MPLS VPNs 44discovery,ASIC versions 19documentation
downloading xiService Activator xi
Domain-level parametersMPLS VPNs 42
EeBGP 61
Juniper commands 61local preference 63PE-CE communication 61prefix limit 64Site of Origin 65
Example configurationaccess rules 109Group-WRR 120rate limiting 112
Export mapsname option 56
Export policyPE-CE 72prefix list 64VRF table 51
FFiles 125Filter see Firewall filters 103Firewall filters 103
and access rules 106applying to an interface 105defining 104defining policer statements 110overview of 103
Flexible PIC Concentrator see FPCForce Install VRF option 55FPC
overview of 102
GGroup-WRR
example configuration 120
HHop count, and Juniper devices 124Hub and spoke VPNs 49
IiBGP
peering 42PE-PE peering 57previously configured 58switch off iBGP peering 42
Import policyprefix list 64
Import policy, VRF table 53inet.0 routing table 45inet.3 routing table 45Installation 10Interface
roles 44Interface capabilities 19Interface IP address 59Interface types
Juniper 8IP
configuring 29
JJUNOS versions
tested 7JUNOS versions, supported 7
LLayer 2 switching CCC
connection definition 81, 99description of 78encapsulation definition 79, 95
LDPconfiguring 29
Local preference 63Login class, configure 26Loopback interface 30
configuring 29, 39loops option 62
Service Activator 5.2.4 136

Juniper M-series Device Support Guide – Third Edition Index
MManagement VPNs 49Manual pre-configuration
MPLS tunneling CCCs 39MPLS VPNs 28SNMP 26
Maximum paths, in VPNs 43MD5 authentication
PE-PE 43, 58Mesh VPNs 49monitor command 126Monitoring 126
clear command 126commit check command 126monitor command 126ping command 126show command 126test command 126traceroute command 126
MPLSconfigured on access interfaces 59configuring 29, 39used in CCCs 78
MPLS tunneling CCCconnection definition 84description of 82implementation in Service Activator 85LSP definition 84manual pre-configuration 39
MPLS VPN configurationmandatory 28optional 30
MPLS VPNsdevice roles 44discovery 44domain-level parameters 42export policy for VRF table 51hub and spoke route targets 50import policy for VRF table 53manual pre-configuration 28PE-CE configuration 60PE-PE peering 57pre-requisites 42route distinguishers 47route targets 49, 50VRF table 45
mpls.0 routing table 45
Multiple paths, in VPNs 67
OObtaining capabilities 19Obtaining device capabilities 19, 20Off-line configuration 21orchestream_last_failed_config.txt 125orchestream_last_failed_config.txt, failed
configuration 125OSPF
Juniper commands 70PE-CE communication 70
Overlapping VPNs 69
PP devices
manual configuration 30PE devices
manual configuration 28PE-CE communication
export policy 72static routes 71using eBGP 60, 61using OSPF 69using RIP 69
PE-CE export policyJuniper commands 73
PE-PE peeringMPLS VPNs 57
Permitting traffic with filters 103ping command 126Pre-configuration, required 26Pre-defined
prefix list filters 31, 33, 64route list filters 31
Pre-defined export maps 30Prefix limit
specifying 64Prefix list filters
configuring 34creating 34pre-defined 31, 33, 64
Privilegesconfigure user 26
productsdownloading xi
Service Activator 5.2.4 137

Juniper M-series Device Support Guide – Third Edition Index
QQoS
overview 103Queue selection
IPv4 traffic 105
RRate limiting
bandwidth/burst size calculation 111configuration command 110example configuration 112implementation in Service Activator 110
RD numberformats 48per VPN 48, 56
RD numbers 47Redistributing routes
Service Activator default metrics 73RIP 69
Juniper commands 69PE-CE communication 69
Role assignment 44Route dampening 67Route distinguishers 47Route list filters
configuring 31pre-defined 31
Route reflectors 42, 58Route targets 49
in hub and spoke VPNs 50Router pre-configuration 25, 42Routes, allow load-sharing for VPNs 67Routing tables
maintained by JUNOS 45RSVP
configuring 36use in MPLS tunneling CCCs 78
RT numbers 49
SSecure Shell 19Shareable 55Shareable VRF option 55Shareable VRF tables 55show command 126Site of Origin
eBGP 65Site of origin 65
SNMPchecking the SNMP Read community 124configuring 26
SOO 65SSH
enabling 27Static routes, PE-CE communication 71Static routes, static routes for PE-CE
communication 71support
customer xSupported devices 7Supported JUNOS versions 7
TTelnet
enabling 27test command 126traceroute command 126Traffic, filtering 103Troubleshooting 124–126
checking Service Activator device logs 124communication problems 124
Troubleshooting See Monitoring
UUser
access privileges, configure 26create 26
VVPN BGP page 42VPN topologies 49VPNs
fully meshed 49hub and spoke 49management 49maximum paths 43multiple paths 67
VPNs See MPLS VPNsVRF reduction 55VRF re-use 55VRF table 45
export policy 51import and export policies 51import policy 53Juniper commands 46prefix limit 64
Service Activator 5.2.4 138

Juniper M-series Device Support Guide – Third Edition Index
WWeighted Round Robin 114Weighted Round Robin see WRRWRR
implementation 118implementation in Service Activator 118overview of 114
Service Activator 5.2.4 139

Index Juniper M-series Device Support Guide – Third Edition
140 Service Activator 5.2.4