JavaScript Robotics
93
JavaScript & Robotics Anna Gerber Anna Gerber JS Robotics
-
Upload
annagerber -
Category
Devices & Hardware
-
view
120 -
download
3
Transcript of JavaScript Robotics

JavaScript & Robotics
Anna Gerber
Anna Gerber JS Robotics

Programming is like writing a recipe…
Direc&ons (statements)
Ingredients (values & variables)
Anna Gerber JS Robotics

Programming languages
Anna Gerber JS Robotics

JS Tools
Platform • Web Browser
– e.g. Google Chrome with built-in developer tools:https://developers.google.com/chrome-developer-tools/
• Node.js – https://nodejs.org/
Editor • JavaScript (JS) programs
are stored in text files with .js file extension or embedded in HTML documents
• Use your favourite text editor to create and edit JS
• You can use online editors e.g JSFiddle http://jsfiddle.net/
Anna Gerber JS Robotics

Console
• Right-click in Chrome and select Inspect Element or select View > Developer > Developer Tools from the menu
• Select the Console tab from the top of the developer tools panel
• Type in and hit return to run (evaluate) statements
Anna Gerber JS Robotics

JSFiddle
• Online editor and development environment, allows code to be saved and shared
• Great for prototyping
Anna Gerber JS Robotics

Source Code Management
Git is a distributed version control and source code management system.
• Hosted Git: – GitHub https://github.com/ – Bitbucket https://bitbucket.org/
• SourceTree is a free graphical tool for working with Git & Mercurial – http://www.sourcetreeapp.com/
• Other systems include Mercurial (hg), Subversion (SVN), CVS
Anna Gerber JS Robotics

JAVASCRIPT BASICS
Anna Gerber JS Robotics

Values
• Numbers – Integers (whole numbers) e.g. 0, 1, 2, 3, 4 – Floats (fractional numbers) e.g. 3.14
• Strings – "A string of characters" – 'This is also a string, but in single quotes' – "Escape quotes with backslash like this: \" ";
• Booleans – true – false
Anna Gerber JS Robotics

Numeric operators
• Addition: 5 + 3 • Subtraction: 7 – 6 • Multiplication: 5.3 * 2.7 • Division: 20 / 4 • Modulo: 8 % 2
Try evalua&ng some numeric
expressions using the console
Anna Gerber JS Robotics

String operators
• Concatenation // Evaluates to "this is a concatenated string" "this is " + "a concatenated string"
• What happens if you add a number to a string? "Here is a string with a number " + 7
Try it in the console!
Anna Gerber JS Robotics

Variables
Store a value with a name for reference elsewhere in the program
Declaration: var myVariable; Assignment statements: myVariable = true; Declaration and initial assignment: var x = 0; var myString = "This is a string";
Anna Gerber JS Robotics

Statements
• Optionally separated by semi-colons • Use curly braces { } to group statements into
blocks • Indent code inside blocks
var radius = 3; var circumference = 2 * Math.PI * radius; console.log("result is " + circumference)
Anna Gerber JS Robotics

Update a variable var x = 0; // other statements ... x = 1;
Shorthands for updating variable values include: +=-=*=/=%=
x += 3 is equivalent to x = x + 3
Increment: x++ or ++x Decrement: x-- or --x
Anna Gerber JS Robotics

Comments
// This is a comment until the end of this line only var aVariable = "Not a comment";
/* * This is a comment spanning several lines, * until the star slash */ // Use comments to disable/enable statements // var anotherVariable = "Disabled code";
Anna Gerber JS Robotics

Structuring your programs
• Functions • Control flow – Conditional
• if / else • switch
– Loops • For • while
– Objects
Anna Gerber JS Robotics

Functions
• A block of statements that can be named and called • Can take parameters, separated by commas e.g.
radius • Can perform an action or return a result (or both!)
function calculateCircumference (radius) { var circumference = 2 * Math.PI * radius; return circumference; }
// The function is called elsewhere in the program, we pass in the value 3 for the radius
var myCircumference = calculateCircumference(3);
Anna Gerber JS Robotics

Built-in libraries
• Math.PI is a constant (a variable that never changes value) from the built-in Math library. Some additional Math functions: – Math.round(4.7) – Math.sqrt(9) – Math.max(1,5) – Math.min(6,7) – Math.floor(5.6) – Math.random()
• console.log() prints values to the console
Experiment with these func&ons using the console
Anna Gerber JS Robotics

Comparison operators
• Expressions based on comparison operators evaluate to a boolean: – Equal:
• 3.5 == 2 // (evaluates to false) – Not equal:
• "aString" != "anotherString" // (true) – Greater than / (or equal):
• 6 > 6 // (false) • 6 >= 6 // (true)
– Less than / (or equal): • 5 < 3 // (false) • 5 <= 3 // (false)
Anna Gerber JS Robotics

Boolean operators
• Combine boolean expressions using logical operators: – AND
&&
– OR ||
– NOT !
Anna Gerber JS Robotics

Conditional Statement
if (myVariable == 0) { // do something...} else { // do something else...}
Anna Gerber JS Robotics

Chaining conditional statements
Implement alternative behaviours based on multiple conditions
var temperature = getTemperature(); if (temperature < 20) { console.log("It is cold");
} else if (temperature >= 20 && temperature < 29) { console.log("It is warm");
} else { console.log("it is hot");
}
Anna Gerber JS Robotics

Loops
While loop var maxLimit = 20, counter = 0, value = 0; while (value != 6 && counter < maxLimit) { // ensure variables in loop condition change
counter++; }
For loop for (var i = 0; i < 10; i++){ // print 0,1,2,3,4,5,6,7,8.9 console.log(i); }
Anna Gerber JS Robotics

Arrays
An ordered list of values
var myArray = [1,6,10]; var anotherArray = ["first value", 5, "third value", false];
// Access values – indexed from 0 myArray[0] // 1 anotherArray[2] // "third value"
Anna Gerber JS Robotics

Objects • Objects have
– State (variables) – Behaviour (functions)
• Classes provide blueprints for Objects • Examples: Array, String, Date
var anArray = new Array() anArray.push("red") // behaviour, anArray is ["red"] anArray.length // state, it is 1 anArray.push("blue") // anArray is ["red","blue"] anArray.length // value of length is now 2
var myString = "here's a string" myString.length // 15 myString.split(" ") // ["here's", "a", "string"] myString.toUpperCase() // "HERE'S A STRING"
var now = new Date();var thisYear = now.getFullYear();
Anna Gerber JS Robotics

JavaScript Object Notation (JSON) var myMovies = [
{ name: "The Hobbit", year: "2013", director: "Peter Jackson", stars: ["Ian McKellen", "Martin Freeman", "Richard Armitage"]
}, { name: "Star Trek", year: "2009", director: "J. J. Abrams", stars: ["Chris Pine", "Zachary Quinto", "Leonard Nimoy", "Zoe Saldana"]
} ]
Anna Gerber JS Robotics

Components of a HTML5 Web App
UI (e.g. index.html)
App-‐specific scripts
(e.g. myapp.js)
Library scripts (e.g. jQuery)
Library stylesheets (e.g. TwiIer Bootstrap)
App-‐specific stylesheets
HTML (Structure)
JavaScript (Behaviour)
CSS (Appearance)
Anna Gerber JS Robotics

DOM
• Document Object Model • Allows traversal and manipulation of the tree of
elements (and their attributes) that make up an HTML page
• Elements and attributes:
<div id="myId" class="my-css-class">…</div>
Anna Gerber JS Robotics

Working with Frameworks & Libraries
• API = Application Programming Interface • Describes how to interact with a library or
software component • For JS libraries, describes available types and
their public fields and functions • node.js libraries are usually published via NPM – https://www.npmjs.com/
• Front end libraries may be published via NPM, Bower, or available on Content Delivery Networks
Anna Gerber JS Robotics

ROBOTICS
Anna Gerber JS Robotics

Anna Gerber JS Robotics
Sensors (Inputs e.g. ultrasonic sensor)
Control (Microcontroller = brain)
Actuators (Outputs e.g. motors)
Power Chassis

PHYSICAL COMPUTING
Building interactive systems that sense and act on (or respond to) the physical world
Anna Gerber JS Robotics

Electricity
• Electricity is a form of energy • We can connect components that convert
electrical energy into other forms of energy: light, sound, movement, heat etc, into a circuit
• In a Direct Current (DC) circuit,electrical energy flows from the positive side of a power source to thenegative side, i.e. from + (power) to – (ground)
Anna Gerber JS Robotics

Electrical concepts
• Current (Amps): measures the flow of electrical energy through a circuit
• Voltage (Volts): measures difference in potential energy between the positive and negative sides of a circuit
• Resistance (Ohms): measures a material's opposition to the flow of energy
• Power (Watts): the rate at which energy is converted from one form to another
Anna Gerber JS Robotics

Ohm's Law
Current = Voltage / Resistance
• Increase the voltage, and the current will increase (i.e. speed up)
• Increase the resistance and the current will decrease
Anna Gerber JS Robotics

Circuit Schematics
• Diagrammatic representations of components and how they are connected
Anna Gerber JS Robotics

Using a Breadboard
Anna Gerber JS Robotics
• Use to prototype circuits without soldering by plugging in components and jumper wires
• Numbered rows are connected • Some have power rails along the sides

Resistors
• Introduces resistance, so restricts the amount of current that can flow through a circuit
• Can be connected in either direction • Bend and trim the leads to approx 1cm each
make it easier to use with the breadboard
Anna Gerber JS Robotics

Anna Gerber JS Robotics

LEDs
• Light Emitting Diode • Polarized: diodes act like one way valves so
must be connected in a certain direction • Emits light when a current passes through
Anna Gerber JS Robotics
Anode (+) longer lead connects to power
Cathode (-‐) connects to ground

Creating a circuit
• Hook up an LED to a power source: anode to + and cathode to -
• Include a current limiting resistor to avoid damaging the LED
Anna Gerber JS Robotics

Adding more components
• Add a second LED to your circuit, experiment with connecting the LEDs in parallel vs series
Anna Gerber JS Robotics

Pushbuttons
• Also known as a momentary switch • Can be connected in either direction • Has two sets of leads on either side
Anna Gerber JS Robotics
Use leads from the same side together

Add a button to your circuit
Anna Gerber JS Robotics

Control
• Microcontroller co-ordinates robot inputs (sensors) and outputs (actuators)
• See http://arduino.cc/
Anna Gerber JS Robotics

Sensors
• Environmental condi&ons (e.g. temperature, humidity, smoke)
• Magne&c (e.g. hall effect sensor)
• Light (e.g. photo resistor) • Sound (e.g. microphone)
• Mo&on (e.g. accelerometer, <, pressure)
• User / Physical Input (e.g. buIon)
Anna Gerber JS Robotics

Example Sensors
Anna Gerber JS Robotics
PHOTO RESISTOR
Produces a variable resistance dependant on the amount of incident light.
ULTRASONIC SENSOR Used to detect distance from objects.
PUSHBUTTON
Can be used as a bump sensor: indicates that the robot has bumped into something when pressed

Actuators
• Light & Displays (e.g. LED, LCD) • Sound (e.g. Piezo buzzer) • Mo&on (e.g. Servo, DC Motor, Solenoid)
• Power (e.g. Relay)
Anna Gerber JS Robotics

Example Actuators: Light and Sound
Anna Gerber JS Robotics
PIEZO ELEMENT
A pulse of current will cause it to click. A stream of pulses will cause it to emit a tone.
LED & RGB LED
We are using Common Cathode RGB LEDs. The longer lead is the common lead which connects to ground. The three other leads are for Red, Green and Blue signal
LED Matrix 8 x 8 matrix of single colour LEDs. One row 8 pins corresponds to rows and the other to columns. We will connect to these pins via shi^ registers.

Example Actutators: Motors
Anna Gerber JS Robotics
9G HOBBY SERVO
A box containing a motor with gears to make it posi&onable from 0 to 180 degrees. Posi&oning is controlled through a &med pulse, between 1.25 milliseconds (0 degrees) and 1.75 milliseconds (180 degrees) (1.5 milliseconds for 90 degrees).
CONTINUOUS ROTATION SERVO A servo that rotates 360 degrees

Digital vs Analog
• Digital – discrete values (0 or 1) – Examples: tilt sensor, push button
• Analog – continuous values – typically values for analog sensors are
constrained within a range e.g. 0 – 255, 0 – 1023 – Example: photo resistor
• Some sensors and actuators support both digital and analog modes
Anna Gerber JS Robotics

Johnny-Five
• Open Source JavaScript Framework for programming Arduino
• https://github.com/rwaldron/johnny-five • Works with nodejs, a platform that runs
programs using Chrome's JS runtime • Communicates with the Arduino using the
Firmata protocol • Supports other devices e.g. Raspberry Pi,
BeagleBone Black, via I/O Plugins • Install via NPM: npm install johnny-‐five
Anna Gerber JS Robotics

Loading Firmata onto the Arduino
• Once-off setup to prepare our Arduino for use with Johnny-Five: – Connect the microcontroller board via USB – Launch Arduino IDE and open the Firmata sketch
via the menu: File > Examples > Firmata > StandardFirmata
– Select your board type (e.g. Arduino Nano w/ ATmega328) via Tools > Board
– Select the port for your board via Tools > Serial Port > (the port of your Arduino) e.g. /dev/tty.usbserial-A9GF3L9D
– Upload the program by clicking on Upload – Close the IDE
Anna Gerber JS Robotics

BLINKING AN LED
Anna Gerber JS Robotics

Connecting an LED to the Arduino
• Unplug the Arduino! • Attach long lead of
LED to pin 13 of Arduino
• Connect resistor to cathode of resistor and ground rail of breadboard
• Connect GND pin of Arduino to ground rail of breadboard using a jumper wire
Anna Gerber JS Robotics

Creating the Johnny-Five program
1. Create a JavaScript file (e.g. blink.js) 2. Edit it using a text editor e.g. Atom 3. At the start of your program load the johnny-
five library into a variable:
var j5 = require("johnny-‐five");
A variable is a named "container" for storing data, including values and functions (reusable blocks of code)
Anna Gerber JS Robotics

Creating a Board object JavaScript objects are groupings of properties (state) and functions (behaviour), and in our programs they correspond to sensors, actuators and to the Arduino. – We can create a Board object which corresponds to our Arduino and store it in a variable. – The new keyword indicates that we are creating a new object via a constructor function.
Let Johnny-Five autodetect the board: var myBoard = new j5.Board();
OR Tell it exactly which board to use: var myBoard = new j5.Board({ port: "/dev/tty.usbserial-‐A9GF3L9D" });
Anna Gerber JS Robotics

Ready event
• When the board is ready for our code to start interacting with it and the attached sensors and actuators, it will trigger a ready event. We can write an event handler (anonymous function) that is run when the event occurs:
myBoard.on("ready", function() { // code for sensors, actuators goes here });
Anna Gerber JS Robotics

Controlling the LED
• Then we can start to read from sensors or control actuators attached to the Arduino within our function.
// attach LED on pin 13 var myLed = new j5.Led(13);
// call strobe function to blink once per second myLed.strobe(1000);
• We can change the parameter to the strobe function to change the speed: This input value is provided in milliseconds
Anna Gerber JS Robotics

REPL
• Read, Eval, Print Loop • A console for real-time interaction with the code • Expose our variables to the REPL to enable
interactive control: // make myLED available as "led" in the REPL this.repl.inject({ led: myLed });
• The this operator refers to the current execution context, in this case our board
Anna Gerber JS Robotics

The complete blink program var j5 = require("johnny-‐five"); var myBoard, myLed; myBoard = new j5.Board({port: "/dev/tty.usbserial-‐A9GF3L9D" }); myBoard.on("ready", function() {
myLed = new j5.Led(13);
// strobe every second myLed.strobe( 1000 );
// make myLED available as "led" in REPL this.repl.inject({ led: myLed }); });
Anna Gerber JS Robotics

Running our program
• Open the Terminal app • Change directory to the location where you have
stored your code e.g.
cd ~/Desktop/code/
• Run your program using node e.g.
node blink.js
• Hit control-D to stop the program at any time
Anna Gerber JS Robotics

Controlling the LED via the REPL
• At the REPL prompt type commands followed by enter
• Try: • stop, • on, • off, • toggle, • strobe
e.g: >> led.stop()
Anna Gerber JS Robotics

ADDING SOME COLOUR
Anna Gerber JS Robotics

Add an RGB LED
• Connect the longest lead to the ground rail using a jumper wire
• Connect a resistor to all of the other leads (for Red, Green and Blue) and then use jumper wires to connect the resistors to pins 9, 10 and 11 on the Arduino
Anna Gerber JS Robotics

Controlling the colour of the LED
• Create an RGB object • Provide an array of pins for R, G and B as a
parameter to the RGB constructor • Use the color function to set the colour (note the
American spelling)
myBoard.on("ready", function() { var myLed = new j5.Led.RGB([ 9, 10, 11 ]); // make the LED red myLed.color("#ff0000"); });
Anna Gerber JS Robotics
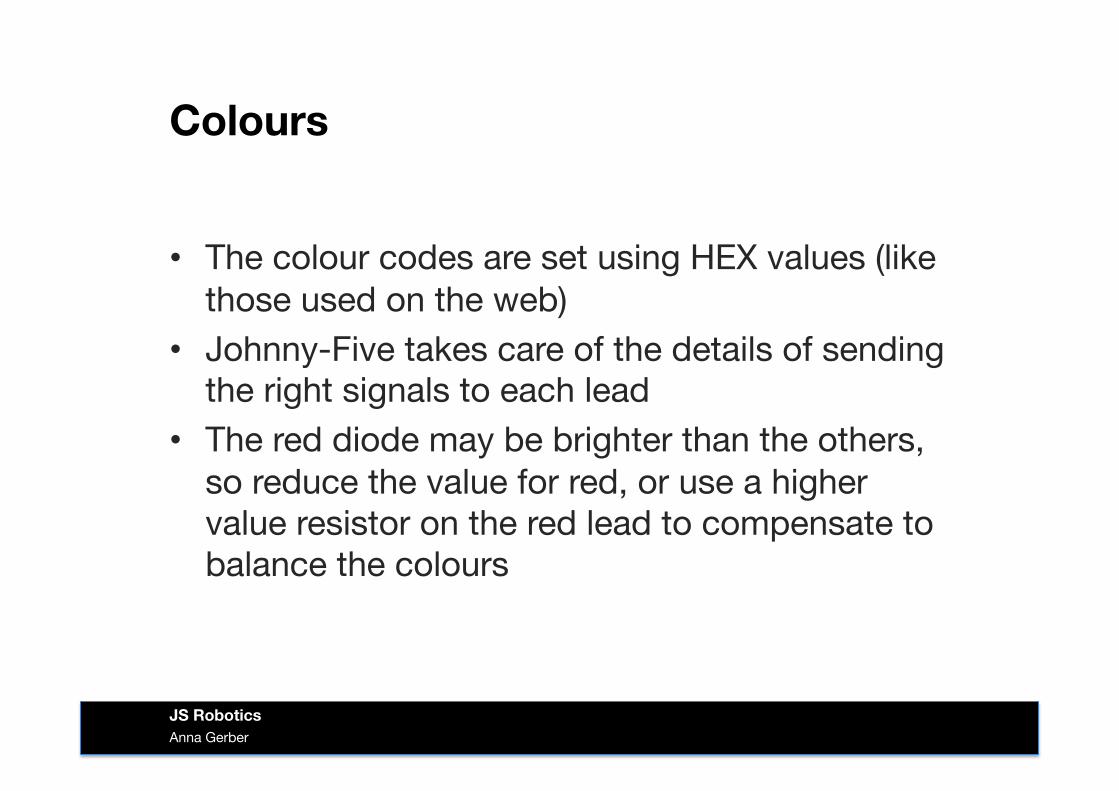
Colours
• The colour codes are set using HEX values (like those used on the web)
• Johnny-Five takes care of the details of sending the right signals to each lead
• The red diode may be brighter than the others, so reduce the value for red, or use a higher value resistor on the red lead to compensate to balance the colours
Anna Gerber JS Robotics

Anna Gerber JS Robotics
Colour Code
White #FFFFFF
Silver #C0C0C0
Gray #808080
Black #000000
Red #FF0000
Maroon #800000
Yellow #FFFF00
Olive #808000
Lime #00FF00
Green #008000
Aqua #00FFFF
Teal #008080
Blue #0000FF
Navy #000080
Fuchsia #FF00FF
Purple #800080

Delayed behaviour
• Use the wait function to schedule functions to occur a number of milliseconds in the future
this.wait( 1000, function() { // make the LED blue after 1 second myLed.color("#00ff00"); });
Anna Gerber JS Robotics

PWM
• Pulse Width Modulation • Produce analog output via digital pins • Instead of on or off, a square wave is sent to
simulate voltages between 0V (off) and 5V (on) • Used to control motors, fade LEDs etc • Only enabled for some pins by default – 3, 5, 6, 9, 10, 11 on Arduino Nano
Anna Gerber JS Robotics

Pulsing the LED
Anna Gerber JS Robotics
• Because the R, G and B leads are connected to PWM pins 9, 10 and 11, we can control the brightness of the LEDs
• Try the following via the REPL or modify your program: – r.brightness(100) // set between 0 and 255 – r.fadeIn(200) // fade in over 200 milliseconds – r.fadeOut(500) // fade out over 500 ms – r.pulse(1000) // pulse LED over one second

MOVEMENT
Anna Gerber JS Robotics

Adding a servo • Add a servo to your
circuit: – Connect the orange
(sometimes yellow) signal wire to one of the I/O pins on the Arduino that supports Pulse Width Modulation (PWM): 3, 5, 6, 9, 10, 11
– Connect the brown (sometimes black) wire to ground
– Connect the red wire to 5V
Anna Gerber JS Robotics

Creating a Servo object
var five = require("johnny-‐five"), board, myServo; board = new five.Board(); board.on("ready", function() { myServo = new five.Servo(6);
board.repl.inject({ servo: myServo });
});
Anna Gerber JS Robotics
Controlling the servo
• Try the following commands: – servo.sweep(); – servo.stop(); – servo.center(); – servo.to(20); // move to point in degrees
– servo.min() – servo.max()
Anna Gerber JS Robotics

SOUND
Anna Gerber JS Robotics

Adding a piezo element
• Add a piezo element
• Connect the ground lead to the ground rail on the breadboard
• Connect the + lead to pin 3 on the Arduino
Anna Gerber JS Robotics

Controlling the piezo
var piezo = new five.Piezo(3);
// notes and durations // use spaces for rests piezo.song("ccggaag", "2222224");
Anna Gerber JS Robotics

WORKING WITH SENSORS
Anna Gerber JS Robotics

Logging to the console
• Use the console.log( ) function to print information to the console, e.g. sensor readings
• Use the + operator to combine text-based messages (strings) with variable values e.g.
console.log("sensor 1 reading is " + sensorVal);
Anna Gerber JS Robotics

Buttons
• Connect one button lead to ground and one to pin 2
• We will use a built in "pull-up" resistor. For info on how these work see: – http://arduino.cc/en/
Tutorial/InputPullupSerial – https://
learn.sparkfun.com/tutorials/pull-up-resistors
• Use the on-board LED or leave your LED from earlier connected to pin 13
Anna Gerber JS Robotics

Attaching handlers for button events • Set the isPullup option to true to enable the pull-up
resistor on the pin and to invert the input
var myButton = new five.Button({ pin: 2, isPullup: true });
var led = new five.Led(13);
myButton.on("down", function(value){ console.log("button pressed!"); led.toggle(); });
Anna Gerber JS Robotics

Adding a photo resistor
• Connect one lead to ground
• Connect the other lead to Analog pin 0
• Connect a 10K resistor from the same lead as A0 to 5V
Anna Gerber JS Robotics

Sensing: Light photoresistor = new five.Sensor({ pin: "A0", freq: 250 });
board.repl.inject({ p: photoresistor });
photoresistor.on("data", function(err, value){ console.log("light reading is " + value); });
Anna Gerber JS Robotics

Constrain and map
photoresistor.on("data", function(err, value) { var brightnessValue = five.Fn.constrain( five.Fn.map(value, 0, 900, 0, 255), 0, 255);
myLed.brightness(brightnessValue);
});
Anna Gerber JS Robotics

Connecting other types of sensors
• Connect VCC to power • Connect GND to ground • Connect the other pin(s) to I/O pins on the
Arduino
Anna Gerber JS Robotics

Conditional Behaviour
if (x==0) { // do something } else { // do something else }
• Use comparison operators like == != < <= > >= and logical operators and ( && ) or ( || ) and not ( ! )
• The conditional operator provides an inline shorthand e.g. var myString = "I have " + (x == 1 ? x + "thing" : x + "things");
Anna Gerber JS Robotics

Repeating behaviour (loops) var myArray = [1,2,3]; for (var i = 0; i < myArray.length; i++) { // do something specified num of times
console.log(myArray[i]); } while (x < 10) { // do something while condition is true console.log(x++); } board.loop(200, function(){ // do something every 200 ms });
Anna Gerber JS Robotics

Manually writing to pins var five = require("johnny-‐five"); five.Board().on("ready", function() { var val = 0; var piezoPin = 3; // Set pin 9 to PWM mode this.pinMode( piezoPin, 3 ); // beep continously this.loop(200, function(){ if (val){ this.analogWrite( piezoPin, 20 ); } else { this.analogWrite(piezoPin, 0); } val = val ? 0 : 1; }); });
Anna Gerber JS Robotics

Where to find more code examples
• Johnny-Five docs and wiki – https://github.com/rwaldron/johnny-five/wiki
• Arduino Experimenters Guide for NodeJS – http://node-ardx.org
Anna Gerber JS Robotics

How to setup the software at home
• Install Arduino IDE – Optional, only required if you want to load Firmata
again or experiment with programming the Arduino using C++
• Install NodeJS – Visit http://nodejs.org/ and click INSTALL
• Create a folder for your code • Open up a terminal and install johnny-five from that
folder e.g. cd ~/Desktop/code npm install johnny-‐five
• Install a code editor e.g. Atom (Mac only), SublimeText etc if you don't already have one
Anna Gerber JS Robotics

Where to now?
• Front end JS – https://developer.mozilla.org/en-US/learn
• Node.js – http://nodeschool.io/
Anna Gerber JS Robotics

Credits
• Some of the images in these slides were taken from the Arduino Experimenters Guide created by .:oomlout:. and SparkFun and are used under a CC-BY-SA license.
• See http://node-ardx.org for more details
Anna Gerber JS Robotics