IV Therapy - Welcome to AT Home Health and Hospice...
24
AtHomeCare.com IV erapy
Transcript of IV Therapy - Welcome to AT Home Health and Hospice...

AtHomeCare.com
IV Therapy
AT Home Care • IV Therapy
IV THERAPY ADMINISTRATION
Clinician handbook
TABLE OF CONTENTS
Vascular Access Device Descriptions .................................................3
Home Infusion Access Reference Guide..............................................4
Drawing Blood From a Central Venous Access....................................7
Central Line Dressing Change............................................................8
Blood Cultures and IV Drug Levels.....................................................9
Port-A-Cath Access / Huber Needle Change .......................................
Removing Non-Tunneled Central Catheters in the Home ..................10
ReadyMed .......................................................................................11
PCA Home Management......................................................................
Calculating PCA Dosage Changes.....................................................12
TPN General Information...................................................................12
Total Parenteral Nutrition (Hyperalimentation) At Home ...................13
Peripheral IV Insertion .....................................................................16
Subcutaneous Infusion Instructions..................................................16
To Declot a Central Venous Access Device ........................................17
Teach Your CADD Prizm Patients Following These Guidelines............18
Infection Control Surveillance and Tracking ....................................19
Treatment of Anaphylaxis ................................................................20
Adverse Drug Reaction......................................................................21
Telephone Resources for the Nurse....................................................22
2
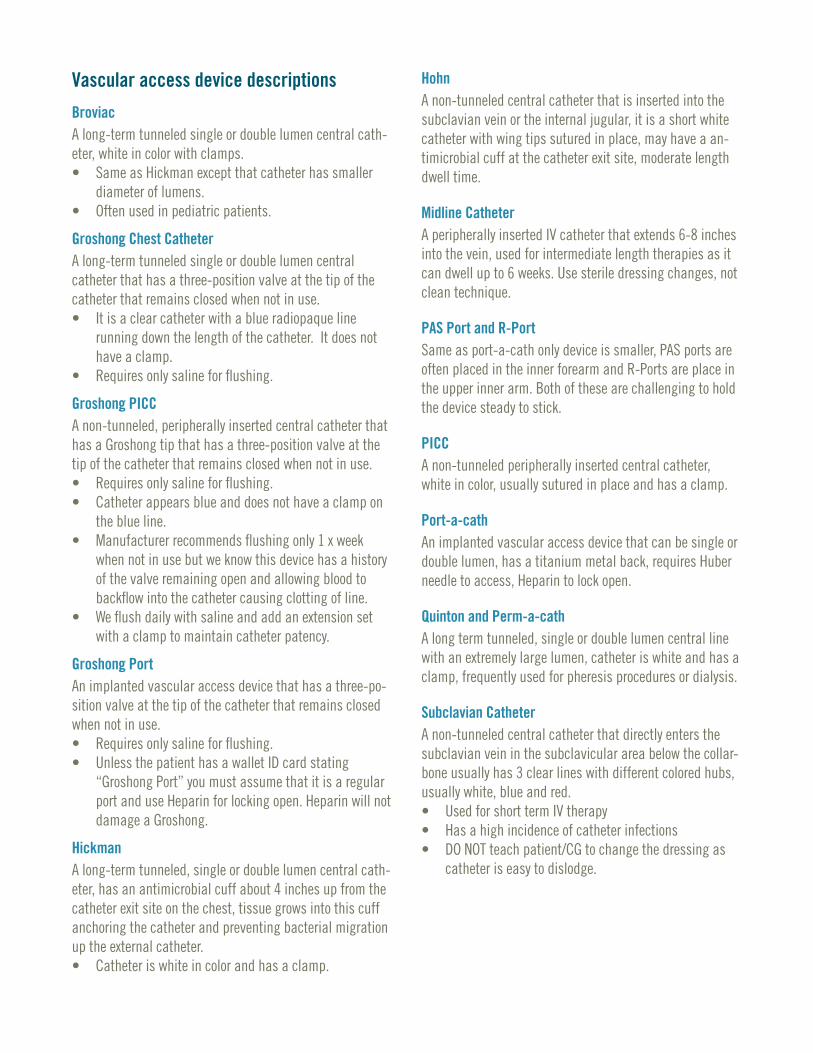
Vascular access device descriptions
BroviacA long-term tunneled single or double lumen central cath-eter, white in color with clamps.• Same as Hickman except that catheter has smaller
diameter of lumens.• Often used in pediatric patients.
Groshong Chest CatheterA long-term tunneled single or double lumen central catheter that has a three-position valve at the tip of the catheter that remains closed when not in use.• It is a clear catheter with a blue radiopaque line
running down the length of the catheter. It does not have a clamp.
• Requires only saline for flushing.
Groshong PICCA non-tunneled, peripherally inserted central catheter that has a Groshong tip that has a three-position valve at the tip of the catheter that remains closed when not in use.• Requires only saline for flushing.• Catheter appears blue and does not have a clamp on
the blue line.• Manufacturer recommends flushing only 1 x week
when not in use but we know this device has a history of the valve remaining open and allowing blood to backflow into the catheter causing clotting of line.
• We flush daily with saline and add an extension set with a clamp to maintain catheter patency.
Groshong PortAn implanted vascular access device that has a three-po-sition valve at the tip of the catheter that remains closed when not in use.• Requires only saline for flushing.• Unless the patient has a wallet ID card stating
“Groshong Port” you must assume that it is a regular port and use Heparin for locking open. Heparin will not damage a Groshong.
HickmanA long-term tunneled, single or double lumen central cath-eter, has an antimicrobial cuff about 4 inches up from the catheter exit site on the chest, tissue grows into this cuff anchoring the catheter and preventing bacterial migration up the external catheter.• Catheter is white in color and has a clamp.
HohnA non-tunneled central catheter that is inserted into the subclavian vein or the internal jugular, it is a short white catheter with wing tips sutured in place, may have a an-timicrobial cuff at the catheter exit site, moderate length dwell time.
Midline CatheterA peripherally inserted IV catheter that extends 6-8 inches into the vein, used for intermediate length therapies as it can dwell up to 6 weeks. Use sterile dressing changes, not clean technique.
PAS Port and R-PortSame as port-a-cath only device is smaller, PAS ports are often placed in the inner forearm and R-Ports are place in the upper inner arm. Both of these are challenging to hold the device steady to stick.
PICCA non-tunneled peripherally inserted central catheter, white in color, usually sutured in place and has a clamp.
Port-a-cathAn implanted vascular access device that can be single or double lumen, has a titanium metal back, requires Huber needle to access, Heparin to lock open.
Quinton and Perm-a-cathA long term tunneled, single or double lumen central line with an extremely large lumen, catheter is white and has a clamp, frequently used for pheresis procedures or dialysis.
Subclavian CatheterA non-tunneled central catheter that directly enters the subclavian vein in the subclavicular area below the collar-bone usually has 3 clear lines with different colored hubs, usually white, blue and red.• Used for short term IV therapy• Has a high incidence of catheter infections• DO NOT teach patient/CG to change the dressing as
catheter is easy to dislodge.
AT Home Care • IV Therapy
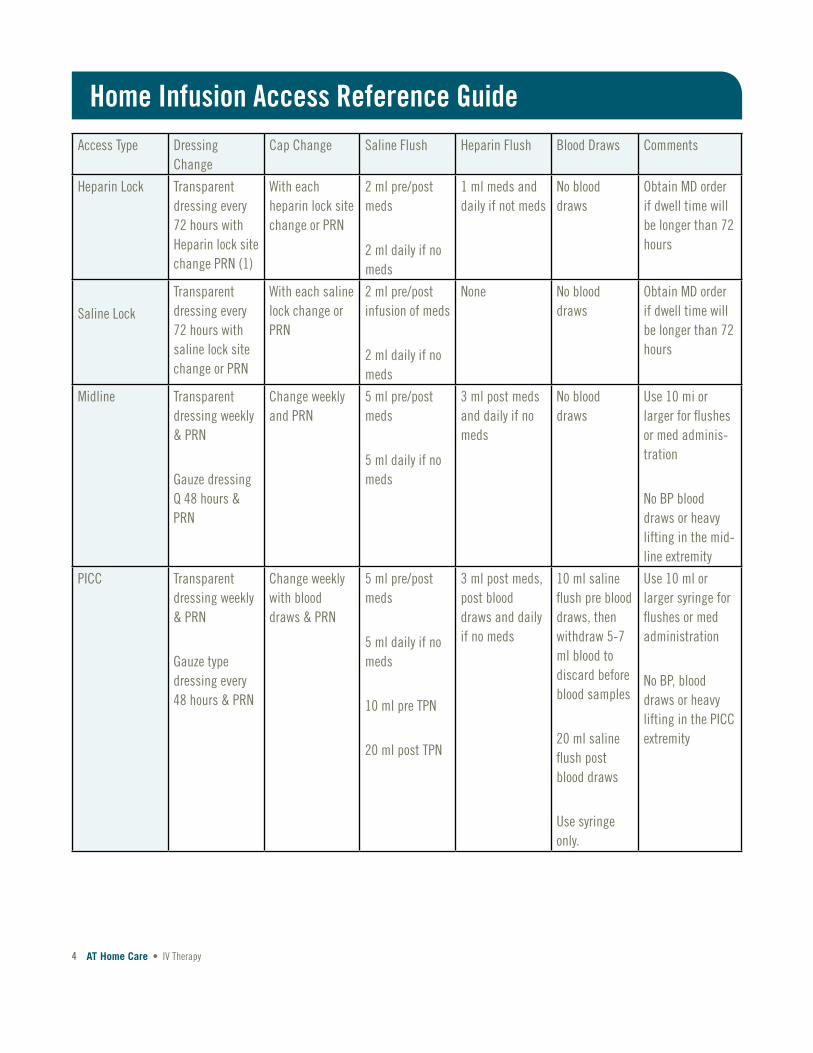
Access Type Dressing Change
Cap Change Saline Flush Heparin Flush Blood Draws Comments
Heparin Lock Transparent dressing every 72 hours with Heparin lock site change PRN (1)
With each heparin lock site change or PRN
2 ml pre/post meds
2 ml daily if no meds
1 ml meds and daily if not meds
No blood draws
Obtain MD order if dwell time will be longer than 72 hours
Saline Lock
Transparent dressing every 72 hours with saline lock site change or PRN
With each saline lock change or PRN
2 ml pre/post infusion of meds
2 ml daily if no meds
None No blood draws
Obtain MD order if dwell time will be longer than 72 hours
Midline Transparent dressing weekly & PRN
Gauze dressing Q 48 hours & PRN
Change weekly and PRN
5 ml pre/post meds
5 ml daily if no meds
3 ml post meds and daily if no meds
No blood draws
Use 10 mi or larger for flushes or med adminis-tration
No BP blood draws or heavy lifting in the mid-line extremity
PICC Transparent dressing weekly & PRN
Gauze type dressing every 48 hours & PRN
Change weekly with blood draws & PRN
5 ml pre/post meds
5 ml daily if no meds
10 ml pre TPN
20 ml post TPN
3 ml post meds, post blood draws and daily if no meds
10 ml saline flush pre blood draws, then withdraw 5-7 ml blood to discard before blood samples
20 ml saline flush post blood draws
Use syringe only.
Use 10 ml or larger syringe for flushes or med administration
No BP, blood draws or heavy lifting in the PICC extremity
Home Infusion Access Reference Guide
4
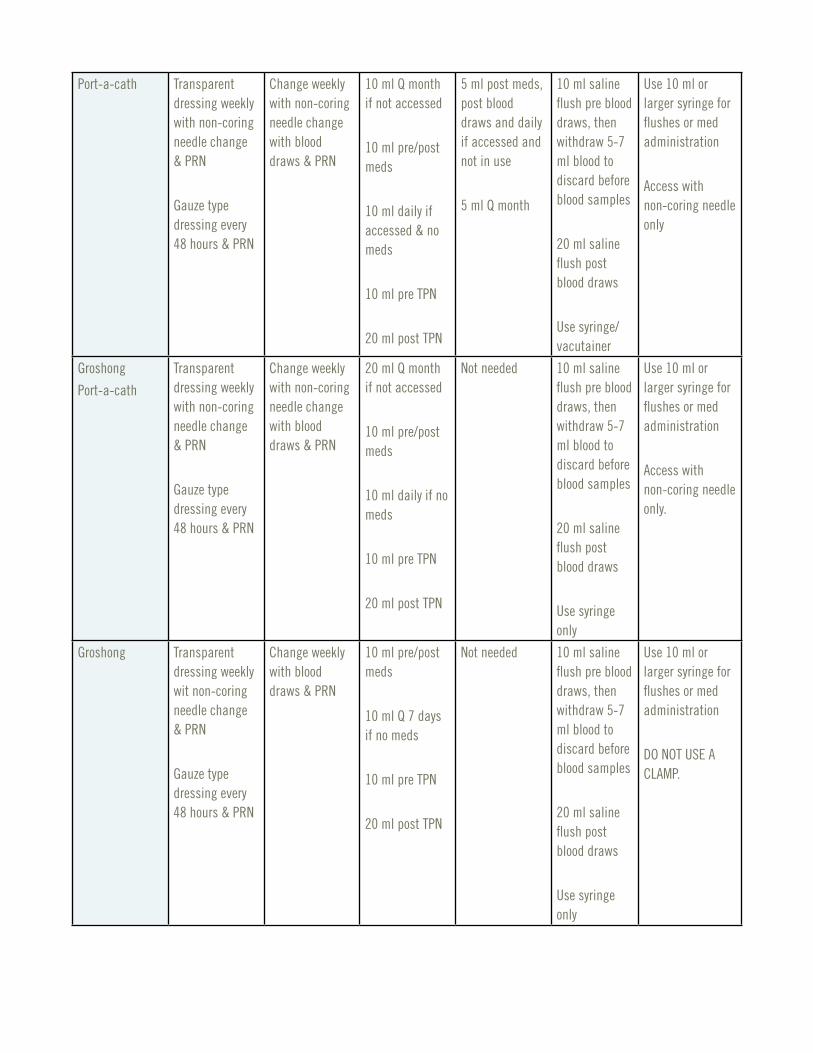
Port-a-cath Transparent dressing weekly with non-coring needle change & PRN
Gauze type dressing every 48 hours & PRN
Change weekly with non-coring needle change with blood draws & PRN
10 ml Q month if not accessed
10 ml pre/post meds
10 ml daily if accessed & no meds
10 ml pre TPN
20 ml post TPN
5 ml post meds, post blood draws and daily if accessed and not in use
5 ml Q month
10 ml saline flush pre blood draws, then withdraw 5-7 ml blood to discard before blood samples
20 ml saline flush post blood draws
Use syringe/ vacutainer
Use 10 ml or larger syringe for flushes or med administration
Access with non-coring needle only
Groshong
Port-a-cath
Transparent dressing weekly with non-coring needle change & PRN
Gauze type dressing every 48 hours & PRN
Change weekly with non-coring needle change with blood draws & PRN
20 ml Q month if not accessed
10 ml pre/post meds
10 ml daily if no meds
10 ml pre TPN
20 ml post TPN
Not needed 10 ml saline flush pre blood draws, then withdraw 5-7 ml blood to discard before blood samples
20 ml saline flush post blood draws
Use syringe only
Use 10 ml or larger syringe for flushes or med administration
Access with non-coring needle only.
Groshong Transparent dressing weekly wit non-coring needle change & PRN
Gauze type dressing every 48 hours & PRN
Change weekly with blood draws & PRN
10 ml pre/post meds
10 ml Q 7 days if no meds
10 ml pre TPN
20 ml post TPN
Not needed 10 ml saline flush pre blood draws, then withdraw 5-7 ml blood to discard before blood samples
20 ml saline flush post blood draws
Use syringe only
Use 10 ml or larger syringe for flushes or med administration
DO NOT USE A CLAMP.
AT Home Care • IV Therapy
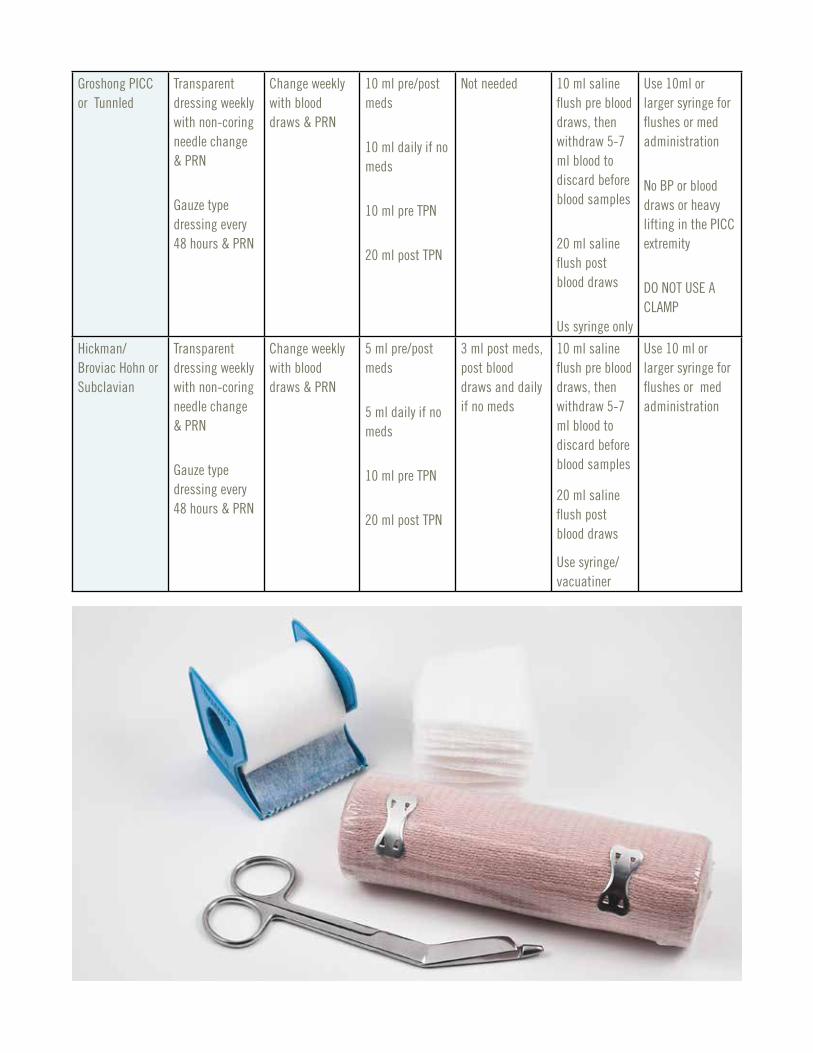
Groshong PICC or Tunnled
Transparent dressing weekly with non-coring needle change & PRN
Gauze type dressing every 48 hours & PRN
Change weekly with blood draws & PRN
10 ml pre/post meds
10 ml daily if no meds
10 ml pre TPN
20 ml post TPN
Not needed 10 ml saline flush pre blood draws, then withdraw 5-7 ml blood to discard before blood samples
20 ml saline flush post blood draws
Us syringe only
Use 10ml or larger syringe for flushes or med administration
No BP or blood draws or heavy lifting in the PICC extremity
DO NOT USE A CLAMP
Hickman/ Broviac Hohn or Subclavian
Transparent dressing weekly with non-coring needle change & PRN
Gauze type dressing every 48 hours & PRN
Change weekly with blood draws & PRN
5 ml pre/post meds
5 ml daily if no meds
10 ml pre TPN
20 ml post TPN
3 ml post meds, post blood draws and daily if no meds
10 ml saline flush pre blood draws, then withdraw 5-7 ml blood to discard before blood samples
20 ml saline flush post blood draws
Use syringe/ vacuatiner
Use 10 ml or larger syringe for flushes or med administration
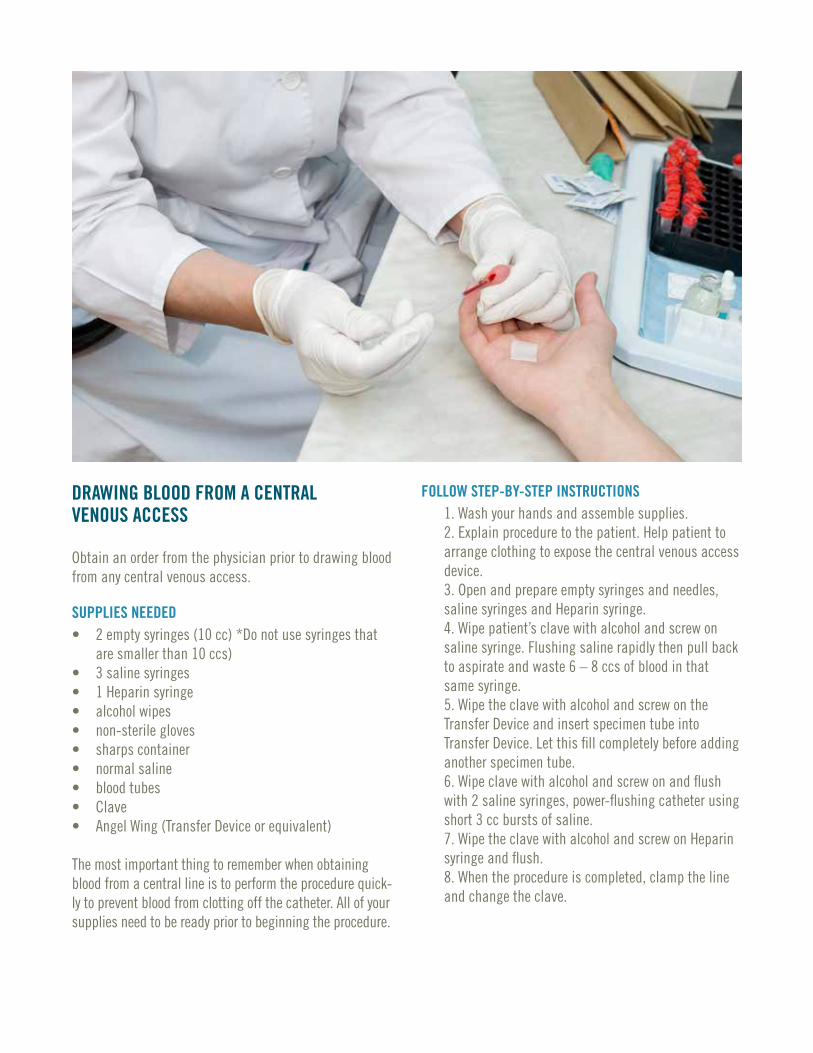
DRAWING BLOOD FROM A CENTRALVENOUS ACCESS
Obtain an order from the physician prior to drawing blood from any central venous access.
SUPPLIES NEEDED• 2 empty syringes (10 cc) *Do not use syringes that
are smaller than 10 ccs)• 3 saline syringes• 1 Heparin syringe• alcohol wipes• non-sterile gloves• sharps container• normal saline• blood tubes• Clave• Angel Wing (Transfer Device or equivalent)
The most important thing to remember when obtaining blood from a central line is to perform the procedure quick-ly to prevent blood from clotting off the catheter. All of your supplies need to be ready prior to beginning the procedure.
FOLLOW STEP-BY-STEP INSTRUCTIONS1. Wash your hands and assemble supplies.2. Explain procedure to the patient. Help patient to arrange clothing to expose the central venous access device.3. Open and prepare empty syringes and needles, saline syringes and Heparin syringe.4. Wipe patient’s clave with alcohol and screw on saline syringe. Flushing saline rapidly then pull back to aspirate and waste 6 – 8 ccs of blood in that same syringe.5. Wipe the clave with alcohol and screw on the Transfer Device and insert specimen tube into Transfer Device. Let this fill completely before adding another specimen tube.6. Wipe clave with alcohol and screw on and flush with 2 saline syringes, power-flushing catheter using short 3 cc bursts of saline.7. Wipe the clave with alcohol and screw on Heparin syringe and flush.8. When the procedure is completed, clamp the line and change the clave.
AT Home Care • IV Therapy
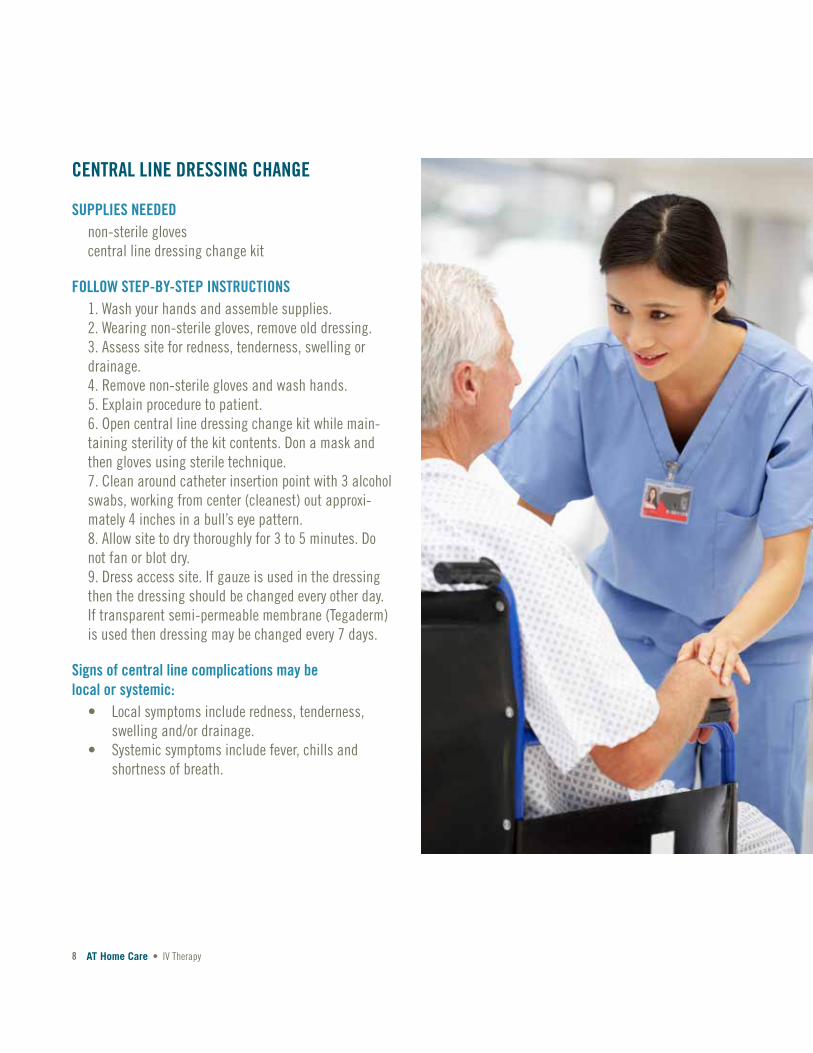
CENTRAL LINE DRESSING CHANGE
SUPPLIES NEEDEDnon-sterile glovescentral line dressing change kit
FOLLOW STEP-BY-STEP INSTRUCTIONS1. Wash your hands and assemble supplies.2. Wearing non-sterile gloves, remove old dressing.3. Assess site for redness, tenderness, swelling or drainage.4. Remove non-sterile gloves and wash hands.5. Explain procedure to patient.6. Open central line dressing change kit while main-taining sterility of the kit contents. Don a mask and then gloves using sterile technique.7. Clean around catheter insertion point with 3 alcohol swabs, working from center (cleanest) out approxi-mately 4 inches in a bull’s eye pattern.8. Allow site to dry thoroughly for 3 to 5 minutes. Do not fan or blot dry.9. Dress access site. If gauze is used in the dressing then the dressing should be changed every other day. If transparent semi-permeable membrane (Tegaderm) is used then dressing may be changed every 7 days.
Signs of central line complications may be local or systemic:
• Local symptoms include redness, tenderness, swelling and/or drainage.
• Systemic symptoms include fever, chills and shortness of breath.
8
BLOOD CULTURES AND IV DRUG LEVELS BLOOD CULTURES
You need to know if the physician has ordered a single blood culture or a paired blood culture.
A single culture means that you will draw a set of aerobic and anaerobic bottles from one site.
A paired culture means you will draw a set of aerobic and anaerobic culture bottles from two sites.
If a paired culture is ordered, usually one is from the cen-tral line and one from a peripheral stick.
Always use betadine to prep the tops of the culture bottles, the patient’s skin for venipuncture and/or the clave/injec-tion cap of the central line. The betadine must be allowed to fully dry in order to kill bacteria.
If drawing a culture from a central line then do not draw and waste 6-8 ccs of blood as you do for all other labs. Use the blood that first comes from the catheter on aspiration, it has been dwelling in the line for a period of time and is most likely to have a colony count if bacteria are present.
Make sure that you have the correct culture bottles for the lab you are using. Each lab uses a different culture col-lection container. Check the expiration date on the culture bottles; they have an extremely short shelf life.Label your culture bottles for the site of collection.
IV DRUG LEVELSPatients receiving aminoglycosides or Vancomycin usually have peak and trough drug levels ordered by the physician.
Vancomycin troughs are drawn immediately before the drug begins to infuse for a scheduled dose. Vancomycin peak levels are drawn 1 hour after the end of the infusion.
Drug levels for Gentamicin, Tobramycin, and Amikacin: the troughs are done just prior to infusing the drug and peaks are done 30 minutes after the end of the infusionMost physicians allow drug levels to be obtained from the central catheter after flushing with 10 ccs of normal saline and discarding the first 10 ccs of blood. Ensure that the physician’s orders are followed regarding obtaining drug levels from the central catheter.
Some physicians do not want drug levels drawn from the catheter.
Drug levels are usually obtained after 3 days of dosing on the same schedule. If your patient has missed a dose or has changed dosing times it is important to discuss this with the pharmacist prior to drawing the levels.PORT-A-CATH ACCESS / HUBER NEEDLE CHANGE
SUPPLIES NEEDED• non-sterile gloves• alcohol wipes• central line dressing kit• Huber needle• 20-gauge needle• 10 cc sterile syringe• vial of normal saline
AT Home Care • IV Therapy
FOLLOW STEP-BY-STEP INSTRUCTIONS1. Wash your hands and assemble supplies.2. Wearing non-sterile gloves, flush patient’s current port-a-cath access device with saline, then Heparin.3. Assess site for redness, tenderness, swelling or drainage.4. Remove old dressing then remove Huber needle from port. Wash skin with soap and water or allow patient to shower.5. Remove non-sterile gloves and wash hands.6. Explain procedure to patient.7. Open central line dressing change kit while main-taining sterility of the kit contents. Don a mask.Open Huber needle, syringe and needle adding each to sterile field in the kit.8. Open vial of saline, wipe top with alcohol then turn vial upside down on alcohol wipe.9. Don sterile gloves.10. Clean over and around port with 3 alcohol swabs, working from center (cleanest) out approximately 4 inches in a bull’s eye pattern.11. Clean over and around port with 1 Cholroprep (chlorohexadine) swab using a scrubbing technique.12. Allow site to dry thoroughly for 3 to 5 minutes. Do not fan or blot dry.13. Join sterile syringe and 20-gauge needle. Draw up 5 ccs of air and uncap needle.14. Use sterile 4x4 from dressing kit to drape bottom of saline vial to keep gloves sterile while drawing up 5 – 10 ccs of saline.15. Prime Huber needle with saline and leave syringe attached and tubing clamp open.16. Use non-dominant hand to stabilize port and insert Huber needle straight in at a 90-degree angle to the skin. Do not rotate wings after sticking.17. Aspirate for blood return, saline flush and clamp Huber needle while still exerting pressure on the syringe plunger.18. Dress access site. If gauze is used in the dressing then the dressing should be changed every other day. If transparent semi-permeable membrane (Tegaderm) is used then dressing may be changed every 7 days.
REMOVING NON-TUNNELED CENTRAL CATHETERS IN THE HOME
SUPPLIES NEEDED• petroleum jelly based ointment• suture removal kit• non-sterile gloves• 4x4 gauze• tape• 1 saline syringe
FOLLOW STEP-BY-STEP INSTRUCTIONS1. Wash your hands and assemble supplies.2. Explain the procedure to the patient. Help the pa-tient to arrange clothing to expose the central venous access device.3. Have the patient lie down flat, may have a pillow under the head. Turn the patient’s head toward the unaffected side. If removing a PICC then have patient to extend the arm straight out from the body.4. Don non-sterile gloves and remove catheter dress-ing.5. Slowly remove the catheter in one-inch increments, taking your fingers back to skin surface after pulling out each inch. Do no stretch the catheter.6. Just prior to removing the tip of the catheter, you may ask the patient to hold their breath and bear down like they are trying to have a bowel movement (Val Salva Maneuver).7. As the catheter tip is removed, apply direct pressure over the site with your gloved finger. Hold pressure 5 minutes (timed).8. As you remove direct pressure, apply the ointment and a folded 4x4 pressure dressing.9. Advise the patient to keep the dressing in place for a minimum of 2 hours. After 2 hours, the patient may then take a bath or shower but caution him/her to use only lukewarm water. Hot water may cause further bleeding from the removal site.10. Instruct the patient or family to observe site for bleeding and in how to apply direct pressure and a pressure dressing.
10
READYMEDReadyMed is an elastomeric infusion device. The balloon inside the bottle is filled with the prescribed medication.
Steps to administer the ReadyMed are as follows:1. The patient’s line is saline flushed and connected to the ReadyMed.2. The clamp is opened and the drug is squeezed in at a steady rate of flow.3. When empty, the device is removed from the patient’s clave.4. The patient will saline flush and Heparinize their IV catheter.The device is not gravity dependent; it can be carried in the patient’s pocket. There are only 2 sizes of the device. Refer to the medication label for the infusion time.
The current pharmacy plan is to use these devices for BID Vancomycin infusions and daily infusions of Tobra, Gentamicin and possibly Solumedrol.
• ReadyMeds can be disposed of in regular trash; do not put into the Sharps containers.
• These medication-filled devices will require refrig-eration and should be removed from the refrigerator 2-8 hours prior to time for the next dose. The elasto-meric plastic will infuse slowly if it is still cold.
• It will not harm the patient to administer the drug directly out of the refrigerator, it will simply not infuse at the correct rate; cold drugs go more slowly
• The patient can not speed the warming of the device by microwaving, soaking in hot water or setting it in the sun. These methods may harm the drug.
• ReadyMed device is latex-free.
PCA HOME MANAGEMENTPlease teach your patient and caregiver that narcotics are controlled substances with “street value” so it is important NOT to say “Mom has a Morphine pump” when talking to friends. Remember that Joe’s son may have a drug problem and be very interested to hear that you have a ready supply.
• When you change the narcotic cassette, remove all remaining drug in the cassette. First remove the cas-sette from the pump and then attach a 10 cc syringe to the cassette tubing at the connection nearest to the cassette, aspirate and discard all remaining drug into the sink or commode with the patient or caregiver witnessing your wasting.
• The cassette discard should match the amount remaining in the reservoir volume on the first screen of the pump to within (+/-) 4 ml. If it is an amount greater or less than 4 ml of the reservoir volume stated on the pump screen then complete an occur-rence report and notify the pharmacist.
• If the discarded cassette will not fit into the mouth of your pharmacy provided sharps container then be sure to advise the caregiver to soak the cassette label off prior to throwing into the regular trash.
• If you receive an order to change the amount of narcotic the patient is receiving, remember to adjust, date and initial the cassette label to reflect the change. Also, the infusion pharmacy needs to be made aware of the new order.
• When you start a patient on PCA you must witness and document the patient has return demonstrated use of the pump dose button.
• Remember your “Nurse Administered Bolus.” The MD does not know you can do this special bolus, you must request this one-time dose to get the patient comfortable if you are seeing him for poor pain control. It is customary to ask for 1 – 2 times the old hourly rate for this one time bolus.
Never take a patient’s unused narcotics out of the home. The drugs must be disposed of in the patient’s home and someone must witness the discard. Write in the Coordi-nation Notes who the witness was.
AT Home Care • IV Therapy
CALCULATING PCA DOSAGE CHANGESIn order for the nurse to be able to calculate a patient’s usage of the PCA pump bolus feature, the pump’s dose given and mg given screens should be cleared on each clinician visit. The dose screen and mg given screen on the CADD Prism are recorded in the narrative note attached to that visit and then cleared by pressing the ENTER button.
We all realize that we must have physician orders to change any aspect of the patient’s infusion dosage amounts. The following methodology can assist the nurse to secure a change in infusion rates to treat patients with “break through pain”:
• Call the pharmacist to request an increase or change in pain medication.• Inform the pharmacist of the:
1. current dosage to include Basal, Bolus, and Lockout rates2. time that has elapsed since pump was last cleared3. number of Bolus given since pump was last cleared
Remember to ask the physician for a one-time nurse-ad-ministered bolus to get the patient comfortable during your visit. A rate increase will take 6 – 8 hours to catch up with the patient’s pain. Ask for 1 to 2 times the old hourly rate for a clinician bolus.
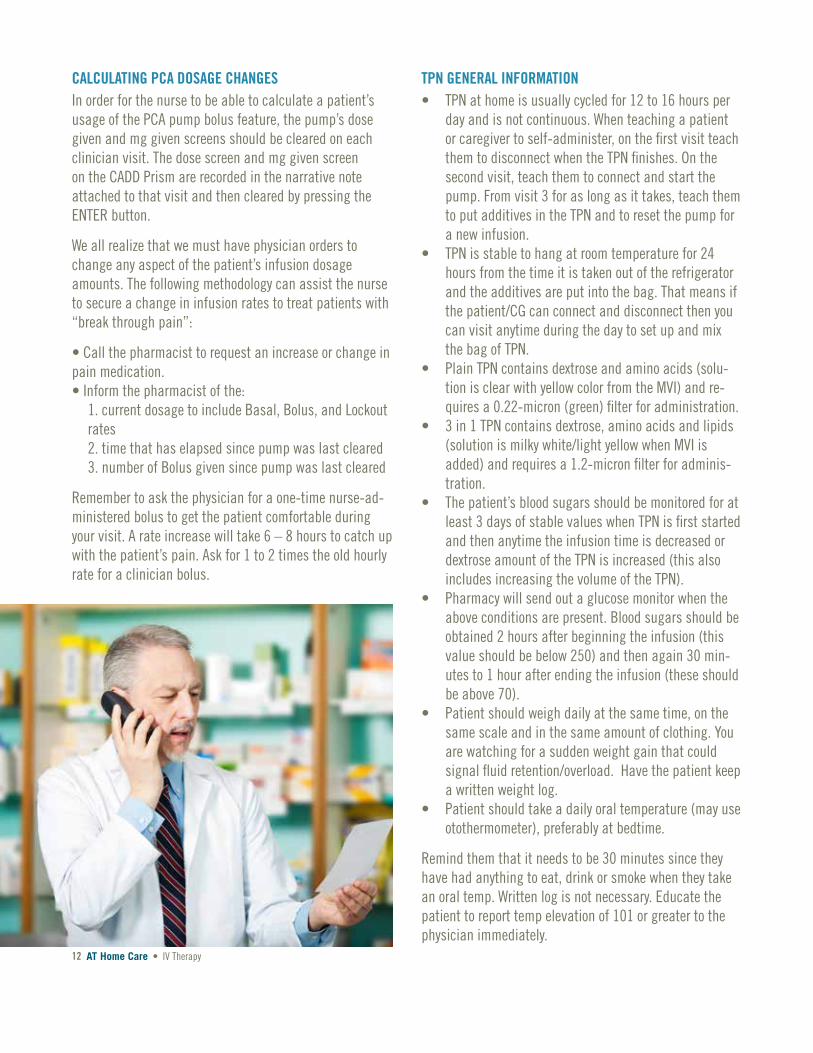
TPN GENERAL INFORMATION• TPN at home is usually cycled for 12 to 16 hours per
day and is not continuous. When teaching a patient or caregiver to self-administer, on the first visit teach them to disconnect when the TPN finishes. On the second visit, teach them to connect and start the pump. From visit 3 for as long as it takes, teach them to put additives in the TPN and to reset the pump for a new infusion.
• TPN is stable to hang at room temperature for 24 hours from the time it is taken out of the refrigerator and the additives are put into the bag. That means if the patient/CG can connect and disconnect then you can visit anytime during the day to set up and mix the bag of TPN.
• Plain TPN contains dextrose and amino acids (solu-tion is clear with yellow color from the MVI) and re-quires a 0.22-micron (green) filter for administration.
• 3 in 1 TPN contains dextrose, amino acids and lipids (solution is milky white/light yellow when MVI is added) and requires a 1.2-micron filter for adminis-tration.
• The patient’s blood sugars should be monitored for at least 3 days of stable values when TPN is first started and then anytime the infusion time is decreased or dextrose amount of the TPN is increased (this also includes increasing the volume of the TPN).
• Pharmacy will send out a glucose monitor when the above conditions are present. Blood sugars should be obtained 2 hours after beginning the infusion (this value should be below 250) and then again 30 min-utes to 1 hour after ending the infusion (these should be above 70).
• Patient should weigh daily at the same time, on the same scale and in the same amount of clothing. You are watching for a sudden weight gain that could signal fluid retention/overload. Have the patient keep a written weight log.
• Patient should take a daily oral temperature (may use otothermometer), preferably at bedtime.
Remind them that it needs to be 30 minutes since they have had anything to eat, drink or smoke when they take an oral temp. Written log is not necessary. Educate the patient to report temp elevation of 101 or greater to the physician immediately.
12
TOTAL PARENTERAL NUTRITION (HYPERALIMENTATION) AT HOME
Purpose of TherapyProvides a means of nourishment and hydration to pa-tients with severe impairment of the normal gastrointesti-nal process. This may be caused by conditions or diseases that preclude adequate oral ingestion or absorption of sufficient nutrition to maintain normal weight, strength, fluid and electrolyte balance.
Definition of TPNTotal Parenteral Nutrition is used to indicate the therapy by which all needed nutrients are provided parenterally by central vein. These solutions are hypertonic, hyperosmo-lar and usually have dextrose concentrations of 10% or greater. Solutions with greater than 10% dextrose may not be administered through a peripheral IV. Even 10% dex-trose is very irritating to peripheral veins and they rarely last for more than 48 hours without becoming phlebotic.
Indications (may include but are not limited to)• bowel fistula• bowel obstruction• congenital disorders• Crohn’s disease• cystic fibrosis• hyperemesis gravidarum• inflammatory bowel• intestinal mobility disorders• malabsorption syndromes• malignant disease• massive bowel resection• mesenteric infarction• pancreatitis• pseudo-obstruction• radiation enteritis• scleroderma• severe mucosal injury• short bowel syndrome• ulcerative colitis• villus atrophy
Patient Selection Criteria Might Include• a malfunctioning GI system that precludes patient
from being able to sustain nutrition from non-paren-teral methods
• a clinically and metabolically stable patient• a central venous access device (unless TPN contains
10% dextrose concentration or less and then may be given peripherally for a short time)
• a reasonably supportive, clean home environment• a patient or caregiver who is capable and will be
comfortable performing care safely after adequate education
• evaluation for a history of drug abuse
Mode of Administration• usually given through a central venous access device
due to hyperosmolar and hypertonic solution• if TPN formulation contains 10% or less concentra-
tion of dextrose then it may be given peripherally for a short time
• may be given continuously 24 hours per day or inter-mittent “cyclic” infusions lasting from 8 to 16 hours per day
• most often requires daily infusions but occasionally infuses QOD or 5 days per week
• always requires an infusion pump• intermittent “cyclic” infusions must be tapered up
and tapered down
Potential Complications/Side EffectsMechanical• air embolism• thrombosis or catheter occlusion• pump malfunction• pneumothorax, hemothorax, hydrothorax
Septic (caused by)• poor technique with catheter care, TPN handling and/
or dressing change• catheter seeded from alternate infection site• contaminated TPN solution
Metabolic• hyper or hypoglycemia• fluid overload or dehydration• electrolyte imbalance• TPN induced liver disease (elevated liver enzymes
while receiving TPN are normal and do not mean that the patient has liver disease)
• acid-base balance
Monitoring Will Include• CMP (Comprehensive Metabolic Panel), Phosphorus,
Magnesium, CO2 and CBC labs. These are drawn weekly or more frequently during the first several months of TPN. The lab frequency may be decreased to monthly if they remain stable.
• Finger stick blood glucose for patients on cyclic infusions. They should be done for 3 days of stable values any time you are decreasing the length of the infusion or increasing the dextrose concentration of the TPN formulation. Should be done 2 hours into the infusion to determine if the patient is adequate-ly managing the dextrose load (should be 250 or less). Should again be done 30 minutes to 1 hour after ending the TPN infusion to see if the patient is experiencing rebound.
• Hypoglycemia (should be 80 or above). If the length of the infusion is staying the same, the patient is not diabetic, no changes are being made to the dextrose concentration then these finger stick blood sugars can be stopped after 3 days of stable numbers.
• Daily weights (patient must have their own scale) to be done at the same time of day in the same amount of clothing and recorded on log. If patient experi-ences a 5 lb. or greater weight gain in 24 hours then they should call their MD.
• Daily temperature monitoring. Not necessary to record but patient must be knowledgeable to report any elevation of 101 or greater to the MD.
COMMUNICATE! COMMUNICATE! COMMUNICATE! with the infusion pharmacy. You should telephone conference at least weekly to provide weight, blood sugars and patient condition information, more often if the patient is unstable or condition or situation is changed (i.e. address change, hospitalized, starting chemo, and new PO meds). Always have your patient labs faxed both to pharmacy and the MD. Pharmacy uses the labs to correct TPN formulation to meet patient’s metabolic needs.
Patient/Caregiver Teaching Will Include• daily weight monitoring• daily temp monitoring• finger stick blood glucose monitoring• TPN mixing and pump training• s/s of therapy complications• s/s of central venous access complications• line flushing, connecting and disconnecting TPN• possibly dressing change for the central venous
access device• safety precautions (no swimming, avoid getting cath-
eter site wet, avoid using scissors near the catheter, what to do in the event the catheter is cut or dam-aged)
• 24-hour home care phone number
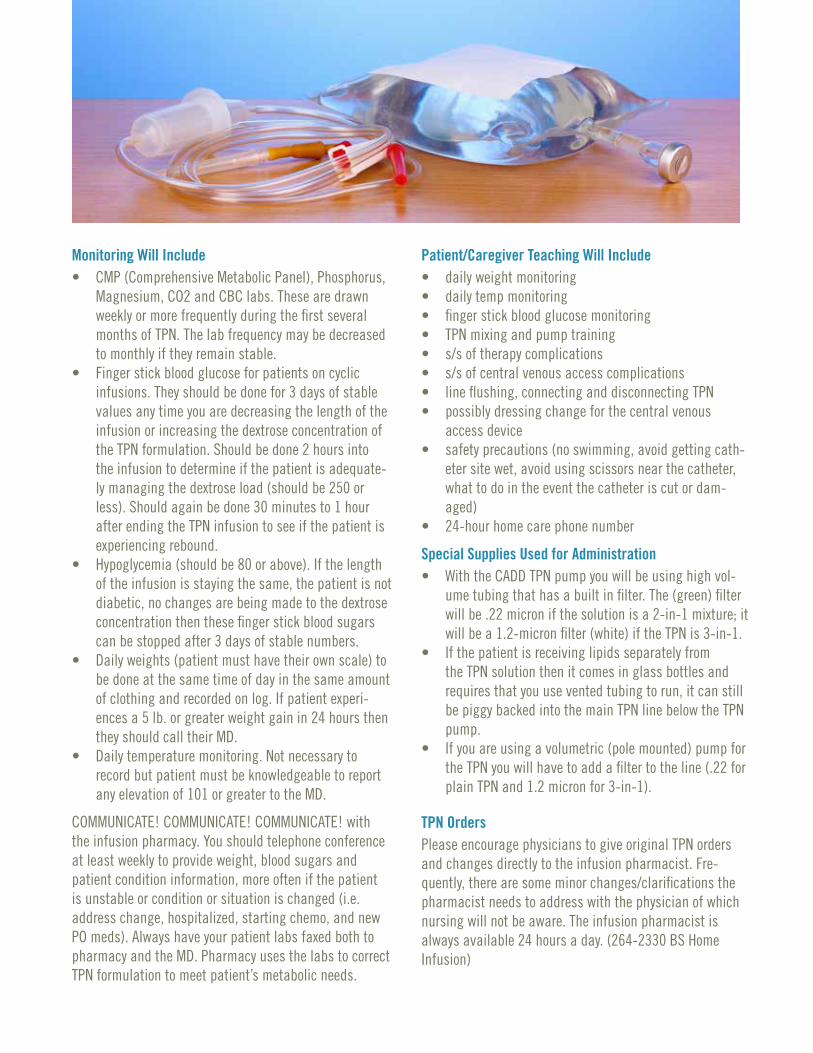
Special Supplies Used for Administration• With the CADD TPN pump you will be using high vol-
ume tubing that has a built in filter. The (green) filter will be .22 micron if the solution is a 2-in-1 mixture; it will be a 1.2-micron filter (white) if the TPN is 3-in-1.
• If the patient is receiving lipids separately from the TPN solution then it comes in glass bottles and requires that you use vented tubing to run, it can still be piggy backed into the main TPN line below the TPN pump.
• If you are using a volumetric (pole mounted) pump for the TPN you will have to add a filter to the line (.22 for plain TPN and 1.2 micron for 3-in-1).
TPN OrdersPlease encourage physicians to give original TPN orders and changes directly to the infusion pharmacist. Fre-quently, there are some minor changes/clarifications the pharmacist needs to address with the physician of which nursing will not be aware. The infusion pharmacist is always available 24 hours a day. (264-2330 BS Home Infusion)
TPN Order ExamplesCONTINUOUS• 3-IN-1 TPN 2500 ml per day IV continuously through
Port-a-cath via CADD Prizm pump• To each bag of TPN add MVI 10ml, Zantac 300 mg• Monitor daily weights, temperature, finger stick
glucose monitoring to be done daily x 3, if stable then d/c
• MD to be notified for temp of 101 or above, blood glucose above 250 or below 80
• Teach patient/care giver self administration and monitoring
• DON’T FORGET TO WRITE YOUR FLUSH ORDERS AND DRESSING/NEEDLE
• CHANGE FOR YOUR IV ACCESS DEVICE!
INTERMITTENT (CYCLIC)• 3-in-1 TPN 2500 ml over 12 hours IV each day with
1 hour taper up and 1hr 30 min taper down through Hickman via CADD TPN pump
• To each bag add MVI 10cc, Famotidine 20 mg, *Reg-ular Insulin 15 Units. Once a week add Vitamin K 2 mg to bag on Mondays
• Monitor daily weights, temperature, finger stick glu-cose monitoring to be done 2 hours into the infusion and 30-60 mins after ending infusion x 3 days, if stable then may d/c
• MD to be notified for temp of 101 or above, blood glucose above 250 or below 80
• Teach patient/care giver self administration and monitoring
• DON’T FORGET TO WRITE YOUR FLUSH ORDERS AND DRESSING/ NEEDLE
• CHANGE FOR YOUR IV ACCESS DEVICE
*** Never add any insulin other than regular to TPN ***Please remember the general rule of thumb is that TPN is not compatible with any other drug in the same line without saline flushing.
Components of TPN• carbohydrates (glucose) at 3.4 calories per gram• proteins composed of both essential and non-essen-
tial amino acids, these add a few calories but these are usually not tabulated into the total calorie count.
Proteins are 4 calories per gram• trace elements of chromium, copper, zinc, manga-
nese, iodine, selenium, molybdenum• vitamins A, D, E, thiamin, riboflavin, niacin, pyroxi-
dine, folic acid, B12, K, pantothenic acid, ascorbic acid, biotin
• electrolytes calcium, phosphorus, magnesium, sodi-um, potassium, iron, chlorine
• 3-in-1 TPN contains lipids in the TPN admixture, 10% Lipids contain 1.1 calories per ml and
• 20% Lipids contain 2.0 calories per ml• VERY General Calorie Requirements• normal maintenance and elective surgery 25kcal/kg/
day• trauma, acute pancreatitis, inflammatory bowel
disease 30 kcal/kg/day• sepsis, minor burns 35 kcal/kg/day• major burns, severe trauma 40 kcal/kg/day
PATIENTS RARELY REQUIRE OVER 3000 kcal/day
Storage and Handling• TPN is kept refrigerated until time to use. It is okay to
use it cold but it may be taken out of refrigerator 1-2 hours prior to use (keep out of direct sunlight and do not warm in the microwave).
• Once TPN is out of refrigeration and additives have been put into the bag, this solution is good to hang at room temperature for 24 hours.
• If lipids are given separate from the TPN then do not refrigerate the bottles of lipids.
• Always have the patient examine each bag of TPN for leaks, discoloration, cracked or oily appearance (label should have correct name, what additives that need to be put into the bag and an expiration date).
• TPN tubing is always changed q 24 hours as the dextrose content encourages bacterial growth.
TPN Reimbursement Issues• Medicare requires that TPN be the sole source of
nutrition, also must have tried enteral feedings and failed.
• Every insurance policy is different, call the infusion pharmacy to have them research if patient qualifies.
• Advise pharmacy as soon as TPN is mentioned; it sometimes takes days to get insurance authorization.
PERIPHERAL IV INSERTION
SUPPLIES NEEDED• IV start kit• IV catheter extension set• clave• pre-filled saline syringe
FOLLOW STEP-BY-STEP INSTRUCTIONS1. Wash your hands and assemble supplies.2. Explain the procedure to the patient.3. Open IV start kit and using tourniquet, select ap-propriate sites for catheter insertion.4. When sites are selected, remove tourniquet.5. Open IV catheter, extension and clave. Join as appropriate, prime extension with saline and leave syringe attached, clamp open.6. Re-apply tourniquet above selected site. Don non-sterile gloves.7. Cleanse selected site with alcohol. Retract/stabilize vein with non-dominant hand.8. Visually determine bevel up position of IV catheter/needle.9. Enter vein with IV catheter and obtain blood flash back, advance needle 1/8” past point of flash back to assure that catheter tip is fully in the vein.10. Hold needle in secure position while advancing catheter off of needle and into the vein.11. Remove needle and discard directly into sharps container.12. Join catheter hub and extension tubing. Aspi-rate for blood then flush with saline. Assess site for swelling.13. Chevron tape and cover with Transparent Semi-permeable Membrane (Tegaderm) dressing.
When placing peripheral IVs or drawing blood, the clini-cian is limited to 2 attempts.IV sites are rotated every 4 days and PRN signs and symptoms of complications.
Signs of peripheral IV complications may be local or systemic:• Local symptoms include redness, tenderness, swell-
ing and/or drainage.• Systemic symptoms include fever and chills.• SUBCUTANEOUS INFUSION INSTRUCTIONS
SUPPLIES NEEDED• alcohol wipes• infusion pump with medication attached• betadine wipes• tape• Tegaderm (large or small)• Baxter Sub Cut Set (27 gauge 5/8” needle on a sticky
disc)• non-sterile gloves
FOLLOW STEP-BY-STEP INSTRUCTIONS1. Wash your hands and assemble supplies.2. Don non-sterile gloves.3. Select a sub cut site. The abdomen is a great site with very few nerve endings. When using the stomach, stay at the level of the umbilicus or below and do not place access closer than two inches to the umbilicus.4. Prep the selected site first with alcohol and then with betadine (paint the area that will be locked under the Tegaderm); allow to air dry while you move to the next step.5. Prime the sub cut set via the pump. (If you prime the line with saline it takes forever before the patient starts receiving the drug.)6. With the needle cover still in place, straighten the sub cut needle to be at a right angle to the sticky disk.7. Remove the cover from the sticky part of the disk and then remove the needle cover.8. Spread the skin taunt across the area to be ac-cessed and stick quickly with the needle at a right angle to the skin.9. Coil the excess tubing on top of the sticky disk and cover all with Tegaderm.10. Start the pump. The first one or two boluses that the patient receives may sting slightly.
TIPS• Subcutaneous site needs to be rotated every 3 to 5 days, plan on rotating sites twice a week on Mon/Thurs or Tues/Fri.• If the sites become too full of solution, also called “loaded,” then the medication runs back out of the same hole (a symptom of this can be the patient’s pain gets out of control).• Use the most concentrated medication possible to place as little fluid volume into the site as is possible.
• Advise the patient to use a heating pad on medium over the old sites for 15 minutes at a time 4 times each day to speed healing of the area so it will be ready to use again.• Do not infuse more than 2 cc per hour into a subcuta-neous site.• Avoid using the outer thighs unless the patient is bed bound, the needle usually pinches them when they walk.• If the drug being infused is DESFERAL then the sites need to be rotated daily.• Tell patients it is okay to shower with subcutaneous needles in place and covered with Tegaderm but not to take a tub bath.
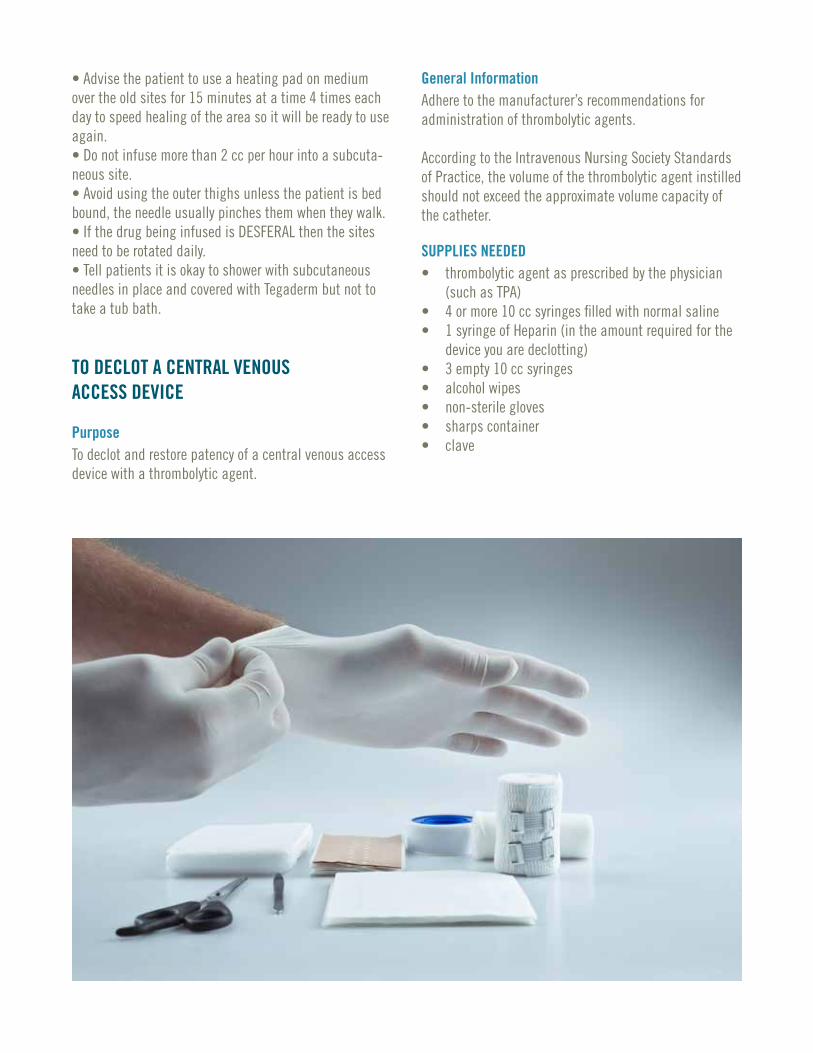
TO DECLOT A CENTRAL VENOUS ACCESS DEVICE
PurposeTo declot and restore patency of a central venous access device with a thrombolytic agent.
General InformationAdhere to the manufacturer’s recommendations for administration of thrombolytic agents.
According to the Intravenous Nursing Society Standards of Practice, the volume of the thrombolytic agent instilled should not exceed the approximate volume capacity of the catheter.
SUPPLIES NEEDED• thrombolytic agent as prescribed by the physician
(such as TPA)• 4 or more 10 cc syringes filled with normal saline• 1 syringe of Heparin (in the amount required for the
device you are declotting)• 3 empty 10 cc syringes• alcohol wipes• non-sterile gloves• sharps container• clave
FOLLOW STEP-BY-STEP INSTRUCTIONS1. Wash your hands and assemble supplies.2. Explain the procedure to the patient.3. Determine the catheter volume by reading the outside of the catheter or manufacturer’s literature. Prepare and draw up (in a 10 cc syringe) thrombolytic agent equal to the catheter volume.4. Clamp the patient’s CVAD, remove the clave and attach an empty syringe to the end of the central line.5. Attempt to gently aspirate, if blood flows freely then the catheter is patent.6. If you are unable to aspirate, clamp the line and re-move empty syringe. Attach syringe filled with correct amount of thrombolytic agent.7. Unclamp the line and aspirate forcefully (holding the plunger of the syringe up towards the ceiling); gently push in the thrombolytic agent and clamp off the catheter. Leave the empty syringe attached.8. Wait 30 minutes (or the amount of time indicated by the thrombolytic label), unclamp the catheter and attempt to aspirate.9. If able to aspirate, then withdraw and waste 5 mls of blood, flush line with 20 to 30 mls of normal saline; follow with Heparin flush if appropriate for the device.10. If unable to aspirate, then re-clamp the line and reassess after 120 minutes of dwell time.11. Attempt aspiration a second time, if still unsuc-cessful, call MD and request an order to leave the thrombolytic agent in catheter for 24 hours before next attempt at aspiration. An order to instill a second dose may also be obtained.
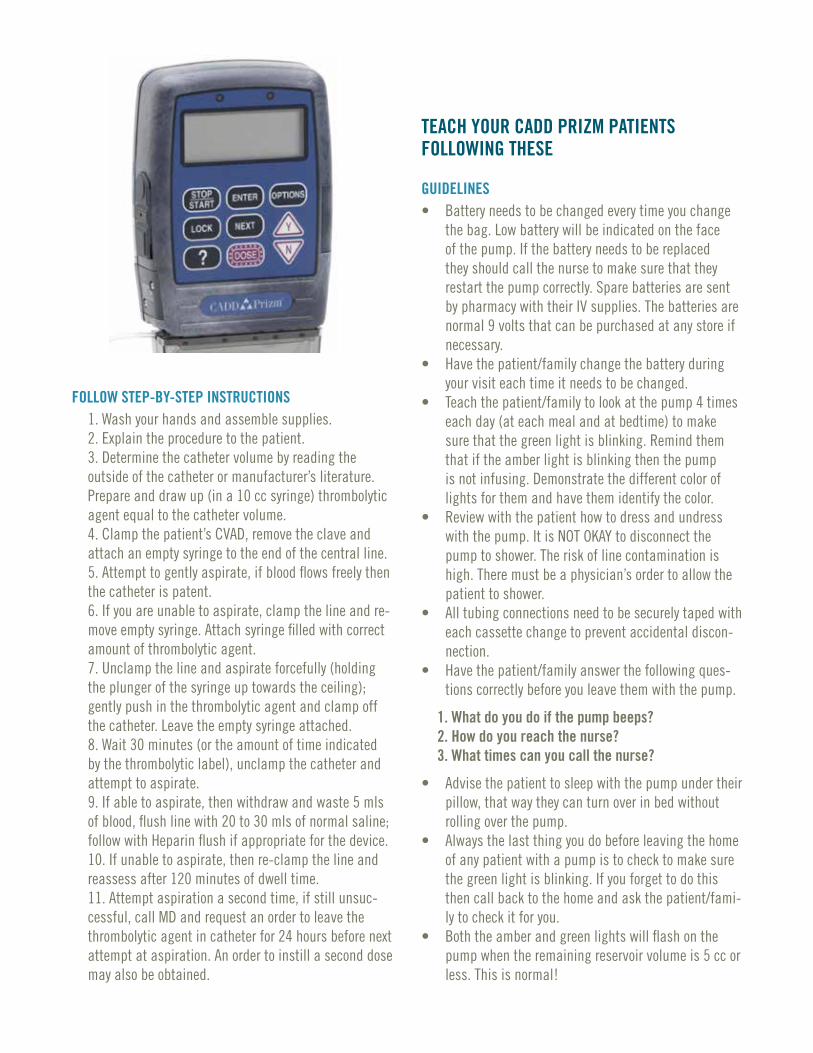
TEACH YOUR CADD PRIZM PATIENTS FOLLOWING THESE
GUIDELINES• Battery needs to be changed every time you change
the bag. Low battery will be indicated on the face of the pump. If the battery needs to be replaced they should call the nurse to make sure that they restart the pump correctly. Spare batteries are sent by pharmacy with their IV supplies. The batteries are normal 9 volts that can be purchased at any store if necessary.
• Have the patient/family change the battery during your visit each time it needs to be changed.
• Teach the patient/family to look at the pump 4 times each day (at each meal and at bedtime) to make sure that the green light is blinking. Remind them that if the amber light is blinking then the pump is not infusing. Demonstrate the different color of lights for them and have them identify the color.
• Review with the patient how to dress and undress with the pump. It is NOT OKAY to disconnect the pump to shower. The risk of line contamination is high. There must be a physician’s order to allow the patient to shower.
• All tubing connections need to be securely taped with each cassette change to prevent accidental discon-nection.
• Have the patient/family answer the following ques-tions correctly before you leave them with the pump.
1. What do you do if the pump beeps?2. How do you reach the nurse?3. What times can you call the nurse?
• Advise the patient to sleep with the pump under their pillow, that way they can turn over in bed without rolling over the pump.
• Always the last thing you do before leaving the home of any patient with a pump is to check to make sure the green light is blinking. If you forget to do this then call back to the home and ask the patient/fami-ly to check it for you.
• Both the amber and green lights will flash on the pump when the remaining reservoir volume is 5 cc or less. This is normal!
INFECTION CONTROL SURVEILLANCE AND TRACKING
PolicyInfection Control Surveillance and Tracking
PurposeEarly detection, intervention, trending and appropriate reporting of infections.Surveillance will be performed by AT Home Care (ATHC) professional staff to collect data related to infections. The following type of surveillance will be performed:• Outbreak surveillance of the occurrence of specific infections in multiple patients at the same time.• Symptomatic infections of central venous access sites will be reported to the Branch Administrator who will report to the Compliance Officer for monitoring for trends.• Wound infections that develop greater than 14 days after admission to ATHC in which the patient is placed on an antibiotic or has a positive wound culture.Any occurrence of these tracked infections will be docu-mented on an occurrence report and given to the Branch Administrator and then the Compliance Officer.
DefinitionsTracked Infections – ATHC will track the following three types of infection for our infectioncontrol surveillance.
1. Venous access infections in which the patient has (or had within the past 7 days) a venous access device and evidences infection by two or more of the following signs and symptoms: Chills and fever, site erythema, exudate from site, site tenderness, edema at site, malaise, and/or hypotension.2. Communicable diseases of staff or patients.3. Wound infections that develop greater than 14 days after the patient’s admission to ATHC in which the patient is placed on an antibiotic or has a positive wound culture.
Procedure1. Staff and/or Clinical Manager will complete a patient occurrence form for all patients who are diagnosed with infection by laboratory results to include:
• community acquired reportable diseases. (See State information listed after these policies)• central venous line infections. (targeted surveil-lance)• wound infections with positive wound culture results or in which an antibiotic is prescribed by the physician (targeted surveillance)
2. Clinical Supervisor/staff will complete an Employee Occurrence report on employee exposures to communica-ble diseases.3. Patients with venous access infections will be reported by the Case Manager via anoccurrence report to the Branch Administrator (BA) and the Corporate Compliance Officer (CCO).4. Patients with wound infections that occur greater that 14 days after admission to ATHC services in which the patient is treated with an antibiotic or has a positive wound culture will be reported by the Case Manager via an occurrence report to the BA and CCO.5. The BA will evaluate all reported infections, in their Branch, for trends in risk factors, infection sites, accu-rate identification of symptoms and professional care-giver contact, and report to the CCO on a quarterly basis. The CCO aggregates the data from all of the Branches and reports to the PAC Committee on a semi-annual basis.6. The Corporate Clinical Team is responsible for tracking this data to identify any trend of infections caused by:• equipment• staff member• technique or identifiable contributing factors7. The Corporate Clinical Team will also write any needed Action Plans.
AT Home Care • IV Therapy
TREATMENT OF ANAPHYLAXISPolicyAn AT Home Care registered nurse may administer emergency medications in the event of an anaphylactic reaction. The emergency medications are to be given ac-cording to Physician’s order. The order may read “Agency Anaphylaxis Protocol PRN” which would be using the protocol stated in this policy.
PurposeGuidelines for the immediate treatment of life threaten-ing anaphylaxis that may occur when administering the first dose of an IV medication.
DefinitionsAnaphylaxis – generalized anaphylaxis is an acute, often explosive, systemic reaction characterized by pruritis, generalized flush, urticaria, respiratory distress, and vascular collapse, and occasionally by seizures, vomit-ing, abdominal cramps and incontinence. It occurs in a previously sensitized person when he again receives the sensitizing antigen.
Anaphylaxis Kit – with a physician’s order the following items are assembled and dispensed by the infusion pharmacy for use in the home in case of an anaphylactic reaction. The kit may include the following:
• 2 epinephrine (Adrenalin) 1:1000 (2) 1 ml ampules or an Epi-Pen• 1 ml syringe with sub cut needle• filter straw• 2 alcohol wipes• 4 chlortrimeton tablets - 2 mg tablets• 3 Benadryl tablets – 50 mg• 2 injectable Benadryl – 50 mg per ml
Procedure (Agency Anaphylaxis Protocol)During medication administration or immediately there-after when anaphylaxis is suspected:
1. If the patient experiences moderate to severe itching the nurse will• stop the medication administration• administer the appropriate dose of antihistamine;
PO route for itching only. Tablets may be chewed for quicker absorption
• monitor vital signs and• notify the physician
2. If the patient experiences new onset wheezing or respi-ratory distress the nurse will• stop the medication administration• administer the appropriate dose of epinephrine
(Adrenalin) subcutaneously, may repeat dose in 3 - 5 minutes if necessary
• Epinephrine 0.3 ml/dose S.C. for adults or 1 Epi-Pen• activate the emergency medical system (call 911)• continue to monitor vital signs• if patient is hypotensive then keep him supine with
legs elevated• remain with patient until emergency medical techni-
cian/paramedic arrives• if cardiopulmonary arrest occurs, begin resuscitation• notify the physician as soon as the situation permits
3. An occurrence report should be completed for any allergic or anaphylactic reaction (Adverse Medication Reaction).
20
ADVERSE DRUG REACTIONPolicyAny significant untoward reaction that develops subse-quent to the administration of medication shall be re-ported by the nurse to the physician who ordered the drug and then to the pharmacist and/or infusion pharmacist (if it is a parenteral medication).
The Corporate Clinical Team shall conduct a review of the reported adverse drug reactions at least quarterly.
PurposeTo identify, report and evaluate adverse drug reactions in order to trend and reduce occurrences, ensure that appropriate follow-up occurs and to comply with FDA regulations.
DefinitionsA significant untoward (adverse) drug reaction is defined as follows:
Any undesirable or unexpected effect (not addressed in product literature) of a prescribed medication (ad-ministered in doses recognized as acceptable medical practice) that requires discontinuing a drug, modifying the dose, required initial or prolonged hospitalization, requires supportive treatment or treatment with a prescription drug, is life threatening or results in death, congenital anomalies or disabilities.
Procedure1. Note clinical manifestations. If not an emergency situation, (wheezing, itching, and/or rashes) notify doctor and follow treatment orders.2. If emergency situation exists (difficulty breathing), evaluate vital functions and employ resuscitative measures.3. If caregiver/family member is present have them activate EMS and call prescribing physician.4. If adverse reaction was from a parenteral medica-tion then the infusion pharmacist will be notified by telephone.5. An occurrence report will be completed in the HCHB software and notification of Clinical Supervisor who will notify the Compliance Officer.6. The Corporate Compliance Officer will track, trend and analyze adverse drug reactions quarterly.
Medical Director’s Signature:
________________________________________
Date: ____________________________________
AT Home Care • IV Therapy
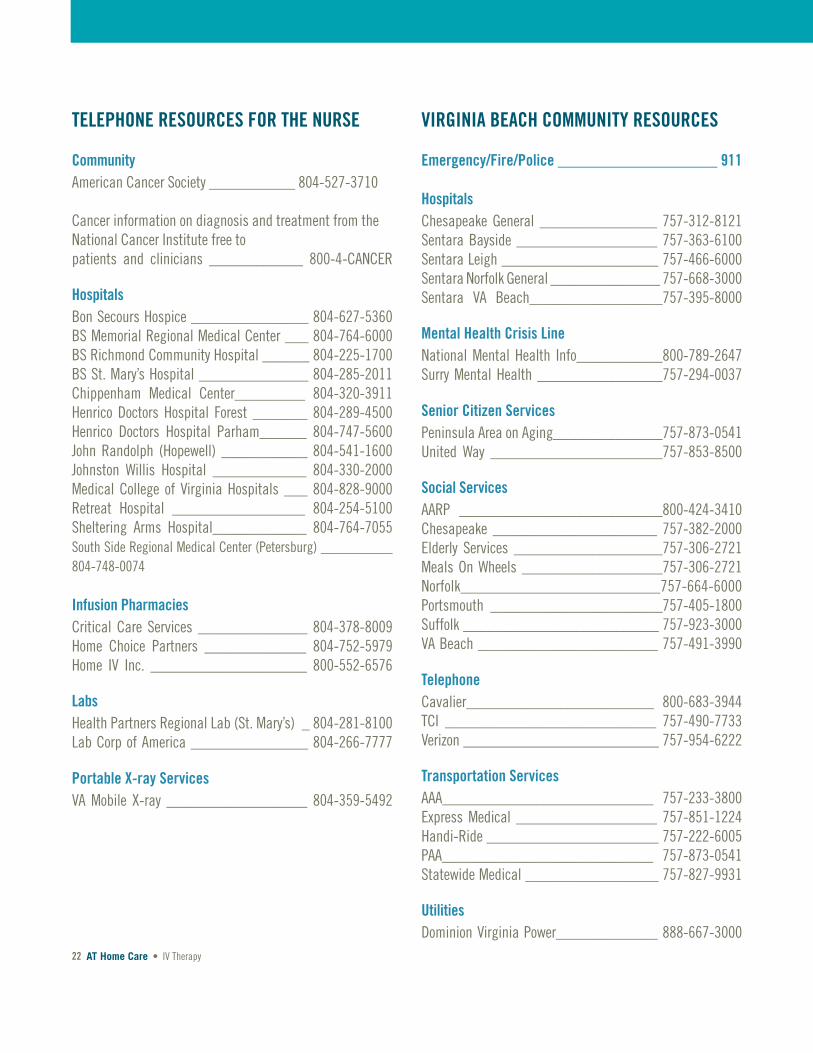
TELEPHONE RESOURCES FOR THE NURSE
CommunityAmerican Cancer Society ___________ 804-527-3710
Cancer information on diagnosis and treatment from the National Cancer Institute free topatients and clinicians ____________ 800-4-CANCER
HospitalsBon Secours Hospice _______________ 804-627-5360BS Memorial Regional Medical Center ___ 804-764-6000BS Richmond Community Hospital ______ 804-225-1700BS St. Mary’s Hospital ______________ 804-285-2011Chippenham Medical Center_________ 804-320-3911Henrico Doctors Hospital Forest _______ 804-289-4500Henrico Doctors Hospital Parham______ 804-747-5600John Randolph (Hopewell) ___________ 804-541-1600Johnston Willis Hospital ____________ 804-330-2000Medical College of Virginia Hospitals ___ 804-828-9000Retreat Hospital _________________ 804-254-5100Sheltering Arms Hospital____________ 804-764-7055South Side Regional Medical Center (Petersburg) __________ 804-748-0074
Infusion PharmaciesCritical Care Services ______________ 804-378-8009Home Choice Partners _____________ 804-752-5979Home IV Inc. ____________________ 800-552-6576
LabsHealth Partners Regional Lab (St. Mary’s) _ 804-281-8100Lab Corp of America _______________ 804-266-7777
Portable X-ray ServicesVA Mobile X-ray __________________ 804-359-5492
VIRGINIA BEACH COMMUNITY RESOURCES
Emergency/Fire/Police ____________________ 911
HospitalsChesapeake General _______________ 757-312-8121Sentara Bayside __________________ 757-363-6100Sentara Leigh ____________________ 757-466-6000Sentara Norfolk General ______________ 757-668-3000Sentara VA Beach_________________757-395-8000
Mental Health Crisis LineNational Mental Health Info___________800-789-2647Surry Mental Health ________________757-294-0037
Senior Citizen ServicesPeninsula Area on Aging______________757-873-0541United Way ______________________757-853-8500
Social ServicesAARP __________________________800-424-3410Chesapeake _____________________ 757-382-2000Elderly Services ___________________757-306-2721Meals On Wheels __________________757-306-2721Norfolk_________________________757-664-6000Portsmouth ______________________757-405-1800Suffolk _________________________ 757-923-3000VA Beach _______________________ 757-491-3990
TelephoneCavalier________________________ 800-683-3944TCI ___________________________ 757-490-7733Verizon _________________________ 757-954-6222
Transportation ServicesAAA___________________________ 757-233-3800Express Medical __________________ 757-851-1224Handi-Ride ______________________ 757-222-6005PAA___________________________ 757-873-0541Statewide Medical _________________ 757-827-9931
UtilitiesDominion Virginia Power_____________ 888-667-3000
22

WILLIAMSBURG COMMUNITY RESOURCES
Emergency/Fire/Police ____________________ 911
HospitalsMary Immaculate Hospital____________ 757-866-6000Riverside _______________________ 757-594-2000Riverside Rehab Hosp ______________ 757-928-8000Riverside Walter Reed Hosp___________ 804-693-8800Sentara Careplex Hospital ____________ 757-736-1000
InfusionRiverside _______________________ 757-594-3944Sentara Williamsburg Hospital ________ 757-984-6000
Mental Health Crisis LineNational Mental Health Info___________ 800-789-2647Surry Mental Health ________________ 757-294-0037
Senior Citizen ServicesPeninsula Area on Aging_____________ 757-873-0541Sentara Living Well ________________ 757-727-7550United Way ______________________ 757-873-9328
Social ServicesAARP _________________________ 800-424-3410Elderly Services __________________ 757-727-1996Gloucester______________________ 804-693-2671Lancaster ______________________ 804-462-5141Mathews _______________________ 804-725-7192Meals On Wheels _________________ 757-873-0541Middlesex ______________________ 804-758-2348Tappahannock ___________________ 804-443-3561
TelephoneCavalier________________________ 800-683-3944TCI ___________________________ 757-490-7733Verizon _________________________ 757-954-6222
Transportation ServicesAAA___________________________ 757-873-0541Express Medical __________________ 757-851-1224Handi-Ride ______________________ 757-222-6005PAA___________________________ 757-873-0541Statewide Medical _________________ 757-827-9931
Utilities ________________________ 757-877-2019
2374 Jefferson Hwy
Suite 102 B
Waynesboro, VA 22980
Phone: (540) 324-3995
2374 Jefferson Hwy
Suite 102 B
Waynesboro, VA 22980
Phone: (540) 324-3995
3610 C Boulevard – Bates Building
Colonial Heights, VA 23834-1329
Phone: (804) 524-0062
Fax: (804) 524-3680
144 Business Park Drive,
Suite 208
Virginia Beach, VA 23462
Phone: (757) 747-0785
Fax: (757) 747-0784
366 McLaws Circle,
Suite 2
Williamsburg, VA 23185-6352
Phone: (757) 220-2112
Fax: (757) 220-2745
300 South Main Street
Emporia, VA 23847
Phone: (434) 336-4238
4100 Brook Road
Richmond, VA 23227-4106
Phone: (804) 359-3400
Fax: (804) 359-3036
16310 Goodes Bridge Road
Amelia Courthouse, VA
Phone: (804) 665-9474
Fax: (804) 249-6184
154 Hansen Road
Suite 102 B
Charlottesville, Virginia, 22911-3552
Phone: (434) 295-5355
Fax: (434) 295-5324
1003 Mahone Street
Fredericksburg, VA 22401-6214
Phone: (540) 370-1588
Fax: (540) 370-1586
AtHomeCare.com