Introduction to Geology - MU Extension
19
The geology of Proffit Mountain was laid bare after the breach of the Taum Sauk Resevoir in December of 2005. Photo by Bill Duley Introduction to Geology Missouri 4-H Geology Project Gerry Snapp University of Missouri 4-H Center for Youth Development
Transcript of Introduction to Geology - MU Extension

The geology of Proffit Mountain was laid bare after the breach of the Taum Sauk Resevoir in December of 2005.
Photo by Bill Duley
Introduction to Geology
Missouri 4-H Geology Project
Gerry Snapp
University of Missouri 4-H Center for Youth Development

Y9410 Rev 4/2013 GS 2
Missouri 4-H University of Missouri 4-H Center for Youth Development
Introduction to Geology Welcome to a great learning adventure, the 4-H Geology Project. Your study of geology will allow you to see the world through new eyes and view Mother Earth with a new appreciation. What is geology? Geology, sometimes referred to as earth science or the study of the earth, is the scientific study of the nature, formation, origin and development of the earth’s crust and its layers. Much of the knowledge discovered about the earth comes from the study of minerals, rocks, and fossils found in the layers of the earth’s crust. By using geological information, scientists are able to locate precious gems and metals, oil, gas, minerals, and building materials that furnish us with fuel, shelter, comfortable living, and enjoyment. Through geologic investigations, scientists have learned about the formation of the earth and its many changes during millions of years. The history of life and its development on earth has been traced through fossils. Geological techniques are used by space scientists to explore the moon and Mars. You do not need to be an accomplished scientist to enjoy geology. There is plenty to learn and do right here in Missouri…even in your own backyard. Content for the study of the earth is vast; what you do as part of your 4-H geology project is only limited by your own initiative. Keep it simple in the beginning and grow into your geology project as you gain knowledge and experience.
GETTING STARTED
Finding a Leader or Project Advisor
Hopefully, your 4-H club has an active, enthusiastic volunteer leader for the geology project. If your club does not have a geology leader, there may be a county-wide leader. Contact your county 4-H specialist or youth program assistant. If no leader is available, ask for suggestions. You may just be the person who can ask a potential adult volunteer to be a leader for the geology project. Possibilities for project leader include science teachers (or other teachers), 4-H geology project alumni, local rock collecting enthusiasts, service club members, neighbors, relatives, and parents or guardians. Look for other youth who are enrolled in the geology project. If you are the only one, a personal project advisor may be the most practical approach. A project advisor is a knowledgeable adult who will provide guidance and advice as you progress through your geology project. The adviser will help you plan your project goals and assist in helping you accomplish those goals. An adviser can serve as a sounding board and a resource. Finding a project leader or advisor to guide you in your 4-H geology project will be worth the effort. Regardless, whether you have a project leader, a project advisor, or a parent – you will need to accept personal responsibility for what you learn and accomplish in the Geology project. This booklet will provide you with only very basic information. You will need to seek other resources to gain the knowledge required to have a truly successful experience. Building a Knowledge Base This project guide contains limited subject matter content. The 4-H member will be responsible for discovering their own information and building their own foundation of knowledge. Search the Internet, library, or bookstore to gather basic information about geology and increase your knowledge. Within this guide you will be encouraged to go to specific websites to reinforce and/or supplement the information provided. Youth are strongly encouraged to take the time to
Y9410 Rev 4/2013 GS 3
Recommended Reading from the Department of Interior, U.S. Geological Survey (USGS) Fossils, Rocks and Time by Lucy E. Edwards and John Pojeta Jr. http://pubs.usgs.gov/gip/fossils Our Changing Continent by John S. Schlee http://pubs.usgs.gov/gip/continents Field Guides: A field guide is the most basic resource for a 4-H geology project and are the primary source for identifying geological specimens. Field guides are available from libraries, but consider purchasing one (or more) for your own permanent use. Three excellent field guides are listed below to choose from. You may want to explore additional guidebooks on your own or talk to a hobbyist or professional in the field of geology for a recommendation.
Smithsonian Handbooks: Rocks & Minerals by Chris Pellant (recommended by University of Missouri Geology Department faculty) A Field Guide to Rocks and Minerals (Peterson Field Guides) by Frederick H. Pough, Jeffrey Scovil (photographer), and Roger Tory Peterson (editor) National Audubon Society Field Guide to North American Rocks and Mineral (Audubon Society Field Guide)
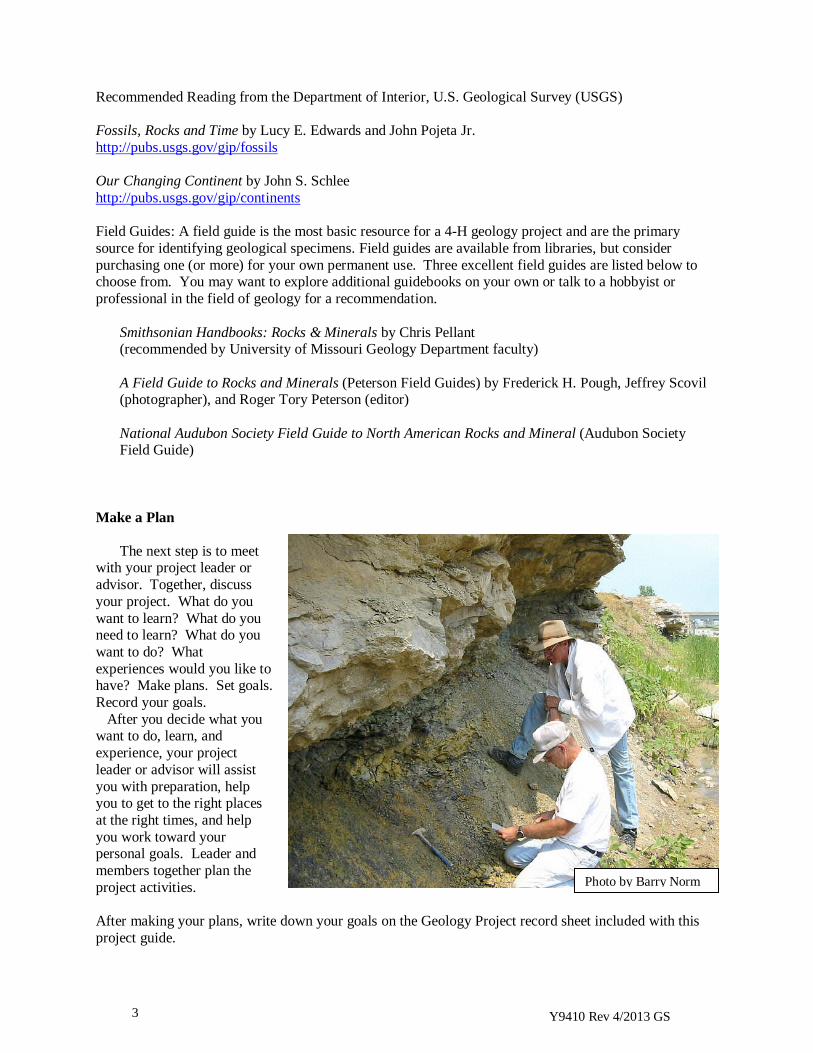
Make a Plan
The next step is to meet with your project leader or advisor. Together, discuss your project. What do you want to learn? What do you need to learn? What do you want to do? What experiences would you like to have? Make plans. Set goals. Record your goals. After you decide what you want to do, learn, and experience, your project leader or advisor will assist you with preparation, help you to get to the right places at the right times, and help you work toward your personal goals. Leader and members together plan the project activities. After making your plans, write down your goals on the Geology Project record sheet included with this project guide.
Photo by Barry Norm

Y9410 Rev 4/2013 GS 4
Things to Do
• Take field trips to collect samples
• Visit museums with geology exhibits
• Visit a rock shop
• Visit a rock/mineral show
• Assemble your collecting kit/gear
• Start or add to your rock/mineral collection
• Build a display case for your collection
• Keep a field notebook
• Exhibit at the county fair
• Give a demonstration or illustrated talk
Things To Learn
• What is a mineral
• What is a rock
• What is a fossil
• Know the 3 kinds of rocks
• The Geological clock
• Geological terms
• What is the Rock Cycle

Y9410 Rev 4/2013 GS 5
BUILDING BLOCKS OF THE EARTH Elements
Consider the earth a large ball of rock – a ball that is 8,000 miles in diameter. The core or the interior of this ball is liquid – molten rock. The outside layer of this ball is a hard crust of rock. Most of the rock of the earth’s crust is composed of just eight elements. These elements are oxygen, silicon, aluminum, iron, calcium, sodium, potassium, and magnesium. Yet, there are thousands of different types of minerals and rocks found on earth. How can this be? Because of the countless number of combinations possible, both the different mixtures of the elements and the different processes by which they are combined or formed.
Minerals
Minerals are made up of two or more elements. There are 92 known natural elements on earth. There are about 3,000 different minerals in the world. A mineral: • occurs naturally. Manmade substances are not considered a
mineral. • is inorganic. Minerals were never living and are not formed
by living processes. • is a solid. • has an orderly repeated pattern from the atoms composing
the solid. • has a definite chemical composition. • has distinct physical properties.
Examples of minerals: quartz, talc, feldspar, gypsum
For more advanced information about minerals see: Minerals; http://volcano.oregonstate.edu/oldroot/education/vwlessons/lessons/Minerals/Minerals1.html
Activity 1- Elements Look in a periodic table and find the chemical symbol for the eight elements that make up most of the earth’s rock crust. Write the symbol in the blank provided.
Symbol % Symbol % ______ Aluminum ______ ______ Oxygen ______ ______ Calcium ______ ______ Potassium ______ ______ Iron ______ ______ Silicon ______ ______ Magnesium ______ ______ Sodium ______
Can you find the percentage of each found in the earth’s crust?

Y9410 Rev 4/2013 GS 6
Rocks
Rock is made up of two or more minerals. Rocks, like minerals, have never been alive. Granite is a good example of a rock in which the different minerals are visible. Granite is always composed of quartz, mica, and feldspar but may also contain other minerals. Geologists classify rocks into three groups: igneous, sedimentary, and metamorphic. Here is a very brief and simple explanation of the three kinds of rock. You will want to investigate further to get a better understanding.
Igneous Rock. Igneous rocks get their name from the Latin word ignis, meaning "fire." Igneous rock is formed by the melted rock from the interior of the earth, called magma, which has cooled and solidified. Magma can reach temperatures close to 1200°C (2192°F). When magma appears on the surface of the earth, it is called lava. Igneous rock was formed either underground or above the ground. Sometimes magma is trapped in small pockets. These pockets of magma cool slowly underground and become igneous rock. When volcanoes erupt, the molten rock (now called lava) appears above ground, cools more quickly, and becomes another kind of igneous rock. Sedimentary Rock. Sedimentary rocks make up about ¾ of the earth’s crust. There are 3 classifications of sedimentary rocks. Clastic sedimentary rocks and are formed by the breakdown (both physical and chemical) of pre-existing rocks. These broken pieces of rock are called sediments. Sand at the beach, mud at the bottom of the pond, smooth pebbles in the stream bed are all sediments. These sediments are transported and then deposited into layers. The sediment layers become rock by the processes of compaction and cementation. Biochemical or organic sedimentary rocks are formed when large numbers of living organisms, animal and/or plant die, pile up and are then compressed and cemented to form rock. Chemical sedimentary rocks are formed by chemical precipitation. Water carrying minerals travels and the minerals are re-deposited, or precipitated, when the water evaporates. Stalactites and stalagmites in caves form this way. Shale, sandstone, and limestone are the most common types of sedimentary rocks. Sedimentary rock is the home of very important resources such as ground water, coal, oil, and soil. Metamorphic Rock. Metamorphic means “changed form.” If sedimentary and igneous rocks are subjected to intense pressures or extreme heat, they can be completely changed and become metamorphic rocks, which form while deeply buried within the earth's crust. The process of metamorphism transforms them into denser, more compact rocks. New minerals are created either by rearrangement of mineral components or by reactions with fluids that enter the rocks.
Activity 2 – Minerals List 10 additional minerals _________________________ _______________________ _________________________ _______________________ _________________________ _______________________ _________________________ _______________________ _________________________ _______________________

Y9410 Rev 4/2013 GS 7
For additional information about the earth’s crust, kinds of rock, and how they are formed see the two following websites: Rock Hounds – Discover How Rocks are Formed! http://www.fi.edu/fellows/fellow1/oct98/create Geology for Kids – The Study of Our Earth; chapter two –Earth, Rocks and Landforms http://www.kidsgeo.com/geology-for-kids/0019-inside-of-earth.php Remnants of Life – Fossils Fossils are the naturally preserved remains, or the representation of remains, of animals, plants, or other organisms that lived in the geological past. Fossils come in a variety of sizes, from minute traces to large skeletons. Trace fossils result from the activities or presence of creatures and plants. Examples of these traces include footprints, burrows, fecal matter, and root tunnels. At the larger end of the scale, fossils include bones, the largest belonging to dinosaurs. Fossils are clues to the past. Scientists use fossils to develop a history of the earth and its plants and animals. How far in the past? Fossils range from thousands of years to many millions of years in age. The earliest fossils date from around 600 million years ago. To put this in context, the dinosaurs became extinct just 65 million years ago.
Photo by Jo Schaper – Jo Schaper’s Missouri World web site.

Y9410 Rev 4/2013 GS 8
More information on fossils for youth and adult leaders can be found on this website: Fossils-Facts- and –Finds: http://www.fossils-facts-and-finds.com/what_is_a_fossil.html This is a commercial site so be careful of the ads. Follow the “buttons” on the left to navigate the site.
Activity 3 – Getting to Know Missouri Geology Answer the following questions about Missouri’s geology. You may have to do some research to find the correct answers. If you “dig” hard enough you will succeed. 1. What is the Missouri state rock? ____________ When was it discovered; and in where was it found? _________________________________________________________ _________________________________________________________ 2. What is the Missouri State mineral? ________________________ What important element is found in this ore? ____________________ 3. The largest deposits of this ore are found in the southeast portion of the state in an area known as the Viburnum Trend. What six counties have some portion of there boundaries within the Viburnum Trend? ____________________________ ________________________ ____________________________ _________________________ ____________________________ __________________________ 4. What is the state fossil? ___________________________________ Phylum ____________________ Class ______________________ Order ______________________ 5. Look at a geological map of Missouri. How many different regions or areas of geological classification do you find? __________________ In which of the regions indicated on the map is your home located? ____________________________________________

Y9410 Rev 4/2013 GS 9
ROCK, MINERAL, FOSSIL COLLECTIONS A collection of geological samples is the best way to display the skills and knowledge you have gained in your 4-H geology project and provides ample opportunity for growth. As you build your collection you will:
• Collect • Keep records • Clean • Identify • Display…rocks and minerals. When beginning your collection focus on samples from your local geographical or geological region.
Learn the local geology first and gather local samples first. At first, your collection should be rather general in nature with representative samples of the 3 types of rocks and also sample of local minerals.
As your knowledge and interest grows, expand your collection to include samples from throughout the state of Missouri, and eventually from any or all parts of the United States. You may decide to specialize as you become more knowledgeable and experienced – that’s great. Your collection should reflect your journey –what you have learned and done – in geology. Each geology collection can be as unique as each individual. Where to Find Samples You can find geological specimens anywhere. Keep your eyes open! There are many sites to be found not far from where you live both on private and public property. Before collecting on private property, be sure to first get permission from the landowner. Make sure of the regulations before you go before collecting on public property. As a rule of thumb, do not collect rocks in national and state parks and monuments The best collecting sites are quarries, road cuts or natural cliffs, and outcrops. Open fields and level country are poor places to find rock exposures. Hills and steep slopes are better sites. Almost any exposure of rock provides some collection opportunities, but fresh, un-weathered outcrops or manmade excavations offer the best locations. If possible, visit several exposures of the same rock to be sure a representative sample is selected. Keep in mind that your rock and mineral collection is a collection of samples. There is no need to bring home huge chunks of a mountain or other geological feature. If a rock is bigger than your fist, you will probably want to trim it down. Equipment You will need a pack or bag in which to carry your equipment and samples. Other recommended equipment includes a geologist’s pick or brick mason’s hammer for breaking rocks (a carpenter’s hammer is too brittle), goggles to protect your eyes, a cold chisel for cutting rocks, and a pair of heavy gloves to protect your hands. You will also want a magnifying glass for examining rocks and a pocketknife. Bring a pen or pencil and some index cards or notebook for taking notes. Wearing comfortable walking shoes is an important piece of equipment as well. Consider taking a canteen of water and a snack with you on your collecting trips. Be prepared. Start your own list of items needed for your trips. Update the list as needed and refer to it before each trip.

Y9410 Rev 4/2013 GS 10
Record Keeping Record each of your geological finds. Take a notebook or index cards with you to take notes. Record the date of collection, location of where the specimen was collected, a description, and any other observations about the site or the specimen. Note the topographic and/or geographic features of the area, as well as an “address” or location. Did you find the specimen on a creek bed, road cut, rock quarry, hillside, river bank, sink hole, etc? Include the name of the stream, mountain, road, etc. At a minimum, record the state, county, and approximate distance and direction from the nearest town. For example, Saline County, Missouri, 6 miles SE of Marshall. You could be more specific by adding Bank of Salt Fork Creek, C.M. Dehn property. Even better would be to add the legal description of the land on which you found the sample such as the range, township, and/or section from the county plat book. If you have a copy of the plat map or aerial photo map, indicate on the map where you collected the specimen. When you bag each geological sample, make sure you can match the specimen with the appropriate notes. Wrap the sample in newspaper and/or bubble wrap for protection. To assure that the notes matches the sample, be sure to include your notes (or some manner of identification) in the wrap. Some use an individual plastic bags for each sample and place the note card within the baggie. Then place the properly wrapped sample (with notes) into your collection bag. Your field notebook or index cards are your initial notes. You need to transfer the information to a permanent record. Be as accurate as possible. Use the Geology Specimen Record included with this project guide or make one of your own.

Y9410 Rev 4/2013 GS 11
Using Technology If you are familiar with a computer spread sheet program such as EXCEL, you may choose
to use it for your permanent record. One advantage would be the ability to sort. If you
choose to computerize your record, be sure to back it up – have a copy on a disc or flash
drive. Back up the data every time you add or modify your record. You do not want to loose it
if your hard drive goes down.
Consider utilizing a GIS/GPS unit in the Geology project. Enter the site of your find into
your unit as a way point and record the coordinates in your notes and permanent record.
Safety There are hazards in rock collecting. Use good judgment and follow acceptable safety practices when on field trips collecting geological samples. • Use proper equipment – use the correct kind of hammer, a geological pick or brick mason hammer. • Use equipment properly – don’t use the pointed end of a geological pick to break rock. • Always wear safety glasses or goggles when chipping or breaking rock. Those around you to. • Wear a hard hat when collecting under a rock overhang or where there is a possibility of falling rock. • Do not go underground. Stay out of mines and caves, unless with an experienced adult. • Use protection from sun and insects. • Wear gloves – some rocks can give you slivers or cuts. • Wash hands thoroughly after handling rocks. Some minerals can make you sick. • Don’t go rock hunting by yourself. Take a friend. Always let your parents know where you will be. • Always let parents know when and where you will be collecting.
Record: • Specimen number • Date (collected or purchased) • Location, where you found the rock – be as descriptive as possible • Type of sample (rock, mineral, fossil) • Description or name • Other information such as plants or other rocks in the area, topographic and/or geographic
features, or anything else that would be helpful or interesting about the specimen.
Cleaning & marking
Gather only the best specimens that display their true character. You may use a geologist's hammer to chip away surface weathering or moss or lichen but do so cautiously. To clean your samples start with a fine brush and gently dry brush soil and debris from the rock or mineral. Some rocks can be damaged by brushing too hard. You can use cold or lukewarm water to clean your specimens but be careful since some minerals dissolve in water. Never use hot water since the hot water can cause some minerals to crack or break. After cleaning, let the specimens dry. Look at your samples again. Keep only those that will improve your collection, unless you plan to trade rocks with someone else. After cleaning, you will want to place a spot of white enamel paint about half the size of a dime on the rock. Place the enamel on the side of the sample that will not be seen when displayed. The smaller the rock, the smaller the spot. After the paint is dry, write the number on the spot with a black permanent marker. Remember to number the samples according to the order in which you find them. Be sure the sample number matches the number in your notes and permanent record.

Y9410 Rev 4/2013 GS 12
Make a Display Box Geology specimens can be kept in good condition by storing in boxes to protect from dust and damage. The dimensions in the diagram meet the Missouri State Fair exhibit guidelines.
Adapted from Kansas State University Agricultural Experiment Station and Cooperative Extension Service
Identification
Proper identification of the specimen is critically important and can be extremely challenging for beginning geologists. Your first resource to refer to when identifying rocks and minerals is the field guide. With field guide in hand, you will be able to compare the physical properties of a mineral to descriptions and pictures in your guide. Most common minerals can be identified by their physical properties. These properties are color, streak, transparency, luster, hardness, cleavage, fracture, specific gravity, and crystal form.
Utilize the knowledge of your geology project leader or advisor. He or she can guide you in proper identification. Seek out assistance from local resource people such as a science teacher or local rock hound. And don’t forget about the many resources that can be found on the world wide web.
It is absolutely necessary to identify your specimens accurately! Displaying the Collection For county and state fair 4-H exhibits, collections should be displayed in an 18” x 24” x 3 ½” inch box with a Plexiglas cover. Display specimens should be somewhat small – approximately 2 inches in size. The collection will display better if the samples are about the same size. If you find spectacular, large mineral samples or fossils, keep these the way you find them. Each specimen is to be mounted and labeled in the exhibit box. Boxes will be displayed in an upright position (not flat), so make sure your specimens are firmly fastened to the floor of the box.

Y9410 Rev 4/2013 GS 13
Labels Each specimen in your display box should be labeled with the following information: specimen number (corresponds with the record/log) date collected, location (county) found, and specimen name or description. Sample labels have been included in this document. The 4-H member may want to format the labels on a computer. If using a computer think about self-adhesive labels. Arrange your specimens in an attractive and logical manner. It is very important that you correctly identify each specimen. Closely read the fair book and follow all guidelines. At the Missouri State Fair exhibit boxes are displayed on the horizontal axis.
Display Box Suggestions* Instead of mounting your specimens directly to the box, you may want to mount them on a small piece of cardboard so that
it is easy to remove them and take them out. Half of an unlined 3”x 5” index card is a good size for most specimens. The regular label also fits across the 2-inch dimension of it with only minor trimming. Glue your specimen firmly to it about 1/3 of the way down the card (leaving room for the label) without any extra glue showing. A glue gun is handy for larger specimens. Elmer’s Glue also works but be sure to allow it to fully dry in a flat position, or your specimens may slide from position. Glue the proof-read label on the bottom 1/3 of the card. You may need to neatly trim the label to match the card. Your box needs a title that tells in what phase of geology you are enrolled (example: Beginning Geology). Make smaller labels for the categories. You will need labels for at least rocks, minerals and fossils, and maybe more for later years. Arrange you box neatly and logically, grouping the cards with specimens under each category. As you do this, look at each category and see if you can tell how they are alike. Put larger, heavier specimens toward the bottom of the box. Straighten the rows, using a ruler or straight edge for a guide. Then pin the cards and labels down, pushing the pins in all the way. Sequin pins, available at some fabric or hobby stores are good to use as they are not as long as regular pins. It usually takes a pin in each corner to hold the card flat. Now your box is finished. Look at it carefully, pretending you are the judge. Did you follow all the requirements? Is your box neat and attractive? Are your identifications correct? Correct any errors found. Then pack it carefully and enter it in the fair. Now matter what award you get, you will know that you have done a good job, and have completed a project your can be proud of. *from Kansas 4-H Geology Notebook

Y9410 Rev 4/2013 GS 14
Guidelines for Geology Exhibit collections Beginning (10-11 yrs)
• 15 rocks and minerals (all from Missouri) Intermediate (12 –14 yrs)
• 30 rocks/minerals, including samples of igneous, sedimentary, and metamorphic rock • May expand collection to include a display box for fossils
Advanced (15 yrs and older) • 45 rocks/minerals, including samples of igneous, sedimentary, and metamorphic rock • Expand collection to include a display box for fossils – 10 or more samples
At least 1/3 of the specimens displayed must have been collected in the current year. Intermediate
and Advanced collections may include a maximum of 1/3 purchased specimens. Each year improve and add to your geology collection.
• Increase the number of samples • Increase quality of samples • Increase variety of samples • Rare, unusual, or hard-to-find samples • Specialty collection
Besides a collection box, other types of exhibits may displayed at the fair. A poster or educational
display is always an option. A photo notebook or scrapbook that illustrates your project experiences or records specimen collection sites is another possibility. Be creative and original, exhibit ideas are nearly limitless. Where from here? It’s up to you. Use the experience and knowledge gained in basic geology project as a foundation or stepping stone to further exploration and study. You can do more of what you have been doing - take more field trips, take field trips to different places, expand your collection, acquire higher quality specimens; become more accurate in identification, etc. or you can explore new subject matter areas and seek new experiences. Some possibilities include: • Gemstones • Lapidary • Practice the advanced identification techniques • Specialized study/exhibits such as: Crystals, Fluorescence or Phosphorescence • Landforms •
You are limited only by your own interest and determination!

Y9410 Rev 4/2013 GS 15
ADDITIONAL RESOURCES
Missouri DNR Publications The following list contains publications of the Missouri Department of Natural Resources. These brief (1 or 2 page) guide sheets provide relevant knowledge appropriate for the 4-H Geology project. Reading of these publications is strongly recommended. These publications, in conjunction with the online publications from the US Geological Survey recommended at the beginning of this guide, will provide a common base of knowledge that can be used by judges, parents, leaders/advisors and members. Geological Time Scale - http://www.dnr.mo.gov/pubs/pub663.pdf Geological Map of Missouri - http://www.dnr.mo.gov/geology/adm/publications/map-GenGeoMap.pdf Mineral Resources of Missouri - http://www.dnr.mo.gov/geology/adm/publications/map-MinRes.pdf Collecting Missouri Minerals (locations) - http://www.dnr.mo.gov/pubs/pub654.pdf Missouri Lead - http://www.dnr.mo.gov/pubs/pub659.pdf Galena – State Mineral - http://www.dnr.mo.gov/pubs/pub658.pdf Mozarkite – State Rock - http://www.dnr.mo.gov/pubs/pub653.pdf Chert - http://www.dnr.mo.gov/pubs/pub661.pdf Elephant Rocks - http://www.dnr.mo.gov/pubs/pub683.pdf Collecting Missouri Fossils - http://www.dnr.mo.gov/pubs/pub665.pdf Crinoids and Brachiopods - http://www.dnr.mo.gov/pubs/pub660.pdf Links The Missouri 4-H web site list 15-20 website links that contain lots of information about geology that should prove valuable in your search for subject matter content.
Visit: http://4h.missouri.edu/projects/projects2.htm#Geology
Mozarkite - Photo by Jo Schaper – Jo Schaper’s Missouri World
Y9410 Rev 4/2013 GS 16
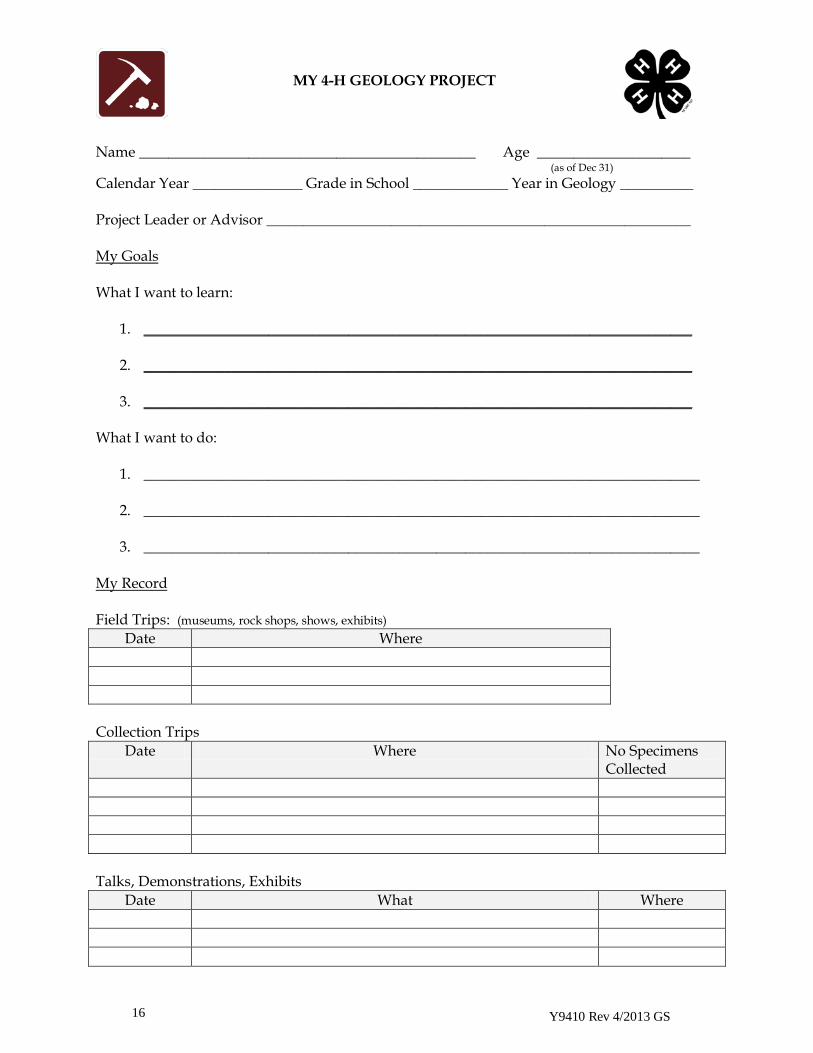
MY 4-H GEOLOGY PROJECT
Name ______________________________________________ Age _____________________ (as of Dec 31) Calendar Year _______________ Grade in School _____________ Year in Geology __________ Project Leader or Advisor __________________________________________________________ My Goals What I want to learn:
1. ___________________________________________________________________________
2. ___________________________________________________________________________
3. ___________________________________________________________________________ What I want to do:
1. ____________________________________________________________________________
2. ____________________________________________________________________________
3. ____________________________________________________________________________ My Record Field Trips: (museums, rock shops, shows, exhibits)
Date Where Collection Trips
Date Where No Specimens Collected
Talks, Demonstrations, Exhibits
Date What Where

Y9410 Rev 4/2013 GS 17
Labels for 4-H Geology Project
No. _______ Date _____________ No. _______ Date _____________ No. _______ Date _____________ Specimen name Specimen name Specimen name or description _________________ or description _________________ or description _________________ Location _____________________ Location _____________________ Location _____________________
No. _______ Date _____________ No. _______ Date _____________ No. _______ Date _____________ Specimen name Specimen name Specimen name or description _________________ or description _________________ or description _________________ Location _____________________ Location _____________________ Location _____________________
No. _______ Date _____________ No. _______ Date _____________ No. _______ Date _____________ Specimen name Specimen name Specimen name or description _________________ or description _________________ or description _________________ Location _____________________ Location _____________________ Location _____________________
No. _______ Date _____________ No. _______ Date _____________ No. _______ Date _____________ Specimen name Specimen name Specimen name or description _________________ or description _________________ or description _________________ Location _____________________ Location _____________________ Location _____________________
No. _______ Date _____________ No. _______ Date _____________ No. _______ Date _____________ Specimen name Specimen name Specimen name or description _________________ or description _________________ or description _________________ Location _____________________ Location _____________________ Location _____________________
No. _______ Date _____________ No. _______ Date _____________ No. _______ Date _____________ Specimen name Specimen name Specimen name or description _________________ or description _________________ or description _________________ Location _____________________ Location _____________________ Location _____________________
No. _______ Date _____________ No. _______ Date _____________ No. _______ Date _____________ Specimen name Specimen name Specimen name or description _________________ or description _________________ or description _________________ Location_____________________ Location _____________________ Location _____________________
No. _______ Date _____________ No. _______ Date _____________ No. _______ Date _____________ Specimen name Specimen name Specimen name or description _________________ or description _________________ or description _________________ Location _____________________ Location _____________________ Location _____________________
No. _______ Date _____________ No. _______ Date _____________ No. _______ Date _____________ Specimen name Specimen name Specimen name or description _________________ or description _________________ or description _________________ Location _____________________ Location______________________ Location______________________
Adapted from Kansas State University of Agricultural Experiment Stations and Cooperative Extension Service
Y9410 Rev 4/2013 GS 18
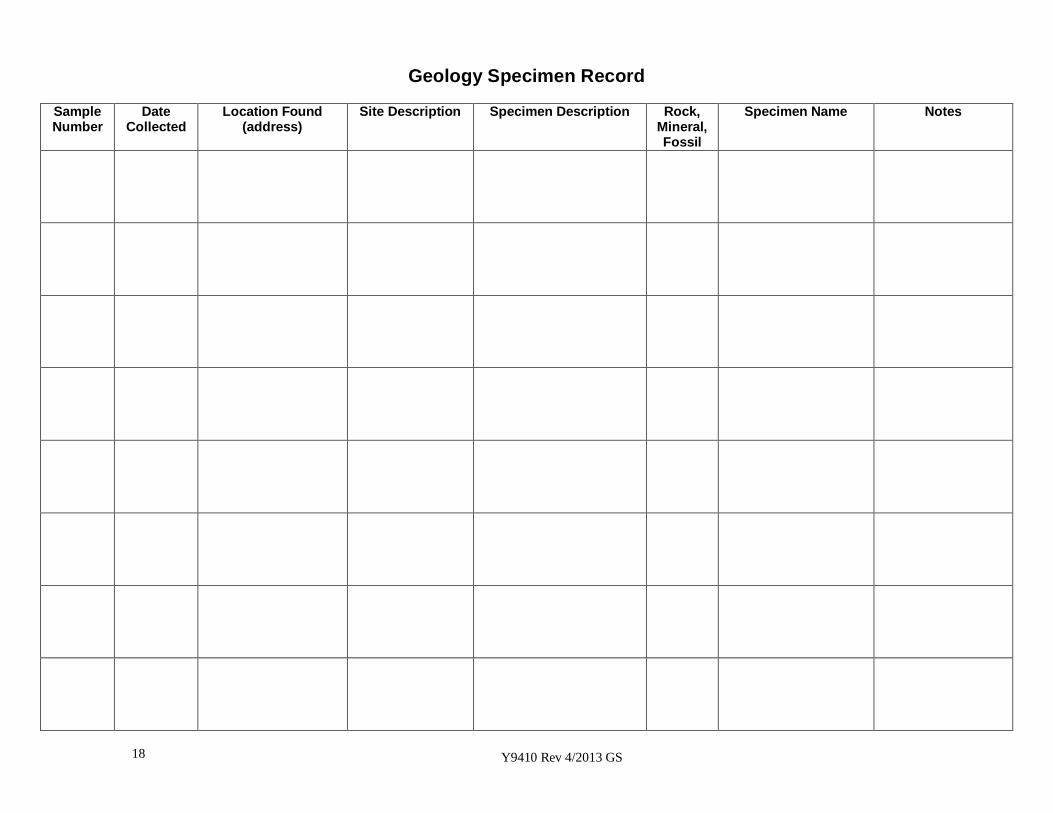
Geology Specimen Record
Sample Number
Date Collected
Location Found (address)
Site Description Specimen Description Rock, Mineral, Fossil
Specimen Name Notes

Y9410 Rev 4/2013 GS 19
Exhibitor Name _____________________ County ________________Age ______ Class name _______________________ Class # ____________
Geology Collection Exhibit Score Sheet Points Points Possible Scored Identification ------------------------------------------------------------- 30 _______
Each specimen correctly identified (2 pts off for each incorrect)
Condition ------------------------------------------------------------------ 15 _______ Specimens are clean, bright, identifying characteristics
easily seen Labels ---------------------------------------------------------------------- 20 _______ Complete, accurate, neat, legible, correct spelling (1 point off for each incorrect or incomplete) Minimum Requirements met --------------------------------------- 20 _______ Has met the minimum number of specimens and variety as class guidelines require Showmanship/Workmanship -------------------------------------- 15 _______ Exhibit is neat, attractive, arrangement is logical. Display
case is well done and meets specifications.