Integrating OBI-EE with Essbase 20111024 v2 · Agenda • Essbase and OBIEE • Integration Notes...
52
October 23, 2011 Integrating OBI-EE with Essbase NEOAUG
-
Upload
phungtuong -
Category
Documents
-
view
226 -
download
0
Transcript of Integrating OBI-EE with Essbase 20111024 v2 · Agenda • Essbase and OBIEE • Integration Notes...

October 23, 2011
Integrating OBI-EE with EssbaseNEOAUG

Premier IT Professional Service and Solution Provider of Oracle and Microsoft Applications and Technologies
Boston ■ New York ■ Atlanta ■ Germany ■ India
Value Delivery – Core to Our Mission
• E‐Business Suite Consulting
• Enterprise Apps Managed Services
• OBIEE, Pre‐Built BI Analytics
• Hyperion EPM• Middleware & Integration
• Infrastructure Services
• Microsoft .Net Dev & Support
• Apps University
• Subject Matter Experts
• Best Practice Methodology
• High Value ROI• Local / Global Service Delivery Model
2
BI Partnerships and Certifications
BI Pillar Partner• Recognizes specialization in one of (5) Pillar technologies• Oracle nominates 1 or 2 partners per region with proven expertise in
strategic technology area• Partner must pass stringent competency and customer reference verification
BI Applications Leadership Board• Select group of partners providing guidance and input on future product
direction
Amazon Web Services Solutions Provider• BI / EPM implementations on the Amazon Cloud
3

Agenda
• Essbase and OBIEE
• Integration Notes
• Essbase‐Aware Features
• Current Limitations
• Other OBIEE Integration
• Integration Process
• Demo
• Questions
4

Essbase and OBIEE
• Essbase• Multidimensional database storage system
• For complex business modeling
• Part of the Hyperion suite of tools
• OBIEE• Sophisticated reporting engine
• Ad hoc analysis, dashboards, reports
5

Integration Notes
• Essbase 9.3.3+, 11.1.1.3.500, 11.1.2.1+
• HFM 9.3.3, 11.1.1.3, 11.1.2+
• OBIEE 11g
• Converts MOLAP to a relational view
• Federation with relational data
6
Essbase‐Aware Features
• BSO and ASO Cubes
• Accounts hierarchy
• Ragged hierarchies
• Parent‐child (value‐based) hierarchies
• Alias tables
• UDAs (for filtering)
• Maintains hierarchy changes
• Attribute dimensions
7

Other OBIEE / EPM Integration
• BI Apps Foundation Suite• Includes OBIEE, Essbase, Scorecard
• HFM Analytics
• Oracle Exalytics In‐Memory Machine
• Open OBIEE in EPM Workspace
• Essbase Studio to create Cubes from OBIEE (business and presentation layers and the DW)
8

Integration Process
• Install Essbase libraries on the OBIEE server
• Import Essbase using the Admin Tool Import Metadata Wizard
• Convert to parent‐child value‐based hierarchies
• Add alias columns
• Create Business Models and Catalogs in the Admin tool
9
Abdul Hafeez Shaik
• Senior BI/DW Architect
• Over 7 years of industry experience
• Over 7 years of experience with ERP, DW, BI and reports
• More than dozen implementations of OBI / BI Apps
• Key Member to build and Develop the BI Practice at Apps Associates
• Team member of OOT which is Responsible for all technologies (not just BI) for the company and strategy for the clients
• Done more than 15 presentations on OBI‐EE at various Oracle Conferences
About Speaker
10

Jonathan A Cohen
• Practice Manager – BI Practice
• Managing the development of the EPM Practice at Apps Associates
• Over 20 years technology experience
• MBA – Northeastern High Tech MBA Program
• 5 years of BI / EPM / DW Experience in many industries
• Hyperion Certified Developer
• Developer, architect, and project manager for numerous OBIEE and Hyperion reporting and planning projects
• Experience develop reporting solutions with Cognos and T1
About Speaker
11

ESSBASE – Hands On
• Creating new RPD
• Importing the ESSBASE cube into OBIEE
• Deploy RPD into the OBIEE
• Create a sample Report
12
• Creating new RPD
• Importing the ESSBASE cube into OBIEE
• Deploy RPD into the OBIEE
• Create a sample Report
ESSBASE – Hands On
13

• Start‐>Oracle Business Intelligence ‐> BI Administration to open the BI Administration tool.
ESSBASE – Hands On
14
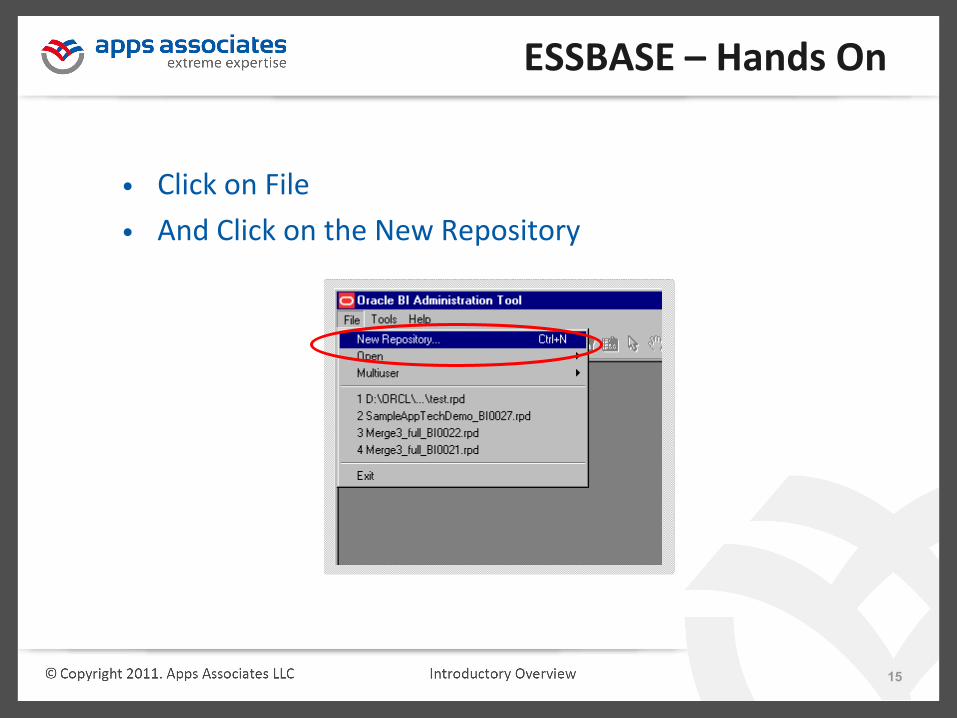
• Click on File
• And Click on the New Repository
ESSBASE – Hands On
15
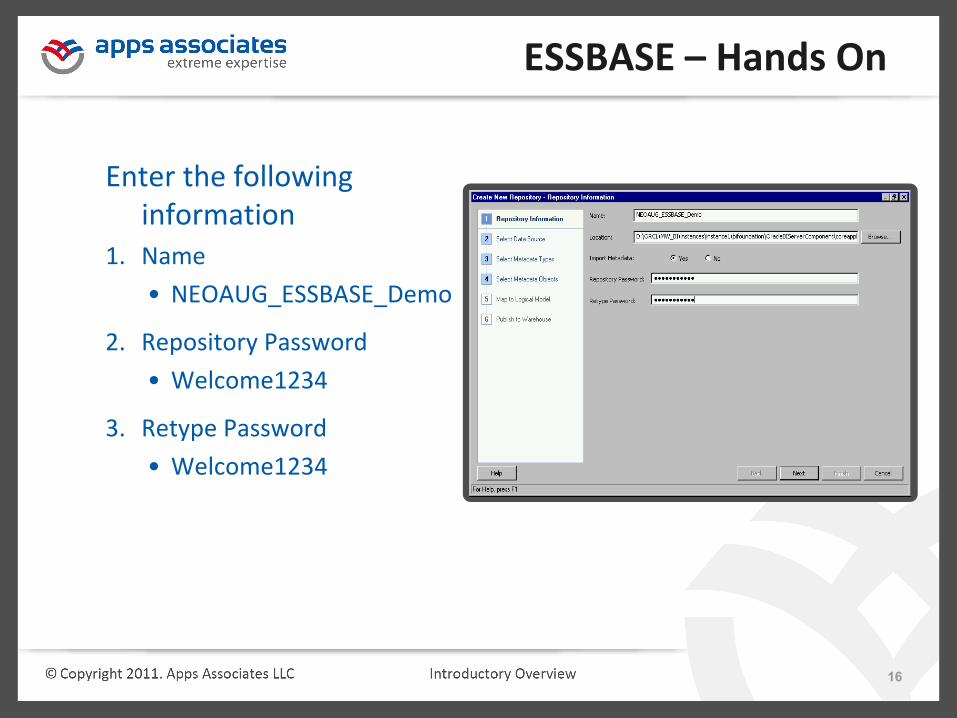
Enter the following information
1. Name
• NEOAUG_ESSBASE_Demo
2. Repository Password
• Welcome1234
3. Retype Password
• Welcome1234
ESSBASE – Hands On
16

• Creating new RPD
• Importing the ESSBASE cube into OBIEE
• Deploy RPD into the OBIEE
• Create a sample Report
ESSBASE – Hands On
17
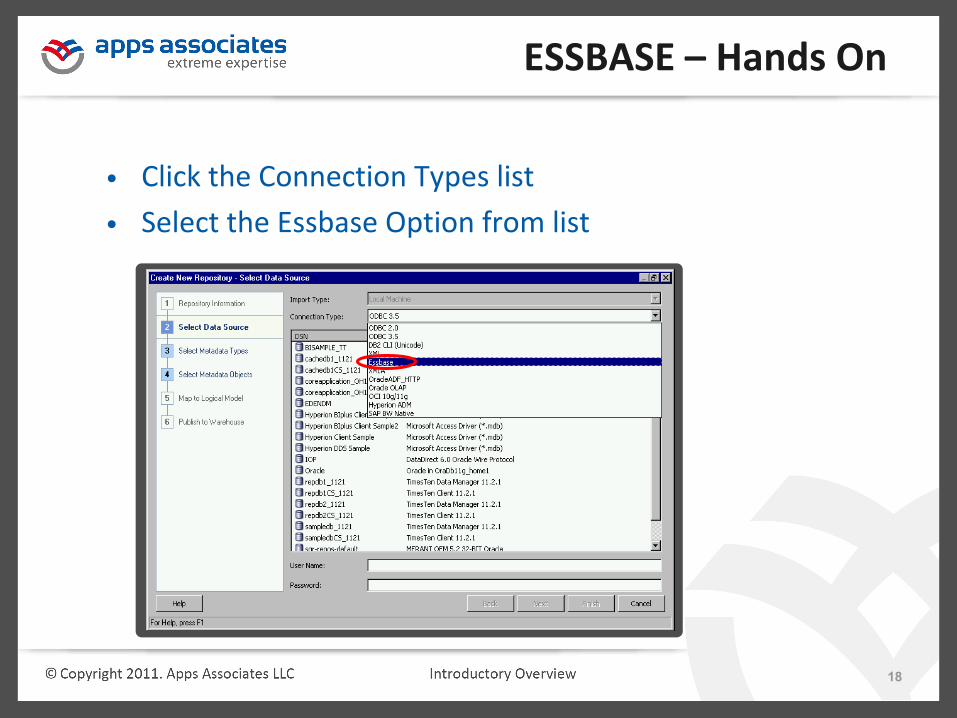
• Click the Connection Types list
• Select the Essbase Option from list
ESSBASE – Hands On
18
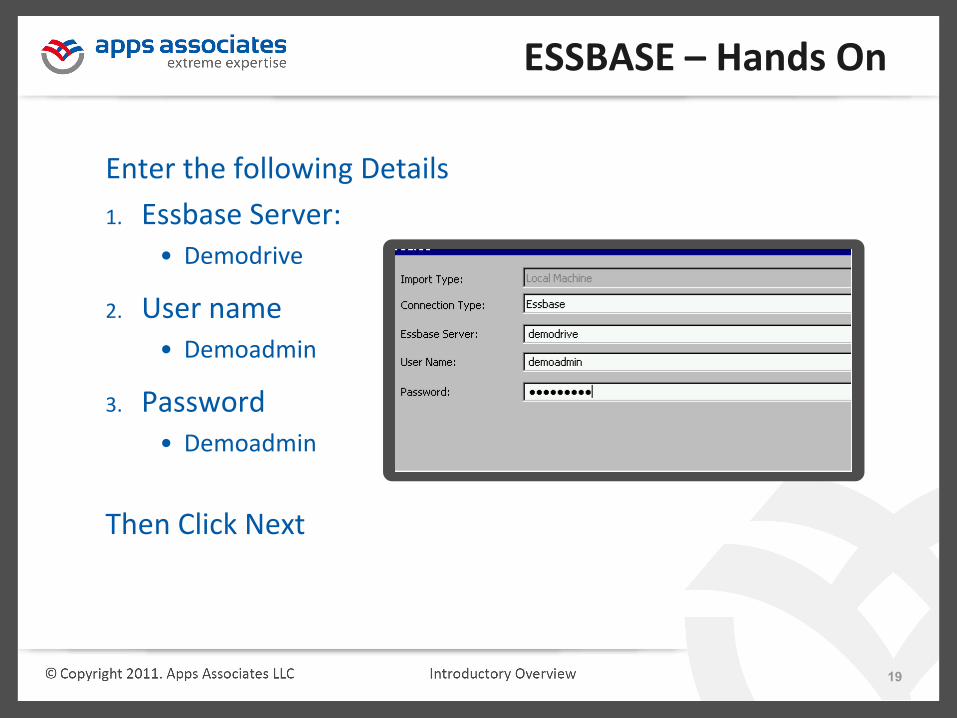
Enter the following Details
1. Essbase Server:• Demodrive
2. User name• Demoadmin
3. Password • Demoadmin
Then Click Next
ESSBASE – Hands On
19
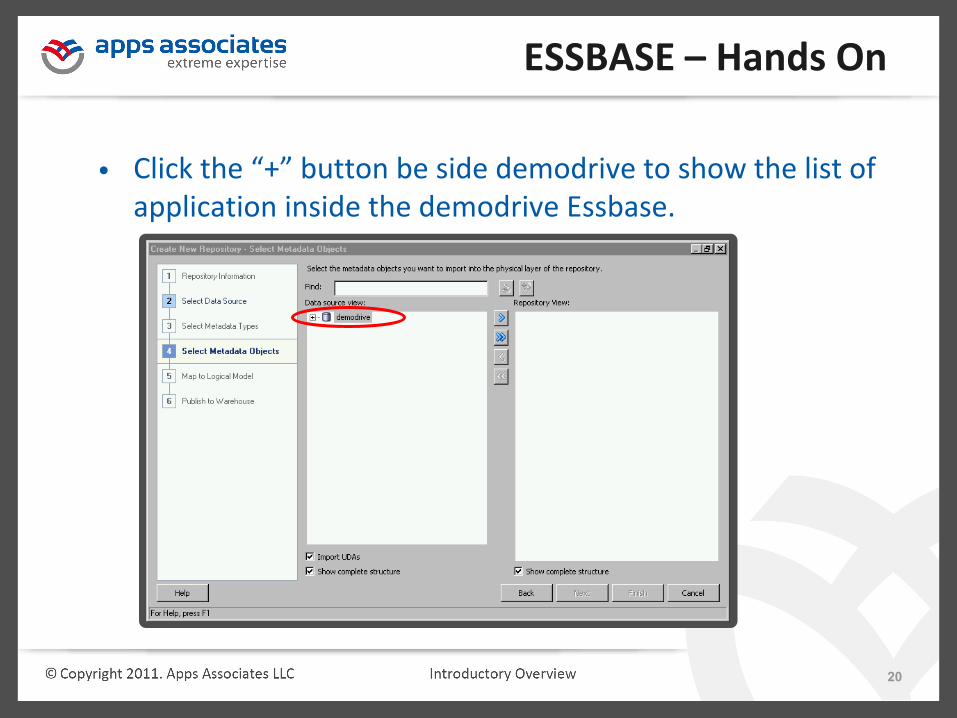
• Click the “+” button be side demodrive to show the list of application inside the demodrive Essbase.
ESSBASE – Hands On
20

• Scroll down all the way down and select the application “OBI_Demo” and OBI_Demo cube.
• Click on the “>”button as highlighted below
• Click Finish Button
ESSBASE – Hands On
21

• Then you will have Essbase application imported the Essbase Physical Layer or RPD
• Open the demo drive connection by clicking the + symbols
ESSBASE – Hands On
22
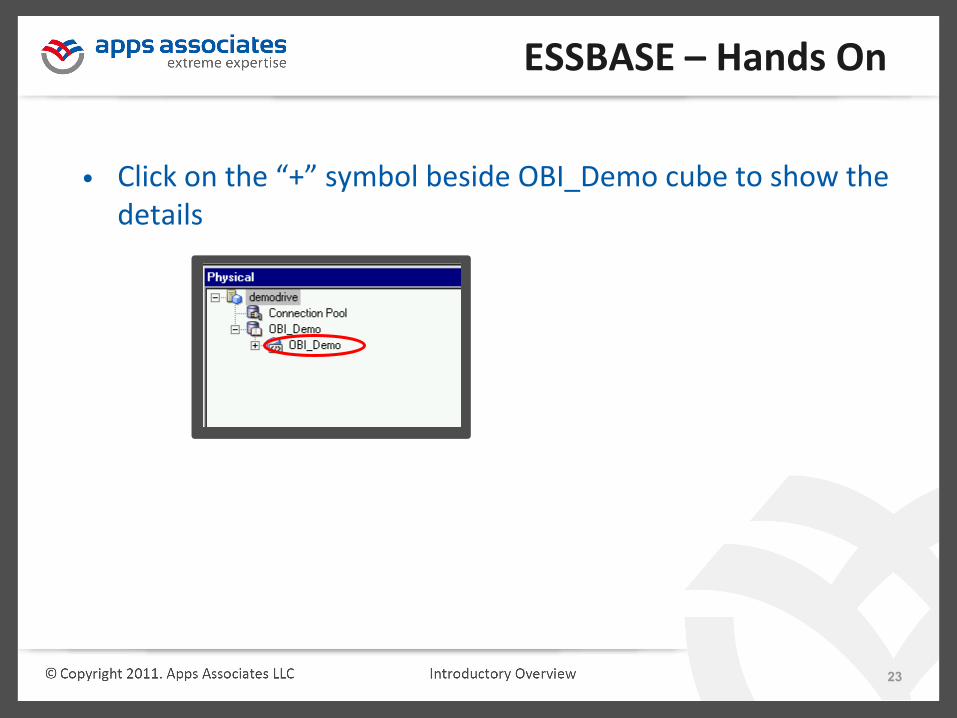
• Click on the “+” symbol beside OBI_Demo cube to show the details
ESSBASE – Hands On
23

• Open the Accounts Dimension
• Right click on the detail view as show below and select the properties
ESSBASE – Hands On
24

• Click on the Hierarchy Type
• And select the option Value
• Repeat the same step for following dimension too• Department
• Divisions
• Organizations
ESSBASE – Hands On
25

• After the changes Physical layer looks as show in the picture
ESSBASE – Hands On
26

• Select the “OBI_Demo” cube from the physical layer and drop into the logical layer
• Then the logical layer looks as below
ESSBASE – Hands On
27

• Open the “OBI_Demo” in the logical layer by clicking on ‘+’symbols.
• All the hierarchies and calculations from cubes will be migrated automatically
• Minimize all By Clicking “‐”
ESSBASE – Hands On
28

• After minimizing everything
• Drag and drop the “OBI_Demo” logical layer folder on the physical layer
• Once you done you will see RPD as below
ESSBASE – Hands On
29
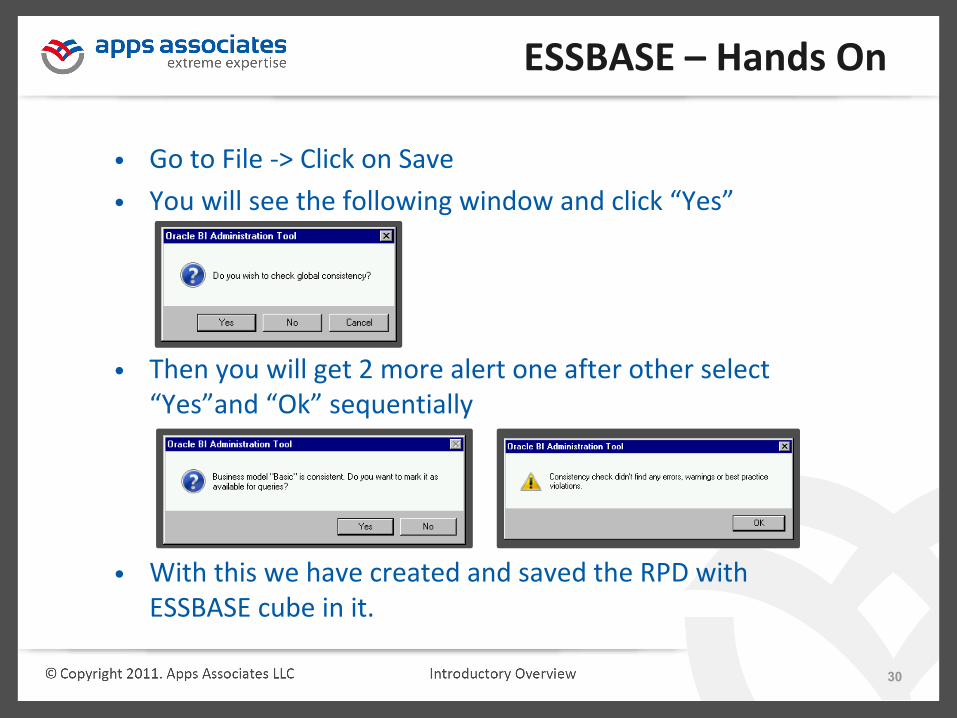
• Go to File ‐> Click on Save
• You will see the following window and click “Yes”
• Then you will get 2 more alert one after other select “Yes”and “Ok” sequentially
• With this we have created and saved the RPD with ESSBASE cube in it.
ESSBASE – Hands On
30
• Creating new RPD
• Importing the ESSBASE cube into OBIEE
• Deploy RPD into the OBIEE
• Create a sample Report
ESSBASE – Hands On
31
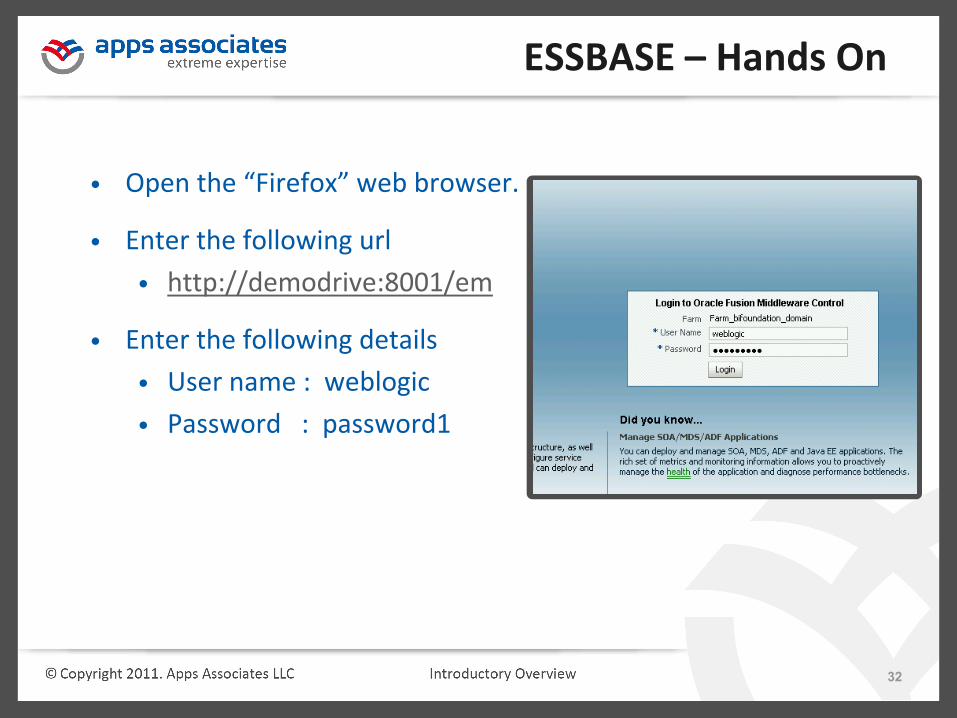
• Open the “Firefox” web browser.
• Enter the following url
• http://demodrive:8001/em
• Enter the following details
• User name : weblogic
• Password : password1
ESSBASE – Hands On
32

• Once you login from the left frame of the browser click the “+”symbol and open the “Business Intelligence” link
• Click on the core application link highlighted in the above picture.
ESSBASE – Hands On
33

• You will find the following view on right side frame once you select the core application link
• Select the “Deployment”
• Select the “Repository” as show in the above picture
• Click on the “Lock and Edit Configuration”
ESSBASE – Hands On
34

• Click on the Browse button from “Upload BI Repository” Section
• Go to the following path to select the RPD
• D:\ORCL\MW_BI\instances\instance1\bifoundation\OracleBIServerComponent\coreapplication_obis1\repository
• Select the “NEOAUG_ESSBASE_Demo.rpd” which we created
ESSBASE – Hands On
35

• Enter the Repository password and Confirm Password as “Welcome1234”
• Then click on “Apply” Button
ESSBASE – Hands On
36

• Click on the “Activate Changes”
• Wait till the below message disappears
•
ESSBASE – Hands On
37

• Click on the “Restart to apply recent changes”
ESSBASE – Hands On
38

• Click on the “Restart” Button
• Click “Yes” for the following alert
• Wait for this processing to complete
ESSBASE – Hands On
39

• Creating new RPD
• Importing the ESSBASE cube into OBIEE
• Deploy RPD into the OBIEE
• Create a sample Report
ESSBASE – Hands On
40

• Login into the OBI‐EE
• Open Firefox Web browser
• Go to http://demodrive:8001/analytics
• Enter the following details• User name : weblogic
• Password : password1
ESSBASE – Hands On
41

• Click on the “New” to create the Report
• Select the Analysis from the option
ESSBASE – Hands On
42
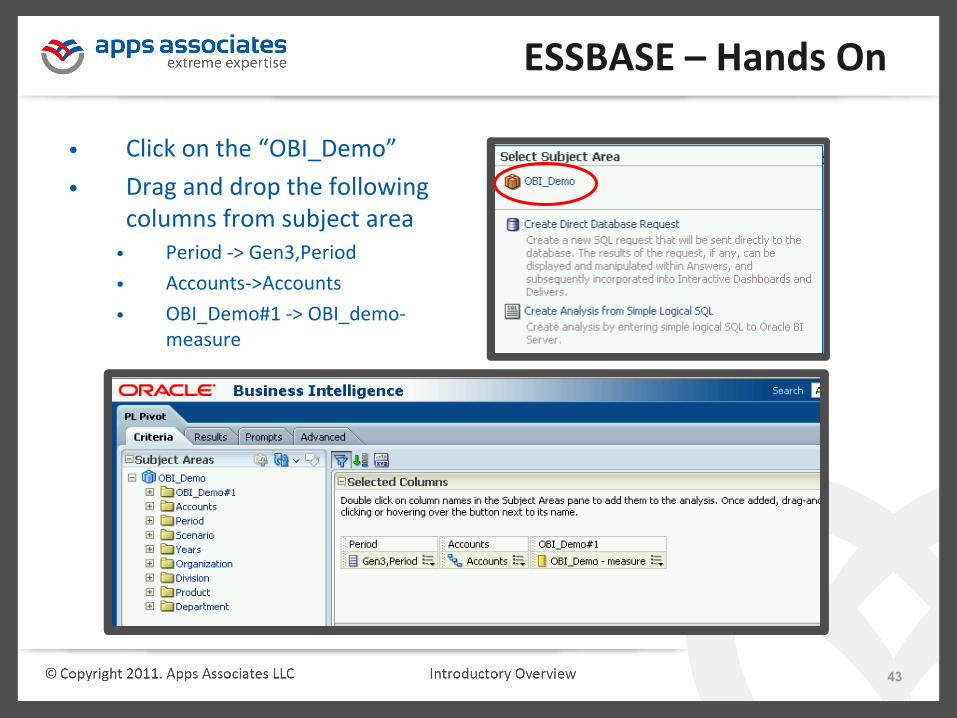
• Click on the “OBI_Demo”
• Drag and drop the following columns from subject area
• Period ‐> Gen3,Period
• Accounts‐>Accounts
• OBI_Demo#1 ‐> OBI_demo‐measure
ESSBASE – Hands On
43

• Click on the filter symbol highlighted below
• Select the more columns option
ESSBASE – Hands On
44

• Select the Scenario‐>Gen2,Scenario
• And select the value as “Actual”
ESSBASE – Hands On
45

• Again select the filter symbol, “more columns option”
• Select the years‐>Gen2,Years
• Select the value as “Fy2007”
ESSBASE – Hands On
46
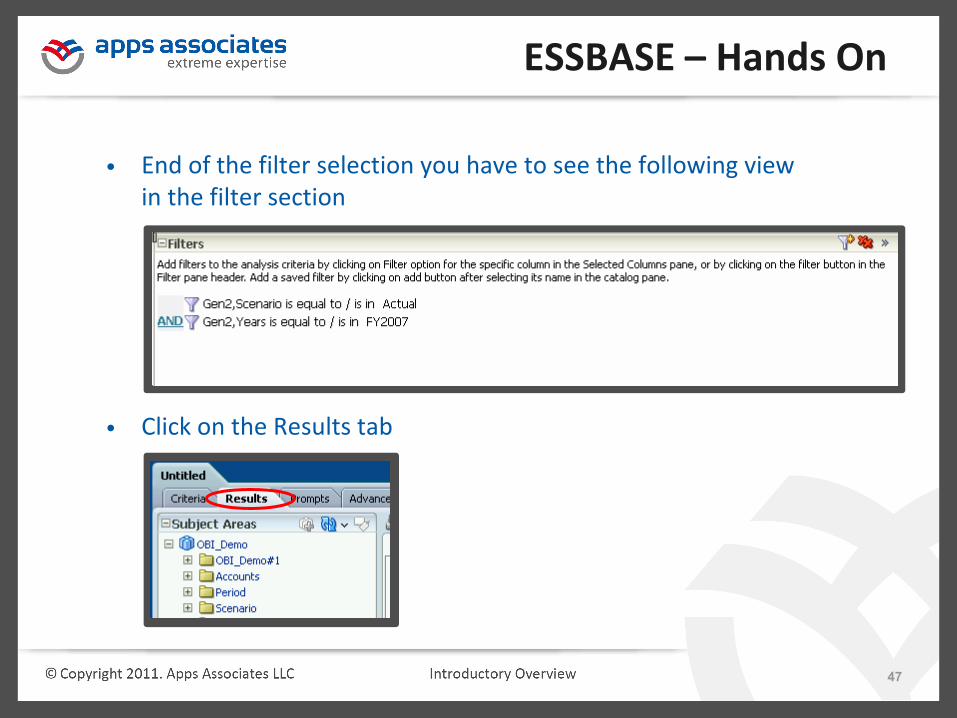
• End of the filter selection you have to see the following view in the filter section
• Click on the Results tab
ESSBASE – Hands On
47

• Click on the Highlighted pencil symbol to edit the pivot table.
• Drag the Gen3,Period from rows to Columns section
ESSBASE – Hands On
48

• Start drill the accounts and open up the details as show below
• Click done button on the left corner window
ESSBASE – Hands On
49

• Click the save button
• Enter the name as P&L Report
• Click “Ok”
ESSBASE – Hands On
50

52