Install Qt/Qt Quick for Android devices
19
Qt-Italia.org P. Sereno (http://www.qt-italia.org) P a g . 1 | 19 Tutorial Install Qt/Qt Quick Target : Android June 2015
-
Upload
paolo-sereno -
Category
Software
-
view
276 -
download
2
Transcript of Install Qt/Qt Quick for Android devices

Qt-Italia.org
P . S e r e n o ( h t t p : / / w w w . q t - i t a l i a . o r g ) P a g . 1 | 19
Tutorial
Install Qt/Qt Quick Target : Android
June 2015
Qt-Italia.org
P . S e r e n o ( h t t p : / / w w w . q t - i t a l i a . o r g ) P a g . 2 | 19
The enclosed material is provided under the Creative Commons Attribution-Share Alike 3.0 License Agreement.
The full license text is available here:
http://creativecommons.org/licenses/by-sa/3.0/legalcode.
Qt and Qt logos are registered trademarks of The Qt Company (http://www.qt.io/about-us/) in Finland and other
countries worldwide.

Qt-Italia.org
P . S e r e n o ( h t t p : / / w w w . q t - i t a l i a . o r g ) P a g . 3 | 19
Definitions
Termine Definizione
JDK Java Development Kit
NDK Native Development Kit
QML Qt Meta Language o Qt Modeling Language
Qt Qt , or "cute", is the Cross platform Application Framework provided by The Qt Company
Qt Quick Qt User Interface Creation Kit
Purpose This tutorial introduces Qt and Qt Quick application framework for Android target. Qt Italia web community uses it
during meetups or workshops as a step-by-step guide to show installation process.
What we need
1) OS: Ubuntu Linux 15.04 64 bits
2) Android SDK: http://dl.google.com/android/android-sdk_r24.2-linux.tgz
3) Android NDK: http://dl.google.com/android/ndk/android-ndk-r10e-linux-x86_64.bin
4) Java SE Development Kit (JDK) v6 o successivi oppure OpenJDK per Linux
5) Apache ant and 32 bits dependency libraries
6) Qt Application framework: http://www.qt.io/download-open-source/
Download the packages
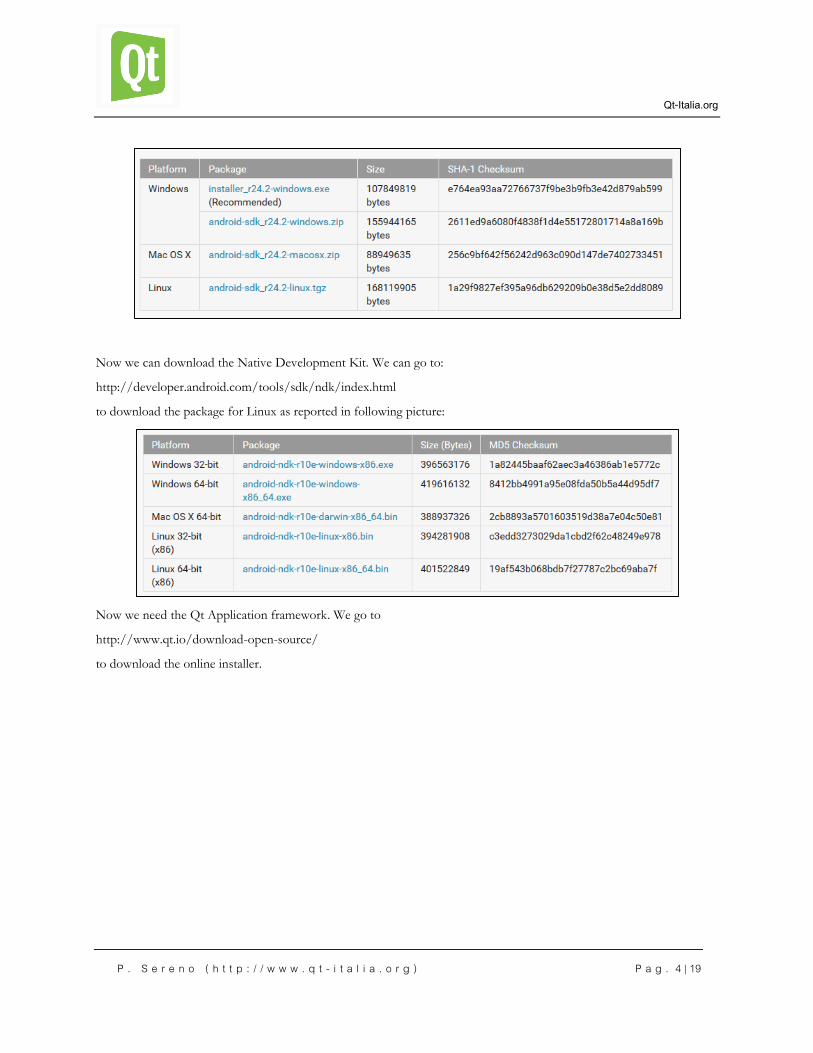
We can start now by downloading all the packages we need. First of all we go to
http://developer.android.com/sdk/index.html
to download the package for Linux as reported in following picture:
Qt-Italia.org
P . S e r e n o ( h t t p : / / w w w . q t - i t a l i a . o r g ) P a g . 4 | 19
Now we can download the Native Development Kit. We can go to:
http://developer.android.com/tools/sdk/ndk/index.html
to download the package for Linux as reported in following picture:
Now we need the Qt Application framework. We go to
http://www.qt.io/download-open-source/
to download the online installer.

Qt-Italia.org
P . S e r e n o ( h t t p : / / w w w . q t - i t a l i a . o r g ) P a g . 5 | 19
Now we have all we need and we can start the installation process.
Installing
First of all we have to install openjdk and ant on our Linux Ubuntu distro. We can open a terminal window and type:
sudo apt-get install ant openjdk-7-jdk:
The system will ask for a password and then starts the installation:
Qt-Italia.org
P . S e r e n o ( h t t p : / / w w w . q t - i t a l i a . o r g ) P a g . 6 | 19
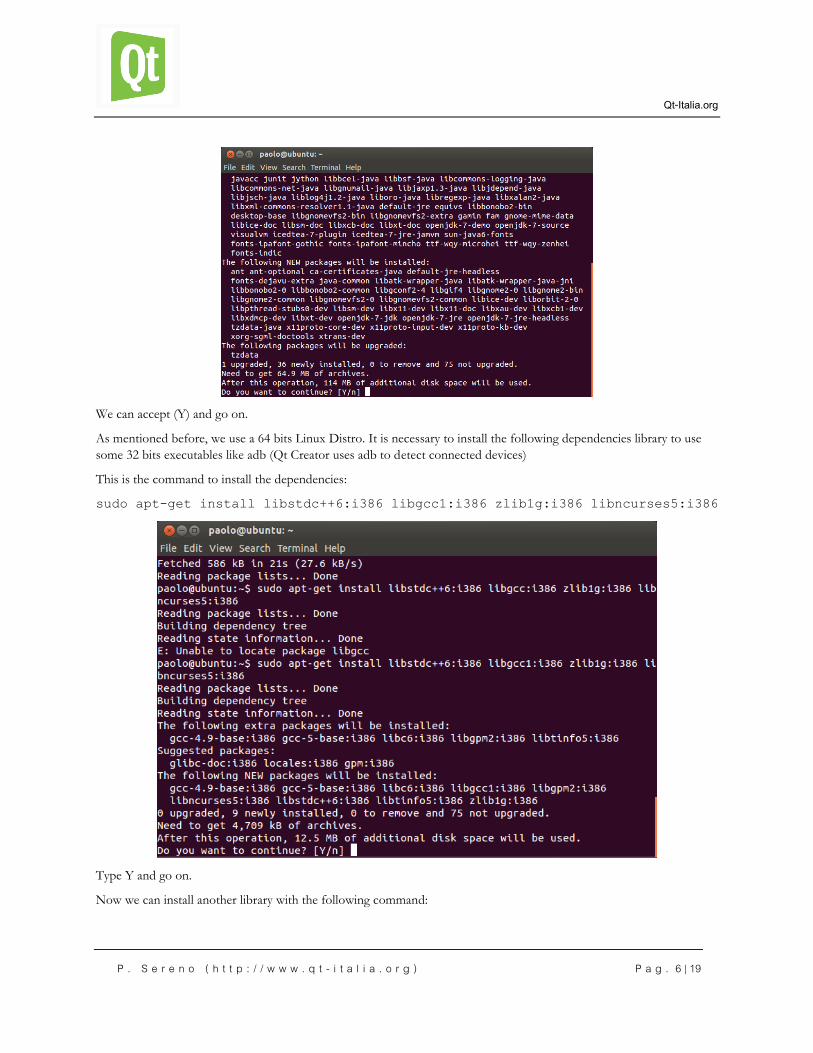
We can accept (Y) and go on.
As mentioned before, we use a 64 bits Linux Distro. It is necessary to install the following dependencies library to use
some 32 bits executables like adb (Qt Creator uses adb to detect connected devices)
This is the command to install the dependencies:
sudo apt-get install libstdc++6:i386 libgcc1:i386 zlib1g:i386 libncurses5:i386
Type Y and go on.
Now we can install another library with the following command:

Qt-Italia.org
P . S e r e n o ( h t t p : / / w w w . q t - i t a l i a . o r g ) P a g . 7 | 19
sudo apt-get install libsdl1.2debian:i386
Type Y and go on.
Now we can go on Downloads directory. We are going to use following files:
From a terminal window we have to make executable the package android-ndk-r10e-linux-x86_64.bin, we can do this
with following command:
chmod a+x android-ndk-r10e-linux-x86_64.bin
Then we can run it, but before we have to choose where to put the extracted files. In our example we decided to put all
the extracted files in /opt.
First of all we have to move the files to /opt. Type:
sudo mv android-ndk-r10e-linux-x86_64.bin /opt
and
sudo mv android-sdk_r24.2-linux.tgz /opt
We can go to /opt folder and run this command:
./android-ndk-r10e-linux-x86_64.bin
At the end the new directory android-ndk-r10e will be created under /opt.
Now we have to exctract the second file. Type the command:
sudo tar –xzf android-sdk_r24.2-linux.tgz
Qt-Italia.org
P . S e r e n o ( h t t p : / / w w w . q t - i t a l i a . o r g ) P a g . 8 | 19
The new directory /opt/android-sdk-linux will be created. Now under /opt we will find the following directory:
Now it’s time to update our SDK Android with this command:
sudo /opt/android-sdk-linux/tools/android update sdk
Remember to change the attributes in order to make it executable if necessary…
chmod a+x android
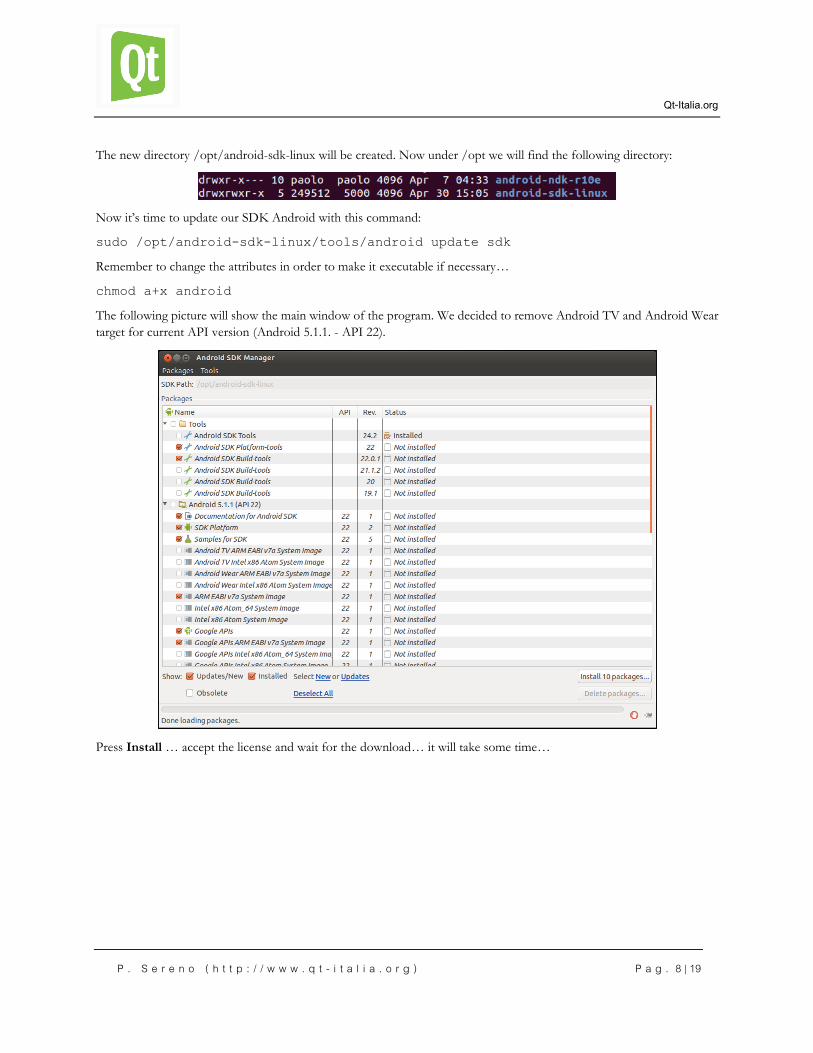
The following picture will show the main window of the program. We decided to remove Android TV and Android Wear
target for current API version (Android 5.1.1. - API 22).
Press Install … accept the license and wait for the download… it will take some time…
Qt-Italia.org
P . S e r e n o ( h t t p : / / w w w . q t - i t a l i a . o r g ) P a g . 9 | 19
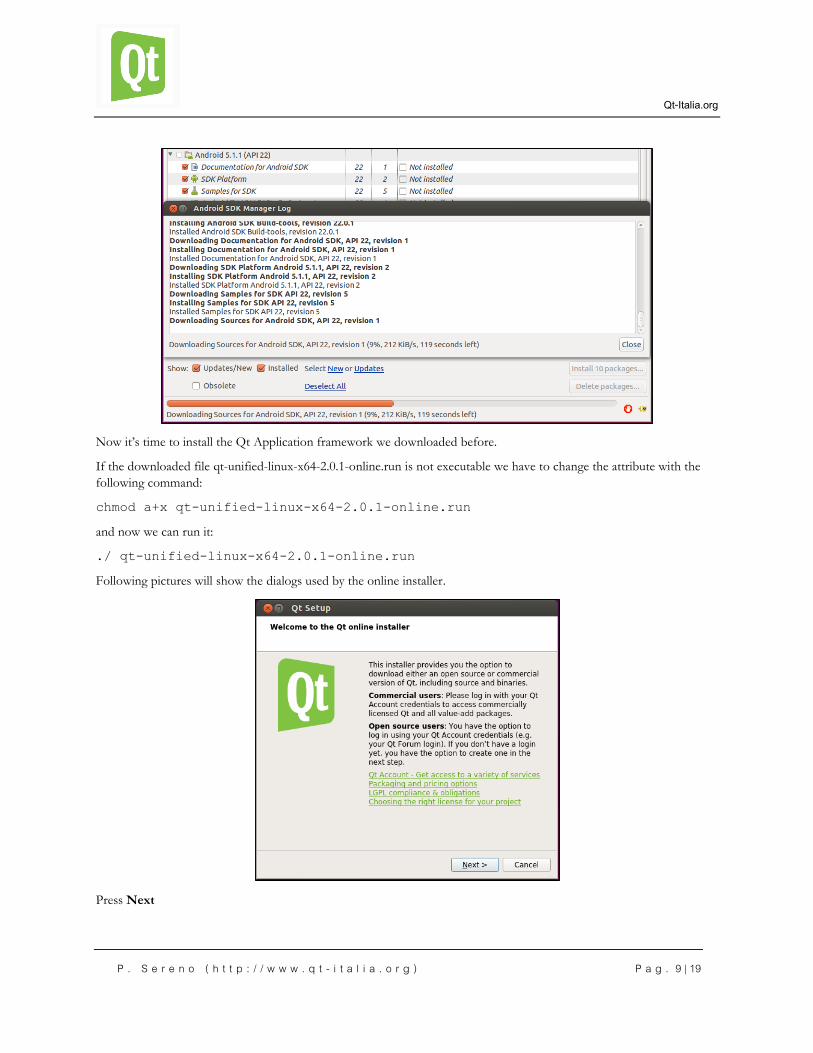
Now it’s time to install the Qt Application framework we downloaded before.
If the downloaded file qt-unified-linux-x64-2.0.1-online.run is not executable we have to change the attribute with the
following command:
chmod a+x qt-unified-linux-x64-2.0.1-online.run
and now we can run it:
./ qt-unified-linux-x64-2.0.1-online.run
Following pictures will show the dialogs used by the online installer.
Press Next

Qt-Italia.org
P . S e r e n o ( h t t p : / / w w w . q t - i t a l i a . o r g ) P a g . 10 | 19
Type your account credentials or create a brand new account and press Next.
If you don’t need custom proxy settings press Next
Qt-Italia.org
P . S e r e n o ( h t t p : / / w w w . q t - i t a l i a . o r g ) P a g . 11 | 19
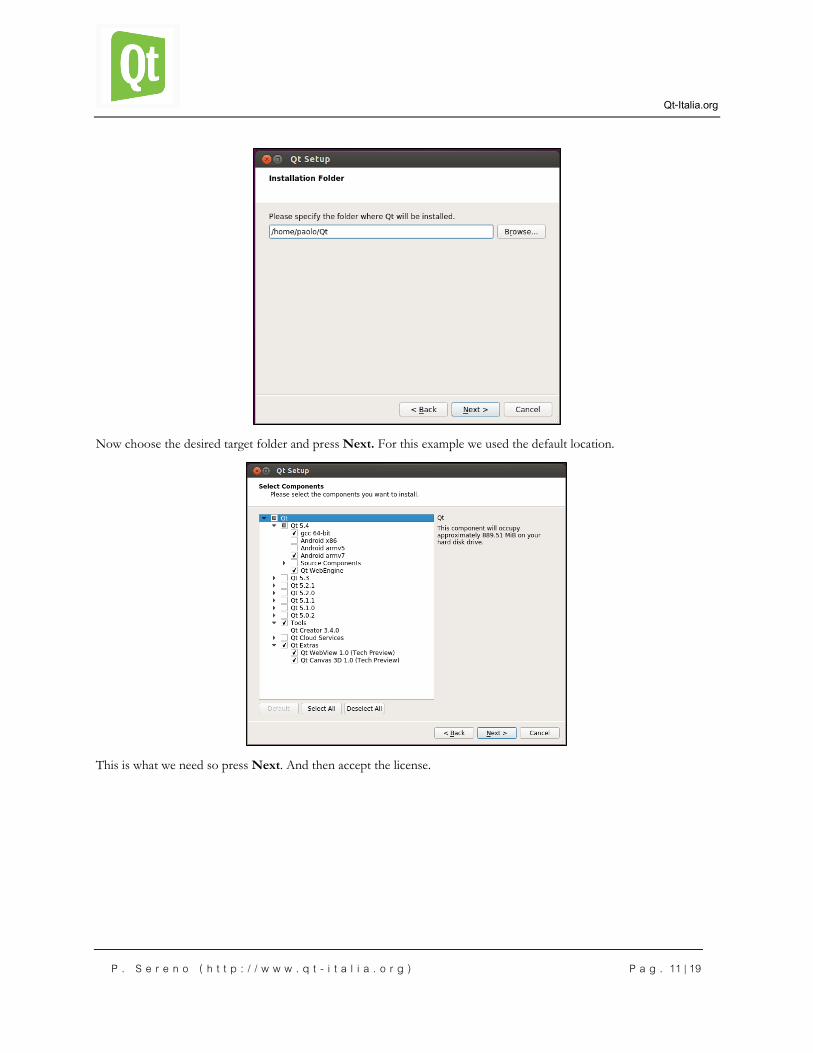
Now choose the desired target folder and press Next. For this example we used the default location.
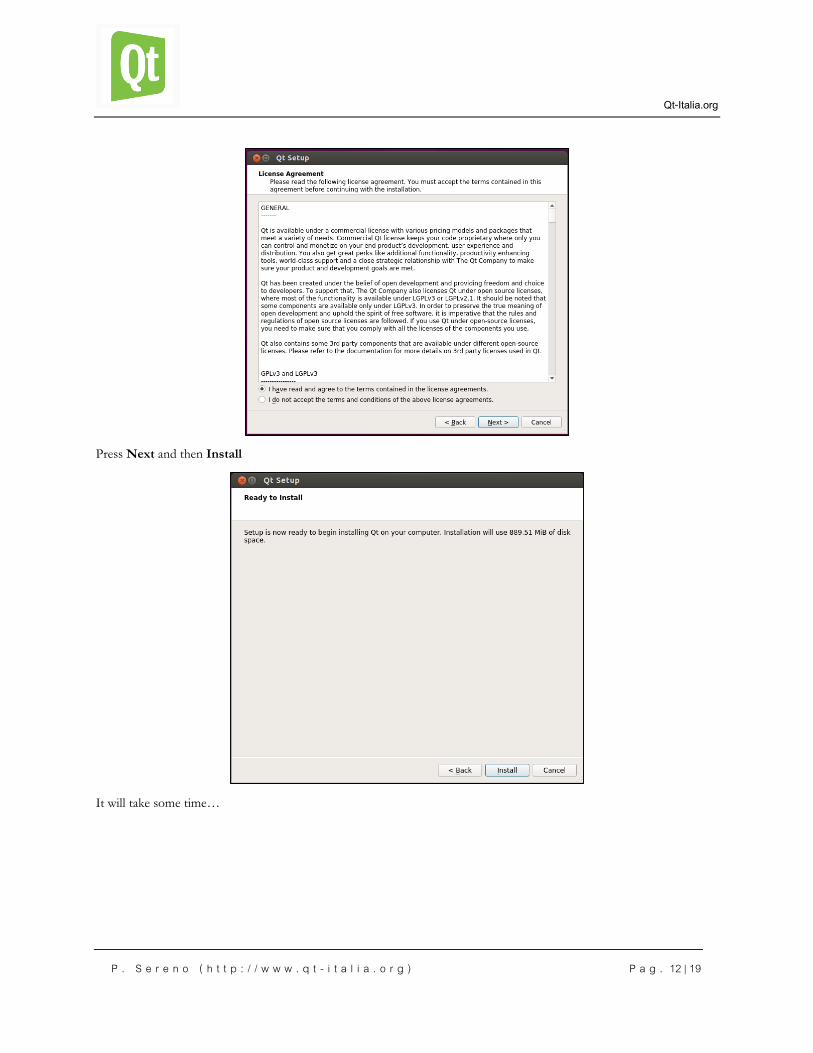
This is what we need so press Next. And then accept the license.
Qt-Italia.org
P . S e r e n o ( h t t p : / / w w w . q t - i t a l i a . o r g ) P a g . 12 | 19
Press Next and then Install
It will take some time…

Qt-Italia.org
P . S e r e n o ( h t t p : / / w w w . q t - i t a l i a . o r g ) P a g . 13 | 19
At the end we have
Now almost everything is ready. We have to do some custom settings to allow code generation from Qt Creator. To do
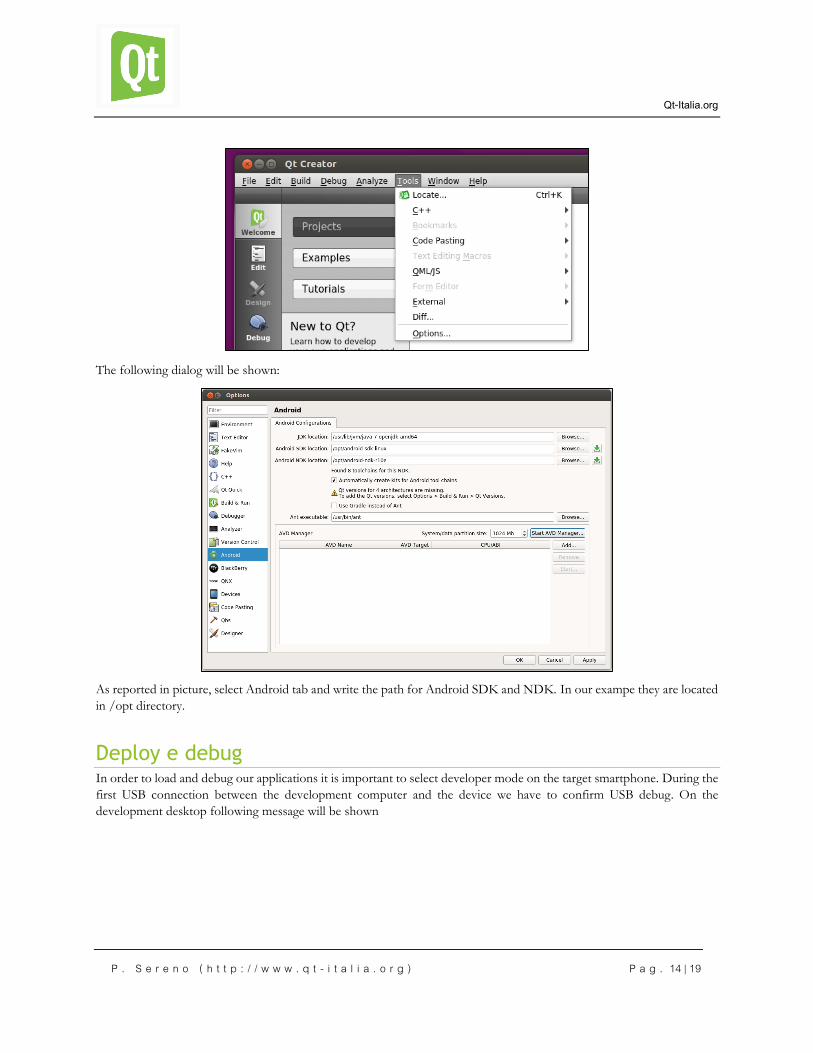
so, open the menu Tools >> Options
Qt-Italia.org
P . S e r e n o ( h t t p : / / w w w . q t - i t a l i a . o r g ) P a g . 14 | 19
The following dialog will be shown:
As reported in picture, select Android tab and write the path for Android SDK and NDK. In our exampe they are located
in /opt directory.
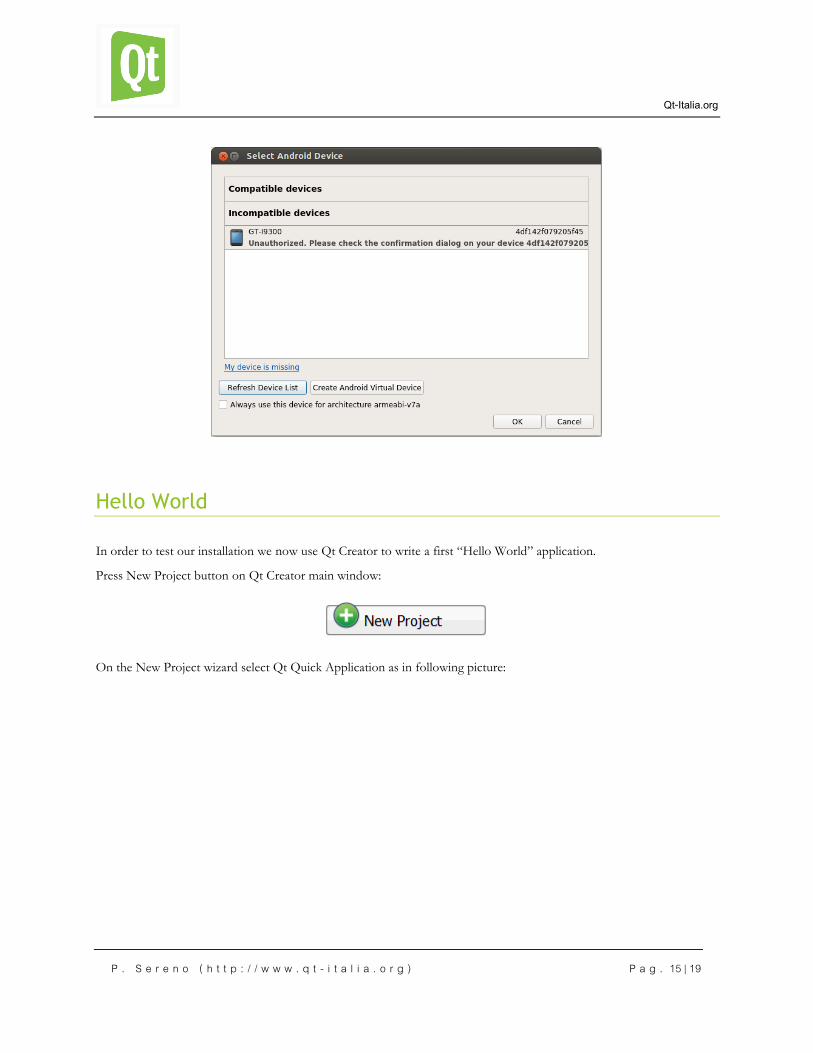
Deploy e debug In order to load and debug our applications it is important to select developer mode on the target smartphone. During the
first USB connection between the development computer and the device we have to confirm USB debug. On the
development desktop following message will be shown
Qt-Italia.org
P . S e r e n o ( h t t p : / / w w w . q t - i t a l i a . o r g ) P a g . 15 | 19
Hello World
In order to test our installation we now use Qt Creator to write a first “Hello World” application.
Press New Project button on Qt Creator main window:
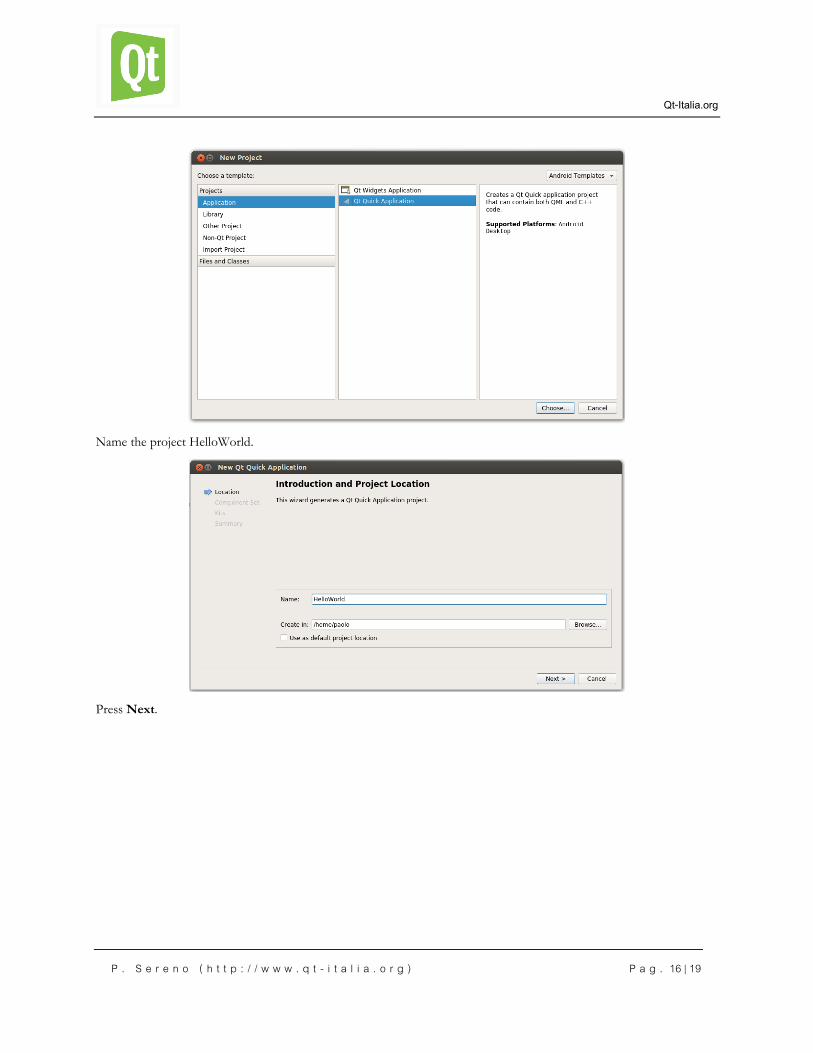
On the New Project wizard select Qt Quick Application as in following picture:
Qt-Italia.org
P . S e r e n o ( h t t p : / / w w w . q t - i t a l i a . o r g ) P a g . 16 | 19
Name the project HelloWorld.
Press Next.
Qt-Italia.org
P . S e r e n o ( h t t p : / / w w w . q t - i t a l i a . o r g ) P a g . 17 | 19
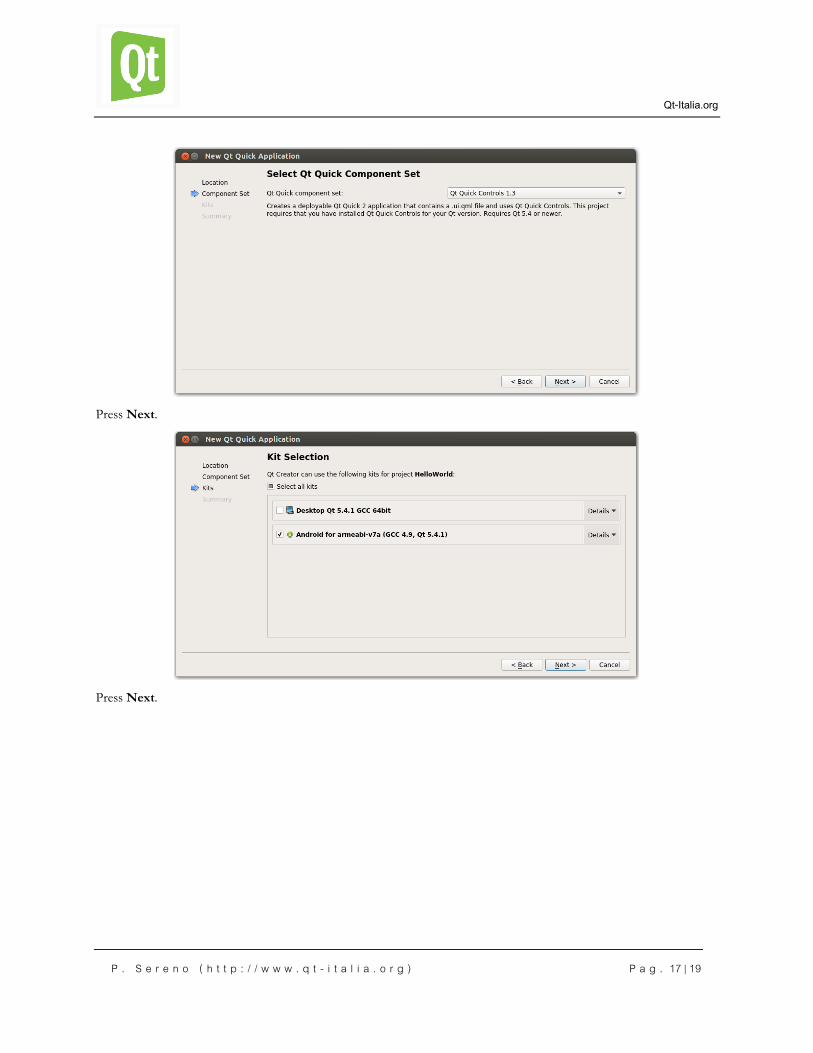
Press Next.
Press Next.

Qt-Italia.org
P . S e r e n o ( h t t p : / / w w w . q t - i t a l i a . o r g ) P a g . 18 | 19
Press Finish. Qt Creator will prepare the application files as reported in following picture.
Now press button , this will start the compiler and then the deploy on target.
A new dialog window will appear to select the target device as reported in previous picture. Choose your device and press
OK.
If everything is fine we see this App on our Android device:

Qt-Italia.org
P . S e r e n o ( h t t p : / / w w w . q t - i t a l i a . o r g ) P a g . 19 | 19
Now we are ready to develop Android Applications for smartphones and tablets. Qt Italia web community is going to
prepare other tutorials concerning Qt and Qt Creator, google Play publishing, QML and more…
Stay tuned!