The STAR Heavy Flavor Tracker and Intermediate Silicon Tracker
In this tutorial I will be taking you through how the clients folder works in the online version of...
51
-
Upload
theodore-thornton -
Category
Documents
-
view
220 -
download
1
Transcript of In this tutorial I will be taking you through how the clients folder works in the online version of...
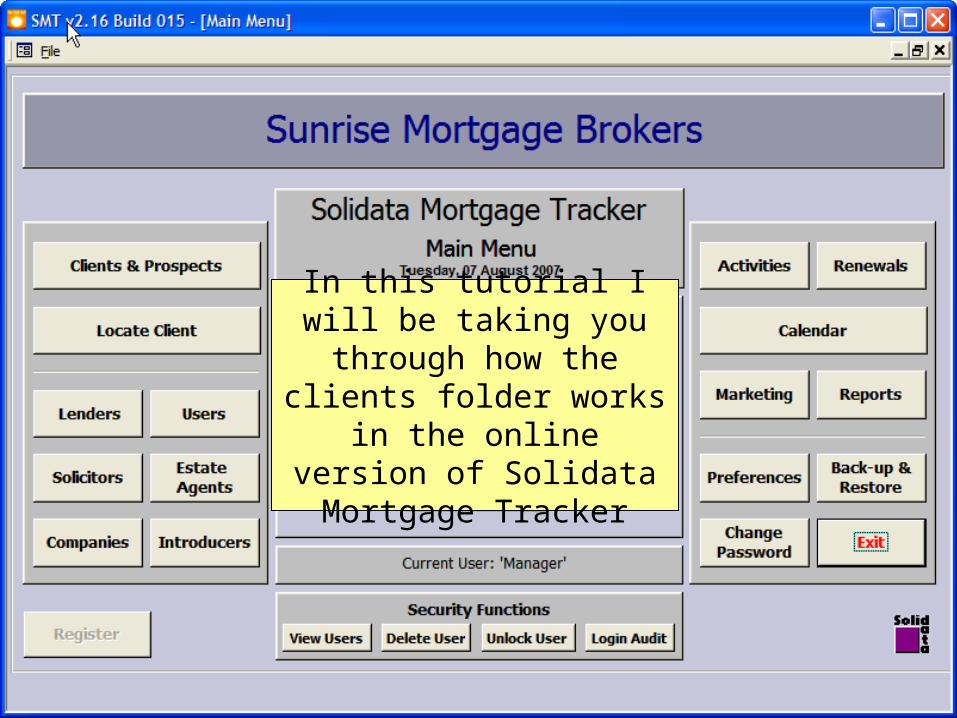
In this tutorial I will be taking you through how the clients folder works in the online
version of Solidata Mortgage Tracker
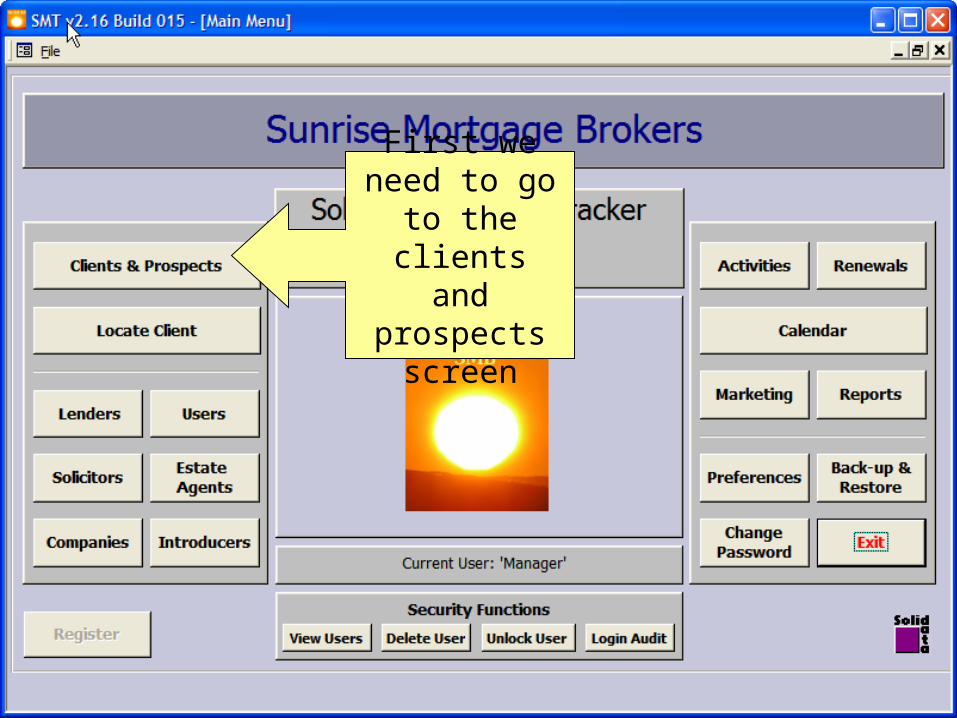
First we need to go to the clients and prospects
screen
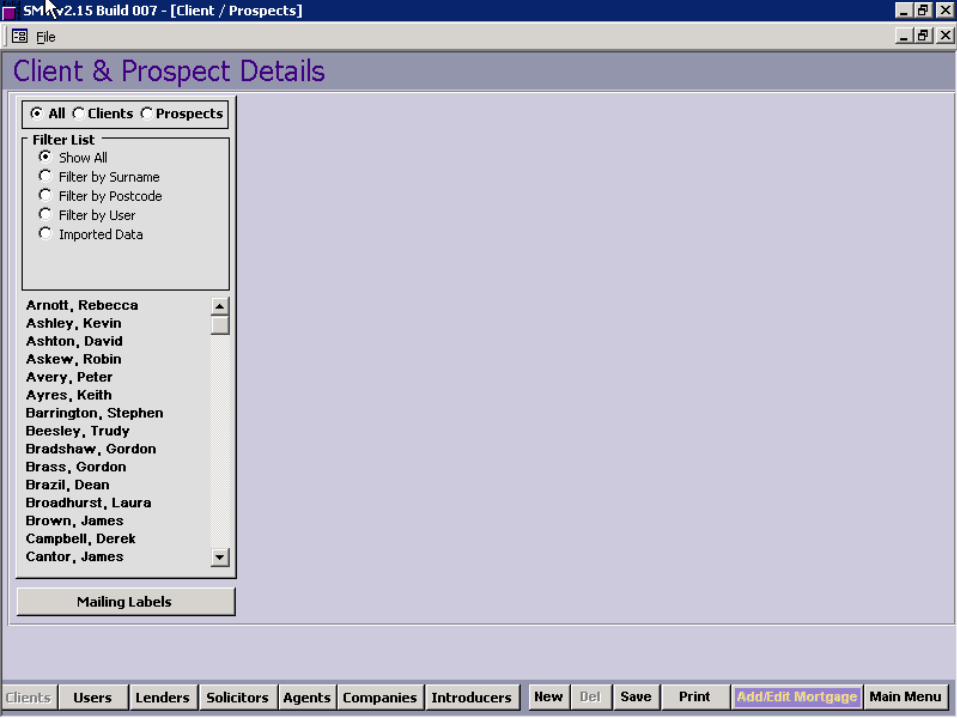
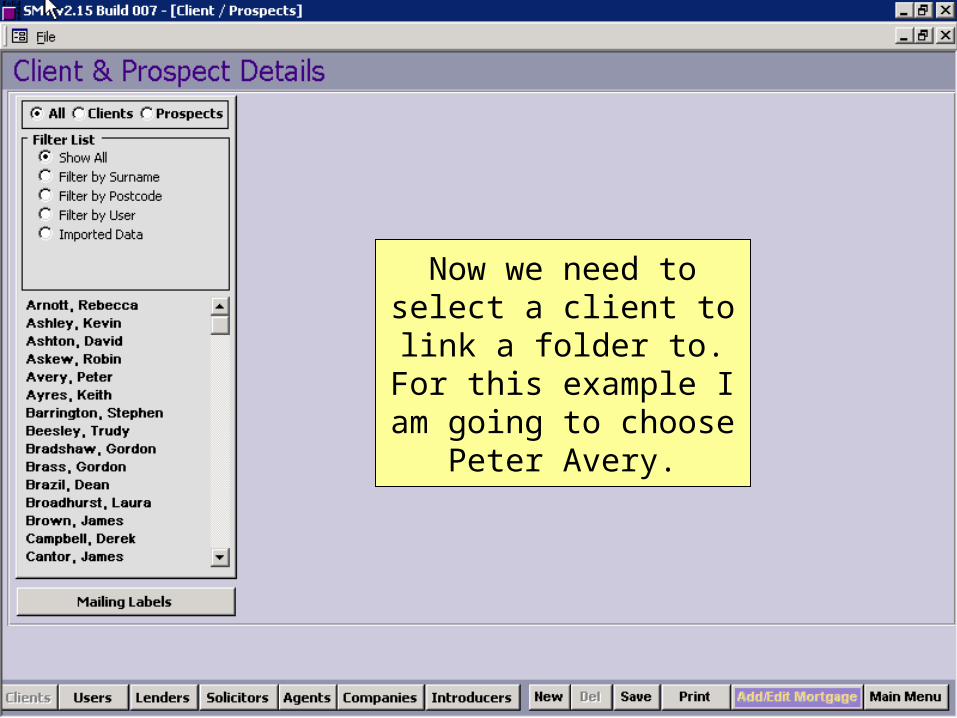
Now we need to select a client to link a folder to. For this example I am going to choose Peter
Avery.
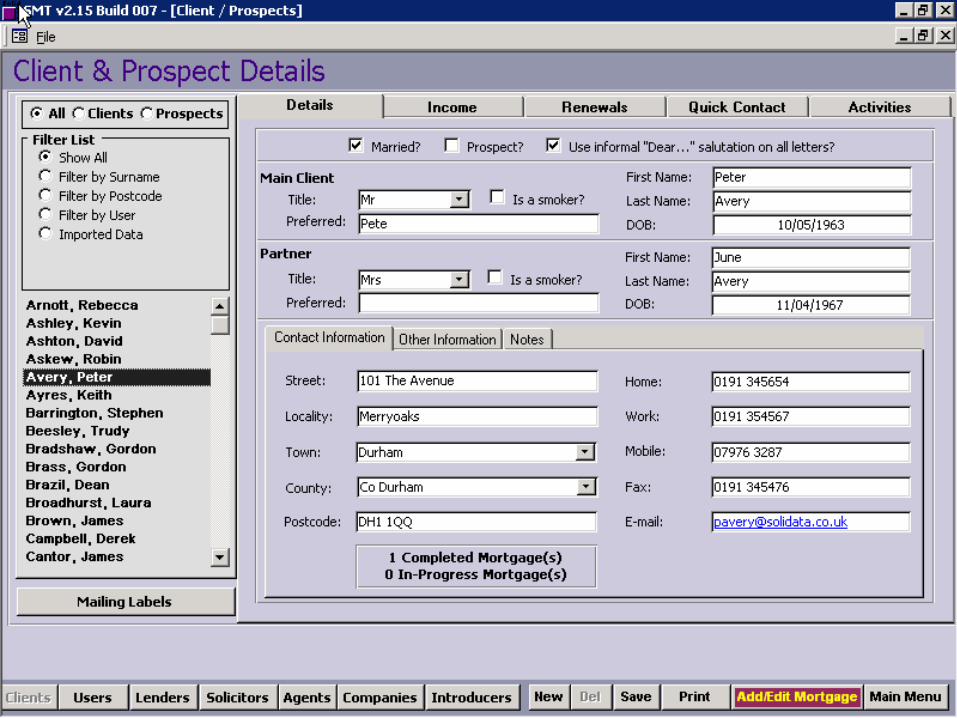

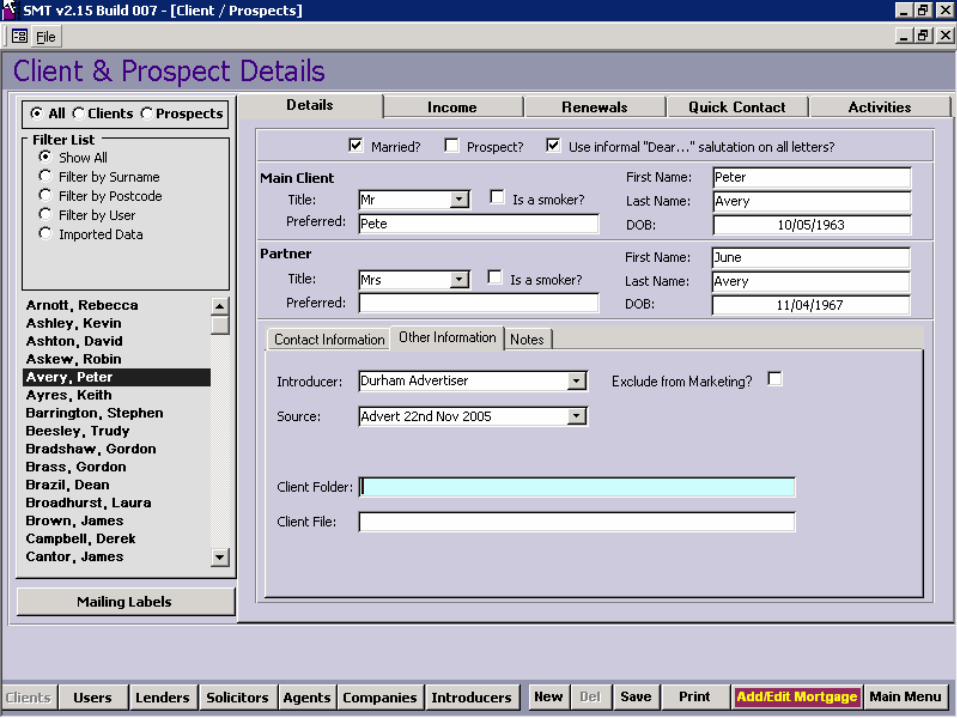
The Client folder is located in the ‘Other
Information’ tab.


This is where the link to the client folder
will be stored.
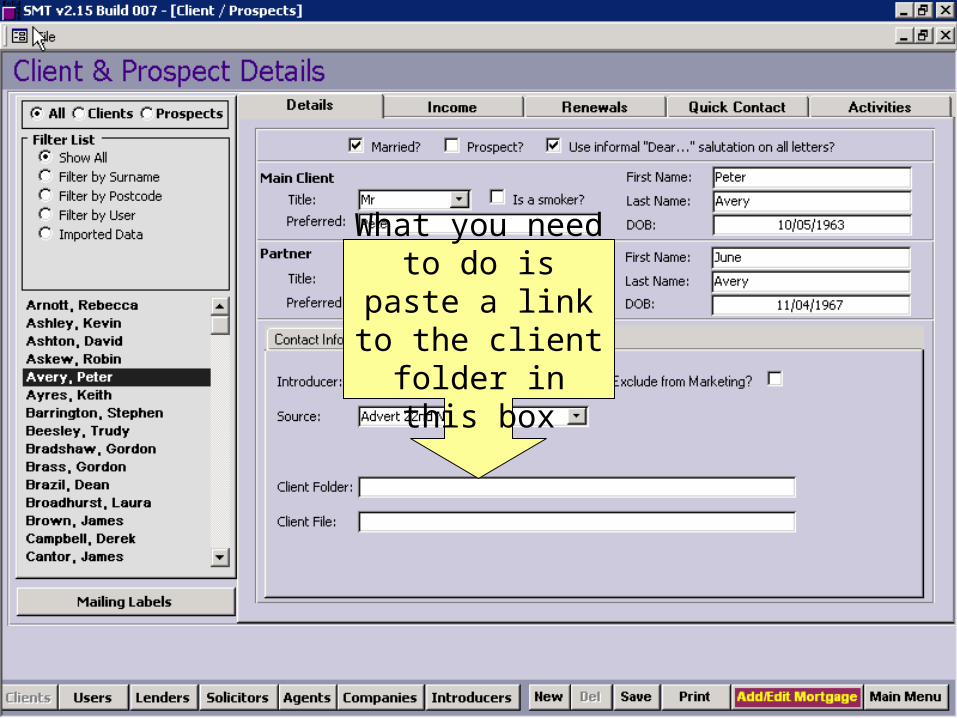
What you need to do is paste a link to the client folder in
this box
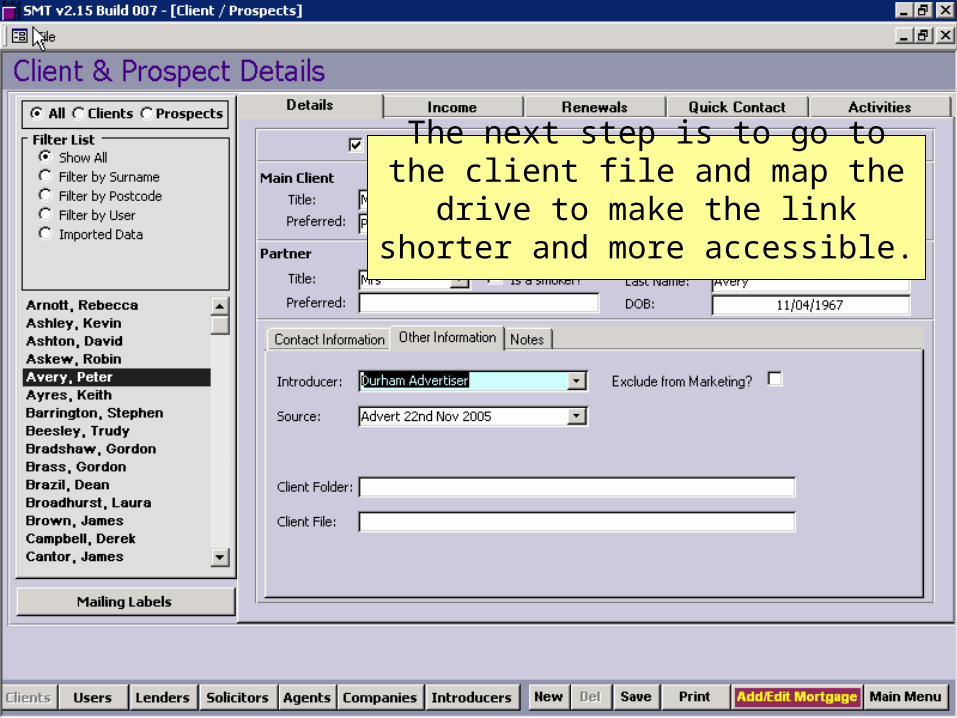
The next step is to go to the client file and map the drive to make the link shorter
and more accessible.
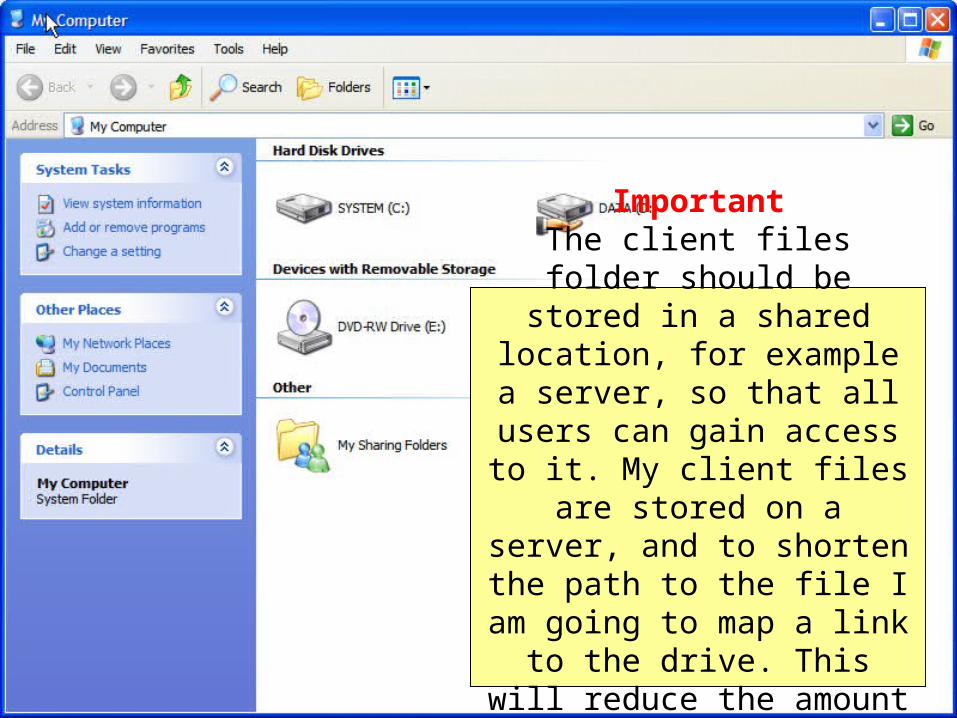
ImportantThe client files folder should be stored in a shared location, for
example a server, so that all users can gain access to it. My client
files are stored on a server, and to shorten the path to the file I am going to map a link to the drive. This will reduce the amount of time taken to find the folder.

To map the drive, you need to go to tools and
map network drive
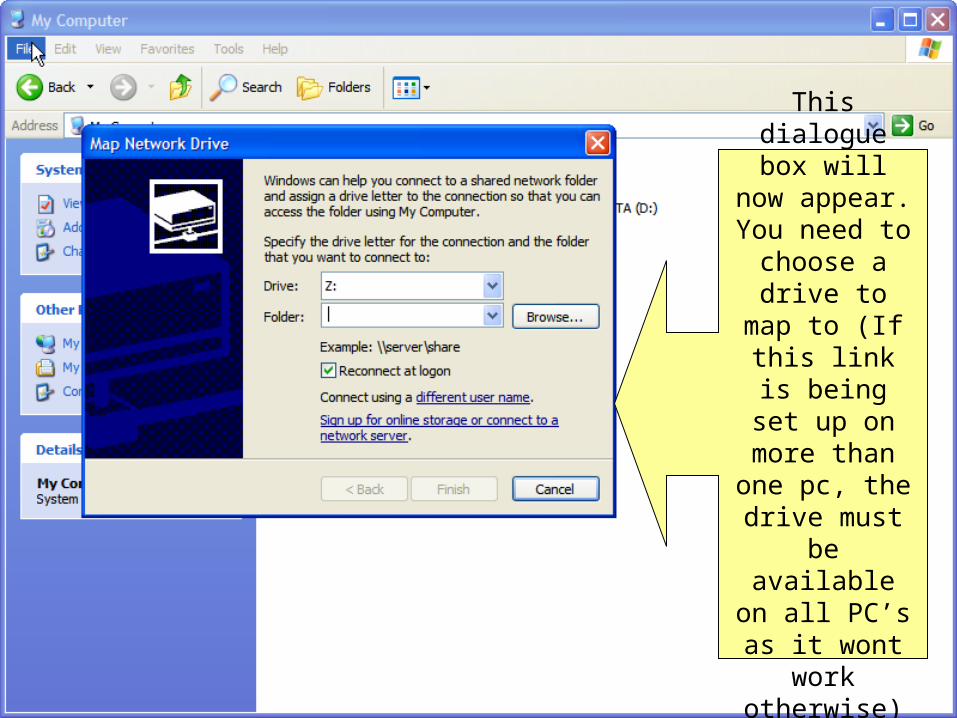
This dialogue box will now
appear. You need to choose a drive to map to (If this link is being set up on more than one pc, the drive must be available on all PC’s as it
wont work otherwise)

For this tutorial I am going to use the ‘N’
drive. I selected this by
using the dropdown box

Now you need to click the browse button to
search for the location of the file

I have now used the browse button to
select where I want my drive to be
mapped to. I have found the server and the file I want to map to, I will now select ok. I created this file
earlier for the purposes of this
tutorial

ImportantThis box must be checked. If you leave it unchecked the drive wont reconnect when you logon, so you would need to
connect to it manually every time
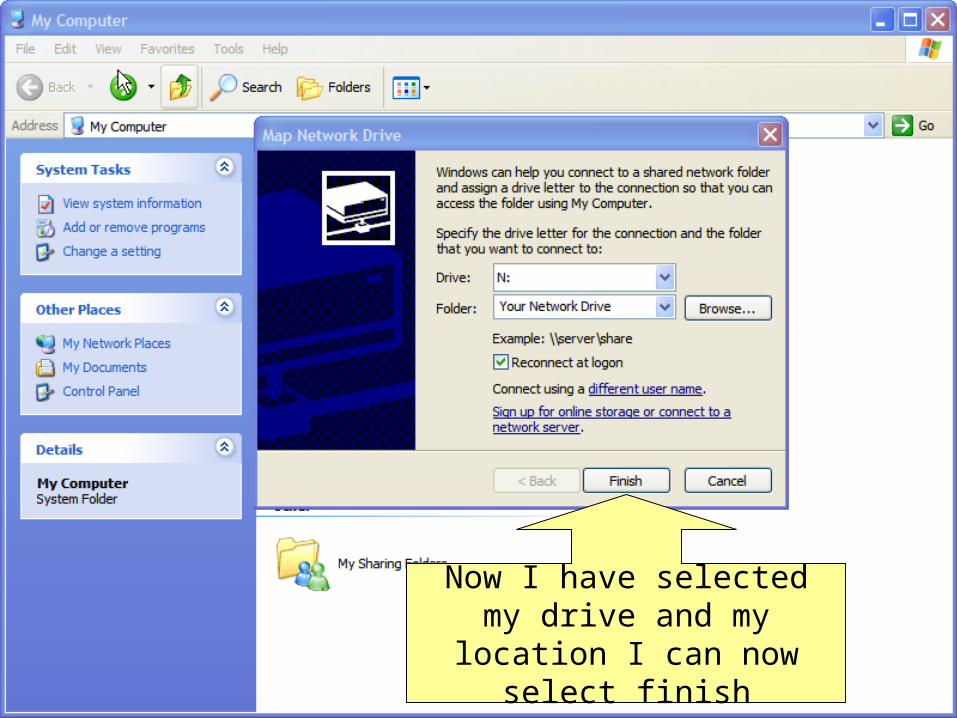
Now I have selected my drive and my location I can now
select finish
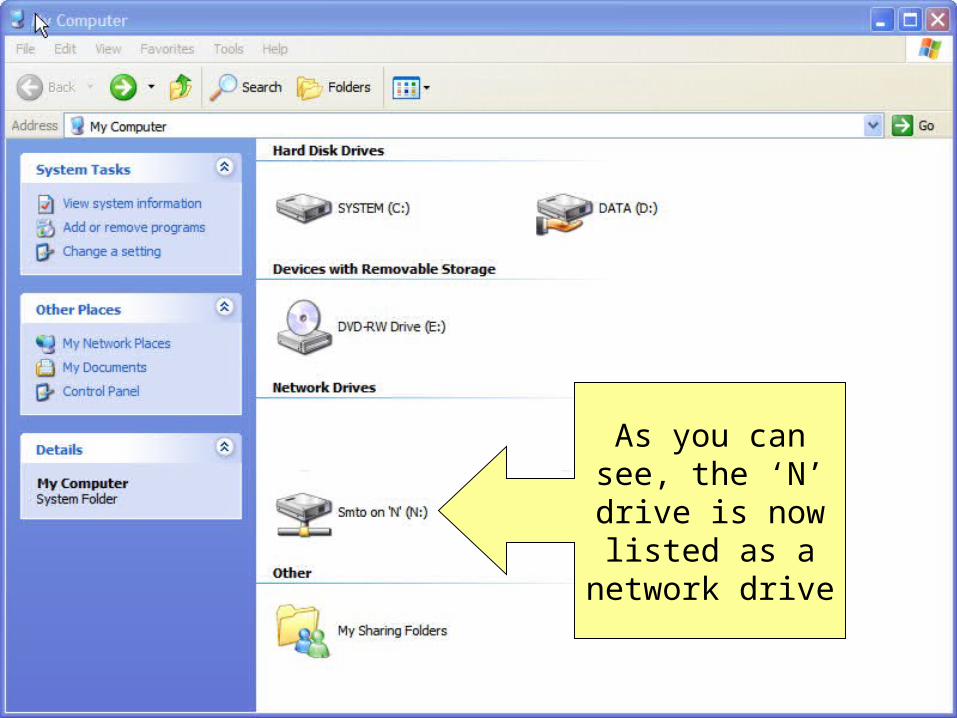
As you can see, the ‘N’ drive is now
listed as a network drive
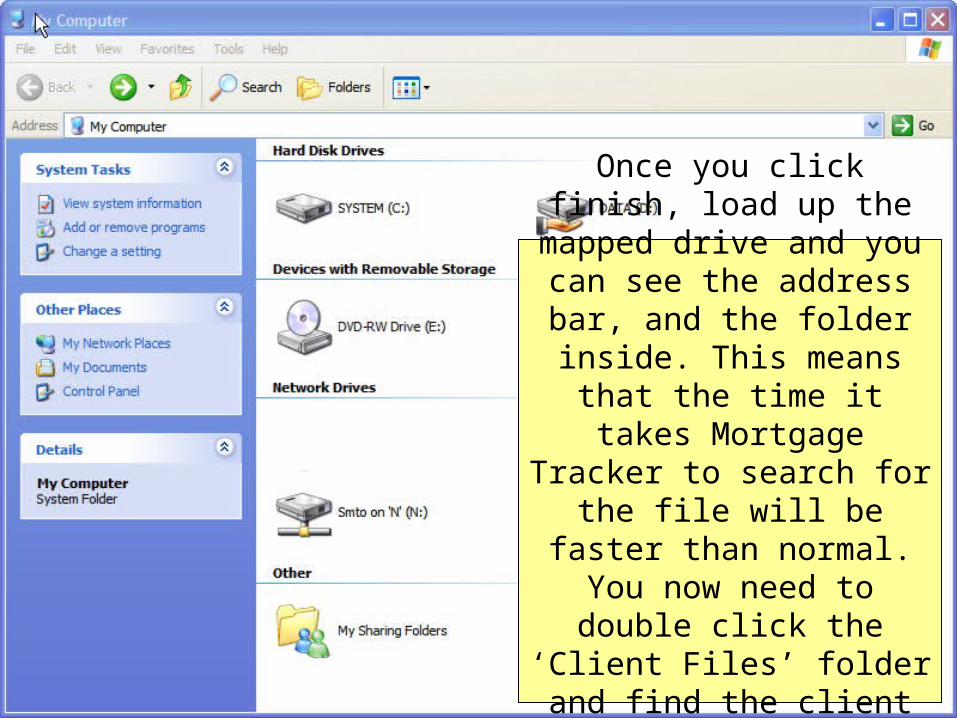
Once you click finish, load up the mapped drive and you can
see the address bar, and the folder inside. This means that
the time it takes Mortgage Tracker to search for the file
will be faster than normal. You now need to double click the ‘Client Files’ folder and find
the client you are going to link their folder to.
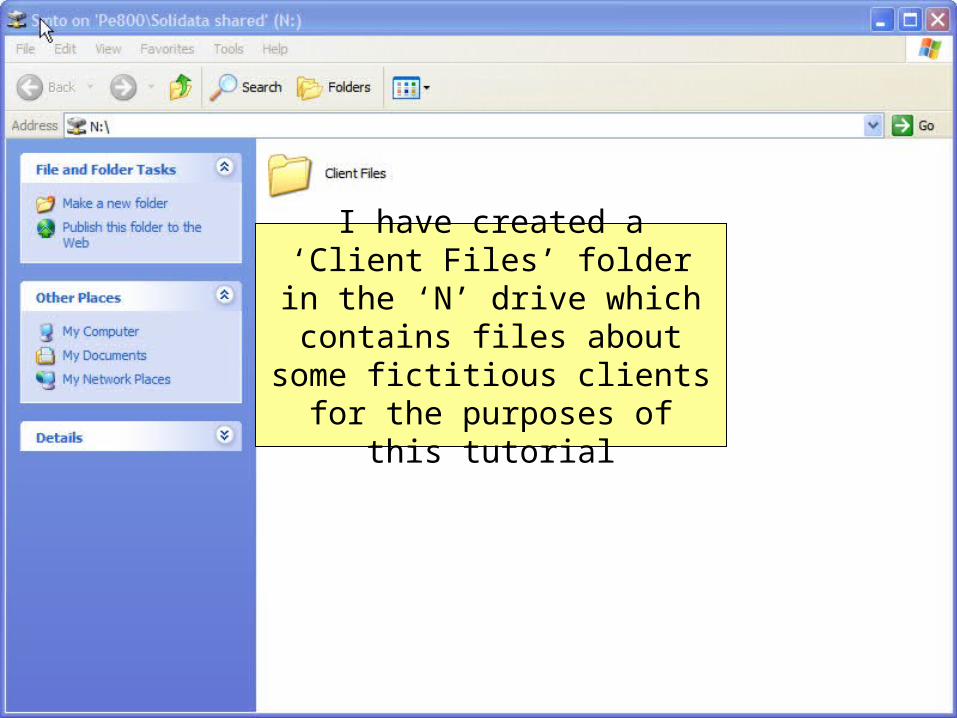
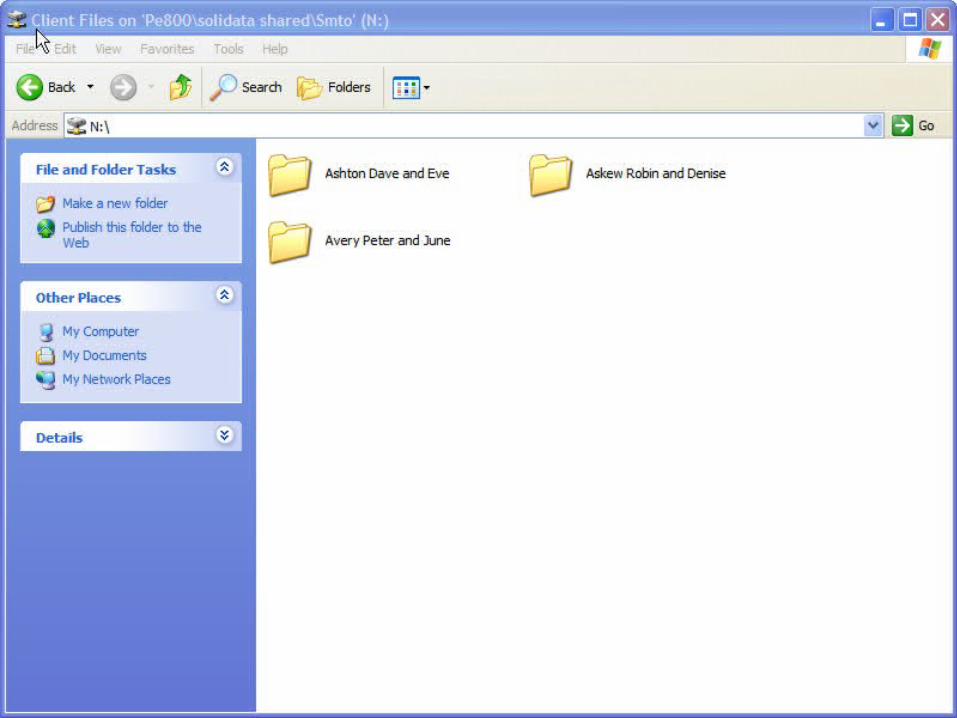
I have created a ‘Client Files’ folder in the ‘N’ drive which
contains files about some fictitious clients for the purposes of this
tutorial
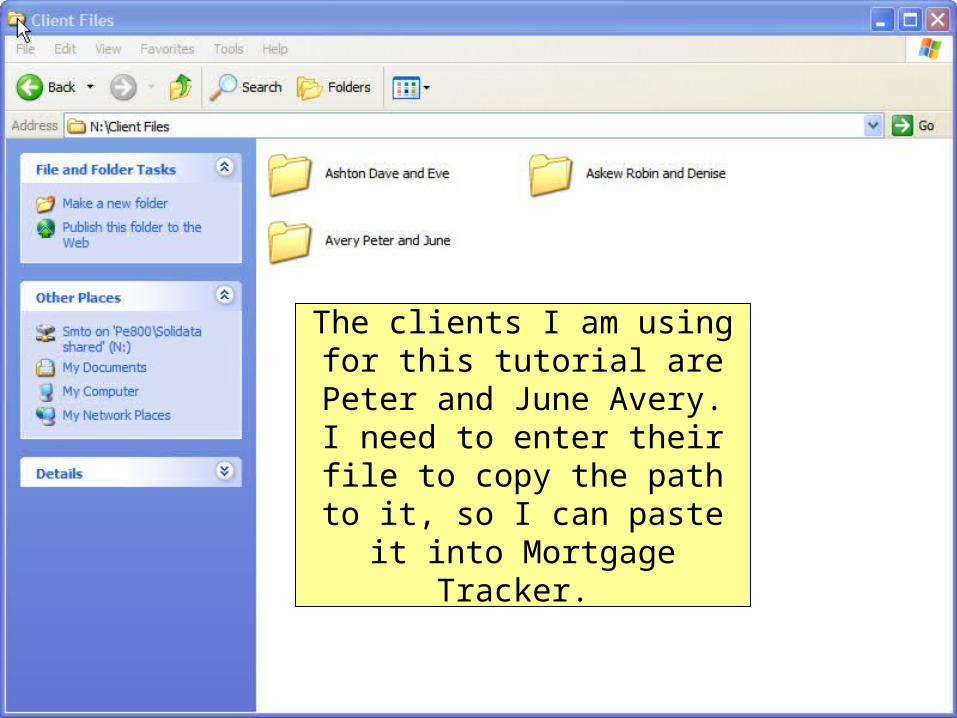
The clients I am using for this tutorial are Peter and June Avery. I need to enter their file to copy
the path to it, so I can paste it into Mortgage Tracker.
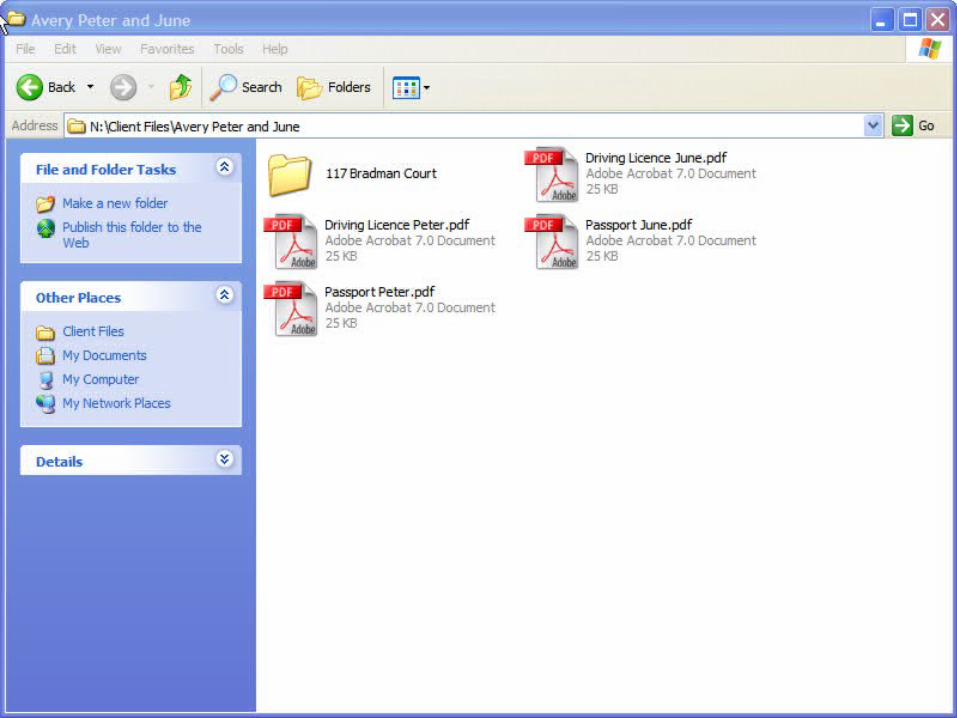
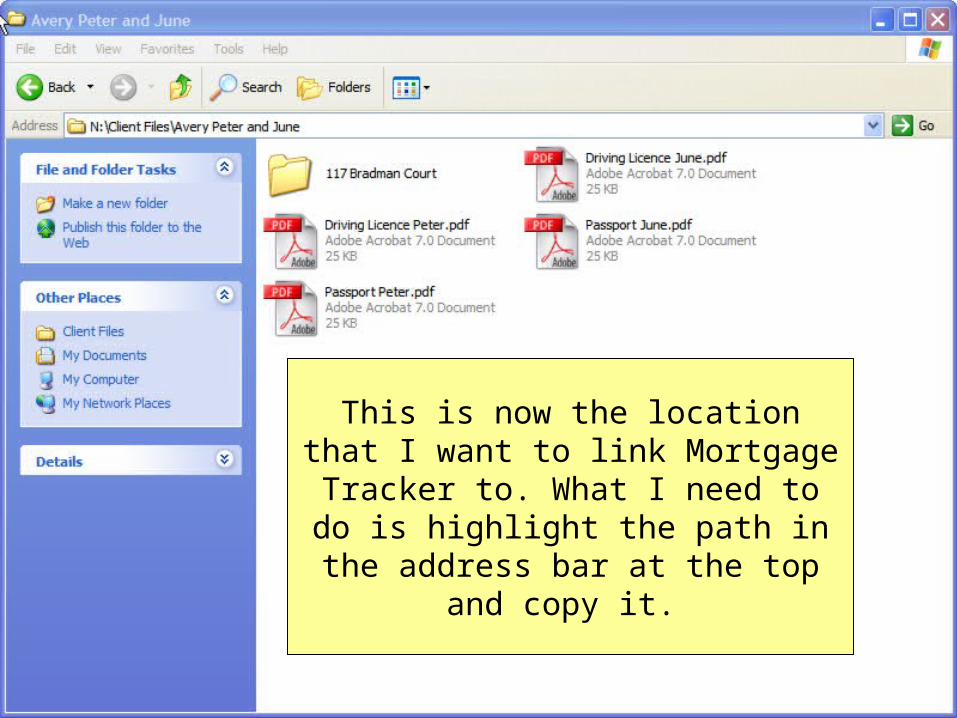
This is now the location that I want to link Mortgage Tracker to. What I need to do is highlight the path in the address bar at the
top and copy it.
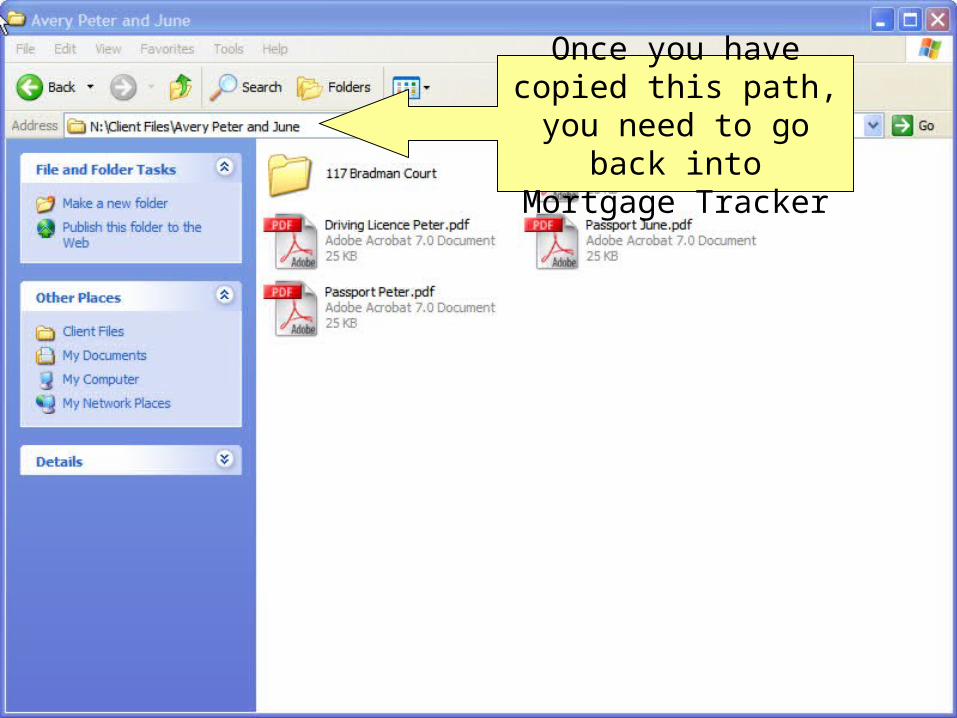
Once you have copied this path, you need to go
back into Mortgage Tracker

Now you need to right click in this
box and select paste
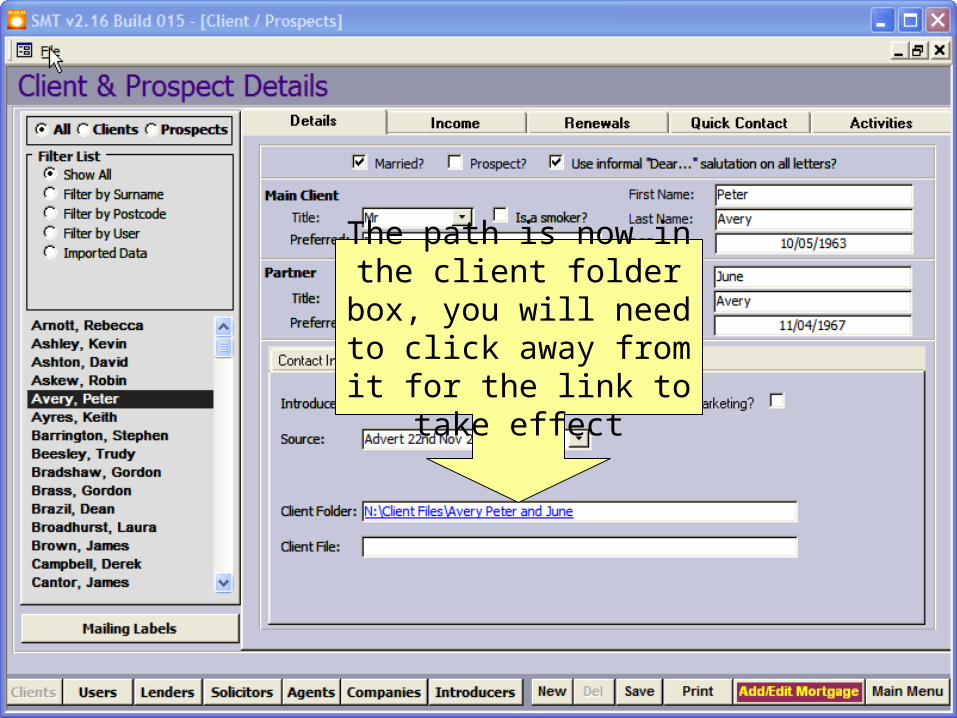
The path is now in the client folder box, you will need to click away from it for the link to take effect

The path is now a link, double clicking this link will open the
folder


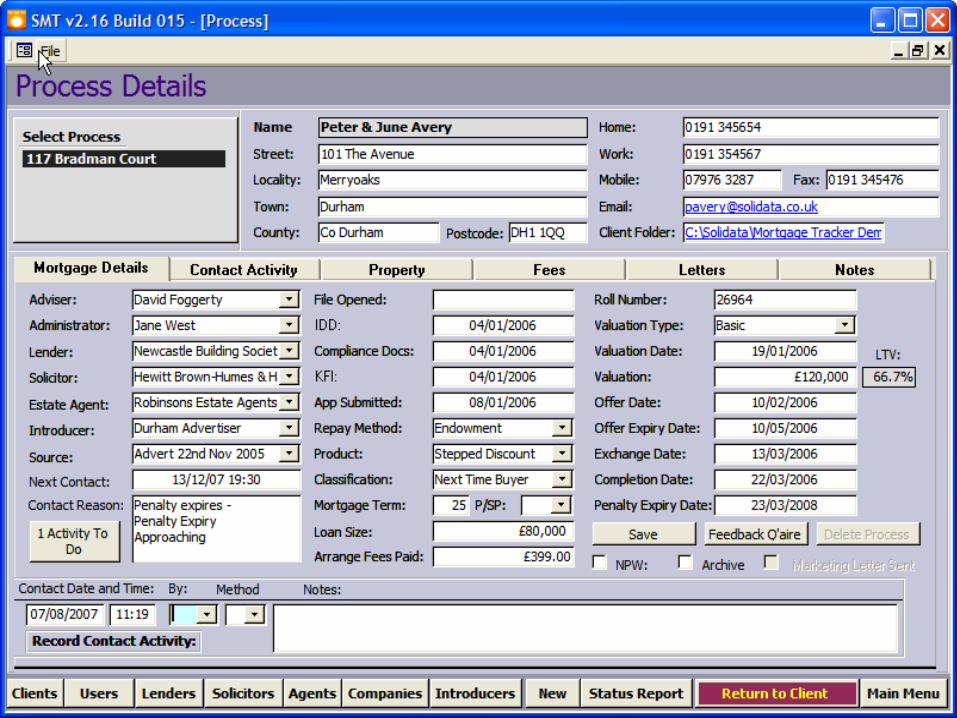
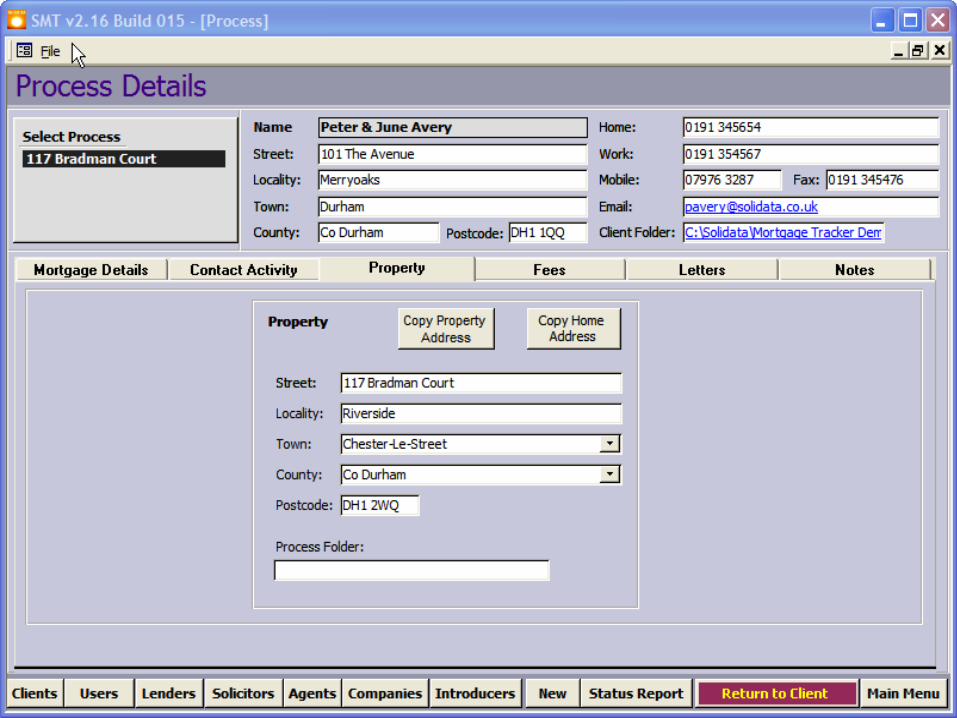
Now we are going to link the folder that applies to a certain mortgage process.
First we need to go to the process screen

This is done by going to the
add/edit mortgage button
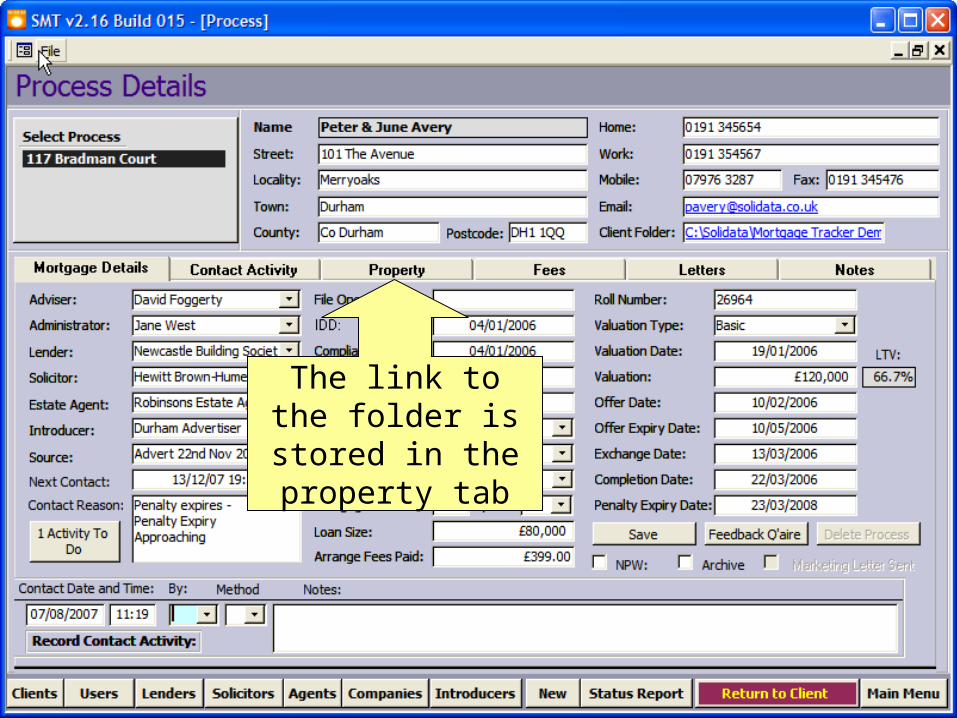
The link to the folder is stored in the
property tab

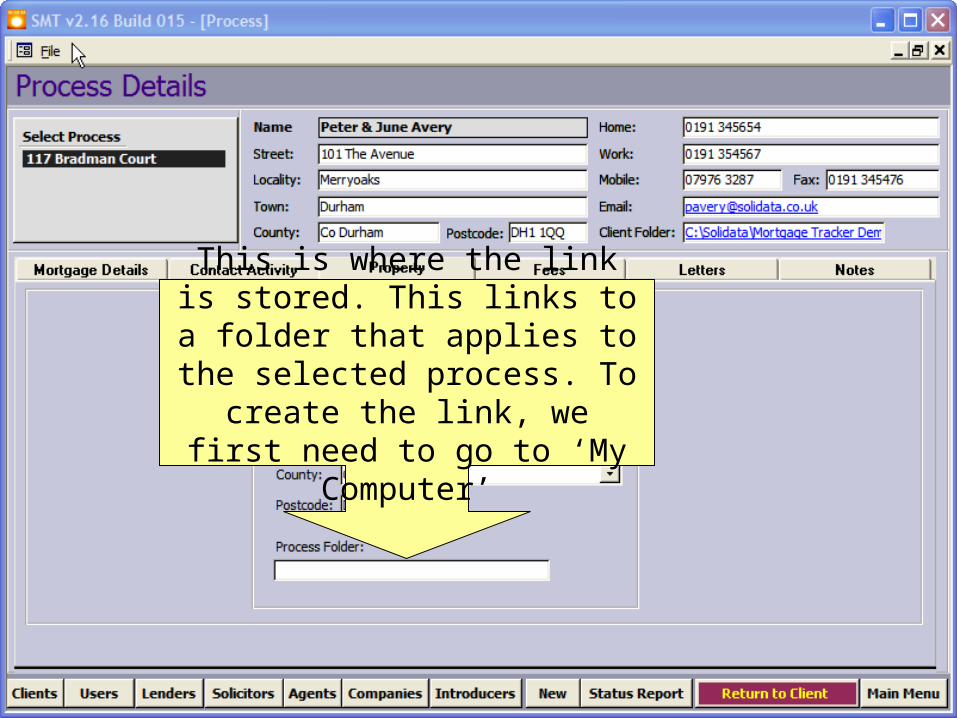
This is where the link is stored. This links to a folder that applies to the
selected process. To create the link, we first need to go to ‘My
Computer’

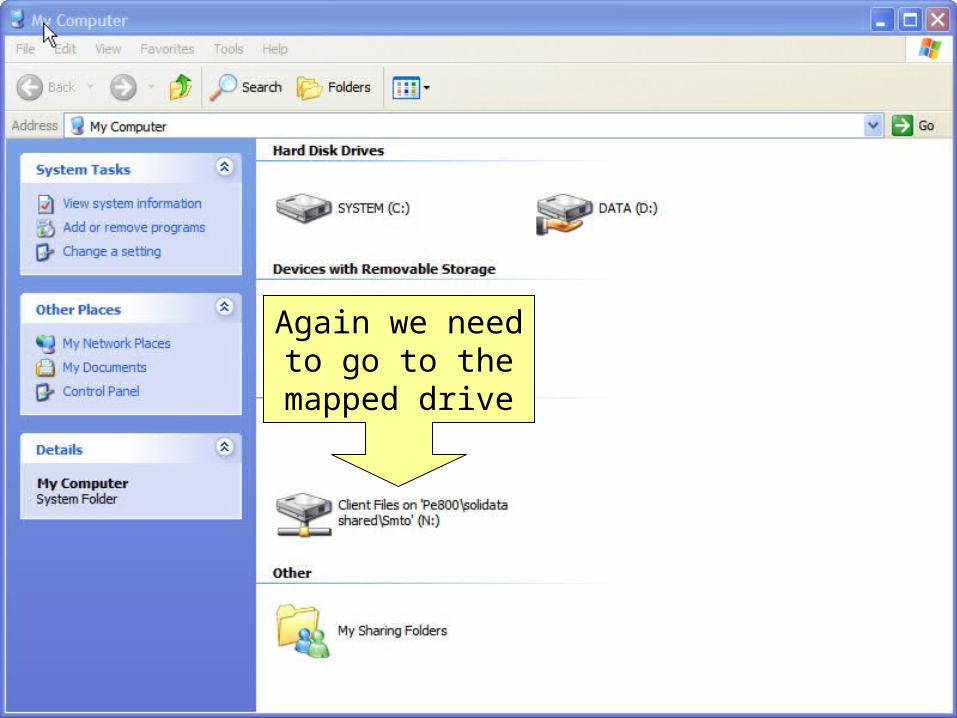
Again we need to go to the mapped
drive

Then into the Peter and June Avery
folder.
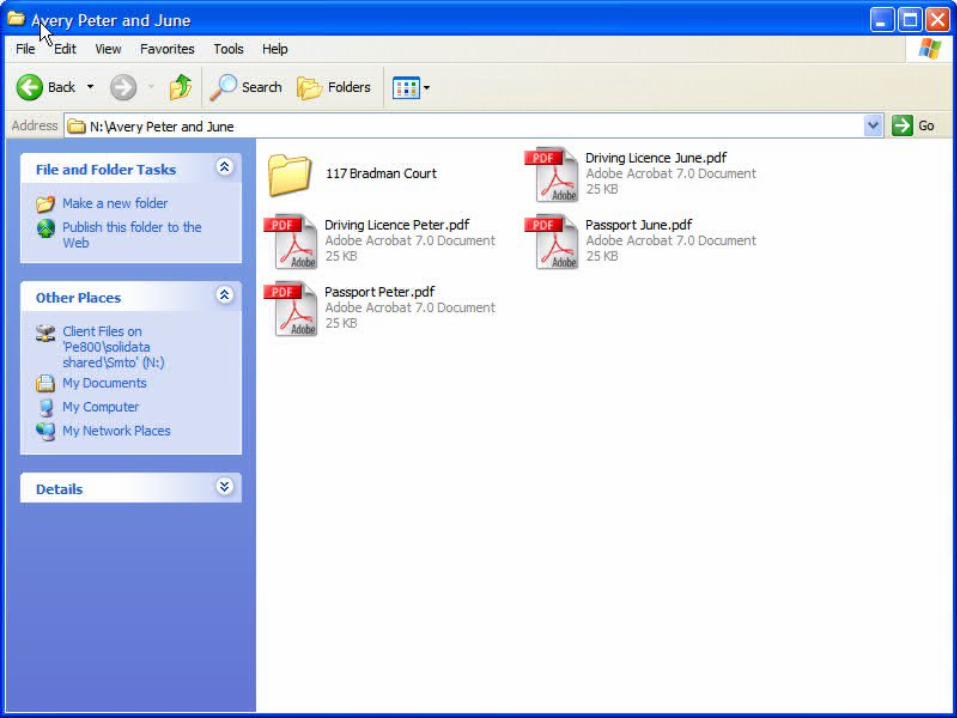

This time we need to go one step further, into the folder that applies to a
certain process. For these clients it will be the folder 117 Bradman court
as this is the mortgage process we have selected in Mortgage Tracker


This is the link that needs to be pasted into the box in Mortgage Tracker. Once
you have copied this, return to Mortgage Tracker
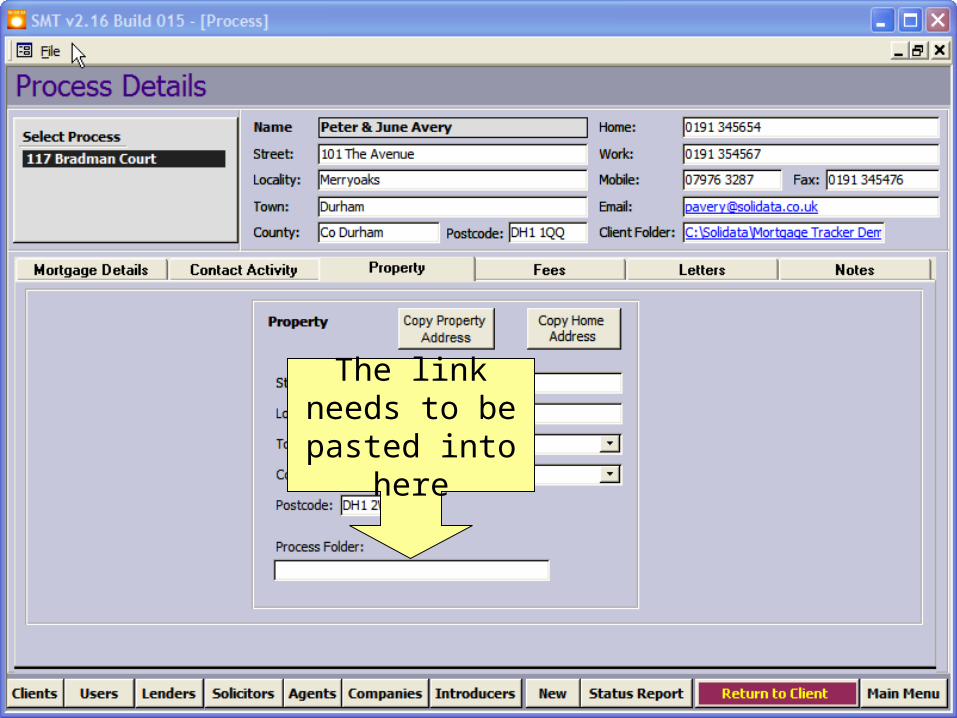
The link needs to be pasted into
here

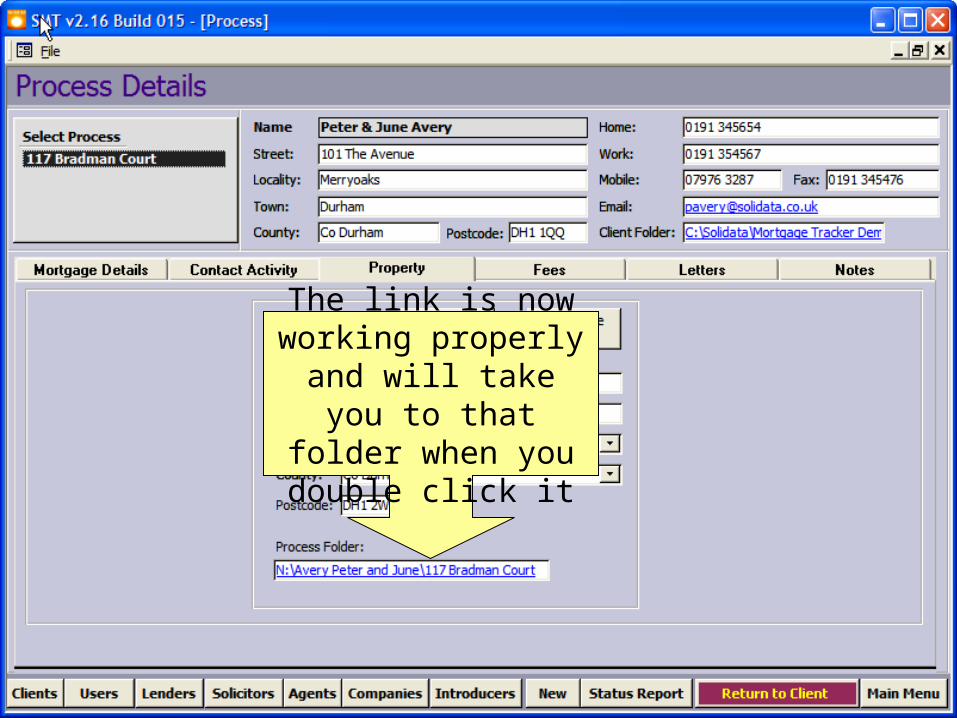
The link is now working properly and will take
you to that folder when you double click it
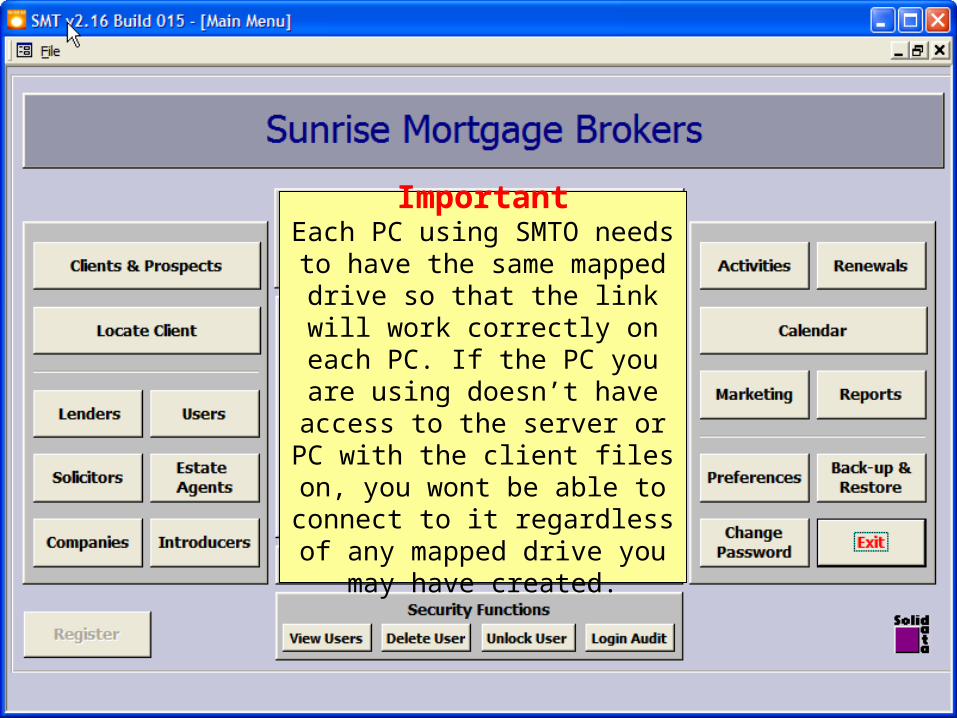
ImportantEach PC using SMTO needs to
have the same mapped drive so that the link will work correctly on each PC. If the PC you are using doesn’t have access to the server or PC with the client files on, you wont be able
to connect to it regardless of any mapped drive you may have
created.

Thank you for viewing this tutorial