ImageMagick Utilities version 5.5.4 John Cristy Glenn Randers
151
Convert, Edit, and Compose Images I m a g e M a g i c k ImageMagick Utilities version 5.5.4 John Cristy Glenn Randers-Pehrson ImageMagick Studio LLC http://www.imagemagick.org
Transcript of ImageMagick Utilities version 5.5.4 John Cristy Glenn Randers

Convert, Edit, and Compose Images
Imag
e Magick
ImageMagick Utilities version 5.5.4
John CristyGlenn Randers-Pehrson
ImageMagick Studio LLChttp://www.imagemagick.org

Copyright
Copyright (C) 2003 ImageMagick Studio, a non-profit organization dedicated tomaking software imaging solutions freely available.
Permission is hereby granted, free of charge, to any person obtaining a copyof this software and associated documentation files (“ImageMagick”), to dealin ImageMagick without restriction, including without limitation the rights touse, copy, modify, merge, publish, distribute, sublicense, and/or sell copies ofImageMagick, and to permit persons to whom the ImageMagick is furnished todo so, subject to the following conditions:
The above copyright notice and this permission notice shallbe included in allcopies or substantial portions of ImageMagick.
The software is provided “as is”, without warranty of any kind, express or im-plied, including but not limited to the warranties of merchantability, fitness for aparticular purpose and noninfringement. In no event shall ImageMagick Studiobe liable for any claim, damages or other liability, whetherin an action of con-tract, tort or otherwise, arising from, out of or in connection with ImageMagickor the use or other dealings in ImageMagick.
Except as contained in this notice, the name of the ImageMagick Studio shall notbe used in advertising or otherwise to promote the sale, use or other dealings inImageMagick without prior written authorization from the ImageMagick Studio.
v

Contents
1 ImageMagick Utilities . . . . . . . . . . . . . . . . . . . . . . . . . . . . . . . . . . . . . . . 1
1.1 NAME . . . . . . . . . . . . . . . . . . . . . . . . . . . . . . . . . . . . . . . . . . . .. . . . 1
1.2 Synopsis . . . . . . . . . . . . . . . . . . . . . . . . . . . . . . . . . . . . . . . .. . . . . . 1
1.3 Description . . . . . . . . . . . . . . . . . . . . . . . . . . . . . . . . . . . . .. . . . . . . 1
1.4 Files and Formats . . . . . . . . . . . . . . . . . . . . . . . . . . . . . . . . .. . . . . . 6
1.5 Options . . . . . . . . . . . . . . . . . . . . . . . . . . . . . . . . . . . . . . . . .. . . . . . 7
1.6 Environment . . . . . . . . . . . . . . . . . . . . . . . . . . . . . . . . . . . . .. . . . . . 48
1.7 Authors . . . . . . . . . . . . . . . . . . . . . . . . . . . . . . . . . . . . . . . . .. . . . . . 48
2 Animate. . . . . . . . . . . . . . . . . . . . . . . . . . . . . . . . . . . . . . . . . . . . . . . . . . .. 49
2.1 NAME . . . . . . . . . . . . . . . . . . . . . . . . . . . . . . . . . . . . . . . . . . . .. . . . 49
2.2 Synopsis . . . . . . . . . . . . . . . . . . . . . . . . . . . . . . . . . . . . . . . .. . . . . . 49
2.3 Description . . . . . . . . . . . . . . . . . . . . . . . . . . . . . . . . . . . . .. . . . . . . 49
2.4 Examples . . . . . . . . . . . . . . . . . . . . . . . . . . . . . . . . . . . . . . . .. . . . . 50
2.5 Options . . . . . . . . . . . . . . . . . . . . . . . . . . . . . . . . . . . . . . . . .. . . . . . 50
2.6 Mouse Buttons . . . . . . . . . . . . . . . . . . . . . . . . . . . . . . . . . . . .. . . . . 54
2.7 Command Widget . . . . . . . . . . . . . . . . . . . . . . . . . . . . . . . . . . .. . . 54
2.8 Keyboard Accelerators . . . . . . . . . . . . . . . . . . . . . . . . . . . .. . . . . . 54
2.9 X Resources . . . . . . . . . . . . . . . . . . . . . . . . . . . . . . . . . . . . . .. . . . . 55
2.10 Environment . . . . . . . . . . . . . . . . . . . . . . . . . . . . . . . . . . . .. . . . . . . 56
2.11 Acknowledgements . . . . . . . . . . . . . . . . . . . . . . . . . . . . . . .. . . . . . 56
2.12 Authors . . . . . . . . . . . . . . . . . . . . . . . . . . . . . . . . . . . . . . . .. . . . . . . 56
3 Composite. . . . . . . . . . . . . . . . . . . . . . . . . . . . . . . . . . . . . . . . . . . . . . . . . .57
3.1 NAME . . . . . . . . . . . . . . . . . . . . . . . . . . . . . . . . . . . . . . . . . . . .. . . . 57
3.2 Synopsis . . . . . . . . . . . . . . . . . . . . . . . . . . . . . . . . . . . . . . . .. . . . . . 57
vi

Contents vii
3.3 Description . . . . . . . . . . . . . . . . . . . . . . . . . . . . . . . . . . . . .. . . . . . . 57
3.4 Examples . . . . . . . . . . . . . . . . . . . . . . . . . . . . . . . . . . . . . . . .. . . . . 57
3.5 Options . . . . . . . . . . . . . . . . . . . . . . . . . . . . . . . . . . . . . . . . .. . . . . . 58
3.6 Environment . . . . . . . . . . . . . . . . . . . . . . . . . . . . . . . . . . . . .. . . . . . 62
3.7 Authors . . . . . . . . . . . . . . . . . . . . . . . . . . . . . . . . . . . . . . . . .. . . . . . 62
4 Conjure . . . . . . . . . . . . . . . . . . . . . . . . . . . . . . . . . . . . . . . . . . . . . . . . . . .. 63
4.1 NAME . . . . . . . . . . . . . . . . . . . . . . . . . . . . . . . . . . . . . . . . . . . .. . . . 63
4.2 Synopsis . . . . . . . . . . . . . . . . . . . . . . . . . . . . . . . . . . . . . . . .. . . . . . 63
4.3 Description . . . . . . . . . . . . . . . . . . . . . . . . . . . . . . . . . . . . .. . . . . . . 63
4.4 Options . . . . . . . . . . . . . . . . . . . . . . . . . . . . . . . . . . . . . . . . .. . . . . . 64
4.5 Magick Scripting Language . . . . . . . . . . . . . . . . . . . . . . . . .. . . . . 65
4.6 Authors . . . . . . . . . . . . . . . . . . . . . . . . . . . . . . . . . . . . . . . . .. . . . . . 67
5 Convert . . . . . . . . . . . . . . . . . . . . . . . . . . . . . . . . . . . . . . . . . . . . . . . . . . .. 68
5.1 NAME . . . . . . . . . . . . . . . . . . . . . . . . . . . . . . . . . . . . . . . . . . . .. . . . 68
5.2 Synopsis . . . . . . . . . . . . . . . . . . . . . . . . . . . . . . . . . . . . . . . .. . . . . . 68
5.3 Description . . . . . . . . . . . . . . . . . . . . . . . . . . . . . . . . . . . . .. . . . . . . 68
5.4 Examples . . . . . . . . . . . . . . . . . . . . . . . . . . . . . . . . . . . . . . . .. . . . . 68
5.5 Options . . . . . . . . . . . . . . . . . . . . . . . . . . . . . . . . . . . . . . . . .. . . . . . 70
5.6 Segmentation . . . . . . . . . . . . . . . . . . . . . . . . . . . . . . . . . . . .. . . . . . 78
5.7 Environment . . . . . . . . . . . . . . . . . . . . . . . . . . . . . . . . . . . . .. . . . . . 79
5.8 Authors . . . . . . . . . . . . . . . . . . . . . . . . . . . . . . . . . . . . . . . . .. . . . . . 79
6 Display . . . . . . . . . . . . . . . . . . . . . . . . . . . . . . . . . . . . . . . . . . . . . . . . . . .. 80
6.1 NAME . . . . . . . . . . . . . . . . . . . . . . . . . . . . . . . . . . . . . . . . . . . .. . . . 80
6.2 Synopsis . . . . . . . . . . . . . . . . . . . . . . . . . . . . . . . . . . . . . . . .. . . . . . 80
6.3 Description . . . . . . . . . . . . . . . . . . . . . . . . . . . . . . . . . . . . .. . . . . . . 80
6.4 Examples . . . . . . . . . . . . . . . . . . . . . . . . . . . . . . . . . . . . . . . .. . . . . 82
6.5 Options . . . . . . . . . . . . . . . . . . . . . . . . . . . . . . . . . . . . . . . . .. . . . . . 83
6.6 Mouse Buttons . . . . . . . . . . . . . . . . . . . . . . . . . . . . . . . . . . . .. . . . . 88
6.7 Command Widget . . . . . . . . . . . . . . . . . . . . . . . . . . . . . . . . . . .. . . 88
6.8 Keyboard Accelerators . . . . . . . . . . . . . . . . . . . . . . . . . . . .. . . . . . 91
6.9 X Resources . . . . . . . . . . . . . . . . . . . . . . . . . . . . . . . . . . . . . .. . . . . 94
viii Contents
6.10 Image Loading . . . . . . . . . . . . . . . . . . . . . . . . . . . . . . . . . . .. . . . . . 97
6.11 Visual Image Directory . . . . . . . . . . . . . . . . . . . . . . . . . . .. . . . . . . 97
6.12 Image Cutting . . . . . . . . . . . . . . . . . . . . . . . . . . . . . . . . . . .. . . . . . . 97
6.13 Image Copying . . . . . . . . . . . . . . . . . . . . . . . . . . . . . . . . . . .. . . . . . 98
6.14 Image Pasting . . . . . . . . . . . . . . . . . . . . . . . . . . . . . . . . . . .. . . . . . . 98
6.15 Image Cropping . . . . . . . . . . . . . . . . . . . . . . . . . . . . . . . . . .. . . . . . 101
6.16 Image Chopping . . . . . . . . . . . . . . . . . . . . . . . . . . . . . . . . . .. . . . . . 101
6.17 Image Rotation . . . . . . . . . . . . . . . . . . . . . . . . . . . . . . . . . .. . . . . . . 102
6.18 Image Segmentation . . . . . . . . . . . . . . . . . . . . . . . . . . . . . .. . . . . . 103
6.19 Image Annotation . . . . . . . . . . . . . . . . . . . . . . . . . . . . . . . .. . . . . . 104
6.20 Image Compositing . . . . . . . . . . . . . . . . . . . . . . . . . . . . . . .. . . . . . 106
6.21 Color Editing . . . . . . . . . . . . . . . . . . . . . . . . . . . . . . . . . . .. . . . . . . 108
6.22 Matte Editing . . . . . . . . . . . . . . . . . . . . . . . . . . . . . . . . . . .. . . . . . . 110
6.23 Image Drawing . . . . . . . . . . . . . . . . . . . . . . . . . . . . . . . . . . .. . . . . . 111
6.24 Region of Interest . . . . . . . . . . . . . . . . . . . . . . . . . . . . . . .. . . . . . . 113
6.25 Image Panning . . . . . . . . . . . . . . . . . . . . . . . . . . . . . . . . . . .. . . . . . 115
6.26 User Preferences . . . . . . . . . . . . . . . . . . . . . . . . . . . . . . . .. . . . . . . 115
6.27 Environment . . . . . . . . . . . . . . . . . . . . . . . . . . . . . . . . . . . .. . . . . . . 116
6.28 Acknowledgements . . . . . . . . . . . . . . . . . . . . . . . . . . . . . . .. . . . . . 116
6.29 Authors . . . . . . . . . . . . . . . . . . . . . . . . . . . . . . . . . . . . . . . .. . . . . . . 117
7 Identify . . . . . . . . . . . . . . . . . . . . . . . . . . . . . . . . . . . . . . . . . . . . . . . . . . .. 118
7.1 NAME . . . . . . . . . . . . . . . . . . . . . . . . . . . . . . . . . . . . . . . . . . . .. . . . 118
7.2 Synopsis . . . . . . . . . . . . . . . . . . . . . . . . . . . . . . . . . . . . . . . .. . . . . . 118
7.3 Description . . . . . . . . . . . . . . . . . . . . . . . . . . . . . . . . . . . . .. . . . . . . 118
7.4 Options . . . . . . . . . . . . . . . . . . . . . . . . . . . . . . . . . . . . . . . . .. . . . . . 119
7.5 Authors . . . . . . . . . . . . . . . . . . . . . . . . . . . . . . . . . . . . . . . . .. . . . . . 120
8 Import . . . . . . . . . . . . . . . . . . . . . . . . . . . . . . . . . . . . . . . . . . . . . . . . . . .. . 121
8.1 NAME . . . . . . . . . . . . . . . . . . . . . . . . . . . . . . . . . . . . . . . . . . . .. . . . 121
8.2 Synopsis . . . . . . . . . . . . . . . . . . . . . . . . . . . . . . . . . . . . . . . .. . . . . . 121
8.3 Description . . . . . . . . . . . . . . . . . . . . . . . . . . . . . . . . . . . . .. . . . . . . 121
8.4 Examples . . . . . . . . . . . . . . . . . . . . . . . . . . . . . . . . . . . . . . . .. . . . . 121
Contents ix
8.5 Options . . . . . . . . . . . . . . . . . . . . . . . . . . . . . . . . . . . . . . . . .. . . . . . 122
8.6 Environment . . . . . . . . . . . . . . . . . . . . . . . . . . . . . . . . . . . . .. . . . . . 125
8.7 Authors . . . . . . . . . . . . . . . . . . . . . . . . . . . . . . . . . . . . . . . . .. . . . . . 125
9 Mogrify . . . . . . . . . . . . . . . . . . . . . . . . . . . . . . . . . . . . . . . . . . . . . . . . . . .. 126
9.1 NAME . . . . . . . . . . . . . . . . . . . . . . . . . . . . . . . . . . . . . . . . . . . .. . . . 126
9.2 Synopsis . . . . . . . . . . . . . . . . . . . . . . . . . . . . . . . . . . . . . . . .. . . . . . 126
9.3 Description . . . . . . . . . . . . . . . . . . . . . . . . . . . . . . . . . . . . .. . . . . . . 126
9.4 Examples . . . . . . . . . . . . . . . . . . . . . . . . . . . . . . . . . . . . . . . .. . . . . 126
9.5 Options . . . . . . . . . . . . . . . . . . . . . . . . . . . . . . . . . . . . . . . . .. . . . . . 127
9.6 Image Segmentation . . . . . . . . . . . . . . . . . . . . . . . . . . . . . . .. . . . . 134
9.7 Environment . . . . . . . . . . . . . . . . . . . . . . . . . . . . . . . . . . . . .. . . . . . 135
9.8 Authors . . . . . . . . . . . . . . . . . . . . . . . . . . . . . . . . . . . . . . . . .. . . . . . 135
10 Montage . . . . . . . . . . . . . . . . . . . . . . . . . . . . . . . . . . . . . . . . . . . . . . . . . . .136
10.1 NAME . . . . . . . . . . . . . . . . . . . . . . . . . . . . . . . . . . . . . . . . . . .. . . . . 136
10.2 Synopsis . . . . . . . . . . . . . . . . . . . . . . . . . . . . . . . . . . . . . . .. . . . . . . 136
10.3 Description . . . . . . . . . . . . . . . . . . . . . . . . . . . . . . . . . . . .. . . . . . . . 136
10.4 Examples . . . . . . . . . . . . . . . . . . . . . . . . . . . . . . . . . . . . . . .. . . . . . 137
10.5 Options . . . . . . . . . . . . . . . . . . . . . . . . . . . . . . . . . . . . . . . .. . . . . . . 138
10.6 X Resources . . . . . . . . . . . . . . . . . . . . . . . . . . . . . . . . . . . . .. . . . . . 142
10.7 Environment . . . . . . . . . . . . . . . . . . . . . . . . . . . . . . . . . . . .. . . . . . . 143
10.8 Acknowledgements . . . . . . . . . . . . . . . . . . . . . . . . . . . . . . .. . . . . . 143
10.9 Authors . . . . . . . . . . . . . . . . . . . . . . . . . . . . . . . . . . . . . . . .. . . . . . . 144

1 ImageMagick Utilities
1.1 NAME
ImageMagick - commandline utilities to create, edit, or convert images
1.2 Synopsis
animate [ options ...] file [ [ options ...] file ... ]
composite [options ...] image composite[ mask] composited
conjure [ options] script.msl[ [ options] script.msl]
convert [ [ options ...] [ input file ... ] ... [ outputfile ] ]
display [ options ...] file ... [ [options ...]file ... ]
identify file [ file ... ]
import [ options ...] file
mogrify [ options ...] file ...
montage [options ...] file [ [ options ...] file ... ] outputfile
1.3 Description
ImageMagickprovides a suite of commandline utilities for creating, converting,editing, and displaying images:
Display is a machine architecture independent image processing anddisplayprogram. It can display an image on any workstation display running anX server.
1
2 ImageMagick
Import reads an image from any visible window on anX server and outputsit as an image file. You can capture a single window, the entirescreen, or anyrectangular portion of the screen.
Montage creates a composite by combining several separate images. The im-ages are tiled on the composite image with the name of the image optionallyappearing just below the individual tile.
Convert converts an input file using one image format to an output file with adiffering image format.
Mogrify transforms an image or a sequence of images. These transforms includeimage scaling, image rotation, color reduction, and others. The transmogrifiedimageoverwrites the original image.
Identify describes the format and characteristics of one or more image files. Itwill also report if an image is incomplete or corrupt.
Compositecomposites images to create new images.
Conjure interprets and executes scripts in the Magick Scripting Language (MSL).
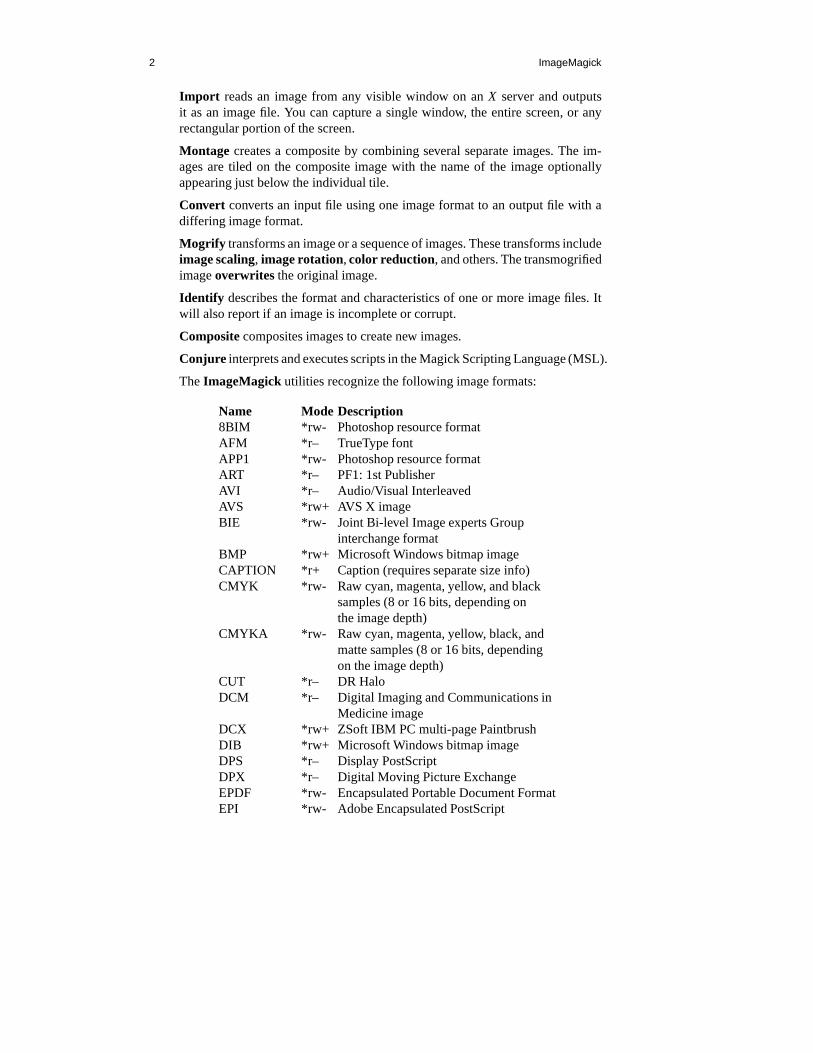
TheImageMagick utilities recognize the following image formats:
Name Mode Description8BIM *rw- Photoshop resource formatAFM *r– TrueType fontAPP1 *rw- Photoshop resource formatART *r– PF1: 1st PublisherAVI *r– Audio/Visual InterleavedAVS *rw+ AVS X imageBIE *rw- Joint Bi-level Image experts Group
interchange formatBMP *rw+ Microsoft Windows bitmap imageCAPTION *r+ Caption (requires separate size info)CMYK *rw- Raw cyan, magenta, yellow, and black
samples (8 or 16 bits, depending onthe image depth)
CMYKA *rw- Raw cyan, magenta, yellow, black, andmatte samples (8 or 16 bits, dependingon the image depth)
CUT *r– DR HaloDCM *r– Digital Imaging and Communications in
Medicine imageDCX *rw+ ZSoft IBM PC multi-page PaintbrushDIB *rw+ Microsoft Windows bitmap imageDPS *r– Display PostScriptDPX *r– Digital Moving Picture ExchangeEPDF *rw- Encapsulated Portable Document FormatEPI *rw- Adobe Encapsulated PostScript
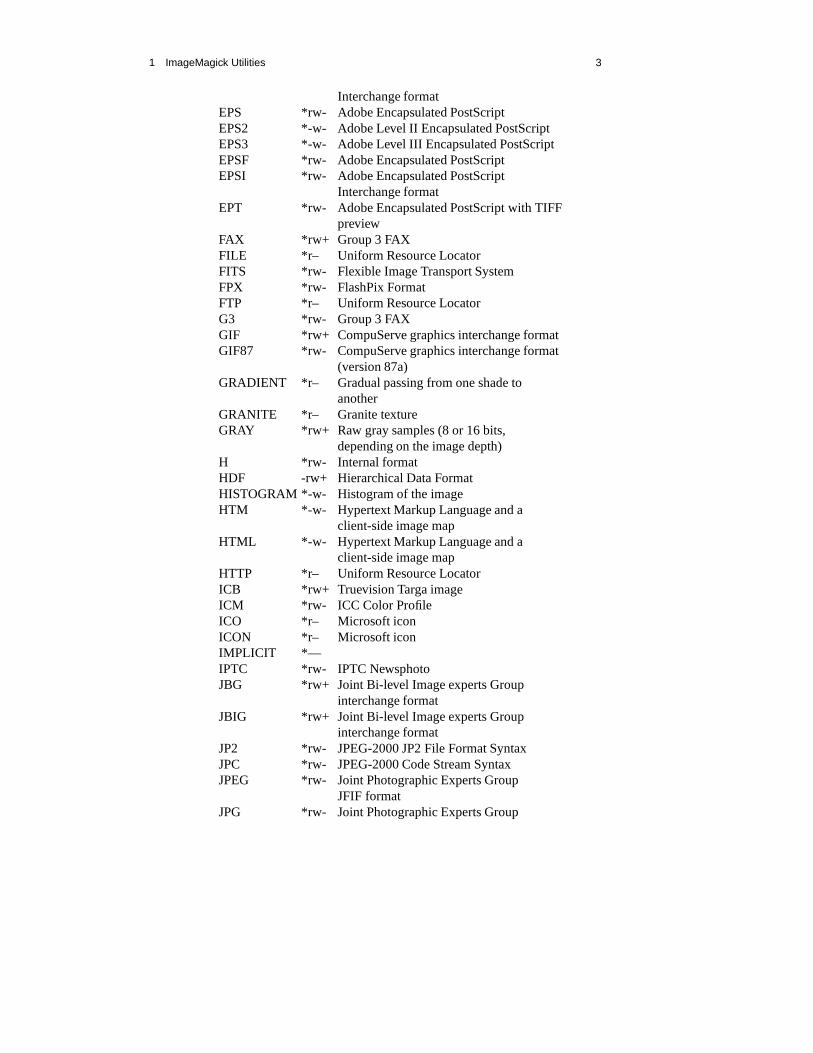
1 ImageMagick Utilities 3
Interchange formatEPS *rw- Adobe Encapsulated PostScriptEPS2 *-w- Adobe Level II Encapsulated PostScriptEPS3 *-w- Adobe Level III Encapsulated PostScriptEPSF *rw- Adobe Encapsulated PostScriptEPSI *rw- Adobe Encapsulated PostScript
Interchange formatEPT *rw- Adobe Encapsulated PostScript with TIFF
previewFAX *rw+ Group 3 FAXFILE *r– Uniform Resource LocatorFITS *rw- Flexible Image Transport SystemFPX *rw- FlashPix FormatFTP *r– Uniform Resource LocatorG3 *rw- Group 3 FAXGIF *rw+ CompuServe graphics interchange formatGIF87 *rw- CompuServe graphics interchange format
(version 87a)GRADIENT *r– Gradual passing from one shade to
anotherGRANITE *r– Granite textureGRAY *rw+ Raw gray samples (8 or 16 bits,
depending on the image depth)H *rw- Internal formatHDF -rw+ Hierarchical Data FormatHISTOGRAM *-w- Histogram of the imageHTM *-w- Hypertext Markup Language and a
client-side image mapHTML *-w- Hypertext Markup Language and a
client-side image mapHTTP *r– Uniform Resource LocatorICB *rw+ Truevision Targa imageICM *rw- ICC Color ProfileICO *r– Microsoft iconICON *r– Microsoft iconIMPLICIT *—IPTC *rw- IPTC NewsphotoJBG *rw+ Joint Bi-level Image experts Group
interchange formatJBIG *rw+ Joint Bi-level Image experts Group
interchange formatJP2 *rw- JPEG-2000 JP2 File Format SyntaxJPC *rw- JPEG-2000 Code Stream SyntaxJPEG *rw- Joint Photographic Experts Group
JFIF formatJPG *rw- Joint Photographic Experts Group
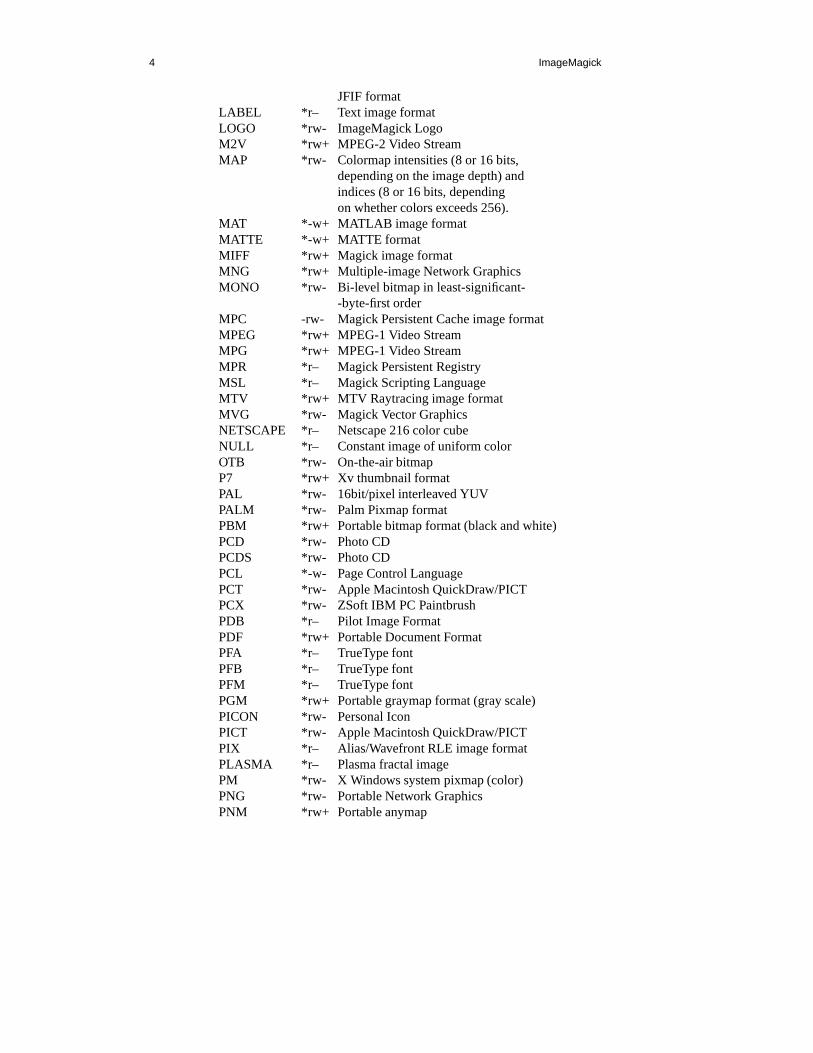
4 ImageMagick
JFIF formatLABEL *r– Text image formatLOGO *rw- ImageMagick LogoM2V *rw+ MPEG-2 Video StreamMAP *rw- Colormap intensities (8 or 16 bits,
depending on the image depth) andindices (8 or 16 bits, dependingon whether colors exceeds 256).
MAT *-w+ MATLAB image formatMATTE *-w+ MATTE formatMIFF *rw+ Magick image formatMNG *rw+ Multiple-image Network GraphicsMONO *rw- Bi-level bitmap in least-significant-
-byte-first orderMPC -rw- Magick Persistent Cache image formatMPEG *rw+ MPEG-1 Video StreamMPG *rw+ MPEG-1 Video StreamMPR *r– Magick Persistent RegistryMSL *r– Magick Scripting LanguageMTV *rw+ MTV Raytracing image formatMVG *rw- Magick Vector GraphicsNETSCAPE *r– Netscape 216 color cubeNULL *r– Constant image of uniform colorOTB *rw- On-the-air bitmapP7 *rw+ Xv thumbnail formatPAL *rw- 16bit/pixel interleaved YUVPALM *rw- Palm Pixmap formatPBM *rw+ Portable bitmap format (black and white)PCD *rw- Photo CDPCDS *rw- Photo CDPCL *-w- Page Control LanguagePCT *rw- Apple Macintosh QuickDraw/PICTPCX *rw- ZSoft IBM PC PaintbrushPDB *r– Pilot Image FormatPDF *rw+ Portable Document FormatPFA *r– TrueType fontPFB *r– TrueType fontPFM *r– TrueType fontPGM *rw+ Portable graymap format (gray scale)PICON *rw- Personal IconPICT *rw- Apple Macintosh QuickDraw/PICTPIX *r– Alias/Wavefront RLE image formatPLASMA *r– Plasma fractal imagePM *rw- X Windows system pixmap (color)PNG *rw- Portable Network GraphicsPNM *rw+ Portable anymap

1 ImageMagick Utilities 5
PPM *rw+ Portable pixmap format (color)PREVIEW *-w- Show a preview an image enhancement,
effect, or f/xPS *rw+ Adobe PostScriptPS2 *-w+ Adobe Level II PostScriptPS3 *-w+ Adobe Level III PostScriptPSD *rw- Adobe Photoshop bitmapPTIF *rw- Pyramid encoded TIFFPWP *r– Seattle Film WorksRAS *rw+ SUN RasterfileRGB *rw+ Raw red, green, and blue samples (8 or
16 bits, depending on the image depth)RGBA *rw+ Raw red, green, blue, and matte samples
(8 or 16 bits, depending on the imagedepth)
RLA *r– Alias/Wavefront imageRLE *r– Utah Run length encoded imageROSE *rw- 70x46 Truecolor test imageSCT *r– Scitex HandShakeSFW *r– Seattle Film WorksSGI *rw+ Irix RGB imageSHTML *-w- Hypertext Markup Language and a
client-side image mapSTEGANO *r– Steganographic imageSUN *rw+ SUN RasterfileSVG *rw+ Scalable Vector GaphicsTEXT *rw+ Raw textTGA *rw+ Truevision Targa imageTIF *rw+ Tagged Image File FormatTIFF *rw+ Tagged Image File FormatTILE *r– Tile image with a textureTIM *r– PSX TIMTTF *r– TrueType fontTXT *rw+ Raw textUIL *-w- X-Motif UIL tableUYVY *rw- 16bit/pixel interleaved YUVVDA *rw+ Truevision Targa imageVICAR *rw- VICAR rasterfile formatVID *rw+ Visual Image DirectoryVIFF *rw+ Khoros Visualization imageVST *rw+ Truevision Targa imageWBMP *rw- Wireless Bitmap (level 0) imageWMF *r– Windows MetafileWPG *r– Word Perfect GraphicsX *rw- X ImageXBM *rw- X Windows system bitmap (black
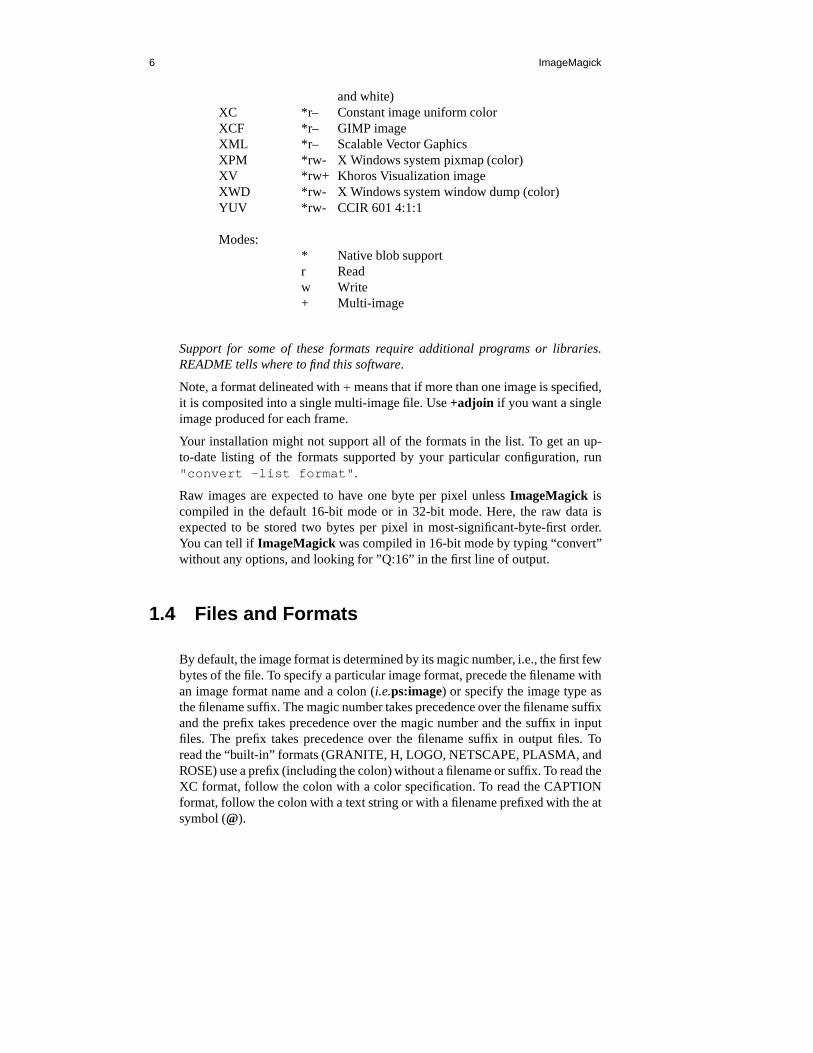
6 ImageMagick
and white)XC *r– Constant image uniform colorXCF *r– GIMP imageXML *r– Scalable Vector GaphicsXPM *rw- X Windows system pixmap (color)XV *rw+ Khoros Visualization imageXWD *rw- X Windows system window dump (color)YUV *rw- CCIR 601 4:1:1
Modes:* Native blob supportr Readw Write+ Multi-image
Support for some of these formats require additional programs or libraries.README tells where to find this software.
Note, a format delineated with+ means that if more than one image is specified,it is composited into a single multi-image file. Use+adjoin if you want a singleimage produced for each frame.
Your installation might not support all of the formats in thelist. To get an up-to-date listing of the formats supported by your particularconfiguration, run"convert -list format" .
Raw images are expected to have one byte per pixel unlessImageMagick iscompiled in the default 16-bit mode or in 32-bit mode. Here, the raw data isexpected to be stored two bytes per pixel in most-significant-byte-first order.You can tell if ImageMagick was compiled in 16-bit mode by typing “convert”without any options, and looking for ”Q:16” in the first line of output.
1.4 Files and Formats
By default, the image format is determined by its magic number, i.e., the first fewbytes of the file. To specify a particular image format, precede the filename withan image format name and a colon (i.e.ps:image) or specify the image type asthe filename suffix. The magic number takes precedence over the filename suffixand the prefix takes precedence over the magic number and the suffix in inputfiles. The prefix takes precedence over the filename suffix in output files. Toread the “built-in” formats (GRANITE, H, LOGO, NETSCAPE, PLASMA, andROSE) use a prefix (including the colon) without a filename or suffix. To read theXC format, follow the colon with a color specification. To read the CAPTIONformat, follow the colon with a text string or with a filename prefixed with the atsymbol (@).
1 ImageMagick Utilities 7
When you specifyX as your image type, the filename has special meaning. Itspecifies an X window byid, name, or root. If no filename is specified, thewindow is selected by clicking the mouse in the desired window.
Specify input file as - for standard input,outputfile as - for standard output.If input file has the extension.Z or .gz, the file is uncompressed withuncom-pressor gunzip respectively. Ifoutputfile has the extension.Z or .gz, the file iscompressed using withcompressor gziprespectively.
Finally, when running on platforms that allow it, precede the image file namewith
�
to pipe to or from a system command (this feature is not available onVMS, Win32 and Macintosh platforms). Use a backslash or quotation marks toprevent your shell from interpreting the
�
.
Use an optional index enclosed in brackets after an input filename to spec-ify a desired subimage of a multi-resolution image format like Photo CD (e.g."img0001.pcd[4]" ) or a range for MPEG images (e.g."video.mpg[50-75]" ). A subimage specification can be disjoint (e.g."image.tiff[2,7,4]" ).For raw images, specify a subimage with a geometry (e.g.-size 640x512"image.rgb[320x256+50+50]" ). Surround the image name with quota-tion marks to prevent your shell from interpreting the square brackets. Singleimages are written with the filename you specify. However, multi-part images(e.g., a multi-page PostScript document with+adjoin specified) are written withthe filename followed by a period (.) and the scene number. You can changethis behavior by embedding a%d, %0Nd, %o, %0No, %x, or %0Nxprintfformat specification in the file name. For example,
image%02d.miff
writes filesimage00.miff, image01.miff,etc.
When running a commandline utility, you can prepend an at sign @to a filenameto read a list of image filenames from that file. This is convenient in the eventyou have too many image filenames to fit on the command line.
1.5 Options
Options are processed in command line order. Any option you specify on thecommand line remains in effect for the set of images that follows, until the set isterminated by the appearance of any option or-noop. Some options only affectthe decoding of images and others only the encoding. The latter can appear afterthe final group of input images.
This is a combined list of the commandline options used by theImageMag-ick utilities (animate, composite, convert, display, identify, import, mogrify andmontage).

8 ImageMagick
In this document, angle brackets (“
��
”) enclose variables and curly brack-ets (“
��
”) enclose optional parameters. For example, “-fuzz
�
distance
��
%
�
”means you can use the option"-fuzz 10" or "-fuzz 2%" .
-adjoin join images into a single multi-image file
By default, all images of an image sequence are stored in the same file. However,some formats (e.g. JPEG) do not support more than one image and are saved toseparate files. Use+adjoin to force this behavior.
-affine
�
matrix
�
drawing transform matrix
This option provides a transform matrix
�
sx,rx,ry,sy,tx,ty
�
for use bysubsequent-draw or -transform options.
-antialias remove pixel aliasing
By default antialiasing algorithms are used when drawing objects (e.g. lines) orrendering vector formats (e.g. WMF and Postscript). Use +antialias to disableuse of antialiasing algorithms. Reasons to disable antialiasing
include avoiding increasing colors in the image, or improving rendering speed.
-append append a set of images
This option creates a single image where the images in the original set arestacked top-to-bottom. If they are not of the same width, anynarrow imageswill be expanded to fit using the background color. Use+append to stack im-ages left-to-right. The set of images is terminated by the appearance of any op-tion. If the -appendoption appears after all of the input images, all images areappended.
-authenticate
�
string
�
decrypt image with this password
Use this option to supply a password for decrypting an image or an image se-quence, if it is being read from a format such as PDF that supports encryption.Encrypting images being written is not supported.
-average average a set of images
The set of images is terminated by the appearance of any option. If the-averageoption appears after all of the input images, all images are averaged.
-backdrop
�
color
�
display the image centered on a backdrop.
1 ImageMagick Utilities 9
This backdrop covers the entire workstation screen and is useful for hiding otherX window activity while viewing the image. The color of the backdrop is spec-ified as the background color. The color is specified using theformat describedunder the-fill option. Refer to “X Resources” in the manual page fordisplayfordetails.
-background
�
color
�
the background color
The color is specified using the format described under the-fill option.
-blue-primary
�
x
�
,
�
y
�
blue chromaticity primary point
-blur
�
radius
��
x
�
sigma
��
blur the image with a Gaussian operator
Blur with the given radius and standard deviation (sigma).
-border
�
width
�
x
�
height
�
surround the image with a border of color
See-geometryfor details about the geometry specification.
-bordercolor
�
color
�
the border color
The color is specified using the format described under the-fill option.
-borderwidth
�
geometry
�
the border width
-box
�
color
�
set the color of the annotation bounding box
The color is specified using the format described under the-fill option.
See-draw for further details.
-cache
�
threshold
�
(This option has been replaced by the -limit option)
-channel
�
type
�
the type of channel
Choose from:Red, Green, Blue, Opacity, Matte, Cyan, Magenta, Yellow, orBlack.
Use this option to extract a particularchannelfrom the image.Matte, for exam-ple, is useful for extracting the opacity values from an image.
-charcoal
�
factor
�
simulate a charcoal drawing

10 ImageMagick
-chop
�
width
�
x
�
height
��
+-
��
x
��
+-
��
y
��
%
�
remove pixels from the in-terior of an image
Width andheightgive the number of columns and rows to remove, andx andy are offsets that give the location of the leftmost column andtopmost row toremove.
Thex offset normally specifies the leftmost column to remove. If the -gravityoption is present withNorthEast, East,or SouthEastgravity, it gives the distanceleftward from the right edge of the image to the rightmost column to remove.Similarly, they offset normally specifies the topmost row to remove, but if the -gravity option is present withSouthWest, South,orSouthEastgravity, it specifiesthe distance upward from the bottom edge of the image to the bottom row toremove.
The -chop option removes entire rows and columns, and moves the remainingcorner blocks leftward and upward to close the gaps.
-clip apply the clipping path, if one is present
If a clipping path is present, it will be applied to subsequent operations.
For example, if you type the following command:
convert -clip -negate cockatoo.tif negated.tif
only the pixels within the clipping path are negated.
The -clip feature requires the XML library. If the XML library is not present,the option is ignored.
-coalesce merge a sequence of images
Each image N in the sequence after Image 0 is replaced with theimage createdby flattening images 0 through N.
The set of images is terminated by the appearance of any option. If the-coalesceoption appears after all of the input images, all images are coalesced.
-colorize
�
value
�
colorize the image with the pen color
Specify the amount of colorization as a percentage. You can apply separate col-orization values to the red, green, and blue channels of the image with a col-orization value list delimited with slashes (e.g. 0/0/50).
-colormap
�
type
�
define the colormap type
Choose betweensharedor private.
1 ImageMagick Utilities 11
This option only applies when the default X server visual isPseudoColororGRAYScale. Refer to-visual for more details. By default, a shared colormapis allocated. The image shares colors with other X clients. Some image colorscould be approximated, therefore your image may look very different than in-tended. ChoosePrivate and the image colors appear exactly as they are defined.However, other clients may gotechnicolorwhen the image colormap is installed.
-colors
�
value
�
preferred number of colors in the image
The actual number of colors in the image may be less than your request, butnever more. Note, this is a color reduction option. Images with less unique colorsthan specified with this option will have any duplicate or unused colors removed.Refer to quantize for more details.
Note, options-dither , -colorspace, and -treedepth affect the color reductionalgorithm.
-colorspace
�
value
�
the type of colorspace
Choices are:GRAY , OHTA , RGB, Transparent, XYZ , YCbCr , YIQ , YPbPr,YUV , or CMYK .
Color reduction, by default, takes place in the RGB color space. Empirical ev-idence suggests that distances in color spaces such as YUV orYIQ correspondto perceptual color differences more closely than do distances in RGB space.These color spaces may give better results when color reducing an image. Referto quantize for more details.
The Transparent color space behaves uniquely in that it preserves the mattechannel of the image if it exists.
The-colorsor -monochromeoption is required for this option to take effect.
-comment
�
string
�
annotate an image with a comment
Use this option to assign a specific comment to the image, whenwriting to animage format that supports comments. You can include the image filename, type,width, height, or other image attribute by embedding special format characterslisted under the-format option. The comment is not drawn on the image, but isembedded in the image datastream via a “Comment” tag or similar mechanism.If you want the comment to be visible on the image itself, use the-draw option.
For example,
-comment "%m:%f %wx%h"
produces an image comment ofMIFF:bird.miff 512x480 for an image titledbird.miff and whose width is 512 and height is 480.
12 ImageMagick
If the first character ofstring is @, the image comment is read from a file titledby the remaining characters in the string.
-compose
�
operator
�
the type of image composition
By default, each of the composite image pixels are replaced by the correspondingimage tile pixel. You can choose an alternate composite operation:
OverInOutAtopXorPlusMinusAddSubtractDifferenceMultiplyBumpmapCopyCopyRedCopyGreenCopyBlueCopyOpacity
How each operator behaves is described below.
OverThe result will be the union of the two image shapes, with opaque areas ofcomposite imageobscuringimagein the region of overlap.
InThe result is simplycomposite imagecut by the shape ofimage. None of theimage data ofimagewill be in the result.
OutThe resulting image iscomposite imagewith the shape ofimagecut out.
AtopThe result is the same shape as imageimage, with composite imageobscur-ing imagewhere the image shapes overlap. Note this differs fromover be-cause the portion ofcomposite imageoutsideimage’s shape does not appearin the result.
XorThe result is the image data from bothcomposite imageand imagethat isoutside the overlap region. The overlap region will be blank.
PlusThe result is just the sum of the image data. Output values arecropped to255 (no overflow). This operation is independent of the mattechannels.
1 ImageMagick Utilities 13
MinusThe result ofcomposite image- image, with underflow cropped to zero. Thematte channel is ignored (set to 255, full coverage).
AddThe result ofcomposite image+ image, with overflow wrapping around(mod256).
SubtractThe result ofcomposite image- image, with underflow wrapping around(mod 256). Theadd and subtract operators can be used to perform re-versible transformations.
DifferenceThe result of abs(composite image- image). This is useful for comparingtwo very similar images.
MultiplyThe result ofcomposite image* image. This is useful for the creation ofdrop-shadows.
BumpmapThe resultimageshaded bycomposite image.
CopyThe resulting image isimagereplaced withcomposite image. Here the matteinformation is ignored.
CopyRedThe resulting image is the red layer inimagereplaced with the red layer incomposite image. The other layers are copied untouched.
CopyGreenThe resulting image is the green layer inimagereplaced with the green layerin composite image. The other layers are copied untouched.
CopyBlueThe resulting image is the blue layer inimagereplaced with the blue layerin composite image. The other layers are copied untouched.
CopyOpacityThe resulting image is the matte layer inimagereplaced with the matte layerin composite image. The other layers are copied untouched.
The image compositor requires a matte, or alpha channel in the image for someoperations. This extra channel usually defines a mask which represents a sort of acookie-cutter for the image. This is the case when matte is 255 (full coverage) forpixels inside the shape, zero outside, and between zero and 255 on the boundary.For certain operations, ifimagedoes not have a matte channel, it is initializedwith 0 for any pixel matching in color to pixel location (0,0), otherwise 255 (towork properlyborderwidth must be 0).
-compress
�
type
�
the type of image compression
Choices are:None, BZip, Fax, Group4, JPEG, Lossless, LZW, RLEor Zip.
14 ImageMagick
Specify+compressto store the binary image in an uncompressed format. Thedefault is the compression type of the specified image file.
If LZW compression is specified but LZW compression has not been enabled,the image data will be written in an uncompressed LZW format that can be readby LZW decoders. This may result in larger-than-expected GIF files.
“Lossless” refers to lossless JPEG, which is only available if the JPEG libraryhas been patched to support it.
Use the-quality option to set the compression level to be used by JPEG, PNG,MIFF, and MPEG encoders. Use the-sampling-factoroption to set the samplingfactor to be used by JPEG, MPEG, and YUV encoders for downsampling thechroma channels.
-contrast enhance or reduce the image contrast
This option enhances the intensity differences between thelighter and darkerelements of the image. Use-contrast to enhance the image or+contrast toreduce the image contrast.
For a more pronounced effect you can repeat the option:
convert rose: -contrast -contrast rose_c2.png
-convolve
�
kernel
�
convolve image with the specified convolution kernel
The kernel is specified as a comma-separated list of integers, ordered left-toright, starting with the top row. The order of the kernel is determined by thesquare root of the number of entries. Presently only square kernels are supported.
-crop
�
width
�
x
�
height
��
+-
��
x
��
+-
��
y
��
%
�
preferred size and locationof the cropped image
See-geometryfor details about the geometry specification.
The width and height give the size of the image that remains after cropping, andx andy are offsets that give the location of the top left corner of the croppedimage with respect to the original image. To specify the amount to be removed,use-shaveinstead.
If the x andy offsets are present, a single image is generated, consisting of thepixels from the cropping region. The offsets specify the location of the upperleft corner of the cropping region measured downward and rightward with re-spect to the upper left corner of the image. If the-gravity option is present withNorthEast, East,or SouthEastgravity, it gives the distance leftward from theright edge of the image to the right edge of the cropping region. Similarly, ifthe -gravity option is present withSouthWest, South,or SouthEastgravity, thedistance is measured upward between the bottom edges.
1 ImageMagick Utilities 15
If the x andy offsets are omitted, a set of tiles of the specified geometry,coveringthe entire input image, is generated. The rightmost tiles and the bottom tiles aresmaller if the specified geometry extends beyond the dimensions of the inputimage.
-cycle
�
amount
�
displace image colormap by amount
Amountdefines the number of positions each colormap entry is shifted.
-debug
�
events
�
enable debug printout
Theevents parameter specifies which events are to be logged. It can be eitherNone, All , or a comma-separated list consisting of one or more of the fol-lowing domains:Annotate , Blob , Cache , Coder , Configure , Locale ,Render , Resource , Transform , X11, or User . For example, to log cacheand blob events, use
convert -debug "Cache,Blob" rose: rose.png
The “User” domain is normally empty, but developers can log ”User” events intheir private copy of ImageMagick.
Use the-log option to specify the format for debugging output.
Use+debugto turn off all logging.
-deconstruct break down an image sequence into constituent parts
This option compares each image with the next in a sequence and returns themaximum bounding region of any pixel differences it discovers. This methodcan undo a coalesced sequence returned by the-coalesceoption, and is usefulfor removing redundant information from a GIF or MNG animation.
The sequence of images is terminated by the appearance of anyoption. If the-deconstructoption appears after all of the input images, all images are decon-structed.
-delay
�
1/100ths of a second
�
display the next image after pausing
This option is useful for regulating the animation of image sequencesDelay/100seconds must expire before the display of the next image. Thedefault is no delaybetween each showing of the image sequence. The maximum delay is 65535.
You can specify a delay range (e.g.-delay 10-500) which sets the minimum andmaximum delay.
16 ImageMagick
-density
�
width
�
x
�
height
�
vertical and horizontal resolution in pixels of theimage
This option specifies an image density when decoding aPostScriptor PortableDocument page. The default is 72 dots per inch in the horizontal and verticaldirection. This option is used in concert with-page.
-depth
�
value
�
depth of the image
This is the number of bits in a color sample within a pixel. Theonly acceptablevalues are 8 or 16. Use this option to specify the depth of raw images whosedepth is unknown such as GRAY, RGB, or CMYK, or to change the depth ofany image after it has been read.
-descend obtain image by descending window hierarchy
-despeckle reduce the speckles within an image
-displace
�
horizontal scale
�
x
�
vertical scale
�
shift image pixels as definedby a displacement map
With this option,composite imageis used as a displacement map. Black, withinthe displacement map, is a maximum positive displacement. White is a max-imum negative displacement and middle gray is neutral. The displacement isscaled to determine the pixel shift. By default, the displacement applies in boththe horizontal and vertical directions. However, if you specify mask, compositeimageis the horizontal X displacement andmaskthe vertical Y displacement.
-display
�
host:display[.screen]
�
specifies the X server to contact
This option is used with convert for obtaining image or font from this X server.SeeX(1).
-dispose
�
method
�
GIF disposal method
The Disposal Method indicates the way in which the graphic isto be treated afterbeing displayed.
Here are the valid methods:
Undefined No disposal specified.None Do not dispose between frames.Background Overwrite the image area with
the background color.
1 ImageMagick Utilities 17
Previous Overwrite the image area withwhat was there prior to renderingthe image.
-dissolve
�
percent
�
dissolve an image into another by the given percent
The opacity of the composite image is multiplied by the givenpercent, then it iscomposited over the main image.
-dither apply Floyd/Steinberg error diffusion to the image
The basic strategy of dithering is to trade intensity resolution for spatial reso-lution by averaging the intensities of several neighboringpixels. Images whichsuffer from severe contouring when reducing colors can be improved with thisoption.
The-colorsor -monochromeoption is required for this option to take effect.
Use+dither to turn off dithering and to render PostScript without text or graphicaliasing.
-draw
�
string
�
annotate an image with one or more graphic primitives
Use this option to annotate an image with one or more graphic primitives. Theprimitives include shapes, text, transformations, and pixel operations. The shapeprimitives are
point x,yline x0,y0 x1,y1rectangle x0,y0 x1,y1roundRectangle x0,y0 x1,y1 wc,hcarc x0,y0 x1,y1 a0,a1ellipse x0,y0 rx,ry a0,a1circle x0,y0 x1,y1polyline x0,y0 ... xn,ynpolygon x0,y0 ... xn,ynBezier x0,y0 ... xn,ynpath path specificationimage operator x0,y0 w,h filename
The text primitive is
text x0,y0 string
The text gravity primitive is
18 ImageMagick
gravity NorthWest, North, NorthEast, West, Center,East, SouthWest, South, or SouthEast
The text gravity primitive only affects the placement of text and does not interactwith the other primitives. It is equivalent to using the-gravity commandlineoption, except that it is limited in scope to the-draw option in which it appears.
The transformation primitives are
rotate degreestranslate dx,dyscale sx,syskewX degreesskewY degrees
The pixel operation primitives are
color x0,y0 methodmatte x0,y0 method
The shape primitives are drawn in the color specified in the preceding-strokeoption. Except for theline andpoint primitives, they are filled with the colorspecified in the preceding-fill option. For unfilled shapes, use-fill none .
Point requires a single coordinate.
Line requires a start and end coordinate.
Rectangleexpects an upper left and lower right coordinate.
RoundRectanglehas the upper left and lower right coordinates and the widthand height of the corners.
Circle has a center coordinate and a coordinate for the outer edge.
UseArc to circumscribe an arc within a rectangle. Arcs require a start and endpoint as well as the degree of rotation (e.g. 130,30 200,100 45,90).
Use Ellipse to draw a partial ellipse centered at the given point with thex-axis and y-axis radius and start and end of arc in degrees (e.g. 100,100 100,1500,360).
Finally, polyline and polygon require three or more coordinates to define itsboundaries. Coordinates are integers separated by an optional comma. For ex-ample, to define a circle centered at 100,100 that extends to 150,150 use:
-draw ’circle 100,100 150,150’
Paths(See Paths) represent an outline of an object which is definedin terms ofmoveto (set a new current point), lineto (draw a straight line), curveto (draw a
1 ImageMagick Utilities 19
curve using a cubic Bezier), arc (elliptical or circular arc) and closepath (closethe current shape by drawing a line to the last moveto) elements. Compoundpaths (i.e., a path with subpaths, each consisting of a single moveto followed byone or more line or curve operations) are possible to allow effects such as “donutholes” in objects.
Use image to composite an image with another image. Follow the image key-word with the composite operator, image location, image size, and filename:
-draw ’image Over 100,100 225,225 image.jpg’
You can use 0,0 for the image size, which means to use the actual dimensionsfound in the image header. Otherwise, it will be scaled to thegiven dimensions.See-composefor a description of the composite operators.
Usetext to annotate an image with text. Follow the text coordinates with a string.If the string has embedded spaces, enclose it in double quotes. Optionally youcan include the image filename, type, width, height, or otherimage attribute byembedding special format character. See-commentfor details.
For example,
-draw ’text 100,100 "%m:%f %wx%h"’
annotates the image withMIFF:bird.miff 512x480 for an image titledbird.miff and whose width is 512 and height is 480.
If the first character ofstring is @, the text is read from a file titled by theremaining characters in the string.
Rotate rotates subsequent shape primitives and text primitives about the origenof the main image. If the-region option precedes the-draw option, the origenfor transformations is the upper left corner of the region.
Translate translates them.
Scalescales them.
SkewX andSkewY skew them with respect to the origen of the main image orthe region.
The transformations modify the current affine matrix, whichis initialized fromthe initial affine matrix defined by the-affine option. Transformations are cu-mulative within the-draw option. The initial affine matrix is not affected; thatmatrix is only changed by the appearance of another-affine option. If another-draw option appears, the current affine matrix is reinitialized from the initialaffine matrix.
Usecolor to change the color of a pixel to the fill color (see-fill ). Follow thepixel coordinate with a method:
point
20 ImageMagick
replacefloodfillfilltoborderreset
Consider the target pixel as that specified by your coordinate. Thepoint methodrecolors the target pixel. Thereplacemethod recolors any pixel that matches thecolor of the target pixel.Floodfill recolors any pixel that matches the color ofthe target pixel and is a neighbor, whereasfilltoborder recolors any neighborpixel that is not the border color. Finally,resetrecolors all pixels.
Usematte to the change the pixel matte value to transparent. Follow the pixelcoordinate with a method (see thecolor primitive for a description of meth-ods). Thepoint method changes the matte value of the target pixel. Thereplacemethod changes the matte value of any pixel that matches the color of the targetpixel. Floodfill changes the matte value of any pixel that matches the color ofthe target pixel and is a neighbor, whereasfilltoborder changes the matte valueof any neighbor pixel that is not the border color (-bordercolor). Finally resetchanges the matte value of all pixels.
You can set the primitive color, font, and font bounding box color with -fill , -font, and-box respectively. Options are processed in command line order so besure to use these optionsbeforethe-draw option.
-edge
�
radius
�
detect edges within an image
-emboss
�
radius
�
emboss an image
-encoding
�
type
�
specify the text encoding
Choose fromAdobeCustom, AdobeExpert, AdobeStandard, AppleRoman, BIG5,GB2312, Latin 2, None, SJIScode, Symbol, Unicode, Wansung.
-endian
�
type
�
specify endianness (MSB or LSB) of output image
Use+endian to revert to unspecified endianness.
-enhance apply a digital filter to enhance a noisy image
-equalize perform histogram equalization to the image
1 ImageMagick Utilities 21
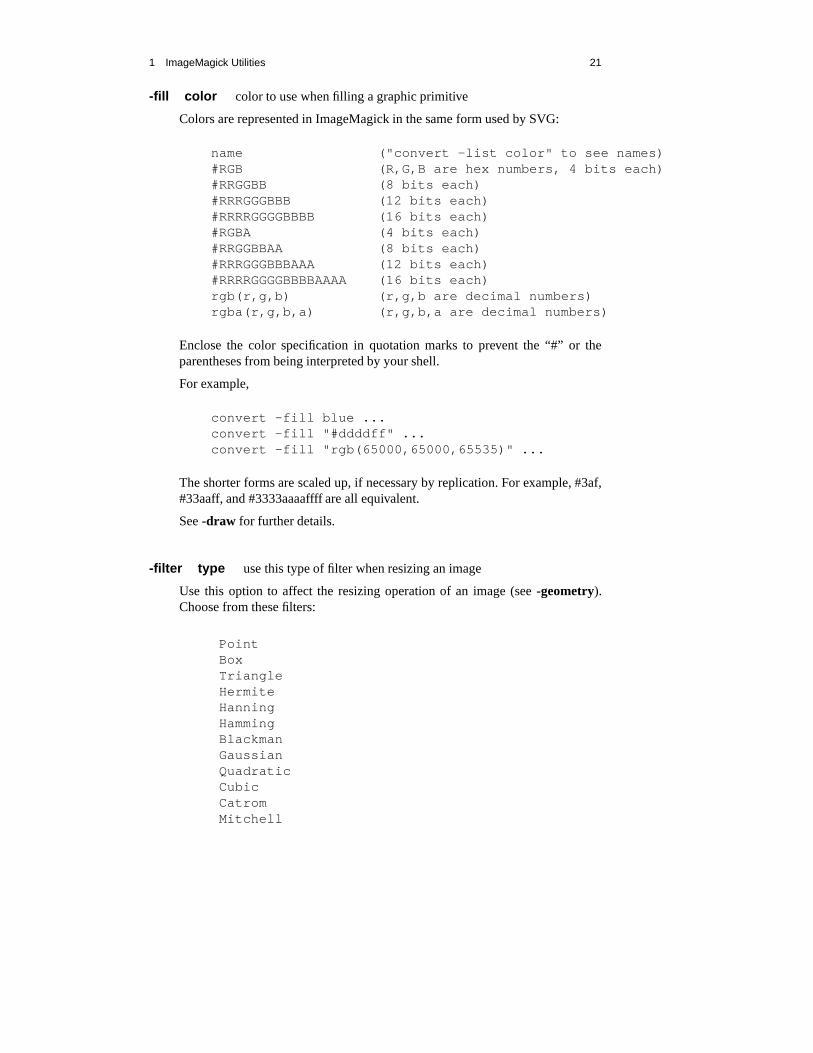
-fill
�
color
�
color to use when filling a graphic primitive
Colors are represented in ImageMagick in the same form used by SVG:
name ("convert -list color" to see names)#RGB (R,G,B are hex numbers, 4 bits each)#RRGGBB (8 bits each)#RRRGGGBBB (12 bits each)#RRRRGGGGBBBB (16 bits each)#RGBA (4 bits each)#RRGGBBAA (8 bits each)#RRRGGGBBBAAA (12 bits each)#RRRRGGGGBBBBAAAA (16 bits each)rgb(r,g,b) (r,g,b are decimal numbers)rgba(r,g,b,a) (r,g,b,a are decimal numbers)
Enclose the color specification in quotation marks to prevent the “#” or theparentheses from being interpreted by your shell.
For example,
convert -fill blue ...convert -fill "#ddddff" ...convert -fill "rgb(65000,65000,65535)" ...
The shorter forms are scaled up, if necessary by replication. For example, #3af,#33aaff, and #3333aaaaffff are all equivalent.
See-draw for further details.
-filter
�
type
�
use this type of filter when resizing an image
Use this option to affect the resizing operation of an image (see-geometry).Choose from these filters:
PointBoxTriangleHermiteHanningHammingBlackmanGaussianQuadraticCubicCatromMitchell
22 ImageMagick
LanczosBesselSinc
The default filter isLanczos
-flatten flatten a sequence of images
The sequence of images is replaced by a single image created by composingeach image after the first over the first image.
The sequence of images is terminated by the appearance of anyoption. If the-flatten option appears after all of the input images, all images are flattened.
-flip create a “mirror image”
reflect the scanlines in the vertical direction.
-flop create a “mirror image”
reflect the scanlines in the horizontal direction.
-font
�
name
�
use this font when annotating the image with text
You can tag a font to specify whether it is a PostScript, TrueType, or OPTION1font. For example,Arial.ttf is a TrueType font,ps:helvetica is PostScript,andx:fixed is OPTION1.
-foreground
�
color
�
define the foreground color
The color is specified using the format described under the-fill option.
-format
�
type
�
the image format type
When used with themogrify utility, this option will convert any image to theimage format you specify. SeeImageMagick(1)for a list of image format typessupported byImageMagick.
By default the file is written to its original name. However, if the filename exten-sion matches a supported format, the extension is replaced with the image formattype specified with-format . For example, if you specifytiff as the format typeand the input image filename isimage.gif, the output image filename becomesimage.tiff.
1 ImageMagick Utilities 23
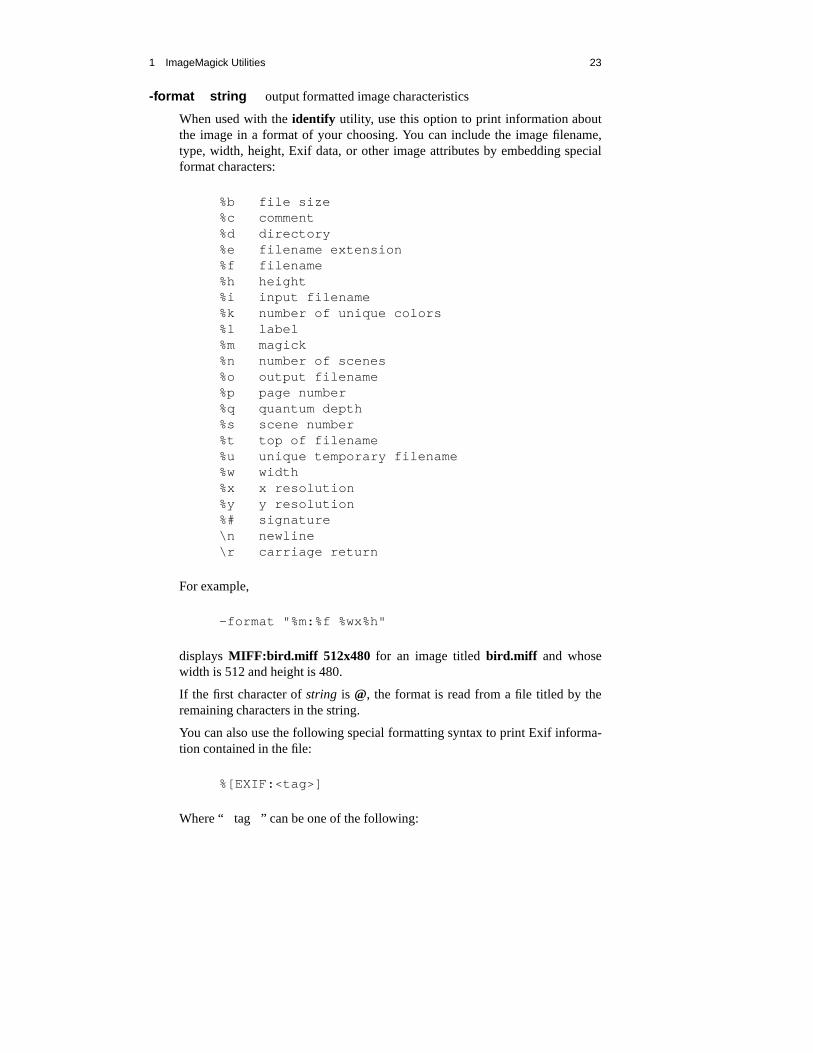
-format
�
string
�
output formatted image characteristics
When used with theidentify utility, use this option to print information aboutthe image in a format of your choosing. You can include the image filename,type, width, height, Exif data, or other image attributes byembedding specialformat characters:
%b file size%c comment%d directory%e filename extension%f filename%h height%i input filename%k number of unique colors%l label%m magick%n number of scenes%o output filename%p page number%q quantum depth%s scene number%t top of filename%u unique temporary filename%w width%x x resolution%y y resolution%# signature\n newline\r carriage return
For example,
-format "%m:%f %wx%h"
displaysMIFF:bird.miff 512x480 for an image titledbird.miff and whosewidth is 512 and height is 480.
If the first character ofstring is @, the format is read from a file titled by theremaining characters in the string.
You can also use the following special formatting syntax to print Exif informa-tion contained in the file:
%[EXIF:<tag>]
Where “
�
tag
�
” can be one of the following:
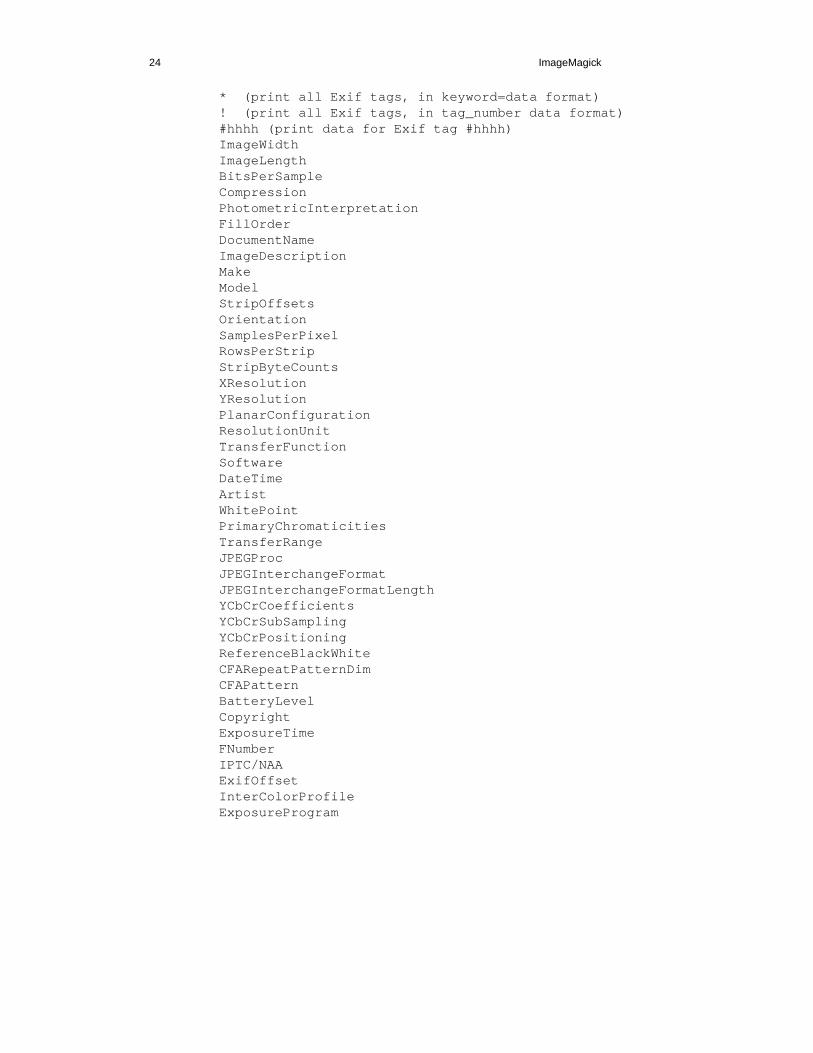
24 ImageMagick
* (print all Exif tags, in keyword=data format)! (print all Exif tags, in tag_number data format)#hhhh (print data for Exif tag #hhhh)ImageWidthImageLengthBitsPerSampleCompressionPhotometricInterpretationFillOrderDocumentNameImageDescriptionMakeModelStripOffsetsOrientationSamplesPerPixelRowsPerStripStripByteCountsXResolutionYResolutionPlanarConfigurationResolutionUnitTransferFunctionSoftwareDateTimeArtistWhitePointPrimaryChromaticitiesTransferRangeJPEGProcJPEGInterchangeFormatJPEGInterchangeFormatLengthYCbCrCoefficientsYCbCrSubSamplingYCbCrPositioningReferenceBlackWhiteCFARepeatPatternDimCFAPatternBatteryLevelCopyrightExposureTimeFNumberIPTC/NAAExifOffsetInterColorProfileExposureProgram
1 ImageMagick Utilities 25
SpectralSensitivityGPSInfoISOSpeedRatingsOECFExifVersionDateTimeOriginalDateTimeDigitizedComponentsConfigurationCompressedBitsPerPixelShutterSpeedValueApertureValueBrightnessValueExposureBiasValueMaxApertureValueSubjectDistanceMeteringModeLightSourceFlashFocalLengthMakerNoteUserCommentSubSecTimeSubSecTimeOriginalSubSecTimeDigitizedFlashPixVersionColorSpaceExifImageWidthExifImageLengthInteroperabilityOffsetFlashEnergySpatialFrequencyResponseFocalPlaneXResolutionFocalPlaneYResolutionFocalPlaneResolutionUnitSubjectLocationExposureIndexSensingMethodFileSourceSceneType
Surround the format specification with quotation marks to prevent your shellfrom misinterpreting any spaces and square brackets.
-frame
�
width
�
x
�
height
�
+
�
outer bevel width
�
+
�
inner bevel width
�
surround the image with an ornamental border
26 ImageMagick
See-geometry for details about the geometry specification. The-frame optionis not affected by the-gravity option.
The color of the border is specified with the-mattecolor command line option.
-frame include the X window frame in the imported image
-fuzz
�
distance
��
%
�
colors within this distance are considered equal
A number of algorithms search for a target color. By default the color must beexact. Use this option to match colors that are close to the target color in RGBspace. For example, if you want to automatically trim the edges of an image with-trim but the image was scanned and the target background color maydiffer bya small amount. This option can account for these differences.
Thedistancecan be in absolute intensity units or, by appending“%” , as a per-centage of the maximum possible intensity (255 or 65535).
-gamma
�
value
�
level of gamma correction
The same color image displayed on two different workstations may look differ-ent due to differences in the display monitor. Use gamma correction to adjustfor this color difference. Reasonable values extend from0.8 to 2.3. Gamma lessthan 1.0 darkens the image and gamma greater than 1.0 lightens it.
You can apply separate gamma values to the red, green, and blue channels of theimage with a gamma value list delimited with slashes (e.g.,1.7/2.3/1.2).
Use+gammavalueto set the image gamma level without actually adjusting theimage pixels. This option is useful if the image is of a known gamma but not setas an image attribute (e.g. PNG images).
-Gaussian
�
radius
��
x
�
sigma
��
blur the image with a Gaussian operator
Use the given radius and standard deviation (sigma).
-geometry
�
width
�
x
�
height
��
+-
��
x
��
+-
��
y
��
%
��
@
� �
!
�������
pre-ferred size and location of the Image window.
By default, the window size is the image size and the locationis chosen by youwhen it is mapped.
By default, the width and height are maximum values. That is,the image is ex-panded or contracted to fit the width and height value while maintaining the as-pect ratio of the image.Append an exclamation point to the geometry to force theimage size to exactly the size you specify. For example, if you specify640x480!the image width is set to 640 pixels and height to 480.

1 ImageMagick Utilities 27
If only the width is specified, the width assumes the value andthe height ischosen to maintain the aspect ratio of the image. Similarly,if only the height isspecified (e.g.,-geometry x256 ), the width is chosen to maintain the aspectratio.
To specify a percentage width or height instead, append %. The image size ismultiplied by the width and height percentages to obtain thefinal image dimen-sions. To increase the size of an image, use a value greater than 100 (e.g. 125%).To decrease an image’s size, use a percentage less than 100.
Use@to specify the maximum area in pixels of an image.
Use
�
to change the dimensions of the imageonly if its width or height exceedsthe geometry specification.
�
resizes the imageonly if both of its dimensions areless than the geometry specification. For example, if you specify ’640x480
�
’and the image size is 256x256, the image size does not change.However, if theimage is 512x512 or 1024x1024, it is resized to 480x480. Enclose the geometryspecification in quotation marks to prevent the
�
or
�
from being interpreted byyour shell as a file redirection.
When used withanimateanddisplay, offsets are handled in the same manneras in X(1) and the-gravity option is not used. If thex is negative, the offsetis measured leftward from the right edge of the screen to the right edge of theimage being displayed. Similarly, negativey is measured between the bottomedges. The offsets are not affected by “%”; they are always measured in pixels.
When used as acompositeoption,-geometrygives the dimensions of the im-age and its location with respect to the composite image. If the -gravity optionis present withNorthEast, East,or SouthEastgravity, thex represents the dis-tance from the right edge of the image to the right edge of the composite image.Similarly, if the -gravity option is present withSouthWest, South,or SouthEastgravity,y is measured between the bottom edges. Accordingly, a positive offsetwill never point in the direction outside of the image. The offsets are not affectedby “%”; they are always measured in pixels. To specify the dimensions of thecomposite image, use the-resizeoption.
When used as aconvert, import or mogrify option, -geometry is synonymouswith -resizeand specifies the size of the output image. The offsets, if present,are ignored.
When used as amontageoption,-geometryspecifies the image size and bordersize for each tile; default is 256x256+0+0. Negative offsets (border dimensions)are meaningless. The-gravity option affects the placement of the image withinthe tile; the default gravity for this purpose isCenter. If the “%” sign appears inthe geometry specification, the tile size is the specified percentage of the originaldimensions of the first tile. To specify the dimensions of themontage, use the-resizeoption.
-gravity
�
type
�
direction primitive gravitates to when annotating the image.
28 ImageMagick
Choices are: NorthWest, North, NorthEast, West, Center, East, SouthWest, South,SouthEast.
The direction you choose specifies where to position the textwhen annotatingthe image. For exampleCentergravity forces the text to be centered within theimage. By default, the image gravity isNorthWest. See-draw for more detailsabout graphic primitives. Only the text primitive is affected by the-gravity op-tion.
The-gravity option is also used in concert with the-geometryoption and otheroptions that take
�
geometry
�
as a parameter, such as the-crop option. See-geometry for details of how the-gravity option interacts with the
�
x
�
and
�
y
�
parameters of a geometry specification.
When used as an option tocomposite, -gravity gives the direction that the imagegravitates within the composite.
When used as an option tomontage, -gravity gives the direction that an imagegravitates within a tile. The default gravity isCenterfor this purpose.
-green-primary
�
x
�
,
�
y
�
green chromaticity primary point
-help print usage instructions
-iconGeometry
�
geometry
�
specify the icon geometry
Offsets, if present in the geometry specification, are handled in the same manneras the-geometryoption, using X11 style to handle negative offsets.
-iconic iconic animation
-immutable make image immutable
-implode
�
factor
�
implode image pixels about the center
-intent
�
type
�
use this type of rendering intent when managing the image color
Use this option to affect the the color management operationof an image (see-profile). Choose from these intents:Absolute, Perceptual, Relative, Satura-tion
The default intent is undefined.

1 ImageMagick Utilities 29
-interlace
�
type
�
the type of interlacing scheme
Choices are:None, Line, Plane,or Partition . The default isNone.
This option is used to specify the type of interlacing schemefor raw image for-mats such asRGB or YUV .
Nonemeans do not interlace (RGBRGBRGBRGBRGBRGB...),
Line uses scanline interlacing (RRR...GGG...BBB...RRR...GGG...BBB...), and
Planeuses plane interlacing (RRRRRR...GGGGGG...BBBBBB...).
Partition is like plane except the different planes are saved to individual files(e.g. image.R, image.G, and image.B).
UseLine or Plane to create aninterlaced PNG or GIF or progressive JPEGimage.
-label
�
name
�
assign a label to an image
Use this option to assign a specific label to the image, when writing to an imageformat that supports labels, such as TIFF, PNG, MIFF, or PostScript. You caninclude the the image filename, type, width, height, or otherimage attribute byembedding special format character. A label is not drawn on the image, but isembedded in the image datastream via a “Label” tag or similarmechanism. Ifyou want the label to be visible on the image itself, use the-draw option. See-commentfor details.
For example,
-label "%m:%f %wx%h"
produces an image label ofMIFF:bird.miff 512x480 for an image titledbird.miffand whose width is 512 and height is 480.
If the first character ofstring is @, the image label is read from a file titled bythe remaining characters in the string.
When converting toPostScript, use this option to specify a header string to printabove the image. Specify the label font with-font.
When creating a montage, by default the label associated with an image is dis-played with the corresponding tile in the montage. Use the+label option tosuppress this behavior.
-lat
�
width
�
x
�
height
��
+-
��
offset
��
%
�
perform local adaptive threshold-ing
Perform local adaptive thresholding using the specified width, height, and offset.The offset is a distance in sample space from the mean, as an absolute integerranging from 0 to the maximum sample value or as a percentage.
30 ImageMagick
-level
�
black point
��
,
�
white point
���
%
��
,
�
gamma
��
adjust the level ofimage contrast
Give one, two or three values delimited with commas: black, white, and gamma(e.g. 10,65000,1.0 or 2%,98%,0.5). The black and white points range from 0 toMaxRGB or from 0 to 100%; if the white point is omitted it is setto MaxRGB-black point. If a “%” sign is present anywhere in the string, the black and whitepoints are percentages of MaxRGB. Gamma is an exponent that ranges from 0.1to 10.; if it is omitted, the default of 1.0 (no gamma correction) is assumed.
-limit
�
type
� �
value
�
Disk, File, Map, or Memory resource limit
The value for File is in number of files and the values for the other resourcesare in Megabytes. By default the limits are 64 files, 512MB memory, 1024MBmap, and unlimited disk, but these are adjusted at startup time on platforms thatcan provide information about available resources. When the limit is reached,ImageMagick will fail in some fashion, or take compensatingactions if possi-ble. For example,-limit memory 32 -limit map 64 limits memoryWhen the pixel cache reaches the memory limit it uses memory mapping. Whenthat limit is reached it goes to disk. If disk has a hard limit,the program will fail.
You can use the option-list resource to find out the limits.
-linewidth the line width for subsequent draw operations
-list
�
type
�
the type of list
Choices are:Delegate, Format, Magic, Module, Resource, or Type.
This option lists information about the ImageMagick configuration.
-log
�
string
�
This option specifies the format for the log printed when the-debugoption is active.
You can display the following components by embedding special format char-acters:
%d domain%e event%f function%l line%m module%p process ID%r real CPU time%t wall clock time%u user CPU time
1 ImageMagick Utilities 31
%% percent sign\n newline\r carriage return
For example:
convert -debug coders -log "%u %m:%l %e" in.gif out.png
The default behavior is to print all of the components.
-loop
�
iterations
�
add Netscape loop extension to your GIF animation
A value other than zero forces the animation to repeat itselfup to iterationstimes.
-magnify
�
factor
�
magnify the image
-map
�
filename
�
choose a particular set of colors from this image
[convertor mogrify]
By default, color reduction chooses an optimal set of colorsthat best representthe original image. Alternatively, you can choose a particular set of colors froman image file with this option.
Use+map to reduce all images in the image sequence that follows to a singleoptimal set of colors that best represent all the images. Thesequence of imagesis terminated by the appearance of any option. If the+map option appears afterall of the input images, all images are mapped.
-map
�
type
�
display image using this type.
[animateor display]
Choose from theseStandard Colormaptypes:
bestdefaultgrayredgreenblue
The X servermust support theStandard Colormapyou choose, otherwise anerror occurs. Uselist as the type anddisplay searches the list of colormap typesin top-to-bottom order until one is located. Seexstdcmap(1)for one way ofcreating Standard Colormaps.
32 ImageMagick
-mask
�
filename
�
Specify a clipping mask
The image read from the file is used as a clipping mask. It must have the samedimensions as the image being masked.
If the mask image contains an opacity channel, the opacity ofeach pixel is usedto define the mask. Otherwise, the intensity (gray level) of each pixel is used.
Use+mask to remove the clipping mask.
It is not necessary to use-clip to activate the mask;-clip is implied by-mask.
-matte store matte channel if the image has one
If the image does not have a matte channel, create an opaque one.
Use+matte to ignore the matte channel and to avoid writing a matte channel inthe output file.
-mattecolor
�
color
�
specify the color to be used with the-frame option
The color is specified using the format described under the-fill option.
-median
�
radius
�
apply a median filter to the image
-mode
�
value
�
mode of operation
-modulate
�
value
�
vary the brightness, saturation, and hue of an image
Specify the percent change in brightness, the color saturation, and the hue sepa-rated by commas. For example, to increase the color brightness by 20% and de-crease the color saturation by 10% and leave the hue unchanged, use:-modulate120,90.
-monochrome transform the image to black and white
-morph
�
frames
�
morphs an image sequence
Both the image pixels and size are linearly interpolated to give the appearanceof a meta-morphosis from one image to the next.
The sequence of images is terminated by the appearance of anyoption. If the-morph option appears after all of the input images, all images are morphed.
1 ImageMagick Utilities 33
-mosaic create a mosaic from an image or an image sequence
The -pageoption can be used to establish the dimensions of the mosaic and tolocate the images within the mosaic.
The sequence of images is terminated by the appearance of anyoption. If the-mosaicoption appears after all of the input images, all images are included inthe mosaic.
-name name an image
-negate replace every pixel with its complementary color
The red, green, and blue intensities of an image are negated.White becomesblack, yellow becomes blue, etc. Use+negateto only negate the grayscale pixelsof the image.
-noise
�
radius
�
type
�
add or reduce noise in an image
The principal function of noise peak elimination filter is tosmooth the objectswithin an image without losing edge information and withoutcreating undesiredstructures. The central idea of the algorithm is to replace apixel with its nextneighbor in value within a pixel window, if this pixel has been found to be noise.A pixel is defined as noise if and only if this pixel is a maximumor minimumwithin the pixel window.
Useradius to specify the width of the neighborhood.
Use +noise followed by a noise type to add noise to an image. Choose fromthese noise types:
UniformGaussianMultiplicativeImpulseLaplacianPoisson
-noop NOOP (no option)
The-noopoption can be used to terminate a group of images and reset alloptionsto their default values, when no other option is desired.
-normalize transform image to span the full range of color values
This is a contrast enhancement technique.
34 ImageMagick
-opaque
�
color
�
change this color to the pen color within the image
The color is specified using the format described under the-fill option.
See-fill for more details.
-page
�
width
�
x
�
height
��
+-
��
x
��
+-
��
y
��
%
��
!
�������
size and loca-tion of an image canvas
Use this option to specify the dimensions of thePostScriptpage in dots per inchor a TEXT page in pixels. The choices for a PostScript page are:
11x17 792 1224Ledger 1224 792Legal 612 1008Letter 612 792LetterSmall 612 792ArchE 2592 3456ArchD 1728 2592ArchC 1296 1728ArchB 864 1296ArchA 648 864A0 2380 3368A1 1684 2380A2 1190 1684A3 842 1190A4 595 842A4Small 595 842A5 421 595A6 297 421A7 210 297A8 148 210A9 105 148A10 74 105B0 2836 4008B1 2004 2836B2 1418 2004B3 1002 1418B4 709 1002B5 501 709C0 2600 3677C1 1837 2600C2 1298 1837C3 918 1298C4 649 918C5 459 649C6 323 459

1 ImageMagick Utilities 35
Flsa 612 936Flse 612 936HalfLetter 396 612
For convenience you can specify the page size by media (e.g. A4, Ledger, etc.).Otherwise,-pagebehaves much like-geometry(e.g.-page letter+43+43
�
).
This option is also used to place subimages when writing to a multi-image formatthat supports offsets, such as GIF89 and MNG. When used for this purpose theoffsets are always measured from the top left corner of the canvas and are notaffected by the-gravity option. To position a GIF or MNG image, use-page
�
+-
��
x
��
+-
��
y
�
(e.g. -page +100+200). When writing to a MNG file, a-pageoption appearing ahead of the first image in the sequence withnonzero widthand height defines the width and height values that are written in theMHDRchunk. Otherwise, the MNG width and height are computed fromthe boundingbox that contains all images in the sequence. When writing a GIF89 file, onlythe bounding box method is used to determine its dimensions.
For a PostScript page, the image is sized as in-geometryand positioned relativeto the lower left hand corner of the page by
�
+-
��
xoffset
��
+-
��
y offset
�
.Use-page 612x792
�
, for example, to center the image within the page. Ifthe image size exceeds the PostScript page, it is reduced to fit the page. Thedefault gravity for the-pageoption isNorthWest, i.e., positivex andy offsetaremeasured rightward and downward from the top left corner of the page, unlessthe-gravity option is present with a value other thanNorthWest.
The default page dimensions for a TEXT image is 612x792.
This option is used in concert with-density.
Use+pageto remove the page settings for an image.
-paint
�
radius
�
simulate an oil painting
Each pixel is replaced by the most frequent color in a circular neighborhoodwhose width is specified withradius.
-pause
�
seconds
�
pause between animation loops [animate]
Pause for the specified number of seconds before repeating the animation.
-pause
�
seconds
�
pause between snapshots [import]
Pause for the specified number of seconds before taking the next snapshot.
-pen
�
color
�
(This option has been replaced by the -fill option)
36 ImageMagick
-ping efficiently determine image characteristics
-pointsize
�
value
�
pointsize of the PostScript, OPTION1, or TrueType font
-preview
�
type
�
image preview type
Use this option to affect the preview operation of an image (e.g. convertfile.png -preview Gamma Preview:gamma.png ). Choose from thesepreviews:
RotateShearRollHueSaturationBrightnessGammaSpiffDullGrayscaleQuantizeDespeckleReduceNoiseAdd NoiseSharpenBlurThresholdEdgeDetectSpreadShadeRaiseSegmentSolarizeSwirlImplodeWaveOilPaintCharcoalDrawingJPEG
The default preview isJPEG.
-process
�
command
�
process a sequence of images
The sequence of images is terminated by the appearance of anyoption.
1 ImageMagick Utilities 37
If the -processoption appears after all of the input images, all images are pro-cessed.
-profile
�
filename
�
add ICM, IPTC, or generic profile to image
-profile filename adds an ICM (ICC color management), IPTC (newswireinformation), or a generic profile to the image.
Use +profile icm , +profile iptc , or +profile profile nameto remove the respective profile. Useidentify -verbose to find out whatprofiles are in the image file. Use+profile "*" to remove all profiles.
To extract a profile, the-profile option is not used. Instead, simply write the fileto an image format such asAPP1, 8BIM, ICM,or IPTC.
For example, to extract the Exif data (which is stored in JPEGfiles in theAPP1profile), use
convert cockatoo.jpg exifdata.app1
-quality
�
value
�
JPEG/MIFF/PNG compression level
For the JPEG and MPEG image formats, quality is 0 (lowest image quality andhighest compression) to 100 (best quality but least effective compression). Thedefault quality is 75. Use the-sampling-factor option to specify the factors forchroma downsampling.
For the MIFF image format, quality/10 is the zlib compression level, which is0 (worst but fastest compression) to 9 (best but slowest). Ithas no effect on theimage appearance, since the compression is always lossless.
For the MNG and PNG image formats, the quality value sets the zlib compres-sion level (quality / 10) and filter-type (quality % 10). Compression levels rangefrom 0 (fastest compression) to 100 (best but slowest). For compression level 0,the Huffman-only strategy is used, which is fastest but not necessarily the worstcompression.
If filter-type is 4 or less, the specified filter-type is used for all scanlines:
0: none1: sub2: up3: average4: Paeth
If filter-type is 5, adaptive filtering is used when quality isgreater than 50 andthe image does not have a color map, otherwise no filtering is used.
If filter-type is 6, adaptive filtering withminimum-sum-of-absolute-valuesisused.
38 ImageMagick
Only if the output is MNG, if filter-type is 7, the LOCO color transformationand adaptive filtering withminimum-sum-of-absolute-valuesare used.
The default is quality is 75, which means nearly the best compression with adap-tive filtering. The quality setting has no effect on the appearance of PNG andMNG images, since the compression is always lossless.
For further information, see the PNG specification.
When writing a JNG image with transparency, two quality values are required,one for the main image and one for the grayscale image that conveys the opacitychannel. These are written as a single integer equal to the main image qualityplus 1000 times the opacity quality. For example, if you wantto use quality 75for the main image and quality 90 to compress the opacity data, use-quality90075 .
-raise
�
width
�
x
�
height
�
lighten or darken image edges
This will create a 3-D effect. See-geometryfor details details about the geom-etry specification. Offsets are not used.
Use-raise to create a raised effect, otherwise use+raise.
-red-primary
�
x
�
,
�
y
�
red chromaticity primary point
-region
�
width
�
x
�
height
��
+-
��
x
��
+-
��
y
�
apply options to a portion ofthe image
Thex andy offsets are treated in the same manner as in-crop.
-remote perform a remote operation
The only command recognized at this time is the name of an image file to load.
-render render vector operations
Use+render to turn off rendering vector operations.
-resize
�
width
�
x
�
height
��
%
��
@
��
!
�������
resize an image
This is an alias for the-geometryoption and it behaves in the same manner. Ifthe-filter option precedes the-resizeoption, the specified filter is used.
There are some exceptions:
When used as acompositeoption,-resizeconveys the preferred size of the outputimage, while-geometryconveys the size and placement of thecomposite imagewithin the main image.

1 ImageMagick Utilities 39
When used as amontageoption,-resizeconveys the preferred size of the mon-tage, while-geometryconveys information about the tiles.
-roll
�
+-
��
x
��
+-
��
y
�
roll an image vertically or horizontally
See-geometryfor details the geometry specification. Thex andy offsets are notaffected by the-gravity option.
A negativex offset rolls the image left-to-right. A negativey offset rolls theimage top-to-bottom.
-rotate
�
degrees
�������
apply Paeth image rotation to the image
Use
�
to rotate the image only if its width exceeds the height.
�
rotates the im-ageonly if its width is less than the height. For example, if you specify -rotate"-90
�
" and the image size is 480x640, the image is not rotated. However, ifthe image is 640x480, it is rotated by -90 degrees. If you use
�
or
�
, enclose itin quotation marks to prevent it from being misinterpreted as a file redirection.
Empty triangles left over from rotating the image are filled with the color de-fined asbackground (classbackgroundColor). The color is specified using theformat described under the-fill option.
-sample
�
geometry
�
scale image with pixel sampling
See-geometryfor details about the geometry specification.-sampleignores the-filter selection if the-filter option is present. Offsets, if present in the geometrystring, are ignored, and the-gravity option has no effect.
-sampling-factor
�
horizontal factor
�
x
�
vertical factor
�
sampling factorsused by JPEG or MPEG-2 encoder and YUV decoder/encoder.
This option specifies the sampling factors to be used by the JPEG encoder forchroma downsampling. If this option is omitted, the JPEG library will use itsown default values. When reading or writing the YUV format and when writ-ing the M2V (MPEG-2) format, use-sampling-factor 2x1 to specify the 4:2:2downsampling method.
-scale
�
geometry
�
scale the image.
See-geometry for details about the geometry specification.-scaleuses a sim-pler, faster algorithm, and it ignores the-filter selection if the-filter option ispresent. Offsets, if present in the geometry string, are ignored, and the-gravityoption has no effect.
40 ImageMagick
-scene
�
value
�
set scene number
This option sets the scene number of an image or the first imagein an imagesequence.
-scenes
�
value-value
�
range of image scene numbers to read
Each image in the range is read with the filename followed by a period (.) andthe decimal scene number. You can change this behavior by embedding a%d,%0Nd, %o, %0No, %x, or %0Nx printf format specification in the file name.For example,
montage -scenes 5-7 image.miff
makes a montage of files image.miff.5, image.miff.6, and image.miff.7, and
animate -scenes 0-12 image%02d.miff
animates files image00.miff, image01.miff, through image12.miff.
-screen specify the screen to capture
This option indicates that the GetImage request used to obtain the image shouldbe done on the root window, rather than directly on the specified window. In thisway, you can obtain pieces of other windows that overlap the specified window,and more importantly, you can capture menus or other popups that are indepen-dent windows but appear over the specified window.
-seed
�
value
�
pseudo-random number generator seed value
The value can be any integer in the range 1 to 2**31-1. Successive runs witha particular seed will generate the same sequence of pseudo-random numbers.If the -seedoption is not present, ImageMagick will generate a random seedfrom system timers, clocks, etc., so that successive runs will generate differentsequences. The pseudo-random numbers are used by options such as-noise, -spread, and theplasmaformat.
-segment
�
cluster threshold
�
x
�
smoothing threshold
�
segment an im-age
Segment an image by analyzing the histograms of the color components andidentifying units that are homogeneous with the fuzzy c-means technique.
Specifycluster thresholdas the number of pixels in each cluster must exceedthe the cluster threshold to be considered valid.Smoothing thresholdeliminatesnoise in the second derivative of the histogram. As the valueis increased, youcan expect a smoother second derivative. The default is 1.5.See “Image Seg-mentation” in the manual page fordisplayfor details.
1 ImageMagick Utilities 41
-shade
�
azimuth
�
x
�
elevation
�
shade the image using a distant light source
Specifyazimuthandelevationas the position of the light source. Use+shadetoreturn the shading results as a grayscale image.
-shadow
�
radius
��
x
�
sigma
��
shadow the montage
-shared-memory use shared memory
This option specifies whether the utility should attempt useshared memory forpixmaps. ImageMagick must be compiled with shared memory support, and thedisplay must support theMIT-SHMextension. Otherwise, this option is ignored.The default isTrue.
-sharpen
�
radius
��
x
�
sigma
��
sharpen the image
Use a Gaussian operator of the given radius and standard deviation (sigma).
-shave
�
width
�
x
�
height
��
%
�
shave pixels from the image edges
Specify the width of the region to be removed from both sides of the image andthe height of the regions to be removed from top and bottom.
-shear
�
x degrees
�
x
�
y degrees
�
shear the image along the X or Y axis
Use the specified positive or negative shear angle.
Shearing slides one edge of an image along the X or Y axis, creating a parallelo-gram. An X direction shear slides an edge along the X axis, while a Y directionshear slides an edge along the Y axis. The amount of the shear is controlled by ashear angle. For X direction shears,x degreesis measured relative to the Y axis,and similarly, for Y direction shearsy degreesis measured relative to the X axis.
Empty triangles left over from shearing the image are filled with the color de-fined asbackground (classbackgroundColor). The color is specified using theformat described under the-fill option.
-silent operate silently
-size
�
width
�
x
�
height
��
+offset
�
width and height of the image
Use this option to specify the width and height of raw images whose dimensionsare unknown such asGRAY , RGB, or CMYK . In addition to width and height,use-sizewith an offset to skip any header information in the image or tell thenumber of colors in aMAP image file, (e.g. -size 640x512+256).
For Photo CD images, choose from these sizes:
42 ImageMagick
192x128384x256768x5121536x10243072x2048
Finally, use this option to choose a particular resolution layer of a JBIG or JPEGimage (e.g. -size 1024x768).
-snaps
�
value
�
number of screen snapshots
Use this option to grab more than one image from the X server screen, to createan animation sequence.
-solarize
�
factor
�
negate all pixels above the threshold level
Specifyfactor as the percent threshold of the intensity (0 - 99.9%).
This option produces asolarizationeffect seen when exposing a photographicfilm to light during the development process.
-spread
�
amount
�
displace image pixels by a random amount
Amountdefines the size of the neighborhood around each pixel to choose a can-didate pixel to swap.
-stegano
�
offset
�
hide watermark within an image
Use an offset to start the image hiding some number of pixels from the be-ginning of the image. Note this offset and the image size. Youwill need thisinformation to recover the steganographic image (e.g. display -size 320x256+35stegano:image.png).
-stereo composite two images to create a stereo anaglyph
The left side of the stereo pair is saved as the red channel of the output im-age. The right side is saved as the green channel. Red-green stereo glasses arerequired to properly view the stereo image.
-stroke
�
color
�
color to use when stroking a graphic primitive
The color is specified using the format described under the-fill option.
See-draw for further details.
1 ImageMagick Utilities 43
-strokewidth
�
value
�
set the stroke width
See-draw for further details.
-swirl
�
degrees
�
swirl image pixels about the center
Degreesdefines the tightness of the swirl.
-text-font
�
name
�
font for writing fixed-width text
Specifies the name of the preferred font to use in fixed (typewriter style) format-ted text. The default is 14 pointCourier.
You can tag a font to specify whether it is a PostScript, TrueType, or OPTION1font. For example,Courier.ttf is a TrueType font andx:fixed is OP-TION1.
-texture
�
filename
�
name of texture to tile onto the image background
-threshold
�
value
���
green
�
,
�
blue
�
,
�
opacity
���
%
�
threshold the im-age
Create an image such that any pixel sample that is equal or exceeds the thresholdis reassigned the maximum intensity otherwise the minimum intensity.
If the green or blue value is omitted, these channels use the same value as thefirst one provided. If all three color values are the same, theresult is a bi-levelimage. If the opacity threshold is omitted, OpaqueOpacity will be used and anypartially transparent pixel will become fully transparent. If only a single 0 isprovided, auto-thresholding will be performed.
To generate an all-black or all-white image with the same dimensions as theinput image, you can use
convert -threshold 65535 in.png black.pngconvert -threshold 0,0 in.png white.png
-tile
�
filename
�
tile image when filling a graphic primitive
-tile
�
geometry
�
layout of images [montage]
-title
�
string
�
assign title to displayed image [animate, display, montage]
Use this option to assign a specific title to the image. This isassigned to theimage window and is typically displayed in the window title bar. Optionally you
44 ImageMagick
can include the image filename, type, width, height, Exif data, or other imageattribute by embedding special format characters described under the-formatoption.
For example,
-title "%m:%f %wx%h"
produces an image title ofMIFF:bird.miff 512x480 for an image titledbird.miff and whose width is 512 and height is 480.
-transform transform the image
This option applies the transformation matrix from a previous-affine option.
convert -affine 2,2,-2,2,0,0 -transform bird.ppm bird.jp g
-transparent
�
color
�
make this color transparent within the image
The color is specified using the format described under the-fill option.
-treedepth
�
value
�
tree depth for the color reduction algorithm
Normally, this integer value is zero or one. A zero or one tells display to choosean optimal tree depth for the color reduction algorithm
An optimal depth generally allows the best representation of the source imagewith the fastest computational speed and the least amount ofmemory. However,the default depth is inappropriate for some images. To assure the best represen-tation, try values between 2 and 8 for this parameter. Refer to quantize for moredetails.
The-colorsor -monochromeoption is required for this option to take effect.
-trim trim an image
This option removes any edges that are exactly the same coloras the cornerpixels. Use-fuzz to make-trim remove edges that are nearly the same color asthe corner pixels.
-type
�
type
�
the image type
Choose from:Bilevel, Grayscale, Palette, PaletteMatte, TrueColor , TrueCol-orMatte , ColorSeparation, ColorSeparationMatte, or Optimize.
Normally, when a format supports different subformats suchas grayscale andtruecolor, the encoder will try to choose an efficient subformat. The-type option
1 ImageMagick Utilities 45
can be used to overrride this behavior. For example, to prevent a JPEG frombeing written in grayscale format even though only gray pixels are present, use
convert bird.pgm -type TrueColor bird.jpg
Similarly, using-type TrueColorMatte will force the encoder to write analpha channel even though the image is opaque, if the output format supportstransparency.
-update
�
seconds
�
detect when image file is modified and redisplay.
Suppose that while you are displaying an image the file that iscurrently dis-played is over-written.display will automatically detect that the input file hasbeen changed and update the displayed image accordingly.
-units
�
type
�
the type of image resolution
Choose from:Undefined, PixelsPerInch, or PixelsPerCentimeter.
-unsharp
�
radius
��
x
�
sigma
���
+
�
amount
���
+
�
threshold
��
sharpenthe image with an unsharp mask operator
The -unsharp option sharpens an image. We convolve the image with a Gaus-sian operator of the given radius and standard deviation (sigma). For reasonableresults, radius should be larger than sigma. Use a radius of 0to have the methodselect a suitable radius.
The parameters are:
radius: The radius of the Gaussian, in pixels, notcounting the center pixel (default 0).
sigma: The standard deviation of the Gaussian, inpixels (default 1.0).
amount: The percentage of the difference between theoriginal and the blur image that is added backinto the original (default 1.0).
threshold: The threshold, as a fraction of MaxRGB, neededto apply the difference amount (default 0.05).
-use-pixmap use the pixmap
-verbose print detailed information about the image
This information is printed: image scene number; image name; image size; theimage class (DirectClassor PseudoClass); the total number of unique colors;

46 ImageMagick
and the number of seconds to read and transform the image. Refer to miff for adescription of the image class.
If -colors is also specified, the total unique colors in the image and color reduc-tion error values are printed. Refer to quantize for a description of these values.
-version print ImageMagick version string
-view
�
string
�
FlashPix viewing parameters
-virtual-pixel
�
method
�
specify contents of “virtual pixels”
This option defines “virtual pixels” for use in operations that can access pixelsoutside the boundaries of an image.
Choose from these methods:
Constant: Use the image background color.Edge: Extend the edge pixel toward infinity (default).Mirror: Mirror the image.Tile: Tile the image.
This option affects operations that use virtual pixels suchas -blur , -sharpen,-wave, etc.
-visual
�
type
�
animate images using this X visual type
Choose from these visual classes:
StaticGrayGrayScaleStaticColorPseudoColorTrueColorDirectColordefaultvisual id
The X server must support the visual you choose, otherwise anerror occurs. Ifa visual is not specified, the visual class that can display the most simultaneouscolors on the default screen is chosen.
-watermark
�
brightness
�
x
�
saturation
�
percent brightness and saturation ofa watermark
1 ImageMagick Utilities 47
-wave
�
amplitude
�
x
�
wavelength
�
alter an image along a sine wave
Specifyamplitudeandwavelengthof the wave.
-white-point
�
x
�
,
�
y
�
chromaticity white point
-window
�
id
�
make image the background of a window
id can be a window id or name. Specifyroot to select X’s root window as thetarget window.
By default the image is tiled onto the background of the target window. If back-drop or -geometry are specified, the image is surrounded by the backgroundcolor. Refer toX RESOURCES for details.
The image will not display on the root window if the image has more unique col-ors than the target window colormap allows. Use-colors to reduce the numberof colors.
-window-group specify the window group
-write
�
filename
�
write an image sequence [convert, composite]
The image sequence following the-write filenameoption is written out, and thenprocessing continues with the same image in its current state if there are addi-tional options. To restore the image to its original state after writing it, use the+write filenameoption.
-write
�
filename
�
write the image to a file [display]
If filenamealready exists, you will be prompted as to whether it should be over-written.
By default, the image is written in the format that it was readin as. To specifya particular image format, prefixfilenamewith the image type and a colon (e.g.,ps:image) or specify the image type as the filename suffix (e.g., image.ps). Seeconvert(1) for a list of valid image formats. Specify file as -for standard output.If file has the extension.Z or .gz, the file size iscompressedusing compressor gzip respectively. Precede the image file name with
�
to pipe to a systemcommand.
Use-compressto specify the type of image compression.
The equivalent X resource for this option iswriteFilename (classWriteFile-name). See “X Resources” in the manual page fordisplayfor details.

48 ImageMagick
1.6 Environment
DISPLAY To get the default host, display number, and screen.
1.7 Authors
John Cristy, ImageMagick Studio LLC,Glenn Randers-Pehrson, ImageMagick Studio LLC.
2 Animate
2.1 NAME
animate - animate a sequence of images
2.2 Synopsis
animate [ options...] file [ [ options...] file ...]
2.3 Description
Animate displays a sequence of images on any workstation display running anX server.animate first determines the hardware capabilities of the workstation.If the number of unique colors in an image is less than or equalto the numberthe workstation can support, the image is displayed in an X window. Otherwisethe number of colors in the image is first reduced to match the color resolutionof the workstation before it is displayed.
This means that a continuous-tone 24 bits-per-pixel image can display on a 8 bitpseudo-color device or monochrome device. In most instances the reduced colorimage closely resembles the original. Alternatively, a monochrome or pseudo-color image sequence can display on a continuous-tone 24 bits-per-pixel device.
To help prevent color flashing on X server visuals that have colormaps,animatecreates a single colormap from the image sequence. This can be rather time con-suming. You can speed this operation up by reducing the colors in the imagebefore you “animate” them. Usemogrify to color reduce the images to a sin-gle colormap. Seemogrify(1) for details. Alternatively, you can use a StandardColormap; or a static, direct, or true color visual. You can define a Standard
49
50 ImageMagick
Colormap withxstdcmap. Seexstdcmap(1)for details. This method is recom-mended for colormapped X server because it eliminates the need to compute aglobal colormap.
2.4 Examples
To animate a set of images of a cockatoo, use:
animate cockatoo.*
To animate a cockatoo image sequence while using the Standard Colormapbest,use:
xstdcmap -bestanimate -map best cockatoo.*
To animate an image of a cockatoo without a border centered ona backdrop,use:
animate +borderwidth -backdrop cockatoo.*
2.5 Options
For a more detailed description of each option, seeImageMagick(1).
-authenticate
�
string
�
decrypt image with this password
-backdrop
�
color
�
display the image centered on a backdrop.
-background
�
color
�
the background color
-bordercolor
�
color
�
the border color
-borderwidth
�
geometry
�
the border width
-cache
�
threshold
�
(This option has been replaced by the -limit option)

2 Animate 51
-chop
�
width
�
x
�
height
��
+-
��
x
��
+-
��
y
��
%
�
remove pixels from the in-terior of an image
-colormap
�
type
�
define the colormap type
-colors
�
value
�
preferred number of colors in the image
-colorspace
�
value
�
the type of colorspace
-crop
�
width
�
x
�
height
��
+-
��
x
��
+-
��
y
��
%
�
preferred size and locationof the cropped image
-debug
�
events
�
enable debug printout
-delay
�
1/100ths of a second
�
display the next image after pausing
-density
�
width
�
x
�
height
�
vertical and horizontal resolution in pixels of theimage
-depth
�
value
�
depth of the image
-display
�
host:display[.screen]
�
specifies the X server to contact
-dispose
�
method
�
GIF disposal method
-dither apply Floyd/Steinberg error diffusion to the image
-font
�
name
�
use this font when annotating the image with text
-foreground
�
color
�
define the foreground color
-gamma
�
value
�
level of gamma correction

52 ImageMagick
-geometry
�
width
�
x
�
height
��
+-
��
x
��
+-
��
y
��
%
��
@
� �
!
�������
pre-ferred size and location of the Image window.
-help print usage instructions
-iconGeometry
�
geometry
�
specify the icon geometry
-iconic iconic animation
-interlace
�
type
�
the type of interlacing scheme
-limit
�
type
� �
value
�
Disk, File, Map, or Memory resource limit
-log
�
string
�
-map
�
type
�
display image using this type.
-matte store matte channel if the image has one
-mattecolor
�
color
�
specify the color to be used with the-frame option
-monochrome transform the image to black and white
-name name an image
-noop NOOP (no option)
-pause
�
seconds
�
pause between animation loops [animate]
-remote perform a remote operation
-rotate
�
degrees
�������
apply Paeth image rotation to the image
2 Animate 53
-sampling-factor
�
horizontal factor
�
x
�
vertical factor
�
sampling factorsused by JPEG or MPEG-2 encoder and YUV decoder/encoder.
-scenes
�
value-value
�
range of image scene numbers to read
-shared-memory use shared memory
-size
�
width
�
x
�
height
��
+offset
�
width and height of the image
-text-font
�
name
�
font for writing fixed-width text
-title
�
string
�
assign title to displayed image [animate, display, montage]
-treedepth
�
value
�
tree depth for the color reduction algorithm
-trim trim an image
-verbose print detailed information about the image
-version print ImageMagick version string
-visual
�
type
�
animate images using this X visual type
-window
�
id
�
make image the background of a window
For a more detailed description of each option, seeImageMagick(1).
Any option you specify on the command line remains in effect for the groupof images following it, until the group is terminated by the appearance of anyoption or-noop. For example, to animate three images, the first with 32 colors,the second with an unlimited number of colors, and the third with only 16 colors,use:
animate -colors 32 cockatoo.1 -noop cockatoo.2-colors 16 cockatoo.3
54 ImageMagick
Animate options can appear on the command line or in your X resources file.SeeX(1). Options on the command line supersede values specified in your Xresources file. Image filenames may appear in any order on the command line ifthe image format isMIFF (refer tomiff(5) and thescenekeyword is specifiedin the image. Otherwise the images will display in the order they appear on thecommand line.
2.6 Mouse Buttons
Press any button to map or unmap the Command widget. See the next sectionfor more information about the Command widget.
2.7 Command Widget
The Command widget lists a number of sub-menus and commands.They are
AnimateOpenPlayStepRepeatAuto Reverse
SpeedFasterSlower
DirectionForwardReverse
Image InfoHelpQuit
Menu items with a indented triangle have a sub-menu. They arerepresentedabove as the indented items. To access a sub-menu item, move the pointer to theappropriate menu and press a button and drag. When you find thedesired sub-menu item, release the button and the command is executed. Move the pointeraway from the sub-menu if you decide not to execute a particular command.
2.8 Keyboard Accelerators
Ctl+O Press to load an image from a file.spacePress to display the next image in the sequence.
2 Animate 55
�
Press to speed-up the display of the images. Refer to-delay for more infor-mation.
�
Press to slow the display of the images. Refer to-delayfor more information.? Press to display information about the image. Press any key or button to erase
the information. This information is printed: image name; image size; andthe total number of unique colors in the image.
F1 Press to display helpful information aboutanimate(1).Ctl-q Press to discard all images and exit program.
2.9 X Resources
Animate options can appear on the command line or in your X resource file.Options on the command line supersede values specified in your X resource file.SeeX(1) for more information on X resources.
All animateoptions have a corresponding X resource. In addition, theanimateprogram uses the following X resources:
background (classBackground)Specifies the preferred color to use for the Image window background. Thedefault is #ccc.
borderColor (classBorderColor)Specifies the preferred color to use for the Image window border. The defaultis #ccc.
borderWidth ( classBorderWidth)Specifies the width in pixels of the Image window border. The default is 2.
font (classFont or FontList)Specifies the name of the preferred font to use in normal formatted text. Thedefault is 14 pointHelvetica.
foreground (classForeground)Specifies the preferred color to use for text within the Imagewindow. Thedefault is black.
geometry (classgeometry)Specifies the preferred size and position of the image window. It is not nec-essarily obeyed by all window managers. Offsets, if present, are handled inX(1)style. A negative x offset is measured from the right edge of the screento the right edge of the icon, and a negative y offset is measured from thebottom edge of the screen to the bottom edge of the icon.
iconGeometry (classIconGeometry)Specifies the preferred size and position of the applicationwhen iconified.It is not necessarily obeyed by all window managers. Offsets, if present, arehandled in the same manner as in class Geometry.
iconic (classIconic)This resource indicates that you would prefer that the application’s windowsinitially not be visible as if the windows had be immediatelyiconified byyou. Window managers may choose not to honor the application’s request.

56 ImageMagick
matteColor (classMatteColor)Specify the color of windows. It is used for the backgrounds of windows,menus, and notices. A 3D effect is achieved by using highlight and shadowcolors derived from this color. Default value: #ddd.
name (className)This resource specifies the name under which resources for the applicationshould be found. This resource is useful in shell aliases to distinguish be-tween invocations of an application, without resorting to creating links toalter the executable file name. The default is the application name.
sharedMemory (classSharedMemory)This resource specifies whether animate should attempt use shared memoryfor pixmaps. ImageMagick must be compiled with shared memory support,and the display must support the MIT-SHM extension. Otherwise, this re-source is ignored. The default is True.
text font (classtextFont)Specifies the name of the preferred font to use in fixed (typewriter style)formatted text. The default is 14 pointCourier.
title (classTitle)This resource specifies the title to be used for the Image window. This in-formation is sometimes used by a window manager to provide some sort ofheader identifying the window. The default is the image file name.
2.10 Environment
DISPLAY To get the default host, display number, and screen.
2.11 Acknowledgements
TheMIT X Consortium for making network transparent graphics a reality.Michael Halle, Spatial Imaging Group at MIT , for the initial implementation
of Alan Paeth’s image rotation algorithm.David Pensak, duPont, for providing a computing environment that made this
program possible.Paul Raveling, USC Information Sciences Institute. The spatial subdivision
color reduction algorithm is based on his Img software.
2.12 Authors
John Cristy, ImageMagick Studio LLC,Glenn Randers-Pehrson, ImageMagick Studio LLC.
3 Composite
3.1 NAME
composite - composite images together.
3.2 Synopsis
composite [options... ] image composite[ mask] composited
3.3 Description
compositecomposite images to create new images.compositeis the base imageandimagecontains the changes.compositedis the result, and normally has thesame dimensions ascomposite.
The optionalmaskcan be used to provide matte information forcompositewhenit has none or if you want a different mask. A mask image is typically grayscaleand the same size ascomposite. If mask is not grayscale, it is converted tograyscale and the resulting intensities are used as matte information.
3.4 Examples
To composite an image of a cockatoo with a perch, use:
composite cockatoo.miff perch.ras composite.miff
To compute the difference between images in a series, use:
57

58 ImageMagick
composite -compose difference series.2 series.1difference.miff
To composite an image of a cockatoo with a perch starting at location (100,150),use:
composite -geometry +100+150 cockatoo.miffperch.ras composite.miff
To tile a logo across your image of a cockatoo, use
convert +shade 30x60 cockatoo.miff mask.miffcomposite -compose bumpmap -tile logo.png
cockatoo.miff mask.miff composite.miff
To composite a red, green, and blue color plane into a single composite image,try
composite -compose CopyGreen green.png red.pngred-green.png
composite -compose CopyBlue blue.png red-green.pngcomposite.png
3.5 Options
Options are processed in command line order. Any option you specify on thecommand line remains in effect only for the image that follows. All options arereset to their default values after each image is read.
For a more detailed description of each option, seeImageMagick(1).
-authenticate
�
string
�
decrypt image with this password
-background
�
color
�
the background color
-blue-primary
�
x
�
,
�
y
�
blue chromaticity primary point
-cache
�
threshold
�
(This option has been replaced by the -limit option)
-colors
�
value
�
preferred number of colors in the image
3 Composite 59
-colorspace
�
value
�
the type of colorspace
-comment
�
string
�
annotate an image with a comment
-compose
�
operator
�
the type of image composition
-compress
�
type
�
the type of image compression
-debug
�
events
�
enable debug printout
-density
�
width
�
x
�
height
�
vertical and horizontal resolution in pixels of theimage
-depth
�
value
�
depth of the image
-displace
�
horizontal scale
�
x
�
vertical scale
�
shift image pixels as definedby a displacement map
-display
�
host:display[.screen]
�
specifies the X server to contact
-dispose
�
method
�
GIF disposal method
-dissolve
�
percent
�
dissolve an image into another by the given percent
-dither apply Floyd/Steinberg error diffusion to the image
-encoding
�
type
�
specify the text encoding
-endian
�
type
�
specify endianness (MSB or LSB) of output image
-filter
�
type
�
use this type of filter when resizing an image
-font
�
name
�
use this font when annotating the image with text
60 ImageMagick
-geometry
�
width
�
x
�
height
��
+-
��
x
��
+-
��
y
��
%
��
@
� �
!
�������
pre-ferred size and location of the Image window.
-gravity
�
type
�
direction primitive gravitates to when annotating the image.
-green-primary
�
x
�
,
�
y
�
green chromaticity primary point
-help print usage instructions
-interlace
�
type
�
the type of interlacing scheme
-label
�
name
�
assign a label to an image
-limit
�
type
� �
value
�
Disk, File, Map, or Memory resource limit
-log
�
string
�
-matte store matte channel if the image has one
-monochrome transform the image to black and white
-negate replace every pixel with its complementary color
-page
�
width
�
x
�
height
��
+-
��
x
��
+-
��
y
��
%
��
!
�������
size and loca-tion of an image canvas
-profile
�
filename
�
add ICM, IPTC, or generic profile to image
-quality
�
value
�
JPEG/MIFF/PNG compression level
-red-primary
�
x
�
,
�
y
�
red chromaticity primary point
-render render vector operations
3 Composite 61
-resize
�
width
�
x
�
height
��
%
��
@
��
!
�������
resize an image
-rotate
�
degrees
�������
apply Paeth image rotation to the image
-sampling-factor
�
horizontal factor
�
x
�
vertical factor
�
sampling factorsused by JPEG or MPEG-2 encoder and YUV decoder/encoder.
-scene
�
value
�
set scene number
-sharpen
�
radius
��
x
�
sigma
��
sharpen the image
-size
�
width
�
x
�
height
��
+offset
�
width and height of the image
-stegano
�
offset
�
hide watermark within an image
-stereo composite two images to create a stereo anaglyph
-treedepth
�
value
�
tree depth for the color reduction algorithm
-trim trim an image
-type
�
type
�
the image type
-units
�
type
�
the type of image resolution
-unsharp
�
radius
��
x
�
sigma
���
+
�
amount
���
+
�
threshold
��
sharpenthe image with an unsharp mask operator
-verbose print detailed information about the image
-version print ImageMagick version string
-watermark
�
brightness
�
x
�
saturation
�
percent brightness and saturation ofa watermark
62 ImageMagick
-white-point
�
x
�
,
�
y
�
chromaticity white point
-write
�
filename
�
write an image sequence [convert, composite]
For a more detailed description of each option, seeImageMagick(1).
3.6 Environment
DISPLAY To get the default host, display number, and screen.
3.7 Authors
John Cristy, ImageMagick Studio LLC,Glenn Randers-Pehrson, ImageMagick Studio LLC.
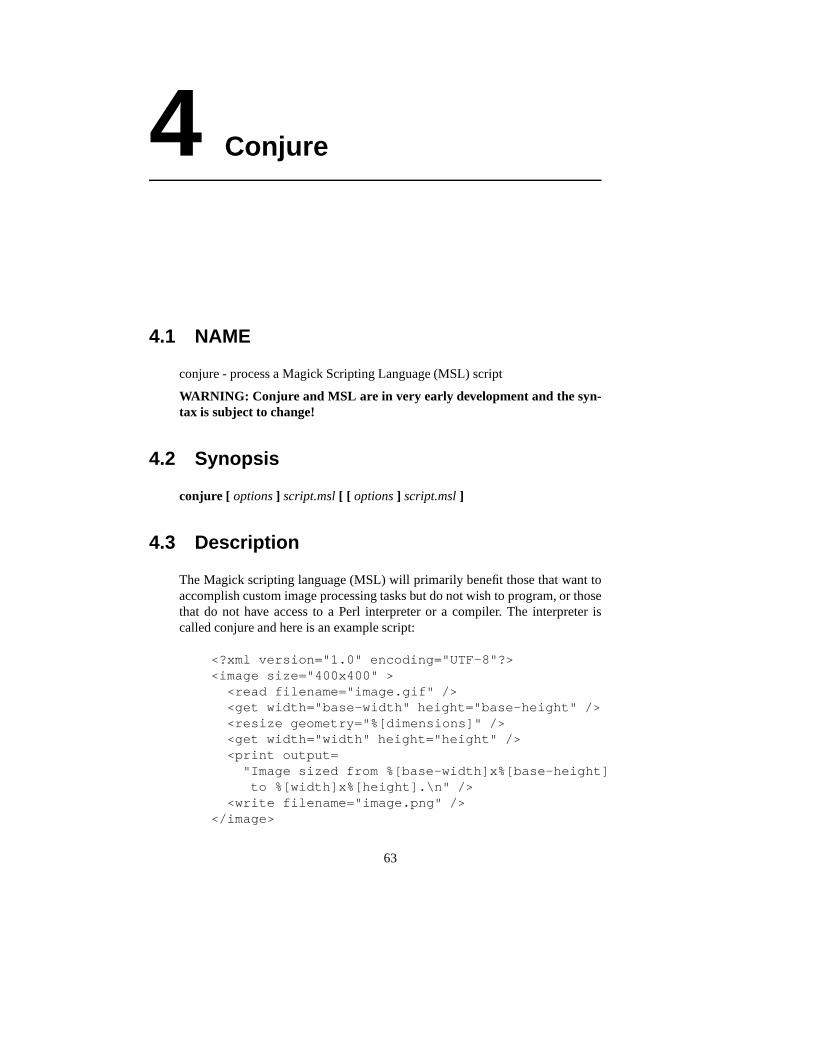
4 Conjure
4.1 NAME
conjure - process a Magick Scripting Language (MSL) script
WARNING: Conjure and MSL are in very early development and the syn-tax is subject to change!
4.2 Synopsis
conjure [ options] script.msl[ [ options] script.msl]
4.3 Description
The Magick scripting language (MSL) will primarily benefit those that want toaccomplish custom image processing tasks but do not wish to program, or thosethat do not have access to a Perl interpreter or a compiler. The interpreter iscalled conjure and here is an example script:
<?xml version="1.0" encoding="UTF-8"?><image size="400x400" >
<read filename="image.gif" /><get width="base-width" height="base-height" /><resize geometry="%[dimensions]" /><get width="width" height="height" /><print output=
"Image sized from %[base-width]x%[base-height]to %[width]x%[height].\n" />
<write filename="image.png" /></image>
63
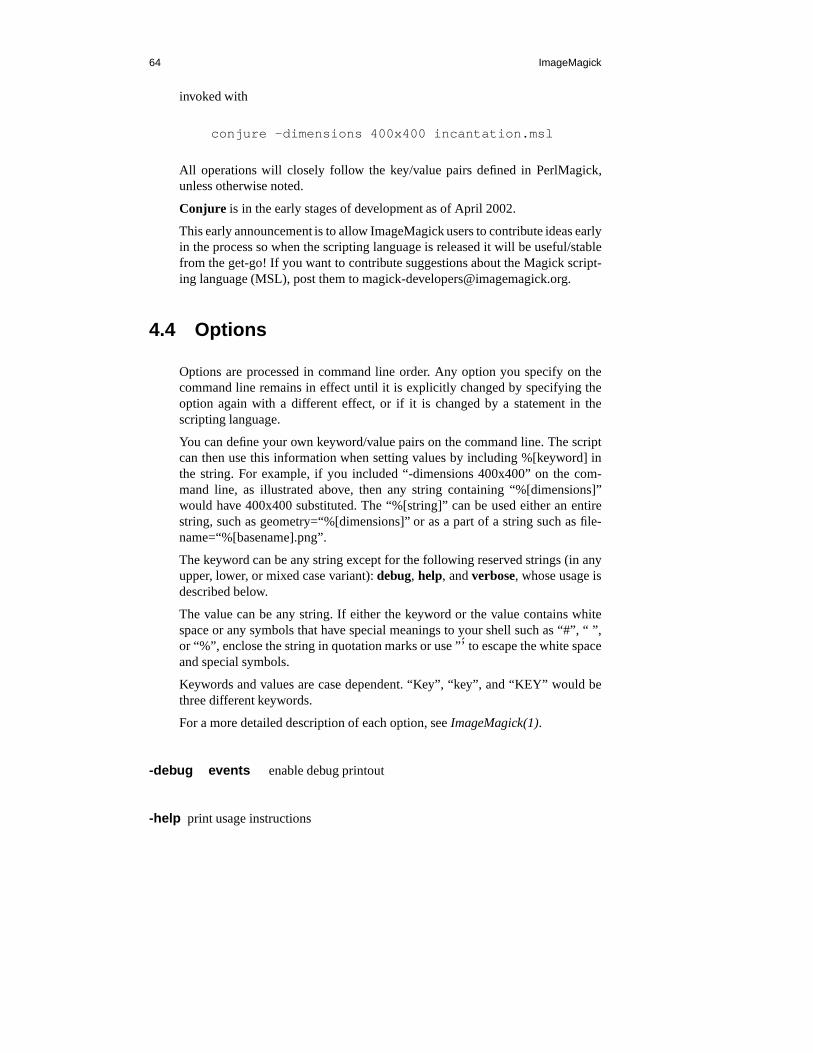
64 ImageMagick
invoked with
conjure -dimensions 400x400 incantation.msl
All operations will closely follow the key/value pairs defined in PerlMagick,unless otherwise noted.
Conjure is in the early stages of development as of April 2002.
This early announcement is to allow ImageMagick users to contribute ideas earlyin the process so when the scripting language is released it will be useful/stablefrom the get-go! If you want to contribute suggestions aboutthe Magick script-ing language (MSL), post them to [email protected].
4.4 Options
Options are processed in command line order. Any option you specify on thecommand line remains in effect until it is explicitly changed by specifying theoption again with a different effect, or if it is changed by a statement in thescripting language.
You can define your own keyword/value pairs on the command line. The scriptcan then use this information when setting values by including %[keyword] inthe string. For example, if you included “-dimensions 400x400” on the com-mand line, as illustrated above, then any string containing“%[dimensions]”would have 400x400 substituted. The “%[string]” can be usedeither an entirestring, such as geometry=“%[dimensions]” or as a part of a string such as file-name=“%[basename].png”.
The keyword can be any string except for the following reserved strings (in anyupper, lower, or mixed case variant):debug, help, andverbose, whose usage isdescribed below.
The value can be any string. If either the keyword or the valuecontains whitespace or any symbols that have special meanings to your shellsuch as “#”, “
�
”,or “%”, enclose the string in quotation marks or use ”’́ to escape the white spaceand special symbols.
Keywords and values are case dependent. “Key”, “key”, and “KEY” would bethree different keywords.
For a more detailed description of each option, seeImageMagick(1).
-debug
�
events
�
enable debug printout
-help print usage instructions
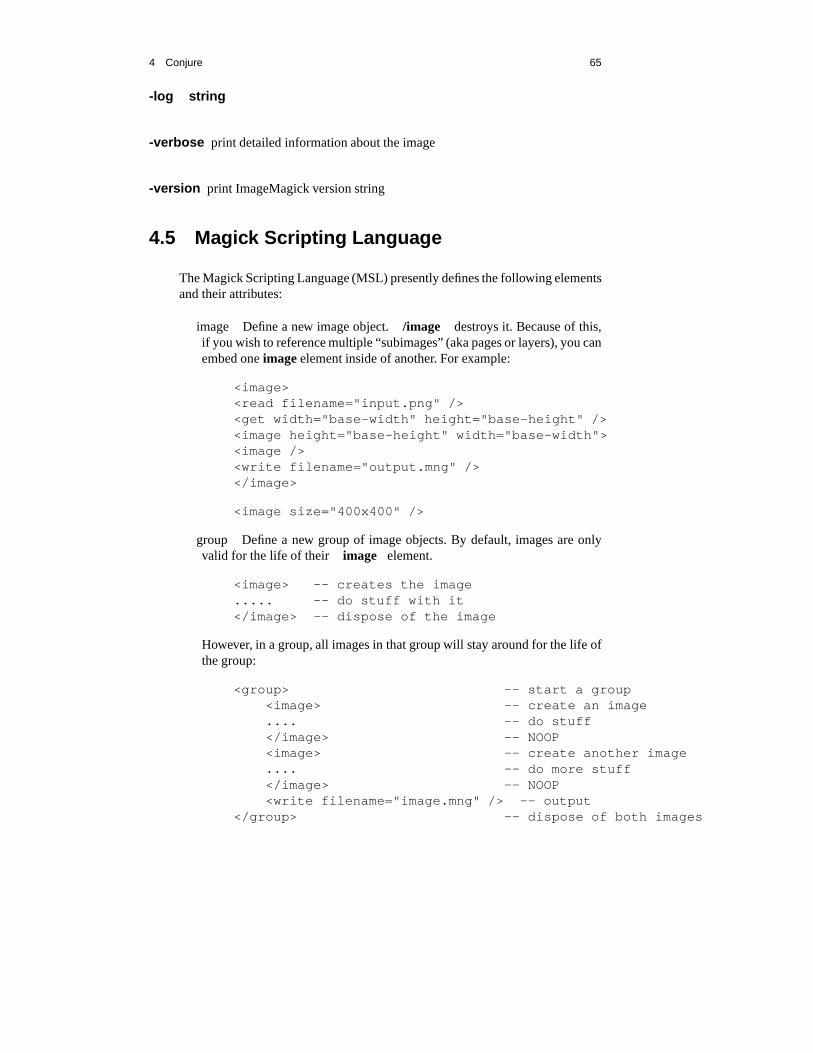
4 Conjure 65
-log
�
string
�
-verbose print detailed information about the image
-version print ImageMagick version string
4.5 Magick Scripting Language
The Magick Scripting Language (MSL) presently defines the following elementsand their attributes:
�
image
�
Define a new image object.
�
/image
�
destroys it. Because of this,if you wish to reference multiple “subimages” (aka pages or layers), you canembed oneimageelement inside of another. For example:
<image><read filename="input.png" /><get width="base-width" height="base-height" /><image height="base-height" width="base-width"><image /><write filename="output.mng" /></image>
<image size="400x400" />
�
group
�
Define a new group of image objects. By default, images are onlyvalid for the life of their
�
image
�
element.
<image> -- creates the image..... -- do stuff with it</image> -- dispose of the image
However, in a group, all images in that group will stay aroundfor the life ofthe group:
<group> -- start a group<image> -- create an image.... -- do stuff</image> -- NOOP<image> -- create another image.... -- do more stuff</image> -- NOOP<write filename="image.mng" /> -- output
</group> -- dispose of both images
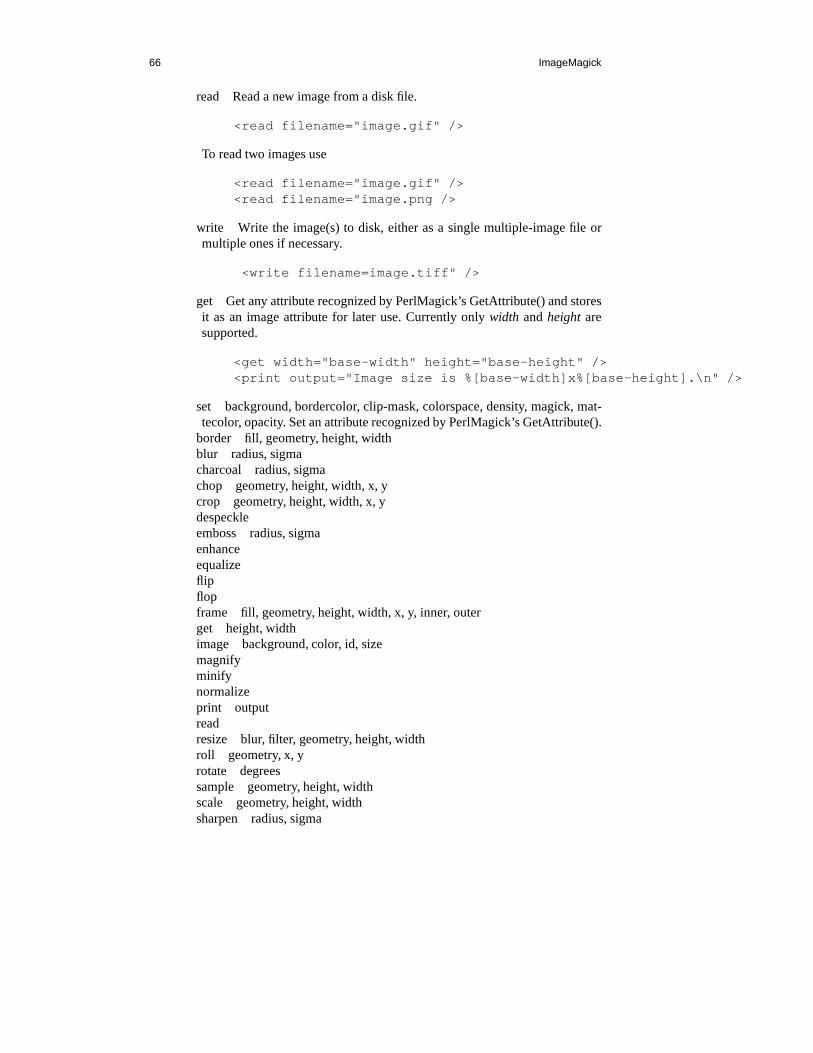
66 ImageMagick
�
read
�
Read a new image from a disk file.
<read filename="image.gif" />
To read two images use
<read filename="image.gif" /><read filename="image.png />
�
write
�
Write the image(s) to disk, either as a single multiple-image file ormultiple ones if necessary.
<write filename=image.tiff" />
�
get
�
Get any attribute recognized by PerlMagick’s GetAttribute() and storesit as an image attribute for later use. Currently onlywidth andheightaresupported.
<get width="base-width" height="base-height" /><print output="Image size is %[base-width]x%[base-heigh t].\n" />
�
set
�
background, bordercolor, clip-mask, colorspace, density, magick, mat-tecolor, opacity. Set an attribute recognized by PerlMagick’s GetAttribute().
�
border
�
fill, geometry, height, width
�
blur
�
radius, sigma
�
charcoal
�
radius, sigma
�
chop
�
geometry, height, width, x, y
�
crop
�
geometry, height, width, x, y
�
despeckle
��
emboss
�
radius, sigma
�
enhance
��
equalize
��
flip
��
flop
��
frame
�
fill, geometry, height, width, x, y, inner, outer
�
get
�
height, width
�
image
�
background, color, id, size
�
magnify
��
minify
��
normalize
��
�
output
�
read
��
resize
�
blur, filter, geometry, height, width
�
roll
�
geometry, x, y
�
rotate
�
degrees
�
sample
�
geometry, height, width
�
scale
�
geometry, height, width
�
sharpen
�
radius, sigma
4 Conjure 67
�
shave
�
geometry, height, width
�
shear
�
x, y
�
solarize
�
threshold
�
spread
�
radius
�
stegano
�
image
�
stereo
�
image
�
swirl
�
degrees
�
texture
�
image
�
threshold
�
threshold
�
transparent
�
color
�
trim
�
4.6 Authors
John Cristy, ImageMagick Studio LLC,Glenn Randers-Pehrson, ImageMagick Studio LLC,Leonard Rosenthol, ImageMagick Studio LLC.
5 Convert
5.1 NAME
convert - convert an image or sequence of images
5.2 Synopsis
convert [ options... ] input file outputfile
5.3 Description
Convert converts an input file using one image format to an output file witha differing image format. In addition, various types of image processing canbe performed on the converted image during the conversion process.Convertrecognizes the image formats listed inImageMagick(1).
5.4 Examples
To make a thumbnail of a JPEG image, use:
convert -size 120x120 cockatoo.jpg -resize 120x120+profile "*" thumbnail.jpg
In this example,’-size 120x120’ gives a hint to the JPEG decoder thatthe image is going to be downscaled to 120x120, allowing it torun faster byavoiding returning full-resolution images to ImageMagickfor the subsequent
68
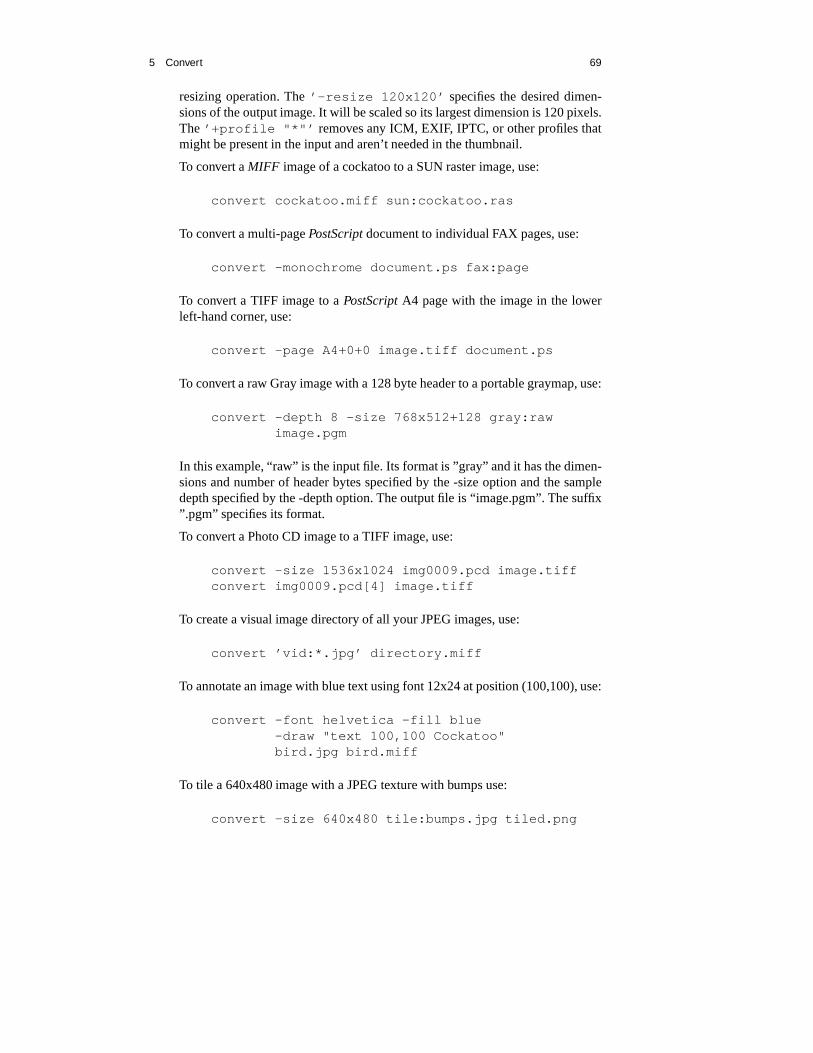
5 Convert 69
resizing operation. The’-resize 120x120’ specifies the desired dimen-sions of the output image. It will be scaled so its largest dimension is 120 pixels.The ’+profile "*"’ removes any ICM, EXIF, IPTC, or other profiles thatmight be present in the input and aren’t needed in the thumbnail.
To convert aMIFF image of a cockatoo to a SUN raster image, use:
convert cockatoo.miff sun:cockatoo.ras
To convert a multi-pagePostScriptdocument to individual FAX pages, use:
convert -monochrome document.ps fax:page
To convert a TIFF image to aPostScriptA4 page with the image in the lowerleft-hand corner, use:
convert -page A4+0+0 image.tiff document.ps
To convert a raw Gray image with a 128 byte header to a portablegraymap, use:
convert -depth 8 -size 768x512+128 gray:rawimage.pgm
In this example, “raw” is the input file. Its format is ”gray” and it has the dimen-sions and number of header bytes specified by the -size optionand the sampledepth specified by the -depth option. The output file is “image.pgm”. The suffix”.pgm” specifies its format.
To convert a Photo CD image to a TIFF image, use:
convert -size 1536x1024 img0009.pcd image.tiffconvert img0009.pcd[4] image.tiff
To create a visual image directory of all your JPEG images, use:
convert ’vid:*.jpg’ directory.miff
To annotate an image with blue text using font 12x24 at position (100,100), use:
convert -font helvetica -fill blue-draw "text 100,100 Cockatoo"bird.jpg bird.miff
To tile a 640x480 image with a JPEG texture with bumps use:
convert -size 640x480 tile:bumps.jpg tiled.png

70 ImageMagick
To surround an icon with an ornamental border to use with Mosaic(1), use:
convert -mattecolor "#697B8F" -frame 6x6 bird.jpgicon.png
To create a MNG animation from a DNA molecule sequence, use:
convert -delay 20 dna.* dna.mng
5.5 Options
Options are processed in command line order. Any option you specify on thecommand line remains in effect for the set of images that follows, until the set isterminated by the appearance of any option or-noop. Some options only affectthe decoding of images and others only the encoding. The latter can appear afterthe final group of input images.
For a more detailed description of each option, seeImageMagick(1).
-adjoin join images into a single multi-image file
-affine
�
matrix
�
drawing transform matrix
-antialias remove pixel aliasing
-append append a set of images
-authenticate
�
string
�
decrypt image with this password
-average average a set of images
-background
�
color
�
the background color
-blue-primary
�
x
�
,
�
y
�
blue chromaticity primary point
-blur
�
radius
��
x
�
sigma
��
blur the image with a Gaussian operator
5 Convert 71
-border
�
width
�
x
�
height
�
surround the image with a border of color
-bordercolor
�
color
�
the border color
-box
�
color
�
set the color of the annotation bounding box
-cache
�
threshold
�
(This option has been replaced by the -limit option)
-channel
�
type
�
the type of channel
-charcoal
�
factor
�
simulate a charcoal drawing
-chop
�
width
�
x
�
height
��
+-
��
x
��
+-
��
y
��
%
�
remove pixels from the in-terior of an image
-clip apply the clipping path, if one is present
-coalesce merge a sequence of images
-colorize
�
value
�
colorize the image with the pen color
-colors
�
value
�
preferred number of colors in the image
-colorspace
�
value
�
the type of colorspace
-comment
�
string
�
annotate an image with a comment
-compose
�
operator
�
the type of image composition
-compress
�
type
�
the type of image compression
-contrast enhance or reduce the image contrast
72 ImageMagick
-convolve
�
kernel
�
convolve image with the specified convolution kernel
-crop
�
width
�
x
�
height
��
+-
��
x
��
+-
��
y
��
%
�
preferred size and locationof the cropped image
-cycle
�
amount
�
displace image colormap by amount
-debug
�
events
�
enable debug printout
-deconstruct break down an image sequence into constituent parts
-delay
�
1/100ths of a second
�
display the next image after pausing
-density
�
width
�
x
�
height
�
vertical and horizontal resolution in pixels of theimage
-depth
�
value
�
depth of the image
-despeckle reduce the speckles within an image
-display
�
host:display[.screen]
�
specifies the X server to contact
-dispose
�
method
�
GIF disposal method
-dither apply Floyd/Steinberg error diffusion to the image
-draw
�
string
�
annotate an image with one or more graphic primitives
-edge
�
radius
�
detect edges within an image
-emboss
�
radius
�
emboss an image
-encoding
�
type
�
specify the text encoding
5 Convert 73
-endian
�
type
�
specify endianness (MSB or LSB) of output image
-enhance apply a digital filter to enhance a noisy image
-equalize perform histogram equalization to the image
-fill
�
color
�
color to use when filling a graphic primitive
-filter
�
type
�
use this type of filter when resizing an image
-flatten flatten a sequence of images
-flip create a “mirror image”
-flop create a “mirror image”
-font
�
name
�
use this font when annotating the image with text
-frame
�
width
�
x
�
height
�
+
�
outer bevel width
�
+
�
inner bevel width
�
surround the image with an ornamental border
-fuzz
�
distance
��
%
�
colors within this distance are considered equal
-gamma
�
value
�
level of gamma correction
-Gaussian
�
radius
��
x
�
sigma
��
blur the image with a Gaussian operator
-geometry
�
width
�
x
�
height
��
+-
��
x
��
+-
��
y
��
%
��
@
� �
!
�������
pre-ferred size and location of the Image window.
-gravity
�
type
�
direction primitive gravitates to when annotating the image.
-green-primary
�
x
�
,
�
y
�
green chromaticity primary point
74 ImageMagick
-help print usage instructions
-implode
�
factor
�
implode image pixels about the center
-intent
�
type
�
use this type of rendering intent when managing the image color
-interlace
�
type
�
the type of interlacing scheme
-label
�
name
�
assign a label to an image
-lat
�
width
�
x
�
height
��
+-
��
offset
��
%
�
perform local adaptive threshold-ing
-level
�
black point
��
,
�
white point
���
%
��
,
�
gamma
��
adjust the level ofimage contrast
-limit
�
type
� �
value
�
Disk, File, Map, or Memory resource limit
-list
�
type
�
the type of list
-log
�
string
�
-loop
�
iterations
�
add Netscape loop extension to your GIF animation
-map
�
filename
�
choose a particular set of colors from this image
-mask
�
filename
�
Specify a clipping mask
-matte store matte channel if the image has one
-mattecolor
�
color
�
specify the color to be used with the-frame option
-median
�
radius
�
apply a median filter to the image

5 Convert 75
-modulate
�
value
�
vary the brightness, saturation, and hue of an image
-monochrome transform the image to black and white
-morph
�
frames
�
morphs an image sequence
-mosaic create a mosaic from an image or an image sequence
-negate replace every pixel with its complementary color
-noise
�
radius
�
type
�
add or reduce noise in an image
-noop NOOP (no option)
-normalize transform image to span the full range of color values
-opaque
�
color
�
change this color to the pen color within the image
-page
�
width
�
x
�
height
��
+-
��
x
��
+-
��
y
��
%
��
!
�������
size and loca-tion of an image canvas
-paint
�
radius
�
simulate an oil painting
-pen
�
color
�
(This option has been replaced by the -fill option)
-ping efficiently determine image characteristics
-pointsize
�
value
�
pointsize of the PostScript, OPTION1, or TrueType font
-preview
�
type
�
image preview type
-process
�
command
�
process a sequence of images
76 ImageMagick
-profile
�
filename
�
add ICM, IPTC, or generic profile to image
-quality
�
value
�
JPEG/MIFF/PNG compression level
-raise
�
width
�
x
�
height
�
lighten or darken image edges
-red-primary
�
x
�
,
�
y
�
red chromaticity primary point
-region
�
width
�
x
�
height
��
+-
��
x
��
+-
��
y
�
apply options to a portion ofthe image
-render render vector operations
-resize
�
width
�
x
�
height
��
%
��
@
��
!
�������
resize an image
-roll
�
+-
��
x
��
+-
��
y
�
roll an image vertically or horizontally
-rotate
�
degrees
�������
apply Paeth image rotation to the image
-sample
�
geometry
�
scale image with pixel sampling
-sampling-factor
�
horizontal factor
�
x
�
vertical factor
�
sampling factorsused by JPEG or MPEG-2 encoder and YUV decoder/encoder.
-scale
�
geometry
�
scale the image.
-scene
�
value
�
set scene number
-seed
�
value
�
pseudo-random number generator seed value
-segment
�
cluster threshold
�
x
�
smoothing threshold
�
segment an im-age
-shade
�
azimuth
�
x
�
elevation
�
shade the image using a distant light source
5 Convert 77
-sharpen
�
radius
��
x
�
sigma
��
sharpen the image
-shave
�
width
�
x
�
height
��
%
�
shave pixels from the image edges
-shear
�
x degrees
�
x
�
y degrees
�
shear the image along the X or Y axis
-size
�
width
�
x
�
height
��
+offset
�
width and height of the image
-solarize
�
factor
�
negate all pixels above the threshold level
-spread
�
amount
�
displace image pixels by a random amount
-stroke
�
color
�
color to use when stroking a graphic primitive
-strokewidth
�
value
�
set the stroke width
-swirl
�
degrees
�
swirl image pixels about the center
-texture
�
filename
�
name of texture to tile onto the image background
-threshold
�
value
���
green
�
,
�
blue
�
,
�
opacity
���
%
�
threshold the im-age
-tile
�
filename
�
tile image when filling a graphic primitive
-transform transform the image
-transparent
�
color
�
make this color transparent within the image
-treedepth
�
value
�
tree depth for the color reduction algorithm
-trim trim an image
78 ImageMagick
-type
�
type
�
the image type
-units
�
type
�
the type of image resolution
-unsharp
�
radius
��
x
�
sigma
���
+
�
amount
���
+
�
threshold
��
sharpenthe image with an unsharp mask operator
-use-pixmap use the pixmap
-verbose print detailed information about the image
-version print ImageMagick version string
-view
�
string
�
FlashPix viewing parameters
-virtual-pixel
�
method
�
specify contents of “virtual pixels”
-wave
�
amplitude
�
x
�
wavelength
�
alter an image along a sine wave
-white-point
�
x
�
,
�
y
�
chromaticity white point
-write
�
filename
�
write an image sequence [convert, composite]
For a more detailed description of each option, seeImageMagick(1).
5.6 Segmentation
Use -segmentto segment an image by analyzing the histograms of the colorcomponents and identifying units that are homogeneous withthe fuzzy c-meanstechnique. The scale-space filter analyzes the histograms of the three color com-ponents of the image and identifies a set of classes. The extents of each class isused to coarsely segment the image with thresholding. The color associated witheach class is determined by the mean color of all pixels within the extents of aparticular class. Finally, any unclassified pixels are assigned to the closest classwith the fuzzy c-means technique.
The fuzzy c-Means algorithm can be summarized as follows:
5 Convert 79
Build a histogram, one for each color component of the image.For each histogram, successively apply the scale-space filter and build an in-
terval tree of zero crossings in the second derivative at each scale. Analyzethis scale-space “fingerprint” to determine which peaks or valleys in the his-togram are most predominant.
The fingerprint defines intervals on the axis of the histogram. Each intervalcontains either a minima or a maxima in the original signal. If each colorcomponent lies within the maxima interval, that pixel is considered “classi-fied” and is assigned an unique class number.
Any pixel that fails to be classified in the above thresholding pass is classi-fied using the fuzzy c-Means technique. It is assigned to one of the classesdiscovered in the histogram analysis phase.
The fuzzy c-Means technique attempts to cluster a pixel by finding the localminima of the generalized within group sum of squared error objective function.A pixel is assigned to the closest class of which the fuzzy membership has amaximum value.
For additional information see:Young Won Lim, Sang Uk Lee, “On The ColorImage Segmentation Algorithm Based on the Thresholding andthe Fuzzyc-Means Techniques”, Pattern Recognition, Volume 23, Number 9, pages 935-952, 1990.
5.7 Environment
DISPLAY To get the default host, display number, and screen.
5.8 Authors
John Cristy, ImageMagick Studio LLC,Glenn Randers-Pehrson, ImageMagick Studio LLC.
6 Display
6.1 NAME
display - display an image on any workstation running X
6.2 Synopsis
display [ options...] file [options...]file
6.3 Description
Display is a machine architecture independent image processing and display pro-gram. It can display an image on any workstation screen running an X server.Display can read and writemany of the more popular image formats (e.g.JPEG, TIFF , PNM, Photo CD, etc.).
With display, you can perform these functions on an image:
load an image from a filedisplay the next imagedisplay the former imagedisplay a sequence of images as a slide showwrite the image to a fileprint the image to aPostScriptprinterdelete the image filecreate a Visual Image Directoryselect the image to display by its thumbnail rather than nameundo last image transformationcopy a region of the image
80
6 Display 81
paste a region to the imagerestore the image to its original sizerefresh the imagehalf the image sizedouble the image sizeresize the imagecrop the imagecut the imageflop image in the horizontal directionflip image in the vertical directionrotate the image 90 degrees clockwiserotate the image 90 degrees counter-clockwiserotate the imageshear the imageroll the imagetrim the image edgesinvert the colors of the imagevary the color brightnessvary the color saturationvary the image huegamma correct the imagesharpen the image contrastdull the image contrastperform histogram equalization on the imageperform histogram normalization on the imagenegate the image colorsconvert the image to grayscaleset the maximum number of unique colors in the imagereduce the speckles within an imageeliminate peak noise from an imagedetect edges within the imageemboss an imagesegment the image by colorsimulate an oil paintingsimulate a charcoal drawingannotate the image with textdraw on the imageedit an image pixel coloredit the image matte informationcomposite an image with anotheradd a border to the imagesurround image with an ornamental borderapply image processing techniques to a region of interestdisplay information about the imagezoom a portion of the imageshow a histogram of the imagedisplay image to background of a window

82 ImageMagick
set user preferencesdisplay information about this programdiscard all images and exit programchange the level of magnificationdisplay images specified by a World Wide Web (WWW) uniform resource lo-
cator (URL)
6.4 Examples
To scale an image of a cockatoo to exactly 640 pixels in width and 480 pixels inheight and position the window at location (200,200), use:
display -geometry 640x480+200+200! cockatoo.miff
To display an image of a cockatoo without a border centered ona backdrop, use:
display +borderwidth -backdrop cockatoo.miff
To tile a slate texture onto the root window, use:
display -size 1280x1024 -window root slate.png
To display a visual image directory of all your JPEG images, use:
display ’vid:*.jpg’
To display a MAP image that is 640 pixels in width and 480 pixels in height with256 colors, use:
display -size 640x480+256 cockatoo.map
To display an image of a cockatoo specified with aWorld Wide Web (WWW)uniform resource locator(URL) , use:
display ftp://wizards.dupont.com/images/cockatoo.jpg
To display histogram of an image, use:
convert file.jpg HISTOGRAM:- | display -
6 Display 83
6.5 Options
Options are processed in command line order. Any option you specify on thecommand line remains in effect until it is explicitly changed by specifying theoption again with a different effect. For example to displaythree images, thefirst with 32 colors, the second with an unlimited number of colors, and the thirdwith only 16 colors, use:
display -colors 32 cockatoo.miff -noop duck.miff-colors 16 macaw.miff
Display options can appear on the command line or in your X resources file.SeeX(1). Options on the command line supersede values specified in your Xresources file.
For a more detailed description of each option, seeImageMagick(1).
-authenticate
�
string
�
decrypt image with this password
-backdrop
�
color
�
display the image centered on a backdrop.
-background
�
color
�
the background color
-border
�
width
�
x
�
height
�
surround the image with a border of color
-bordercolor
�
color
�
the border color
-borderwidth
�
geometry
�
the border width
-cache
�
threshold
�
(This option has been replaced by the -limit option)
-colormap
�
type
�
define the colormap type
-colors
�
value
�
preferred number of colors in the image
-colorspace
�
value
�
the type of colorspace
84 ImageMagick
-comment
�
string
�
annotate an image with a comment
-compress
�
type
�
the type of image compression
-contrast enhance or reduce the image contrast
-crop
�
width
�
x
�
height
��
+-
��
x
��
+-
��
y
��
%
�
preferred size and locationof the cropped image
-debug
�
events
�
enable debug printout
-delay
�
1/100ths of a second
�
display the next image after pausing
-density
�
width
�
x
�
height
�
vertical and horizontal resolution in pixels of theimage
-depth
�
value
�
depth of the image
-despeckle reduce the speckles within an image
-display
�
host:display[.screen]
�
specifies the X server to contact
-dispose
�
method
�
GIF disposal method
-dither apply Floyd/Steinberg error diffusion to the image
-edge
�
radius
�
detect edges within an image
-endian
�
type
�
specify endianness (MSB or LSB) of output image
-enhance apply a digital filter to enhance a noisy image
-filter
�
type
�
use this type of filter when resizing an image
6 Display 85
-flip create a “mirror image”
-flop create a “mirror image”
-font
�
name
�
use this font when annotating the image with text
-foreground
�
color
�
define the foreground color
-frame
�
width
�
x
�
height
�
+
�
outer bevel width
�
+
�
inner bevel width
�
surround the image with an ornamental border
-gamma
�
value
�
level of gamma correction
-geometry
�
width
�
x
�
height
��
+-
��
x
��
+-
��
y
��
%
��
@
� �
!
�������
pre-ferred size and location of the Image window.
-help print usage instructions
-iconGeometry
�
geometry
�
specify the icon geometry
-iconic iconic animation
-immutable make image immutable
-interlace
�
type
�
the type of interlacing scheme
-label
�
name
�
assign a label to an image
-limit
�
type
� �
value
�
Disk, File, Map, or Memory resource limit
-log
�
string
�
-magnify
�
factor
�
magnify the image
86 ImageMagick
-map
�
type
�
display image using this type.
-matte store matte channel if the image has one
-mattecolor
�
color
�
specify the color to be used with the-frame option
-monochrome transform the image to black and white
-name name an image
-negate replace every pixel with its complementary color
-noop NOOP (no option)
-page
�
width
�
x
�
height
��
+-
��
x
��
+-
��
y
��
%
��
!
�������
size and loca-tion of an image canvas
-quality
�
value
�
JPEG/MIFF/PNG compression level
-raise
�
width
�
x
�
height
�
lighten or darken image edges
-remote perform a remote operation
-roll
�
+-
��
x
��
+-
��
y
�
roll an image vertically or horizontally
-rotate
�
degrees
�������
apply Paeth image rotation to the image
-sample
�
geometry
�
scale image with pixel sampling
-sampling-factor
�
horizontal factor
�
x
�
vertical factor
�
sampling factorsused by JPEG or MPEG-2 encoder and YUV decoder/encoder.
-scenes
�
value-value
�
range of image scene numbers to read

6 Display 87
-segment
�
cluster threshold
�
x
�
smoothing threshold
�
segment an im-age
-shared-memory use shared memory
-sharpen
�
radius
��
x
�
sigma
��
sharpen the image
-size
�
width
�
x
�
height
��
+offset
�
width and height of the image
-text-font
�
name
�
font for writing fixed-width text
-texture
�
filename
�
name of texture to tile onto the image background
-title
�
string
�
assign title to displayed image [animate, display, montage]
-treedepth
�
value
�
tree depth for the color reduction algorithm
-trim trim an image
-update
�
seconds
�
detect when image file is modified and redisplay.
-use-pixmap use the pixmap
-verbose print detailed information about the image
-version print ImageMagick version string
-visual
�
type
�
animate images using this X visual type
-window
�
id
�
make image the background of a window
-window-group specify the window group

88 ImageMagick
-write
�
filename
�
write the image to a file [display]
For a more detailed description of each option, seeImageMagick(1).
6.6 Mouse Buttons
The effects of each button press is described below. Three buttons are required.If you have a two button mouse, button 1 and 3 are returned. PressALT andbutton 3 to simulate button 2.
1 Press this button to map or unmap the Command widget . See the next section formore information about the Command widget.
2 Press and drag to define a region of the image to magnify.
3 Press and drag to choose from a select set ofdisplay(1) commands. This but-ton behaves differently if the image being displayed is a visual image directory.Choose a particular tile of the directory and press this button and drag to selecta command from a pop-up menu. Choose from these menu items:
OpenNextFormerDeleteUpdate
If you chooseOpen, the image represented by the tile is displayed. To returnto the visual image directory, chooseNext from the Command widget (refer toCommand Widget).NextandFormer moves to the next or former image respec-tively. ChooseDelete to delete a particular image tile. Finally, chooseUpdateto synchronize all the image tiles with their respective images. See montage andmiff for more details.
6.7 Command Widget
The Command widget lists a number of sub-menus and commands.They are
FileOpen...NextFormer
6 Display 89
Select...Save...Print...Delete...Canvas...Visual Directory...Quit
EditUndoRedoCutCopyPaste
ViewHalf SizeOriginal SizeDouble SizeResize...ApplyRefreshRestore
TransformCropChopFlopFlipRotate RightRotate LeftRotate...Shear...Roll...Trim Edges
EnhanceHue...Saturation...Brightness...Gamma...Spiff...DullEqualizeNormalizeNegate

90 ImageMagick
GRAYscaleQuantize...
EffectsDespeckleEmbossReduce NoiseAdd NoiseSharpen...Blur...Threshold...Edge Detect...Spread...Shade...Raise...Segment...
F/XSolarize...Swirl...Implode...Wave...Oil Paint...Charcoal Draw...
Image EditAnnotate...Draw...Color...Matte...Composite...Add Border...Add Frame...Comment...Launch...Region of Interest...
MiscellanyImage InfoZoom ImageShow Preview...Show HistogramShow MatteBackground...Slide ShowPreferences...
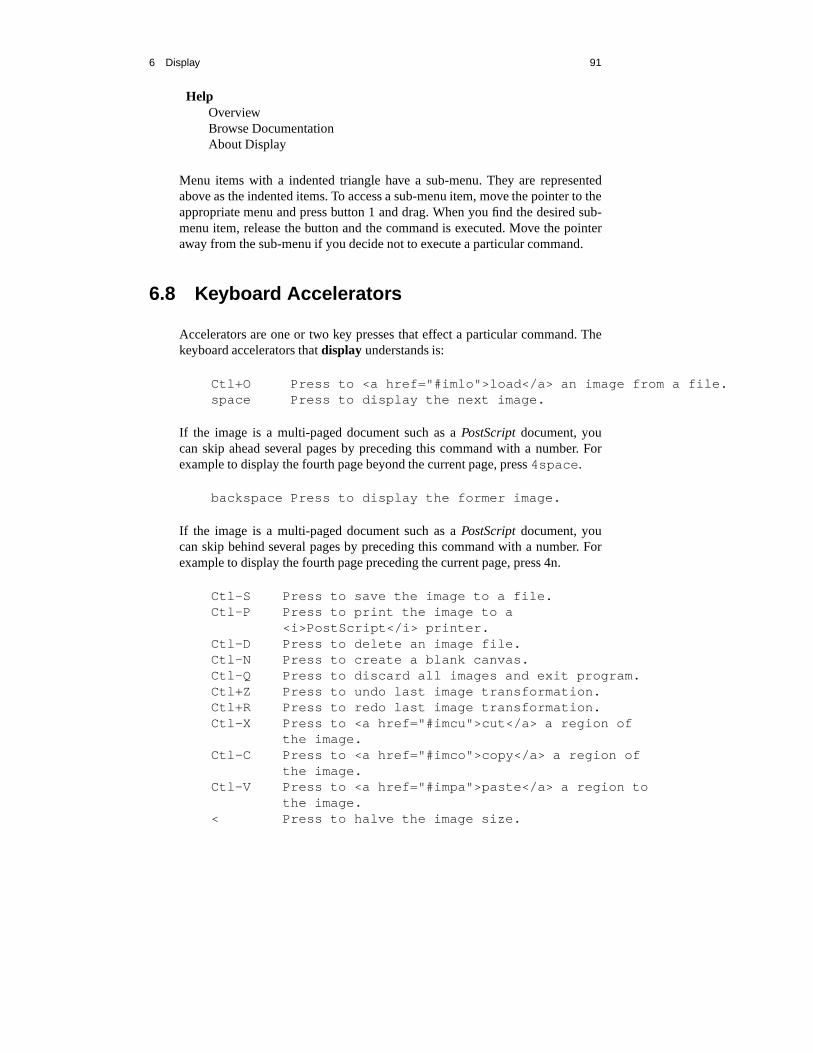
6 Display 91
HelpOverviewBrowse DocumentationAbout Display
Menu items with a indented triangle have a sub-menu. They arerepresentedabove as the indented items. To access a sub-menu item, move the pointer to theappropriate menu and press button 1 and drag. When you find thedesired sub-menu item, release the button and the command is executed. Move the pointeraway from the sub-menu if you decide not to execute a particular command.
6.8 Keyboard Accelerators
Accelerators are one or two key presses that effect a particular command. Thekeyboard accelerators thatdisplay understands is:
Ctl+O Press to <a href="#imlo">load</a> an image from a file .space Press to display the next image.
If the image is a multi-paged document such as aPostScriptdocument, youcan skip ahead several pages by preceding this command with anumber. Forexample to display the fourth page beyond the current page, press4space .
backspace Press to display the former image.
If the image is a multi-paged document such as aPostScriptdocument, youcan skip behind several pages by preceding this command witha number. Forexample to display the fourth page preceding the current page, press 4n.
Ctl-S Press to save the image to a file.Ctl-P Press to print the image to a
<i>PostScript</i> printer.Ctl-D Press to delete an image file.Ctl-N Press to create a blank canvas.Ctl-Q Press to discard all images and exit program.Ctl+Z Press to undo last image transformation.Ctl+R Press to redo last image transformation.Ctl-X Press to <a href="#imcu">cut</a> a region of
the image.Ctl-C Press to <a href="#imco">copy</a> a region of
the image.Ctl-V Press to <a href="#impa">paste</a> a region to
the image.< Press to halve the image size.
92 ImageMagick
. Press to return to the original image size.> Press to double the image size.% Press to resize the image to a width and height
you specify.Cmd-A Press to make any image transformations permanent.
By default, any image size transformations areapplied to the original image to create the imagedisplayed on the X server. However, thetransformations are not permanent (i.e. the originalimage does not change size only the X image does).For example, if you press ">" the X image willappear to double in size, but the original imagewill in fact remain the same size. To force theoriginal image to double in size, press ">" followedby "Cmd-A".
@ Press to refresh the image window.C Press to <a href="#imcr">crop</a> the image.[ Press to <a href="#imch">chop</a> the image.H Press to flop image in the horizontal direction.V Press to flip image in the vertical direction./ Press to rotate the image 90 degrees clockwise.\ Press to rotate the image 90 degrees
counter-clockwise.* Press to <a href="#imro">rotate</a> the image
the number of degrees you specify.S Press to shear the image the number of degrees
you specify.R Press to roll the image.T Press to trim the image edges.Shft-H Press to vary the color hue.Shft-S Press to vary the color saturation.Shft-L Press to vary the image brightness.Shft-G Press to gamma correct the image.Shft-C Press to spiff up the image contrast.Shft-Z Press to dull the image contrast.= Press to perform histogram equalization on
the image.Shft-N Press to perform histogram normalization on
the image.Shft-˜ Press to negate the colors of the image.. Press to convert the image colors to gray.Shft-# Press to set the maximum number of unique
colors in the image.F2 Press to reduce the speckles in an image.F2 Press to emboss an image.F4 Press to eliminate peak noise from an image.

6 Display 93
F5 Press to add noise to an image.F6 Press to sharpen an image.F7 Press to blur image an image.F8 Press to threshold the image.F9 Press to detect edges within an image.F10 Press to displace pixels by a random amount.F11 Press to shade the image using a distant light
source.F12 Press to lighten or darken image edges to create
a 3-D effect.F13 Press to segment the image by color.Meta-S Press to swirl image pixels about the center.Meta-I Press to implode image pixels about the center.Meta-W Press to alter an image along a sine wave.Meta-P Press to simulate an oil painting.Meta-C Press to simulate a charcoal drawing.Alt-X Press to <a href="#imcomp">composite</a> the image
with another.Alt-A Press to <a href="#iman">annotate</a> the image with text.Alt-D Press to <a href="#imdr">draw</a> a line on the image.Alt-P Press to <a href="#cole">edit an image pixel color</a >.Alt-M Press to <a href="#matt">edit the image matte</a> inf ormation.Alt-X Press to <a href="#imcomp">composite</a> the image w ith another.Alt-A Press to add a border to the image.Alt-F Press to add a ornamental frame to the image.Alt-Shft-! Press to add an image comment.Ctl-A Press to apply image processing techniques to a
region of interest.Shft-? Press to display information about the image.Shft-+ Press to map the zoom image window.Shft-P Press to preview an image enhancement, effect,
or f/x.F1 Press to display helpful information about
the "display" utility.Find Press to browse documentation about ImageMagick.1-9 Press to change the level of magnification.
Use the arrow keys to move the image one pixel up, down, left, or right within themagnify window. Be sure to first map the magnify window by pressing button 2.
Press ALT and one of the arrow keys to trim off one pixel from any side of theimage.
94 ImageMagick
6.9 X Resources
Display options can appear on the command line or in your X resource file.Options on the command line supersede values specified in your X resource file.SeeX(1) for more information on X resources.
Mostdisplay options have a corresponding X resource. In addition,display usesthe following X resources:
background (class Background) Specifies the preferred color to use for the Im-age window background. The default is #ccc.
borderColor (class BorderColor) Specifies the preferred color to use for theImage window border. The default is #ccc.
borderWidth (class BorderWidth) Specifies the width in pixels of the imagewindow border. The default is 2.
browseCommand (class browseCommand) Specifies the name of the pre-ferred browser when displaying ImageMagick documentation. The default isnetscape %s .
confirmExit (class ConfirmExit) Display pops up a dialog box to confirm exit-ing the program when exiting the program. Set this resource to False to exitwithout a confirmation.
displayGamma (class DisplayGamma) Specifies the gamma of the X server.
You can apply separate gamma values to the red, green, and blue channels of theimage with a gamma value list delineated with slashes (i.e. 1.7/2.3/1.2).
The default is 2.2.
displayWarnings (class DisplayWarnings) Displaypops up a dialog box when-ever a warning message occurs. Set this resource toFalse to ignore warningmessages.
font (class FontList) Specifies the name of the preferred font to use in normalformatted text. The default is 14 point Helvetica.
6 Display 95
font[1-9] (class Font[1-9]) Specifies the name of the preferred font to use whenannotating the image window with text. The default fonts arefixed, variable,5x8, 6x10, 7x13bold, 8x13bold, 9x15bold, 10x20, and 12x24.
foreground (class Foreground) Specifies the preferred color to use for textwithin the image window. The default is black.
gammaCorrect (class gammaCorrect) This resource, if true, will lighten ordarken an image of known gamma to match the gamma of the display (see re-sourcedisplayGamma). The default is True.
geometry (class Geometry) Specifies the preferred size and position of the imagewindow. It is not necessarily obeyed by all window managers.
Offsets, if present, are handled inX(1) style. A negative x offset is measuredfrom the right edge of the screen to the right edge of the icon,and a negative yoffset is measured from the bottom edge of the screen to the bottom edge of theicon.
iconGeometry (class IconGeometry) Specifies the preferred size and positionof the application when iconified. It is not necessarily obeyed by all windowmanagers.
Offsets, if present, are handled in the same manner as in class Geometry.
iconic (class Iconic) This resource indicates that you would prefer that the appli-cation’s windows initially not be visible as if the windows had be immediatelyiconified by you. Window managers may choose not to honor the application’srequest.
magnify (class Magnify) specifies an integral factor by which the image shouldbe enlarged. The default is 3.
This value only affects the magnification window which is invoked with buttonnumber 3 after the image is displayed.
matteColor (class MatteColor) Specify the color of windows. It is used for thebackgrounds of windows, menus, and notices. A 3D effect is achieved by usinghighlight and shadow colors derived from this color. Default value: #697B8F.
96 ImageMagick
name (class Name) This resource specifies the name under which resources for theapplication should be found. This resource is useful in shell aliases to distinguishbetween invocations of an application, without resorting to creating links to alterthe executable file name. The default is the application name.
pen[1-9] (class Pen[1-9]) Specifies the color of the preferred font to use whenannotating the image window with text. The default colors are black, blue, green,cyan, gray, red, magenta, yellow, and white.
printCommand (class PrintCommand) This command is executed wheneverPrint is issued. In general, it is the command to printPostScriptto your printer.Default value:lp -c -s %i .
sharedMemory (class SharedMemory) This resource specifies whether displayshould attempt use shared memory for pixmaps. ImageMagick must be com-piled with shared memory support, and the display must support the MIT-SHMextension. Otherwise, this resource is ignored. The default is True.
textFont (class textFont) Specifies the name of the preferred font to use in fixed(typewriter style) formatted text. The default is 14 point Courier.
title (class Title) This resource specifies the title to be used for the image window.This information is sometimes used by a window manager to provide a headeridentifying the window. The default is the image file name.
undoCache (class UndoCache) Specifies, in mega-bytes, the amount of memoryin the undo edit cache. Each time you modify the image it is saved in the undoedit cache as long as memory is available. You can subsequently undoone ormore of these transformations. The default is 16 Megabytes.
usePixmap (class UsePixmap) Images are maintained as a XImage by default.Set this resource to True to utilize a server Pixmap instead.This option is usefulif your image exceeds the dimensions of your server screen and you intend to panthe image. Panning is much faster with Pixmaps than with a XImage. Pixmapsare considered a precious resource, use them with discretion.
To set the geometry of the Magnify or Pan or window, use the geometry resource.For example, to set the Pan window geometry to 256x256, use:
display.pan.geometry: 256x256
6 Display 97
6.10 Image Loading
To select an image to display, chooseOpenof theFile sub-menu from the Com-mand widget. A file browser is displayed. To choose a particular image file,move the pointer to the filename and press any button. The filename is copiedto the text window. Next, pressOpenor press theRETURN key. Alternatively,you can type the image file name directly into the text window.To descend direc-tories, choose a directory name and press the button twice quickly. A scrollbarallows a large list of filenames to be moved through the viewing area if it exceedsthe size of the list area.
You can trim the list of file names by using shell globbing characters. For exam-ple, type*.jpg to list only files that end with.jpg .
To select your image from the X server screen instead of from afile, ChooseGrab of theOpenwidget.
6.11 Visual Image Directory
To create a Visual Image Directory, choose Visual Directoryof the File sub-menu from the Command widget . A file browser is displayed. To create a VisualImage Directory from all the images in the current directory, pressDirectory orpress theRETURN key. Alternatively, you can select a set of image names byusing shell globbing characters. For example, type*.jpg to include only filesthat end with.jpg . To descend directories, choose a directory name and pressthe button twice quickly. A scrollbar allows a large list of filenames to be movedthrough the viewing area if it exceeds the size of the list area.
After you select a set of files, they are turned into thumbnails and tiled onto asingle image. Now move the pointer to a particular thumbnailand pressbutton3 and drag. Finally, select Open. The image represented by thethumbnail isdisplayed at its full size. ChooseNext from theFile sub-menu of the Commandwidget to return to the Visual Image Directory.
6.12 Image Cutting
Note that cut information for image window is not retained for colormapped Xserver visuals (e.g.StaticColor, StaticColor, GRAYScale, PseudoColor). Correctcutting behavior may require aTrueColoror DirectColor visual or aStandardColormap.
To begin, press chooseCut of the Edit sub-menu from the Command widget.Alternatively, pressF3 in the image window.
A small window appears showing the location of the cursor in the image window.You are now in cut mode. In cut mode, the Command widget has these options:

98 ImageMagick
HelpDismiss
To define a cut region, press button 1 and drag. The cut region is defined by ahighlighted rectangle that expands or contracts as it follows the pointer. Onceyou are satisfied with the cut region, release the button. Youare now in rectifymode. In rectify mode, the Command widget has these options:
CutHelpDismiss
You can make adjustments by moving the pointer to one of the cut rectanglecorners, pressing a button, and dragging. Finally, press Cut to commit your copyregion. To exit without cutting the image, press Dismiss.
6.13 Image Copying
To begin, press chooseCopy of theEdit sub-menu from the Command widget.Alternatively, pressF4 in the image window.
A small window appears showing the location of the cursor in the image win-dow. You are now in copy mode. In copy mode, the Command widgethas theseoptions:
HelpDismiss
To define a copy region, press button 1 and drag. The copy region is defined bya highlighted rectangle that expands or contracts as it follows the pointer. Onceyou are satisfied with the copy region, release the button. You are now in rectifymode. In rectify mode, the Command widget has these options:
CopyHelpDismiss
You can make adjustments by moving the pointer to one of the copy rectanglecorners, pressing a button, and dragging. Finally, press Copy to commit yourcopy region. To exit without copying the image, press Dismiss.
6.14 Image Pasting
To begin, press choosePasteof theEdit sub-menu from the Command widget.Alternatively, pressF5 in the image window.

6 Display 99
A small window appears showing the location of the cursor in the image window.You are now in Paste mode. To exit immediately, press Dismiss. In Paste mode,the Command widget has these options:
Operatorsoverinoutatopxorplusminusaddsubtractdifferencemultiplybumpmapreplace
HelpDismiss
Choose a composite operation from theOperators sub-menu of the Commandwidget. How each operator behaves is described below.image windowis theimage currently displayed on your X server andimage is the image obtainedwith the File Browser widget.
over The result is the union of the two image shapes, withimageobscuringimagewindowin the region of overlap.
in The result is simplyimagecut by the shape ofimage window. None of the imagedata of image window is in the result.
out The resulting image isimagewith the shape ofimage windowcut out.
atop The result is the same shape asimage window, with imageobscuringimagewindowwhere the image shapes overlap. Note this differs from over because theportion of image outsideimage window’s shape does not appear in the result.
xor The result is the image data from bothimageandimage windowthat is outsidethe overlap region. The overlap region is blank.
100 ImageMagick
plus The result is just the sum of the image data. Output values arecropped to 255(no overflow). This operation is independent of the matte channels.
minus The result ofimage- image window, with underflow cropped to zero. Thematte channel is ignored (set to 255, full coverage).
add The result ofimage+ image window, with overflow wrapping around (mod 256).
subtract The result ofimage - image window, with underflow wrapping around(mod 256). The add and subtract operators can be used to perform reversibletransformations.
difference The result of abs(image- image window). This is useful for comparingtwo very similar images.
multiply The result ofimage* image window. This is useful for the creation ofdrop-shadows.
bumpmap The result ofimage windowshaded bywindow.
replace The resulting image isimage windowreplaced withimage. Here the matteinformation is ignored.
The image compositor requires a matte, or alpha channel in the image for someoperations. This extra channel usually defines a mask which represents a sort of acookie-cutter for the image. This is the case when matte is 255 (full coverage) forpixels inside the shape, zero outside, and between zero and 255 on the boundary.If image does not have a matte channel, it is initialized with0 for any pixelmatching in color to pixel location (0,0), otherwise 255. See Matte Editing for amethod of defining a matte channel.
Note that matte information for image window is not retainedfor colormappedX server visuals (e.g.StaticColor, StaticColor, GrayScale, PseudoColor). Cor-rect compositing behavior may require aTrueColoror DirectColor visual or aStandard Colormap.
Choosing a composite operator is optional. The default operator is replace. How-ever, you must choose a location to composite your image and press button 1.Press and hold the button before releasing and an outline of the image will ap-pear to help you identify your location.
The actual colors of the pasted image is saved. However, the color that appears inimage window may be different. For example, on a monochrome screen image
6 Display 101
window will appear black or white even though your pasted image may havemany colors. If the image is saved to a file it is written with the correct colors. Toassure the correct colors are saved in the final image, anyPseudoClassimage ispromoted toDirectClass. To force aPseudoClassimage to remainPseudoClass,use-colors.
6.15 Image Cropping
To begin, press chooseCrop of the Transform submenu from the Commandwidget. Alternatively, press [ in the image window.
A small window appears showing the location of the cursor in the image win-dow. You are now in crop mode. In crop mode, the Command widgethas theseoptions:
HelpDismiss
To define a cropping region, press button 1 and drag. The cropping region isdefined by a highlighted rectangle that expands or contractsas it follows thepointer. Once you are satisfied with the cropping region, release the button. Youare now in rectify mode. In rectify mode, the Command widget has these op-tions:
CropHelpDismiss
You can make adjustments by moving the pointer to one of the cropping rectan-gle corners, pressing a button, and dragging. Finally, press Crop to commit yourcropping region. To exit without cropping the image, press Dismiss.
6.16 Image Chopping
An image is chopped interactively. There is no command line argument to chopan image. To begin, chooseChop of theTransform sub-menu from the Com-mand widget. Alternatively, press ] in the Image window.
You are now inChop mode. To exit immediately, pressDismiss. In Chop mode,the Command widget has these options:
Directionhorizontalvertical

102 ImageMagick
HelpDismiss
If the you choose the horizontal direction (this is the default), the area of theimage between the two horizontal endpoints of the chop line is removed. Other-wise, the area of the image between the two vertical endpoints of the chop lineis removed.
Select a location within the image window to begin your chop,press and holdany button. Next, move the pointer to another location in theimage. As youmove a line will connect the initial location and the pointer. When you releasethe button, the area within the image to chop is determined bywhich directionyou choose from the Command widget.
To cancel the image chopping, move the pointer back to the starting point of theline and release the button.
6.17 Image Rotation
Press the / key to rotate the image 90 degrees or to rotate -90 degrees. To interac-tively choose the degree of rotation, chooseRotate...of theTransform submenufrom the Command Widget. Alternatively, press * in the imagewindow.
A small horizontal line is drawn next to the pointer. You are now in rotate mode.To exit immediately, press Dismiss. In rotate mode, the Command widget hasthese options:
Pixel ColorblackbluecyangreengrayredmagentayellowwhiteBrowser...
Directionhorizontalvertical
HelpDismiss
Choose a background color from the Pixel Color sub-menu. Additional back-ground colors can be specified with the color browser. You canchange the menucolors by setting the X resources pen1 through pen9.
6 Display 103
If you choose the color browser and pressGrab, you can select the backgroundcolor by moving the pointer to the desired color on the screenand press anybutton.
Choose a point in the image window and press this button and hold. Next, movethe pointer to another location in the image. As you move a line connects the ini-tial location and the pointer. When you release the button, the degree of imagerotation is determined by the slope of the line you just drew.The slope is rela-tive to the direction you choose from the Direction sub-menuof the Commandwidget.
To cancel the image rotation, move the pointer back to the starting point of theline and release the button.
6.18 Image Segmentation
ChooseEffects-
�
Segmentto segment an image by analyzing the histogramsof the color components and identifying units that are homogeneous with thefuzzy c-means technique. The scale-space filter analyzes the histograms of thethree color components of the image and identifies a set of classes. The extentsof each class is used to coarsely segment the image with thresholding. The colorassociated with each class is determined by the mean color ofall pixels withinthe extents of a particular class. Finally, any unclassifiedpixels are assigned tothe closest class with the fuzzy c-means technique. The fuzzy c-Means algorithmcan be summarized as follows:
Build a histogram, one for each color component of the image.For each histogram, successively apply the scale-space filter and build an in-
terval tree of zero crossings in the second derivative at each scale. Analyzethis scale-space “fingerprint” to determine which peaks or valleys in the his-togram are most predominant.
The fingerprint defines intervals on the axis of the histogram. Each intervalcontains either a minima or a maxima in the original signal. If each colorcomponent lies within the maxima interval, that pixel is considered “classi-fied” and is assigned an unique class number.
Any pixel that fails to be classified in the above thresholding pass is classi-fied using the fuzzy c-Means technique. It is assigned to one of the classesdiscovered in the histogram analysis phase.
The fuzzy c-Means technique attempts to cluster a pixel by finding the localminima of the generalized within group sum of squared error objective function.A pixel is assigned to the closest class of which the fuzzy membership has amaximum value.
For additional information see:Young Won Lim, Sang Uk Lee, ”On The ColorImage Segmentation Algorithm Based on the Thresholding andthe Fuzzy

104 ImageMagick
c-Means Techniques”, Pattern Recognition, Volume 23, Number 9, pages 935-952, 1990.
6.19 Image Annotation
An image is annotated interactively. There is no command line argument to an-notate an image. To begin, chooseAnnotate of the Image Edit sub-menu fromthe Command widget. Alternatively, press a in the image window.
A small window appears showing the location of the cursor in the image window.You are now in annotate mode. To exit immediately, press Dismiss. In annotatemode, the Command widget has these options:
Font Namefixedvariable5x86x107x13bold8x13bold9x15bold10x2012x24Browser...
Font ColorblackbluecyangreengrayredmagentayellowwhitetransparentBrowser...
Box Colorblackbluecyangreengrayredmagentayellow

6 Display 105
whitetransparentBrowser...
Rotate Text-90-45-300304590180Dialog...
HelpDismiss
Choose a font name from theFont Namesub-menu. Additional font names canbe specified with the font browser. You can change the menu names by settingthe X resources font1 through font9.
Choose a font color from theFont Color sub-menu. Additional font colors canbe specified with the color browser. You can change the menu colors by settingthe X resources pen1 through pen9.
If you select the color browser and pressGrab, you can choose the font color bymoving the pointer to the desired color on the screen and press any button.
If you choose to rotate the text, chooseRotate Text from the menu and select anangle. Typically you will only want to rotate one line of textat a time. Dependingon the angle you choose, subsequent lines may end up overwriting each other.
Choosing a font and its color is optional. The default font isfixed and the de-fault color is black. However, you must choose a location to begin entering textand press a button. An underscore character will appear at the location of thepointer. The cursor changes to a pencil to indicate you are intext mode. To exitimmediately, press Dismiss.
In text mode, any key presses will display the character at the location of the un-derscore and advance the underscore cursor. Enter your textand once completedpress Apply to finish your image annotation. To correct errors pressBACKSPACE. To delete an entire line of text, pressDELETE . Any text that exceedsthe boundaries of the image window is automatically continued onto the nextline.
The actual color you request for the font is saved in the image. However, thecolor that appears in your Image window may be different. Forexample, on amonochrome screen the text will appear black or white even ifyou choose thecolor red as the font color. However, the image saved to a file with -write iswritten with red lettering. To assure the correct color textin the final image,any PseudoClassimage is promoted toDirectClass(see miff(5)). To force aPseudoClassimage to remainPseudoClass, use-colors.
106 ImageMagick
6.20 Image Compositing
An image composite is created interactively.There is no command line argu-ment to composite an image. To begin, chooseCompositeof the Image Editfrom the Command widget. Alternatively, press x in the Imagewindow.
First a popup window is displayed requesting you to enter an image name. PressComposite, Grab or type a file name. PressCancel if you choose not to createa composite image. When you chooseGrab, move the pointer to the desiredwindow and press any button.
If the Compositeimage does not have any matte information, you are informedand the file browser is displayed again. Enter the name of a mask image. Theimage is typically grayscale and the same size as the composite image. If theimage is not grayscale, it is converted to grayscale and the resulting intensitiesare used as matte information.
A small window appears showing the location of the cursor in the image win-dow. You are now in composite mode. To exit immediately, press Dismiss. Incomposite mode, the Command widget has these options:
Operatorsoverinoutatopxorplusminusaddsubtractdifferencebumpmapreplace
BlendDisplaceHelpDismiss
Choose a composite operation from the Operators sub-menu ofthe Commandwidget. How each operator behaves is described below. imagewindow is theimage currently displayed on your X server and image is the image obtained
over The result is the union of the two image shapes, withimageobscuringimagewindowin the region of overlap.

6 Display 107
in The result is simplyimagecut by the shape ofimage window. None of the imagedata of image window is in the result.
out The resulting image isimagewith the shape ofimage windowcut out.
atop The result is the same shape asimage window, with imageobscuringimagewindowwhere the image shapes overlap. Note this differs from over because theportion of image outsideimage window’s shape does not appear in the result.
xor The result is the image data from bothimageandimage windowthat is outsidethe overlap region. The overlap region is blank.
plus The result is just the sum of the image data. Output values arecropped to 255(no overflow). This operation is independent of the matte channels.
minus The result ofimage- image window, with underflow cropped to zero. Thematte channel is ignored (set to 255, full coverage).
add The result ofimage+ image window, with overflow wrapping around (mod 256).
subtract The result ofimage - image window, with underflow wrapping around(mod 256). The add and subtract operators can be used to perform reversibletransformations.
difference The result of abs(image- image window). This is useful for comparingtwo very similar images.
bumpmap The result ofimage windowshaded bywindow.
replace The resulting image isimage windowreplaced withimage. Here the matteinformation is ignored.
The image compositor requires a matte, or alpha channel in the image for someoperations. This extra channel usually defines a mask which represents a sort of acookie-cutter for the image. This is the case when matte is 255 (full coverage) forpixels inside the shape, zero outside, and between zero and 255 on the boundary.If image does not have a matte channel, it is initialized with0 for any pixel

108 ImageMagick
matching in color to pixel location (0,0), otherwise 255. See Matte Editing for amethod of defining a matte channel.
If you chooseblend, the composite operator becomesover. The image mattechannel percent transparency is initialized to factor. Theimage window is ini-tialized to (100-factor). Where factor is the value you specify in the Dialog wid-get.
Displaceshifts the image pixels as defined by a displacement map. Withthisoption, image is used as a displacement map. Black, within the displacementmap, is a maximum positive displacement. White is a maximum negative dis-placement and middle gray is neutral. The displacement is scaled to determinethe pixel shift. By default, the displacement applies in both the horizontal andvertical directions. However, if you specifymask, imageis the horizontal X dis-placement andmaskthe vertical Y displacement.
Note that matte information for image window is not retainedfor colormappedX server visuals (e.g.StaticColor, StaticColor, GrayScale, PseudoColor). Cor-rect compositing behavior may require aTrueColoror DirectColor visual or aStandard Colormap.
Choosing a composite operator is optional. The default operator is replace. How-ever, you must choose a location to composite your image and press button 1.Press and hold the button before releasing and an outline of the image will ap-pear to help you identify your location.
The actual colors of the composite image is saved. However, the color that ap-pears in image window may be different. For example, on a monochrome screenImage window will appear black or white even though your composited imagemay have many colors. If the image is saved to a file it is written with the correctcolors. To assure the correct colors are saved in the final image, any PseudoClassimage is promoted toDirectClass(see miff). To force aPseudoClassimage toremainPseudoClass, use-colors.
6.21 Color Editing
Changing the the color of a set of pixels is performed interactively. There is nocommand line argument to edit a pixel. To begin, chooseColor from the Im-age Edit submenu of the Command widget. Alternatively, press c in theimagewindow.
A small window appears showing the location of the cursor in the image window.You are now in color edit mode. To exit immediately, pressDismiss. In color editmode, theCommand widgethas these options:
Methodpointreplace

6 Display 109
floodfillreset
Pixel ColorblackbluecyangreengrayredmagentayellowwhiteBrowser...
Border ColorblackbluecyangreengrayredmagentayellowwhiteBrowser...
Fuzz024816Dialog...
UndoHelpDismiss
Choose a color editing method from theMethod sub-menu of the Commandwidget. Thepoint method recolors any pixel selected with the pointer unlessthe button is released. Thereplace methodrecolors any pixel that matches thecolor of the pixel you select with a button press.Floodfill recolors any pixel thatmatches the color of the pixel you select with a button press and is a neighbor.Whereasfilltoborder changes the matte value of any neighbor pixel that is notthe border color. Finallyresetchanges the entire image to the designated color.
Next, choose a pixel color from thePixel Color sub-menu. Additional pixelcolors can be specified with the color browser. You can changethe menu colorsby setting the X resources pen1 through pen9.
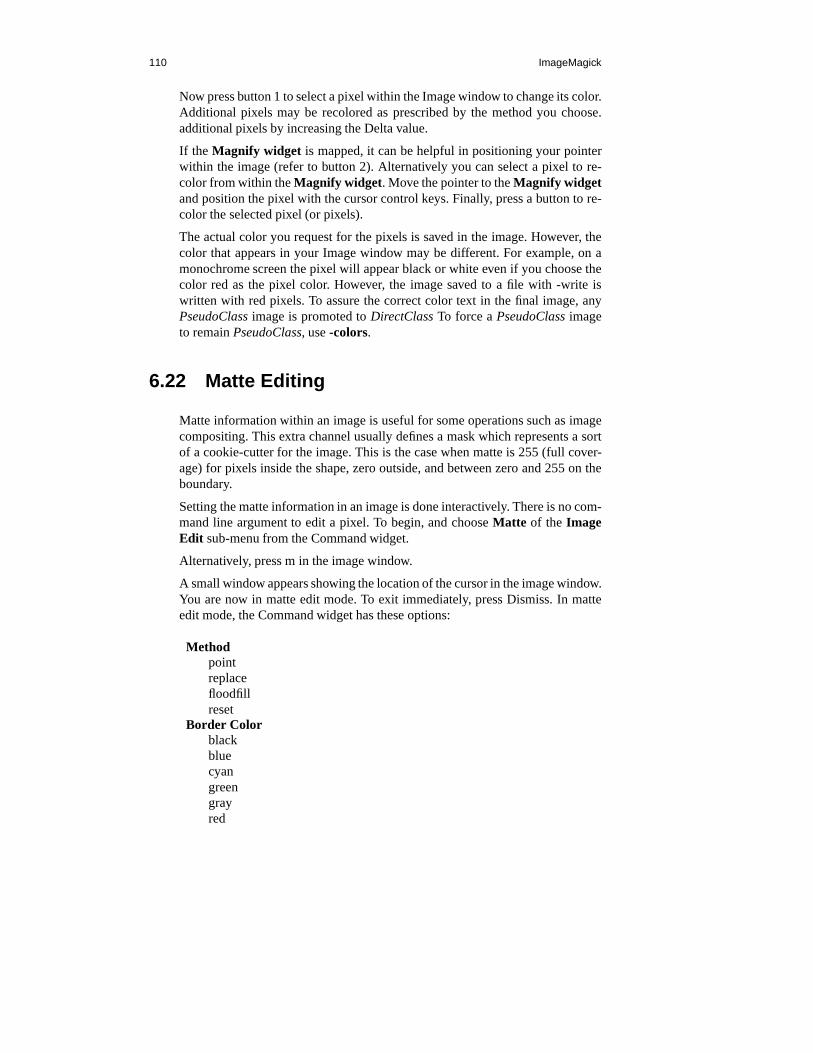
110 ImageMagick
Now press button 1 to select a pixel within the Image window tochange its color.Additional pixels may be recolored as prescribed by the method you choose.additional pixels by increasing the Delta value.
If the Magnify widget is mapped, it can be helpful in positioning your pointerwithin the image (refer to button 2). Alternatively you can select a pixel to re-color from within theMagnify widget. Move the pointer to theMagnify widgetand position the pixel with the cursor control keys. Finally, press a button to re-color the selected pixel (or pixels).
The actual color you request for the pixels is saved in the image. However, thecolor that appears in your Image window may be different. Forexample, on amonochrome screen the pixel will appear black or white even if you choose thecolor red as the pixel color. However, the image saved to a filewith -write iswritten with red pixels. To assure the correct color text in the final image, anyPseudoClassimage is promoted toDirectClassTo force aPseudoClassimageto remainPseudoClass, use-colors.
6.22 Matte Editing
Matte information within an image is useful for some operations such as imagecompositing. This extra channel usually defines a mask whichrepresents a sortof a cookie-cutter for the image. This is the case when matte is 255 (full cover-age) for pixels inside the shape, zero outside, and between zero and 255 on theboundary.
Setting the matte information in an image is done interactively. There is no com-mand line argument to edit a pixel. To begin, and chooseMatte of the ImageEdit sub-menu from the Command widget.
Alternatively, press m in the image window.
A small window appears showing the location of the cursor in the image window.You are now in matte edit mode. To exit immediately, press Dismiss. In matteedit mode, the Command widget has these options:
Methodpointreplacefloodfillreset
Border Colorblackbluecyangreengrayred
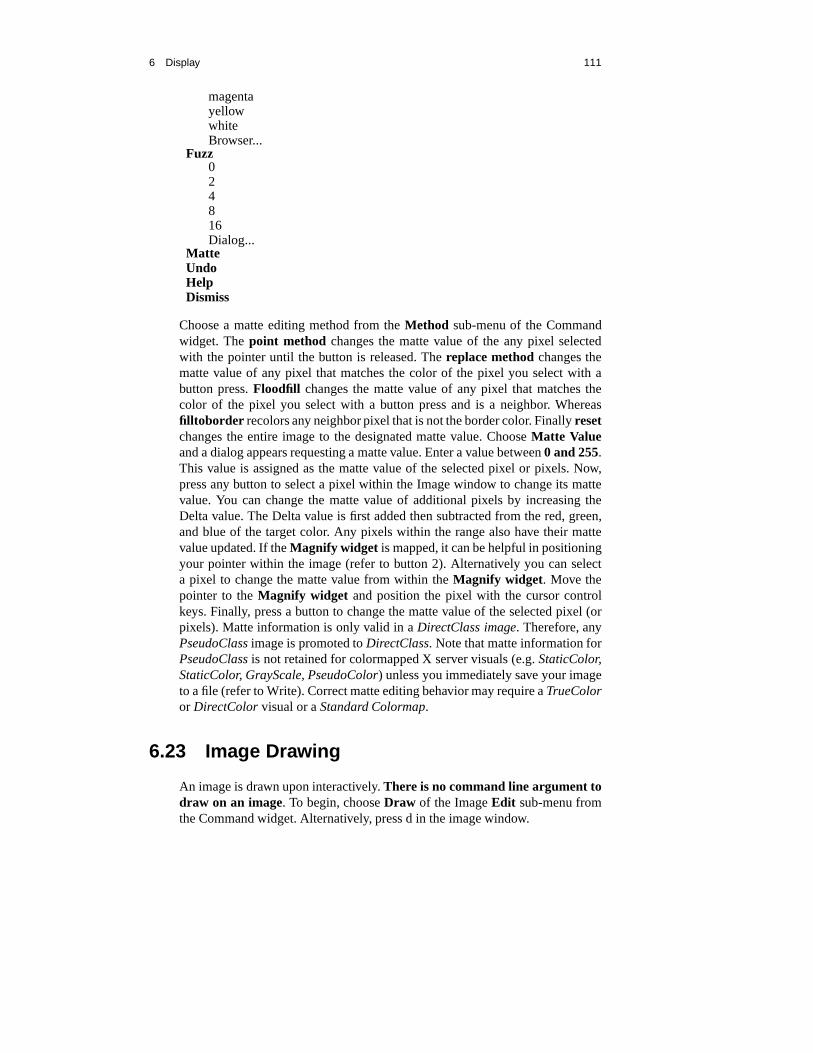
6 Display 111
magentayellowwhiteBrowser...
Fuzz024816Dialog...
MatteUndoHelpDismiss
Choose a matte editing method from theMethod sub-menu of the Commandwidget. Thepoint method changes the matte value of the any pixel selectedwith the pointer until the button is released. Thereplace methodchanges thematte value of any pixel that matches the color of the pixel you select with abutton press.Floodfill changes the matte value of any pixel that matches thecolor of the pixel you select with a button press and is a neighbor. Whereasfilltoborder recolors any neighbor pixel that is not the border color. Finally resetchanges the entire image to the designated matte value. ChooseMatte Valueand a dialog appears requesting a matte value. Enter a value between0 and 255.This value is assigned as the matte value of the selected pixel or pixels. Now,press any button to select a pixel within the Image window to change its mattevalue. You can change the matte value of additional pixels byincreasing theDelta value. The Delta value is first added then subtracted from the red, green,and blue of the target color. Any pixels within the range alsohave their mattevalue updated. If theMagnify widget is mapped, it can be helpful in positioningyour pointer within the image (refer to button 2). Alternatively you can selecta pixel to change the matte value from within theMagnify widget. Move thepointer to theMagnify widget and position the pixel with the cursor controlkeys. Finally, press a button to change the matte value of theselected pixel (orpixels). Matte information is only valid in aDirectClass image. Therefore, anyPseudoClassimage is promoted toDirectClass. Note that matte information forPseudoClassis not retained for colormapped X server visuals (e.g.StaticColor,StaticColor, GrayScale, PseudoColor) unless you immediately save your imageto a file (refer to Write). Correct matte editing behavior mayrequire aTrueColoror DirectColor visual or aStandard Colormap.
6.23 Image Drawing
An image is drawn upon interactively.There is no command line argument todraw on an image. To begin, chooseDraw of the ImageEdit sub-menu fromthe Command widget. Alternatively, press d in the image window.
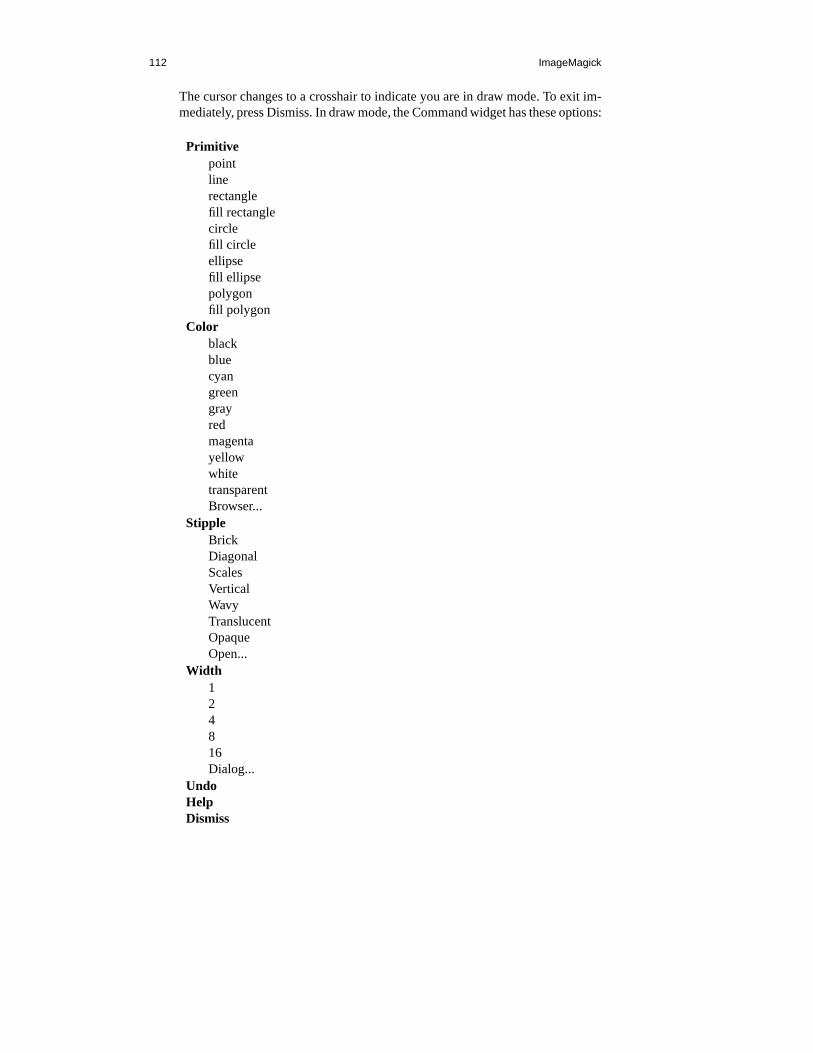
112 ImageMagick
The cursor changes to a crosshair to indicate you are in draw mode. To exit im-mediately, press Dismiss. In draw mode, the Command widget has these options:
Primitivepointlinerectanglefill rectanglecirclefill circleellipsefill ellipsepolygonfill polygon
ColorblackbluecyangreengrayredmagentayellowwhitetransparentBrowser...
StippleBrickDiagonalScalesVerticalWavyTranslucentOpaqueOpen...
Width124816Dialog...
UndoHelpDismiss

6 Display 113
Choose a drawing primitive from thePrimitive sub-menu.
Next, choose a color from theColor sub-menu. Additional colors can be spec-ified with the color browser. You can change the menu colors bysetting the Xresources pen1 through pen9. The transparent color updatesthe image mattechannel and is useful for image compositing.
If you choose the color browser and pressGrab, you can select the primitivecolor by moving the pointer to the desired color on the screenand press anybutton. The transparent color updates the image matte channel and is useful forimage compositing.
Choose a stipple, if appropriate, from theStipple sub-menu. Additional stipplescan be specified with the file browser. Stipples obtained fromthe file browsermust be on disk in the X11 bitmap format.
Choose a line width, if appropriate, from theWidth sub-menu. To choose aspecific width select theDialog widget.
Choose a point in the image window and press button 1 and hold.Next, move thepointer to another location in the image. As you move, a line connects the initiallocation and the pointer. When you release the button, the image is updated withthe primitive you just drew. For polygons, the image is updated when you pressand release the button without moving the pointer.
To cancel image drawing, move the pointer back to the starting point of the lineand release the button.
6.24 Region of Interest
To begin, press choose Region of Interest of the Pixel Transform sub-menu fromthe Command widget. Alternatively, press R in the image window.
A small window appears showing the location of the cursor in the image window.You are now in region of interest mode. In region of interest mode, the Commandwidget has these options:
HelpDismiss
To define a region of interest, press button 1 and drag. The region of interestis defined by a highlighted rectangle that expands or contracts as it follows thepointer. Once you are satisfied with the region of interest, release the button. Youare now in apply mode. In apply mode the Command widget has these options:
FileSave...Print...
Edit
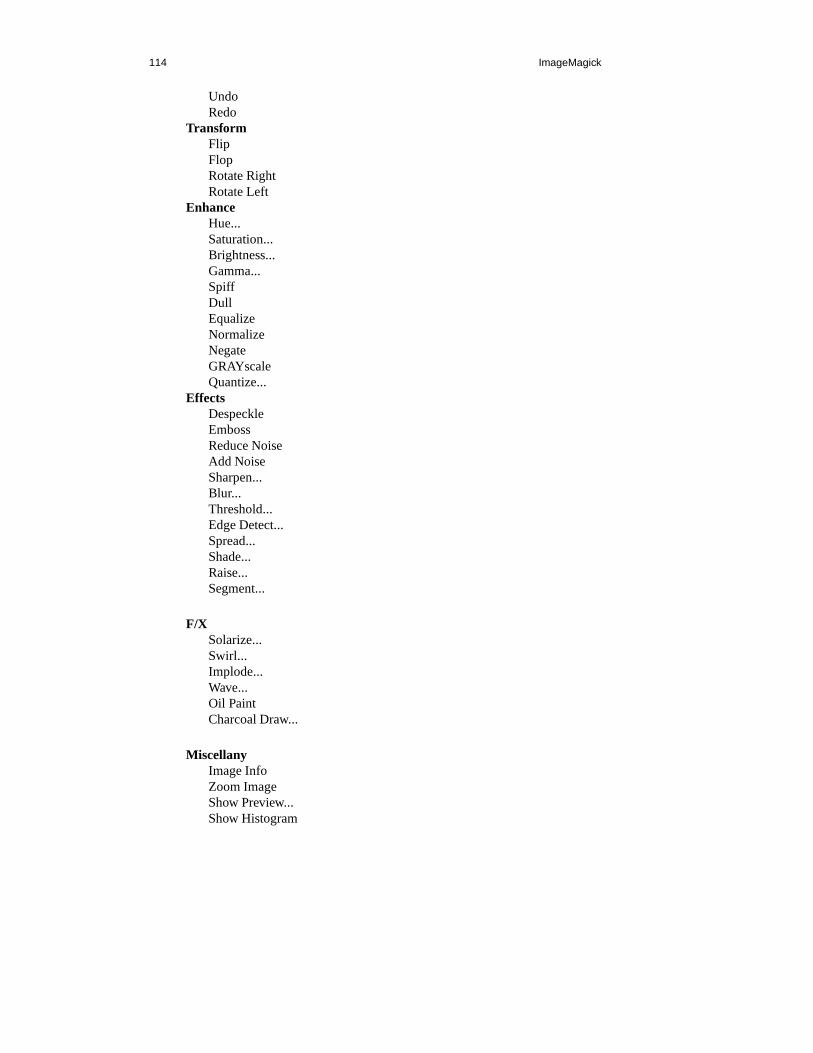
114 ImageMagick
UndoRedo
TransformFlipFlopRotate RightRotate Left
EnhanceHue...Saturation...Brightness...Gamma...SpiffDullEqualizeNormalizeNegateGRAYscaleQuantize...
EffectsDespeckleEmbossReduce NoiseAdd NoiseSharpen...Blur...Threshold...Edge Detect...Spread...Shade...Raise...Segment...
F/XSolarize...Swirl...Implode...Wave...Oil PaintCharcoal Draw...
MiscellanyImage InfoZoom ImageShow Preview...Show Histogram
6 Display 115
Show MatteHelpDismiss
You can make adjustments to the region of interest by moving the pointer toone of the rectangle corners, pressing a button, and dragging. Finally, choose animage processing technique from the Command widget. You canchoose morethan one image processing technique to apply to an area. Alternatively, you canmove the region of interest before applying another image processing technique.To exit, press Dismiss.
6.25 Image Panning
When an image exceeds the width or height of the X server screen, display mapsa small panning icon. The rectangle within the panning icon shows the areathat is currently displayed in the the image window. To pan about the image,press any button and drag the pointer within the panning icon. The pan rectanglemoves with the pointer and the image window is updated to reflect the locationof the rectangle within the panning icon. When you have selected the area of theimage you wish to view, release the button.
Use the arrow keys to pan the image one pixel up, down, left, orright within theimage window.
The panning icon is withdrawn if the image becomes smaller than the dimen-sions of the X server screen.
6.26 User Preferences
Preferences affect the default behavior ofdisplay(1). The preferences are eithertrue or false and are stored in your home directory as.displayrc :
display image centered on a backdropThis backdrop covers the entire workstation screen and is useful for hidingother X window activity while viewing the image. The color ofthe backdropis specified as the background color. Refer to X Resources fordetails.
confirm on program exitAsk for a confirmation before exiting thedisplay(1)program.
correct image for display gammaIf the image has a known gamma, the gamma is corrected to matchthat ofthe X server (see the X ResourcedisplayGamma).
display warning messagesDisplay any warning messages.

116 ImageMagick
apply Floyd/Steinberg error diffusion to imageThe basic strategy of dithering is to trade intensity resolution for spatialresolution by averaging the intensities of several neighboring pixels. Imageswhich suffer from severe contouring when reducing colors can be improvedwith this preference.
use a shared colormap for colormapped X visualsThis option only applies when the default X server visual isPseudoColororGRAYScale. Refer to-visual for more details. By default, a shared colormapis allocated. The image shares colors with other X clients. Some image col-ors could be approximated, therefore your image may look very differentthan intended. Otherwise the image colors appear exactly asthey are de-fined. However, other clients may go technicolor when the image colormapis installed.
display images as an X server pixmapImages are maintained as a XImage by default. Set this resource to Trueto utilize a server Pixmap instead. This option is useful if your image ex-ceeds the dimensions of your server screen and you intend to pan the image.Panning is much faster with Pixmaps than with a XImage. Pixmaps are con-sidered a precious resource, use them with discretion.
6.27 Environment
DISPLAY To get the default host, display number, and screen.
6.28 Acknowledgements
TheMIT X Consortium for making network transparent graphics a reality.
Peder Langlo, Hewlett Packard, Norway, made hundreds of suggestions andbug reports. Without Peder,ImageMagick would not be nearly as useful as it istoday.
Rod BogartandJohn W. Peterson, University of Utah. Image compositing isloosely based on rlecomp of the Utah Raster Toolkit.
Michael Halle, Spatial Imaging Group at MIT , for the initial implementationof Alan Paeth’s image rotation algorithm.
David Pensak, ImageMagick Studio, for providing a computing environmentthat made this program possible.
Paul Raveling, USC Information Sciences Institute. The spatial subdivisioncolor reduction algorithm is based on his Img software.

6 Display 117
6.29 Authors
John Cristy, ImageMagick Studio LLC,Glenn Randers-Pehrson, ImageMagick Studio LLC.

7 Identify
7.1 NAME
identify - describe an image or image sequence.
7.2 Synopsis
identify file [ file ... ]
7.3 Description
Identify describes the format and characteristics of one or more image files. Itwill also report if an image is incomplete or corrupt. The information displayedincludes the scene number, the file name, the width and heightof the image,whether the image is colormapped or not, the number of colorsin the image, thenumber of bytes in the image, the format of the image (JPEG, PNM, etc.), andfinally the number of seconds it took to read and process the image. An exampleline output fromidentify follows:
images/aquarium.miff 640x480 PseudoClass 256c308135b MIFF 1s
If -verbose is set, expect additional output including any image comment:
Image: images/aquarium.miffclass: PseudoClasscolors: 256signature: eb5dca81dd93ae7e6ffae99a527eb5dca8...
118
7 Identify 119
matte: Falsegeometry: 640x480
depth: 8bytes: 308135format: MIFFcomments:Imported from MTV raster image: aquarium.mtv
For some formats, additional format-specific information about the file will bewritten if the-debug coder or -debug all option is used.
7.4 Options
Options are processed in command line order. Any option you specify on thecommand line remains in effect for the set of images immediately following,until the set is terminated by the appearance of any option or-noop.
For a more detailed description of each option, seeImageMagick(1).
-authenticate
�
string
�
decrypt image with this password
-cache
�
threshold
�
(This option has been replaced by the -limit option)
-debug
�
events
�
enable debug printout
-density
�
width
�
x
�
height
�
vertical and horizontal resolution in pixels of theimage
-depth
�
value
�
depth of the image
-format
�
string
�
output formatted image characteristics
-help print usage instructions
-interlace
�
type
�
the type of interlacing scheme
-limit
�
type
� �
value
�
Disk, File, Map, or Memory resource limit

120 ImageMagick
-list
�
type
�
the type of list
-log
�
string
�
-ping efficiently determine image characteristics
-sampling-factor
�
horizontal factor
�
x
�
vertical factor
�
sampling factorsused by JPEG or MPEG-2 encoder and YUV decoder/encoder.
-size
�
width
�
x
�
height
��
+offset
�
width and height of the image
-verbose print detailed information about the image
-version print ImageMagick version string
For a more detailed description of each option, seeImageMagick(1).
7.5 Authors
John Cristy, ImageMagick Studio LLC,Glenn Randers-Pehrson, ImageMagick Studio LLC.
8 Import
8.1 NAME
import - capture some or all of an X server screen and save the image to a file.
8.2 Synopsis
import [ options... ] file
8.3 Description
Import reads an image from any visible window on an X server and outputsit as an image file. You can capture a single window, the entirescreen, or anyrectangular portion of the screen. Usedisplay for redisplay, printing, editing,formatting, archiving, image processing, etc. of the captured image.
The target window can be specified by id, name, or may be selected by clickingthe mouse in the desired window. If you press a button and thendrag, a rectanglewill form which expands and contracts as the mouse moves. To save the portionof the screen defined by the rectangle, just release the button. The keyboard bellis rung once at the beginning of the screen capture and twice when it completes.
8.4 Examples
To select an X window or an area of the screen with the mouse andsave it in theMIFF image format to a file entitled window.miff, use:
import window.miff
121

122 ImageMagick
To select an X window or an area of the screen with the mouse andsave it in theEncapsulated PostScript format to include in another document, use:
import figure.eps
To capture the entire X server screen in the JPEG image formatin a file entitledroot.jpeg, without using the mouse, use:
import -window root root.jpeg
To capture the 512x256 area at the upper right corner of the X server screenin the PNG image format in a well-compressed file entitled corner.png, withoutusing the mouse, use:
import -window root -crop 512x256-0+0 -quality 90corner.png
8.5 Options
Options are processed in command line order. Any option you specify on thecommand line remains in effect until it is explicitly changed by specifying theoption again with a different effect.
Import options can appear on the command line or in your X resources file.SeeX(1). Options on the command line supersede values specified in your Xresources file.
For a more detailed description of each option, seeImageMagick(1).
-bordercolor
�
color
�
the border color
-cache
�
threshold
�
(This option has been replaced by the -limit option)
-colors
�
value
�
preferred number of colors in the image
-colorspace
�
value
�
the type of colorspace
-comment
�
string
�
annotate an image with a comment
-crop
�
width
�
x
�
height
��
+-
��
x
��
+-
��
y
��
%
�
preferred size and locationof the cropped image
8 Import 123
-debug
�
events
�
enable debug printout
-delay
�
1/100ths of a second
�
display the next image after pausing
-density
�
width
�
x
�
height
�
vertical and horizontal resolution in pixels of theimage
-depth
�
value
�
depth of the image
-descend obtain image by descending window hierarchy
-display
�
host:display[.screen]
�
specifies the X server to contact
-dispose
�
method
�
GIF disposal method
-dither apply Floyd/Steinberg error diffusion to the image
-encoding
�
type
�
specify the text encoding
-endian
�
type
�
specify endianness (MSB or LSB) of output image
-frame include the X window frame in the imported image
-geometry
�
width
�
x
�
height
��
+-
��
x
��
+-
��
y
��
%
��
@
� �
!
�������
pre-ferred size and location of the Image window.
-help print usage instructions
-interlace
�
type
�
the type of interlacing scheme
-label
�
name
�
assign a label to an image
-limit
�
type
� �
value
�
Disk, File, Map, or Memory resource limit
124 ImageMagick
-log
�
string
�
-monochrome transform the image to black and white
-negate replace every pixel with its complementary color
-page
�
width
�
x
�
height
��
+-
��
x
��
+-
��
y
��
%
��
!
�������
size and loca-tion of an image canvas
-pause
�
seconds
�
pause between snapshots [import]
-ping efficiently determine image characteristics
-pointsize
�
value
�
pointsize of the PostScript, OPTION1, or TrueType font
-quality
�
value
�
JPEG/MIFF/PNG compression level
-resize
�
width
�
x
�
height
��
%
��
@
��
!
�������
resize an image
-rotate
�
degrees
�������
apply Paeth image rotation to the image
-sampling-factor
�
horizontal factor
�
x
�
vertical factor
�
sampling factorsused by JPEG or MPEG-2 encoder and YUV decoder/encoder.
-scene
�
value
�
set scene number
-screen specify the screen to capture
-silent operate silently
-snaps
�
value
�
number of screen snapshots
-transparent
�
color
�
make this color transparent within the image

8 Import 125
-trim trim an image
-verbose print detailed information about the image
-version print ImageMagick version string
For a more detailed description of each option, seeImageMagick(1).
8.6 Environment
DISPLAY
8.7 Authors
John Cristy, ImageMagick Studio LLC,Glenn Randers-Pehrson, ImageMagick Studio LLC.
9 Mogrify
9.1 NAME
mogrify - mogrify an image
9.2 Synopsis
mogrify [ options... ] file ...
9.3 Description
Mogrify transforms an image or a sequence of images. These transforms includeimage scaling, image rotation, color reduction, and others. Each transmogrifiedimage overwrites the corresponding original image, unlessan option such as-format causes the output filename to be different from the input filename.
The graphics formats supported bymogrify are listed inImageMagick(1).
9.4 Examples
To convert all the TIFF files in a particular directory to JPEG, use:
mogrify -format jpeg *.tiff
To convert a directory full of JPEG images to thumbnails, use:
mogrify -size 120x120 *.jpg -resize 120x120 +profile "*"
126
9 Mogrify 127
In this example,’-size 120x120’ gives a hint to the JPEG decoder thatthe images are going to be downscaled to 120x120, allowing itto run faster byavoiding returning full-resolution images to ImageMagickfor the subsequent re-sizing operation. The’-resize 120x120’ specifies the desired dimensionsof the output images. It will be scaled so its largest dimension is 120 pixels.The ’+profile "*"’ removes any ICM, EXIF, IPTC, or other profiles thatmight be present in the input and aren’t needed in the thumbnails.
To scale an image of a cockatoo to exactly 640 pixels in width and 480 pixels inheight, use:
mogrify -resize 640x480! cockatoo.miff
9.5 Options
Options are processed in command line order. Any option you specify on thecommand line remains in effect for the set of images that follows, until the set isterminated by the appearance of any option or-noop.
For a more detailed description of each option, seeImageMagick(1).
-affine
�
matrix
�
drawing transform matrix
-antialias remove pixel aliasing
-authenticate
�
string
�
decrypt image with this password
-background
�
color
�
the background color
-blue-primary
�
x
�
,
�
y
�
blue chromaticity primary point
-blur
�
radius
��
x
�
sigma
��
blur the image with a Gaussian operator
-border
�
width
�
x
�
height
�
surround the image with a border of color
-bordercolor
�
color
�
the border color
-cache
�
threshold
�
(This option has been replaced by the -limit option)
128 ImageMagick
-channel
�
type
�
the type of channel
-charcoal
�
factor
�
simulate a charcoal drawing
-colorize
�
value
�
colorize the image with the pen color
-colors
�
value
�
preferred number of colors in the image
-colorspace
�
value
�
the type of colorspace
-comment
�
string
�
annotate an image with a comment
-compose
�
operator
�
the type of image composition
-compress
�
type
�
the type of image compression
-contrast enhance or reduce the image contrast
-convolve
�
kernel
�
convolve image with the specified convolution kernel
-crop
�
width
�
x
�
height
��
+-
��
x
��
+-
��
y
��
%
�
preferred size and locationof the cropped image
-cycle
�
amount
�
displace image colormap by amount
-debug
�
events
�
enable debug printout
-delay
�
1/100ths of a second
�
display the next image after pausing
-density
�
width
�
x
�
height
�
vertical and horizontal resolution in pixels of theimage
-depth
�
value
�
depth of the image
9 Mogrify 129
-despeckle reduce the speckles within an image
-display
�
host:display[.screen]
�
specifies the X server to contact
-dispose
�
method
�
GIF disposal method
-dither apply Floyd/Steinberg error diffusion to the image
-draw
�
string
�
annotate an image with one or more graphic primitives
-edge
�
radius
�
detect edges within an image
-emboss
�
radius
�
emboss an image
-encoding
�
type
�
specify the text encoding
-endian
�
type
�
specify endianness (MSB or LSB) of output image
-enhance apply a digital filter to enhance a noisy image
-equalize perform histogram equalization to the image
-fill
�
color
�
color to use when filling a graphic primitive
-filter
�
type
�
use this type of filter when resizing an image
-flip create a “mirror image”
-flop create a “mirror image”
-font
�
name
�
use this font when annotating the image with text
-format
�
type
�
the image format type
130 ImageMagick
-frame
�
width
�
x
�
height
�
+
�
outer bevel width
�
+
�
inner bevel width
�
surround the image with an ornamental border
-fuzz
�
distance
��
%
�
colors within this distance are considered equal
-gamma
�
value
�
level of gamma correction
-Gaussian
�
radius
��
x
�
sigma
��
blur the image with a Gaussian operator
-geometry
�
width
�
x
�
height
��
+-
��
x
��
+-
��
y
��
%
��
@
� �
!
�������
pre-ferred size and location of the Image window.
-gravity
�
type
�
direction primitive gravitates to when annotating the image.
-green-primary
�
x
�
,
�
y
�
green chromaticity primary point
-help print usage instructions
-implode
�
factor
�
implode image pixels about the center
-interlace
�
type
�
the type of interlacing scheme
-label
�
name
�
assign a label to an image
-lat
�
width
�
x
�
height
��
+-
��
offset
��
%
�
perform local adaptive threshold-ing
-level
�
black point
��
,
�
white point
���
%
��
,
�
gamma
��
adjust the level ofimage contrast
-limit
�
type
� �
value
�
Disk, File, Map, or Memory resource limit
-linewidth the line width for subsequent draw operations
9 Mogrify 131
-list
�
type
�
the type of list
-log
�
string
�
-loop
�
iterations
�
add Netscape loop extension to your GIF animation
-map
�
filename
�
choose a particular set of colors from this image
-mask
�
filename
�
Specify a clipping mask
-matte store matte channel if the image has one
-mattecolor
�
color
�
specify the color to be used with the-frame option
-median
�
radius
�
apply a median filter to the image
-modulate
�
value
�
vary the brightness, saturation, and hue of an image
-monochrome transform the image to black and white
-negate replace every pixel with its complementary color
-noise
�
radius
�
type
�
add or reduce noise in an image
-noop NOOP (no option)
-normalize transform image to span the full range of color values
-opaque
�
color
�
change this color to the pen color within the image
-page
�
width
�
x
�
height
��
+-
��
x
��
+-
��
y
��
%
��
!
�������
size and loca-tion of an image canvas
132 ImageMagick
-paint
�
radius
�
simulate an oil painting
-pen
�
color
�
(This option has been replaced by the -fill option)
-pointsize
�
value
�
pointsize of the PostScript, OPTION1, or TrueType font
-profile
�
filename
�
add ICM, IPTC, or generic profile to image
-quality
�
value
�
JPEG/MIFF/PNG compression level
-raise
�
width
�
x
�
height
�
lighten or darken image edges
-red-primary
�
x
�
,
�
y
�
red chromaticity primary point
-region
�
width
�
x
�
height
��
+-
��
x
��
+-
��
y
�
apply options to a portion ofthe image
-render render vector operations
-resize
�
width
�
x
�
height
��
%
��
@
��
!
�������
resize an image
-roll
�
+-
��
x
��
+-
��
y
�
roll an image vertically or horizontally
-rotate
�
degrees
�������
apply Paeth image rotation to the image
-sample
�
geometry
�
scale image with pixel sampling
-sampling-factor
�
horizontal factor
�
x
�
vertical factor
�
sampling factorsused by JPEG or MPEG-2 encoder and YUV decoder/encoder.
-scale
�
geometry
�
scale the image.
-scene
�
value
�
set scene number
9 Mogrify 133
-seed
�
value
�
pseudo-random number generator seed value
-segment
�
cluster threshold
�
x
�
smoothing threshold
�
segment an im-age
-shade
�
azimuth
�
x
�
elevation
�
shade the image using a distant light source
-sharpen
�
radius
��
x
�
sigma
��
sharpen the image
-shave
�
width
�
x
�
height
��
%
�
shave pixels from the image edges
-shear
�
x degrees
�
x
�
y degrees
�
shear the image along the X or Y axis
-size
�
width
�
x
�
height
��
+offset
�
width and height of the image
-solarize
�
factor
�
negate all pixels above the threshold level
-spread
�
amount
�
displace image pixels by a random amount
-stroke
�
color
�
color to use when stroking a graphic primitive
-strokewidth
�
value
�
set the stroke width
-swirl
�
degrees
�
swirl image pixels about the center
-texture
�
filename
�
name of texture to tile onto the image background
-threshold
�
value
���
green
�
,
�
blue
�
,
�
opacity
���
%
�
threshold the im-age
-tile
�
filename
�
tile image when filling a graphic primitive
-transform transform the image

134 ImageMagick
-transparent
�
color
�
make this color transparent within the image
-treedepth
�
value
�
tree depth for the color reduction algorithm
-trim trim an image
-type
�
type
�
the image type
-units
�
type
�
the type of image resolution
-unsharp
�
radius
��
x
�
sigma
���
+
�
amount
���
+
�
threshold
��
sharpenthe image with an unsharp mask operator
-verbose print detailed information about the image
-version print ImageMagick version string
-view
�
string
�
FlashPix viewing parameters
-virtual-pixel
�
method
�
specify contents of “virtual pixels”
-wave
�
amplitude
�
x
�
wavelength
�
alter an image along a sine wave
-white-point
�
x
�
,
�
y
�
chromaticity white point
For a more detailed description of each option, seeImageMagick(1).
9.6 Image Segmentation
Use -segmentto segment an image by analyzing the histograms of the colorcomponents and identifying units that are homogeneous withthe fuzzy c-meanstechnique. The scale-space filter analyzes the histograms of the three color com-ponents of the image and identifies a set of classes. The extents of each class isused to coarsely segment the image with thresholding. The color associated witheach class is determined by the mean color of all pixels within the extents of aparticular class. Finally, any unclassified pixels are assigned to the closest classwith the fuzzy c-means technique.
The fuzzy c-Means algorithm can be summarized as follows:

9 Mogrify 135
Build a histogram, one for each color component of the image.For each histogram, successively apply the scale-space filter and build an in-
terval tree of zero crossings in the second derivative at each scale. Analyzethis scale-space “fingerprint” to determine which peaks or valleys in the his-togram are most predominant.
The fingerprint defines intervals on the axis of the histogram. Each intervalcontains either a minima or a maxima in the original signal. If each colorcomponent lies within the maxima interval, that pixel is considered “classi-fied” and is assigned an unique class number.
Any pixel that fails to be classified in the above thresholding pass is classi-fied using the fuzzy c-Means technique. It is assigned to one of the classesdiscovered in the histogram analysis phase.
The fuzzy c-Means technique attempts to cluster a pixel by finding the localminima of the generalized within group sum of squared error objective function.A pixel is assigned to the closest class of which the fuzzy membership has amaximum value.
For additional information see:Young Won Lim, Sang Uk Lee, “On The ColorImage Segmentation Algorithm Based on the Thresholding andthe Fuzzyc-Means Techniques”, Pattern Recognition, Volume 23, Number 9, pages 935-952, 1990.
9.7 Environment
DISPLAY To get the default host, display number, and screen.
9.8 Authors
John Cristy, ImageMagick Studio LLC,Glenn Randers-Pehrson, ImageMagick Studio LLC.
10 Montage
10.1 NAME
montage - create a composite image by combining several separate images
10.2 Synopsis
montage [options...] file [ [ options...] file ...] outputfile
10.3 Description
montagecreates a composite image by combining several separate images. Theimages are tiled on the composite image with the name of the image optionallyappearing just below the individual tile.
The composite image is constructed in the following manner.First, each imagespecified on the command line, except for the last, is scaled to fit the maximumtile size. The maximum tile size by default is 120x120. It canbe modified withthe -geometry command line argument or X resource. SeeOptions for moreinformation on command line arguments. SeeX(1) for more information on Xresources. Note that the maximum tile size need not be a square.
Next the composite image is initialized with the color specified by the-backgroundcommand line argument or X resource. The width and height of the compositeimage is determined by the title specified, the maximum tile size, the numberof tiles per row, the tile border width and height, the image border width, andthe label height. The number of tiles per row specifies how many images areto appear in each row of the composite image. The default is tohave 5 tiles ineach row and 4 tiles in each column of the composite. A specificvalue is spec-ified with -tile. The tile border width and height, and the image border width
136
10 Montage 137
defaults to the value of the X resource-borderwidth . It can be changed with the-borderwidth or -geometrycommand line argument or X resource. The labelheight is determined by the font you specify with the-font command line argu-ment or X resource. If you do not specify a font, a font is chosen that allows thename of the image to fit the maximum width of a tiled area. The label colors isdetermined by the-backgroundand-fill command line argument or X resource.Note, that if the background and pen colors are the same, labels will not appear.
Initially, the composite image title is placed at the top if one is specified (referto -fill ). Next, each image is set onto the composite image, surrounded by itsborder color, with its name centered just below it. The individual images are left-justified within the width of the tiled area. The order of the images is the sameas they appear on the command line unless the images have a scene keyword.If a scene number is specified in each image, then the images are tiled ontothe composite in the order of their scene number. Finally, the last argument onthe command line is the name assigned to the composite image.By default,the image is written in theMIFF format and can be viewed or printed withdisplay(1).
Note, that if the number of tiles exceeds the default number of 20 (5 per row,4 per column), more than one composite image is created. To ensure a singleimage is produced, use-tile to increase the number of tiles to meet or exceed thenumber of input images.
Finally, to create one or more empty spaces in the sequence oftiles, use the“NULL:” image format.
Note, a composite MIFF image displayed to an X server withdisplay behavesdifferently than other images. You can think of the composite as a visual imagedirectory. Choose a particular tile of the composite and press a button to displayit. Seedisplay(1)andmiff(5)
10.4 Examples
To create a montage of a cockatoo, a parrot, and a hummingbirdand write it toa file called birds, use:
montage cockatoo.miff parrot.miff hummingbird.miffbirds.miff
To tile several bird images so that they are at most 256 pixelsin width and192 pixels in height, surrounded by a red border, and separated by 10 pixels ofbackground color, use:
montage -geometry 256x192+10+10 -bordercolor redbirds.* montage.miff

138 ImageMagick
To create an unlabeled parrot image, 640 by 480 pixels, and surrounded by aborder of black, use:
montage -geometry 640x480 -bordercolor black-label "" parrot.miff bird.miff
To create an image of an eagle with a textured background, use:
montage -texture bumps.jpg eagle.jpg eagle.png
To join several GIF images together without any extraneous graphics (e.g. nolabel, no shadowing, no surrounding tile frame), use:
montage +frame +shadow +label -tile 5x1-geometry 50x50+0+0 *.png joined.png
10.5 Options
Any option you specify on the command line remains in effect for the groupof images following it, until the group is terminated by the appearance of anyoption or-noop. For example, to make a montage of three images, the first with32 colors, the second with an unlimited number of colors, andthe third with only16 colors, use:
montage -colors 32 cockatoo.1 -noop cockatoo.2-colors 16 cockatoo.3 cockatoos.miff
For a more detailed description of each option, seeImageMagick(1).
-adjoin join images into a single multi-image file
-authenticate
�
string
�
decrypt image with this password
-background
�
color
�
the background color
-blue-primary
�
x
�
,
�
y
�
blue chromaticity primary point
-blur
�
radius
��
x
�
sigma
��
blur the image with a Gaussian operator
-bordercolor
�
color
�
the border color
10 Montage 139
-borderwidth
�
geometry
�
the border width
-cache
�
threshold
�
(This option has been replaced by the -limit option)
-chop
�
width
�
x
�
height
��
+-
��
x
��
+-
��
y
��
%
�
remove pixels from the in-terior of an image
-colors
�
value
�
preferred number of colors in the image
-colorspace
�
value
�
the type of colorspace
-comment
�
string
�
annotate an image with a comment
-compose
�
operator
�
the type of image composition
-compress
�
type
�
the type of image compression
-crop
�
width
�
x
�
height
��
+-
��
x
��
+-
��
y
��
%
�
preferred size and locationof the cropped image
-debug
�
events
�
enable debug printout
-density
�
width
�
x
�
height
�
vertical and horizontal resolution in pixels of theimage
-depth
�
value
�
depth of the image
-display
�
host:display[.screen]
�
specifies the X server to contact
-dispose
�
method
�
GIF disposal method
-dither apply Floyd/Steinberg error diffusion to the image
-draw
�
string
�
annotate an image with one or more graphic primitives

140 ImageMagick
-encoding
�
type
�
specify the text encoding
-endian
�
type
�
specify endianness (MSB or LSB) of output image
-fill
�
color
�
color to use when filling a graphic primitive
-filter
�
type
�
use this type of filter when resizing an image
-font
�
name
�
use this font when annotating the image with text
-frame
�
width
�
x
�
height
�
+
�
outer bevel width
�
+
�
inner bevel width
�
surround the image with an ornamental border
-gamma
�
value
�
level of gamma correction
-geometry
�
width
�
x
�
height
��
+-
��
x
��
+-
��
y
��
%
��
@
� �
!
�������
pre-ferred size and location of the Image window.
-gravity
�
type
�
direction primitive gravitates to when annotating the image.
-green-primary
�
x
�
,
�
y
�
green chromaticity primary point
-help print usage instructions
-interlace
�
type
�
the type of interlacing scheme
-label
�
name
�
assign a label to an image
-limit
�
type
� �
value
�
Disk, File, Map, or Memory resource limit
-log
�
string
�
-matte store matte channel if the image has one
10 Montage 141
-mattecolor
�
color
�
specify the color to be used with the-frame option
-mode
�
value
�
mode of operation
-monochrome transform the image to black and white
-noop NOOP (no option)
-page
�
width
�
x
�
height
��
+-
��
x
��
+-
��
y
��
%
��
!
�������
size and loca-tion of an image canvas
-pen
�
color
�
(This option has been replaced by the -fill option)
-pointsize
�
value
�
pointsize of the PostScript, OPTION1, or TrueType font
-quality
�
value
�
JPEG/MIFF/PNG compression level
-red-primary
�
x
�
,
�
y
�
red chromaticity primary point
-render render vector operations
-resize
�
width
�
x
�
height
��
%
��
@
��
!
�������
resize an image
-rotate
�
degrees
�������
apply Paeth image rotation to the image
-sampling-factor
�
horizontal factor
�
x
�
vertical factor
�
sampling factorsused by JPEG or MPEG-2 encoder and YUV decoder/encoder.
-scenes
�
value-value
�
range of image scene numbers to read
-shadow
�
radius
��
x
�
sigma
��
shadow the montage
-sharpen
�
radius
��
x
�
sigma
��
sharpen the image
142 ImageMagick
-size
�
width
�
x
�
height
��
+offset
�
width and height of the image
-stroke
�
color
�
color to use when stroking a graphic primitive
-strokewidth
�
value
�
set the stroke width
-texture
�
filename
�
name of texture to tile onto the image background
-tile
�
geometry
�
layout of images [montage]
-title
�
string
�
assign title to displayed image [animate, display, montage]
-transparent
�
color
�
make this color transparent within the image
-treedepth
�
value
�
tree depth for the color reduction algorithm
-trim trim an image
-type
�
type
�
the image type
-verbose print detailed information about the image
-version print ImageMagick version string
-white-point
�
x
�
,
�
y
�
chromaticity white point
For a more detailed description of each option, seeImageMagick(1).
10.6 X Resources
Montage options can appear on the command line or in your X resource file.Options on the command line supersede values specified in your X resource file.SeeX(1) for more information on X resources.
All montageoptions have a corresponding X resource. In addition,montageuses the following X resources:

10 Montage 143
background (class Background) background color
Specifies the preferred color to use for the composite image background. Thedefault is #ccc.
borderColor (class BorderColor) border color
Specifies the preferred color to use for the composite image border. The defaultis #ccc.
borderWidth (class BorderWidth) border width
Specifies the width in pixels of the composite image border. The default is 2.
font (class Font) font to use
Specifies the name of the preferred font to use when displaying text within thecomposite image. The default is 9x15, fixed, or 5x8 determined by the compositeimage size.
matteColor (class MatteColor) color of the frame
Specify the color of an image frame. A 3D effect is achieved byusing highlightand shadow colors derived from this color. The default valueis #697B8F.
pen (class Pen) text color
Specifies the preferred color to use for text within the composite image. Thedefault is black.
title (class Title) composite image title
This resource specifies the title to be placed at the top of thecomposite image.The default is not to place a title at the top of the composite image.
10.7 Environment
DISPLAY To get the default host, display number, and screen.
10.8 Acknowledgements
TheMIT X Consortium for making network transparent graphics a reality.

144 ImageMagick
Michael Halle, Spatial Imaging Group at MIT , for the initial implementationof Alan Paeth’s image rotation algorithm.
David Pensak, ImageMagick Studio, for providing a computing environmentthat made this program possible.
10.9 Authors
John Cristy, ImageMagick Studio LLC,Glenn Randers-Pehrson, ImageMagick Studio LLC.