IIS 6.0 Creation
31
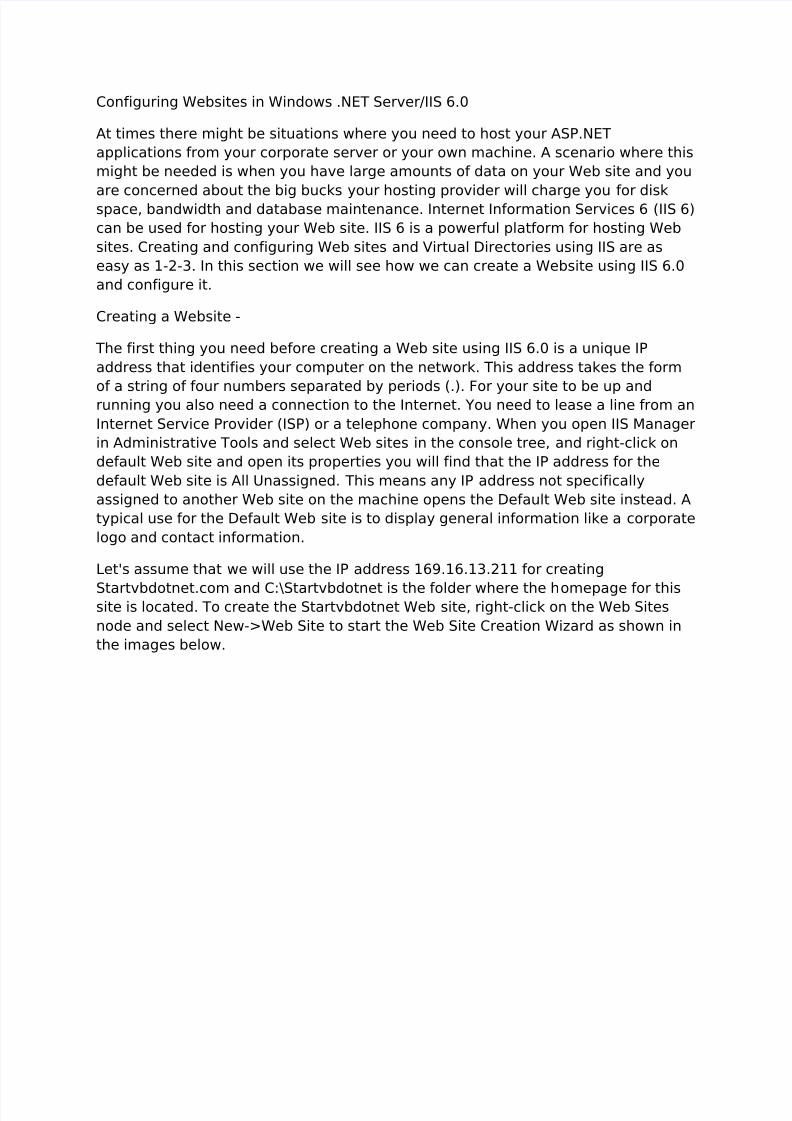
Configuring Websites in Windows .NET Server/IIS 6.0 At times there might be situations where you need to host your ASP.NET applications from your corporate server or your own machine. A scenario where this might be needed is when you have large amounts of data on your Web site and you are concerned about the big bucks your hosting provider will charge you for disk space, bandwidth and database maintenance. Internet Information Services 6 (IIS 6) can be used for hosting your Web site. IIS 6 is a powerful platform for hosting Web sites. Creating and configuring Web sites and Virtual Directories using IIS are as easy as 1-2-3. In this section we will see how we can create a Website using IIS 6.0 and configure it. Creating a Website - The first thing you need before creating a Web site using IIS 6.0 is a unique IP address that identifies your computer on the network. This address takes the form of a string of four numbers separated by periods (.). For your site to be up and running you also need a connection to the Internet. You need to lease a line from an Internet Service Provider (ISP) or a telephone company. When you open IIS Manager in Administrative Tools and select Web sites in the console tree, and right-click on default Web site and open its properties you will find that the IP address for the default Web site is All Unassigned. This means any IP address not specifically assigned to another Web site on the machine opens the Default Web site instead. A typical use for the Default Web site is to display general information like a corporate logo and contact information. Let's assume that we will use the IP address 169.16.13.211 for creating Startvbdotnet.com and C:\Startvbdotnet is the folder where the h omepage for this site is located. To create the Startvbdotnet Web site, right-click on the Web Sites node and select New->Web Site to start the Web Site Creation Wizard as shown in the images below.
-
Upload
nranjithrao -
Category
Documents
-
view
221 -
download
0
Transcript of IIS 6.0 Creation
8/3/2019 IIS 6.0 Creation
http://slidepdf.com/reader/full/iis-60-creation 1/31
Configuring Websites in Windows .NET Server/IIS 6.0
At times there might be situations where you need to host your ASP.NETapplications from your corporate server or your own machine. A scenario where thismight be needed is when you have large amounts of data on your Web site and you
are concerned about the big bucks your hosting provider will charge you for diskspace, bandwidth and database maintenance. Internet Information Services 6 (IIS 6)can be used for hosting your Web site. IIS 6 is a powerful platform for hosting Websites. Creating and configuring Web sites and Virtual Directories using IIS are aseasy as 1-2-3. In this section we will see how we can create a Website using IIS 6.0and configure it.
Creating a Website -
The first thing you need before creating a Web site using IIS 6.0 is a unique IPaddress that identifies your computer on the network. This address takes the form
of a string of four numbers separated by periods (.). For your site to be up andrunning you also need a connection to the Internet. You need to lease a line from anInternet Service Provider (ISP) or a telephone company. When you open IIS Managerin Administrative Tools and select Web sites in the console tree, and right-click ondefault Web site and open its properties you will find that the IP address for thedefault Web site is All Unassigned. This means any IP address not specificallyassigned to another Web site on the machine opens the Default Web site instead. Atypical use for the Default Web site is to display general information like a corporatelogo and contact information.
Let's assume that we will use the IP address 169.16.13.211 for creating
Startvbdotnet.com and C:\Startvbdotnet is the folder where the homepage for thissite is located. To create the Startvbdotnet Web site, right-click on the Web Sitesnode and select New->Web Site to start the Web Site Creation Wizard as shown inthe images below.
8/3/2019 IIS 6.0 Creation
http://slidepdf.com/reader/full/iis-60-creation 2/31

8/3/2019 IIS 6.0 Creation
http://slidepdf.com/reader/full/iis-60-creation 3/31
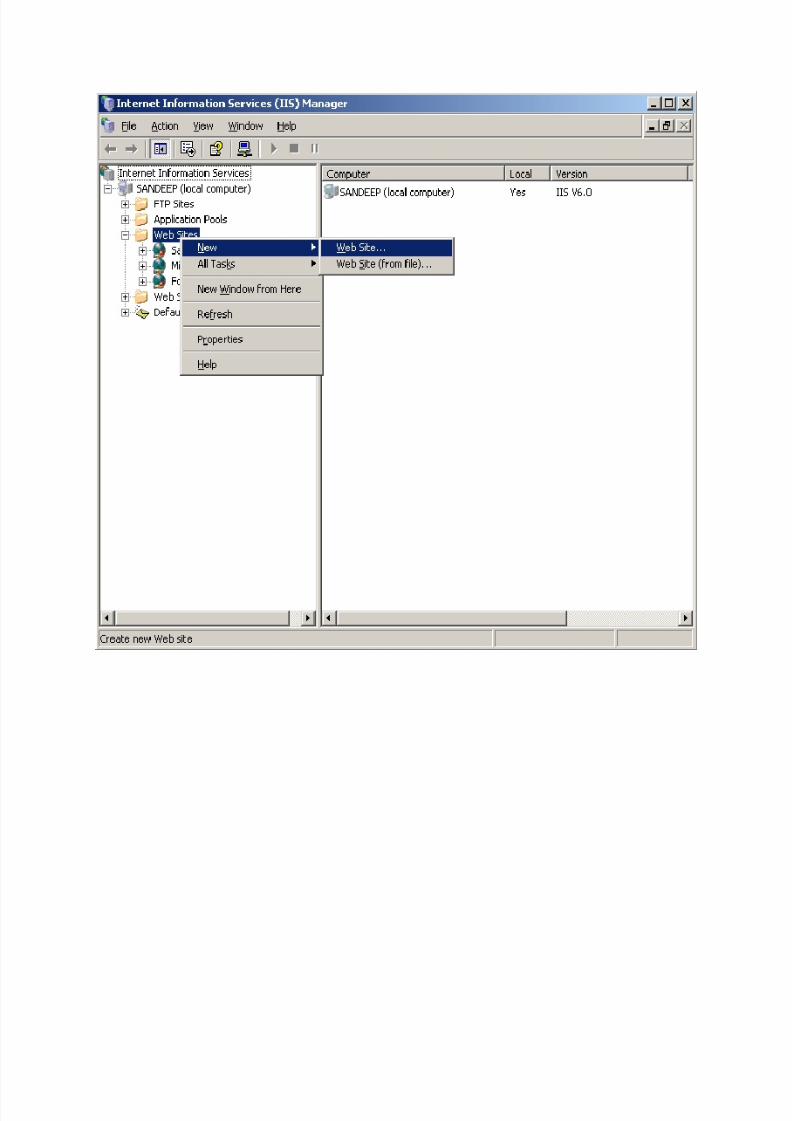
Click Next on the Web site creation wizard dialog and type a description for the siteas shown in the image below.
8/3/2019 IIS 6.0 Creation
http://slidepdf.com/reader/full/iis-60-creation 4/31
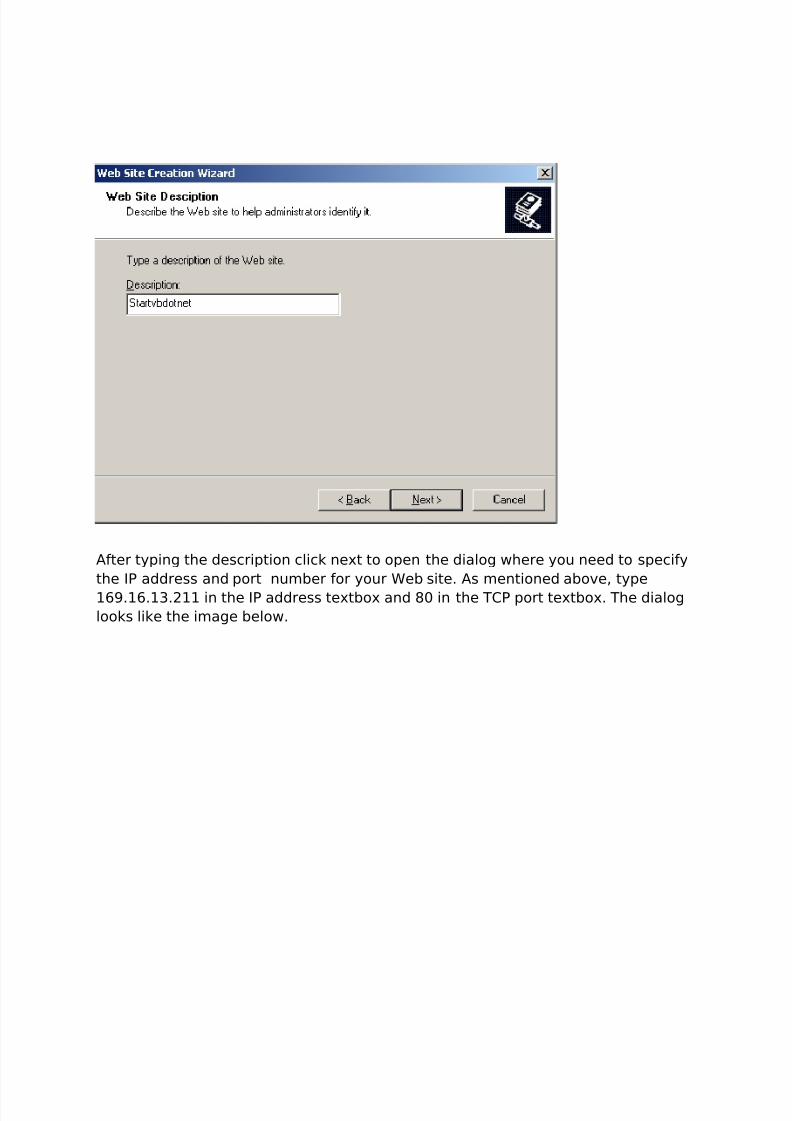
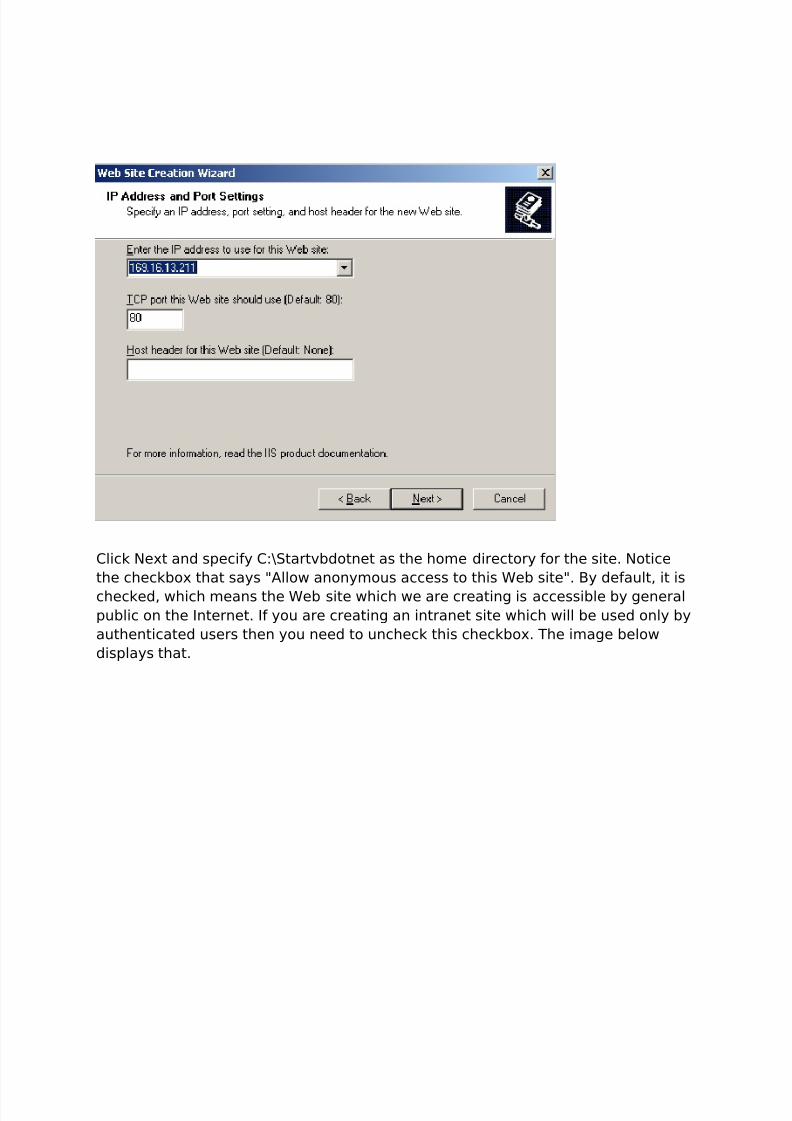
After typing the description click next to open the dialog where you need to specifythe IP address and port number for your Web site. As mentioned above, type169.16.13.211 in the IP address textbox and 80 in the TCP port textbox. The dialoglooks like the image below.
8/3/2019 IIS 6.0 Creation
http://slidepdf.com/reader/full/iis-60-creation 5/31
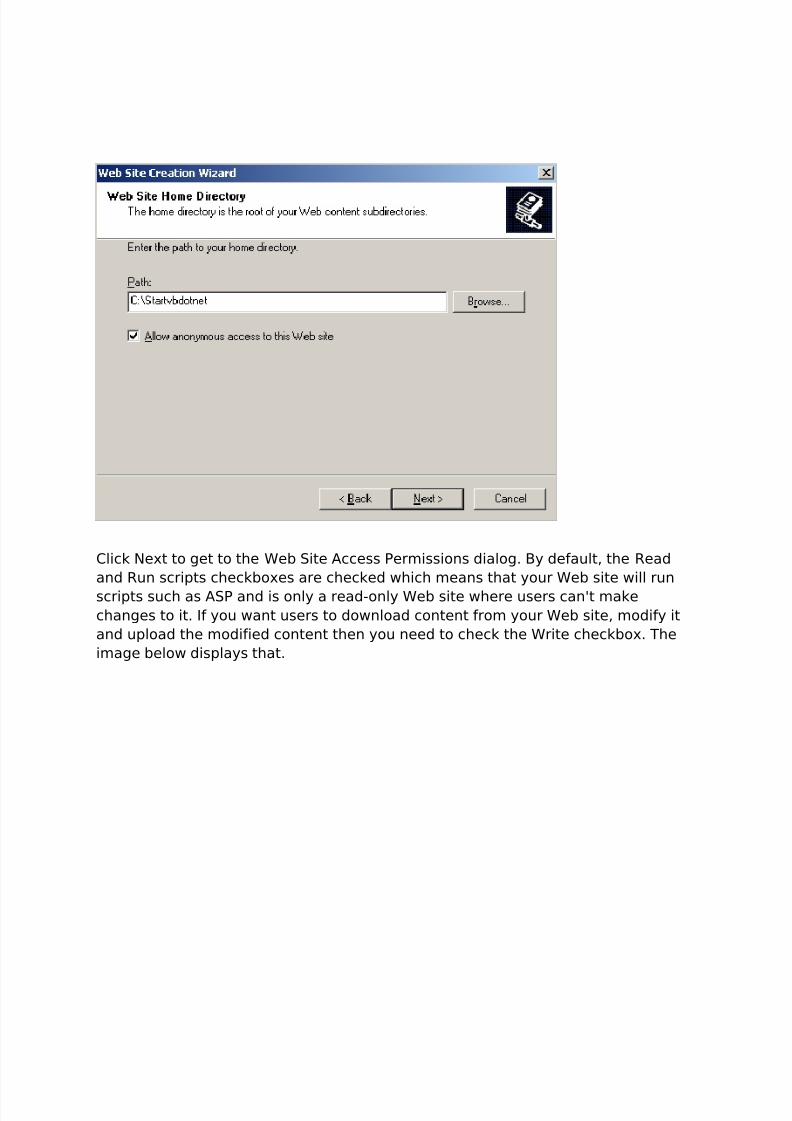
Click Next and specify C:\Startvbdotnet as the home directory for the site. Noticethe checkbox that says "Allow anonymous access to this Web site". By default, it ischecked, which means the Web site which we are creating is accessible by generalpublic on the Internet. If you are creating an intranet site which will be used only byauthenticated users then you need to uncheck this checkbox. The image belowdisplays that.
8/3/2019 IIS 6.0 Creation
http://slidepdf.com/reader/full/iis-60-creation 6/31
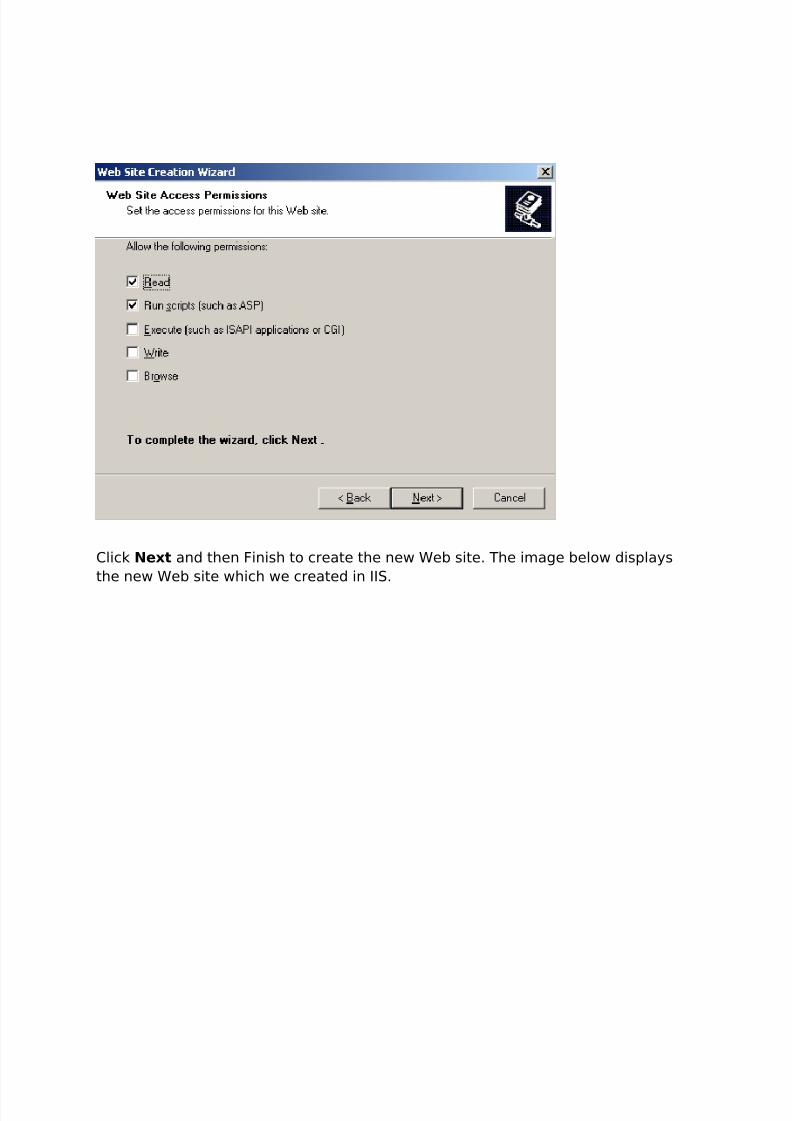
Click Next to get to the Web Site Access Permissions dialog. By default, the Readand Run scripts checkboxes are checked which means that your Web site will runscripts such as ASP and is only a read-only Web site where users can't makechanges to it. If you want users to download content from your Web site, modify itand upload the modified content then you need to check the Write checkbox. Theimage below displays that.
8/3/2019 IIS 6.0 Creation
http://slidepdf.com/reader/full/iis-60-creation 7/31
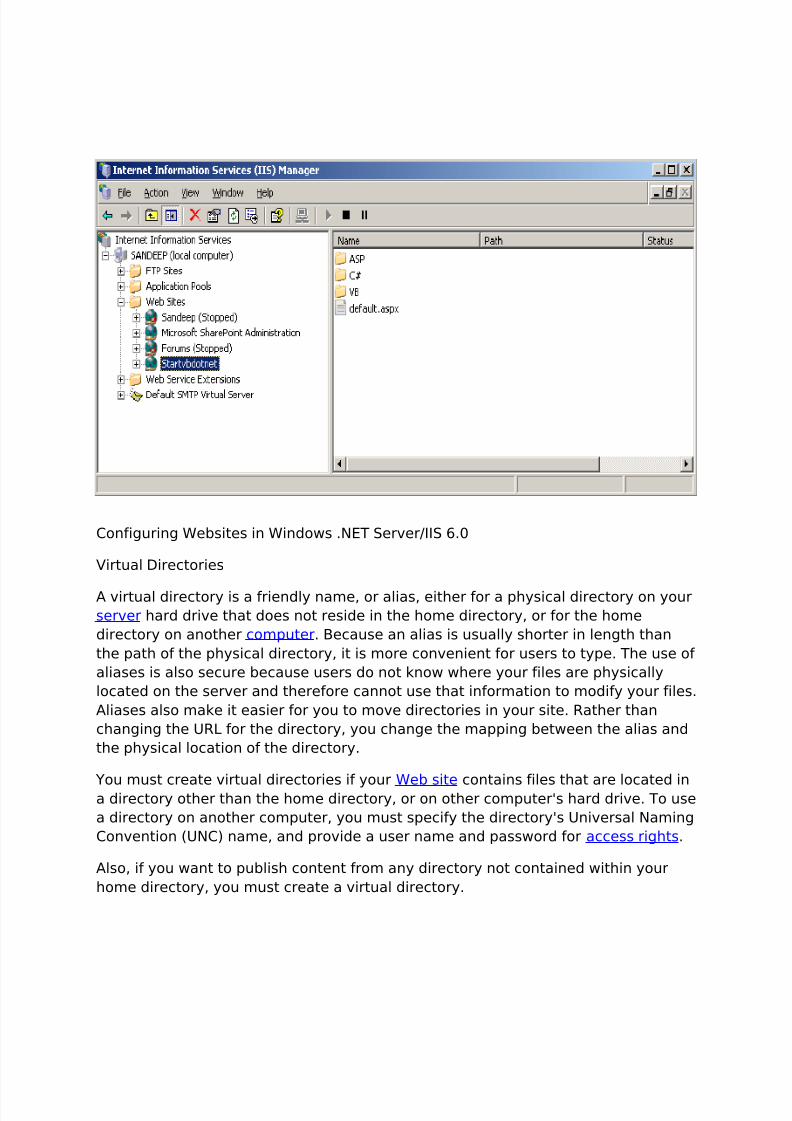
Click Next and then Finish to create the new Web site. The image below displaysthe new Web site which we created in IIS.
8/3/2019 IIS 6.0 Creation
http://slidepdf.com/reader/full/iis-60-creation 8/31
Configuring Websites in Windows .NET Server/IIS 6.0
Virtual Directories
A virtual directory is a friendly name, or alias, either for a physical directory on yourserver hard drive that does not reside in the home directory, or for the homedirectory on another computer . Because an alias is usually shorter in length thanthe path of the physical directory, it is more convenient for users to type. The use of aliases is also secure because users do not know where your files are physicallylocated on the server and therefore cannot use that information to modify your files.Aliases also make it easier for you to move directories in your site. Rather thanchanging the URL for the directory, you change the mapping between the alias andthe physical location of the directory.
You must create virtual directories if your Web site contains files that are located ina directory other than the home directory, or on other computer's hard drive. To usea directory on another computer, you must specify the directory's Universal NamingConvention (UNC) name, and provide a user name and password for access rights .
Also, if you want to publish content from any directory not contained within yourhome directory, you must create a virtual directory.

8/3/2019 IIS 6.0 Creation
http://slidepdf.com/reader/full/iis-60-creation 9/31
Creating a Virtual Directory
Let's say Startvbdotnet keeps their contacts in a folder calledC:\StartvbdotnetContacts on their web server and would like users to be able to usethe URL http://169.16.13.211/contacts when they need to access contact
information. To do this we need to create a virtual directory that associates the/contacts portion of the URL, the alias for the virtual directory, with the physicaldirectory C:\StartvbdotnetContacts where these documents are actually located.
To create a new virtual directory, right-click on Startvbdotnet Web site and selectNew->Virtual Directory to start the Virtual Directory Creation Wizard. The imagesbelow display that.

8/3/2019 IIS 6.0 Creation
http://slidepdf.com/reader/full/iis-60-creation 10/31

8/3/2019 IIS 6.0 Creation
http://slidepdf.com/reader/full/iis-60-creation 11/31
Click Next and type the alias for the virtual directory, say, contacts as shown in theimage below.

8/3/2019 IIS 6.0 Creation
http://slidepdf.com/reader/full/iis-60-creation 12/31
Click Next and specify the physical folder on the local server to map to this alias. The physical folder on the server is C:\StartvbdotnetContacts. The image belowshows that.

8/3/2019 IIS 6.0 Creation
http://slidepdf.com/reader/full/iis-60-creation 13/31
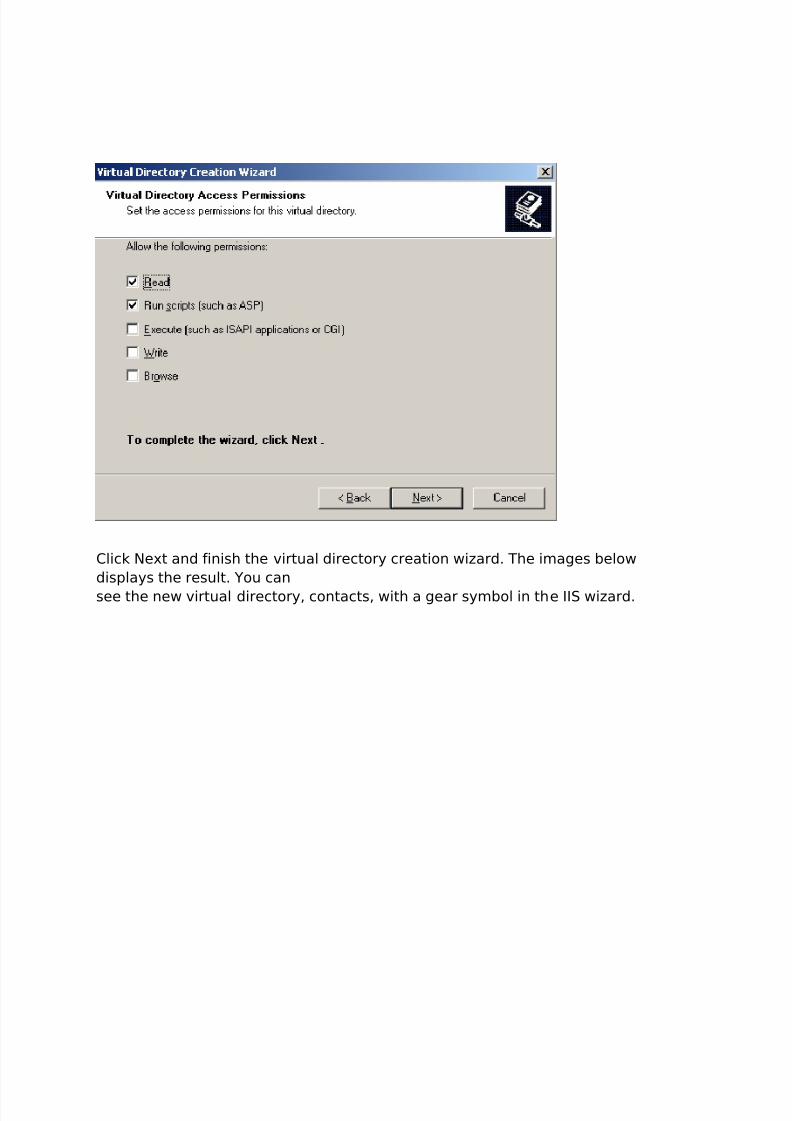
Click Next and specify permissions for this Virtual Directory as shown in the imagebelow.
8/3/2019 IIS 6.0 Creation
http://slidepdf.com/reader/full/iis-60-creation 14/31
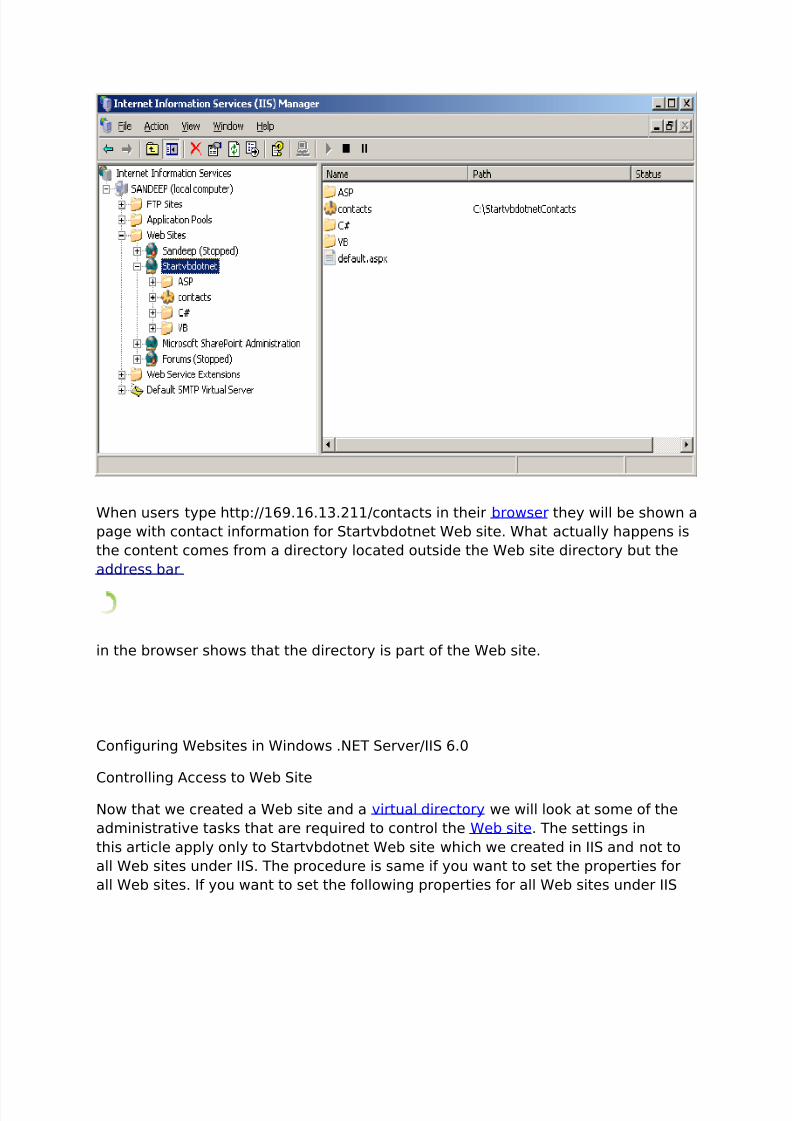
Click Next and finish the virtual directory creation wizard. The images belowdisplays the result. You cansee the new virtual directory, contacts, with a gear symbol in the IIS wizard.

8/3/2019 IIS 6.0 Creation
http://slidepdf.com/reader/full/iis-60-creation 15/31
8/3/2019 IIS 6.0 Creation
http://slidepdf.com/reader/full/iis-60-creation 16/31
When users type http://169.16.13.211/contacts in their browser they will be shown apage with contact information for Startvbdotnet Web site. What actually happens isthe content comes from a directory located outside the Web site directory but theaddress bar
in the browser shows that the directory is part of the Web site.
Configuring Websites in Windows .NET Server/IIS 6.0
Controlling Access to Web Site
Now that we created a Web site and a virtual directory we will look at some of theadministrative tasks that are required to control the Web site . The settings inthis article apply only to Startvbdotnet Web site which we created in IIS and not toall Web sites under IIS. The procedure is same if you want to set the properties forall Web sites. If you want to set the following properties for all Web sites under IIS

8/3/2019 IIS 6.0 Creation
http://slidepdf.com/reader/full/iis-60-creation 17/31
then you need to right-click on Web Sites in IIS and select properties from the menuand follow the steps which are mentioned in this article.
When you right-click on the Startvbdotnet Web site in IIS and select properties, theproperties window that is displayed looks like the image below.
As you might notice from the above image the dialog box displays information as
tabs, all of which are discussed below.Web Site Information (Web Site Tab)
By defaut, the Web site tab is displayed when you right-click andselect properties for any of the Web sites in IIS. The information under Web site tabis discussed below.
Web site identification
8/3/2019 IIS 6.0 Creation
http://slidepdf.com/reader/full/iis-60-creation 18/31
The Web site identification part displays general information like the description of the Website, IP address and the port number it is using.
Connections
Connection timeout
Connection timeouts are used to reduce the amount of memory resources that areconsumed by idle connections. Time-out settings also allow you to specify how longserver resources are allocated to specific tasks or clients. The default connectiontimeout setting set by IIS is 120 seconds which means that when a visitor accessesyour site and has no activity on your site for 2 mins his connection will be timed out.
Enable HTTP Keep-Alives
Most Web browsers request that the server keep the client connection open whilethe server sends multiple elements like .htm files and .gif or .jpeg files to the client.
Keeping the client connection open in this way is referred to as an HTTP Keep-Alive.Keep-Alive is an HTTP specification that improves server performance . HTTP Keep-Alives are enabled by default in IIS.
Enable Logging
The logging feature allows you to collect information about user activity on yoursite. Information such as who has visited your site, what the visitor viewed, andwhen the information was last viewed, etc, can be collected with this feature. Thedefault logging format is the W3C Extended Log File Format. You can also changethe logging format based on your preferences. To change the logging format you
need to make a selection from the active log format drop-down list.
To set how often you want your new log file to be created click the propertiesbutton to open the Logging Properties dialog as shown in the image below.

8/3/2019 IIS 6.0 Creation
http://slidepdf.com/reader/full/iis-60-creation 19/31
The Logging Properties dialog shown in the image above allows you to record log
information on an hourly basis or daily or weekly or monthly basis or based on filesize. If you select the Weekly option then a log file is created once every week. Youcan also change the location of the log file on your server in the LoggingProperties dialog.
Performance (Performance Tab)
The Performance tab let's you control the performance of your Web site, like,setting the amount of bandwidth per second and allowing the number of simultaneous connections accessing the Web site at a given time. The dialog lookslike the image below.

8/3/2019 IIS 6.0 Creation
http://slidepdf.com/reader/full/iis-60-creation 20/31
Bandwidth throttling
If the network or Internet connection used by our Web server is also used by otherservices such as e-mail, then we might want to limit the bandwidth used by our Webserver so that it is available for those other services. If our Web server hosts morethan one Web site, you can individually throttle the bandwidth used by each site. By
default, bandwidth throttling is disabled. If you want to enable it, check thecheckbox and enter the bandwidth you want in kbps.
Web site connections
Connection limits restrict the number of simultaneous client connections to our Website. Limiting connections not only conserves memory but also protects againstmalicious attacks designed to overload our Web server with thousands of clientrequests. By default, unlimited connections are allowed. If you want to limit the

8/3/2019 IIS 6.0 Creation
http://slidepdf.com/reader/full/iis-60-creation 21/31
number of connections then you need to select the "Connections limited to" radiobutton and enter the number of connections you want to access your site at a giventime.
Home Directory
The Home Directory tab in the properties dialog for the Web site is displayed below.
As you can see from the image above, the content for this Web site comes from thelocal path on the server. If you want the content for this Web site to come fromanother computer located on a network you need to select the radio button whichsays "A share located on another computer" and enter the computer on thenetwork.
Redirecting
8/3/2019 IIS 6.0 Creation
http://slidepdf.com/reader/full/iis-60-creation 22/31
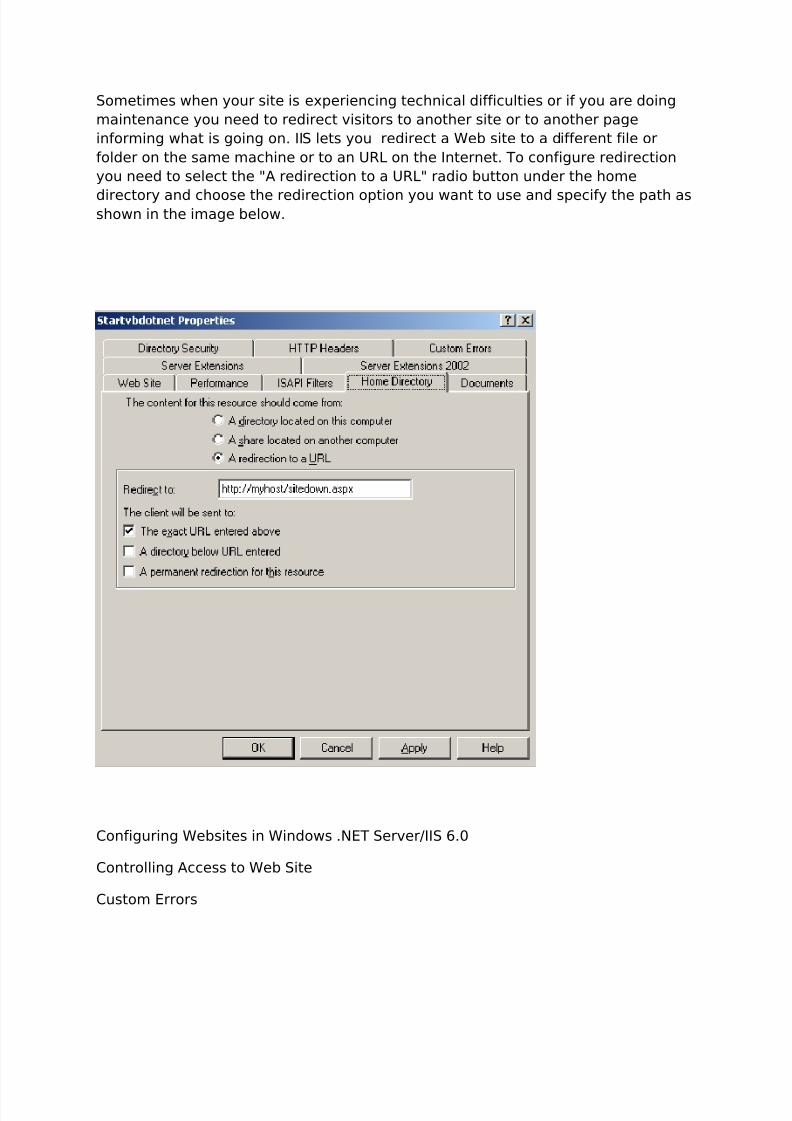
Sometimes when your site is experiencing technical difficulties or if you are doingmaintenance you need to redirect visitors to another site or to another pageinforming what is going on. IIS lets you redirect a Web site to a different file orfolder on the same machine or to an URL on the Internet. To configure redirectionyou need to select the "A redirection to a URL" radio button under the home
directory and choose the redirection option you want to use and specify the path asshown in the image below.
Configuring Websites in Windows .NET Server/IIS 6.0
Controlling Access to Web Site
Custom Errors

8/3/2019 IIS 6.0 Creation
http://slidepdf.com/reader/full/iis-60-creation 23/31
You can configure Internet Information Services (IIS) to send default HTTP 1.1 errormessages or custom error messages. Custom error messages can be mapped to afile name or to a URL. The image below displays Custom Errors dialog.
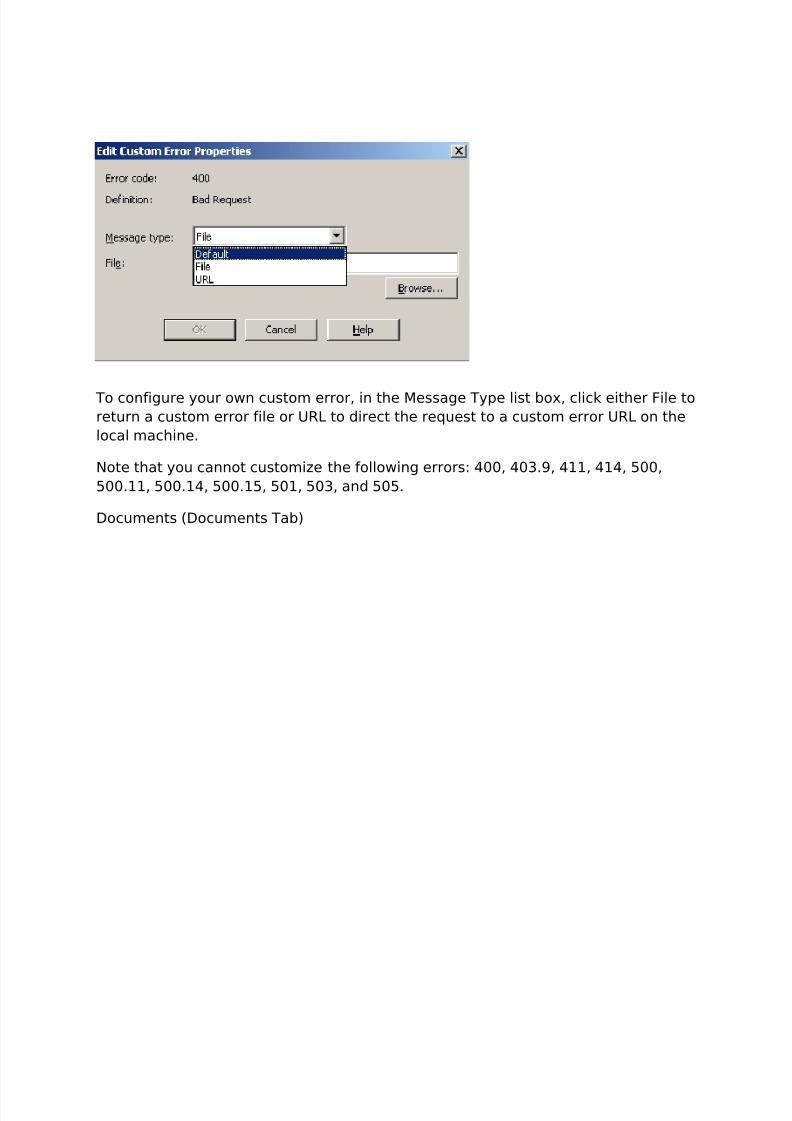
You can also configure your own custom error messages. To do that, click the HTTPerror that you want to change, and then click Edit to open the Edit Custom ErrorProperties dialog as shown in the image below.
8/3/2019 IIS 6.0 Creation
http://slidepdf.com/reader/full/iis-60-creation 24/31
To configure your own custom error, in the Message Type list box, click either File toreturn a custom error file or URL to direct the request to a custom error URL on thelocal machine.
Note that you cannot customize the following errors: 400, 403.9, 411, 414, 500,500.11, 500.14, 500.15, 501, 503, and 505.
Documents (Documents Tab)
8/3/2019 IIS 6.0 Creation
http://slidepdf.com/reader/full/iis-60-creation 25/31
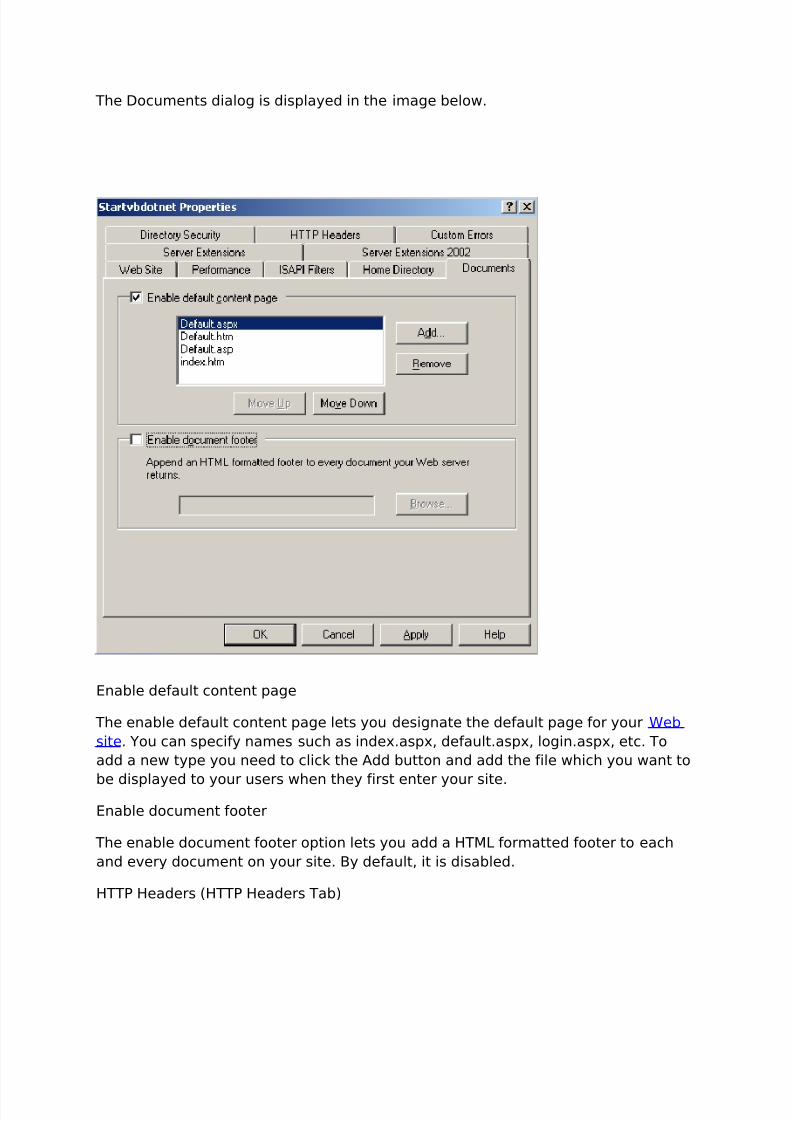
The Documents dialog is displayed in the image below.
Enable default content page
The enable default content page lets you designate the default page for your Website . You can specify names such as index.aspx, default.aspx, login.aspx, etc. Toadd a new type you need to click the Add button and add the file which you want to
be displayed to your users when they first enter your site.Enable document footer
The enable document footer option lets you add a HTML formatted footer to eachand every document on your site. By default, it is disabled.
HTTP Headers (HTTP Headers Tab)
8/3/2019 IIS 6.0 Creation
http://slidepdf.com/reader/full/iis-60-creation 26/31
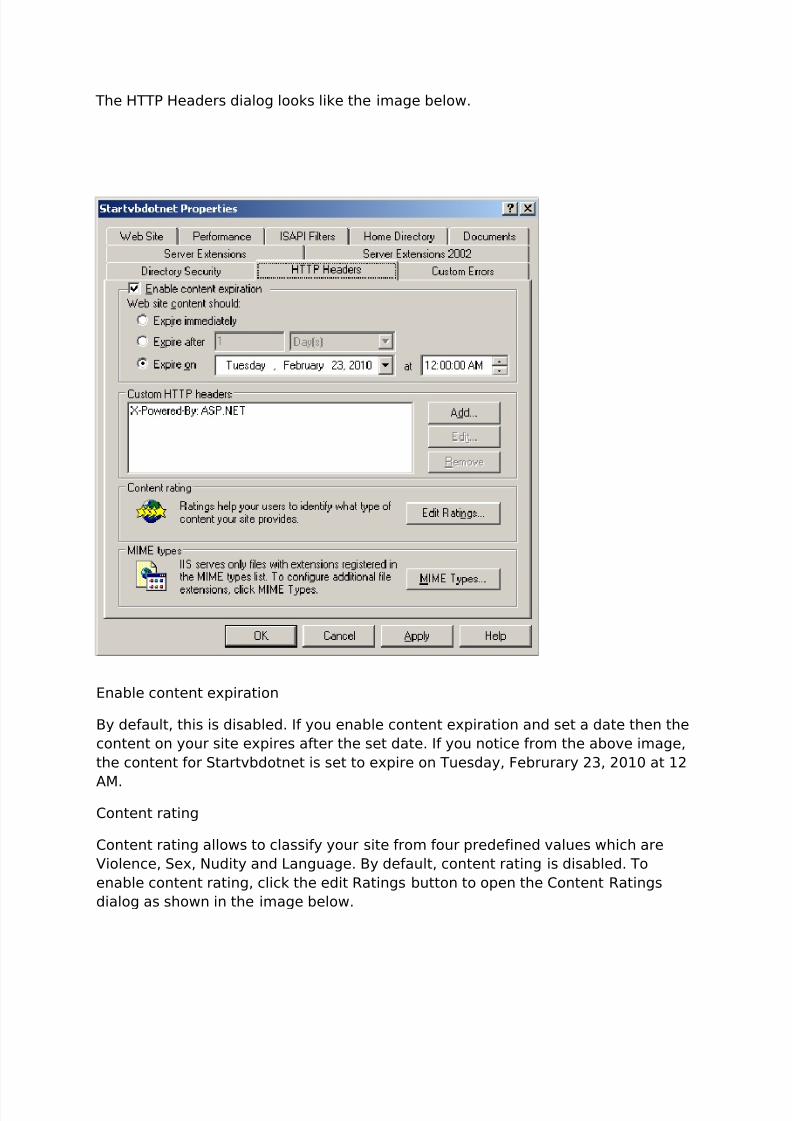
The HTTP Headers dialog looks like the image below.
Enable content expiration
By default, this is disabled. If you enable content expiration and set a date then thecontent on your site expires after the set date. If you notice from the above image,the content for Startvbdotnet is set to expire on Tuesday, Februrary 23, 2010 at 12
AM.Content rating
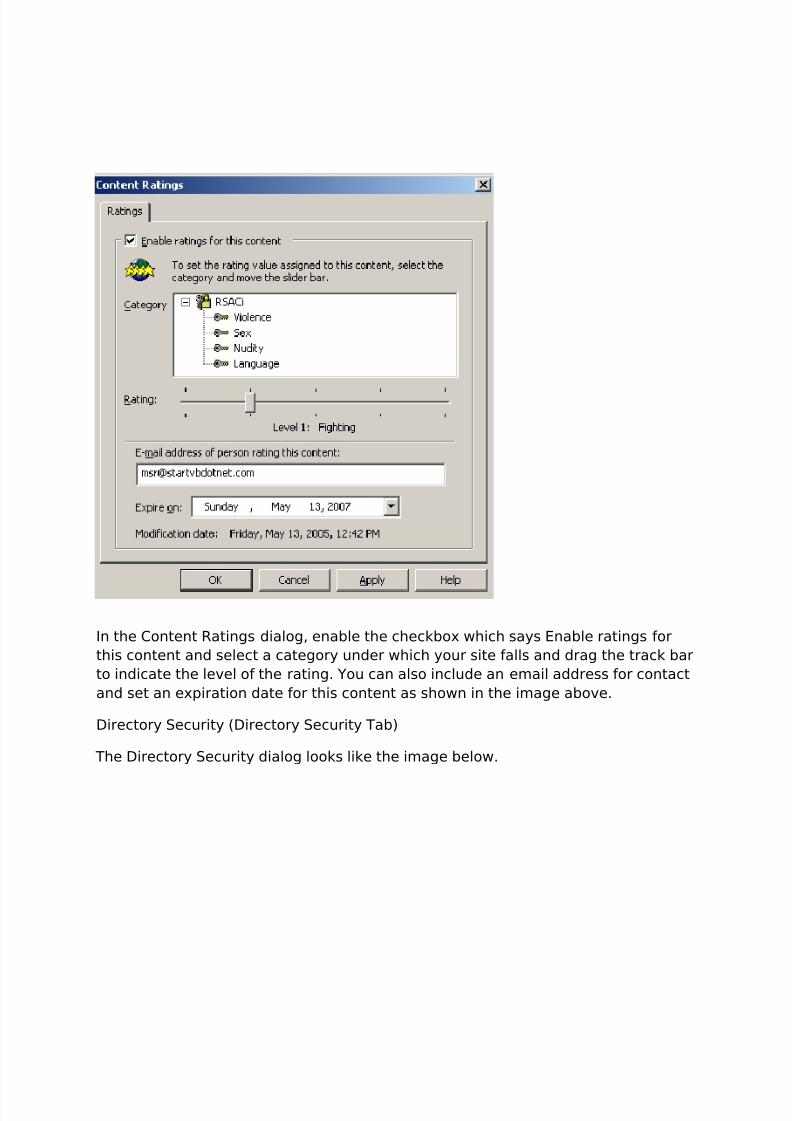
Content rating allows to classify your site from four predefined values which areViolence, Sex, Nudity and Language. By default, content rating is disabled. Toenable content rating, click the edit Ratings button to open the Content Ratingsdialog as shown in the image below.
8/3/2019 IIS 6.0 Creation
http://slidepdf.com/reader/full/iis-60-creation 27/31
In the Content Ratings dialog, enable the checkbox which says Enable ratings forthis content and select a category under which your site falls and drag the track barto indicate the level of the rating. You can also include an email address for contactand set an expiration date for this content as shown in the image above.
Directory Security (Directory Security Tab)
The Directory Security dialog looks like the image below.

8/3/2019 IIS 6.0 Creation
http://slidepdf.com/reader/full/iis-60-creation 28/31
Authentication and access control Authentication and access control allows us to setup access to oursite using Authentication Methods. If you click the Edit button the AuthenticationMethods dialog that is displayed looks like the image below.

8/3/2019 IIS 6.0 Creation
http://slidepdf.com/reader/full/iis-60-creation 29/31
By default, the enable anonymous access checkbox is checked which means thatyour site will be accessed by everyone using the IUSR_COMPUTERNAME (default IISaccount). If you want to enforce restrictions and want users to be authenticatedbefore they access your site you need to set it in this dialog.
IP address and domain name restrictions
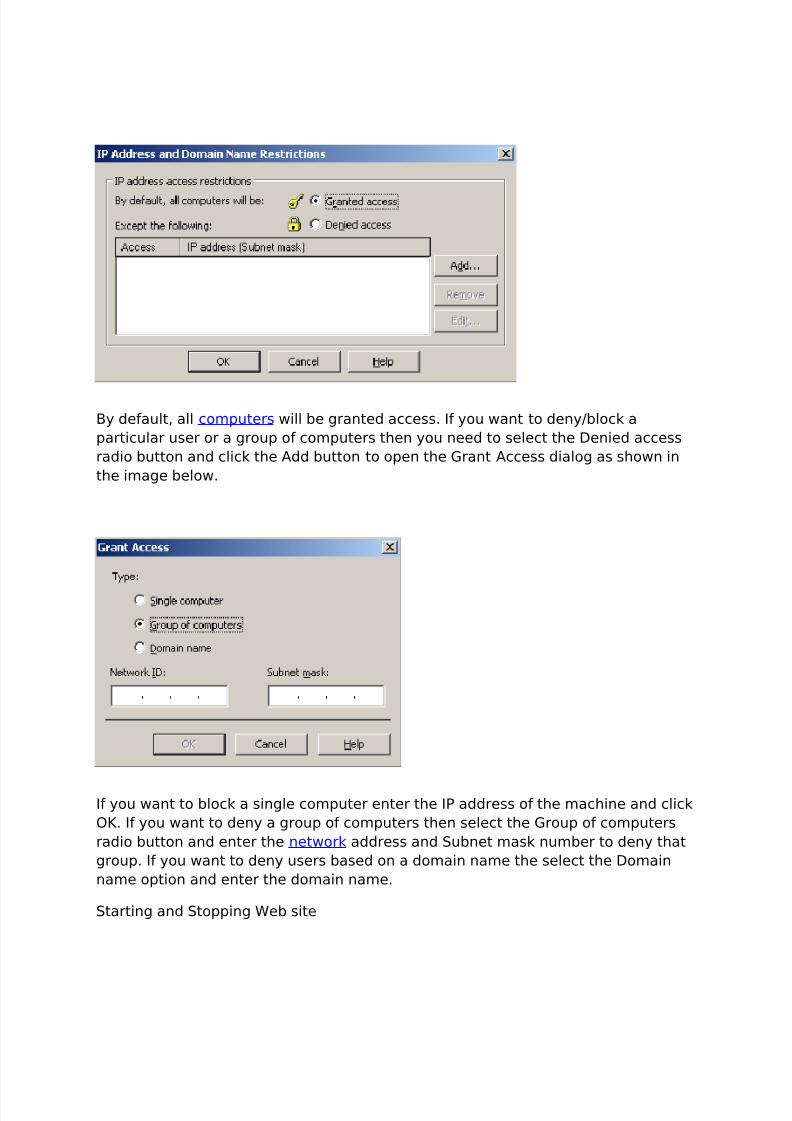
The IP address and domain name restrictions allows us to grant or deny access tousers based on their IP address . If you click the Edit button the IP Address andDomain Name Restrictions dialog that is displayed looks like the image below.
8/3/2019 IIS 6.0 Creation
http://slidepdf.com/reader/full/iis-60-creation 30/31
By default, all computers will be granted access. If you want to deny/block aparticular user or a group of computers then you need to select the Denied accessradio button and click the Add button to open the Grant Access dialog as shown inthe image below.
If you want to block a single computer enter the IP address of the machine and clickOK. If you want to deny a group of computers then select the Group of computersradio button and enter the network address and Subnet mask number to deny thatgroup. If you want to deny users based on a domain name the select the Domainname option and enter the domain name.
Starting and Stopping Web site

8/3/2019 IIS 6.0 Creation
http://slidepdf.com/reader/full/iis-60-creation 31/31
You can start and stop a Web site in IIS manager . To start a Web site, select theWeb site, right-click on it and from the menu select start/stop as shown below.