Introduces the Smart Drainage System Introduces the Smart Drainage System ®
ii
Copyright © 2016 YEALINK(XIAMEN) NETWORK TECHNOLOGY CO., LTD.
Copyright © 2016 Yealink(Xiamen) Network Technology CO., LTD. All rights reserved. No parts of
this publication may be reproduced or transmitted in any form or by any means, electronic or
mechanical, photocopying, recording, or otherwise, for any purpose, without the express written
permission of Yealink(Xiamen) Network Technology CO., LTD. Under the law, reproducing
includes translating into another language or format.
When this publication is made available on media, Yealink(Xiamen) Network Technology CO.,
LTD. gives its consent to downloading and printing copies of the content provided in this file only
for private use but not for redistribution. No parts of this publication may be subject to alteration,
modification or commercial use. Yealink(Xiamen) Network Technology CO., LTD. will not be
liable for any damages arising from use of an illegally modified or altered publication.
THE SPECIFICATIONS AND INFORMATION REGARDING THE PRODUCTS IN THIS GUIDE ARE
SUBJECT TO CHANGE WITHOUT NOTICE. ALL STATEMENTS, INFORMATION, AND
RECOMMENDATIONS IN THIS GUIDE ARE BELIEVED TO BE ACCURATE AND PRESENTED
WITHOUT WARRANTY OF ANY KIND, EXPRESS OR IMPLIED. USERS MUST TAKE FULL
RESPONSIBILITY FOR THEIR APPLICATION OF PRODUCTS.
YEALINK(XIAMEN) NETWORK TECHNOLOGY CO., LTD. MAKES NO WARRANTY OF ANY KIND
WITH REGARD TO THIS GUIDE, INCLUDING, BUT NOT LIMITED TO, THE IMPLIED WARRANTIES OF
MERCHANTABILITY AND FITNESS FOR A PARTICULAR PURPOSE. Yealink(Xiamen) Network
Technology CO., LTD. shall not be liable for errors contained herein nor for incidental or
consequential damages in connection with the furnishing, performance, or use of this guide.
We are striving to improve our documentation quality and we appreciate your feedback. Email
your opinions and comments to [email protected].

About This Guide
iii
The Yealink video conferencing systems provide an API interface for the AMX NetLinx
Controllers. The interface allows you to control the Yealink video conferencing system
through the touch panels installed in the control device.
When you successfully deploy environment and configure the AMX NetLinx Controllers,
the Yealink video conferencing systems and the control devices, you can remotely
manage certain features of your video conferencing system via the control device.
The following table lists the products included in the AMX NetLinx Controllers.
NX-1200 NetLinx NX Integrated Controller
NX-2200 NetLinx NX Integrated Controller
NX-3200 NetLinx NX Integrated Controller
NX-4200 NetLinx NX Integrated Controller
Topics provided in this guide include:
Chapter 1 Deployment Environment
Chapter 2 Debugging Process
Chapter 3 Yealink VCS Panel Pages Overview
Chapter 4 Frequently Asked Questions

Yealink VC Deployment and User Manual for AMX Control Systems
iv
Deployment Environment
1
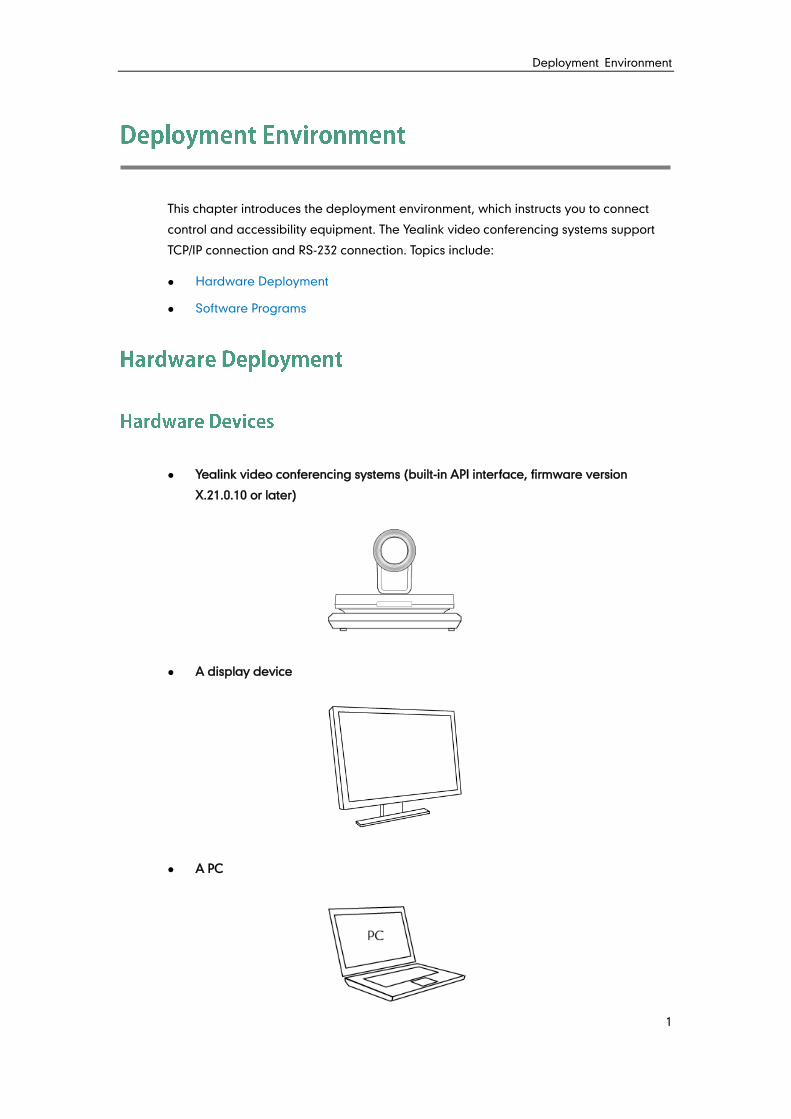
This chapter introduces the deployment environment, which instructs you to connect
control and accessibility equipment. The Yealink video conferencing systems support
TCP/IP connection and RS-232 connection. Topics include:
Hardware Deployment
Software Programs
Yealink video conferencing systems (built-in API interface, firmware version
X.21.0.10 or later)
A display device
A PC
Yealink VC Deployment and User Manual for AMX Control Systems
2
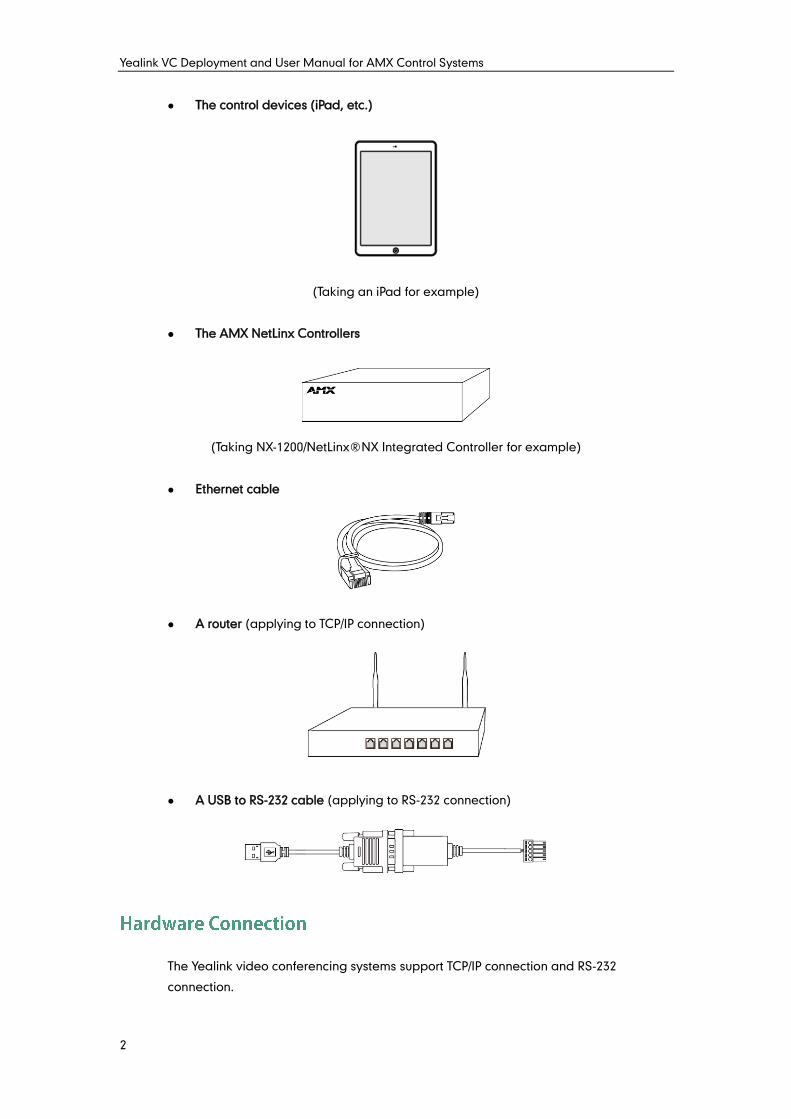
The control devices (iPad, etc.)
(Taking an iPad for example)
The AMX NetLinx Controllers
(Taking NX-1200/NetLinx○R NX Integrated Controller for example)
Ethernet cable
A router (applying to TCP/IP connection)
A USB to RS-232 cable (applying to RS-232 connection)
The Yealink video conferencing systems support TCP/IP connection and RS-232
connection.
Deployment Environment
3
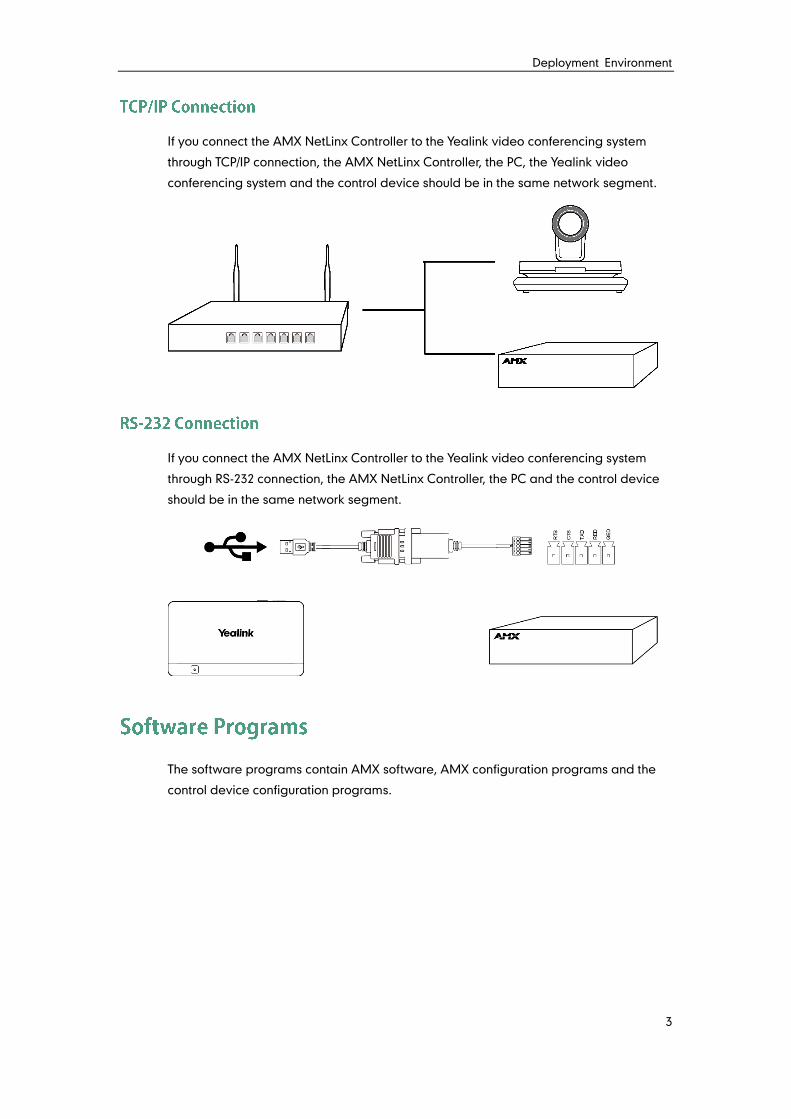
If you connect the AMX NetLinx Controller to the Yealink video conferencing system
through TCP/IP connection, the AMX NetLinx Controller, the PC, the Yealink video
conferencing system and the control device should be in the same network segment.
If you connect the AMX NetLinx Controller to the Yealink video conferencing system
through RS-232 connection, the AMX NetLinx Controller, the PC and the control device
should be in the same network segment.
The software programs contain AMX software, AMX configuration programs and the
control device configuration programs.
Yealink VC Deployment and User Manual for AMX Control Systems
4
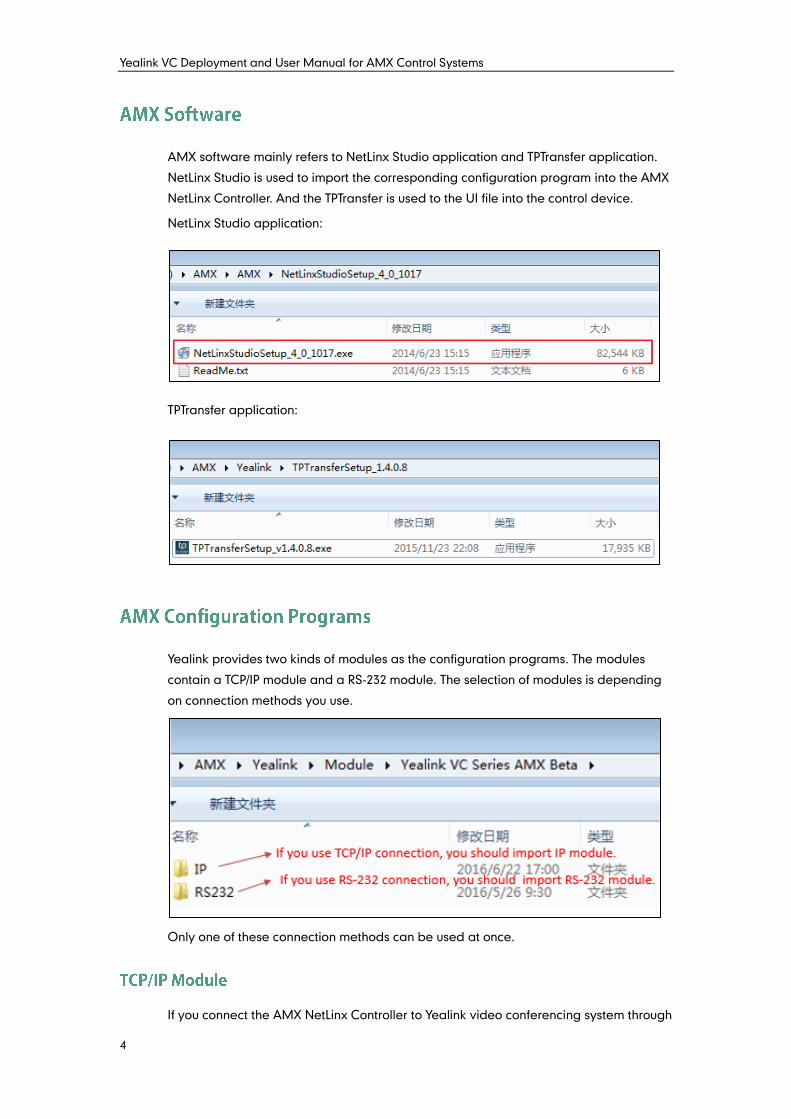
AMX software mainly refers to NetLinx Studio application and TPTransfer application.
NetLinx Studio is used to import the corresponding configuration program into the AMX
NetLinx Controller. And the TPTransfer is used to the UI file into the control device.
NetLinx Studio application:
TPTransfer application:
Yealink provides two kinds of modules as the configuration programs. The modules
contain a TCP/IP module and a RS-232 module. The selection of modules is depending
on connection methods you use.
Only one of these connection methods can be used at once.
If you connect the AMX NetLinx Controller to Yealink video conferencing system through
Deployment Environment
5
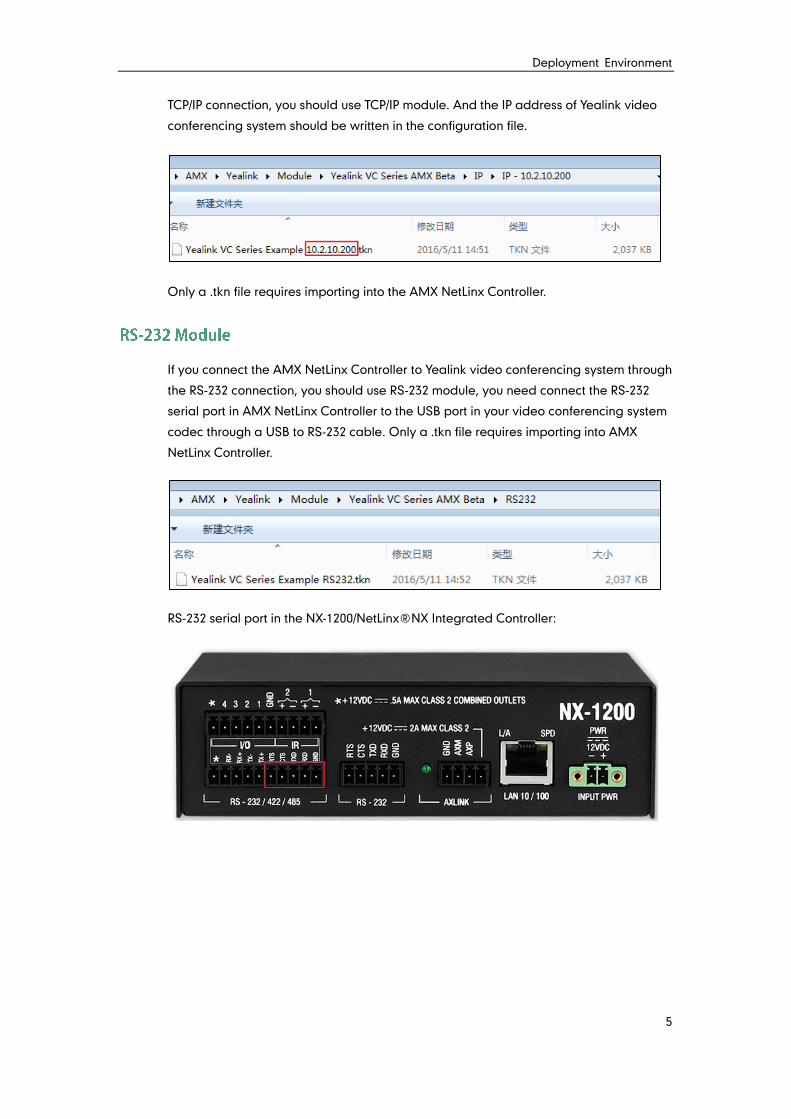
TCP/IP connection, you should use TCP/IP module. And the IP address of Yealink video
conferencing system should be written in the configuration file.
Only a .tkn file requires importing into the AMX NetLinx Controller.
If you connect the AMX NetLinx Controller to Yealink video conferencing system through
the RS-232 connection, you should use RS-232 module, you need connect the RS-232
serial port in AMX NetLinx Controller to the USB port in your video conferencing system
codec through a USB to RS-232 cable. Only a .tkn file requires importing into AMX
NetLinx Controller.
RS-232 serial port in the NX-1200/NetLinx○R NX Integrated Controller:
Yealink VC Deployment and User Manual for AMX Control Systems
6
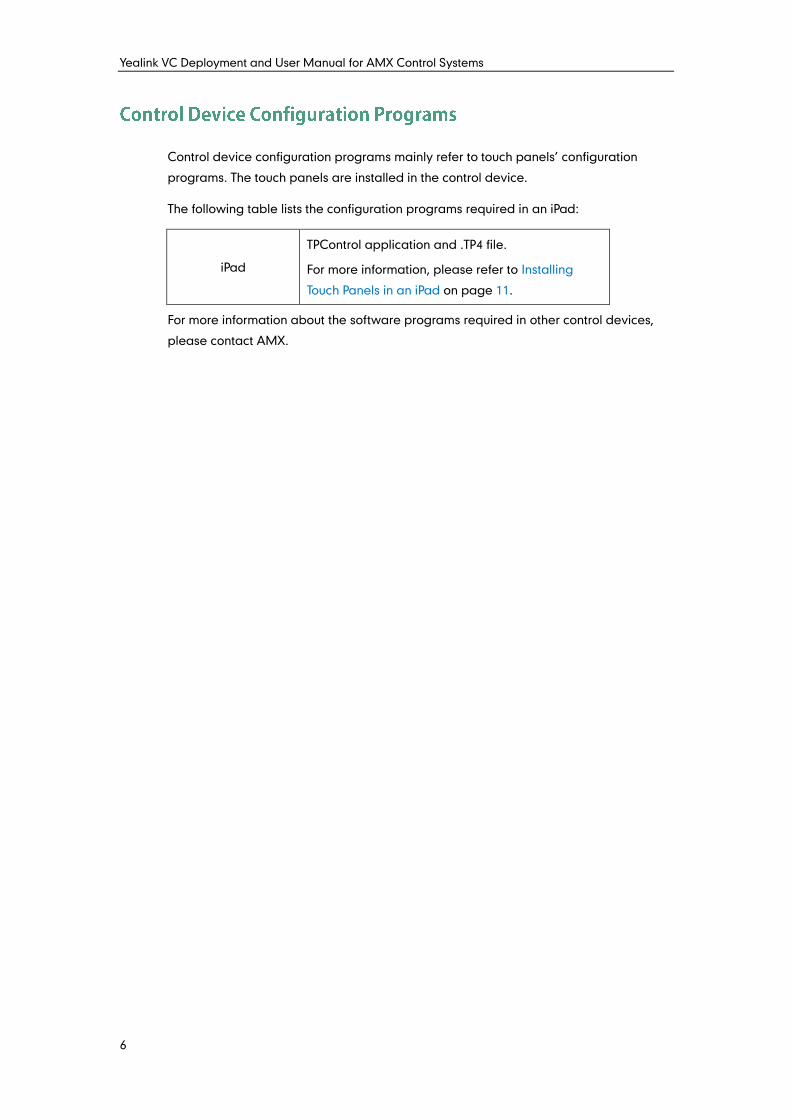
Control device configuration programs mainly refer to touch panels’ configuration
programs. The touch panels are installed in the control device.
The following table lists the configuration programs required in an iPad:
iPad
TPControl application and .TP4 file.
For more information, please refer to Installing
Touch Panels in an iPad on page 11.
For more information about the software programs required in other control devices,
please contact AMX.
Debugging Process
1
This chapter provides the debugging process. The RS-232 connection is introduced for
example. Topics include:
Installing NetLinx Studio
Installing TPTransfer
Importing Modules
Installing Touch Panels
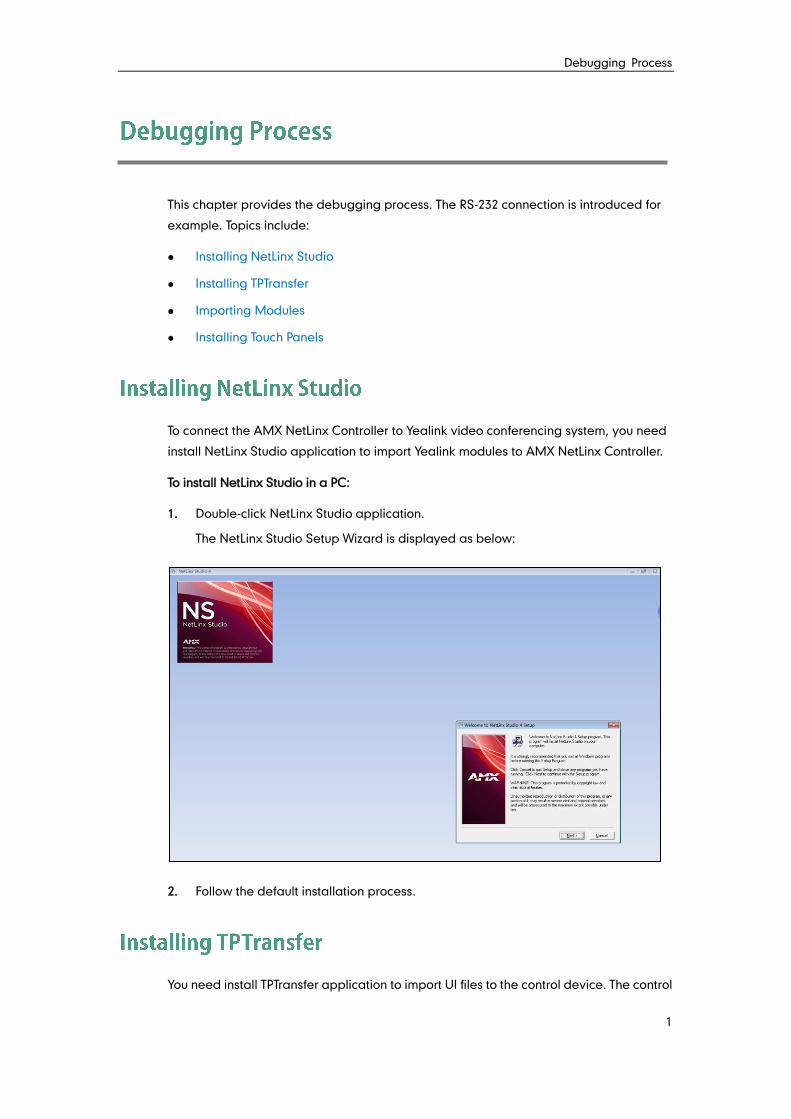
To connect the AMX NetLinx Controller to Yealink video conferencing system, you need
install NetLinx Studio application to import Yealink modules to AMX NetLinx Controller.
To install NetLinx Studio in a PC:
1. Double-click NetLinx Studio application.
The NetLinx Studio Setup Wizard is displayed as below:
2. Follow the default installation process.
You need install TPTransfer application to import UI files to the control device. The control

Yealink VC Deployment and User Manual for AMX Control Systems
2
device interacts and operates seamlessly with the AMX NetLinx controller, just like other
native AMX system components.
To install TPTransfer in a PC:
1. Double-click TPTransfer application.
2. Select the desired language, and then click OK.
The TPTransfer Setup Wizard is displayed as below:
3. Follow the default installation process.
Importing a RS-232 module into the AMX NetLinx Controller is introduced for an
example.
Debugging Process
3
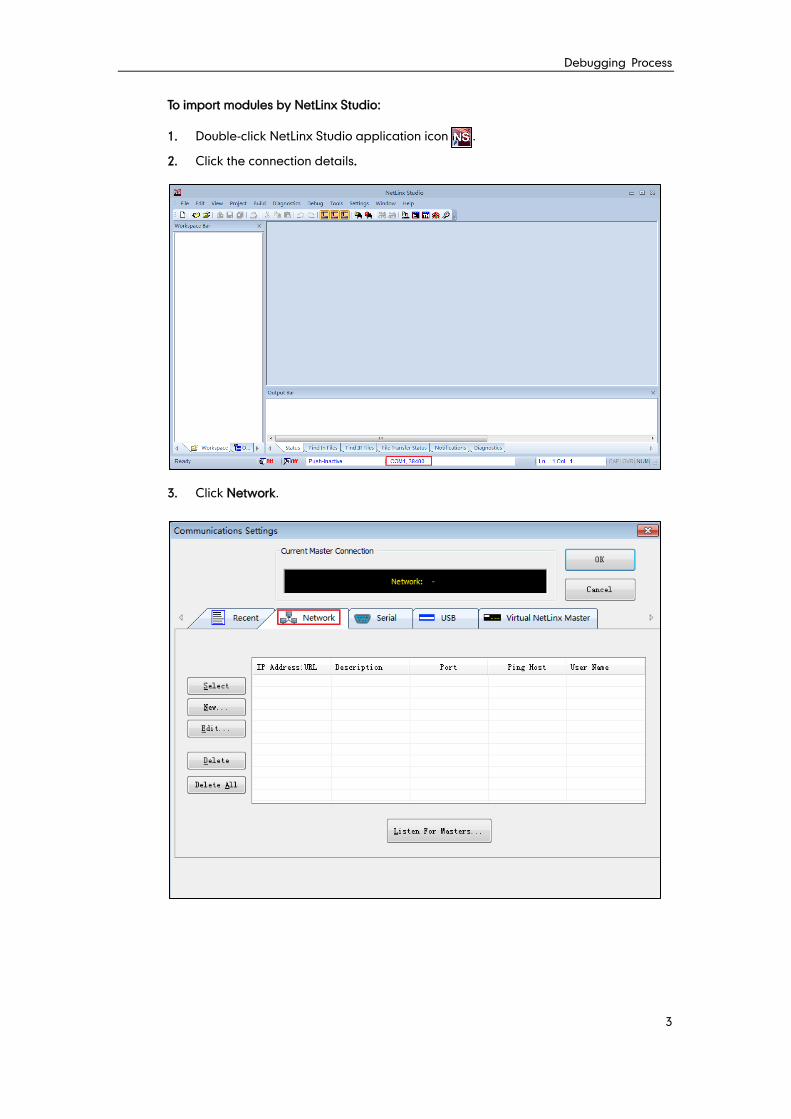
To import modules by NetLinx Studio:
1. Double-click NetLinx Studio application icon .
2. Click the connection details.
3. Click Network.
Yealink VC Deployment and User Manual for AMX Control Systems
4
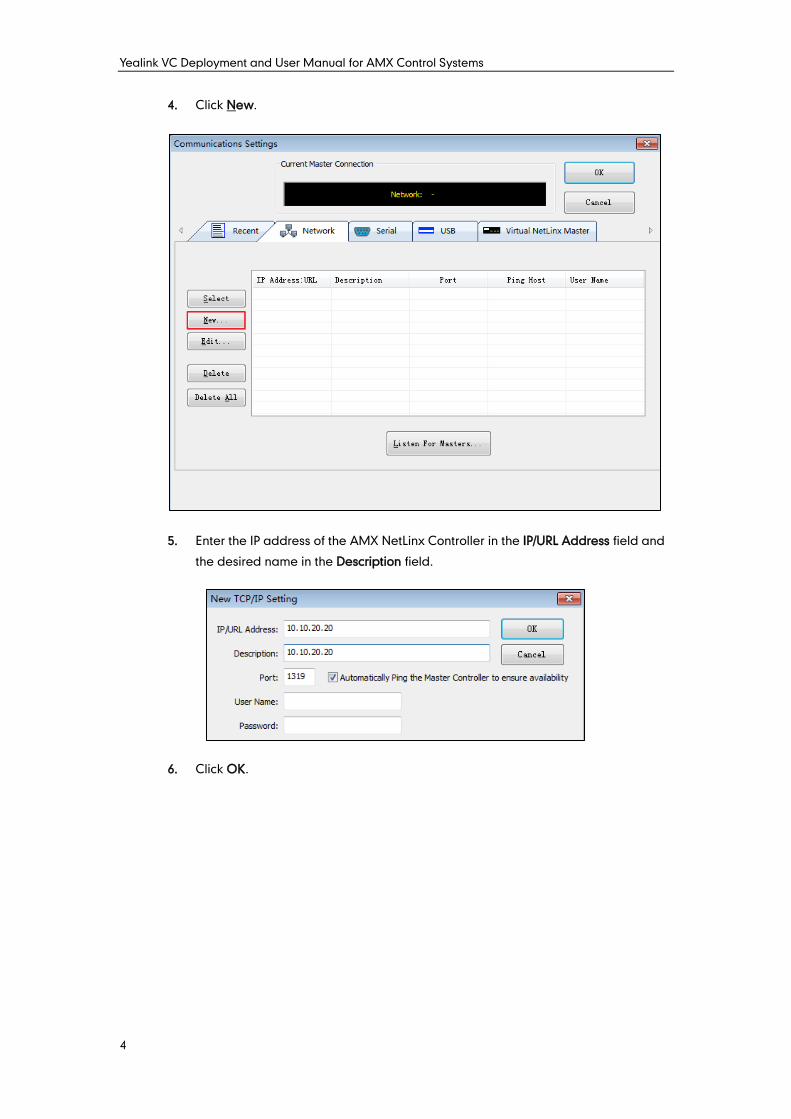
4. Click New.
5. Enter the IP address of the AMX NetLinx Controller in the IP/URL Address field and
the desired name in the Description field.
6. Click OK.
Debugging Process
5
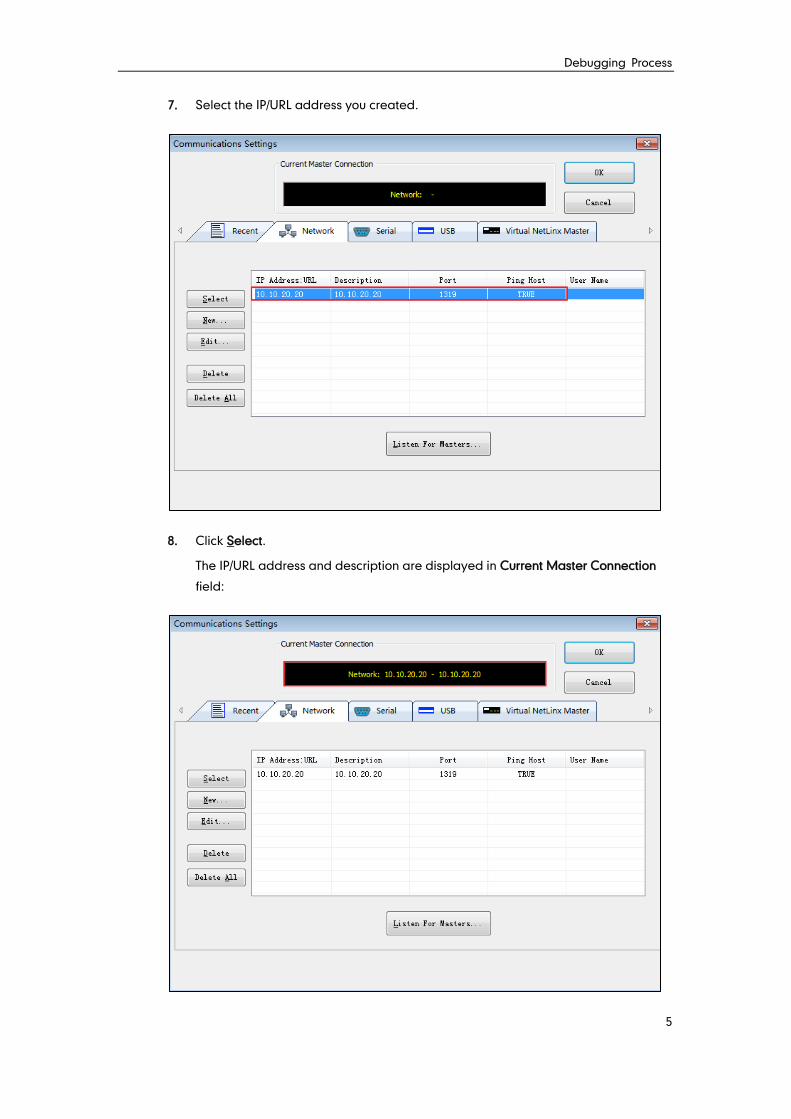
7. Select the IP/URL address you created.
8. Click Select.
The IP/URL address and description are displayed in Current Master Connection
field:
Yealink VC Deployment and User Manual for AMX Control Systems
6
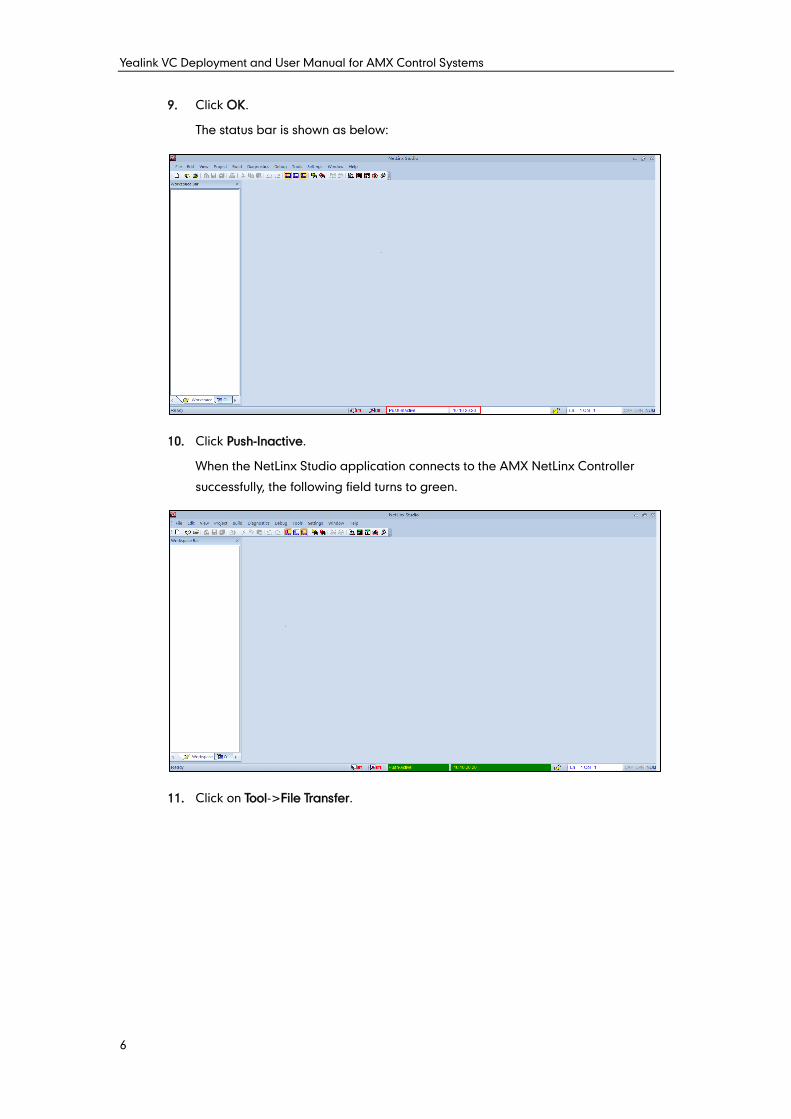
9. Click OK.
The status bar is shown as below:
10. Click Push-Inactive.
When the NetLinx Studio application connects to the AMX NetLinx Controller
successfully, the following field turns to green.
11. Click on Tool->File Transfer.

Debugging Process
7
12. Click Add.
13. Click on Other.
Yealink VC Deployment and User Manual for AMX Control Systems
8
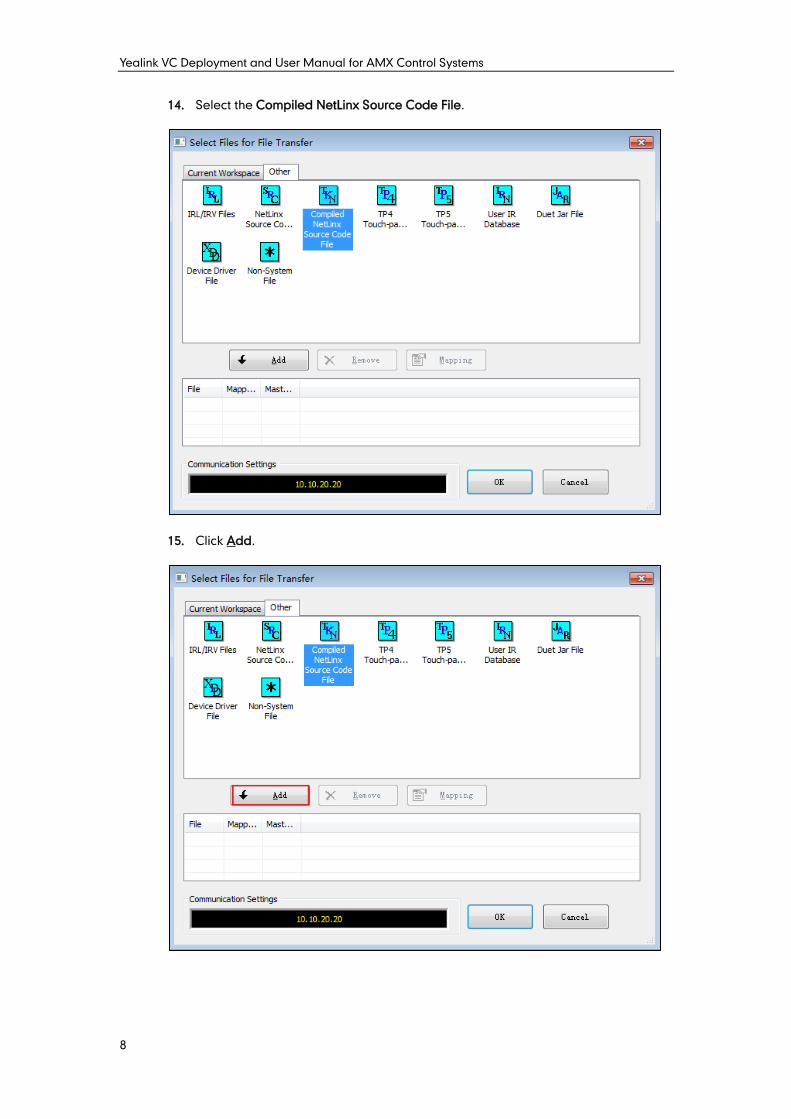
14. Select the Compiled NetLinx Source Code File.
15. Click Add.

Debugging Process
9
16. According to the RS-232 connection method, select a .tkn file.
17. Click OK.
Yealink VC Deployment and User Manual for AMX Control Systems
10
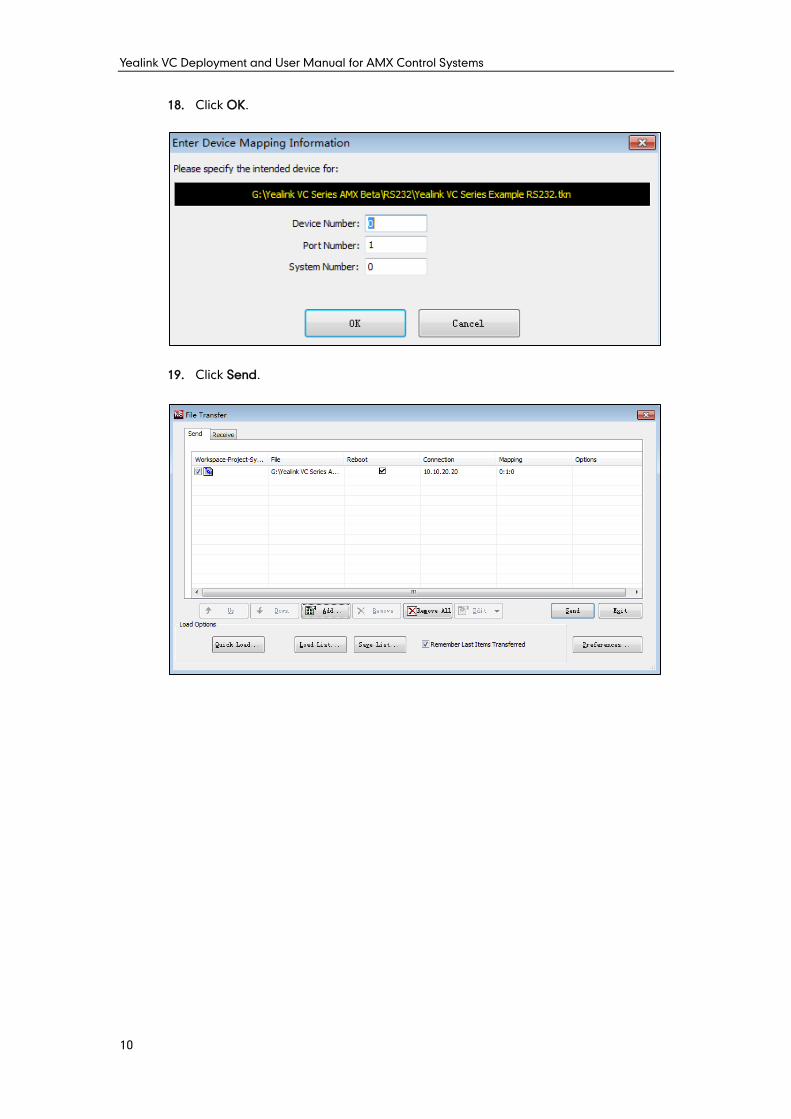
18. Click OK.
19. Click Send.
Debugging Process
11
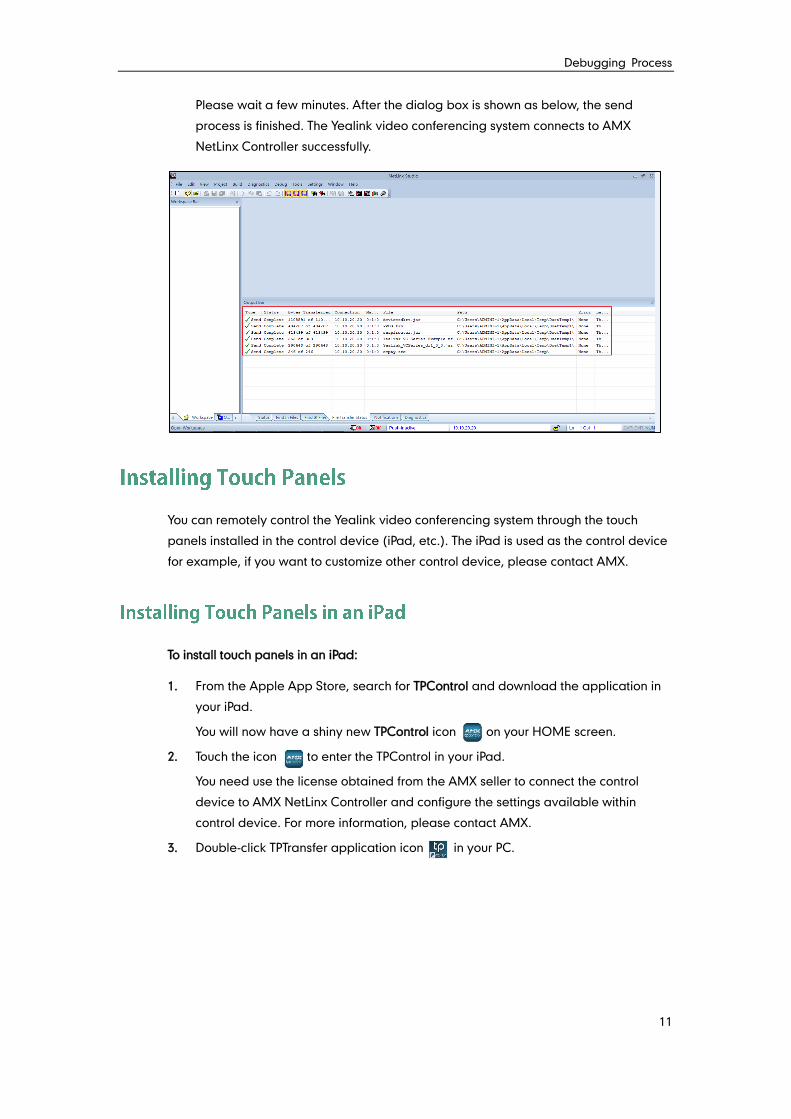
Please wait a few minutes. After the dialog box is shown as below, the send
process is finished. The Yealink video conferencing system connects to AMX
NetLinx Controller successfully.
You can remotely control the Yealink video conferencing system through the touch
panels installed in the control device (iPad, etc.). The iPad is used as the control device
for example, if you want to customize other control device, please contact AMX.
To install touch panels in an iPad:
1. From the Apple App Store, search for TPControl and download the application in
your iPad.
You will now have a shiny new TPControl icon on your HOME screen.
2. Touch the icon to enter the TPControl in your iPad.
You need use the license obtained from the AMX seller to connect the control
device to AMX NetLinx Controller and configure the settings available within
control device. For more information, please contact AMX.
3. Double-click TPTransfer application icon in your PC.
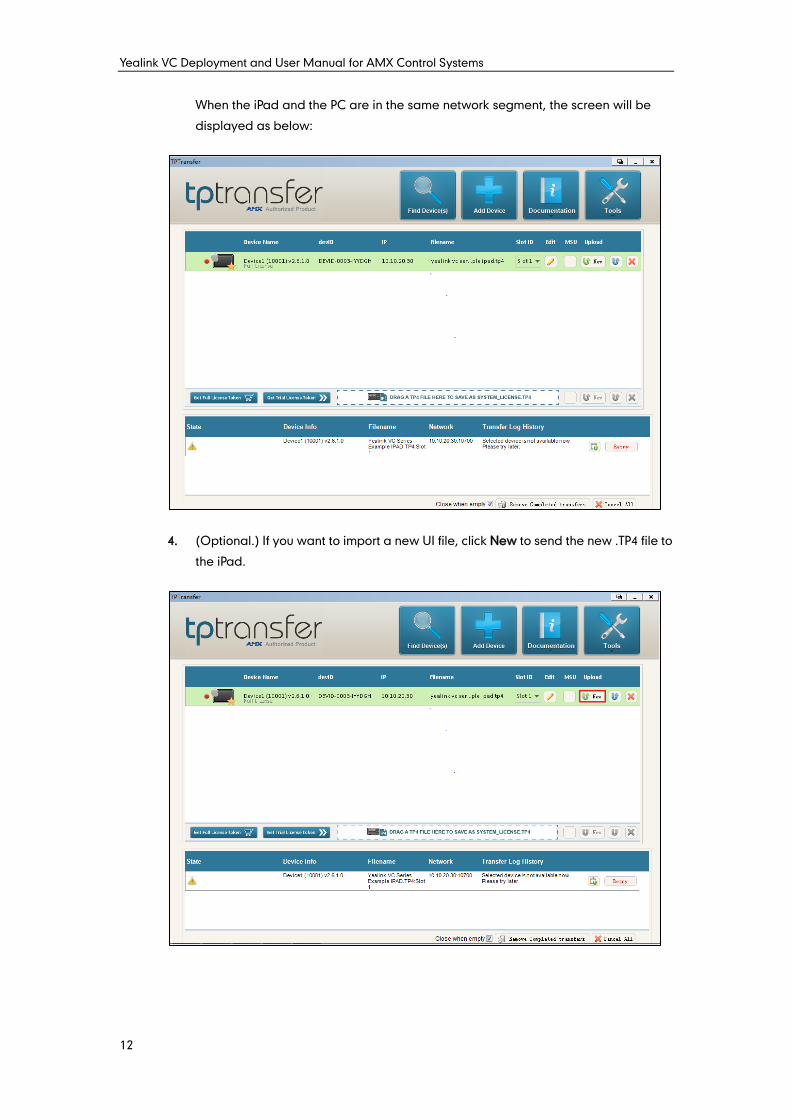
Yealink VC Deployment and User Manual for AMX Control Systems
12
When the iPad and the PC are in the same network segment, the screen will be
displayed as below:
4. (Optional.) If you want to import a new UI file, click New to send the new .TP4 file to
the iPad.
Debugging Process
13
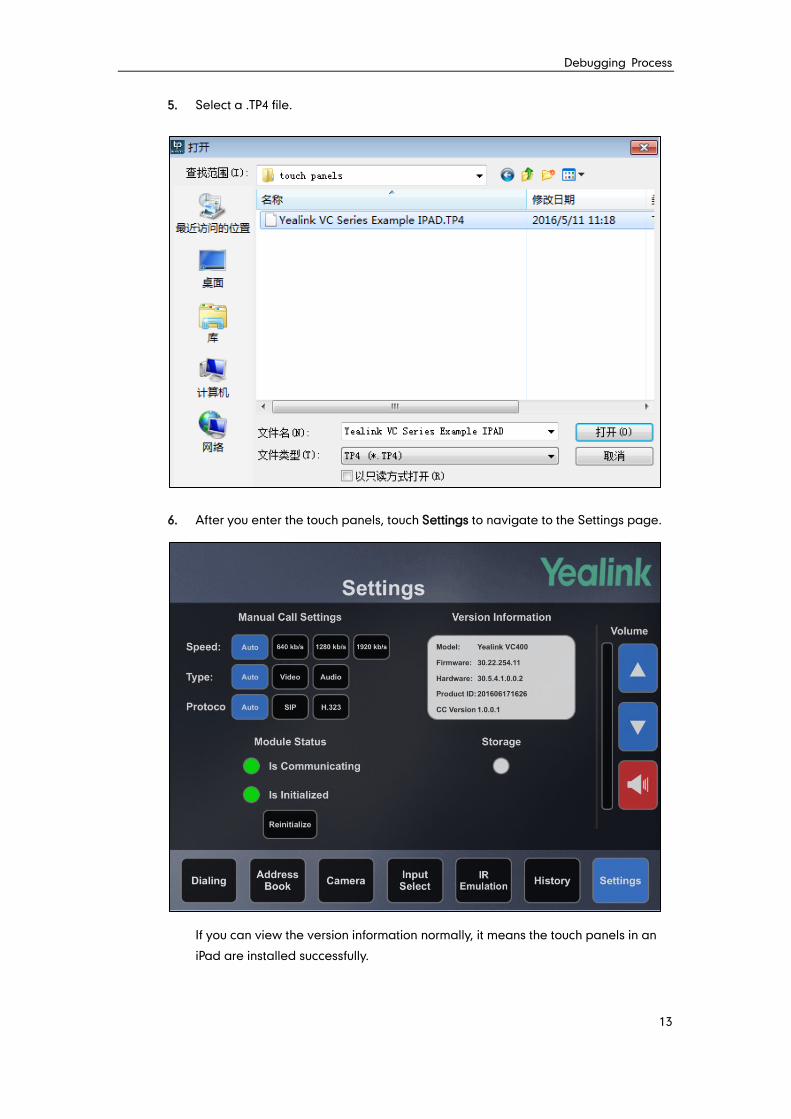
5. Select a .TP4 file.
6. After you enter the touch panels, touch Settings to navigate to the Settings page.
If you can view the version information normally, it means the touch panels in an
iPad are installed successfully.

Yealink VC Deployment and User Manual for AMX Control Systems
14
Yealink VCS Panel Pages Overview
15
Every page in touch panels includes a menu for navigating to a different page. Many of
the pages in touch panels also include buttons for increasing or decreasing the volume
and muting the microphone. This chapter provides instructions for the Yealink VCS panel
pages overview. The touch panels in an iPad are introduced for example. Topics
include:
Yealink Logo Page
Dialing Page
Address Book Page
Camera Page
Input Select Page
IR Emulation Page
History Page
Settings Page
Yealink VC Deployment and User Manual for AMX Control Systems
16
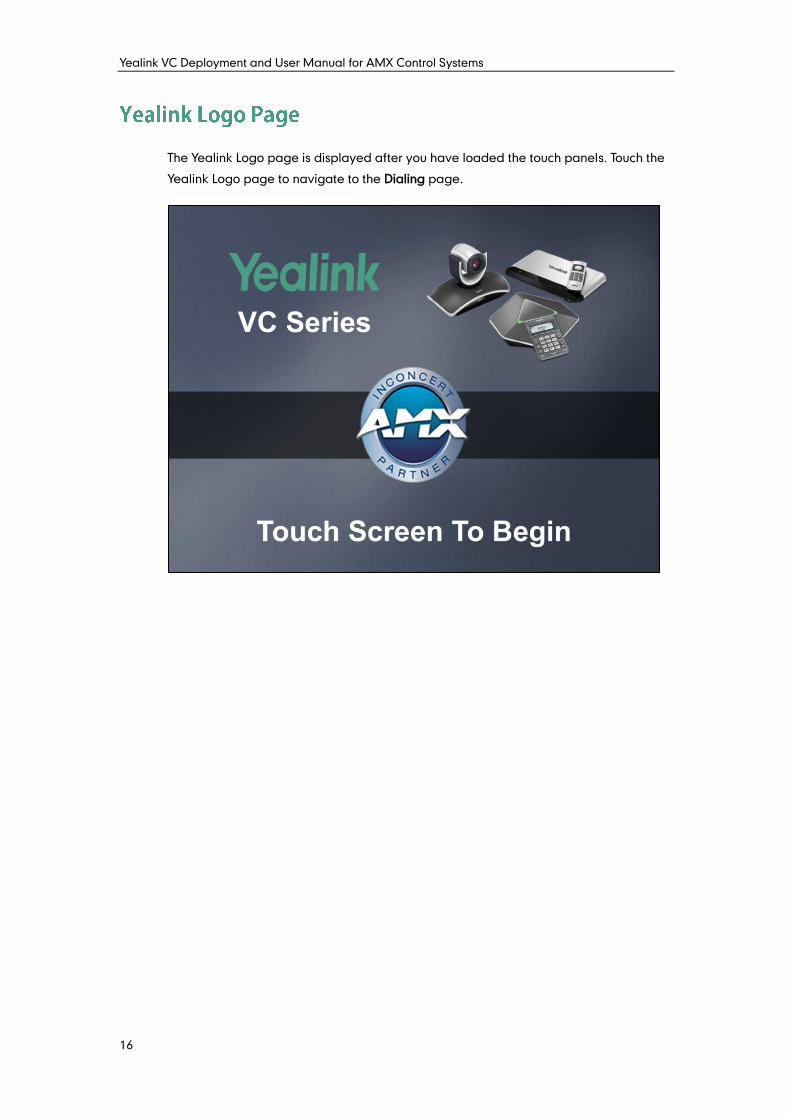
The Yealink Logo page is displayed after you have loaded the touch panels. Touch the
Yealink Logo page to navigate to the Dialing page.
Yealink VCS Panel Pages Overview
17
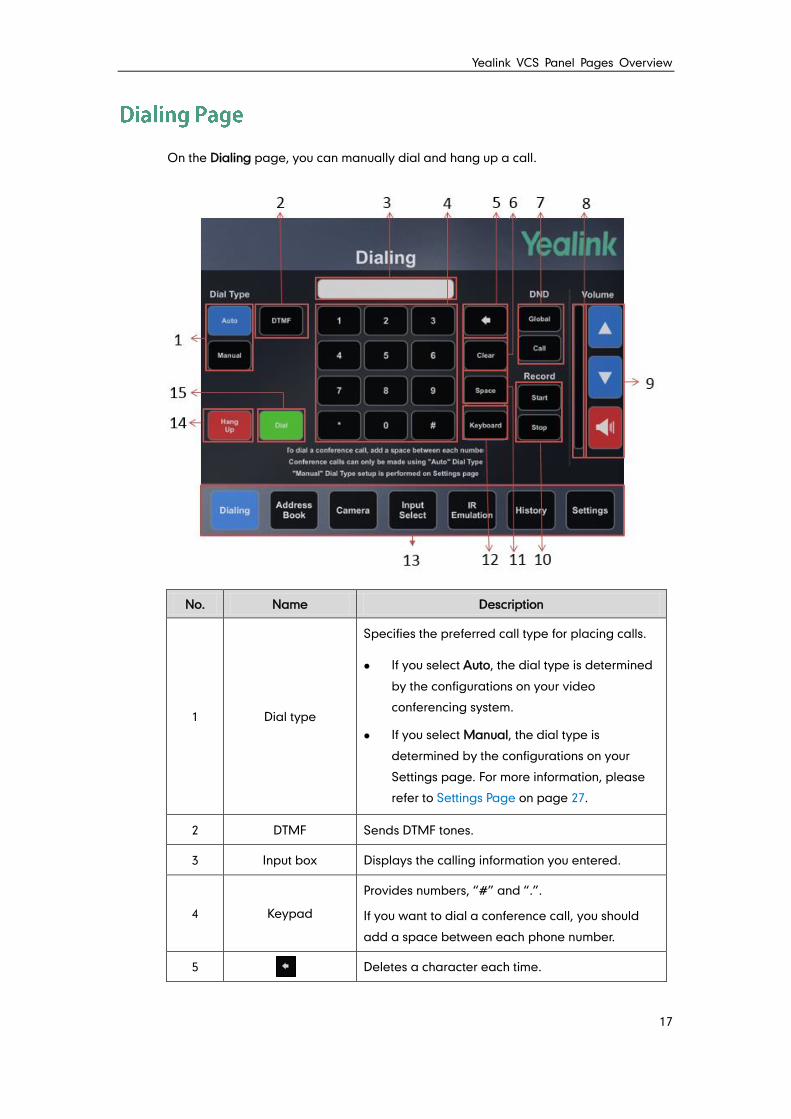
On the Dialing page, you can manually dial and hang up a call.
No. Name Description
1 Dial type
Specifies the preferred call type for placing calls.
If you select Auto, the dial type is determined
by the configurations on your video
conferencing system.
If you select Manual, the dial type is
determined by the configurations on your
Settings page. For more information, please
refer to Settings Page on page 27.
2 DTMF Sends DTMF tones.
3 Input box Displays the calling information you entered.
4 Keypad
Provides numbers, “#” and “.”.
If you want to dial a conference call, you should
add a space between each phone number.
5 Deletes a character each time.
Yealink VC Deployment and User Manual for AMX Control Systems
18
No. Name Description
6 Clear Clears all calling information you entered.
7 DND
Configures the type of Do Not Disturb.
If you select Global, DND mode applies to
global setting.
If you select Call during a call, DND mode
applies to the current call.
8 Bar graph Reflects the current volume level.
9 Volume
Touches to increase the volume.
Touches to decrease the volume.
Touches to mute the microphone.
10 Record Starts/Stops recording video.
11 Space Enters spaces.
12 Keyboard
Opens the Dialing keyboard.
For more information, please refer to Dialing
Keyboard Page on page 18.
13 Shortcut Keys Navigates to the corresponding page.
14 Hang up Hangs up the current call.
15 Dial Places a call.
To enter the Dialing Keyboard page:
1. Touch Dialing to navigate to the Dialing page.

Yealink VCS Panel Pages Overview
19
2. Touch Keyboard button to enter the Dialing Keyboard page.
No. Name Description
1 Input box Displays the calling information you entered.
2 Closes the Dialing keyboard and return to the
dialing page.
3 Keyboard Provides the QWERTY keyboard to enter the calling
information.
4 Enter Finishes entering the calling information and
returns to the Dialing page.
Yealink VC Deployment and User Manual for AMX Control Systems
20
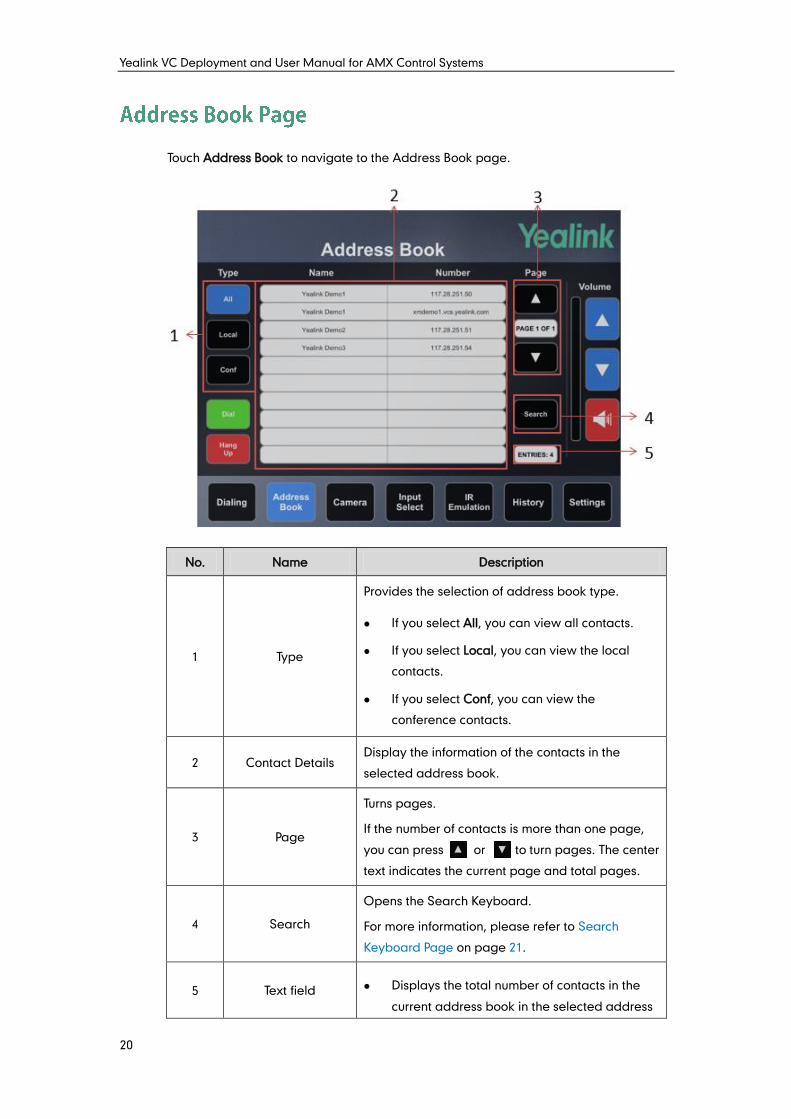
Touch Address Book to navigate to the Address Book page.
No. Name Description
1 Type
Provides the selection of address book type.
If you select All, you can view all contacts.
If you select Local, you can view the local
contacts.
If you select Conf, you can view the
conference contacts.
2 Contact Details Display the information of the contacts in the
selected address book.
3 Page
Turns pages.
If the number of contacts is more than one page,
you can press or to turn pages. The center
text indicates the current page and total pages.
4 Search
Opens the Search Keyboard.
For more information, please refer to Search
Keyboard Page on page 21.
5 Text field Displays the total number of contacts in the
current address book in the selected address
Yealink VCS Panel Pages Overview
21
No. Name Description
book.
Displays the total number of the search results.
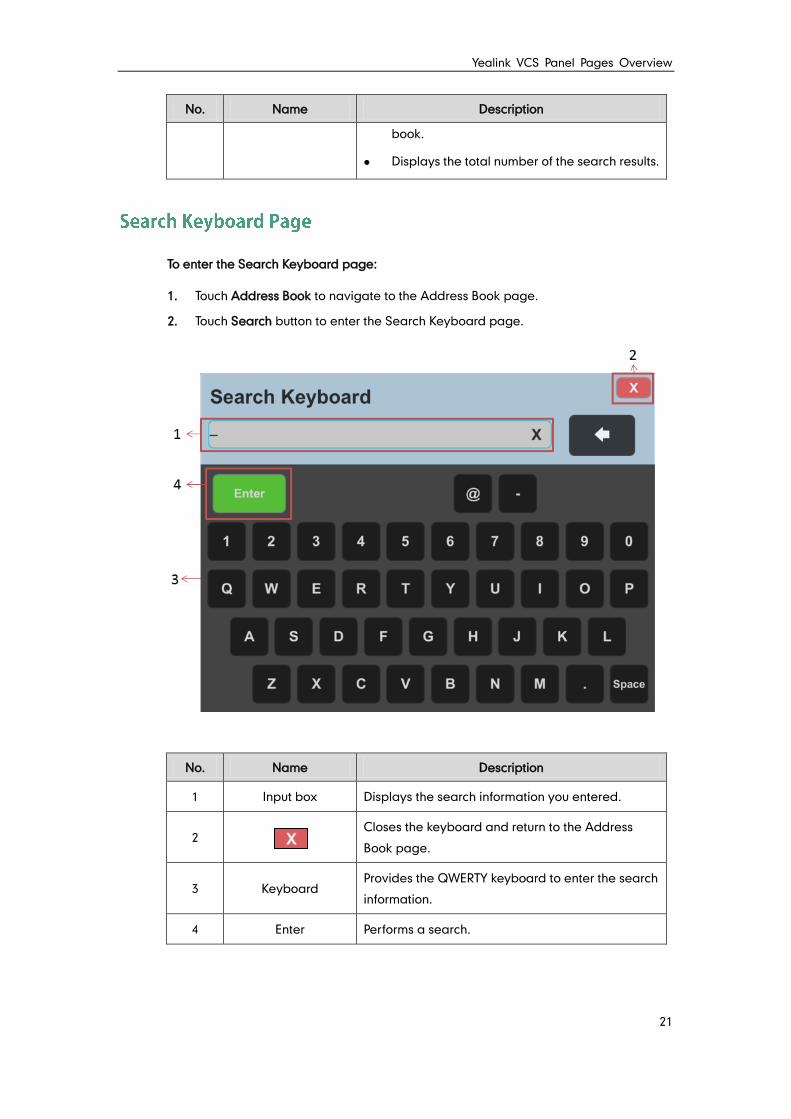
To enter the Search Keyboard page:
1. Touch Address Book to navigate to the Address Book page.
2. Touch Search button to enter the Search Keyboard page.
No. Name Description
1 Input box Displays the search information you entered.
2 Closes the keyboard and return to the Address
Book page.
3 Keyboard Provides the QWERTY keyboard to enter the search
information.
4 Enter Performs a search.
Yealink VC Deployment and User Manual for AMX Control Systems
22
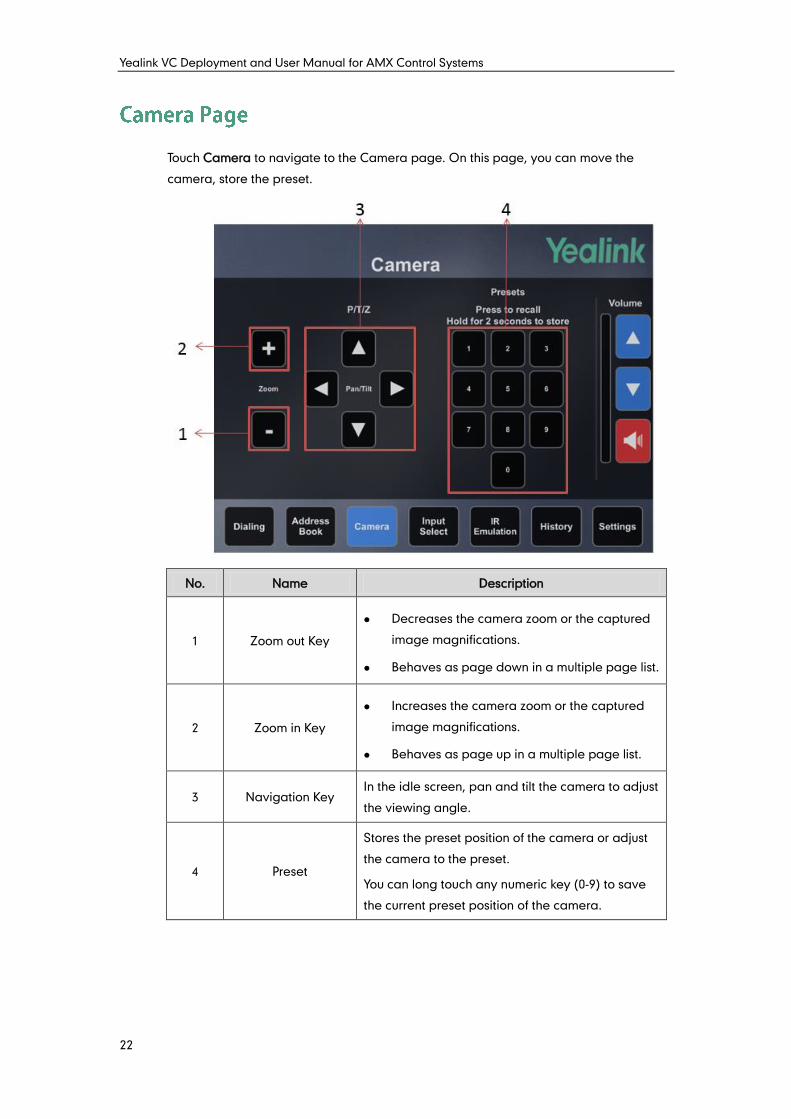
Touch Camera to navigate to the Camera page. On this page, you can move the
camera, store the preset.
No. Name Description
1 Zoom out Key
Decreases the camera zoom or the captured
image magnifications.
Behaves as page down in a multiple page list.
2 Zoom in Key
Increases the camera zoom or the captured
image magnifications.
Behaves as page up in a multiple page list.
3 Navigation Key In the idle screen, pan and tilt the camera to adjust
the viewing angle.
4 Preset
Stores the preset position of the camera or adjust
the camera to the preset.
You can long touch any numeric key (0-9) to save
the current preset position of the camera.

Yealink VCS Panel Pages Overview
23
Touch Input Select to navigate to the Input Select page.
No. Name Description
1 Camera Displays Camera input source.
2 PC Displays PC input source.
3 Camera+PC Displays Camera + PC input source.
Yealink VC Deployment and User Manual for AMX Control Systems
24
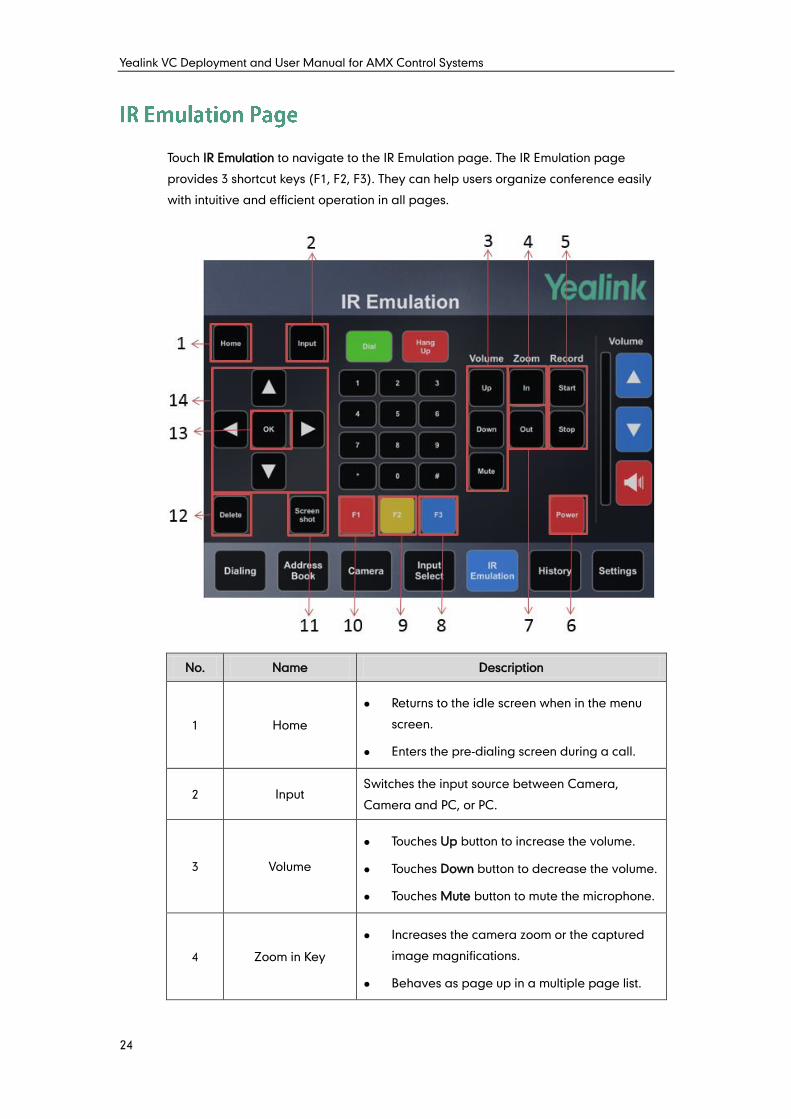
Touch IR Emulation to navigate to the IR Emulation page. The IR Emulation page
provides 3 shortcut keys (F1, F2, F3). They can help users organize conference easily
with intuitive and efficient operation in all pages.
No. Name Description
1 Home
Returns to the idle screen when in the menu
screen.
Enters the pre-dialing screen during a call.
2 Input Switches the input source between Camera,
Camera and PC, or PC.
3 Volume
Touches Up button to increase the volume.
Touches Down button to decrease the volume.
Touches Mute button to mute the microphone.
4 Zoom in Key
Increases the camera zoom or the captured
image magnifications.
Behaves as page up in a multiple page list.
Yealink VCS Panel Pages Overview
25
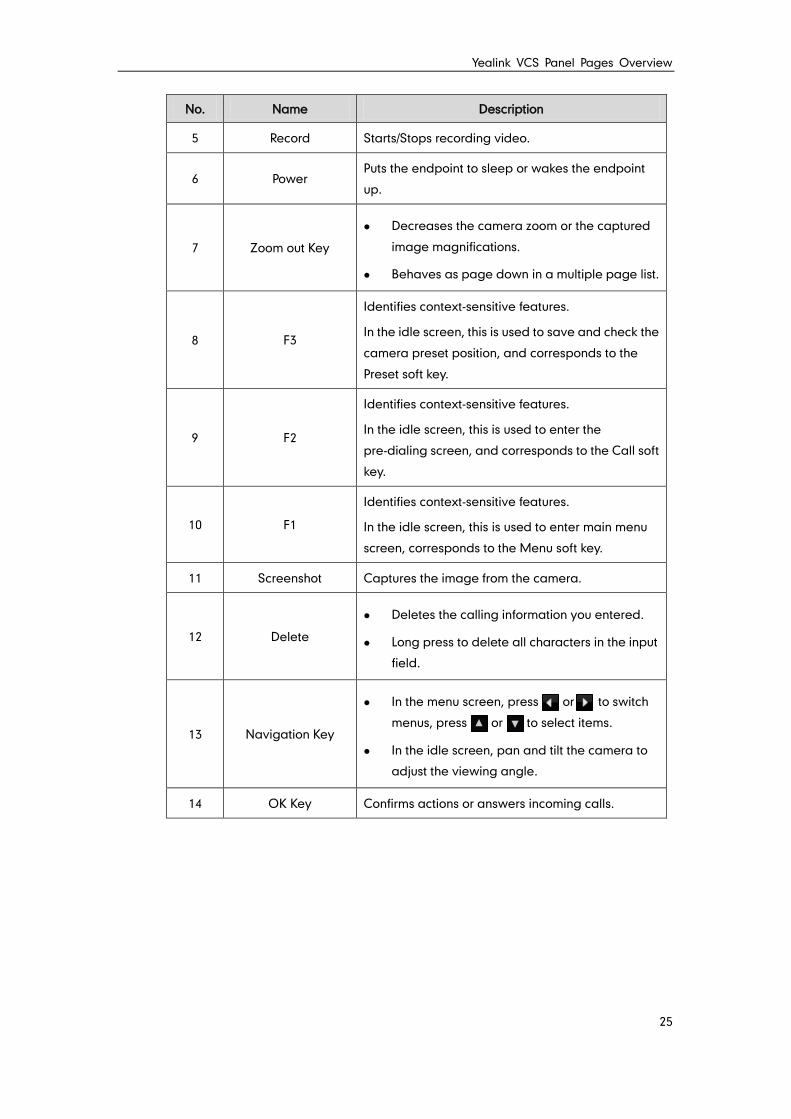
No. Name Description
5 Record Starts/Stops recording video.
6 Power Puts the endpoint to sleep or wakes the endpoint
up.
7 Zoom out Key
Decreases the camera zoom or the captured
image magnifications.
Behaves as page down in a multiple page list.
8 F3
Identifies context-sensitive features.
In the idle screen, this is used to save and check the
camera preset position, and corresponds to the
Preset soft key.
9 F2
Identifies context-sensitive features.
In the idle screen, this is used to enter the
pre-dialing screen, and corresponds to the Call soft
key.
10 F1
Identifies context-sensitive features.
In the idle screen, this is used to enter main menu
screen, corresponds to the Menu soft key.
11 Screenshot Captures the image from the camera.
12 Delete
Deletes the calling information you entered.
Long press to delete all characters in the input
field.
13 Navigation Key
In the menu screen, press or to switch
menus, press or to select items.
In the idle screen, pan and tilt the camera to
adjust the viewing angle.
14 OK Key Confirms actions or answers incoming calls.

Yealink VC Deployment and User Manual for AMX Control Systems
26
Touch History to navigate to the History page.
No. Name Description
1 Type
Provides the selection of call history type.
It contains all calls, placed calls, received calls and
missed calls.
2 Page
Turns pages.
If the number of entries is more than one page, you
can press or to turn pages.
3 Text field Displays the total amount of entries in the selected
call history type.
Yealink VCS Panel Pages Overview
27
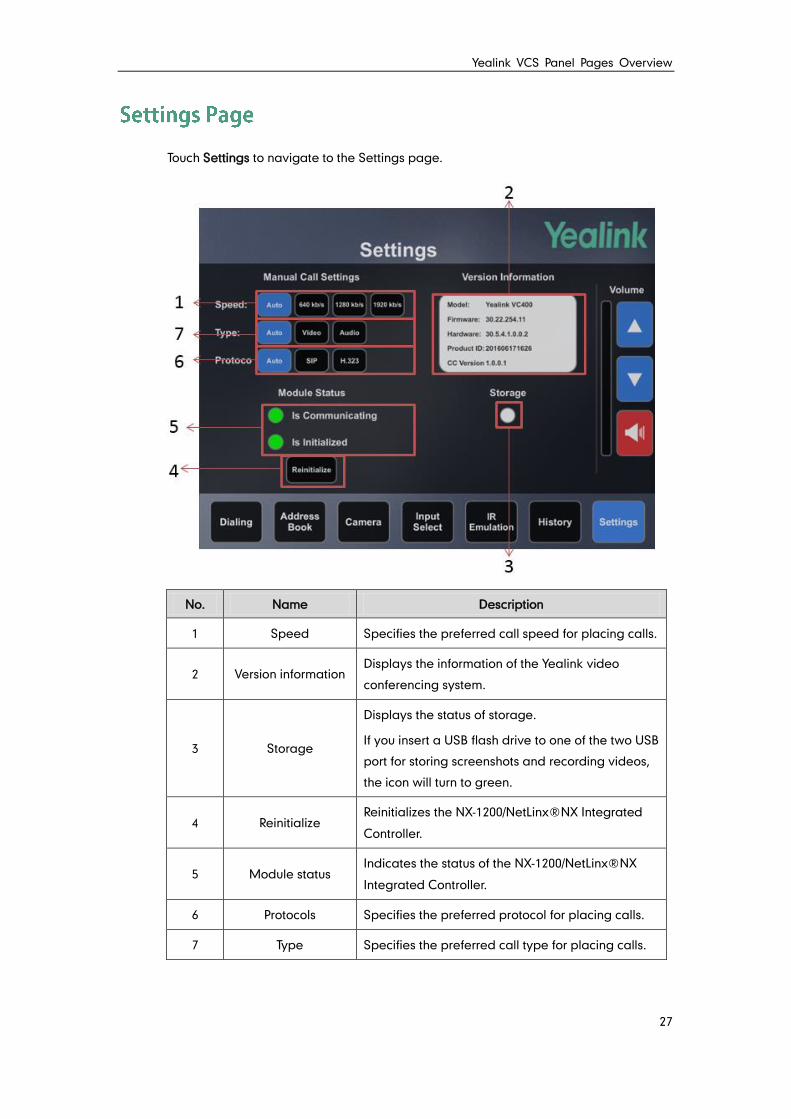
Touch Settings to navigate to the Settings page.
No. Name Description
1 Speed Specifies the preferred call speed for placing calls.
2 Version information Displays the information of the Yealink video
conferencing system.
3 Storage
Displays the status of storage.
If you insert a USB flash drive to one of the two USB
port for storing screenshots and recording videos,
the icon will turn to green.
4 Reinitialize Reinitializes the NX-1200/NetLinx○R NX Integrated
Controller.
5 Module status Indicates the status of the NX-1200/NetLinx○R NX
Integrated Controller.
6 Protocols Specifies the preferred protocol for placing calls.
7 Type Specifies the preferred call type for placing calls.

Yealink VC Deployment and User Manual for AMX Control Systems
28
Frequently Asked Questions
29
This chapter provides the solutions to common issues to help you solve problems you
might encounter. Upon encountering a scenario not listed in this section, contact your
Yealink FAE for further support.
Ensure WiFi is enabled on the device, and that it is connected to the correct IP
network. Furthermore, ensure the IP address assigned to the device is valid.
Ensure whether the IP address of the iPad is in the same network segment of AMX
NetLinx Controller.