![SERVIS NoFrost FRI@IDERA - miletodorov.rs · milodorov servis nofrstri@idera recenzt ingljuban todi] grafi^ki dizjn orispavlovi] prvo izanje tir@ 200 izava^ miletodorov svaprvazadravaizdava^neovla[]enoumno@avanje](https://static.fdocuments.net/doc/165x107/5e076aed15e17145e83ceb3b/servis-nofrost-friidera-milodorov-servis-nofrstriidera-recenzt-ingljuban-todi.jpg)
IDERA Team Server /...
25
IDERA Team Server / Repository Installation and Upgrade Guide Version 17.0 Published July 2017
Transcript of IDERA Team Server /...

IDERA Team Server / Repository Installation and Upgrade Guide
Version 17.0 Published July 2017

IDERA, Inc. 2
© 2017 IDERA, Inc. All rights reserved. IDERA and the IDERA logo are trademarks or registered trademarks of IDERA, Inc. Database tools product names are trademarks or registered trademarks of Embarcadero Technologies, Inc., a wholly owned subsidiary of IDERA, Inc.
July 20, 2017
IDERA, Inc. 3
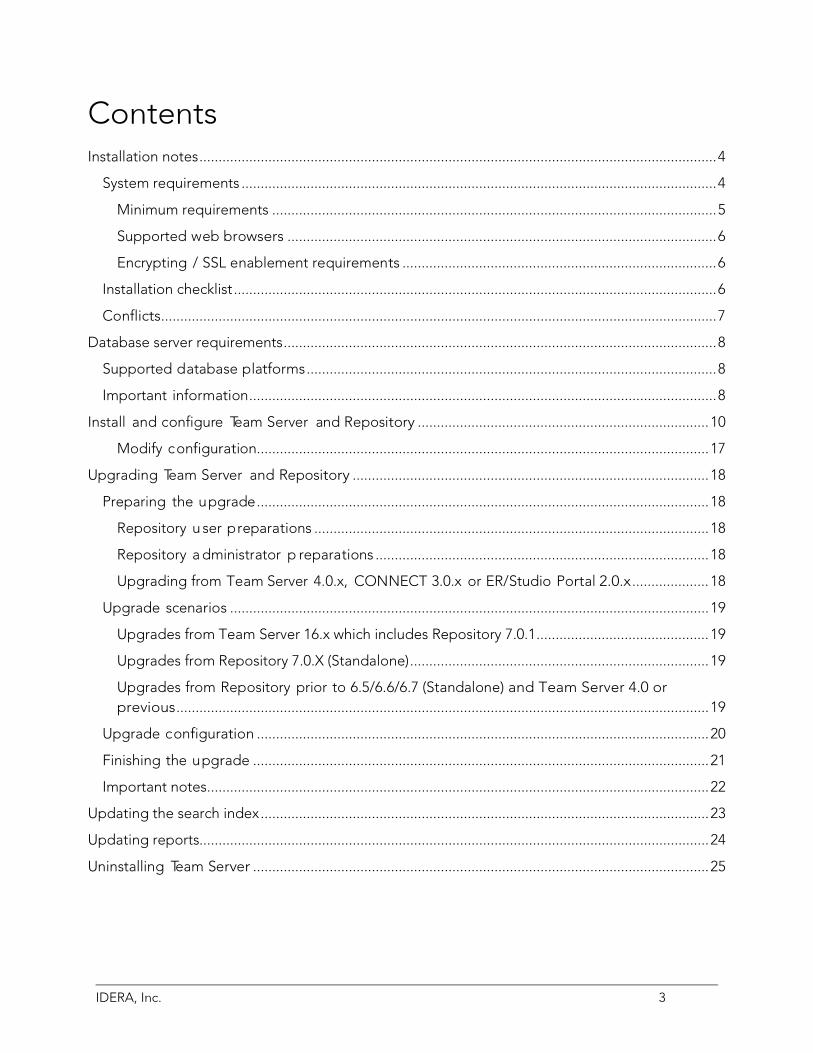
Contents Installation notes ....................................................................................................................................... 4
System requirements ............................................................................................................................ 4
Minimum requirements .................................................................................................................... 5
Supported web browsers ................................................................................................................ 6
Encrypting / SSL enablement requirements .................................................................................. 6
Installation checklist .............................................................................................................................. 6
Conflicts ................................................................................................................................................. 7
Database server requirements ................................................................................................................. 8
Supported database platforms ........................................................................................................... 8
Important information .......................................................................................................................... 8
Install and configure Team Server and Repository ............................................................................ 10
Modify configuration ...................................................................................................................... 17
Upgrading Team Server and Repository ............................................................................................. 18
Preparing the upgrade ...................................................................................................................... 18
Repository u ser preparations ....................................................................................................... 18
Repository a dministrator p reparations ....................................................................................... 18
Upgrading from Team Server 4.0.x, CONNECT 3.0.x or ER/Studio Portal 2.0.x .................... 18
Upgrade scenarios ............................................................................................................................. 19
Upgrades from Team Server 16.x which includes Repository 7.0.1 ............................................. 19
Upgrades from Repository 7.0.X (Standalone) .............................................................................. 19
Upgrades from Repository prior to 6.5/6.6/6.7 (Standalone) and Team Server 4.0 or previous ........................................................................................................................................... 19
Upgrade configuration ...................................................................................................................... 20
Finishing the upgrade ....................................................................................................................... 21
Important notes ................................................................................................................................... 22
Updating the search index ..................................................................................................................... 23
Updating reports..................................................................................................................................... 24
Uninstalling Team Server ....................................................................................................................... 25

IDERA, Inc. 4
Installation notes These notes provide important information about installation requirements for new Team Server installer which includes Repository. You should read this document in its entirety before any install or uninstall procedure.
The following information is for installation only. If you are upgrading from separate ER/Studio Repository and Team Server installations, please see Upgrading Team Server and Repository for important upgrade information.
System requirements Before installing Team Server and Repository, verify that your environment meets the hardware and operating system requirements. Adhering to these requirements optimizes performance. These hardware requirements are based on a 5-10 user environment.
For more than 10 users, ensure your hardware surpasses the previously stated hardware requirements to accommodate the number of transactions that increase as the number of users increases.
If you are installing the x64 version of our software, you must uninstall any previously installed x32 bit versions.

IDERA, Inc. 5
Minimum requirements
Hardware Database Server Application Server
Processor
As required by your database platform.
4 x 3.0 Ghz (8 x 3.0 Ghz recommended)
RAM 6 GB (8 GB recommended)
Disk Space
5 GB + 100 MB per Team Server diagram + additional database growth (if the database is on the same server)
DVD Reader Depending on install medium.
Operating System As supported by your database platform.
Any of the following (64-bit):
• Windows Server 2008
• Windows Server 2008 R2
• Windows Server 2012
• Windows Server 2012 R2
Software
• Transaction Control Protocol (TCP) up and running.
• Single-byte character sets are supported as long as the database is set to the required code page (character set). UNICODE and UTF8 are not supported.
TCP up and running
Privileges • DBMS privileges to create objects on the server
• Local administrator privileges
To provide a great user experience, the following minimum configuration is strongly recommended for Team Server.
Additional notes
• If you install the Application and the Database on the same server, consider surpassing the hardware requirements described previously.
• Supported DBMS (see Database Server Requirements)
• Should you be running the minimum spec requirements, it is advised to reduce the maxThreads to a single thread. To do this, edit: ...tomcat>webapps>api>WEB-INF>ersportal-app.xml and change the line: <property name="maxThreads" value="2" /> to have a value of "1" (a restart is required after saving the change).
IDERA, Inc. 6
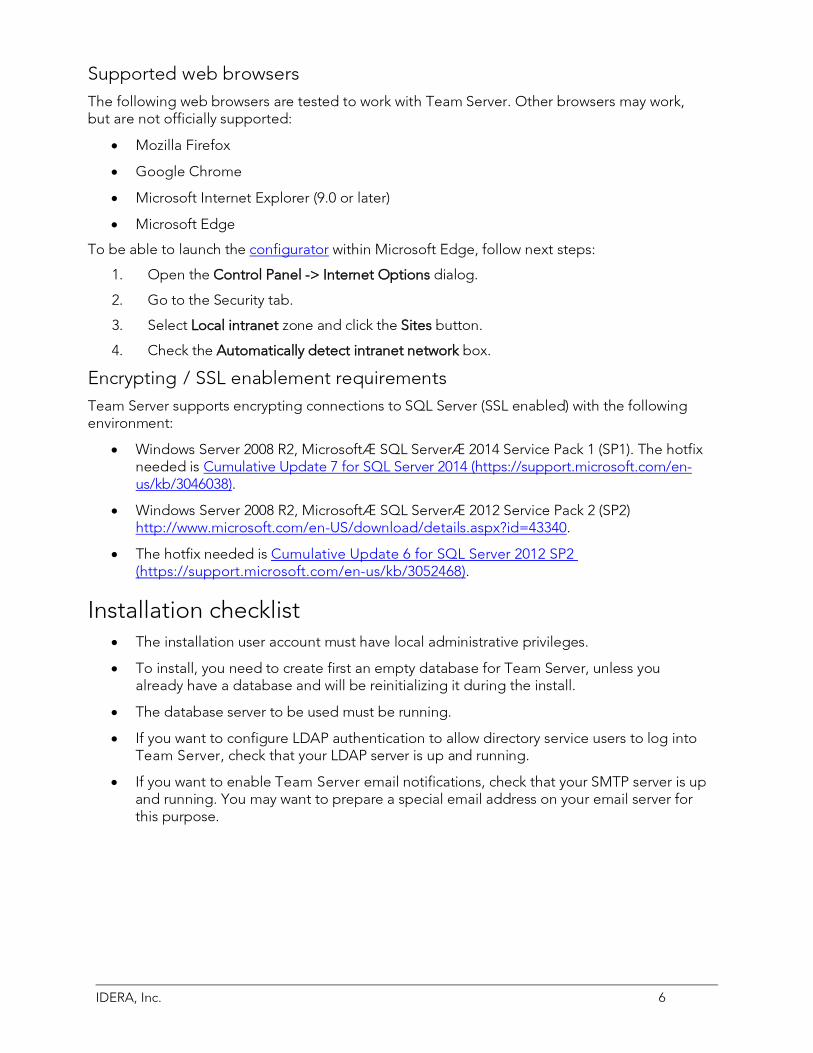
Supported web browsers The following web browsers are tested to work with Team Server. Other browsers may work, but are not officially supported:
• Mozilla Firefox
• Google Chrome
• Microsoft Internet Explorer (9.0 or later)
• Microsoft Edge
To be able to launch the configurator within Microsoft Edge, follow next steps:
1. Open the Control Panel -> Internet Options dialog.
2. Go to the Security tab.
3. Select Local intranet zone and click the Sites button.
4. Check the Automatically detect intranet network box.
Encrypting / SSL enablement requirements Team Server supports encrypting connections to SQL Server (SSL enabled) with the following environment:
• Windows Server 2008 R2, Microsoft® SQL Server® 2014 Service Pack 1 (SP1). The hotfix needed is Cumulative Update 7 for SQL Server 2014 (https://support.microsoft.com/en-us/kb/3046038).
• Windows Server 2008 R2, Microsoft® SQL Server® 2012 Service Pack 2 (SP2) http://www.microsoft.com/en-US/download/details.aspx?id=43340.
• The hotfix needed is Cumulative Update 6 for SQL Server 2012 SP2 (https://support.microsoft.com/en-us/kb/3052468).
Installation checklist • The installation user account must have local administrative privileges.
• To install, you need to create first an empty database for Team Server, unless you already have a database and will be reinitializing it during the install.
• The database server to be used must be running.
• If you want to configure LDAP authentication to allow directory service users to log into Team Server, check that your LDAP server is up and running.
• If you want to enable Team Server email notifications, check that your SMTP server is up and running. You may want to prepare a special email address on your email server for this purpose.

IDERA, Inc. 7
Conflicts • Do not install Team Server (that includes Repository) on a system where ER/Studio
Data Architect or ER/Studio Business Architect is installed.
• If a previous version of Team Server is installed, please uninstall first.
• If the Team Server installer detects an installation of any of these applications, the installer asks you to uninstall these applications before you proceed.
See also
• Install and configure Team Server and Repository
• Database server requirements
• Upgrading Team Server and Repository
IDERA, Inc. 8
Database server requirements Supported database platforms Team Server and Repository databases may run on any of the following database platforms:
• Microsoft SQL Server 2008 to 2016.
• Oracle 11g and 12c.
• IBM DB2 UDB 9.x, 10.x, and 11.x Server.
In order for the Repository to communicate with the database, the machine running Team Server must also have the corresponding RDBMS client utility installed.
Important information Oracle
• Install the 64-bit version of Oracle Client Utilities.
• Configure your server in one of the Oracle configuration tools: Net Easy Config or Net Configuration Assistant.
• Create a connection alias.
• If you are upgrading using Oracle, you need to increase the number of processes (connections) to 200 before running.
• Minimum permissions for owner of Repository and Team Server schema:
o Roles:
SELECT_CATALOG_ROLE
o Privileges:
CREATE INDEXTYPE
CREATE PROCEDURE
CREATE SEQUENCE
CREATE SESSION
CREATE SYNONYM
CREATE TABLE
CREATE TRIGGER
CREATE TYPE
CREATE VIEW
UNLIMITED TABLESPACE

IDERA, Inc. 9
Microsoft SQL Server
• 64-bit client libraries are already installed on Windows machines.
• Ensure that the database, and the instance, is set to case-insensitive, as case- sensitive is not supported. Also set the SQL Server Configuration Properties to allow SQL Server authentication. Team Server only supports SQL Server Authentication.
• When using SQL Server, ensure the SQL Server Agent is running.
• Team Server on SQL Server only supports the following communication protocols:
Shared Memory
TCP/IP
Named Pipes
• The option ANSI_NULLS (Server Properties > Connections) needs to be set as On.
IBM DB2
• Install 64-bit version of IBM DB2 UDB Client Utilities.
• Configure an ODBC data source entry for the IBM DB2 database that you want to access from Team Server.
• Create a connection alias. The data source name must match the connection alias specified in the client connection.
• For all versions of an IBM DB2 UDB server, to ensure optimal Repository performance, you must have a user temporary tablespace with a 32 KB page size and the database must be tuned so it does not run out of memory or log space.
See also
• Installation notes

IDERA, Inc. 10
Install and configure Team Server and Repository Please ensure that you have read the Installation notes before proceeding.
Repository 16.0 and later installations are now part of Team Server 16.0 and later (as appropriate) installations.
To install Team Server and Repository, you need to run the new installer and follow the steps. You need a user with administrative privileges to run the installation wizard.
In this page, you can find detailed information about the different steps of the installation wizard.
You may have to create a blank database before starting the installation, please check the Installation checklist.
1. Run the installation wizard. Select I agree to the license terms and conditions, and then click Install.
In case you need to change the default Port or the Install location, please click Options previous to Install.
2. In the Configurator Welcome Page, use Admin/Admin (case-sensitive) as the login and password, and then click Login to start the configuration wizard.
IDERA, Inc. 11
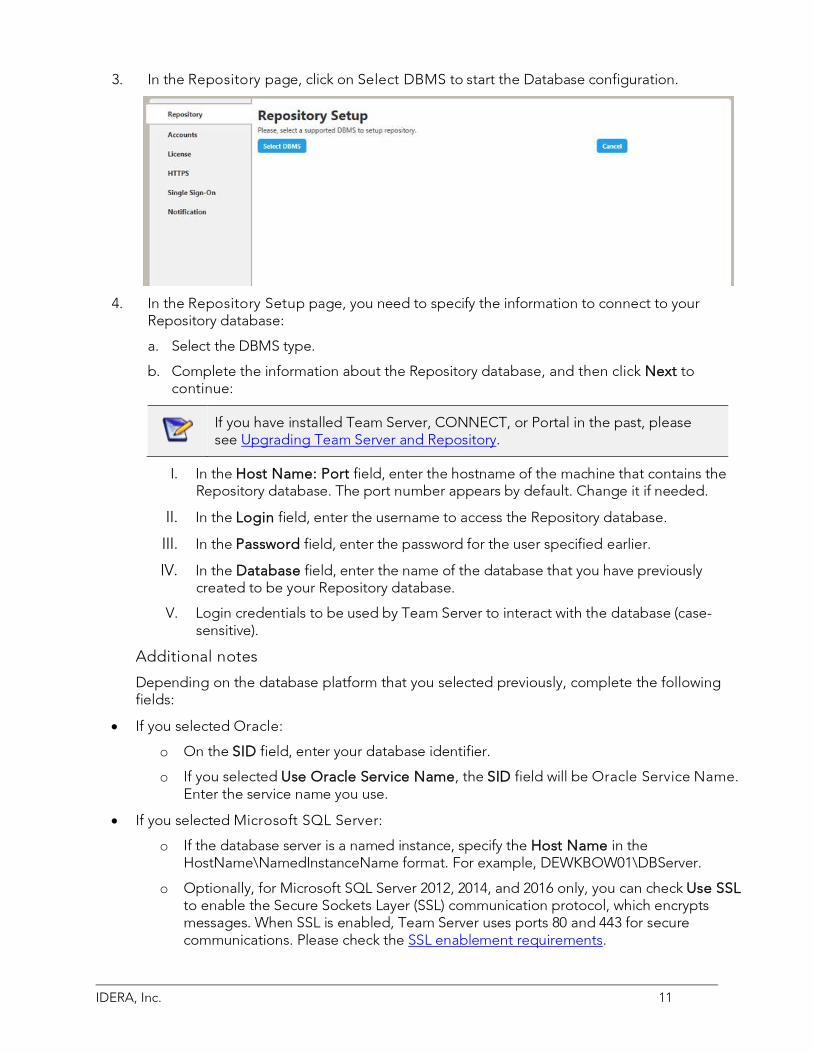
3. In the Repository page, click on Select DBMS to start the Database configuration.
4. In the Repository Setup page, you need to specify the information to connect to your
Repository database:
a. Select the DBMS type.
b. Complete the information about the Repository database, and then click Next to continue:
If you have installed Team Server, CONNECT, or Portal in the past, please see Upgrading Team Server and Repository.
I. In the Host Name: Port field, enter the hostname of the machine that contains the Repository database. The port number appears by default. Change it if needed.
II. In the Login field, enter the username to access the Repository database.
III. In the Password field, enter the password for the user specified earlier.
IV. In the Database field, enter the name of the database that you have previously created to be your Repository database.
V. Login credentials to be used by Team Server to interact with the database (case-sensitive).
Additional notes
Depending on the database platform that you selected previously, complete the following fields:
• If you selected Oracle:
o On the SID field, enter your database identifier.
o If you selected Use Oracle Service Name, the SID field will be Oracle Service Name. Enter the service name you use.
• If you selected Microsoft SQL Server:
o If the database server is a named instance, specify the Host Name in the HostName\NamedInstanceName format. For example, DEWKBOW01\DBServer.
o Optionally, for Microsoft SQL Server 2012, 2014, and 2016 only, you can check Use SSL to enable the Secure Sockets Layer (SSL) communication protocol, which encrypts messages. When SSL is enabled, Team Server uses ports 80 and 443 for secure communications. Please check the SSL enablement requirements.

IDERA, Inc. 12
o It is possible to have the installer create your MSSQL database for you at this point. If you enter the name of a non-existent database, the installer will pop up a confirmation window and then create the database.
5. Click Next to continue.
6. In the Accounts page:
a. In the Windows User field, enter the name of a Windows user that Team Server can use to log into the system. The user account must have local administrative privileges. The name should be in the format "machine_name\username".
b. In the Password field, enter the password of the Windows user.

IDERA, Inc. 13
c. Login credentials to be used by Team Server to interact with repository (case-sensitive):
Leave it in blank to keep using Admin/Admin to log into ER/Studio Repository.
If you want to modify the super user login to enter into ER/Studio Repository, introduce the information. If the login does not exist, it will be created.
d. Click Next to continue.
7. In the License page, you can register your licenses.
a. In the EDN Login or Email Address field, enter your existing Developer Network account. If you need a new user account, click Create Account. Fill in the required information.
b. In the Password field, enter your EDN password.
c. Specify the serial number to register in the Serial Number field.
d. Click Next.
If you have a license file, please use the Import from file button to register.

IDERA, Inc. 14
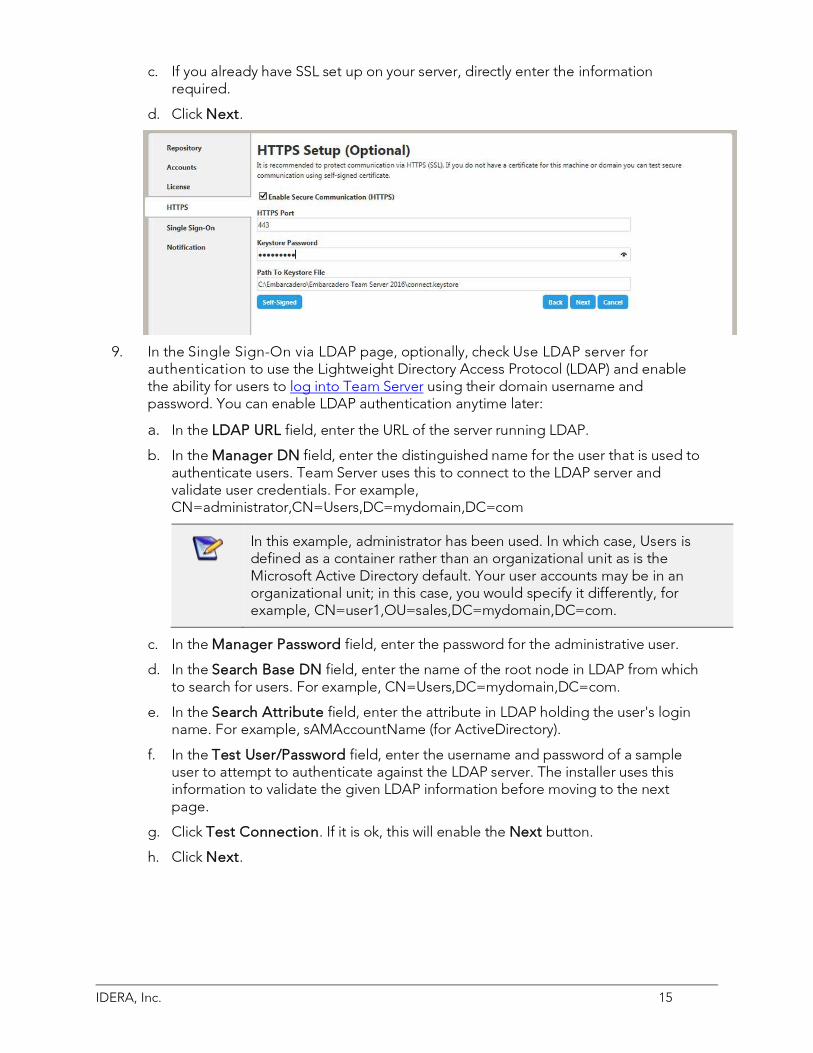
8. In the HTTPS Setup page, you can optionally choose to enable HTTPS (SSL). It is recommended
that you enable secure communications as this will keep your password transmissions secure.
a. Optionally, select Enable Secure Communication (HTTPS) to enable it.
b. If you do not have SSL set up on your server, you can click the Self-Signed button to walk you through the short wizard that will create a Keystore file allowing you to use encryption.
I. Fill out the fields of the Self-Signed wizard, and then click Generate. The Keystore file will be created in the location of your choosing.
IDERA, Inc. 15
c. If you already have SSL set up on your server, directly enter the information required.
d. Click Next.
9. In the Single Sign-On via LDAP page, optionally, check Use LDAP server for
authentication to use the Lightweight Directory Access Protocol (LDAP) and enable the ability for users to log into Team Server using their domain username and password. You can enable LDAP authentication anytime later:
a. In the LDAP URL field, enter the URL of the server running LDAP.
b. In the Manager DN field, enter the distinguished name for the user that is used to authenticate users. Team Server uses this to connect to the LDAP server and validate user credentials. For example, CN=administrator,CN=Users,DC=mydomain,DC=com
In this example, administrator has been used. In which case, Users is defined as a container rather than an organizational unit as is the Microsoft Active Directory default. Your user accounts may be in an organizational unit; in this case, you would specify it differently, for example, CN=user1,OU=sales,DC=mydomain,DC=com.
c. In the Manager Password field, enter the password for the administrative user.
d. In the Search Base DN field, enter the name of the root node in LDAP from which to search for users. For example, CN=Users,DC=mydomain,DC=com.
e. In the Search Attribute field, enter the attribute in LDAP holding the user's login name. For example, sAMAccountName (for ActiveDirectory).
f. In the Test User/Password field, enter the username and password of a sample user to attempt to authenticate against the LDAP server. The installer uses this information to validate the given LDAP information before moving to the next page.
g. Click Test Connection. If it is ok, this will enable the Next button.
h. Click Next.

IDERA, Inc. 16
i. In the Notification Enablement page, optionally, check Enable Email
Notifications via SMTP to allow users to send search results and reports by email directly from Team Server. You can enable notifications anytime later:
I. In the Email Address field, enter the email address that you want to use as the sender of the emails sent from Team Server. You may want to prepare a special email address on your email server for this purpose.
II. In the Server/Port field, enter the host name of the email server (for example, "mail"), the fully qualified network name (for example: "mail.example.com"), or the IP address (for example: "10.10.23.250") and the port number where the email server is listening. The default port is 25.
III. Optionally, check Requires Authentication if your email server requires authentication. When you check this option, the User Name and Password fields are highlighted. Fill them with the required values to authenticate Team Server against your STMP server.
IV. Click Next.

IDERA, Inc. 17
V. In the Migration page, you perform the data migration during an upgrade. Click the Start button for this purpose. You can load or save the log file generated by clicking Load log file.
Please note that the configurator will show Migration tab only if you are upgrading.
Team Server and Repository are now installed and configured on your system.
Modify configuration You can modify the configuration at any moment:
• Use Configure Team Server. From Windows: Start > All Programs > Team Server x.x > Configure Team Server.
• Select My Setting > Configurator once you are logged as Admin in Team Server.
See also
• Tomcat Configuration Application
• Upgrading Team Server and Repository

IDERA, Inc. 18
Upgrading Team Server and Repository This Upgrade Guide provides important information regarding the process of upgrading from previous versions using the new Team Server installer which includes Repository.
Please note that with this new installer, Repository and Team Server will be installed on the same server machine. If in your current installation they are on separate machines, please be sure to uninstall both before upgrading. Run the upgrade on the machine that was previously running Team Server.
Preparing the upgrade Repository user preparations
1. Ensure you have backed up all your .dm1 files.
2. Check in all your diagrams and objects. If you try to check in a file from the previous version with the same name as a current file, the current file will become corrupted.
3. Rename all local copies of Repository diagrams in the active file directory as follows:
a. Choose Repository > Options.
b. Make note of the Active File Directory.
c. Switch to the Windows Explorer and rename all the diagrams in the Active File Directory in order to protect them of being overwritten. Example: Backup_DiagramName.dm1.
Repository administrator p reparations 1. Ensure no one is logged into the Repository.
2. Backup the current Repository database.
If you are upgrading from a Repository version prior to 4.0, you can delete the C:\Program Files\Embarcadero\Repository\Data directory. This directory is not used with Repository versions 4.0 and later.
Upgrading from Team Server 4.0.x, CONNECT 3.0.x or ER/Studio Portal 2.0.x
1. Make a copy of the license files, for example: license.txt, ao_12345678.txt or .slip until the upgrade has completed. Then copy to the license folder in the installation directory of the new Team Server installation folder.

IDERA, Inc. 19
2. Depending on your installation location, you can find the license file in the program directory. For example: C:\Embarcadero\ERStudio Portal 2.0\license
o If you have already used the uninstaller, you may also have a license backup in the following location:
32-bit Windows: C:\Program Files (x86)\Common Files\ersEnterprisePortalBackup\license
64-bit Windows: C:\Program Files\Common Files\ersEnterprisePortalBackup\license
3. After copying over the license.txt file to the license folder within the installation folder of Team Server, log into Team Server as Admin, select My Settings > Admin > Licenses, and then click Refresh for Team Server to recognize your licenses.
We always recommend backing up your data before starting the process. You may have to back up your database and, for Team Server and Connect, export your Glossaries and Terms.
4. Uninstall the previous version.
Upgrade scenarios First of all, prepare the upgrade for any scenario.
Upgrades from Team Server 16.x which includes Repository 7.0.1 1. Uninstall the previous version of Team Server.
2. Install Team Server 17.0.
Upgrades from Repository 7.0.X (Standalone) 1. Uninstall Repository 7.0.X.
2. Install Team Server 17.0.
3. On the repository setup page select Specify location for Team Server database..., this will expand the information fields.
Upgrades from Repository prior to 6.5/6.6/6.7 (Standalone) and Team Server 4.0 or previous You can perform an upgrade to Repository 17.0 directly from versions 6.5 and later. There is no need for incremental upgrades before attempting to upgrade to Repository 17.0.
1. Install Team Server 17.0.
2. On the repository setup page, if you were also using Team Server 4.0 or previous, select Specify location for Team Server database, this will expand the information fields.

IDERA, Inc. 20
Upgrade configuration If you are upgrading from Team Server 16.x, you already have one unique combined database, directly follow the steps on the repository setup.
If you have installed Team Server XE7 or any previous version, including CONNECT or Portal you need to specify the information to connect to its database. The new installer will copy the Team Server database tables into the Repository database, after which both Repository and Team Server Web will share the same database. Please, read first Database Server Requirements.
1. Check the repository setup and introduce repository database information.
2. Select Specify location for Team Server database…, this will expand the information fields to include Team Server database information.
3. Fill the fields with the Team Server database information with the same structure than you have introduced previously for repository database.
4. If your Portal installation was using a separate Solution database, select Specify the
location of Solution database...
5. Specify Portal Solution database details so the tables can also be copied to the Repository database.

IDERA, Inc. 21
Oracle: Once the upgrade is done, the alias in the tnsnames file must be updated to point the new database server in case you had Team Server and Repository old databases in different machines.
DB2: Once the upgrade is done, create a System DSN with the ODBC Data Source Administrator to point the new database server in case you had Team Server and Repository old databases in different machines.
Finishing the upgrade 1. Perform the migration process.
2. Update the search index.
3. Update reports.
4. Click Update Solution Repository in My Settings > Admin > Repository Management.
Wait until a message of successful update appears.
5. Once the Team Server upgrade is complete, you should upgrade your diagrams with the latest version of ER/Studio Data Architect.
IDERA, Inc. 22
Important notes • Always back up databases before upgrading.
• Upgrading diagrams can be time consuming and memory intensive. The number and size of the diagrams managed in the upgrade dictates how long the upgrade process takes.
• Regardless of the process that you must follow to back up your licenses, which depends on the previous version that you are upgrading from and other factors, after you restore your licenses in your new installation, you must log in as a super user and use the Manage Users page to assign different types of available licenses to your users.
See also
• Install and Configure Team Server and Repository
• Uninstalling Team Server

IDERA, Inc. 23
Updating the search index To update the search index:
• Select My Settings > Admin > Repository Management.
• Click Update Search Index ( ).
• Click OK on the confirmation dialog that appears.
A dialog box appears confirming that Team Server successfully completed the task.
See also
• Configuring the Search Index
• Repository Management page

IDERA, Inc. 24
Updating reports This section explains how to deal with the upgrade from previous versions when the adhoc report metadata changes with respect to the new version. Changes include adding new model into an adhoc report, or changing field name in the existing adhoc report.
The following instructions affect the upgrade from previous versions in which the adhoc report metadata changes with respect to the actual version. For example, the Connect Model option is not available until Connect 3.0.2. For this reason, when upgrading from releases prior to Connect 3.0.1 to versions Connect 3.0.2 or higher, you should follow these steps. Particularly, when upgrading from Connect 3.0.2, the Connect Model option appears on the New Report page but if you move to the next page, the custom attribute options are missing until these steps are executed.
If the adhoc report metadata changes when you upgrade from a previous version, you should follow the following steps after installing the new version:
1. Select My Settings > Admin > Repository Management.
2. Click the More button.
3. Click on the options in the following order:
a. Refresh Reporting Metadata.
b. Execute Global Action.
c. Refresh System Settings.
4. Click Close.
See also
• Configuring the Search Index
• Repository Management page

IDERA, Inc. 25
Uninstalling Team Server To remove an installation of Team Server and Repository:
1. Select Start > Programs > Team Server X.X > Uninstall Team Server to start the uninstallation wizard.
2. On the Welcome page, click Next.
3. On the Summary Information page, review the information and click Uninstall.
4. Once the uninstallation process is completed, click Finish to close the uninstallation wizard.
5. After you close the uninstallation wizard, you are given the choice to reboot immediately or at a later time. For a complete uninstallation, a system reboot may be required. Make your selection and click Finish.
Notes
• The Team Server uninstaller does not uninstall the Team Server Reporting Repository database. It is the Database Administrator's responsibility to delete the Reporting Repository database if you decide to permanently delete Team Server.
• When Team Server is uninstalled, the backup folder remains in the disk. In case you are uninstalling Team Server with no plans to install it again, remember you can delete this folder manually. You may find a backup folder in the following locations:
o Team Server 4.0.8 and previous versions: C:\Program Files (x86)\Common Files\ersEnterprisePortalBackup
o Team Server 4.1: C:\Program Files\Common Files\ersEnterprisePortalBackup
o Team Server 17.0: C:Users\username\AppData\Local\Temp\ersEnterprisePortalBackup (Please see known issue about backing up 16.0.0 or later versions.)
See also
• Install and Configure Team Server and Repository
• Upgrading Team Server and Repository