I&A Account Creation
24
I&A Account Creation I&A Account Creation The following walk-through shows New Users how to create an account in the Identity & Access Management System for a User or an Individual Provider 1. The User will go to the Identity & Access Management System web site at https://nppes.cms.hhs.gov/IAWeb and select "Accept." 2. The User will select "Create Account Now" on the right side of the screen.
Transcript of I&A Account Creation

I&A Account Creation
I&A Account Creation The following walk-through shows New Users how to create an account in the Identity & Access Management System for a User or an
Individual Provider
1. The User will go to the Identity & Access Management System web site at
https://nppes.cms.hhs.gov/IAWeb and select "Accept."
2. The User will select "Create Account Now" on the right side of the screen.

3. The User will enter a unique email address, the captcha code, and select
"Submit".

4. The User will create a User ID and Password using the requirements
listed at the right of the User ID and Password boxes and select five
unique Security Questions and Answers. Each question and answer must
be different. The User will then select "Continue".
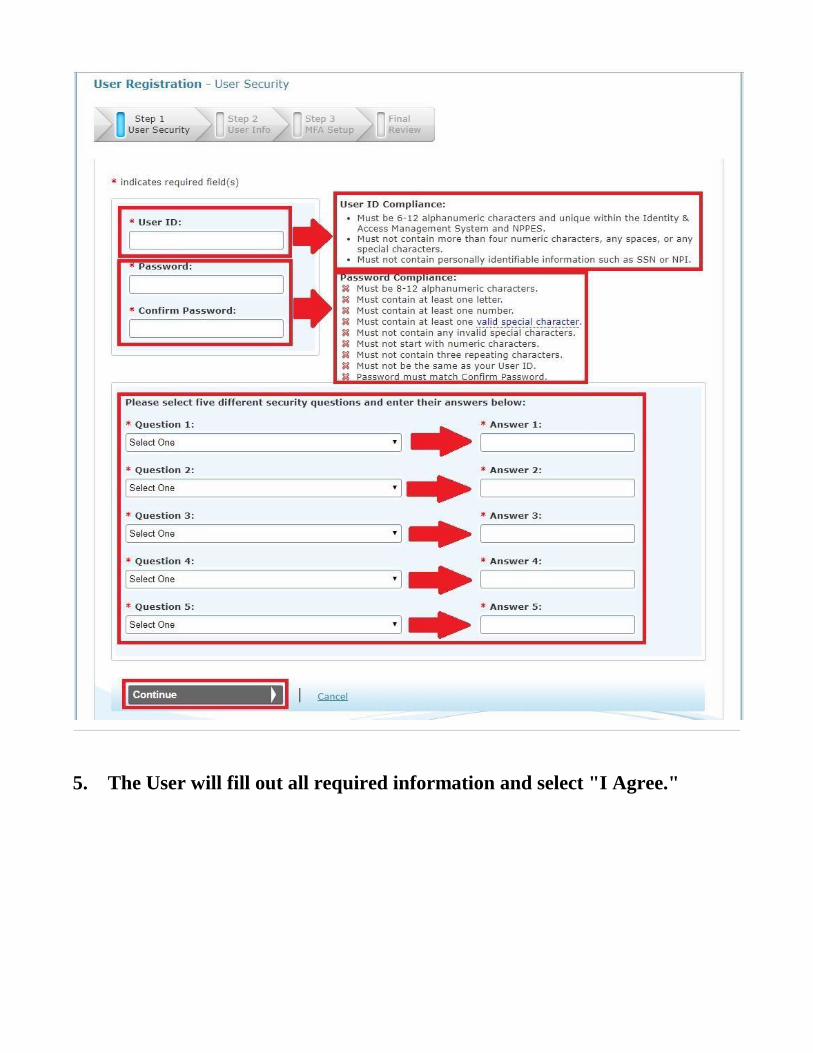
5. The User will fill out all required information and select "I Agree."

The User will (usually) be asked if they want to use their standardized
address.

6. The User will start the Multi-Factor Authentication (MFA) Setup.

For Text/SMS
7. The User will select Phone Number Text/SMS in the drop down field.

8. The User will input their Phone Number they want to use for Text/SMS
and then select the "Send Text/SMS" button.

The following image is an example of the text message the User will receive.
The Phone Number that sends the Text/SMS to the User changes often. This example phone number is only 1 of many possible phone numbers.

9. The User will receive a text message at the Phone Number they input and
the User will input the code on the page and then select "Verify".
The "Resend Text/SMS" button will be grayed out and not able to be selected for 30 seconds. If the User needs to send the code again, the User will have to wait 30 seconds on this page before they can select the "Resend Text/SMS" button.

10. The User will have confirmation they completed Primary MFA Setup.
The User will have the option to set up an Alternate MFA Device that is
different from their Primary MFA Device. If the User wants to set up an
Alternate, they will select "Begin Alternative Setup" and repeat Steps 6
through 9. Otherwise, the User will select "Complete Registration".

For E-mail Address
7. The User will select "E-mail Address" in the drop down field.

8. The User will input the E-mail address they wish to use for MFA and
select the "Send E-mail" button.
The E-mail address will automatically pre-populate with the E-mail address on the account.
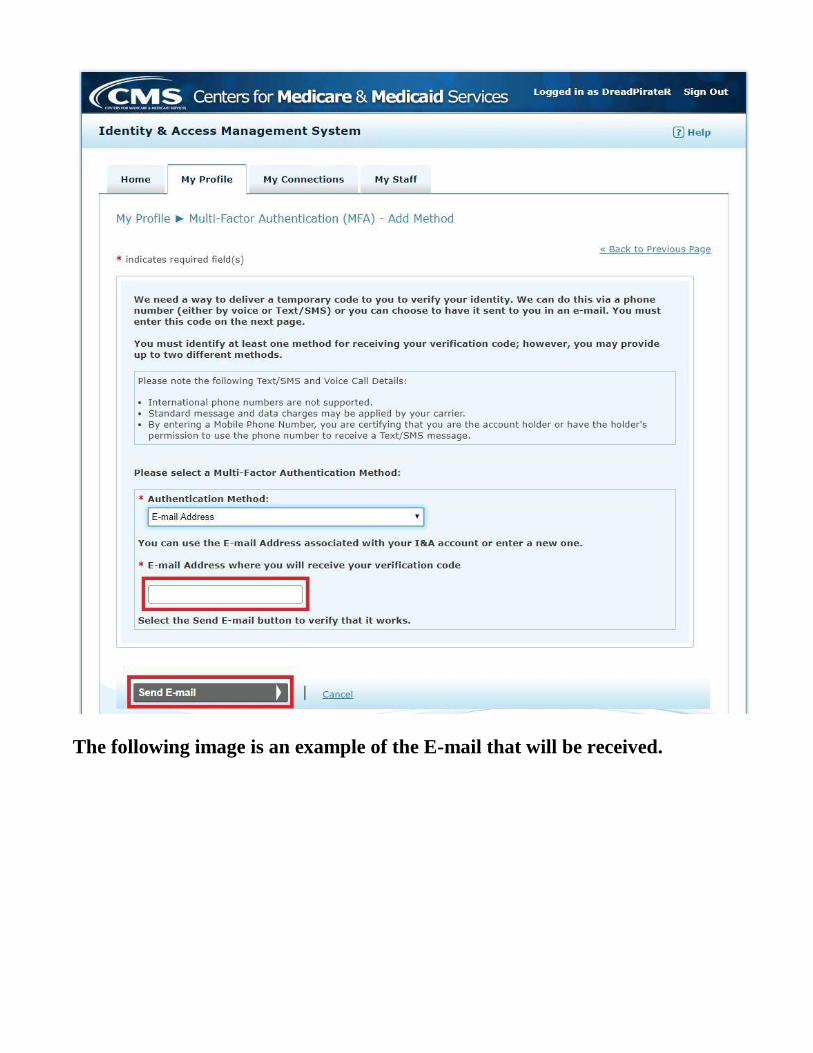
The following image is an example of the E-mail that will be received.

9. The User will input the Code that they received by E-mail and select
"Verify Code".
The "Resend E-mail" button will be grayed out and not able to be selected for 30 seconds. If the User needs to send the code again, the User will have to wait 30 seconds on this page before they can select the "Resend E-mail" button.

10. The User will have confirmation they completed Primary MFA
Setup. The User will have the option to set up an Alternate MFA Device that
is different from their Primary MFA Device. If the User wants to set up an
Alternate method, they will select "Begin Alternative Setup" and repeat
Steps 6 through 9. Otherwise, the User will select "Complete Registration".

For Phone Number Voice Call
7. The User will select "Phone Number Voice Call" in the drop down field.

8. The User will input the Phone Number they wish to use for MFA and
select the "Call" button.

The following image is an example of the Phone Call that will be received.
The Robot Caller will immediately start providing the code. The voice will repeat the code only twice and immediately hang up. If the User misses the number, they will need to wait 30 seconds on the next page and select the "Call Again" button.
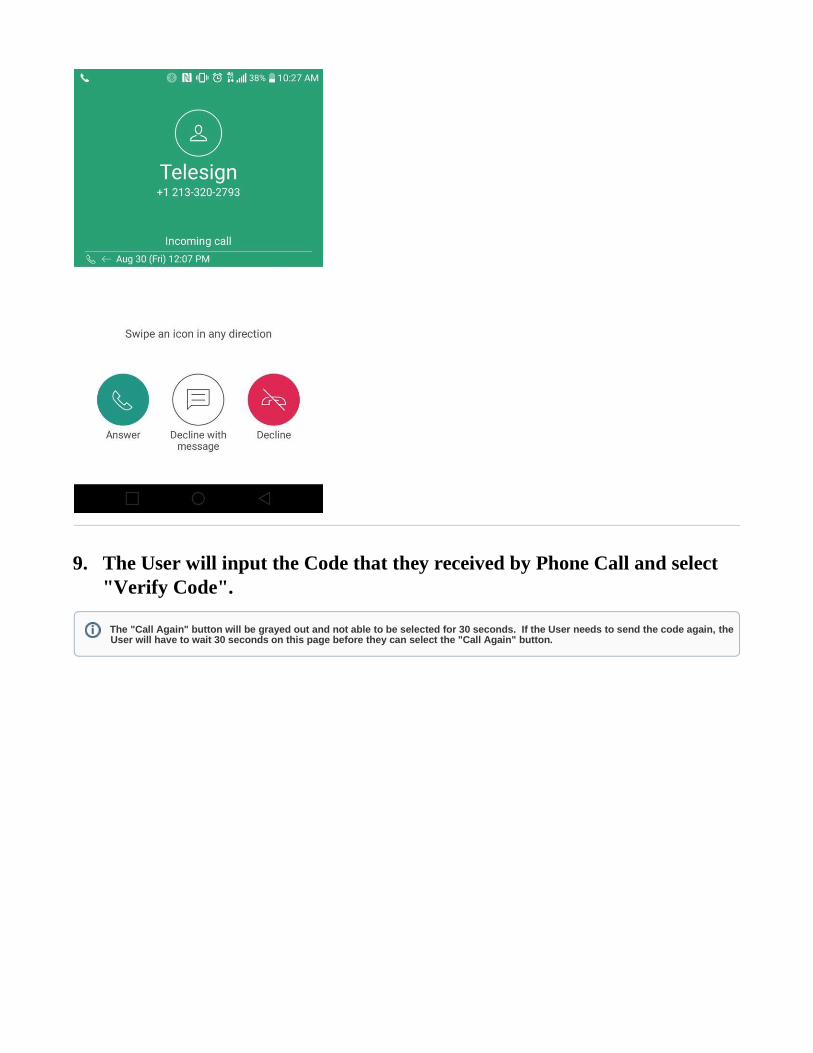
9. The User will input the Code that they received by Phone Call and select
"Verify Code".
The "Call Again" button will be grayed out and not able to be selected for 30 seconds. If the User needs to send the code again, the User will have to wait 30 seconds on this page before they can select the "Call Again" button.

10. The User will have confirmation they completed Primary MFA
Setup. The User will have the option to set up an Alternate MFA Device that
is different from their Primary MFA Device. If the User wants to set up an
Alternate, they will select "Begin Alternative Setup" and repeat Steps 6
through 9. Otherwise, the User will select "Complete Registration".

11. After the account creation confirmation is received, the User will select
"Continue to Homepage."
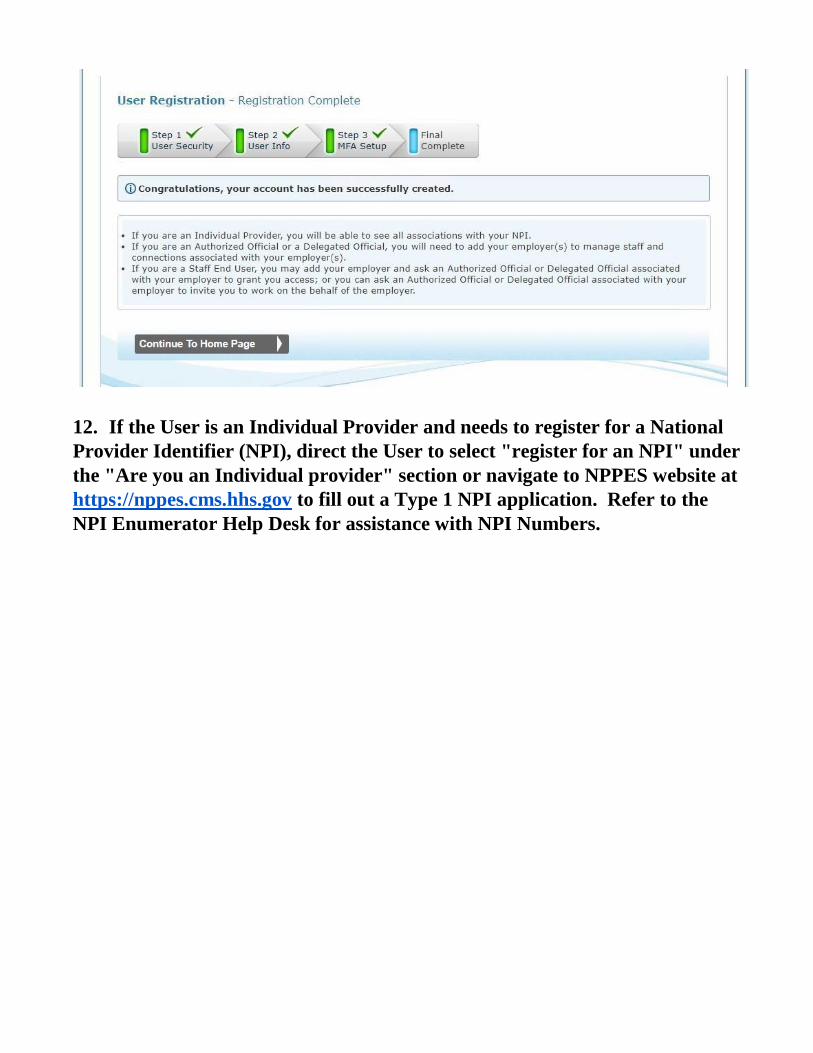
12. If the User is an Individual Provider and needs to register for a National
Provider Identifier (NPI), direct the User to select "register for an NPI" under
the "Are you an Individual provider" section or navigate to NPPES website at
https://nppes.cms.hhs.gov to fill out a Type 1 NPI application. Refer to the
NPI Enumerator Help Desk for assistance with NPI Numbers.

Article I001


![Bulk Account Creation [ppt]](https://static.fdocuments.net/doc/165x107/5491c22cac795949288b45fa/bulk-account-creation-ppt.jpg)