IA L16 - Hands-On Lab Hands on with Instant Backup and...
36
IA L16 - Hands-On Lab Hands on with Instant Backup and Recovery Features of NetBackup 7.6 for VMware Description NetBackup 7.6 offers terrific new technologies that provide faster VMware backups and restores than ever thought possible. In this hands on lab we will explore the configuration of these instant backup and restore technologies, help you understand the science behind how they work and discover the significant and powerful performance advantages that NetBackup 7.6 brings to VMware data protection. If you are interested in faster, more feature-rich VMware protection technologies, be sure and make time to attend this hands on lab. This lab assumes that you have a basic understanding of backup concepts. Experience running and using NetBackup is also highly recommended. You should also understand concepts associated with VMware’s virtual machine technology, VMware’s vStorage API for Data Protection (VADP) and are familiar with VMware’s vSphere Client interface. At the end of this lab, you should be able to Understand NetBackup for VMware policy configuration options Configure a VMware backup using NetBackup for VMware Perform an instant restore of a VM using the new NetBackup Instant Recovery for VMware (IRV) Understand the technologies behind the IRV feature Learn how the NetBackup Plugin for vCenter provides advanced reporting and VM restore capabilities to the VMware administrator Restore an entire VM using the NetBackup Plugin for vCenter restore interface
Transcript of IA L16 - Hands-On Lab Hands on with Instant Backup and...

IA L16 - Hands-On Lab
Hands on with Instant Backup and Recovery Features of NetBackup 7.6 for VMware
Description NetBackup 7.6 offers terrific new technologies that provide faster VMware backups and restores than ever thought possible. In this hands on lab we will explore the configuration of these instant backup and restore technologies, help you understand the science behind how they work and discover the significant and powerful performance advantages that NetBackup 7.6 brings to VMware data protection. If you are interested in faster, more feature-rich VMware protection technologies, be sure and make time to attend this hands on lab.
This lab assumes that you have a basic understanding of backup concepts. Experience running and using NetBackup is also highly recommended. You should also understand concepts associated with VMware’s virtual machine technology, VMware’s vStorage API for Data Protection (VADP) and are familiar with VMware’s vSphere Client interface.
At the end of this lab, you should be able to
Understand NetBackup for VMware policy configuration options
Configure a VMware backup using NetBackup for VMware
Perform an instant restore of a VM using the new NetBackup Instant Recovery for VMware (IRV)
Understand the technologies behind the IRV feature
Learn how the NetBackup Plugin for vCenter provides advanced reporting and VM restore capabilities to the VMware administrator
Restore an entire VM using the NetBackup Plugin for vCenter restore interface

Symantec Vision 2013
NetBackup 7.6 for VMware Hands On Lab Student Guide
2 of 36
Notes This lab guide will provide you with a step-by-step walk-through of new NetBackup 7.6 for VMware features.
Carefully follow the instructions outlined in this document. Skipping steps can prevent you from successfully completing this lab.
Be sure to ask your instructor any questions you may have.
Thank you for coming to our lab session.

Symantec Vision 2013
NetBackup 7.6 for VMware Hands On Lab Student Guide
3 of 36
Hands on Lab Configuration
This VMware Workstation based hands on lab is designed to simulate an actual NetBackup for VMware configuration. It is comprised of 4 virtual machine (VM) images. They are described as follows:
NBU1 – This is the NetBackup master and media server. It is running a beta version of NetBackup 7.6. A Media Server Deduplication Pool (MSDP) storage unit has been preconfigured as well.
ESXi – This an actual ESXi 5.1 host running with a VMware Workstation environment. We’ve configured a virtual machine (VM1) on this ESXi host. You will not need to login to this system during this lab.
NBUVCPLUGIN – The NBUVCPLUGIN system is distributed as a preconfigured VM that is running the new NetBackup 7.6 for VMware vCenter Plugin. You will not need to login to this system during this lab.
VCENTER – This is the VMware vCenter Server Appliance version 5.1. This is a preconfigured VM that is made available by VMware. This is a fully functional vCenter server.
NetBackup 7.6 for VMware Lab System Diagram
This diagram illustrated the components involved in the
Symantec Vision 2013
NetBackup 7.6 for VMware Hands On Lab Student Guide
4 of 36
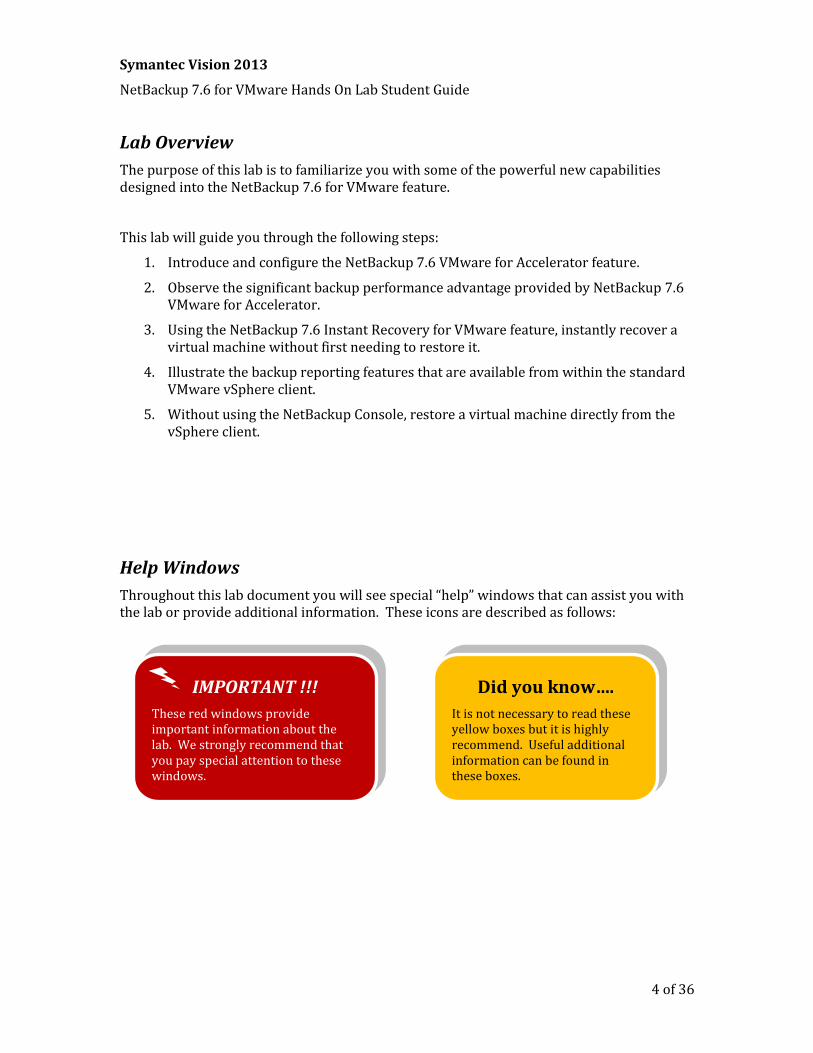
Lab Overview
The purpose of this lab is to familiarize you with some of the powerful new capabilities designed into the NetBackup 7.6 for VMware feature.
This lab will guide you through the following steps:
1. Introduce and configure the NetBackup 7.6 VMware for Accelerator feature.
2. Observe the significant backup performance advantage provided by NetBackup 7.6 VMware for Accelerator.
3. Using the NetBackup 7.6 Instant Recovery for VMware feature, instantly recover a virtual machine without first needing to restore it.
4. Illustrate the backup reporting features that are available from within the standard VMware vSphere client.
5. Without using the NetBackup Console, restore a virtual machine directly from the vSphere client.
Help Windows
Throughout this lab document you will see special “help” windows that can assist you with the lab or provide additional information. These icons are described as follows:
Did you know….
It is not necessary to read these yellow boxes but it is highly recommend. Useful additional information can be found in these boxes.
IMPORTANT !!!
These red windows provide important information about the lab. We strongly recommend that you pay special attention to these windows.

Symantec Vision 2013
NetBackup 7.6 for VMware Hands On Lab Student Guide
5 of 36
Lab Exercise 1: Connect NetBackup to vSphere Environment
In this section we will provide NetBackup with access to the VMware environment. NetBackup communicates to the vSphere environment by simply adding vCenter server credentials within NetBackup. Once these vCenter credentials are added, NetBackup has all the access necessary to perform backup and restore functions for every ESXi host within that vCenter domain. NetBackup also supports backing up multiple vCenter domains within a single NetBackup domain.
Let’s begin by configuring the vCenter credentials on the NetBackup master server.
First, let’s log into our NetBackup master server.
From the VMware Workstation application, select the “nbu” tab.
From the VMware Workstation application select the “VM” menu.
Select the “Send Ctrl+Alt+Del” menu option

Symantec Vision 2013
NetBackup 7.6 for VMware Hands On Lab Student Guide
6 of 36
You should now see the following screen:
Log into the NetBackup server using this password:
Symc4now!
1) Select the Windows Start button.
2) Now click on the
NetBackup Administration
Console menu.
1
2

Symantec Vision 2013
NetBackup 7.6 for VMware Hands On Lab Student Guide
7 of 36
The first task we need to perform is to obtain access to the VMware vSphere 5.1 environment. We accomplish this by simply entering the credentials for the vCenter server.
Expand the Credentials section by clicking on the “+” sign.
Click on the “Virtual Machine Servers” menu item.
Right-click on the empty pane
Select “New…” from the pop-up menu

Symantec Vision 2013
NetBackup 7.6 for VMware Hands On Lab Student Guide
8 of 36
In the “Add Virtual Machine Server” dialogue window type in the hostname of our vCenter Server:
vcenter.symc.com
Now we specify that we are defining a vCenter server and adding the login credentials for this vCenter server. Because we are using the Linux based vCenter Appliance, we will use the “root” account to login to the vCenter system.
From the pull-down arrow, select the “VMware Virtual Center Server” option
Username is: root
Password is: Symc4now!
Select “OK”
IMPORTANT !!!
Be careful when you enter this information. Incorrect entries will prevent the lab from working correctly.

Symantec Vision 2013
NetBackup 7.6 for VMware Hands On Lab Student Guide
9 of 36
If everything has been entered correctly, after the brief validation process you should now see the following validation screen:
Select “OK”
If you do not see the validation message listed above, go to the previous page and double check all entries.
Once you select OK, you will see a warning message that indicates that indicates that these “credentials may not take effect until daemons or services are restarted”. You may safely ignore this message.
At this point we have simply defined and entered credentials for the vCenter server. This provides NetBackup with the required access to the vSphere environment and every ESXi host and VM within that vSphere environment.
This concludes lab exercise 1.

Symantec Vision 2013
NetBackup 7.6 for VMware Hands On Lab Student Guide
10 of 36
Lab Exercise 2: Configure the NetBackup for VMware Policy
In this section we will configure the NetBackup policy. The NetBackup policy defines when we perform backups and what options we use when performing these backups.
In this section we will configure an important new NetBackup for VMware technology that is being introduced in the NetBackup 7.6 release. This technology is called NetBackup Accelerator for VMware. NetBackup Accelerator for VMware provides an “incremental forever” style of backup to VMware. The advantages of NetBackup’s implementation include:
Less impact on the VMware environment – never perform full backups again
Backup more VMs with less hardware
Shorter backup windows
More reliable VM backups
Zero loss of any restore functionality
Incremental database and application backups (Exchange, SQL and SharePoint)
Lets take a look at how easy it is to configure NetBackup Accelerator for VMware.
From the main NetBackup Administration Console, open the Policies tab.
Right-click on the “vm1” policy
Select the “Change” option

Symantec Vision 2013
NetBackup 7.6 for VMware Hands On Lab Student Guide
11 of 36
From the main attributes tab, make sure the “VMware” Policy Type is selected.
Select the checkbox next to the “Use accelerator” option.
This is all that is required to enable the NetBackup Accelerator for VMware feature. Once turned on, only the first VMware backup works like a traditional full backup where the entire VM is transferred to the NetBackup deduplication backup target. All subsequent full backups only transfer the blocks that have changed. This significantly improves overall VMware backup efficiency.
Now let’s explore other NetBackup for VMware features.
Click on the “Schedules” tab.
Note that the only schedule configured is a Full schedule. Incremental schedules no longer need to be configured.

Symantec Vision 2013
NetBackup 7.6 for VMware Hands On Lab Student Guide
12 of 36
Select the Clients tab
Select New
You will now see the “Browse for Virtual Machines” interface.
Open each of the menu levels.
Click on esxi.symc.com
Note that the virtual machine “vm1” can be seen. We can statically select all VMs this way but the VMware environment is typically much too dynamic for this.
Select Cancel

Symantec Vision 2013
NetBackup 7.6 for VMware Hands On Lab Student Guide
13 of 36
We will use the VMware Intelligent Policy (VIP) feature to automatically select our VM for backup. VMware Intelligent Policy automatically selects VMs for backup. As new VMs are brought online or existing VMs move across ESXi servers or Datastores, VMware Intelligent Policy can be configured to automatically detect these changes to ensure that all VMs are protected.
Lets configure a NetBackup VMware Intelligent Policy.
Select the “Select automatically through query” radio button.
Select OK
From the “Field:” pulldown menu select “Displayname”
From the “Operator” pulldown menu select “Equal”.

Symantec Vision 2013
NetBackup 7.6 for VMware Hands On Lab Student Guide
14 of 36
Now select the “Load Values” button.
The “Select From List” dialogue box lists all values associated with the “Field” that was previously selected. We only have one VM configured in this demo.
Select the checkbox next to “vm1”.
Select OK.
Now that we have selected this VM using the NetBackup VMware Intelligent Policy, anytime this VM is moved to another ESXi Datastore or moved to a different ESXi host, this move will be detected and the VM will automatically be included in backup processing.

Symantec Vision 2013
NetBackup 7.6 for VMware Hands On Lab Student Guide
15 of 36
To enable this query, select the “+” sign to add it to the query list.
You will now see the query we just created in the query list.
Lets test the query to ensure that it is working as we expect.
Select the “Test Query” button.
After a few moments we will now see the results of our test query.
Here we see that “vm1” will be included in backup processing, as we expected.
Select “Close”
Did you know….
The VIP technology is a very popular way of selecting virtual machines for backups.

Symantec Vision 2013
NetBackup 7.6 for VMware Hands On Lab Student Guide
16 of 36
Within the VMware tab, we will refine our VM backups using the advanced capabilities built into the NetBackup for VMware feature. These capabilities are described as follows:
Optimizations: “Enable file recovery from VM backup” turns on the ability to perform a single file restore from the backup of a VMDK. No client in the VM is required for this backup capability and no modification to backup processing or the backup environment (e.g. additional hardware) is required for this feature.
“Enable block level incremental backups”. Note that this is enabled by default as it is required to enable the NetBackup for VMware Accelerator feature.
“Exclude deleted blocks” removes blocks that contain no data from backup processing. This improves overall backup efficiency by about 10 to 15 percent.
“Exclude swap and paging files”. NetBackup for VMware can automatically detect and extract swap and paging files from backup processing. This can reduce the amount of data backed up and increase backup efficiency.
Orphaned snapshot handling: Extremely busy Datastores can prevent the VMware-created backup snaphot from automatically being removed after backup processing. This option detects only NetBackup-created snapshots and removes them at the beginning of each backup run.
Transport mode: This determines how the backup data will be sent to the NetBackup host. NetBackup supports all transport modes that are provided by VMware. This support includes VM restores as well as backups.
Lets configure these options:
Select the VMware tab
Select all of the available Optimizations
Select “Remove NetBackup” in the Orphaned snapshot handling pulldown menu
Deselect SAN and select the NBD transport
Select “Advanced”

Symantec Vision 2013
NetBackup 7.6 for VMware Hands On Lab Student Guide
17 of 36
From the “VMware – Advanced Attributes” section, we have additional capabilities that are associated with VMware backups. In this section we will turn on the “Post events to vCenter” capability. This feature uses the “Custom Attributes” feature of NetBackup to report the backup status of every VM.
Select “All Events” from this pulldown menu.
You may explore other configuration parameters that are available from this menu. If you have any questions about these features feel free to ask your lab assistant.
Select “OK”
The “vm1” policy should now look like this screen shot.
We are now done configuring the NetBackup for VMware policy.
Select “OK”
A short policy validation process will now occur.
This concludes lab exercise 2.

Symantec Vision 2013
NetBackup 7.6 for VMware Hands On Lab Student Guide
18 of 36
Lab Exercise 3 – Using NetBackup Accelerator for VMware
NetBackup Accelerator for VMware enables what is sometimes referred to as an “incremental forever” technology. After the initial full backup, only incremental backups are performed. The NetBackup Accelerator for VMware feature is different in that NetBackup’s implementation takes advantage of VMware’s Changed Block Tracking (CBT) feature to enable the incremental nature of these backups. When the backup is performed, the backup is cataloged in NetBackup as a full backup but the amount of data transferred from VMware environment during the backup process is only the incremental data change that occurred since any previous backup. The net result of this is that backups are significantly faster than traditional full backups. The net effect of this is that the backup impact on the vSphere virtual machine environment is far less, backups are more reliable and all of this can be accomplished with a shorter backup window. This is all done with zero loss of any restore functionality.
Now we will manually backup our VM using the policy we just created. Remember that when we created our policy we enabled the NetBackup Accelerator for VMware feature by selecting a simple checkbox:
Next we will manually initiate the first backup of our virtual machine. Keep in mind that the first full backup of a NetBackup Accelerator for VMware style of backup will be exactly the same as a traditional full.
From the main NetBackup Administration Console, right-click on the vm1 policy.
Select “Manual Backup…” from the pull-down menu.

Symantec Vision 2013
NetBackup 7.6 for VMware Hands On Lab Student Guide
19 of 36
You will now see the “Manual Backup” dialoge box.
1) Select OK
2) Select OK
We can monitor the process by clicking on the NetBackup Activity Monitor from the main NetBackup Administrator Console:
3) Click on the Activity Monitor

Symantec Vision 2013
NetBackup 7.6 for VMware Hands On Lab Student Guide
20 of 36
The entire backup process for this first of two Accelertor backups will take about 6 to 10 minutes.
Once the backup job is finished it should look something like this:
Based on the screenshot shown above, we will take a look at three aspects of the backup job.
1) This is the average backup rate for this VM. This rate is based on the performance that would be achieved with a standard full backup. As mentioned before, the first Accelerator backup must backup everything as if it was a standard backup.
2) The Accelerator Optimization is zero. This makes sense as it is the first backup of this VM and there is nothing to optimize against.
3) This deduplication rate is low as the deduplication pool (MSDP) has no data and has nothing to deduplicate against.
Now that we’ve “seeded” the deduplication storage, lets start another manual backup of this VM.
From the main NetBackup Administration Console, right-click on the vm1 policy.
Select “Manual Backup…” from the pull-down menu.
1
2
3
IMPORTANT !!!
Keep in mind that the performace of this backup is slowed by the fact that we are running all of these systems inside a VMware Workstation virtual environment.

Symantec Vision 2013
NetBackup 7.6 for VMware Hands On Lab Student Guide
21 of 36
You will now see the “Manual Backup” dialoge box.
4) Select OK
5) Select OK
We can monitor the process by clicking on the NetBackup Activity Monitor from the main NetBackup Administrator Console:
6) Click on the Activity Monitor

Symantec Vision 2013
NetBackup 7.6 for VMware Hands On Lab Student Guide
22 of 36
After a few moments the jobs will complete as before. Keep in mind that this second backup was exactly the same backup that we previously performed. However, for this second backup, the Accelerator optimizations kicked in. Lets take a look at the numbers as reported by the NetBackup Activity Monitor (below).
1) KB Per Second: Here we see a significantly higher backup rate. The first run backed up the entire VM. The second backup run only backed up the data that changed since the previous backup. The listed backup rate is high because the effective backup rate is based on the amount of data that would have been protected during a traditional full backup. The effective backup performance can be a much higher rate than the backup hardware even supports because incremental backups can be extremely efficient.
2) Accelerator Optimization: The Accelerator Optimization column shows how much impact the Accelerator technology works in this environment. This rate is higher than might be encountered in the real world but this column can show you how efficient the NetBackup Accelerator for VMware technology is performing.
3) Deduplication Rate: The deduplication pool has now been seeded so we see a much better deduplication rate.
This concludes lab exercise 3.
1
2
3

Symantec Vision 2013
NetBackup 7.6 for VMware Hands On Lab Student Guide
23 of 36
Lab Exercise 4: Instant Recovery for VMware (IRV)
Instant Recovery for VMware is an innovative technology that effectively turns the VM recovery process around. With standard recovery procedures, we typically restore the VM and then boot it. The restore process can take hours and the subsequent boot process takes minutes. What if we could reverse this process? What if we could first boot the VM, make it accessible to all users, and and then restore it? That is effectively what the Instant Recovery for VMware process does.
Lets take a look and see how easy this feature is to use. First, let’s open the vSphere client.
1) Still logged into “nbu”, click on the Windows Start button.
2) Click on the “VMware vSphere Client” menu entry.
Log into the vSphere client using the following credentials:
User name is: root
Password is: Symc4now!
1
2

Symantec Vision 2013
NetBackup 7.6 for VMware Hands On Lab Student Guide
24 of 36
In a few moments you will see the vSphere client (be patient). But first you will see a reminder that we are running an evaluation copy of VMware.
Select OK
From the vSphere Client, select the Hosts and Clusters icon.
Click on the VM named vm1.

Symantec Vision 2013
NetBackup 7.6 for VMware Hands On Lab Student Guide
25 of 36
Right-click on vm1
Select the Delete from Disk option.
This will completely remove vm1 from the ESXi server and remove all references to it in the vCenter database.
At this point we have simulated a disaster recovery scenario. We’ve lost the VM named vm1 and need to gain access to it very quickly. We will now use the Instant Recovery for VMware feature to make vm1 quickly available.
1) Click on the Windows Start menu.
2) Select the Command Prompt menu item
1
2

Symantec Vision 2013
NetBackup 7.6 for VMware Hands On Lab Student Guide
26 of 36
Using this command prompt, we will now recover vm1. Type the command exactly as follows:
> nbrestorevm -vmw -ir_activate -C vm1 -temp_location Datastore2
Your command prompt window should now look like this:
Click on the enter key
Now we will monitor the progress of the recovery of vm1.
Open the NetBackup Administration Console and make sure the Activity monitor is visible.
Two new jobs will appear. After a few moments only one job will be active (see below). This job indicates that vm1 is 100% available to the VMware system. However, at this point, the actual VM data (VMDK) still exists on the deduplication storage. The job listed below will remain active until it is manually stoped.
The next steps in the recovery process would involve using VMware’s Storage VMotion. Using Storage VMotion, the VM’s VMDK data would be copied from the backup storage to the traditional ESXi Datatore. The Storage VMotion process is a simple GUI based procedure. Once the Storage VMotion process is complete, the VM instant recovery job can be cancelled.

Symantec Vision 2013
NetBackup 7.6 for VMware Hands On Lab Student Guide
27 of 36
Lets take a look at the vSphere client and see how this job looks from the VMware perspective.
Open the VMware vSphere Client
Notice two things show in the following screen shot of the vSphere Client:
1) We previously deleted vm1 but it is back now. It is being made available using the Instant Recovery feature.
2) There is a new Datastore on this ESXi server. It is the temporary Datastore that we automatically provisioned using the Instant Recovery for VMware feature. It is a read-only Datastore that is physically our NetBackup deduplication pool (MSDP). We’ve “tricked” VMware into thinking that our backup target is a Datastore. This new Datastore is only used as long as the NetBackup Instant Recovery job is active.
In an actual user scenario we could now use VMware’s Storage VMotion feature to move the VMDK data to the traditional Datastore. We will not perform that action as part of this lab. We will now cancel the VMware Instant Recover job.
Open the NetBackup Administration Console.
Right-click on the active Instant Recovery job.
Click on Cancel Job
1
2

Symantec Vision 2013
NetBackup 7.6 for VMware Hands On Lab Student Guide
28 of 36
Let’s take a look at the vSphere Client and see what effect cancelling this job had.
1) Open the vSphere Client (see below)
Notice that both vm1 and the temporary Datastore have automatically been removed. In our case vm1 is no longer there because we did not migrate it to a permanent Datastore (although we could have done that). The temporary Datastore is no longer in use so it has automatically been removed.
As you can see, the NetBackup Instant Recovery for VMware feature is a powerful way of getting VMs online when bad things happen.
This concludes lab exercise 4.

Symantec Vision 2013
NetBackup 7.6 for VMware Hands On Lab Student Guide
29 of 36
Lab Exercise 5 – Empowering the Virtual Machine Administrator
In this lab we will use the NetBackup for VMware vSphere Plugin to explore how the vSphere Client can be used to provide valuable backup history information to the VMware Administrator. We will also finally restore the VM (vm1) that we previously deleted. So, lets begin!
2) Open the vSphere Client (see below)
Select the Yes button in the security alert popup.
1) Click on the esxi.symc.com server (see below)
2) Click on the Symantec NetBackup tab
This view provides you a rich graphical view of all the backups associated with that ESXi server. For environments that have more objects, you can click on any object (e.g. Datastore or Resource Pool) and obtain the backup status of all VMs associated with that object.
1 2

Symantec Vision 2013
NetBackup 7.6 for VMware Hands On Lab Student Guide
30 of 36
Click on the Events tab
Here we see a tabular view of all VM backup events. In this view we can filter out events that are associated with a specific VM or multiple VMs.
Now let’s use the NetBackup for vSphere Client plugin to restore an entire virtual machine. This features allows the VM administrator to process a full VM restore without needing to contact the backup administrator. This can offload restore tasks from the backup administrator.
The backup administrator is always in complete control and can revoke this restore ability from the VM administrator at any time.
Let’s restore our VM!
From the vSphere client select the Home view
Select the Symantec NetBackup button

Symantec Vision 2013
NetBackup 7.6 for VMware Hands On Lab Student Guide
31 of 36
From the Recovery Portal, select the Recovery Wizard.
Type in the first two charcaters of the VM name: vm
Click on vm1
Click on Next

Symantec Vision 2013
NetBackup 7.6 for VMware Hands On Lab Student Guide
32 of 36
We’ve now searched for and selected the VM to be restored. We now get a summary screen that defines how the VM was configured at the time of the backup. We will use this as the basis for the restore. However, there are a number of VM attributes that can be modified as part of the restore process.
Click on Next
Now we will define exactly how we want to restore this VM.
We can restore the VM to its original location or an alternate location (ESXi server, Datastore, etc.)
Before the restore is processed, the VM can be renamed. This is helpful if the original VM already exists.
Click on Next

Symantec Vision 2013
NetBackup 7.6 for VMware Hands On Lab Student Guide
33 of 36
Here the transport mode used to restore the VM is defined. NetBackup supports all transport modes for both backup as well as restores.
Click on the NBD transport mode
Click on the right-arrow
Click on Next
Next we can define how the VM’s VMDKs are provisioned. This can be handy if there is a shortage of disk storage at the restore site and thin provisioned disks are preferred.
Select Next

Symantec Vision 2013
NetBackup 7.6 for VMware Hands On Lab Student Guide
34 of 36
More configurable restore options are made available.
Select Next
We can optionally select a different virtual network for the virtual machine.
Select Next

Symantec Vision 2013
NetBackup 7.6 for VMware Hands On Lab Student Guide
35 of 36
Before any restore is initiated, NetBackup runs a series of basic tests to help ensure that the restore process will succeed. The process is described below.
1) First the Run Pre-Recovery Check button is selected.
2) NetBackup runs through a series of basic tests. If these tests succeed, a green checkmark is indicated. Any failures of these tests will be indicated by a red X
3) Once the tests are complete, the Recover button is no longer faded out and the restore can proceed
Select the Recover (3) button.
The restore will now proceed and can be monitored from the NetBackup Administration Console.
This concludes exercise 5.
1
2
3

Symantec Vision 2013
NetBackup 7.6 for VMware Hands On Lab Student Guide
36 of 36
This concludes today’s hands on lab.
Thank you for joining us today! We appreciate you attending this lab. If you have any additional questions regarding this technology, feel free to come by the NetBackup booth and visit us.