HT STAGE 60 112 MkII HT STAGE 60 212 MkII 100 MkII · 2 3 USA / Canada IMPORTANT SAFETY...
49
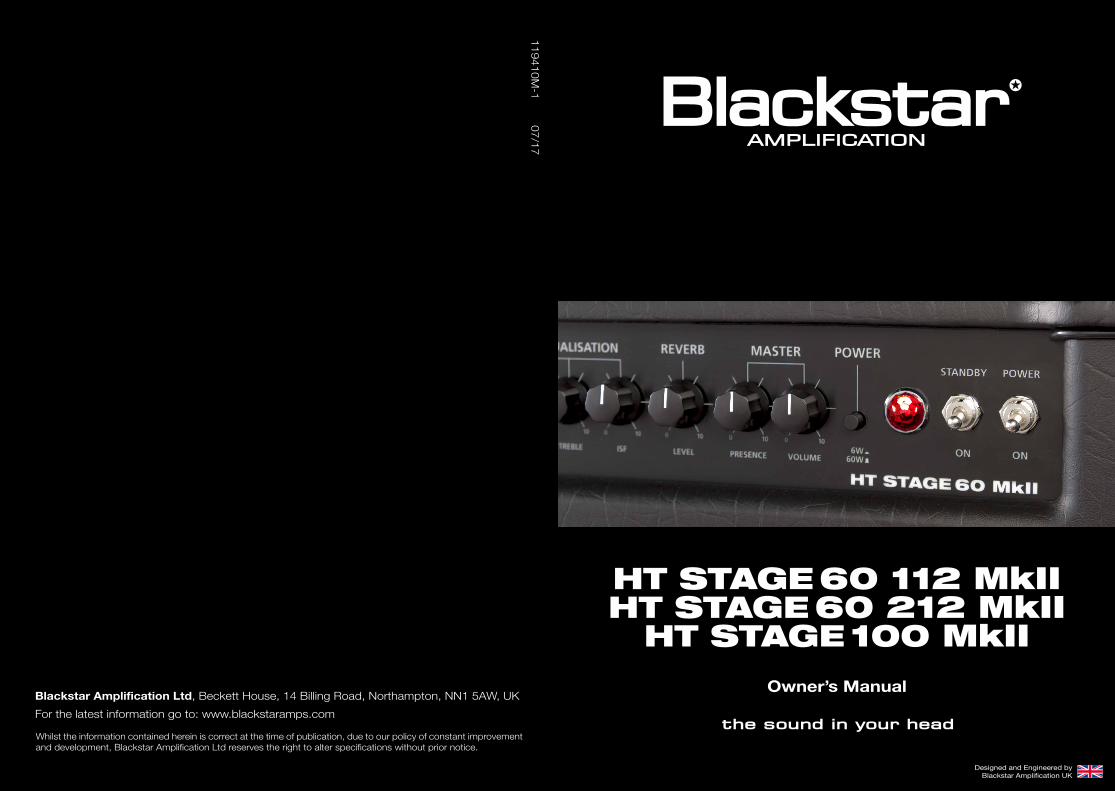
Owner’s Manual Blackstar Amplification Ltd, Beckett House, 14 Billing Road, Northampton, NN1 5AW, UK For the latest information go to: www.blackstaramps.com Whilst the information contained herein is correct at the time of publication, due to our policy of constant improvement and development, Blackstar Amplification Ltd reserves the right to alter specifications without prior notice. Designed and Engineered by Blackstar Amplification UK 119410M-1 07/17 HT STAGE 60 112 MkII HT STAGE 60 212 MkII HT STAGE 100 MkII
Transcript of HT STAGE 60 112 MkII HT STAGE 60 212 MkII 100 MkII · 2 3 USA / Canada IMPORTANT SAFETY...
11
Owner’s ManualBlackstar Amplification Ltd, Beckett House, 14 Billing Road, Northampton, NN1 5AW, UKFor the latest information go to: www.blackstaramps.com
Whilst the information contained herein is correct at the time of publication, due to our policy of constant improvement and development, Blackstar Amplification Ltd reserves the right to alter specifications without prior notice.
Designed and Engineered byBlackstar Amplification UK
119410M-1 07/17
HT STAGE 60 112 MkIIHT STAGE 60 212 MkII
HT STAGE 100 MkII
32
US
A / C
anada
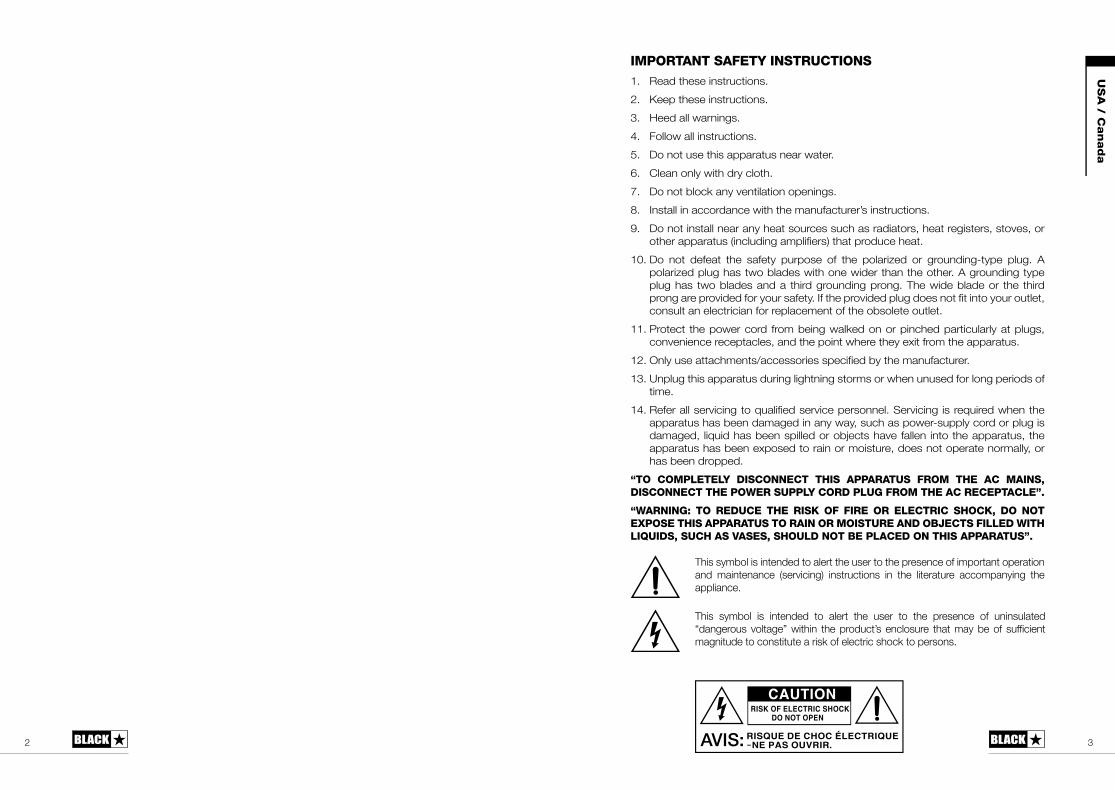
IMPORTANT SAFETY INSTRUCTIONS1. Read these instructions.2. Keep these instructions.3. Heed all warnings.4. Follow all instructions.5. Do not use this apparatus near water.6. Clean only with dry cloth.7. Do not block any ventilation openings. 8. Install in accordance with the manufacturer’s instructions.9. Do not install near any heat sources such as radiators, heat registers, stoves, or
other apparatus (including amplifiers) that produce heat.10. Do not defeat the safety purpose of the polarized or grounding-type plug. A
polarized plug has two blades with one wider than the other. A grounding type plug has two blades and a third grounding prong. The wide blade or the third prong are provided for your safety. If the provided plug does not fit into your outlet, consult an electrician for replacement of the obsolete outlet.
11. Protect the power cord from being walked on or pinched particularly at plugs, convenience receptacles, and the point where they exit from the apparatus.
12. Only use attachments/accessories specified by the manufacturer.13. Unplug this apparatus during lightning storms or when unused for long periods of
time.14. Refer all servicing to qualified service personnel. Servicing is required when the
apparatus has been damaged in any way, such as power-supply cord or plug is damaged, liquid has been spilled or objects have fallen into the apparatus, the apparatus has been exposed to rain or moisture, does not operate normally, or has been dropped.
“TO COMPLETELY DISCONNECT THIS APPARATUS FROM THE AC MAINS, DISCONNECT THE POWER SUPPLY CORD PLUG FROM THE AC RECEPTACLE”.
“WARNING: TO REDUCE THE RISK OF FIRE OR ELECTRIC SHOCK, DO NOT EXPOSE THIS APPARATUS TO RAIN OR MOISTURE AND OBJECTS FILLED WITH LIQUIDS, SUCH AS VASES, SHOULD NOT BE PLACED ON THIS APPARATUS”.
This symbol is intended to alert the user to the presence of important operation and maintenance (servicing) instructions in the literature accompanying the appliance.
This symbol is intended to alert the user to the presence of uninsulated “dangerous voltage” within the product’s enclosure that may be of sufficient magnitude to constitute a risk of electric shock to persons.
54
English
Englis
h
Warning!
Important safety information!
READ THE FOLLOWING INFORMATION CAREFULLY. SAVE ALL INSTRUCTIONS FOR FUTURE REFERENCE!
Follow all warnings and instructions marked on the product!
Danger! High internal operating voltages.
Do not open the equipment case. There are no user serviceable parts in this equipment. Refer all servicing to qualified service personnel.
Clean only with dry cloth.
Condensation can form on the inside of an amplifier if it is moved from a cold environment to a warmer location. Before switching the unit on, it is recommended that the unit be allowed to reach room temperature.
Unauthorised modification of this equipment is expressly forbidden by Blackstar Amplification Ltd.
Never push objects of any kind into ventilation slots on the equipment casing.
Do not expose this apparatus to rain, liquids or moisture of any type.
Do not place this product on an unstable trolley, stand or table. The product may fall, causing serious damage to the product or to persons!
Do not cover or block ventilation slots or openings.
This product should not be placed near a source of heat such as a stove, radiator, or another heat producing amplifier.
Use only the supplied power cord which is compatible with the mains voltage supply in your area.
Power supply cords should always be handled carefully and should be replaced if damaged in any way.
Never break off the earth (ground) pin on the power supply cord.
The power supply cord should be unplugged when the unit is to be unused for long periods of time.
Before the unit is switched on, the loudspeaker should be connected as described in the handbook using the lead recommended by the manufacturer.
Always replace damaged fuses with the correct rating and type.
Never disconnect the protective mains earth connection.
High loudspeaker levels can cause permanent hearing damage. You should therefore avoid the direct vicinity of loudspeakers operating at high levels. Wear hearing protection if continuously exposed to high levels.
If the product does not operate normally when the operating instructions are followed, then refer the product to a qualified service engineer.
The U.S. Government´s Occupational Safety and Health Administration (OSHA) has specified the following permissible noise level exposures:
Duration Per Day In Hours Sound Level dBA, Slow Response8 906 924 953 972 1001½ 1021 105½ 110¼ or less 115
According to OSHA, any exposure in excess of the above permissible limits could result in some hearing loss.
Ear plug protectors in the ear canals or over the ears must be worn when operating this amplification system in order to prevent a permanent hearing loss if exposure is in excess of the limits as set forth above. To ensure against potentially dangerous exposure to high sound pressure levels, it is recommended that all persons exposed to equipment capable of producing high sound pressure levels such as this amplification system be protected by hearing protectors while this unit is in operation.
All electrical and electronic products should be disposed of separately from the municipal waste stream via designated collection facilities appointed by the government or the local authorities.
76
English
Englis
h
Introduction
Thank you for purchasing this Blackstar HT Venue MkII amplifier. Like all our products, this amp is the result of countless hours of painstaking Research and Development by our world-class design team. Based in Northampton (UK), the Blackstar team are all experienced musicians themselves and the sole aim of the development process is to provide guitarists with products which are the ultimate tools for self-expression.
All Blackstar products are subjected to extensive laboratory and road testing to ensure that they are truly uncompromising in terms of reliability, quality and above all TONE.
The HT Stage MkII’s flexible three channel design features the unique patented ISF (Infinite Shape Feature) control and although it has a comprehensive control set, it is still simple and intuitive to use. Please read through this handbook carefully to ensure you get the maximum benefit from your new Blackstar product.
If you like what you hear and want to find out more about the Blackstar range of products please visit our website at www.blackstaramps.com.
Thanks!
The Blackstar Team
Features
This HT Venue MkII is a highly versatile amplifier suited to a wide range of playing styles and situations.
The Clean Channel has two voices; one based on a classic American circuit and the other based on a classic British tone. The Voice switch reconfigures the preamp voicing, EQ and valve gain structure, as well as the power amplifier damping. This produces a clean, bright and tight but solid bass response for the American tone and a highly responsive ‘chime’ with looser bottom for the British tone that can be pushed into a midrange overdrive when driven hard. The Voice setting can also be selected via footcontroller.
The HT Stage MkII has two Overdrive channels which share a common EQ section and, like the Clean Channel, each of the Overdrive channels has a Voice switch which allows the character of each channel to be changed, providing a broad palette of overdriven tones.
As with the Clean Channel, each of these voices can also be selected by footcontroller. When switching between channels, the amplifier will recall the specific Voice setting last used on that channel.
The Overdrive channels are characterised by a tone which is high in gain, but avoids any of the detached top-end ‘fizz’ often found in other designs. This is a result of unique preamplifier and power amplifier shaping techniques, which also benefit the player in the way the overdrives clean up beautifully as the guitar volume is reduced. Even at the most extreme settings, the Overdrive channels remain natural sounding.
The patented ISF (Infinite Shape Feature) control is unique to Blackstar Amplification and represents a major step forward in tone shaping flexibility. The ISF control shifts the response of the three control tone stack between, a US type response at one end, and at the other, a UK type response. Importantly, in between the two extremes lie an infinite number of alternative tone choices that would be otherwise unavailable.
The amplifier features naturally sounding digital reverb that can be adjusted via the Reverb control on the front panel or turned on and off via the optional 5-way footcontroller. A switch on the rear panel selects between ‘Dark’ and ‘Light’. The Dark setting is based on a room reverb and the Light setting is based on a plate reverb.A Power Switch is provided on the front panel to switch the amplifier between full power and 10% power. This means that the full tonal depth of the EL34 power stage can be enjoyed at any volume, retaining the distinctive sound of power valves working hard.
A USB connector allows for sending up to 4 channels of the guitar signal (dry, preamp out and stereo emulated out) into a computer for recording purposes.
Two further outputs on the rear, a stereo jack socket and balanced XLR, also allow the speaker emulated signal(s) to be connected to external devices for practicing, recording or live use.
98
English
Englis
h
Front Panel
1. Input
Plug your guitar in here. Always use a good quality screened guitar lead.
Clean Channel
2. Clean Select Switch
Press this switch to select the Clean Channel. When the green LED is on, the Clean Channel is selected.
3. Clean Volume
This controls the volume of the Clean Channel. Turning it clockwise increases the volume. At extreme clockwise settings the preamplifer will start to overdrive, particularly in the ‘British’ mode.
4. Clean Voice Switch
This is a momentary switch that selects between the two clean voices. The ‘American’ setting is very clean and bright but with a solid and tight low end; this Voice is selected when the Voice LED is unlit. The ‘British’ setting has a looser bass response with warmer mid-range and is very sensitive to the output level of the guitar and the player’s dynamics; this Voice is selected when the Voice LED is lit. The EQ voicing and valve gain structure is completely reconfigured between each voice.
5. Bass
The Bass control adjusts the amount of bass frequencies in your tone. Fully counter clockwise the sound will be tighter in character. Rotating the control clockwise will progressively increase the bass response of the channel.
6. Treble
The Treble control allows adjustment of the treble frequencies within the sound. At low settings (counter clockwise) the sound will be warm and darker in character. As the Treble control is rotated clockwise the sound will become brighter.
OD 1 (Overdrive 1) Channel
7. OD 1 Select Switch
Press this switch to select the OD 1 Channel. When the yellow LED is on, the OD 1 Channel is selected.
8. OD 1 Gain
The OD 1 Gain control adjusts the amount of the OD 1 Channel’s overdrive or distortion. Low settings (anti-clockwise) will deliver a clean sound on the edge of break-up. As the Gain control is increased clockwise the sound will become more overdriven, moving through crunch tones until, at its maximum position, a full distorted tone is reached.
9. OD 1 Volume
This control adjusts the overall volume of the OD 1 Channel. Turning it clockwise increases the volume.
10. OD 1 Voice Switch
This is a momentary switch that selects between the two voices of the OD 1 Channel. When the small yellow LED is unlit, this channel has a ‘classic’ overdrive voicing. With the yellow LED lit the overdrive sound has a more ‘modern’ voicing, with a greater bass response and a looser, more aggressive sound due to reduced power amp damping.
OD 2 (Overdrive 2) Channel
11. OD 2 Select Switch
Press this switch to select the OD 2 Channel. When the red LED is on, the OD 2 Channel is selected.
12. OD 2 Gain
The OD 2 Gain control adjusts the amount of overdrive or distortion in this channel. With low settings (anti-clockwise) the tone will be mildly overdriven. As the Gain control is increased clockwise the sound will turn from crunch to a high gain, saturated lead tone.
13. OD 2 Volume
This controls the overall volume of the OD 2 Channel. Turning it clockwise increases the volume.
14. OD 2 Voice Switch
This is a momentary switch that selects between the two voices of the OD 2 Channel. With the small red LED unlit this channel has a ‘classic’ but ‘hot-rodded’ overdrive, with medium power amp damping. With the red LED lit the overdrive sound has a more ‘modern’ voicing that includes a strong mid-emphasised pre-overdrive boost, as well as a looser, more aggressive sound due to reduced power amp damping.
OD 1 and OD 2 EQ
15. Bass
The Bass control adjusts the amount of low-end frequencies in your tone. This amp has an advanced tone shaping circuit which allows the tone to be varied from tight and cutting when counter clockwise, to warm and thumping when fully clockwise.
16. Middle
The Middle control adjusts the amount of middle frequencies in your tone. The middle frequencies are particularly important in setting the amount of ‘body’ your tone has. With the Middle control set to its minimum position (fully counter clockwise) the sound will be aggressive and scooped, a tone ideal for aggressive rhythm playing. As the Middle control is increased (clockwise) the amount of ‘body’ is increased, which is more suitable for sustained lead guitar tones.
1110
17. Treble
The Treble control allows exact adjustment of the treble frequencies within the sound. At low settings (counter clockwise) the sound will be warm and darker in character. As the Treble control is increased (clockwise) the sound will become brighter. At the maximum settings the sound will be aggressive and cutting.
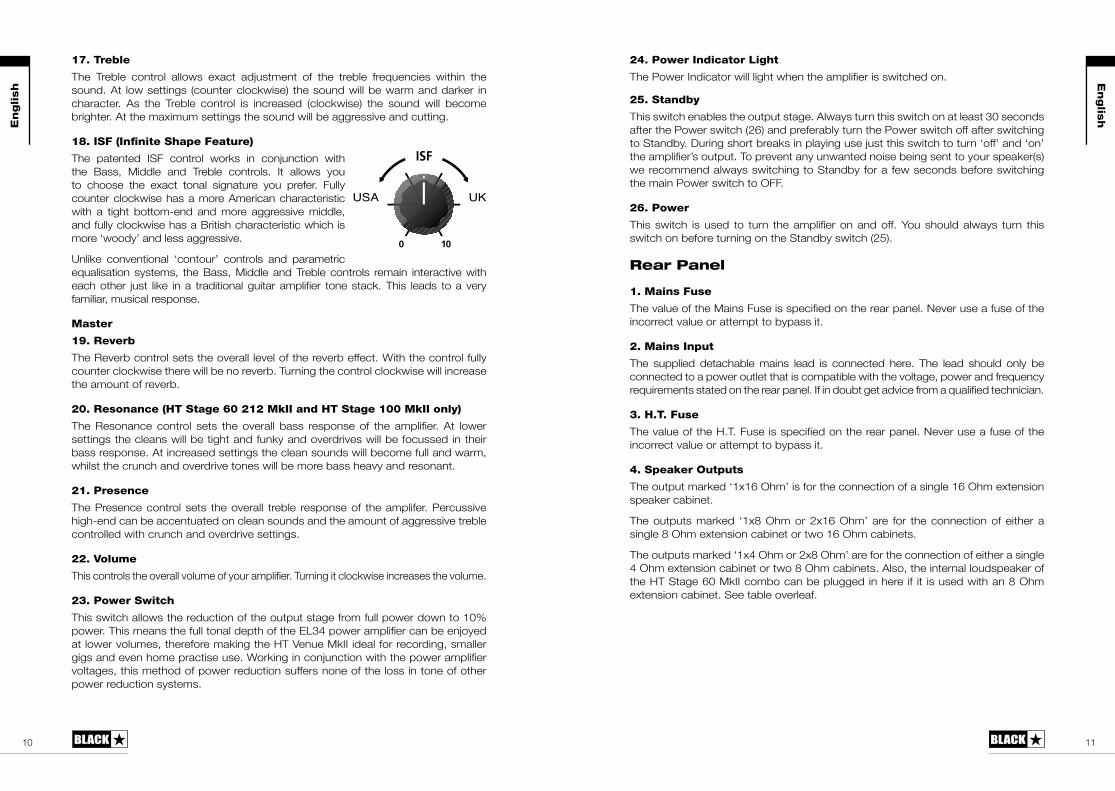
18. ISF (Infinite Shape Feature)
The patented ISF control works in conjunction with the Bass, Middle and Treble controls. It allows you to choose the exact tonal signature you prefer. Fully counter clockwise has a more American characteristic with a tight bottom-end and more aggressive middle, and fully clockwise has a British characteristic which is more ‘woody’ and less aggressive.
Unlike conventional ‘contour’ controls and parametric equalisation systems, the Bass, Middle and Treble controls remain interactive with each other just like in a traditional guitar amplifier tone stack. This leads to a very familiar, musical response.
Master
19. Reverb
The Reverb control sets the overall level of the reverb effect. With the control fully counter clockwise there will be no reverb. Turning the control clockwise will increase the amount of reverb.
20. Resonance (HT Stage 60 212 MkII and HT Stage 100 MkII only)
The Resonance control sets the overall bass response of the amplifier. At lower settings the cleans will be tight and funky and overdrives will be focussed in their bass response. At increased settings the clean sounds will become full and warm, whilst the crunch and overdrive tones will be more bass heavy and resonant.
21. Presence
The Presence control sets the overall treble response of the amplifer. Percussive high-end can be accentuated on clean sounds and the amount of aggressive treble controlled with crunch and overdrive settings.
22. Volume
This controls the overall volume of your amplifier. Turning it clockwise increases the volume.
23. Power Switch
This switch allows the reduction of the output stage from full power down to 10% power. This means the full tonal depth of the EL34 power amplifier can be enjoyed at lower volumes, therefore making the HT Venue MkII ideal for recording, smaller gigs and even home practise use. Working in conjunction with the power amplifier voltages, this method of power reduction suffers none of the loss in tone of other power reduction systems.
English
Englis
h
USA UK
24. Power Indicator Light
The Power Indicator will light when the amplifier is switched on.
25. Standby
This switch enables the output stage. Always turn this switch on at least 30 seconds after the Power switch (26) and preferably turn the Power switch off after switching to Standby. During short breaks in playing use just this switch to turn ‘off’ and ‘on’ the amplifier’s output. To prevent any unwanted noise being sent to your speaker(s) we recommend always switching to Standby for a few seconds before switching the main Power switch to OFF.
26. Power
This switch is used to turn the amplifier on and off. You should always turn this switch on before turning on the Standby switch (25).
Rear Panel
1. Mains Fuse
The value of the Mains Fuse is specified on the rear panel. Never use a fuse of the incorrect value or attempt to bypass it.
2. Mains Input
The supplied detachable mains lead is connected here. The lead should only be connected to a power outlet that is compatible with the voltage, power and frequency requirements stated on the rear panel. If in doubt get advice from a qualified technician.
3. H.T. Fuse
The value of the H.T. Fuse is specified on the rear panel. Never use a fuse of the incorrect value or attempt to bypass it.
4. Speaker Outputs
The output marked ‘1x16 Ohm’ is for the connection of a single 16 Ohm extension speaker cabinet.
The outputs marked ‘1x8 Ohm or 2x16 Ohm’ are for the connection of either a single 8 Ohm extension cabinet or two 16 Ohm cabinets.
The outputs marked ‘1x4 Ohm or 2x8 Ohm’ are for the connection of either a single 4 Ohm extension cabinet or two 8 Ohm cabinets. Also, the internal loudspeaker of the HT Stage 60 MkII combo can be plugged in here if it is used with an 8 Ohm extension cabinet. See table overleaf.
1312
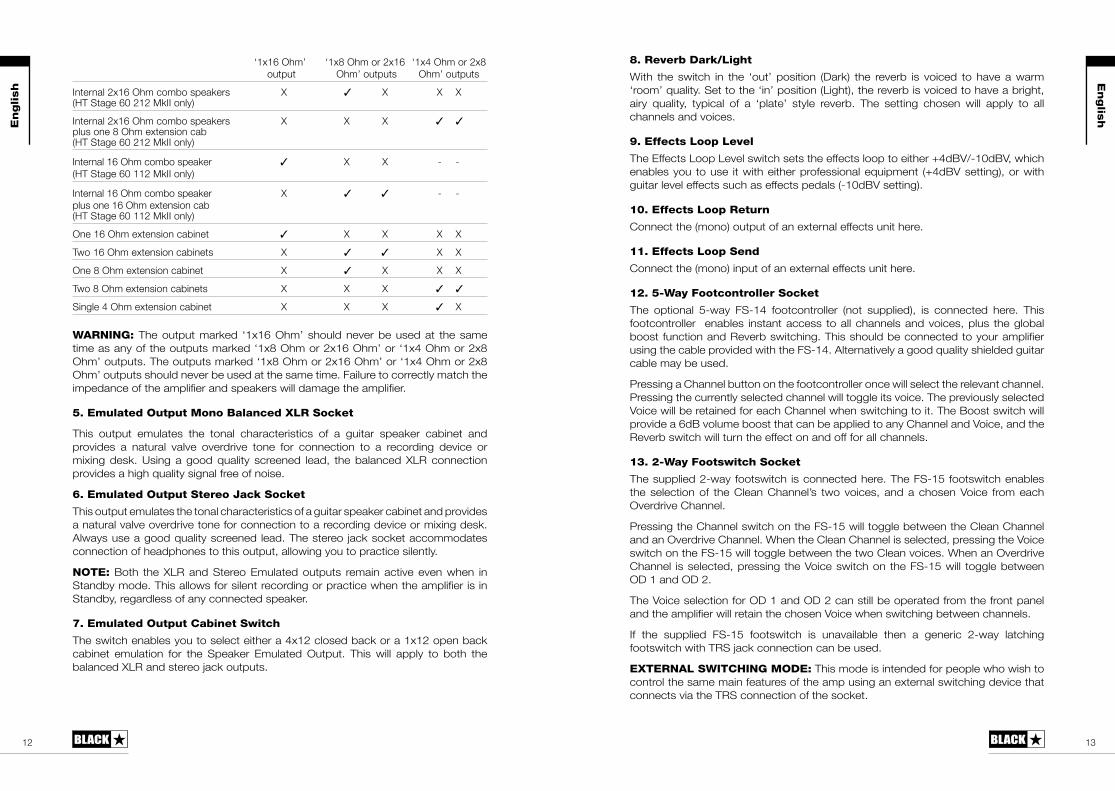
‘1x16 Ohm’ ‘1x8 Ohm or 2x16 ‘1x4 Ohm or 2x8 output Ohm’ outputs Ohm’ outputs
Internal 2x16 Ohm combo speakers X ✓ X X X (HT Stage 60 212 MkII only)
Internal 2x16 Ohm combo speakers X X X ✓ ✓ plus one 8 Ohm extension cab (HT Stage 60 212 MkII only)
Internal 16 Ohm combo speaker ✓ X X - - (HT Stage 60 112 MkII only)
Internal 16 Ohm combo speaker X ✓ ✓ - - plus one 16 Ohm extension cab (HT Stage 60 112 MkII only)
One 16 Ohm extension cabinet ✓ X X X X
Two 16 Ohm extension cabinets X ✓ ✓ X X
One 8 Ohm extension cabinet X ✓ X X X
Two 8 Ohm extension cabinets X X X ✓ ✓
Single 4 Ohm extension cabinet X X X ✓ X
WARNING: The output marked ‘1x16 Ohm’ should never be used at the same time as any of the outputs marked ‘1x8 Ohm or 2x16 Ohm’ or ‘1x4 Ohm or 2x8 Ohm’ outputs. The outputs marked ‘1x8 Ohm or 2x16 Ohm’ or ‘1x4 Ohm or 2x8 Ohm’ outputs should never be used at the same time. Failure to correctly match the impedance of the amplifier and speakers will damage the amplifier.
5. Emulated Output Mono Balanced XLR Socket
This output emulates the tonal characteristics of a guitar speaker cabinet and provides a natural valve overdrive tone for connection to a recording device or mixing desk. Using a good quality screened lead, the balanced XLR connection provides a high quality signal free of noise.
6. Emulated Output Stereo Jack Socket
This output emulates the tonal characteristics of a guitar speaker cabinet and provides a natural valve overdrive tone for connection to a recording device or mixing desk. Always use a good quality screened lead. The stereo jack socket accommodates connection of headphones to this output, allowing you to practice silently.
NOTE: Both the XLR and Stereo Emulated outputs remain active even when in Standby mode. This allows for silent recording or practice when the amplifier is in Standby, regardless of any connected speaker.
7. Emulated Output Cabinet Switch
The switch enables you to select either a 4x12 closed back or a 1x12 open back cabinet emulation for the Speaker Emulated Output. This will apply to both the balanced XLR and stereo jack outputs.
English
Englis
h
8. Reverb Dark/Light
With the switch in the ‘out’ position (Dark) the reverb is voiced to have a warm ‘room’ quality. Set to the ‘in’ position (Light), the reverb is voiced to have a bright, airy quality, typical of a ‘plate’ style reverb. The setting chosen will apply to all channels and voices.
9. Effects Loop Level
The Effects Loop Level switch sets the effects loop to either +4dBV/-10dBV, which enables you to use it with either professional equipment (+4dBV setting), or with guitar level effects such as effects pedals (-10dBV setting).
10. Effects Loop Return
Connect the (mono) output of an external effects unit here.
11. Effects Loop Send
Connect the (mono) input of an external effects unit here.
12. 5-Way Footcontroller Socket
The optional 5-way FS-14 footcontroller (not supplied), is connected here. This footcontroller enables instant access to all channels and voices, plus the global boost function and Reverb switching. This should be connected to your amplifier using the cable provided with the FS-14. Alternatively a good quality shielded guitar cable may be used.
Pressing a Channel button on the footcontroller once will select the relevant channel. Pressing the currently selected channel will toggle its voice. The previously selected Voice will be retained for each Channel when switching to it. The Boost switch will provide a 6dB volume boost that can be applied to any Channel and Voice, and the Reverb switch will turn the effect on and off for all channels.
13. 2-Way Footswitch Socket
The supplied 2-way footswitch is connected here. The FS-15 footswitch enables the selection of the Clean Channel’s two voices, and a chosen Voice from each Overdrive Channel.
Pressing the Channel switch on the FS-15 will toggle between the Clean Channel and an Overdrive Channel. When the Clean Channel is selected, pressing the Voice switch on the FS-15 will toggle between the two Clean voices. When an Overdrive Channel is selected, pressing the Voice switch on the FS-15 will toggle between OD 1 and OD 2.
The Voice selection for OD 1 and OD 2 can still be operated from the front panel and the amplifier will retain the chosen Voice when switching between channels.
If the supplied FS-15 footswitch is unavailable then a generic 2-way latching footswitch with TRS jack connection can be used.
EXTERNAL SWITCHING MODE: This mode is intended for people who wish to control the same main features of the amp using an external switching device that connects via the TRS connection of the socket.
1514
To switch to External Switching Mode: simply press and hold the Clean Select and Clean Voice switches for 5 seconds. The green LEDs will then flash together to indicate the change of mode. The amplifier will retain this mode, even when switched off, until it is changed back to normal/footswitch mode.
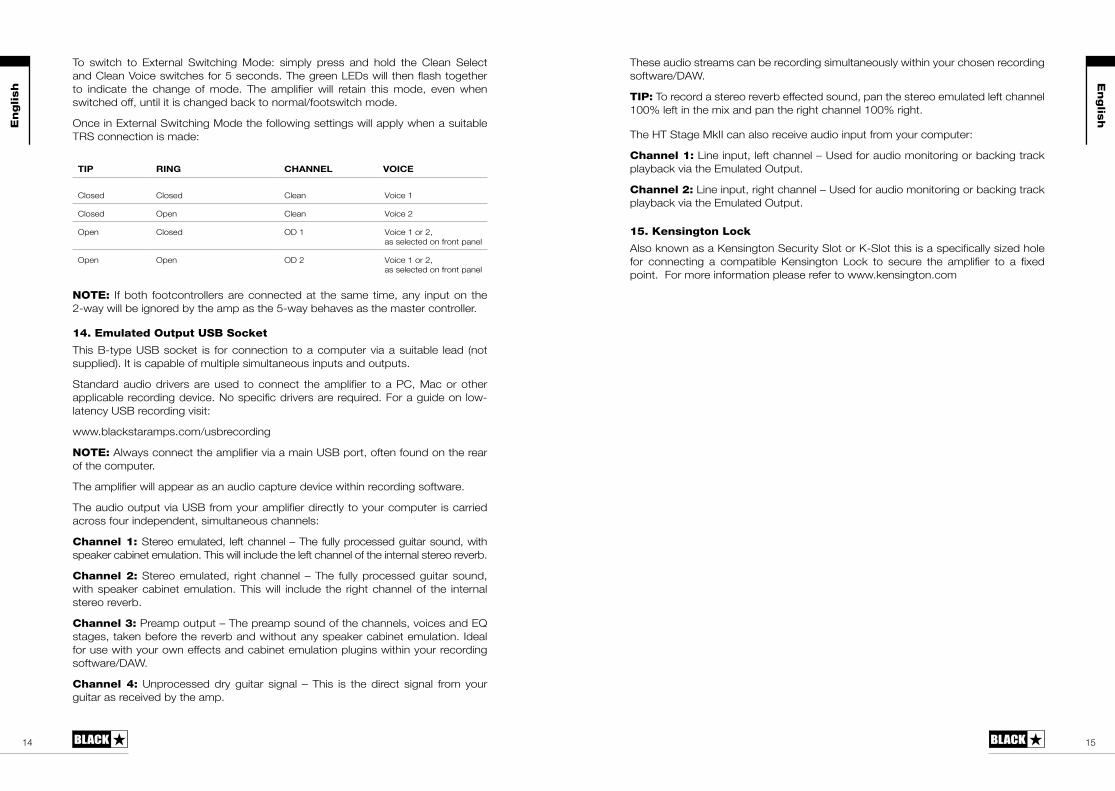
Once in External Switching Mode the following settings will apply when a suitable TRS connection is made:
TIP RING CHANNEL VOICE
Closed Closed Clean Voice 1
Closed Open Clean Voice 2
Open Closed OD 1 Voice 1 or 2,as selected on front panel
Open Open OD 2 Voice 1 or 2,as selected on front panel
NOTE: If both footcontrollers are connected at the same time, any input on the 2-way will be ignored by the amp as the 5-way behaves as the master controller.
14. Emulated Output USB Socket
This B-type USB socket is for connection to a computer via a suitable lead (not supplied). It is capable of multiple simultaneous inputs and outputs.
Standard audio drivers are used to connect the amplifier to a PC, Mac or other applicable recording device. No specific drivers are required. For a guide on low-latency USB recording visit:
www.blackstaramps.com/usbrecording
NOTE: Always connect the amplifier via a main USB port, often found on the rear of the computer.
The amplifier will appear as an audio capture device within recording software.
The audio output via USB from your amplifier directly to your computer is carried across four independent, simultaneous channels:
Channel 1: Stereo emulated, left channel – The fully processed guitar sound, with speaker cabinet emulation. This will include the left channel of the internal stereo reverb.
Channel 2: Stereo emulated, right channel – The fully processed guitar sound, with speaker cabinet emulation. This will include the right channel of the internal stereo reverb.
Channel 3: Preamp output – The preamp sound of the channels, voices and EQ stages, taken before the reverb and without any speaker cabinet emulation. Ideal for use with your own effects and cabinet emulation plugins within your recording software/DAW.
Channel 4: Unprocessed dry guitar signal – This is the direct signal from your guitar as received by the amp.
These audio streams can be recording simultaneously within your chosen recording software/DAW.
TIP: To record a stereo reverb effected sound, pan the stereo emulated left channel 100% left in the mix and pan the right channel 100% right.
The HT Stage MkII can also receive audio input from your computer:
Channel 1: Line input, left channel – Used for audio monitoring or backing track playback via the Emulated Output.
Channel 2: Line input, right channel – Used for audio monitoring or backing track playback via the Emulated Output.
15. Kensington Lock
Also known as a Kensington Security Slot or K-Slot this is a specifically sized hole for connecting a compatible Kensington Lock to secure the amplifier to a fixed point. For more information please refer to www.kensington.com
English
Englis
h
1716
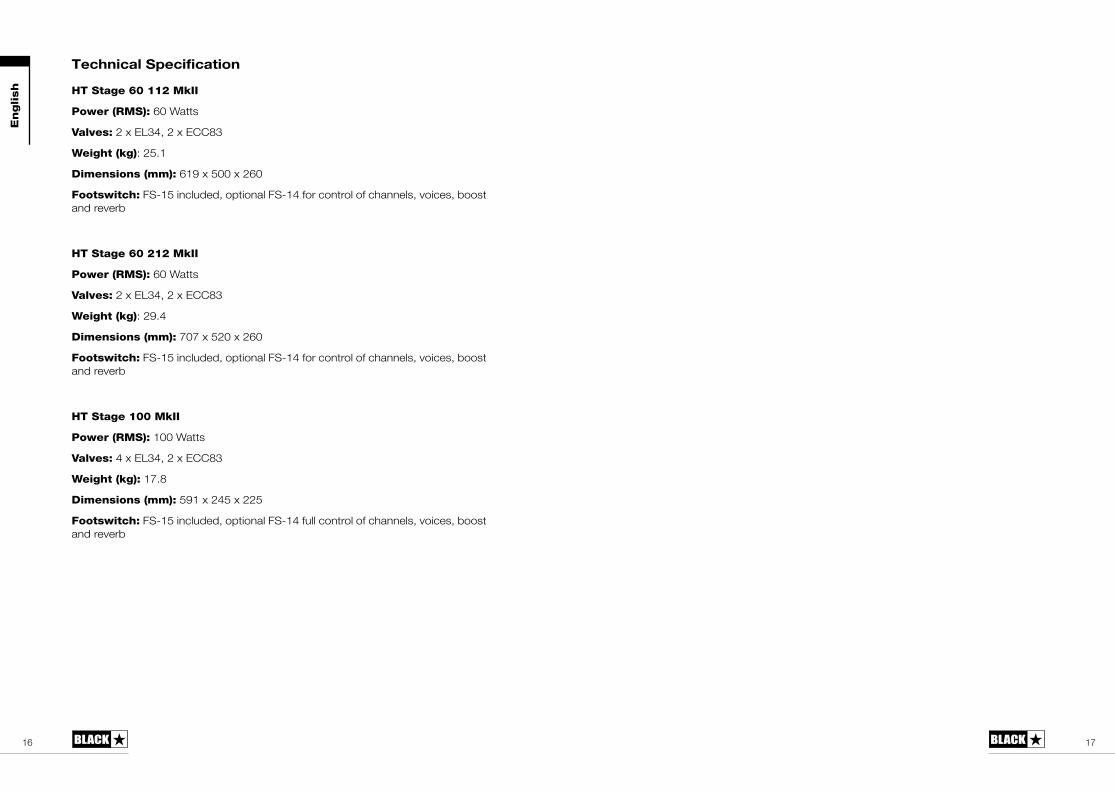
Technical Specification
HT Stage 60 112 MkII
Power (RMS): 60 Watts
Valves: 2 x EL34, 2 x ECC83
Weight (kg): 25.1
Dimensions (mm): 619 x 500 x 260
Footswitch: FS-15 included, optional FS-14 for control of channels, voices, boost and reverb
HT Stage 60 212 MkII
Power (RMS): 60 Watts
Valves: 2 x EL34, 2 x ECC83
Weight (kg): 29.4
Dimensions (mm): 707 x 520 x 260
Footswitch: FS-15 included, optional FS-14 for control of channels, voices, boost and reverb
HT Stage 100 MkII
Power (RMS): 100 Watts
Valves: 4 x EL34, 2 x ECC83
Weight (kg): 17.8
Dimensions (mm): 591 x 245 x 225
Footswitch: FS-15 included, optional FS-14 full control of channels, voices, boost and reverb
English
1918
Deuts
ch
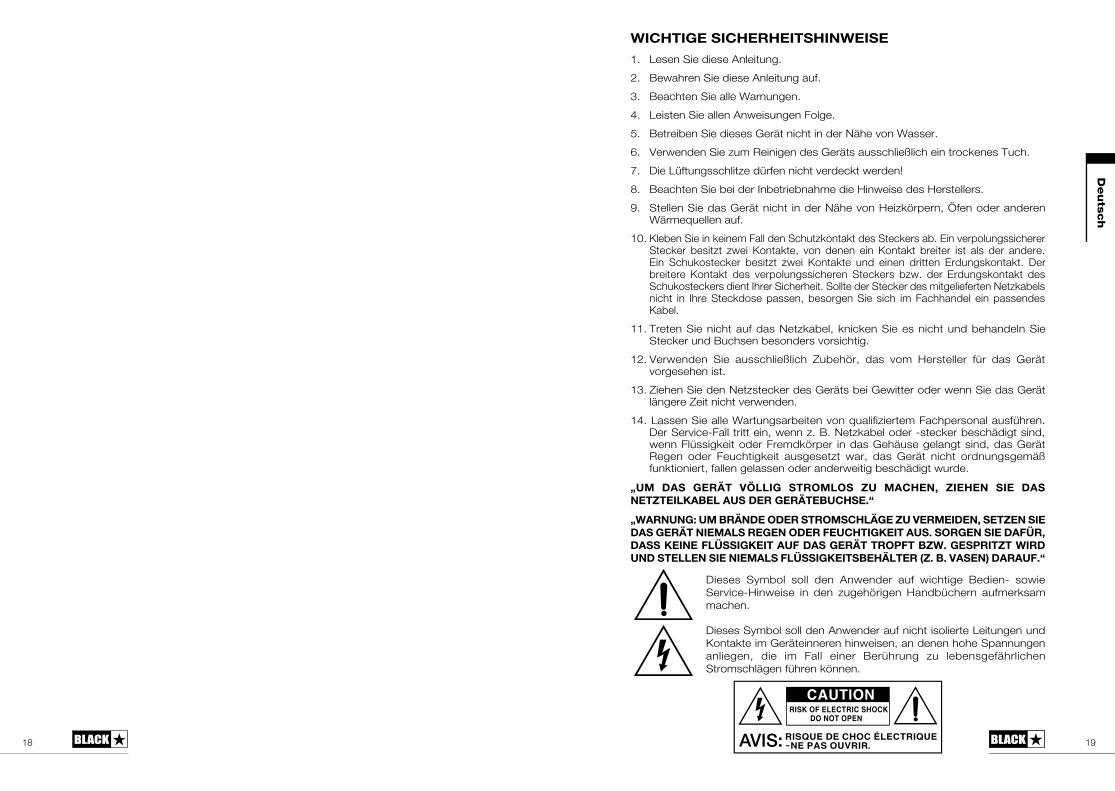
WICHTIGE SICHERHEITSHINWEISE
1. Lesen Sie diese Anleitung.
2. Bewahren Sie diese Anleitung auf.
3. Beachten Sie alle Warnungen.
4. Leisten Sie allen Anweisungen Folge.
5. Betreiben Sie dieses Gerät nicht in der Nähe von Wasser.
6. Verwenden Sie zum Reinigen des Geräts ausschließlich ein trockenes Tuch.
7. Die Lüftungsschlitze dürfen nicht verdeckt werden!
8. Beachten Sie bei der Inbetriebnahme die Hinweise des Herstellers.
9. Stellen Sie das Gerät nicht in der Nähe von Heizkörpern, Öfen oder anderen Wärmequellen auf.
10. Kleben Sie in keinem Fall den Schutzkontakt des Steckers ab. Ein verpolungssicherer Stecker besitzt zwei Kontakte, von denen ein Kontakt breiter ist als der andere. Ein Schukostecker besitzt zwei Kontakte und einen dritten Erdungskontakt. Der breitere Kontakt des verpolungssicheren Steckers bzw. der Erdungskontakt des Schukosteckers dient Ihrer Sicherheit. Sollte der Stecker des mitgelieferten Netzkabels nicht in Ihre Steckdose passen, besorgen Sie sich im Fachhandel ein passendes Kabel.
11. Treten Sie nicht auf das Netzkabel, knicken Sie es nicht und behandeln Sie Stecker und Buchsen besonders vorsichtig.
12. Verwenden Sie ausschließlich Zubehör, das vom Hersteller für das Gerät vorgesehen ist.
13. Ziehen Sie den Netzstecker des Geräts bei Gewitter oder wenn Sie das Gerät längere Zeit nicht verwenden.
14. Lassen Sie alle Wartungsarbeiten von qualifiziertem Fachpersonal ausführen. Der Service-Fall tritt ein, wenn z. B. Netzkabel oder -stecker beschädigt sind, wenn Flüssigkeit oder Fremdkörper in das Gehäuse gelangt sind, das Gerät Regen oder Feuchtigkeit ausgesetzt war, das Gerät nicht ordnungsgemäß funktioniert, fallen gelassen oder anderweitig beschädigt wurde.
„UM DAS GERÄT VÖLLIG STROMLOS ZU MACHEN, ZIEHEN SIE DAS NETZTEILKABEL AUS DER GERÄTEBUCHSE.“
„WARNUNG: UM BRÄNDE ODER STROMSCHLÄGE ZU VERMEIDEN, SETZEN SIE DAS GERÄT NIEMALS REGEN ODER FEUCHTIGKEIT AUS. SORGEN SIE DAFÜR, DASS KEINE FLÜSSIGKEIT AUF DAS GERÄT TROPFT BZW. GESPRITZT WIRD UND STELLEN SIE NIEMALS FLÜSSIGKEITSBEHÄLTER (Z. B. VASEN) DARAUF.“
Dieses Symbol soll den Anwender auf nicht isolierte Leitungen und Kontakte im Geräteinneren hinweisen, an denen hohe Spannungen anliegen, die im Fall einer Berührung zu lebensgefährlichen Stromschlägen führen können.
Dieses Symbol soll den Anwender auf wichtige Bedien- sowie Service-Hinweise in den zugehörigen Handbüchern aufmerksam machen.
2120
Warnung!
Wichtige Sicherheitshinweise!
LESEN SIE DIE FOLGENDEN INFORMATIONEN SORGFÄLTIG DURCH. HEBEN SIE ALLE ANLEITUNGEN FÜR REFERENZWECKE AUF!
Beachten Sie alle Warnungen und folgen Sie den auf dem Produkt angebrachten Anweisungen!
Gefahr! Hohe interne Betriebsspannungen.
Öffnen Sie niemals das Gehäuse. Es befinden sich keine vom Anwender austauschbaren Teile im Gerät. Lassen Sie alle Wartungsarbeiten von qualifiziertem Fachpersonal ausführen.
Verwenden Sie zum Reinigen des Geräts ausschließlich ein trockenes Tuch.
Im Inneren von Verstärkern kann sich Kondensfeuchtigkeit bilden, wenn der Verstärker aus einer kalten in eine wärmere Umgebung gebracht wird. Warten Sie vor dem Einschalten, bis das Gerät die Raumtemperatur erreicht hat.
Nicht autorisierte Modifikationen am Gerät sind von Blackstar Amplification Ltd. ausdrücklich untersagt.
Führen Sie in keinem Fall irgendwelche Gegenstände in die Lüftungsschlitze im Gehäuse ein.
Setzen Sie das Gerät niemals Regen oder Feuchtigkeit aus.
Platzieren Sie das Gerät nicht auf instabilen Rollwagen, Ständern oder Tischen. Andernfalls könnte das Gerät herunterfallen und schwere Schäden am Produkt oder Verletzungen verursachen.
Die Lüftungsschlitze dürfen nicht verdeckt werden.
Dieses Produkt darf nicht in der Nähe von Wärmequellen wie Öfen, Heizkörpern oder einem anderen Wärme produzierenden Verstärker betrieben werden.
Verwenden Sie ausschließlich das mitgelieferte, mit dem Stromnetz in Ihrer Region kompatible Netzkabel.
Netzkabel müssen sehr sorgfältig behandelt und bei jeglichem Defekt umgehend ausgetauscht werden.
Entfernen Sie niemals den Erdungskontakt des Netzkabels.
Wenn Sie das Gerät längere Zeit nicht verwenden, ziehen Sie das Netzkabel.
Vor dem Einschalten muss der Lautsprecher wie in diesem Handbuch beschrieben mit dem vom Hersteller empfohlenen Kabel angeschlossen werden.
Ersetzen Sie beschädigte Sicherungen immer durch Sicherungen gleichen Typs.
Manipulieren Sie niemals den Schutzleiter des Netzsteckers.
Hohe Lautsprecherpegel können zu dauerhaften Hörschäden führen. Halten Sie sich nicht in direkter Nähe von mit hoher Lautstärke betriebenen Lautsprechern auf. Falls
Sie längere Zeit hohen Lautstärken ausgesetzt sind, verwenden Sie einen Gehörschutz.
Wenn das Gerät offenbar nicht normal arbeitet, obwohl Sie die Inbetriebnahme wie beschrieben vorgenommen haben, wenden Sie sich an einen qualifizierten Service-Techniker.
Das amerikanische Amt für Sicherheit und Gesundheitsschutz am Arbeitsplatz (OSHA) hat folgende Grenzwerte für Lärmbelastung festgelegt:
Dauer pro Tag in Stunden Lärmpegel in dBA, langsame Ansprechzeit8 906 924 953 972 1001½ 1021 105½ 110¼ oder weniger 115
Gemäß der OSHA kann eine anhaltende Beschallung über diese Grenzwerte hinaus zu Hörverlusten führen.
Für den Betrieb dieses Verstärkersystems empfiehlt es sich, einen Hörschutz im Gehörkanal oder über den Ohren zu tragen, um einen dauerhaften Hörverlust zu vermeiden, wenn die genannten Grenzwerte nicht eingehalten werden. Um sich gegen die potenziellen Gefahren hoher Schalldruckpegel zu schützen sollten alle Personen, die mit Geräten, die zur Ausgabe hoher Schalldruckpegel geeignet sind (z. B. dieser Verstärker), für die Dauer des Betrieb solcher Geräte einen Gehörschutz tragen.
Elektrische und elektronische Geräte dürfen nicht in den Hausmüll gegeben, sondern müssen entsprechend den staatlichen bzw. kommunalen Vorgaben entsorgt werden.
Deuts
ch
Deuts
ch
2322
Einleitung
Vielen Dank, dass Sie sich für den Blackstar HT Venue MkII Verstärker entschieden haben. Dieser Amp ist wie alle unsere Verstärker das Ergebnis unzähliger Stunden akribischer Arbeit durch unser erstklassiges Entwickler-Team. Die erfahrenen Musiker des Blackstar-Teams aus Northampton (UK) verfolgen ein einziges Ziel: Gitarristen das bestmögliche Equipment zur Verfügung zu stellen, damit diese sich optimal selbstverwirklichen können.
Alle Blackstar-Produkte wurden sowohl in unseren Labors als auch im Live-Betrieb auf Herz und Nieren getestet, um sicherzustellen, dass sie in puncto Zuverlässigkeit, Qualität und SOUND absolut kompromisslose Ergebnisse liefern.
Das flexible Design des HT Stage MkII mit drei Kanälen zeichnet sich durch die patentierte ISF-Schaltung (Infinite Shape Feature) aus. Dabei bleibt der Verstärker trotz umfangreicher Regelmöglichkeiten stets einfach und intuitiv zu bedienen. Bitte lesen Sie dieses Handbuch aufmerksam durch, um Ihr neues Blackstar-Produkt optimal nutzen zu können.
Wenn Sie mehr über die Blackstar-Produktreihe erfahren möchten, besuchen Sie unsere Webseite unter www.blackstaramps.com.
Vielen Dank!
Das Blackstar-Team
Merkmale
Dieser HT Venue MkII ist ein extrem vielseitiger Verstärker, der sich für eine Vielzahl unterschiedlicher Stilistiken und Anwendungen empfiehlt.
Der Clean-Kanal bietet zwei Voicings, die auf einem amerikanischen bzw. britischen Schaltungsdesign basieren. Über die Voice-Taste wird die Ansprache der Vorstufe, des EQ sowie das Gain-Verhalten der Röhren und die Dämpfung der Endstufe variiert. Der amerikanisch inspirierte Sound steht dabei für eine cleane, höhenreiche und direkte Ansprache mit einem druckvollen Bassfundament, während der britische Sound deutlich dynamischer anspricht, jedoch weniger Bass bietet: Dafür übersteuert der Sound im Mittenbereich schneller, wenn man mit die Dynamik variiert. Die gewünschte Voice-Einstellung kann auch über einen Fußschalter gewählt werden.
Der HT Stage MkII bietet zwei Overdrive-Kanäle, die über einen gemeinsamen EQ verfügen. Ähnlich wie der Clean-Kanal kann das Voicing für beide Overdrive-Kanäle mit der Voice-Taste umgeschaltet werden, sodass sich der Charakter jedes Kanals nach Bedarf ändert und so eine große Palette an übersteuerten Sounds zur Verfügung steht.
Wie im Clean-Kanal kann jedes Voicing auch über den Fußschalter aufgerufen werden. Wenn Sie zwischen den Kanälen umschalten, lädt der Verstärker immer das für den jeweiligen Kanal zuletzt gewählte Voicing.
Die Overdrive-Kanäle zeichnen sich durch einen Sound aus, der ausreichend Gain-Reserven bietet, jedoch kein übermäßiges Top-End liefert, wie man es von anderen Schaltungen kennt. Das ist das Ergebnis der einzigartigen Shaping-Technologien in der Vor- und Endstufe: Dabei werden Sie als Gitarrist sicher zu schätzen wissen, dass Sie allein mit Hilfe des Volume-Potis zwischen Overdrive- und wunderschönen Clean-Sounds variieren können. Selbst bei extremen Einstellungen klingen die Overdrive-Kanäle immer natürlich und offen.
Die patentierte ISF-Steuerung (Infinite Shape Feature) gibt es nur bei Blackstar: Sie stellt einen großen Fortschritt in Bezug auf eine flexible Klangregelung dar. Der ISF-Regler erlaubt es, die Klangfarbe der 3-Band-Klangregelung zwischen einer Ansprache nach US-amerikanischen Vorbild auf der einen und britischem Charakter auf der anderen Seite zu variieren. Natürlich liegen zwischen diesen beiden Extremen unendlich viele andere Klangfärbungen, die sich mit anderen Schaltungen gar nicht realisieren lassen.
Der Verstärker integriert zudem ein natürlich klingendes Digital-Reverb, das über den Reverb-Regler auf der Vorderseite eingestellt und über den optional erhältlichen 5-Wege-Fußschalter an- bzw. abgeschaltet werden kann. Über einen Schalter auf der Rückseite wählen Sie zwischen den Optionen „Dark“ und „Light“. Die Stellung Dark basiert auf einem Room-Reverb, während die Position Light einem Plattenhall nachempfunden ist.Über den Power-Schalter auf der Vorderseite schalten Sie den Verstärker zwischen maximaler und reduzierter Leistung (10%) um. Das bedeutet, dass Sie die Klangtiefe der EL34-Endstufe in jeder Lautstärke ausschöpfen können und der für Endstufenröhren unter Volllast typische Sound erhalten bleibt.
Über den USB-Anschluss können Sie das Gitarrensignal auf bis zu vier Kanälen
Deuts
ch
Deuts
ch
2524
(Dry, Preamp Out und stereophones Signal der Lautsprechersimulation) zu Aufnahmezwecken auf einen Computer ausgeben.
Über zwei weitere Ausgänge auf der Rückseite (Stereoklinken- und symmetrische XLR-Buchsen) können Sie das Signal der Lautsprechersimulation zum Üben oder für den Live-Einsatz bzw. die Aufnahme auf externe Geräte speisen.
Vorderseite
1. Input
Hier schließen Sie Ihre Gitarre an. Verwenden Sie in jedem Fall ein hochwertiges geschirmtes Gitarrenkabel.
Clean-Kanal
2. Wahlschalter Clean
Mit diesem Schalter aktivieren Sie den Clean-Kanal. Wenn die grüne LED leuchtet, ist der Clean-Kanal aktiv.
3. Clean Volume
Mit diesem Regler steuern Sie die Lautstärke im Clean-Kanal. Im Uhrzeigersinn heben Sie die Lautstärke an. Im Rechtsanschlag des Reglers setzt insbesondere im „British“-Betrieb bereits eine Übersteuerung ein.
4. Voice-Schalter Clean
Mit diesem Drucktaster schalten Sie zwischen zwei Clean-Voicings um. Die Einstellung „American“ steht dabei für einen sehr cleanen und höhenreichen Sound, der jedoch ein kräftiges und straffes Bassfundament bietet: Dieses Voicing ist aktiv, wenn die Voice-LED nicht leuchtet. In der „British“-Einstellung ist die Bassansprache weniger druckvoll, dafür klingen die Mitten wärmer und der Verstärker reagiert stärker auf den Ausgangspegel der Gitarre und die Dynamik des Gitarristen: Dieses Voicing ist aktiv, wenn die Voice-LED leuchtet. Wenn Sie zwischen beiden Voicings umschalten, wird neben dem EQ- auch das Gain-Verhalten der Röhren geändert.
5. Bass
Der Bass-Regler steuert den Anteil der tiefen Frequenzen im Gesamt-Sound. Im Linksanschlag bietet der Sound einen deutlich knackigeren und strafferen Charakter. Wenn Sie den Regler im Uhrzeigersinn aufdrehen, nimmt die Bassansprache im Kanal zu.
6. Treble
Mit dem Regler Treble können Sie den Höhenanteil im Gesamt-Sound einstellen. Bei niedrigen Einstellungen (gegen den Uhrzeigersinn) erhält der Sound einen wärmeren und dumpferen Charakter. Wenn Sie den Treble-Regler im Uhrzeigersinn aufdrehen, wird der Sound immer höhenreicher.
Kanal OD 1 (Overdrive 1)
7. Wahlschalter OD 1
Mit diesem Schalter aktivieren Sie den Kanal OD 1. Wenn die gelbe LED leuchtet, ist der Kanal OD 1 aktiv.
8. OD 1 Gain
Mit dem OD 1 Gain-Regler steuern Sie den Übersteuerungs- oder Verzerrungsgrad im Kanal OD 1. Niedrige Einstellungen (gegen den Uhrzeigersinn) liefern cleane bis angezerrte Sounds. Wenn der Gain-Regler (im Uhrzeigersinn) aufgedreht wird,
Deuts
ch
Deuts
ch
2726
nimmt der Verzerrungsgrad mehr und mehr zu und wechselt von crunchigen Sounds bis hin zu stark übersteuerten Sounds in der Maximalstellung.
9. OD 1 Volume
Mit diesem Regler steuern Sie die Gesamtlautstärke im Kanal OD 1. Im Uhrzeigersinn heben Sie die Lautstärke an.
10. Voice-Schalter OD 1
Mit diesem Drucktaster schalten Sie zwischen den zwei Voicings für den Kanal OD 1 um. Wenn die gelbe LED nicht leuchtet, bietet dieser Kanal ein klassisches Overdrive-Voicing. Wenn die gelbe LED leuchtet, klingt das Voicing für den Overdrive-Sound moderner und bietet dank einer geringeren Dämpfung der Endstufe eine stärkere Bass-Ansprache sowie einen aggressiveren Charakter.
Kanal OD 2 (Overdrive 2)
11. Wahlschalter OD 2
Mit diesem Schalter aktivieren Sie den Kanal OD 2. Wenn die rote LED leuchtet, ist der Kanal OD 2 angewählt.
12. OD 2 Gain
Mit dem OD 2 Gain-Regler steuern Sie den Grad der Übersteuerung bzw. Verzerrung für diesen Kanal. Bei niedrigen Einstellungen (gegen den Uhrzeigersinn) wird der Sound dezent übersteuert. Wenn Sie den Gain-Regler im Uhrzeigesinn aufdrehen, wechselt der Charakter von Crunch zu einem gesättigten High-Gain-Sound für Lead-Passagen.
13. OD 2 Volume
Mit diesem Regler steuern Sie die Gesamtlautstärke im Kanal OD 2. Im Uhrzeigersinn heben Sie die Lautstärke an.
14. Voice-Schalter OD 2
Mit diesem Drucktaster schalten Sie zwischen den zwei Voicings für den Kanal OD 2 um. Wenn die rote LED nicht leuchtet, liefert der Kanal eine „klassische“, aber singendere Übersteuerung mit einer mittleren Dämpfung der Endstufe. Wenn die rote LED leuchtet, klingt das Voicing für den Overdrive-Sound moderner und bietet einen kräftigen Mittenboost vor der Overdrive-Stufe sowie aufgrund der geringeren Endstufen-Dämpfung einen aggressiveren Grundcharakter.
OD 1 und OD 2 EQ
15. Bass
Der Bass-Regler steuert den Anteil der tiefen Frequenzen im Gesamt-Sound. Dieser Verstärker bietet eine umfangreiche Klangregelung, mit der Sie den Sound zwischen knackig und aggressiv (gegen den Uhrzeigersinn) oder warm und mächtig (im Uhrzeigersinn) einstellen können.
16. Middle
Der Middle-Regler steuert den Anteil der Mittenfrequenzen im Gesamt-Sound. Die Mitten sind insbesondere für den Grundsound entscheidend. In der Minimalposition (komplett gegen den Uhrzeigersinn) ist der Sound sehr aggressiv und hohl, was sich speziell für knackige Rhythmus-Parts eignet. Wenn der Mitten-Regler angehoben wird (im Uhrzeigersinn), nimmt der Grundton-Anteil zu, was sich für singende Lead-Sounds empfiehlt.
17. Treble
Mit dem Regler Treble können Sie gezielt den Höhenanteil im Gesamt-Sound einstellen. Bei niedrigen Einstellungen (gegen den Uhrzeigersinn) erhält der Sound einen wärmeren und dumpferen Charakter. Wenn der Treble-Regler angehoben wird (im Uhrzeigersinn), wird der Sound immer höhenreicher. In der Maximalposition klingt der Sound schließlich aggressiv und schneidend.
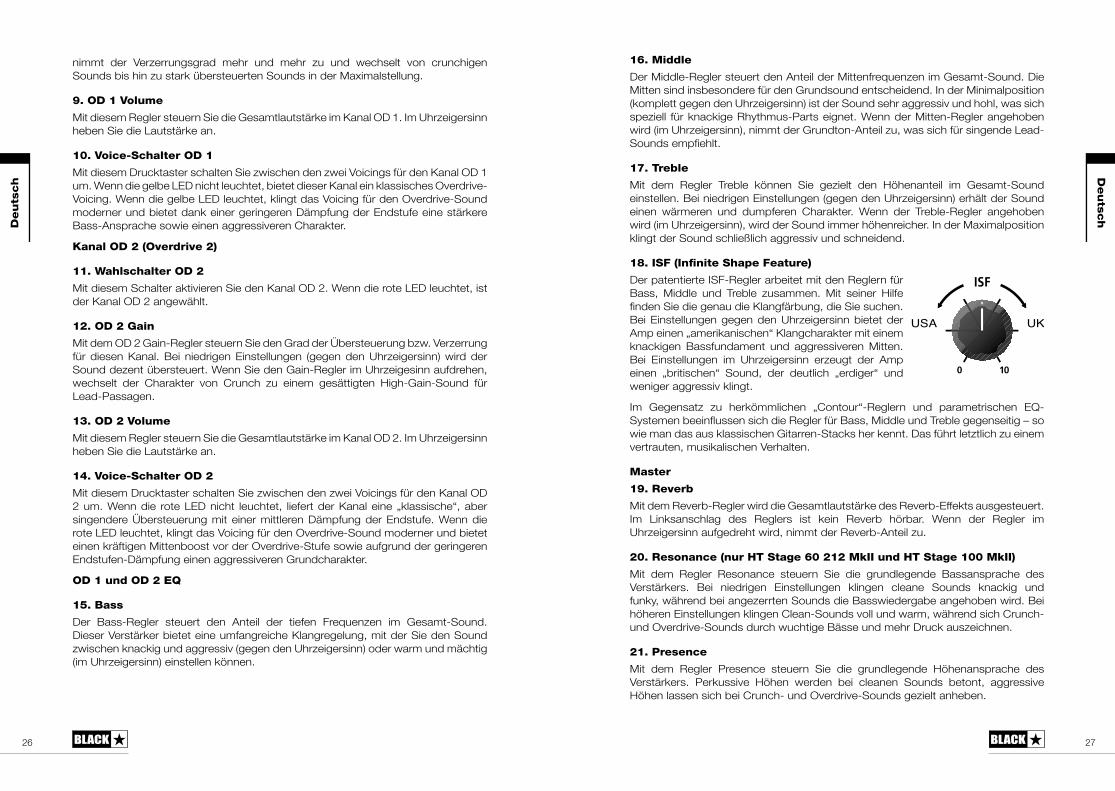
18. ISF (Infinite Shape Feature)
Der patentierte ISF-Regler arbeitet mit den Reglern für Bass, Middle und Treble zusammen. Mit seiner Hilfe finden Sie die genau die Klangfärbung, die Sie suchen. Bei Einstellungen gegen den Uhrzeigersinn bietet der Amp einen „amerikanischen“ Klangcharakter mit einem knackigen Bassfundament und aggressiveren Mitten. Bei Einstellungen im Uhrzeigersinn erzeugt der Amp einen „britischen“ Sound, der deutlich „erdiger“ und weniger aggressiv klingt.
Im Gegensatz zu herkömmlichen „Contour“-Reglern und parametrischen EQ-Systemen beeinflussen sich die Regler für Bass, Middle und Treble gegenseitig – so wie man das aus klassischen Gitarren-Stacks her kennt. Das führt letztlich zu einem vertrauten, musikalischen Verhalten.
Master
19. Reverb
Mit dem Reverb-Regler wird die Gesamtlautstärke des Reverb-Effekts ausgesteuert. Im Linksanschlag des Reglers ist kein Reverb hörbar. Wenn der Regler im Uhrzeigersinn aufgedreht wird, nimmt der Reverb-Anteil zu.
20. Resonance (nur HT Stage 60 212 MkII und HT Stage 100 MkII)
Mit dem Regler Resonance steuern Sie die grundlegende Bassansprache des Verstärkers. Bei niedrigen Einstellungen klingen cleane Sounds knackig und funky, während bei angezerrten Sounds die Basswiedergabe angehoben wird. Bei höheren Einstellungen klingen Clean-Sounds voll und warm, während sich Crunch- und Overdrive-Sounds durch wuchtige Bässe und mehr Druck auszeichnen.
21. Presence
Mit dem Regler Presence steuern Sie die grundlegende Höhenansprache des Verstärkers. Perkussive Höhen werden bei cleanen Sounds betont, aggressive Höhen lassen sich bei Crunch- und Overdrive-Sounds gezielt anheben.
Deuts
ch
Deuts
ch
USA UK
2928
22. Volume
Dieser Regler steuert die Gesamtlautstärke Ihres Verstärkers. Im Uhrzeigersinn heben Sie die Lautstärke an.
23. Power-Schalter
Mit diesem Schalter lässt sich die Leistung der Ausgangsstufe von maximal auf 10% reduzieren. Das bedeutet, dass Sie die Klangtiefe der EL34-Ausgangsstufe auch bei niedriger Lautstärke voll ausschöpfen können, wodurch sich der HT Venue MkII bestens für Aufnahmen, kleinere Gigs oder auch das Üben zuhause empfiehlt. Da diese Schaltung direkt mit der Spannungsversorgung der Endstufe zusammenarbeitet, treten bei diesem Verfahren keine Klangverluste auf, wie man sie von anderen Systemen zur Leistungsreduktion kennt.
24. Power-LED
Die Power-LED leuchtet, wenn der Verstärker eingeschaltet ist.
25. Standby
Mit diesem Schalter aktivieren Sie die Ausgangsstufe. Aktivieren Sie diesen Schalter frühestens 30 Sekunden nach dem Power-Schalter (26) und deaktivieren Sie das Standby möglichst wieder, bevor Sie den Power-Schalter auf Off schalten. Während kurzer Spielpausen können Sie den Verstärkerausgang mit diesem Schalter an- und abschalten. Zum Schutz vor unerwünschten Störgeräuschen, die über den Lautsprecher wiedergegeben werden können, empfehlen wir Ihnen, den Standby immer ein paar Sekunden vor dem Power-Schalter auszuschalten.
26. Power
Mit diesem Schalter schalten Sie den Verstärker ein bzw. aus. Aktivieren Sie diesen Schalter in jedem Fall vor dem Standby-Schalter (25).
Rückseite
1. Sicherung
Der Wert für die Sicherung ist auf der Rückseite vermerkt. Verwenden Sie in keinem Fall eine Sicherung mit falschen Werten und versuchen Sie nicht, die Sicherung zu überbrücken.
2. Netzanschluss
Hier wird das mitgelieferte Kaltgerätenetzkabel angeschlossen. Das Kabel muss an einer Netzsteckdose angeschlossen werden, die in puncto Spannung, Leistung und Netzfrequenz den auf der Rückseite vermerkten Spezifikationen entspricht. Im Zweifelsfall wenden Sie sich an einen qualifizierten Techniker/Elektriker.
3. H.T.- Sicherung
Der Wert für die H.T.- Sicherung ist auf der Rückseite vermerkt. Verwenden Sie in keinem Fall eine Sicherung mit falschen Werten und versuchen Sie nicht, die Sicherung zu überbrücken.
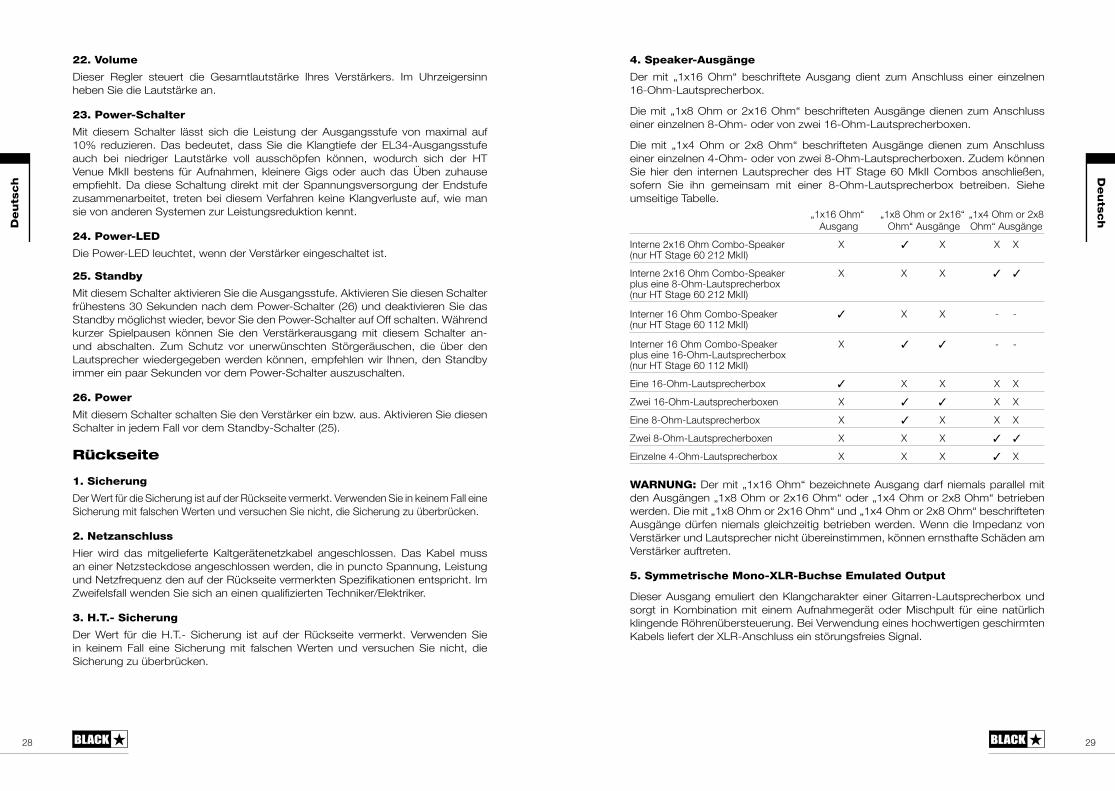
4. Speaker-Ausgänge
Der mit „1x16 Ohm“ beschriftete Ausgang dient zum Anschluss einer einzelnen 16-Ohm-Lautsprecherbox.
Die mit „1x8 Ohm or 2x16 Ohm“ beschrifteten Ausgänge dienen zum Anschluss einer einzelnen 8-Ohm- oder von zwei 16-Ohm-Lautsprecherboxen.
Die mit „1x4 Ohm or 2x8 Ohm“ beschrifteten Ausgänge dienen zum Anschluss einer einzelnen 4-Ohm- oder von zwei 8-Ohm-Lautsprecherboxen. Zudem können Sie hier den internen Lautsprecher des HT Stage 60 MkII Combos anschließen, sofern Sie ihn gemeinsam mit einer 8-Ohm-Lautsprecherbox betreiben. Siehe umseitige Tabelle. „1x16 Ohm“ „1x8 Ohm or 2x16“ „1x4 Ohm or 2x8 Ausgang Ohm“ Ausgänge Ohm“ Ausgänge
Interne 2x16 Ohm Combo-Speaker X ✓ X X X (nur HT Stage 60 212 MkII)
Interne 2x16 Ohm Combo-Speaker X X X ✓ ✓ plus eine 8-Ohm-Lautsprecherbox (nur HT Stage 60 212 MkII)
Interner 16 Ohm Combo-Speaker ✓ X X - - (nur HT Stage 60 112 MkII)
Interner 16 Ohm Combo-Speaker X ✓ ✓ - - plus eine 16-Ohm-Lautsprecherbox (nur HT Stage 60 112 MkII)
Eine 16-Ohm-Lautsprecherbox ✓ X X X X
Zwei 16-Ohm-Lautsprecherboxen X ✓ ✓ X X
Eine 8-Ohm-Lautsprecherbox X ✓ X X X
Zwei 8-Ohm-Lautsprecherboxen X X X ✓ ✓
Einzelne 4-Ohm-Lautsprecherbox X X X ✓ X
WARNUNG: Der mit „1x16 Ohm“ bezeichnete Ausgang darf niemals parallel mit den Ausgängen „1x8 Ohm or 2x16 Ohm“ oder „1x4 Ohm or 2x8 Ohm“ betrieben werden. Die mit „1x8 Ohm or 2x16 Ohm“ und „1x4 Ohm or 2x8 Ohm“ beschrifteten Ausgänge dürfen niemals gleichzeitig betrieben werden. Wenn die Impedanz von Verstärker und Lautsprecher nicht übereinstimmen, können ernsthafte Schäden am Verstärker auftreten.
5. Symmetrische Mono-XLR-Buchse Emulated Output
Dieser Ausgang emuliert den Klangcharakter einer Gitarren-Lautsprecherbox und sorgt in Kombination mit einem Aufnahmegerät oder Mischpult für eine natürlich klingende Röhrenübersteuerung. Bei Verwendung eines hochwertigen geschirmten Kabels liefert der XLR-Anschluss ein störungsfreies Signal.
Deuts
ch
Deuts
ch
3130
6. Stereoklinkenbuchse Emulated Output
Dieser Ausgang emuliert den Klangcharakter einer Gitarren-Lautsprecherbox und sorgt in Kombination mit einem Aufnahmegerät oder Mischpult für eine natürlich klingende Röhrenübersteuerung. Verwenden Sie in jedem Fall hochwertige geschirmte Kabel. Die stereophone Klinkenausgangsbuchse erlaubt zudem den Anschluss eines Kopfhörers für ein geräuschloses Üben.
ANMERKUNG: Die Emulated Outputs (XLR und Stereoklinke) sind auch im Standby-Betrieb aktiv. Auf diese Weise können Sie unabhängig von den angeschlossenen Lautsprechern im Standby-Betrieb lautlos üben.
7. Schalter Emulated Output Cabinet
Mit diesem Schalter können Sie die Emulation einer geschlossenen 4x12-er oder einer auf der Rückseite offenen 1x12-Box für den Speaker Emulated Output anwählen. Diese Einstellung bezieht sich auf die XLR- und Stereoklinkenausgänge.
8. Reverb Dark/Light
Wenn der Schalter nicht gedrückt ist (Position „Dark“), simuliert das interne Digital-Reverb den warmen Klangcharakter in einem „Raum“. Wenn der Schalter gedrückt ist („Light“), erzeugt das Reverb den deutlich höhenreicheren und luftigeren Charakter eines Platten-Halls. Die gewählte Einstellung gilt für alle Kanäle und Voicings.
9. Effects Loop Level
Mit dem Schalter Effects Loop Level können Sie den Effekt-Loop wahlweise mit +4dBV oder -10dBV betreiben: Entsprechend können Sie professionelles Equipment (Einstellung +4dBV) oder Effektpedale mit einem für Gitarren ausgelegten Pegel (Einstellung -10dBV) anschließen.
10. Effects Loop Return
Hier schließen Sie den (Mono-)Ausgang eines externen Effektgeräts an.
11. Effects Loop Send
Hier schließen Sie den (Mono-)Eingang eines externen Effektgeräts an.
12. Buchse für den 5-Wege-Fußschalter
Hier wird der optionale 5-Wege-Fußschalter FS-14 (nicht im Lieferumfang enthalten) angeschlossen. Dieser Fußschalter bietet direkten Zugriff auf alle Kanäle und Voicings und kann zudem die globalen Boost- und Reverb-Funktionen schalten. Verwenden Sie zum Anschluss am Verstärker das im Lieferumfang des FS-14 enthaltene Kabel. Alternativ können Sie ein hochwertiges, geschirmtes Gitarrenkabel verwenden.
Durch Drücken einer Kanal-Taste am Fußschalter wird der zugehörige Kanal aktiviert. Durch Drücken der Taste eines aktiven Kanals schalten Sie seine Voice um. Die zuletzt gewählte Voice wird beim Umschalten auf den jeweiligen Kanal wieder aktiviert. Der Boost-Schalter sorgt für eine zusätzliche Verstärkung von 6 dB und kann auf jeden Kanal bzw. jede Voice geschaltet werden. Die Reverb-Taste (de-)aktiviert den Halleffekt global für alle Kanäle.
13. Buchse für den 2-Wege-Fußschalter
Hier wird der mitgelieferte 2-Wege-Fußschalter angeschlossen. Mit dem Fußschalter FS-15 können Sie die zwei Voices für den Clean-Kanal und je eine Voice in jedem Overdrive-Kanal aktivieren.
Durch Drücken der Kanal-Taste am FS-15 schalten Sie zwischen dem Clean- und einem Overdrive-Kanal um. Wenn der Clean-Kanal aktiv ist, schalten Sie durch Drücken der Voice-Taste am FS-15 zwischen den beiden Clean-Voicings um. Wenn ein Overdrive-Kanal aktiv ist, schalten Sie durch Drücken der Voice-Taste am FS-15 zwischen OD 1 und OD 2 um.
Sie können die Voicings für OD 1 und OD 2 weiterhin über das Bedienfeld am Verstärker auswählen: Das gewählte Voicing bleibt dann auch beim Umschalten der Kanäle erhalten.
Wenn der mitgelieferte Fußschalter FS-15 nicht zur Verfügung steht, können Sie alternativ auch einen herkömmlichen 2-Wege-Fußschalter mit TRS-Klinkenstecker anschließen.
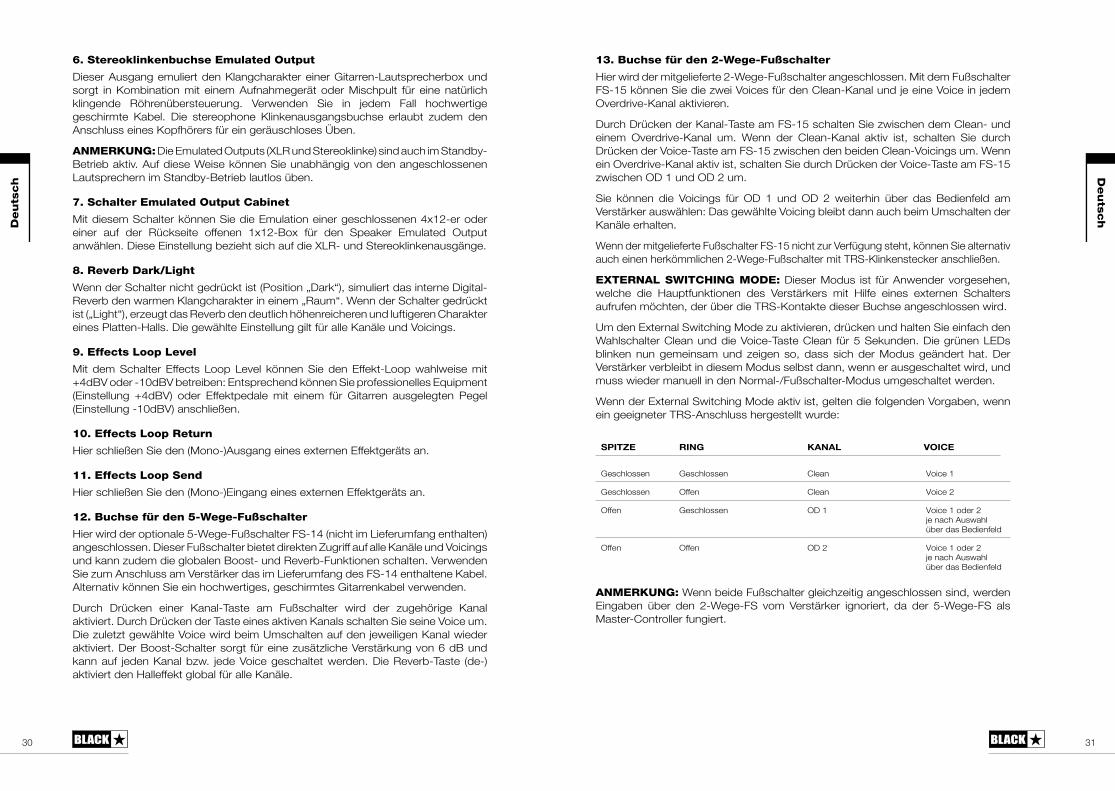
EXTERNAL SWITCHING MODE: Dieser Modus ist für Anwender vorgesehen, welche die Hauptfunktionen des Verstärkers mit Hilfe eines externen Schalters aufrufen möchten, der über die TRS-Kontakte dieser Buchse angeschlossen wird.
Um den External Switching Mode zu aktivieren, drücken und halten Sie einfach den Wahlschalter Clean und die Voice-Taste Clean für 5 Sekunden. Die grünen LEDs blinken nun gemeinsam und zeigen so, dass sich der Modus geändert hat. Der Verstärker verbleibt in diesem Modus selbst dann, wenn er ausgeschaltet wird, und muss wieder manuell in den Normal-/Fußschalter-Modus umgeschaltet werden.
Wenn der External Switching Mode aktiv ist, gelten die folgenden Vorgaben, wenn ein geeigneter TRS-Anschluss hergestellt wurde:
SPITZE RING KANAL VOICE
Geschlossen Geschlossen Clean Voice 1
Geschlossen Offen Clean Voice 2
Offen Geschlossen OD 1 Voice 1 oder 2je nach Auswahl über das Bedienfeld
Offen Offen OD 2 Voice 1 oder 2je nach Auswahl über das Bedienfeld
ANMERKUNG: Wenn beide Fußschalter gleichzeitig angeschlossen sind, werden Eingaben über den 2-Wege-FS vom Verstärker ignoriert, da der 5-Wege-FS als Master-Controller fungiert.
Deuts
ch
Deuts
ch
3332
14. USB-Buchse Emulated Output
Diese USB-Buchse vom Typ B dient zum Anschluss an einen Computer über ein geeignetes (optionales) Kabel. Sie kann mehrere Ein- und Ausgänge gleichzeitig übertragen.
Die Kommunikation des Verstärkers mit einem PC, Mac oder einem anderen kompatiblen Aufnahmegerät erfolgt über Standard-Audiotreiber. Es werden keine spezifischen Treiber benötigt. Eine kurze Anleitung zur USB-Aufnahme mit minimaler Latenz finden Sie unter:
www.blackstaramps.com/usbrecording
ANMERKUNG: Schließen Sie den Verstärker immer über einen Haupt-USB-Port des Computers an (meist auf der Rückseite zu finden).
Der Verstärker erscheint innerhalb der Aufnahme-Software auf dem Computer als Audio-Interface.
Das Audiosignal Ihres Verstärkers wird über den USB-Anschluss gleichzeitig über vier unabhängige Kanäle an Ihren Computer ausgegeben:
Kanal 1: Linker Kanal der Stereo-Emulation – das bearbeitete Gitarrensignal mit Lautsprecher-Emulation. Zudem wird hier der linke Kanal des internen Stereo-Reverbs übertragen.
Kanal 2: Rechter Kanal der Stereo-Emulation – das bearbeitete Gitarrensignal mit Lautsprecher-Emulation. Zudem wird hier der rechte Kanal des internen Stereo-Reverbs übertragen.
Kanal 3: Preamp-Ausgang – das Signal der Kanäle, Voices und der EQ-Stufen der Vorverstärker, Abgriff vor dem Effekt und ohne Lautsprecher-Emulation. Ideal geeignet für den Einsatz mit Ihren eigenen Effekten und Plug-Ins zur Lautsprechersimulation in Ihrer Aufnahmesoftware/DAW.
Kanal 4: Unbearbeitetes Gitarrensignal – das Direktsignal Ihrer Gitarre, das auch am Verstärker anliegt.
Diese Audiostreams können gleichzeitig mit Ihrer Aufnahmesoftware/DAW aufgenommen werden.
TIPP: Um den Sound mit einem Stereo-Reverb-Effekt aufzunehmen, pannen Sie den linken bzw. rechten Kanal des Emulated-Output-Signals im Mix zu 100% nach links bzw. rechts.
Deuts
ch
Deuts
ch
Ihr HT Stage MkII lässt sich auch mit einem Audiosignal von Ihrem Computer speisen:
Kanal 1: Line-Eingang, linker Kanal – für das Monitoring oder die Wiedergabe von Dateien und Backing-Tracks über den Emulated Output.
Kanal 2: Line-Eingang, rechter Kanal – für das Monitoring oder die Wiedergabe von Dateien und Backing-Tracks über den Emulated Output.
16. Kensington-Schloss
Diese speziell geformte Öffnung wird als Kensington Security Slot oder K-Slot bezeichnet und dient dazu, den Verstärker über ein kompatibles Kensington-Schloss gegen Diebstahl zu schützen.Weitere Informationen finden Sie unter www.kensington.com
3534
Technische Spezifikationen
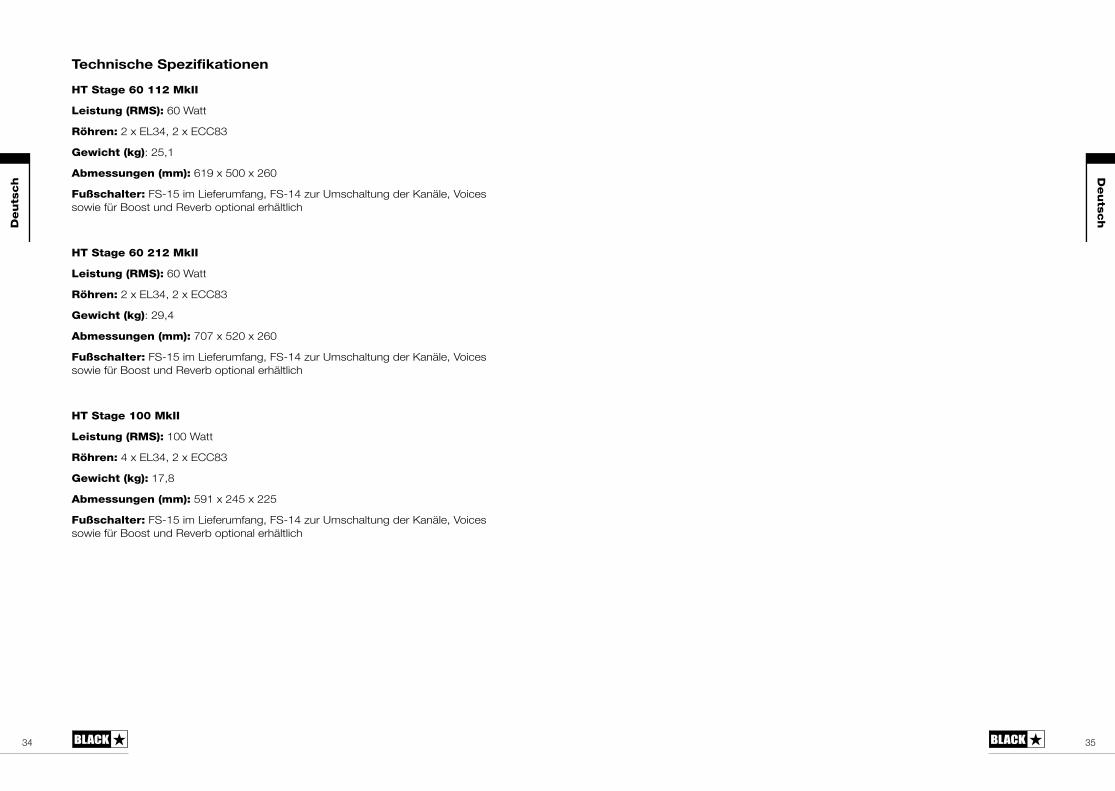
HT Stage 60 112 MkII
Leistung (RMS): 60 Watt
Röhren: 2 x EL34, 2 x ECC83
Gewicht (kg): 25,1
Abmessungen (mm): 619 x 500 x 260
Fußschalter: FS-15 im Lieferumfang, FS-14 zur Umschaltung der Kanäle, Voices sowie für Boost und Reverb optional erhältlich
HT Stage 60 212 MkII
Leistung (RMS): 60 Watt
Röhren: 2 x EL34, 2 x ECC83
Gewicht (kg): 29,4
Abmessungen (mm): 707 x 520 x 260
Fußschalter: FS-15 im Lieferumfang, FS-14 zur Umschaltung der Kanäle, Voices sowie für Boost und Reverb optional erhältlich
HT Stage 100 MkII
Leistung (RMS): 100 Watt
Röhren: 4 x EL34, 2 x ECC83
Gewicht (kg): 17,8
Abmessungen (mm): 591 x 245 x 225
Fußschalter: FS-15 im Lieferumfang, FS-14 zur Umschaltung der Kanäle, Voices sowie für Boost und Reverb optional erhältlich
Deuts
ch
Deuts
ch

3736
Fra
nçais
Fra
nçais
Les éléments électriques et électroniques doivent être jetés séparément, dans les vide-ordures prévus à cet effet par votre municipalité.
Consignes de sécurités importantes !
LISEZ LES INFORMATIONS SUIVANTES ATTENTIVEMENT. CONSERVEZ TOUTES LES CONSIGNES POUR RÉFÉRENCE ULTÉRIEURE !
Respectez tous les avertissements et toutes les consignes figurant sur le produit !
Danger ! Hautes tensions internes.
N’ouvrez pas le boîtier de l’appareil. Cet appareil ne possède aucune pièce sur laquelle l’utilisateur puisse intervenir. Confiez toutes les réparations à un réparateur qualifié.
Nettoyez l’appareil avec un chiffon sec uniquement.
Il est possible que de la condensation se forme à l’intérieur d’un amplificateur s’il est transféré d’un environnement froid à un endroit plus chaud. Il est conseillé d’attendre que l’appareil ait atteint la température ambiante avant de l’allumer.
La modification non autorisée de cet appareil est expressément interdite par Blackstar Amplification plc.
N’introduisez jamais d’objets dans les fentes de ventilation du boîtier de l’appareil.
N’exposez pas cet appareil à la pluie, à des liquides ni à aucune forme d’humidité.
Respectez tous les avertissements et toutes les consignes figurant sur le produit !
Evitez de poser un contenant rempli de liquide au dessus de l’appareil!
Ne placez pas ce produit sur un chariot, un guéridon ou une table instable. Il pourrait tomber et ce faisant sérieusement s’endommager ou causer des blessures !
Ne couvrez pas les fentes de ventilation ni les ouvertures et ne les obstruez pas non plus.
Évitez de placer ce produit près d’une source de chaleur telle qu’un poêle, un radiateur ou un autre amplificateur produisant de la chaleur.
Utilisez uniquement le cordon d’alimentation fourni car il est compatible avec la tension de l’alimentation générale de votre secteur.
Manipulez toujours les cordons d’alimentation avec le plus grand soin. Remplacez-les s’ils sont endommagés.
Ne détachez jamais la prise de terre du cordon d’alimentation.
Débranchez le cordon d’alimentation en cas d’inutilisation prolongée de l’appareil.
Avant d’allumer l’appareil, branchez l’enceinte de la manière décrite dans la notice d’emploi à l’aide du cordon recommandé par le fabricant.
Remplacez toujours les fusibles endommagés par des fusibles du type et du calibre appropriés.
Ne débranchez jamais la connexion à la terre de protection.
À des niveaux élevés, le volume des enceintes peut causer des pertes auditives définitives. Par conséquent, évitez de rester à proximité des enceintes lorsque le volume est élevé. Portez des protecteurs d’oreilles en cas d’exposition continue à des niveaux sonores élevés.
Si le produit ne fonctionne pas normalement alors que vous respectez la notice d’emploi, confiez-le à un réparateur qualifié.
La loi américaine sur la santé et la sécurité du travail indique la durée d’exposition autorisée à différents niveaux sonores :
Durée par jour en heures Niveau sonore (dBA), réponse lente8 906 924 953 972 1001½ 1021 105½ 110¼ ou moins de 115
D’après cette loi, toute exposition d’une durée supérieure aux limites autorisées ci-dessus peut entraîner une perte auditive.
Des protecteurs d’oreilles doivent être portés dans le canal auditif ou sur l’oreille lors de l’utilisation de ce système d’amplification afin d’éviter toute perte auditive permanente si l’exposition dépasse les limites susmentionnées. Afin d’éviter toute exposition potentiellement dangereuse à des niveaux de pression acoustique élevés, il est conseillé que toutes les personnes exposées à des appareils capables de produire des niveaux de pression acoustique élevés tels que ce système d’amplification utilisent des protecteurs d’oreilles lors de l’utilisation de l’appareil.
3938
Introduction
Merci d’avoir acheté cet amplificateur Blackstar HT Venue MkII. Comme tous nos produits, cet ampli est le résultat d’innombrables heures de recherche et de développement rigoureux par notre équipe de conception de classe mondiale. Basée à Northampton (Royaume-Uni), l’équipe Blackstar est composée de musiciens expérimentés et le seul but du processus de développement est de fournir aux guitaristes les outils d’expression par excellence.
Tous les produits Blackstar sont soumis à de nombreux tests en laboratoire et en conditions réelles pour s’assurer d’une fiabilité et d’une qualité sans compromis, et surtout du SON.
La conception très souple à trois canaux du HT Stage MkII présente le contrôle ISF (Infinite Shape Feature) breveté et bien qu’il comporte un ensemble de contrôles complet, il reste intuitif et simple d’utilisation. Veuillez lire consciencieusement la totalité du manuel pour vous assurer de tirer le maximum de ce nouveau produit Blackstar.
Si vous aimez ce que vous entendez et souhaitez en savoir plus sur la gamme de produits Blackstar, veuillez vous rendre sur notre site internet www.blackstaramps.com.
Merci !
L’équipe Blackstar
Fonctionnalités
Ce HT Venue MkII est un amplificateur très polyvalent adapté à une large gamme de situations et de styles de jeu.
Le canal Clean a deux modes : l’un basé sur un circuit américain classique, et l’autre sur un son britannique classique. L’interrupteur Voice reconfigure l’harmonisation, l’égaliseur et la structure du gain de la lampe du préampli, ainsi que l’amortissement de l’amplificateur de puissance. Cela créé une réponse de basse claire, brillante et fine, mais ferme pour le son américain et un « carillon » très réactif avec des basses plus vagues pour le son britannique pouvant être poussées dans une saturation de milieu de gamme lorsqu’elles sont mises à rude épreuve. Le réglage Voice peut aussi être sélectionné à l‘aide d‘un contrôleur au pied.
Le HT Stage MkII présente deux canaux saturés (Overdrive) qui partagent une partie égaliseur commune et, tout comme pour le canal Clean, chaque canal Overdrive comporte un interrupteur Voice permettant de changer le caractère de chaque canal, apportant ainsi une large palette de sons saturés.
Comme pour le canal Clean, chacune de ces voix peut aussi être sélectionnée à l’aide d’un contrôleur au pied. Lorsque vous changez de canal, l’amplificateur rappellera le réglage Voice spécifique utilisé pour la dernière fois sur ce canal.
Les canaux saturés sont caractérisés par un son ayant un gain élevé, mais sans « crépitements » d’aigus que l’on retrouve souvent dans des conceptions similaires. C’est le résultat de techniques d’élaboration uniques de préamplificateur et d’amplificateur de puissance, qui profitent également au musicien puisque les saturations sont joliment épurées à mesure que le volume de la guitare est réduit. Les canaux saturés gardent un son naturel, même aux réglages les plus extrêmes.
Le contrôle ISF (Infinite Shape Feature) breveté par Blackstar Amplification représente une avancée majeure en termes de flexibilité de l’édition sonore. Le contrôle ISF fait alterner la réponse des trois contrôles sonores entre une réponse de type américain à une extrémité, et à l’autre, une réponse de type britannique. Ce qui importe, c’est le nombre infini de choix de sons alternatifs qui ne seraient pas accessibles autrement.
L’amplificateur présente une réverb numérique au son naturel, qui peut être réglée à l’aide de la commande Reverb située sur le panneau avant ou activée et désactivée grâce au contrôleur au pied 5 voies optionnel. Un interrupteur sur le panneau arrière permet de sélectionner les options « Dark » ou « Light ». Le réglage Dark est basé sur une réverb de salle et le réglage Light s’appuie sur une réverb à plaque.
Un interrupteur Power est intégré au panneau avant pour faire baswler l’amplificateur entre la pleine puissance et 10 % de puissance. Cela signifie que la profondeur sonore totale de l’amplificateur de puissance EL34 peut être obtenue à n’importe quel volume, retenant le son caractéristique des lampes de puissance qui travaillent dur.
Un connecteur USB permet d’envoyer jusqu’à quatre canaux de signal de guitare (dry, sortie préampli et sortie émulée stéréo) vers un ordinateur à des fins d’enregistrement.
Fra
nçais
Fra
nçais
4140
Deux autres sorties à l’arrière, une prise jack stéréo et une prise XLR symétrique, permettent aussi au(x) signal/signaux de baffle émulé d’être connectés à des périphériques externes pour la pratique, l’enregistrement ou l’utilisation en live.
Le panneau avant
1. Entrée
Branchez-y votre guitare. Servez-vous toujours d’un cordon blindé pour guitare de bonne qualité.
Canal Clean
2. Interrupteur de sélection Clean
Appuyez sur cet interrupteur pour sélectionner le canal Clean. Lorsque le témoin vert est allumé, le canal Clean est sélectionné.
3. Volume Clean
Il contrôle le volume du canal Clean. Le tourner dans le sens des aiguilles d’une montre augmente le volume. Lorsqu’il est complètement tourné, le préamplificateur commencera à saturer, surtout en mode « British ».
4. Interrupteur Clean Voice
Il s’agit d’un interrupteur momentané qui sélectionne l’une des deux voix Clean. Le réglage « American » est très clair et brillant, mais avec des basses fermes et serrées : cette Voix est sélectionnée lorsque le témoin Voice est éteint. Le réglage « British » a une réponse de basse avec un milieu de gamme plus chaud et est très sensible au niveau de sortie de la guitare et des dynamiques du musicien : cette voix est sélectionnée quand le témoin Voice est allumé. La sonorisation de l’égaliseur et la structure de gain de la lampe sont complètement reconfigurées entre chaque voix.
5. Bass
La commande Bass ajuste la quantité de basses fréquences (graves) dans votre son. Totalement dans le sens inverse des aiguilles d’une montre, le son aura un caractère plus fin. Le fait de le tourner dans le sens des aiguilles d’une montre augmentera progressivement la réponse en basses du canal.
6. Treble
Le contrôle Treble permet le réglage des hautes fréquences (aiguës) dans le son. Complètement dans le sens inverse des aiguilles d’une montre, le son aura un caractère chaud et plus sombre. Si le contrôle Treble est tourné dans le sens des aiguilles d’une montre, le son deviendra plus brillant.
Canal OD 1 (Overdrive 1)
7. Interrupteur de sélection OD 1
Appuyez sur cet interrupteur pour sélectionner le canal OD 1. Quand le témoin jaune est allumé, le Canal OD 1 est sélectionné.
8. Gain OD 1
Le contrôle OD 1 Gain règle la quantité de saturation ou de distorsion du canal OD 1. Des réglages bas (sens inverse des aiguilles d’une montre) délivreront un son clair à la limite de la rupture. À mesure que le contrôle Gain sera augmenté dans le sens des aiguilles d’une montre, le son deviendra plus saturé, en passant par des sons
Fra
nçais
Fra
nçais
4342
crunch jusqu’à ce que la distorsion totale soit atteinte au réglage maximal.
9. Volume OD 1
Ce contrôle règle le volume global du Canal OD 1. Le tourner dans le sens des aiguilles d’une montre augmente le volume.
10. Interrupteur OD 1 Voice
Il s’agit d’un interrupteur momentané qui sélectionne l’une des deux voix du Canal OD 1. Lorsque le petit témoin jaune est éteint, ce canal a une harmonisation de saturation « classique ». Quand le témoin jaune est allumé, le son saturé a une harmonisation plus « moderne », avec une réponse dans les graves plus importante et un son plus ample, plus agressif du fait de l’amortissement réduit de l’amplificateur de puissance.
Canal OD 2 (Overdrive 2)
11. Interrupteur de sélection OD 2
Appuyez sur cet interrupteur pour sélectionner le canal OD 2. Quand le témoin rouge est allumé, le canal OD 2 est sélectionné.
12. Gain OD 2
Le contrôle OD 2 Gain règle la quantité de saturation ou de distorsion de ce canal. Avec des réglages bas (sens inverse des aiguilles d’une montre) le son sera moyennement saturé. À mesure que le contrôle Gain est augmenté dans le sens des aiguilles d’une montre, le son passera d’un crunch à un son « lead » à fort gain totalement saturé.
13. Volume OD 2
Ce contrôle règle le volume global du Canal OD 2. Le tourner dans le sens des aiguilles d’une montre augmente le volume.
14. Interrupteur OD 2 Voice
Il s’agit d’un interrupteur momentané qui sélectionne l’une des deux voix du canal OD 2. Lorsque le petit témoin rouge est éteint, ce canal dispose d’une saturation « classique » mais « dynamisée », avec amortissement moyen de l’amplificateur de puissance. Quand le témoin rouge est allumé, le son saturé a une sonorisation plus « moderne », qui inclut un boost pré-saturation à moitié accentué ainsi qu’un son plus vague et plus agressif du fait de l’amortissement réduit de l’amplificateur de puissance.
Égaliseurs OD 1 et OD 2
15. Bass
Le réglage Bass règle la quantité de basses fréquences dans votre son. Cet ampli dispose d’un circuit d’édition sonore avancé qui permet au son d’être varié de précis et incisif en réglage minimal à un son chaud et lourd en position maximale.
16. Middle
La commande Middle règle la quantité de moyennes fréquences de votre son. Ces moyennes fréquences sont particulièrement importantes pour régler la quantité de « corps » de votre son. Quand le contrôle Middle est réglé au minimum (tout à fait dans le sens inverse des aiguilles d’une montre) le son sera agressif et creusé, un son idéal pour le jeu de rythmes agressifs. Quand ce réglage est augmenté (dans le sens des aiguilles d’une montre) la quantité de « corps » augmente, ce qui est plus approprié à des sons de guitare « lead » avec sustain.
17. Treble
Le réglage Treble permet d’ajuster les hautes fréquences du son. À des réglages bas (sens inverse des aiguilles d’une montre) le son aura un caractère chaud et plus sombre. S’il est augmenté (tourné dans le sens des aiguilles d’une montre), le son deviendra plus brillant. Au réglage maximal, le son sera plus agressif et incisif.
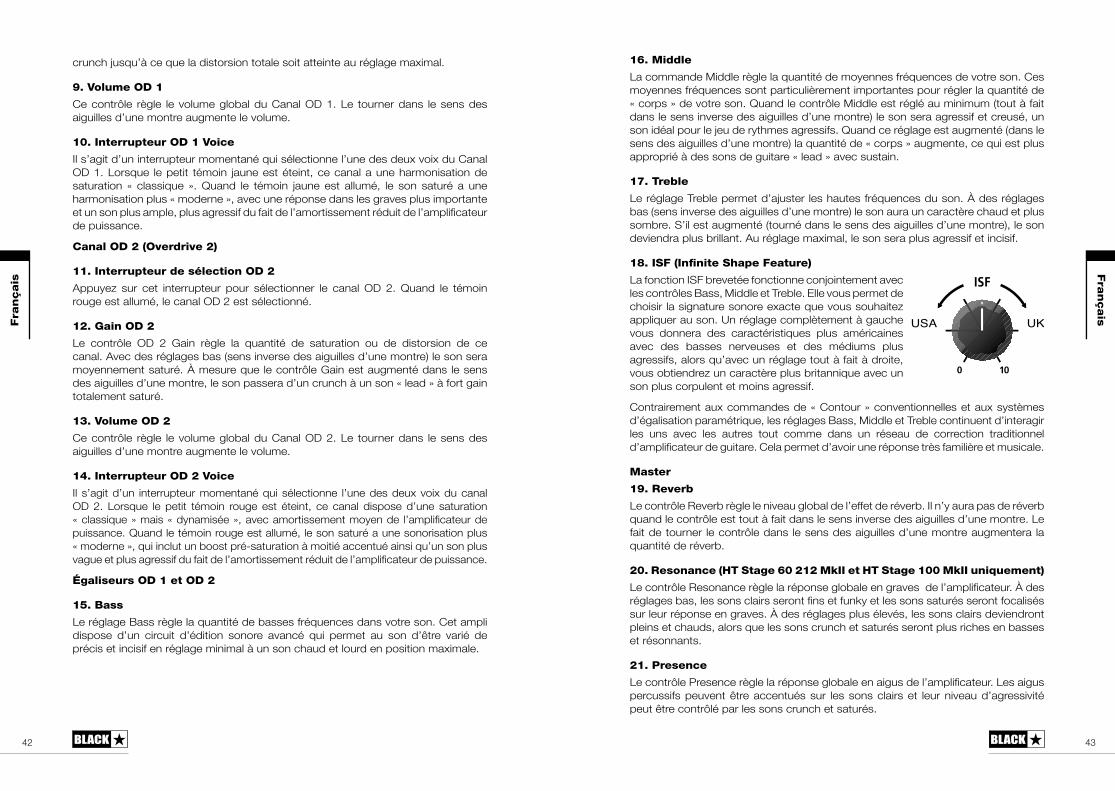
18. ISF (Infinite Shape Feature)
La fonction ISF brevetée fonctionne conjointement avec les contrôles Bass, Middle et Treble. Elle vous permet de choisir la signature sonore exacte que vous souhaitez appliquer au son. Un réglage complètement à gauche vous donnera des caractéristiques plus américaines avec des basses nerveuses et des médiums plus agressifs, alors qu’avec un réglage tout à fait à droite, vous obtiendrez un caractère plus britannique avec un son plus corpulent et moins agressif.
Contrairement aux commandes de « Contour » conventionnelles et aux systèmes d’égalisation paramétrique, les réglages Bass, Middle et Treble continuent d’interagir les uns avec les autres tout comme dans un réseau de correction traditionnel d’amplificateur de guitare. Cela permet d’avoir une réponse très familière et musicale.
Master
19. Reverb
Le contrôle Reverb règle le niveau global de l’effet de réverb. Il n’y aura pas de réverb quand le contrôle est tout à fait dans le sens inverse des aiguilles d’une montre. Le fait de tourner le contrôle dans le sens des aiguilles d’une montre augmentera la quantité de réverb.
20. Resonance (HT Stage 60 212 MkII et HT Stage 100 MkII uniquement)
Le contrôle Resonance règle la réponse globale en graves de l’amplificateur. À des réglages bas, les sons clairs seront fins et funky et les sons saturés seront focalisés sur leur réponse en graves. À des réglages plus élevés, les sons clairs deviendront pleins et chauds, alors que les sons crunch et saturés seront plus riches en basses et résonnants.
21. Presence
Le contrôle Presence règle la réponse globale en aigus de l’amplificateur. Les aigus percussifs peuvent être accentués sur les sons clairs et leur niveau d’agressivité peut être contrôlé par les sons crunch et saturés.
USA UKFra
nçais
Fra
nçais
4544
22. Volume
Contrôle le volume global de votre amplificateur. Le tourner dans le sens des aiguilles d’une montre permet d’augmenter le volume.
23. Interrupteur Power
Cet interrupteur permet de réduire l’étage de sortie, de la pleine puissance jusqu‘à 10 % de puissance. Cela signifie que la profondeur sonore complète de l’amplificateur de puissance EL34 peut être appréciée à des volumes plus faibles, rendant ainsi le HT Venue MkII idéal pour l’enregistrement, les petits concerts et même l’utilisation à la maison. Fonctionnant conjointement avec les voltages d’un amplificateur de puissance, cette méthode de réduction de puissance ne souffre d’aucune perte sonore d’autres systèmes de réduction de puissance.
24. Lumière du témoin d’alimentation
Le témoin d’alimentation s’allumera quand l’amplificateur est allumé.
25. Standby
Cet interrupteur active l’étage de sortie. Veillez à toujours activer cet interrupteur au moins 30 secondes après l’interrupteur Power (26) et désactivez de préférence l’interrupteur Power après avoir mis en Standby. Lors de courtes pauses en cours d’utilisation, utilisez cet interrupteur pour éteindre (off) et allumer (on) l’amplificateur. Pour éviter que tout bruit indésirable ne soit envoyé à votre (vos) baffle(s), nous vous recommandons de toujours passer en Standby pendant quelques secondes avant de mettre l’interrupteur Power principal sur OFF.
26. Power
Cet interrupteur sert à allumer et éteindre l’amplificateur. Vous devez toujours activer cet interrupteur avant d’activer l’interrupteur Standby (25).
Le panneau arrière
1. Fusible d’alimentation
La valeur du Fusible d’alimentation est spécifiée sur le panneau arrière. Veillez à ne jamais utiliser un fusible d’une valeur incorrecte ou n’essayez pas de le court-circuiter.
2. Entrée d’alimentation
Le cordon d’alimentation détachable fourni se branche ici. Le cordon ne doit être branché qu’à une prise électrique compatible avec les exigences de tension, de puissance et de fréquence indiquées à l’arrière de l’appareil. En cas de doute, demandez conseil à un technicien qualifié.
3. Fusible Haute Tension
La valeur du Fusible H.T. est spécifiée sur le panneau arrière. Veillez à ne jamais utiliser un fusible d’une valeur incorrecte ou n’essayez pas de le court-circuiter.
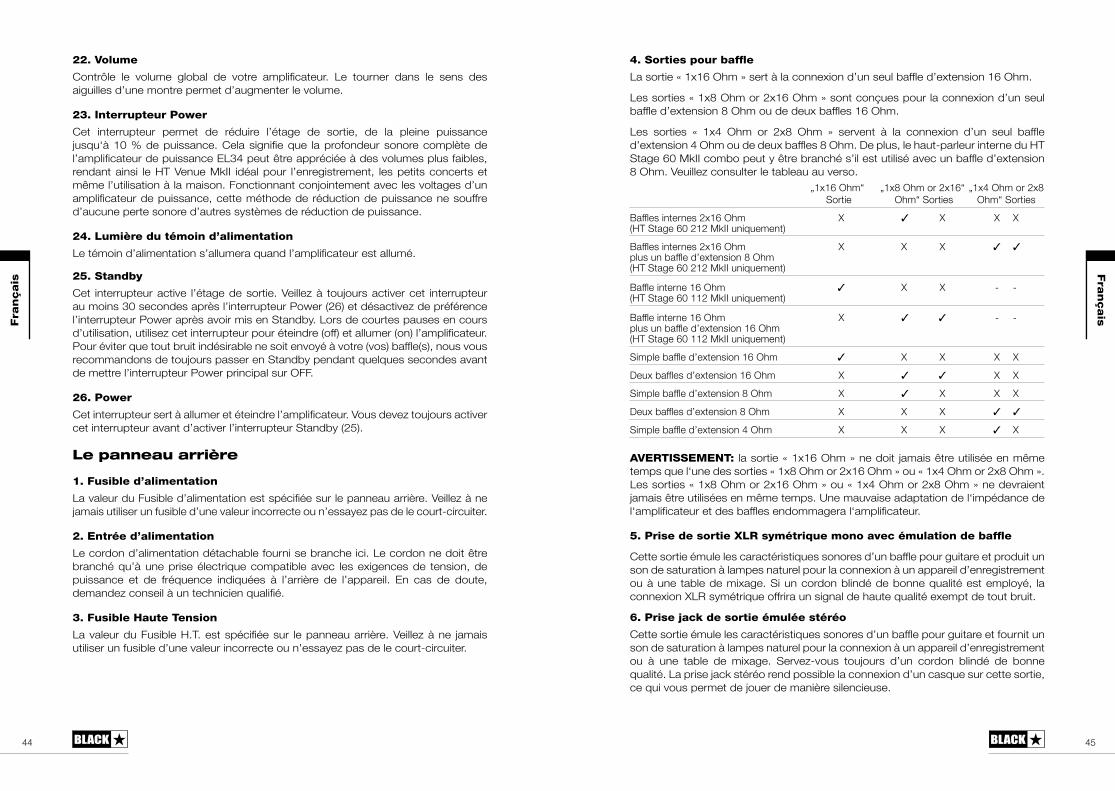
4. Sorties pour baffle
La sortie « 1x16 Ohm » sert à la connexion d’un seul baffle d’extension 16 Ohm.
Les sorties « 1x8 Ohm or 2x16 Ohm » sont conçues pour la connexion d’un seul baffle d’extension 8 Ohm ou de deux baffles 16 Ohm.
Les sorties « 1x4 Ohm or 2x8 Ohm » servent à la connexion d’un seul baffle d’extension 4 Ohm ou de deux baffles 8 Ohm. De plus, le haut-parleur interne du HT Stage 60 MkII combo peut y être branché s’il est utilisé avec un baffle d’extension 8 Ohm. Veuillez consulter le tableau au verso. „1x16 Ohm“ „1x8 Ohm or 2x16“ „1x4 Ohm or 2x8 Sortie Ohm“ Sorties Ohm“ Sorties
Baffles internes 2x16 Ohm X ✓ X X X (HT Stage 60 212 MkII uniquement)
Baffles internes 2x16 Ohm X X X ✓ ✓ plus un baffle d’extension 8 Ohm (HT Stage 60 212 MkII uniquement)
Baffle interne 16 Ohm ✓ X X - - (HT Stage 60 112 MkII uniquement)
Baffle interne 16 Ohm X ✓ ✓ - - plus un baffle d’extension 16 Ohm (HT Stage 60 112 MkII uniquement)
Simple baffle d’extension 16 Ohm ✓ X X X X
Deux baffles d’extension 16 Ohm X ✓ ✓ X X
Simple baffle d’extension 8 Ohm X ✓ X X X
Deux baffles d’extension 8 Ohm X X X ✓ ✓
Simple baffle d’extension 4 Ohm X X X ✓ X
AVERTISSEMENT: la sortie « 1x16 Ohm » ne doit jamais être utilisée en même temps que l‘une des sorties « 1x8 Ohm or 2x16 Ohm » ou « 1x4 Ohm or 2x8 Ohm ». Les sorties « 1x8 Ohm or 2x16 Ohm » ou « 1x4 Ohm or 2x8 Ohm » ne devraient jamais être utilisées en même temps. Une mauvaise adaptation de l‘impédance de l‘amplificateur et des baffles endommagera l‘amplificateur.
5. Prise de sortie XLR symétrique mono avec émulation de baffle
Cette sortie émule les caractéristiques sonores d’un baffle pour guitare et produit un son de saturation à lampes naturel pour la connexion à un appareil d’enregistrement ou à une table de mixage. Si un cordon blindé de bonne qualité est employé, la connexion XLR symétrique offrira un signal de haute qualité exempt de tout bruit.
6. Prise jack de sortie émulée stéréo
Cette sortie émule les caractéristiques sonores d’un baffle pour guitare et fournit un son de saturation à lampes naturel pour la connexion à un appareil d’enregistrement ou à une table de mixage. Servez-vous toujours d’un cordon blindé de bonne qualité. La prise jack stéréo rend possible la connexion d’un casque sur cette sortie, ce qui vous permet de jouer de manière silencieuse.
Fra
nçais
Fra
nçais
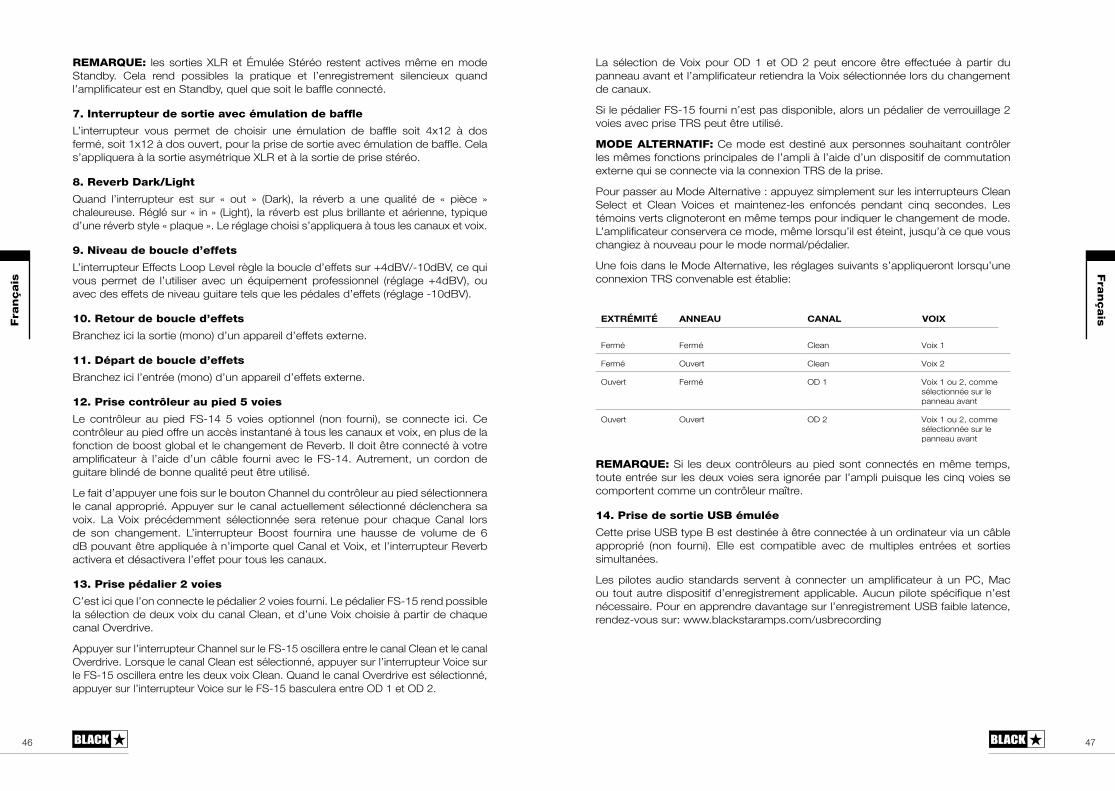
4746
REMARQUE: les sorties XLR et Émulée Stéréo restent actives même en mode Standby. Cela rend possibles la pratique et l’enregistrement silencieux quand l’amplificateur est en Standby, quel que soit le baffle connecté.
7. Interrupteur de sortie avec émulation de baffle
L’interrupteur vous permet de choisir une émulation de baffle soit 4x12 à dos fermé, soit 1x12 à dos ouvert, pour la prise de sortie avec émulation de baffle. Cela s’appliquera à la sortie asymétrique XLR et à la sortie de prise stéréo.
8. Reverb Dark/Light
Quand l’interrupteur est sur « out » (Dark), la réverb a une qualité de « pièce » chaleureuse. Réglé sur « in » (Light), la réverb est plus brillante et aérienne, typique d’une réverb style « plaque ». Le réglage choisi s’appliquera à tous les canaux et voix.
9. Niveau de boucle d’effets
L’interrupteur Effects Loop Level règle la boucle d’effets sur +4dBV/-10dBV, ce qui vous permet de l’utiliser avec un équipement professionnel (réglage +4dBV), ou avec des effets de niveau guitare tels que les pédales d’effets (réglage -10dBV).
10. Retour de boucle d’effets
Branchez ici la sortie (mono) d’un appareil d’effets externe.
11. Départ de boucle d’effets
Branchez ici l’entrée (mono) d’un appareil d’effets externe.
12. Prise contrôleur au pied 5 voies
Le contrôleur au pied FS-14 5 voies optionnel (non fourni), se connecte ici. Ce contrôleur au pied offre un accès instantané à tous les canaux et voix, en plus de la fonction de boost global et le changement de Reverb. Il doit être connecté à votre amplificateur à l’aide d’un câble fourni avec le FS-14. Autrement, un cordon de guitare blindé de bonne qualité peut être utilisé.
Le fait d’appuyer une fois sur le bouton Channel du contrôleur au pied sélectionnera le canal approprié. Appuyer sur le canal actuellement sélectionné déclenchera sa voix. La Voix précédemment sélectionnée sera retenue pour chaque Canal lors de son changement. L’interrupteur Boost fournira une hausse de volume de 6 dB pouvant être appliquée à n’importe quel Canal et Voix, et l’interrupteur Reverb activera et désactivera l’effet pour tous les canaux.
13. Prise pédalier 2 voies
C’est ici que l’on connecte le pédalier 2 voies fourni. Le pédalier FS-15 rend possible la sélection de deux voix du canal Clean, et d’une Voix choisie à partir de chaque canal Overdrive.
Appuyer sur l’interrupteur Channel sur le FS-15 oscillera entre le canal Clean et le canal Overdrive. Lorsque le canal Clean est sélectionné, appuyer sur l’interrupteur Voice sur le FS-15 oscillera entre les deux voix Clean. Quand le canal Overdrive est sélectionné, appuyer sur l’interrupteur Voice sur le FS-15 basculera entre OD 1 et OD 2.
La sélection de Voix pour OD 1 et OD 2 peut encore être effectuée à partir du panneau avant et l’amplificateur retiendra la Voix sélectionnée lors du changement de canaux.
Si le pédalier FS-15 fourni n’est pas disponible, alors un pédalier de verrouillage 2 voies avec prise TRS peut être utilisé.
MODE ALTERNATIF: Ce mode est destiné aux personnes souhaitant contrôler les mêmes fonctions principales de l’ampli à l’aide d’un dispositif de commutation externe qui se connecte via la connexion TRS de la prise.
Pour passer au Mode Alternative : appuyez simplement sur les interrupteurs Clean Select et Clean Voices et maintenez-les enfoncés pendant cinq secondes. Les témoins verts clignoteront en même temps pour indiquer le changement de mode. L’amplificateur conservera ce mode, même lorsqu’il est éteint, jusqu’à ce que vous changiez à nouveau pour le mode normal/pédalier.
Une fois dans le Mode Alternative, les réglages suivants s’appliqueront lorsqu’une connexion TRS convenable est établie:
EXTRÉMITÉ ANNEAU CANAL VOIX
Fermé Fermé Clean Voix 1
Fermé Ouvert Clean Voix 2
Ouvert Fermé OD 1 Voix 1 ou 2, comme sélectionnée sur le panneau avant
Ouvert Ouvert OD 2 Voix 1 ou 2, comme sélectionnée sur le panneau avant
REMARQUE: Si les deux contrôleurs au pied sont connectés en même temps, toute entrée sur les deux voies sera ignorée par l’ampli puisque les cinq voies se comportent comme un contrôleur maître.
14. Prise de sortie USB émulée
Cette prise USB type B est destinée à être connectée à un ordinateur via un câble approprié (non fourni). Elle est compatible avec de multiples entrées et sorties simultanées.
Les pilotes audio standards servent à connecter un amplificateur à un PC, Mac ou tout autre dispositif d’enregistrement applicable. Aucun pilote spécifique n’est nécessaire. Pour en apprendre davantage sur l’enregistrement USB faible latence, rendez-vous sur: www.blackstaramps.com/usbrecording
Fra
nçais
Fra
nçais
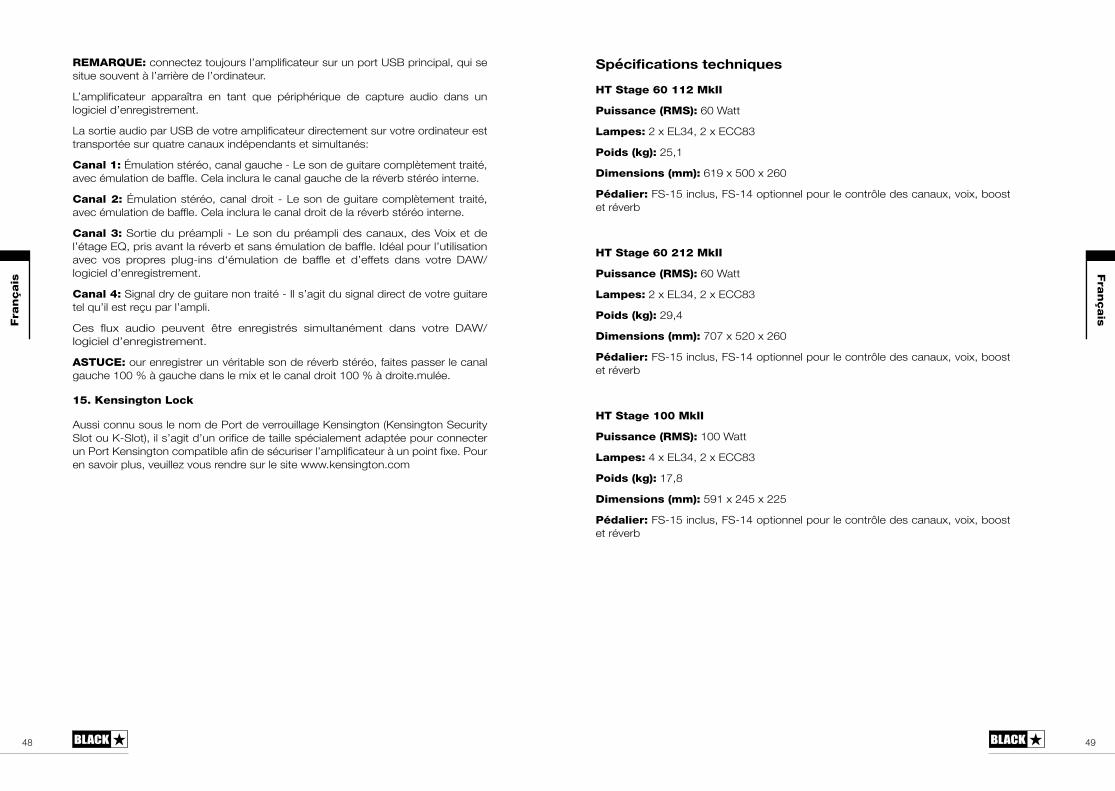
4948
REMARQUE: connectez toujours l’amplificateur sur un port USB principal, qui se situe souvent à l’arrière de l’ordinateur.
L’amplificateur apparaîtra en tant que périphérique de capture audio dans un logiciel d’enregistrement.
La sortie audio par USB de votre amplificateur directement sur votre ordinateur est transportée sur quatre canaux indépendants et simultanés:
Canal 1: Émulation stéréo, canal gauche - Le son de guitare complètement traité, avec émulation de baffle. Cela inclura le canal gauche de la réverb stéréo interne.
Canal 2: Émulation stéréo, canal droit - Le son de guitare complètement traité, avec émulation de baffle. Cela inclura le canal droit de la réverb stéréo interne.
Canal 3: Sortie du préampli - Le son du préampli des canaux, des Voix et de l’étage EQ, pris avant la réverb et sans émulation de baffle. Idéal pour l’utilisation avec vos propres plug-ins d‘émulation de baffle et d’effets dans votre DAW/logiciel d’enregistrement.
Canal 4: Signal dry de guitare non traité - Il s’agit du signal direct de votre guitare tel qu’il est reçu par l’ampli.
Ces flux audio peuvent être enregistrés simultanément dans votre DAW/logiciel d’enregistrement.
ASTUCE: our enregistrer un véritable son de réverb stéréo, faites passer le canal gauche 100 % à gauche dans le mix et le canal droit 100 % à droite.mulée.
15. Kensington Lock
Aussi connu sous le nom de Port de verrouillage Kensington (Kensington Security Slot ou K-Slot), il s’agit d’un orifice de taille spécialement adaptée pour connecter un Port Kensington compatible afin de sécuriser l’amplificateur à un point fixe. Pour en savoir plus, veuillez vous rendre sur le site www.kensington.com
Spécifications techniques
HT Stage 60 112 MkII
Puissance (RMS): 60 Watt
Lampes: 2 x EL34, 2 x ECC83
Poids (kg): 25,1
Dimensions (mm): 619 x 500 x 260
Pédalier: FS-15 inclus, FS-14 optionnel pour le contrôle des canaux, voix, boost et réverb
HT Stage 60 212 MkII
Puissance (RMS): 60 Watt
Lampes: 2 x EL34, 2 x ECC83
Poids (kg): 29,4
Dimensions (mm): 707 x 520 x 260
Pédalier: FS-15 inclus, FS-14 optionnel pour le contrôle des canaux, voix, boost et réverb
HT Stage 100 MkII
Puissance (RMS): 100 Watt
Lampes: 4 x EL34, 2 x ECC83
Poids (kg): 17,8
Dimensions (mm): 591 x 245 x 225
Pédalier: FS-15 inclus, FS-14 optionnel pour le contrôle des canaux, voix, boost et réverb
Fra
nçais
Fra
nçais
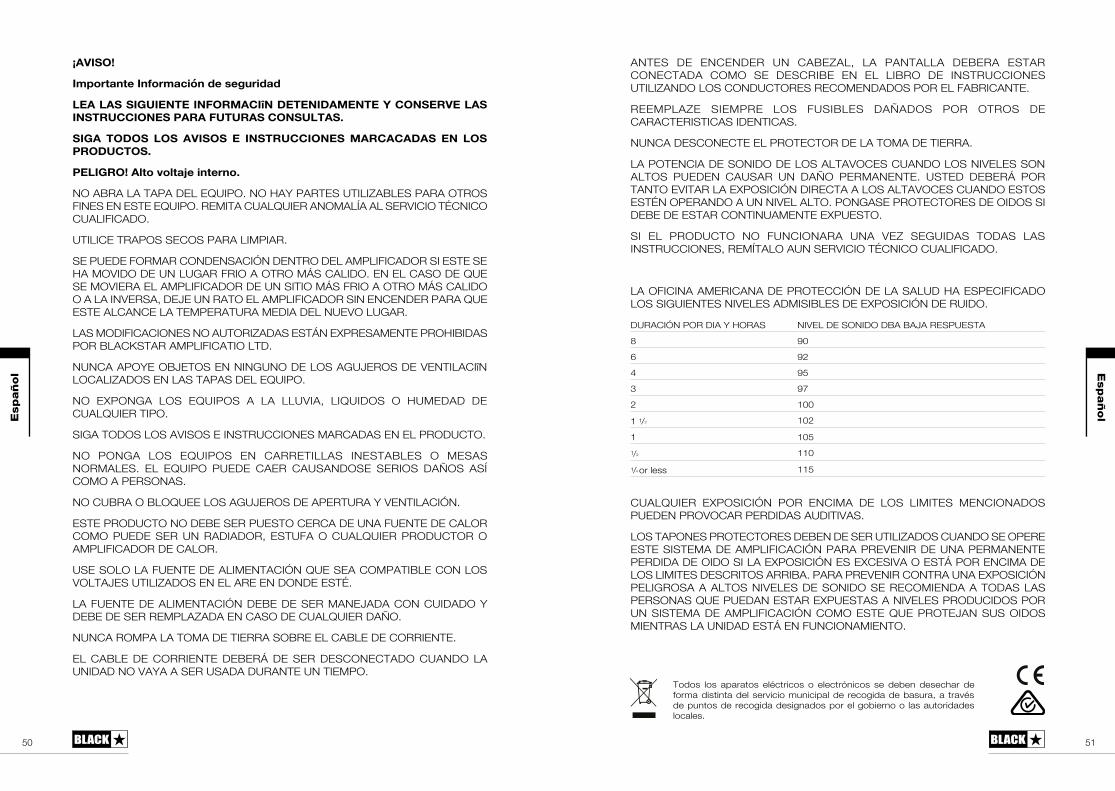
5150
Español E
spañol
¡AVISO!
Importante Información de seguridad
LEA LAS SIGUIENTE INFORMACIîN DETENIDAMENTE Y CONSERVE LAS INSTRUCCIONES PARA FUTURAS CONSULTAS.
SIGA TODOS LOS AVISOS E INSTRUCCIONES MARCACADAS EN LOS PRODUCTOS.
PELIGRO! Alto voltaje interno.
NO ABRA LA TAPA DEL EQUIPO. NO HAY PARTES UTILIZABLES PARA OTROS FINES EN ESTE EQUIPO. REMITA CUALQUIER ANOMALÍA AL SERVICIO TÉCNICO CUALIFICADO.
UTILICE TRAPOS SECOS PARA LIMPIAR.
SE PUEDE FORMAR CONDENSACIÓN DENTRO DEL AMPLIFICADOR SI ESTE SE HA MOVIDO DE UN LUGAR FRIO A OTRO MÁS CALIDO. EN EL CASO DE QUE SE MOVIERA EL AMPLIFICADOR DE UN SITIO MÁS FRIO A OTRO MÁS CALIDO O A LA INVERSA, DEJE UN RATO EL AMPLIFICADOR SIN ENCENDER PARA QUE ESTE ALCANCE LA TEMPERATURA MEDIA DEL NUEVO LUGAR.
LAS MODIFICACIONES NO AUTORIZADAS ESTÁN EXPRESAMENTE PROHIBIDAS POR BLACKSTAR AMPLIFICATIO LTD.
NUNCA APOYE OBJETOS EN NINGUNO DE LOS AGUJEROS DE VENTILACIîN LOCALIZADOS EN LAS TAPAS DEL EQUIPO.
NO EXPONGA LOS EQUIPOS A LA LLUVIA, LIQUIDOS O HUMEDAD DE CUALQUIER TIPO.
SIGA TODOS LOS AVISOS E INSTRUCCIONES MARCADAS EN EL PRODUCTO.
NO PONGA LOS EQUIPOS EN CARRETILLAS INESTABLES O MESAS NORMALES. EL EQUIPO PUEDE CAER CAUSANDOSE SERIOS DAÑOS ASÍ COMO A PERSONAS.
NO CUBRA O BLOQUEE LOS AGUJEROS DE APERTURA Y VENTILACIÓN.
ESTE PRODUCTO NO DEBE SER PUESTO CERCA DE UNA FUENTE DE CALOR COMO PUEDE SER UN RADIADOR, ESTUFA O CUALQUIER PRODUCTOR O AMPLIFICADOR DE CALOR.
USE SOLO LA FUENTE DE ALIMENTACIÓN QUE SEA COMPATIBLE CON LOS VOLTAJES UTILIZADOS EN EL ARE EN DONDE ESTÉ.
LA FUENTE DE ALIMENTACIÓN DEBE DE SER MANEJADA CON CUIDADO Y DEBE DE SER REMPLAZADA EN CASO DE CUALQUIER DAÑO.
NUNCA ROMPA LA TOMA DE TIERRA SOBRE EL CABLE DE CORRIENTE.
EL CABLE DE CORRIENTE DEBERÁ DE SER DESCONECTADO CUANDO LA UNIDAD NO VAYA A SER USADA DURANTE UN TIEMPO.
ANTES DE ENCENDER UN CABEZAL, LA PANTALLA DEBERA ESTAR CONECTADA COMO SE DESCRIBE EN EL LIBRO DE INSTRUCCIONES UTILIZANDO LOS CONDUCTORES RECOMENDADOS POR EL FABRICANTE.
REEMPLAZE SIEMPRE LOS FUSIBLES DAÑADOS POR OTROS DE CARACTERISTICAS IDENTICAS.
NUNCA DESCONECTE EL PROTECTOR DE LA TOMA DE TIERRA.
LA POTENCIA DE SONIDO DE LOS ALTAVOCES CUANDO LOS NIVELES SON ALTOS PUEDEN CAUSAR UN DAÑO PERMANENTE. USTED DEBERÁ POR TANTO EVITAR LA EXPOSICIÓN DIRECTA A LOS ALTAVOCES CUANDO ESTOS ESTÉN OPERANDO A UN NIVEL ALTO. PONGASE PROTECTORES DE OIDOS SI DEBE DE ESTAR CONTINUAMENTE EXPUESTO.
SI EL PRODUCTO NO FUNCIONARA UNA VEZ SEGUIDAS TODAS LAS INSTRUCCIONES, REMÍTALO AUN SERVICIO TÉCNICO CUALIFICADO.
LA OFICINA AMERICANA DE PROTECCIÓN DE LA SALUD HA ESPECIFICADO LOS SIGUIENTES NIVELES ADMISIBLES DE EXPOSICIÓN DE RUIDO.
CUALQUIER EXPOSICIÓN POR ENCIMA DE LOS LIMITES MENCIONADOS PUEDEN PROVOCAR PERDIDAS AUDITIVAS.
LOS TAPONES PROTECTORES DEBEN DE SER UTILIZADOS CUANDO SE OPERE ESTE SISTEMA DE AMPLIFICACIÓN PARA PREVENIR DE UNA PERMANENTE PERDIDA DE OIDO SI LA EXPOSICIÓN ES EXCESIVA O ESTÁ POR ENCIMA DE LOS LIMITES DESCRITOS ARRIBA. PARA PREVENIR CONTRA UNA EXPOSICIÓN PELIGROSA A ALTOS NIVELES DE SONIDO SE RECOMIENDA A TODAS LAS PERSONAS QUE PUEDAN ESTAR EXPUESTAS A NIVELES PRODUCIDOS POR UN SISTEMA DE AMPLIFICACIÓN COMO ESTE QUE PROTEJAN SUS OIDOS MIENTRAS LA UNIDAD ESTÁ EN FUNCIONAMIENTO.
Todos los aparatos eléctricos o electrónicos se deben desechar de forma distinta del servicio municipal de recogida de basura, a través de puntos de recogida designados por el gobierno o las autoridades locales.
DURACIÓN POR DIA Y HORAS NIVEL DE SONIDO DBA BAJA RESPUESTA
8 90
6 92
4 95
3 97
2 100
1 1/2 102
1 1051/2 1101/4 or less 115
5352
Introducción
Gracias por comprar este amplificador Blackstar HT Venue MkII. Como todos nuestros productos, este amplificador es el resultado de incontables horas de meticulosa Investigación y Desarrollo por parte de nuestro prestigioso equipo de diseño. Con base en Northampton (Reino Unido), el equipo de Blackstar está formado por músicos experimentados y el único objetivo del proceso de desarrollo es el de proporcionar a los guitarristas con productos que sean las herramientas de autoexpresión definitivas.
Todos los productos Blackstar son sometidos a intensivas pruebas de laboratorio y de rodaje para asegurar que están fuera de compromiso en términos de fiabilidad, calidad y, sobretodo, TONO.
El diseño flexible de tres canales del HT Stage MkII cuenta con el exclusivo control patentado ISF (Infinite Shape Feature) y aunque tiene un conjunto de control integral, sigue siendo sencillo e intuitivo de usar. Por favor lee este manual detenidamente para asegurarte de que obtienes el máximo rendimiento de tu producto Blackstar.
Si te gusta lo que oyes y quieres averiguar mas acerca de la línea de productos Blackstar, por favor visita nuestro sitio web en www.blackstaramps.com.
¡Gracias!
El Equipo Blackstar
Características
El HT Venue MkII es un amplificador muy versátil y adecuado para una amplia gama de estilos y situaciones.
El Clean Channel tiene dos voces; uno basado en un clásico circuito estadounidense y el otro basado en un clásico tono británico. El botón Voice reconfigura el preamplificador de sonido, EQ y la ganancia de la estructura de la válvula, así como también la potencia de la amortiguación del amplificador. Esto produce una respuesta de graves limpia, brillante y apretada pero sólida para el tono americano y un “toque” altamente sensible con la parte inferior más floja para el tono británico que se puede empujar en una sobremarcha de gama media cuando se conduce con fuerza. El ajuste de voz también se puede seleccionar a través del pedal.
El HT Stage MkII tiene dos canales Overdrive que comparten una sección de EQ común y, como el Clean Channel, cada uno de los canales de Overdrive tiene un conmutador de voz que permite cambiar el carácter de cada canal, proporcionando una amplia gama de tonos saturados.
Como con el Clean Channel, cada una de estas voces también se puede seleccionar por el pedal o footcontroller. Al cambiar entre los canales, el amplificador llamará a la configuración específica de voz que se usó por última vez en ese canal.
Los canales Overdrive se caracterizan por un tono que es alto en Gain, pero evita cualquiera de la parte superior de la parte superior ‘fizz’ que a menudo se encuentran en otros diseños. Este es el resultado de técnicas únicas del preamplificador y amplificador de potencia, que también benefician al músico en la forma en que los overdrives se limpian maravillosamente a medida que se reduce el volumen de la guitarra. Incluso en los ajustes más extremos, los canales Overdrive suenan de forma natural.
El control patentado ISF (Infinite Shape Feature) es exclusivo de Blackstar Amplification y representa un gran paso adelante en la flexibilidad del modelado de tonos. El control ISF desplaza la respuesta del conjunto de tres tonos de control entre, por un lado una respuesta de tipo US y por el otro, una respuesta de tipo UK. Es importante destacar que entre los dos extremos se encuentra un número infinito de opciones de tonos alternativos que de otro modo no estarían disponibles.
El amplificador ofrece un reverb digital que puede ser ajustado a través del control de reverb en el panel frontal o encender y apagarlo a través del pedal de 5 posiciones opcional. Un interruptor en el panel posterior selecciona entre ‘Dark’ y ‘Light’. El ajuste Dark se basa en un reverb de habitación y el ajuste Light se basa en un reverb de lámina.
En el panel frontal hay un interruptor de encendido para cambiar el amplificador entre una potencia máxima y una del 10%. Esto significa que la profundidad tonal total de la etapa de potencia EL34 se puede disfrutar en cualquier volumen, manteniendo el sonido distintivo de las válvulas de potencia trabajando duro.
Un conector USB permite enviar hasta 4 canales de la señal de la guitarra (seco, preamplificador y emulado estéreo) en un ordenador para fines de grabación.
Dos salidas adicionales en la parte trasera, una toma de jack estéreo y un XLR balanceado, también permiten que la señal de emulación del altavoz se conecte a dispositivos externos para practicar, grabar o usar en vivo.
Español E
spañol
5554
9. OD 1 Volume
Este control ajusta el volumen total del canal OD 1. Aumenta el volumen girándolo en el sentido de las agujas del reloj.
10. OD 1 Voice
Este es un interruptor momentáneo que selecciona entre las dos voces del canal OD1. Cuando el LED amarillo pequeño está apagado, este canal tiene un sonido overdrive clásico. Con el LED amarillo iluminado, el sonido overdrive es más “moderno”, con una mayor respuesta de graves y un sonido más flojo y agresivo debido a la reducción de la potencia de la amortiguación del amplificador.
Canal OD 2 (Overdrive 2)
11. OD 2
Pulse este interruptor para seleccionar el canal OD2. El canal OD2 está seleccionado cuando el LED rojo está encendido.
12. OD 2 Gain
El control OD 2 Gain ajusta la cantidad de overdrive o distorsión en este canal. Con ajustes bajos, (en sentido contrario a las agujas del reloj) el tono será ligeramente sobresaturado. A medida que se incrementa, en el sentido de las agujas del reloj, el sonido cambiará de crunch a un tono de plomo saturado.
13. OD 2 Volume
Esto controla el volumen total del canal OD 2. Aumenta el volumen girándolo en el sentido de las agujas del reloj.
14. OD 2 Voice
Este es un interruptor momentáneo que selecciona entre las dos voces del canal OD2. Con el pequeño LED rojo apagado este canal tiene un overdrive “clásico” pero “hot-rodded”, con una amortiguación media del amplificador. Con el LED rojo iluminado, el sonido overdrive es más “moderno” que incluye un potente, acentuado impulso pre-overdrive, así como un sonido más flojo y agresivo debido a la reducción de la potencia de la amortiguación del amplificador.
EQ OD 1 y OD 2
15. Bass
El control Bass ajusta la cantidad de frecuencias bajas en su tono. Este amplificador tiene un avanzado circuito tonal ajustable que permite variar el tono, en sentido contrario a las agujas del reloj un tono más apretado y cortante, girado totalmente en sentido horario para un tono más cálido y fuerte.
Panel Frontal
1. Input
Conecta tu guitarra aquí. Usa siempre un cable apantallado de calidad.
Clean Channel
2. Clean
Pulsa este botón para seleccionar el Clean Channel. Cuando la luz LED verde está encendida, éste canal está seleccionado.
3. Clean Volume
Controla el volumen del Clean Channel. Girándolo en el sentido de las agujas del reloj aumenta el volumen. En los ajustes extremos en el sentido de las agujas del reloj, el preamplificador empezará a overdrive, particularmente en el modo “británico”.
4. Clean Voice
Este es un interruptor momentáneo que selecciona entre dos voces limpias. El ajuste “American” es muy limpio y luminoso, pero con un sólido y estrecho bajo final; Esta voz se selecciona cuando el LED de voz está apagado. El ajuste “británico” tiene una respuesta de graves más baja con una gama media más cálida y es muy sensible al nivel de salida de la guitarra y la dinámica del músico; Esta Voz se selecciona cuando el LED de Voz está encendido. La válvula de gain y el sonido EQ se reconfigura completamente entre cada voz.
5. Bass
El control Bass ajusta la cantidad de frecuencias graves en su tono. En sentido contrario a las agujas del reloj el sonido será más estrecho en carácter. Al girar el control en el sentido de las agujas del reloj aumentará progresivamente la respuesta de graves del canal.
6. Treble
El control Treble permite ajustar las frecuencias agudas dentro del sonido. En los ajustes más bajos (en sentido contrario a las agujas del reloj) el sonido será cálido y de carácter más oscuro. A medida que se gira en sentido de las agujas del reloj el sonido será más vivo.
Canal OD 1 (Overdrive 1)
7. OD 1
Pulse este botón para seleccionar el canal OD1. El canal OD1 está seleccionado cuando el LED amarillo está encendido.
8. OD 1 Gain
El control OD1 Gain ajusta la cantidad de overdrive o distorsión del canal OD1. Los ajustes bajos (en sentido contrario a las agujas del reloj) proporcionan un sonido limpio a punto de romper. A medida que se incrementa en el sentido de las agujas del reloj, el sonido se vuelve más distorsionado, moviéndose a través de los tonos crunch hasta que, en su posición máxima, se alcanza un tono completamente distorsionado.
Español E
spañol
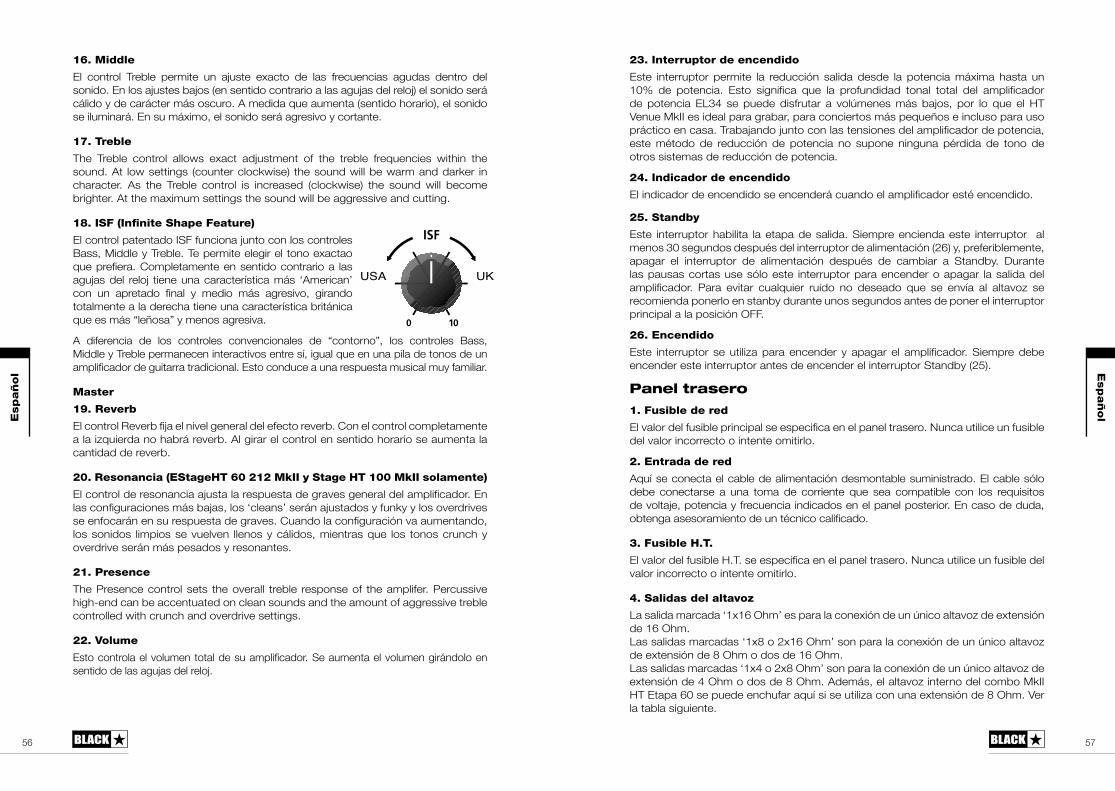
5756
16. Middle
El control Treble permite un ajuste exacto de las frecuencias agudas dentro del sonido. En los ajustes bajos (en sentido contrario a las agujas del reloj) el sonido será cálido y de carácter más oscuro. A medida que aumenta (sentido horario), el sonido se iluminará. En su máximo, el sonido será agresivo y cortante.
17. Treble
The Treble control allows exact adjustment of the treble frequencies within the sound. At low settings (counter clockwise) the sound will be warm and darker in character. As the Treble control is increased (clockwise) the sound will become brighter. At the maximum settings the sound will be aggressive and cutting.
18. ISF (Infinite Shape Feature)
El control patentado ISF funciona junto con los controles Bass, Middle y Treble. Te permite elegir el tono exactao que prefiera. Completamente en sentido contrario a las agujas del reloj tiene una característica más ‘American’ con un apretado final y medio más agresivo, girando totalmente a la derecha tiene una característica británica que es más “leñosa” y menos agresiva.
A diferencia de los controles convencionales de “contorno”, los controles Bass, Middle y Treble permanecen interactivos entre sí, igual que en una pila de tonos de un amplificador de guitarra tradicional. Esto conduce a una respuesta musical muy familiar.
Master
19. Reverb
El control Reverb fija el nivel general del efecto reverb. Con el control completamente a la izquierda no habrá reverb. Al girar el control en sentido horario se aumenta la cantidad de reverb.
20. Resonancia (EStageHT 60 212 MkII y Stage HT 100 MkII solamente)
El control de resonancia ajusta la respuesta de graves general del amplificador. En las configuraciones más bajas, los ‘cleans’ serán ajustados y funky y los overdrives se enfocarán en su respuesta de graves. Cuando la configuración va aumentando, los sonidos limpios se vuelven llenos y cálidos, mientras que los tonos crunch y overdrive serán más pesados y resonantes.
21. Presence
The Presence control sets the overall treble response of the amplifer. Percussive high-end can be accentuated on clean sounds and the amount of aggressive treble controlled with crunch and overdrive settings.
22. Volume
Esto controla el volumen total de su amplificador. Se aumenta el volumen girándolo en sentido de las agujas del reloj.
23. Interruptor de encendido
Este interruptor permite la reducción salida desde la potencia máxima hasta un 10% de potencia. Esto significa que la profundidad tonal total del amplificador de potencia EL34 se puede disfrutar a volúmenes más bajos, por lo que el HT Venue MkII es ideal para grabar, para conciertos más pequeños e incluso para uso práctico en casa. Trabajando junto con las tensiones del amplificador de potencia, este método de reducción de potencia no supone ninguna pérdida de tono de otros sistemas de reducción de potencia.
24. Indicador de encendido
El indicador de encendido se encenderá cuando el amplificador esté encendido.
25. Standby
Este interruptor habilita la etapa de salida. Siempre encienda este interruptor al menos 30 segundos después del interruptor de alimentación (26) y, preferiblemente, apagar el interruptor de alimentación después de cambiar a Standby. Durante las pausas cortas use sólo este interruptor para encender o apagar la salida del amplificador. Para evitar cualquier ruido no deseado que se envía al altavoz se recomienda ponerlo en stanby durante unos segundos antes de poner el interruptor principal a la posición OFF.
26. Encendido
Este interruptor se utiliza para encender y apagar el amplificador. Siempre debe encender este interruptor antes de encender el interruptor Standby (25).
Panel trasero
1. Fusible de red
El valor del fusible principal se especifica en el panel trasero. Nunca utilice un fusible del valor incorrecto o intente omitirlo.
2. Entrada de red
Aquí se conecta el cable de alimentación desmontable suministrado. El cable sólo debe conectarse a una toma de corriente que sea compatible con los requisitos de voltaje, potencia y frecuencia indicados en el panel posterior. En caso de duda, obtenga asesoramiento de un técnico calificado.
3. Fusible H.T.
El valor del fusible H.T. se especifica en el panel trasero. Nunca utilice un fusible del valor incorrecto o intente omitirlo.
4. Salidas del altavoz
La salida marcada ‘1x16 Ohm’ es para la conexión de un único altavoz de extensión de 16 Ohm.Las salidas marcadas ‘1x8 o 2x16 Ohm’ son para la conexión de un único altavoz de extensión de 8 Ohm o dos de 16 Ohm.Las salidas marcadas ‘1x4 o 2x8 Ohm’ son para la conexión de un único altavoz de extensión de 4 Ohm o dos de 8 Ohm. Además, el altavoz interno del combo MkII HT Etapa 60 se puede enchufar aquí si se utiliza con una extensión de 8 Ohm. Ver la tabla siguiente.
USA UK
Español E
spañol
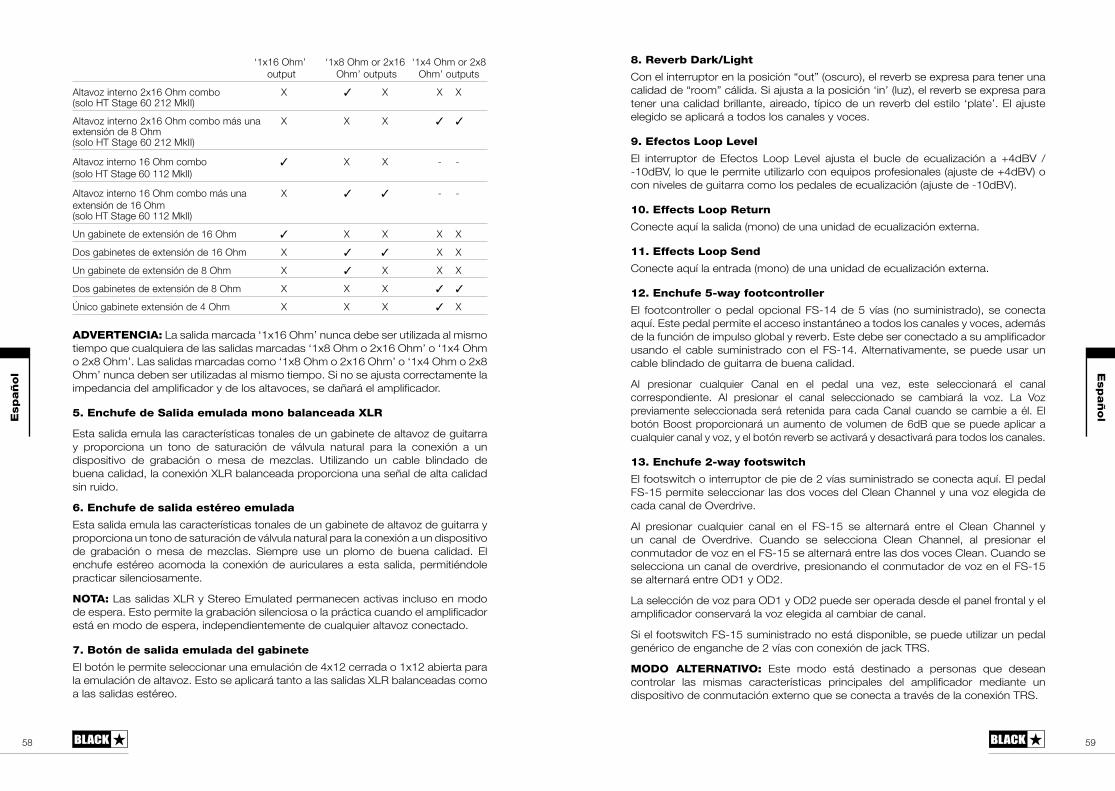
5958
‘1x16 Ohm’ ‘1x8 Ohm or 2x16 ‘1x4 Ohm or 2x8 output Ohm’ outputs Ohm’ outputs
Altavoz interno 2x16 Ohm combo X ✓ X X X (solo HT Stage 60 212 MkII)
Altavoz interno 2x16 Ohm combo más una X X X ✓ ✓ extensión de 8 Ohm (solo HT Stage 60 212 MkII)
Altavoz interno 16 Ohm combo ✓ X X - - (solo HT Stage 60 112 MkII)
Altavoz interno 16 Ohm combo más una X ✓ ✓ - - extensión de 16 Ohm (solo HT Stage 60 112 MkII)
Un gabinete de extensión de 16 Ohm ✓ X X X X
Dos gabinetes de extensión de 16 Ohm X ✓ ✓ X X
Un gabinete de extensión de 8 Ohm X ✓ X X X
Dos gabinetes de extensión de 8 Ohm X X X ✓ ✓
Único gabinete extensión de 4 Ohm X X X ✓ X
ADVERTENCIA: La salida marcada ‘1x16 Ohm’ nunca debe ser utilizada al mismo tiempo que cualquiera de las salidas marcadas ‘1x8 Ohm o 2x16 Ohm’ o ‘1x4 Ohm o 2x8 Ohm’. Las salidas marcadas como ‘1x8 Ohm o 2x16 Ohm’ o ‘1x4 Ohm o 2x8 Ohm’ nunca deben ser utilizadas al mismo tiempo. Si no se ajusta correctamente la impedancia del amplificador y de los altavoces, se dañará el amplificador.
5. Enchufe de Salida emulada mono balanceada XLR
Esta salida emula las características tonales de un gabinete de altavoz de guitarra y proporciona un tono de saturación de válvula natural para la conexión a un dispositivo de grabación o mesa de mezclas. Utilizando un cable blindado de buena calidad, la conexión XLR balanceada proporciona una señal de alta calidad sin ruido.
6. Enchufe de salida estéreo emulada
Esta salida emula las características tonales de un gabinete de altavoz de guitarra y proporciona un tono de saturación de válvula natural para la conexión a un dispositivo de grabación o mesa de mezclas. Siempre use un plomo de buena calidad. El enchufe estéreo acomoda la conexión de auriculares a esta salida, permitiéndole practicar silenciosamente.
NOTA: Las salidas XLR y Stereo Emulated permanecen activas incluso en modo de espera. Esto permite la grabación silenciosa o la práctica cuando el amplificador está en modo de espera, independientemente de cualquier altavoz conectado.
7. Botón de salida emulada del gabinete
El botón le permite seleccionar una emulación de 4x12 cerrada o 1x12 abierta para la emulación de altavoz. Esto se aplicará tanto a las salidas XLR balanceadas como a las salidas estéreo.
8. Reverb Dark/Light
Con el interruptor en la posición “out” (oscuro), el reverb se expresa para tener una calidad de “room” cálida. Si ajusta a la posición ‘in’ (luz), el reverb se expresa para tener una calidad brillante, aireado, típico de un reverb del estilo ‘plate’. El ajuste elegido se aplicará a todos los canales y voces.
9. Efectos Loop Level
El interruptor de Efectos Loop Level ajusta el bucle de ecualización a +4dBV / -10dBV, lo que le permite utilizarlo con equipos profesionales (ajuste de +4dBV) o con niveles de guitarra como los pedales de ecualización (ajuste de -10dBV).
10. Effects Loop Return
Conecte aquí la salida (mono) de una unidad de ecualización externa.
11. Effects Loop Send
Conecte aquí la entrada (mono) de una unidad de ecualización externa.
12. Enchufe 5-way footcontroller
El footcontroller o pedal opcional FS-14 de 5 vías (no suministrado), se conecta aquí. Este pedal permite el acceso instantáneo a todos los canales y voces, además de la función de impulso global y reverb. Este debe ser conectado a su amplificador usando el cable suministrado con el FS-14. Alternativamente, se puede usar un cable blindado de guitarra de buena calidad.
Al presionar cualquier Canal en el pedal una vez, este seleccionará el canal correspondiente. Al presionar el canal seleccionado se cambiará la voz. La Voz previamente seleccionada será retenida para cada Canal cuando se cambie a él. El botón Boost proporcionará un aumento de volumen de 6dB que se puede aplicar a cualquier canal y voz, y el botón reverb se activará y desactivará para todos los canales.
13. Enchufe 2-way footswitch
El footswitch o interruptor de pie de 2 vías suministrado se conecta aquí. El pedal FS-15 permite seleccionar las dos voces del Clean Channel y una voz elegida de cada canal de Overdrive.
Al presionar cualquier canal en el FS-15 se alternará entre el Clean Channel y un canal de Overdrive. Cuando se selecciona Clean Channel, al presionar el conmutador de voz en el FS-15 se alternará entre las dos voces Clean. Cuando se selecciona un canal de overdrive, presionando el conmutador de voz en el FS-15 se alternará entre OD1 y OD2.
La selección de voz para OD1 y OD2 puede ser operada desde el panel frontal y el amplificador conservará la voz elegida al cambiar de canal.
Si el footswitch FS-15 suministrado no está disponible, se puede utilizar un pedal genérico de enganche de 2 vías con conexión de jack TRS.
MODO ALTERNATIVO: Este modo está destinado a personas que desean controlar las mismas características principales del amplificador mediante un dispositivo de conmutación externo que se conecta a través de la conexión TRS.
Español E
spañol
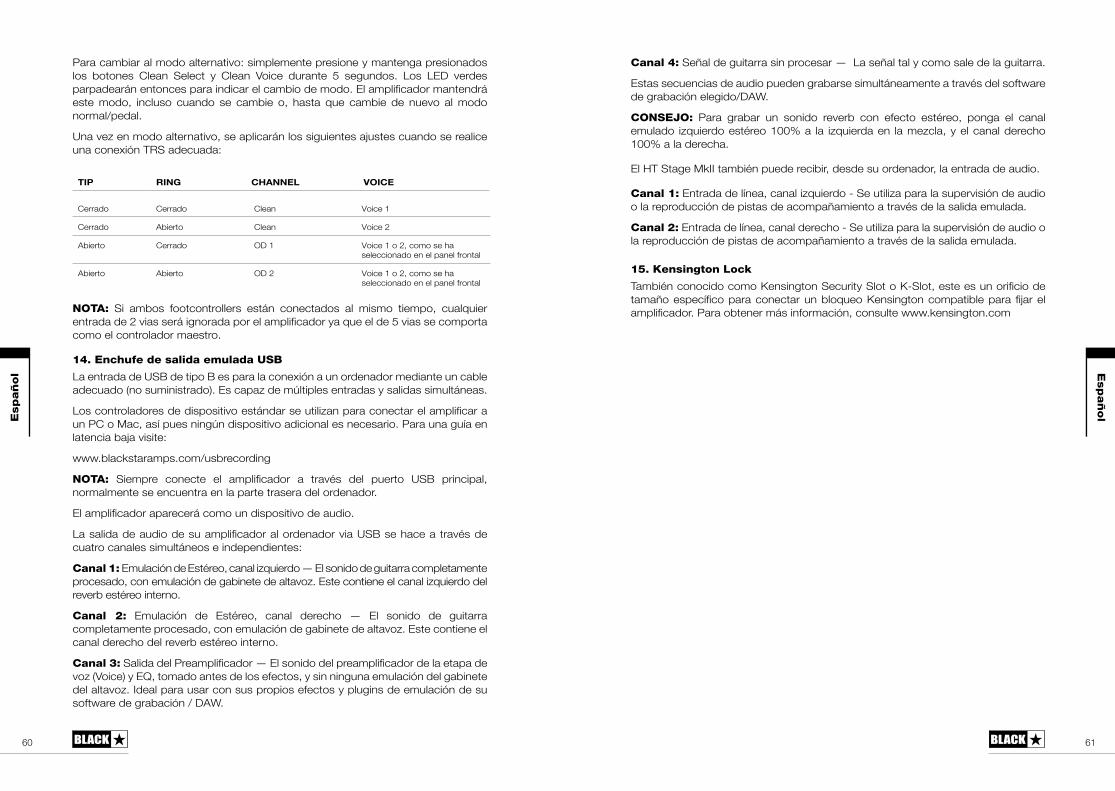
6160
Para cambiar al modo alternativo: simplemente presione y mantenga presionados los botones Clean Select y Clean Voice durante 5 segundos. Los LED verdes parpadearán entonces para indicar el cambio de modo. El amplificador mantendrá este modo, incluso cuando se cambie o, hasta que cambie de nuevo al modo normal/pedal.
Una vez en modo alternativo, se aplicarán los siguientes ajustes cuando se realice una conexión TRS adecuada:
TIP RING CHANNEL VOICE
Cerrado Cerrado Clean Voice 1
Cerrado Abierto Clean Voice 2
Abierto Cerrado OD 1 Voice 1 o 2, como se ha seleccionado en el panel frontal
Abierto Abierto OD 2 Voice 1 o 2, como se ha seleccionado en el panel frontal
NOTA: Si ambos footcontrollers están conectados al mismo tiempo, cualquier entrada de 2 vias será ignorada por el amplificador ya que el de 5 vias se comporta como el controlador maestro.
14. Enchufe de salida emulada USB
La entrada de USB de tipo B es para la conexión a un ordenador mediante un cable adecuado (no suministrado). Es capaz de múltiples entradas y salidas simultáneas.
Los controladores de dispositivo estándar se utilizan para conectar el amplificar a un PC o Mac, así pues ningún dispositivo adicional es necesario. Para una guía en latencia baja visite:
www.blackstaramps.com/usbrecording
NOTA: Siempre conecte el amplificador a través del puerto USB principal, normalmente se encuentra en la parte trasera del ordenador.
El amplificador aparecerá como un dispositivo de audio.
La salida de audio de su amplificador al ordenador via USB se hace a través de cuatro canales simultáneos e independientes:
Canal 1: Emulación de Estéreo, canal izquierdo — El sonido de guitarra completamente procesado, con emulación de gabinete de altavoz. Este contiene el canal izquierdo del reverb estéreo interno.
Canal 2: Emulación de Estéreo, canal derecho — El sonido de guitarra completamente procesado, con emulación de gabinete de altavoz. Este contiene el canal derecho del reverb estéreo interno.
Canal 3: Salida del Preamplificador — El sonido del preamplificador de la etapa de voz (Voice) y EQ, tomado antes de los efectos, y sin ninguna emulación del gabinete del altavoz. Ideal para usar con sus propios efectos y plugins de emulación de su software de grabación / DAW.
Canal 4: Señal de guitarra sin procesar — La señal tal y como sale de la guitarra.
Estas secuencias de audio pueden grabarse simultáneamente a través del software de grabación elegido/DAW.
CONSEJO: Para grabar un sonido reverb con efecto estéreo, ponga el canal emulado izquierdo estéreo 100% a la izquierda en la mezcla, y el canal derecho 100% a la derecha.
El HT Stage MkII también puede recibir, desde su ordenador, la entrada de audio.
Canal 1: Entrada de línea, canal izquierdo - Se utiliza para la supervisión de audio o la reproducción de pistas de acompañamiento a través de la salida emulada.
Canal 2: Entrada de línea, canal derecho - Se utiliza para la supervisión de audio o la reproducción de pistas de acompañamiento a través de la salida emulada.
15. Kensington Lock
También conocido como Kensington Security Slot o K-Slot, este es un orificio de tamaño específico para conectar un bloqueo Kensington compatible para fijar el amplificador. Para obtener más información, consulte www.kensington.com
Español E
spañol
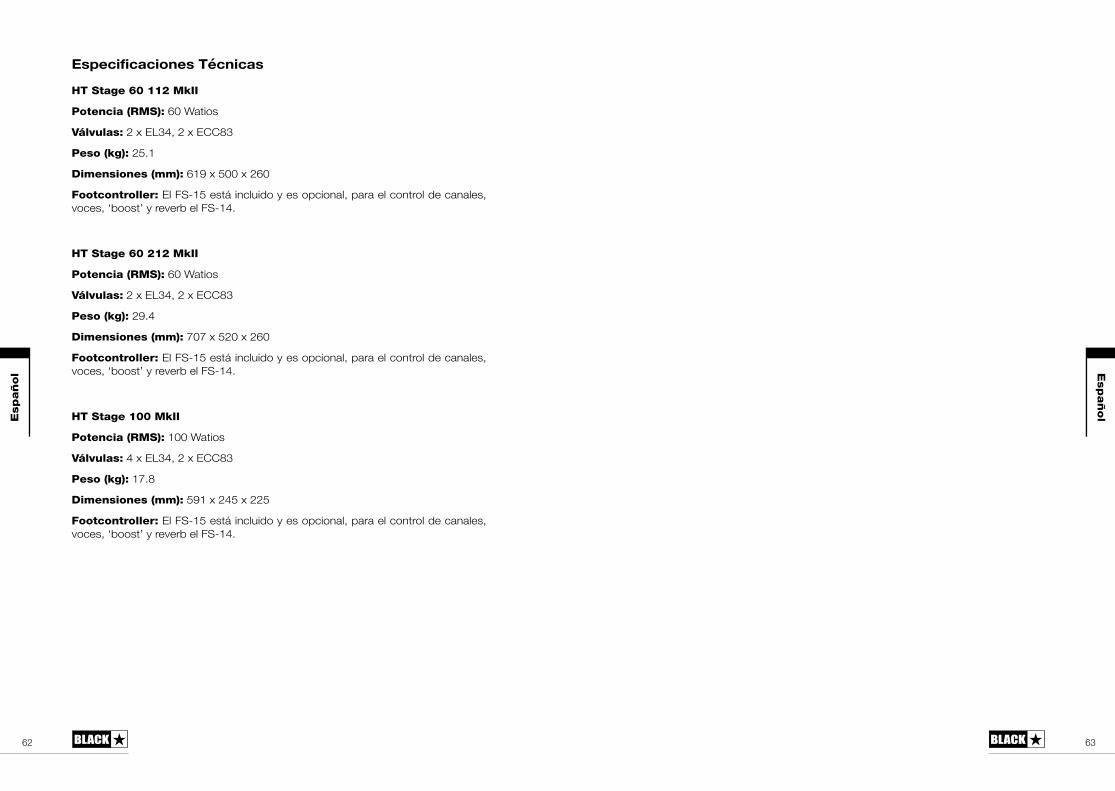
6362
Especificaciones Técnicas
HT Stage 60 112 MkII
Potencia (RMS): 60 Watios
Válvulas: 2 x EL34, 2 x ECC83
Peso (kg): 25.1
Dimensiones (mm): 619 x 500 x 260
Footcontroller: El FS-15 está incluido y es opcional, para el control de canales, voces, ‘boost’ y reverb el FS-14.
HT Stage 60 212 MkII
Potencia (RMS): 60 Watios
Válvulas: 2 x EL34, 2 x ECC83
Peso (kg): 29.4
Dimensiones (mm): 707 x 520 x 260
Footcontroller: El FS-15 está incluido y es opcional, para el control de canales, voces, ‘boost’ y reverb el FS-14.
HT Stage 100 MkII
Potencia (RMS): 100 Watios
Válvulas: 4 x EL34, 2 x ECC83
Peso (kg): 17.8
Dimensiones (mm): 591 x 245 x 225
Footcontroller: El FS-15 está incluido y es opcional, para el control de canales, voces, ‘boost’ y reverb el FS-14.
Español E
spañol
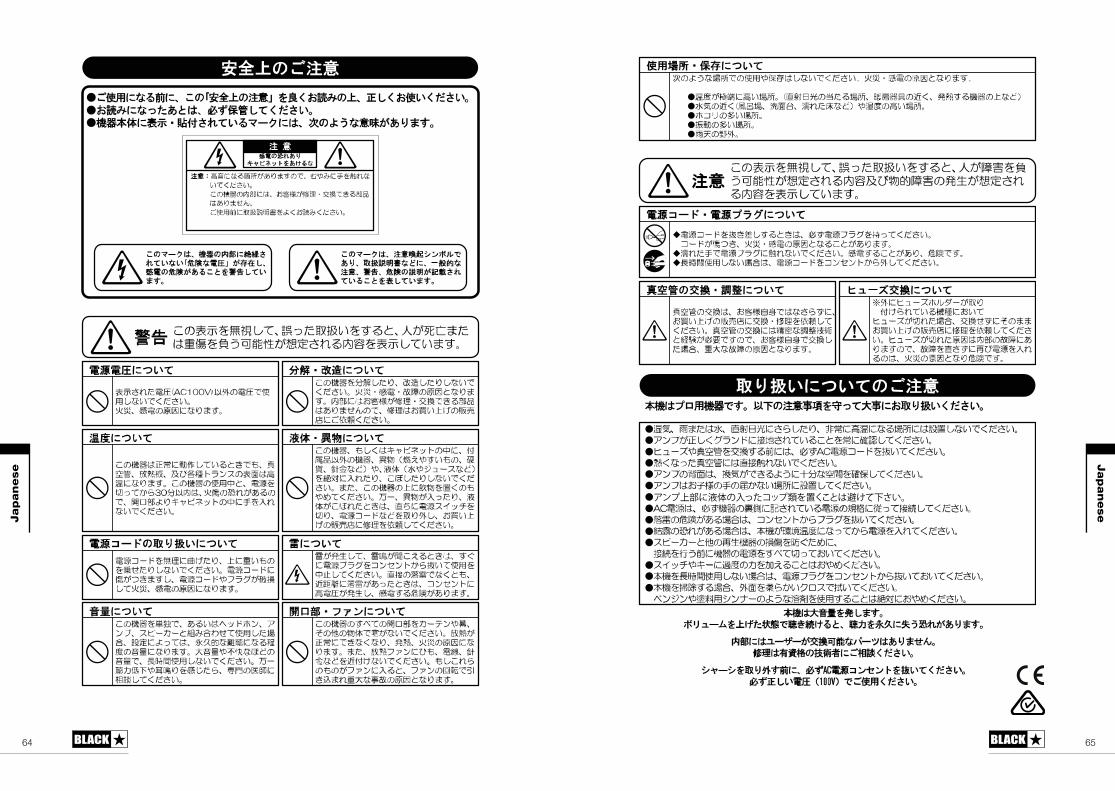
6564
Japanese
Japanese
アンプ上部に液体の入ったコップ類を置くことは避けて下さい。アンプ上部に液体の入ったコップ類を置くことは避けて下さい。
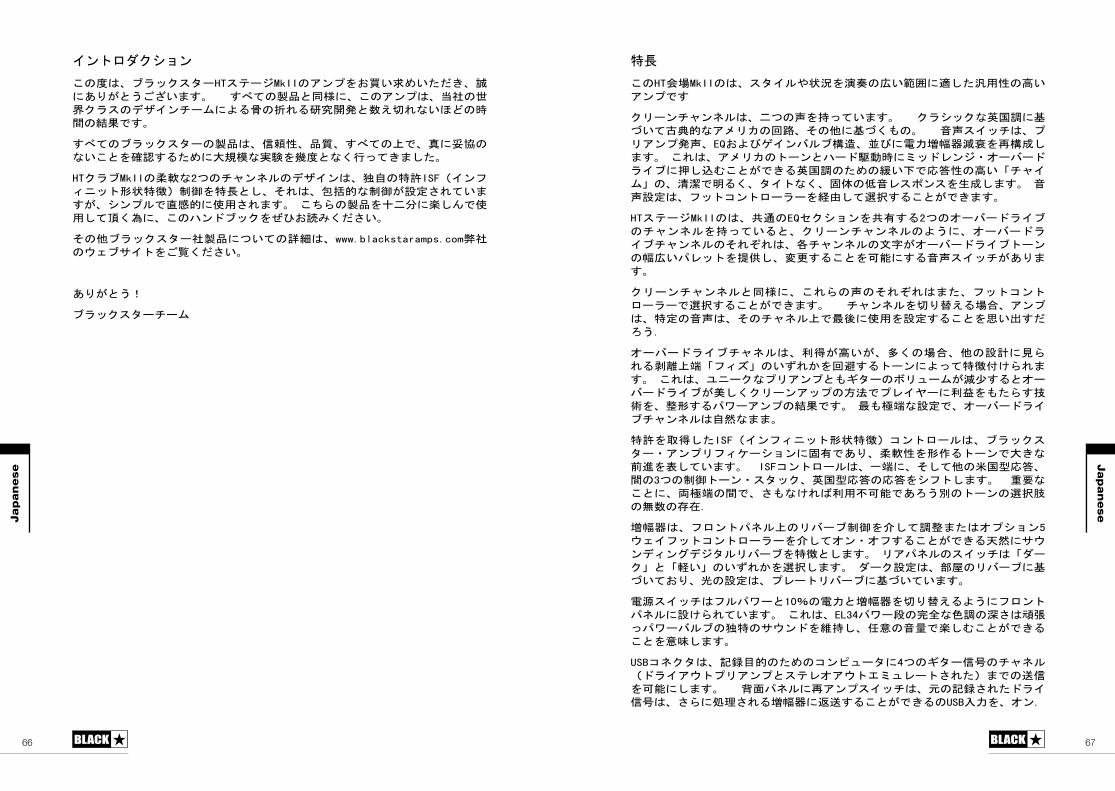
6766
イントロダクション
この度は、ブラックスターHTステージMkIIのアンプをお買い求めいただき、誠
にありがとうございます。 すべての製品と同様に、このアンプは、当社の世
界クラスのデザインチームによる骨の折れる研究開発と数え切れないほどの時
間の結果です。
すべてのブラックスターの製品は、信頼性、品質、すべての上で、真に妥協の
ないことを確認するために大規模な実験を幾度となく行ってきました。
HTクラブMkIIの柔軟な2つのチャンネルのデザインは、独自の特許ISF(インフ
ィニット形状特徴)制御を特長とし、それは、包括的な制御が設定されていま
すが、シンプルで直感的に使用されます。 こちらの製品を十二分に楽しんで使
用して頂く為に、このハンドブックをぜひお読みください。
その他ブラックスター社製品についての詳細は、www.blackstaramps.com弊社
のウェブサイトをご覧ください。
ありがとう!
ブラックスターチーム
特長
このHT会場MkIIのは、スタイルや状況を演奏の広い範囲に適した汎用性の高い
アンプです
クリーンチャンネルは、二つの声を持っています。 クラシックな英国調に基
づいて古典的なアメリカの回路、その他に基づくもの。 音声スイッチは、プ
リアンプ発声、EQおよびゲインバルブ構造、並びに電力増幅器減衰を再構成し
ます。 これは、アメリカのトーンとハード駆動時にミッドレンジ・オーバード
ライブに押し込むことができる英国調のための緩い下で応答性の高い「チャイ
ム」の、清潔で明るく、タイトなく、固体の低音レスポンスを生成します。 音
声設定は、フットコントローラーを経由して選択することができます。
HTステージMkIIのは、共通のEQセクションを共有する2つのオーバードライブ
のチャンネルを持っていると、クリーンチャンネルのように、オーバードラ
イブチャンネルのそれぞれは、各チャンネルの文字がオーバードライブトーン
の幅広いパレットを提供し、変更することを可能にする音声スイッチがありま
す。
クリーンチャンネルと同様に、これらの声のそれぞれはまた、フットコント
ローラーで選択することができます。 チャンネルを切り替える場合、アンプ
は、特定の音声は、そのチャネル上で最後に使用を設定することを思い出すだ
ろう.
オーバードライブチャネルは、利得が高いが、多くの場合、他の設計に見ら
れる剥離上端「フィズ」のいずれかを回避するトーンによって特徴付けられま
す。 これは、ユニークなプリアンプともギターのボリュームが減少するとオー
バードライブが美しくクリーンアップの方法でプレイヤーに利益をもたらす技
術を、整形するパワーアンプの結果です。 最も極端な設定で、オーバードライ
ブチャンネルは自然なまま。
特許を取得したISF(インフィニット形状特徴)コントロールは、ブラックス
ター・アンプリフィケーションに固有であり、柔軟性を形作るトーンで大きな
前進を表しています。 ISFコントロールは、一端に、そして他の米国型応答、
間の3つの制御トーン・スタック、英国型応答の応答をシフトします。 重要な
ことに、両極端の間で、さもなければ利用不可能であろう別のトーンの選択肢
の無数の存在.
増幅器は、フロントパネル上のリバーブ制御を介して調整またはオプション5
ウェイフットコントローラーを介してオン・オフすることができる天然にサウ
ンディングデジタルリバーブを特徴とします。 リアパネルのスイッチは「ダー
ク」と「軽い」のいずれかを選択します。 ダーク設定は、部屋のリバーブに基
づいており、光の設定は、プレートリバーブに基づいています。
電源スイッチはフルパワーと10%の電力と増幅器を切り替えるようにフロント
パネルに設けられています。 これは、EL34パワー段の完全な色調の深さは頑張
っパワーバルブの独特のサウンドを維持し、任意の音量で楽しむことができる
ことを意味します。
USBコネクタは、記録目的のためのコンピュータに4つのギター信号のチャネル
(ドライアウトプリアンプとステレオアウトエミュレートされた)までの送信
を可能にします。 背面パネルに再アンプスイッチは、元の記録されたドライ
信号は、さらに処理される増幅器に返送することができるのUSB入力を、オン.
Japanese
Japanese
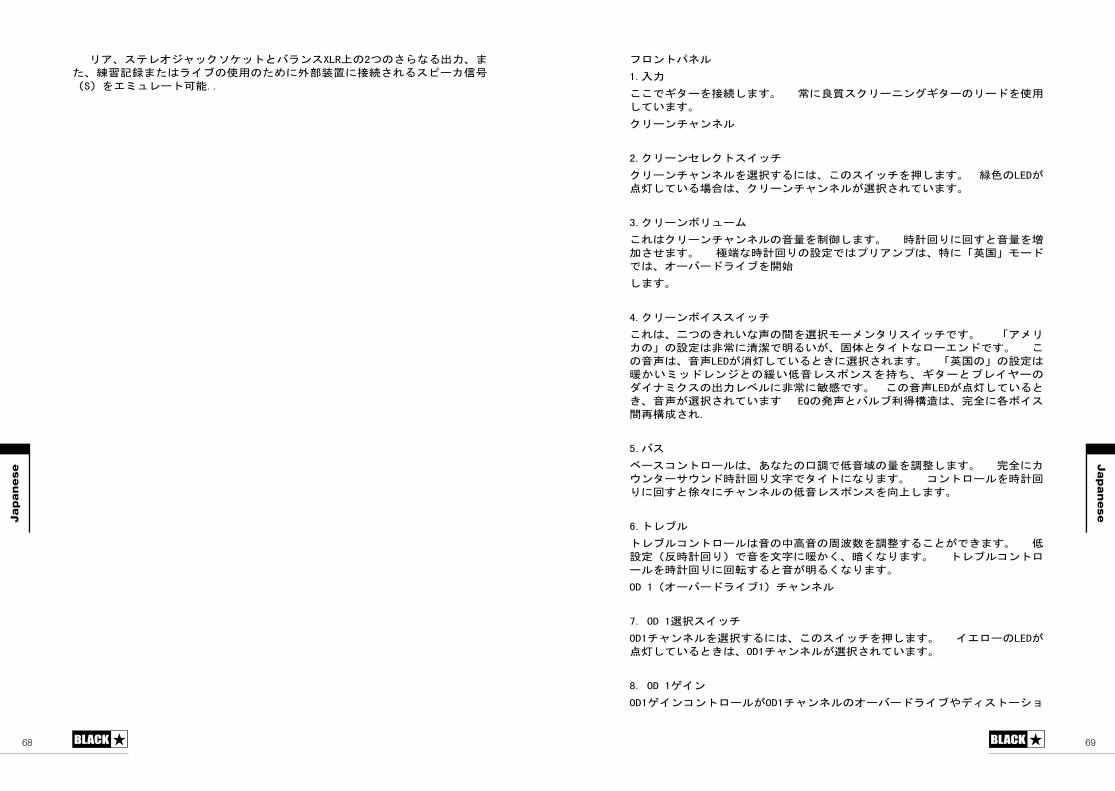
6968
リア、ステレオジャックソケットとバランスXLR上の2つのさらなる出力、ま
た、練習記録またはライブの使用のために外部装置に接続されるスピーカ信号
(S)をエミュレート可能..
フロントパネル
1.入力
ここでギターを接続します。 常に良質スクリーニングギターのリードを使用
しています。
クリーンチャンネル
2.クリーンセレクトスイッチ
クリーンチャンネルを選択するには、このスイッチを押します。 緑色のLEDが
点灯している場合は、クリーンチャンネルが選択されています。
3.クリーンボリューム
これはクリーンチャンネルの音量を制御します。 時計回りに回すと音量を増
加させます。 極端な時計回りの設定ではプリアンプは、特に「英国」モード
では、オーバードライブを開始
します。
4.クリーンボイススイッチ
これは、二つのきれいな声の間を選択モーメンタリスイッチです。 「アメリ
カの」の設定は非常に清潔で明るいが、固体とタイトなローエンドです。 こ
の音声は、音声LEDが消灯しているときに選択されます。 「英国の」の設定は
暖かいミッドレンジとの緩い低音レスポンスを持ち、ギターとプレイヤーの
ダイナミクスの出力レベルに非常に敏感です。 この音声LEDが点灯していると
き、音声が選択されています EQの発声とバルブ利得構造は、完全に各ボイス
間再構成され.
5.バス
ベースコントロールは、あなたの口調で低音域の量を調整します。 完全にカ
ウンターサウンド時計回り文字でタイトになります。 コントロールを時計回
りに回すと徐々にチャンネルの低音レスポンスを向上します。
6.トレブル
トレブルコントロールは音の中高音の周波数を調整することができます。 低
設定(反時計回り)で音を文字に暖かく、暗くなります。 トレブルコントロ
ールを時計回りに回転すると音が明るくなります。
OD 1(オーバードライブ1)チャンネル
7. OD 1選択スイッチ
OD1チャンネルを選択するには、このスイッチを押します。 イエローのLEDが
点灯しているときは、OD1チャンネルが選択されています。
8. OD 1ゲイン
OD1ゲインコントロールがOD1チャンネルのオーバードライブやディストーショ
Japanese
Japanese
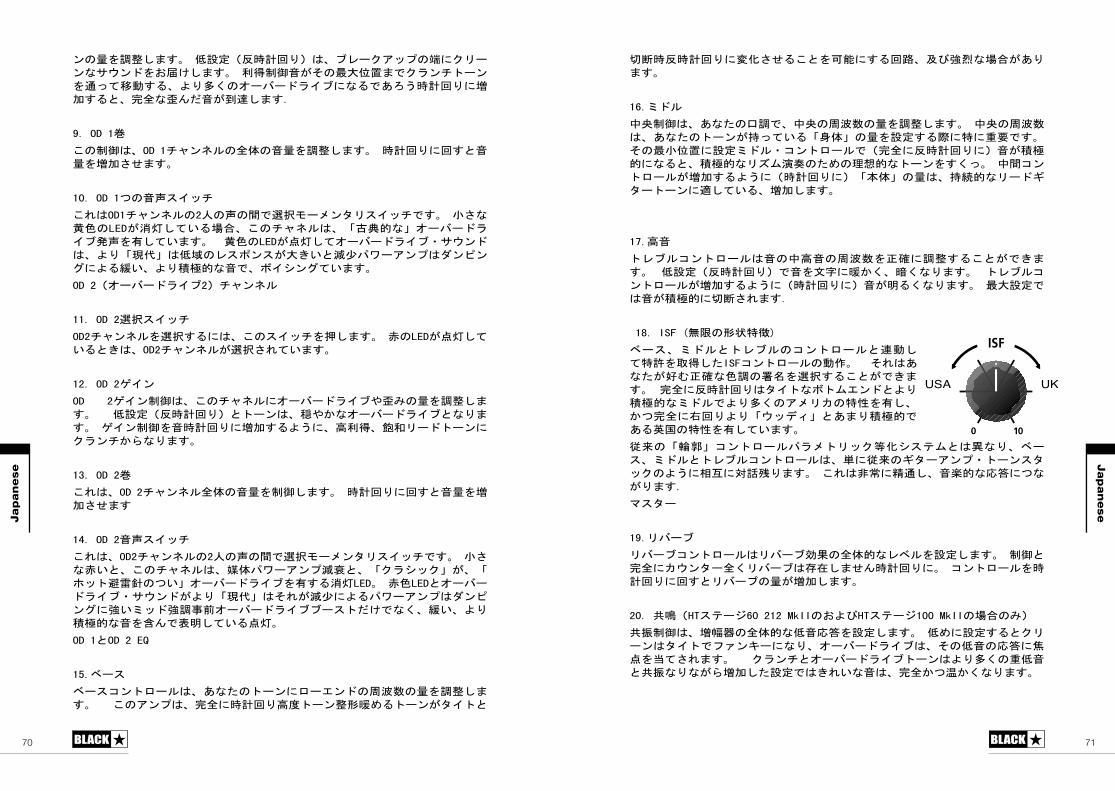
7170
ンの量を調整します。 低設定(反時計回り)は、ブレークアップの端にクリー
ンなサウンドをお届けします。 利得制御音がその最大位置までクランチトーン
を通って移動する、より多くのオーバードライブになるであろう時計回りに増
加すると、完全な歪んだ音が到達します.
9. OD 1巻
この制御は、OD 1チャンネルの全体の音量を調整します。 時計回りに回すと音
量を増加させます。
10. OD 1つの音声スイッチ
これはOD1チャンネルの2人の声の間で選択モーメンタリスイッチです。 小さな
黄色のLEDが消灯している場合、このチャネルは、「古典的な」オーバードラ
イブ発声を有しています。 黄色のLEDが点灯してオーバードライブ・サウンド
は、より「現代」は低域のレスポンスが大きいと減少パワーアンプはダンピン
グによる緩い、より積極的な音で、ボイシングています。
OD 2(オーバードライブ2)チャンネル
11. OD 2選択スイッチ
OD2チャンネルを選択するには、このスイッチを押します。 赤のLEDが点灯して
いるときは、OD2チャンネルが選択されています。
12. OD 2ゲイン
OD 2ゲイン制御は、このチャネルにオーバードライブや歪みの量を調整しま
す。 低設定(反時計回り)とトーンは、穏やかなオーバードライブとなりま
す。 ゲイン制御を音時計回りに増加するように、高利得、飽和リードトーンに
クランチからなります。
13. OD 2巻
これは、OD 2チャンネル全体の音量を制御します。 時計回りに回すと音量を増
加させます
14. OD 2音声スイッチ
これは、OD2チャンネルの2人の声の間で選択モーメンタリスイッチです。 小さ
な赤いと、このチャネルは、媒体パワーアンプ減衰と、「クラシック」が、「
ホット避雷針のつい」オーバードライブを有する消灯LED。 赤色LEDとオーバー
ドライブ・サウンドがより「現代」はそれが減少によるパワーアンプはダンピ
ングに強いミッド強調事前オーバードライブブーストだけでなく、緩い、より
積極的な音を含んで表明している点灯。
OD 1とOD 2 EQ
15.ベース
ベースコントロールは、あなたのトーンにローエンドの周波数の量を調整しま
す。 このアンプは、完全に時計回り高度トーン整形暖めるトーンがタイトと
切断時反時計回りに変化させることを可能にする回路、及び強烈な場合があり
ます。
16.ミドル
中央制御は、あなたの口調で、中央の周波数の量を調整します。 中央の周波数
は、あなたのトーンが持っている「身体」の量を設定する際に特に重要です。
その最小位置に設定ミドル・コントロールで(完全に反時計回りに)音が積極
的になると、積極的なリズム演奏のための理想的なトーンをすくっ。 中間コン
トロールが増加するように(時計回りに)「本体」の量は、持続的なリードギ
タートーンに適している、増加します。
17.高音
トレブルコントロールは音の中高音の周波数を正確に調整することができま
す。 低設定(反時計回り)で音を文字に暖かく、暗くなります。 トレブルコ
ントロールが増加するように(時計回りに)音が明るくなります。 最大設定で
は音が積極的に切断されます.
18. ISF (無限の形状特徴)
ベース、ミドルとトレブルのコントロールと連動し
て特許を取得したISFコントロールの動作。 それはあ
なたが好む正確な色調の署名を選択することができま
す。 完全に反時計回りはタイトなボトムエンドとより
積極的なミドルでより多くのアメリカの特性を有し、
かつ完全に右回りより「ウッディ」とあまり積極的で
ある英国の特性を有しています。
従来の「輪郭」コントロールパラメトリック等化システムとは異なり、ベー
ス、ミドルとトレブルコントロールは、単に従来のギターアンプ・トーンスタ
ックのように相互に対話残ります。 これは非常に精通し、音楽的な応答につな
がります.
マスター
19.リバーブ
リバーブコントロールはリバーブ効果の全体的なレベルを設定します。 制御と
完全にカウンター全くリバーブは存在しません時計回りに。 コントロールを時
計回りに回すとリバーブの量が増加します。
20. 共鳴(HTステージ60 212 MkIIのおよびHTステージ100 MkIIの場合のみ)
共振制御は、増幅器の全体的な低音応答を設定します。 低めに設定するとクリ
ーンはタイトでファンキーになり、オーバードライブは、その低音の応答に焦
点を当てされます。 クランチとオーバードライブトーンはより多くの重低音
と共振なりながら増加した設定ではきれいな音は、完全かつ温かくなります。
USA UK
Japanese
Japanese
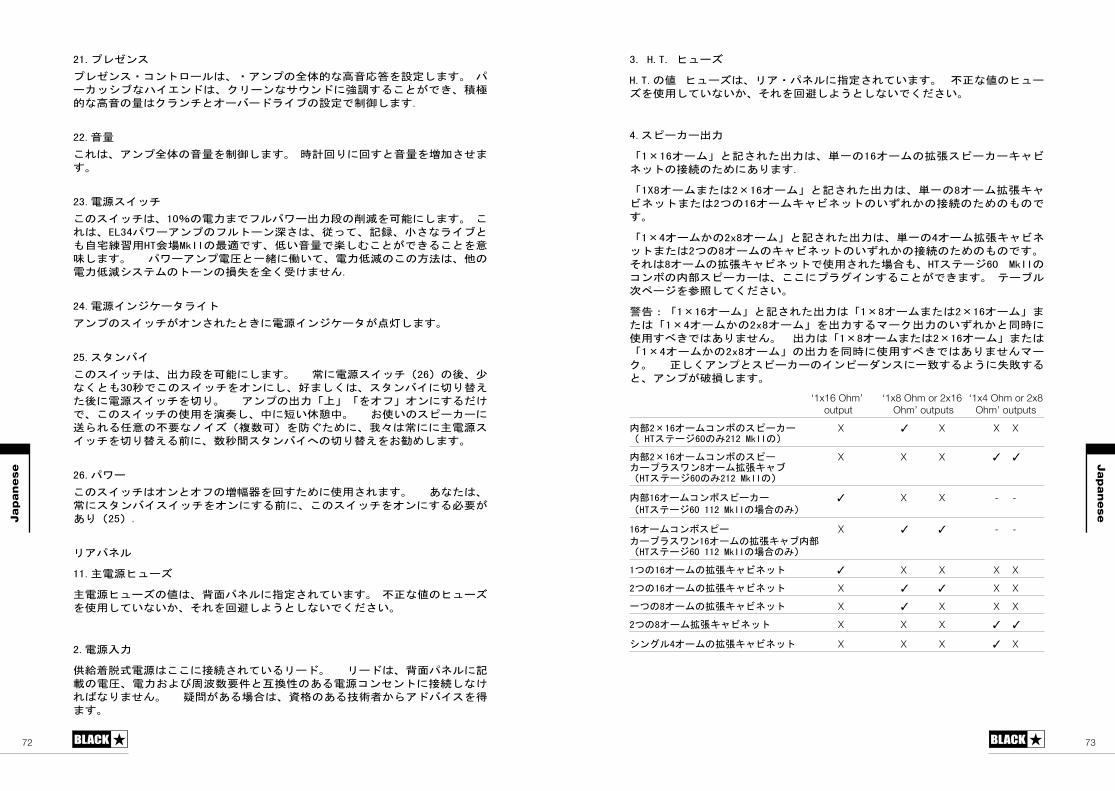
7372
21.プレゼンス
プレゼンス・コントロールは、・アンプの全体的な高音応答を設定します。 パ
ーカッシブなハイエンドは、クリーンなサウンドに強調することができ、積極
的な高音の量はクランチとオーバードライブの設定で制御します.
22.音量
これは、アンプ全体の音量を制御します。 時計回りに回すと音量を増加させま
す。
23.電源スイッチ
このスイッチは、10%の電力までフルパワー出力段の削減を可能にします。 こ
れは、EL34パワーアンプのフルトーン深さは、従って、記録、小さなライブと
も自宅練習用HT会場MkIIの最適です、低い音量で楽しむことができることを意
味します。 パワーアンプ電圧と一緒に働いて、電力低減のこの方法は、他の
電力低減システムのトーンの損失を全く受けません.
24.電源インジケータライト
アンプのスイッチがオンされたときに電源インジケータが点灯します。
25.スタンバイ
このスイッチは、出力段を可能にします。 常に電源スイッチ(26)の後、少
なくとも30秒でこのスイッチをオンにし、好ましくは、スタンバイに切り替え
た後に電源スイッチを切り。 アンプの出力「上」「をオフ」オンにするだけ
で、このスイッチの使用を演奏し、中に短い休憩中。 お使いのスピーカーに
送られる任意の不要なノイズ(複数可)を防ぐために、我々は常にに主電源ス
イッチを切り替える前に、数秒間スタンバイへの切り替えをお勧めします。
26.パワー
このスイッチはオンとオフの増幅器を回すために使用されます。 あなたは、
常にスタンバイスイッチをオンにする前に、このスイッチをオンにする必要が
あり(25).
リアパネル
11.主電源ヒューズ
主電源ヒューズの値は、背面パネルに指定されています。 不正な値のヒューズ
を使用していないか、それを回避しようとしないでください。
2.電源入力
供給着脱式電源はここに接続されているリード。 リードは、背面パネルに記
載の電圧、電力および周波数要件と互換性のある電源コンセントに接続しなけ
ればなりません。 疑問がある場合は、資格のある技術者からアドバイスを得
ます。
3. H.T. ヒューズ
H.T.の値 ヒューズは、リア・パネルに指定されています。 不正な値のヒュー
ズを使用していないか、それを回避しようとしないでください。
4.スピーカー出力
「1×16オーム」と記された出力は、単一の16オームの拡張スピーカーキャビ
ネットの接続のためにあります.
「1X8オームまたは2×16オーム」と記された出力は、単一の8オーム拡張キャ
ビネットまたは2つの16オームキャビネットのいずれかの接続のためのもので
す。
「1×4オームかの2x8オーム」と記された出力は、単一の4オーム拡張キャビネ
ットまたは2つの8オームのキャビネットのいずれかの接続のためのものです。
それは8オームの拡張キャビネットで使用された場合も、HTステージ60 MkIIの
コンボの内部スピーカーは、ここにプラグインすることができます。 テーブル
次ページを参照してください。
警告:「1×16オーム」と記された出力は「1×8オームまたは2×16オーム」ま
たは「1×4オームかの2x8オーム」を出力するマーク出力のいずれかと同時に
使用すべきではありません。 出力は「1×8オームまたは2×16オーム」または
「1×4オームかの2x8オーム」の出力を同時に使用すべきではありませんマー
ク。 正しくアンプとスピーカーのインピーダンスに一致するように失敗する
と、アンプが破損します。
‘1x16 Ohm’ ‘1x8 Ohm or 2x16 ‘1x4 Ohm or 2x8 output Ohm’ outputs Ohm’ outputs
内部2×16オームコンボのスピーカー X ✓ X X X ( HTステージ60のみ212 MkIIの)
内部2×16オームコンボのスピー X X X ✓ ✓ カープラスワン8オーム拡張キャブ (HTステージ60のみ212 MkIIの)
内部16オームコンボスピーカー ✓ X X - - (HTステージ60 112 MkIIの場合のみ)
16オームコンボスピー X ✓ ✓ - - カープラスワン16オームの拡張キャブ内部 (HTステージ60 112 MkIIの場合のみ)
1つの16オームの拡張キャビネット ✓ X X X X
2つの16オームの拡張キャビネット X ✓ ✓ X X
一つの8オームの拡張キャビネット X ✓ X X X
2つの8オーム拡張キャビネット X X X ✓ ✓
シングル4オームの拡張キャビネット X X X ✓ X
Japanese
Japanese
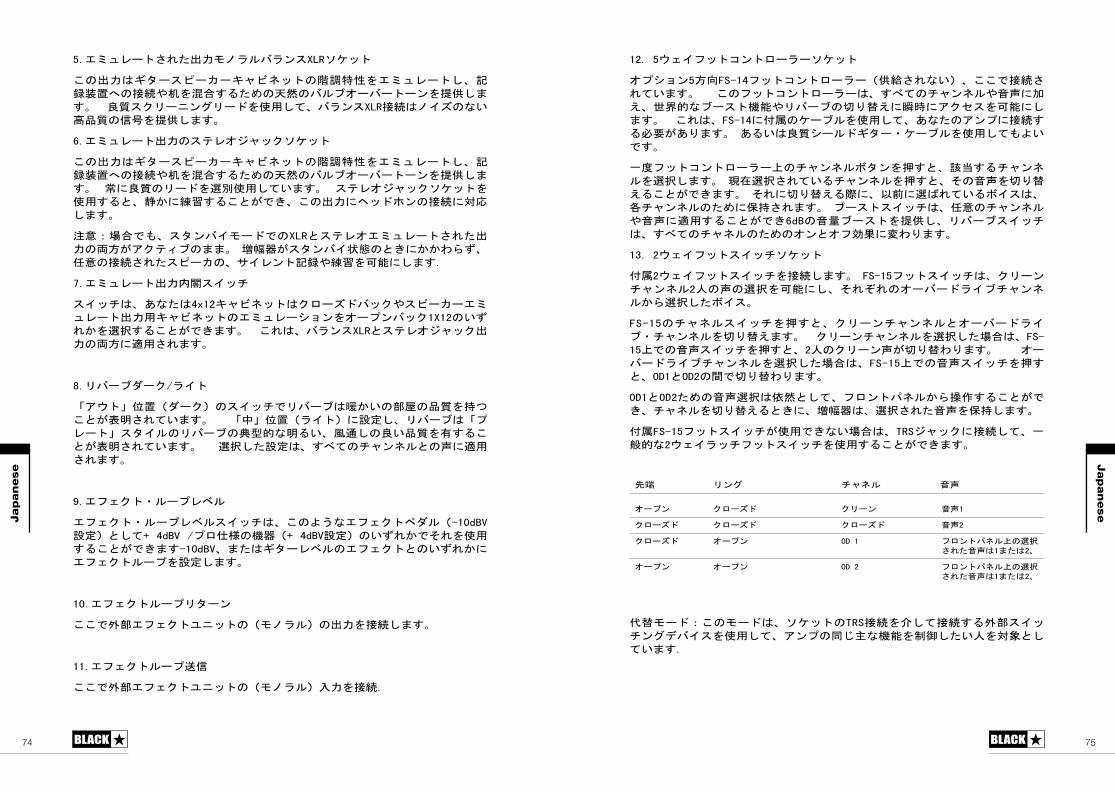
7574
5.エミュレートされた出力モノラルバランスXLRソケット
この出力はギタースピーカーキャビネットの階調特性をエミュレートし、記
録装置への接続や机を混合するための天然のバルブオーバートーンを提供しま
す。 良質スクリーニングリードを使用して、バランスXLR接続はノイズのない
高品質の信号を提供します。
6.エミュレート出力のステレオジャックソケット
この出力はギタースピーカーキャビネットの階調特性をエミュレートし、記
録装置への接続や机を混合するための天然のバルブオーバートーンを提供しま
す。 常に良質のリードを選別使用しています。 ステレオジャックソケットを
使用すると、静かに練習することができ、この出力にヘッドホンの接続に対応
します。
注意:場合でも、スタンバイモードでのXLRとステレオエミュレートされた出
力の両方がアクティブのまま。 増幅器がスタンバイ状態のときにかかわらず、
任意の接続されたスピーカの、サイレント記録や練習を可能にします.
7.エミュレート出力内閣スイッチ
スイッチは、あなたは4x12キャビネットはクローズドバックやスピーカーエミ
ュレート出力用キャビネットのエミュレーションをオープンバック1X12のいず
れかを選択することができます。 これは、バランスXLRとステレオジャック出
力の両方に適用されます。
8.リバーブダーク/ライト
「アウト」位置(ダーク)のスイッチでリバーブは暖かいの部屋の品質を持つ
ことが表明されています。 「中」位置(ライト)に設定し、リバーブは「プ
レート」スタイルのリバーブの典型的な明るい、風通しの良い品質を有するこ
とが表明されています。 選択した設定は、すべてのチャンネルとの声に適用
されます。
9.エフェクト・ループレベル
エフェクト・ループレベルスイッチは、このようなエフェクトペダル(-10dBV
設定)として+ 4dBV /プロ仕様の機器(+ 4dBV設定)のいずれかでそれを使用
することができます-10dBV、またはギターレベルのエフェクトとのいずれかに
エフェクトループを設定します。
10.エフェクトループリターン
ここで外部エフェクトユニットの(モノラル)の出力を接続します。
11.エフェクトループ送信
ここで外部エフェクトユニットの(モノラル)入力を接続.
12. 5ウェイフットコントローラーソケット
オプション5方向FS-14フットコントローラー(供給されない)、ここで接続さ
れています。 このフットコントローラーは、すべてのチャンネルや音声に加
え、世界的なブースト機能やリバーブの切り替えに瞬時にアクセスを可能にし
ます。 これは、FS-14に付属のケーブルを使用して、あなたのアンプに接続す
る必要があります。 あるいは良質シールドギター・ケーブルを使用してもよい
です。
一度フットコントローラー上のチャンネルボタンを押すと、該当するチャンネ
ルを選択します。 現在選択されているチャンネルを押すと、その音声を切り替
えることができます。 それに切り替える際に、以前に選ばれているボイスは、
各チャンネルのために保持されます。 ブーストスイッチは、任意のチャンネル
や音声に適用することができ6dBの音量ブーストを提供し、リバーブスイッチ
は、すべてのチャネルのためのオンとオフ効果に変わります。
13. 2ウェイフットスイッチソケット
付属2ウェイフットスイッチを接続します。 FS-15フットスイッチは、クリーン
チャンネル2人の声の選択を可能にし、それぞれのオーバードライブチャンネ
ルから選択したボイス。
FS-15のチャネルスイッチを押すと、クリーンチャンネルとオーバードライ
ブ・チャンネルを切り替えます。 クリーンチャンネルを選択した場合は、FS-
15上での音声スイッチを押すと、2人のクリーン声が切り替わります。 オー
バードライブチャンネルを選択した場合は、FS-15上での音声スイッチを押す
と、OD1とOD2の間で切り替わります。
OD1とOD2ための音声選択は依然として、フロントパネルから操作することがで
き、チャネルを切り替えるときに、増幅器は、選択された音声を保持します。
付属FS-15フットスイッチが使用できない場合は、TRSジャックに接続して、一
般的な2ウェイラッチフットスイッチを使用することができます。
先端 リング チャネル 音声
オープン クローズド クリーン 音声1
クローズド クローズド クローズド 音声2
クローズド オープン OD 1 フロントパネル上の選択された音声は1または2、
オープン オープン OD 2 フロントパネル上の選択された音声は1または2、
代替モード:このモードは、ソケットのTRS接続を介して接続する外部スイッ
チングデバイスを使用して、アンプの同じ主な機能を制御したい人を対象とし
ています.
Japanese
Japanese
7776
14.再アンペアスイッチ
USBソケットを介して、入力信号のリアンプに係合するように切り替えます。
AMPは「再AMPモード」にあるときに、隣接する赤色LEDが点灯します。
使用方法のガイダンスについては、以下を参照してください。
15.エミュレート出力のUSBソケット
このB型USBソケットは、適切なリード(供給されていない)を介してコンピュ
ータに接続するためのものです。 複数の同時入出力が可能です。
標準的なオーディオドライバをPC、Macや他の適用可能な記録装置にアンプを
接続するために使用されています。 いかなる特定のドライバは必要ありませ
ん。 低レイテンシーのUSB録音に関するガイドは、www.blackstaramps.com/
usbrecordingをご覧ください。
注意:必ず、多くの場合、コンピュータの背面で見つかった、メインのUSBポ
ートを介して増幅器を接続してください。
アンプは、録音ソフトウェア内のオーディオキャプチャデバイスとして表示さ
れます。
お使いのアンプから直接コンピュータにUSB経由での音声出力は、4つの独立し
た、同時チャネル間で実施されます:
チャンネル1:ステレオエミュレートされ、左チャンネル - 完全に処理された
ギターの音、スピーカー・キャビネット・エミュレーションと。 これは、内部
ステレオリバーブの左チャンネルが含まれます。
チャンネル2:ステレオエミュレートされ、右チャンネル - 完全に処理された
ギターの音、スピーカー・キャビネット・エミュレーションと。 これは、内部
ステレオリバーブの右チャンネルが含まれます。
チャンネル3:プリアンプ出力 - チャンネル、声やEQ段階のプリアンプ音、リ
バーブの前にし、任意のスピーカー・キャビネット・エミュレーションなしで
撮影しました。 レコーディングソフトウェア/ DAW内に独自のエフェクトやキ
ャビネットエミュレーションプラグインを使用するのに最適です。
チャンネル4:未処理のドライなギター信号 - これはアンプによって受信され
たギターからの直接信号です。
これらのオーディオストリーム、選択した録画ソフト/ DAW内で同時に記録する
ことができます。
先端:ステレオリバーブを記録するためには、音をもたらした、ステレオは
100%ミックスで左右チャンネルに100%の権利をパン左チャンネルをエミュレ
ートパン。
HTステージMkIIのも、あなたのコンピュータからのオーディオ入力を受け取る
ことができます:
Japanese
Japanese
ノーマルモードのとき:
チャンネル1:ライン入力、左チャンネル - エミュレート出力を介してオーデ
ィオモニタリングやバッキングトラックを再生するために使用します。
チャンネル2:ライン入力、右チャンネル - エミュレート出力を介してオーデ
ィオモニタリングやバッキングトラックを再生するために使用します。
チャンネル1:リアンプ入力 - リアンプのためのあなたのアンプにあらかじめ
記録された未処理のギターの信号を送信します。
チャンネル2:モノライン入力 - オーディオモニタリングやバッキングトラッ
クを再生するために使用します。 USBオーディオ出力に送信されません。
16. ケンジントンロック
また、この固定点に増幅器を確保するために互換性のあるケンジントンロック
を接続するための具体的なサイズの孔であるケンジントンセキュリティスロッ
トまたはKスロットとしても知られています。
詳細については、www.kensington.com

7978
技術仕様
HTステージ60 112 MkII
電力(RMS):60ワット
バルブ:2 x EL34、2 x ECC83
重量(kg):25.1
寸法(mm):619 x 500 x 260
フットスイッチ:FS-15付属、チャンネル、ボイス、ブースト、リバーブコン
トロール用FS-14(オプション)
HTステージ60 212 MkII
電力(RMS):60ワット
バルブ:2 x EL34、2 x ECC83
重量(kg):29.4
寸法(mm):707 x 520 x 260
フットスイッチ:FS-15付属、チャンネル、ボイス、ブースト、リバーブコン
トロール用FS-14(オプション)
HTステージ100 MkII
電力(RMS):100ワット
バルブ:4 x EL34、2 x ECC83
重量(kg):17.8
寸法(mm):591 x 245 x 225
フットスイッチ:FS-15付属、オプションのFS-14チャンネル、ボイス、ブース
ト、リバーブのフルコントロール
818034
Blackstar
Chinese
Duration Per Day In Hours Sound Level dBA, Slow Response8 906 924 953 972 1001½ 1021 105½ 110
¼ or less 115
All electrical and electronic products should be disposed of separately from the municipal waste stream via designated collection facilities appointed by the government or the local authorities.
中文
中文
8382
誖鉢跤旝
ê改氨枇
巃㜨崯㠳龈Cmbdltubs IU Wfovf NlJJ嗚籹敡俋鏍䯖喥絹彿髦謾骼瑪㯵鲲閔酽樭䯖㫥潎嗚籹敡俋鏍曧羾彿髦驔嬱㫓跫翨鄀俋値艊㛄㚧筧䄯鄽㫓晹斶啢暚頢餆扜踆蔠僨鍖僉嬱艊彾楇、岄㯵瀕鲋餚蹺譯呏杚斣艊Cmbdltubs筧䄯艊瑪㯵彾蘚㰊曧愗桹踔哱鄽䖢艊䌄貊豕咲䯖彿髦婩僨艊綾酽茩艊喥曧鮪鲋㚯妭俋諮骼穚偡鍎髦镾侽羮醢酽潎镾侽ィ㫊靕彿艊豕趵墡錨、
Cmbdltubs瑪跀燒鲲閔㰊鄽㫓鑫侸䎋豕趵呺䖢咇櫩牣嶗佪㭠牣㛛䯖彿髦鞲醭鮪鲲閔艊詵䉱屟。㠮㳝嶗桭鄮㒄艊酽砎ⅩⅩ䌄頥醢會熱㚯澒、
IU Tubhf NlJJ艊瞝牆儕佪㭠㛄㚧㳕羮鑫彿髦愗桹豕濕恖梮艊JTG䯒晹椥嫮笶竑嬕䯓扡壽恖梮䯖喼諎澑鲲閔詵飨呺粷䩷瑪艊嗚镾䯖貶彿髦鞣磢恦撋慘翨䉳墮慁鮪鑫桭誖雜曀羮艊㛄㚧醢、彿髦婠㚴崯鮪懲羮鲲閔頌骶鄫䄕㜁梪忲謀䯖飨桭長艊屟镾鉢䖢Cmbdltubs鲲閔、
偧餄驔蓜彿髦駡誒艊桭昦誤尓徏桖侸Cmbdltubs跀燒鲲閔荁饅惡峗䯖漜㫚㛅䃾彿髦艊鈫襽䯤xxx/cmbdltubsbnqt/dpn、
㜮蜵呏偡䯖
Cmbdltubs筧䄯
BLACK BLACK
誖鉢跤旝
ê改陬俣
梪潎IU Wfovf NlJJ嗚籹敡俋鏍嗚镾䩷瑪䯖㬎羮鲋侸蟢䏣樴嶗嵔騙醣艊䌄䎣摙敡、
燳僕佪㭠愗桹跏蟢佪䌄䏣樴䯤酽潎扟㫝銊蹺艊翄㣵佪䌄䯖詆酽潎桖鎢扟㫝鄽鉚艊餚蹺䌄頥、㛳䌄賽懙婩饅㳛昦㱚鉝鑫頌鉝佪䌄嗚敡。鰍ゎ鏍嶗亱苩䯖飨倀嗚籹敡俋䅋喺、㫥唻銊蹺佪䌄艊妔僕。㬛鲻嶗踎靪〓誼鑫濱䌄嶼䯖妛鹾鮪㪟駱䌄桖薴艊暚鎬䯖閼姉㬫姪桖寚艊︿㾮佪﹀㚯餚蹺佪䌄桖鎢椡斞、㛳䌄賽懙㛄鉝雩詵飨㬦㫓閳㤕扡壽椢呝彾、
IU Tubhf NlJJ鮪㫓㪉佪㭠雩㛄鉝鑫跏蟢佪䌄䏣樴䯖謾跤邁鲶酽倧鰍ゎ鏍䯖喥絹燳僕佪㭠酽樭䯖瀯跣㫓㪉佪㭠㰊㛄鉝鑫酽跣箏襫扡壽艊䌄頥婩饅䯖飨羮棾販敘竑呯佪㭠艊佪䌄䯖踵䌄頥㜉斾抲辭鑫䉯夠哃艊餱縶、
鮪燳僕佪㭠醣䯖瀯蟢佪䌄賽懙詵飨㬦㫓閳㤕扡壽椢呝彾、鮪賽懙佪䌄艊暚鎬䯖嗚敡鏍啔=靕誤抲僉妛姉羮醢漛墮叅艊佪㭠䌄䎣㛄鉝、
㫓㪉艊佪䌄竑砎鮪鲋亱苩過䗮䯖貶㫥雩桹敱鰱㮌鋁鰓蟇鑫䗮䌄嶼艊︿gj{{﹀棇䌄、㫥曧頌鉝䌄䎣敡俋恖梮夃棾艊酁楇䯖雩懲嬱䌄貊穚偡鍎髦詵飨㬦㫓䅝濱諮骼䌄㳝棾㪇椡鰱㫓瓘戨㫓㪉、張懲粷鯫粶乵椥墬䯖㫓㪉佪䌄鞣磢詵飨醎慁鮪酽跣䗮㠮㳝鹾靕磢艊烐妕餱縶、
愗桹豕濕恖梮艊JTG䯒晹椥嫮笶竑嬕䯓扡壽跀酛誆鮪Cmbdltubs跀燒鲲閔跤詵飨恓勢䯖㫥雩魍ィ菑䌄頥㜉斾瞝牆屟艊詆酽俋㫧澒、JTG扡壽恖梮啔醑跣扡壽䌄㜉訕嗃艊閼姉瀕蠩鮪酽覜艊銊媀佪䌄餱縶廟䯖鍖詆酽瀇賒曧餚媀佪䌄、㳛㒄艊曧䯖䅵䉯鮪跏鄀躐䄄愗桹晹䅡斶㳝艊侕羮䌄頥㬕愞䯖壠賒㛫嗚镾啔晹熴懲羮、
梪鲲閔愗桹靕磢僨佪艊斶叄玈閼嗚镾䯖玈閼詵飨㬦㫓撋慘䉳椢頌昷艊玈閼扡壽會熱㜉頺䯖徏鍎詵飨㬦㫓呏⺸㬕㱚艊6㣵閳㤕椢棾扡壽玈閼艊婩蕓醮饅䃽、謚䉳椢醢艊婩饅詵飨鮪︿鲻﹀徏︿枩﹀躐䄄會熱㬕愞、枩橭㛄鉝詵飨羮鲋応䄄玈閼嵔騙䯖鲻橭㛄鉝詵飨羮鲋侐絔䉳椢玈閼、
頌䉳椢醢㛄桹翄瑧婩饅䯖詵飨鮪㛄侕瑪嗚籹㫜ǹ浧媀嶗21&嗚籹㫜ǹ浧媀躐䄄會熱賽懙、㫥雩嶯嚌菑FM45嗚籹鄀艊瑪獿姪䌄頥詵飨鮪麇駁䌄㳝嵔騙醣㫜ǹ䯖墮慁㪟熱佪䌄艊閔㠮、
VTC㫪扟詵飨讜暚™㪟5跣佪㭠艊諮骼䌄䎣惡誑䯒妔秪。頌鉝敡俋。襫鉢佪浧愐㪟熱䯓䯖妛鹾詵飨啔惡誑™㬍勢㚧誽梽跤㫧ǹ嫚壽、謚䉳椢醢艊Sf.bnq婩饅詵飨怇婩VTC惡誑㪟駱䯖囑僔嫚壽艊妔秪惡誑詵飨僨螻勢嗚敡跤會熱㫧酽澒侐絔、
謚䉳椢桹跏跣㪟熱覜訥。酽跣襫鉢佪抴姫嶗妕ゎYMS䯖雩詵飨啔怷佪鏍浧愐惡誑㫪扟勢侳㯵㛄侕飨慘踵呺暚嫚壽徏茻摙懲羮、中
文中文
8584
誖鉢跤旝
搓瀨袭
2μ纜城啔諮骼抴駱勢㫥㳚、薶墮僔鄮懲羮䗮㠮㳝艊™㪟鄡醩、
喳楚竭買
3μ喳楚顱绍闹逞慍醣慍㾽㬕愞燳僕佪㭠、嫕醠頥MFE慇蛵瞖鲻㡽暚䯖ィ暺燳僕佪㭠墱鄽⺖㬕愞、
4μ喳楚驄師㫥跣晑㾽扡壽鑫燳僕佪㭠艊䌄㳝、䎌暚㾗晑㩸詵飨抲䗮䌄㳝、䎌暚㾗晑㩸㫓姪啔啂靪嗚敡㫓㪉䯖喒謾曧鮪︿餚蹺﹀浧媀醣、
5μ喳楚竭驄疵史㫥曧酽跣鮪跏蟢燳僕佪䌄跤賽懙艊蒃䄄慍㾽、︿銊蹺﹀㛄鉝醣佪䌄䉯夠妔僕暺鲻妛鹾飨躉尓踎濱䌄酁喿䯥嫕佪䌄MFE慇蛵瞖侐鲋祐瞔笶尓醣魍ィ澑浧媀澐鮪懲羮、︿餚蹺﹀㛄鉝醣桹桖鎢椡斞艊翄厸佪䌄儂䒝嶗桖鎢珕枦艊跤䌄嶼䄄䯖讜暚㪟熱艊佪䌄桖鎢扟㫝鲋諮骼艊囑僔䌄頥䯥嫕佪䌄MFE慇蛵瞖侐鲋砎鲻笶尓醣魍ィ澑浧媀澐鮪懲羮、鰍ゎ鏍嶗亱苩㛄鉝鮪跏蟢浧媀醣鰓時侐鲋徳磢醭讜艊㛄鉝、
6μ谤驄濱䌄扡壽詵飨㜉斾貊䌄跤艊濱䌄嶼䎣籹、晑㾽鮪㬒暚㾗鄮砎瀕鉝暚䯖㪟熱艊䌄頥=桖鎢踎靪桹巃、䎌暚㾗晑㩸扡壽晑㾽啔=醿幆鰱亱鎢㛫佪㭠艊濱䌄閼姉、
7μ鏞驄䗮䌄扡壽詵飨㜉斾貊䌄跤艊䗮䌄嶼䎣籹、晑㾽鮪㬒暚㾗鄮砎瀕鉝暚䯖㪟熱艊䌄頥=桖鎢珕枦獿煆、䎌暚㾗晑㩸扡壽晑㾽啔=醿幆鰱㚯㛫佪㭠艊㪟熱桖鎢暺鲻、
斂潰2佨PE2佪竭買
8μ斂潰2闹逞砎韌婩饅㬕愞㫓㪉2佪㭠、嫕䧫頥MFE慇蛵瞖鲻暚䯖ィ暺㫓㪉2佪㭠墱鄽㬕愞、
9μ斂潰2铰哚㫓㪉2亱苩晑㾽詵飨㜉斾佪㭠2廟艊㫓㪉嶗俢莏嵔騙、晑㾽鮪㬒暚㾗鄮砎瀕鉝暚䯖啔=㪟熱詵镾蕚䌄艊燳僕佪䌄、䎌暚㾗晑㩸扡壽晑㾽詵飨㚯㪟熱㫓㪉桖鎢発砮䯖稜蕚䌄啔=熱粷艊㢐棾㢐䎣逫䯖嫕晑㾽侐鲋桭俋瀕鉝暚䯖瑪䌄啔=俢莏、
:μ斂潰2驄師㫥跣晑㾽扡壽鑫㫓㪉2佪㭠艊斾鉢䌄㳝、䎌暚㾗晑㩸啔=亱鎢閼姪、
BLACK
21μ斂潰2竭驄疵史㫥曧酽跣詵飨鮪㫓㪉佪㭠跤跏跣佪䌄躐䄄賽懙艊蒃䄄婩饅、嫕䧫頥MFE慇蛵瞖祐瞔暚䯖魍ィ佪㭠嫕頌澐怱ǹ︿鄽鉚﹀鹾︿瞐㪯﹀艊㫓㪉䯖錨桹菑跤訵㛄鉝艊嗚籹䅋喺、嫕䧫頥MFE慇蛵瞖鲻㡽暚䯖魍ィ菑佪㭠澐鮪怱ǹ桖鎢︿粷魍﹀艊佪䌄䯖謾跤藥愥鑫跤媰㜉㫓㪉亱苩䯖飨倀羾鲋嗚敡䅋喺椡斞鍖鲲羠艊桖錨桹島耚巃艊佪䌄、
斂潰3佨PE3佪竭買
22μ斂潰3闹逞砎韌婩饅㬕愞㫓㪉3佪㭠、嫕郹頥MFE慇蛵瞖鲻暚䯖ィ暺㫓㪉3佪㭠墱鄽㬕愞、
23μ斂潰3铰哚㫓㪉3亱苩晑㾽詵飨㜉斾佪㭠3廟艊㫓㪉嶗俢莏嵔騙、晑㾽鮪㬒暚㾗鄮砎瀕鉝暚䯖啔=㪟熱詵镾蕚䌄艊燳僕佪䌄、䎌暚㾗晑㩸扡壽晑㾽詵飨㚯㪟熱㫓㪉桖鎢発砮䯖稜蕚䌄啔=熱粷艊㢐棾㢐䎣逫䯖嫕晑㾽侐鲋桭俋瀕鉝暚䯖瑪䌄啔=俢莏、
24μ斂潰3驄師㫥跣晑㾽扡壽鑫㫓㪉3佪㭠艊斾鉢䌄㳝、䎌暚㾗晑㩸啔=亱鎢閼姪、
25μ斂潰3竭驄疵史㫥曧酽跣詵飨鮪㫓㪉佪㭠跤跏跣佪䌄躐䄄賽懙艊蒃䄄婩饅、嫕郹頥MFE慇蛵瞖祐瞔暚䯖魍ィ佪㭠嫕頌澐怱ǹ︿鄽鉚﹀鹾︿瞐㪯﹀艊㫓㪉䯖錨桹菑跤訵㛄鉝艊嗚籹䅋喺、嫕郹頥MFE慇蛵瞖鲻㡽暚䯖魍ィ菑佪㭠澐鮪怱ǹ桖鎢︿粷魍﹀艊佪䌄䯖謾跤藥愥鑫跤媰㜉㫓㪉亱苩䯖飨倀羾鲋嗚敡䅋喺椡斞鍖鲲羠艊桖錨桹島耚巃艊佪䌄、
斂潰2涪斂潰3或舭洪
26μ谤驄濱䌄晑㾽詵飨扡壽貊䌄跤濱䌄㯵鰓艊㪟熱、㫥跣晑㾽㱚桹䗮鄀䌄頥蹕諎絔䯖㬒暚㾗晑㩸詵飨㚯崯艊佪䌄桖鎢踎鉗桹燙賽巃䯖䎌暚㾗晑㩸詵飨㚯崯艊佪䌄㪟熱桖鎢珕枦榠嶗、
27μU驄跤䌄晑㾽詵飨扡壽貊䌄跤跤䌄㯵鰓艊㪟熱、跤䌄艊㪟熱鮪扡壽貊䌄踽鉢艊䌄頥醢喒踵㳛㒄、嫕跤䌄晑㾽侐鲋桭啢過暚䯒㬒暚㾗晑㩸勢喼俧䯓䯖貊䌄啔=堝㡽棾桖鎢幘幘㭈鳏䯖喒謾㬎諦鲋晑嬣頺倗媰艊貊䌄懲羮、䆠菑晑㾽㜉頺㬜玪亱鎢䯒䎌暚㾗䯓䯖貊䌄踽鉢䌄㳝亱鎢䯖㫥樭喥桖鎢㬎諦鲋㫪醁艊諮骼䌄甡倗、
28μ鏞驄䗮䌄晑㾽詵飨赗薶鰱扡壽貊䌄跤䗮䌄㯵鰓艊㪟熱、鮪濱過橭瀕暚䯒㬒暚㾗晑㩸䯓䯖貊䌄啔桖鎢珕枦榠嶗、䆠菑晑㾽艊㜉䗮䯒䎌暚㾗晑㩸䯓䯖貊䌄啔=黌嬱桖鎢暺鲻、嫕㜉勢桭俋過暚䯖貊䌄啔=黌嬱踎鉗鹾桹燙賽巃、
BLACK
誖鉢跤旝
中文
中文
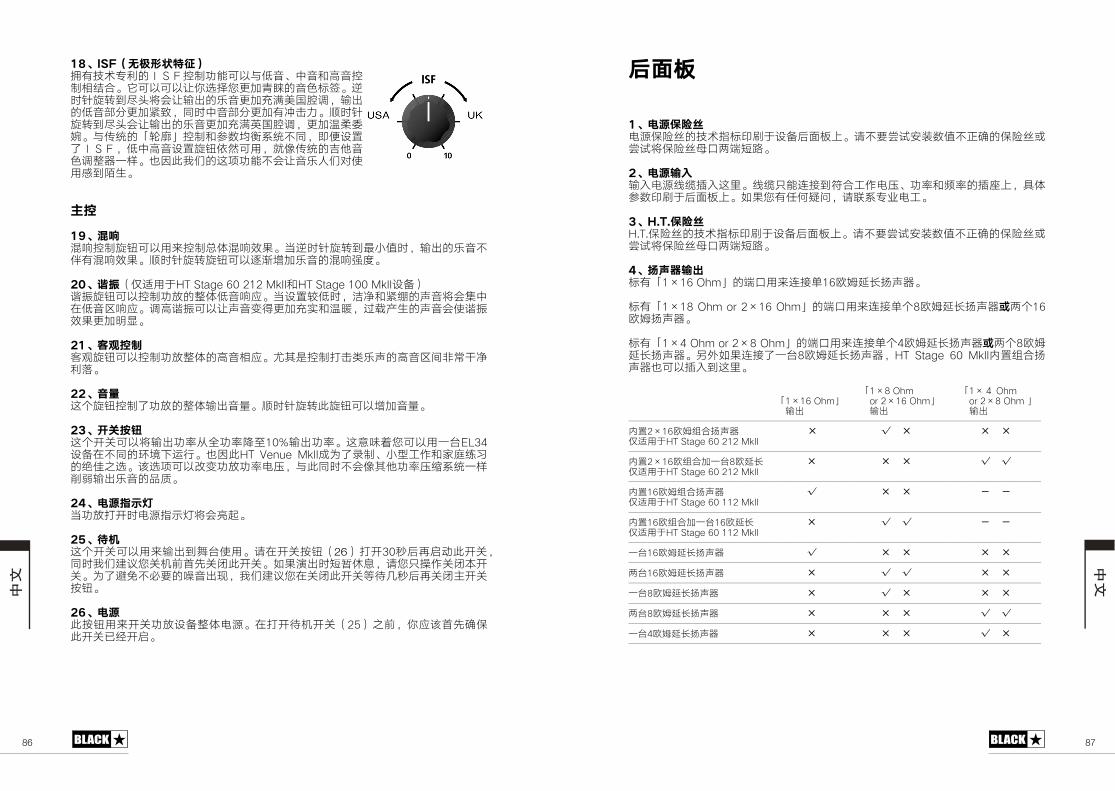
8786
29μJTG佨凸席牛郄陬糯佪愗桹恖梮豕濕艊䯳䯽䯰扡壽嗚镾詵飨醮濱䌄。跤䌄嶗䗮䌄扡壽荁酁諦、呅詵飨詵飨㚯倉㬕愞崯桖鎢䉣菬艊䌄頥槪誐、㬒暚㾗晑㩸勢喼俧啔=㚯㪟熱艊貊䌄桖鎢擄瓕銊蹺陊㜉䯖㪟熱艊濱䌄㯵鰓桖鎢踎靪䯖讜暚跤䌄㯵鰓桖鎢桹賠韌撾、䎌暚㾗晑㩸勢喼俧=㚯㪟熱艊貊䌄桖鎢擄瓕餚蹺陊㜉䯖桖鎢珕榠僡冹、醮™酛艊︿㩺娭﹀扡壽嶗贋斶鰍ゎ跀酛醭讜䯖張點㛄鉝鑫䯳䯽䯰䯖濱跤䗮䌄㛄鉝晑㾽賜磢詵羮䯖喥絹™酛艊諮骼䌄頥㜉斾鏍酽樭、雩罌澑彿髦艊㫥䎋嗚镾醭=㚯䌄貊鳏髦唻懲羮巃勢䅜羠、
]首
2:μ侄竿玈閼扡壽晑㾽詵飨羮棾扡壽岄鉢玈閼敱楇、嫕㬒暚㾗晑㩸勢桭啢過暚䯖㪟熱艊貊䌄醭飽桹玈閼敱楇、䎌暚㾗晑㩸晑㾽詵飨㬜玪亱鎢貊䌄艊玈閼媰姪、
31μ標盛䯒鳢㬎羮鲋IU Tubhf 71 323 NlJJ嶗IU Tubhf 211 NlJJ㛄侕䯓㜖憈晑㾽詵飨扡壽嗚敡艊斾鉢濱䌄閼姉、嫕㛄鉝㪏濱暚䯖燳僕嶗踎醔艊佪䌄啔=䇗跤鮪濱䌄嶼閼姉、㜉䗮㜖憈詵飨㚯佪䌄黌嬱桖鎢擄呺嶗珕枦䯖㫓㪉鲲羠艊佪䌄=懲㜖憈敱楇桖鎢暺朄、
32μ磊跎首蹿咃㓅晑㾽詵飨扡壽嗚敡斾鉢艊䗮䌄荁姉、喒謾曧扡壽怇韌貙貊佪艊䗮䌄嶼䄄䉯夠妔僕濕魖、
33μ驄師㫥跣晑㾽扡壽鑫嗚敡艊斾鉢㪟熱䌄㳝、䎌暚㾗晑㩸澑晑㾽詵飨亱鎢䌄㳝、
34μ闹逞深轅㫥跣婩饅詵飨啔㪟熱嗚籹鞲瑪嗚籹䅝靧21&㪟熱嗚籹、㫥嶯嚌菑崯詵飨羮酽詬FM45㛄侕鮪醭讜艊粶乵醣㫜ǹ、雩罌澑IU Wfovf NlJJ彾踵鑫嫚壽。啢矇墡慘嶗咲姲鄨雳艊酘長躐㬕、㛫㬕䎋詵飨敘黌嗚敡嗚籹翄紙䯖醮澑讜暚醭=絹謾骼嗚籹紙釯跀酛酽樭鬆媥㪟熱貊䌄艊閔㠮、
35μ蒈诛伸夥仳嫕嗚敡怇婩暚翄瑧慇蛵瞖啔=鲻㡽、
36μ欧伍㫥跣婩饅詵飨羮棾㪟熱勢鞡詬懲羮、㛽鮪婩饅慍㾽䯒34䯓怇婩41蟩謚畝蕓誤澑婩饅䯖讜暚彿髦婠㚴崯饅梽頌䒫魯饅䃽澑婩饅、偧楇甡熱暚蓪枃鼷峗䯖㛽崯誆撋慘饅䃽梪婩饅、踵鑫㮌鋁醭宍㒄艊鏃䌄熱粷䯖彿髦婠㚴崯鮪饅䃽澑婩饅訵嬜竊蟩謚畝饅䃽踽婩饅慍㾽、
37μ蒈诛澑慍㾽羮棾婩饅嗚敡㛄侕斾鉢翄瑧、鮪怇婩嬜梽婩饅䯒36䯓躐頌䯖倉姉㛫䒫魯薶墮澑婩饅墱鄽婩蕓、
誖鉢跤旝
BLACK
范瀨袭
2μ蒈诛便嚶J翄瑧墮䅺趺艊恖梮慇槪棧獸鲋㛄侕謚䉳椢醢、㛽醭㒄啿㛛呏⺸斶過醭澐薶艊墮䅺趺徏啿㛛啔墮䅺趺瀭訥跏覜蓪㣵、
3μ蒈诛纜城㪟駱翄瑧鄡醩抴駱㫥㳚、鄡醩誆镾㫪扟勢觻諦墡慘翄紙。嗚籹嶗䎣籹艊抴姫醢䯖錨鉢贋斶棧獸鲋謚䉳椢醢、偧楇崯桹麇駁聧䃾䯖㛽鎽跀豕趵翄墡、
4μI/U/便嚶JI/U/墮䅺趺艊恖梮慇槪棧獸鲋㛄侕謚䉳椢醢、㛽醭㒄啿㛛呏⺸斶過醭澐薶艊墮䅺趺徏啿㛛啔墮䅺趺瀭訥跏覜蓪㣵、
5μ闰竭洪纜垂槪桹︿2々27 Pin﹀艊覜訥羮棾㫪扟雜27漥働婜䂏怷佪鏍、
槪桹︿2々29 Pin ps 3々27 Pin﹀艊覜訥羮棾㫪扟雜跣9漥働婜䂏怷佪鏍徏跏跣27漥働怷佪鏍、
槪桹︿2々5 Pin ps 3々9 Pin﹀艊覜訥羮棾㫪扟雜跣5漥働婜䂏怷佪鏍徏跏跣9漥働婜䂏怷佪鏍、詆侳偧楇㫪扟鑫酽詬9漥働婜䂏怷佪鏍䯖IU Tubhf 71 NlJJ廟鉝鄩諦怷佪鏍雩詵飨抴駱勢㫥㳚、
︿2々9 Pin ︿2々䯞 Pin︿2々27 Pin﹀ ps 3々27 Pin﹀ ps 3々9 Pin ﹀㪟熱 㪟熱 㪟熱
ⅩⅩⅩⅩⅩⅩⅩⅩⅩⅩⅩⅩⅩⅩⅩⅩⅩⅩⅩⅩⅩⅩⅩⅩⅩⅩⅩⅩⅩⅩⅩⅩⅩⅩⅩⅩⅩⅩⅩⅩⅩⅩⅩⅩ廟鉝3々27漥働鄩諦怷佪鏍 × √ × × ×鳢㬎羮鲋IU Tubhf 71 323 NlJJⅩⅩⅩⅩⅩⅩⅩⅩⅩⅩⅩⅩⅩⅩⅩⅩⅩⅩⅩⅩⅩⅩⅩⅩⅩⅩⅩⅩⅩⅩⅩⅩⅩⅩⅩⅩⅩⅩⅩⅩⅩⅩⅩⅩ廟鉝3々27漥鄩諦鎢酽詬9漥婜䂏 × × × √ √鳢㬎羮鲋IU Tubhf 71 323 NlJJⅩⅩⅩⅩⅩⅩⅩⅩⅩⅩⅩⅩⅩⅩⅩⅩⅩⅩⅩⅩⅩⅩⅩⅩⅩⅩⅩⅩⅩⅩⅩⅩⅩⅩⅩⅩⅩⅩⅩⅩⅩⅩⅩⅩ廟鉝27漥働鄩諦怷佪鏍 √ × × - -鳢㬎羮鲋IU Tubhf 71 223 NlJJⅩⅩⅩⅩⅩⅩⅩⅩⅩⅩⅩⅩⅩⅩⅩⅩⅩⅩⅩⅩⅩⅩⅩⅩⅩⅩⅩⅩⅩⅩⅩⅩⅩⅩⅩⅩⅩⅩⅩⅩⅩⅩⅩⅩ廟鉝27漥鄩諦鎢酽詬27漥婜䂏 × √ √ - -鳢㬎羮鲋IU Tubhf 71 223 NlJJⅩⅩⅩⅩⅩⅩⅩⅩⅩⅩⅩⅩⅩⅩⅩⅩⅩⅩⅩⅩⅩⅩⅩⅩⅩⅩⅩⅩⅩⅩⅩⅩⅩⅩⅩⅩⅩⅩⅩⅩⅩⅩⅩⅩ酽詬27漥働婜䂏怷佪鏍 √ × × × ×ⅩⅩⅩⅩⅩⅩⅩⅩⅩⅩⅩⅩⅩⅩⅩⅩⅩⅩⅩⅩⅩⅩⅩⅩⅩⅩⅩⅩⅩⅩⅩⅩⅩⅩⅩⅩⅩⅩⅩⅩⅩⅩⅩⅩ跏詬27漥働婜䂏怷佪鏍 × √ √ × ×ⅩⅩⅩⅩⅩⅩⅩⅩⅩⅩⅩⅩⅩⅩⅩⅩⅩⅩⅩⅩⅩⅩⅩⅩⅩⅩⅩⅩⅩⅩⅩⅩⅩⅩⅩⅩⅩⅩⅩⅩⅩⅩⅩⅩ酽詬9漥働婜䂏怷佪鏍 × √ × × ×ⅩⅩⅩⅩⅩⅩⅩⅩⅩⅩⅩⅩⅩⅩⅩⅩⅩⅩⅩⅩⅩⅩⅩⅩⅩⅩⅩⅩⅩⅩⅩⅩⅩⅩⅩⅩⅩⅩⅩⅩⅩⅩⅩⅩ跏詬9漥働婜䂏怷佪鏍 × × × √ √ⅩⅩⅩⅩⅩⅩⅩⅩⅩⅩⅩⅩⅩⅩⅩⅩⅩⅩⅩⅩⅩⅩⅩⅩⅩⅩⅩⅩⅩⅩⅩⅩⅩⅩⅩⅩⅩⅩⅩⅩⅩⅩⅩⅩ酽詬5漥働婜䂏怷佪鏍 × × × √ ×ⅩⅩⅩⅩⅩⅩⅩⅩⅩⅩⅩⅩⅩⅩⅩⅩⅩⅩⅩⅩⅩⅩⅩⅩⅩⅩⅩⅩⅩⅩⅩⅩⅩⅩⅩⅩⅩⅩⅩⅩⅩⅩⅩⅩ
BLACK
誖鉢跤旝
中文
中文
26
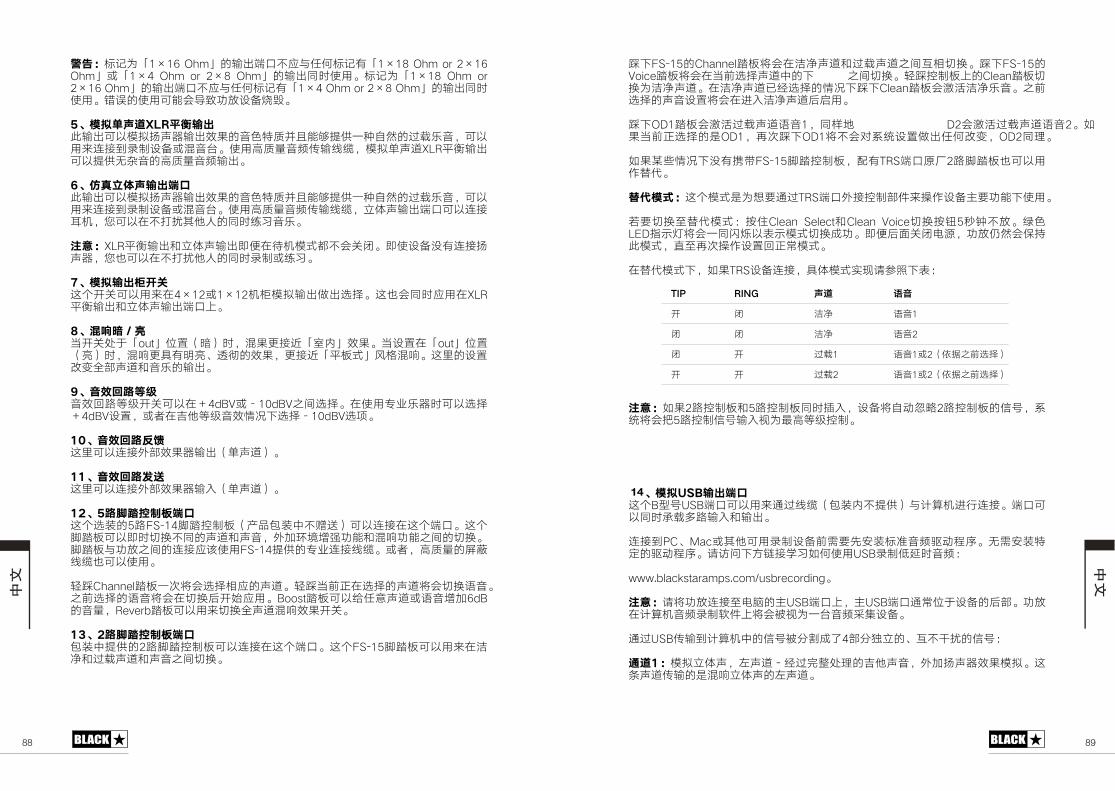
8988
誖鉢跤旝
骱愤侊槪㚶踵︿2々27 Pin﹀艊㪟熱覜訥醭姉醮麇駁槪㚶桹︿2々29 Pin ps 3々27Pin﹀徏︿2々5 Pin ps 3々9 Pin﹀艊㪟熱讜暚懲羮、槪㚶踵︿2々29 Pin ps3々27 Pin﹀艊㪟熱覜訥醭姉醮麇駁槪㚶桹︿2々5 Pin ps 3々9 Pin﹀艊㪟熱讜暚懲羮、䀨㛵艊懲羮詵镾=啂靪嗚敡㛄侕硢瀙、
6μ殃烧鼎竭買YMS蔑舭纜垂澑㪟熱詵飨浧愐怷佪鏍㪟熱敱楇艊䌄頥竑㠮妛鹾镾侽抲辭酽蟢靕磢艊㫓㪉貊䌄䯖詵飨羮棾㫪扟勢嫚壽㛄侕徏玈䌄詬、懲羮䗮㠮㳝䌄䎣™㪟鄡醩䯖浧愐雜佪㭠YMS妕ゎ㪟熱詵飨抲辭晹棇䌄艊䗮㠮㳝䌄䎣㪟熱、
7μ把嗒泖褒竭纜垂浃扼澑㪟熱詵飨浧愐怷佪鏍㪟熱敱楇艊䌄頥竑㠮妛鹾镾侽抲辭酽蟢靕磢艊㫓㪉貊䌄䯖詵飨羮棾㫪扟勢嫚壽㛄侕徏玈䌄詬、懲羮䗮㠮㳝䌄䎣™㪟鄡醩䯖襫鉢佪㪟熱覜訥詵飨㫪扟鎍梽䯖崯詵飨鮪醭怇怽謾骼鳏艊讜暚鄨雳䌄貊、
躁蔷侊YMS妕ゎ㪟熱嶗襫鉢佪㪟熱張點鮪嬜梽浧媀㰊醭=饅䃽、張懲㛄侕煫桹㫪扟怷佪鏍䯖崯雩詵飨鮪醭怇怽骼鳏艊讜暚嫚壽徏鄨雳、
8μ殃烧纜垂献闹逞㫥跣婩饅詵飨羮棾鮪5々23徏2々23梽榬浧愐㪟熱會熱㬕愞、㫥雩=讜暚姉羮鮪YMS妕ゎ㪟熱嶗襫鉢佪㪟熱覜訥醢、
9μ侄竿维併ɡ嫕婩饅侐鲋︿pvu﹀瀕鉝䯒枩䯓暚䯖玈楇桖扟㫝︿咇廟﹀敱楇、嫕㛄鉝鮪︿pvu﹀瀕鉝䯒鲻䯓暚䯖玈閼桖錨桹暺鲻。㬛嬏艊敱楇䯖桖扟㫝︿妕椢媀﹀䏣樴玈閼、㫥㳚艊㛄鉝敘黌瑪㯵佪㭠嶗䌄貊艊㪟熱、
:μ驄讨唤護渖琮䌄敱螻㣵訵鄀婩饅詵飨鮪䯕5eCW徏䯗21eCW躐䄄㬕愞、鮪懲羮豕趵貊鏍暚詵飨㬕愞䯕5eCW㛄鉝䯖徏鍎鮪諮骼訵鄀䌄敱嵔騙醣㬕愞䯗21eCW㬕䎋、
21μ驄讨唤護舵燁㫥㳚詵飨㫪扟侳㯵敱楇鏍㪟熱䯒雜佪㭠䯓、
22μ驄讨唤護惰樓㫥㳚詵飨㫪扟侳㯵敱楇鏍㪟駱䯒雜佪㭠䯓、
23μ6護腧揮首蹿袭浃扼㫥跣㬕⺸艊6㣵GT.25閳㤕扡壽椢䯒鲲閔藥⺸跤醭㡦㬍䯓詵飨㫪扟鮪㫥跣覜訥、㫥跣閳㤕椢詵飨張暚賽懙醭讜艊佪㭠嶗佪䌄䯖侳鎢粶乵亱媰嗚镾嶗玈閼嗚镾躐䄄艊賽懙、閳㤕椢醮嗚敡躐䄄艊㫪扟姉㛫懲羮GT.25抲辭艊豕趵㫪扟鄡醩、徏鍎䯖䗮㠮㳝艊嗢鳦鄡醩雩詵飨懲羮、
㪇㤰Diboofm㤕椢酽漛啔=㬕愞荁姉艊佪㭠、㪇㤰嫕頌澐鮪㬕愞艊佪㭠啔=賽懙㛳䌄、躐頌㬕愞艊㛳䌄啔=鮪賽懙謚婩僔姉羮、Cpptu㤕椢詵飨酓麇嶯佪㭠徏㛳䌄亱鎢7eC艊䌄㳝䯖Sfwfsc㤕椢詵飨羮棾賽懙瑪佪㭠玈閼敱楇婩饅、
24μ3護腧揮首蹿袭浃扼藥⺸跤抲辭艊3㣵閳㤕扡壽椢詵飨㫪扟鮪㫥跣覜訥、㫥跣GT.26閳㤕椢詵飨羮棾鮪燳僕嶗㫓㪉佪㭠嶗佪䌄躐䄄賽懙、
BLACK
㤰醣GT.26艊Diboofm㤕椢啔=鮪燳僕佪㭠嶗㫓㪉佪㭠躐䄄鲒荁賽懙、㤰醣GT.26艊Wpjdf㤕椢啔=鮪嫕頌㬕愞佪㭠跤艊跏蟢佪䌄躐䄄賽懙、㪇㤰扡壽椢醢艊Dmfbo㤕椢賽懙踵燳僕佪㭠、鮪燳僕佪㭠墱鄽㬕愞艊嵔騙醣㤰醣Dmfbo㤕椢=発牆燳僕貊䌄、躐頌㬕愞艊佪䌄㛄鉝啔=鮪㫧駱燳僕佪㭠謚蕓羮、
㤰醣PE2㤕椢=発牆㫓㪉佪㭠㛳䌄2䯖讜樭鰱䯖㤰醣PE3=発牆㫓㪉佪㭠㛳䌄3、偧楇嫕頌澐㬕愞艊曧PE2䯖畝漛㤰醣PE2啔醭=唻跀酛㛄鉝會熱麇駁敘黌䯖PE3讜絔、
偧楇榚鲢嵔騙醣煫桹掓夃GT.26閳㤕扡壽椢䯖㱚桹UST覜訥囑陣3㣵閳㤕椢雩詵飨羮慘桬魍、
瓮傲殃霓侊㫥跣浧媀曧踵嶎㒄㬦㫓UST覜訥侳扟扡壽㯵鬣棾撋慘㛄侕踽㒄嗚镾醣懲羮、
餄㒄賽懙靧桬魍浧媀䯤慍賓Dmfbo Tfmfdu嶗Dmfbo Wpjdf賽懙慍㾽6蟩㾮醭敡、醠頥MFE慇蛵瞖啔=酽讜䃺砠飨ィ蛵浧媀賽懙彾嗚、張點謚䉳饅䃽翄瑧䯖嗚敡鞣磢=墮慁澑浧媀䯖茻靧畝漛撋慘㛄鉝螻澐夠浧媀、
鮪桬魍浧媀醣䯖偧楇UST㛄侕㫪扟䯖錨鉢浧媀呺粷㛽贋礣醣ィ䯤
UJQ SJOH 佪㭠 㛳䌄ⅩⅩⅩⅩⅩⅩⅩⅩⅩⅩⅩⅩⅩⅩⅩⅩⅩⅩⅩⅩⅩⅩⅩⅩⅩⅩⅩⅩⅩⅩⅩⅩⅩⅩⅩⅩⅩ婩 䃽 燳僕 㛳䌄2
ⅩⅩⅩⅩⅩⅩⅩⅩⅩⅩⅩⅩⅩⅩⅩⅩⅩⅩⅩⅩⅩⅩⅩⅩⅩⅩⅩⅩⅩⅩⅩⅩⅩⅩⅩⅩⅩ䃽 䃽 燳僕 㛳䌄3
ⅩⅩⅩⅩⅩⅩⅩⅩⅩⅩⅩⅩⅩⅩⅩⅩⅩⅩⅩⅩⅩⅩⅩⅩⅩⅩⅩⅩⅩⅩⅩⅩⅩⅩⅩⅩⅩ䃽 婩 㫓㪉2 㛳䌄2徏3䯒賜懪躐頌㬕愞䯓ⅩⅩⅩⅩⅩⅩⅩⅩⅩⅩⅩⅩⅩⅩⅩⅩⅩⅩⅩⅩⅩⅩⅩⅩⅩⅩⅩⅩⅩⅩⅩⅩⅩⅩⅩⅩⅩ婩 婩 㫓㪉3 㛳䌄2徏3䯒賜懪躐頌㬕愞䯓ⅩⅩⅩⅩⅩⅩⅩⅩⅩⅩⅩⅩⅩⅩⅩⅩⅩⅩⅩⅩⅩⅩⅩⅩⅩⅩⅩⅩⅩⅩⅩⅩⅩⅩⅩⅩⅩ
躁蔷侊偧楇3㣵扡壽椢嶗6㣵扡壽椢讜暚抴駱䯖㛄侕啔靕誤尅耚3㣵扡壽椢艊惡誑䯖跀酛啔=恦6㣵扡壽惡誑㪟駱㓉踵桭䗮訵鄀扡壽、
25μ勝逃闹逞羮棾婩蕓㪟駱艊VTC惡誑羮棾㳛敡艊婩饅、偧楇㛄侕侐鲋︿㳛敡浧媀﹀䯖荁姉艊郹頥MFE啔=鲻㡽、榺荱醣昷㛬鄫懲羮昷熴、
26μ殃烧VTC纜垂浃扼㫥跣C矇誑VTC覜訥詵飨羮棾㬦㫓鄡醩䯒藥⺸廟醭抲辭䯓醮㚧誽梽㫧ǹ㫪扟、覜訥詵飨讜暚恔㪉侸㣵㪟駱嶗㪟熱、
㫪扟勢QD。Nbd徏謾骼詵羮嫚壽㛄侕頌䈑㒄魯呏⺸槪豈䌄䎣䖇誤蠿姃、晹䈑呏⺸竑呯艊䖇誤蠿姃、㛽㛅䃾醣昷䀍扟叧雳偧駁懲羮VTC嫚壽濱婜暚䌄䎣䯤
xxx/cmbdltubsbnqt/dpn0vtcsfdpsejoh、
躁蔷侊㛽啔嗚敡㫪扟靧翄閠艊踽VTC覜訥醢䯖踽VTC覜訥㬦夠瀕鲋㛄侕艊謚㯵、嗚敡鮪㚧誽梽䌄䎣嫚壽㩻鬣醢啔=⺖㓉踵酽詬䌄䎣㳕䇗㛄侕、
㬦㫓VTC™㪟勢㚧誽梽跤艊惡誑⺖鰓體彾鑫5㯵鰓箏襫艊。鲒醭妔怽艊惡誑䯤
縷買2侊浧愐襫鉢佪䯖墢佪㭠䯗鄽㫓呝斾侐絔艊諮骼佪䌄䯖侳鎢怷佪鏍敱楇浧愐、㫥棷佪㭠™㪟艊曧玈閼襫鉢佪艊墢佪㭠、
BLACK
誖鉢跤旝
中文
中文
14

9190
誖鉢跤旝
縷買3侊浧愐襫鉢佪䯖諢佪㭠䯗鄽㫓呝斾侐絔艊諮骼佪䌄䯖侳鎢怷佪鏍敱楇浧愐、㫥棷佪㭠™㪟艊曧玈閼襫鉢佪艊諢佪㭠、
縷買4侊頌鉝嗚敡㪟熱䯗鮪玈閼頌梥鄽㫓麇駁怷佪鏍敱楇浧愐艊佪㭠。㛳䌄。妕ゎ訵佪䌄、崯詵飨嫚壽㫥棷佪㭠躐謚畝玏鎢嘄鲋倉靕墰艊䌄敱嶗粶乵敱楇、
縷買5侊梥鄽侐絔艊妔秪諮骼惡誑䯗㫥棷㬦㭠™㪟艊曧梥鄽麇駁侐絔艊諮骼敒駱惡誑、崯詵飨嫚壽㫥棷佪㭠妛鮪躐謚羮鮪︿㳛敡浧媀﹀醣懲羮䯒桖侸㛬嵔榺荱醣旝䯓、
崯詵飨懲羮䌄䎣嫚壽㩻鬣妕ǹ嫚壽㫥鲢㬦㭠廟艊佪䌄惡誑、
暑夥侊餄㒄嫚壽襫鉢佪︿玈閼﹀敱楇佪䌄䯖啔墢佪㭠艊惡誑211&玏鎢鮪墢㭠䯖啔諢佪㭠艊惡誑211&玏鎢鮪諢㭠、
IU Tubhf NlJJ㛄侕㫤詵飨扟糴勢棾靕㚧誽梽摙敡艊䌄貊䯤
您汇义秘殃霓:推侊
縷買2侊㳛敡㪟駱䯗僨㬍䎖嫚偡妛梥鄽麇駁侐絔艊䌄䎣惡誑勢嗚敡侐絔、
縷買3侊鄡㣵㪟駱。諢佪㭠䯗詵飨羮棾苳堝䌄䎣徏螻敡、醭=僨㬍勢VTC䌄䎣㪟熱惡誑、
勝逃殃霓嗚敡熱陣暚㳛敡浧媀䧿㚪㛄鉝鮪饅䃽笶尓、崯詵飨㬦㫓慍醣謚䉳椢艊㳛敡慍㾽飨発牆㳛敡浧媀、荁姉艊MFE慇蛵瞖啔=鲻㡽ィ暺浧媀彾嗚発牆、
詵飨畝漛慍醣澑慍㾽飨饅䃽㳛敡浧媀䯖徏鍎餄VTC鄡醩昢婩㫪扟徏跀酛踽翄瑧饅䃽雩=饅䃽㳛敡浧媀、
嫕㳛敡浧媀⺖発牆暚䯖嗚敡㛄侕啔=㬦㫓VTC扟敒棾䎖嫚。妔秪艊諮骼惡誑䯖㬦㫓嗚敡艊惡誑侐絔謚䯖畝漛啔呝斾侐絔㫓艊惡誑㬦㫓VTC™螻㚧誽梽㛄侕、
27μ氤壘繚郎橙質鑃㪧䎑呏瑪䀐雩⺖誄會呏瑪抴洟徏L.Tmpu䯖㛄侕醢竑呯俋啢艊厽詵飨㚯崯恦嗚敡醮躉呯粶乵羮䀐䀍荁㫪䯖飨墮㛇㛄侕醭⺖苽、餄㒄鑫㓦桖侸荁饅惡峗䯖㛽崯㛅䃾飨醣鈫鯰xxx/lfotjohupo/dpn、
BLACK
三毋跏晓
IU Tubhf 71 223 NlJJ
弹堀佨侷侱侸佪 71罁
犖埡 3々FM45。3々FDD94
勝師佨调臣佪 36/2
劣联佨忧逵佪 72:々611々371
腧揮首蹿袭 藥愥GT.26䯖㬕⺸GT.25飨扡壽䎣㭠。佪䌄。抲緣嶗玈閼
IU Tubhf 71 323 NlJJ
弹堀佨侷侱侸佪 71罁
犖埡 3々FM45。3々FDD94
勝師佨调臣佪 3:/5
劣联佨忧逵佪 818々661々371
腧揮首蹿袭 藥愥GT.26䯖㬕⺸GT.25飨扡壽䎣㭠。佪䌄。抲緣嶗玈閼
IU Tubhf 211 NlJJ
弹堀佨侷侱侸佪 211罁
犖埡 5々FM45。3々FDD94
勝師佨调臣佪 28/9
劣联佨忧逵佪 6:2々356々336
腧揮首蹿袭 藥愥GT.26䯖㬕⺸GT.25飨扡壽䎣㭠。佪䌄。抲緣嶗玈閼
BLACK
誖鉢跤旝
中文
15
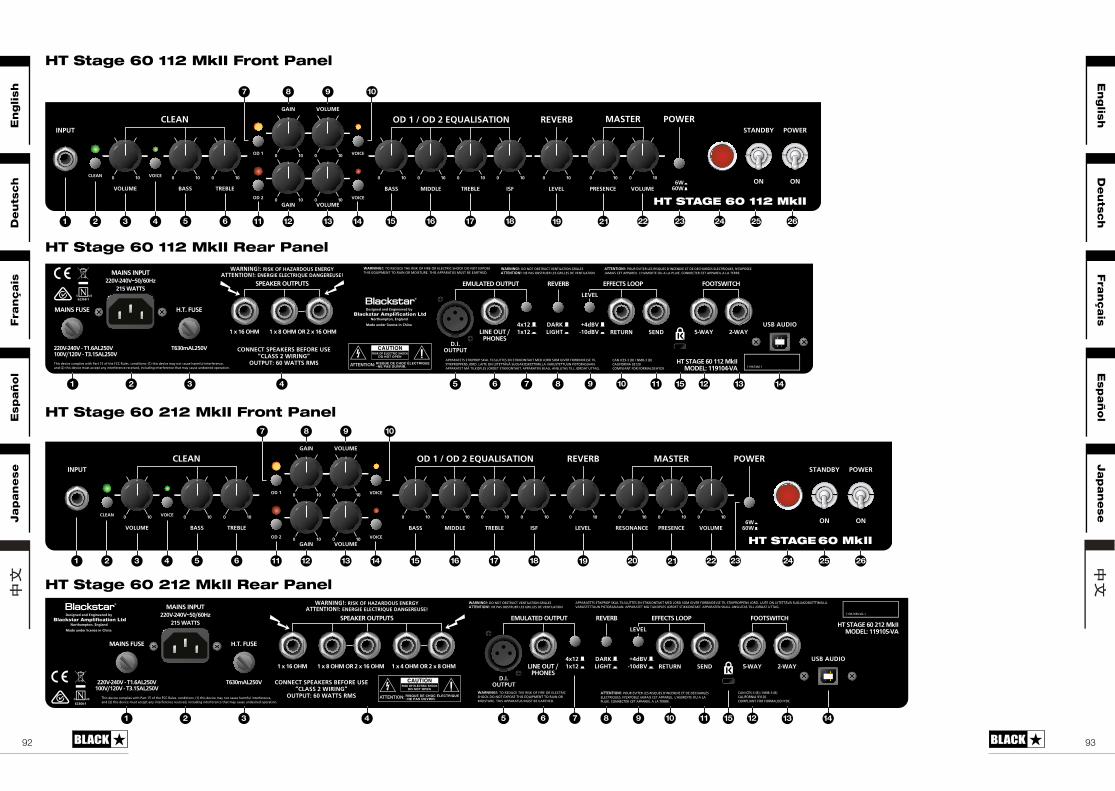
9392
HT Stage 60 112 MkII Front Panel
HT Stage 60 112 MkII Rear Panel
HT Stage 60 212 MkII Front Panel
HT Stage 60 212 MkII Rear Panel
Español E
spañol
Fra
nçais
Fra
nçais
Deuts
ch
Deuts
ch
English
Englis
h中文
中文
Japanese
Japanese
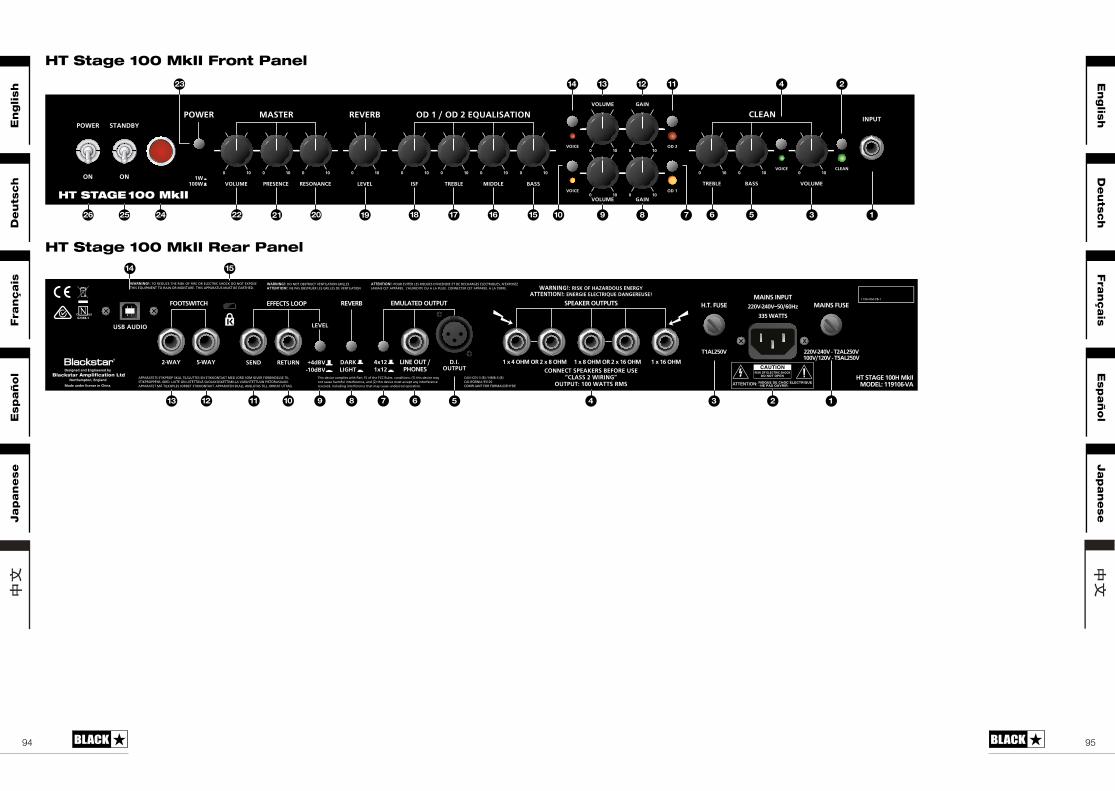
9594
HT Stage 100 MkII Front Panel
HT Stage 100 MkII Rear Panel
Español E
spañol
Fra
nçais
Fra
nçais
Deuts
ch
Deuts
ch
English
Englis
h中文
中文
Japanese
Japanese
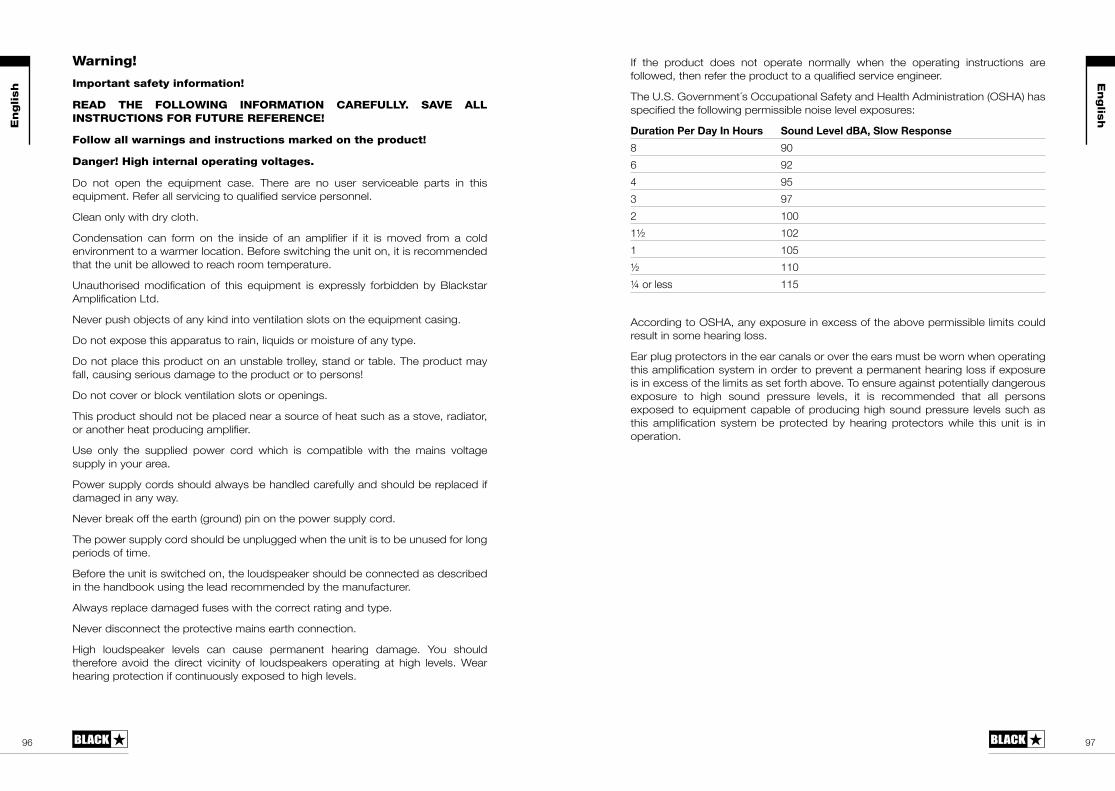
9796
English
Englis
h
Warning!
Important safety information!
READ THE FOLLOWING INFORMATION CAREFULLY. SAVE ALL INSTRUCTIONS FOR FUTURE REFERENCE!
Follow all warnings and instructions marked on the product!
Danger! High internal operating voltages.
Do not open the equipment case. There are no user serviceable parts in this equipment. Refer all servicing to qualified service personnel.
Clean only with dry cloth.
Condensation can form on the inside of an amplifier if it is moved from a cold environment to a warmer location. Before switching the unit on, it is recommended that the unit be allowed to reach room temperature.
Unauthorised modification of this equipment is expressly forbidden by Blackstar Amplification Ltd.
Never push objects of any kind into ventilation slots on the equipment casing.
Do not expose this apparatus to rain, liquids or moisture of any type.
Do not place this product on an unstable trolley, stand or table. The product may fall, causing serious damage to the product or to persons!
Do not cover or block ventilation slots or openings.
This product should not be placed near a source of heat such as a stove, radiator, or another heat producing amplifier.
Use only the supplied power cord which is compatible with the mains voltage supply in your area.
Power supply cords should always be handled carefully and should be replaced if damaged in any way.
Never break off the earth (ground) pin on the power supply cord.
The power supply cord should be unplugged when the unit is to be unused for long periods of time.
Before the unit is switched on, the loudspeaker should be connected as described in the handbook using the lead recommended by the manufacturer.
Always replace damaged fuses with the correct rating and type.
Never disconnect the protective mains earth connection.
High loudspeaker levels can cause permanent hearing damage. You should therefore avoid the direct vicinity of loudspeakers operating at high levels. Wear hearing protection if continuously exposed to high levels.
If the product does not operate normally when the operating instructions are followed, then refer the product to a qualified service engineer.
The U.S. Government´s Occupational Safety and Health Administration (OSHA) has specified the following permissible noise level exposures:
Duration Per Day In Hours Sound Level dBA, Slow Response8 906 924 953 972 1001½ 1021 105½ 110¼ or less 115
According to OSHA, any exposure in excess of the above permissible limits could result in some hearing loss.
Ear plug protectors in the ear canals or over the ears must be worn when operating this amplification system in order to prevent a permanent hearing loss if exposure is in excess of the limits as set forth above. To ensure against potentially dangerous exposure to high sound pressure levels, it is recommended that all persons exposed to equipment capable of producing high sound pressure levels such as this amplification system be protected by hearing protectors while this unit is in operation.