How to Sharpen Pencils
21
-
Upload
melville-house -
Category
Documents
-
view
272 -
download
8
description
A hilarious guide to the lost art of artisanal pencil sharpening
Transcript of How to Sharpen Pencils
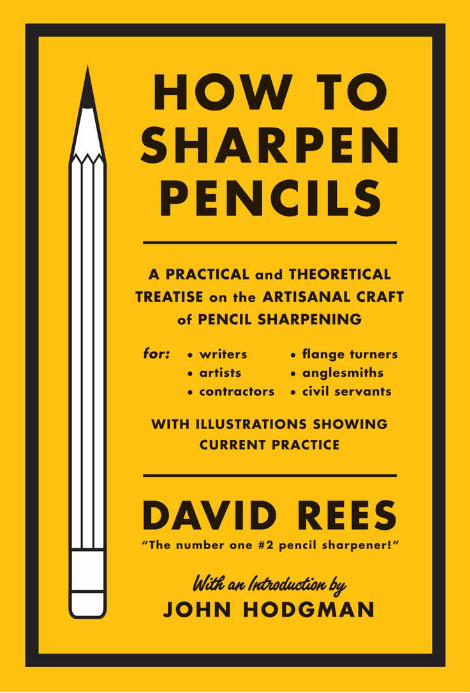
HOW TO SHARPEN PENCILS
A practical and theoretical treatise on the
artisanal craft of pencil sharpening, for writers,
artists, contractors, flange turners, anglesmiths,
and civil servants, with illustrations showing
current practice
DAVID REES
JOHN HODGMANWith an Introduction by
B r o o k l y n , N e w Yo r kMELVIL LE HOUSE
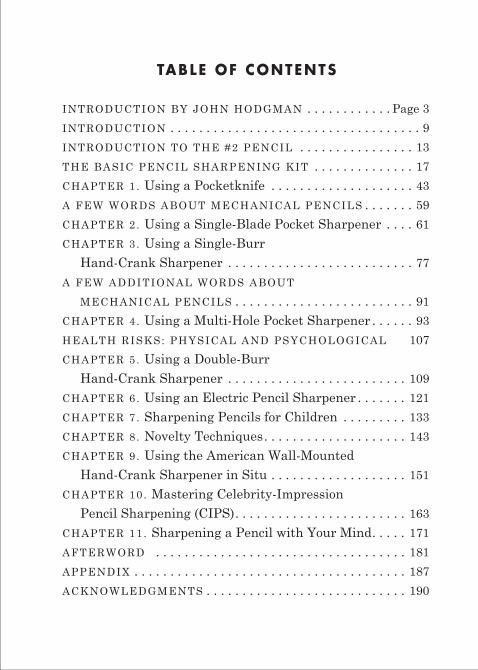
INTRODUCTION BY JOHN HODGMAN . . . . . . . . . . . . Page 3
INTRODUCTION . . . . . . . . . . . . . . . . . . . . . . . . . . . . . . . . . . . 9
INTRODUCTION TO THE #2 PENCIL . . . . . . . . . . . . . . . . 13
THE BASIC PENCIL SHARPENING KIT . . . . . . . . . . . . . . 17
CHAPTER 1 . Using a Pocketknife . . . . . . . . . . . . . . . . . . . . 43
A FEW WORDS ABOUT MECHANICAL PENCILS . . . . . . . 59
CHAPTER 2 . Using a Single-Blade Pocket Sharpener . . . . 61
CHAPTER 3 . Using a Single-Burr Hand-Crank Sharpener . . . . . . . . . . . . . . . . . . . . . . . . . . 77
A FEW ADDITIONAL WORDS ABOUT
MECHANICAL PENCILS . . . . . . . . . . . . . . . . . . . . . . . . . 91
CHAPTER 4 . Using a Multi-Hole Pocket Sharpener . . . . . . 93
HEALTH RISKS: PHYSICAL AND PSYCHOLOGICAL 107
CHAPTER 5 . Using a Double-Burr Hand-Crank Sharpener . . . . . . . . . . . . . . . . . . . . . . . . . 109
CHAPTER 6 . Using an Electric Pencil Sharpener . . . . . . . 121
CHAPTER 7 . Sharpening Pencils for Children . . . . . . . . . 133
CHAPTER 8 . Novelty Techniques . . . . . . . . . . . . . . . . . . . . 143
CHAPTER 9 . Using the American Wall-Mounted Hand-Crank Sharpener in Situ . . . . . . . . . . . . . . . . . . . 151
CHAPTER 10 . Mastering Celebrity-Impression Pencil Sharpening (CIPS) . . . . . . . . . . . . . . . . . . . . . . . . 163
CHAPTER 11 . Sharpening a Pencil with Your Mind . . . . . 171
AFTERWORD . . . . . . . . . . . . . . . . . . . . . . . . . . . . . . . . . . . 181
APPENDIX . . . . . . . . . . . . . . . . . . . . . . . . . . . . . . . . . . . . . . 187
ACKNOWLEDGMENTS . . . . . . . . . . . . . . . . . . . . . . . . . . . . 190
TABLE OF CONTENTS
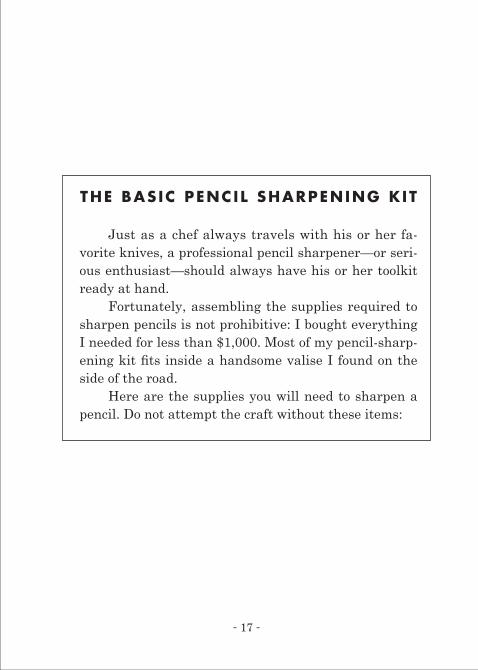
- 17 -
THE BAS IC PENCIL SHARPENING K IT
Just as a chef always travels with his or her fa-vorite knives, a professional pencil sharpener—or seri-ous enthusiast—should always have his or her toolkit ready at hand .
Fortunately, assembling the supplies required to sharpen pencils is not prohibitive: I bought everything I needed for less than $1,000 . Most of my pencil-sharp-ening kit fits inside a handsome valise I found on the side of the road .
Here are the supplies you will need to sharpen a pencil . Do not attempt the craft without these items:

- 24 -
HEADBAND MAGNIF I ER (WITH LED L IGHTS )
Pencil sharpening requires long stretches of close work, which can strain the eyes . A good desk-mounted or headband magnifier allows for hours of focus with minimal eye strain. I use a magnifier with 2x optical power, which is sufficient.
It’s amazing how much a pencil point reveals itself when you examine it through magnifying lenses. What looks like a fine point under normal conditions may, under the illumination of a magnifying lens, reveal it-self as less than ideal, playing host to imperfections that should be resolved before returning the pencil to its owner .
On the other hand, donning magnifying spectacles and confirming that a point really is as fine as you ex-pect is enough to make the most hardened pencil sharp-ener fall into an ecstasy .
- 25 -
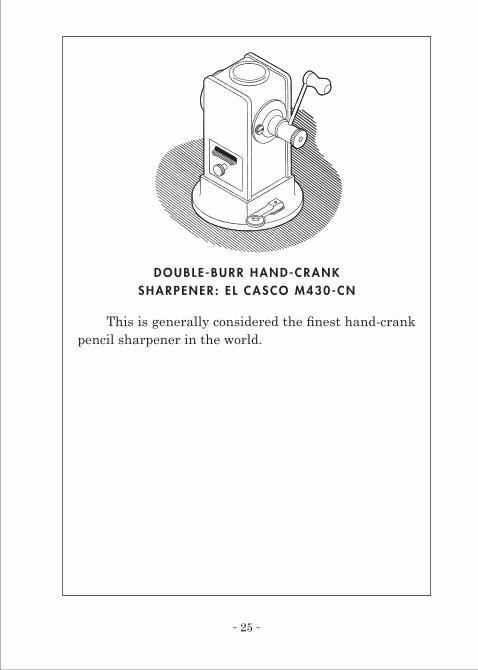
DOUBLE -BURR HAND-CRANK SHARPENER : E L CASCO M430-CN
This is generally considered the finest hand-crank pencil sharpener in the world .
- 61 -
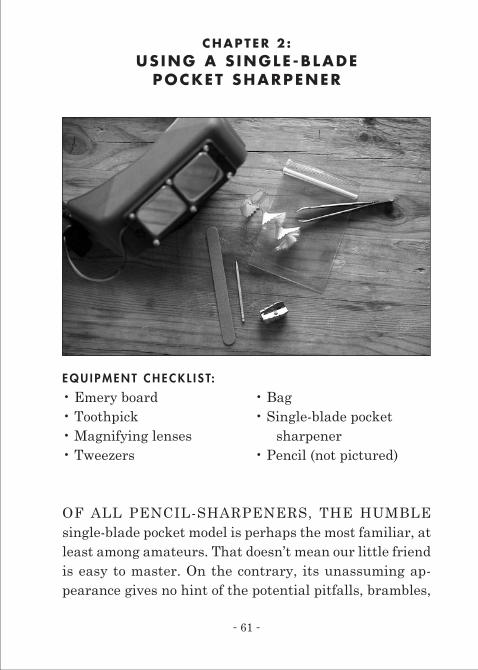
CHAPTER 2 :US ING A S INGLE -BLADE
POCKET SHARPENER
E Q U I P M E N T C H E C K L I S T:
OF ALL PENCIL-SHARPENERS, THE HUMBLE single-blade pocket model is perhaps the most familiar, at least among amateurs . That doesn’t mean our little friend is easy to master . On the contrary, its unassuming ap-pearance gives no hint of the potential pitfalls, brambles,
• Emery board• Toothpick• Magnifying lenses• Tweezers
• Bag• Single-blade pocket
sharpener• Pencil (not pictured)
- 62 -
frustrations, dead-ends, and heartbreaks that lie within .I approach every use of a pocket sharpener with
guarded optimism . As far as I’m concerned, it offers the most intimate encounter with a pencil . It’s my favorite sharpening technique precisely because, like all intimate encounters, its ideal outcome is so obvious yet its practi-cal application is so fraught with peril .
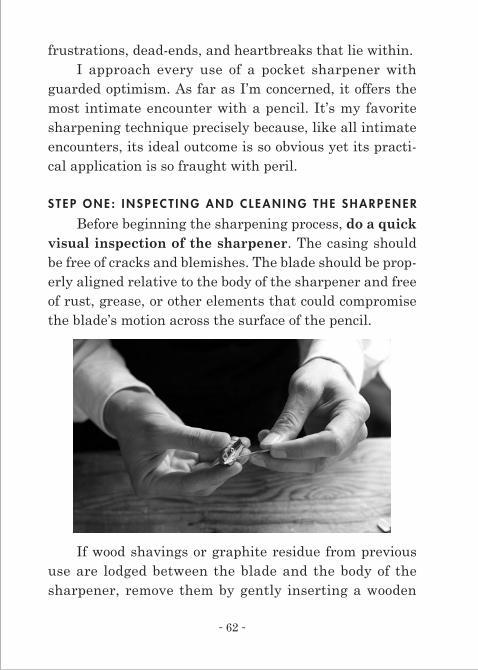
S T E P O N E : I N S P E C T I N G A N D C L E A N I N G T H E S H A R P E N E R
Before beginning the sharpening process, do a quick visual inspection of the sharpener . The casing should be free of cracks and blemishes . The blade should be prop-erly aligned relative to the body of the sharpener and free of rust, grease, or other elements that could compromise the blade’s motion across the surface of the pencil .
If wood shavings or graphite residue from previous use are lodged between the blade and the body of the sharpener, remove them by gently inserting a wooden
- 63 -
toothpick between the blade and the opposite plane . Pull the toothpick towards the sharpener’s entrance hole, col-lecting debris as you go .
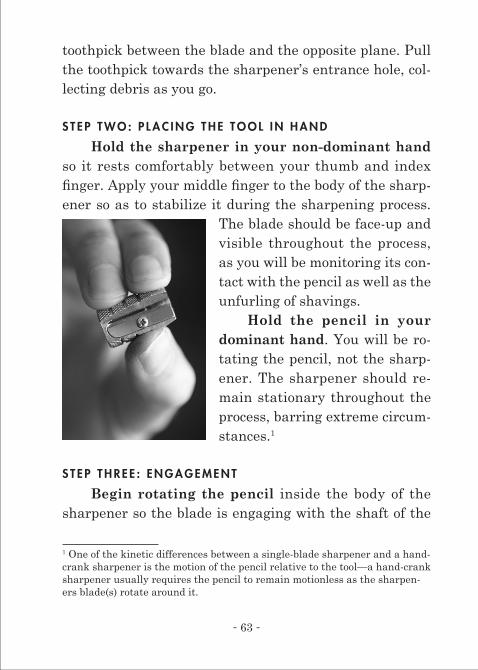
S T E P T W O : P L A C I N G T H E T O O L I N H A N D
Hold the sharpener in your non-dominant hand so it rests comfortably between your thumb and index finger. Apply your middle finger to the body of the sharp-ener so as to stabilize it during the sharpening process .
The blade should be face-up and visible throughout the process, as you will be monitoring its con-tact with the pencil as well as the unfurling of shavings .
Hold the pencil in your dominant hand . You will be ro-tating the pencil, not the sharp-ener . The sharpener should re-main stationary throughout the process, barring extreme circum-stances .1
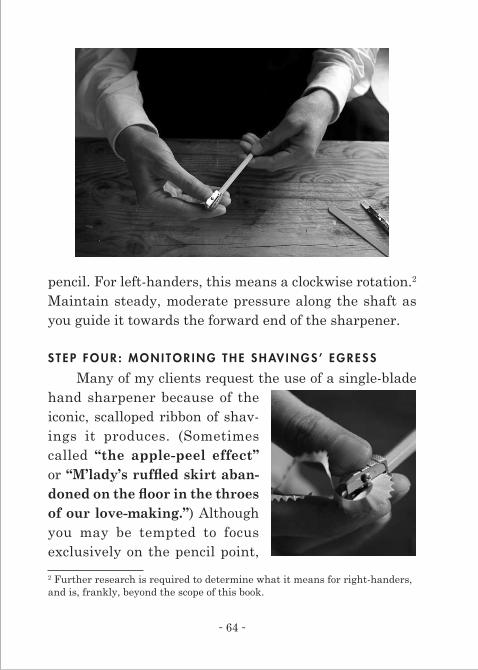
S T E P T H R E E : E N G A G E M E N T
Begin rotating the pencil inside the body of the sharpener so the blade is engaging with the shaft of the
1 One of the kinetic differences between a single-blade sharpener and a hand-crank sharpener is the motion of the pencil relative to the tool—a hand-crank sharpener usually requires the pencil to remain motionless as the sharpen-ers blade(s) rotate around it .
- 64 -
pencil . For left-handers, this means a clockwise rotation .2 Maintain steady, moderate pressure along the shaft as you guide it towards the forward end of the sharpener .
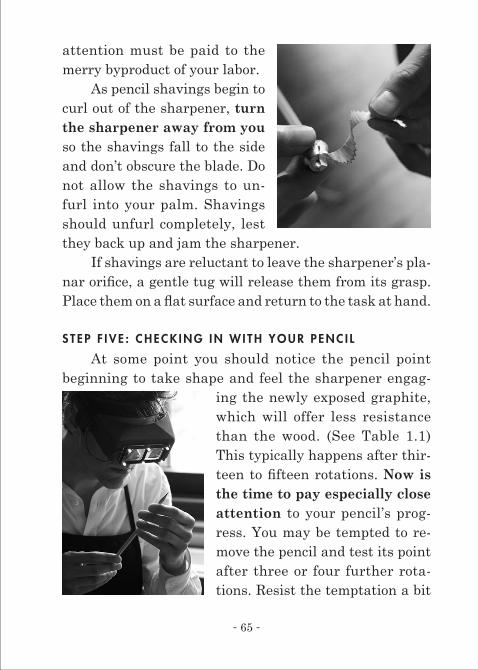
S T E P F O U R : M O N I T O R I N G T H E S H AV I N G S ’ E G R E S S
Many of my clients request the use of a single-blade hand sharpener because of the iconic, scalloped ribbon of shav-ings it produces . (Sometimes called “the apple-peel effect” or “M’lady’s ruffled skirt aban-doned on the floor in the throes of our love-making.”) Although you may be tempted to focus exclusively on the pencil point,
2 Further research is required to determine what it means for right-handers, and is, frankly, beyond the scope of this book .
- 65 -
attention must be paid to the merry byproduct of your labor .
As pencil shavings begin to curl out of the sharpener, turn the sharpener away from you so the shavings fall to the side and don’t obscure the blade . Do not allow the shavings to un-furl into your palm . Shavings should unfurl completely, lest they back up and jam the sharpener .
If shavings are reluctant to leave the sharpener’s pla-nar orifice, a gentle tug will release them from its grasp. Place them on a flat surface and return to the task at hand.
S T E P F I V E : C H E C K I N G I N W I T H Y O U R P E N C I L
At some point you should notice the pencil point beginning to take shape and feel the sharpener engag-
ing the newly exposed graphite, which will offer less resistance than the wood . (See Table 1 .1) This typically happens after thir-teen to fifteen rotations. Now is the time to pay especially close attention to your pencil’s prog-ress . You may be tempted to re-move the pencil and test its point after three or four further rota-tions . Resist the temptation a bit
- 66 -
longer—approximately two or three more rotations, if not one additional rotation, or even a further, final rotation.
Remove the pencil and look at it .If the pencil is still not sharp enough, engage the
sharpener in another one or two rotations . Avoid a third rotation, a .k .a . “the Devil’s Dance .”
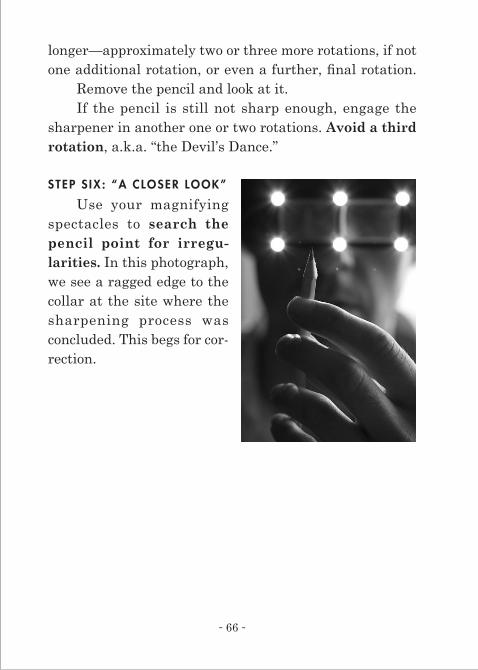
STEP S IX : “A CLOSER LOOK”
Use your magnifying spectacles to search the pencil point for irregu-larities. In this photograph, we see a ragged edge to the collar at the site where the sharpening process was concluded . This begs for cor-rection .

Ori
gin
al p
enci
l len
gth
(z
ero
rota
tion
s):
7 1 ∕2
inch
es
Aft
er o
ne
rota
tion
:7
1 ∕2 in
ches
Aft
er t
wo
rota
tion
s:7
1 ∕2 in
ches
Aft
er t
hre
e ro
tati
ons:
7 1 ∕2
inch
es
Aft
er f
our
rota
tion
s:7
1 ∕2 in
ches
Aft
er fi
ve r
otat
ion
s:7
1 ∕2 in
ches
Aft
er s
ix r
otat
ion
s:7
1 ∕2 in
ches
(sh
arpe
ner
is s
till
sh
avin
g w
ood;
no
grap
hit
e ex
posu
re)
Aft
er s
even
rot
atio
ns:
7 1 ∕2
inch
es
Aft
er e
igh
t ro
tati
ons:
7 1 ∕2
inch
es
Aft
er n
ine
rota
tion
s:7
1 ∕2 in
ches
Aft
er t
en r
otat
ion
s:7
1 ∕2 in
ches
Aft
er e
leve
n r
otat
ion
s:7
1 ∕2 in
ches
Aft
er t
wel
ve r
otat
ion
s:7
1 ∕2 in
ches
Aft
er t
hir
teen
rot
atio
ns:
7 1 ∕2
inch
es (
360
degr
ees
of
grap
hit
e ex
pose
d)
Aft
er f
ourt
een
rot
atio
ns:
7 1 ∕2
inch
es
Aft
er fi
ftee
n r
otat
ion
s:7
1 ∕2 in
ches
(n
otic
eabl
e am
oun
t of
gra
phit
e sh
avin
gs a
lon
g w
ith
woo
d sh
avin
gs)
Aft
er s
ixte
en r
otat
ion
s:7
1 ∕2 in
ches
(tu
rnin
g pe
nci
l in
side
sh
arpe
ner
not
ably
ea
sier
du
e to
red
uce
d co
nta
ct
of b
lade
aga
inst
woo
d)
Aft
er s
even
teen
ro
tati
ons:
7 15
∕32 in
ches
(co
uld
be
plau
sibl
y id
enti
fied
as
“sh
arp”
)
Aft
er e
igh
teen
rot
atio
ns:
7 7 ∕1
6 in
ches
Aft
er n
inet
een
rot
atio
ns:
7 7 ∕1
6 in
ches
Aft
er t
wen
ty r
otat
ion
s:7
3 ∕8 in
ches
Aft
er t
wen
ty-o
ne
rota
tion
s:7
11∕32
inch
es (
good
pla
ce t
o st
op;
furt
her
sh
arpe
nin
g in
crea
ses
the
risk
of
brea
kin
g th
e pe
nci
l’s t
ip)
Aft
er t
wen
ty-t
wo
rota
tion
s:7
11∕32
inch
es
Aft
er t
wen
ty-t
hre
e ro
tati
ons:
7 1 ∕4
inch
es (
tip
brok
e of
f)
Aft
er t
wen
ty-f
our
rota
tion
s:7
7 ∕32 i
nch
es
Aft
er t
wen
ty-fi
ve
rota
tion
s:7
7 ∕32 i
nch
es (
proj
ect
aban
don
ed)
TYPI
CAL
LENG
TH O
F PE
NCIL
AFT
ER E
ACH
FULL
ROT
ATIO
N IN
SIN
GLE-
BLAD
E
POCK
ET S
HARP
ENER
, BLA
DE L
ENGT
H =
29∕32
INCH
, MOD
ERAT
E PR
ESSU
RE A
PPLI
ED
- 68 -
S T E P S E V E N : C O R R E C T I N G T H E C O L L A R
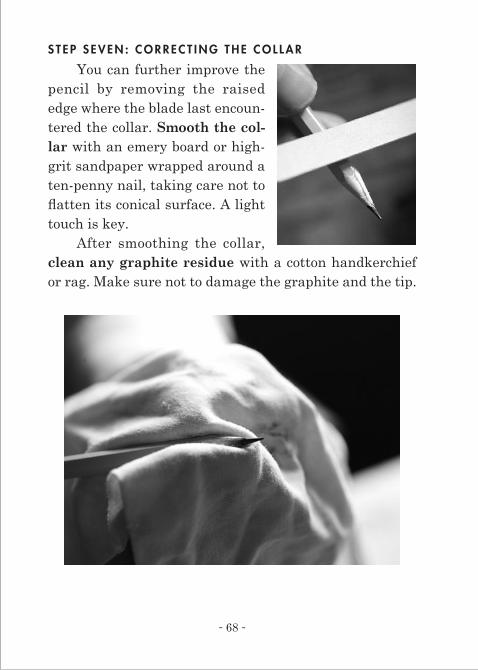
You can further improve the pencil by removing the raised edge where the blade last encoun-tered the collar . Smooth the col-lar with an emery board or high-grit sandpaper wrapped around a ten-penny nail, taking care not to flatten its conical surface. A light touch is key .
After smoothing the collar, clean any graphite residue with a cotton handkerchief or rag . Make sure not to damage the graphite and the tip .
- 69 -
S T E P E I G H T: “ B A G G I N G T H E B I G G A M E ”
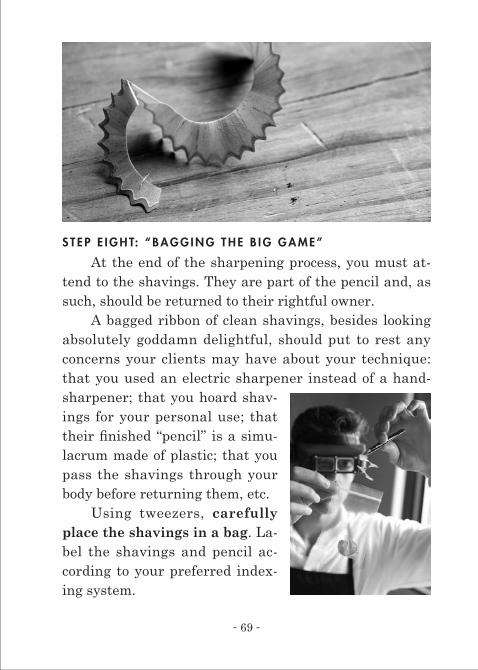
At the end of the sharpening process, you must at-tend to the shavings . They are part of the pencil and, as such, should be returned to their rightful owner .
A bagged ribbon of clean shavings, besides looking absolutely goddamn delightful, should put to rest any concerns your clients may have about your technique: that you used an electric sharpener instead of a hand-sharpener; that you hoard shav-ings for your personal use; that their finished “pencil” is a simu-lacrum made of plastic; that you pass the shavings through your body before returning them, etc .
Using tweezers, carefully place the shavings in a bag . La-bel the shavings and pencil ac-cording to your preferred index-ing system .
- 70 -
S T E P N I N E : R E V I E W I N G Y O U R H A N D I W O R K
This step can be emotionally wrenching, but it’s re-quired if you hope to improve your practice . Taking a long look at your finished pencil is an opportunity for reflection and renewal .
While reviewing your handiwork, ask yourself the following questions:
1 . How closely does the pencil point correspond to your desired outcome? Is it sharper or duller than you wanted? If the former is the case, review the rotations recorded for this job in your log book and try one or two fewer rotations on your next pencil; if the latter, add rotations—keeping in mind that most pocket sharpeners lack a physical bulwark against over-sharpening, thereby risking the pro-duction of an irregular “pin-tip” which may break at the slightest pressure and leave the point further compromised .
2 . Is the collar-top consistent around the point and flush with the graphite? Are there dips or scoops in the wood you didn’t intend?3 (These issues may have more to do with the quality of your pencil than your abilities; lesser pencils may have a loose or otherwise imperfect bond between the graphite core and the wooden shaft .)
3 Keep in mind that a single dramatic scoop in the collar-top is not necessar-ily a blemish; it may lend an air of sophistication or erotic frisson to an unre-markable pencil point . One is reminded of the eighteenth-century courtesan’s practice of adding a “beauty mark” to an otherwise “perfect” face .
- 71 -
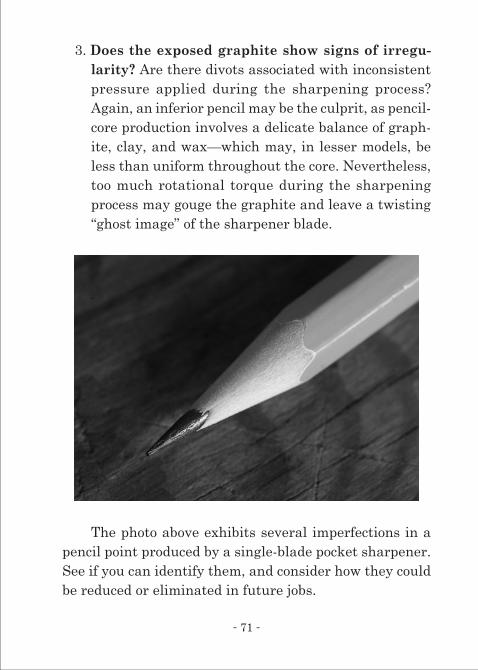
3 . Does the exposed graphite show signs of irregu-larity? Are there divots associated with inconsistent pressure applied during the sharpening process? Again, an inferior pencil may be the culprit, as pencil-core production involves a delicate balance of graph-ite, clay, and wax—which may, in lesser models, be less than uniform throughout the core . Nevertheless, too much rotational torque during the sharpening process may gouge the graphite and leave a twisting “ghost image” of the sharpener blade .
The photo above exhibits several imperfections in a pencil point produced by a single-blade pocket sharpener . See if you can identify them, and consider how they could be reduced or eliminated in future jobs .
- 72 -
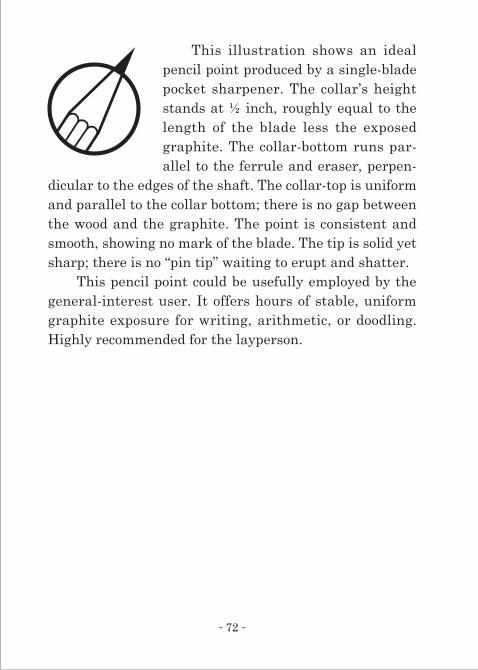
This illustration shows an ideal pencil point produced by a single-blade pocket sharpener . The collar’s height stands at ½ inch, roughly equal to the length of the blade less the exposed graphite . The collar-bottom runs par-allel to the ferrule and eraser, perpen-
dicular to the edges of the shaft . The collar-top is uniform and parallel to the collar bottom; there is no gap between the wood and the graphite . The point is consistent and smooth, showing no mark of the blade . The tip is solid yet sharp; there is no “pin tip” waiting to erupt and shatter .
This pencil point could be usefully employed by the general-interest user . It offers hours of stable, uniform graphite exposure for writing, arithmetic, or doodling. Highly recommended for the layperson .
- 132 -
- 133 -
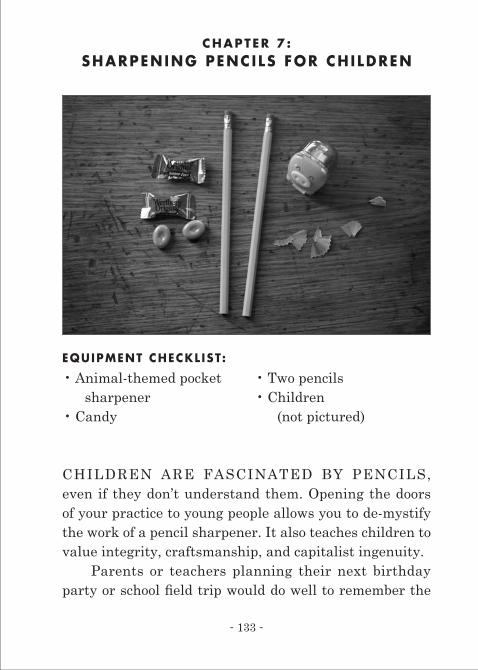
CHAPTER 7 :SHARPENING PENCILS FOR CHILDREN
EQUIPMENT CHECKL IST:
CHILDREN ARE FASCINATED BY PENCILS, even if they don’t understand them . Opening the doors of your practice to young people allows you to de-mystify the work of a pencil sharpener . It also teaches children to value integrity, craftsmanship, and capitalist ingenuity .
Parents or teachers planning their next birthday party or school field trip would do well to remember the
• Animal-themed pocket sharpener
• Candy
• Two pencils• Children
(not pictured)