INTERVIEW WITH EMPLOYEE: BARBIE SHEA - HAIRSTYLIST BY:BRANDON SHEA.
Upload
brianna-staffordCategory
view
250download
2
HOW TO PROCESS PREMIUM QUALITY SHEA BUTTER

© 2012 StarShea. All rights reserved. 2
Germinated nuts Insect Attack Nuts

© 2012 StarShea. All rights reserved. 3
Mouldy Nuts Black Nuts

© 2012 StarShea. All rights reserved. 4
Broken Nuts Impurities

© 2012 StarShea. All rights reserved. 5
STEP 1Kernel cleaning & drying
All nuts must be washed and rinsed several times with clean warm water to get rid of remains wastes
Dry washed and cleaned nuts in the sun for 30 to 45 minutes depending on the intensity of the sun

© 2012 StarShea. All rights reserved. 6
STEP 2Kernel Sorting
Separate bad and black nuts from the good ones.
Use only clean and good nuts to produce unrefined butter.
Sources of black nuts: germinated, broken, insects, early stage

© 2012 StarShea. All rights reserved. 7
STEP 3Kernel Crushing
Send them to the crusher and wait for small and uniform size particles for easy roasting
The time between crushing and roasting of your kernels must be as short as possible. Not more than 1 hour

© 2012 StarShea. All rights reserved. 8
Send your crushed shea kernels to the roaster immediately after crushing and roasted for 45 minutes to 1 hour
STEP 4Roasting Of Crushed Shea Kernels
Use a stop clock or a simple watch to keep same roasting time and so a constant quality of production

© 2012 StarShea. All rights reserved. 9
1) Cool down the nuts for 30 minutes to 1 hour
2) Mill in a milling machine into a fine paste.
3) Ensure the paste as smooth as possible
The paste has to be the finest as possible to extract the oil
The production process could be suspended after this process to make time for the hot paste to cool down. Evening is the best moment to mill, it allows the paste to cool down overnight
STEP 5Milling Your Roasted Kernels

© 2012 StarShea. All rights reserved. 10
The paste from the mill should be left to cool down completely
Fetch just enough quantity of paste your arm can knead with less stress
STEP 6 Kneading
Knead and add small amount of cold water from time to time to get a smoother texture
Sometimes, depending on the temperature, you may need to add warm water

© 2012 StarShea. All rights reserved. 11
The final kneading should be vigorous to fully aerate the fat
The kneading is slowed down completely, as the mixture becomes soft, light and fluffy
You can determine the right time for separation by observing the paste on your fingers. It should run freely on your hand instead of getting stuck to it
Note that when you separate at the wrong time you leave a lot of oil in the water and cake and this can affect your profit margin
STEP 6 Kneading

© 2012 StarShea. All rights reserved. 12
Add larger amount of cold water into the mixture and stir continuously to cause a grey, oily scum to rise
Continue to stir, it will reject the fat to the float, then collect it from the surface of the water into another bowl
You must not leave your kneaded butter overnight. You will destroy completely the quality of your butter, you need to start boiling as soon as possible
STEP 6 Kneading

© 2012 StarShea. All rights reserved. 13
Boil your fat immediately after kneading to complete the separation of the fat from the cake which you started during the kneading stage
Boil until you see clear oil and allow it to sit for 30 minutes
STEP 7First Stage Boiling

© 2012 StarShea. All rights reserved. 14
Transfer your oil into a new pot and boil to dehydrate on a gentle fire
You should add a cup of water to your oil before boiling to wash and clean it
Monitor your oil and regularly remove all floating particles and dirty foam with your ladle
STEP 8Second Stage Boiling

© 2012 StarShea. All rights reserved. 15
Filter the warm liquid fat through a cloath into a plastic bowl
Allow the filtered liquid fat to cool down and solidify
Use a wooden ladle when the shea butter is going to solidificate to stir the butter as long as possible
STEP 9Filtration & Solidification
© 2012 StarShea. All rights reserved. 16
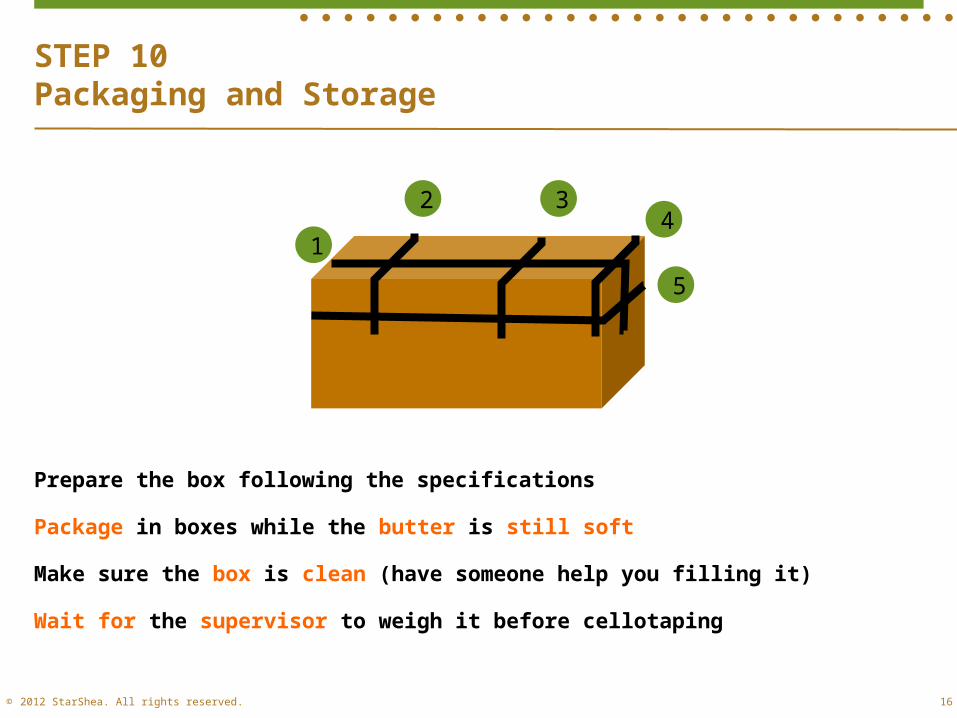
Prepare the box following the specifications
Package in boxes while the butter is still soft
Make sure the box is clean (have someone help you filling it)
Wait for the supervisor to weigh it before cellotaping
STEP 10Packaging and Storage
1
2 34
5

© 2012 StarShea. All rights reserved. 17
Weigh the shea butter with a scale and package into cartons
Ensure that your packaging is air tight as well as water proof
STEP 10Packaging and Storage
Keep your shea butter Away from direct sunlight In a common clean room Raised on platforms (local
wood)

© 2012 StarShea. All rights reserved. 18
Recommended equipment