
How did you use media technologies in the construction, research, planning and evaluation stages?
Upload
wyke-sixth-form-collegeCategory
view
55download
0
How did you use media technologies in the construction and research, planning and evaluation stages?BY BETHANY STEPHENSON

Products Used
Camera corder
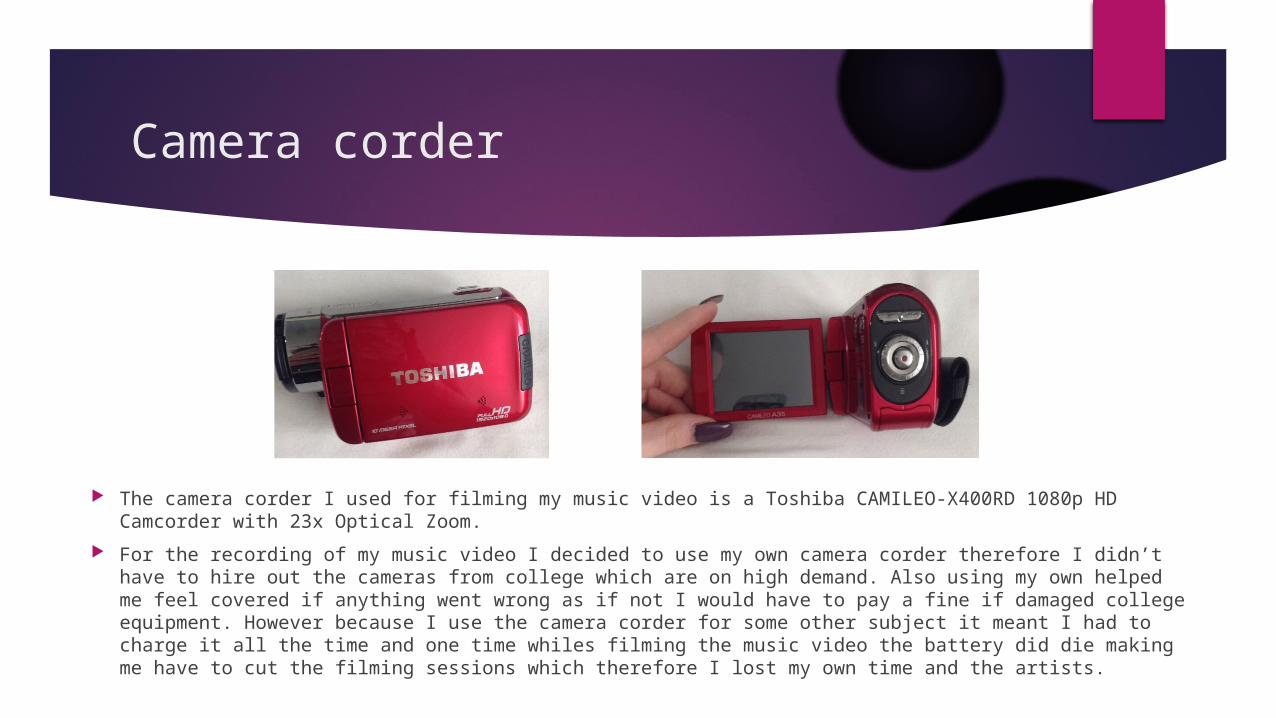
The camera corder I used for filming my music video is a Toshiba CAMILEO-X400RD 1080p HD Camcorder with 23x Optical Zoom.
For the recording of my music video I decided to use my own camera corder therefore I didn’t have to hire out the cameras from college which are on high demand. Also using my own helped me feel covered if anything went wrong as if not I would have to pay a fine if damaged college equipment. However because I use the camera corder for some other subject it meant I had to charge it all the time and one time whiles filming the music video the battery did die making me have to cut the filming sessions which therefore I lost my own time and the artists.

SD Card
The SD card I used to store my footage was 4GB SanDisk card, this card was far too small to hold all my footage therefore I could only record some footage and then save to a mac computer and this was done continuously, therefor doing this lost time. Also when placing SD card into Mac the file format was not recognised so I often had to get the files transferred to a MP4 which could only be done from one system which the technician only had access to, but finding this person was a struggle therefore again time was lost.

Tripod
A tripod was used in order to keep my camera steady, this was proven to be successful as all footage where still and this is what I wanted also doing this made the music video look professional. However I do not own my own Tripod therefore I had to hire one from media department however finding time to hire was proven difficult as there is a schedule for when you can hire and collect I often went after college as this was when I was filming for my music video.

Mac Suite
The work I have produced was all done on one single Mac computer this is done because once you’ve started work on Final cut or Photo shop the work will only stay on that desktop not any other mac computers.
Although it was proven difficult to get access to the computer as there are other student who have work located on to the same mac therefore I often hire the mac out in order to ensure nobody else would take the computer.

Software used
Blogger Photoshop Final cut Prezi YouTube

Blogger
Advantages I can include many images and
YouTube clips. Easy and quick to update or add new
posts. Can use software anywhere and on
the go with the app for the site.
Disadvantages Blog can not be private as wont be
able to be marked by examiners but it risks other students copying work.
Can only use when have internet Work can be lost if you don’t save
changes that have been made. Only upload video if you upload it on
YouTube first and then blog after.
Blogger is a blogging site where I have presented all my work this includes my research and planning and also presenting my final products of my coursework.

Final Cut
Advantages Any changes made are saved
automatically. System includes many different
effects for different clips. You are able to adjust the speed of
clips either faster or lower helping create quirky effects.
Can upload straight to YouTube from the software.
Disadvantages System was quite complex to use at
first for a beginner as its not as simple as other software's like iMovies.
Can only use system on one computer and therefore can not work on projects from home.
Can corrupt files if the project isn’t saved properly therefore some work is lost.
Final cut is an editing system which has been used to create my music video also I have used final cut for showing my constructions of other products by speeding up clips.

YouTube
Advantages The system is Free You are able to use software at home,
college or on the go. Easy to use The service is clean and clear Many videos to chose from during
research. Includes tutorial clips for software that I
needed help with.
Disadvantages Requires the internet in order for it to
work. After uploading my music video the
quality was affected as it became blurry in some parts of the video.
There could be copyright infringement issues.
There could be issues of privacy invasion.
YouTube has been used in order to upload my music videos and also to upload videos of the construction of the products another way I have used YouTube is to look at existing music videos in order to help me with my research and planning.
Prezi
Advantages System is free to use Can use software on any
technological device due to system having an app.
System is easy to use There are many different templates
to chose from allowing you have different ways to present your work.
Disadvantages Can only use system if connected to
internet. Work is lost if not saved correctly Work is lost if there is bad internet
connection.
Prezi is an online system which allows you to present work differently, I used this system to show information on my planning and research this way was more of an artistic way to present my work.

Photoshop
Advantages There are different filters and adjustments
that can be made to one image. You can use web images on top as I used
an image of a barcode as was able to manipulate this on to my Digi Pak template.
Text can be added and there is multiple filters for this. You can also curve text around images which is affective.
Disadvantages If using the system on a Mac computer
you can only use that computer to finish off uncompleted work.
For every adjustment made you have to make a new layer and if the layer isn’t name it is hard to go back to this layer to make further adjustments.
Complicated to use system if not used in a while as all basic strategies are forgotten.
Photoshop has been used to create my Digi-pak and also my advertising poster, the system allows me to edit photos to my liking by adjusting the brightness, saturation and sharpness etc.

Production Process
Throughout creating my Music video and also creating my ancillary text products I screen recorded each process. I did this by using Quick time player, this I believe helps provide the best evidence of my creations.
Although I thought I screen recorded all my process for all product it turns out the last adjustments I made on my Digi-pak have not been recorded and also when I created my second draft for my Advertising poster this also was
not recorded.

Music Video- Draft 2 production process
The clip has been speeded up by 40x this has been done because the clip was 3 hours long, however all that is included in this video is me placing my footage into place and matching the lip syncing. No effects have been added to the footages. This Editing progression video shows me starting my music video with the new footage I had also the new footage with my new artist. Before adding any of the footage I added the soundtrack of the song I have chosen therefore when adding the footages where the artist is lip syncing I can get the footage to match the soundtrack therefore this saves me from making any adjustments later. Whiles placing my footage in place I did have my storyboard next to it therefore I knew where and how I wanted to the clips, however some of the footages have been changed from my story board as I didn’t think some of the shot suited to they way the video was looking. The footages so far in the draft 2 have no effects or any adjustments made to them apart from I reduced the audio on all as there was unnecessary sound and all that needs to be heard is the soundtrack.In this production process I was also ensuring that the clips that are at the side of each other, that the artist wasn’t wearing the same outfits. Therefore this helps the product look professional.

Music Video- Draft 3 production process
The clip has been speeded up by 40x this has been done because the clip was 2 hours long, however what is included in this video is me changing some of the colour within the footages. I have done this by using colour adjustment and adjusting the colour to which I think is appropriate, I decided to use bright bold colours like, pink, blue and purple this way it helps conform to the pop genre and grabs the attention of my audience. Also there was still some gaps from draft 2 therefore the video shows me filling the gaps with footages.
Also In the video it shows me adding effects to my clips, I managed to do this by using the effects Icon and from the selection of effects I chose which I thought suited best to the clips, I often used tilling effect as I think this is the most creative and also this effect is often used in pop music videos.
From draft 3 to my final draft I am going to be creative and consider looking at more different effects that could be added to my clips in order to get the best professional looking product I can possibly create.

Music Video- Final Draft production process
Again this clip had to be speeded up due too how long the clip was of 2 hours. Therefore I am not able to produce a voice over to help state what I’ve done individually.
However I can say that this video includes me making the final adjustments as some effects that where all ready on my audience didn’t like therefore I have deleted the affects and included one that is more likeable for my audience. The effects I have decided to use are kaleidoscope, tiling, bad TV and Prism, all these effects help bring fun and energy into the video which I need as my audience need to be energised and excited by the video and also to keep their attention onto the video.
I also changed the colour in most of the footages as I believe the video was lacking in colour. The colours have also been done to help relate to the pop genre and to grab my audience attention.
After making all these changes I believe my product looks professional. It clearly links to the pop genre due to the use of colours, effects, fast editing and lip syncing matching the soundtrack.
Digi Pak- Front cover
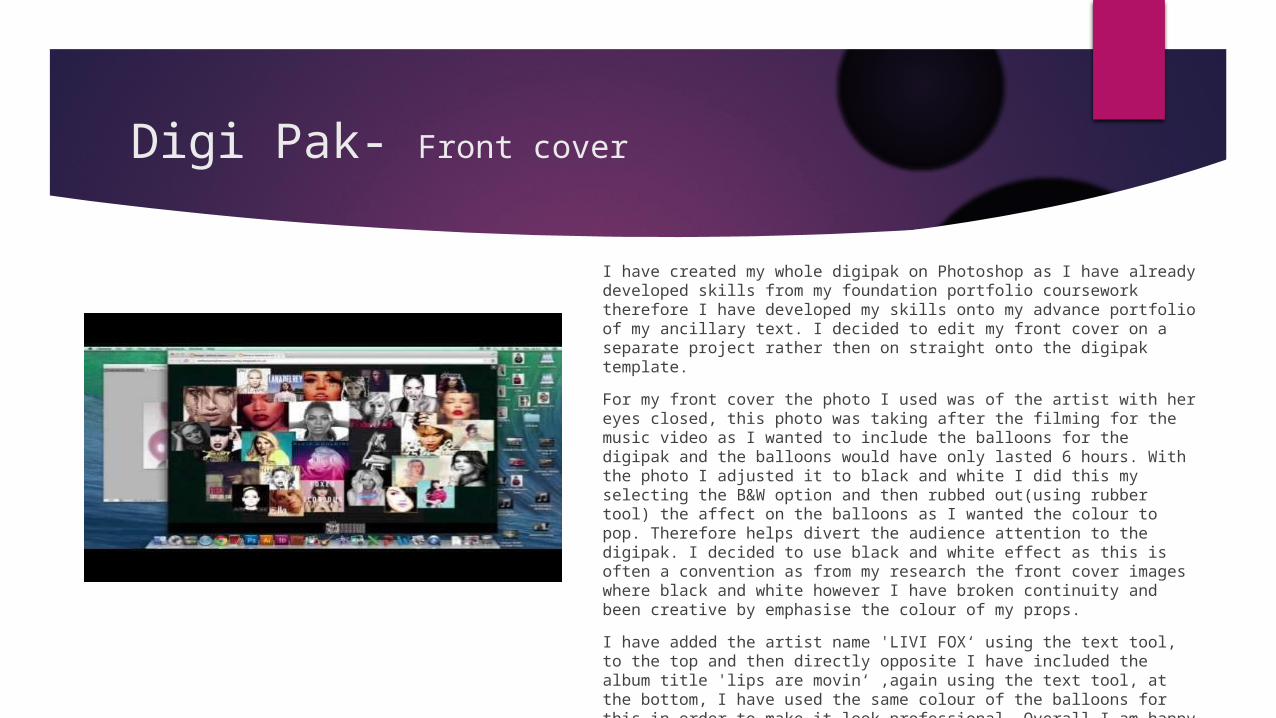
I have created my whole digipak on Photoshop as I have already developed skills from my foundation portfolio coursework therefore I have developed my skills onto my advance portfolio of my ancillary text. I decided to edit my front cover on a separate project rather then on straight onto the digipak template. For my front cover the photo I used was of the artist with her eyes closed, this photo was taking after the filming for the music video as I wanted to include the balloons for the digipak and the balloons would have only lasted 6 hours. With the photo I adjusted it to black and white I did this my selecting the B&W option and then rubbed out(using rubber tool) the affect on the balloons as I wanted the colour to pop. Therefore helps divert the audience attention to the digipak. I decided to use black and white effect as this is often a convention as from my research the front cover images where black and white however I have broken continuity and been creative by emphasise the colour of my props.I have added the artist name 'LIVI FOX‘ using the text tool, to the top and then directly opposite I have included the album title 'lips are movin‘ ,again using the text tool, at the bottom, I have used the same colour of the balloons for this in order to make it look professional. Overall I am happy with the front cover as I have followed conventions and included the necessary information. Once completed I added dragged the image on to my template.

Digi Pak- Disks
Whiles constructing my disk I believed it to be one of the tedious aspects of the digipak as it was time consuming of adjusting the image to the disk shape. I decided to use the same image for both disk but just adjusted the colour which I believe to look effective. The image I used was a quick snap from when I was filming for my music video, using the image of the balloons helps create continuity from the music video to my physical products. In order to get the image into the shape of the disk I reduce the opacity of the image so that I could see the guidelines of the template behind. Then using the lasso tool I selected around the areas of the guide therefore the shape was formed. I then duplicated the image so that I had two cd’s and then with the second cd I adjusted the colour by changing the saturation.On the disk I have included the artist name 'LIVI FOX' using the text tool therefore this is helpful for the consumers to know which CD belongs to which artist, also I have included in small prints 'disk 1' and 'disk 2' in order for the consumers to identify the individual disks. Around the edging of the disks I have included the song titles I did this by using the same text from the back cover but using an edging effect and then adjusting it to the edge of the disk this was all done using the text tool., by doing this the consumers are able to know the song track in case they loose the digipak cover. Overall I am happy with how the disk look as they look professional and neat and overall I have took into consideration what the audience will want and need.

Digi Pak- Back cover
Originally I was going to use an image print screened from the music video which was the artist holding the balloons however the image looked blurry and the colours just wasn't appropriate for the digipak. Therefore I used the same image I used for the disks, although it the same image I believe with the different shapes its almost unrecognisable. Therefore I imported the image and placed it onto my template.As on all back covers I included a list of songs and placed the text central as this is often an a convention of text on the back cover, using the colour of yellow helps the text stand out from the pink background making it pop linking to the genre. I added the text using the text tool.I've included a barcode in order for the product to be purchased also I have included a music company logo of 'SONY' in order for the consumers to know part of the production team also it is a recognisable company making the consumers aware of the business previous work. I added these by using a google image and using the lasso tool to remove any unnecessary background and then placed them in their conventional places. A 'Piracy Warning' logo has been included as this has been seen as a convention on the back of digipak therefore including this makes the product look professional and realistic. I added this by using a google image and placing it on the back cover next to the barcode.Lastly I have included a list of the production team some names have being made up in order to look like a lot of people have worked on the production, the text is very formal therefore I have left the text black. This was done using the text tool.Overall I am happy with the back cover as I have conventional aspects and the song list pops with the yellow colour used.

Advertising Poster
The YouTube video has been speeded up by x40 as I spent several hours on the editing and therefore a brief explanation will be easier.
This is the editing process for my advertising poster for my first draft, I needed some inspiration as to how to display the information needed on my poster therefore I looked at past blogs from last year, after looking at others I found http://molliemaymediaa2.blogspot.co.uk/ poster and the poster inspired me to have the same layout. Therefore I found images of yellow stars and using magic wand tool I cut out the background and then duplicated the layer and placed the stars by each other making the album have a rating. I also placed successful pop magazine logos below and this will make the audience intrigued, I decided to use Billboard and Top of the pops.
Also I included a bright pink box in the middles of the star ratings and included the information where the album is available to download from also that there is a bonus track this therefore intrigues the audience also they fell special as they think they’re getting something special.
On the poster I included social networking site logos as this will help the audience engage with the artist as this is the modern way in the music industry. So aside I included the artist account name as well as a website which allows the audience to look for more information on the artist and also see other product she sells. Once I completed my first draft I asked one of my peers what she thought and she disliked the poster due to the image used therefore I shoed her the other images I have and she said which pictured she thought I should use therefore I took her advice on board and used the image and created the same effect of the black and white pictures but balloons still being pink and then the same information was transferred from my first draft however I placed the text differently therefore I was my own design. However I was unable to get show evidence of this as I forgot to screen record my process.

Show any tutorials you used to help you when constructing your product.
This is the only tutorial clip I used as I wanted to have a 3 way split screen affect throughout my music video. I did try out the tutorial however this was proven difficult as I had trouble getting the background to match and also the footage was too close up proven it difficult to get the perfection look I wanted.
What went wrong? Explain this.
Throughout my coursework I came across many struggles as firstly I had trouble with my artist as my original artist dropped out due to having a busy schedule therefore I had the trouble of finding another artist.
Another struggle I had was I was filing my music video in the college green room however it always seemed to be booked out whenever I was free however a group kindly offered their slot for me therefore I was able to get my footage filmed
Finally another problem I had was all my work was all on One mac computer located in the college media department however there was often a class in the room or whenever I was free during the day groups had already managed to locate the computer therefore I often took the time to work on my projects after school and in my own time, therefor leaving me behind on some of my other courses.
I always ran of space on my SD card therefore some filming sessions had to be cut short. My camera corder battery died ones during filming therefore I lost my own time for filming and also
the artists.

What went well?
One of the main things that went well is the dedication my actress had toward been the artist and taking time out of her life to help me. She had amazing performance and she came across to the camera that she was have a fab time and the audience got this message too.
In pop music video there is often outfit changes and the audience where able to recognise this in my music video which I believe helps conform that my music video links to the pop genre.

What would you do differently
If I was to do this project again I would consider varying my location and perhaps produce a narrative music video.
Purchase an SD card with a larger GB so that no time is losted. Also I would consider creating my Ancillary text products on a PC rather
than a Mac computer therefore I have a better chance of getting the project done quicker with there been a better selection of PCS. However this means I wont be able to provide a screen recording of my creation but perhaps I can use screenshots for my evidence.
Another thing I would do differently is take more pictures for my ancillary text as I had to screenshot some of the images from my music video.


